
Ali Edwards's Blog, page 217
June 27, 2014
Project Life® 2014 | Week Ten + Tips For Adding More Words & Cutting Up PL Cards
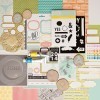
Say hello to Project Life® 2014 | Week Ten (March 3rd through March 9th). You can check out all the new kits for July (called Penny Arcade) over at Studio Calico here: Scrapbook Kit | Project Life® Kit | Card Kit.
Today I wanted to share a few specific ideas for getting a few more words in a spread without including an insert with paragraphs of text plus a couple ideas for cutting up the PL cards and making them work for you. Both are things I do over and over again as I tell my stories and craft these spreads.
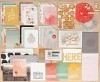
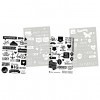
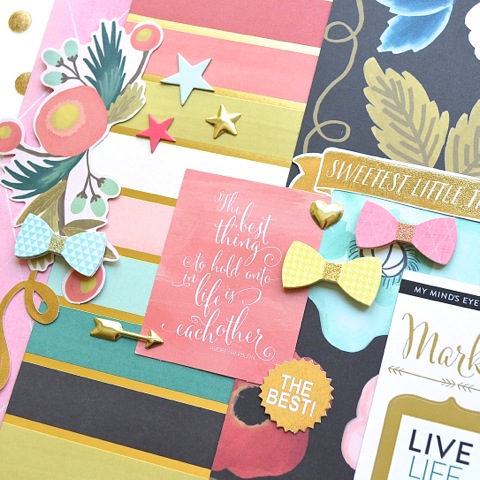
Here’s a look at Week 10:
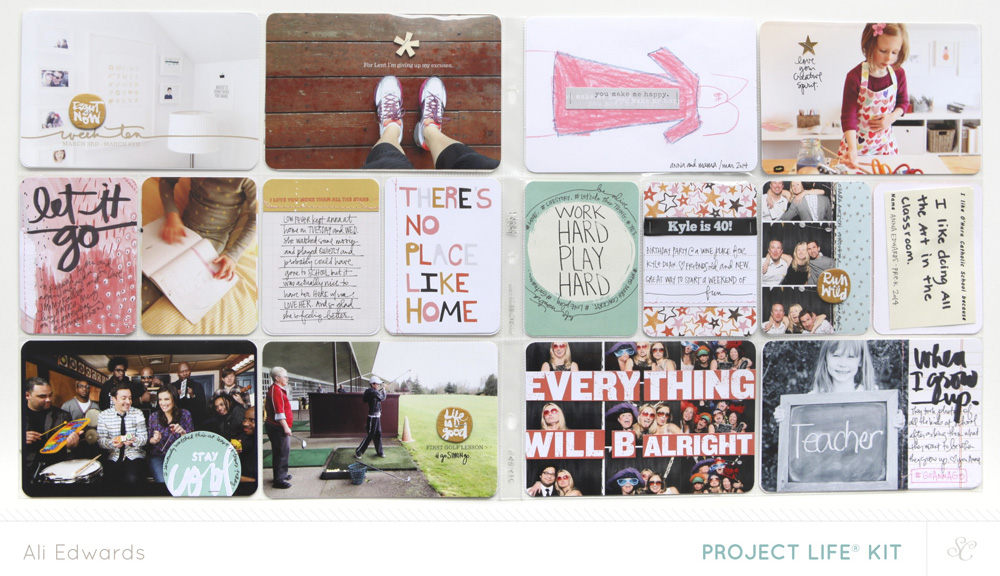
I’m continually struck by the everyday-ness of these spreads – especially as I go back and play catch-up from earlier in the year. Sometimes I just write, man I’m thankful for these ordinary weeks. These kind of weeks are what make up the bulk of our lives.
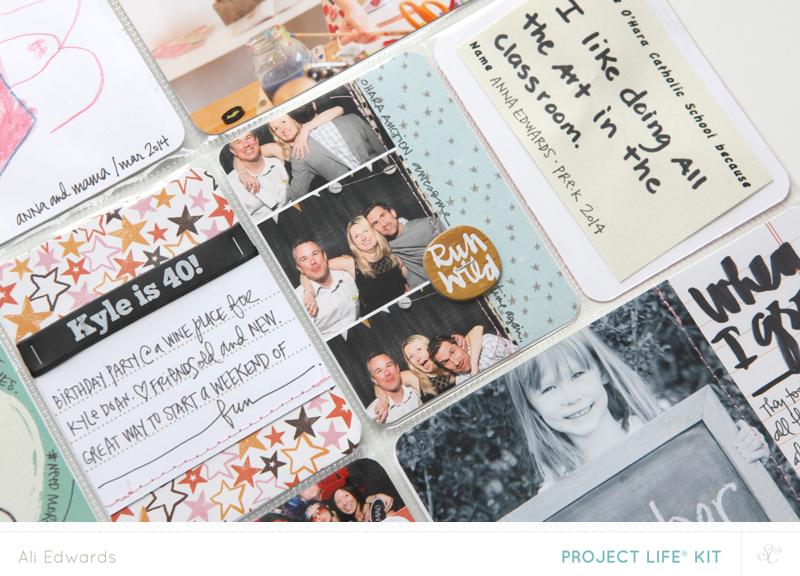
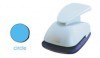
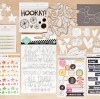
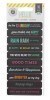
CUT IT UP IDEA NO. 1 | Use a circle punch to punch out a sentiment. The “Stay cool” card was punched with a 2-inch circle punch. I often add a little staple to hold it in place.
ADD MORE WORDS NO. 1 | Write directly onto the pattern cards. I did that above in the middle left card. I wrote “let it go” using a Copic marker and then journaled below letting my words follow the flow of the design on the card. The words here simply talk about how the song was on repeat and Jimmy Fallon is awesome. Nothing profound – in fact it’s profoundly mundane and a piece of the everyday story right now and I love it.
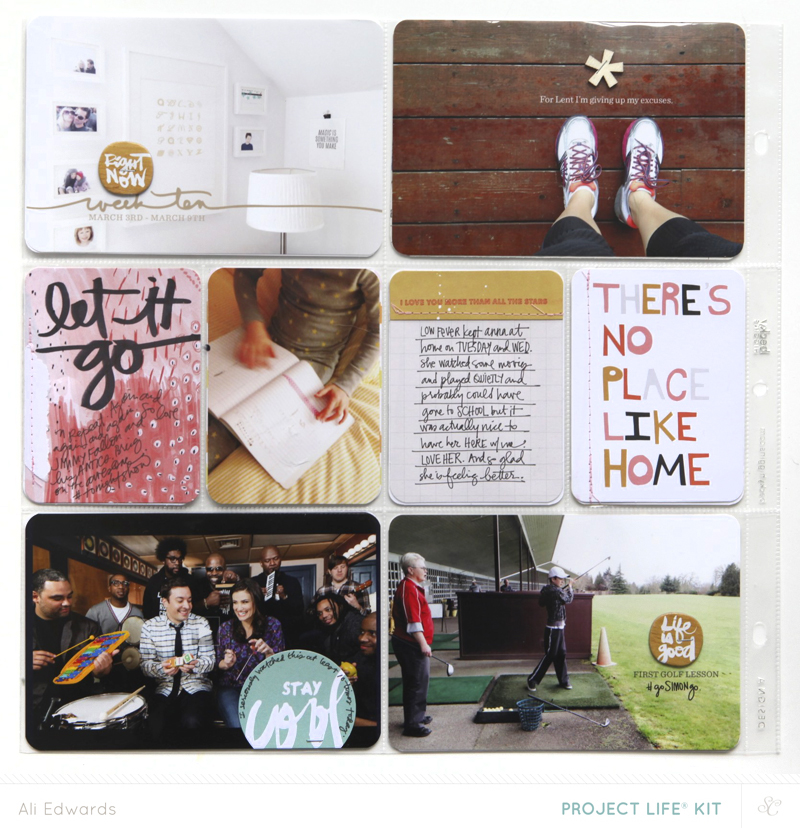
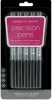
ADD MORE WORDS NO. 2 | One of the simplest ways to add a few more personal details to your spreads is by hand-writing or adding text directly to your photos. It’s super easy to do in Photoshop before printing (or in an app on your phone) and even easier to do with a pen after the photo has been printed. Even just a little something makes it that much more personal. My favorite pens for writing on photos are the Precision Pens, Le Pen, Slick Writers, or the Staedler Lumocolor Permanent pens.
I also used my Messy Weekly Lines for the title card.
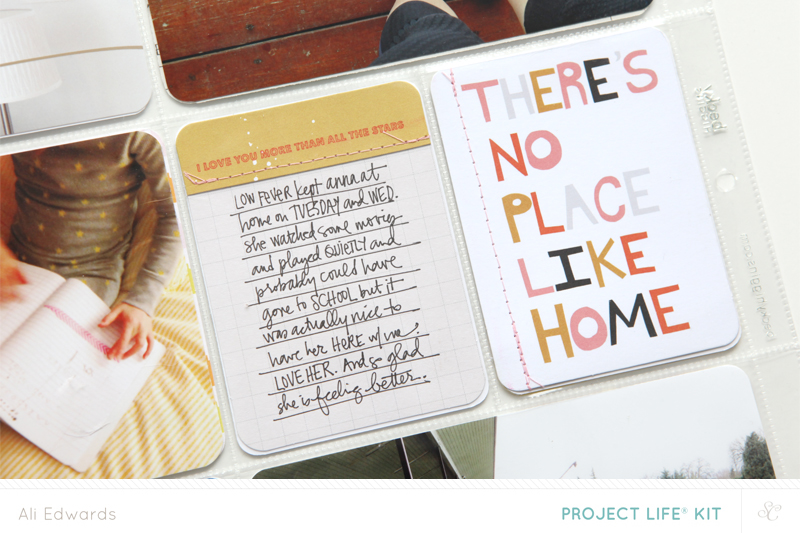
CUT IT UP IDEA NO.2 | Cut the top piece of one of the cards and stitch it onto another one. On the top of this one I stamped the “I love you more than all the stars” sentiment using Well Red ink. Sometimes I will cut off the top or bottom of a card and then use it on top of a photo for an option instead of writing directly onto the photo.
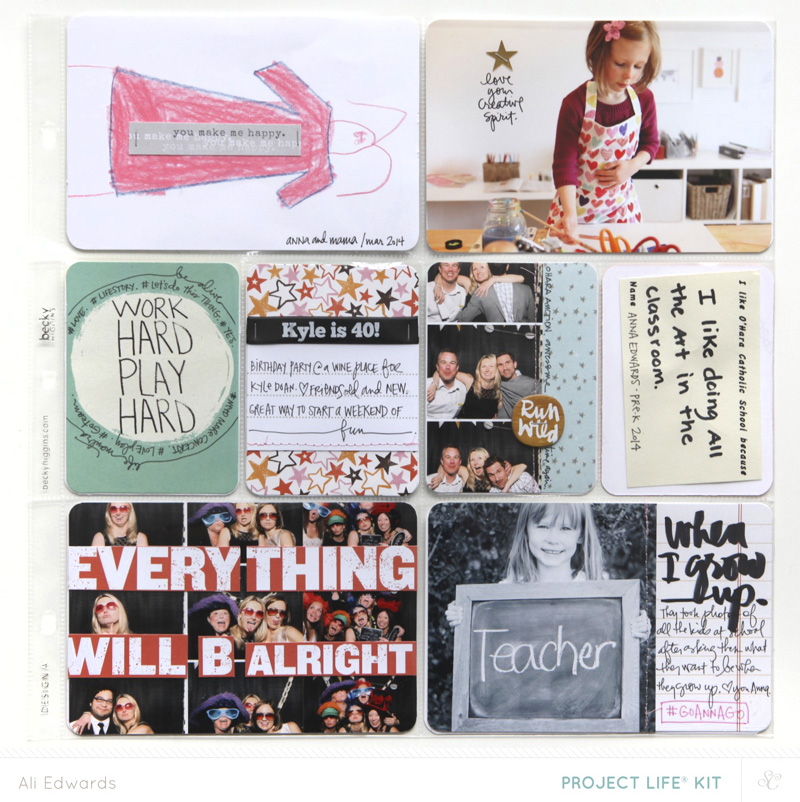
ADD MORE WORDS NO. 3 | Add more words by including words written by someone else. Here I added a slip of paper that was on the back of the photo of Anna holding the chalkboard (from her school auction). I love doing this with little notes she or Simon leave around the house too.
CUT IT UP IDEA NO. 3 | Cut the lined section from a 3×4 card and lay it on top of a pattern card to make room for words. There’s always a few lovely pattern cards included in most PL kits. If you don’t have any cards with lines you could just cut up a piece of white cardstock and add it to the center of the card to add a few more words to your week.
ADD MORE WORDS NO. 4 | A way to generate a few more words is to ask yourself one of these questions such as, “Why am I including this photo?” or “What’s important about this photo?” Sometimes there’s absolutely nothing vitally important about the photo and you might just like it. Perfect. By literally writing, “I just like this.” you are giving your reader a little some context vs. leaving them wondering why in the heck you included a photo of your salad. Other times there might be something important to be said – I added “love your creative spirit” to the photo of Anna painting (top right). I’m so thankful that memory keeping continues to be an opportunity to express and communicate love.
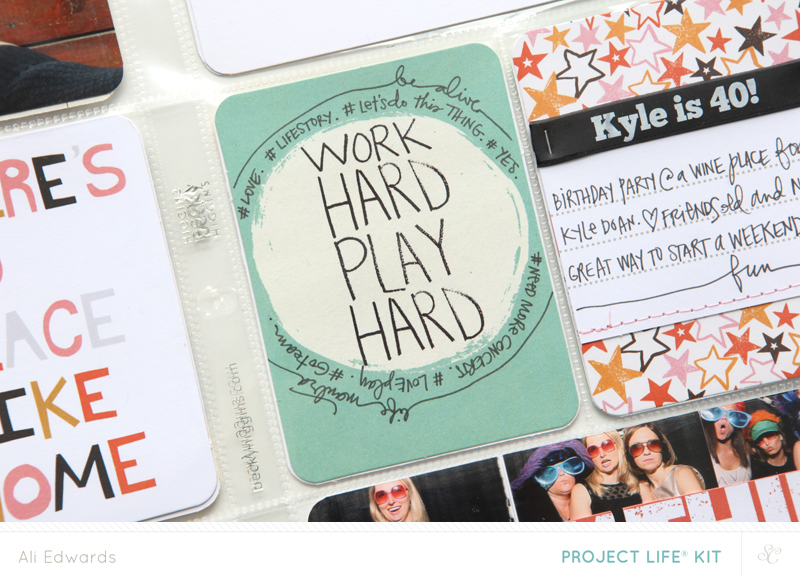
ADD MORE WORDS NO. 5 | Go around the outside of a circle on a card to add a few words that personalize your story. Let the sentiment be a prompt to spark some of your own words.
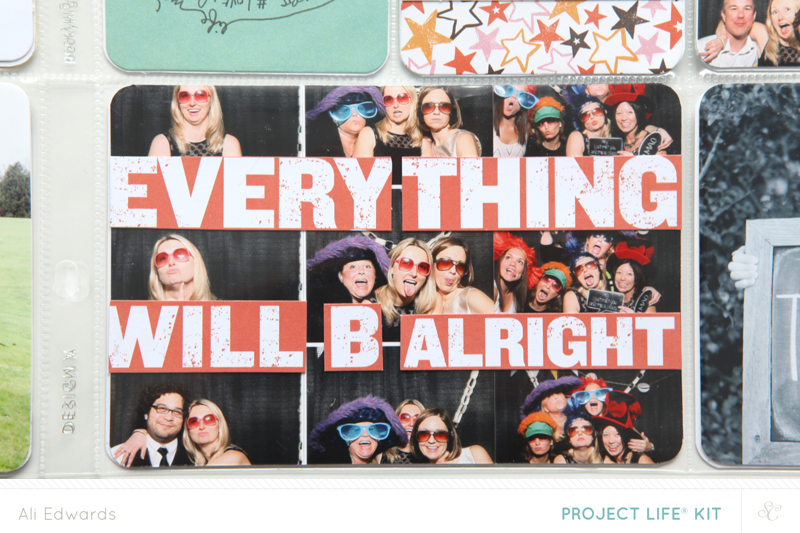
CUT IT UP IDEA NO. 4 | Take one of the sentiment cards and cut the words out and adhere them onto a photo (or a grouping of photos like I did here with the photobooth pictures).
ACTION ITEMS/IDEAS
Ask yourself how you can tell more of the story? Even if you don’t want to write paragraphs, what are ways you can add a few more details, memories, thoughts, observations to your pages? Maybe it’s writing with pen directly onto your photos or starting to ask yourself what’s meaningful about a particular photo and use that as the spark for your story.
Have fun. That’s it. It’s so simple and man aren’t we lucky we get to be alive and play with words and photos and stuff?
Have a great weekend!
SUPPLIES | 2014 | WEEK TEN
Click on the images to link to the products.

InLinkz.com
Project Life® is a product and a system and a lifestyle created by Becky Higgins. It can be anything you want it to be. The core pieces used in my album are available here. If you live outside the US check Becky’s site for more information on sources. View all my posts about Project Life® here.


Last Call For One Little Word® 2014 Workshop Registration
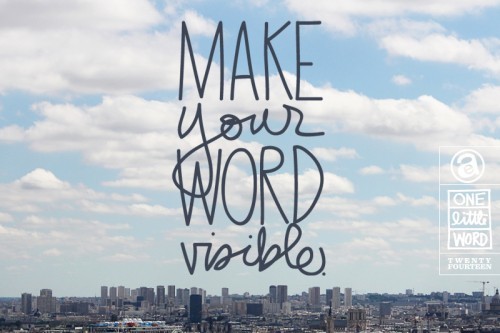
Just a quick heads up today that I’ll be closing registration for the One Little Word® 2014 workshop on Monday, June 30th, 2014.
I generally leave registration open throughout the year and people continue to sign up here and there and join me on the journey to make our words visible throughout the year. To simplify things around here the last day to sign up for this year will be June 30th.
Upon registration you’ll have immediate access to the past 6 months of content – videos, handouts, printables, etc and you are welcome to join the thriving Facebook community as well.
It’s not too late to join the journey – people are at a variety of different places with their word. My goal is to support you through the process of making your word visible via simple creative monthly prompts.
More details and registration here.
Looking for a more scrapbook-focused workshop? Check out Yesterday & Today.


June 26, 2014
The End Of An Era | Saying Goodbye To Two Peas
Yesterday I learned that Two Peas In A Bucket was closing it’s website after 15 years.
It feels more than appropriate to issue a public thank you for the impact it made on my life.
Two Peas was always more than a shop for me, even though I purchased many supplies there over the years. I know this was true for a bunch of you as well. For quite some time it was my main online home – the place I went for memory keeping supplies, inspiration, education, conversation, industry updates and to share my own layouts.
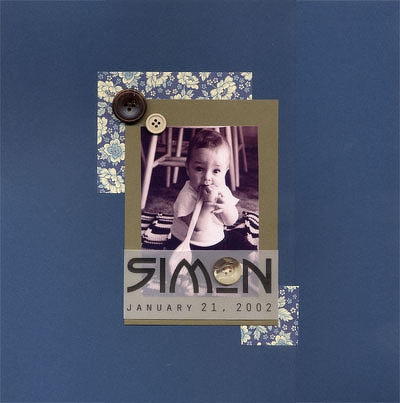
It was the first place I became aware of what “modern” scrapbooking looked like (this was back in 2002 when I went searching for ideas for Simon’s baby book) and it opened up an entire new world for me.
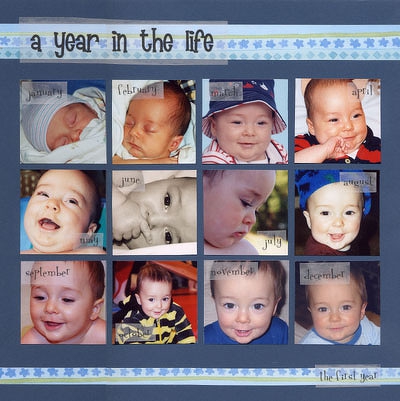
I posted my first two scrapbook layouts there on December 10, 2002 (the one at the top of this post and the one right below).
It was the place I first met so many awesome people related to scrapbooking – including some who became very dear, life-long friends like Cathy Zielske and Carrie Colbert.
It was the place to go to find out what was happening in the scrapbook world (or speculation or gossip and sometimes mis-information as happens on the interwebs).
It was the place I got my start in the industry – sharing layouts as a member and then as part of the Garden Girl design team. I made so many friendships during those years.
I was less active over there the last five or so years as I spent more time working on my own projects and doing design work for other companies. Even then I still checked the General Scrapbooking message board at least three-four days a week to read what was happening.
I’m so thankful to Jeff and Kristina for their passion for memory keeping and for creating a place where we could connect and get inspired and purchase products online and learn stuff and tell our stories. I wish you guys all the best in whatever is next for you and your family.
It made a difference in my life.


June 25, 2014
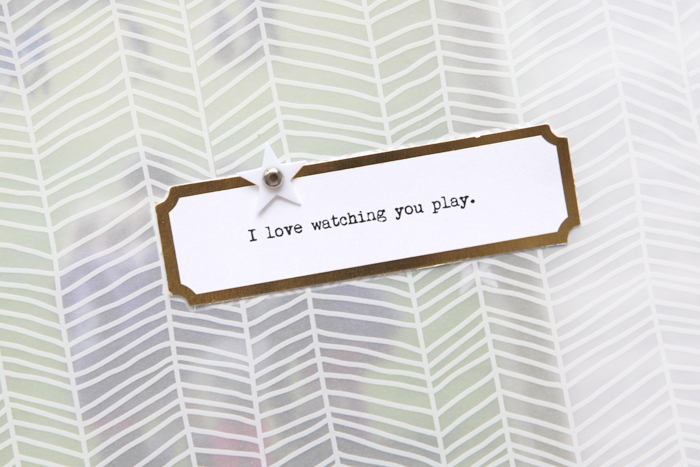
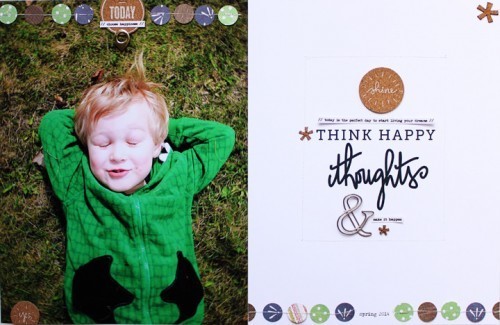
I Love Watching You Play | Multi-Page Scrapbook Layout + Video Overview
Today I’m sharing a layout here and over on the Studio Calico blog that was inspired by a page in the Member Gallery by Pam:
It’s likely not much of a surprise to you guys that I like two-page layouts that incorporate a full-page photo. It’s hard to beat the visual impact that comes from an enlarged photo.
On Pam’s page I especially liked all the white space on the second page, the enlarged type (part of a phrase) and the stitched circles across the bottom and the top.
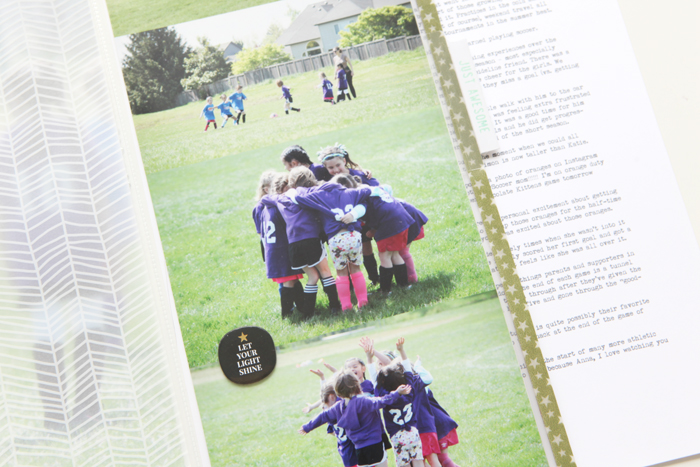
With those design elements in mind I looked at my list of layouts I want to make and decided to get the story of Anna’s first soccer season into layout form.
As you probably know by now, I like to blog many of my stories first and then turn them into layouts. Why? Usually it’s because I get more of the story told since I’m focusing on the words first and then creating a design to fit my words vs. making my words fit my design. Obviously I don’t do this for every story or every layout, but the ones where I tell a more complete story tend to be my favorites.
Here’s a look at what I came up with (video follows with a walk-through below):

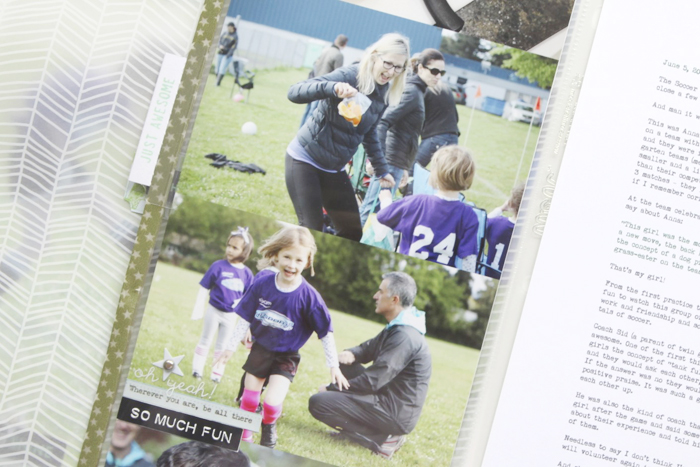
This is a 4-page layout. Here’s a break down:
One full page 8.5×11 photo
One full page of pattern vellum + labels
One photo collage (front and back) that measures 5 x 11
One 8.5×11 page of journaling
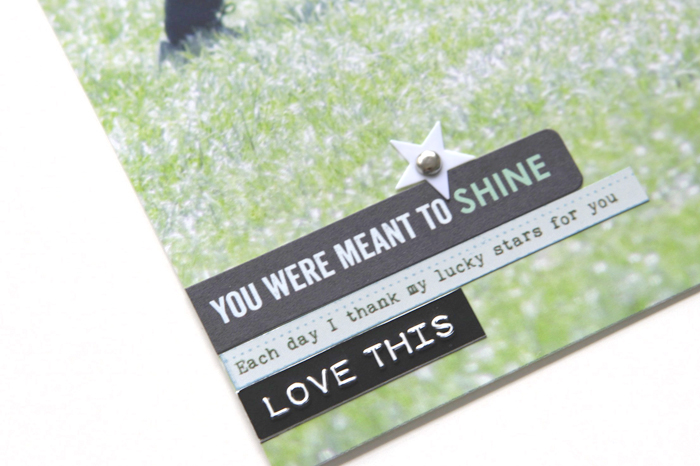
The full page photo includes just a few embellishments added to the bottom left corner. These include phase stickers from the following sets: Pink Paislee Sunshine Collection, Studio Calico South Of Market Phrase Stickers, and Cosmo Cricket Punch Me Tiny Text.
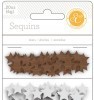
In addition I added a little white star sequin attached with a small silver brad.
On the front side of the pattern vellum I added my title. The font I used is My Underwood (I say it wrong in the video).

When you turn the vellum over I’ve repeated the same label shape with a different collection of embellishments.
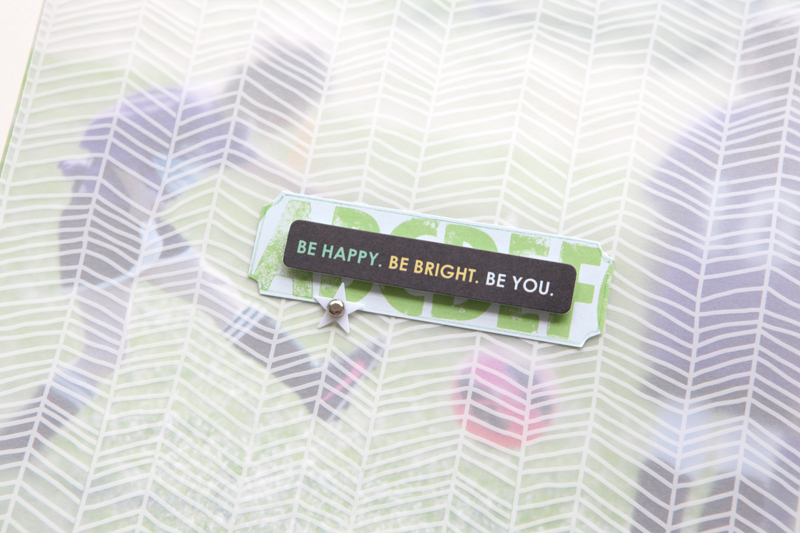
Using the punched out section of the gold-rimmed label (see video for visual) I traced the area and then cut it out of the Turnip The Beet pattern paper. On top of that I layered another sticker from the Pink Paislee set and added another star/brad combo.
I like repetition.

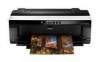
The next page in the layout is 2, 5 inch x 11 inch photo collages I put together in Photoshop. I printed them on photo paper and then adhered them back to back. For printing at home I use an Epson R2000.
After adhering the two photo collages back to back I slipped them into a 8.5×11 page protector. To make the page protector a custom size I placed it on my trimmer (with the photo page inside) and cut it, leaving about 1/4 inch of space along the edge. To seal up the page I used some star washi tape.
A single circle chipboard embellishment was added to the front of the photo collage. These were from an embellishment kit at Studio Calico that is no longer available.
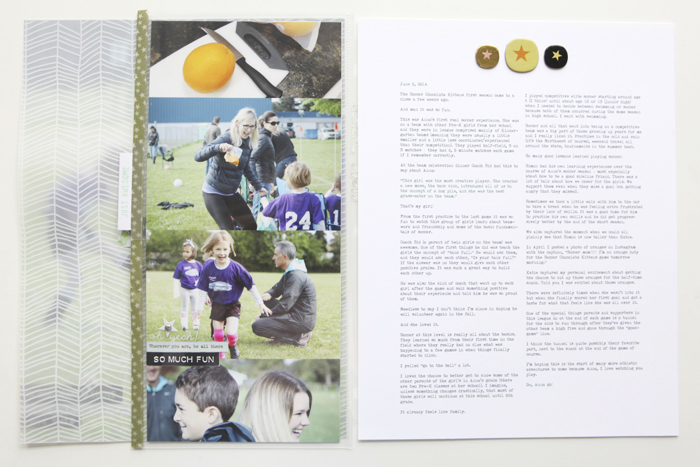
The backside of the photo collage page includes a few more of the phrase stickers and another small white star/brad combo.
Along the edge I added a 2-inch plastic tab and stamped “just awesome” using my Just Awesome stamp set + Mint Hint ink.
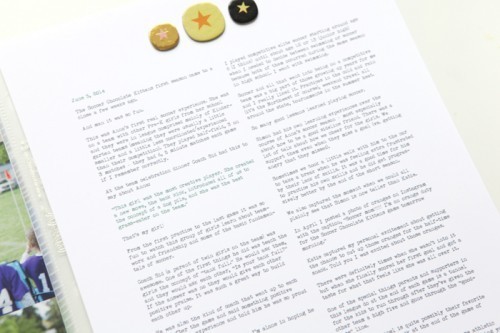
And the last page is the full story. As I mention in the video below I originally intended to fit the journaling into about the same amount of space as Pam took up for her title in the inspiration layout. Once I started flowing my text in from the blog post it was obvious it was going to need more space.
I know including this much text isn’t for everyone, but man it has my heart.
VIDEO OVERVIEW
In case you are interested, the green Copic marker I used is from this set and the plain 8.5 inch x 11 inch vellum I used in the video that I didn’t end up incorporating into the layout.
SUPPLIES | LOVE WATCHING YOU PLAY
Click on the images to jump to the products.

InLinkz.com


June 24, 2014
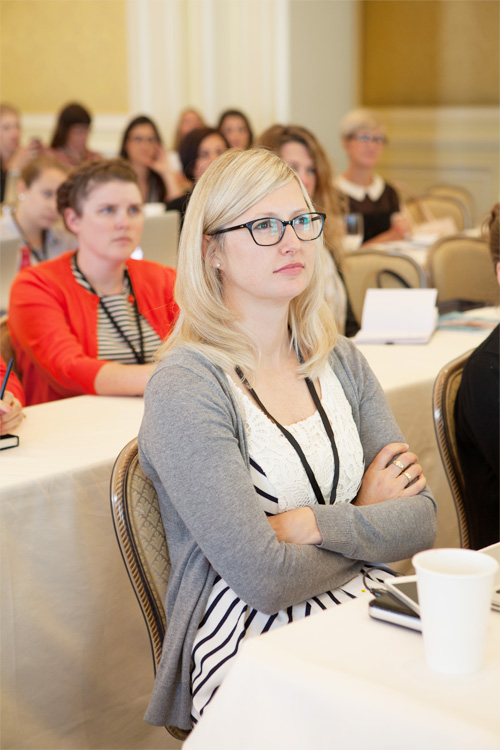
For The Love Of Learning | Alt Summit 2014
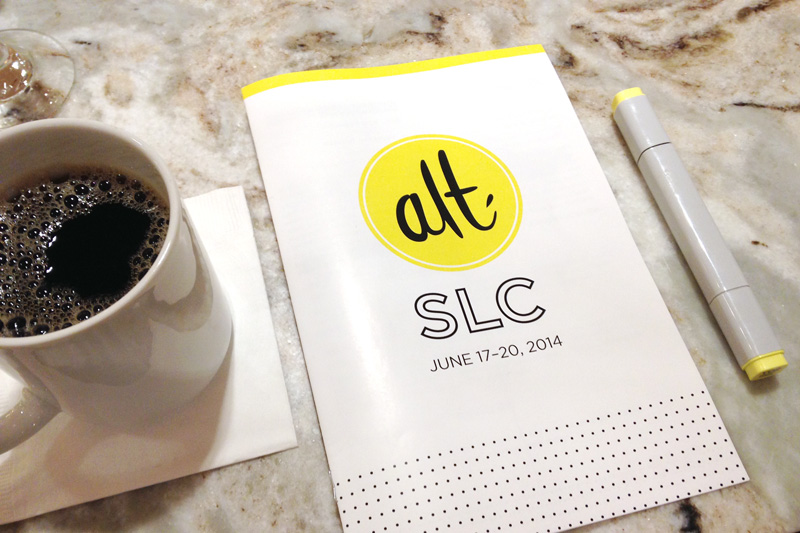
Last week Katie and I flew to Salt Lake City to attend the Altitude Summit – a blogging business/inspiration conference.
This was my first time attending Alt. I’ve been following along each year from the sidelines, reading about other people’s experiences after the event online and wondering if it would be a good fit for me.

As usual it was quite an adventure and today I’m going to share some of my personal observations and things I loved most about the event.
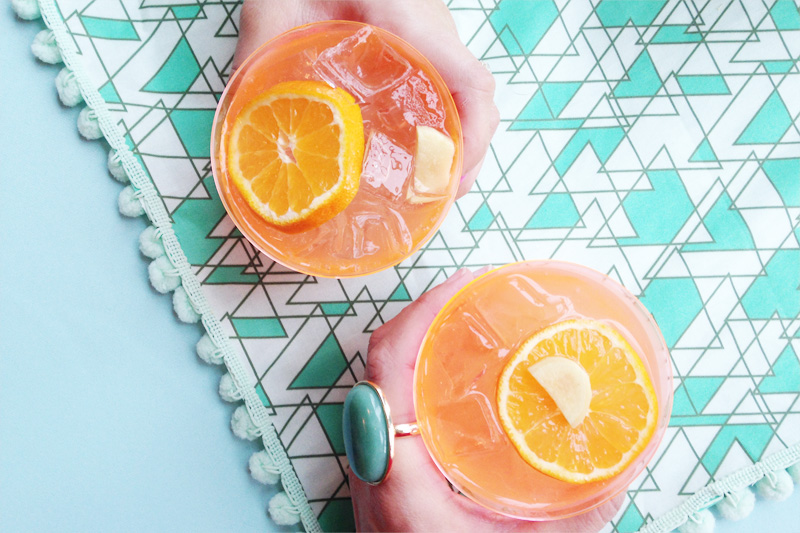
Our first order of business was to attend a dinner on Tuesday night. We selected the Bing dinner hosted by Alison Faulkner Robertson of The Alison Show.

I recently started following Alison (first via Instagram I think) and loved her crazy dance moves and her blog series: How To Be Awesome. As you might have heard me mention before, I’m working on not taking things so darn seriously on a regular basis and I think she’s an awesome example of someone who’s really great at being silly and fun.
I like people who are bringing that vibe to the world.
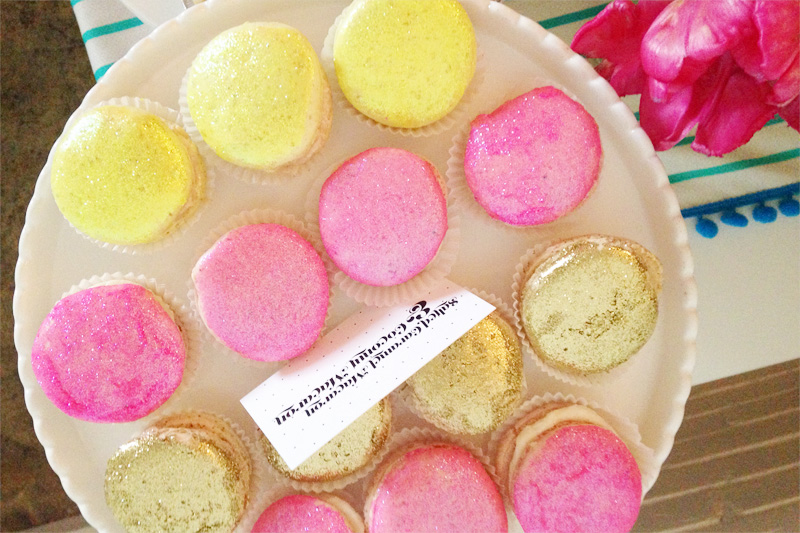
It was awesome to meet her in person and the dinner itself was spot on with music and decor and desserts. Yes, those are glitter macarons.
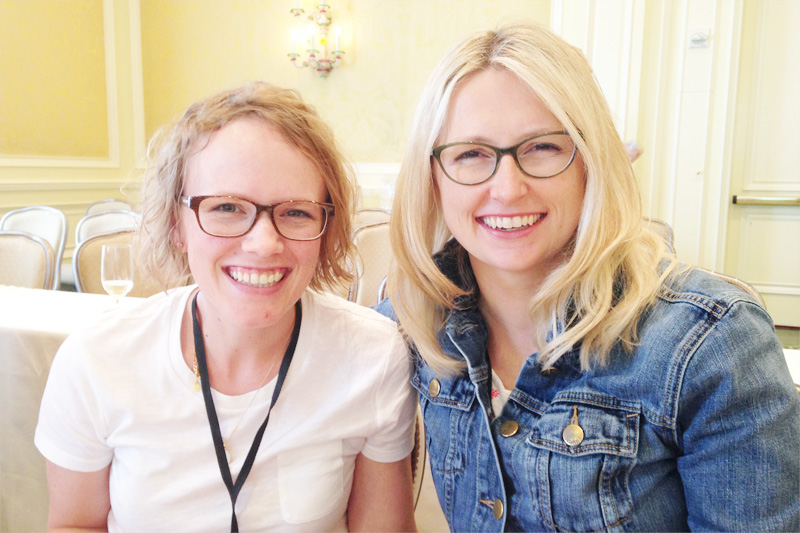
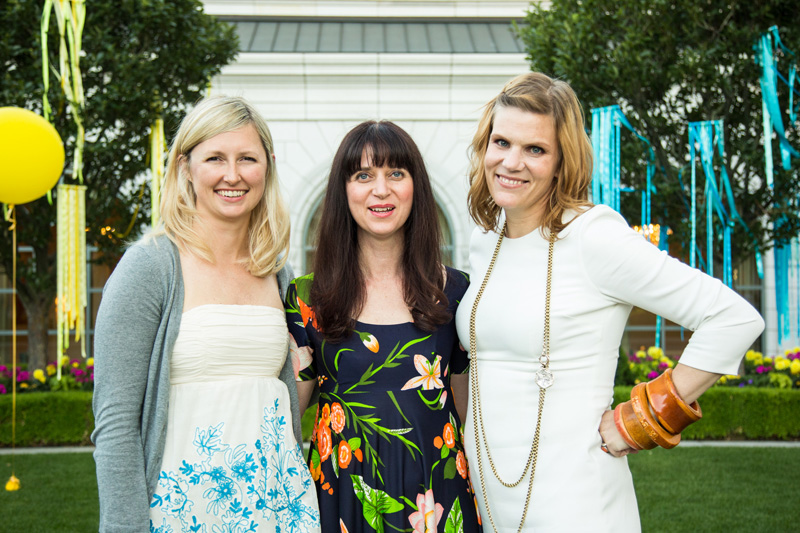
Another reason we were excited to attend this event was to connect with some of the people we work with already – many of which have become friends over the years. We shared a room with Elise which meant late night conversations about life and business. We connected with April and Sam from Studio Calico and loved seeing Celine Navarro from France. I also loved running into Candace Stringham and her sister Stephanie Ford. And I know I will forget to mention someone here.
Elise has a great review post here – she captured many of the same feelings I had about the event. She’s wonderfully articulate about her brand and her business. We both have blogs that support our brands vs. blogs that are our sole income generators which led to lots of healthy discussions about why we do the things we do and where we want to be moving forward.
This event came along at the right time for me both personally and professionally. For the last year I’ve been working through some major business changes behind the scenes and sometimes I feel lost in the middle of it all even though I’m super excited about what’s to come. It’s been a crisis of confidence on many levels – the cans, the shoulds, the maybes, the fears, the comparisons, the uncertainties. I think this confidence crisis inevitably also has to do with the major life change of divorce and how there’s simply no way around that but to move through it one day at a time.
What I loved about the opportunity to go to Alt is that it made me continue to hone in on who I am and what I do and what I’m really good at and what I want to be doing with my life.
I loved being a student. Doing what I do can be pretty isolating at times and I really value the chance to go to something like this and connect with other creative business people. Alt gave me the opportunity to learn from creative people like designer and illustrator Emily McDowell and videographers Jesse & Kimberly Moore from Modern Atelier.
It was also a reminder to me that I like the lane I’m in. I love memory keeping and photos and words and living authentically – it is the heart of what I do whether I’m writing or designing products or taking photos or developing classes.
I loved getting to meet Gabrielle Blair of Design Mom who I’ve admired for many years.
I also loved the chance to have a sit-down conversation about business and empowerment and confidence with Rachel Faucett of Handmade Charlotte. To say she is motivating is an understatement.

I loved listening to Gabrielle interview Martha Stewart. She’s a cultural icon and a woman that has persevered through all kinds of things in her life and her work. I know not everyone loves Martha and of course that’s okay but for me this was a meaningful part of the event and I’m so glad I had an opportunity to hear her speak.

The other inspiring main-stage presenter was Joy Cho from Oh Joy. She’s another person I’ve followed for many years and it was so cool to hear her tell her own story of how she’s gotten to where she is today.

I loved the invitation to dress up a bit more than usual. I also loved that the only new thing I bought to wear were a couple Classic Cardigan sweaters from Forever 21 that are around $8 each. I now want them in every color.
The bottom line for me, and my biggest take-away, is that I still love memory keeping and I want to keep delving deeper into the heart of it and I want to bring you content that is in alignment with what is most meaningful.
I’m all about figuring out ways to tell my own story and helping you figure out ways to tell yours.
We’re in this thing together. Onward!
PHOTO CREDIT | Any photos I didn’t take with my phone were taken by either Justin Hackworth or Brooke Dennis.


June 23, 2014
And The Giveaways Go To…

GIVEAWAY | One person will receive all three new Distress Mini Ink sets from Ranger & Tim Holtz.
#555 | Strapkitty said…The distress inks have so much dimension and the colors you chose just exude summer. Thanks to both you and Tim for the opportunity to try to get some of these to try on my own!
GIVEAWAY | One (1) person will win the June Main Scrapbook kit from Paper Camellia Kits. US & Canada Addresses only.
#154 | Caitlin said…Looks like there’s some great stuff in this kit! Loving the colors!
Congratulations! Please email Katie with your contact information.


June 21, 2014
Sposored Giveaways | Paper Camellia Kits
GIVEAWAY | One (1) person will win the June Main Scrapbook kit from Paper Camellia Kits. US & Canada Addresses only.
Our June kits are filled with a mix of soft watercolor tones accented with touches of gold. Fun embellishments include metallic shapes, lovely ephemera packs, flair, wood sequins, arrow paperclips, chipboard hearts, stars, and sparkle infused enamel dots. This kit will keep you creating through the month and beyond!
SPECIAL OFFER | Receive 20% off any purchase from Papercamellia.com Use promo code
ALI20 at checkout. Offer good through 6/30/14. Subscriptions excluded.
ABOUT | Paper Camellia Kit Club is your destination where beautifully coordinated scrapbook kits come together with inspiration, creativity and exceptional customer care. Delivered right to your door every month. We design our kits with an eye for the latest products, a clean and simple style, as well as quality and value.
Join us as a subscriber to be assured to receive the Main Scrapbook or “Everyday Life” pocket page kit each month. We are a no-commitment kit club and you may cancel at any time without fees. We invite you to visit us at Papercamellia.com for a look at our kits, and wonderful creative inspiration from our talented design team!
CONNECT | Shop | Website | Blog | Facebook | Pinterest | Instagram
TO BE ENTERED into this giveaway please leave a comment below (if you are reading this post on Facebook please come to my blog to leave a comment). Comments will be closed at 8pm Pacific on Sunday, June 22nd. The winners will be announced shortly after. Please be sure to check back or subscribe (click here to get posts delivered to your email box) to see if you are receiving one of the items.


June 20, 2014
Rad Lab Summer Sale + Scrapbook & Cards Today Summer Issue
Hey guys! I’m coming to you this morning from Salt Lake City where Katie and I have been attending Alt Summit which has been an awesome experience for us to connect with other bloggers and learn stuff. We like to learn stuff.
Today I wanted to give you a heads up about two things.
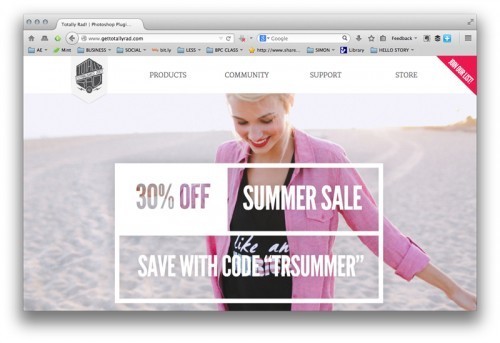
#1 | Rad Lab – the awesome plug-in I use in Photoshop to edit most of my photos – is one sale for 30% off this weekend. These guys don’t have sales very often so now is a great time to buy if you have an interest.
Use the code TRSUMMER when you check out.
Sale ends Monday, June 23rd at Midnight.
Rad Lab is so easy because all I have to do is open the photo in Photoshop, click a button to launch it and then click once more to select an adjustment/filter for the photo. My consistent personal favorite is “lights on” which seems to lighten and brighten just enough.
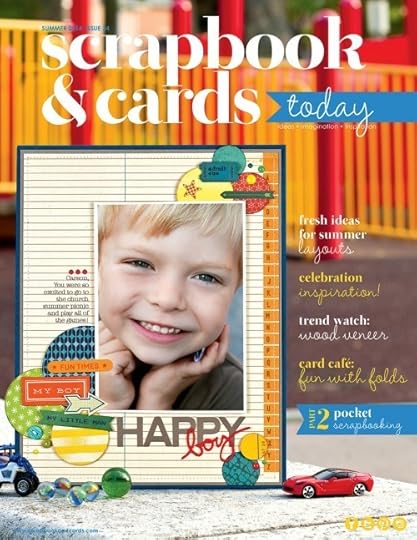
#2 | I wanted to let you know that the summer issue of Scrapbook & Cards Today magazine is now available. You can choose between the free digital version or subscribe to their print magazine and get it delivered to your mailbox old-school style.
I’ve teamed up with Scrapbook & Cards Today to do a series with them called Stories With Heart. Each issue you can find an article by me that includes a couple layouts around a particular topic. This issue the topic I focused on was “recording the everyday things because they matter” and it includes two new layouts and a Project Life® spread.
Download your own copy or subscribe to the print edition here.
IN-PERSON WORKSHOP NEWS | Also, I wanted to let you know (especially those of you in the Markham/Toronto, Canada area) that Katie and I will be coming to the Scrapbook & Cards Today Crop & Create event in Markham on February 28 – March 1, 2015. I’ll be teaching a couple classes there – more details to come soon regarding registration.
Have a great weekend!


June 18, 2014
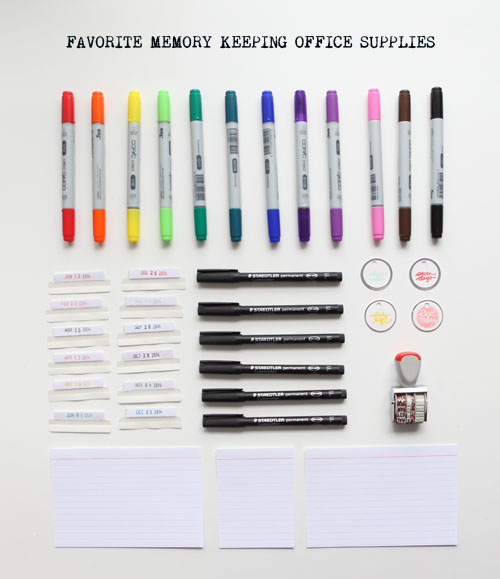
Favorite Memory Keeping Office Supplies
When I was working on Project Life® 2014 | Week Nine and added in those 4 inch x 6 inch lined cards I was thinking about how much I love incorporating office supplies into my memory keeping projects.
Here’s some of my favorites:
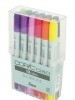
Copic Markers | Probably not technically an office supply, but I just got this set of these and am loving playing with them – especially the brush tip (and using the black for some of my digital word art that I write and then scan before saving as PNG files).
Avery Index Tabs | I use these all the time on inserts in Project Life®. They are a favorite.
Staedtler Fine Tip Pens | Wilna recommended these and I really like them as a thicker tip permanent pen. A nice alternative to the Precision Pens.
Avery Metal Rimmed Tags | Another product I’ve used for years on layouts and in Project Life®. Here’s how I used them in Week 23 (2013).
Rolling Date Stamp | This is my preferred way to get a date on my layouts. Simple and easy.
4×6 Ruled Index Cards | These are something I’ve had in my stash for a long time for Project Life® and just used one for a title card for the first time in Week 9. A nice alternative to cardstock or other pattern journaling cards.
Is there anything you guys love picking up from the office supply store to use in your memory keeping projects?


June 17, 2014
Things I’m Working On

I’m working on going through all the kids clothes – it’s that time of year when I assess what, if anything, they need for summer. Anna and I tackled her closet last weekend and bagged up anything that was too small or too worn (which ended up being quite a few things). She wore a uniform for school this year which was awesome and she definitely needs a few updates for summer (a couple dresses, a couple pairs of shorts and t-shirts). Limited choices have been working well for the uniform so I’m thinking of approaching her summer clothes in the same way.
I’m working on getting to 10,000 steps each day and using a FitBit to track it. And let me tell you, as someone who works on a computer a lot of the day, it IS work. For me it means I have to go for a walk – which was really the whole point for me.
I’m working on not taking things so seriously. Ha. Always.
I’m working on loving my home for what it is right now. This book The Nesting Place: It Doesn’t Have to Be Perfect to Be Beautiful is helping.
I’m working on letting things happen in their own sweet time. My timeline is not the only timeline.
I’m working on some cool behind the scenes stuff for my business. Stuff that I think you guys will be excited about. Stuff that I’m feeling pretty darn excited about.
I’m working on keeping the kitchen counters clear of stuff. Do something with the stuff rather than let it pile up. Put it where it goes. “One touch” is my mantra – recycle, garbage, or put it away where it goes.
I’m working on not working on so many things. Ha. I listened to a podcast from The Art Of Simple recently that talked about ennegrams. I don’t know much about those at all but I did one of the tests and based on those results I think I’m a #1 – The Reformer. There’s a whole lot of me, even the parts of me I dislike, in that description. (The next closest for me was #3 – The Achiever.)
What are you guys working on these days?


