
Ali Edwards's Blog, page 206
January 5, 2015
My Plans For Memory Keeping In 2015

I've been thinking a lot over the last few months about how I want to approach my memory keeping in 2015.
I'm ready for a bit of an adjustment. I want something more loose and less structured (as in less emphasis on weekly) and from what I've been reading around the web that seems to be a bit of a trend.
I'm ready for one album for my stories this year.
One 12x12 album to hold pocket pages, traditional pages, and stuff of life (kids artwork, notes, etc). I don't literally mean that I'll force everything into ONE album because I might fill up one and need another, but I mean one home for all my stories this year.
This one home will be a mix of pocket pages and traditional layouts in 12x12 and 8.5x11 and 6x8 and it will hold stories from 2015. Supplies will come from my Story and Stamp Kits™, from Studio Calico kits, and from other things I find here in my stash or from Scrapbook.com.
This isn't new or revolutionary. People have been combining layouts and Project Life® style documentation since it's inception and I've been using divided page protectors mixed in with my traditional pages from time to time for many years.
I think really what I'm ready for is something more organic and less structured and more focused on stories. I still love everyday life documentation - which has been my passion since I first started this adventure back in 2002. I still love capturing little and big things and I'm definitely not stopping any of it. But it's time for me to mix it up.
This means I will not be committing to weekly Project Life® documentation in 2015. I'm up to date until June of 2014 and I plan to finish that as time permits (lots of photos already printed and "stuff" in pockets, but it needs some TLC). I anticipate that I will still do some specific weeks-at-a-glance like I've been doing the last few years, but it will be significantly looser than in the past (and include more of a mix of divided pockets when I do use them vs. always using Design A). I'm ready for that change. Just writing that out feels good. Does it mean I will never do weekly Project Life® again? Nope. My first Project Life® album was in 2010 and I've loved the process but I'm ready for the next evolution.
And if none of this makes any sense, know that it's a work in progress and I'll be figuring it out as a go.
Here's a look at how I'm starting my 2015 story album:
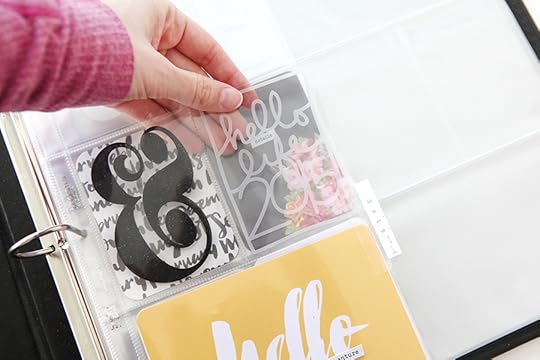
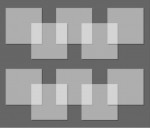
The album begins with a divided 6x8 page protector from Becky Higgins (this is inside a black 12x12 We Are Memory Keepers album).
"Hello Life 2015" is a new digital set now available in my shop. I cut it out with my Silhouette and vellum. I've got a tutorial here that shows you how to trace PNG files with the Silhouette software here.
The big ampersand was from a previous Studio Calico kit (can't remember which one). I embossed it with black opaque embossing powder on both sides.
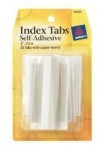
Along the edge of the page protector I added a 2-inch Avery index tab and stamped 2015 using this awesome Pebbles rolling stamp.
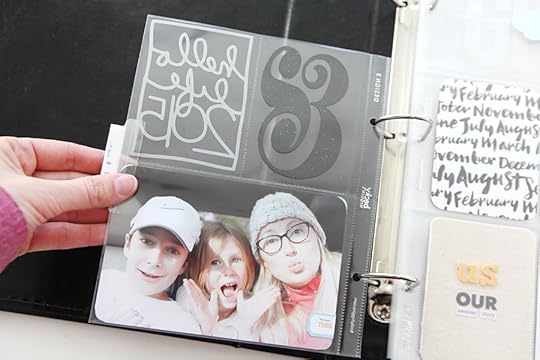
On the back side I added my favorite 2014 photo of the three of us. I'm just about done over-using it (taken during Week In The Life™ and used as my Christmas card). Note to self to take more group shots of the three of us.
I like it so I'm going to use it. Again.
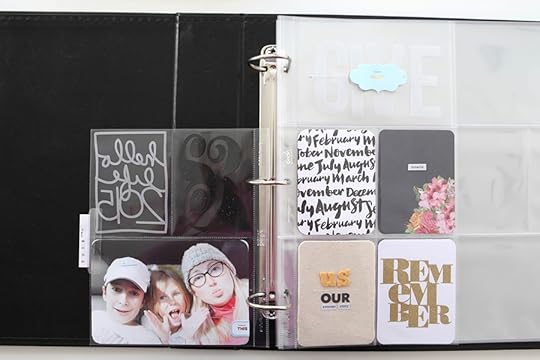
The next pages is a 12x12 page protector from this variety pack that I cut to 6x12.
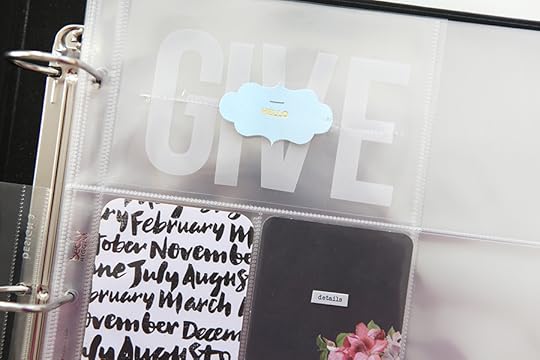
"Give" in vellum was a left-over mistake from the end of my December Daily® album (the thread came out of the stitching). I decided to give it a home here as a nod to my One Little Word® for 2015 (I do have a separate album for documenting my experience with my word but I like having it included here as well). The "hello" label on top is actually on the outside of the page protector.
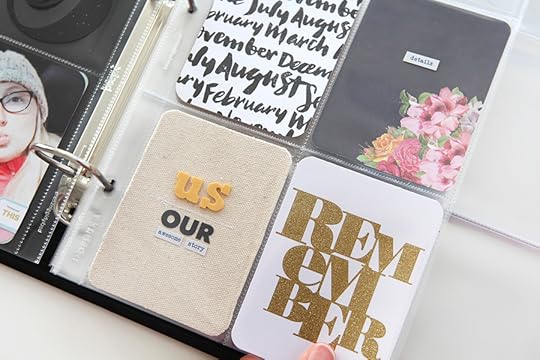
The monthly paper and the floral 3x4 card are from the Park Avenue Studio Calico kits.
The gold glitter remember card and the canvas 3x4 card are both from Heidi Swapp Project Life® kits (available via Michael's if I remember correctly). This was a 4x6 card that I cut down to 3x4.
The letter stickers for "our" and the small word stickers are from my Firsts Story Kit™.
It's a very simple beginning to what I hope will be an awesome mixture of long and short stories from 2015.
Here's to stories and documentation and flexibility and evolution and giving myself permission to loosen up the way I'm documenting, holding, and sharing my stories.


January 2, 2015
AE Digital Creative Team | Story Bubbles
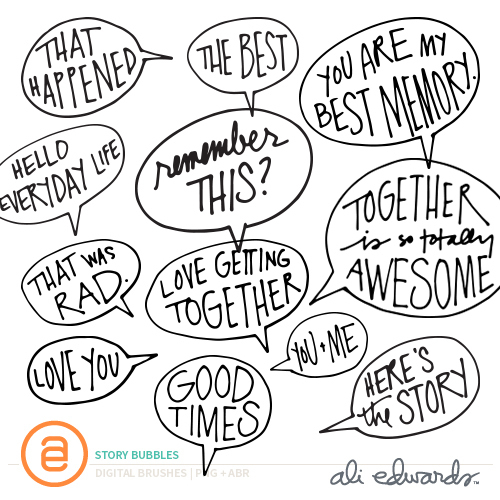
Today I wanted to share with you some of the awesome layouts that members of my Digital Creative Team made using this set called Story Bubbles. Katie and I were super excited to see each of these come in - such creative uses of this digital product.
Click on the Design Team Members name to go to their personal site for more details.
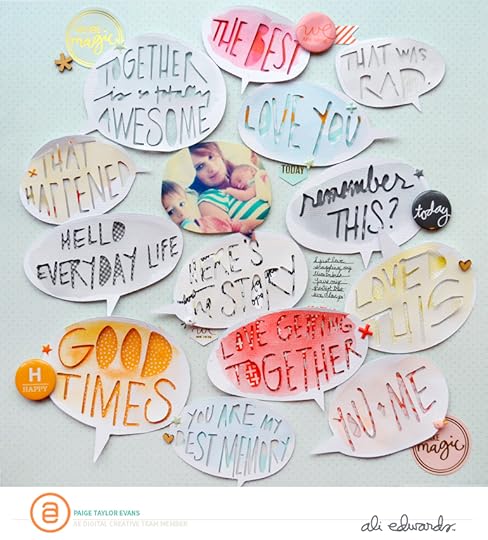
Paige Taylor Evans | Paige used her Silhouette to cut out the bubbles (so cool). I love how she backed them with pattern paper.

Pam Baldwin | It's totally possible I will adopt this same design for one of my stories. Love the layout and love how she went big with the printed out bubble.

Pam Baldwin | A second one from Pam that tells a slighty diffferent story than the previous page. Also not how she used the word art without the bubble for "the best."
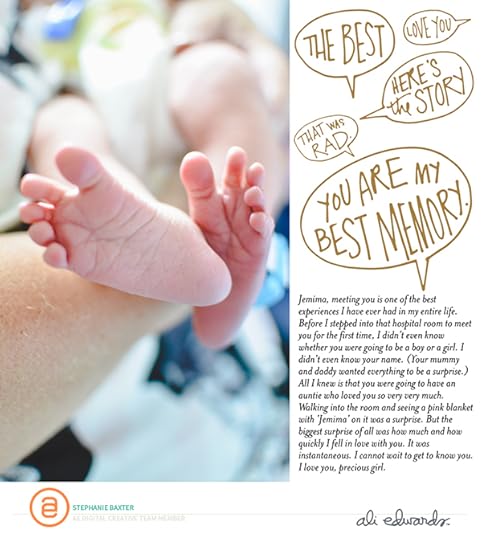
Stephanie Baxter | Great use of letter-writing as a storytelling tool by Stephanie. This is a fully digital page - I love how she varied the size of the bubbles above the journaling.
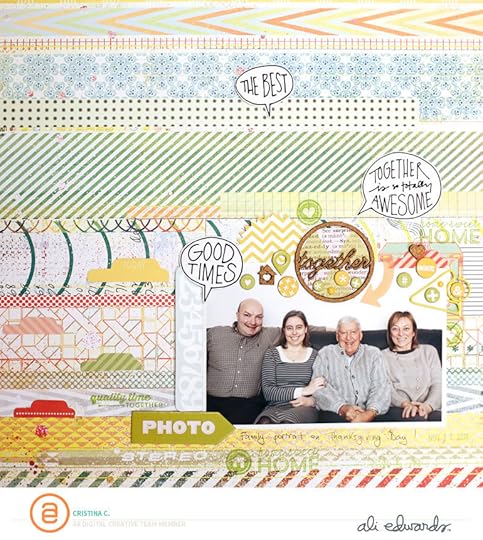
Cristina C. | Love this colorful page from Cristina. I thought it was a cool choice to keep the story bubbles black an white.
Hope you have an awesome first weekend in 2015.
December 31, 2014
One Little Word® 2015 | What Students Have Learned And Last Chance To Join At The Reduced Workshop Rate
A big thanks to those of you who have shared your word on my most recent post - it's always so inspiring to read your words and your reasons why. I'll leave that open for a few more days as I compile your words to share in a new post next week.
I wanted to give you a heads up that today (December 31) is the last day to join the One Little Word® 2015 workshop at the reduced rate of $26 (price will go up to $31 on January 1).
At it's heart, One Little Word® is really what you make it. I re-iterate that every year in the January presentation in the classroom. I can share my journey, I can encourage you to take the next step, etc. but I can't come to your house and get you off the couch, change the thoughts in your head, or purge your closet.
One Little Word® is about pinpointing one guiding principle and then walking with that word throughout the year.
Last month I asked my One Little Word® 2014 Workshop Community via our closed Facebook Group what they have learned through the process of the workshop and of working towards making their words more visible in their lives this past year. Their responses were so awesome and heartfelt. I wanted to share them with you here as you contemplate joining the community this year:
Nicole | I've learned to step back in the story and not just watch from the sidelines. And I've reconnected with how to find joy. All through action and reflection in relation to my word.
Heather | You learn to take time for yourself. That you are important and your journey is important. Even if you don't accomplish all the prompts. Even if you don't accomplish ANY of the prompts. You still learn about yourself and your journey and how your word relates to your world. OLW brings the word to mind so that you're thinking about it, you're thinking about you and your journey and we always need to take that time. We always seem to out ourselves last. OLW teaches us to spend some time on ourselves. I have grown through the process the last two years, even though I never seem to get past the March or April prompts. My word is always there, in front of me, and each year it evolves a little more.
Heather | I've learned to work on myself; improve myself. Have personal growth.
Sheri | I think you learn what you need from yourself. Whether it's from inside yourself or the world around you.
Natalie | Reflecction via different techniques, e.g., writing, art journalling, photography.
Bonnie | Living every day with a mantra (your word)... Refocusing you ideas and perspectives every month by working towards the goals you have set forth when you decided on your word. Expressing your mantra through words, reflection, photography, art, creativity. Making your word an active part of your life. This practice of choosing a word every year ( or letting the word choose you ) is empowering to me, fostering personal growth.
Dawn | At it's most basic, setting goals & intentions, monitoring them throughout the year, reflecting on the monthly, evaluating progress, making changes as needed, and year-end summary, all while linking everything to one specific word. But... oh so much more! Life-altering personal growth that is beyond measure.
Carol | This was my 4th year choosing a word and my first year taking this course. The course helped keep me focused on my goals, my intent, the purpose of my word in my life and made my word more successful than I'd ever experienced before. It's helped me reflect, journal, and go deep within to experience personal growth at a time when I really needed it.
Amanda | After taking the One Little Word class for three years, I have come to realize that learning alongside Ali and the rest of the community goes beyond documenting a word for the year. Instead, it links to something much bigger - to better understanding myself, my story, and my journey. It helps me look within and beyond myself, providing a means to continually reflect on where I am and where I want to go as I work toward goals in life and celebrate. Ali's monthly support has helped shape my perspective on life with an emphasis on - capturing what is real, celebrating what is real, thinking about implications, and recognizing that it is a work in progress. This class has complemented other aspects of my life and has been a perfect fit. I am so very grateful for the One Little Word journey. This is my 5th year of choosing a word, and I noticed a significant difference of the impact of my words once I started taking the class.
Laura | I have learned that life throws curves (our house blowing up) but having my word and your workshop and the Facebook family has kept me grounded through the worst experience of my life so far. I have learned introspection and patience and self forgiveness and that the focus I had on one little word can not only change a person but get them through some hard times. I am so glad you are doing the class again. My 2015 word is OPEN- open to change!
Wendy | This is my third year. OLW has been amazing. The monthly prompts provided the opportunity for self reflection and an outlet for creativity through some very difficult times. Ali your gentle persistent guidance to live the length and width of life has been so supportive and amazing. I recommend this project to every one I can.
Debra | How bring one specific word into your life can assist in focusing your intentions for the year and making those life changes. How to document goals, the importance of reflection and a variety of methods to document the process.
Diana | I learned to be kinder to myself and to be more empathetic to others...that we each have our own journey and to honor that. I also learned to breathe...which is really nice. I learned that I CAN accomplish things and make progress forward to the woman I want to be while still taking care of the woman I am. I also learned that it does not always go as planned and that it is ok. The last few months have been more challenging and nothing has gone as planned...nothing has felt right...I have felt completely off track and that is ok...I can breathe, focus on my word, and regroup. I love having a word of the year. My word is like my own personal lighthouse...it helps me find my way. This process is incredible Ali and I am so grateful to you for leading us on this journey... how open you are about your story is so inspiring and encouraging...thank you!! Looking forward to 2015!!
Thank you to those of you that shared your experiences with me. It meant a lot.
Here's to 2015!
PS | A big thank you to Colleen Attara for making my word again for me this year. Check out her wonderful offerings here.
December 29, 2014
One Little Word® 2015
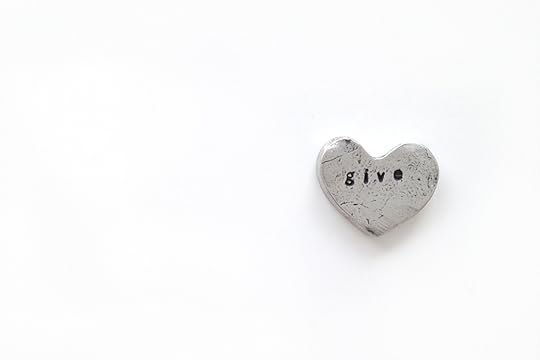
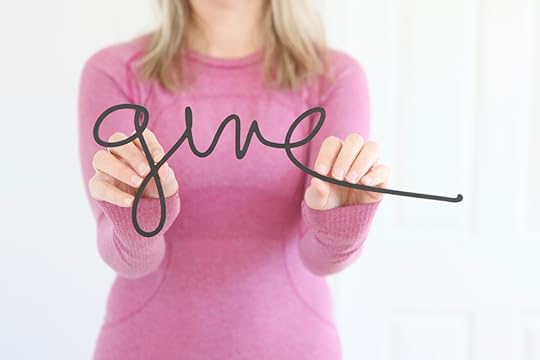
My One Little Word® for 2015 is give.
The process of choosing a word, or letting it choose me as is often the case, is always interesting. For me it often starts around October - words begin popping up here and there via reading or conversations or overhearing something on the radio. I tend to do a lot of listening and thinking and trying each one on for a minute or two or a couple days or longer.
I know there is no perfect word, there's only choices and paths and possibilities.
This year the word give showed up in October if I remember correctly. It came in more like a whisper - some years my words have been so loud as if they were making it so they couldn't be ignored.
Give began with the idea of giving to others and the question of what is it that I currently give. I'm pretty sure it was sparked by my trip to Washington DC to attend the ONE Campaign's AYA Girls And Women's Summit. There was a shift in my thoughts and a vivid reminder that it's not just about me and my own stuff - it was such a powerful opportunity to reflect on my place in the larger world and become educated on some of the issues facing girls and women in Africa.
Over the last few months since it first made itself known, my thoughts about the word give and what I want to focus on in 2015 has evolved which is something I always welcome as I choose a new word. Give, for me, is so much more than the process of "handing something over."
Give love. Give kindness. Give time. Give patience. Give to others. Give to myself.
On a certain level, the word give for me is rooted in connection and openness and awareness and willingness. What do the people around me need? How can I connect with them through the process of giving of myself? Over the last year I've lost some of myself in work and the transitions and I want more than anything to reconnect to the things/people/places I most value.
Another level/definition of the word give is the idea of bending and being flexible. It's a nod to living in the gray areas and working on lessening my constant grip on the black and whiteness of things. My ability to be black and white is at the same time very much a strength in some areas and a weakness in others. Discerning the difference between when to give and when to hold firm is something I'd like to explore this year.
The third level of give for me is in giving to myself. Giving time to myself. Giving patience to myself. Giving kindness to myself. Giving love to myself. I like the combination of the connection with others and the connection with myself. It's an opportunity to fine tune and get clear and make choices that align with what I care about most.
I'm also interested in exploring give up, give away, and give in - all three of which I see as positive steps/ideas vs. the negative way they could be taken.
I'm looking forward to experiencing a new journey with a new word in 2015.
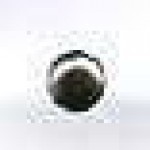
PS | That awesome little whole heart pocket talisman is from my dear friend Liz Lameroux's shop Soul Mantras. Check out all her lovely offerings here.
PSS | Listen to Elise Cripe and I chat about One Little Word® on her latest podcast episode here .
SHARE YOUR WORD THE COMMENTSI’d love to read what word you’ve chosen or are considering for 2015. In the comments feel free to simply leave your word as your comment or write a bit about why you are choosing this word. Next week I’ll combine all the words into a single post – it's become tradition and super inspiring to see all the words in one place.
If you’re new to the concept of One Little Word®, you can read some of my previous posts here: 2007, 2008, 2009, 2010, 2011, 2012, 2013 and 2014.
JOIN METo help keep your One Little Word® more visible throughout the year I offer a year-long workshop featuring one creative prompt per month. Read all the details and sign up here. Registration is $5 off until December 31.
December 28, 2014
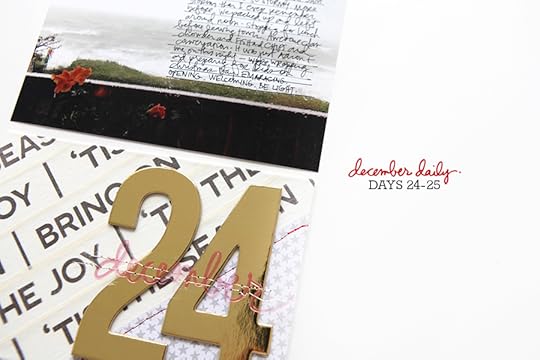
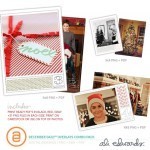
December Daily® 2014 | Day Twenty-Four And Twenty-Five
Welcome to
December Daily® 2014 | Days Twenty-Four and Twenty-Five.
Thank you for joining me on this adventure again this year. I'm always excited to begin and I'm always excited to wrap it up and move on to the new year - most often moving on to think about my new
One Little Word® (I'll share my new word tomorrow).
I hope this project helped you to connect with joy in your own life this December. I know for many people, December can be an emotionally challenging month for a million different reasons. My hope with this project is that it's used as an opportunity to connect with what's real and beautiful even in the middle of struggles (both big and small). It's definitely been something that has helped me as I've experienced changes in my family over the last few years. I'm ending my album this year with a strong sense that this was really a very happy Christmas for me - it was full of old traditions and family and open hearts and new beginnings (
regardless of what comes next). If this holiday season was hard for you, I'm sorry. I hope that working on this album was a path to joy for you - a way to literally see the things that are good and true and awesome.
If I've learned anything over the last few years it's that those things exist even in the middle of pain if you are willing to look.
Here's a look at my Days 24 and 25:
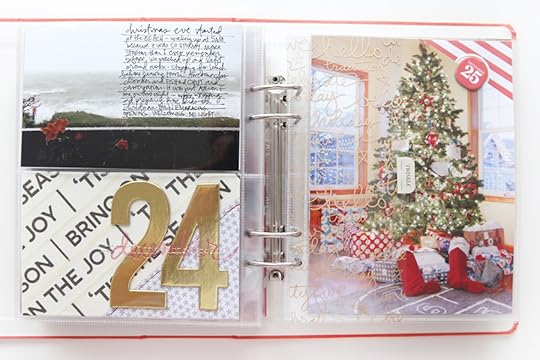
Christmas Eve for me this year included waking up to the biggest storm I ever remember experiencing on the coast, a long-lunch with Aaron before leaving the beach, stopping at a grocery store on the way home when I decided I had to cook pot roast on Christmas Day, driving home to Eugene, wrapping all the presents, heading back over to Aaron's and spending the rest of the evening with him while he wrapped presents and we got ready to see the rest of our families on Christmas Day.
It was a year of new experiences, of changing traditions, of being open to what it is right now and being thankful.
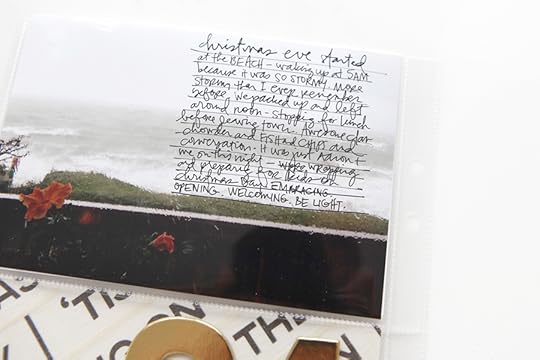
For Christmas Eve documentation I decided to use the photo of it storming at the beach and hand-write the journaling directly on the photo.
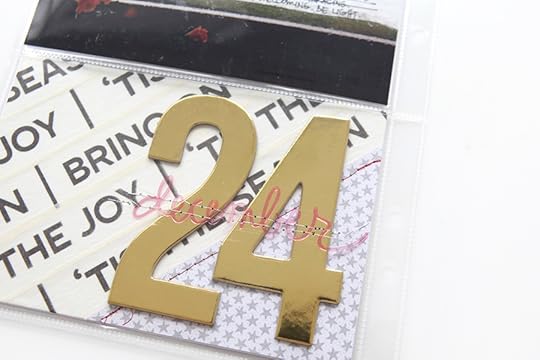
I adhered the large gold 24 and then stitched the plastic "December" on top.
In between the 24th and the start of the 25th (which spans a few pages) I included the printed transparency with the tab from my
foundation pages.
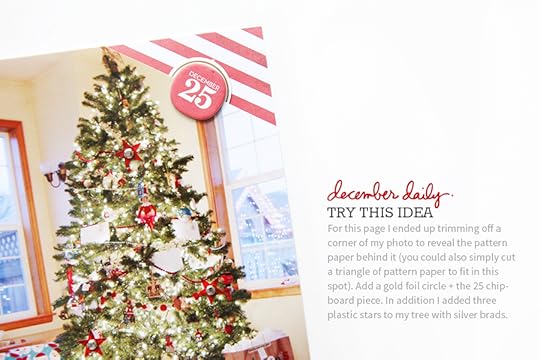
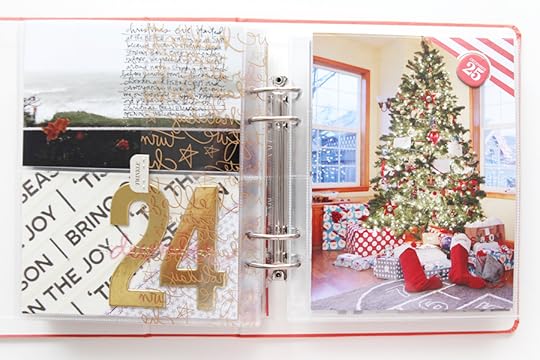
For the beginning of my story of the 25th (spans a few pages) I printed out a 6x8 photo of my tree the way it looked before Anna and Simon arrived home.
I cut the top off of the photo to reveal the red and white pattern paper from the back of the next page in the album. I tucked one of the gold foil circles in between the two and then added the 25 chipboard circle on top. I also added three red plastic hearts using silver mini-brads directly to my tree photo.
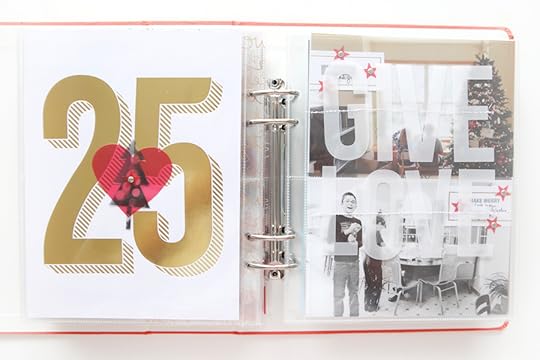
That gold foil 25 page was waiting all month to be used. I knew I wanted to use it here.
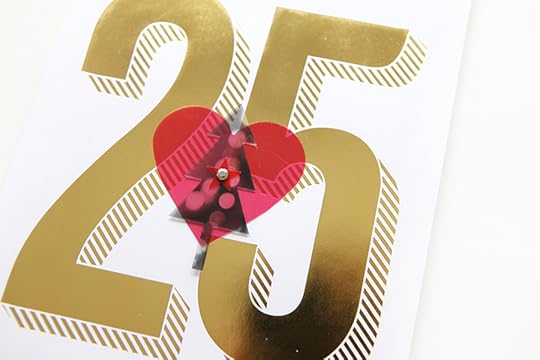
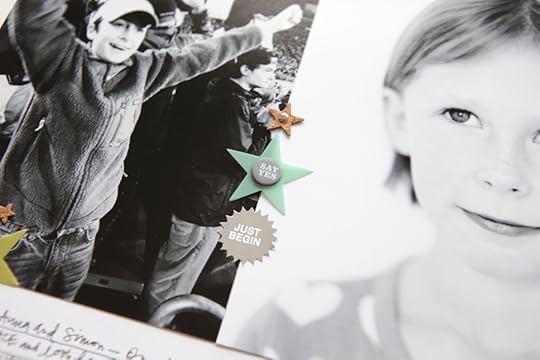
On top of the 25 I layered the plastic heart + the tree + a red star + a silver mini-brad.
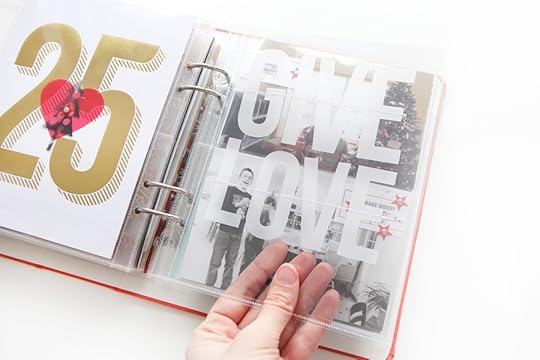
The words repeated over and over in my head on Christmas Eve and Christmas Day were
give love and as I was putting this page together I knew I wanted to include them in a big way.

I used my
Silhouette to cut the words "give love" from vellum. I laid them on top of a 6x8 transparent sheet (cut from these 12x12) and then slipped the sheet inside the pocket. Over the top I stitched two lines to keep everything in place.
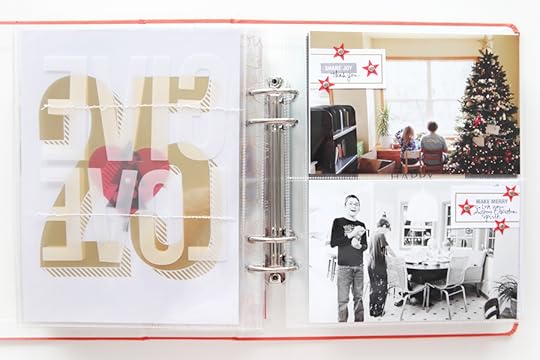
Behind the transparent page are two photos from Christmas Day + gold foil labels + plastic stars.
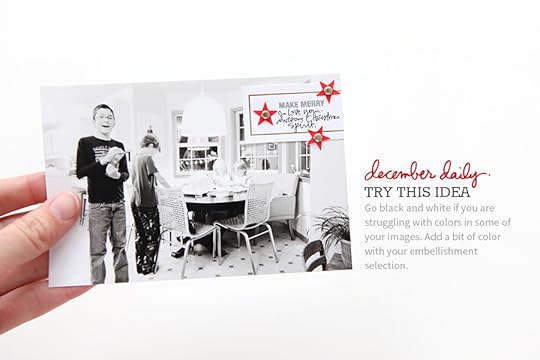
This photo was really, really bad in terms of color and overexposure. I used
RadLab to convert it to black and white before printing.
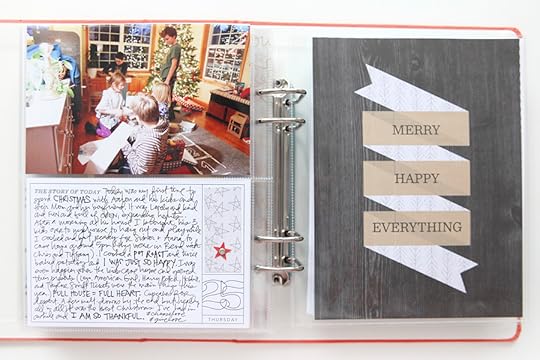
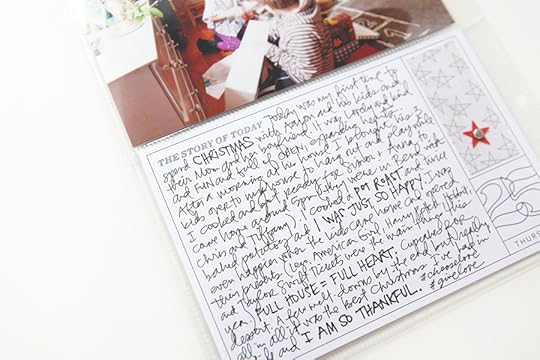
For the last spread in my album I added another photo with all the kids included and wrote out the story of the day.
#chooselove and #givelove
Bring on 2015.
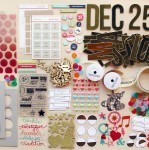
SUPPLIES

SHARE YOUR DAY 24 AND/OR DAY 25
December 26, 2014
December Daily® 2014 | Day Twenty-Two And Twenty-Three
Today I'm combining my Day 22 and Day 23 of my
December Daily® album into one post partly because they feel like they go together and partly just to get them up here on my site. I'm working on the last two days today and hope to share them soon as well.
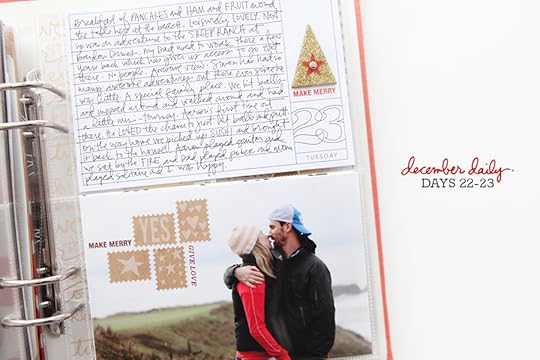
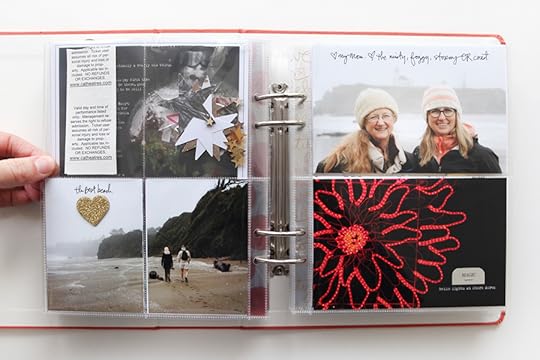
Days 22 and 23 for me were at the beach with my parents. Aaron joined us on the night of the 22nd and then we drove back home on the 24th. Here's a look at those two days in my album:
Mom and I went to see
Wild on the 22nd. We had both read the book and were looking forward to seeing the story played out in the movie. I think I wrote about it before on here but maybe I didn't - I had a bit of a hard time getting through the book because the main character made me so mad (who the heck walks the PCT without preparation and planning ahead). And then I kept getting mad at myself because I was being so judgmental. Sometimes we just have to set out without knowing how the story is going to end. Duh. I think the reality is that there are themes in the story that hit close to home for me in recent years - not literally but more figuratively - walking a new unknown path, letting go of control, loosing and looking for and discovering yourself, fear, loneliness, the evolution of our own personal story, etc.
Bottom line. I liked the movie.
That photo of my Dad on the bottom shows him cutting up meat for Shabu Shabu (a traditional Japanese dish that I love having with my parents). It's so him. It's actually one of those photos I think I'll treasure for a very long time. I find myself keenly aware of the fragility of life as I myself get older and I'm doing all that I can to really treasure and celebrate my parents while we are here together on earth. They are such
real people - imperfect and awesome and I'm so thankful that they are mine. Getting to go and spend time with them by myself is such a huge gift to me. Our conversations - so often rooted in family stuff and our own histories and future and the things we let go of and hold on to - are so important to me even when we disagree.
My parents are awesome examples of love and forgiveness and forward movement.
Visits with my parents always include at least one walk on the beach, pretty much always with camera in hand.
I love listening to them tell stories about this beach and I love watching them as they look through the lens of their camera to document the changes they see from a storm or things they want to show their elderly neighbors or just something they think is beautiful. I love how they notice things and want to document them.
Yeah, not a lot of questions about where that comes from for me.
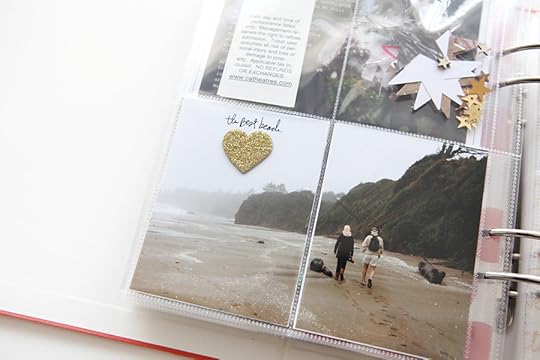
In those top pockets I included the movie tickets and then a collection of stars - punched and other ones that were on my desk. Those glitter chipboard pieces totally got used this year.
Definitely want to frame that photo of me and my Mom. Thanks Dad.
Just a bit of writing on my photos for Day 22 - simple and easy.
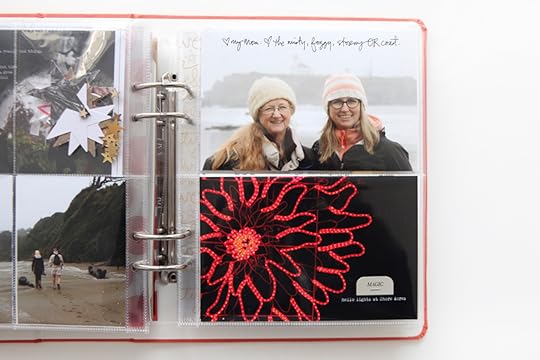
After our beach walk and after Aaron arrived we went out to see the lights.
That top left photo includes silhouetted profiles of Aaron and my parents. On Instagram I added a caption that mentioned yesterday and today. That spot is a favorite for me to capture - in this one I also love that just off the center to the left are two hibiscus blooms that decided to bloom on the days we were there.
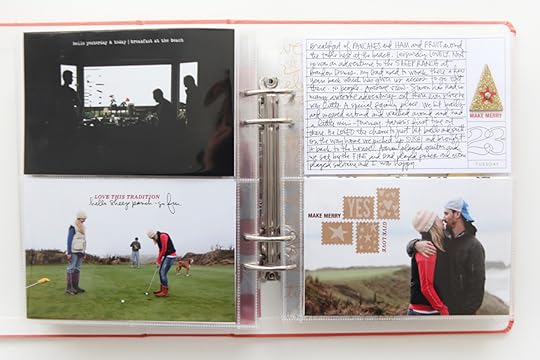
On the 23rd we took Aaron to the Sheep Ranch which is a private section of
Bandon Dunes (the short story is my Dad worked out there at one time). We hit balls and walked around and had putting competitions and marveled at the view of the Pacific Ocean.

It was a really great few days with my parents and Aaron.
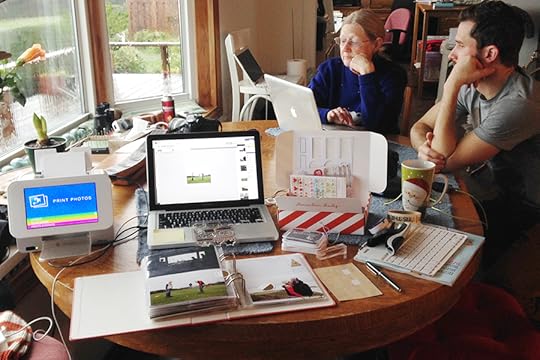
I also wanted to share a shot of my workspace from when I was at my parents. I took a big basket down with me that included my
December Daily® kit, my lap top and my Epson PictureMate Show printer. I shared this photo on Instagram and got a bunch of questions about the printer. It's the same one I've been using for a few years now and I love it. I use it here at home for printing all my 4x6 photos and smaller. Usually it's just hooked up to my desktop computer but it also travels pretty well. Highly recommended if you are looking for an at-home printer.
SUPPLIES
SHARE YOUR DAY 22 AND/OR 23
December 23, 2014
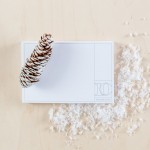
December Daily® 2014 | Day Twenty-One

Welcome to
December Daily® 2014 | Day Twenty-One.
Today the story I'm sharing is some of the things we did yesterday here at the beach. It's basically a simple accounting of the day which is a nice way to add details to my album. When I look back through this album one of the things I'm drawn to is the combination of days that have a lot of words and days that have just a few. I like both and both contribute to the overall story of this holiday season. Remember, it's not all or nothing.
Here's a look at my photo and my story and my page:
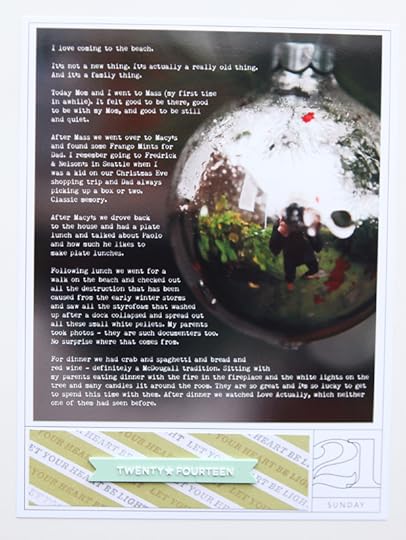
I hooked up my laptop to my Mom's ink jet printer (
HP Photosmart Premium C310) to print out this 5.5 inch x 6.25 inch photo.
Here it is in the album:
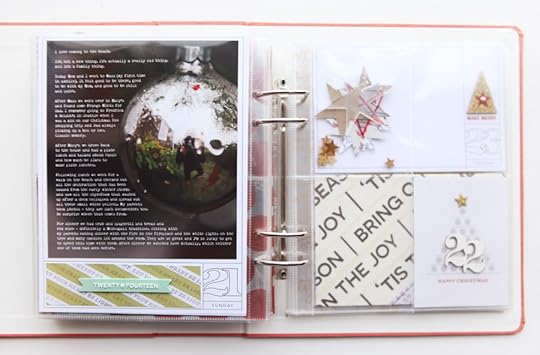
That photo of the ornament was taken with my DSLR. My Dad had hung some ornaments around the outside of the house - they were red originally but the stormy weather has wiped away most of the red. Have you captured yourself this holiday season? Make sure to include a self-portrait if you can in your documentation. You are a big part of the story.
SUPPLIES
SHARE YOUR DAY TWENTY-ONE
December 22, 2014
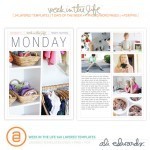
Week In The Life™ 2014 | Sunday In Album
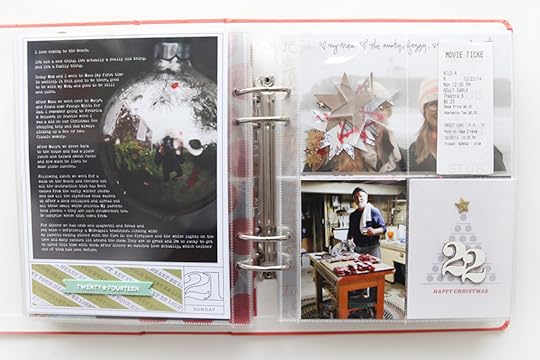
Wrapping up Week In The Life™ today by sharing what Sunday ended up looking like in my album.
What I want to tell you about this album is that I really love it. As I close it up and put it on my shelf, I love the Monday through Sunday look at my life over this one particular week in 2014. I love the depth. I love the focus on the words and photos. I love, love, love that I really went for it with the words this year. I know it will be something I will look back on and be thankful for in the years to come, just like the last nine or so years of doing this project. It makes my heart happy.
You can check out my words and photos from Sunday here.
Here's a look at what I ended up with:
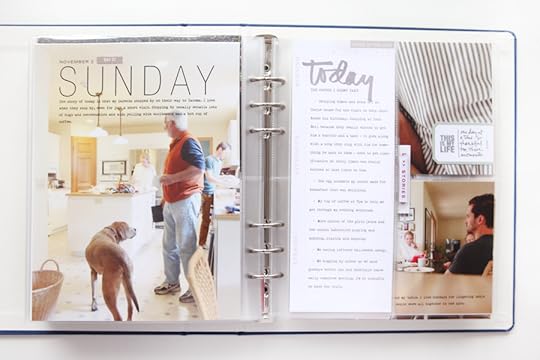
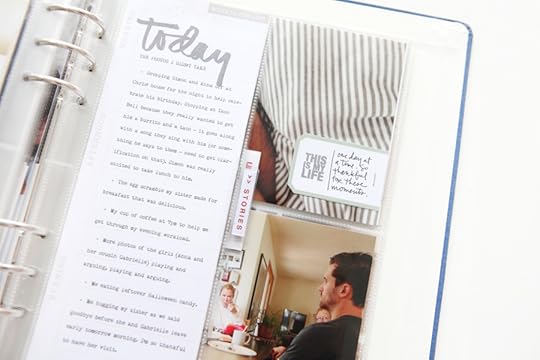
Another variation for the 3x8 page protector - all typed words. I ran this one through my printer like I did on Wednesday, but this time I went with smaller text and a collection of words that tell the story of the photos I didn't take (included in my blog post). "Today" is from the stamp set.
I also just wanted to mention that I love the enlarged photo I started Sunday with - it's such a great representation of this day. People in my kitchen is something that has my heart - my Dad, my sister, Aaron and Woody the dog. They are all doing stuff, chatting, fixing food - in action. These are the kinds of photos I personally love as they really showcase real life in action - my people in action.
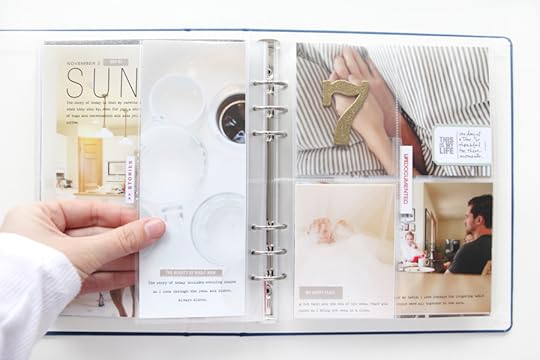
On the back of the 3x8 pocket I included a photo of dishes in the sink.
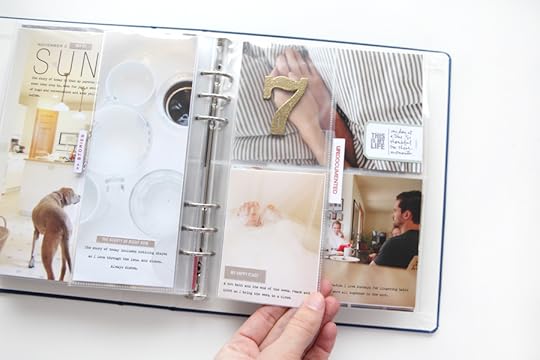
Today I actually ended up with 2, 3x8 inserts - the second one was created by cutting a 4-pocket page protector in half. The main reason I did this is because I didn't have any other photos I felt like including. The gold seven is stapled in the pocket. I added a second 2-inch plastic tab along the edge. I always like adding something like that for these insert-style pages. "Life documented" stamp is from my Photos stamp set.
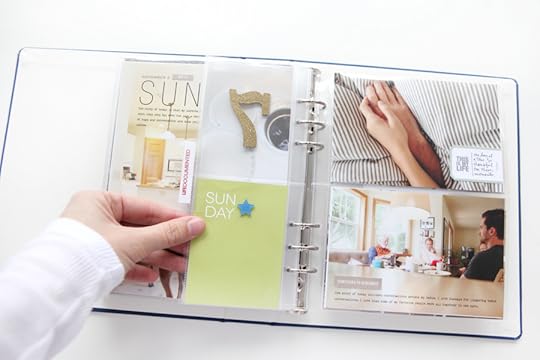
On the back of this second insert I added the "Sunday" card + a blue star.
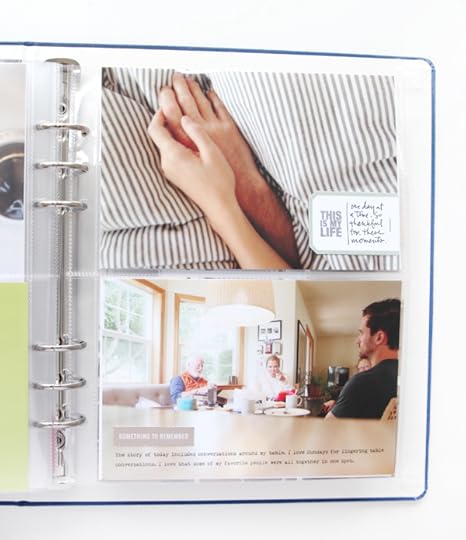
On the next page I've got two, 4x6 photos. One I added text directly to the photo and on the other I added a label with stamp and hand-written journaling.
That photo of hand holding is special to me.
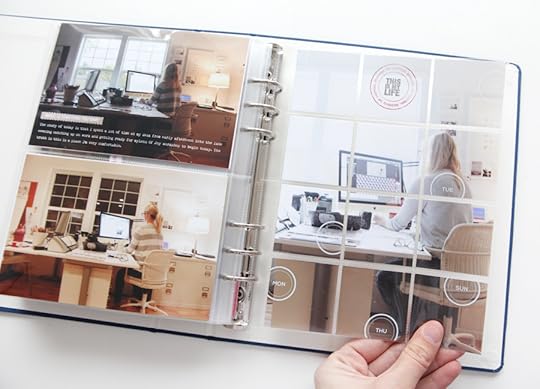
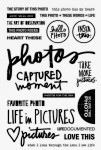
I ended my album with a 12-pocket (2x2) page protector. I printed out my 6 inch x 8 inch photo and then cut it up into 2-inch squares. I used the circle stamp + the "this is my life" stamp in the top center square and then added the white circle rub ons onto various other squares.
Thank you so much for joining me on this project this year. I appreciate your support and my main hope is that you got some of your own everyday life stories documented through the process.
Check out my other completed Week In The Life™ 2014 days here: Monday // Tuesday // Wednesday // Thursday // Friday // Saturday // Sunday
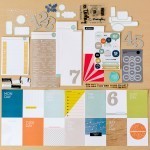
Introducing Story Kits™
Many months ago when we started talking about what this
kit subscription would look like I had a very clear idea that I wanted it to be first and foremost about the stories. I wanted to design and offer products in a kit format that were jumping off points to encourage people to include more of the stories of their lives in their scrapbook albums, regardless of the system used to hold those stories.
In addition to the intentional products, what I most wanted was to offer kits that included an
education component - a chance to present, open up, and focus on the reason why, to address different ideas for documenting stories related to specific themes (and to investigate all the different paths one theme can take), and for encouraging people to tell more.
The result is the Story Stamp™ and Story Kit™ and Digital Story Kit™ subscriptions.
Each subscription option includes full access to the Story Community Classroom - each monthly theme has it's own classroom. Inside each classroom you'll first find a theme video presentation that addresses the topic and storytelling ideas to go along with it. Under the Lessons tab you'll find (1) a full-color multi-page PDF that includes thoughts from the video presentation + storytelling ideas + how to's for the layouts I've completed that month and (2) a video that walks you through the process of creating one or more of the layouts I completed for the theme and (3) a product overview video (I'm sharing this video in this post below).
In addition there is a message board and gallery for sharing your work and ideas with this community of memory keepers.
Starting on January 1st, I'll welcome my first Guest Storytellers who will add their own take on working with the products and sharing their own stories (the guest storyteller content will be available in the classroom each month on the 1st). This month features Cathy Zielske and Pam Garrison.
Here's a closer look at each subscription:

The Story Stamp™ subscription is a 4x6 stamp set that includes, on average, around 25 individual stamps.
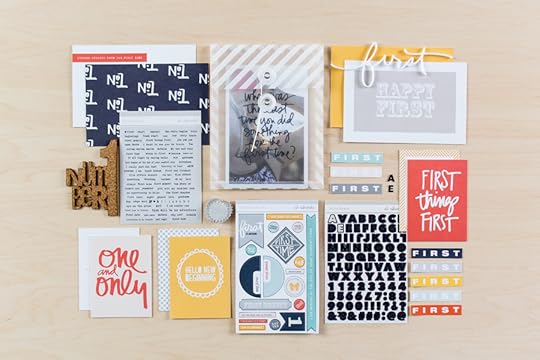
The Story Kit™ subscription includes 3x4 and 4x6 cards that can be used in pocket pages or on traditional layouts. In addition each kit will include some combination of letter stickers, word/phrase stickers, a plastic word, and other intentional products/embellishments designed with the specific theme in mind. Check out the Theme page for a full list of what is included this month.
If you subscribe to both the Story Stamp™ and the Story Kit™ you will receive the Digital Story Kit™ for FREE.
The Digital Story Kit™ subscription includes many of the products from the Story Kit™ as PNG files (not always every product because there are simply some things that don't translate to digital products) plus the Story Stamps™ designs as PNG files. Check out the Theme page for a full list of what is included this month.
For additional information check out the How It Works page here.
Thank you to those of you who have jumped on board and trusted me with your time and money. I appreciate that support and I appreciate your interest in story-focused kits.
I also wanted to take this opportunity to share with you some of the positive messages that have been shared in the
Story Community Classroom the past few months:
J | Ali honestly I am blown away by this subscription. I am only into month two and it has by far enriched my life SO very much more than I could have ever imagined. I find myself listening each month and taking notes and highlighting and just generally going about my life and day differently and more mindfully and watching more for the daily stories which make up my life and for that I thank you!
C | I would like to send a personal, very heartfelt THANK YOU for taking a huge risk, changing your business around and embracing your amazing talent to share with us all! At first I thought, I don't really do stamps and don't really "need" any physical products BUT this months prompt & the introduction video had me writing notes, sketching ideas and letting the tears fall! This project is So SO much more than stamps!!!!
S | I think that one of the reasons I love taking Ali's courses is the fact that they always - pretty much without fail - prompt me to really stop and think deeply about my life and my stories. The stories are stuck in there, just waiting to be drawn out. I'm so looking forward to giving myself permission to play with these stamps and products as a way to tease out those buried stories.
J | The classroom material is awesome this month, as always. This was the first month that I really didn't think I would use the theme, but thanks to the classroom content I already have some ideas.
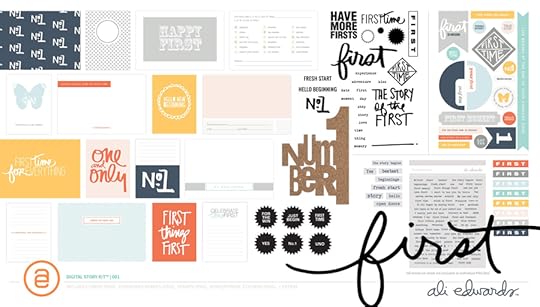
Here's a video overview from the Story Classroom with a closer look at the products included in the
Firsts Story Stamp™ and Story Kit™:
I hope you will consider joining me for these focused adventures in memory keeping. Upcoming themes include gatherings and AM/PM.
Subscription details can be found here.
December 21, 2014
December Daily® 2014 | Day Twenty
Welcome to
December Daily® 2014 | Day Twenty.
I made it safe and sound to my parents house and today I'm sharing the story of getting here and how thankful I am that this place is part of our lives. Just like last year I packed up my kit, my laptop, and my
Epson PictureMate printer and have set up a little station for working on my album while I'm here visiting my parents. There's always a lot of picture-taking that takes place even when it's just the three of us.
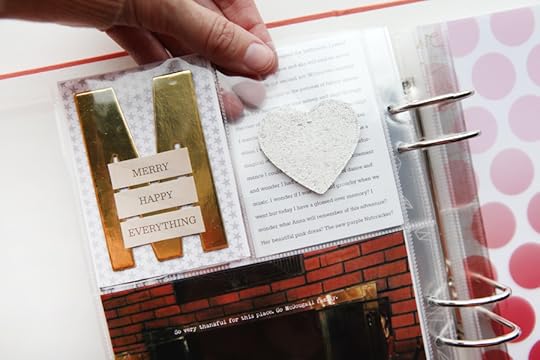
Here's a look at Day Twenty:
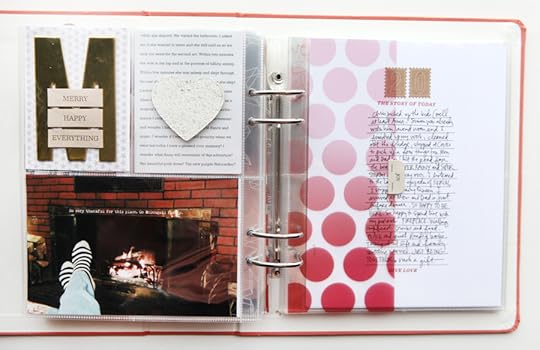
Today consists of one initial card, the back of the gold glitter star (embossed white), a 4x6 photo, the transparency cut in half with a tab, and a full 6x8 journal page with the kraft stickers on top for the date.
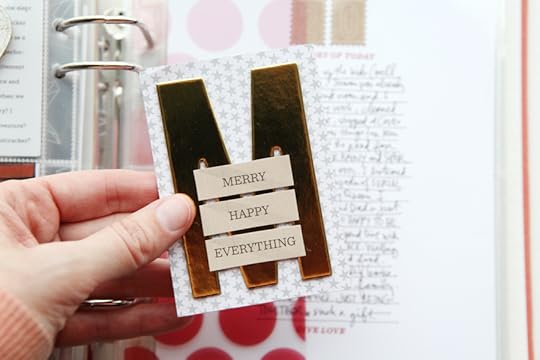
"M" is for McDougall. That's my maiden name.
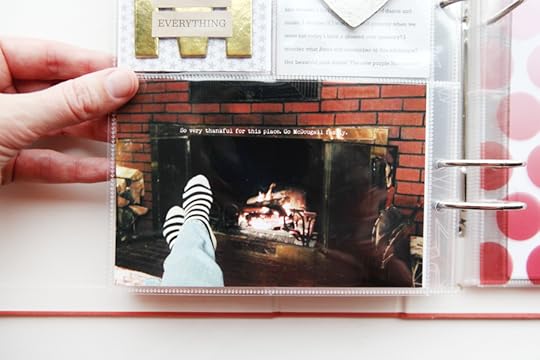
This fireplace is so, so awesome. It's huge and it is literally one of the best places in the entire world to sit and relax.
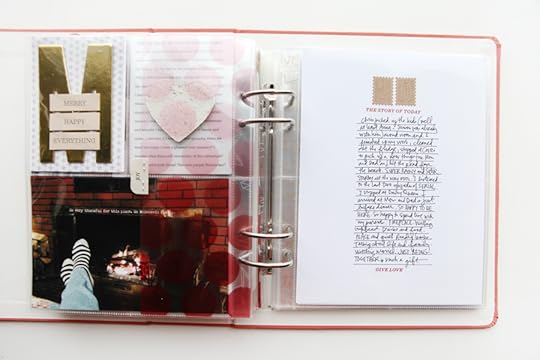
For journaling today I decided to create a column with my words:
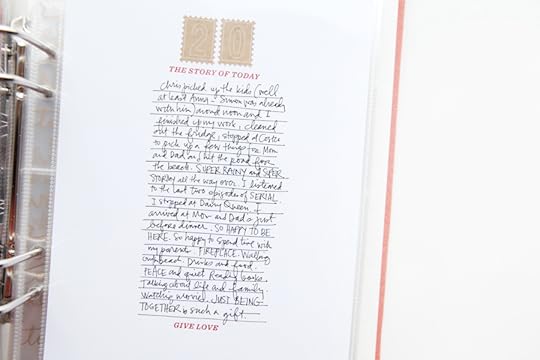
Written first and underlined second, the words talk about the logistics of getting here and the happiness of being together.
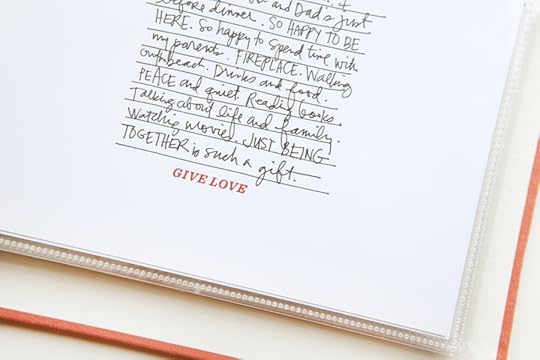
I ended it with the "give love" stamp. I've really loved working with this stamp set this year. Those little word prompts have been so great for so many of my stories this year. I hope you've enjoyed them too if you purchased a kit.
SUPPLIES
SHARE YOUR DAY TWENTY


