
Heather Solos's Blog, page 82
June 29, 2011
How to Clean Window Sills
I feel your pain. It's been quite a while since my windows have received the attention they need and lately I keep the shades down in the sunroom -the official reason is to reduce solar heating, but the side benefit is no one can see my window sills.
Just to be sure we are all on the same page, let's go over some -not all- basic anatomy of a window:
Pane or Lite – the glassMuntin – in windows that have separate panes, these are the usually wooden dividers that hold the panes in placeSnap-in Grilles- the aesthetic dividers found in windows that are actually a single pane of glass made to look like many, these can be between the panes or on the inside or outside.Sash – refers to each unit that holds the glass in place – in some windows you have an upper and lower sashTrack – (loose definition, may have some incorrect technical points) the dirtiest, most obnoxious part of the window, designed to catch filth its actual function is to allow the sashes to move and contains the space between the sash and the screen that collects bugsFrame – acts as a housing for the sashesSills – are the horizontal ledges that form the bottom of the frameStool – On the bottom of a window, this is the interior, decorative lip on which the window sits (yay for awkward sentence structure)Apron – this is decorative framework below the stoolI didn't want to suggest a cleaning method for the track that is inadequate nor do I want to suggest a method that could damage your interior trim work, the stool and apron.
Now that we have our anatomy down, let's talk cleaning.
The general idea for both cleaning suggestions is to get rid of as much dry dirt as possible before adding liquid to the mix. Water and dirt make mud and that is a pain in the rear to remove.
General precaution:
Water and wood can be a tricky combination. Use common sense, do NOT soak your work area. Work quickly to reduce the amount of water you are exposing the wood to and dry thoroughly when finished. Do not empty your bucket into your window frame and call me crying saying your insulation and dry wall are wet.
Just as an FYI, the cleaning techniques outlined are NOT weekly cleaning techniques. This is the once a year (or every few years, if you are me) kind of cleaning.
Window Track Cleaning ToolsA vacuum with a hose attachment, a shop vac will work fineA stiff bristled (nylon, not metal) brush like a grout brush – there are specific track brushesA bucket (preferably two) one with warm water with a squirt of dish detergent and a splash of laundry detergent, the second bucket is for plain water to rinse the brush / rag and keep the first from becoming horrendously filthyA damp ragA butter or putty knife to get into the crevices, if you must, but it needs to be wrapped in the rag or you may damage the trackWindow Track Cleaning TechniqueOpen the window and remove the screen, if possible. Brush or vacuum the loose filth -bugs, cobwebs, etc Vacuum these up and try not to squeal or make other silly noises if any of the bugs happen to decide they are alive. Once all of the loose dirt has been removed dip your brush into the soapy water, scrub the track, rinse the brush, and wipe away the soapy reside with the damp rag. You'll need to frequently rinse the rag, soap residue is sticky so don't skip this step or the track will be an even better dirt magnet. Replace the screen and congratulate yourself for getting around to the job after X years.
Window Stool / Apron Cleaning (Interior Sills) ToolsVacuum with the soft bristle attachmentSoft bristled paint brush (I like the two inch size) x 2 -assuming you're cleaning more than one windowdamp ragtwo buckets, one filled with plain warm water, the other with water and a squirt of both dish detergent (like Dawn) and laundry detergent (like Tide, but nothing with bleach)dry ragFor the exceptionally detailed only rubbing alcohol and cotton swabsWindow Track Cleaning TechniqueRun the vacuum's soft bristle brush (with the appliance on, naturally) over the window's stool and apron. While you have everything out, you may as well vacuum the whole interior frame. Use the dry, soft bristled paint brush to sweep as dirt as possible out of any crevices.
Dip the other paint brush in the soapy water and use this to swish any dirt out of the crevices. Follow up with a quick rinse with the damp, clean rag.
Finally, if your windows are painted white and there is still dirt in the crevice, you can use a cotton swab dipped in rubbing alcohol to get that last tiny bit. This technique often takes a tiny bit of paint, so be judicious.
Run a dry rag over the wood and pat yourself on the back.
The good news:
Regular dusting will help prevent the dirt from collecting.
The bad news:
Windows naturally act as dust magnets; eventually you will have to repeat the process.
How to Clean Window Sills is a post from: Home Ec 101 ©Home Ec 101.com 2007 - 2011


June 28, 2011
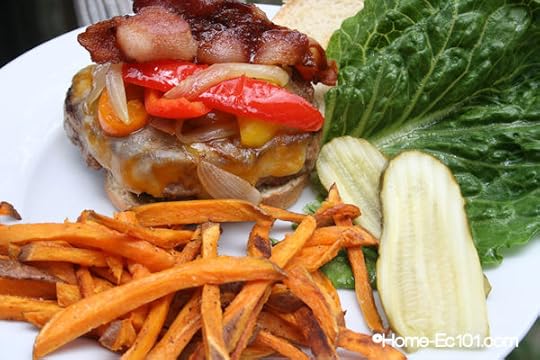
Johnsonville's Loaded Bratburgers with Oven Baked Sweet Potato Fries
I moved from South Carolina to Minnesota in 1999. The family that became my in-laws took me to a traditional lutefisk dinner that first week. As you can imagine, I was highly suspicious of all Midwestern traditions from that point forward -Once Bitten Twice Shy and all that. Thankfully my Minnesotan family made up for the whole lutefisk debacle when they introduced me to brats; casual cookouts have never been the same.
This leads me to a new-found phenomena the fully loaded brat burger. (Don't tell anyone, but I also added a big spoonful of chili to mine, it just didn't photograph very well.)
Last week I received an email asking if I'd be willing to check out Johnsonville's new product as part of the No Ordinary Burger promotion by the National Pork Board. We normally buy half a cow, so burger patties -of any kind- aren't anything I've paid much attention to.
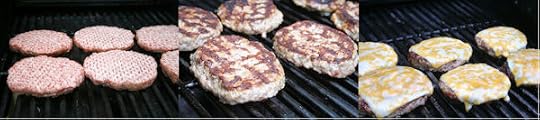
Preparation of the patties themselves is simple enough. You grill for 15 – 18 minutes over medium-low heat. You know the grill is medium-low when you can hold your dry hand about an inch over the grate for 5 – 7 seconds. (Yes, count 1 Mississsippi, 2 Mississippi etc). To get nice grill marks, rotate the patties 90 degrees about 4 minutes in, flip the patties at 8, rotate again at 12. See, isn't that easy? As always, watch for flare ups.
 To get in on the fully loaded brat burger action, you'll also need:
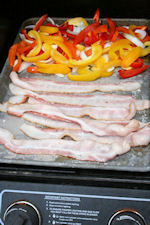
Grab an old sheet pan or a large cast iron skillet.
Fire up the grill and grill the bacon and vegetables over medium heat. Grill the jalapenos directly on the grill. If you have a fairly large grill, the bacon and the vegetables will finish about the same time as the burgers.
If you don't want the bacon, you can grill bell peppers and onion using the foil pack method.
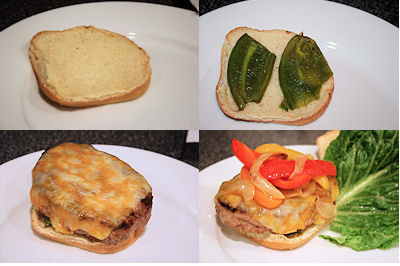
 Turn the jalapenos occasionally. When the skin just starts to blacken, remove the peppers from the grill and place them in a zippered plastic bag. The steam will loosen the skin to make peeling the peppers easier. Before serving, remove the outer skin, slice in half, and use a knife to scrape out the ribs and seeds. This gets rid of most of the heat, leaving a fabulous roasted jalapeno flavor.
Serve the burgers with the vegetables, jalapenos, cheese, and bacon on toasted buns.
So you've got the fully loaded burgers, how do you make those oven baked sweet potato fries?
It's ridiculously easy, don't worry about measuring, this is a simple method not an actual recipe.
Preheat your oven to 400°F.
Grab a couple of sweet potatoes, some olive oil, salt and fresh ground pepper. To make less mess you'll also need a knife, cutting board, and a bowl.
Scrub the potatoes and then slice into fry sized slices. Toss with a drizzle of olive oil and spread on a baking sheet. Lightly salt and pepper the fries and bake for 20 – 30 minutes, depending on how done you prefer your fries.
Could that be easier? Probably not.
In other news, Johnsonville is hosting a recipe contest with a chance to win a free groceries for a year. Just head over to their No Ordinary Burger Contest. You can also find Johnsonville on Facebook and Twitter. You can find the new Brat Burgers only at Walmart.
How will you top your brat burger?
I was compensated for this post.
Johnsonville's Loaded Bratburgers with Oven Baked Sweet Potato Fries is a post from: Home Ec 101 ©Home Ec 101.com 2007 - 2011


KIPing* Along
The great majority of my crafting life has been a solitary experience.
As a child, I spent many, mostly happy, hours alone with needles, hooks, books, and yarn pouring over patterns, learning and creating. I didn't know anyone else who knitted or crocheted, but in a house with many siblings, it was nice to have some space.

Out enjoying Stitch 'N Pitch at the local ballpark with my knitsibs
In those days, I rarely hauled out my handiwork in public, preferring to keep it a home or maybe overnights at a relative's. I wasn't shy about it, just didn't do it much.
Finding other knitters and crocheters on line spurred a knitting and crocheting renaissance nearly a decade ago, and I haven't stopped since. It also introduced me to local crafters and got my needlework out of the house.
Today, I pretty much knit and crochet in public on a regular basis and pretty much anywhere it's allowed. There's something about needles and yarn that drops barriers and makes people feel that they can come up to me and ask questions, and the diva in me loves the attention.
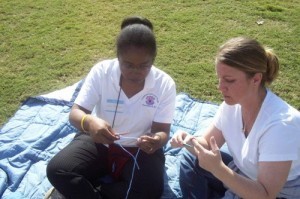
Teaching in Public at a Knit and Crochet Out
The question I'm most asked is what is the difference between knitting and crocheting and which do I like better (a future post). It makes me smile when men come up to me and confess that their mother, grandmother, aunt, or even father, taught them and they even passed it on their children.
One of the nicest experiences I had was at a classic music concert during Spoleto. I was very quietly knitting a sock and I noticed one of the musicians staring at me. At first I thought she was annoyed but then she smiled and kept playing. Afterwards, she told me that her grandmother in the Ukraine knitted socks and my knitting brought back pleasant memories for her.
To top it off, her grandmother was also named Vera. How cool is that?
Although some of my friends have had their share of negative experiences knitting in public (one was told she was being rude), I only have one.
I brought my crocheting to the post office, it was during the Christmas season, I expected to be in line for a while, and wanted to pass the time finishing last minute gifts. I had a nice time in line chatting up others and showing off my work. When I got up to the clerk, she frowned and huffed, "Well, we aren't so slow that you have to bring your knitting."
Since it wouldn't go over well to tell her that I actually was crocheting, and I wanted my packages to arrive on time, I refrained pointing out her error.
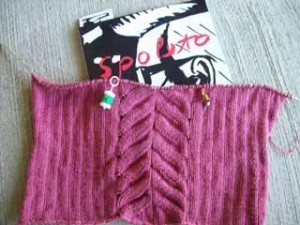
A tank top in progress during Spoleto.
I don't knit at work except at lunch. The church I attend is very open to knitting during the service, but I don't bring my knitting to other churches. I will knit at a causal concert, not at an opera, and I take care to choose quiet needles and a pattern I know very well so I'm not thrashing about with instructions. I also take time to engage make eye contact with the speaker if at a lecture and clap and generally be otherwise present.
When in doubt, just ask.
Outdoors or with other knitters, it's all about sharing and having fun. Still it's probably not the best time to graft that intricate lace shawl. Been there, messed it up.
Do you knit or crochet in public? Have any stories to share?
What rules/etiquette do you follow when doing needlework in public?
Gather up your yarn and hooks because a crocheting tutorial is on the way!
*KIP: Knit In Public–crochet too.
 Vera Hannaford lives and crafts in Charleston, South Carolina. She took part in a World Wide Knit in Public Week event at the Charleston Museum and is excited about starting a Sunflower Field Shawl for a Tour de France Knit A Long, but is still stressing about the yarn.
KIPing* Along is a post from: Home Ec 101 ©Home Ec 101.com 2007 - 2011


June 27, 2011
Looking for Cold Lunch Ideas
I don't have to leave the house for lunch, but I certainly understand the appeal of a quick meal. Typically I feed 4 – 6 people 3 times a day. That adds up to quite a bit of food prep. I love lunch to require as little thought as possible.
There's a lot more to salad than the lettuce and dressing varieties we tend to picture.
Consider any of the following:
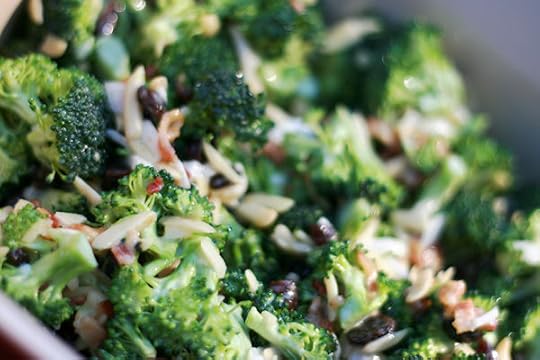
Now isn't that better than iceberg with carrot and cabbage shreds?
Get creative with your sandwiches, too.
There's a whole world beyond deli meat and PBJ.
What about tuna salad or chicken salad sandwiches. (Lately I've been craving ham salad, someone explain that, please. I think I just miss my grandma a little -she died many years ago.)
Gazpacho, a cold vegetable soup is another option.
Some leftovers are amazing cold, even though it's not an everyday kind of food I do have an unhealthy fondness for leftover fried chicken. Sliced pork tenderloin on a sandwich is lovely, too.
These are a just a few ideas to help get those lunchtime creative juices flowing.
What I really want to do is open the comments up to suggestions from Home-Ec 101 Readers. I know you have tons of ideas, let's hear them.
Submit your questions to helpme@home-ec101.com.
Looking for Cold Lunch Ideas is a post from: Home Ec 101 ©Home Ec 101.com 2007 - 2011


June 24, 2011
Grilled Fish: The Other White Meat
1. Through Thick and Thin
You think this one would seem like a no-brainer, right? But to this day, there are still those out there (who will not be named), who still can't seem to get this rule of thumb right. To put it plainly: thicker, steak-like cuts of fish (e.g. tuna, shark, swordfish and salmon), hold up better when placed directly on the rack. I'm not saying that you're limited to these species (we'll get to that later…), but if you're looking for a heartier, no-frills piece of fish to grill, this is your best bet. Note: Always remember to coat the fish with regular olive oil (which is best for sauteing and grilling).
2. The Royal Tin Foil
When dealing with very light to medium types of fish, you can still get all the aesthetics of on-the-rack grilling (i.e. grill marks, etc.) without having your fish fall apart, by just using a sheet of foil over the rack. You get all the heat you'll need and none of the fuss. Lightly brushing the foil with oil will keep the fish from sticking.
3. On the Whole
If and only if your find yourself bored with the methods I've mentioned above, you can get a little more advanced and try grilling a whole fish. But before slapping a whole trout, halibut or char on the grill, be sure to ask your local fishmonger to properly clean your fish before taking it home. And by "properly" I mean gutting, scaling and washing your fish before you take it home. Some seafood places may charge extra for this service, but the truly professional ones won't, so be sure to ask.
Keep in mind that these are merely the bare-bone basics of preparing and grilling fish. The more you delve into the subject the more you'll find tips and tricks that will put you ahead of the curve. If you have any swell recipes or comments, please feel free to share with the class.
Brian Wilder is a writer for Home Ec 101. You can also find him at Things My Grandfather Taught Me.
If you have a question you'd like Brian to answer send it to Brian@home-ec101.com.
Grilled Fish: The Other White Meat is a post from: Home Ec 101 ©Home Ec 101.com 2007 - 2011


June 23, 2011
Easy Greek Pasta Salad Recipe
As with any pasta and vegetable salad, you can change the proportions and the veggies up a bit to suit your own taste and accommodate what you have or can get at a good price. Seeded cucumbers would be nice in this, as would some grape tomatoes, which I would suggest leaving whole. I used black olives here, but I've also prepared the salad with kalamata or green olives, or a mixture. Pepperoncini or other jarred, pickled peppers can be used instead of the mild banana peppers. For the pasta, I chose penne rigate, which is ridged rather than smooth, and holds onto the dressing better. Also, penne is a sturdier shape than say, rotini or farfalle, so it doesn't fall apart as easily when tossed with the veggies and dressing in a salad. The tri-color pasta was the same price as the plain, and makes a more visually-appealing salad.
Recipe: Greek Salad Dressing1/3 cup white wine vinegar2/3 cup extra virgin olive oil (or use half olive oil, half sunflower or peanut oil)1/2 teaspoon oregano1/2 teaspoon basil1/2 teaspoon salt1/2 teaspoon black pepper1/2 teaspoon instant minced garlic or garlic powder1/2 teaspoon instant minced onion or onion powder1/2 teaspoon sugar1/2 teaspoon dijon mustardCombine in a jar with tight-fitting lid, and shake well. Set aside while prepping salad ingredients. Makes enough for one recipe of Greek Pasta Salad, about 1 cup. I tend to make a double recipe to have it on hand, as it keeps well for a few weeks in the refrigerator and it's also great on lettuce-based salads.
Recipe: Greek Pasta Salad6 ounces tri-colored penne rigate pasta4 ounces firm feta cheese (not crumbles)1 cup pitted olives1/2 large red onion1/2 cup mild banana pepper rings or pepperoncini, sliced1 medium green bell pepper (or red bell, or half of each)1 cup Greek Salad Dressing (above)Cook the pasta to al dente, according to package directions. Drain, then rinse well in cold water until pasta is completely cold, then drain well.
While the pasta is cooking, prepare the veggies and cheese, adding each item to a large mixing bowl as you go.
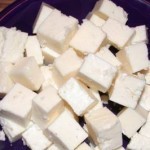
Cut the feta cheese into half-inch sized cubes. If you chose a firm cheese, they will hold their shape when tossed in the salad. This makes a much more pleasant-looking dish than results when using crumbled feta.

Slice olives in half lengthwise. As you do this, look for any fragments of olive pits which may have been left behind by the mechanical olive pitting equipment. Usually, you won't find any, but this time I found two!

Slice the red onion into strips from root end to the top, rather than cutting into rings. This gives nice sturdy pieces that work well in this chunky salad.

If you're using banana pepper rings, no prep is needed. For pepperoncini or other pickled peppers, cut into rings or strips if they are whole and large. Small, whole peppers may be used as is.
Clean and dice the bell pepper into approximately bite-sized pieces. If you don't know how to do that, Heather did a demo for us a while back.
Once the cooked & cooled pasta and all the veggies & cheese are in the bowl, shake up the dressing and pour it over everything. Using a large spoon, stir the salad gently, so you don't break up the pasta or the feta, until all the pieces are coated evenly. Serve immediately or cover and chill until serving time. I love this as a light lunch all by itself, but it's great as a side for cookouts, too.

Bobbie Laughman is a part-time caregiver and freelance writer, who lives by the belief that life is too short to drink bad coffee or eat lousy food.
Easy Greek Pasta Salad Recipe is a post from: Home Ec 101 ©Home Ec 101.com 2007 - 2011


June 22, 2011
How to Be A Fabulous Knitter/Crocheter–Basic Tools
In the Spirit of the Sunday Confessional, I have one to make…
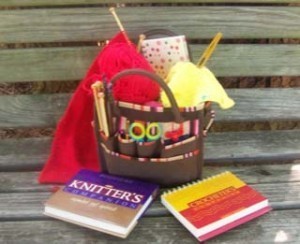
I am profoundly addicted to knitting and crocheting tools, and I'm pretty much powerless in resisting their allure.
You can read about some of my favorite tools here, but you don't have to live in fear of being featured on an episode of Hoarders (as I do) to get started. All you really need is a hook, needle, some yarn, and something to cut with, and you're all set.
Needles and Hooks
The only "right" needle or hook is the one that works the best for you. You may find what you like immediately or it make take some trial and error. Don't tolerate or struggle with something that's not working; a good hook or needle can transform a horrid project into a joyful one.
Here are some general guidelines to get started . YMMV*

While you really need only one set of knitting needles to start, it's probably a good idea to have three sets of straight needles in sizes 7 (4.5 mm)** 8 (5 mm) and 9 (5.5 mm) handy to make adjustments. There's no need to be fancy; almost any reasonable pair of needles will do–although I do love my rosewood needles with amethyst and silver tips.
I would suggest a smooth pair of bamboo or aluminum needles no longer than 9 inches. Nickle plated brass needles (my personal favorites) are probably too slick for most beginners.

Pretty much the same thing goes for hooks. Either start off with one or have a collection of three–G (4.5 mm), H (5 mm) and I (5.5 mm) on hand.
While I'm always on the lookout for something interesting, my favorites are the Clover Soft Touch (The ones on the far left and right).
Yarn

A good yarn is at the epicenter of any project. Just as a good hook or needle makes a world of difference, of course, so does the yarn. From type of fiber, to weight, to brand, it runs the gamut from super cheap to stunningly expensive.*** The choices can make one dizzy.
For practice, however, I would choose an expensive worsted weight cotton or cotton blend in a solid color. Stay away from multicolors, dark colors, and novelty yarns and yarn that splits or comes apart easily as these make if difficult to see your stitches and are harder for beginners to work with.
Some brands I like for teaching are Sugar N' Cream and Peaches and Cream. They also make excellent dishcloths, which are good first projects.
Moving On Up

Of course, you'll need a scissor for cutting. A yarn cutter pendant is attractive and good for travel. While gauge is not very important while learning, a tape measure or ruler is essential once you graduate to projects. While you can use any tape measure or ruler, my "Mr. Roboto" tape measure makes me smile.
I always encourage people I teach to get a good reference book. It's good to have something to fall back on, learn some history and terms, and it aids in good pattern reading. Like needles, hooks, and yarn, the "right" reference book is entirely a matter of personal taste.
Don't feel intimidated if you don't understand many of the concepts ay first; they will come to light as you grow in knowledge. I always have to go to my books for things I don't do often like short rows and seaming.
Some of my "go to" books are Interweave's Knitter's and Crocheter's Companion. I also highly recommend Donna Kooler's Encyclopedia of Crochet and Encyclopedia of Knitting.
So go out and get ready. I'll manicure my nails and have my husband shoot some lessons for next time. Please leave any questions in the comments.
We are on the road to fabulous.
*Your Mileage May Vary. Does anyone say that anymore?
**Learning some metric system basics is highly recommended. Sounds like a future post may be in order.
***That's over $90 an ounce –28 grams to the ounce. Sugar N' Cream is cheaper, I promise.
Vera Hannaford lives and crafts in Charleston, South Carolina. She's currently finishing up a crocheted baby blanket, setting in sleeves for a knitted bolero, and thinking about making a red cardigan. You can follow her adventures in needlework on Vera's Crafty Blog and get some helpful hints at KnittingTips on Twitter
How to Be A Fabulous Knitter/Crocheter–Basic Tools is a post from: Home Ec 101 ©Home Ec 101.com 2007 - 2011


June 21, 2011
How to Grill Bacon
Earlier this month here and on Facebook, I asked Home Ec 101 readers to submit their questions and concerns about grilling. Eric Mueller asked for tutorials including how to make bacon on the grill. Well Erica, yesterday it was 102ºF and a friend of mine mentioned California Dreaming and I couldn't get their salad out of my head. It was far too hot to cook bacon in the oven, so I grabbed a quarter pound of bacon and an old, already warped sheet pan to conduct my latest grilling experiment. If you are lucky enough to have a cast iron skillet, use that instead.
Do not use your favorite sheet pan.
Do not use sheet pans with a nonstick coating. I buy my sheet pans from a restaurant supply store and rotate one or two into use as needed.
Do not grill bacon directly over the flame. You'll create flare ups that will be hard to control.
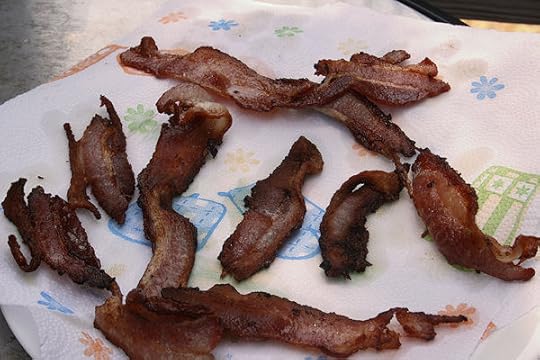
Do enjoy tasty bacon from the grill.
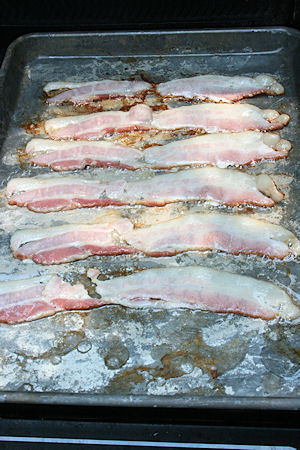 It couldn't have been easier. Start or light your grill. Arrange the bacon on your sheet pan, place the sheet pan over the grill and proceed to cook your bacon just as you would on the stove in a pan.
Just like when you cook bacon on the stove, you don't want to toss cold bacon into a hot pan. Place the bacon in the room temperature pan and then proceed.
Since you typically have less control over the heat of the grill than you do the stove, it is important to not leave the bacon unattended. Try not to move it too much, but do rearrange if hot spots develop that would scorch the bacon. Also consider moving the pan on the grill or rotating it occasionally to ensure more even cooking. (Use a towel or oven mitt, metal conducts heat).
Charcoal grillers may want to note that this process is so quick that it would be wise to have other items to grill when the bacon is through. You don't want to let those coals go to waste.
Within a few minutes, you'll have bacon without heating up the kitchen.
I file that under: WIN.
Submit your questions to helpme@home-ec101.com.
How to Grill Bacon is a post from: Home Ec 101 ©Home Ec 101.com 2007 - 2011


June 20, 2011
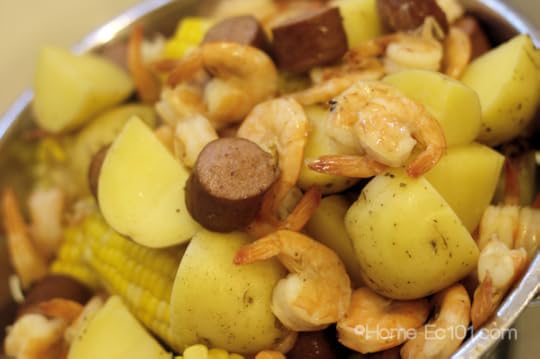
Home-Ec 101 Weekly Menu and Shopping List #16
This menu is intended for use during the summer when temperatures warrant minimizing the use of the oven in favor for slow cookers and the grill. Usually I try to do one vegetarian night, this week is an exception to that rule. However, there are two fish / seafood nights and vegetables are well represented.
Check out SayMmm.com for this week's easily editable and free printable grocery list.
If you create your own menu plans, what are you eating this week to beat the heat?
Want to know who won the signed copy of Home-Ec 101: Skills for Everyday Living? Check out the Home-Ec 101 Facebook Fan page. The winner has until 11:00pm Eastern Tuesday June 21, to contact helpme@home-ec101.com with their mailing address.
Home-Ec 101 Weekly Menu and Shopping List #16 is a post from: Home Ec 101 ©Home Ec 101.com 2007 - 2011


June 17, 2011
Friday Fun: Home-Ec 101 Skills for Everyday Living Giveaway
It's hot, the beach is calling my name and it has been a very long week of technical issues -hopefully you didn't see too many.This morning I realized that I have yet to give away a signed¹ copy of Home-Ec 101: Skills for Everyday Living on this site.
It's time to remedy that oversight.
Let's do this simply, shall we?
Each person has up to three ways to enter.
Simply leave a comment linking to your favorite post here on Home-Ec 101.Tweet about this giveaway and paste the link into a NEW comment.Share your favorite Home-Ec 101 post on Facebook and leave the link to the url in a NEW comment.This giveaway will run through Sunday June 19, 2011 at 9pm Eastern Daylight Time.
Quick tip: To grab the url -that's the web address or link- of either a Tweet or a Facebook entry, look at the tweet or post. On both Twitter and Facebook, the timestamp is under the text on the left. Right click this text and click copy url. When you go to add your comment here, simply paste that url into your comment. It's not as complicated as it sounds, I promise.
Have a wonderful weekend!
¹Yes, offering it signed does feel a little presumptuous to me, too.
Friday Fun: Home-Ec 101 Skills for Everyday Living Giveaway is a post from: Home Ec 101 ©Home Ec 101.com 2007 - 2011


Heather Solos's Blog

- Heather Solos's profile
- 12 followers

