
Heather Solos's Blog, page 49
February 16, 2014
Sunday Confessional with a Splash of Margarita
 Heather says:
This isn’t particularly Home Ec related, but sometimes life is more than the chores that make it easier.
As many of you know, last year was incredibly difficult. Okay, I can see my therapist giving me a look, last year was insane.
Yet I’m still standing.
In fact, now I’m standing with a few more freckles. I just got back from Cozumel, Mexico. I saved up for and took my first solo vacation. (Trust me, Customs thought it was a little weird, too when I re-entered the country. Are you sure you traveled alone? You didn’t meet friends?) Back in November, as things were just starting to fall back into place a really good Groupon deal crossed my radar. I jumped on it and bought that “dream vacation.” Ever since I was a child, I’ve wanted to go somewhere warm and have nothing to do. And. if anything, last year taught me that life won’t hand you the things you want and may cut the ride short.
So I went.
It turns out that I am truly awful at doing nothing.
I brought a crapton -technical term- of Kindle books (Highlights include but are not limited to): Looking for Alaska , The Book Thief
 , The Off Season
 (actually I read all three in this series but this one was the emotional sucker punch), Innocence: A Novel
 , and Socially Awkward: A Novel
 . I dove back into the Flavia de Luce Series
 which I highly recommend if you’re looking for a book for pre-teens with a strong, smart, sassy female lead. Yes, I read YA and teen fiction and quite happily, thank you. If a book is well-written, it doesn’t matter the demographic.
It turns out you can avoid a lot by being busy and last year I avoided mourning by burying myself in work and busyness.
So what happens when you go to Cozumel alone, armed only with books?
You meet wonderful people who offer to drag you up to North Dakota to set you up with a man -completely unnecessary and I’m sure North Dakota is perfectly nice, but I live in the South for many reasons and warmth is fairly high on that list. (And please understand that’s only what’s wrong with that idea on the surface, we aren’t going to get into the deeper aspects, that would get too ranty for my taste.)
You take SCUBA lessons and get PADI certified for Open Water*, only to rupture an eardrum and end up spending a lot of time sitting in a boat with a captain who speaks no English and probably has no interest in your clumsy grasp of kitchen Spanish.
You learn that all-inclusive means that margaritas are way too easy to order and end up going to bed ridiculously early. When you go to bed ridiculously early, you wake up ridiculously early in a town that runs on tourist time. Hello many more hours to fill.
You learn that hot water is truly one of life’s greatest pleasures. (My room had none.)
You learn that you can survive without a smart phone, but that you miss all the people on the other side far more than you ever imagined.
And you finally cry. A lot. Mostly in private, but I’m pretty sure the staff at the hotel wondered who the weird, crying woman was. And apparently you let perfect strangers hug you in the bathroom.
And weirdly, you start to feel better.
 And, maybe, just maybe you’ll see yourself in a book. Tsh Oxenrider, in Notes from a Blue Bike: The Art of Living Intentionally in a Chaotic World
 stated, “[...]work is my leisure of choice.”
I know what that looks like and I’m finally okay with it.
So this wasn’t the standard Sunday Confessional, but it’s a big one for me. I know I need to make sure important things don’t fall off my radar, but I need to quit trying to define myself in ways that don’t fit my preferences.
What about you?
What do you have to get off your chest?


January 31, 2014
The Hard Water Headache
Dear Home-Ec 101,
I was visiting my MIL recently and she told me that they have hard water, so she had to put a lot of extra soap in the washer because otherwise she didn’t get any bubbles and it wouldn’t clean the laundry. This confuses me because I always thought you weren’t supposed to have a lot of foam in the washer. I’ve read articles recently saying that most people use way too much laundry detergent. Also, the man who installed our new septic system told me that I should use liquid soaps because they didn’t foam and foam would not build up in the septic system (which is apparently a bad thing).
I suspect that my MIL simply doesn’t know what she’s talking about, but I would never say so to her. If I’m wrong, please correct me- or at least just clear this up so I can think about something else!
Signed,
Biting My Tongue
Heather says:
You are both partly right.
Laundry detergent isn’t just one thing, it is a blend of ingredients in either a solution or powdered form. Some of it is soap, some detergent, some surfactants, water conditioners, and then we get to the perfumes and dyes.
Hard water is water that has calcium and magnesium in solution and these dissolved minerals cause a lot of headaches in laundry. If they are not suspended in water when the wash water or rinse water is drained, the magnesium and calcium can cling to clothing causing fabrics to feel stiff and dulling the color. Think of it a bit like looking through a slightly dirty window, usually you can’t focus on the dirt, but your view of the outside world isn’t as bright and clear due to the slight film obscuring the view.
It is often necessary to use more laundry detergent in hard water.
When laundry detergent is added to hard water, a number of the detergent molecules -which I’ve been describing ad nauseum of late- get used up binding the calcium and magnesium. This simply means that all conditions being equal, there will be fewer detergent molecules able to trap dirt in hard water than in soft water. Soap molecules that come in contact with minerals form our nemesis soap scum which is difficult to remove from wherever it decides to cling.
Please do not expect Home-Ec 101 to help you study for your physical chemistry final, I am only trying to get across basic concepts. In chemistry we often talk about something called the saturation point. When something is saturated, it can’t hold any more. In your laundry, this is the point at which no more detergent can be in the wash water. Whatever cannot be in the water falls out as precipitate. (Remember it like this, when it rains, it’s precipitating, the cloud cannot hold any more moisture so it falls out of the sky.)
Water can only hold so much soap, even if that detergent is busy holding minerals like calcium and magnesium in solution -the clusters of soap around oil or dirt are called micelles. So there is a point at which too much of anything is going to precipitate out of solution. Where that precipitate (dirt, oil, gunk micelles) goes depends on its density, it may sink or float on top of the water in a scummy layer.
As consumers we tend to associate soap suds with laundry detergent doing its job.
Foaming and bubbles occur when when air your washer agitates, splashing the water around and trapping air. Bubbles and foam are actually two layers of soap sandwiching a tiny film of water. Air gets trapped in this film creating bubbles, as more air is introduced through splashing, you create the foam and suds we are all familiar with.
For the most part, suds aren’t coming in contact with the clothing and when the water drains, the suds leave a sticky film of soap behind. If there isn’t enough rinse water to bring everything into solution, those deposits will stay on the fabric which pretty much defeats the entire purpose of doing laundry.
People who live in areas with hard water do have a few tools at their disposal.
Heat improves solubility.
Approximate Temperatures of Wash Water
Cold Water
Warm Water
Hot Water
65°F – 75°F
80°F – 105°F
120°F – 140°F
18°C – 24°C
27°C – 40°C
49°C – 60°C
In general, higher temperatures allow more soap or detergent to be in the water at a given time.
Additionally, please note that most laundry detergents aren’t going to be very effective at temperatures below 60°F or 16°C. If this is the only option, try dissolving powdered detergent in a small amount of hot water before adding it to the washing machine. This will help prevent those white powdery streaks caused by undissolved detergents.
Water conditioning
Those looking to improve the effectiveness of their laundry detergent in hard water can give conditioning their water a try. Water conditioning is the process of getting the calcium and magnesium out of the water where it won’t use up the detergent. This is typically done by exchanging the calcium and magnesium ions with those in salt (sodium and chloride). Now kep in mind that some laundry detergents already contain ingredients, known as zeolites that condition the water.
Point of Use Water Conditioning -
If you are looking to soften your hard water only in the clothes washer, be absolutely sure to purchase a non-precipitating water softener. Non-precipitating water softeners work best when added to the water before the detergent, this prevents the detergent from beating the water softener to those pesky ions. Yes, this means you will have to be more attentive to your washing machine when doing laundry.
Precipitating water softeners will cause the minerals to fall out of solution where they will likely cling to clothing and the inside of your washing machine, completely defeating the purpose.
Whole House Water Softening

 Water softeners are a fairly common solution that also works by switching out the calcium and magnesium with the ions in salt by passing the water through a chamber of resin beads. These beads have to be recharged with salt on a regular basis. There are some environmental concerns with choosing to use a water softening unit and you should do your research thoroughly before making the investment.
Do not waste your time with a magnetic water softener.
You are not going to get the results you desire slapping a couple of magnets around a pipe. It’s a scam.
So for the TL/DR crowd to answer your initial questions:
1. Yes, you need more laundry detergent in places with hard water.
2. Soap suds are not an indication of how well laundry detergent is working and they can leave dirt behind.
Regarding Septic Systems:
Everything you allow to go down the drain affects the chemistry and bacterial balance of your septic system. Your septic system is designed to handle some variations, but if you go too far, you’ll upset the natural balance and end up with big problems.
Use the least amount of low foaming soap possible. The low foaming is critical for septic systems with an aeration chamber. As stated above, suds form when air is introduced to that soap film. Suds will leave behind soap and eventually clog the system.
And those of you who have septic tanks should remember that it is better to spread laundry out over the course of a week than overloading your system and upsetting the chemical / biological balance with a marathon laundry day. If you’re that far behind and the mountain of laundry is threatening to avalanche, consider saving yourself expensive septic repairs with the relatively cheaper laundry mat option.
Send your questions to helpme@home-ec101.com
Image is linked with an affiliate code to Amazon.com. That image is used as an illustration of the system mentioned in the post, rather than a recommendation of a specific brand. . .

Copyright Home-Ec101.com 2007-2014


CommentsConnie, When ever I visit family who has hard water I all ... by JenWe use cold water frequently when doing laundry to save on ... by ConnieFogglesThank you for explaining it so well heather!! I use cloth ... by MamaDweeb@bookchick@HeatherSolos@stevejberry i've found telling people ... by imabugThanks you so much for this- it has been exceptionally helpful. ... by CharaWatsonPlus 9 more...Related StoriesHow to Solve the Soaking Problem with a Front Load WasherHow to Clean a Bath Mat After a Toilet OverflowHow to Deal With Stubborn Body Odor in Laundry
January 30, 2014
Garlic and Soy Chicken Thighs
Heather says:
The humble chicken thigh certainly doesn’t get as much attention as its counterpart the boneless skinless chicken breast. In my area BSCB have been running in the neighborhood of $5 a pound on sale, which makes thighs much more attractive. This recipe is flexible, substitute low sodium soy sauce if you wish. If you have it on hand, consider adding fresh, grated ginger.
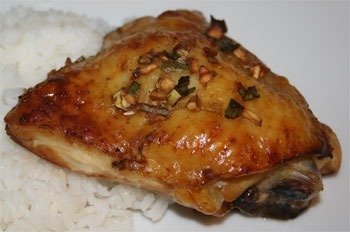
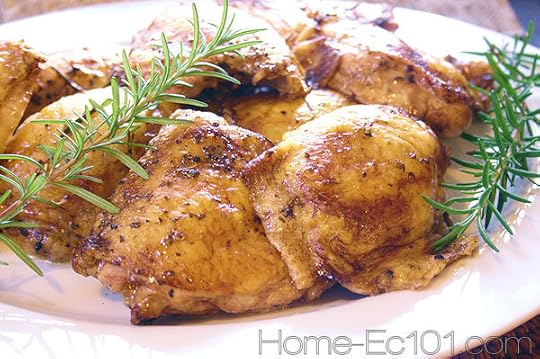
Garlic and Soy Chicken Thighs
Ingredients
6 – 8 chicken thighs
1/2 cup soy sauce
1/4 cup honey
1 spring onion or 2 green onions, chopped
3 – 4 garlic cloves, minced
black pepper* to taste
Directions:
Trim the excess skin and fat from each chicken thigh. I leave just enough skin to cover the meat. Place the breasts in a baking dish just big enough to accomodate the chicken. If you have too much space between the pieces the sugars in the sauce will burn and your evening’s entertainment will consist of dish scrubbing.
Preheat the oven to 350°F.
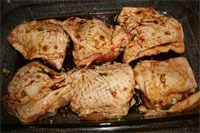 Whisk together the soy sauce, honey, onion, garlic, and pepper*. Pour the sauce over the chicken. Turn each piece so it is well coated and then leave it skin side up.
Bake at 350°F for 30 – 40 minutes.
*If you aren’t cooking for sensitive palates (ie young kids or picky spouses) consider substituting crushed red pepper flakes for the black pepper. These will add a nice kick.

Copyright Home-Ec101.com 2007-2014

CommentsAwesome recipe! I've made this for family members who just came ... by PeterHi Heather How much fresh ginger do you suggest adding ... by JackieI made this today. Hopefully it turns out good. I had to use ... by ssk9139This recipe looks really yummy. I don't buy honey very often ... by Jessica FlowerI love this! When I'm in a hurry I use dried onion and garlic. ... by MarshaPlus 6 more...Related ArticlesIs Extra Virgin Olive Oil a Substitute for Vegetable OilHollandaise SauceGluten-Free Chicken Marsala


January 10, 2014
Mattress Cleaning and Other Indoor Sports
Dear Home-Ec 101,
What is the best way to clean a mattress? Dec 2008 I splurged and upgraded from a queen bed to a fabulously huge king size bedset.I’m wondering what is the best way to clean the mattress? I have a small “spot” cleaner by Hoover (I think)-and I use that to get stains/spills-thank goodness there have only been a few. But I’ve been thinking how does everyone clean their mattresses? I’ve heard of putting it outside and letting it “air out” but that’s not feasible where I live. Recently in a yoga catalog I saw a sanitizing “wand” sort of thing (uses UV I think) and have thought about getting that. Just curious as to what other people do.
Signed,
Bedwarmer
Heather says:
We humans are fairly nasty creatures and we spend a lot of time in bed. We shed skin cells, which the dust mites adore and then there’s hair oil, sweat, drool, and potentially other bodily fluids. Even if you don’t have allergies, it’s something to think about. Mattresses can get pretty funky without attention.
Let’s give a thought to prevention. Let your bed air out daily and no, I don’t mean drag the whole thing outside. Just fold the sheets back toward the foot of your bed. Take a shower, eat breakfast, then make your bed. Dust mites love moisture and if you create a favorable environment, they’ll hang out eating, breeding, excreting. . .
Change your sheets frequently, they are your mattress’s first line of protection.
January 6, 2014
Brand New Printable Chore Chart for 2014
Heather says,
I may still be in Las Vegas for a conference, but that doesn’t mean all things Home Ec have come to a complete stop. I asked my friend Amy Tucker to put her skills to work and she created a brand new printable chore chart for you.
Just visit http://www.home-ec101.com/clean-it/weekly-chore-schedule/ to find both versions of the weekly chore schedule. Because Amy is Amy, she also made a couple of cheeky versions that I’ll be sharing closer to Valentine’s Day.
I’ll be back tomorrow night and hopefully the jet lag doesn’t kick me in the butt. It’s been a great show, but I’ll be glad to get home and back into my *ahem* normal routines.
Have a great week and please stay warm.

Copyright Home-Ec101.com 2007-2014


January 2, 2014
January’s Seasonal Recipes Make Eating Local More Practical (for some)
Heather says:
A healthy lifestyle happens one choice, one recipe, one meal at a time. There’s no reason to think that if you can’t set up a permaculture garden that there is no reason to try at all.
Scratch Cooking, The Whys explores some of the reasons why I prefer to cook at home rather than eat out. My life has changed significantly since I wrote that post, but the underlying motivation remains the same. After struggling through grief and situational depression since August -there is still much ground to cover- I let a lot of things go. I more or less stopped writing here, cooking became a matter of just putting food on the table.
I have thrown a disturbing amount of food away. (I’m about to clean out my refrigerator later today and will once again waste a disgusting amount of food, but it is what it is.) You do the best you can under the circumstances you’ve been given.
It’s a new year, thank God.
Later this week I leave for a conference in Las Vegas, so the minions and I will be trying to use up some leftovers. When I get back from Vegas, the menu planning will begin again -touch wood. I hang around too many Brits, apparently.
When I had the personal bandwidth to try, I enjoyed trying out new recipes that take advantage of South Carolina’s seasonal produce -our seasonal produce matches much of the South and I happily stretch the eat locally mantra to mean eat as locally as possible within my time and budget. You’re welcome to define it more strictly, if you prefer.
I hope to return to seasonal cooking this year. I’ve also dug my camera out of storage¹ and I’ve been trying to figure out the best lighting in my new kitchen. I’ve had the energy to put meals on the table again, so now I’m hoping that I can get back into a hobby I enjoyed, photographing those recipes to share with you.
In the interim, here is a printable with four winter recipes and a list of recipes that take advantage of winter produce.
Enjoy.

Click to download the pdf
Collard Greens and Northern Beans
Vegan Collards (surprisingly tasty, even for omnivores)
Cabbage and Ground Beef Skillet
Roasted Vegetables (a technique that works with many root vegetables)
Sausage, Peppers, Onions, with Collard Greens (this one sort of pushes it by using bell peppers)
Cheddar Cauliflower Bites - you can substitute broccoli if you’d like
Which of these recipes, if any, have you tried? Will you be adding any to your menu and what are you looking forward to trying this winter?
¹Storage may or may not mean a neglected corner of my office.

Copyright Home-Ec101.com 2007-2014
 Related StoriesHow to Store Greens in a Small Living SpaceIs Extra Virgin Olive Oil a Substitute for Vegetable OilWhy Does My Oven Burn My Biscuit Bottoms
December 30, 2013
How to Store Greens in a Small Living Space
Dear Home Ec 101,
I live in a small apartment and have a refrigerator with a limited amount of space and chest freezer. We have been trying to utilize local produce from our CSA and the Farmer’s Market, but storage is an issue with space at such a premium. What is the best way to store leafy greens without giving up all of my refrigerator space or destroying the cell structure.
Thanks!
Crucifarean in Crumpler
Heather says:
Fall and winter are great for cruciferous vegetables, which are high in nutrition, but they do have a tendency to take up prime storage space. For the most part the best way to store your leafy greens and brussels sprouts is by blanching and then freezing your greens. Now you do need to keep in mind that blanching will keep your greens from becoming a soupy, disgusting mess, but their texture will change a bit.
Dark green vegetables contain an enzyme that breaks down the cell structure, even when the vegetables have been frozen. Freezing also damages the cell structure, but much less significantly. Freezing greens, including cabbage, isn’t a complicated process, but it does require a little bit of choreography. Before getting started you’ll need to gather:
a large pot

a large bowl

a colander
 that can fit in said, large bowl
zippered or vacuum* freezer bags
a permanent marker
water
lots of ice
*You’re also going to need a vacuum sealer if you go this route. Yes, sometimes I do have to state the obvious
Clear any young kids out of the kitchen or secure them somewhere safe. There’s too much boiling water and carrying to worry about tripping. You can let them explore all the things when you’re done. Safety first.
Place a large pot on your stove and fill it about 2/3rds of the way with water. Bring the water to a boil. While the water is heating, wash your greens, remove the woody stems and less than pristine leaves, and chop the greens into consumable size. Fill your large bowl with ice water and set it nearby. Set the colander in the sink and get ready.
Blanch your greens.
Blanch? Yep, add them to the boiling water. Yes, but for how long? Check the table below:
Beet
2 Minutes
Brussels Sprouts (small)
3 Minutes
Brussels Sprouts (medium)
4 Minutes
Brussels Sprouts (large)
5 Minutes
Chard
2 Minutes
Collard
3 Minutes
Kale
2 Minutes
Mustard
2 Minutes
Spinach
2 Minutes
Turnip
2 Minutes
Immediately drain the greens in the colander and as soon as they have drained place the bowl of ice water in the sink and plunge the colander directly into the ice water. You may want to add more ice at this time. Cool the greens for the same length of time they were blanched.
Once the appropriat time has elapsed, drain the greens. If you have a salad spinner, awesome, use it. If not, use paper towels* or flour sack style towels. just spread the greens across, loosely close the towel and gently shake. DO NOT SQUEEZE YOUR GREENS, you went to all this trouble to preserve the cell structure, don’t squash them now.
As soon as most of the extra moisture has been removed package the greens in freezer storage bags.
Label and freeze promptly. Your greens will remain in peak condition for 12 months in a deep freeze but are edible indefinitely. Remember freezer burn is safe, just unappetizing.
Enjoy! Now or later. Frozen greens are a fantastic addition to soups, stews, and one pot meals. If you have finicky people in your life, start by adding spinach, it’s the least bitter of the greens and slowly work your way up to the more peppery varieties. There will likely be some wailing and gnashing of teeth, but less than if you went all kale smoothie on them from out of nowhere. (I still distrust the kale smoothie, types, sorry, they aren’t that awesome and I actually love greens.)
Submit your questions to helpme@home-ec101.com.
*Lint free, the greens provide enough fiber, thank you very much

Copyright Home-Ec101.com 2007-2012
 Related ArticlesIs Extra Virgin Olive Oil a Substitute for Vegetable OilRoast Some Turkey Necks for Awesome StockGlancing Back, but Looking Forward, Home-Ec 101 2013 in Review

December 28, 2013
Glancing Back, but Looking Forward, Home-Ec 101 2013 in Review
Heather says:
2013 is rapidly winding down and to say it has been a difficult year for me personally would be a gross understatement.
I lost two siblings in senseless ways.
I moved.
I’ve dealt with personal change.
I was in a car accident.
My current job became full-time and I quit the fun job at the pub.

Some of these changes were for the better, but change is still hard. I joke that I’m overachieving on the life stressor test.
Home-Ec 101 bore the brunt of this, for sanity’s sake. Despite this, I still think it’s a good idea to take a look at the state of things.
Home Ec 101 By the Numbers
1.4 million people have visited Home-Ec101.com so far in 2013, compared to 1.8 million in 2012. It was the first year of decline, but since I’ve started writing for the site on a more regular basis, it does seem to be making a turn around.
2,754 of you subscribe to the Home-Ec 101 newsletter. Thank you, that means a lot to me. I appreciate your tolerating the dry spell that was 2013.
More than 514k arrived via search, Pinterest sent 30k, and Facebook, the world’s biggest time suck sent only 8k. I’ll give you one guess to figure out who is going to spend more time focusing on writing and less on trying to get Facebook to let fans see content. (Keep in mind that over 5k people are fans of Home-Ec101)
Home-Ec101.com remains mildly profitable.
Home-Ec 101 Skills for Everyday Living, which came out in March 2011, finally earned me a royalty check, which I happily applied toward a summer air conditioning bill. Here’s a tip to aspiring authors, being traditionally published is more about building your reputation than hoping to hit the big time. It’s a major resume bullet point, it is not the end all. I’m not spending my days poolside sipping margaritas. (I’ll spend a couple in February, but that is an entirely different story and one I’m excited about, hurry up 2014)
So there you have it: Traffic down, Facebook stinks, Pinterest? Maybe I should get back to taking prettier pictures of food again. We’ll see where the energy bar lands.
So what exactly did we write about in 2013?
January

I did a basic cooking series starting -and trailing off- with ground beef, probably the most useful of the bunch was a recipe for no-salt taco seasoning. Personally I’m more of a fried pork chop fan, but whatever floats your boat.
February
Not a whole going on, but here’s a Thai-inspired beef and cabbage skillet.

March
Well that was a quiet month, here’s how to clean kitchen laundry in a public laundromat.
April
Oh, look I found some balsamic marinated chicken thighs.
May
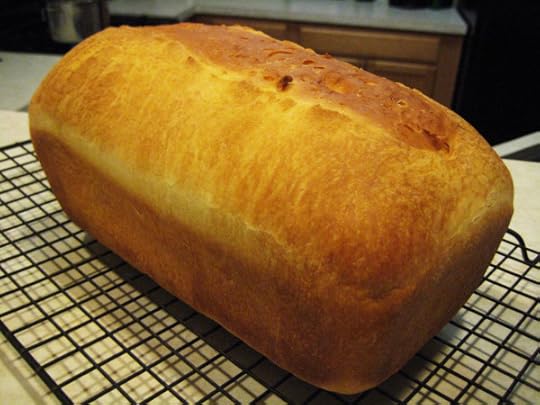
Michelle stepped up and saved the day with Hearty White Sandwich Bread
A look at 6 years of Home-Ec 101.
June
It’s high grilling season so I published a compilation of recipes and techniques for the grill.
July
How to deal with stubborn body odor in laundry remains, to this day, a bizarrely popular post. I’m glad none of you want to stink.
August
Here’s where things went from hard to unbearable. The good news is, that together with Anne Weiskopf and PostSecret, we helped raise of $50000 for the Kristin Brooks Hope Center.
Thank you.
September
Life went on. L’chaim.
Michelle shared a recipe for challah.
October
Through the misadventure of someone, we learned how to remove flammable liquids from clothing.
November
I thought I could handle the annual countdown to Turkey Day and well, ha. I got it started and just kind of fizzled.
December
With 11 posts, this is the most productive month since April. I hope this is a good sign. Maybe I’ve found my rhythm again. Maybe I’m once again on stable ground.
Parting note:
Your emails, tweets, and Facebook messages of support have come exactly when I’ve needed them most. This has been a tough year, but it’s over and there are new and better things to come.
In a few days, as we count down to midnight, let’s look forward with hope. On that note, I’ll leave you with my (current) favorite song.

Copyright Home-Ec101.com 2007-2012
 Related ArticlesIs Extra Virgin Olive Oil a Substitute for Vegetable OilNutella No Bake Oatmeal CookiesFeeling Desperate
December 27, 2013
Is Extra Virgin Olive Oil a Substitute for Vegetable Oil
Dear Home Ec 101,
If a recipe calls for vegetable oil, is extra virgin olive oil a suitable replacement or is there a specific reason for vegetable oil?
Signed,
Slick in Slatesville
Heather says:
It depends on the recipe in question. In baking, oils are often specified for their lack of taste, so for baking it depends mostly on the quality of the oil you are using. If your extra virgin olive oil is the generic store brand, it may not be the best oil for the job. High quality extra virgin olive oil should be just fine. There is good news, in late October olive oil will have stricter labeling standards so this should be of less concern.
For marinades, salad dressings, and savory sauces, extra virgin olive oil is a fantastic substitute for vegetable oil and may even be preferable. When it comes to frying and sauteing it depends on the manufacturer and the quality of the oil. The oil listed in fried recipes is often chosen for its smoke point. High quality extra virgin olive oil can have a very high smoke point above 400°F (204°C), but lesser quality versions can be significantly lower in the 220°F (104°C) range, which is much too low to use for frying. Use your judgment when making your decision.
Before anyone flips out about how oils break down at high temperatures becoming toxic keep in mind that the temperature of the oven or burner is not the actual temperature of the food. Just because the oven says 350°F does not mean the oil inside the cupakes is 350°F degrees. That is the temperature of the air, if your cupcakes reached 350°F degrees, it would be a sad, burnt mess. Those of you with professional grade equipment need to be slightly more concerned than those of us schlumps with standard home grade appliances.
In the case of baked goods, unless they are savory, plain olive oil may be a better choice.
Send your domestic questions to helpme@home-ec101.com.

Copyright Home-Ec101.com 2007-2012

CommentsEVOO is too fruity for me in most applications. I keep a pint ... by @madbadger2742although expensive…a little bit goes a long way and can be ... by caryn verellI hate that I'm excited about stricter labeling standards, but ... by HeatherSolosit's not grilled cheese if you don't use butter! double yuck by ThatBobbieGirlOlive oil has a distinct taste, Extra Virgin even more so. If ... by ThatBobbieGirlPlus 3 more...Related ArticlesWhat Is a Good Alternative for CheeseclothCountdown to Turkey Day 2013: Let’s Get StartedHollandaise Sauce

December 26, 2013
Why Does My Oven Burn My Biscuit Bottoms
Dear Home-Ec 101,
My oven burns pizza and biscuits on the bottom and the top is under-done.
Help!
Signed,
Pastry Proselyte in Provence
Heather says:
There are many factors that could be at play inside your oven, it’s going to take some detective work on your part to get to the [burnt] bottom of your mystery.
Here are the tools you’ll need to ensure you need to fine tune your technique or appliance, rather than repair your oven:
An oven thermometer

a baking sheet
 -actually a baker’s half-sheet, if your home oven isn’t a professional model
oven mitts or a dishtowel, because burnt fingers aren’t fun
cheap, white bread -no matter who you are or what you normally eat, just grab a loaf of the crappiest, cheapest white bread you can find at the grocery store. You can give it to the pigeons when you are done, this is for SCIENCE, people, not personal consumption.
Your brain -not optional
a digital camera OR a piece of paper and a pencil
tape
This project is going to take a little bit of time, but it’ll be worth it in reduced annoyance alone.
First we need to see if your oven is even getting to the right temperature or if the appliance needs to be calibrated.
Make sure one of the racks is in the middle position, hang the oven thermometer from the rack, close the oven door, and turn on the oven. If your oven has an automatic pre-heat it to 350°F setting use that and if not, set it to pre-heat to 350°F. If the oven is electric, open the door and observe the heating elements, in the pre-heat phase of baking, both the top and bottom elements should be heating. Are they? Great.
Close the door.
No? Only the bottom element is working? You’ve found the cause of your problem. Home owners, replace the top element, renters have the top element replaced by your landlord. Bookmark this page and come back once both elements are working.
If your oven is gas, the heat comes from the bottom, regardless. Set the oven to pre-heat to 350°F and chill for a bit. Heh.
Once the oven has pre-heated, set the temperature for 350°F. Give the oven five more minutes. Why? Because this lets the whole oven come to temperature and not just the area nearest the thermostat. Now, look at your oven thermometer. Does it read 350°F? Yes? Fantastic, skip ahead.
No, the oven thermometer does not read 350°F. This can be for a couple of reasons, the thermostat may be broken or it may simply need to be calibrated. (That’s an upcoming article, in the interim pay attention to the difference between the set temperature and the recorded temperature. Leave a post-it note or other reminder somewhere you can see, but not set on fire. It should say let you know how far off the oven is. You may want to also check the difference at 400°F as it may not be as simple as 10 degrees low.)
The elements both work and the temperature is right, but things still aren’t happy.
Pre-heat the oven to 350°F.
Now you get to solve the mystery of the white bread.
I want you to think about your oven, it’s not a magic box. Cooking food is a balance of applying enough heat to cook the inside of food in a reasonable amount of time and balancing that with the need to not burn the outside before the interior is cooked. This is true regardless of the cooking method. When baking or roasting, the temperature of the air in the oven is responsible for the majority of the heat transfer (indirect heating). However, the baking sheet (or muffin tin or pan) gets heated by the air, too. Metal is a great conductor of heat, in fact it is far better at heat transference than air. Once the pan reaches the temperature of the oven, it also cooks your food through direct heating. This is why the bottom of your food gets done before the top (and quite possibly the middle). Some of this you can control by using the upper rack position -this slows the heating of your baking sheet and decreases the distance to the top of the oven which reflects heat back onto your food.
Get your baking sheet and cover it in a single layer of the white bread. Get your digital camera or that pencil and paper. Ready? Good. Place the baking sheet in your oven, close the door, and get comfortable in front of the oven. Pretend you’re Jane Goodall and get ready to take notes on the behaviour of your appliance.
Watch as the bread begins to brown, you need to wait until all areas of the top of the bread are at least tan and then remove the baking sheet from the oven.
Now take a picture of the bread (you may want to include a sticky note in the frame to show you which way the baking sheet is oriented) or sketch it on your paper and pay particular attention to what areas of the bread are darkest. You are creating a heat zone map of your oven, just like people, ovens are special little snowflakes and have quirks. Once you know this, you can take advantage of their hot and cool spots depending on your baking needs.
If you took a picture, you’ll need to get it printed. If you drew a picture, tape it to the inside of the nearest cabinet, but make sure it is oriented in a way that makes sense to you. You don’t want to have to remember you need to turn the baking sheet around when you’re cooking for company.
Now turn each piece of bread over, do a horizontal flip, not a vertical one, and again either take a picture or make a sketch. Is the bread significantly darker on the bottom? Then you know next time to move the rack a bit higher. Repeat and see what happens. When you find the rack position that browns the top of your toast without burning the bottom, note it and use it the next time you bake.
I’d like to acknowledge Nathalie Dupree for sharing this technique at one of her presentations. I highly recommend getting to know your appliance as a way to prevent frustration and burnt food.
Submit your questions to helpme@home-ec101.com.

Copyright Home-Ec101.com 2007-2012
 Related StoriesHomemade ChallahWhat Is a Good Alternative for CheeseclothCan I Freeze an Overnight Apple French Toast Bake


Heather Solos's Blog

- Heather Solos's profile
- 12 followers

