
Heather Solos's Blog, page 46
July 18, 2014
Lemon Shake-Up Recipe — A Refreshing Summer Drink
 Bobbie says:
Ah, summer. The scorching heat, the overwhelming humidity. Fun times. Well, when life hands you lemons, shake things up a bit and make Lemon Shake-Ups. Depending where you live, you may have had these treats at a local fair or carnival. For the uninitiated, a Lemon Shake-Up is basically a freshly made individual lemonade. At the fairs where I’ve had them, it’s a big production: One person operates a big press to squeeze the bejeebers out of a lemon, into a tall, heavy glass. Another person adds sugar, ice and some water. A paper cup is turned upside down over the glass, and someone else shakes it all up to dissolve the sugar. The whole lot is dumped into the paper cup, water is added to fill, et voila – a Lemon Shakeup is served. You’d have to pay four or five dollars for this refreshing beverage and the opportunity to see it being freshly made in front of you.

I’d been reminiscing about this unofficial beverage of state and county fairs, but not about the hassle of actually going to a fair and the expense of paying several dollars for one beverage. For the cost fair admission and ONE Lemon Shake-Up at the fair, I could buy enough lemons to make shake-ups for the whole neighborhood.
Making Lemon Shake-Ups at home means I can choose my own sweetener. Most of the time, I use a stevia-based sweetener such as Truvia or Pure Via. (I like my lemonade on the tart side, so I usually use 3 packets.) Honey and lemon is a great flavor combination, but getting honey to dissolve well in the ice water is difficult, so it’s best to first melt the honey in a small amount of very hot water. Once the honey melts into the water, add the ice and lemon and proceed. (As always, do not give honey or anything prepared with honey to infants under one year of age.)
Whatever sweetener you choose, use an amount equivalent in sweetening power to ¼ cup sugar.

Lemon reamer
Personally, I prefer this handheld wooden kind,because I find I’m able to get more juice out of each lemon or lime. I used to have one made of shiny black plastic, which looked gorgeous but was too slippery to get a good grip, so I could hardly
squeeze anything out of the fruit. That tool wore out its welcome almost immediately.
 One-quart jar with lid
If you use a wide-mouth jar, you can put the lemon halves right in for a more authentic shake-up. If not, you can cut the lemon into smaller pieces after you’ve juiced it thoroughly. Make sure it has a leak-proof lid. This replaces the potential disaster of the tall-glass-and-large-paper-cup shaking method used in the carnival and fair production.
Lemon Shake-Up Recipe
1 lemon
¼ cup sugar OR 3 tablespoons honey, maple syrup or agave nectar (OR equivalent amount of a sugar substitute – read package to determine amount – remember to dissolve thick syrupy sweeteners in a little hot water first)
1 cup ice (crushed or cubes)
Cold water
Wash the lemon, and cut it in half. Juice the lemon into the jar using your method of choice. If you prefer your drink to be slightly less “authentic” you can remove the seeds.
Add the lemon halves to the jar. If you wish, you can cut these into smaller pieces first, but it’s not
necessary. Add the sugar or sweetener, ice and about a cup of water. Cover tightly and shake until the sugar is completely dissolved. Remove the lid and add enough ice and water to make 16 ounces. Pour into a tall glass, or just drink it straight from the jar. I won’t tell.

Bobbie Laughman is a freelance writer who thinks she’s normal. Don’t try to tell her otherwise.

Copyright Home-Ec101.com 2007-2014


CommentsThank you for posting this — it brought back memories of ... by jeddahgalThey make it like this at the corndog stand in our mini-mall's ... by EricaMueller@Bobbie Laughman We're cut from the same cloth. Milk out of ... by HeatherSolos@HeatherSolos If you really want to know, I have wide-mouth ... by Bobbie Laughman@Bobbie Laughman the question is, pint or quarts? by HeatherSolosPlus 8 more...Related ArticlesHow to Fry an EggLowcountry BoilShrimp Quesadillas


July 17, 2014
Where Do You Find that Cleaning Motivation
Dear Home-Ec 101,
How do I motivate myself to clean? What do you do?
Signed,
Do I Have To
PS I’m also ADD
 Heather says
Living in a mess is like being in a bad relationship. It starts off comfortable enough, let’s just stay in tonight. You don’t need to put that away.
But sooner or later it starts to whisper things that aren’t very nice:
If you weren’t messy, maybe you’d be more successful.
If you could just keep a clean home, you would have more friends.
If you weren’t so messy someone would love you.
Over time those whispers aren’t whispers anymore. You don’t want to go home from work, you are ashamed to have people over, the amount of energy it takes to fix things seems overwhelming.
One day though, you snap, and kick the jerk to the curb. You throw out all the reminders and let the sun back in. Friends come over, I’ve missed you they say.
If you aren’t careful though, the phone calls start, I’ll get to it tomorrow. The temptation to just let the mess stay one night, you’ll kick it out in the morning. . . and you’re right back in it all over again.
Yeah, I’ve drug the metaphor out far enough. You get it though, right? It sucks. Eventually though it clicks that it’s just not healthy to ignore the mess because it moves in and makes itself comfortable every. single. time.
My motivation to clean isn’t that I’m a particularly neat person, it’s that I’ve learned that letting the mess in takes too big a toll on my energy -physical and emotional. Sure, none of that stuff it says is true, but I sure as hell don’t have to listen to it.
It takes less energy to unload the dishwasher or fold and put away the clothes than it does to hear that garbage.
The secret to keeping a clean home is simply putting your stuff away. You might have to start off by creating a place for your things, but getting into the habit of putting things away takes tiny spurts of energy, not the herculean amount needed to tackle a huge mess.
Use a chore chart to keep yourself on track and prevent the bigger tasks,
I listen to podcasts while I clean, staying on top of tech news. And when I’ve let a room get out of control, I don’t let myself leave the area, because I will get distracted. I use timers when I need to.
And, just to be honest today, my house is not company ready. Someone was ridiculously kind and gave me a couple of chairs, which started the whole If You Give a Mouse a Cookie phenomenon of furniture rearranging. You’ve been there, right?
Most of us don’t like to clean, some of us have figured out it’s easier to do it before it gets out of hand. You’ll be okay.
Submit your questions to helpme@home-ec101.com.

Copyright Home-Ec101.com 2007-2014

CommentsThis cleaning schedule has *changed my life*. I have two kids ... by MelanieRelated ArticlesSoap Scum and Acrylic BathtubsAcrylic Flooring Part Deux, Why Do We Do This Again?Dealing With Too Much Stuff
July 15, 2014
Zucchini Parmesan Crisps, Regular and Gluten-Free
Heather says
Did you think oven fried goodness was out of reach just because you have to go gluten-free?
Here’s a simple, magic substitution for you… swap crushed Rice Chex for Panko crumbs and you’re set. No other changes, no mixing a bazillion different flours or buying special bread to make your own crumbs. Take out your aggression on a handful of cereal and call it a day.
Tested. Tasted. Proven.
I really like oven-fried zucchini chips, but find them a bit too fiddly for most occasions. If you have older kids, make them bread the zucchini, it’s a great exercise in patience with a decent pay off. I see these often suggested for parties, but unless you want to keep the oven on until serving time, save them for a rainy afternoon with a craving for some savory, crispy deliciousness.

: Zucchini Parmesan Crisps (Gluten-Free)
: Crisp, cheesy, oven-fried zucchini chips
2 medium – large zucchini sliced thinly (use the slicer on a grater)
2 eggs
splash of milk or water
1 cup grated parmesan -yes, the cheap stuff
1 cup Rice Chex, crushed -if you don’t have a wheat allergy / you can use Panko crumbs
1/2 teaspoon garlic powder
pinch of salt
fresh ground pepper
Instructions:
Spread the sliced zucchini on paper towels and lightly sprinkle with salt
Turn the oven on to 450°F
Beat the eggs with either a splash of milk or water in a shallow bowl to create an egg wash.
In a second shallow bowl or dish, combine the crushed cereal, parmesan cheese, garlic powder, a pinch of salt if desired, and a few turns of fresh ground pepper. (If you want to kick up the heat a little, cayenne pepper is a nice addition)
Grease a baking sheet.
Roll or blot the zucchini in the paper towel to absorb the moisture it sweated due to the sprinkle of salt.
Dip the zucchini slices in the egg wash and then the breading.
Arrange in a single layer on the baking sheet.
Bake at 450°F for 10 minutes and flip the zucchini slices with a fork or tongs. Bake for another 8 – 10 minutes depending on how done / crispy you like your cheese. Watch them carefully toward the end.
Serve immediately.
Cooking time: 20 minute(s)
Number of servings (yield): 4

Copyright Home-Ec101.com 2007-2014
 Related ArticlesEasy Grilled Foil Vegetable PacketsHow to Fry an EggRed, White, and Blue Potato Salad
July 2, 2014
Soap Scum and Acrylic Bathtubs
Dear Home-Ec 101,
How do I remove built up soap scum from my acrylic tub?
Signed,
Scummed in Scuddy
Heather says:
Soap scum is a generic term for that funky film that is created by soap and hard water creating a loving bond with your tub or shower.
It’s ugly and a pain in the rear to remove without scratching the surface you’re trying to clean. Once you scratch your tub or its surround, you create all kinds of new nicks and crevices for the next layer of soap scum to adhere to, which lets soap scum build up even faster.
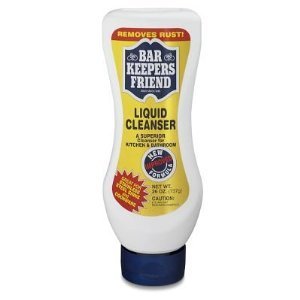 Since I started writing Home-Ec 101 back in 2007, I have often recommended Barkeeper’s Friend and once again it is my go-to recommendation.
Why? It’s cheap and effective. Barkeeper’s friend relies on oxalyic acid to clean. This is a mild acid that you can find in foods like spinach and tea.
*Do not apply with steel wool or a honey badger, even if he don’t care.
As a consumer you may find the liquid version of Bar Keepers Friend easier to apply to vertical surfaces like the side of your acrylic tub or the shower doors. But if you only have the can lying around, just make a paste and gently apply.
Do not use Bar Keepers Friend or any acidic cleanser on natural stone, it’s a bad idea. Try not to get acidic cleansers on your grout or it will need to be resealed more often -use the water bead test to check.
Yes, you still need to use common sense when you use Bar Keepers Friend and not rub it in your eyes -ever squirt a lemon in your eye? It’s not pleasant, is it? And you probably should wear gloves if you’re going to be in contact with Bar Keepers Friend more than incidentally. Why? Acids aren’t great for your skin. You’ll get raw hands if you spend a lot of time, cutting up fruit, too.
And finally, don’t let your kids or pets eat your cleaning products.
Got it? Good.
If you want to prevent soap scum, use a squeegee on your tub after use.
Submit your questions to helpme@home-ec101.com.
PS Thank you all for sending in these great questions. You’re helping me get back into the habit of writing consistently and often which is good for both Home Ec 101 and me. It is deeply appreciated.

Copyright Home-Ec101.com 2007-2014
 Related ArticlesAcrylic Flooring Part Deux, Why Do We Do This Again?Dealing With Too Much StuffWhat Are These Tiny Bugs in My Puzzle Box?
July 1, 2014
Acrylic Flooring Part Deux, Why Do We Do This Again?
Dear Home Ec 101,
I like your suggestion of using an acrylic polish, but the PLEDGE web site I saw said:
“Pledge® FloorCare Multi Surface Finish should be removed from your floor every 6 to 8 applications, or annually, with a solution of 1 cup ammonia and 1/4 cup Pledge® FloorCare Multi Surface Concentrated Cleaner in 1/2 gallon cool water. Then rinse floor with clean water.”
I do not look forward to washing a whole floor with ammonia.
Any suggestions?
Don’t Wanna in Wando
PS All together, I love your site. It’s like talking with my sister and mother around the kitchen table.Heather says:
Your mom and sister sound like my kind of people, provided they like to play Cards Against Humanity around that table.
No one looks forward to cleaning an entire floor with ammonia. If they do, they should probably get their head examined because you’re right, ammonia isn’t pleasant.
Heck, I don’t know anyone that looks forward to cleaning any floor at any time, much less the giant task of stripping and reapplying acrylic polish. That’s why you only use the acrylic polish when you can no longer bear the look of the floor any longer, thus increasing the length of time between applications.
Sweep or vacuum often, use door mats and kitchen mats, and spot mop most of the time and you can probably stretch out the time between the applications of acrylic polish and only strip the floor when you have to -after that 8th application has started to dull.
That is, unless you have a large dog. Why? Claws are the bane of your floor. Those claws will leave little nicks and dings that will wear off that polish faster than anything other than not sweeping regularly.
Remember the acrylic polish protects the flooring itself from damage, so pay attention to the high traffic areas to make sure you aren’t pushing too long between applications.
Remember regular cleaning and maintenance speaks to the investment and value of an item. Flooring is a giant pain in the butt to purchase and install, so it makes sense to take good care of it. If your flooring is actual linoleum and not just vinyl, it has an expected lifespan of 20 – 40 years -this is also why it is significantly more expensive than vinyl flooring. If the flooring is vinyl, it’s only expected to last half as long as linoleum AND the design is only on the surface. The design may wear off long before the flooring needs to be replaced.
So I agree, playing with ammonia isn’t fun, but you don’t really need to do it more than once a year, maybe even less often than that. And if you truly loathe the idea of it, consider hiring a maid type service for that one job. Get a referral. If I had to guess, it’d probably be about the same as a nice dinner out -this will of course depend on where you live and is under the assumption that Taco Bell is not considered a nice dinner out.
Submit your questions to helpme@home-ec101.com.

Copyright Home-Ec101.com 2007-2014
 Related ArticlesHow Do I Keep Long Hair from Clogging the VacuumHow Often Do I Have to Vacuum Anyway?To Rinse or Not, That is the Dishwasher Loading Question

June 30, 2014
Dealing With Too Much Stuff
Dear Home Ec 101
The article I read about a mother with 3 children with a baby on the way felt her house. Work was not getting done as she would like. You said your life has changed and yet you still do you regular cleaning. What is your regular cleaning routine? I once tried FLY LADY.
My situation is there are three adults here. Our son works full time. He helps in the evenings and on weekends but not consistently.
I am a senior adult college student Studying music, flute and piano. I took a brief hiatus, but I’ll be starting back in August
My husband is disabled with the right side of his body limp. He requires lots of care and is unsteady on his feet as he sits in a wheel chair all day. He can help himself, but isn’t mobile.
I care for him and the house in the day time and our son does the evening before bed time. There are many chores I want to accomplish in the day, during the week, and before school starts in August.
Our home is full of stuff that needs to go. It is 25 years of what ever, it’s neatly stored and organized. The house is telling me do not bring anything else home. There isn’t any place to put it.
1. Here is what is bothering me. I have a major Piano (beginner level) exam. I need to practice but it has not fit into what has to be done in the day to keep the house running each day.
2. Window washing have not been done in two years, refrigerator, cleaning the back and on the floor, blowing out the compressor vent for dust bunnies.
3. Reclaiming the living room for Christmas where hubby sleeps and put him in a spare room full of stuff. There are lots of old files, clothing, computer stuff…
4. When you come into the house from the outside the house has an odor! From where? I don’t know. An unclean smell /where do I begin to locate the source? I empty the trash from the kitchen every night. Bleach the garbage tote every week that the city takes to prevent maggots.
5. Learning to keep up with shopping, bill paying, dishes, (no dishwasher) laundry, bed making, DUSTING, meal planning,baking, washing floors, hubby’s doctor appointments, cooking, Oh yes, yard work and other tasks to crop up. Learning to declutter the house, closets, lighten the load of unusable items.
Where do you begin?
I did complete the hallway linen closet last week with four drawers loaded. I rearranged, sorted and got a lot of extra space. YEH!
An agency comes here to help with the hubby for two hours two days a week. What is the schedule she was talking about in your book? Would you be willing to help me as well??
Awaiting your generous reply,
Living in Michigan
Heather says:
The busy seasons happen throughout our lives, it’s not just when the kids are little, although for many people this is the first time we encounter that complete sense of overwhelm. The how did I get into this and how do I undo it. Your situation is unique and yet, it isn’t. You really aren’t alone. You are a caregiver, but also a college student. It’s good to see that you haven’t lost your identity in the care of your family. I’m certainly not an expert, but I see time and again that’s where the danger of depression often lurks.
Your house took a long time to get into the overloaded shape it is in and it’s going to take time and energy to undo it. Too much stuff means you have to spend too much time caring for it. Ignore the sunk costs and work on getting rid of things.
To address you main concerns, let’s call it the
Let’s Make Life More Livable Project:
1. Move the piano practice to first thing in the morning. I’ve had to move my exercise to first thing in the morning or it simply isn’t going to happen. If I don’t, there’s always a reason to put it off. If you’re practicing on an electronic piano, there is no reason you can’t use headphones to not disturb others. Don’t turn on the tv or the computer until after you’ve gotten your practice done. Maybe use a post-it note reminder to break the habit of tuning out. Fifteen minutes is not going to ruin the rest of the day.
2. From reading your email, window washing is not a real priority at the moment, getting rid of the extra stuff in your household is. Set up a savings jar, throw in your change and small bills when you can, as you work to declutter the rest of the house add to this jar and when the house has been reclaimed from the twenty-five years of stuff accumulation, celebrate by hiring someone to wash the windows and let the light shine in.
Use the Saturday project day to accomplish the other deep cleaning projects.
3. Every time you walk through the room, pick up something that needs to be go. Put a bin or a bag near the front door and fill it. Get used to loading your trunk with items that need to be donated or taken to the swap shed at the landfill. Every time you find yourself in a box store like Target or Walmart, make sure you have your discipline with you. Do not buy anything you absolutely do not need until the house is clear of all the things. Find the recycling drop-off points in your community and use them. Books, give to the library or senior centers, check before dropping off items.
4. That odor is most likely part of having too much stuff. Cooking odors get trapped in floating, greasy dust particles that adhere to surfaces. It’s also the smell of people and there is a specific odor associated with illness. Over the years that odor is absorbed by everything in the home, the carpeting, the padding, the walls. Like the windows, this isn’t an immediate project. Open the windows as often as is possible. And as the house is cleared of the stuff that’s in the way, steam clean the carpet and furniture, and dry clean / launder the window coverings. Get rid of old pillows and make sure blankets / duvet covers get laundered.
Change the air filter frequently and clean the filter in the vent hood. – You may also find this post on Musty Odors in a Home useful
5. Institute the chore schedule, it addresses these issues.
The weekly chore schedule consists of one big chore and one little chore each day. FLYLady has a great system, too, but be aware -unless things have changed in the last few years, the system comes with a fair amount of email. This works for people who need a lot of reminders and hand-holding. It all depends on your preferences which one will work for you.
If you have a smart phone use it to set reminders and then. . . this is the hard part… get up and do the chore when the phone reminds you.
There is no quick and easy answer to fix twenty-five years. It’s going to take, time, energy, and cooperation. This will be accomplished one day, one drawer, one corner at a time.
Get your son involved with the recycling and donating. There’s no reason he can’t also make the Let’s Make Life More Livable Project a priority, if he’s in the home, he’s part of the team. Maybe give Dividing the Chores Fairly a look.
I wish you the best of luck. Would you mind checking in to let us know how things are going as you work through this project?
Submit your questions to helpme@home-ec101.com.

Copyright Home-Ec101.com 2007-2014
 Related ArticlesWhat Are These Tiny Bugs in My Puzzle Box?Soap News: Microbeads and the EnvironmentHow Do I Keep Long Hair from Clogging the Vacuum

June 27, 2014
How to Fry an Egg
Heather says:
Today we’re covering fried eggs -as new projects to procrastinate develop- I’ll also address: scrambled eggs, omelets, frittatas, quiche, and my as yet unnamed hybrid of the three techniques that feeds my family on a busy evening when I have no interest in effort.
So what is a fried egg? Well there are five ways to have them, in this tutorial:
 Got that?
If you do not have a nonstick pan before you even pull the eggs out of the fridge, you have a little prep work. Grab a bottle of vegetable oil, a paper towel, salt, and your pan. Wipe the pan with a thin coat of vegetable oil. Heat the pan over medium high heat until it is very hot, but not smoking. Turn off the burner and let it cool completely. Your pan is now conditioned and primed for use.
You must do this if you are using a stainless steel pan or the eggs will stick in the tiny scratches and pits on your pan’s surface. The vegetable oil seals these cracks and lets the eggs fry without making a horrific stuck on mess. If some bits of egg do stick to your pan, scrub with a little bit of salt and a paper towel between batches. If you use soap and water, you’ll have to recondition your pan before cooking more eggs.
Now we’re ready to fry some eggs.
Whether the eggs are basted, sunny side up, over light (easy), over medium, or over hard they all start the same:
Gather your conditioned or nonstick pan, your fat -butter, bacon grease, coconut oil, or vegetable oil,- and a spatula. Flipping eggs without a spatula will be covered in a future post. Just hang tight if that’s your goal.
The amount of fat you’ll use depends completely on the size of your pan. You want 1/8″ of fat / oil, less than that and the eggs may stick with more, they may be greasy.
Turn your burner to medium or your griddle to 325F. Allow the pan and fat to heat. To check and see if the pan is ready sprinkle a TINY -you read that right? TINY- amount of water. It should sizzle. If it pops, turn the heat DOWN.
Oil that is too hot causes brown, crispy edges.
Oil that is too cool lets the eggs spread too far which makes them harder to flip.
Reduce the heat to low, unless you’re using a griddle, in that case just leave it alone, but know you’ll have to flip sooner.
Now here’s where the methods diverge.
 For basted eggs, sprinkle a few drops of water over the eggs and cover. Cook just until the whites are set. The steam will create a thin film of cooked white over the yolk.
For sunny side up eggs cook slowly until the whites are set, then use a spatula to remove from the pan. This is boring, but effective.
To fry eggs over light, medium, or hard they must be turned.
 Slide the tip of your spatula all the way around the edge of the white, to ensure the egg is not sticking the pan. Then, slide the spatula halfway under the eggs, in one motion lift up and turn over toward the side of the egg that does not have the spatula under it. That edge (marked in my ever so spiffy illustration with a blue arrow) should never lose contact with the pan.
Remember! Flip gently or suffer the consequence of broken yolks. Remember you will probably break a few before you get the hang of the turn.
 For over light / easy eggs leave them alone until the edge of the white is set, there will still be a pool of unset white surrounding the yolk. Let the egg cook for only a few seconds to set the rest of the white and transfer it to a plate to serve.
Over medium eggs should cook until the white is mostly set, then turned and allowed to cook for 15 – 20 seconds. The yolk should be thick and partially, but not fully cooked. If you break it with a fork, it should still flow, but not be super runny.
 For over hard eggs, break the yolk with a fork, then flip and allow to cook until the yolk is completely set.
Enjoy!
Related Post:

Copyright Home-Ec101.com 2007-2014

CommentsI see people in here cringing at sunny side up because the egg ... by Mike C.If I were a kind wife, I'd use this to make my husband ... by ElenaAnd now I know what I'll be having for breakfast tomorrow. Yum! by Jessica @FoundtheMarblesYou have to be extra careful with the temperature of your pan: ... by Heather SolosI have never cooked eggs in anything other then butter. I am a ... by Shana DPlus 30 more...Related ArticlesLowcountry BoilShrimp QuesadillasGarlic and Soy Chicken Thighs
June 26, 2014
Laundry and the Great Diaper Blowout
Dear Home-Ec 101,
I’m a brand new mom and I need to know if it is okay to wash clothes that have suffered through a diaper leak with the rest of the baby clothes. How do I make sure that poop (sorry!) doesn’t get all over the washer and the rest of our stuff without resorting to throwing away the outfit?
Thanks,
Pooped in Pooler
Heather says:
Babies. Sometimes it’s a really good thing we are designed to find them cute, because they can cause us as caregivers to deal with things that we would normally cause us to lose our lunch over.
This won’t be the last poopy outfit you deal with.
I guarantee at some point during the next two years, you will throw at least one outfit away, maybe even something of yours, due to a diaper blowout.
One of my kids’ first real explosion was on the way to the photographer’s for baby pics. So I changed the baby, bagged everything up to deal with at home, and congratulated myself for being so prepared.
Guess who exploded again, but this time in the waiting room?
Yup.
So guess who has first baby pics in a clean diaper and not much else? That kid. Guess who was a hot mess of I’m never going to get this right? This mom.
Airports, car seats, man oh man all the car seats, the crib, the carrier, the carpet… there isn’t really a baby safe surface that hasn’t had this contamination. You sort of become immune to it at some point.
Anyhow, enough story time.
Baby clothes are tiny and unless you overload your washer they can agitate freely in the wash tub. Rinse as much of the solid matter as possible out of the clothing. If you aren’t running the load immediately go ahead and soak the item with a tiny bit of mild dish detergent (or liquid laundry detergent) applied directly to the stain in cold water. Give it a good swish, wash your hands and wash it with the next load of laundry.
Rules for running the load of laundry with the casualties of a diaper blowout:
RINSE the items involved thoroughly
SOAK the item if time allows in COLD water
Do not overload your clothes washer
Use the largest load possible for your machine
Inspect the item after washing for residual stain. Spot treat with additional detergent and rewash if stain lingers.
Why?
1. This removes as much solid particulate matter as possible. Detergent works by surrounding particles and bringing them into solution (the water in your washing machine.) Pre-removing what can simply be rinsed away reduces the amount of particulates that have to be suspended in the water by a limited number of detergent molecules
2. This gives the detergent time to work into the stain and surround those remaining particles. Cold water prevents any proteins from denaturing -changing into a structure that may be impossible or exceptionally difficult to remove.
3. The clothing articles needs to be able to move freely so the water and detergent molecules can move around and between the fabric’s fibers.
4. The more water the more movement opportunity for the clothing items AND the more particles that can be brought into solution and not left on the clothing. Think about stirring salt into water. There comes a point where the solution is saturated and no more salt can be dissolved. This is the same with detergent and the particles it is trying to bring into solution. The issue is trickier than the salt in water solubility as detergent molecules are sticky and will cling to your fabric and yes, the inside of your washer if there is not enough solvent to keep it in solution.
5. This circles back to item 2. and 4. You don’t want any leftover protein molecules to denature -change structure – in the heat of the dryer. There may not have been enough detergent available to completely remove the stain, it could have been so deeply embedded in the fibers that it needs another run through the wash.
Unless someone in the house is ill, the clothes washer and dryer are enough “disinfecting” for the average home. Obviously wash your hands well after handling soiled clothing.
Enjoy the new minion.
Submit your questions to helpme@home-ec101.com.

Copyright Home-Ec101.com 2007-2014
 Related ArticlesHow to Remove Flammable Liquids from ClothingHow to Clean a Bath Mat After a Toilet OverflowHow to Deal With Stubborn Body Odor in Laundry

June 25, 2014
A Call for Your Questions
Heather says:
The questions answered here at Home Ec 101 come from a variety of sources:
IRL friends
email to helpme@home-ec101.com
my weirdo imagination
I know the past couple of years have been a little different around here. I’m glad the bulk of you stuck around through it. I thought I had it all together, but *snort* yeah, you just don’t know what you don’t know.
Anyhow, I want to toss out there a call for questions today. Feel free to just toss them in the comments or send them right to me (if you’re getting the newsletter) by hitting reply. Thank you, in advance. As always, I’ll never reveal who you are, unless you want me to. If you’re anything like me, growing up a latchkey kid and never actually taking Home Ec there’s bound to be something. There’s no judging.
Here’s a confession:
I switched hosting providers back in December and with that something about the email changed -where my app picks it up. And. . . I forgot to make that switch until about a month ago. Brilliant move, Heather, brilliant.
I think I was able to download everything that had been sitting in the queue and I think I answered everything people had sent to Helpme that was not a pitch or a link request. If I missed your question, I am sorry.
I have a backlog of cookbooks to review including Joy of Kosher . I’ve been cooking again for a few months -some of it experimental and some of it really dang good, but the camera has been sitting neglected. It’s time to take the next step and get back to doing some of the want-tos in addition to the have-tos and should-dos.
I joked on Twitter the other day that it took a year, but now I’m eating kale (I moved to a very hipster part of town), the truth behind that is that I’m getting back to eating healthier and finally exercising. Kale just happened to be on special (and always is, maybe it’s waning as the best food ever, whatever, I’ll buy your cheap unloved produce).
Enough rambling, Heather.
Have at it, Home Eccers, what do you want to know?
Submit your questions to helpme@home-ec101.com.

Copyright Home-Ec101.com 2007-2014
 Related ArticlesStaying on top of Everything?The Freezer Was Left Open, Now What?Lowcountry Boil
June 23, 2014
What Are These Tiny Bugs in My Puzzle Box?
Dear Home Ec 101,
I was putting a puzzle together with one of my kids the other day and noticed, while looking for a corner piece, some tiny little bugs moving around.
I didn’t freak out, I just want to know what they are and if there is a way I can get rid of them?
Signed,
Slightly Skeeved in Slidell
Heather says
Those tiny bugs you found are insects, but they aren’t bugs. I have to clarify because some people out there like to get super picky about how we describe the creepy-crawlies we run into. Bugs are a specific order of insects. (Think back to Biology, do you remember: Did King Philip Cry Out, “For Goodness Sakes!”) The little, hard-to-see colorless or gray insects you found are commonly known as booklice and belong to the order Psocoptera.
First of all, I want to assure you, that while a little on the icky side, pscoids like your new friends the booklice are harmless. They aren’t going to bite you, your kid, or your destroy your library. Psocids show up when the humidity is high and dine on the resulting mold.
Most commercially available insecticides won’t work on your barely visible pests, so it’s better to make your environment less hospitable to psocids in general. Who, by the way, may have non-traditional families -and I don’t mean of the taxonomic kind. Psocids can reproduce through a process called parthenogenesis, which is a bit different than asexual reproduction. Animals that can reproduce via parthenogenesis have different sexes, but the females can reproduce without the presence of a male. I find this fascinating, which is probably just another reason why my favorite place is the nerd table.
So, I guess the question is what to do if you find psocids in your books or puzzles?
Option 1: Take off your glasses and pretend you never saw them in the first place.
Option 2: Freak out and hire an exterminator and pay a lot of money to get rid of a harmless cohabitant.
Option 3: Invest in a dehumidifier and make the living conditions less hospitable to your little squatters. The best thing about this option is that it also makes your home less of a haven for the much more bothersome dust mites.
The choice is up to you.
Send your questions to Helpme@Home-ec101.com.

Copyright Home-Ec101.com 2007-2014
 Related ArticlesSoap News: Microbeads and the EnvironmentWhy Won’t My Gas Grill Get Hot?How Do I Keep Long Hair from Clogging the Vacuum

Heather Solos's Blog

- Heather Solos's profile
- 12 followers

