
Kathleen Flinn's Blog, page 6
October 22, 2022
Sick of Cooking? Get Thanksgiving To Go
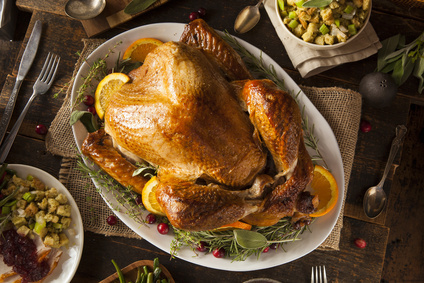
 Cajun fried turkey dinner from Williams Sonoma
If you don’t feel like cooking a big holiday meal, it’s OK. As someone who encourages people to cook, you might expect a different message for me, but give yourself a break. Maybe this is the year to try something different and get Thanksgiving to go. Most of these places also offer a la carte options, so if you’re tagged with a dish for a potluck Thanksgiving but don’t have the time or the will to shop and cook, you can always (literally) phone it in and pick it up. Consider these options. (Updated November 2022)
Support a Local Restaurant Sous vide spatch-cocked turkey from Addo in Seattle
Many eateries that might normally be closed are offering full Thanksgiving meals or meal kits for delivery or pick up this year, often with a twist on their signature cuisine. Inquire directly with some of your favorites to see if there are offering holiday meals or kits or check out your local eater.com site or food section. Shake things up with a jerked turkey from a Jamaican joint or a smoked turducken from a BBQ spot. While you’re at it, throw some love to local bakeries for pies and other holiday sweets, as well.
Popular Restaurant Chain OptionsBob Evans has two options, a hot meal to go or a chilled one to reheat and serve later. Each option serves six for about $85. The Honey Baked Honey Ham Company offers both ham and turkey, plus various sides. If you’ve got a Boston Market in your area, they are open on the holiday and provide both full heat-and-serve meals and a la carte options. Cracker Barrel also provides a variety of full meal options starting at $15 per person. If you’re going this route, it’s a good idea to order ahead of time and expect a wait.
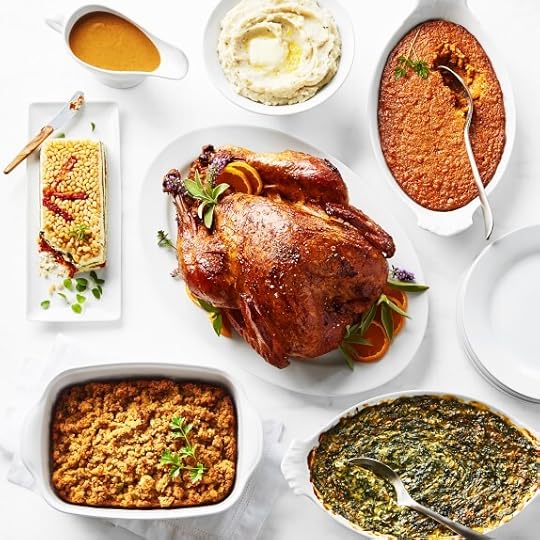
Supermarket Heat and Serve Meals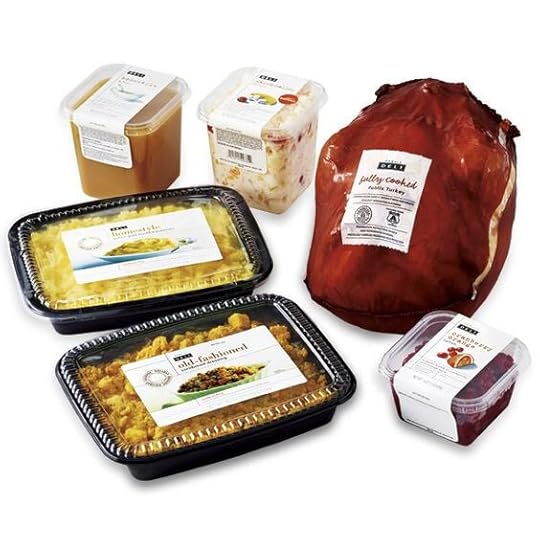 Publix supermarkets Thanksgiving dinner
 Many supermarkets offer up heat-and-serve meals. Years ago, I did a comparative tasting on a few for a food client. The sides from large chains tend to be on the bland side. If your budget allows, check out local supermarkets or higher-end markets, too, notably Whole Foods.
Turkeys in these packages tend to be cooked, then frozen, and thus can take hours to reheat, often as long as making a bird from scratch, so it’s not exactly a time saver. For a story, I picked up a heat-and-serve meal from The Fresh Market and it took nearly four hours to reheat the turkey. It tasted fine, but I was taken by surprise that a pre-cooked turkey would take that long to reheat.
Supermarket and gourmet market options tend to provide good deals ($10 per person and up), and save you time shopping in a busy supermarket during a pandemic. You still have the option of making one or two family favorites to round out the meal.
Holiday Meal Kits Collards and carrots from Blue Apron’s 2020 Thanksgiving offerings
A hybrid that allows you the joy of cooking without the non-joy of shopping. Again, check with local restaurants to see if they’ve got a meal kit on offer.
Hello Fresh: Their turkey dinner bundle serves 8 to 10 people, so if you’re a small group, you’ll have a lot of leftovers. If you’re not into turkey, they offer a beef tenderloin dinner for four to six. $16 per person
Home Chef: Customize your meal, as every dish is al a carte. The main protein is a roast turkey breast to serve six, not a whole turkey, but that’s a good thing if you’ve got a small crew. Varies
Blue Apron: Blue Apron offers a variety of holiday dinner options at an average of about $14 per serving.
Purple Carrot: Skip the turkey and go fully plant-based with roasted squash as a savory main, rounded out by fresh takes on traditional sides. After all, yur grandma probably didn’t put kimchi butter in her Brussels sprouts. About $18 per person.
Fancy & Delivered Cranberry stuffing casserole from Williams Sonoma
Amazon.com: Well, of course you order a turkey via the world’s biggest retailer. The most highly rated turkey comes from Kansas City-based Burgers Smokehouse which offers fully cooked ready to heat hickory-smoked birds starting at around $115 for a 12- to 14-pound bird. Kansas City Steaks offers a whole turkey meal for about $150.
Omaha Steaks has a Thanksgiving Roast dinner for those who want beef and not the bird. Good option for procrastinators with a Primer membership, or for someone who wants to ship a holiday dinner to a friend or relative long distance.
Williams Sonoma: This upscale kitchen store which will ship you everything from and in full Cajun fried Turkey with all the trimmings. $35 per person and up.
McKenzie Ltd.: Get a complete meal with your choice of a Cajun-style deep fried turkey or stuffed chicken breasts sides. $28 per person and up.
 More Thanksgiving coverage
Homemade Mashed Potatoes vs. Instant
Homemade Green Beans vs. Canned
Conventional Turkey vs. Organic
19 Ideas for Holiday Leftovers
Note: If you order anything from Amazon.com, I will earn a small commission. I have no affiliation or relationship with any of the other companies.
The post Sick of Cooking? Get Thanksgiving To Go appeared first on Kathleen Flinn.


May 26, 2022
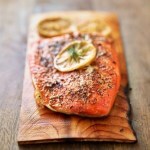
Easy Planked Salmon (or any other fish)

In summer months (also known as salmon season here in Seattle), I make this planked salmon about once a week. Before I moved to Seattle in the 1990s, I’d never heard of cooking on a plank, and frankly, it sounded like a strange concept. But then, I’d also never been hiking in the mountains, seen Orca whales in the wild and certainly never laid eyes on a geoduck.
History of planked salmon
Most culinary historians I know agree that Native Americans in the Pacific Northwest widely used the technique of cooking freshly caught fish on or attached to wood planks set on the edges of open fires. This legacy is one reason it’s popular in the Northwest.
However, if you read up on the history of European cuisine, plank cooking is noted as a Scandinavian technique used by Vikings as far back as 12th Century. It’s plausible that both populations (and others) developed the technique separately. After all, if you’re out fishing in the wild, there’s generally plenty of wood around, and cooking fish on a roaring fire designed to provide heat cold humans isn’t exactly the best means to cook delicate fish. Attaching fish to a plank next to the fire makes sense. Later, putting it over the fire seems like a logical extension. (Genetically, according to my DNA, I’m about 38% Swedish, so perhaps that’s why I gravitate toward this cooking technique.)
To me, a perfect summer day in Seattle starts with an early morning visit to Pike Place Market, the city’s massive historic waterfront market. The crowds don’t move in until around 11 a.m. and by then, I’ve been to Pure Foods Seafood Market, hit Sosio’s Produce, picked up some flowers and I’m back at home.
A Fisherman’s Daughter
As a kid, I didn’t know that you could buy fish at a store. This was back before supermarkets felt compelled to offer everything from deli meat to sushi. Our local supermarket chain in Davison didn’t have a fish counter; the closest they came to seafood were the fish sticks in the frozen food aisle, a product that I never consumed outside of a school lunch.
That’s because my dad was a fisherman. He used to say that they deducted time in heaven that you’d spent fishing on earth, or something like that. Seasons were no obstacle. No matter the weather, we dragged our aluminum fishing boat behind our station wagon from to some lake in search of fish.
 A scene from a family fishing trip circa 1971
In spring, we huddled together under umbrellas in cold, pouring rain. In the summer, we fished until everyone was thoroughly sunburned. Winter brought ice fishing, with the family shivering together, staring at their lines dropped below the hole cut in the ice. For all of that, we had the great reward of fresh-from-the-water fish.
=As my brothers got older and developed social lives and jobs, they fished less often. By her late teens, my sister chose never to fish, but instead lay across the stern of the boat in her bikini, trying to get tan. Eventually, we moved to Florida and that left just me and my dad and our two poles at the Rod n’ Reel pier together, chatting and fishing, staring at the warm, green water. My father had some odd power of fish; even when the fish weren’t biting, he always caught something.

So when I go to the market now and I see the parade of all the fish, once exotic and new, I think of those days with my dad, and how I used to look into the water, wondering how all those fish breathed down there.
Yesterday, I picked out a nice hunk of fresh Alaskan salmon and cooked it my favorite way, on a plank of wood over a hot fire. I like a bit of spice with everything, so I tend to put together a mix of Cajun spice and Italian herbs, but you can use whatever you like, even just salt, pepper and a bit of lemon. I paired it with lemon risotto and simple sautéed fiddlehead greens. For the risotto, start with this recipe. At the end, add about 2 teaspoons lemon zest and 1/3 cup of fresh lemon juice plus a tablespoons of butter toward the end cooking. A couple tablespoons chopped parsley is a nice finish.
How to Make Spicy Planked Salmon
If you’ve never cooked planked salmon or any fish on a plank, give it a try, especially if you’re uneasy about grilling fish. This method slows down the cooking of the fish, making it less likely to overcook. The main benefit to cooking on a plank is that it gives the fish a lovely smoked flavor. Most grocery stores carry planks now, or you can order online for less than $2 each [affiliate link].
You can read all about planking fish here, but here’s the short version. Be sure to soak the plank or planks in water for at least an hour before grilling to avoid having them catch on fire. Lightly brush the plank with a bit of oil, put the fish on top, sprinkle on the seasonings. I keep a spray bottle of water handy just in case the edges alight. Keep the lid on for as long as possible. Have a pair of tongs and a metal baking tray handy so that you can easily remove the fish from the grill when it’s done.
In the Northwest, it’s most common to cook cedar planked salmon, and cedar is definitely the most economical as its the most available retail wise. The truth is the wood only imparts a hint of flavor, so I haven’t noticed much difference between cedar and alderwood planks.
My dad died when I was 13. I never got a chance to show him all those fish at Pike Place Market. He would have loved it. An Indian friend told me that she was raised to believe the first bite of any meal is meant for God. Whenever I eat fish, I always think, this first bite is for my dad.
 PrintRecipe: Spicy Planked SalmonPlank grilling takes a bit longer than other cooking methods; allow for about fifty percent more time for the fish to cook. When the fish is done, it should be firm to the touch and register around 140 degrees Fahrenheit with an instant-read thermometer. In the summer, when wild Alaskan halibut and salmon are plentiful, I use this method at least once a week. This mother also works well for any reasonably firm sweet fish as grouper, black cod or snapper, too. I prefer to use this method over a charcoal fire. If you use a gas grill, avoid placing the wood plank directly over the gas flames. Allow about four ounces of fish per serving.Course SeafoodPrep Time 1 hour 20 minutesCook Time 10 minutesTotal Time 1 hour 30 minutesServings 4 servingsAuthor Kathleen FlinnIngredientsAbout 1 lb. halibut salmon or any dense white fish1/4 cup of olive oil1 teaspoon mixed Cajun spices1 teaspoons mixed Italian herbsJuice of 1/2 lemon about 2 tablespoons3 garlic cloves minced1/2 teaspoon coarse sea saltGround black2 to 3 slices lemonInstructionsSoak the planks in water for at least one hour. Prepare the coals. When ready, lightly dry the plank. Brush one side of the fish with a generous coat of olive oil; if the fish has the skin attached, oil that side. Place the fish oiled side down onto the platter. Sprinkle the top with Cajun spices, mixed Italian herbs, paprika and garlic over the top of the fish. Juice half the lemon, slice the other half thinly. Evenly sprinkle the fish with oil and lemon juice. Finish off with sea salt and freshly ground black pepper. Top with the sliced lemon.Put the plank on the metal rack over hot coals and cover. How long the fish takes to cook depends on the heat of your grill; at 350 degrees, it should take about eight to 10 minutes per pound. Fish is cooked when it’s hot in the center (about 145 degrees on a thermometer) and flakes easily with a fork at its thickest point. Take care not to overcook the fish. Serve hot, directly off the plank if desired.
Originally published April 20th, 2009; updated 27 May 2022. This page contains affiliate links.
The post Easy Planked Salmon (or any other fish) appeared first on Kathleen Flinn.
May 21, 2022
Recipe: Salade Niçoise

I first encountered Salade Niçoise in a most embarrassing way — by reading about it in a cheap romance novel.
The salad appeared in a typically evocative of a dime store read. A beautiful protagonist perched at a table under a striped umbrella on an immaculate beach in Cannes waiting for a murky character. The server brought her a bracingly cold glass of Chablis and Salade Niçoise. At this point, the author abandoned the entire plot to wax poetically about the brackish black olives, crisp greens, tender French green beans and plump tomatoes for at least two pages.
I don’t know what happened to the character. Although only 14-years-old, I put down the book and picked up The French Chef by Julia Child. I made it sans anchovies or capers, and with green olives and cheap tuna packed in water and juice from one of those plastic yellow lemons as that’s all we had in the house. It was still good: lemony, fresh and elegant.
Twenty years later while living in London, I fled to Cannes one weekend for the sole purpose of recreating that scene. As I sat under a striped umbrella, alone with a glass of wine waiting for my salad, I wondered whatever happened in that book? I’m sure she met some handsome, mysterious stranger and fell in love. Even so, I’m curious how she got there.

What is Salade Niçoise, anyway?
In the heat of summer, Salade Niçoise is one of my go-to dishes.
Named for Nice, the beachfront town on the southeastern coast of France, Salade Niçoise sounds fancy but it’s a great, relatively inexpensive dish in warm months. You’ll need fresh tomatoes, green beans and lettuce, while the rest of the dish’s ingredients can be kept on hand in the fridge or pantry, namely eggs, olives, capers, anchovies and canned tuna.
Yes, I said canned tuna. There’s a raging debate about the use of fresh versus canned fish. Even Dorie Greenspan writes in Around My French Table that a French friend implored that she “not go all modern and use fresh tuna.” The second line of my notes on the dish from Le Cordon Bleu read: “Always canned tuna, packed in oil.” (I think it was The Gray Chef from Sharper, a culinary purist.) But Ina Garten shrugs off such controversy and employs simply grilled fresh tuna steaks in her version.
What does Escoffier say?
Looking for an answer, I turned to Auguste Escoffier, the man who codified French cuisine. He described the dish as “equal quantities string beans, potato dice and quartered tomatoes. Decorate with capers, pitted olives and anchovy fillets. Season with oil and vinegar.” Note the glaring lack of tuna, canned or otherwise, in the description. Another point of contention: Should the ingredients be cordoned off into ghettos, the green beans to one side, the potatoes to another? Escoffier generously allowed that the arrangement of vegetables were “subject to no rules, merely a matter of taste.” I interpret this to mean I should arrange in whatever way pleases my own heart. The same can be said for your tuna. Go fresh if you want. Your kitchen should be a judgement-free zone.
Involve a quality canned tuna in this affair
But if you do used canned tuna, I implore you not to reach for a cheap supermarket variety. Splurge on a Mediterranean option (I’m partial to Tonnino Ventresca), or better yet, a sustainable wild caught albacore such as the brand I use here in Seattle from the fishing boat St. Jude.
Use good olives
In France, this is made with Niçoise olives, but these can be expensive and hard to come by outside the country. I recommend using whatever good olives you like, whether they’re black, green or a blend. Avoid cheap canned black olives as they add little to the final result.
A bit about capers
Is it worth the extra money to purchase “non-pareil” capers? That’s up to you. Capers are sold by size, with smaller ones prized for their more delicate and subtile flavor. Capers which measure less than 7 millimeters qualify as “non pareil,” which in French means “no equal.” Capers may seem a little expensive, but a few go a long way to add a punch of flavor to dishes such as this recipe for chicken piccata.
In the end, go with what you’ve got and what you like
After years of making and eating Salade Niçoise, I’ve come down to this variation on Julia’s classic. Nothing wrecks this salad faster than bland potatoes, so I prefer the classic Southern French approach to flavor them in their own right first as a potato salad. If you’re pressed for time, just toss them in a bit of vinaigrette.
Escoffier didn’t mention lettuce. I’m partial to a simple butter lettuce or a fresh arugula. The latter has some bite which adds depth to the salad, but use what you’ve got on hand or prefer.
Vary to what’s in your kitchen. No shallots? Use red or white onions. No cherry tomatoes? Just chop up one big one. No capers? That’s OK, leave them out.
Once you’ve made your salade, all that’s left is to find a place in the sun with a cold glass of wine or a chilled Perrier with lemon. The paperback romance is optional.
 PrintClassic Salade Niçoise for Two#wprm-recipe-rating-1 .wprm-rating-star.wprm-rating-star-full svg * { fill: #343434; }#wprm-recipe-rating-1 .wprm-rating-star.wprm-rating-star-33 svg * { fill: url(#wprm-recipe-rating-1-33); }#wprm-recipe-rating-1 .wprm-rating-star.wprm-rating-star-50 svg * { fill: url(#wprm-recipe-rating-1-50); }#wprm-recipe-rating-1 .wprm-rating-star.wprm-rating-star-66 svg * { fill: url(#wprm-recipe-rating-1-66); }linearGradient#wprm-recipe-rating-1-33 stop { stop-color: #343434; }linearGradient#wprm-recipe-rating-1-50 stop { stop-color: #343434; }linearGradient#wprm-recipe-rating-1-66 stop { stop-color: #343434; }Use good quality tuna packed in oil, not water, for the best flavor. This serves four as a main dish. Pairs nicely with a crisp white such as a sauvignon blanc, Chablis or rose. This serves two but is easily doubled.Course lunch, SaladCuisine FrenchKeyword Composed, Easy, French, French cuisine, SaladPrep Time 25 minutesTotal Time 25 minutesServings 2Author Kathleen FlinnIngredientsVinaigrette3 tablespoons olive oil1 tablespoon fresh lemon juice or white wine vinegar1/2 teaspoon mustard1 teaspoon dried thymeCoarse saltground black pepperSalad ingredients2 large Yukon gold potatoes cut into eight pieces2 tablespoons chicken or vegetable stock (optional)1 tablespoon chopped parsley2 teaspoons minced shallot or onion1 teaspoon capers optional4 ounces green beans1 handful cherry tomatoes (halved) or 1 large tomato diced3 ounces butter lettuce arugula, romaine or other greens12 cup olives black or green, sliced2 hard-boiled eggs roughly chopped or quartered7 oz. can tuna packed in olive oil4 anchovy fillets optionalInstructionsPrepare the vinaigretteIn a small bowl or jar, mix the lemon juice, olive oil, thyme, two pinches of salt, coarse ground pepper and shake or whisk together until emulsified. Set aside until needed.Prepare the potatoesSteam or boil the potatoes just until tender. While still warm, toss gently with stock and a bit of salt. After a few minutes, toss again with half the vinaigrette, chopped parsley, capers and shallots or onion.Compose the ingredientsArrange the cooked green beans, tomatoes, lettuce, hard-boiled eggs and olives in a bowl. Toss with the vinaigrette. Arrange the elements onto two plates, top each with the anchovies and tuna. NotesKat's one-pan trick: I cook the potatoes, green beans and eggs in the same pan. It's easy if you have a colander or mesh strainer that fits into a medium-sized pan.Fill pan with cold water. Place colander inside and add the chopped potatoes. Bring to a boil and cook for about eight minutes.Add the green beans and cook for another five. Remove the potatoes and beans from the pot in one swoop by removing the colander.Turn the heat down to a simmer and add the eggs. Cook for four minutes, then turn off the heat. Cover and let sit for 10 minutes. It will be easier to peel the eggs while still warm.If you don't have this colander-in-a-pan setup, don't worry. You can use tongs, a large slotted spoon, a small mesh sieve or even chopsticks to pull out the potatoes and green beans, but take care not to burn yourself.Extra creditBlanche the green beans. To do this, add ice cubes and water to a bowl large enough to hold the green beans. When the green beans finish cooking, use tongs to plop them into the ice water. The cold water will stop the cooking process and keep the beans nice and green.
French Tip: To keep the green beans crisp and retain bright color, boil briefly just until tender, then plunge into an ice bath.
Other recipes I like:
Simply Recipes (classic version)
Last Night’s Dinner (from leftovers)
Just Bento (with an Asian twist)
Feeding Maybelle (vegan)
You may want to take a look at my vinaigrette video lesson. This recipe was originally posted in 2016. It has been updated.
The post Recipe: Salade Niçoise appeared first on Kathleen Flinn.
May 13, 2022
Black Bean, Greens and Corn Veggie Burgers (Gluten-Free)
 So I used buy these manufactured black bean burgers in the frozen section. They were fine. A little tough, a tad cardboard-ish, but they would get the job done. Then, after working on my second book, I couldn’t bring myself to buy processed veggie burgers anymore. So, I went on a frenzy to develop or adapt recipes to make my own versions. I learned two key things. First, if you can chop, stir and play patty cakes with your hands, you can make your own burgers. Second, they’re infinitely better tasting. Second, they’re vegan and packed with good stuff, including a lot of fiber. Bonus, they don’t take that long.
Sun-dried tomatoes offer a mellow flavor while the greens offer a bit of bite. Greens such as arugula, Italian kale, swiss chard, mustard greens or beet greens all work well. For super-easy cookouts, make the patties ahead, then reheat them on the grill. In summer, I add in freshly grilled corn, but this is optional. Stash a few in the freezer for busy weeknight meals. Onions, tomatoes and a couple of slices of avocado pairs well as toppings. The other nice thing is that its bound with quinoa, which also makes them gluten free. Makes 6 patties.
You May Also Like:
Mushroom-Lentil Burgers
Go With the Flow Lentil Soup
 PrintBlack Bean, Greens and Corn Veggie BurgersAn easy take on veggie burgers that packed with fiber and nutrients. Use canned black beans and frozen corn and you likely have most of the ingredients at home already. If you don't want to preheat your entire oven, you can finish the patties in a countertop oven or toaster oven if you've got one. Course Main CourseCuisine AmericanKeyword BBQ, Burgers, good grilling recipes, Summer, vegetarianServings 4Ingredients½ cup quinoa1 small onion finely chopped (1 cup)6 oil-packed sun-dried tomatoes drained and finely chopped (¼ cup)2 handfuls mustard greens or arugula washed, trimmed and chopped2 cloves garlic minced (2 teaspoons)1½ cups cooked black beansOR a 15-oz. can black beans rinsed and drained1 ½ cups water3 tablespoons corn kernels optional1 teaspoon chili powder½ teaspoon dried oregano½ teaspoon coarse salt½ teaspoon ground black pepperAvocado oil or cooking sprayInstructionsStir together quinoa and 1½ cups water in small saucepan, and season with salt, if desired. Bring to a boil. Cover, reduce heat to medium-low, and simmer 20 minutes, or until all liquid is absorbed. You should have 1½ cups cooked quinoa.Meanwhile, place onion and sun-dried tomatoes in medium nonstick skillet, and cook over medium heat. (The oil left on the tomatoes should be enough to sauté the onion.) Cook 3 to 4 minutes, or until onion has softened. Add the greens and sauté for another 3 to 5 minutes or so until softened and wilted. Stir in ¾ cup black beans, garlic, cumin, steak seasoning, and 1½ cups water. Simmer 9 to 11 minutes, or until most of liquid has evaporated.Transfer bean-onion mixture to food processor, add 1 cup cooked quinoa, and process until smooth or put into a bowl and mash with a fork. Stir in remaining ¾ cup quinoa and remaining black beans and corn if using. Season with additional salt and pepper, if needed, and cool.Preheat oven to 375°F. Spray or coat with oil an oven-proof skillet over medium-high heat. Add the burgers and cook until browned on one side about 4 minutes. Turn, cook another two minutes and then place into the oven for 10 to 12 minutes.
The post Black Bean, Greens and Corn Veggie Burgers (Gluten-Free) appeared first on Kathleen Flinn.
May 12, 2022
Mushroom and Lentil Burgers

Years ago, I found myself the only vegetarian at a barbecue hosted by co-workers. I’ve dabbled with vegetarianism on and off; this was during one of my “on” phases. Thoughtfully, or so I thought, I packed my own frozen meatless patties so no would even notice that I wasn’t eating meat. Of course, that didn’t happen.

Instead my hard commercial discs became the center of everyone’s attention.
“These don’t even look like meat!” remarked one of the “hosts.” He considered himself a comic. He cooked them – right on the same grill with the ground beef – and then tasted one afterward. “No wonder you’re so skinny, you’re eatin’ cardboard!”
These mushroom and lentil burgers would shut that guy up. They offer a similar meaty umami quality to the real thing. Topped with cheese, it hits the same satisfying receptors a traditional burger. Make your own breadcrumbs by either pulverizing an extra hamburger bun or leftover bread in a food processor; these can be made from leftover gluten-free breads as well.
This calls for steak seasoning. I am a fan of the garlic-laced Steakhouse Smoke Seasoning from Spice House, or the classic Montreal Steak Seasoning from McCormick, but use your own favorite. You can use canned pre-cooked lentils available on market shelves, but the texture of making them from dried beans is superior for burgers and takes 20 (hands-free) minutes.
Pre-cooked lentils come in 15 oz. cans so if you’re using those, you might as well double the recipe since these freeze so well. Topping with cheese is optional. Great toppings for these burgers include sliced avocado, tomatoes and mixed greens. One cup dry lentils yields about two cups cooked. Makes four burgers and is easily doubled. These mushroom and lentil burgers can be made a day ahead and then simply re-heated on the grill.
You May Also Like:
Black Beans, Greens and Corn Burgers (vegan, gluten free)
Go With the Flow Lentil Soup
 PrintMushroom and Lentil BurgersYou can make these gluten free by simply swapping out the breadcrumbs for a GF option. Course Main CourseCuisine AmericanKeyword BBQ, Burgers, good grilling recipes, mushrooms, vegetarianIngredients1 cup dry green or red lentils OR 8 oz. 225g pre-cooked lentils1 tablespoon vegetable oil or cooking spray½ medium onion 225g, chopped (3/4 cup)2 garlic cloves minced6 oz. cremini or Portobello mushrooms 180g, chopped fine (2 cups)2 teaspoons Dijon mustard2 teaspoons chopped fresh thyme1/4 teaspoon freshly ground black pepper1/2 teaspoon kosher salt1 cup breadcrumbs1 large egg lightly beaten½ teaspoon steak seasoning optional6 oz. cheeseInstructionsHeat a large ovenproof skillet (such as cast iron) over medium-high heat, adding a bit more vegetable oil. Cook the patties for about four minutes on one side until browned, adjusting the heat so it doesn’t burn. Then put into the oven for about 10 minutes. If you want to make cheese burgers, remove the patties after six minutes, add the cheese and finish under the broiler until the cheese melts.NotesNote: These also freezer well. Simply wrap tightly with plastic wrap or parchment and then store in an air-tight container. Use within two months to retain optimal flavor.
Photos by Kathleen Flinn. This page may contain affiliate links. Originally posted in 2013; it has been updated.
The post Mushroom and Lentil Burgers appeared first on Kathleen Flinn.
May 5, 2022
A Cheat Sheet to Flavor Profiles

What makes something taste Italian or Cajun or Moroccan? Here’s a quick guide to understanding flavor profiles and how ingredients work together to define various cuisines.
What is a flavor profile, anyway? At its most basic, a flavor profile is made up of ingredients that help define the common flavors found within a specific cuisine.
What ingredients come to mind when you think of Italian food? Given a few minutes to think about it, you’ll likely respond with the following: basil, tomatoes, garlic, olives, pine nuts, fennel, parsley, balsamic vinegar, white beans and mozzarella. All are part of the flavor profile of Italian cuisine. It’s that simple.
Why it’s important to understand flavor profilesOnce you get the gist of flavor profiles and command a few basic cooking techniques, you’re on your way to being able to cook without a recipe. Let’s say you have a simple fillet of fish and a cup of rice. Cloak the fish in sesame seeds and pan-fry it, then serve with rice, soy sauce and seaweed flakes. You’re hitting Japanese notes.
Take that same piece of fish or chicken, coat it with blackening spices and pan-fry it quickly. Serve with a wedge of lemon and rice, and you’re in Cajun country. That same fish seasoned with tandoori spice and served with rice and a piece of naan bread? You’ve wandered into Indian cuisine. That’s the basic essence of using flavor profiles.
Use this same thinking when it comes to crafting vinaigrette, seasoning chicken, or even making a soup or stew such as gumbo.
The list below is hardly exhaustive; the world has some 200 countries, each with its own cuisine and many with regional variations. Basque cuisine is vastly different from the classic dishes from Provence, but they’re both French, for instance. So consider this a shorthand reference to a few culinary stereotypes just to get you started. Don’t overdo it. Try incorporating two to four ingredients to tilt a flavor profile in that general direction. Want a printable version of this cheat sheet to flavor profiles? Download it here.
Cajun/Creoledark roux, Blackening spice, onions, celery, green pepper, tomatoes, parsley, cayenne, Cajun spice blends, blackening seasonings, lemon, scallions, andouille sausage, crab, shrimp
Caribbeanallspice, scotch bonnet peppers, garlic, rum, jerk seasoning, corn, plantains, mace, pineapple, nutmeg, cloves, cinnamon, bay leaves, saffron, vanilla, coconut, citrus
Chinesesoy sauce, chili oil, sesame oil, garlic, ginger, water chestnuts, Sichuan peppercorns, star anise, hoisin sauce, five-spice blend, fish sauce, rice vinegar, red bean paste, pork, straw mushrooms, tea, pickled vegetables
Frenchbutter, shallots, onions, celery, carrots, thyme, tarragon, herbs de Provence, Fine herbs, bay leaves, chives, chervil, capers, red and white wine, truffle, soft cheeses, Dijon mustard, mushrooms, cream
Koreankimchi, sesame oil, gochujang, kochukaru, eggs, kochujang, bonito flakes, tofu, bulgogi spice, ginger, garlic, soy sauce, seaweed, rice wine, noodles, dried anchovies
Indiantandoori spices, garam masala, curry, yogurt, coconut milk, basmati rice, tamarind, cardamom, cumin, coriander, cilantro, fennel, garlic, saffron, fenugreek, dried chilies
Italiangarlic, onions, celery, basil, pesto, Italian herb blend, prosciutto, Parmigiano-Reggiano cheese, mozzarella cheese, pine nuts, tomatoes, artichokes, olives, olive oil, oregano, lemon, fennel, flat-leaf parsley, red pepper flakes, rosemary, white beans, balsamic vinegar
Japanesemiso, sesame seed oil, sesame seeds, rice vinegar, sake, soy sauce, wasabi, ginger, seaweed (including kombu, Nori and wakame), Mirin (sweet sake), teriyaki sauce, bonito flakes, dashi, pickled vegetables, tofu
Greek/Mediterraneanoregano, lemon, olives, tuna, rosemary, bay leaves, thyme, olive oil, lamb, garlic, feta cheese, tomatoes, red onions, fish, shellfish (other countries along the Mediterranean have similar flavor profiles)
Mexican/Tex-Mexcumin, chili powder, hot sauce, green peppers, oregano, lime, garlic, onions, celery, cilantro, tomatoes, scallions, black beans, fajita spices, Cheddar cheese, avocado
Middle Eastern/West Asian or Levantinedates, honey, sesame seeds, mint, prunes, sumac, turmeric, cinnamon, olives, Baharat spice, parsley, pine nuts, pomegranates, pistachios, yogurt (note: this includes Arab, Iraqi, Iranian, Israeli, Lebanese and Turkish cuisine which for geographical and historical reasons, share similar ingredients and flavor profiles)
North African/Moroccanmint, lemon, harissa, ras-al-hanout, saffron, turmeric, parsley, cilantro, honey, olives, almonds, dates, raisins, chickpeas, eggplant, green bell peppers, carrots, lentils, onion, ground ginger, paprika, cumin, cayenne, figs
South Asianginger, garlic, scallions, lemongrass, cilantro, fish sauce, shrimp paste, soy sauce, coconut milk, sesame oil, lime, oyster sauce, galangal, hot chili peppers, vinegar
Spanisholive oil, saffron, paprika, chorizo, ham, sherry vinegar, garlic, olives, anchovies, peppers, olives, tomatoes, Manchego cheese, piquillo peppers, eggs, almonds, tuna
West Africanokra, peanuts, yams, hot peppers, tomatoes, onions, rice, cassava, plantains, black-eye peas, palm nut oil, ginger, millet, coriander, thyme
Central/South Asianginger, garlic, scallions, shallots, lemongrass, Thai basil, cilantro, fish sauce, shrimp paste, soy sauce, coconut milk, sesame seeds, sesame oil, rice or sweet wine vinegar, cilantro, lime, oyster sauce, galangal, hot chili peppers
Note: This study on flavor profiles tarted as an except from my book, The Kitchen Counter Cooking School with permission from Viking/Penguin Random House. It has been expanded and updated here online. Photo of spice map by Africa Studio. This page contains affiliate links.

The post A Cheat Sheet to Flavor Profiles appeared first on Kathleen Flinn.
April 26, 2022
How to Freeze Meat, Cheese, Milk, Butter and Fish So You Can Actually Use It Later

Reader question: “I have bought far more meat and cheese than usual due to the pandemic and now I am worried about it going bad. Is freezing meat OK? What about butter and cheese? How long will it last?” – Rebecca, Orlando FL
Answer: I have been teaching people cooking in their homes foryears. One of the first things I do is to inventory their fridge and freezer.For many, the freezer turns into the Land That Time Forgot. I’ve found14-year-old packages of hamburger in a client’s fridge.
With many people adding in much more food than usual, learning how to safety store foods like meat and cheese in your freezer is a critical lesson. A few key tips:
What Not to FreezeFor starters, don’t freeze anything past its expiration date. Freezing it will not magically make it safe to eat again. Prepared convenience foods from your supermarket generally should not be frozen. This includes those pre-stuffed chicken breasts or chops and fresh salads containing potatoes, eggs or pasta. Canned ham, too, should not be frozen, although whole hams, chops or roasts are fine. Eggs are tricky business. Don’t freeze eggs in their shells – they’ll explode. Hard-boiled eggs or egg substitutes that have been opened are also not freezer candidates. See below for tips on meats, cheese and milk.
Always let food cool before freezingIf you’re making meals and then storing the leftovers, it’s important to cool them and store in the refrigerator before freezing. This will assure that new, hot items will not affect already frozen items. Don’t overfill containers, as foods tend to expand when they freeze, so it’s important to leave a bit of headspace in containers. Also, wait until containers are frozen before stacking them.
Wrap meat twice before freezingThe packaging from your local supermarket alone will not keep your meat and poultry safe in the freezer. The trick to freezing meat, according to the Food and Drug Administration and the Meat Sciences department at Texas A&M University, is to wrap it twice, preferably in heavy duty aluminum foil, plastic wrap or freezer paper, or put the whole package inside a plastic bag. Personally, I remove meat from its plastic and wrap it in parchment, then plastic and then a layer of foil and then freeze. Alternately, you can seal meat, fish and poultry in heavy plastic using a vacuum sealer. This will allow the food to remain frozen longer.
How long will it keep in the freezer?I recommend printing out this awesome flyer from the FDA has an easy-to-read chart that covers how long to freeze all kinds of food, including meat and cheese. It also includes how long stuff can last in your fridge, too. I keep a copy right on my fridge for easy reference.
Label and date everythingIt’s easy to forget what’s what. Do what many professional kitchens do. Use blue painter’s tape and a sharpie to mark down the contents and the date. No tape? Write the contents on a piece of paper and secure in place with plastic wrap. Be sure to check your freezer regularly. One of my classic “clean out the fridge or freezer” recipes is soup. Check out my Soup 101 primer on how to make soup out of (almost) anything.
What about freezing cheese?According to the National Dairy Board, softer cheeses like mozzarella andyoung cheddar can be frozen, especially when shredded. Firmer cheeses, likeaged cheddar become crumbly and shift texture, so plan on using those inrecipes, rather than highlighting on a cheese plate.
There’s an important key to freezing shredded cheese and it’s in the way youthaw it. This is because cheese containsa fair amount of moisture and this becomes frost when frozen. Allowing it to thawslowly will allow this moisture to get absorbed back into the cheese.
Have blocks of cheese? Chop them into half-pound blocks or smaller and wraptwice in plastic or freezer bags.
 What about milk and butter?
The Dairy Board suggests putting milk into small, air-tight containers
before freezing. Be sure to leave at least an inch at the top because milk,
like other liquids, expands when frozen. Personally, I find that freezing milk
tends to slightly change its taste, so try freezing a small amount to see if
you like it.
Once you’re ready to use the milk, let it thaw completely in the
refrigerator. Milk fats thaw separately than the water in milk, so if it’s not
completely thawed, you may notice that it isn’t smooth. A quick shake or stir should resolve this. Try to use thawed milk within three days.
I always keep butter in my freezer. Unsalted butter can last up to five months and salted can last up to nine. Keep it in its original packaging and then double wrap.
What about freezing fish?Fish is best when cooked the day you buy it. If it must sit overnight, consider placing it on top of ice. Often, seafood sold as “fresh” in your supermarket case was previously frozen. Freezing raw seafood twice won’t render it inedible, but it will break down more of the protein so the texture will be a bit mushier when you thaw it again. Like meat, wrap fish twice. I prefer to wrap it in parchment first, then a layer of plastic or aluminum foil. Fish is best left to thaw in the fridge where, like cheese, it can reabsorb frost as moisture into its flesh. Fish are a good option for a vacuum sealer.
Please note: This post was originally published in March 2020. It contains affiliate links.
The post How to Freeze Meat, Cheese, Milk, Butter and Fish So You Can Actually Use It Later appeared first on Kathleen Flinn.
April 22, 2022
Shrimp Tarragon Pasta with Wilted Greens
 It started as this small thing, just a tiny container from a local nursery. Then, like something out of a 1950s horror film, by August last summer, my French tarragon grew into an embarrassment of riches on the patio of my Seattle home. On a chilly day in late autumn, I hacked most of it back and dried it to make my own fine herbs, that classic combination that’s a mainstay in French cuisine. The traditional ingredients include parsley, chives, tarragon and chervil, all of which I grow all on my patio garden most summers. Generally, herbs don’t overwinter well in Seattle. They spring up, make a show over summer, tolerate my regular hacking and then retreat until I let them drift into stiff vines or get around to drying them.
To my surprise, however, the tarragon resurrected with exceptional vigor this spring. When I first investigated my patio this past March, it greeted me like a baby unexpectedly up and standing in a morning crib, all happy and ready for the day. It reminded me that too often, we underestimate people or things, or even plants.
I had an embarrassment of riches of frozen shrimp, so my mind went to shrimp tarragon pasta. I stumbled across this recipe while researching tarragon, originally published in Bon Appetit in 2005. I made some changes to it, notably tossing the greens with a bit of pasta to round it out as a full meal. I first made it for my mother visiting from Florida. “It tastes like spring in France,” she said. I agree. 

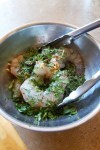 PrintShrimp with Tarragon and Pasta on Wilted GreensYou can use frozen shrimp, but be sure to thaw according to package directions first and then pat down to sop up any leftover water. If you can't find shallots, you can use sweet onion or leek instead. If you don't have fresh tarragon, you can use 2 teaspoons dried but I recommend adding in a bit of chopped fresh parsley if you've got it to keep up the fresh flavor.Course SeafoodCuisine FrenchPrep Time 15 minutesCook Time 12 minutesTotal Time 27 minutesServings 4 servingsAuthor Kathleen FlinnIngredients6 ounces linguine cooked and drained3/4 pound of large shrimp peeled and deveined1/3 cup chopped parsley1 tablespoons + 2 tablespoons olive or avocado oil1 tablespoon + 2 tablespoons fresh lemon juice2 teaspoons lemon zest2 tablespoons chopped fresh tarragon2 teaspoon minced peeled fresh ginger½ cup finely chopped shallots (about two large)¼ cup white wine2 tablespoons butter2 tablespoons whipping cream or half & half10 oz. baby spinach leaves2 tablespoons chicken or vegetable stockInstructionsAdd water to a large stockpot and bring it to a boil. Once at the boil, add 1 tablespoon salt and add the pasta, cooking it according to package directions while you complete the rest of the dish.Toss shrimp, parsley, 1 tablespoon of the olive oil, 1 tablespoon lemon juice, lemon zest, half the chopped tarragon, and half the minced ginger in medium bowl. Generously season the mixture with sea salt and ground pepper.Heat 1 tablespoon oil in large skillet over medium heat. Add the shallots and sauté until soft, about four minutes. Add the white wine and reduce briefly, about two minutes. Add shrimp mixture; sauté until shrimp are almost cooked through, about 3 minutes. Add butter and cream; bring just to simmer. Add remaining 1 teaspoon ginger. Season with salt and pepper. Set shrimp aside in another bowl, scraping out most of the pan’s contents.Put the pan back on the heat and heat remaining 1 tablespoon oil in large nonstick skillet over medium-high heat. Add spinach and remaining 1 tablespoon lemon juice; sprinkle with salt and pepper. Toss until just wilted, about 25 seconds. Add the cooked spaghetti and the vegetable stock and stir through to integrate the leaves into the pasta. Mound spinach pasta mixture in center of plates top with shrimp and sauce. Sprinkle shrimp with remaining 2 teaspoons tarragon; serve.
This was originally published in 2015; it has been updated. It may contain affiliate links.
The post Shrimp Tarragon Pasta with Wilted Greens appeared first on Kathleen Flinn.
April 11, 2022
Recipe: Popovers
 I’ve long been fascinated by popovers and for this, I blame Dorothy Parker.
 Dorothy Parker
For those unfamiliar, Dorothy was a fabulously wry writer who was among the founding members of “the vicious circle” of writers who made up The Algonquin Roundtable in New York. Starting in 1919, the group of thirty newspaper and magazine writers met almost daily for lunch over the course of about ten years to share gossip, jokes and cultural observations.
Through their writings, the conversations around their lunch table in the dining room became national fodder. Dorothy, in particular, became known for her remarkable wit. The group led to the creation of a magazine that you may have heard of, The New Yorker.
Many went on to celebrated careers. Parker sold three books of acclaimed poetry, won an O. Henry Award for her short story, “Big Blonde,” and was nominated for an Oscar for co-writing 1939’s “A Star is Born.” While she lived a public life of acclaim, her internal life was often tortured and she slipped into alcoholism late in life. Parker has been one of my favorite writers since I was introduced to her work in high school. Her humor, use of sharp descriptions and subtlety in commenting on important issues still inspire me today.
Popovers and the Vicious Circle
As a food writer, I did some research on what the group ate during their ten-year lunch. It was the usual fare of the 1920s, continental dishes influenced by French. Shrimp cocktails, cold fish cakes with lemon cream sauce, various cuts of beef in red wine sauce, that sort of thing. The hotel manager, happy that the group made its home there, offered them a regular table and waiter along with two enduring food items served gratis: celery and popovers. Popovers? I always wondered why.

The Algonquin has a special place in my heart. When my first book, The Sharper Your Knife, was on its way to auction, I traveled to New York to meet with the ten publishers (yes, ten) who wanted to buy it.
As a Dorothy Parker devotee, my husband thought that staying at the city’s most celebrated literary hotel would offer good karma and he found a great last-minute deal for a room online. My agent and I went around to meet with seven publishers one day and three the next.
And Here’s How I Learned I Sold My First Book
After the whirlwind, I packed up and met my long-time friend J.R. in the hotel’s dark wood-paneled bar for a cocktail before catching a flight home. I tried to be cool, but I was mystified at how this improbable moment could possibly be happening. It felt as if I had somehow stepped into another person’s life. J.R. and I talking about the popovers and the auction expected to take place the following week when my phone rang.
“So a publisher wants to pre-empt the auction,” my agent explained. A pre-empt happens when a publisher offers an advance as high or higher than a manuscript is expected to raise at auction. I asked him what I should do. “I think you should take it!” he said enthusiastically. So I did, and the auction was over.I hung up. I explained that I’d just sold my book to the waiter. With great flourish, he and the manager brought over two glasses of champagne on the house… and a basket of warm popovers. “We overheard you talking about them, and we have them on the menu at the moment,” the manager explained, a bit awkwardly, admitting to eavesdropping. “I hope it’s OK.” I asked him, why did they serve popovers to the round table members?“Because they’re delicious?” he offered.We toasted to the book sale, and ate popovers. They were awfully good.
Popovers – At Last!
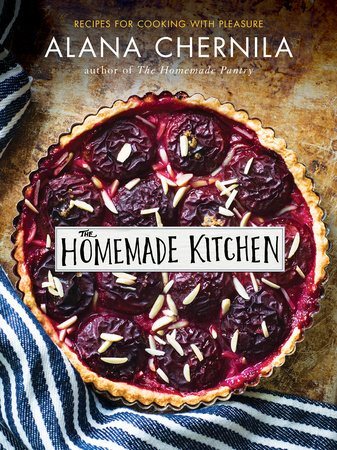
Oddly, however, I’ve never made them — until a couple weeks ago. I’ve been collecting audio interviews for a podcast that I’m planning to launch soon. One of my first interviewees was Alana Chernila of the lovely blog, Eating from the Ground Up. She arrived in the midst of a busy book tour on a crisp autumn morning to hang out in my kitchen. I wanted to make something from her new book, The Homemade Kitchen, so imagine my delight when I saw she had a recipe for popovers.
It turns out that popovers are remarkably easy to make – and cheap. You put the ingredients into a blender, puree it and pour into an oiled muffin or popover tin. The hardest part is not opening the oven while the bake. I had some fresh dill on hand, so that’s what I used along with chevre. Alana and I sat in my kitchen, drinking tea and talking popovers and book tours. I’ve added them to my Thanksgiving menus for approximately forever. It reminded me that sometimes we wait too long to try things, only to find they were so easy. All I needed was a few ingredients and some patience. Oh, and a blender. Listen to my conversation with Alana on my podcast, Hungry for Words, with the player at the top of the page. PrintRecipe: Popovers from ‘A Homemade Kitchen’I have one back-pocket recipe that can save any breakfast, lunch, or dinner. Special birthday breakfast on a school morning when we have to get out at 7:00 a.m.? Popovers. A soup pulled from the freezer that’s not quite as delicious as I remember it? Serve with popovers. Friends coming over with picky kids? Anything + popovers. Of course, I wish all my meals were flawless and delicious, and all my experiments came out cookbook-worthy. But for the meals that do n’t quite make it, popovers save the day. This is also a great recipe for kids, because once it’s in your blood, you can rely on it for life. The blender, along with the hot oven, creates a lofty popover with a hollow center. Although you can buy a special fancy popover pan, this recipe works just fine in a regular muffin tin. If you prefer a more custardy popover, mix the ingredients by hand and bake in a 375°F oven for 30 to 35 minutes.Course BakingCuisine AmericanPrep Time 10 minutesCook Time 28 minutesTotal Time 38 minutesServings 12 popoversAuthor Alana ChernilaIngredients3 large eggs1½ cups 360 ml whole milk or buttermilk (for homemade, see page 34)1½ cups 180 g all-purpose flour½ teaspoon kosher salt4 tablespoons ½ stick/56 g unsalted butter, melted and slightly cooledSafflower oil or melted butter for greasing the panOptional: ¼ cup fresh herbs; 4 ounces 115 g chèvreInstructionsPreheat the oven to 425°F. Combine the eggs, milk, flour, salt, and butter in a blender. Blend until you have a smooth batter, 15 to 20 seconds. Let the batter rest for about 10 minutes.Generously grease a 12-cup muffin or popover tin with oil. Divide the batter evenly among the cups, filling them most of the way. Add a pinch of fresh herbs and a dollop of chèvre, if using, to the center of each muffin cup. Bake until puffed and golden, WITH OUT OPENING THE OVEN, 25 to 28 minutes. Serve immediately.
The post Recipe: Popovers appeared first on Kathleen Flinn.
April 10, 2022
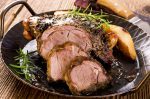
Grilled Lamb with Rosemary & Olives and Instant Pot White Beans (Recipe)

This grilled lamb dish is my favorite recipe from The Sharper Your Knife, the Less You Cry. In the book, it’s listed by its French name, Agneau grillé mariné aux olives, artichauts et tomates.
People who say they don’t like lamb (like my mother) will like this dish. The earthy rosemary, the briny, salty goodness of the olives, the bite of garlic and the bright acid of lemon tenderize the meat making it moist plus lend it a a burst of flavors.
One key tip in making lamb to avoid overcooking it as it can make the meat chewy. Your goal is to cook it just to medium-rare, about 145°F/63°C, then let it rest before slicing.
Lamb and White Beans: So Very French
I first had a dish like this on a trip to Paris around 2002. I was single and living in London and decided to spend a stormy April weekend in Paris on my own. I wandered into a small bistro that specialized in food from Provence. This dish was the special that night, in part, because lamb is less expensive and more plentiful in April due to Easter.
High quality olives make all the difference in this dish, so don’t skimp. Go to a deli and get a glistening Mediterranean mix, or pick up this great mix from Trader Joe’s.
Key to Grilling: Butterfly the Leg
A butterflied leg is simply one with the bone remove and slit open like a book. This makes for an easy grilled lamb main with lots of flavor. With the bone removed, you can lay it flat on the grill and maneuver it as needed. Supermarket butchers will sometimes butterfly a leg if you ask nicely, while any full service butcher will do it and be sure to give you the bone.
If you’ve got a sharp knife and the confidence, it’s not hard to do yourself and takes about 15 minutes. BBC Good Food has a good video primer. I add the bone into with the beans for extra flavor.
Marinade the Lamb
Ideally, the lamb should marinate overnight in the refrigerator and be brought back to room temperature before grilling. If you don’t have that kind of time, marinate for at least a couple of hours. Don’t need a whole leg? I use this recipe for steaks cut from a lamb leg when serving just two or three.
No plans to grill? No worries. Roast the lamb uncovered for 50 to 70 minutes at 350°F/175°C turning at least once until an instant-read thermometer reads 145°F/63°C. Cover with foil and let rest for 15 minutes before carving.
Instant Pot the White Beans
White northern and Cannelloni beans both work well. Use a mix of fresh rosemary and thyme that I bought for the herb mix in the marinade. I start the beans from dried, something I strongly recommend. (I’m a fan of Bob’s Red Mill Cannelloni beans.)
These days, I use my Instant Pot to cook dried beans in my Instant Pot as they’re cooked in less than an hour and no soaking is required. You’ll find instruction on how to cook dried white beans in your Instant Pot at the bottom of the recipe below. No Instant Pot? Saute the initial ingredients as directed and allow it to cook for about two hours, adding water if needed to keep the beans moist.
Round out this easy grilled lamb with simple steamed asparagus or green beans and rosemary popovers.
 PrintEasy Grilled Lamb with Rosemary & Olives and Instant Pot White BeansA great holiday recipe or just something different to put on the grill during summer. You can also make the white beans on their own. One note: if the lamb doesn't come butterflied, ask the butcher to do it. You can add the bone to the beans for extra flavor, or just treat your dog. Course Main CourseCuisine French, Greek, ItalianKeyword BBQ, Christmas, Easter, good grilling recipes, grill, holidays, Lamb, marinated, olives, PassoverServings 8 peopleEquipmentElectric pressure cookerIngredientsLamb and marinade4 ½ to 6 pounds (2 to 2.5 kgs) boneless leg of lamb butterflied¾ cup (80 g) high quality olives, pitted1 tablespoon coarse salt2 teaspoons ground black pepper1 cup mixed fresh herbs chopped6 tablespoons olive oil6 cloves garlic peeled, smashedJuice of two lemonsBeans4 ounces 125 g salt pork or thick cut bacon, cubed1 medium onion chopped (about 1 cup)2 medium carrots chopped (about 1 cup)1 pound (500 g) dry white beans1 sprig fresh rosemary2 bay leaves3 tablespoons fresh thyme chopped or 1 tablespoon dry2 cloves garlic chopped1 14 oz can chopped, seeded tomatoes2 16 oz cans artichokes hearts, drained2 quarts (2 liters) chicken stock2 tablespoons butter2 tablespoons fresh parsley choppedHot sauce such as TabascoInstructionsMarinade the lamb Combine the ingredients in a small food processor. Blend until the olives and garlic are minced, and the mixture emulsifies. Slather on the lamb, and set into a non-reactive bowl and cover with plastic wrap. Marinate at least two hours or overnight. Make the beansStart the beans in a 6 qt. electric pressure cooker by sauteing the salt pork or bacon slowly over low heat until browned. Add the onion and carrots until softened. Add the beans, rosemary sprig, bay leaf, thyme, garlic, tomatoes, artichokes and enough chicken stock to cover the beans by about three inches. Secure the top and set to Manual for 28 minutes, allowing 10 to 15 minutes for pressure to build. Allow the pressure to release naturally according to your manufacturer's instruction, about 10 to 30 minutes. Grill the lambDiscard marinade, pat the meat dry with paper towels. If grilling a whole leg, start cooking the fat side down, about 15 to 20 minutes per side or until a meat thermometer reaches 125°F/ 51°C degrees for medium rare. Let lamb rest for 10 minutes before slicing. Finish the beansFinish beans with butter, salt, pepper and hot sauce to taste. Remove rosemary sprig, bay leaves, stir in chopped parsley. Serve with sliced lamb.
 Please note this page may contain affiliate links. Originally published in 2009, updated in 2022.
The post Grilled Lamb with Rosemary & Olives and Instant Pot White Beans (Recipe) appeared first on Kathleen Flinn.


