Kathleen Flinn's Blog, page 2
January 20, 2025
Join me for a Beach Cooking Getaway in 2025


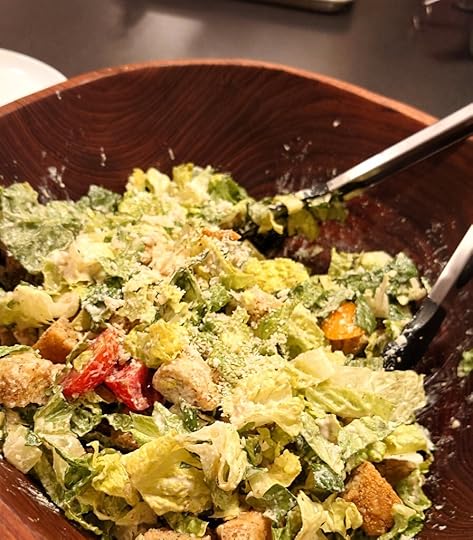

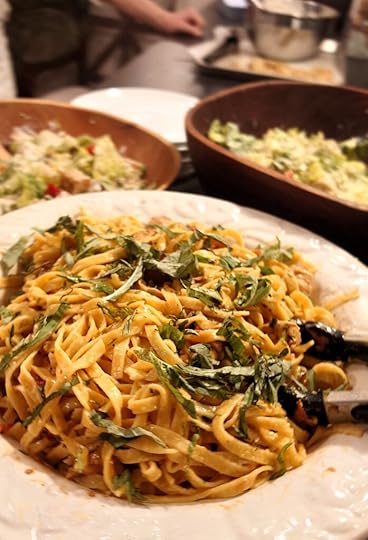

In January 2024, I held my first Beach Cooking Getaway at our home on Anna Maria Island. I’ve been thinking about doing this kind of intensive cooking experience for years and decided to just host a couple and see how it went. As it happened, these getaways were my favorite weeks of the entire year, and I can’t wait to host some more. Spending a few days with readers and getting a chance to understand what people most need to learn to gain confidence in their own skills was inspirational for me, not just for those who joined me in my kitchen.
This year is especially poignant, since it comes after rebuilding our island home after it was sacked by two hurricanes last September. So whether you’re a seasoned cook or you need a crash course on how to chop an onion, this body- and soul-feeding beach getaway is for you. We’ll focus on fundamental techniques and craft a variety of dishes based on French and Mediterranean cuisine while incorporating all kinds of healthy variations and seasonal produce, seafood and more. I send out a lengthy survey ahead of each class to customize it to what each group most wants to learn.
We’ll also do some writing/journaling exercises to get you thinking about where you are on life’s journey. Don’t worry, you don’t have to be a writer, just be yourself.
Your stay includes all meals, cooking lessons, a dozen comparative tastings and a nearby field trip. Accommodation is complimentary; you’ll be staying as my guest. Bring a friend or partner to share your room and they get a 20% discount. You’ll receive a digital packet of recipes and hopefully a heart full of inspiration. To assure everyone gets plenty of individual attention, each session is limited to a maximum of eight participants.
To learn more, see the full itinerary and book your place, click the date you’re interested in below.
2025 – Saturday to Tuesday
April 5 to April 8th
May 24th to 27th (Memorial Day weekend)
November 8th to 11th (Veterans Day weekend)
2025 – Tuesday to Friday
May 27th to May 30th


 271478588


The post Join me for a Beach Cooking Getaway in 2025 first appeared on Kathleen Flinn.
The post Join me for a Beach Cooking Getaway in 2025 appeared first on Kathleen Flinn.


December 20, 2024
No Stress Guide to Hosting Holiday Dinner
 Table tip: Go white, and then add color (or not) with collected leaves, small squash, acorns and natural elements for an inexpensive, yet elegant effect.
Hosting a holiday dinner can feel overwhelming. This is especially true if you’re a novice cook, or frankly, if you haven’t been in charge of planning for a large culinary gathering. All that food, the dishes, the cleaning, the table decor… where to start? I’m here to help. Start with a deep breath.
Remember the math. Most classic holiday dinner menus include a main dish, gravy or sauce, potatoes, two to three vegetables, some bread, plus dessert. Figuring out what to serve is Step 1 in hosting a holiday dinner. Ham is a popular option at Christmas and Easter. To make things easy on yourself, get one that’s already cooked or smoked, so you just have to slightly reheat and serve.
But then Step 2 is figuring out who can help you.
If you’re opting for a roast turkey – a favorite for both Thanksgiving and Christmas in the U.S. and Christmas in other countries – then you can focus on the turkey, gravy and stuffing and then delegate all the side dishes and at least a couple of pies (or buy them), you’ve wildly cut down on the tasks at hand. This is the same advice that Rick Rodgers, the author of Christmas 101, offers novice cooks in his excellent primer for novice cooks on Epicurious.
Food writer Jess Thomson has this advice: “I try to reduce the number of dishes I feel have to be piping hot. I think there’s a huge misconception that all the food has to be ready at exactly the same time.” With that in mind, she includes dishes that are more flexible – roasted carrots, for instance – and dishes that are better after they sit for 15 to 20 minutes, such as a potato gratin.
Get 37 Awesome Hosting Tips from Pro Food WritersCheck out this awesome infographic on the subject from SavvyEats.How to Create a MenuAs soon as you know you’ll be hosting a holiday dinner, you’ll want to do two things. Create a guest list to get an idea of how many you’ll be hosting. Second, start thinking of the menu. When I am hosting any kind of party, I start by making a table, like the one below. It can just be a rough sketch on a legal pad or sheet of paper. Your goal is to buy or assign at least half the items.
Holiday Dinner, 12 guests, Christmas
CourseRecipeMake/buy AssignedNotesMain dishHoney-Baked HamBuyPick up on Dec. 22StarchMashed potatoesMake or Buy Premade (don’t use instant)Make day early, reheatVegRoasted Brussels sproutsFriend or RelativeVegRoasted carrotsMakeCut up the carrots a day early, roast early, reheatVegGreen beansMakeSteamedBreadDinner rollsBuy12 rollsDessertPies – threeFriend or RelativeGet from a store or bakery Main Course
Here are my go-to recipes for classic main courses.
Roast Beef : Impressive, yet uncomplicated. Braised Lamb Shanks : Great comfort food. After initial browning, shanks cook themselves. Old-fashioned turkey with gravy : It’s hard to beat Rodgers’ detailed step-by-step guide. Spend an extra $10 or so and buy a fresh kosher bird, which is salted and rinsed as part of the kosher process so it requires no brine. Ham : Easily feeds a crowd, most come pre-cooked, and honestly, you can buy one from the likes of Honey Baked Ham. Vegetarian : I served Kim O’Donnel’s terrific Shepard’s Pie a couple of times. I made two – one with meat, one with the wine braised-lentils and chard called for in her version. Everyone preferred the vegetarian option. So, there you go. I’ve also served this vegetarian wellington from omgyummy. Stuffing/Dressing
The good news is that all the prep for stuffing can be done a couple of days ahead and tossed into a baking dish – just don’t add the liquid or eggs until just before you’re ready to bake it along. This year, I’m once again making this fabulous stuffing with apples, bacon and caramelized onions by Diane Morgan. Want something else? I’m a big fan of this interactive build-your-own-stuffing guide from Fine Cooking. One of my tricks: baste the stuffing with a bit of the turkey juices toward the end of cooking.
 Potatoes
For mashed potatoes, you can prep them in the afternoon and then keep them warm by putting into a bowl covered with plastic wrap and settling it into a simmering bath on the back of the stove. My friend Chef John has a great video on making mashed potatoes, although I prefer Yukon Gold potatoes over russets, but it’s a minor point. Don’t have a potato masher? Fear not. You can always use a large fork.
 My husband is partial to scalloped potatoes, and I’ve become a fan of them for big meals because once baked, they can hang out lightly covered for a half hour or so until everything’s ready. I’ve tried a dozen recipes, and my favorite by a long shot is Thomson’s potato gratin with chevre and pancetta.
 Side dishes
Don’t go too crazy. With stuffing and potatoes, three vegetable side dishes are enough for groups up to about 12. After that, add another side dish for each additional three people. Don’t forget colors, and go with a variety: green beans, carrots, corn, etc. Here’s what I am making for my side dishes this year: Roasted carrots with mustard, glazed brussel sprouts and apples in brown butter and cream and roasted cauliflower with gremolata bread crumbs. Some other great sides: SpoonandSaucer’s How to Make Cranberry Sauce (with video!) and Northwest Rice Pilaf, TheSpicedLife’s Cream of Wild Mushroom Soup and Food Goes Healthy’s Shaved Brussels Sprouts Salad with Dates
Here are three troves of reliable side dish recipes: The New York Times, Food52 and Southern Living.
 Something sweet
Cranberries are a die-hard staple, and ever-so-good on leftover sandwiches. Making a dish from scratch isn’t much more difficult than opening the can and slicing them. Here’s my family recipe for cranberries with port and ginger.
 Breads
If you’re not a baker, find a good bakery near you. I’ve become partial to a more flavorful bread, though. Last year, I made this terrific rosemary focaccia by Elise Bauer at Simply Recipes.
 Dessert
Pie is traditional, obviously, but it doesn’t mean you have to slave making a huge coterie of them. If you’re hosting dinner, ask other diners to bring pie and ice cream. Or, order some pies from a local bakery. If you want to try something with a twist, try my recipe for Light Pumpkin Cheesecake. Also, don’t overlook cheese as an option for dessert. “It seems like people forget the option for Thanksgiving,” says Judith Finlayson, the author of a dozen cookbooks, most recently 750 Best Appetizers. “My husband goes crazy on buying cheeses for a final course…served with port.”
 Beverages & the Holiday Pantry
Be sure to stock up on wine, non-alcoholic beverages and the like as part of your shopping. Not enough food writers focus on pantries. Here’s a good take on a holiday pantry from MyRecipes.com. I’m also a fan of this cranberry cocktail recipe from CreativeCulinary and this slow cooker apple Chai from FarmFreshFeasts.
Setting the TableIt’s lovely when guests walk in and the table is beautifully set out. But the real scramble isn’t usually place settings – it’s having the right serving dishes. I recommend starting a few days before the holiday, perhaps even a week, and make a note next to your menu items about what dish you’ll serve them in. Missing a dish? You can order from Amazon, although I have to admit, I’ve picked up some of my very favorite serving dishes from Goodwill and other thrift stores.
If it’s your first time hosting a large dinner, consider doing a trial run of your table a few days earlier. This will help you get an idea of what dishes or silverware items you might need, and you’ll have time to add some flowers or other finishing touches. Cloth napkins are nice, but I’ve become a convert to paper cloth-like napkins, so give those a try.
Then, do the actual dinner table layout the morning of the holiday. Just get up, have coffee and set the table. It will be done, and you won’t be running around trying to find your napkins or candles as guests arrive. Trust me, I’ve done this a few times.
To sum upHosting a holiday dinner is inevitably a lot of work. But these festive tables are often home to many great memories. Pour yourself a favorite beverage, start with a chart, check out these tips and don’t worry. It will all be fine.
This was originally posted in 2014; it has been updated and may contain affiliate links.
The post No Stress Guide to Hosting Holiday Dinner first appeared on Kathleen Flinn.
The post No Stress Guide to Hosting Holiday Dinner appeared first on Kathleen Flinn.
December 1, 2024
Recipe: Mom’s Cranberry Bread

Gently warmed and slathered with butter, this cranberry bread tastes like Christmas morning to me. The flavor is sweet yet tart, and the look beautiful thanks to the cranberries studded throughout. I’ve been missing my mother, who passed away this year in late September and decided to update this recipe. She made this cranberry bread pretty much every Christmas for 20 years.
When she noticed cranberries on sale at Thanksgiving many years ago, my ever-frugal mother decided to try them in a bread. The idea is based on her Swedish grandmother’s habit of making breads with dried fruit around the holidays. Slipped into a plastic bags tied with a handsome bow, cranberry bread makes a lovely (and low-cost) holiday gift. It’s also an unexpected addition to a traditional holiday menu, plus it can offer a nice alternative to cranberry sauce. It’s the bomb when used with leftover turkey for sandwiches.
Walnuts are an obvious seasonal choice for nuts here, but I’ve used almonds and pecans with great success. My husband, Mike, doesn’t like nuts in baked goods. (He considers a “texture violation.”) I leave them out if making it just for us. This makes one standard-size loaf, three or four mini loaves or about a dozen cranberry bread muffins. I’ve become a little obsessed with silicon baking gear, so last year I made this recipe into batches of muffins and handed out four each to friends with the recipe printed on a little card and a silicon muffin tray as a gift.
 PrintRecipe: Mom’s Cranberry BreadI like to use a micro-planer for the orange peel; it spreads the flavor more evenly throughout the finished bread. This yields one large loaf, about three small loaves or about 12 muffins. Course BakingCuisine AmericanKeyword Baking, Bread, cranberries, cranberry, food gifts, gifts, holidays, leftovers, ThanksgivingEquipmentloaf pan or muffin trayIngredients2 cups (230 g) fresh or frozen cranberries, coarsely chopped1 cup (150 g) chopped nuts optional2 tablespoons grated orange peel4 cups (500g) all purpose flour2 cups (400g) sugar1 tablespoon baking powder2 teaspoons salt4 tablespoons shortening, vegan butter or unsalted butter1 1/5 cups orange juice3 eggs well beatenInstructionsPreheat oven to 350F/180C. Generously grease and lightly flour a 9-inch x 5-inch loaf pan or 3 mini loaf pans. If using this recipe to make muffins, line a muffin tin with parchment or paper cups.Prepare cranberries, nuts (if using) and orange peel. Set aside. In a large bowl, mix together the flour, sugar, baking powder, salt and soda. Cut in shortening, vegan butter or butter to incorporate it in the bowl. Stir in orange juice, egg and orange peel mixing just to moisten. Fold in the prepared cranberries and nuts using a spatula. Spoon into a prepared pan up to about halfway up. For a loaf, bake 50 minutes or until wooden pick inserted in the center comes out clean. For mini loaves or muffins, baked for 25 minutes and then check with a toothpick. Cool on rack 15 minutes. Remove from pan, cool completely. Wrap and store overnight.
This post was originally published in 2014; it has been updated. As with all my posts, it may contain affiliate links. Photo by Brent Hofacker.
The post Recipe: Mom’s Cranberry Bread first appeared on Kathleen Flinn.
The post Recipe: Mom’s Cranberry Bread appeared first on Kathleen Flinn.
November 24, 2024
19 Ideas for Thanksgiving Leftovers
 Kentucky Hot Browns: a masterful use of holiday leftovers
Let’s be honest: We all tend to buy and make too much food for holiday meals. I do it every year. And you must have too, or you wouldn’t be looking for ideas for Thanksgiving leftovers, right?
Personally, I love holiday leftovers. They may even be the best part of the whole holiday dinner. When I go shopping for the main meal, I think ahead to what I’ll do with the leftovers. Will ham be on the table? I’ll pick up split peas or beans. Turkey or ham? I plan on making stock or soup from the bones.
A few years ago, I quizzed food writer friends about what they did with their holiday leftovers. Here’s some advice from them, along with some fresh ideas.
 1. Update the traditional leftover sandwich
“I just recently created some holiday recipes for a grocery store and some of them used leftover turkey,” Amy says. “One of my absolute favorite recipes was a turkey, jack cheese and cranberry sauce melt on whole wheat bread.” A great example: her grilled cheese, pear and turkey sandwich.
“Turkey is really good in all kinds of grilled cheese sandwiches, so get as creative as you like with it,” Sherman says. ” Try it with chutney, slices of apple, tomato, roasted red pepper or a layer of leftover cooked vegetables like sautéed spinach or creamed onions. You could even use turkey or ham in a Reuben (in place of pastrami) or Cuban sandwich (in place of the roast pork). I like cheddar, jack or swiss cheese paired with turkey. Grilled cheese turkey sandwiches are so easy to make even kids can make them. Best of all they let you enjoy some of the flavors of Thanksgiving in a fresh way.”
 2. Make a Drink with the Cranberry Sauce
Seriously. For an elegant post-holiday toast, make a simple cranberry champagne cocktail by putting a teaspoon into the bottom of a flute and top with sparkling wine. Alternately, you can try my recipe for a “Crantini” for a post-shopping break. Combine 1 1/2 oz. gin, 1/2 oz. Cointreau, 1 teaspoon cranberry sauce in a shaker with ice. Shake vigorously and pour into chilled martini glass. Garnish with lime wedge.
3. Mashed potato pattiesOlga Massov has a terrific idea for leftover veggies. “One of my favorite things to do is to take leftover mashed potatoes and make these mashed potato patties with them and whatever leftover vegetables I have. Usually it’s caramelized onions and/or squash so I just combine them (cut the squash into smaller pieces if need be), bind with an egg, and fry in olive oil. I mix a lemon-dill yogurt dipping sauce and voila – vegetables reborn. It makes for a really delicious post Thanksgiving lunch!”
4. Kentucky Hot BrownsMy brother’s family has lived in Louisville for more than a decade. When my niece was married at the famed Brown Hotel, the meal options for the reception included a Kentucky Hot Brown. Looking around the room, it appeared 95% of the guests were tucking into one. A Hot Brown is basically an option faced sandwich topped with turkey, thin slices of tomato and a creamy cheese sauce. This is broiled until it’s slightly browned and bubbly and then topped with slices of bacon. I often skip the bacon and top the tomato with diced ham (if it was part of the meal) and then broil it. In place of the tomato, I’ve used leftover green beans or Brussel sprouts with great results. Try the original recipe from The Brown Hotel.
 5. Make Stock
“I always make stock,” says Sheri Wetherall, the editor-in-chief of Foodista.com. “I roast the carcass with carrots, onions, celery and whatever yummy root veggies I have on hand until the bones are dark and golden, then simmer it for a long time on as low as I can get it until I have a luscious broth! I freeze it in small-sized batches for soups throughout the year. Check out my latest take on bone broth/stock for tips on how to extract the most goodness from those bones. Works for beef, turkey or chicken bones.
 6. Make Soup
When you’ve got the stock, you can make a wide range of soups. You can keep the flavor of the holiday meal or really change it up. Check out my Soup 101 guide for how to make soup out of virtually anything, including bean soup from a ham bone. Meanwhile, here a couple of my favorite options from food writer friends:
Comforting Turkey Potato Soup from the WhiteOnRiceCouple.comTurkey Soup with Lemon and Barley from SimplyRecipes.com 7. Turkey Gumbo
Jaden Hair of Steamy Kitchen is a fan what I typically do with a leftover turkey: make turkey gumbo. “What’s great about this is that it’s nearly a one-pot meal, easy to make and has such intense flavor that’s DIFFERENT from night-before menu,” Jaden says. I totally agree. See my guide on how to make gumbo out of (almost) anything.
8. Turkey and DumplingsKeep the comfort food going. Wetherall has a great twist on the classic chicken and dumplings on Foodista.com.
9. Make Meaty SaladA twist on chicken salad, a simple turkey salad can be an easy lunch when plopped onto a bed of simple greens or put inside a pita. I like this recipe from Kalyn’s Kitchen. Made roast beef? Make a simple green salad, top with blue cheese dressing and slices of roast beef.
 10. Turkey or Beef Pot Pie
A classic. I liked this updated version with cheddar biscuits as the top crust from Just a Taste.
11. Sweet Potato SouffleIf you end up with a lot of mashed sweet potatoes like we seem to every year, consider trying your hand at shifting them into a souffle. Note: this won’t work if you covered up their naturally sweet flavor with tons of syrup or marshmallows. Marla Meredith at FamilyFreshCooking.com has a lovely recipe for sweet potato souffles with feta and sage.
 12. Fry the Leftover Sage Leaves
I did this a couple of years ago. It genuinely intensifies the flavor and adds a certain something to a leftover sandwich or even crumbled into a dish. Saveur’s recipe is the best one I’ve found.
 13. Try Turkey Curry
Remember the opening of Bridget Jones Diary? Every New Year’s Day, Bridget’s mother hosted her turkey curry buffet. I found it hard to get a turkey in November. Why? They don’t celebrate Thanksgiving and turkey tends to be reserved for Christmas dinner. Curry is a very traditional means to dispatch the leftovers from the holiday turkey. I’ve used this recipe from the BBC site for the past couple of years. When it calls for “double cream,” you just use whipping cream. I’ve used sweet potatoes in place of the butternut squash.
 14. Make croutons
It seems like there’s always leftover rolls and bread from holiday meals. You can only eat so many sandwiches or consume so many carbs. Don’t throw it away. Dice it up, toast it and make it into croutons.
 15. Orange Cranberry Smoothies
Even a couple tablespoons of cranberry sauce can transform a simple smoothie. In a blender, combine a few tablespoons of leftover cranberry sauce, ¼ cup orange juice, ½ cup yogurt, a banana, a bit of honey and blend together. Taste and add a bit more honey if needed.
16. BLT Turkey Tacos with Cranberry SalsaI tried this recipe from How Sweet Eats a couple of years ago. I admit that I use tortillas something of a crutch to use up leftovers. This felt like a great complement to the carb heavy holiday meal with a few crumbles of bacon tossed in to complement the sweetness of the cranberry salsa.
17. Turkey PanzanellaBy definition, the famed Italian summer lunch dish, panzanella, is itself a leftover dish. In this classic Tuscan dish, chunks of stale white bread are tossed with sliced onions, chopped tomatoes and basil then soaked with a vinaigrette made with good olive. Take the leftover rolls and bread from the dinner and toast lighter if not sufficiently stale, make a lemony vinaigrette and toss in chopped turkey, tomatoes and herbs.
 Use up leftover turkey and ham in a composed salad, such as a Cobb18. Turkey or Ham Cobb Salad
If you’re ready to go low carb after the big dinner, a cobb salad is just the ticket. Grab a couple avocados, tomatoes and some bleu cheese when you’re shopping for the rest of the meal. After that, all you have to do is boil a couple of eggs. Take leftover turkey and ham (or bacon) and voila!
19. Meatballs from Leftover StuffingFinely chop turkey and mix leftover stuffing with an egg and leftover stuffing and Italian seasoning and bake for about 10 minutes. Put on a roll with some cheese for a lovely meatball sandwich. If you want more traditional meatballs with beef (or a plant-based ground protein), check out this recipe from Good Housekeeping.
Originally published in 2014. Updated November 2023.
The post 19 Ideas for Thanksgiving Leftovers first appeared on Kathleen Flinn.
The post 19 Ideas for Thanksgiving Leftovers appeared first on Kathleen Flinn.
November 18, 2024
Irene Flinn 1934 – 2024

My beautiful and amazing mother, Irene, has died. She had turned 90 on the 4th of July this year. She passed away just after midnight on the first day of autumn.
If you read my third book, Burnt Toast Makes You Sing Good, you know all about my mother. She was the lead character, in part because she’s the one who fed me the family history while drinking wine in the gazebo our island house for months. It followed her life growing up as a child in the Great Depression to meeting my dad at a roller rink in Lansing, Mich. and their life together afterward.
Their story was a blend of adventure and a more traditional Midwest existence. They once sold everything and drove Route 66 from the Midwest to San Francisco so my dad could work in his brother’s pizza restaurant. Later, they returned to Michigan to raise their young family on a small farm. The book details my mom’s experiences killing chickens, putting up hundreds of cans of produce every year and their financial struggles after a failed business. They impulsively bought a house on Anna Maria Island while on a week-long vacation in 1976. Two years later, they moved there after my father was diagnosed with terminal cancer. He died a couple years afterward at age 50.
[image error]My parents got married in an old church in Hope, MichiganI’m sharing this news a bit late for a complex set of reasons. To start, four days after she passed, Hurricane Helene hit and flooded Anna Maria Island. Almost everything inside our home of 22 years was destroyed. Two weeks later, a second hurricane named Milton – my father’s name – ripped through the island again, wiping out my dad’s favorite place on the island – the Rod N Reel Pier.
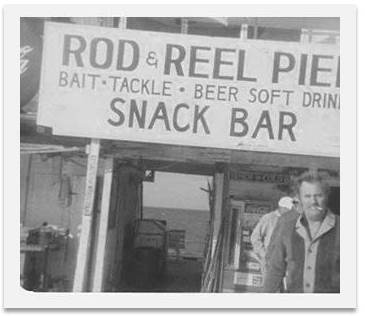 My Dad on the Rod & Reel Pier in 1976 – his favorite hangout
 Rod and Reel after Hurricane Milton – totally gone
I suppose that I have been so stung by the loss of my mom and the overwhelming task overhauling our house that I just haven’t had time, or the emotional strength to put in writing that she’s actually gone. Mike and I are staying at the last home she lived in, just over the bridge from the island. We both expect her to be up, sitting in her chair, ready for her coffee every single morning.
Right up until the end, my mom was happy, sharp as a tack and in good spirits. After being in and out of the hospital, she settled into a big, lovely room in serene, well-run rehab. She could see trees and birds and the occasional rabbit from her two big windows. Her beloved grand dog, our little Maddy, could stay with her all day. She adored the staffers plus the food was good. She was seemingly on the mend, and we expected her to go home in mid-October. Then, we got a call she passed away in her sleep.
In retrospect, I think she knew her time was coming. A couple days before she passed, she told me, “Listen, I’m 90 years old, I had a great life and I’m not afraid. I talked to your dad last night, and we’re going to be together.” We had a private burial service for her, on a sunny day between the hurricanes.
 Angie fixing mom’s hair for photos at her 90th brithday party
 Mom with me and my brothers
 Mom and I – she could walk with a walker, but used a transport chair so she didn’t get too tired
  Four Generations – Mom with my brother Doug, his daughter Kourtney and mom’s great-grandson, Ryland
 Mom loved anything fun.
These photos are from mom’s 90th Birthday Party on July 4th — which also happened to be our 20th anniversary because Mike and I were married on her 70th birthday. Mike’s 60th birthday was the next day. They both got cakes.
Mom loved Mike right from the beginning, and not just because he was a fellow Cancerian. In 2003, we’d been dating in London and I asked him to come to the island to meet my family – a very big deal for a never married 36-year-old woman. I rented a house that looks like a small castle on Beach Avenue, and shortly after he arrived, I dropped Mike at the beach with mom and my then 11-year-old niece and left to pick up my close friends Cindy and Andy. I realized later how awkward that could have been. “Hey, meet my mom, here’s my niece, I’ll be back.”
I returned to see their dark silhouettes against the sunset, virtually alone on the beach, next to a large sandcastle. I could see a glow around the castle, and it turned out that it was luminescence, an odd bio phenomenon that makes seawater glow – the only time mom ever saw it, despite living on the island for 43 years. They’d pushed this shimmering water into the mote they dug around the castle, grabbed hands and were dancing around it.
It was my mom in her essence. Child-like, fun, loving the beach and so open and willing to embrace the moment without caring who was watching. Mike says he always heard that if you want to know what your wife will be like as she ages, meet her mother. Well, he was sold after that sunset.
When we got married on the same beach a year later, my mother stood next to me as my maid of honor, and Mike’s dad was his best man. She wore the cream dress she wore at my wedding to her 90th birthday party this past July. Fittingly, she was buried in it.
 Mom always had a smile and lavished everyone with praise
 She loved Maddy. She once texted, “Don’t get too attached to that dog…”
  Mom at her grandson Tommy’s wedding – it was Western themed, so she dressed up as a glamorous cowgirl
Thorton Wilder wrote that the greatest tribute we can give to the dead is not grief but gratitude. I’m grateful for everything my mother taught me. She had endless optimism, she was kind, smart, pragmatic, strong and she had a great sense of humor.
Above all, she had a gift for always seeing things in a positive light. Maybe it was from being a child in the the Great Depression, but she often said she wasn’t a glass-is-half-full or a glass-as-half empty person – she was just happy to have a glass.
She was effusive with her praise. She made everyone feel good. “You are so beautiful!” “This is the BEST meal I’ve ever had!” “You have the most beautiful smile!” Whatever she told you, she meant it. When I told a friend she had passed, she mused, “I loved your mom. She always told me I had great upper body strength.”
 Mom and I at Fort Ebey on Whidbey Island in Washington state
 During my book tour for “Burnt Toast,” mom and I took a road trip to Mancelona and Antrim, places she grew up in northern Michigan
 Mom and I at a beach place in Mexico
This past year, I ended up as her primary caregiver along with Mike. For the first time, she needed 24/7 care, so we assembled a small crew that included Angie, her daytime caregiver, who became a close friend to her.
My father died when I was 13, and for years, it was just mom and I. Helen Reddy’s “Me and You Against the World” was our theme song. I didn’t marry until age 37 and never had children. Perhaps that’s why I developed such a tight bond with my mom as an adult. I spent virtually every Thanksgiving and Christmas with her, as my siblings got married and started spending those holidays with their own families and in-laws. We took vacations together. When I started teaching at Rancho La Puerta in 2009, I was allowed to bring a guest – she was my plus-one for more than a decade. She loved that place as much as I still do.
After I moved to London in 1999, I flew her and her second husband, Eddie, to visit me. When I learned Eddie was having surgery for a malignant brain tumor, I flew home from the UK. I was the only one with my mom during his six-hour surgery. Rather than sit in a drab waiting room, I took her to lunch at The Olive Garden, and then to a bakery to get him a big slice of cake so he’d have something to look forward to the next day.
Not long before Mike and I married, I bought the house on Anna Maria Island – just five blocks from her – to assure I’d always have a physical link to her, too. Mike had been incredibly close to his own mother, but like my dad, she died too young in 1995. He and mom became genuinely close, especially after his father died four years after we married. That their birthdays were a day apart didn’t feel like a coincidence.
Anyone who has cared for an elderly parent knows it’s a tough gig, but in the end, I’m grateful for all the time we got to spend with her. Whenever she was in the hospital or rehab, I always made sure she had a big slice of chocolate cake. Taking care of her at the end was the privilege of my life.
 Me, mom and her best friend, my Aunt Mary Jo in Seattle
 Mom and I at the Biltmore in Asheville – also hit by Hurricane Helene
 Mike and mom at our favorite beach spot on the island
 Mom at the Mariners game – I posted this on Twitter and it ended up on national TV and the big screen. She was 84.
 Getting ready for the 2017 solar eclipse in 2017 – we stayed with Mike’s cousin Judy in Mill City, Oregon, in the path of “totality” and witnessed the full, total eclipse
When my father died, my mom believed he could come visit us in the form of a white egret. Mom did have some offbeat beliefs, but on this one, she had the ancients to back her up. White egrets have long been considered a type of spiritual messenger. At seemingly well-timed moments in my life, a white egret has shown up in my yard or in my path – even in places where they aren’t usually found.
The first day we were allowed back on the island after Hurricane Helene, and learned our house had flooded with everyone else’s, Mike was outside in the debris-strewn yard. He was thinking of my mother when he saw two white egrets, a large one and smaller one. They both walked right up to him. He said he felt the larger one represented my dad, and the other, my mother. It was squawking, almost trying to talk.
A day or two later, a similar or perhaps the same pair came up to me and did the same thing – they both got so close, I could have touched them. This is uncommon behavior for egrets; they tend to be standoffish. We stood there, staring at each other, for minutes. Then, they turned, walked off together and flew off into the red sky of sunset.
Maybe I am crazy, but somehow, I knew it was my parents’ way of letting us know they were together, just as mom said they would be, and that everything will be fine.
I’ll never stop missing her. Rest in peace, mama.

Note: Mom and her husband, Eddie, were longtime supporters of the Anna Maria Island Turtle Watch program; they volunteered with the organization for years. If you’d like to make a memorial donation in her name, she would be thrilled.
The post Irene Flinn 1934 – 2024 first appeared on Kathleen Flinn.
The post Irene Flinn 1934 – 2024 appeared first on Kathleen Flinn.
June 1, 2024
Easy Mushroom and Lentil Burgers

Years ago, I found myself the only vegetarian at a barbecue hosted by co-workers. I’ve dabbled with vegetarianism on and off; this was during one of my “on” phases. Thoughtfully, or so I thought, I packed my own frozen meatless patties so no would even notice that I wasn’t eating meat. Of course, that didn’t happen.

Instead, my hard hockey puck commercial discs became the center of everyone’s attention.
“These don’t even look like meat!” remarked one of the “hosts,” a rotund guy named Mac who considered himself a comic. He cooked them – right on the same grill with the ground beef – and then tasted one afterward.
“No wonder you’re so skinny, you’re eatin’ cardboard!”
No More PucksThese mushroom and lentil burgers would shut Mac up. They offer a similar meaty umami quality to the real thing. Topped with cheese, it hits the same satisfying flavor receptors as a traditional burger. Make your own breadcrumbs by either pulverizing an extra hamburger bun or leftover bread in a food processor; these can be made from leftover gluten-free breads as well.
This calls for steak seasoning. I am a fan of the Montreal Steak Seasoning from World Spice Merchants in Seattle’s Pike Place Market, although you can certainly use the classic Montreal Steak Seasoning from McCormick, or use your own favorite blend. You can use canned pre-cooked lentils available on market shelves, but the texture of making them from dried beans is superior for burgers and takes 20 (hands-free) minutes.
Pre-cooked lentils come in 15 oz. cans so if you’re using those, you might as well double the recipe since these patties freeze so well. Topping with cheese is optional. Great toppings for these burgers include sliced avocado, tomatoes and mixed greens. One cup dry lentils yields about two cups cooked. Makes four burgers and is easily doubled. These mushroom and lentil burgers can be made a day ahead and then simply re-heated on the grill.
You May Also Like:
Black Beans, Greens and Corn Burgers (vegan, gluten free)
Go With the Flow Lentil Soup
 PrintMushroom and Lentil BurgersYou can make these gluten free by simply swapping out the breadcrumbs for a GF option. Course Main CourseCuisine AmericanKeyword BBQ, Burgers, good grilling recipes, mushrooms, vegetarianIngredients1 cup dry green or red lentils OR 8 oz. 225g pre-cooked lentils1 tablespoon vegetable oil or cooking spray½ medium onion 225g, chopped (3/4 cup)2 garlic cloves minced6 oz. cremini or Portobello mushrooms 180g, chopped fine (2 cups)2 teaspoons Dijon mustard2 teaspoons chopped fresh thyme1/4 teaspoon freshly ground black pepper1/2 teaspoon kosher salt1 cup breadcrumbs1 large egg lightly beaten½ teaspoon steak seasoning optional6 oz. cheeseInstructionsHeat a large ovenproof skillet (such as cast iron) over medium-high heat, adding a bit more vegetable oil. Cook the patties for about four minutes on one side until browned, adjusting the heat so it doesn’t burn. Then put into the oven for about 10 minutes. If you want to make cheese burgers, remove the patties after six minutes, add the cheese and finish under the broiler until the cheese melts.NotesNote: These also freezer well. Simply wrap tightly with plastic wrap or parchment and then store in an air-tight container. Use within two months to retain optimal flavor.
Photos by Kathleen Flinn. This page contains affiliate links. Originally posted in 2013; it has been updated.
The post Easy Mushroom and Lentil Burgers first appeared on Cook Fearless from Kathleen Flinn.
The post Easy Mushroom and Lentil Burgers appeared first on Cook Fearless from Kathleen Flinn.
April 23, 2024
Recipe: Risotto 101

Question: I am looking for good, super flexible budget-friendly things to cook while sheltering at home. A friend mentioned risotto. My store was sold out of the usual rice to make it. Can I make it with other rice? What other things can I substitute? There are only two of us, so what can I do with the leftovers? – Anne C., Defiance, Ohio
Answer: Risotto sounds posh, but it’s a great value food and offers a splendid way to use up leftovers or clear out the fridge. It’s also a dish you can make almost entirely from your pantry. All you need is an onion, rice, some kind of flavorful liquid, vegetables and some cheese, but all of these things lend themselves to substitutions.
To this basic recipe you can add virtually anything – a handful of leftover vegetables, shrimp, chicken, sausage – whatever you’ve got that you don’t want to waste. I once made a smashing risotto with leftover fixings from a pizza-making party.
In theory, water can stand in for stock, but it doesn’t yield the same flavor or silky texture. Toasting the rice in the fats without any liquid is a key step as it helps determine the final texture of the rice. Be sure to warm up the stock; adding cold stock to the hot rice will cook the outside of the rice, but not the inside, resulting in a hard, unpleasant texture.
This basic recipe makes a pot with enough to serve four to six servings for about a $1 each.
Rice and what to substituteTraditionally, risotto is made with Arborio rice, a high-starch short-grain Italian rice. There are a number of other Italian risotto rice options, including Balda, Carnaroli and Vialone Nano.
However, you can use almost any kind of rice for risotto. I once showed up to teach a class on a risotto at a cooking school only to find the place had been cleared out all of it. The class of ten was split up into pairs, so I pulled out three types – a medium-grained brown, Chinese black Imperial and traditional sushi rice. I also selected pearled farro and quinoa, both ancient grains. All the dishes worked out fine, even if their texture and flavor were not the same as traditional rice. After that experience, I tried making paella with different types of rice when I didn’t have traditional short-grained Valencia-style rice on hand, and they all worked out fine, too.
The best substitutions: High starch short-grain and medium-grain rice are your best options, such as Valencia-style paella rice, sushi rice such as Calrose (don’t rinse it first), English pudding rice, other short- to medium-grain white rice, short- and medium-grained brown rice, quinoa, barley and pearled farro.
Avoid these substitutions: Long-grain brown rice (takes too long to cook), extra-long white rice such as Basmati, wild rice of any kind (it’s a grass, not a rice), parboiled rice (Uncle Ben’s or Minute Rice).
StockThe stock is what flavors the dish, so the better whatever liquid you use will yield superior results. Chicken stock is the standard and if you’ve got it, great. If not, consider making a vegetable stock out of what vegetables you’ve got on hand. You can also boost or make a “stock” by adding a few dried mushrooms or my long-time fave rave, Star porcini bouillon cubes. In a pinch, you can certainly use bouillon. I’m a major fan of I’m partial to Better than Bouillon, especially the beef options as they lend a lot of flavor and can stay in the fridge for a year or more. If your plan is to include shrimp to your finished dish, take the shrimp and toss them into the liquid to boost the flavor. One of my favorite risotto tricks is to use a leftover corn on the cob from a barbecue. I shuck off the corn and then throw the cob into the stock.
AromaticsTraditionally, risotto begins with sautéing chopped onion in oil or a combination of oil and butter. No onion? You can use chopped leeks or celery. Neither? Fear not, all will be well. Just skip to the rice step.
Sweating the riceTo the warmed oil or oil/butter in the pan, add the rice or grains. The goal here is to coat each grain with fat and heat it throughout. In traditional risotto, you want to cook it for at least a minute, perhaps two, over medium-high until it starts to turn a bit translucent.
WineAfter sweating the rice, a splash of white wine is added. This will “swell” up the rice and lends both flavor and texture to the finished dish. Some people, especially those who don’t drink wine regularly, prefer to use white vermouth. Vermouth is a great pantry staple as it lasts much longer than open wine and lends a similar dry acidic flavor. If you’re avoiding alcohol, you can use water for this step. If your final dish will lend itself to lemon, a cup of water with a splash of lemon juice works fine, too.
Ladle stock into rice and stirThis is the time-consuming part of risotto, but it is not difficult. Ladle in about a half cup of warm stock, then stir. And keeps stirring – almost constantly – for about 20 to 25 minutes. You can chat, listen to TV and, if you feel confident, cook or prepare the vegetables that you’re going to add to the dish. This is not the time to otherwise multitask. As the liquid gets absorbed and the rice appears almost dry, add more. Keep the liquid warm but not boiling. If you run out, add warm water. You’re aiming for the rice to have a nice bite, a recognizable shape but without any crunch.
Add your vegetables or other ingredientsStir in your ingredients. Long live leftovers! Cooked meats and vegetables should be chopped into bite-sized pieces. Just toss them in and stir. Then, add salt. Stir and taste.
Add oil or butter and cheeseMost risotto recipes call for adding butter to the end of the dish. You can also just use olive oil. Typically, risotto is finished with a dose of Parmesan cheese. None on hand? Try adding a bit of chevre or even grated Swiss cheese. Just think about what you’ve got and whether it will taste good with what you’ve put into your risotto. No cheese at all? Consider simmering some milk or half and half so that it reduces and thickens. You can add a bit of garlic to it for extra flavor.
Add something green as a garnishTraditional risotto calls for adding a handful of chopped parsley at the end. I tend to scour my fridge and see what greens need to be used up. Add parsley if you’ve got it, but you can also use arugula or spinach. I’ve even taken the last of a marinated kale salad, chopped it up and stirred it in.
Taste again and adjust as neededDoes it “need something?” Try adding a bit of hot sauce or dried herbs or even a tiny splash of lemon, lime or vinegar for a hit of acid.
Risotto-stuffed chicken breasts: Stuffing a chicken breast is a great way to make your meat supplies go farther. Flatten a breast by banging it with a small pan, place the risotto in the center, roll up and secure with toothpicks. Coat with breadcrumbs if you’ve got them. Bake at 350F/175C for 20 to 25 minutes.Risotto patties: Roll into balls them flatten into patties. Coat with breadcrumbs. Bake at 350F/175C for 8 minutes per side until slightly golden. Serve as a side dish.Cheese-stuffed risotto balls: Roll the risotto into balls and stuff the interior with a good melting cheese such as shredded mozzarella. You’ll only need a tablespoon of cheese per ball. Bake at 350F/175C for about 15 minutes until the cheese melts. Let cool slightly before serving.Risotto-stuffed mushroom caps: Remove the stems, stuff caps with risotto and top with a bit of cheese. Bake or microwave until hot.*Please note: This post includes affiliate links.
PrintBasic RisottoThis is a basic recipe for risotto. Be sure to toast the rice before adding the liquid. Leftover risotto can be kept in an airtight container in the fridge for up to five days. You can "refresh" basic risotto by stirring it into other sauteed vegetables to create a whole new dish. Course Main CourseCuisine ItalianKeyword Easy, Rice, Risotto, vegetarianPrep Time 10 minutes minutesCook Time 20 minutes minutesServings 4 peopleCost $1.30 per servingIngredients1 tablespoon butter3 tablespoons olive oil
1 small onion, chopped (about 1 cup)
2 cups aborio or other short- to medium-grain rice
½ cup white wine
6 to 8 cups chicken stock, heated
¼ cup grated Parmesan cheese
1 ½ tablespoons butter or olive oil to finish
Small handful chopped parsley
Salt, pepper
InstructionsIn a heavy saucepan over medium heat, melt the butter into the olive oil. Add the onion and cook until translucent. Add the rice, stirring to coat with the oil until the rice is hot, pearly white but not brown, about two minutes. Stir in the wine and let it reduce by half, about two minutes. Add one ladle of warm stock, about ½ cup, and stir until absorbed into the rice. Repeat this process for about 20 minutes, then taste a grain of rice. It should offer slight resistance when chewed. If it seems too hard, add 1/4 cup more broth and continue cooking for another few minutes until broth has been absorbed. Remove pot from heat and let it sit about two minutes. Stir in the cheese and butter, then parsley and add salt and pepper until it taste good to you. PrintRisotto with Mushrooms, Chicken and LentilsThis is an example of how dried mushrooms can be an economical pantry item for a punch of flavor. I bought a one-pound jar of mixed dried mushrooms for about $19.50, or 12 cents per ounce. For this dish, I hand-selected about 1.5 ounces of various mushrooms and reconstituted them in two cups of warm water– resulting in a lovely flavored liquid combined to the warm chicken stock toadd flavor to the rice.Raiding the fridge, I came across a container of chopped meat from a roasted chicken, a half container of brown mushrooms, a cup of leftover cooked lentils and the last of a bulk of fresh arugula. Here’s the result.Course Main CourseCuisine ItalianKeyword arugula, budget friendly, chicken, leftovers, lentils, mushrooms, RisottoServings 4Cost $1.50 per servingIngredientsBasic Risotto 1 tablespoon butter3 tablespoons olive oil1 small onion, chopped (about 2 cups)2 cups arborio rice1/2 cup white wine or vermouth6 to 8 cups chicken stock, heated1/4 cup Parmesan cheese1 tablespoons butter (to finish)SaltPepperAdditional ingredients1 teaspoon dried thyme2 cups cooked chicken cut into bite-sized pieces1.5 ounces dried mushrooms4 ounces fresh mushrooms1 cup cooked lentils2 ounces fresh arugula or parsleyInstructionsReconstitute the mushrooms in about 2 cups warm water for at least 15 minutes until mushrooms are softened. Drain, reserving the liquid. Chop the mushrooms into bite-size pieces. Set aside.Follow the standard risotto recipe, and toss in the thyme when cooking the onions. Substitute two cups of the chicken stock for the liquid from the mushrooms. After the last two ladle of stock is added, stir in the mushrooms, lentils, thyme, cooked chicken and arugula to heat through. Add the butter and cheese, and add salt and pepper until it tastes good to you. Serve warm.This post was originally published in 2009. It has been updated and may contain affiliate links.
The post Recipe: Risotto 101 first appeared on Cook Fearless from Kathleen Flinn.
The post Recipe: Risotto 101 appeared first on Cook Fearless from Kathleen Flinn.
February 14, 2024
Easy Coq au Vin [Chicken Cooked in Wine] with Instant Pot option
This classic French dish sounds impressive. But if you can sear chicken and cook up some vegetables, you can make this easy coq au vin recipe, and offer a variation for cooking it in an Instant Pot. The name means simply, “chicken with wine,” and in this version, I’ve removed some of the more laborious steps without sacrificing either the flavor or the final result.
In its original French inception, the coq in coq au vin referred to a rooster, typically mean old birds who wore out their welcome in the hen house. The tough nature of the meat required a long simmering time to soften. Wine was used to help tenderize the meat thanks to its sugar content.
This easy coq au vin dish is great for entertaining, taking to a potluck or when preparing ahead for weekday meals as it taste better reheated. To make it even easier, I have included an Instant Pot variation.
Even though this dish calls for wine, it remains an economical dish. You don’t need an expensive bottle and you only need a cup or so. I’ve made this with $8 table wine and a expensive French red and frankly, it was a struggle to tell the difference.
Given that the odds of finding a rooster at your local supermarket are essentially none, I recommend employing chicken thighs and legs – or better yet, the full hind quarter piece with leg and thigh attached. You can use white meat if you’ve got non-dark meat fans in your posse.

At Le Cordon Bleu in Paris, we made the classic version that includes pearl onions and lardons, diced pieces of salted pork. In this recipe, I use a quality bacon over lardons. It’s easier to find and lends an earthy bit of flavor. I’ve also used diced ham leftover from a holiday meal, too.
Pearl onions do impart a certain sweetness, but they tend to be wickedly expensive and take a woefully long time to peel if you buy them fresh. I’ve come to rely on the frozen variety. They’re already peeled and it just takes a quick bath in butter to make them taste fresh. I’ve made this dish with both pearl onions and classic yellow and it’s good both ways.
It’s not coq au vin without wine…What kind of wine to use for this easy coq au vin? Choose a wine decent enough that you’d drink it alone. I prefer something a bit hearty, such as a Syrah, a Cabernet Sauvignon or a blend.
Not a red wine fan? Here’s a surprising tip: you can also make this with white wine. It yields a different flavor, but it’s still delicious. Use white wine or an inexpensive sparkling wine in place of red. When Mike and I visited the Chablis region, we ordered coq au vin and lo and behold, it came swimming in the region’s famed white. The end flavor tends to be a bit sweeter and lighter, yet still hearty and savory.
I usually buy two bottles of wine for this dish – one to cook the chicken in, and one to drink with it when it’s done. This dish also calls for brandy or Cognac, and while optional, definitely adds something to the dish, but you don’t buy a big bottle if you don’t have it on hand. I admit that I employ E&J Brandy at such moments; it runs about five bucks for a small bottle.
Paired with noodles or mashed potatoes, this serves six to eight.
– Updated February 15, 2024. Please note this page may include affiliate links.
How to make basic chicken stock (video)
How to cut up a whole chicken (video)
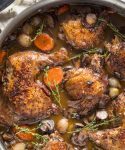 PrintEasy Coq Au Vin (Chicken Braised in Red Wine) with Instant Pot optionCoq au Vin or "Chicken with Wine" is a classic French braised dish that sounds impressive but is surprisingly inexpensive and uncomplicated. If you don't want bones in the finished dish, use 3 pounds of boneless thighs. Use a higher-heat oil for the chicken, such as avocado oil – any type of olive oil will smoke too much. Course Main CourseCuisine FrenchKeyword braise, budget friendly, chicken, chicken legs, chickent thighs, comfort food, French cuisine, whole chickenPrep Time 40 minutes minutesCook Time 2 hours hoursServings 6 servingsEquipmentDutch oven or heavy pot with lidIngredientsFor the braise5 lbs chicken, preferably thighs, legs or quarter pieces3 tablespoons avocado or grapeseed oil8 ounces (250g) bacon, sliced1 large yellow onion chopped (about 2 cups)4 ribs celery chopped (about 1 ½ cups)2 medium carrots about 1 ½ cups3 tablespoons butter2 tablespoons all-purpose flour2 tablespoons brandy or Cognac3 cups (700 ml) chicken stock1/2 bottle dry red wine (about 2 cups)4 cloves garlic chopped10 sprigs thyme tied togetheror 1 tablespoon of dried thyme2 bay leavesCooked separately from braise2 cups peeled frozen pearl onions thawed8 ounces (250g) brown mushrooms sliced3 tablespoons parsley choppedServe withMashed potatoes or wide noodlesInstructionsPreheat oven to 350°F /180°C. Pat dry with paper towels. Cut off extra fan and excess skin. Season the chicken pieces with salt and pepper. In a heavy Dutch oven, brown in batches in hot oil over high heat. It’s important to get the chicken nice and browned, as shown. Don’t rush this step; properly browned chicken is a key to the final outcome. Once browned, set chicken aside on a plate.
 Turn the heat to medium-low and add the bacon and cook slowly until slightly browned, about 5 minutes. Add the onions, celery and carrot and stir until tender. Add the brandy (if using), reduce slightly. Sprinkle with flour and stir until coated.
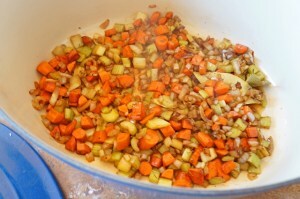 Return the chicken to the pan. Add the chicken stock, garlic and herbs. Then, add enough wine so the liquid just covers chicken pieces; this could be up to 2 cups. Bring the liquid to a boil, skimming off any foam or fat. Cover tightly and place in oven for about two hours or until meat is very tender.
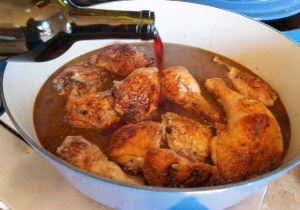 Meanwhile, cook the pearl onions and mushrooms in a medium skillet in 2 tablespoons of butter. Before serving, add the mushrooms, onions and chopped parsley to the cooked chicken. Check seasonings, adding salt and pepper until it taste right to you. Serve with noodles or mashed potatoes.
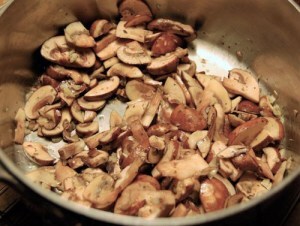 Instant Pot optionPrepare steps as directed using the saute mode. Pressure cook for 20 minutes, then do a careful quick release. You may need to do a thorough skim of any accumulated fat before adding the pearl onoins and mushrooms. Finish as directed.
 Process photos by Kathleen Flinn. Finished dish photo by Brent Hofacker.
The post Easy Coq au Vin [Chicken Cooked in Wine] with Instant Pot option first appeared on Kathleen Flinn.
The post Easy Coq au Vin [Chicken Cooked in Wine] with Instant Pot option appeared first on Kathleen Flinn.
February 2, 2024
Turkish-Style Baked Chicken Wings Recipe with Chili & Thyme Salt

I have a thing for chicken wings, especially baked chicken wings. Yes, I might be a French-trained chef and I have the ability to make complicate sauces and all that. But I love chicken wings. Hot wings, savory wings, spicy wings, you name it. They’re a great vehicle for virtually any flavor profile.
So when I was going to sit down with food journalist Robyn Eckhardt for the remarkable book Instanbul and Beyond: Exploring the Diverse Cuisines of Turkey and I saw she had a recipe for baked chicken wings, I thought, “Done. That’s the first recipe I’m going to try.” We ate them as part of the conversation we had for my podcast, Hungry for Words. You can listen here.
This is her version of the not-too-spicy savory chicken wings found on huge rotisseries throughout Istanbul’s famed Tahtakale Market, Istanbul’s famed spice bazaar. Even a modest stalls may sell hundreds of pounds of wings a day. She notes the wings are generally accompanied by a few traditional sides: grilled green chiles, sliced onions and tomatoes along with a bulgur pilaf and dimpled flatbreads. The wings are first tenderized in a bath of vinegar and onion, then coated in a seasoned olive oil. Having made these several times now, there are two keys: the vinegar/onion marinade and the accompanying salt.
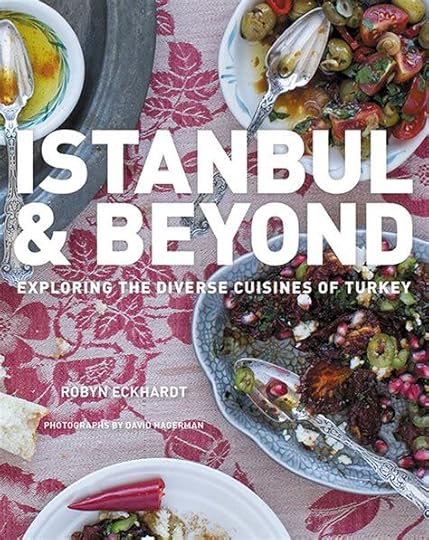
Click the cover to listen to my chat with Robyn
The recipe calls for Aleppo chili pepper which can be tricky to find. I get mine from World Spice in Seattle. You can substitute red pepper flakes. I prefer using oregano to thyme or a blend of the two in this recipe.
Why Baked Chicken Wings instead of Grilled?She recommends against barbecuing these and I agree; a nice, hot oven will best mimic the rotisserie flavor. These are best cooked on a large cooking sheet fitted with a cooling rack. If you don’t have one, a broiler pan works fine. Neither? A plain cookie sheet works, just turn them regularly while cooking. I admit, we usually just eat the wings alone, but you can make a meal of them if you serve with some flatbread, a savory grain and sliced onions, tomatoes and cucumber. They reheat fabulously.
Can I use an Air Fryer?Definitely. If you have a large air fryer, it works best since this makes quite a few wings. See the recipe for specifics. I’ve made them with both cooking methods and they’re fabulous both ways, but I found the timing varied from model and brand of air fryer, so just watch them carefully.
PrintTurkish Market Baked Chicken Wings with Herb-Chili SaltAddictive spicy and savory wings from Istanbul's famed spice market. Do be aware this requires a two-step marination process. I usually start these the night before and let them marinade in the onion-spiced vinegar, and then transfer them to the other marinade an hour or two before making them. However, if you're tight for time, you can cut the first marinade to two hours and the second to 45 minutes. Course AppetizerCuisine MediterraneanKeyword chicken, Easy, picnic fare, spicy, take to a party, Turkish, wingsServings 4Author Robyn EckhardtEquipmentTongsBaking sheetCooling rackIngredientsTenderizing marinade16 chicken wings (about 2 lbs/1 kilo)1 medium onion1 cup apple cider1 teaspoon sea saltSeasoning marinade3 tablespoons olive oil1 teaspoon Aleppo pepper or dried red pepper flakes3/4 teaspoon ground cumin1 teaspoon dried thyme or oregano½ teaspoon sea saltHerb-Chili Salt1 tablespoon dried thyme or oregano 1 tablespoon Aleppo pepper or red pepper flakes½ teaspoon coarse saltInstructionsTenderizing marinadeGrate the onion or pulse in a food processor. In a large bowl, combine with the vinegar and salt and stir to combine. Add the wings and toss to coat. Cover the bowl and marinate overnight or for at least four hours, jostling the wings from time to time. To save space in your fridge, you can transfer to a well-sealed plastic bag. Seasoning marinadeCombine the olive oil, chili flakes, cumin, thyme or oregano and sea salt in a large bowl. Remove the wings from the tenderizing marinade, pat dry with paper towels and add to the bowl. Stir or toss with tongs until the wings are coated with the new marinade. Cover and refrigerate for at least 45 minutes or up to four hours. Herb-Chili SaltIn a small bowl, mix the red pepper and the thyme or oregano. Stir in the salt. Set aside.Roast the wingsPreheat the oven to 450*F/230*C. Line a baking sheet with foiland top with a oiled cooling rack, or line a broiler pan with foil. Remove the wings from the marinade and roast for about 10 minutes. Using tongs, turn and cook an additional 10 to 12 minutes until well browned and cook through. Serve warm with the Herb-Chili salt. If using an air fryerHeat the air fryer to 400*F/200*C. When hot, add the wings and cook for about 8 to 10 minutes. Shake or turn and cook an additional 8 to 12 minutes until crispy and cooked through. The amount of air frying time will vary depending on the meatiness of the wings and the type and model of air fryer, so watch them closely.The post Turkish-Style Baked Chicken Wings Recipe with Chili & Thyme Salt first appeared on Kathleen Flinn.
The post Turkish-Style Baked Chicken Wings Recipe with Chili & Thyme Salt appeared first on Kathleen Flinn.
January 23, 2024
Soup 101: The Basics of Simple Soup
Simple soups are an inexpensive, low-fat meal solution. They can be a kid-friendly source of vegetables plus a great way to use leftovers. Soup has become a trendy diet alternative to juicing. To make a good soup, you just need adequate time and salt; try to avoid skimping on either.
Consider vegetables and flavors that taste good together. Potential vegetables for soup include asparagus, broccoli, peas, beans, potatoes, butternut or acorn squash, carrots, tomatoes, celery, corn, roasted peppers, mushrooms and cauliflower; this is hardly an exhaustive list. Take a look at my Cheat Sheet to Flavor Profiles for some ideas.
Simple vegetable soups, such as this carrot and rosemary version, lend themselves well to purees. This can be accomplished with a traditional counter top or “stick” style blender or mashed with a fork for a more rustic feel. Plus, if you’re focused on making your own lunches, soup is easy to transport; just get an insulated mug. The format below makes about eight one-cup servings.
Basic technique (yields about eight servings) 1) Heat two to three tablespoons of butter or oil in a five- to eight-quart pot. Sauté three handfuls of diced onions and cook until soft, about 10 minutes. Add carrots, celery, leeks or garlic to the onions if desired.
 2) Stir in a pound of chopped vegetables along with dried or fresh herbs, spices and a half teaspoon of salt and a few grinds of black pepper and cook briefly. Add about 1 teaspoon of dried herbs to fit the flavor you want for your soup, such as oregano, thyme, chili powder, etc. and a bay leaf.
 3) If you want to make a bean soup with soaked but otherwise uncooked dry beans (see note below), add with or in place of the vegetables. They will take about 90 minutes to two hours to cook, depending on the kind of bean and how fresh they are.
 4) Add two quarts of water, chicken or vegetable stock, along with the chicken (if using). Bring to a boil, then reduce heat, partially cover and simmer until the vegetables are tender, at least an hour, preferably two. Add extra water as it cooks if the soup seems too thick.
 5) Add ingredients that don’t need much cooking time such as canned beans, diced cooked meats, shellfish, pasta or cooked rice; about a cup of such addition usually suffices. Cook for about 10 minutes or until those ingredients cook through.
 6) Puree if that’s your intent. Taste. Add more salt, pepper, fresh herbs, citrus, hot sauce or any other potential flavor enhancers.
 7) Garnish it. Yogurt, croutons, chopped scallions, grated cheese, herbs, bacon, the list is endless.
Dried beans are a great base for soups, but they take some time to soak before cooking. Put them in a pot with plenty of water; there should be at least three inches of water above the beans. You can let them soak overnight, or do a “quick soak” by bringing them to a boil for two minutes, then cover and let sit for an hour. Regardless of how you soak the beans, discard the water and rinse the beans before proceeding.
Some ideas: Chicken noodle: Onions + celery + carrot + garlic + chicken + thyme + pasta + chopped fresh parsley garnishItalian: Onions + garlic + chicken + tomatoes + zucchini + white beans + oregano + Parmeggiano cheese or pesto garnishTexMex-y: Onions + celery + garlic + corn + chicken + chili powder + cumin + black beans + chorizo + hot sauce, green onion and sour cream garnishBaked potato soup: Onions + celery + garlic + broccoli + white potatoes + cayenne + grated cheddar, bacon, sour cream and chive garnishCurried squash: Onions + garlic + butternut squash + carrots + curry + cardamom + puree, then top with croutons and yogurtHere’s the first recipe from the video, or see the Carrot & Rosemary Soup recipe here on CookFearless.
 PrintBasic White Bean Soup#wprm-recipe-rating-0 .wprm-rating-star.wprm-rating-star-full svg * { fill: #343434; }#wprm-recipe-rating-0 .wprm-rating-star.wprm-rating-star-33 svg * { fill: url(#wprm-recipe-rating-0-33); }#wprm-recipe-rating-0 .wprm-rating-star.wprm-rating-star-50 svg * { fill: url(#wprm-recipe-rating-0-50); }#wprm-recipe-rating-0 .wprm-rating-star.wprm-rating-star-66 svg * { fill: url(#wprm-recipe-rating-0-66); }linearGradient#wprm-recipe-rating-0-33 stop { stop-color: #343434; }linearGradient#wprm-recipe-rating-0-50 stop { stop-color: #343434; }linearGradient#wprm-recipe-rating-0-66 stop { stop-color: #343434; }This recipe is meant to demonstrate how to use the above formula using a simple bean soup. I've corresponded the steps in this recipe to the method described above. You'll want to start a soup like this with dried beans; canned beans won't stand up to the long cooking. The natural starch released in the beans will make the soup thicken as it cooks; if it gets too thick, simply add some water.Course SoupPrep Time 20 minutes minutesCook Time 2 hours hoursTotal Time 2 hours hours 20 minutes minutesServings 8 servingsAuthor Kathleen FlinnIngredients1 medium onion chopped2 or 3 carrots chopped3 ribs of celery chopped2 garlic cloves1 teaspoon salt1/2 teaspoon pepper1 14 oz. can pureed tomatoes1 teaspoon thyme1 bay leaf1 lb. white beans soaked2 quarts chicken stock1 cup cooked meat such as shredded chicken, diced cooked sausage, crumbled bacon or ham (optional)1/2 teaspoon cayenne3 tablespoon chopped fresh parsley optional3 slices cooked bacon crumbled (optional)Instructions) Heat two tablespoons oil in a stock pot over medium heat.) Saute the onion, carrots, celery and garlic until softened about five minutes. Add half the salt and a few cranks of black pepper.) Add the herbs, bay leaf.) Add the beans.) Add the stock, water and tomatoes. Bring to a boil, reduce to a simmer and partially cover. Cook for about two to three hours or until the beans soften, adding additional water if needed if it gets too thick.) Add the chicken, sausage, bacon or ham (optional). Cook for an additional 10 minutes) If you want a smoother texture, you can puree some of the beans. Add the cayenne. Taste and add the additional salt if desired, along with more pepper, thyme or other seasoning.) Garnish with chopped fresh parsley, if desired
This post was updated January 24th, 2024
The post Soup 101: The Basics of Simple Soup first appeared on Kathleen Flinn.
The post Soup 101: The Basics of Simple Soup appeared first on Kathleen Flinn.