
Rinku Bhattacharya's Blog, page 21
September 25, 2020
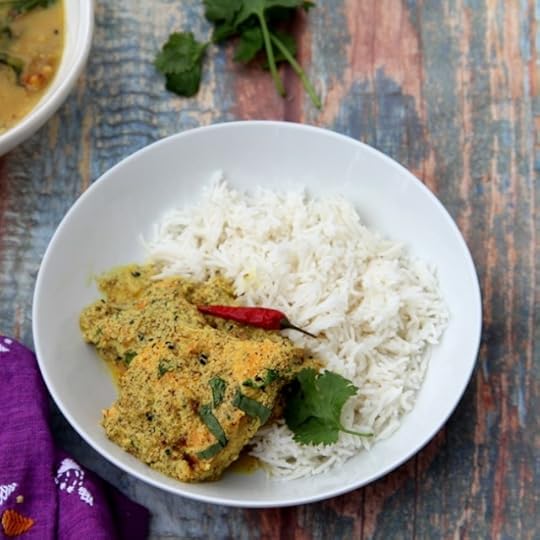
One Pot Bengali Mustard Salmon – Shorshe Salmon
 A few weeks ago, I revisited a comforting and classic dish. I made a very slight difference. I pan fried the salmon, and then made the mustard sauce in the same pan. A large cast iron pan to be specific. Small tweaks offering me a Shorshe Salmon that is very flavorful and very easy to boot. For the first time ever I got my family to lap up the crisp skin of the fish. This is an adaptation of my recipe from The Bengali Five Spice Chronicles.
To accomplish this whole process, outside of soaking the mustard and poppy seeds, the entire process takes about 30 minutes and you are left with one cast iron pan to clean. I use a flat pan, back in the day my grandmother used a karai or wok. Her karai were made of kansha or bell metal. For as long as she did her own cooking, she took great pride in cleaning these herself. Keeping them all nice and shiny.

I have swapped a lot of this for cast iron. A lot of this is related to the fact, that I have constructed my kitchen without family heirlooms for the most part. A lot of my cookware is based on what I can find readily. And of course, then there are new things that change life a lot. In my case, it is the instant pot. It is a fixture in my kitchen that has actually replaced my stove top cooker.
Now, a note here. This recipe includes a mixture of poppy seeds and mustard seeds. There are many variations of the shorshe maach. Sometimes with just the mustard or shorshe. A little posto or poppy seeds is always a good idea.
A couple of tips to pay attention to,
Soaking the mustard and poppy seeds for a few hours. More does not hurt, so you can certainly do this overnight. If you are like me a lot of my meal prep happens at night.
Use a large pan, and add the seasonings in batches.
Do not not cook on high heat as the jhol or sauce will curdle.
PrintOne Pot Bengali Mustard Salmon – Shorshe Salmon
Prep Time: 3 hours, 5 minutes
Cook Time: 25 minutes
Total Time: 3 hours, 30 minutes
Yield: Serves 4 to 6

A simple and classic take on Bengali mustard fish, prepared with salmon and a mustard poppy seed paste.
Ingredients
1/4 cup whole black mustard seeds2 tablespoons poppy seeds
3 green chilies
2 teaspoons salt (divided)
2 pounds salmon fillet (skin on) cut into 2 inch pieces
1 teaspoon turmeric
2 tablespoons mustard oil
1 teaspoon nigella seeds
1 or 2 dried red chilies broken
2 teaspoons fresh ginger paste
1 small onion, very finely diced
Instructions
Soak the black mustard seeds and poppy seeds in warm water for at least 3 hours.Place this in a blender with the green chilies and 1 teaspoon salt. Grind to a smooth paste. Do not overgrind as this will turn out bitter.
Set the prepared paste aside.
Rub the salmon with the remaining salt and turneric.
Heat 1 tablespoon on the oil an a flat cast iron or heavy bottomed pan. Place the fish in a single layer, skin side up and cook for 4 minutes and turn and cook for 4 more minutes. Note, the fish when done should be fairly easy to turn.
Remove the fish from the pan. Salmon is a naturally oily fish, but the fat is good for you. So add the additional tablespoon of oil into the pan with the pan drippings.
Add in the nigella seeds and the dried red chilies. Add in the ginger paste and the onion and sauté well for a couple of minutes.
Add in the prepared mustard paste with 1 cup of water and bring to a low simmer. It is important to cook on low heat from this point onwards.
Add in the fish and cook for 5 to 6 minutes, the sauce should thicken slightly. Serve at once with steaming white rice.3.1http://www.spicechronicles.com/one-pot-bengali-mustard-salmon-shorshe-salmon/
The post One Pot Bengali Mustard Salmon – Shorshe Salmon appeared first on Spice Chronicles.


September 24, 2020
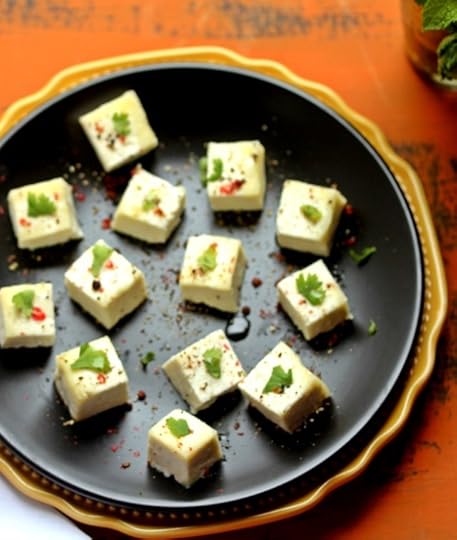
How to make and use Paneer
 There are few things that are a part of my weekly cooking ritual. Making paneer at home is one of these rituals. With a mostly vegetarian (husband and kid) home crew, this is a once a week creation. The girl is picky though about her paneer. The right paneer is the way I make it. As I say, thank god, for small mercies.
Tested, tried and daughter approved. I make this paneer at least once a week in small batches. Last weekend this did not happen. But it is on slate this weekend. Let me tell you how I do it and yes, you can watch me make this live and work with this in two separate segments.
On a personal note, I seem to be on the mend. Not quite there yet, but looks like the meds are taking impact. I am pushing myself to try and get back to doing my lives and back to a cooking routine.
How to make
Paneer is made by curdling milk with lime or lemon juice or in a pinch with white vinegar.
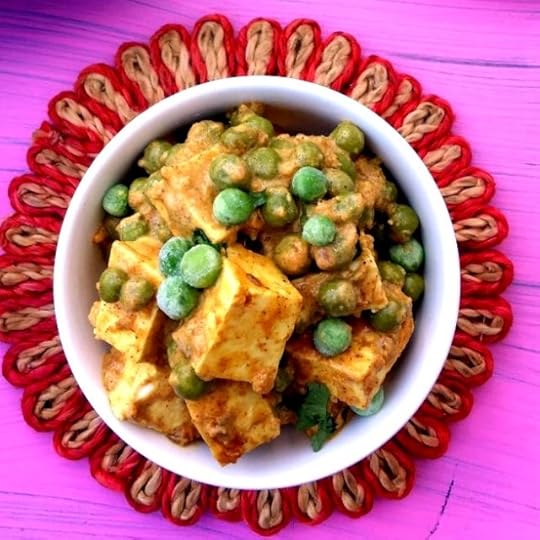
Paneer is used in various ways, the cubes are added into curies and sauces, grilled and or pan fried and enjoyed as a snack. A couple of ideas from my kitchen.
Paneer Matar – Panner Cooked with Tomatoes and Green Peas
Paneer Tikka – Marinated Paneer Kebabs
In addition, paneer can be mixed into rice dishes to make layered rice dishes called Biryani, and stuffed into breads to make Parathas.
The whey from preparing the paneer is highly nutritious and a good source of nutrients. You can reserve the whey and add it to drinks and smoothies. I often add whey to flatbreads while kneading in lieu of other liquids.
Essentials of Making Paneer
In order to make good paneer, we need to go through a few essentials.
What Kind of Milk to use?
Buffalo milk is the preferred milk in Indian commercial kitchens. I use whole pasteurized milk with a little half and half, to add some extra richness. You can add some cream for a richer taste, but I would not do more than 30% of the volume.
If you want to keep the fat level lower, you can use just the milk, however I would not use low fat milk.
What Curdling Agent to Use?
Lime or lemon is best for curdling the milk, they both add a brightness along with the right amount of acid to separate the cheese curds from the whey. You can see the process in this video.
What equipment to keep handy?
There really is no special equipment needed to make the cheese. All you will need is,
Heavy bottomed pot for boiling the milk
Cheese cloth
Colander
Plate
Heavy weight to press down (You can use a bowl filled with water)
PrintHow to make and use Paneer
Prep Time: 2 hours
Cook Time: 30 minutes
Total Time: 2 hours, 30 minutes
Yield: Make about 1 and 1/2 pounds of paneer

An easy feature on how to make paneer.
Ingredients
1 gallon whole milk (use organic milk for best results)½ gallon half and half
3 limes or lemons
Instructions
Place the milk and half and half in a heavy bottom pot. The pot should be large enough to hold the milk and allow room for the milk to come to a rolling boil. Heat the milk mixture gradually allowing it to come to a rolling boil. This is important for the right texture. Stir the milk occasionally while it is heating, it is important to ensure that it does not stick to the bottom of the pot.In the meantime cut the limes and lemons into halves and remove the seeds.
Line the colander with the cheesecloth and place over a container to gather they whey.
When the milk reaches a rolling boil, turn off the heat. Squeeze in the lime or lemon juice, using half a lime or lemon at a time, stir in the juice. Eventually the milk will separate into milk solids and greenish whey.
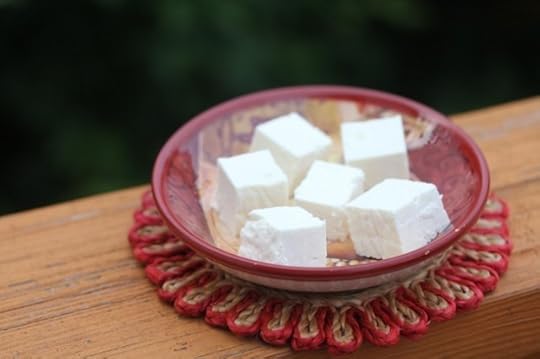
Pour this mixture over the colander, and allow most of the liquid to drain out. Gather the paneer into a round disc, about 1 inch in thickness.
Place on a plate. Cover with another plate and put something heavy over the plate. Let it rest for about 3 to 4 hours.
Remove the weight and the covering plate. Remove the disc, cut into 1 inch cubes and use as needed.
The paneer can be stored for up to 1 week in the refrigerator.
3.1http://www.spicechronicles.com/how-to-make-and-use-paneer/
The post How to make and use Paneer appeared first on Spice Chronicles.
September 21, 2020
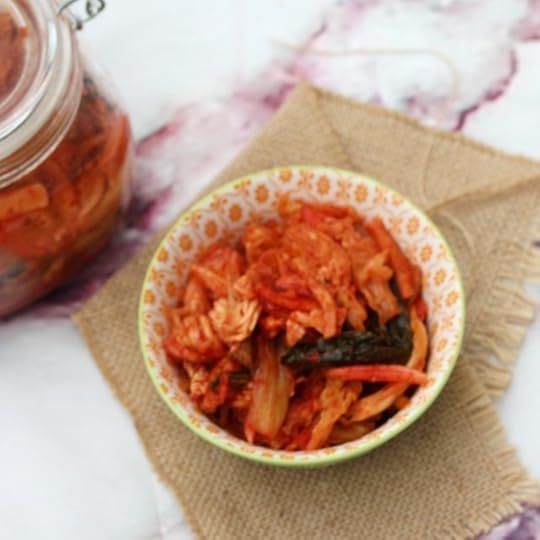
Easy to make Kimchi in your Instant Pot
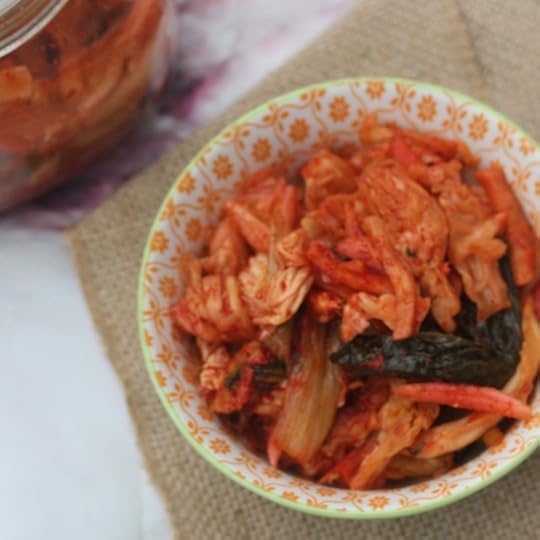 So, after several efforts I bring to you my husband approved instant pot Kimchi. So, the husband is certainly not Korean. But, as we all know these days, almost everyone is into fermented things. The man has had a perchance for Kimchi for a while. Actually it is one of the only ways I can persuade him to come to my favorite HMart.
As readers of this blog know, I have been trying out different bucket list items. Sourdough starter, then bread, and somewhere in the list Kimchi made its way. Kimchi to the un-initiated is a fermented spicy Korean cabbage pickle. Made with a handful of ingredients, it is what makes cabbage sexy.
I first made this over about 8 days, and then learnt to jump start this in the instant pot. Much like the starter, doing kimchi in the instant pot is not instant, but using the yogurt mode you can certainly significantly speed up the time. So, I actually leave the kimchi to ferment using the yogurt mode for 1.5 days – 36 hours. Giving it a good shake in between. What I get from this is the beginnings of a good Kimchi.
As the Kimchi stays in the refrigerator, it ferments more. This is typical of all Kimchi’s which is why there are so many recipes using Kimchi, as the kimchi gets nice and ripe it is used both as a condiment and a seasoning agent. And yes, I have a very good recipe for Kimchi Fried Rice somewhere in the wings. It does look like, I will be lying low from the kitchen the next few days, until the doctor is able to opine on my situation. BTW, if you have tried navigating the medical system during the pandemic let me tell you it is nothing short of crazy. Things seem to be in two buckets – emergency and virtual with absolutely nothing in between.
Now back to my kimchi. What I am offering you here is a very basic recipe, using the essentials. I have tried this with both red and white cabbage. Red Cabbage while prettier in appearance does not necessarily result in a better flavor. So, there you have it my friends, here is my kimchi recipe for you.

An honest confession, I do not necessarily eat a lot of plain kimchi, but, I love cooking with it. So, my husband enjoys it until it gets very sour and then I start cooking with it. We all win.
If you like this recipe and want more ideas, do join my Indian Instant Pot Facebook group and Legume Love Group. Of course Instant Indian is ready for order, joining its siblings The Bengali Five Spice Chronicles and Spices and Seasons.
PrintEasy to make Kimchi in your Instant Pot
Total Time: 48 hours
Yield: Makes 1 to 2 jars of kimchi
A crisp and flavorful tasting Kimchi fermented in the instant pot.
Ingredients
1 and 1/2 pounds napa cabbage1/4 cup kosher salt
3 tablespoons fish sauce
1 tablespoon minced ginger
1/2 tablespoon minced garlic
2 - 4 tablespoons Gojugaru (Korean red pepper flakes)
8 cherry belle or daikon radishes
3 to 4 scallions
Instructions
Shred the cabbage into 1 inch sized pieces (note, since I tend to use this a lot for cooking, I make it a little smaller)Wash the cabbage thoroughly and drain in a colander. Place in a large bowl and sprinkle with the salt. Rub the salt lightly to massage into the cabbage. Add enough water to cover the cabbage and set this aside for at least 2 hours.
Rinse the cabbage with fresh water and set it aside on a colander to drain as you prepare the remaining ingredients such as the spice base.
In a mixing bowl add the fish sauce (note, traditionally shrimp paste is used for this, but I more readily have fish sauce on hand and it seems to do the trick), the ginger, garlic, and the Gojugaru.
Cut the radish into thick matchsticks. Cut the scallions into 2 inch pieces.
In a mixing bowl mix together the vegetables, spice paste, and the drained cabbage, radishes, and scallions.
Place this in a clean glass jar with a tight fitting lit.
Place in the instant pot (no water) and set the yogurt setting to 18 hours. If time permits you can occasionally give the jar a good shake.
After 18 hours remove from the instant pot. Leave at room temperature for another day and then store in the refrigerator and use as needed.3.1http://www.spicechronicles.com/easy-to-make-kimchi-in-your-instant-pot/
The post Easy to make Kimchi in your Instant Pot appeared first on Spice Chronicles.
September 19, 2020
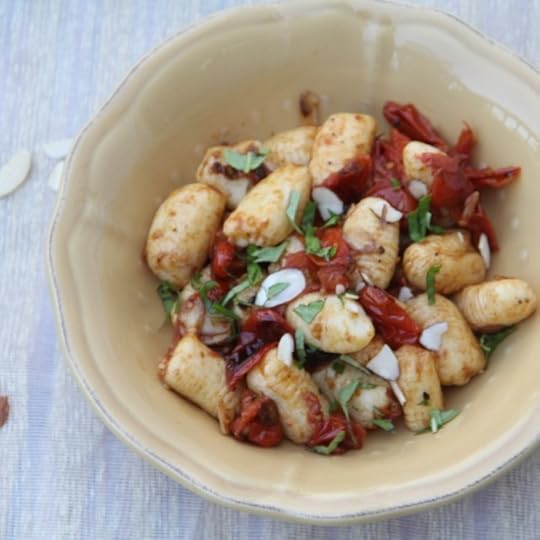
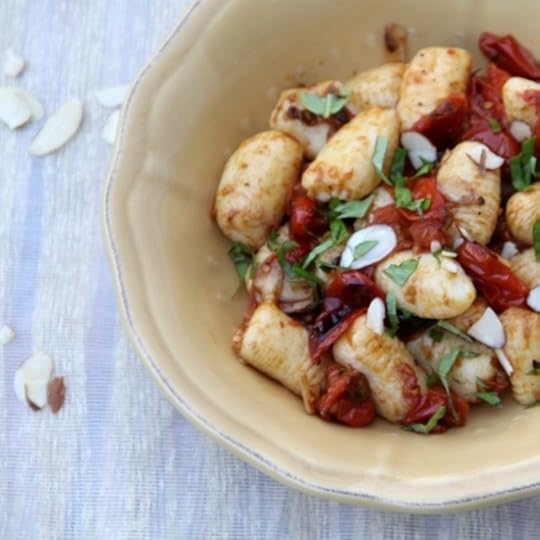
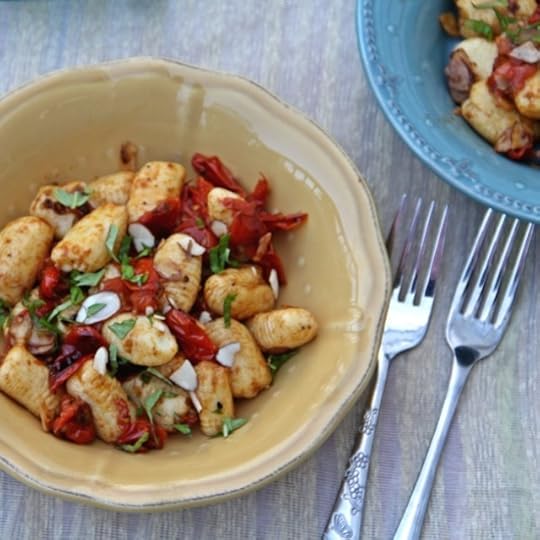
Cheddar Gnocchi with Oven Roasted Tomatoes
 This post is sponsored by Cabot Creamery.
Necessity kind of fueled this one. Making gnocchi takes a little longer that some dishes, but is probably one of the most simple and satisfying dishes out there. So, the need to make this is fueled by my current crazy throat situation. It looks like I will need a minor procedure sometime next week to put me out my misery. Well, until then I am confined to soft foods. And, I love potatoes. Actually this cheddar gnocchi is enriched with a generous about of sharp cheddar cheese and is held together with a little flour and an egg. So technically it would qualify as a breakfast dish.
With making gnocchi, once you get the hang of it, it is really quite a simple affair. It is perfect therapy. Soothing, comforting, and takes your mind away from things that might otherwise bother you. In fact, these days, I have a lot of fun teaching gnocchi making. Sadly, until this throat situation gets resolved I cannot do any classes or lives. I tell you 2020 is truly turning out to be a year of trial and challenges.
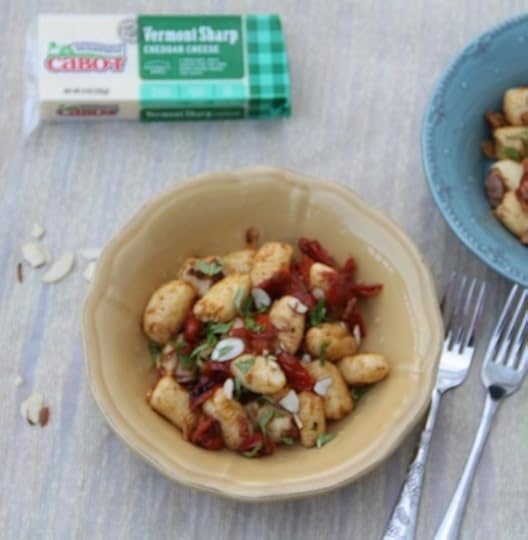
But thankfully, this is why cooking with simple, flavorful and practical ingredients make such a difference. As they say, good cheese makes everything better. The gluten and lactose free aged Cheddars are one of their many offerings, including a full line of cheeses, Greek yogurt, sour cream, cottage cheese, butter and whey protein.

Treated simply, I toss the gnocchi with some Cabot butter, oven roasted tomatoes, garlic, and a handful of almonds. The tomatoes get roasted while I shape and make the gnocchi and then everything get tossed together. I brown the butter just a little to deepen the flavor.
This gnocchi actually freezes very well, so you can make a large batch and set it aside in the freezer. This is a great dish to plan on a weekend, peaceful, satisfying and simple.
PrintCheddar Gnocchi with Oven Roasted Tomatoes
Prep Time: 1 hour, 10 minutes
Cook Time: 35 minutes
Total Time: 1 hour, 45 minutes
Yield: Serves 4
A beautiful easy to make flavorful take on Cheddar enriched gnocchi.
Ingredients
4 to 6 plum or roma tomatoes, halved3 tablespoon olive oil
3 teaspoons salt divided
2 large russet potatoes (about 1 and 1/2 pounds)
1 egg and 1 egg yolk
1 cup of Cabot Vermon Sharp Cheddar grated
3/4 to 1 cup of all purpose flour, plus extra flour for dusting and shaping
3 tablespoons of Cabot butter
2 cloves of garlic, minced
1/2 cup sliced almonds
3 to 4 tablespoons finely chopped sage or basil
Instructions
Pre-heat the oven to 375 degrees.Place the tomatoes on a sheet pan and drizzle with olive oil. Roast the tomatoes for about 20 minutes.
In the meantime cover the tomatoes with plastic wrap and microwave on high for 4 to 5 minutes. Cool slightly and peel the potatoes. Allow them to cool slightly and grate the potatoes or push through a potato ricer.
Spread out over a piece of parchment paper. Beat the egg and egg yolk and spread over the potatoes. Sprinkle with the remaining salt and the grated cheese. Lightly mix and shape together into a smooth mixture. Sprinkle with enough flour to hold the gnocchi together. I have been able to do this with 3/4 cup, but you can use up to a cup if needed.
Divide into 4 parts. Shape each part into a long rope and cut into 1 inch pieces. Gently indent the pieces using a fork or a gnocchi roller.
Place these on a separate sheet of paper. Allow the gnocchi to rest for about 20 minutes.
Boil water in a large pot and place the gnocchi in the water. The gnocchi will float in about 2 to 3 minutes.
Drain them in a colander.
Heat the butter in a large pan (large enough to hold the gnocchi). Allow the butter to cook and brown gently for 2 to 3 minutes. Add in the minced garlic and in about 2 minutes add in the roasted tomatoes. The tomatoes are very soft and will melt into the butter. Stir in the gnocchi and cook for 2 minutes.
Add in the sliced almonds and the sage or basil. Serve immediately.
3.1http://www.spicechronicles.com/cheddar-gnocchi-with-oven-roasted-tomatoes/
The post Cheddar Gnocchi with Oven Roasted Tomatoes appeared first on Spice Chronicles.
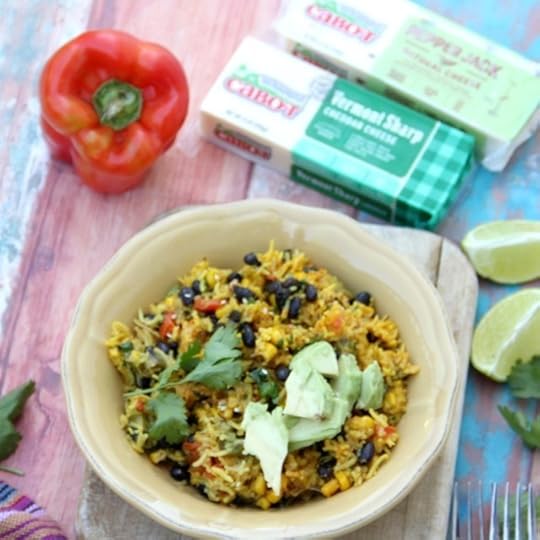
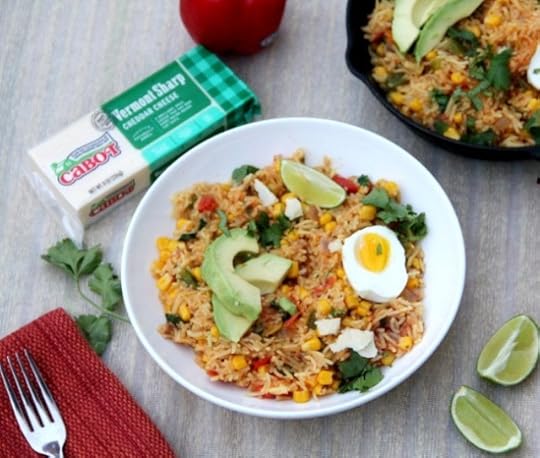
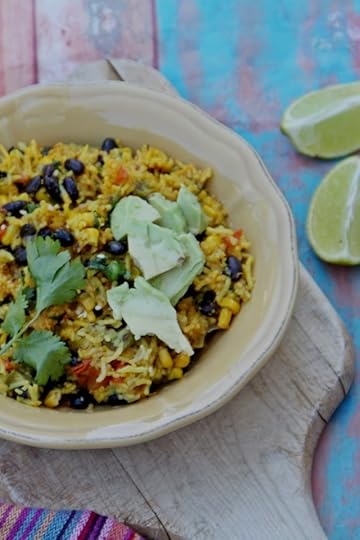
South of the Border Cheesy Rice
 I am really excited to be working with Cabot Creamery to bring you some budget friendly meals. I am happy to have received free samples to create these recipes. This could not be more timely. Ironically, being a little under weather on a very unusual back to school week, I am glad to be working with cheese that we love. Earlier this week, creating this large batch of South of the Border Cheesy Rice is one of the best things I could have done for all around. Flexible, flavorful, loaded with peppers, corn, lime, cilantro and cheese it is so very satisfying. All made with ready to find pantry staples. The great thing about this recipes is that is can be a complete meal by itself – I add in avocados and a semi soft egg to boost the protein content.
Depending on your preference you can add in black beans. I sometimes do, and sometime finish with hard boiled eggs.
Simple, easy and nostalgic I love a comforting bowl of dressed up nice. It is like a hug in a bowl. I am sad as I write this today. In general, nursing a strange sort of sadness. It is not much fun for a chef if you are not eating or tasting food. The news today about Ruth Bader Ginsberg does not help!
It is the perfect foil for the simple and peppy flavors of this dish. It is so much needed in these rather stressful times.
This dish can be,
Very easy done in either the stove top or instant pot.
Completely gluten free, as these gorgeous rich and perfectly aged cheddar are completely gluten-free
Worked in beautifully to add and use up whatever you have in hand.
I worked this with the sharp Vermont Cheddar, and if you really want you can serve this with a side of Cabot Sour Cream. Cabot cheddar aged, lactose and gluten free.
For a nice kick of spice you can also make this with you can also through in some Cabot Pepper jack cheese.
Works well as a complete meal or a great comforting side that compliments all your casual quick eating needs
Honestly, these flavors are popular in my house. I use them in different combinations as life happens. This is the first time, I have actually added in the cheese. I usually reserve adding cheese on the side. Today, I actually in a generous amount of the creamy aged cheese right into the dish. This boosts the flavor and richness of the dish. 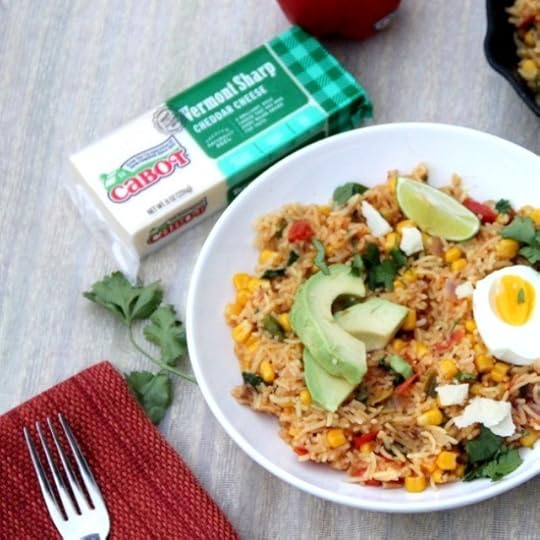 All of this making it a perfect bowl of goodness to enjoy. I have both stove top and instant pot instructions for you. Just to make sure you can make this dish all your own.
PrintSouth of the Border Cheesy Rice
Prep Time: 10 minutes
Cook Time: 35 minutes
Total Time: 45 minutes
Yield: Serves 4 to 6

A gorgeous flavorful bowl of rice that brings Southwestern flavors to your table.
Ingredients
2 tablespoons olive oil1 teaspoon powdered cumin
1 medium sized onion, finely diced
2 garlic cloves, minced
1 cup chopped bell peppers (use a mixture of red and green if possible)
1 and 1/2 cups long grained rice, such as basmati
2 tomatoes, diced
1 teaspoon turmeric (optional, but adds a nice depth of color)
1 teaspoon salt
1 and 1/2 cups fresh or frozen corn kernels
3/4 cup cooked black beans
4 tablespoons chopped cilantro
3 tablespoons fresh lime juice
2 cups of grated Cabot Vermont Sharp Cheddar (or a mixture of cheddar and Cabot Pepper Jack Cheese)
To Serve
Sliced Avocado
Instructions
Heat the oil and add in the cumin seeds. After about 30 seconds, add in the garlic and onion and cook until they are fragrant and gently wilted. This will take about 4 to 5 minutes.Add in the peppers and cook for about a minute. Stir in the rice, tomatoes, salt, and turmeric (if using). Add in the corn and the black beans 2 and 1/2 cups of water. Add in the dried oregano.
Cover and cook for 20 minutes until all the water has evaporated.
Remove the cover stir in the chopped cilantro, lime juice and the grated cheese
Cover and let the rice rest for 15 minutes. This will allow the flavors to develop comfortably.
Serve with sliced avocado.
Notes
Instant Pot Instructions
Begin the process with the sauté mode. Continue with steps 1 to 3. Turn off the sauté mode and in 1 and 1/4 cups of water. Set on rice mode and allow the instant pot to complete and release pressure naturally.
Remove the cover and stir in the cilantro, lime juice, and cheese. Let the rice rest uncovered for 10 minutes prior to serving.
The post South of the Border Cheesy Rice appeared first on Spice Chronicles.
September 15, 2020
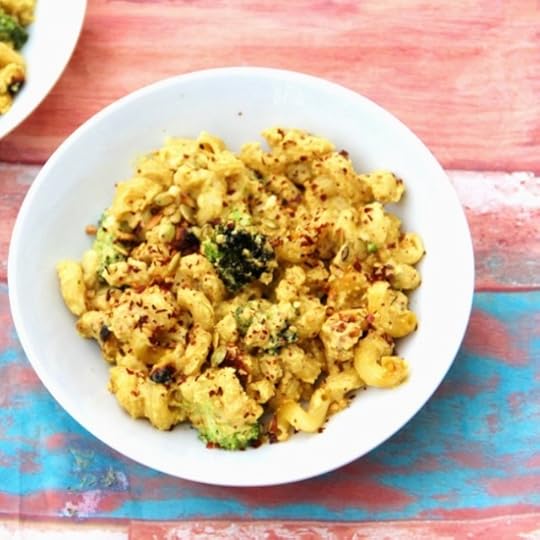
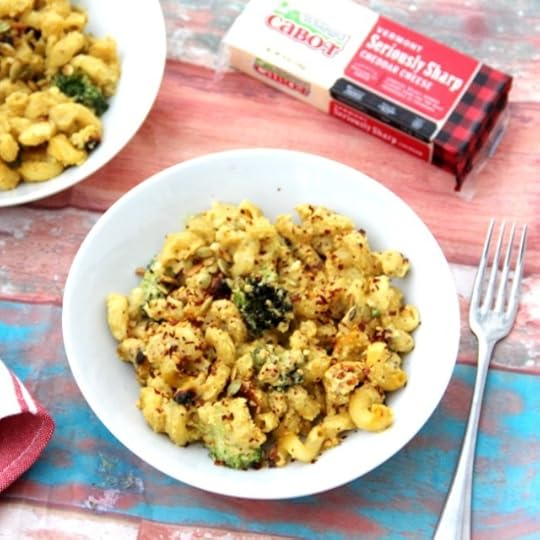
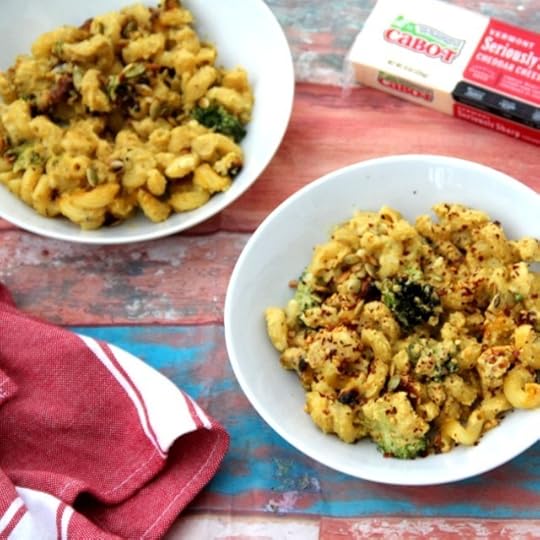
Spicy Veggie Loaded Pumpkin Mac and Cheese
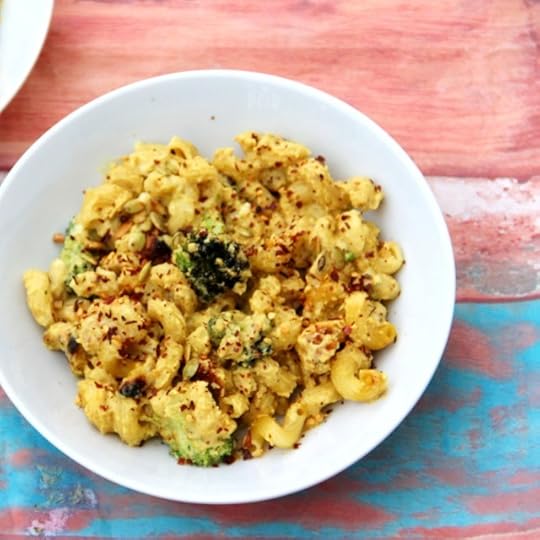 You will probably see a cheesy takeover on my site this week. I am really excited to be working with Cabot Creamery to bring you some budget friendly meals. Given how much we love their Cheddar in this house, and I mean LOVE this is such a fun collaboration. Take 3 on this Spicy Veggie Loaded Pumpkin Mac and Cheese and I am a happy camper. Over the years, I love fall but avoid the hype and no the pumpkin spice latte is not my thing. Then came a busy weekend, a houseful of people, a butternut squash and all of this together happened to make this spicy veggie loaded Pumpkin Mac and Cheese. A budget friendly one pot meal that also rings in the season with happiness.
I will warn you that there is nothing wimpy about this mac and cheese,
Sweet and tender butternut squash turns smoky with notes of cumin and smoked paprika
Along with the squash I add in chunks of broccoli and shredded cauliflower

Lots of sharp cheddar cheese
And, I have two versions for the pasta – a baked variation and an instant pot version. They both taste pretty good, so it really is a matter of preference. The instant pot version saves the step of boiling the pasta.
If you really want to amp up the spice level, add in some Habanero Cheddar or finish this with or add some crushed red pepper flakes
This pasta can be assembled and frozen so it is definitely a good idea to make a double batch.
In addition, large batches of veggies can be roasted and pureed to make the sauce. This will help you have the sauce handy when you want it.
If you peruse through my site, you will find that I am huge cheddar fan. Possibly because this is what I grew up on. I love the Cabot flavored cheeses and their extra sharp cheddar. Depending on what else I am doing, I often use their butter and sour cream. Their butter makes pretty good ghee in my opinion. Of course, that fact that you are supporting small business is certainly a plus.
This squash laden sauce brings just a little bit of sweetness to bind the assertive smoky sharp flavors together. Instead of the shredded cauliflower, you can certainly use any vegetable of your choice -zucchini, bell peppers, mushrooms. You get the idea.
If you like this recipe and want more ideas, do join my Indian Instant Pot Facebook group and Legume Love Group. Of course Instant Indian is ready for order, joining its siblings The Bengali Five Spice Chronicles and Spices and Seasons.
PrintSpicy Veggie Loaded Pumpkin Mac and Cheese
Prep Time: 10 minutes
Cook Time: 35 minutes
Total Time: 45 minutes
A smoky spicy seasonal take on pumpkin mac and cheese.
Ingredients
2 cups cubed butternut squash (about 1 pound)1 cup broccoli, cut into small pieces
2 tablespoons olive oil
2 teaspoons salt, divided
1 cup milk (can be lo fat)
10 oz pasta such as fusilli, cut according to directions on the package
2 tablespoons butter (such as Cabot)
3 cloves minced garlic
1 teaspoon powdered cumin
1/2 teaspoon smoked paprika
11/2 cups grated extra sharp Cabot Cheddar
1/4 cup grated Cabot Habanero Cheddar (optional)(see note)
Instructions
Pre-heat the oven to 400 degrees. Place the squash and broccoli on a sheet pan. Do not mix, keep on separate parts of the pan.Drizzle with the olive oil. Cook for 20 minutes, until the squash is soft. Toss with 1 teaspoon of the salt.
Place the squash in a blender, set the broccoli aside. Add in the milk and blend into a puree.
Heat the Cabot butter and add in the garlic and cook until golden.
Add in the cumin and paprika and the pasta and mix well.
Stir in the butternut squash mixture and bring to a simmer. Add in the pasta and the extra sharp cheddar and Habanero cheddar if using. Cook on low until the cheese melts, do not allow the sauce to boil.
Stir in the reserved broccoli and serve hot.
Notes
If you are not using the habanero cheddar you can finished with some red pepper flakes.
Instant Pot Instructions
Complete roasting the squash as described and then prepare the sauce, however increase the milk by an extra cup.
Do not pre-cook the pasta.
Place the sauce and the pasta with an extra 1/2 cup of water and cook for 2 minutes on high pressure.
Release the pressure and stir in the cheese.
Stir in the broccoli and serve immediately.
The post Spicy Veggie Loaded Pumpkin Mac and Cheese appeared first on Spice Chronicles.
September 12, 2020
Roasted Squash with Apples and Shallots
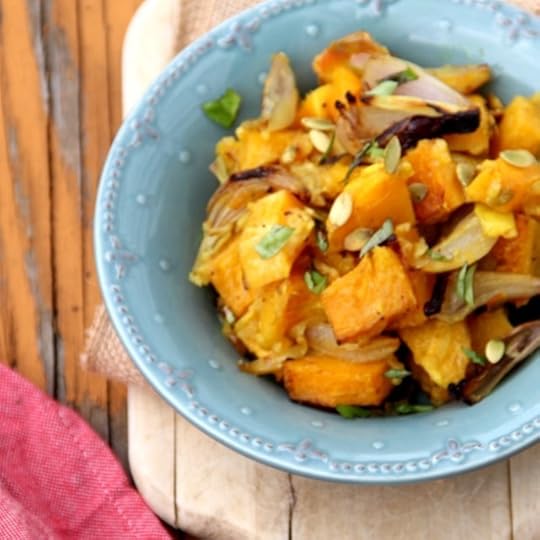 I so love fall! Even when I do not feel good, something about the gentle golden sunshine makes me smile. Fall to me about fragrant spices and earth tones. It is about warm gentle flavors. Much like this roasted squash with apples and shallots. I will make an honest confession that this is a recipe in progress. Well, it is fine as is, but sometimes you look at a recipe and know that you just want to do more. This said, it is a new kind of pairing. This combination is extremely versatile. I pureed it for pasta and everyone loved it. But today let us stick to the fine as is part of things.
Firstly, this is a great recipe to make in either the oven (think one well seasoned sheet pan) or the air fryer. The squash and shallots turn golden as do the shallots. The apples cook down to practically a nice thick saucy consistency. All of this makes it one good happy family. To put this together, I toss this with some gentle spices – you can use either pumpkin pie spice or garam masala for this recipe, olive oil, a teeny bit of molasses, ginger and some cayenne pepper.
The sweet and flavorful result will delight you. Ok, I cannot speak for you, but it certainly made me very happy. The real element of surprise and delight for me is the way the apples mixes in so very nicely into the mix forming that perfect sweet and tangy sauce.

Despite it’s simplicity I think it is worth a few ground rules.
Do not be tempted to overdo the spices. The subtlety matters. It helps both the spice and scallions shine.
If you wish to add a little more complexity to the dish you can use either coconut oil or ghee instead of the olive oil.

I use butternut squash for this, but any kind of squash should work.
The flavors are best with a tart or semi tart apple, but, I will leave that up to you.
If you like this recipe and want more ideas, do join my Indian Instant Pot Facebook group and Legume Love Group. Of course Instant Indian is ready for order, joining its siblings The Bengali Five Spice Chronicles and Spices and Seasons.
PrintRoasted Squash with Apples and Shallots
Prep Time: 10 minutes
Cook Time: 30 minutes
Total Time: 40 minutes

A gorgeous seasonal side this that is perfect for anytime of the year.
Ingredients
2 tablespoons olive oil1 teaspoon minced ginger
1 teaspoon pumpkin pie spice or garam masala
1/2 teaspoon red cayenne pepper (more or less to taste)
1 teaspoon salt or to taste
1 small butternut squash peeled and cut into cubes
3 medium shallots quartered
1 medium sized granny smith or other tart apple quartered
2 tablespoons pumpkin seeds or pepitas
Chopped thyme or other herb to finish
Instructions
In a small bowl add the olive oil, ginger, pumpkin pie spice (or garam masala), red cayenne pepper and salt and mix well.In a larger bowl toss the squash, shallots, and apples. Mix in the olive oil mixture.
If you are doing this in an air fryer place in the basket and roast at 450 degrees for 15 minutes, stirring to mix things up one in between.
Alternately, pre-heat the oven to 450 degrees. Spread the mixture on a greased sheet pan. Roast for 25 to 30 minutes until the squash is tender. If you want the squash to be turning golden, then you need to cook a little longer.
Sprinkle with the pumpkin seeds and herbs before serving.3.1http://www.spicechronicles.com/roasted-squash-with-apples-and-shallots/
The post Roasted Squash with Apples and Shallots appeared first on Spice Chronicles.
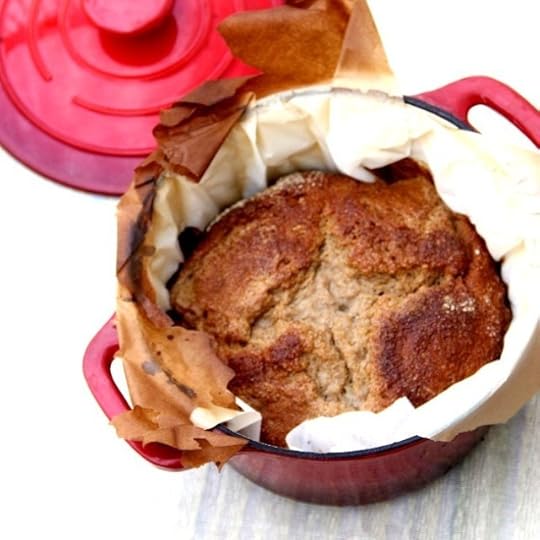
Wholegrain Sourdough Bread – Recipe, Tips, and How I do it.
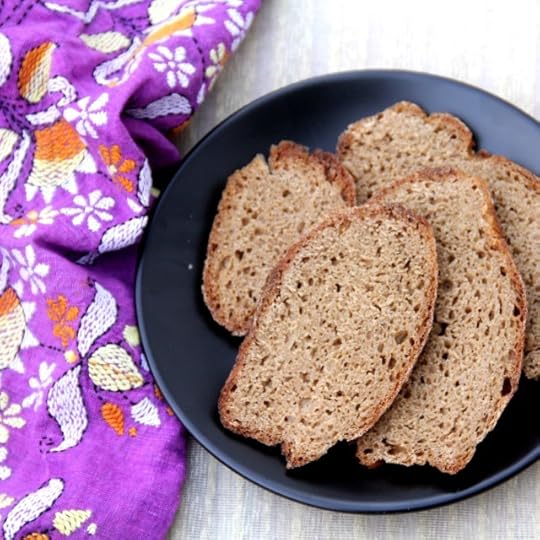 So, yes, indeed I am someone who has jumped onto the sourdough bandwagon. Truth be told, if you have been following me, breads, pancakes, and fermentation of all kinds have made a revival in my house. And yes, sourdough bread is all part of this process. After creating my starter Pinocchio in the Instant Pot, I have been working through the rambles of creating a loaf of sourdough bread that I can stand by. Since we mostly enjoy wholegrain flour in our house, this has taken me a little more time. But as they say good things happen when you are patient. The kids are finally endorsing my wholegrain sourdough bread. And, when it is kid endorsed it is time to share this with you.
I am as most of you know a fairly intuitive cook. When making sourdough bread, you will need to curb your spontaneity and measure. Now, there is a lot out there on gorgeous sourdough bread, just a little less when it comes to wholegrain/wheat sourdough. Hence this post.
Why is it different?
Like a lot of breads, sourdough bread relies a lot on gluten-development. Wholegrain flours are naturally lower in gluten. This makes the crumb denser than a bread made with all purpose or even bread flour. The dough is not as stretchy, this said you can certain get comforting and soft sourdough breads using 100% wholegrain.
Additional Ingredients
I use vital gluten and an enhancer. I prefer this to adding regular yeast as some recipes suggest. An enhancer is something sweet that jump starts your bread. My go to enhancers are molasses, maple syrup, and honey. Of these, molasses adds the richest depth of flavor and honey is the most neutral. Since, I absolutely hate people going on a wild goose chase to buy new things for a basic recipe, if you do not have any of these just use sugar.

What flour to Use
I am still waiting to work with rye flour, but I have tried various varieties of whole wheat and spelt flour, including atta and whole wheat pastry flour. My best results are working with white whole wheat flour and spelt flour. I have made this recipe with various combinations of the two including 100% of either flour.
Starter
You need a very active starter. Yes, do the float test!
If you store your starter in the refrigerator like me, bring it out at least a day before baking, and feed it about 2 to 3 times in eight hour intervals.
Autolyse
So, autolyse is one of those terms I learned on my sourdough journey and yes, I swear by it. This is essentially mixing the dough roughly prior to adding salt and the starter and letting it rest for 20 minutes to a couple of hours. I find about 2 hours is a charm.
Hydration
Without writing a thesis on this, hydration is the percentage of water in the dough. I feel that about 60 to 70% hydration gets me there.

Baking
I like baking this in a deep cast iron pan or a loaf pan. Also a cast iron loaf pan. Yes, I love cast iron cookware.

Storing
If you are not using your sourdough bread right away, freeze it! I find that it deteriorates in flavor if left for two long in the refrigerator. Considering we spend so long in building that wonderful deep flavor, this matters, right?
And now without much ado, here is my sourdough recipe.
PrintWholegrain Sourdough Bread – Recipe, Tips, and How I do it.
Prep Time: 24 hours
Cook Time: 40 minutes
Total Time: 24 hours, 40 minutes
Yield: 1 loaf
A tested and tried technique for wholegrain sourdough bread
Ingredients
500 grams whole grain flour (white whole wheat or spelt or a combination)3/4 cup about 75 grams vital gluten
1 tablespoon molasses, honey or sugar
300 to 350 grams of water (see note)
3/4 cup (100 grams) very active starter
2 teaspoon salt or to taste
3/4 cup rice or other gluten free flour for dusting (see note)
Instructions
In a large mixing bowl using a bread whisk stir in the wholegrain flour, vital gluten until well mixed.Sir in the molasses or other sweetener and the water. Mix until just incorporated into a loose shaggy dough and set this aside.
After 2 hours or at least 30 minutes later check out the dough. You will be amazed at how much more elastic this becomes.
Stir the salt into the starter and mix the mixture well until smooth and well incorporated. I use my hand and it takes about 10 minutes.
Cover and set this aside for about 8 hours until the mixture is doubled.
Mix well, and gather roughly into a ball.
Stretch the dough on either side and as much as it will allow your without tearing. Fold the dough over. Repeat this every 15 minutes about 4 times.
Dust a shaping basket with the rice flour. Using a gluten free flour like a rice flour makes it less sticky, however, if you do not have this on hand use regular flour.
Cover and let this rest for at least another 6 hours.
Preheat the oven to 500 degrees. Heat a cast iron pot (with a cover) such as a Dutch oven for 20 minutes,
Remove the Dutch Oven and line with a piece of parchment.
Carefully place the bread into the Dutch Oven. Score the bread using a sharp knife or lame.
Cover and place into the oven.
Bake for 40 minutes (I keep the lid closed, as the home crew likes the crust soft). Turn off the oven, remove the cast iron pot and enjoy warm or allow the bread to cool and slice and enjoy as you wish.
Notes
Adding more water will make the bread lighter, but also makes the dough harder to work with.
A gluten free flour for dusting your final shaping bowl helps in removing the bread when ready as it is less sticky.
You can use any basket, certainly the Banneton baskets are the most common.
The post Wholegrain Sourdough Bread – Recipe, Tips, and How I do it. appeared first on Spice Chronicles.
September 7, 2020
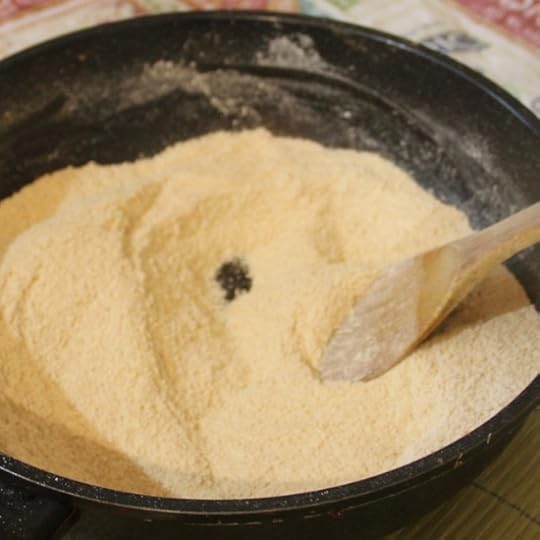
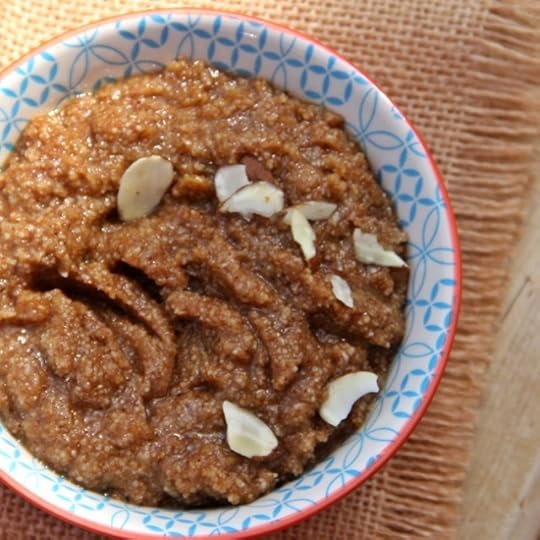
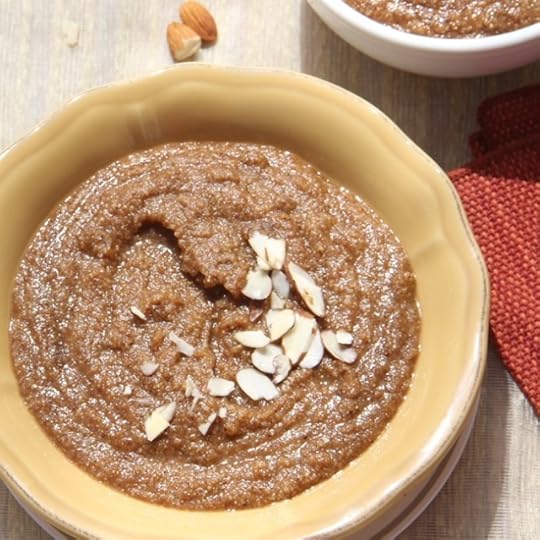
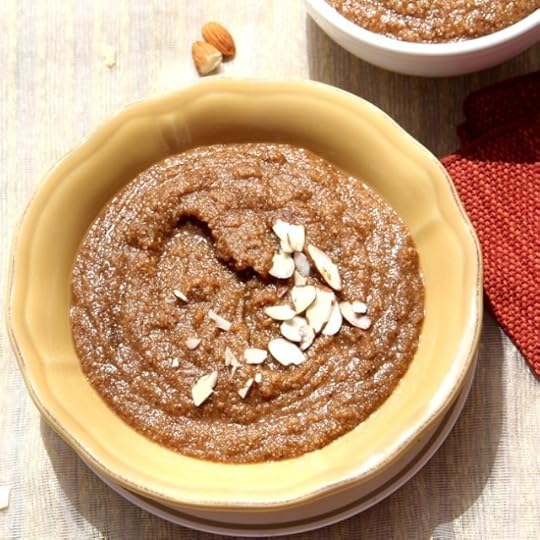
Atta ka Sheera/Halwa – Whole Wheat Flour Pudding
 What a crazy few days it has been. It is almost like September arrives and so that a quicker pace of things. The pandemic has helped me veer away from crazy mindless shopping. All the cooking has honed my already good meal planning skills. This said, I am cooking a lot more and when house guests visit, it is a challenge to keep up. It makes me realize how simple the general fare in our house is. And speaking of simple, if you are looking for a super simple dessert think Atta ka sheera or Halwa. 3 ingredients plus some raisins and almonds if you so wish and we are in the sheera business.
In Indian homes, combining a wholegrain with ghee and a sweetener to make a halwa is a very common affair. The beauty of these desserts rest in their sheer simplicity.
Now interestingly enough, this is a very common halwa in North Indian households as the ingredients are always readily available. Whole wheat flour, sugar or jaggery and ghee. That is the baseline. You do want good quality ghee, preferably homemade ghee. As an alternative you can use the coarse whole wheat laddu flour, found in Indian markets. I happened to have some on hand. Using this gives the halwa a lovely texture, but does take a little longer to brown.
Given that I am almost always used to making the semolina halwa or mohon bhog, this is a nice change. And I managed to add another dessert to my repertoire. A simple and easy to make one to boot. Warm, fragrant, simple and soothing. It is just the kind of warming dessert that you want on your table.
A few things to note:
It is important to dry roast the whole wheat flour stirring consistently to get the nice brown color and flavor. You will need to plan about 20 minutes for this.
The halwa gets its color from the roasting, so do not skip or shortchange this step.
I turn off the fire during the final 4 minutes of cooking, and feel that this prevents extra browning or burning.
If you are not using the coarse whole wheat flour, stir constantly and consistently to prevent any lumps.
Leave the halwa a little looser than what you actually want to serve as it will thicken a little when you are ready to serve.
Jaggery if you have it really complements the rustic flavors of this halwa.
PrintAtta ka Sheera/Halwa – Whole Wheat Flour Pudding
Prep Time: 2 minutes
Cook Time: 30 minutes
Total Time: 32 minutes
Yield: Serves 6 to 8
A gorgeous comforting sheera or halwa which is a pudding and in this case it is done with whole wheat flour or atta.
Ingredients
1 cup of atta or whole wheat flour1/2 cup pure ghee
2 cups water
1/2 to 3/4 cup jaggery, chopped into small pieces
Optional
1/4 cup raisins
1/4 cup chopped almonds
Instructions
Place the whole wheat flour in a heavy bottomed pan and roast on medium low heat. Set the timer to 20 minutes. You need to continue roasting until the whole wheat flour turns medium brown. The color of burnished wood.Turn off the stove (since your pan retains a lot of heat, this allows it cool slightly to prevent the flour from burning up.
Add in the ghee and stir well until the ghee is well incorporated. Turn the heat back on keeping the flame on medium low.
Add in the water and the jaggery and cook stirring frequently until the water is absorbed and the mixture thickens considerably. It should have the consistency of thick oatmeal.
If you are using raisins and almonds, add them in at this point of time.
Cool slightly and serve warm.3.1http://www.spicechronicles.com/atta-ka-sheera-halwa-whole-wheat-flour-pudding/
The post Atta ka Sheera/Halwa – Whole Wheat Flour Pudding appeared first on Spice Chronicles.
September 2, 2020
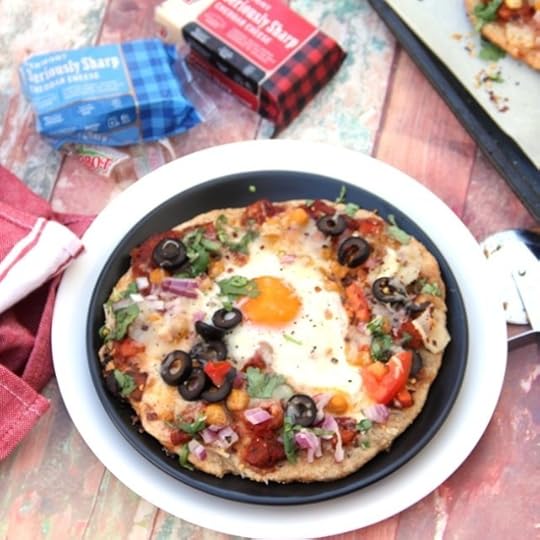
Shakshuka Pizza or Flatbread
 And, here is September with a bang. Fun as it was, our vacation was just too short. This Sunday, I worked through a lot of some of our favorite ingredients and flavors to create this pizza flatbread. It actually started it’s life as shakshuka.
Well, Shakshuka sauce anyway. This time of the year, when tomatoes are so plentiful I make a few different sauces and keep them handy. There is always my basic curry sauce and the tikka masala sauce from Instant Indian and then there is everything else in between. To make this a complete meal, I created these flat breads or pizza. Interestingly enough, the combination of cheddar and tomatoes brought home a sharp nostalgic memory. As a child growing up, we mostly ate Amul cheese, which is a cheddar cheese of sorts. Probably why I love cheddar so much. And, yes, my first homemade taste of pizza in fact, combined cheddar with a simple tomato sauce. Since then, I have learned to love sharp and sharper cheeses and my go to these days is Cabot Sharp, Extra Sharp and Seriously Sharp Cheddars.
Nostalgia is such a strange thing, every time I made this, the combined flavors of sharp melted cheddar with a homey tomato sauce transports me right back to childhood. My toppings are different, and I love being able to add the egg, after all everything tastes better with an egg on top.
Wholesome, satisfying and healthy. This is comfort and healthy satisfaction in a colorful package. T
So, here I have used a bunch of things like olives and chickpeas to boost the flavor and nutrition. I have made by own pita/pizza base, however whole grain pita’s work very well for this recipe. You can do this in the oven. And, this can be done very well in the air fryer, if you just want to make one or two. So, it is really all about possibilities. I use cilantro, lots of it. I think working with mint or any other herb of your choice will be just fine.
To get this done right, there are a few layers to the flatbread and I am offering all the options that make this one of our favorite all time meals.
The Bread or Crust
You can use my wholewheat naan recipe or use wholegrain Pita breads. You want a structured and assertive base.

The Sauce
I have a recipe for a quick shakshuka base, however, if you are in a rush you can definitely use your favorite pasta sauce.
The Cheese
I am using Seriously Sharp Cheddar for this, I feel it adds some good assertive flavors to this mix.
Other Toppings
You can get creative here, I use chickpeas, olives, diced red onions and cilantro. And of course, a bright egg. 
The net result is a gorgeous flatbread that everyone can stand behind.
If you like this recipe and want more ideas, do join my Indian Instant Pot Facebook group and Legume Love Group. Of course Instant Indian is ready for order, joining its siblings The Bengali Five Spice Chronicles and Spices and Seasons.
PrintShakshuka Pizza or Flatbread
Prep Time: 15 minutes
Cook Time: 35 minutes
Total Time: 50 minutes
Yield: Serves 4 to 6

A gorgeous creation of a shakshuka pizza, that makes a hearty and wholesome meal.
Ingredients
4 wholewheat pita or naan breadsOil and Cornmeal to prep the sheet pan
2 tablespoons oil
1 teaspoon powdered cumin
1 large red onion,diced
2 cloves of garlic, minced
1 bell pepper diced
3 tomatoes, diced
1 teaspoon red pepper flakes
1 teaspoon salt or to taste
4 eggs
2 cups grated extra sharp Cabot Cheddar (can be by NY or Vermont)
1/2 cup sliced olives
1/2 cup cooked chickpeas
Chopped cilantro
Instructions
Preheat the oven to 400 degrees.Grease and lightly sprinkle a sheet pan with cornmeal. (Please see the notes for air-fryer instructions)
Place the pita or naan breads on the sheet pan and bake for about 5 minutes until lightly crisped. Remove from the oven.
In the meantime, heat the oil in a skillet.
Add in the cumin and all but 2 tablespoons of the diced onion and garlic and saute for about 5 minutes.
Add in the bell pepper and all but 2 tablespoons of the diced tomatoes.
Stir in the salt and the red pepper flakes. Cook until the mixture simmers and thickens into a spreadable sauce. This will take about 10 minutes.
Spread each of the flat breads with the sauce, covering the surface. Break an egg into the center of each bread.
Sprinkle with the cheese.
Add in the olives and chickpeas.
Place back into the oven and bake for another 10 minutes.
Remove from the oven and sprinkle with the reserved tomatoes, onions and cilantro. You can add extra cheese if you wish. Cut into wedges and serve hot.
Notes
To make this in an Air fryer.
Place the pita in the basket and cook for 3 minutes.
Prepare the sauce and arrange as above. Air fryer for 5 minutes until the cheese has melted.
Top with cilantro, tomatoes and onions and serve.
The post Shakshuka Pizza or Flatbread appeared first on Spice Chronicles.


