
Jordan Castillo Price's Blog, page 37
January 31, 2013
Zero Hour recommended in USA Today!
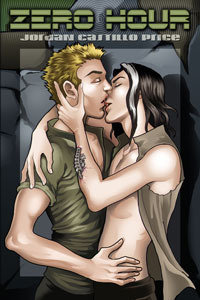 What a treat! Zero Hour was recommended in a USA Today review of three backlist post-apocalyptic romance novels. This is a thrill for me because not only as the author but as the publisher.
"This is perfect if you're looking for a sweet innocent hero..." read the rest here!
And if you haven't voted yet for Favourite m/m Author 2012, there's still a few more days. Come show your support! All you need to do is leave a comment.


January 28, 2013
I've Made Top 5!
Happy Monday, everyone! I'm so honored to have landed in the top five nominees for Favourite M/M Author 2012 at Reviews by Jessewave. My fellow nominees are the talented Abigail Roux, Amy Lane, Harper Fox and Kaje Harper.
Come cast your vote! (It's a dead heat between Abi and Amy at this point...)
Thank you so much to all of you who nominated me, I'm really touched.
Come cast your vote! (It's a dead heat between Abi and Amy at this point...)
Thank you so much to all of you who nominated me, I'm really touched.
January 25, 2013
Photoshop Friday - the magic of the right click
Because I'm a mac user, I learned to mouse with a single-click mouse. Because I'm sloppy, I keep my modern programmable mouse as a left-click-only, because who the heck knows what's happening when I accidentally right click. But in Photoshop, it turns out there's scads of functionality waiting to be unlocked with the right-click (or control-click, for those of us who've deliberately dumbed down their input devices.)
Move Tool - right-click allows you to select a different layer
Select Tool - right click pulls up a menu to let you invert or feather your selection, fill or deselect, just to name a few
Brush Tool - right-click pulls up the brush menu so you can switch brushes on the fly
Try right-clicking in your favorite tool today. You may be surprised at how easy it is to fine-tune it.
Find out more about the cover art used in the demo at jcpbooks.com
January 18, 2013
Photoshop Friday - powerhouse key: option/alt
Three uses for the option key (alt on PC)
1. move the rotation point of an object you're transforming
2. make "undo" act like it does in other programs
3. set the background color with the eyedropper tool
And, bonus! I demonstrate option-clicking between two layers to clip them together.
1. move the rotation point of an object you're transforming
2. make "undo" act like it does in other programs
3. set the background color with the eyedropper tool
And, bonus! I demonstrate option-clicking between two layers to clip them together.
January 17, 2013
Turbulence Collection cover happiness
Turbulence Collection will release 2/15 with the last edition of the serialized Turbulence. And it now has cover art.

January 15, 2013
Penultimate Turbulence! JCP News #60
 Turbulence is wrapping next month - get your penultimate episode in January's JCP News. Also find a few interesting Mac recommendations, a roundup of Photoshop Friday, and a cool story about a guy and his point-and-shoot. Read about it here!
(Also, wow, I'm on issue #60, which means I've been doing this newsletter monthly for five years! Or does that mean I'm starting year six???)
January 11, 2013
Photoshop Friday - art history brush (video)
I posted the result of an art history brush experiment a while back and had a request to see it in action. Here's the screencast, using the art history brush and the history brush to create custom distressed text for things like titles.
My steps:
1. Type out the text
2. Rasterize text layer
3. Merge layer with the color layer below it
4. Indicate in the history panel that your current step is the state you'd like the history brush to refer to (click little box on left)
Now select the Art History brush (beneath the History brush in the tools) (letter Y on the keyboard)
and start scrubbing out your lettering, then switch to the History brush
to bring back clarity where you want it. Keep working back and forth
between the two brushes to reveal and conceal parts of your text.
Keep in mind: there are MULTIPLE styles of Art History brush to choose from
at the top. You might use one type for your initial pass, bring back
some undistorted pixels with the History brush (shift-Y), then go for another pass
with a different style Art History brush. (shift-Y again to toggle)
Also: you can choose
between ALL YOUR BRUSH TIPS for this function. A hard-edged brush and a misty soft brush will
The other layers in the demo were applied with blend modes "screen" and "hard light" to create depth.
January 4, 2013
Photoshop Friday - multiple views
Here's a short screencast about using multiple document windows and Save for Web to see your composition the way viewers will see it.
January 2, 2013
Notion Potion #9: Capturing Ideas
Don't let the awesomeness of your mind slip away from you - relentlessly capture those ideas!
December 31, 2012
Site Update, PsyCop.com
The PsyCop site has been updated to include links to Photoshop Fridays, the JCP Books Gift Shop, and links to the Victor Bayne online jigsaw puzzle.
Visit PsyCop.com
Visit PsyCop.com


