Rachael Ray's Blog, page 71
February 6, 2013
Chocolate-Dipped Coconut Macaroons
When I first started dating my now-husband, his palate was pretty limited and there was a lengthy list of foods he would not eat, including, off the top of my head, beans (black, white, garbanzo, you name it), tofu, squash, sweet potatoes, brussel sprouts, coconut, and many many more. He has come a long way since then, and has embraced beans, which was a particular mission of my mother’s. One food he still can’t tolerate is coconut, which I love. Sad for him because many of my favorite desserts have coconut - including hello dollies and these chocolate dipped coconut macaroons. It’s actually sad for me too because I just end up eating his share of the coconut treats. I wish I could say the same for his squash.
Chocolate-Dipped Coconut Macaroons
(click here for printable recipe)
Ingredients
14 ounces sweetened shredded coconut
14 ounces sweetened condensed milk
1 teaspoon vanilla
2 egg whites
1/2 teaspoon salt
2 cups chocolate chips
small piece of paraffin wax (optional)
Directions
Preheat the oven to 325 degrees F. Combine the coconut, condensed milk, and vanilla in a large bowl. Whip the egg whites and salt on high speed in the bowl of an electric mixer fitted with the whisk attachment until they make medium-firm peaks. Carefully fold the egg whites into the coconut mixture.
Drop the batter in generous tablespoons onto sheet pans lined with parchment paper. Bake for 25 to 30 minutes, until golden brown. Let cool completely. Melt chocolate chips and paraffin (if using) over low heat or in the microwave, stirring often. Dip the half of each cookie in the melted chocolate, lay dipped cookies on wax paper to set. Store at room temperature.
Sweetheart Strawberry Pancakes!
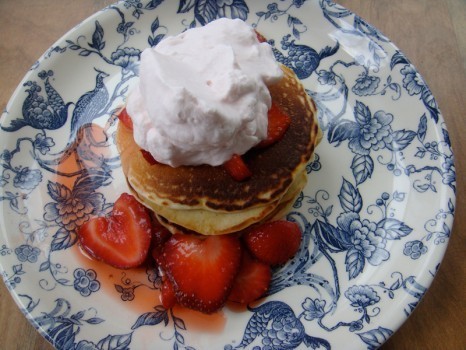
Surprise your sweetheart this Valentine’s Day with something sweet: breakfast in bed. These homemade pancakes are fantastic with just better and syrup, and are a Sunday morning staple in my house, but topped with fresh, heart-shaped strawberries and homemade whipped cream they become a Valentine’s Day treat.
Ingredients
Strawberry topping:
1-lb strawberries
2 tbsp. lemon juice
1/4 - 1/2 cup sugar
Pancakes:
1 1/4 cup flour
3 tsp. baking powder
1 tbsp. sugar
1/2 tsp. salt
1 egg
1 cup milk
2 tbsp. vegetable oil
(makes about a dozen small pancakes)
Strawberry Whipped Cream:
1 pint heavy or whipping cream
1 tsp. vanilla extract
2 tbsp. sugar
Juice from strawberries
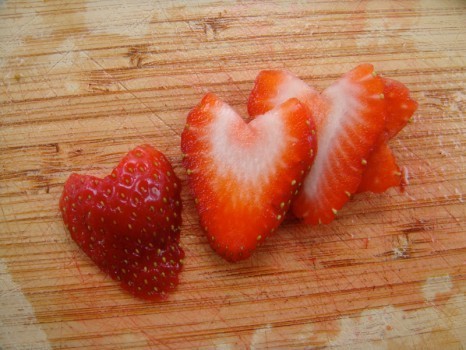
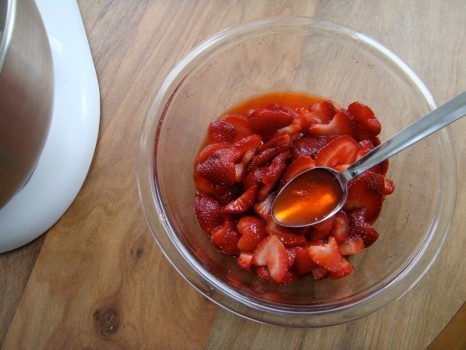
Remove the strawberry stems. Cut a notch in the top to make the strawberry slices heart-shaped. Slice the strawberries into thin slices. Throw the cut out notch into the bowl too.
Mix the strawberry slices with the sugar and lemon juice. Use less sugar for really sweet, fresh berries, and more for more tart berries. To properly macerate the strawberry topping, let the strawberries sit in the lemon and sugar at least an hour (up to two hours).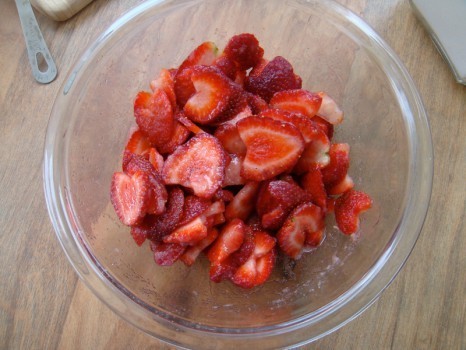
Tip: If the berries stain your cutting board, scrub clean with half a lemon and salt.
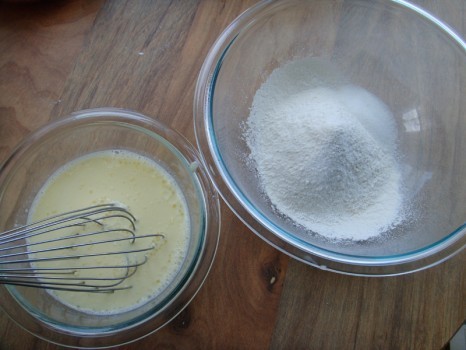
To make the pancakes, sift flour and baking powder together. Add sugar and salt. In a separate bowl, whisk egg milk and oil.
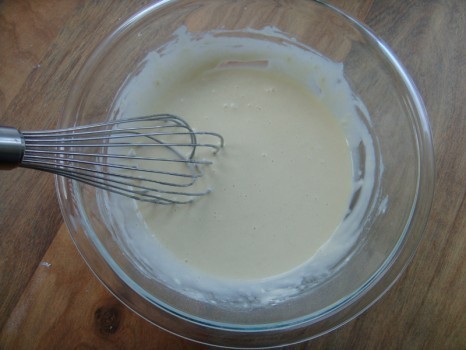
Add wet ingredients to dry and whisk just until combined
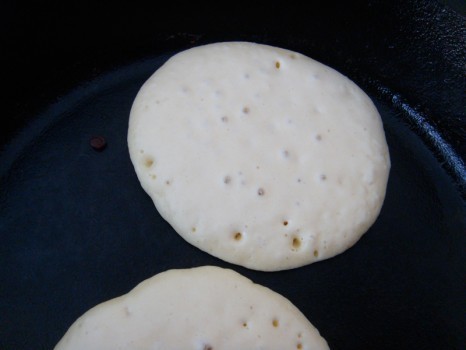
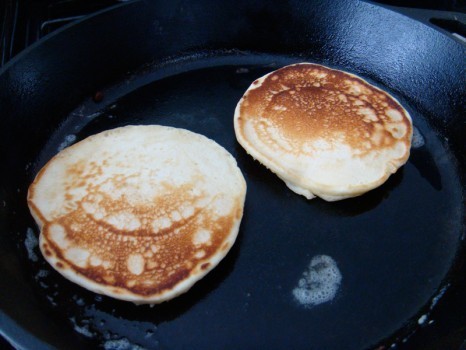
Put a little butter into a skillet on medium heat—it may take a couple rounds to get the heat just right. Spoon pancake batter into the pan (about two spoonfuls per pancake). Cook until batter starts to bubble and the bubbles on the edges stay open. Then flip.
If your pan is like mine, it might not heat evenly, so you won’t get those smooth, restaurant-style looking pancakes like one gets from a griddle, but they’ll still be delicious.
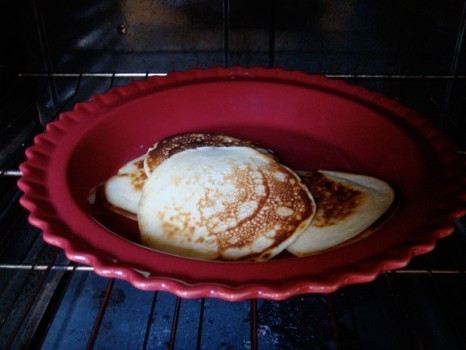
Since all the pancakes can’t be cooked at the same time, keep them in a warm oven until ready to serve.
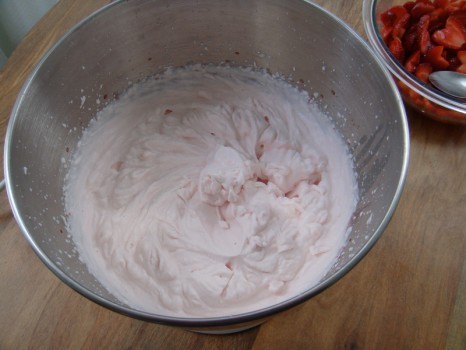
When the strawberries have macerated, and the pancakes are done, pour the pint of cream into a mixing bowl with the sugar and vanilla. Mix on medium speed. Add juice from macerated strawberries until the cream turns a light pink. This will make a ton of whipped cream, so half the recipe if you don’t want a lot of leftover cream.
Mix on high to whip the cream being careful not to over whip the cream into butter.
Stack the pancakes, spoon the strawberries over the cakes and top with whipped cream. Serve with a little maple syrup on the side. Yum!
Find me on Facebook!
February 4, 2013
Guilt-free snacking: crispy roasted chick peas
I am recovering from an incredible weekend of eating (I’m sure I’m not alone) - capped off by a Super Bowl chili extravaganza. Today is definitely a day for yoga pants (hold the yoga). I am a self-professed saltaholic, and love nothing more than a crispy, salty snack to mindlessly munch. I made these roasted garbanzo beans (or chick peas) yesterday and was pleased with the result - a healthy substitute for salty chips. I used canned beans, tossed them in a little olive oil with some spices and roasted them in a hot oven for 40 minutes. I will definitely make them again.
Crispy Roasted Chick Peas (click here for printable recipe)
Ingredients
3 cans chick peas
3 tablespoons olive oil (you could also use non-stick cooking spray)
1/2 - 1 teaspoon each of your choice of spices (I used cumin, chili powder, cayenne pepper, and ginger)
Salt and pepper to taste
Directions
Preheat oven to 400 degrees F. Drain and rinse the chick peas and lay out on paper towels to thoroughly dry. Line a cookie sheet with foil or parchment paper and spray with non-stick cooking spray. Transfer chick peas to cookie sheet. Combine the olive oil and spices in a small bowl and whisk to combine. Immediately pour over chick peas and toss. Season with salt and pepper. Bake for 35-45 minutes, until browned and crispy. Serve hot or at room temperature. Store at room temperature.
Romantic Decoupage Candles
Add some romantic mood lighting to your Valentine’s Day with these easy decoupage candle holders. They make a great gift for your sweetheart, and they’re simple to make, so make a few to light up the night. These can also double as vases if your Valentine prefers flowers to candles.
Materials
Glass candle holder
Red, white, and/or pink tissue paper
Decoupage glue (or acrylic gel medium)
Paint brush
Tea candle
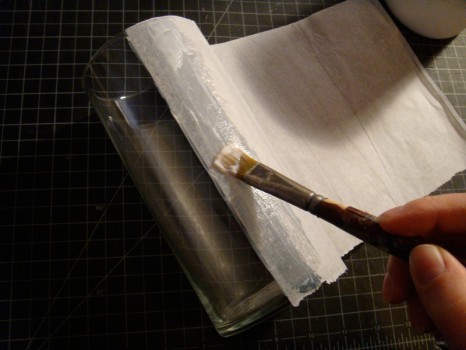
Cut the base tissue paper, so it will wrap around the glass candle holder, Tack in place with a little glue on the back edge. Then paint the glue on top.
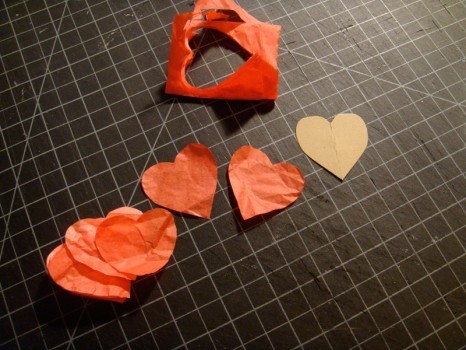
To make uniform, decorative hearts, make a template with paper, fold a strip of tissue paper accordion style, trace the template, and cut the paper.
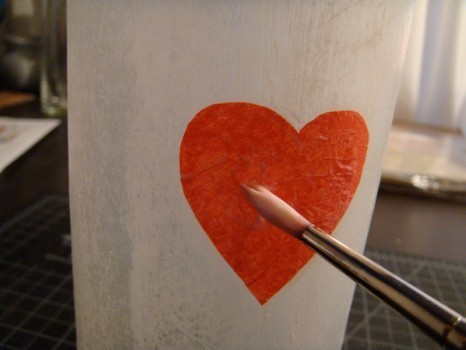
Once the base paper has dried, tack the heart on with a little glue, and paint over with glue. Use your imagination to create any design you like. Your special someone will love that you took the time to make something unique for Valentine’s Day.
Find me on Facebook!
Asking Hard Questions of Teresa Von Fuchs, The Coffee Woman
This week, as a service to Rachael Ray.com readers, many of whom drink coffee, I interviewed coffee expert Teresa von Fuchs, who in spite of her formidable-sounding name, is actually a great gal and easily relatable. Teresa is the director of wholesale at Irving Farm Coffee Roasters, one of the city’s elite coffee operations.
Theresa, when I go to buy coffee, every kind has a million varieties from places I never heard of. How the hell am I supposed to figure out what to get?
There’s a lot of meats and cheeses most people aren’t familiar with, either. All you need to do is ask about them, the way you would at a butcher or a cheesemonger.
Listen you. Don’t get wise. There is never anybody around at a supermarket to ask. That’s why I am interviewing you!
Fair enough. Well, there are traditional flavor profiles that people traditionally associate with various regions. Indonesian coffees tend to be big and earthy, Central American coffees are clean and chocolately, and African coffees range from tea-like and winey to fruity and acidic - generally wilder than the other regions.
That makes sense. But what the hell am I supposed to make of all these ridiculous descriptions like “notes of honeydew, marzipan, and a hint of tobacco on the back of the palate?” I mean, what is that even supposed to mean? Plus there’s all this stuff about the elevation, the soil, “organic,” “shade-grown,” and a million other buzzwords.
Most of that is just to show off. But some of it is actually relevant. The altitude tells you something about the coffee, because the higher it is grown the more complex the taste and often the greater the acidity. Cooler temperatures means it takes longer for the fruit to fully develop. The region matters, because the place something grows makes it taste the way it does. And then there are other aspects, like varietials and proccesses, that take longer to figure out and then sometimes there’s stuff that only hardcore coffee nerds get into. Probably the most important thing is that, no matter where it’s from, it comes from one particular farm or plantation.
How come?
Because when beans from dozens of producers are all thrown together, there’s no real incentive for any one of them to really take extra care. And coffee-growing is super labor-intensive. The beans are hand-picked. It takes multiple passes during a harvest to pick only the ripe cherries. And how the beans are stored is as important as how they are picked. Nobody is going to take that extra trouble if their beans are all bought in bulk for a rock-bottom price, which is how most of the big coffee brands get their beans.
I know, but….the good coffee is so expensive now! How the hell am I supposed to pay $16 for a pound of coffee I’ll go through in three days? I mean, really!
Look dude. Coffee comes from far away and people hand-pick every bean. Those beans have to be cleaned and carried and stored - coffee is very volatile - and then shipped halfway across the world to be carefully roasted - every one has to be cooked the right way, just like any other kind of food - and then brought to you at the store before it gets stale. None of the top coffee roasters are getting rich at this. This is a labor of love. It costs what it costs.
Well. OK.
I’m just saying. You get what you pay for.
So what do I look for? If I’m going to pay that much, I want to make sure I get the really good stuff. So I can put evaporated milk and Sweet n Low in it!
(Pause) OK, well - make sure there is a roasting date. If there isn’t, that means it’s likely to be old and / or stale. Look where it’s roasted. You want it to be somewhere close to where you are buying it. There are a lot of roasters and importers that you can rely on to sell good coffee. I’m a fan of Irving Farm, obviously, but there’s the big guys: Stumptown, Counter Culture, Intelligentsia, and a bunch of small roasters around the country like Madcap and Four Barrell, Dallis Bros, Square One, Cuvee and if none of those are near you there are a bunch of us that have subscriptions by mail and web shops.
And they send it, how? As beans? Or as ground up coffee?
No, it gets stale if it’s ground ahead of time. Get a coffee grinder. The best kind is a burr grinder, which does the best job of grinding evenly; but even the little propeller-style grinders, that have a little blade that spins at the bottom, are better than buying it ground. Just make sure that it’s a different machine; those combo grinders are hard to clean. We like to stay away from the plug in Mr. Coffee-style machines. They never get the water hot enough, and they’re also hard to clean. Go to a simple method like a french press or a simple pour-over. They’re easy to use and the generally make the best coffee.
OK, some last quick questions. Then I will let you go. If you had to buy one of the regular supermarket brands, which one would it be? I personally like Chock Full O’ Nuts, “that heavenly coffee.”
I drank some Bustelo at somebody’s house recently, which is a canned ground cofffee like that. And well, I drank it. So guess I’d say Bustelo.
Can I nuke the coffee when it gets cold?
You can, but it’s going to taste different than it did when you first made it. The acids are going to concentrate, which makes for an unpleasant taste. Nuking it changes the flavor. Just make more fresh cups.
How do you drink your coffee?
I drink my coffee black.
Do you use Sweet n’ Low?
We’re done here, I think.
February 1, 2013
Superbowl Sweet: Spicy Chocolate Monkey Bread
Superbowl is just a few days away and by now I’m sure you have your savory items planned out for the big tailgate feast. Sliders, dogs, ribs are all fan favorites on game day but the sweets are usually an afterthought. I may not know who’s playing but I do know a lot about the food and any meal without dessert is one not worth having if you ask me.
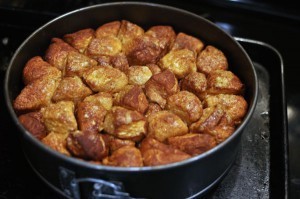
So, if you’re still searching for that perfect game day dessert, look no further my friends. I’m here to tell you that Monkey Bread is all you really need. What is Monkey Bread, you ask? It’s a sweet, pull-apart style bread that’s soft and gooey and oh-so-delicious. You can eat Monkey Bread with your fingers which makes it perfect for those who need their other hand to cheer on the team. Oh and the bites are small so you’ll have plenty of mouth space to talk trash about the other team. Best thing is, it’s made with refrigerated biscuit dough and comes together in minutes. The inspiration for this monkey bread came from the slightly sweet, slightly spicy flavors of Mexican hot chocolate. The combination of cocoa powder, sugar, cinnamon and just a pinch of cayenne is outstanding. No matter who takes home the trophy on Sunday, this dessert is sure to be a winner!
Yay Food, er….TEAM!
Spicy Chocolate Monkey Bread
Serves 6
Ingredients:
1/2 cup granulated sugar
1 teaspoon cinnamon
1 1/2 teaspoons unsweetened cocoa powder
1/8 teaspoon cayenne pepper
1/4 teaspoon salt
2 cans refrigerated buttermilk biscuit dough
1 cup brown sugar
3/4 cup unsalted butter
Instructions:
1. Preheat oven to 350 degrees. Grease a 9-inch speincform pan and set aside.
2. In a large zip-top bag combine granulated sugar, cinnamon, cocoa powder, cayenne pepper and salt and mix to combine.
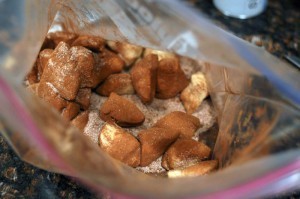
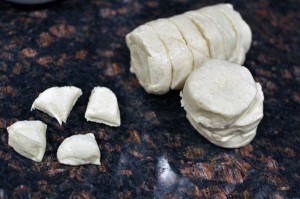
3. Separate each biscuit and cut them into quarters. Add biscuits to the zip-top bag, remove air from bag and seal. Shake bag until all of the pieces of dough are coated in the sugar mixture.
4. In a small saucepan heat butter and brown sugar until melted.
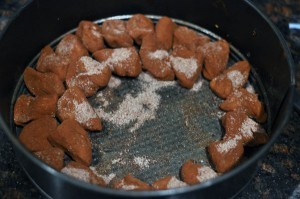
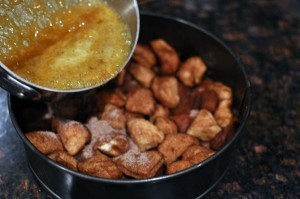
5. Arrange the biscuit pieces in the prepared spring-form pan in layers. Pour butter and sugar mixture over the pieces and bake for 25-28 minutes. Cool in pan for about 8-10 minutes before un-molding onto a platter. Serve warm.
January 30, 2013
Junk in Da Trunk Cookies
When I first starting baking, your standard chocolate chip cookie or classic brownie was more than enough for me. As I have continued on my baking journey, I have delved deeper and deeper into different kinds of recipes. Classic recipes are my favorite - think lemon squares, oatmeal cookies, blondies, red velvet cupcakes. I went through a cake phase (I subsequently realized not my strong suit), a cream puff/eclair stage, muffin madness, a cheesecake binge, the list goes on.
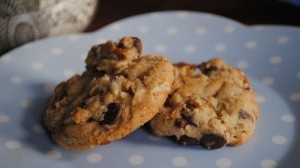
I’ve noticed that the current trend in baking is recreating childhood treats in your kitchen - homemade twinkies, ho-hos, cream filled frosted cupcakes. My friend gave me this cookbook for Christmas - “Baking Out Loud” by Hedy Goldsmith - which features many of these recipes. I have made a few but this cookie recipe is my favorite so far. It’s a sweet and salty party - a rich and chewy chocolate chip cookie with potato chips, pretzels and whoppers in the mix. Insane but it works. The dough balls need to be chilled for at least an hour so plan ahead.
Junk in Da Trunk Cookies (adapted from a recipe from “Baking Out Loud” by Hedy Goldsmith)
(Click here for printable recipe)
Ingredients
1 3/4 cups flour
3/4 teaspoon baking soda
1 stick butter, softened
1/2 cup packed brown sugar
1/2 cup sugar
1 teaspoon kosher salt
1 egg
1 teaspoon vanilla
1 cup chocolate chips
1/3 cup lightly crushed potato chips
1/3 cup coarsely chopped pretzels
12 malted milk balls, cut in half
Directions
Whisk together flour and baking soda in a small bowl, set aside. Using an electric mixer with a paddle attachment, beat the butter on medium speed for a few minutes. Add brown sugar, granulated sugar, and salt and beat on medium high for 5 minutes, scraping the bowl down occasionally. Add the egg and vanilla and beat until blended. Add flour mixture and beat on low speed until just combined - do not over mix.
Scrape down the sides of the bowl, add the chocolate chips, potato chips, pretzels, and malted milk balls. Stir until just blended - the dough will be jam-packed with “junk” - don’t worry, that’s how it should be.
Shape the dough into approximately 2 1/2-3 tablespoon-sized balls, arrange on a plate or cookie sheet, cover and chill for at least one hour or up to 2 days.
When ready to bake, preheat oven to 350 degrees F. Line 2 cookie sheets with parchment paper and arrange the chilled dough balls about two inches apart on the lined cookie sheets. Flatten each dough ball slightly. Bake for 11 - 15 minutes, or until the cookies are light golden brown. Do not over cook - these cookies are better underdone than over. Cool and store cookies in airtight container at room temp for up to 4 days. Reheat briefly in microwave prior to serving if desired.
Super Bowl Chicken Sliders
Sunday, as in SUPER BOWL SUNDAY, is just around the corner. Somehow, this sport made the transition to the ‘festive holiday’ category. We barely packed away the Christmas tree and now sports memorabilia of all sorts are being pulled out and grocery lists adhese to the refrigerator door. Friends and family will congregate and will then be immobilized for the rest of the day. Focus is in full force amongst spectators and if you’re at my house, idol chitchat is forbidden in fear of being ‘unlucky’. Of course food is on the agenda. In fact it makes a massive contribution to the day.
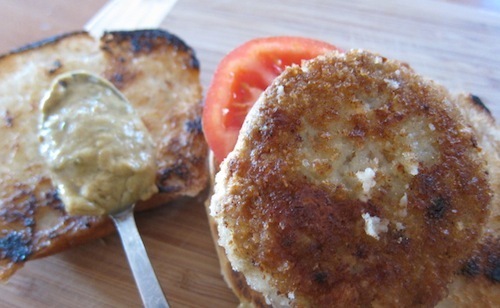
Since emotions runs high and low, it appears that only the spiciest varieties can stand up to the loudest of chanting and ranting. Buffalo wings, chips and salsas, spicy fries, really, the list could go on. Last year, I threw on home-made chicken sliders and it was a hit!! Chicken patties that were spiked with ginger, coriander and jalapeños and served on a toasted whole-wheat bun could be eaten without a plate and freed my guests from the act of finger-licking. But more importantly, it also kept the crowd at bay as they nuzzled their teeth in to calming carbs and protein twanged with heat and citrus.
These burgers can be made ahead of time and can be heated through in the oven on Sunday. Simply lay out two sheet pans, one with the pre-cooked burgers and the other with buttered buns, reheat them in the oven and serve on trays with condiments allowing your guests to customize their own sandwich.
Recipe for Super Bowl Chicken Sliders
Ingredients:
2 lbs. ground chicken
Medium-sized onion, grated
1 tbsp. grated ginger
2 tsp. salt
1 tsp. black pepper
1 tsp. coriander powder
1 deseeded and finely chopped jalapeno
1 tbsp. tabasco
1/4 cup finely chopped cilantro
2 tbsp. olive oil
3 cups panko breadcrumbs
Cooking method
1) In a large mixing bowl, add all the ingredients and mix thoroughly
2) Form 8 balls from the mixture
3) Spread bread crumbs on to the plate and press the balls in to the breadcrumbs to make round patties. Turn the patties over to coat the other side
4) Heat a non-stick frying pan on medium to high heat – coating with a film of oil.
5) Cook on each side for 5 minutes until cooked through and golden brown
Saira Malhotra, is of British–Indian descent and is a chef, food writer and cooking instructor based in New York City. Raised in Hounslow, U.K, or rather ‘Little India’, where the air is aromatic with roasted spices, little did Saira know these moments would follow her from being a student in France and Italy to residing in NYC with her husband and kids and parlay themselves unexpectedly in to a culinary career. She is a graduate of the International Culinary Center in New York City. Come visit her at her food blog: www.passportpantry.com where she shares approachable and international recipes
January 28, 2013
Valentine’s Day Party Favors!!!
This is a fun kids’ Valentine’s Day craft that’s easy to make, and inexpensive too. It’s made with simple materials, but the outcome is so impressive. Plus, they’re filled with candy, and what kid doesn’t like that?
Materials
Toilet paper tubes
Fancy paper: wrapping paper, construction paper, scrapbooking paper, etc.
Double-sided tape or glue
White electrical tape (optional)
White paper
Markers
Tissue Paper
Pre-wrapped candy
Clear cellophane
Pipe cleaners
Start with empty toilet paper tubes and fancy paper.
Tape or glue the fancy paper to the tube. I like to use double-sided tape—especially for thin papers like wrapping paper—because the paper won’t wrinkle. Kids will like it because it will adhere immediately without waiting for the glue to dry.
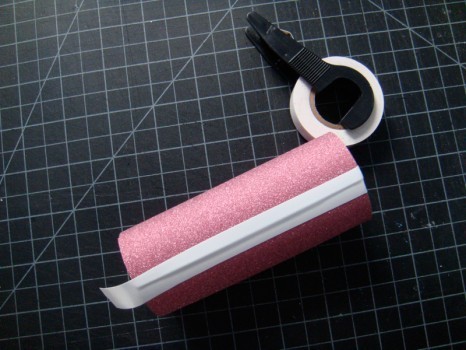
For thicker papers, like this glitter paper, a little bit of electrical tape keeps the paper in place, and still has a neat finish.
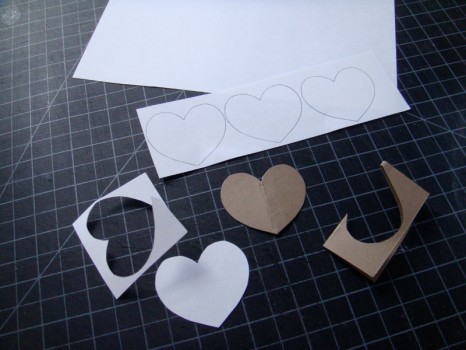
Make uniform hearts for labels or tags by making a template, and then trace that template onto white paper.
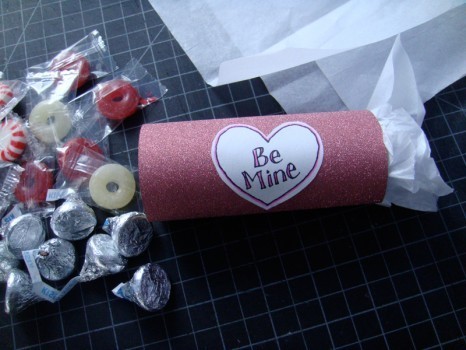
Write a message on the heart (or your Valentine’s name). Stuff one end of the tube with tissue paper. Fill the tube with pre-wrapped candy, and close open end of tube with more tissue paper.
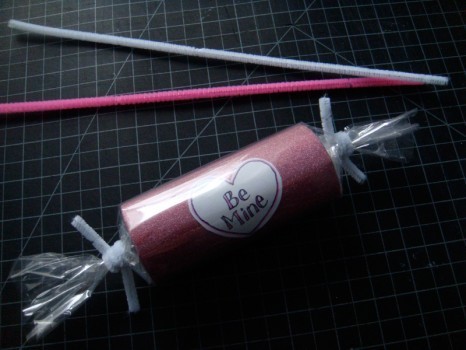
Wrap the adorable little package with clear cellophane and tie the ends by wrapping with pipe cleaners.
Find me on Facebook!
Candy Sushi, don’t miss the message
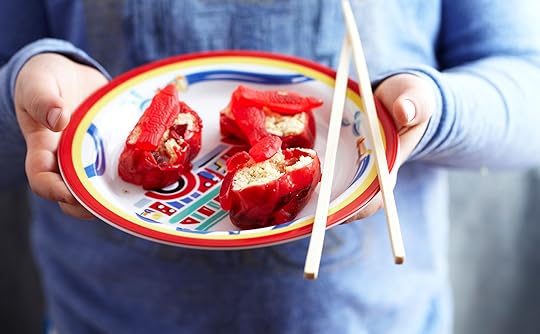
I know it sounds strange to be touting the benefits of candy, but we did have a positive moment with it recently, my son and I that is. He was taking a lunchtime elective at school called “Sweet Treats” where a few parents taught the kids how to make sweet recipes. They weren’t for the most part too terrible-there were smoothies and other fruit-related recipes, but one day they taught the kids to make “candy sushi,” which was about as bad as it gets. The kids took fruit roll-ups (hardly fruit), smooshed a rice krispie treat all over it, added some gummy worms and rolled it up, cut it sushi-roll style and added a Swedish fish atop each piece for good measure.
When he came home with this dish, I was at first horrified. Of course he had to have a piece for dessert after dinner and proudly paraded it around the house. The next day, I had a pastry chef in my home for a photo shoot and he insisted we go to the store so he could buy the ingredients to make her his candy sushi. I indulged him as I was curious to see how far he would take his project and he did something that really impressed me. Confidently, he called her next to him and he made the sushi, step by step, then presented it on a plate complete with chopsticks alongside. She was delighted.
I decided to try using this example to set him on a path of preparing other dishes for people and relishing in their joy at his creations. The candy sushi thing worked because it was easy for him and of course fun to play with candy, but that doesn’t mean he couldn’t take it to another level-away from the junk food and into other categories. The next day I had him make us all lunch, where he assembled sandwiches and pretzels for each person in the family.
While the candy may have been an indulgence, the message was not lost on me and it’s my turn to keep it going. We can’t expect a fellow parent or even a teacher to make our kids eat perfectly well all the time, that’s our job as parents. But we can listen to the lessons they are teaching and interpret them into something our kids can build and grow from at home. Hmmm, could this be the start of a solution for the picky eater??
Rachael Ray's Blog
- Rachael Ray's profile
- 296 followers


