
Melissa Clark's Blog
December 4, 2012
Easy, Comforting Cranberry Beans

There’s probably no need to state the obvious, but there’s
also no way to avoid talking about it: New York City has had a very turbulent
six weeks. Our city’s most devastating
natural disaster has taken a major toll on just about everything in our lives; it’s
impossible to ignore the consequences.
Many people in low-lying areas have lost everything. Others are still without power and heat, fuel
is scarce, and the most basic necessities are desperately needed. Forty-thousand people were homeless. The storm is over, but the recovery is
anything but. Of course, there’s always
the Red Cross, but it seems that Occupy Sandy is really leading the way in
relief efforts, alongside the Red Hook Initiative. Donate now, donate often.
My family and I were incredibly fortunate. Our power didn’t even flicker. We hunkered down for two days, and ate. Ate steak. Ate fried potatoes. Baked cakes and ate them. Ate just about any darn thing we wanted. And booze of course…my husband Daniel kept
the Manhattans flowing. And we snuggled Dahlia
till we were all snuggled out.
Towards
the end of the week, I actually made the trek into midtown, where I started my new staff job at the Times. A great thing, this new job, but it added to the feeling of upheaval. I now have a desk at the paper and a place to go, but after over a decade of working from home, it's disconcerting.
Then, the election filled with nail-biting anxiety and then a flood of relief. This was quickly followed by Thanksgiving, the busiest time of year for the food section of a newspaper. And now, the holiday season is here. Not coming, not on its way, but offically here. Dahlia and I sang Hanukkah songs and Christmas carrolls on the way to school today, even though it was 50 degrees out.
All this up and down has just about tuckered me out. And I know I’m not alone. So for those of you who, like me, need a
little easy comfort, I think I have just the thing: beans.
Beans…they might just be the most ancient comfort food. Just imagine how valuable they would have
been a hundred (or more) years ago—they store magnificently. They’re inexpensive. They’re hearty and nutritious. They can feed an army. Beans are little bundles of promise; they
hold immense potential that a few hours of simmering can unlock with wonderful
results.
A few weeks back, I froze the
last of the fresh cranberry beans I could get my hands on at the greenmarket, knowing
they’d come in handy. And they did
indeed. Cranberry beans can be utterly
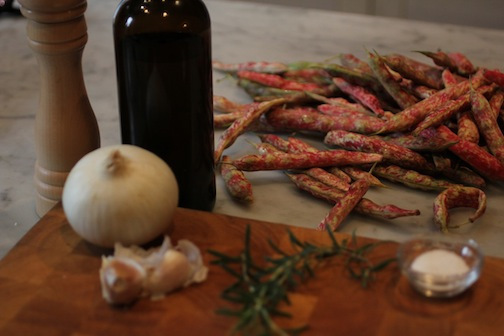
elegant, but my goal here was something easy and rustic. (Note to New Yorkers, Ray Bradley often sells frozen, shelled cranberry beans at the Grand Army Plaza Farmers' Market on Saturday.)

Dinner, with about five ingredients. I toss everything into a pot, and add enough
water to just cover the contents. I
bring the pot just to a boil, then reduce the heat and simmer, uncovered, for
about thirty to forty minutes until the beans are creamily irresitable. Of course, this could work with dried beans
too. Just give them a solid overnight
soak, drain them, and off you go though it will take more like an hour and a half (add more water if needed).
Even though Thanksgiving is past, I still feel a deep sense of gratitude. I have much to be thankful for, and being able to share good, satisfying food is high on the list.
Easy, Comforting Cranberry Beans
2 pounds fresh cranberry beans or 1 pound dried (soak overnight if using dried beans)
1 white onion, chopped
2 cloves garlic, smashed and chopped
3 sprigs rosemary
1 tablespoon salt
1/4 cup extra-virgin olive oil, more to taste
freshly ground black pepper, to taste
1. Into a large pot,
add all ingredients. Add enough water to
cover the beans (cover them by 2 inches if using dried beans). Over high heat, bring
pot to a boil then reduce heat to low and simmer 30-45 minutes (1 1/2-ish for dried
beans) until beans are tender.
2. Finish with flaky
sea salt, more black pepper, more olive oil, chili flakes, etc. Whatever suits your comfort food fancy.
Serves 4 to 6


October 15, 2012
Kitchen Hip Tip - Freezing Pesto
It got cold in New York last week and I had to conceed that autumn really is here. I took all my sweaters out of storage, turned the heat on, and clipped all the lemon verbena from the box on the deck to dry it out for tea in winter (feeling very DIY right now...).
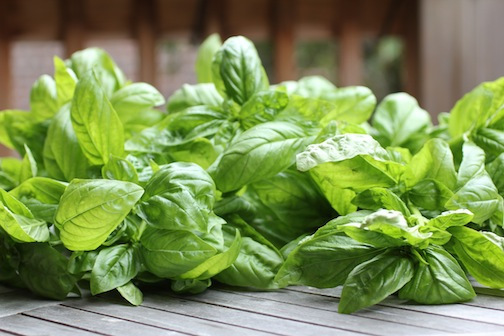
And a friend of
mine with a very, very large and hearty outdoor basil plant decided it was time
to slaughter it before the weather did first. Since I seem to be something of a halfway house for wayward, uprooted foods, she
brought this mass of basil here, to me. Why? To make pesto, of course.
I hauled out my tried-and-true pesto recipe, doubled it, and added a cup of parm—which was
left out originally for my non-cheese eating husband. As with anything that has so few ingredients,
the number one “trick” is to use the best.
Of everything. For pesto, that
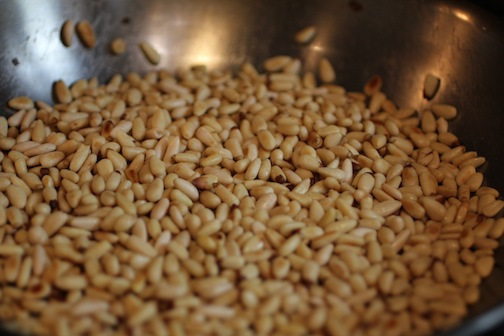
means really fresh basil and the best olive oil you have. It also means high-quality pine nuts (never,
EVER buy pine nuts from China) that have been well toasted until they’re
fragrant and golden. Some real
Parmigiano-Reggiano, and some super-sticky fresh garlic (garlic is soooo good
right now) and you’re off to the races.
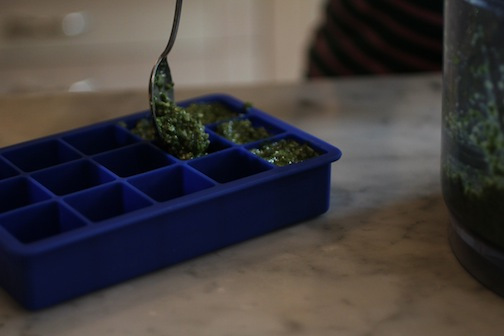
And here’s where the Kitchen Hip Tip comes in: freeze it!
Freeze that glorious, green, assertively warm-weather goodness for a
chilly night in February. Pesto freezes
marvelously. And I love to freeze it in
ice-cube trays (like I do homemade concentrated stocks, tomato paste, compound
butters, etc.) so that I have little bricks ready whenever I need just a touch
of something bright or deep. Spoon your ingredient X into your trays, cover with plastic wrap, and then, ideally, pop them out once they're frozen, wrap them, and label them...you know...when you're feeling industrious.
Pesto is fabulous
dotted over the top of soups, smeared into sandwiches, or spooned over a
blistering-hot steak. I love these
silicone trays that the fantastic Jim Meehan introduced me to; they make gorgeous ice cubes,
but they’re also incredibly handy for freezing other things. (Maybe buy red ones for ice, blue for everything else?) They hold a perfect two tablespoon’s
worth. Brilliant…just like the flavor of
basil in winter.
Indian Summer Pesto for Freezing
10 cups basil leaves, packed
1 1/2 cups good extra-virgin olive oil
1 cup toasted pine nuts
1 cup freshly-grated Parmigiano Reggiano
5 to 6 large garlic cloves
Salt, to taste
Freshly ground pepper, to taste
Into the food processor, add first five ingredients and
pulse until a coarse puree forms. Season
to taste with salt and pepper.
October 8, 2012
Carrot Greens with Sesame Dressing
My friend Dori Fern is one of those food friends I can’t
really remember meeting. It seems like
she and I have always been running into each other at the green market,
standing and chatting about what looks good, what we’re buying, and what we’re
going to do with it. (Dori is a generous
font of great food tips—thanks to her I now know to add a touch of water
to my homemade mayo.) I love market
conversations. They’re spontaneous, and
they capture the spirit of whatever season.
Strangers chat with strangers—gourd gossip, rutabaga repartee, carrot
confabs, daikon debates…ok. I’ll
stop. But often these conversations can
be a bit whacky. Green market people are
curious, adventurous, and frugal—not
because they’re cheap, but because when you’re looking a grower in the eye, somehow
that produce takes on a greater value.
As a lover of nose-to-tail cooking, it stands to reason that I’d
be into eating every part of a veggie too. You get a
gorgeous green market bunch of Rainbow Swiss Chard, and it seems a real shame
to throw away those beautifully pigmented stems. They’re easy to use—slice them up, sauté them,
and then toss into pastas, soups, etc.
Turnip and beet greens? Saute them like collard or kale. But carrot tops? Their culinary use has pretty much eluded
me. I’ve used them here and there in
odd-ball herb applications (chopped into a salad or slaw but more for bragging rights about nose-to-tail veggie cookery than because of their flavor).
All this changed recently when I bumped into Dori at Ray Bradley’s stand, collecting people’s
carrot tops (I’ve seen people doing this with beet greens too.)
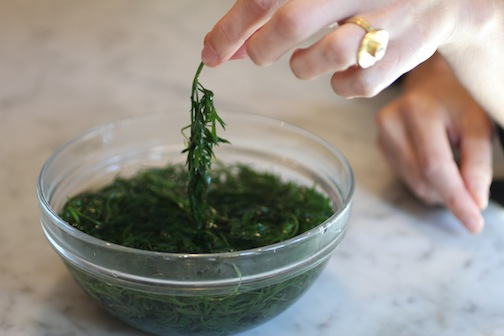
Naturally I grilled her about it. And Dori told me about a carrot green recipe, based on goma ae, she’d discovered
from “Good Food From a Japanese Temple” by Soei Yoneda. Written in the 80’s by a Buddhist
Abbess, it sounded like a fascinating book full of Zen (vegan) recipes. And there is absolutely something very Zen
about this recipe. With all the changes
of water (to eliminate the bitterness) it’s almost devotional.
You have to be devoted to the notion of stem-to-root eating;
you have to want to use your carrot
tops. It’s quite a good amount of work
for not a lot of yield (double the recipe while you’re at it, and only use
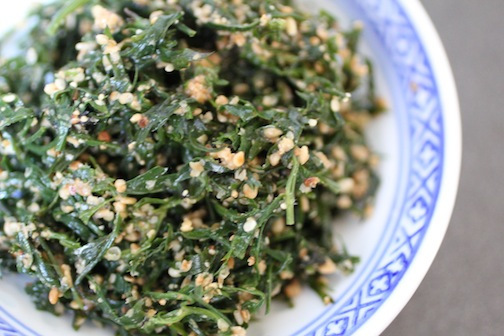
organic carrot greens.) But the result
is absolutely delicious: savory like a
seaweed salad, with a crisp, juicy texture, and a haunting, compelling flavor. After toasting the sesame seeds, I remembered
that my spice grinder was broken so I just pulsed them up in my blender. Once I dressed the greens, I gave them a
taste and could tell they needed to sit.
This dish is one of those things that really gets better with a bit of
marinating (meditation.)
I had planned on saving
some of the carrot greens to share and show off my new discovery, but I wolfed
them down, standing at the counter. Which
is really no surprise. For someone like
me, who’s pretty much stuffed just about everything under the sun into her
mouth, an entirely new flavor is seriously exciting stuff. I did my best Buddhist “be here now”, trying
to savor the moment in the present. But
I felt my mind drift back to Dori, amassing carrot greens at the market. The Buddha was right: “A jug fills drop by drop.”
Carrot Greens with Sesame Dressing
1 bunch carrot greens, washed and stemmed
3 tablespoons toasted and ground white sesame seeds
1 1/2 teaspoons soy sauce
1 tablespoon sake
1/8 teaspoon sugar
1. In a large pot of lightly
salted boiling water, parboil carrot greens for 2 minutes then shock in ice
water drain and squeeze dry. Place in a
new bowl of cold water and refrigerate overnight, changing water 2-3 times to
eliminate bitter flavor. Drain and
squeeze again, then cut into 1/2 inch lengths.
2. In a medium bowl,
dress carrot greens with sesame seeds, soy sauce, sake, and sugar. Allow greens to sit and marinate at least 1
hour before serving.
September 25, 2012
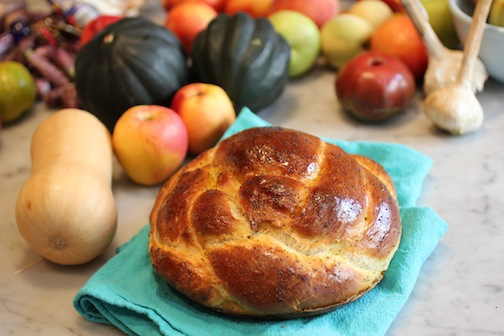
Really, This is The Best-ever Challah

I love challah all year-round, but during the High Holidays,
good challah is a necessity. This recipe
represents a hybrid between my friend Robin’s challah, and the mighty Joan
Nathan’s (my Jewish cooking Idol) challah.
There’s a lot to love about it.
First off, it’s easy—easy to remember (thanks to the straightforward
measurements), easy to whip up (because it’s just for one loaf), and easy to
handle (because all the dough fits in my Kitchen Aid.)
For the challah-impaired, this post will be text-light,
but image-heavy (scroll down after the recipe).
Also, check out this video which I think is totally
helpful for learning how to braid a round challah, which is what you want for the holidays. In terms of looks, I’m not too fussy. I’m more
concerned with how something tastes. If you don't want to bother braiding your challah, just twist it like a snail shell into a spiral. Looks just as nice though not quite as boast-worthy.
Flavor-wise, this challah is perfectly egg-y and perfectly
honeyed (I use honey in the dough for a deeper, more complex taste). My friend Olga had the
brilliant idea of using really good extra-virgin olive oil, but if you want to
just use safflower oil your challah would still turn out delicious, though maybe not as interesting.
There are two key elements here: The dough should
be sticky (as Dahlia so deftly displays above). The stickier the dough, the softer and more supple the loaf (I wrote about this last year, too). And the double egg wash is essential to give your loaf that super-glossy, dark brown look.
If you have a darling child around to help,
that will make your challah all the more special and festive. Happy New Year!
Really, This is The Best-ever Challah
Makes 1 large loaf
1 package dry yeast
1 teaspoon sugar
1/2 cup warm water
1/3 cup orange juice (freshly squeezed from 1 big orange)
1/4 cup extra-virgin olive oil, more as needed
3 eggs
1/4 cup good honey
1 1/2 teaspoons fine sea salt
4 1/2 cups all-purpose flour, more as needed
1 teaspoon poppy seeds, optional
1. In the bowl of a
Kitchen Aid mixer, combine yeast, sugar, and 1/2 cup warm water. Let yeast mixture stand at room temperature for about 5
minutes until it starts to look foamy.
2. Whisk in orange juice, olive oil, 2 eggs,
honey, and salt. Fit mixer with dough
hook and begin slowly beating in flour 1 cup at a time to form smooth dough,
beating well after each addition. Beat on medium speed until smooth and
elastic, but still sticky, about 5 minutes. Turn dough out
onto a floured work surface and knead for about 2 minutes until the dough
begins to spring back. It should stick to your hands, it's annoying, but worth it.
3. Lightly oil large bowl. Add dough, turning to
coat with oil. Cover with plastic wrap, and let dough rise in warm draft-free
area until doubled in volume, about 1 to 2 hours.
4. Punch down dough. Cover again with plastic and
let rise another hour. Punch dough down
again.
5. Grease a 9-inch pie pan or baking sheet. Turn out dough onto
lightly floured work surface. Divide dough into 4 equal portions. Roll each
piece into ropes. Arrange ropes in a criss-cross pattern and braid into a
round. (See photos below.) Place braided round in the pie pan or on the baking sheet. Whisk
remaining egg, brush dough all over and let rise again until almost doubled, about 30 minutes.
6. Preheat oven to 375°F. Brush dough again with egg. Sprinkle with poppy seeds and transfer to
oven. Bake 30-40 minutes until golden and the bottom sounds hollow when tapped. An instant read thermometer should read 190 degrees F. Transfer challah to rack and cool completely.


September 13, 2012
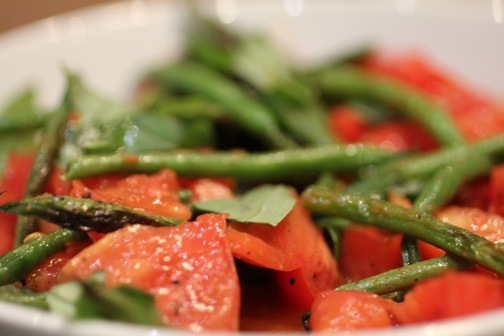
Brown Butter Tomatoes and Green Beans
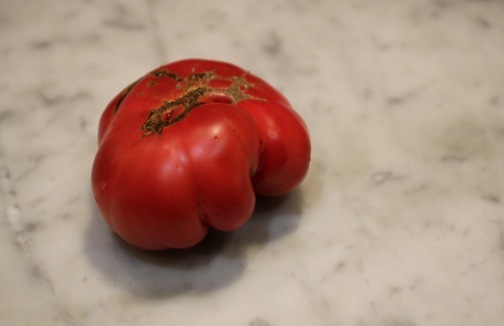
Ripe summer tomatoes don't require much. A thick slice sprinkled with flaky sea salt hits every note in and of itself - sweet, tart, salty, juicy. Really, that's all you need. There are a million and one other ways to enjoy
good tomatoes, too, but rarely do I think to pair them with butter (except maybe on sandwiches.) Then one day while reading
Food 52, I came across a recipe that did just that, and did it in a way that
seemed to be speaking directly to ME: tomatoes with brown butter. In my
professional opinion (twitterese=IMPO?), brown butter ought to be its own food
group. It is singular and utterly
unique. I lie in bed at night, dreaming
of new ways to use it. (Ok, no…not
quite...if I am lying awake at night, it's sadly from having eaten too much butter rather than buttery dreams). But I do use brown butter whenever
possible. It adds layers of
complexity and richness to everything it graces.
In food-nerdery, it is the ultimate
example of that glorious chain of events to which we all owe so much:
the Maillard Reaction. You’re not just
melting butter; you’re actually cooking it.
It’s terrifically easy, just let the butter melt, then let it cook for a few more minutes until it turns brown but not black (burned). Don’t walk away
from your skillet. When the frantic sound of bubbling
begins to die down and the room fills with a toasty, nutty scent, that is when you know your brown butter is almost ready. Stay nearby. It goes quickly.
To
make a more substantial side dish, I added haricot vert to the tomatoes with brown butter. Good green beans and good tomatoes are in
season together, so why not? A finish of
fresh, fragrant basil upped the elegance quotient. Daniel and I ate ours alongside grilled
sausages, but these buttery warm vegetables would be spectacular with a
beautiful steak. So simple, but so
surprising, brown butter with tomatoes is now definitely added to my quiver of
brown butter recipes, all so dear to my heart.
Brown Butter Tomatoes and Green Beans
Serves 4
2 tablespoons butter
1/2 pound skinny green beans (preferably haricot vert), topped but not tailed
1 large heirloom tomato, coarsely chopped
1 garlic clove, minced
Sea Salt
Freshly ground black pepper
Splash of balsamic vinegar (optional)
Fresh basil
1)
In a large skillet, melt the butter over medium-high heat. Reduce the heat to
medium and cook until the frothy white milk solids sink to the bottom of the
pan and turn a fragrant, nutty brown, 5 to 7 minutes. Brown butter can burn quickly,
so watch it carefully. Add beans to skillet
and sauté until tender and browned in spots, 3 to 5 minutes. Season with salt and pepper.
2)
Add tomato and garlic to skillet and cook 1 to 2 minutes until tomato is warmed
through and some of its liquid reduces.
Adjust seasoning with additional salt and pepper and perhaps a splash of
balsamic vinegar if tomatoes taste flat.
3)
Shower beans and tomatoes with torn fresh basil. Eat.
September 9, 2012
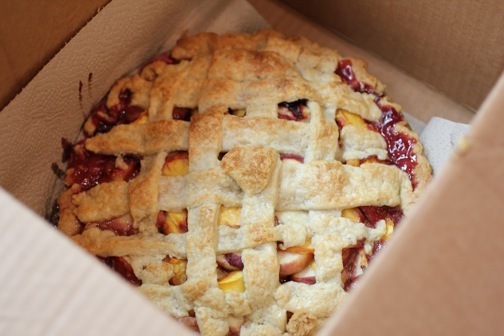
Late Summer Peach (etc.) Pie
Oh late-summer riches. The abundance of juicy, sun-soaked things
(tomatoes, peaches, eggplant) seems to stretch out forever, until we think warm
days will never cease. Sometimes I even find myself getting a
little complacent, maybe even smug? Ho-hum, yet another obscenely delicious
plum. Yawn, yet another incredibly
perfect tomato. Thanks to the endlessly
(read: brutally) hot summer here in the Northeast, my kitchen countertops have
been strewn with these gems for months.
Earlier in the summer I had promised Dahlia that we'd make a make
a pie together, but we never quite got around to it. It was time to make good. Besides, as I surveyed the lingering produce on my counters I realized I really needed to do away with those fruit fly magnets.
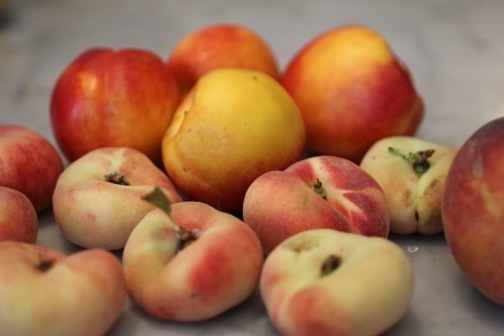
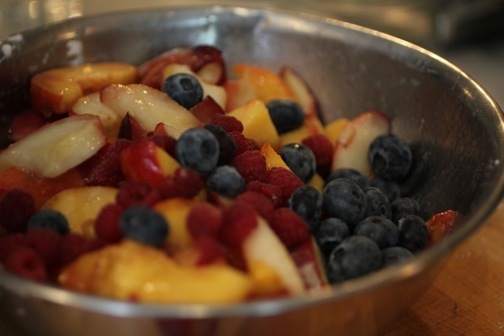
I adapted this recipe from my book In The Kitchen With a Good Appetite,
using it as an opportunity to make use of every bit of stray fruit—nectarines,
peaches (both yellow and donut), raspberries, and blueberries.
My favorite piecrust is one I’ve
used again and again. A devoted
pie-lover, I kept trying different techniques over the years—trust me, I’ve
earned this recipe. It’s both easy
and versatile. I was feeling
fancy, so I went with a lattice top. Dahlia
and I whipped this beauty up in the morning and then took it over to my
parent’s house for brunch.
A good trick when traveling with
freshly-baked pies? Don’t go with a
standard plastic cake carrier. If the pie is at all
warm, it will steam itself and loose its essential flakiness. Just put a wire cake rack in the bottom of an
open cardboard box (so the bottom can cool) and voila. No steaming.
This pie was still molten when we got in the car, so it was still a bit
warm when we tucked into it after our bagels and lox. And all that summer bounty was condensed down
into a totally luscious dessert that reminded us all to be grateful for this
season, quickly approaching its denouement.
At least apple pie season will offer some solace. There's always a reason for pie.
For the crust:
2 1/2 cups all-purpose flour
1/2 teaspoon kosher salt
20 tablespoons unsalted butter,
chilled and cut into pieces
4 to 10 tablespoons ice water
For the filling:
2 1/2 pounds (about 6 cups) peaches
and nectarines, pitted and sliced 1/2 inch thick
1 tablespoon freshly squeezed lemon
juice
1/2 cup granulated sugar (or less if
the fruit is very sweet)
1/3 cup light brown sugar
Pinch Kosher salt
2 1/2 tablespoons cornstarch
2 cups berries (raspberries,
blueberries, blackberries, or a combination)
1 large egg white, lightly beaten
Demerara sugar, for sprinkling
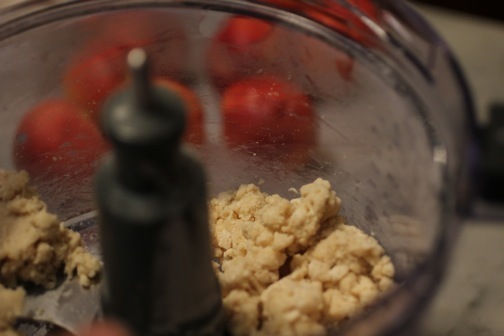
1. First make the dough, in the bowl
of a food processor pulse together flour and salt just to combine. Add butter
and pulse until chickpea-sized pieces form. Add the water one tablespoon at a
time and pulse until mixture just comes together. Pat the dough into 2 discs,
one using two-thirds of the dough. Wrap
the discs in plastic and refrigerate at least 1 hour (and up to 3 days), before
rolling out and baking.
2. Preheat the oven to 375° F. On a very lightly floured surface, roll out
larger disc into about a 12 inch round and line a 9-inch pie pan with about 1
1/2 inches of overhang. Using your
fingertips, flute the edges of the dough around the pie pan. Chill the dough at least 30 minutes before
baking. Line the crust with foil and
fill with pie weights. Bake for 25
minutes, or until the edges of the crust begin to crisp but do not take on
color. Remove the weights and the foil
and bake for an additional 5 minutes to crisp the bottom of the crust.
3. While the piecrust is baking,
prepare the filling. In a large bowl,
combine the peaches and nectarines with the lemon juice. Add the granulated sugar, brown sugar, and
salt and gently toss until the sugar dissolves.
Allow the fruit to macerate at room temperature for 20 to 30 minutes.
4. When the pie crust is ready,
transfer it to a wire rack to cool slightly, remove the foil and pie weights and
raise the oven temperature to 400° F.
Add the cornstarch to the fruit and stir until the cornstarch
dissolves. Add the berries and toss
gently. Scrape the fruit mixture into
the prebaked pie shell.
5. Roll out remaining dough disc into about a 10 inch round and slice into
strips about 1 inch thick. Top pie with strips, weaving them into a lattice.
Crimp edges to seal. Place pie on a foil-lined, rimmed baking sheet. Brush
the lattice crust and fluted edge with the egg white and sprinkle generously
with the Demerara sugar. Transfer the
pie to the oven and bake for 40 minutes, or until the crust is pale gold.
6. Lower the temperature to 350°
F. Continue baking the pie for an
additional 35 to 40 minutes, or until the filling is bubbling and the crust is
deeply golden brown.
August 23, 2012
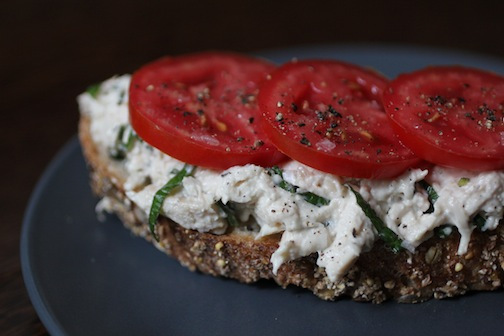
Chicken Salad with Preserved Lemon and Mint
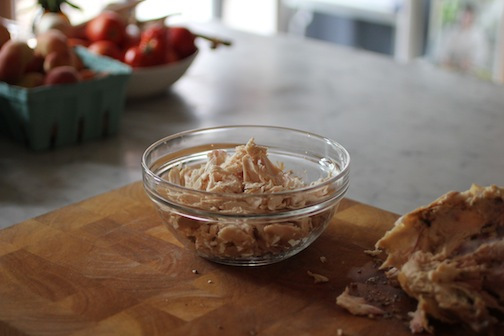
I rarely make chicken salad in the summer because I rarely roast chickens in the heat. But this year, there have been days here and there that are cool enough to turn the oven for for an hour or more. So recently, I roasted a nice, plump 4-pounder as per my new favorite method.
The chicken was heaven and so were the leftovers, especially after I slathered them in mayonnaise and preserved lemon, then garnished it all with mint and fresh ripe tomatoes.
A word about the mayo. If I don't have any homemade stuff on hand (and I often do because I'm now in love with mayo-making), I use Kraft. That's right all you Hellman's lovers, Kraft. I think it's better. More savory, less sweet (I'm not talking Miracle Whip, which is vile).
I discovered this several years ago when I did a blind mayo taste test for Real Simple magazine. Up until then I was a Hellman's lover but I came out of the taste test loyal to Kraft. Try it and tell me what you think.
In any case you can use whatever mayo you like. Or if you hate mayo, use full-fat Greek yogurt, whish gives a nice creaminess and gentle tang. Sour cream and creme fraiche are lovely, too.
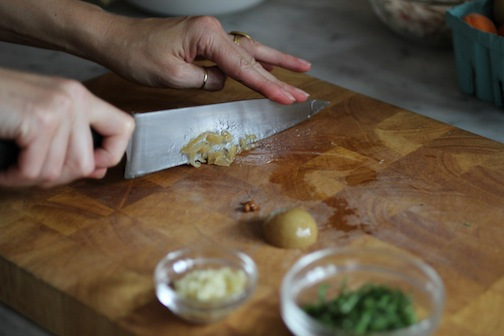
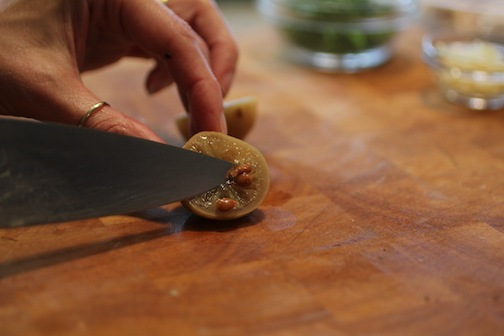
Having run out of my own, homemade preserved lemons, I used Roland brand jarred ones and they were fine. Take the seeds out before you chop them. If you don't have any preserved lemon in the house, use a generous blast of grated lemon zest and some capers for a salty tang.
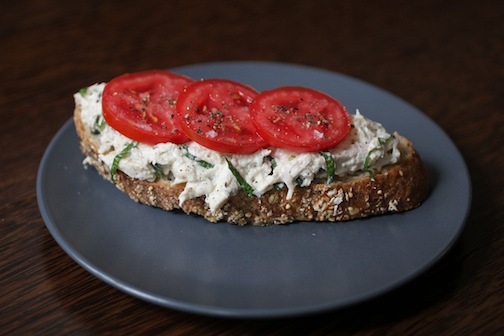
Serve on crunchy toast with something green (mint here, cilantro or basil would be good) and something juicy (tomatoes, tomatoes, tomatoes). Yum.
Chicken Salad with Preserved Lemon and Mint
Serves 2 to 4
2 cups cooked shredded chicken
1/4 cup mayonnaise
2 tablespoons sliced fresh mint leaves
1 tablespoon finely chopped preserved lemon
1 tablespoon extra-virgin olive oil
Sea salt
Freshly ground black pepper
Fresh lemon juice
Ripe tomato slices
In a medium bowl, combine chicken, mayonnaise, mint,
preserved lemon, and olive oil and blend with a spatula until all ingredients are mixed together. Season to taste
with salt, pepper, and a small squeeze of lemon juice. Mound on toast and cover with tomatoes, seasoning them with more salt and pepper.
August 6, 2012
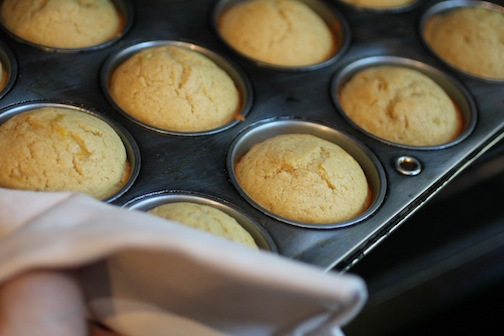
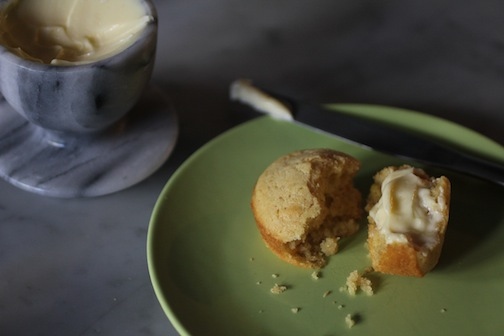
Fresh Corn Muffins with Maple Syrup
Ah, life with a pre-schooler. Last year, Dahlia loved all things corny - both in terms of her sense of humor and her taste in vegetables. She ate caramelized creamed corn faster than I could make it (and I can make it fast). She nibbled the kernels raw off the cob, and gobbled corn that was steamed and buttered.
This summer, corn is off the list. Just like that. Poof. One day she ate 2 ears of corn at my parents' house for lunch, and then ever since, she shakes her head when I offer her any, with the polite "no thank you" that really means "get this stuff out of my face or I will freak out and you'll be sorry."
What this means is that I've bought an awful lot of corn that's gone uneaten by said small child -- despite the fact that her jokes are getting even cornier.
Fear not though, none one kernel of the corn went to waste. Because now when I've got lots of corn in the house, I make a very adult corn salad. Or I fold the kernels into cornbread -- or in this case, corn muffins.
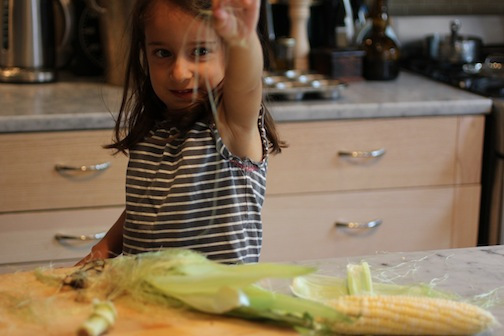
(Dahlia loves shucking corn even if she's lukewarm on consuming the stuff...)
I love cornbread in all its forms, but I have to admit to having a favorite recipe. In the version from my book, In the Kitchen with a Good Appetite, I brown the butter for the batter (say that 5 times fast while munching on a piece of cornbread) and bake it in a cast-iron skillet. It's crusty on the outside and moist within, with a nutty flavor suffused throughout the crumb.
Sometimes, I go the muffin pan route. There’s something so appealing about little individual cornbreads—they’re ready-made for snacking. Loaded with maple syrup flavor from both syrup and maple flavored yogurt (but not quite sweet enough for dessert), these muffins are light, fluffy, and barely hold together once you break them apart. The antithesis of a heavy, sweet, diner-style corn muffin, they make great little breakfast breads, and they are perfect with that afternoon cup of tea (or iced tea).
To take them into more decisively savory territory, you could add some black pepper, cayenne, chopped jalapeno, grated cheese…use your imagination here. This said, their texture is a bit too delicate to dunk into a hearty bowl of chili. But they’d be great alongside a fresh, light soup, or a juicy tomato salad with some ricotta for smearing on the muffins.
Of course I just go for a heavy smear of butter. Have some soft, slightly-salted butter at the ready--it's all you really need. These cornbread muffins are so tender and crumbly they almost fall apart in your hands, but their sweet crumb is so, so worth it.
And by the way, Dahlia won't touch them. Which means more for me.
Fresh Corn Muffins with Maple Syrup
8 tablespoons unsalted butter (1 stick)
1 ear corn, kernels removed (about 1 cup)
1 tablespoon pure maple syrup
1 cup all-purpose flour
1 cup stone-ground yellow cornmeal
1 tablespoon baking powder
1/2 teaspoon fine sea salt
1 1/4 cups whole milk maple yogurt (or use plain yogurt and add an extra tablespoon or two of syrup)
1 large egg
2 tablespoons sugar
1/4 teaspoon baking soda
1. Preheat the oven to 375°F. In a small saucepan, melt butter over medium-high heat and cook until golden with a nutty fragrance, about 5 minutes. Be careful not to let it get too brown. Add the corn and maple syrup and cook, stirring, until the corn is tender, about 3 minutes. Remove from heat.
2. In a large bowl, sift together the flour, cornmeal, baking powder, and salt. In a separate bowl, which together the yogurt, egg, sugar, and baking soda. Gently fold the wet ingredients into the dry ones until just combined. Fold in the corn-butter mixture.
3. Spoon batter into a greased muffin pan, about two-thirds full into each well. Bake for 15-20 minutes until muffins spring back when lightly pressed with a finger and are pale golden on top. This are great warm, and nearly as good cooled, and will last for days in stored airtight at room temperature. The maple flavor gets stronger the longer they sit.
July 26, 2012
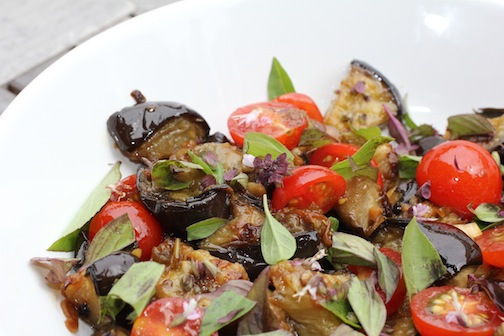
Roasted Eggplant Salad with Asian Ginger Sauce
Yet again, the largess of my CSA has drawn a recipe out of me. I love, love, love eggplant, but I rarely find myself buying the big boys. At the summer greenmarket, I fill my tote bag with slim Japanese eggplants, taut and tiny Italian eggplants, pale they-really-look-like-eggs white eggplan, and especially those adorable, doll-sized Fairytale eggplants. Once they’re home I halve them and roast them up, hot and quick. Tossed with Italian-driven flavors (capers, olive oil, flat-leaf parsley,) the little nightshade fruits are reliably delightful.
Crazy as it sounds, eggplant is not just a fruit—it is in fact botanically classified as a berry (yes I just looked his up). Probably hauled back from Asia along with noodles, eggplants have settled comfortably into Italy’s kitchens along with their nightshade cousin, the tomato. I’ll get back to the eating/cooking bit in a moment, but to unpack this berry thing, nightshade fruits are berries because they develop from a single ovary. If voluptuous summer tomatoes, eggplants, and peppers are any indication, nightshade plants have pretty tantalizing sex lives.
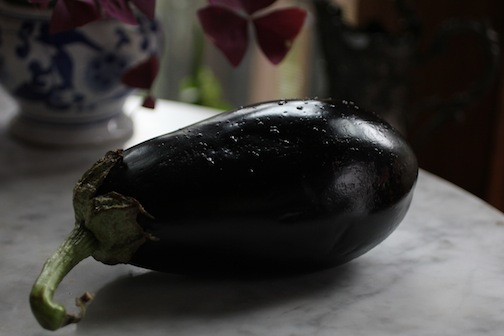
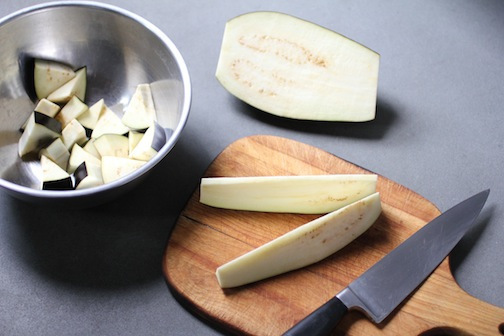
My alluring, deeply-aubergine CSA eggplant was calling out to me the minute I put it on my countertop (like their cousins, the tomatoes, they’re happier not being refrigerated even if they don't last as long.) With the more sizable, meaty eggplant varieties, I love to grill them, but while I was contemplating lunch yesterday morning, rain was falling in sheets. So I settled on roasting. I wanted to get a bit of skin with every bite, so I sliced the eggplant into wedges. That way, every bite is held together with some of the satisfying, purple peel. And to break out of my Italian-inspired eggplant holding pattern, I looked to Asia for change.
When I was growing up, every time we went out in Chinatown, my mother would ask right away for a bowl of hot sauce and a bowl of ginger sauce. Everything tasted better after it was dunked in one of those sauces. The ginger sauce in particular was my favorite - pungent, bright, oniony from scallions. Riffing on that memory, I whisked up a dressing for my roasted eggplant. Super sweet cherry tomatoes (to keep it in the family) also made an appearance, and added a nice juiciness to the richness of the eggplant. My Thai basil plant is blooming, so I trimmed her down and scattered some torn leaves and plucked flowers over everything to finish.
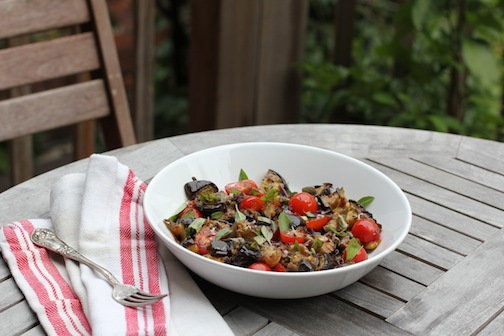
And just as the skies cleared, my gorgeous plate of summer berries (?!?!?!) was ready.
Roasted Eggplant Salad with Asian Ginger Sauce
Serves 2 ardent eggplant lovers or 4 regular people
1 large eggplant (about 1 1/2 pounds), sliced into wedges
3 tablespoons extra-virgin olive oil
1 teaspoon salt
1/3 cup peanut oil
2 scallions, white and green parts, thinly sliced
2 teaspoons grated gingerroot
1 garlic clove, minced
1 teaspoon Asian (toasted) sesame oil
Few drops rice wine vinegar or white wine vinegar, to taste
Few drops chile oil, optional
1/2 cup halved cherry tomatoes
Basil leaves or cilantro leaves, to taste
1. Pre-heat oven to 400°F. In a large bowl, toss eggplant wedges with olive oil and salt to coat. Spread eggplant out on a baking sheet and roast, stirring once, until tender, about 25 to 30 minutes.
2. Meanwhile, in a small bowl, whisk together the peanut oil, scallions, grated ginger, minced garlic, sesame oil, vinegar, and chile oil if using.
3. Toss the roasted eggplant and cherry tomatoes with the peanut oil dressing. Finish with torn basil leaves or cilantro leaves.
July 13, 2012
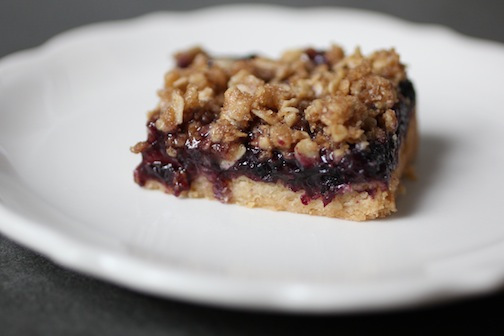
Blueberry Crumble Shortbread Bars
Fruit, fruit, fruit! Summer fruit is everywhere, and I have a countertop strewn with plums, peaches, and nectarines to prove it. I snack on it constantly, all day long helping myself to whatever is the ripest and most alluring at the moment. A juicy apricot here, some raspberries there. When it's perfect, fruit needs little in the way of ornament (but some sour cream or creme fraiche never hurts.)
I particulary go nuts for sour cherries, though they are too tart for out of hand nibbling. Instead, for the last few weeks I’ve been pitting them and preserving them in various and sundry ways; homemade Maraschino cherries (just perfect in a good, Rye Manhattan) are a must in my household, but so is good jam.
Homemade jam is a great way to enjoy summer goodness, all year long. Spread on toast, in between the layers of a lovely cake, or simply spooned over vanilla ice cream, you’ll thank yourself later when you’ve got some homemade jam on hand.
I’ve got a shiva call to pay this weekend (my friend's grandpa died at 101, he was a marvel, and will be missed), and have been thinking about what to bring. Since I had an abundance of blueberries in my fridge, I decided to make a dessert that would incorporate them.
I thought tender little shortbread cookie bars spread with a homemade blueberry jam (and topped with a buttery cinnamon-spiced crumble topping) would be just the thing.
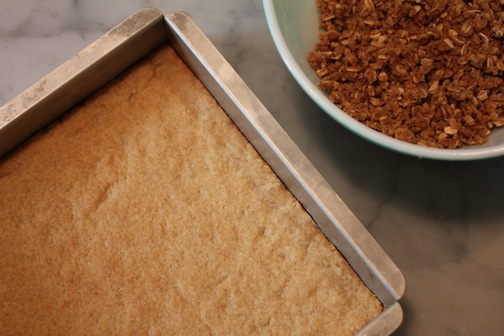
Easy to share, easy to transport…and shortbread is a cinch to make.
Blueberry Crumble Shortbread Bars
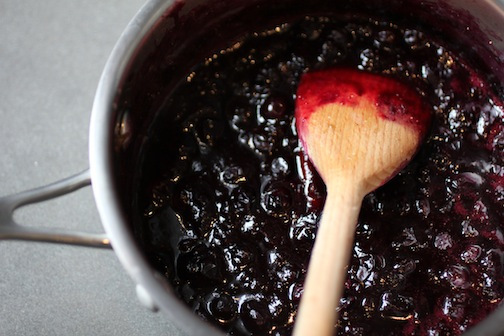
For the jam:
1 pint blueberries
2 tablespoons sugar
Zest from one large lemon
Small cinnamon stick
Juice from half a lemon, more to taste
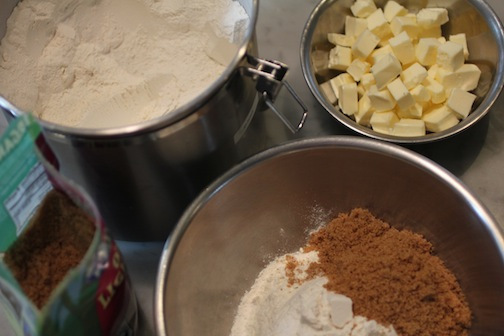
For the crust:
2 cups all-purpose flour
1/2 cup light brown sugar
1/2 teaspoon fine sea salt
12 tablespoons unsalted butter (1 1/2 sticks), cubed
For the crumble:
1/2 cup rolled oats
1/2 cup light brown sugar
1/2 cup finely chopped walnuts
1/4 cup all-purpose flour
1 teaspoon ground cinnamon
1/2 teaspoon freshly grated nutmeg
1/4 teaspoon fine sea salt
4 tablespoons unsalted butter, softened
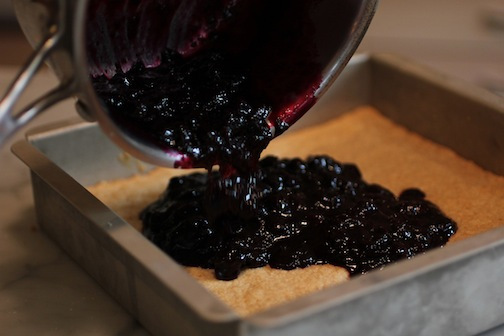
1. To make the jam, in a small saucepan, add blueberries, sugar, and lemon zest and mash berries slightly with the back of a large spoon, just to release some of their juices. Add cinnamon stick and simmer over low heat for about 20 minutes. Remove cinnamon stick and allow jam to cool.
2. Preheat the oven to 350° F. Grease a 9-inch square baking pan. In a food processor, pulse together the flour, sugar, and salt. Add the butter and pulse until mixture just comes together in one ball. Press into the bottom of the prepared pan. Bake until crust is pale golden, 25 to 30 minutes. Cool. Spread the blueberry jam evenly over the shortbread.
3. To make the crumble, in a small bowl, whisk together the oats, sugar, walnuts, flour, cinnamon, nutmeg, and salt. Blend in the butter with your fingertips, forming pea-sized crumbs. Sprinkle the streusel over the blueberry sauce. Bake until topping is golden brown and crisp, about 20 minutes. Cool and cut into bars.
Melissa Clark's Blog

- Melissa Clark's profile
- 133 followers

