
Vickie Howell's Blog: Vickie Howell's Website, page 19
September 28, 2020
Halloween Hanging Ornaments

Halloween Hanging Ornaments
This week on Ask Me Monday, I show to make Halloween Hanging Ornaments, a quick crochet project that uses scrap yarn from your stash.
It’s Halloween, season, folks!

This episode of Ask Me Monday is sponsored by Knitter’s Pride/ KnitPro
See more KP products during “Vic’s Tips” segments of The Knit Show!
Featured Knitter’s Pride Products: Waves, Aluminum, and Ginger Crochet Hooks
MATERIALS
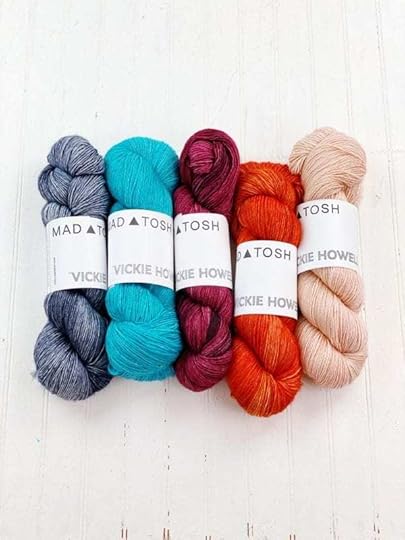
Small Amounts of Fingering/Sock-Yarn (I used Vickie Howell for Mad | Tosh TML Unicorn Tails in colors: Peace Fingers and Snaps)
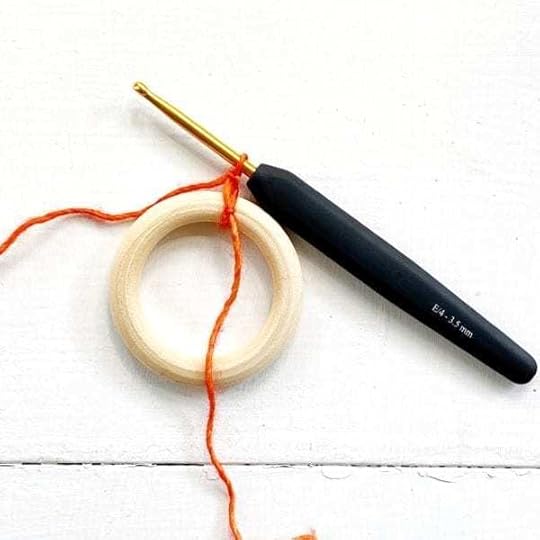
Knitter’s Pride US E/3.5 mm Aluminum Hook
2″/5 cm Wooden Ring
Tapestry Needle
Scraps, Black Felt
Glue

FINISHED SIZE
Approx 6″ long, excluding hanging loop

DIRECTIONS
Make Center Circle:
Using desired color, ch 3.
Rnd 1: 6 hdc in 3rd ch from hook. Join rnd with a sl st. — 6hdc
Rnd 2: Ch 2 (counts as hdc), hdc in same space as ch, 2 hdc in next st and every st around. Join rnd with a sl st. — 12 hdc
Fasten off, leaving a long tail for seaming.
Cover Ring:
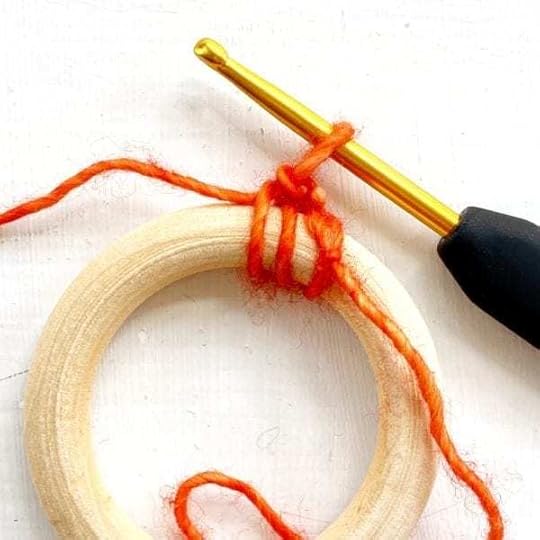
Insert hook through the center of the wooden ring, place a slip knot on the hook, pull the loop through the wooden ring, ch 1.
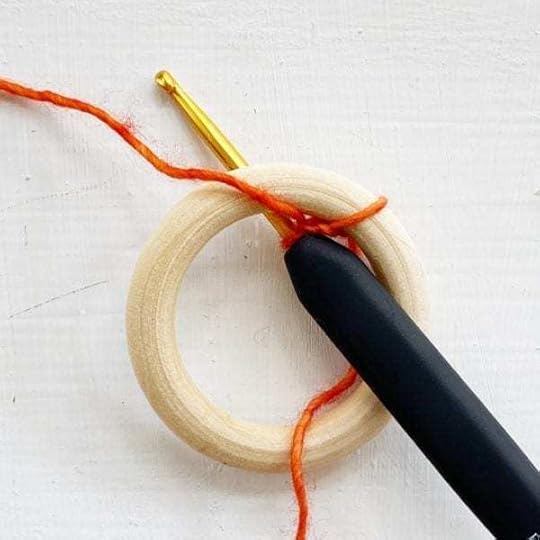
Sc AROUND the wooden ring, until it’s completely covered. Join rnd with a sl st.
Fasten off.
FINISHING
Assemble:
Using long tail and tapestry needle, whip-stitch Center Circle to the inside of Ring.
Tie a 2″ hanging loop to top of ring.
Cut six, 8″ fringe strands yarn. Holding 2 pieces together, fold and attach fringe to center-bottom of Ring (through the loops of one, sc). Repeat on either side with 2 more pieces of fringe.
Weave in ends.
Pumpkin Only:

Out of black felt, cut out 2, triangle eyes; 1 triangle nose; 1 snaggle tooth mouth.
Glue pumpkin face to Center Circle.
Ghost Only:

Out of black felt, cut out 2 oval eyes, and 1 wobbly mouth.
Glue pumpkin face to Center Circle.
Looking for more creepy craft ideas? Go here!

The post appeared first on Vickie Howell.


September 21, 2020

September 14, 2020
Knit & Crochet Mock Cables
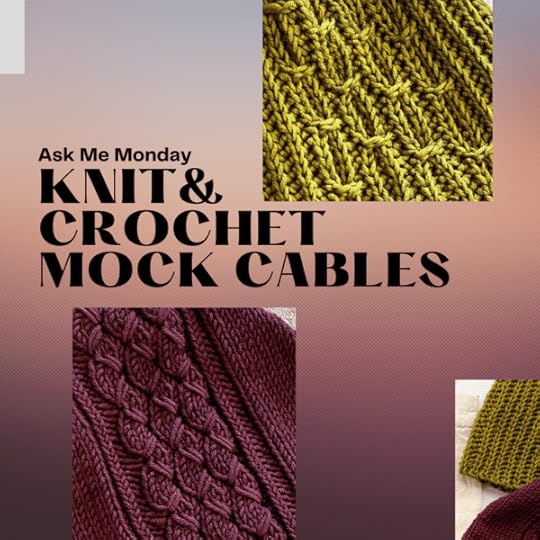
Mock Cables
Manipulating fibers to create bending shapes if one of the most fun things to do with knit and crochet stitches. This week on Ask Me Monday, I’ll show you how to do that with two stitches, one knit and one crochet, by creating mock cables.
Give the episode a watch, practice the swatches below, then give the Racer & Rever hat patterns, both with mock cables panels, a try. Both patterns come in the YarnYAY! September box. Enjoy!
This episode of Ask Me Monday is sponsored by Knitter’s Pride/ KnitPro
See more KP products during “Vic’s Tips” segments of The Knit Show!
Featured Knitter’s Pride Products: Ginger Circular Needles and Ginger Crochet Hooks.
<<>>
Knit Mock Cable Swatch

SPECIAL STITCH:
EL – Elongated Stitch, Left: Insert the right needle 4 stitches to the left and 3 rows down and bring up a long loop. Place it on the left needle and knit it together with the next stitch.
ER – Elongated Stitch, Right: Slip the next stitch purl-wise onto the right needle. Insert the right needle 4 stitches to the right and 4 rows down and bring up a long loop. Slip two stitches purl-wise back to the left needle and knit them together.
CO 21 sts.
Row 1 (RS): *P2, k1tbl, p2, (k3, p1) x 2, k3, p2, k1tbl, p2.
Row 2 and all WS rows: K2, p tbl, k2, (p3, k1) × 2, p3, k2, p tbl, k2.
Row 3: Rep Row 1.
Row 5: P2, k tbl, p2, (EL, k2, p1) × 2, EL, k2, p2, k tbl, p2.
Row 7: Rep Row 1.
Row 9: *P2, k1tbl, p2, (k2, ER, p1) x 2, k2, ER, p2, k1tbl, p2.
Repeat Rnds 2-9 until the piece is square, ending after a Row 2 or Row 6.
BO.
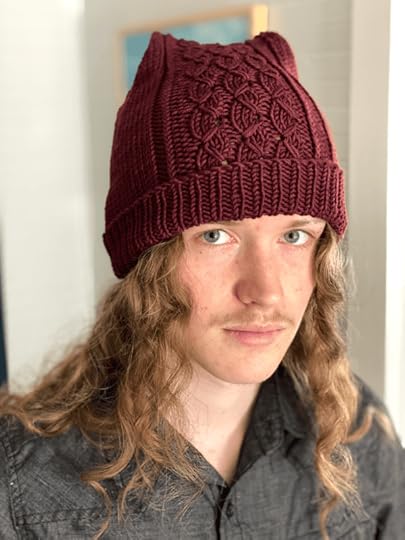
Knit Mock Cable Panel, in the Racer Hat by Chris Bahls for YarnYAY!
Crochet Mock Cable Swatch

SPECIAL STITCHES
YO-slst = Yarn-Over Slip Stitch: Yarn over hook, insert hook through the stitch and pull loop through stitch AND the 2 loops on the hook.
BL-YO-slst = Yarn-Over Slip Stitch through the Back Loop: Working through the BACK LOOP only, work a YO-slst.
ldc = YO, insert hook in stitch 2 rows down, finish working double crochet as usual in that stitch.
Ch 24.
Row 1: YO-slst in 2nd ch fr hook and to end.
Rows 2-4: Ch 1, BL-YO-slst in same st and in each st to end. Turn.
Row 5 (RS): BL-YO-slst in each of next 5 sts, ldc in next st; rep from * 3 more times, BL-YO-slst in each st to end. Turn.
Row 6 (WS): Ch 1, BL-YO-slst in same st and in each st to end. Turn.
Rows 7-8: Rep Row 6.
Row 9: Ch 1, BL-YO-slst in same stitch and in next 6 (8) sts, ldc in next st, *BL-YO-slst in each of next 5 sts, ldc in next st; rep from * 3 more times, BL-YO-slst in each st to end. Turn.
Rows 10-12: Rep Row 6.
Repeat Rows 5-12 until the piece is square.
Fasten off.
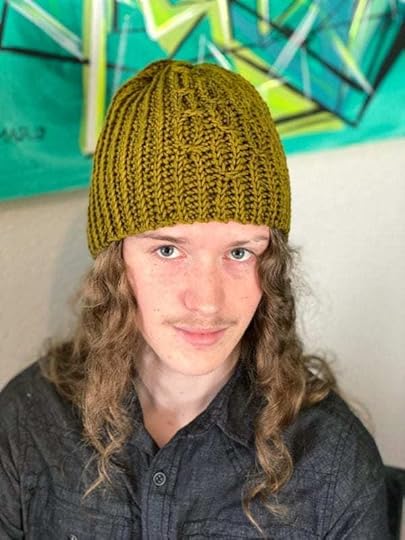
Crochet Mock Cable Panel in, Racer by Vickie Howell for YarnYAY!
Put those skills to work with the September YarnYAY! Box Projects, Racer & Rever Hats!


The post Knit & Crochet Mock Cables appeared first on Vickie Howell.
September 3, 2020
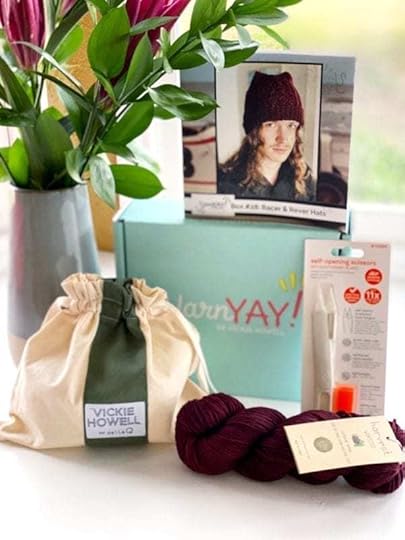
YarnYAY! September Box
YarnYAY! September Box
Oh, joy of joys it’s September which traditionally (at least in the “Before Times”, when time and space mattered) has meant the official kick-off of crafting season! Of course, most of us never stop making, but nevertheless, yaaaaaaaay Fall/Winter seasons!
To celebrate, for the YarnYAY! September box, I’ve worked closely with partners to create a specially curated collection of goodies that support small businesses and altruistic projects and treats YarnYAYers to over $65 worth of gorgeous items for our subscriber price of $35! We could all use a little feel-goodness in our lives right now, and it’s my intention that the YarnYAY! September Box is just that. Here’s what’s inside!

Harvest Worsted | Urth yarns
Harvest is a squishy, extra-fine merino yarn that’s hand-dyed with roots, fruits and nuts. Our selections this month are earthy shades Fig and Black Grape. Subscribers will be surprised with one of these colors at random.
Urth Yarns is a family-owned business, powered by the women dyers in Istanbul and Mersin. The company plants a tree in Africa for each hank purchased.
Hat Patterns | Designs by Chris Bahls & Vickie Howell
This month’s projects are inspired by the straight lines and curvy turns of a racetrack. The Rever Hat, by YarnYAY!’s own Chris Bahls, is knit with mock-cable panels amidst a bed of rib and is finished off with a paper bag-style top.
The Racer Hat, by Vickie, is crocheted flat and through the back loops of stitches to create a knit-looking rib with spike stitch mock cables.

Self-Opening Scissors | Slice
These Self-Opening Scissors are ideal for fiber artists or anyone with arthritis, hand weakness, or dexterity challenges. The innovative Zirconium oxide blades will never rust, and BPA, phthalate. and lead-free.
Slice is a California based business, founded by TJ Scimone. One percent of sales are donated to Autism research.
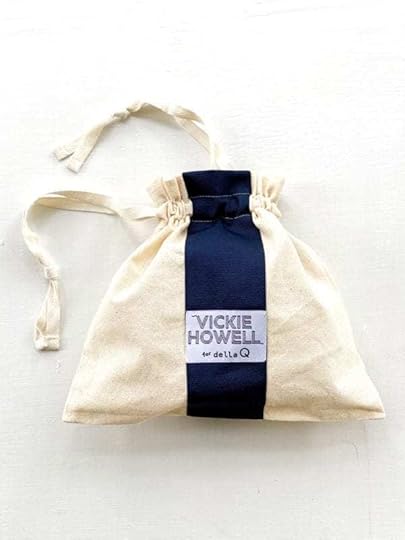
Fella Q Drawstring Bag | Vickie Howell for Della Q
This racing-striped drawstring bag is a YarnYAY! exclusive, in celebration of the launch of Vickie’s latest collaboration with Della Q, Fella Q: Project Bags for the dapper in all of us. YarnYAYers will get the Navy version paired with the Fig yarn, OR the Olive version paired with the Black Grape.
The post YarnYAY! September Box appeared first on Vickie Howell.
August 31, 2020
7 Back-to-School Supplies for Craft Organization
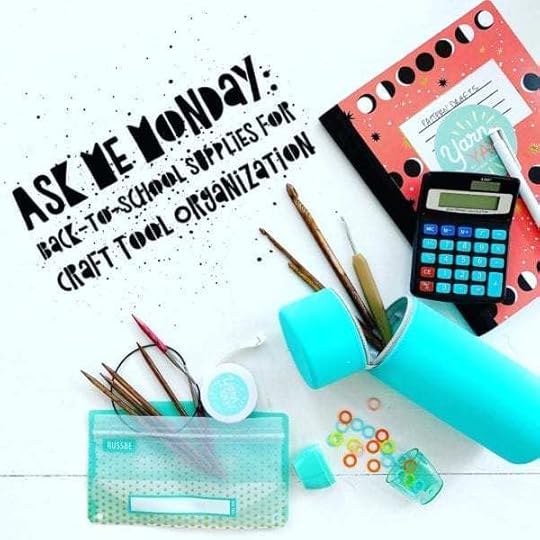
Back-to-School Craft Tool Organization
It’s been a minute since I’ve talked about my favorite time of the year to organize my knitting and crochet tools. Unlike for some folks, it’s not the usual “Spring cleaning” months. Nope, for me, it’s back-to-school time that gets me motivated to manage my craft studio.
This week on Ask Me Monday, I’ll show you my latest back-to-school supply scores, and how I use them to keep my knitting needles, crochet hooks, and notions in their place!
This episode of Ask Me Monday is sponsored by Knitter’s Pride/ KnitPro
See more KP products during “Vic’s Tips” segments of The Knit Show!
Featured Knitter’s Pride Products: Ginger Circular Needles, Ginger DPNS, Ginger Crochet Hooks, Waves Crochet Hooks, Smart Stix Needles, Yarn Cutter, and more!
7 Back-to-School Supplies for Craft Organization
Although back-to-school looks a little different this year, fortunately, the school supply aisles at the stores, do not. Here are just some of the great, practical tools for school that also work great as organizational components for our knitting, crochet, and crafting supplies!

Cylindrical Pencil Case
These work for holding a myriad of tools, but I especially dig using them to hold loose crochet hooks and double-pointed knitting needles. Bonus: silicon versions like this one are easily cleaned with a wet rag, so a great choice for throwing in a large project bag that you take on-the-go!
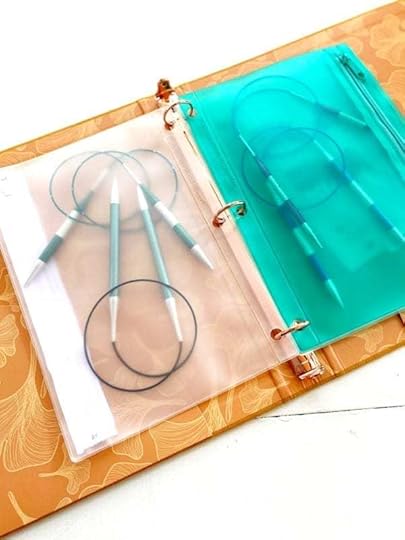
3-Ring Binder & Clear Zipper Bags
Those rogue circular needles can be a wily bunch! Keep them at bay with a simple, 3-ring binder, filled with basic, clear plastic zipper bags. Organize your needles by size, cord length or, if you’re feeling saucy, material!
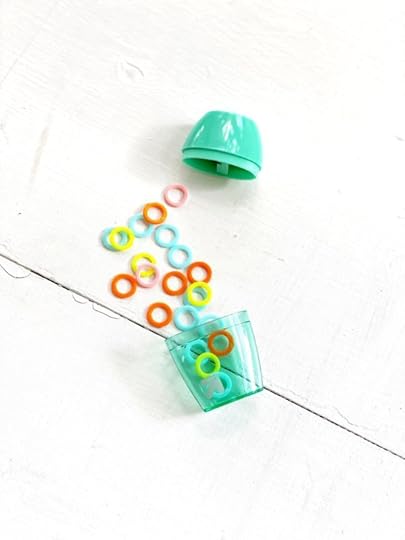
Pencil Sharpener
In a pinch, an unused pencil sharpener is a perfect size for holding loose, stitch markers. Plus, it’s pretty cute!

Composition Books
These are my favorite types of notebooks to write pattern drafts, make notes on supplies, and sketch out ideas. Stock up on all of the fun prints offered at the beginning of the school year, so you’ll be all set for a year’s worth of doodling!

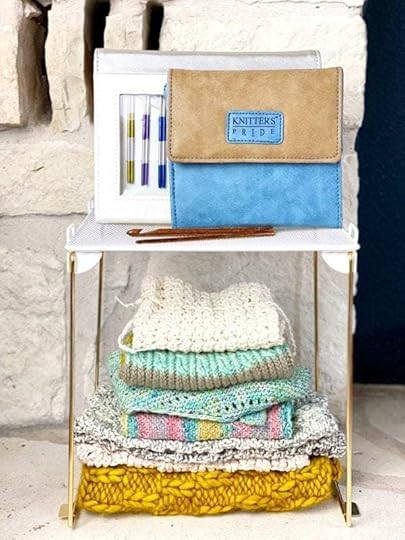
Locker Shelf
Collapsible locker shelves will take your craft space organization to the next level… literally! Use these on tabletops and in shelving units to create more space to house books, yarn, needle and hook sets, and more!

Bento Box
Bento boxes are the best! Of course, they offer no-waste food storage, but they’re also cute and compact keepers of a range of crafty items. Use them to house your pattern highlighter tape, extra circular needle cords, scissors, and more. Alternatively, pack yourself a little knit kit before you hit the road on your next outing!
 Reusable Food Bags
Whether you go snack or sandwich-sized, reusable food bags are ideal for a crafter’s thises and thats. Use then to keep your notions, or as a waste-free gift bag option for small items like wee, baby socks.
Do you, like me, eagle-eye school supplies for craft tool organization? What are your favorites? I wanna know!
The post 7 Back-to-School Supplies for Craft Organization appeared first on Vickie Howell.
August 24, 2020
Grand Eyelet Lattice Stitch + Geo Scarf!
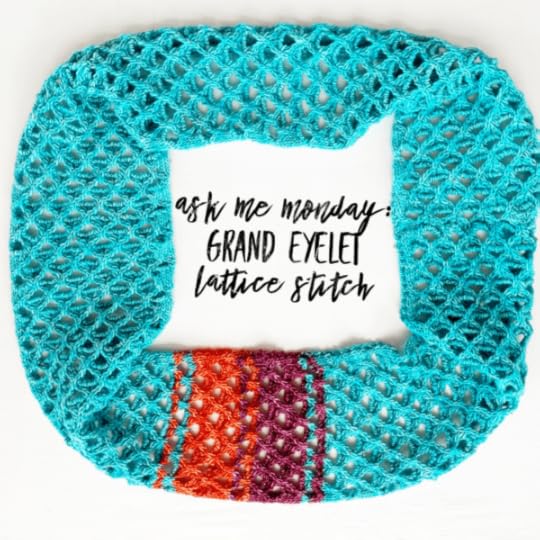
Grand Eyelet Lattice Stitch
This week on. Ask Me Monday, I delve into one of my absolute favorite lace patterns: Grand Eyelet Lattice Stitch. I discovered this stitch pattern while researching for the numerology section of my book The Knit Vibe (this one is featured for the number 8, see page 107), and fell in love with the modern angles of the geometric shapes created by the 8 row repeat. This one looks cool in a chunky-weight yarn, and lovely in a lace-weight (see my new Geo Scarf below). Here’s wishing you a grand time knitting this one! 
August 17, 2020
IKEA Hack: Linen Broomstick Lace Embellished Pillow
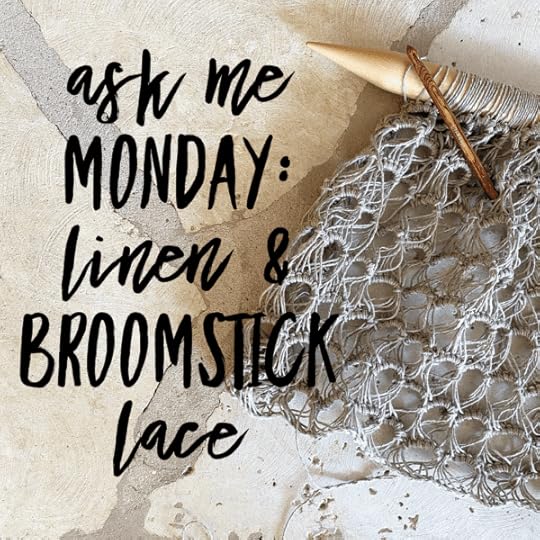
Linen Broomstick Lace
As I’m settling into our beautiful new YarnYAY! studio space, I’m working on adding little handmade details to make otherwise store-bought home decor pieces feel like my vibe. This week on Ask Me Monday, I show you one of those pieces and IKEA pillow hack of sorts. Using beautiful, crisp linen yarn, and an old-school technique, I create a Broomstick Lace panel to add texture and dimension to a velveteen pillow. Watch the tutorial, then make it your own.
Don’t forget to tag @vickiehowell #askmemonday with your Linen Broomstick Lace projects, and Tune into Ask Me Monday, on Facebook three Mondays a week at 12pmCT!
This episode of Ask Me Monday is sponsored by Knitter’s Pride/ KnitPro
See more KP products during “Vic’s Tips” segments of The Knit Show!
Featured Knitter’s Pride Products: Ginger Crochet Hooks & Jumbo Birch Needles
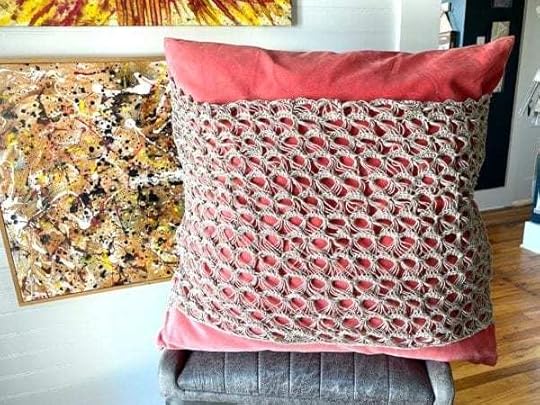
Broomstick Lace Embellished Pillow
MATERIALS
Flax & Twine Daytime Linen (100% Egyptian linen; 130 yds) —yardage will vary; I used 1 1/2 hanks for my oversized pillow.
Size G/4 mm Knitter’s Pride Ginger Hook
1 Size 30 mm Jumbo Birch Needle
Sharp Tapestry Needle
Sewing Pins or Clips
Pop Color Pillow, in your desired size. — I used the 26″ version of this one.
GAUGE
Not important for this project. See the instructions below.
DIRECTIONS
Ch a multiple of 5, that measures the width of the front of your pillow. For my pillow, I chained 85.
Row 1: Place loop from hook onto knitting needle; *using hook pull loop up from the next ch and place onto knitting needle; repeat from * to end. Turn.
Row 2: *Holding knitting needle in the left hand, slip 5 loops from needle to crochet hook; [YO, pull through loops, YO pull through rem loop to close], 5 sc in center of hole just created; repeat from * to end. Turn.
Rep Rows 1-2, until piece measures approximately 2/3 of the height of your pillow. For my pillow, it was twelve times more.
Fasten off leaving a very long tail for seaming.

FINISHING
Using sewing pins or clips, center the piece, and secure it at both sides.

Using the tail, a sharp tapestry needle, and either the blanket stitch or whip stitch, sew piece to the side seams of pillow.
Tie. Off. Weave in ends.

Try new skills and fun projects every month…

The post IKEA Hack: Linen Broomstick Lace Embellished Pillow appeared first on Vickie Howell.
August 3, 2020
YarnYAY! August Subscription Pack
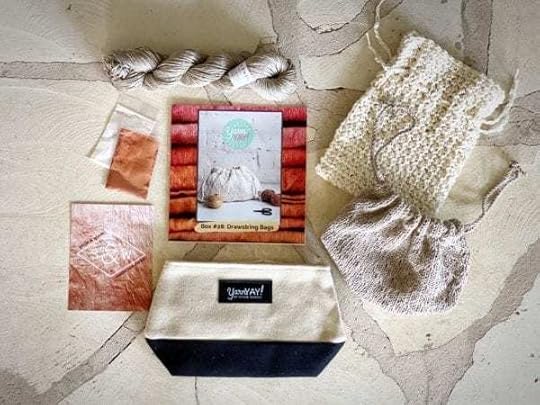
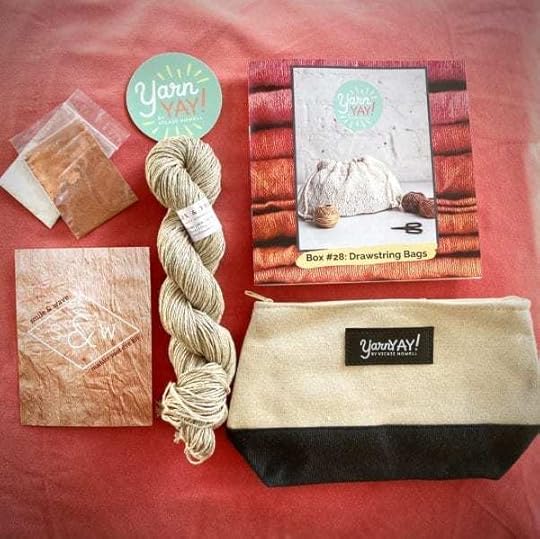
YarnYAY! August Subscription Pack
I’m thrilled to announce that for YarnYAY! August, I’ve had the pleasure of partnering up with two more amazingly talented women, designers and business owners. This month, we at YarnYAY! are focused on easy-breezy natural crafting elements as an ode to the last days of summer. Subscribe today to get the August Knit & Crochet Pack! Here’s what’s inside.
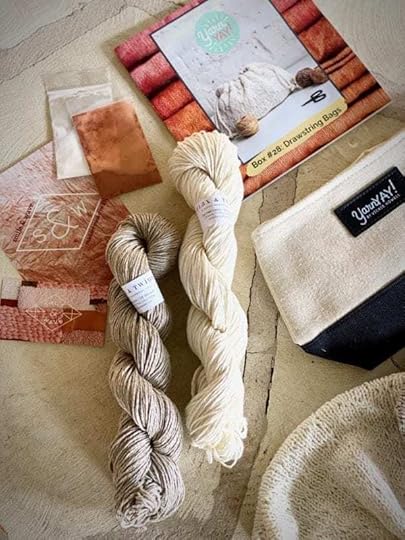
Daytime Linen | Flax & Twine
This month, we’re working with Flax & Twine Daytime Linen. Made in Egypt, it has a beautiful natural sheen to it, and gets more and more flexible as you work with it. The natural is a boiled, dew-ret, long fiber flax. The ecru has been bleached. Watch it soften up with washing!
Flax & Twine is owned by renowned designer Anne Weil. It’s based in Denver, Colorado.

Drawstring Bag Patterns | Designs by Anne Weil & Vickie Howell
Which project do we like best this month? It’s a draw! Well, a drawstring bag, that is. The knit version, designed by Anne Weil, employs a simple, sweet stitch with a hem channel and cleverly made drawstring. Both printed and digital versions of both patterns come with the August pack.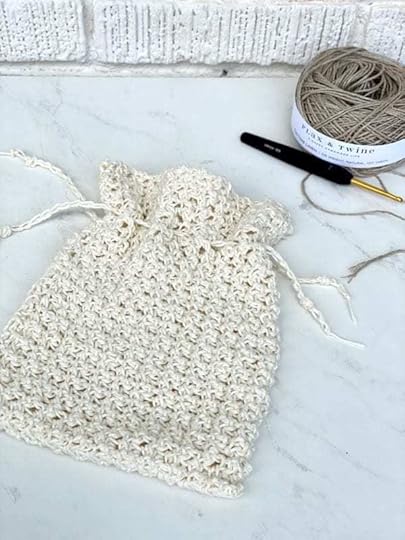 The crochet version, designed by Vickie, leans into the stitch definition that linen allows when using a textured stitch.
*All of our YarnYAY! booklets are printed by woman-run, Austin print shop Digital Technology Professionals.
Madder Root Dye Kit | Smile & Wave
There’s nothing more gorgeous in the textile world than the magic of natural dyeing. Designer/instructor Rachel Denbow’s work takes it to the next level! This month, she’ll share a bit of that beauty with us through both a lesson and a kit using madder root to dye our linen projects (or a piece of fabric) in a blush to terracotta palette.
Rachel’s company Smile & Wave focuses on dyeing and weaving courses, and gorgeous tools and fibers.

Canvas Notions Bag | YarnYAY!
One can never have too many zippered bags to help keep all of our project bags organized. This canvas version will go with anything and hold everything from notions to tools!

The post YarnYAY! August Subscription Pack appeared first on Vickie Howell.
July 27, 2020
Tunisian Loopy Knot Cowl & Scarf
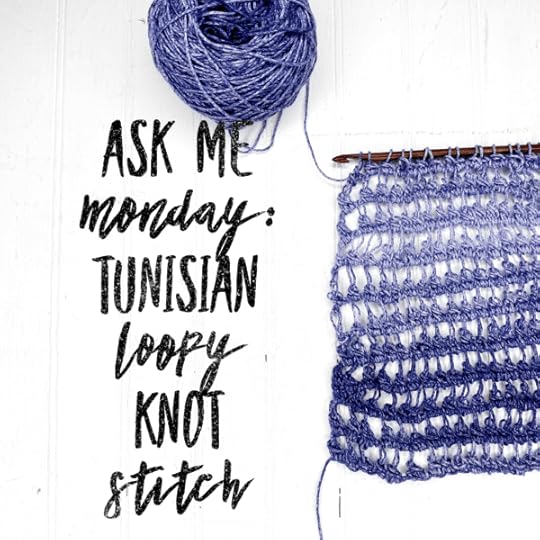
Loopy Knot Stitch
This month on Ask Me Monday, we’ve been playing with net stitches, which are great options for summer pieces like tops, scarves and market bags. In a recent episode, I covered knit and crochet stitches that produce a mesh-like fabric. Today, we’re looping in (har, har, har) a third craft by learning a Tunisian crochet stitch that evokes a knotty net look. I love the Tunisian Loopy Knot Stitch because it’s got the cool vibe of modern macrame while feeling light and airy like lace.
Watch the episode, learn the stitch, then put your sweet, stitching skills to work by making the Loopy Knot Stitch Cowl or Scarf. Have fun!
This episode of Ask Me Monday is sponsored by Knitter’s Pride/ KnitPro
See more KP products during “Vic’s Tips” segments of The Knit Show!
Featured Knitter’s Pride Products: Ginger Tunisian Interchangeable Hooks
Loopy Knot Stitch Cowl & Scarf

MATERIALS
1 (2) hank(s) HiKoo Popcycle (50% Polyester from Recycled Bottles/50% Bamboo; 305 yards), in color: Do-Able Denim
Size 7 Knitter’s Pride Ginger Tunisian Crochet Hook
Tapestry Needle
FINISHED MEASUREMENTS
Cowl 36″/91 cm circumference
Scarf 60″/152 cm length
SPECIAL STITCHES
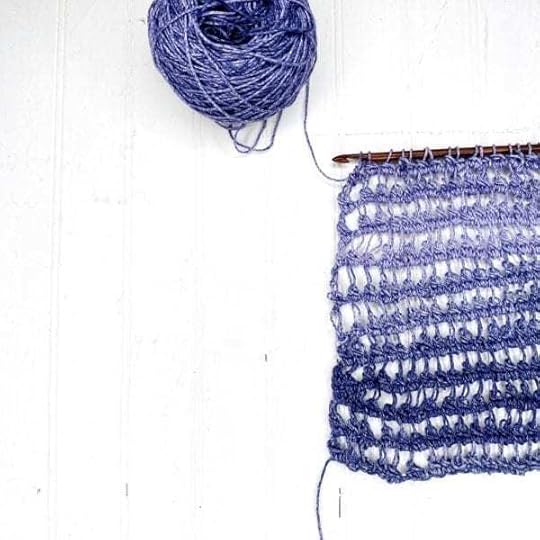
Loopy Knot (LK)
In the same space [insert hook, pull through loop, ch 1] TWICE, insert hook, pull through loop, YO pull through 3 loops.
PRO TIP: Use this same pattern (except start with ch 14) with a super chunky yarn and size US 15 Tunisian hook, for a cool, snuggly winter scarf!
DIRECTIONS
Ch 24.
Row 1:
Forward Pass: LK in 4th ch from hook and every ch to end. — 20 sts.
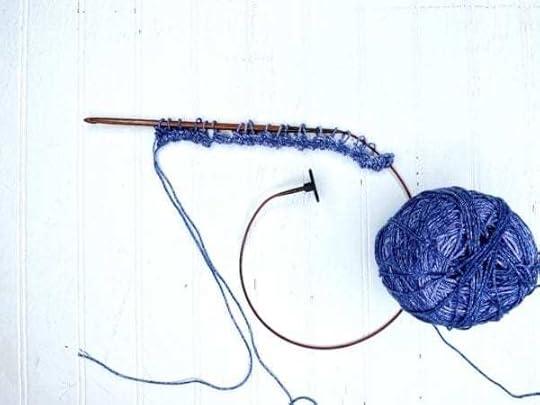
Backward Pass: Ch 2, *YO and pull through 2 loops; rep from to end. — 1 loop left, 20 LK
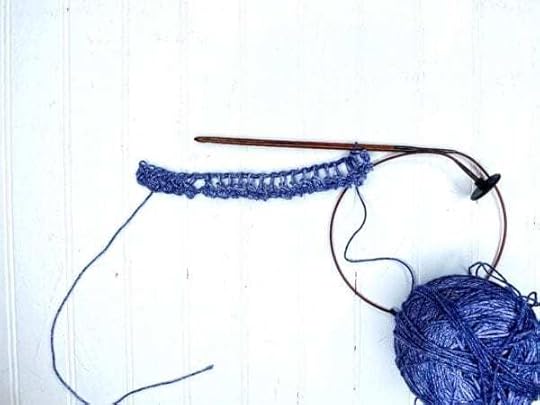
Row 2:
Forward Pass: Ch 2, LK in every sp across, taking care not to miss the first sp next to the beg-ch.
Backward Pass: Ch 2, *YO and pull through 2 loops; rep from to end. — 1 loop left, 20 LK

Repeat Row 2, until piece measures 36″(60″)/91(152) cm
Cowl only:
Fasten off.
Scarf only:
Last Row:
Forward Pass: Insert hook in 2nd bar from hook. YO and pull up a loop *Insert hk in next bar, YO and pull up a loop. Rep from * to end of row.
Backward Pass: YO and pull through 1 loop, *YO and pull through 2 loops; rep from to end. — 1 loop left, 20 LK
Looking for more Tunisian Crochet Projects? Try these:
Tunisian Honeycomb Stitch Pillow
Tunisian Summer Scarf
Try new skills and fun projects every month…
The post Tunisian Loopy Knot Cowl & Scarf appeared first on Vickie Howell.
July 20, 2020
Puffy Stocking Ornament
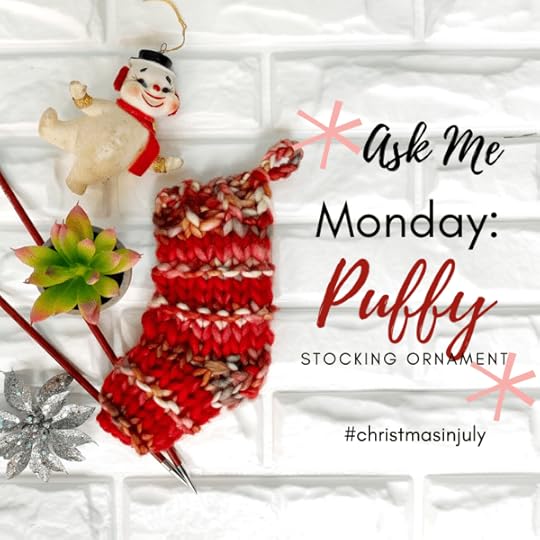
Puffy Stocking Ornament
This week on Ask Me Monday I teach one of my annual Christmas in July projects, which in the past have included Scrap Bin Stockings and Broomstick Lace Trees. This time, I riff on the former by creating smaller stockings that are stuffed and made ornament sized. A Puffy Stocking Ornament will make a great gift-topper or tree decor this upcoming holiday season. Better yet, since we’ve got a few months to prepare, make them for all of your friends as just a little something to make their holiday heart smile.
For this project, I use chunky-weight yarn (for extra puffiness), but if you’d like smaller ornaments, simply scale down to worsted-weight yarn and Size 8/5mm needle.
Psst…don’t forget to bookmark this project to revisit in December!
Find Ask Me Monday three Mondays a month at 12pmCT on my Facebook page. See past episodes here.
This episode of Ask Me Monday is sponsored by Knitter’s Pride/ KnitPro
See more KP products during “Vic’s Tips” segments of The Knit Show!
Featured Knitter’s Pride Products: Aluminum Crochet Hooks, Ginger Circular Needles
Puffy Stocking Ornament Pattern
MATERIALS
Chunky-weight scrap yarn in colors A & B.
Size US 11/8 mm needles
Wool Needle
Optional: Size US J/6 mm crochet hook
Don’t crochet? No problem! Simply add a ribbon or knit an i-cord loop!
FINISHED MEASUREMENTS
Approx 7″/18 cm tall x 3″/7.5 cm wide (stuffed)
FIND ABBREVIATION DEFINITIONS HERE
DIRECTIONS
Note: This project is worked flat, then seamed up.
Leg:
With A, CO 14 sts.
Rows 1 & 3: *K1tbl, p1; rep from * to end.
Rows 2 &4 : *p1tbl, p1; rep from * to end.
Row 5: With B, knit.
Row 6: Purl.
Rows 7-8: With A, knit.
Repeat Rows 5-8, once more.
Repeat Rows 5-6, once more.
Cut B.
Heel:
Row 1 (RS): K9, yf, sl 1, yb, sl st back to LH needle. Turn. (You’ll leave the remaining sts
unworked.)
Row 4: P4, yb, sl 1, yf, sl st back to LH needle. Turn.
Row 5: K3, yf, sl 1, yb, sl st back to LH needle.
Row 6: P2, yb, sl 1, yf, sl st back to LH needle. Turn.
Row 7: K3, yf, sl 1, yb, sl st back to LH needle.
Row 8: P4, yb, sl 1, yf, sl st back to LH needle. Turn.
Row 9: K4, k2tog (closes gap), k to end.
Row 10: P8, p2tog (closes gap), p to end. –12 sts.
Rejoin B.
Resume yarn striping pattern.
Rows 1-2: With B, knit.
Row 2: P all sts.
Rows 3-4: With A, knit.
Repeat Rows 1-4, once more.
Cut A.
Toe:
Row 1: K2, ssk, k2tog, ssk, k2tog, k2. — 8 sts.
Row 2: Ssp, p2tog, ssp, p2tog. — 4 sts.
Row 3: Ssk, k2tog, pass stitch over to BO, leaving a long tail for seaming.
FINISHING
Fold piece in half and using tail and wool needle, seam together foot and side of leg.
Stuff all ends, plus additional scarp yarn into stocking until it’s nice and puffy, then continue seaming across top of leg. Feed end through the body to bury.
Looking for a vessle for those gift cards? Simple skip the stuffing and top-seaming steps to turn this project into a gift card stocking!
Hanging loop:
Using crochet hook, rejoin yarn at top corner of stocking, ch 8, join loop with a slip st in same space as you began. Fasten off. Bury ends.

Give a gift to yourself…
The post appeared first on Vickie Howell.


