
Gretchen Hirsch's Blog, page 8
October 16, 2015
Poodle Blouse!
 Here's another version of B6217, this time in flocked poodle chiffon! This is one of my new fall fabrics, available here. I love flocked fabrics so much, and poodles just make everything better.
For this version of the blouse, I left off the bust ties and used the puff sleeve rather than the tulip sleeve. I added pom pom trim around the neckline and sleeves and a little black velvet bow at the center. I made a little alteration to the puff sleeve: it was a little big around the hem, so I added some gathers to the sleeve hem as well.
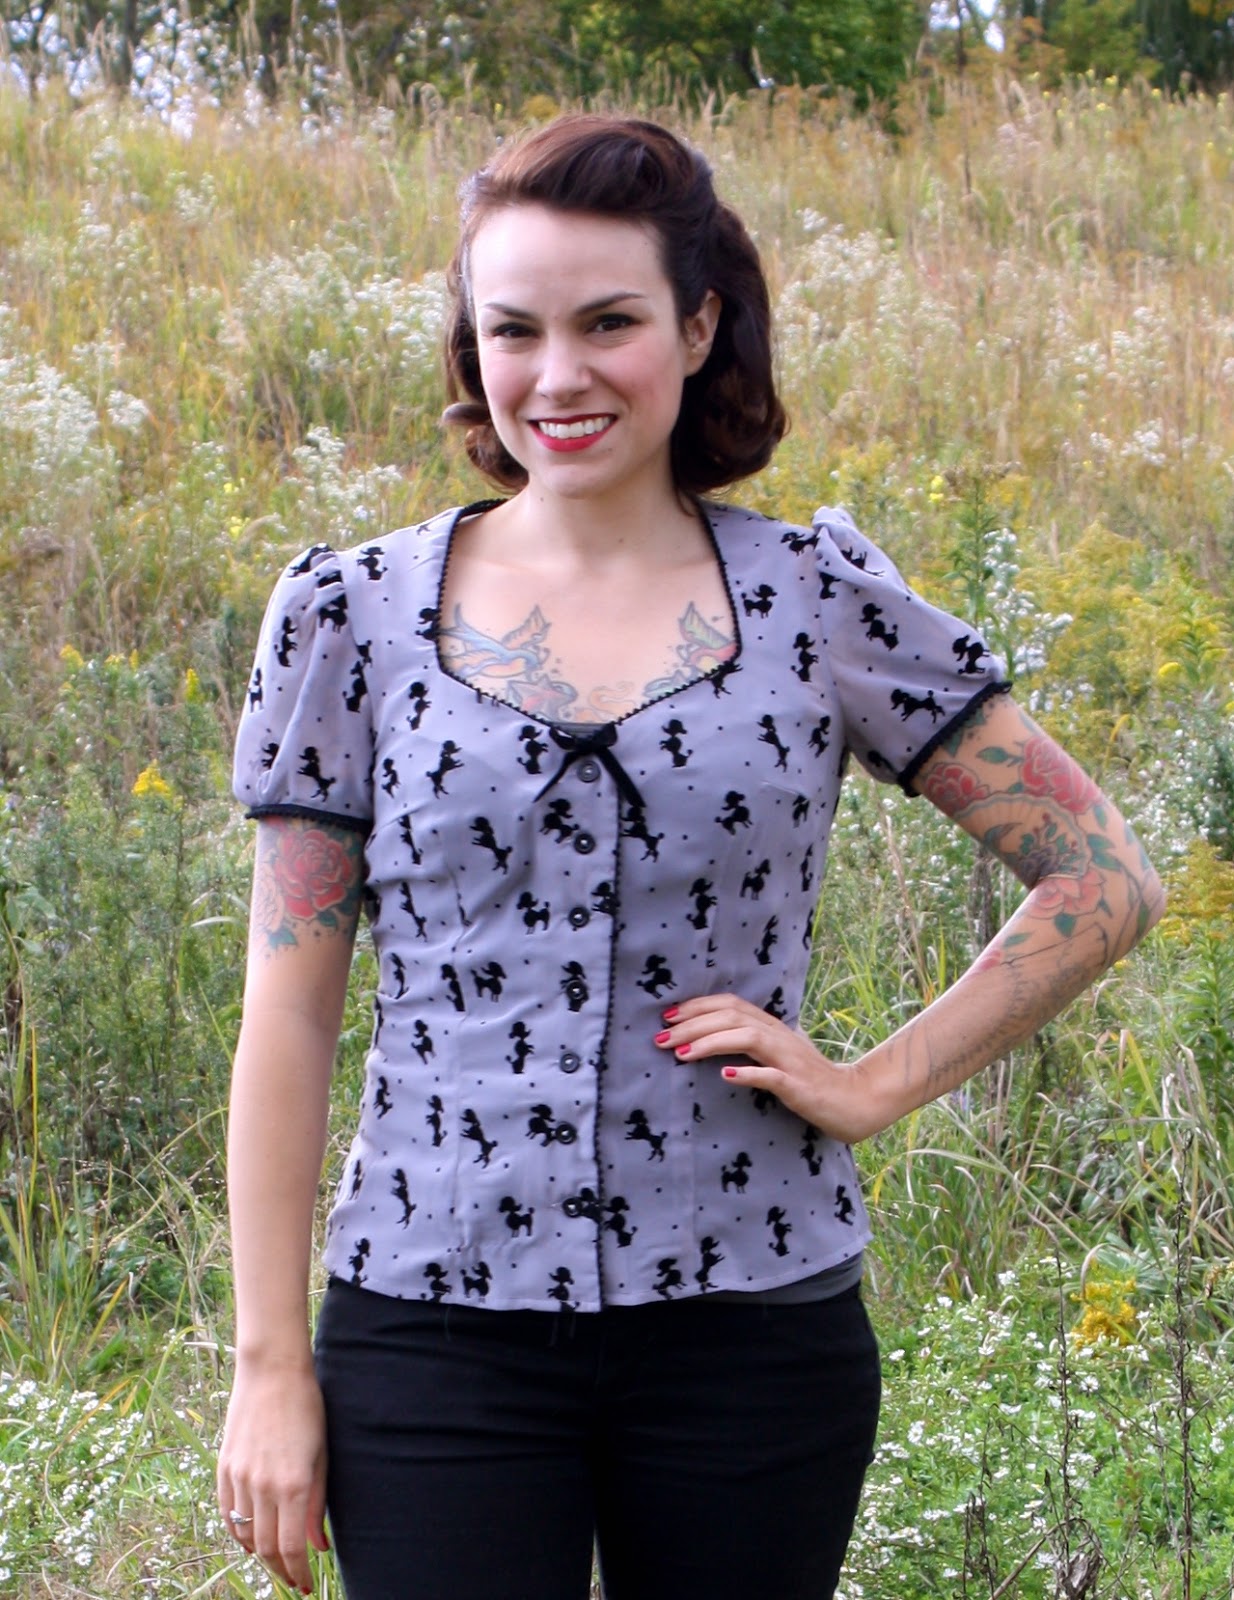
I paired it with store-bought capris (Modcloth!) and two-tone black and white Bass Weejuns. Retro Casual!
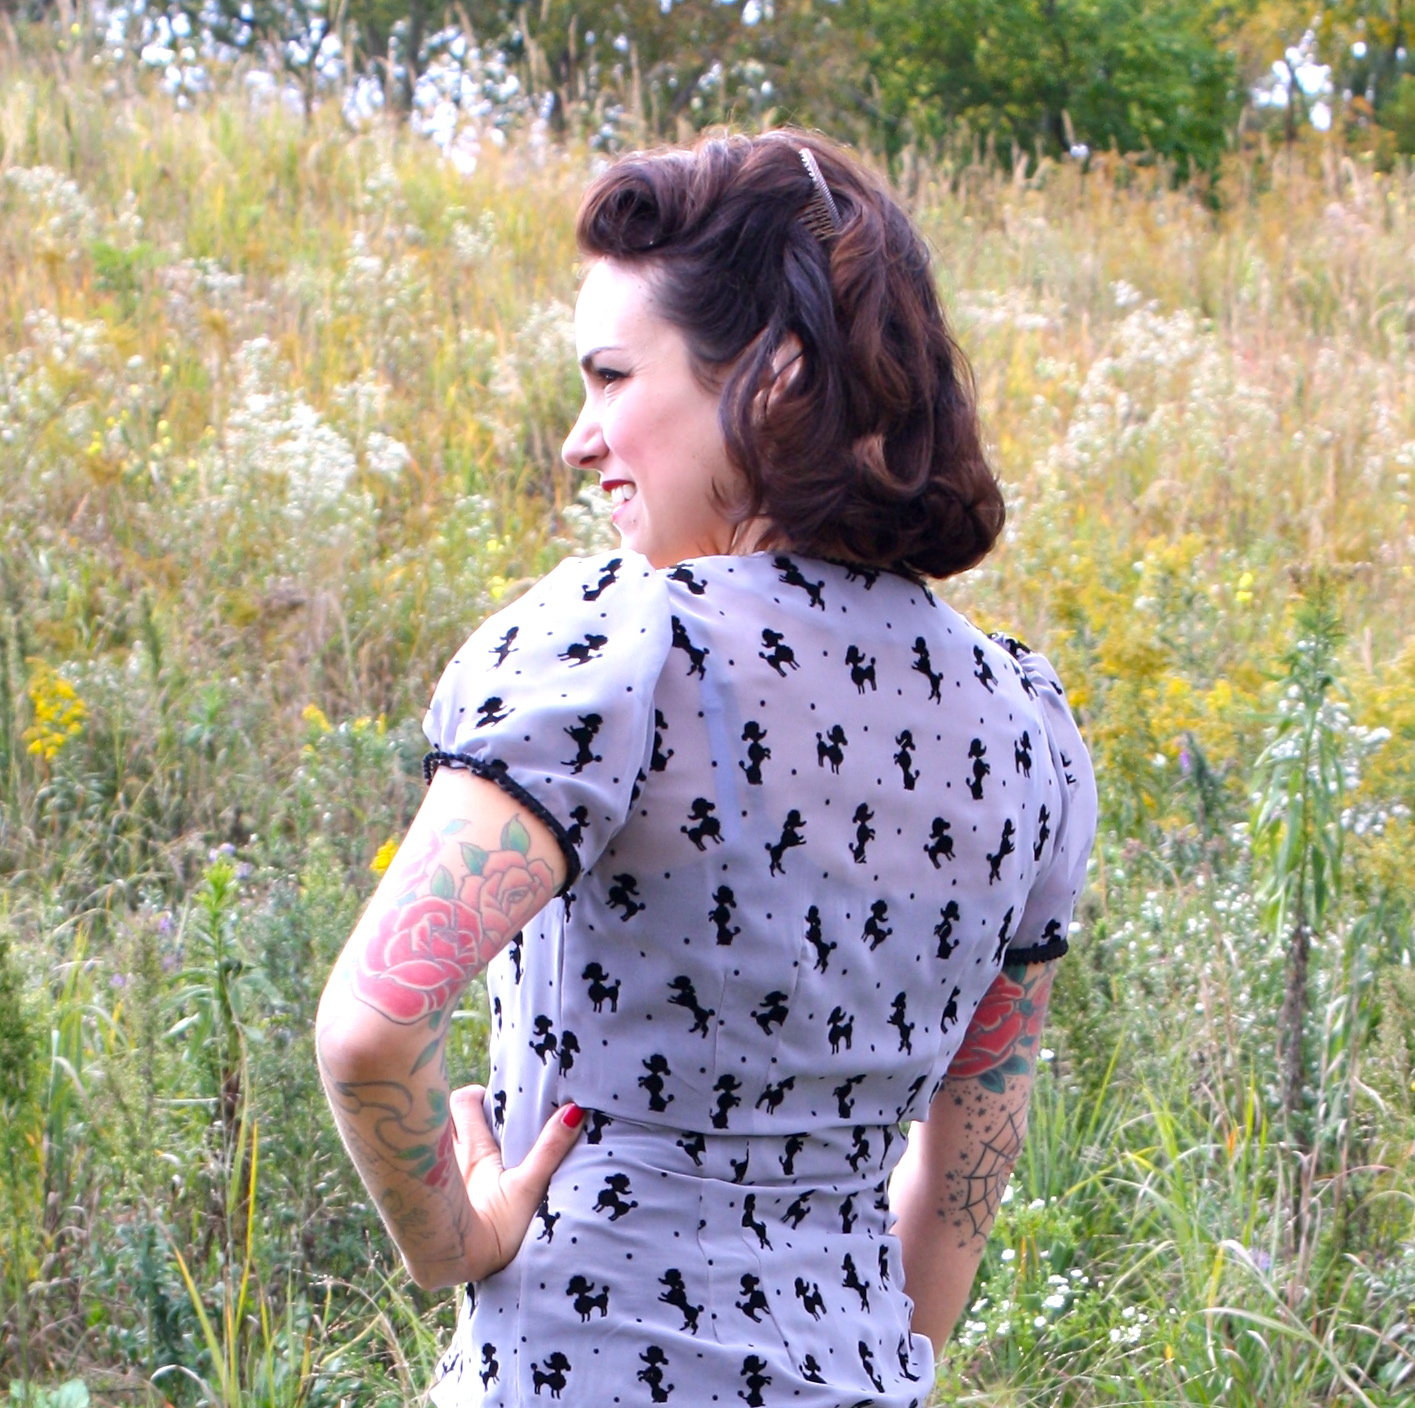
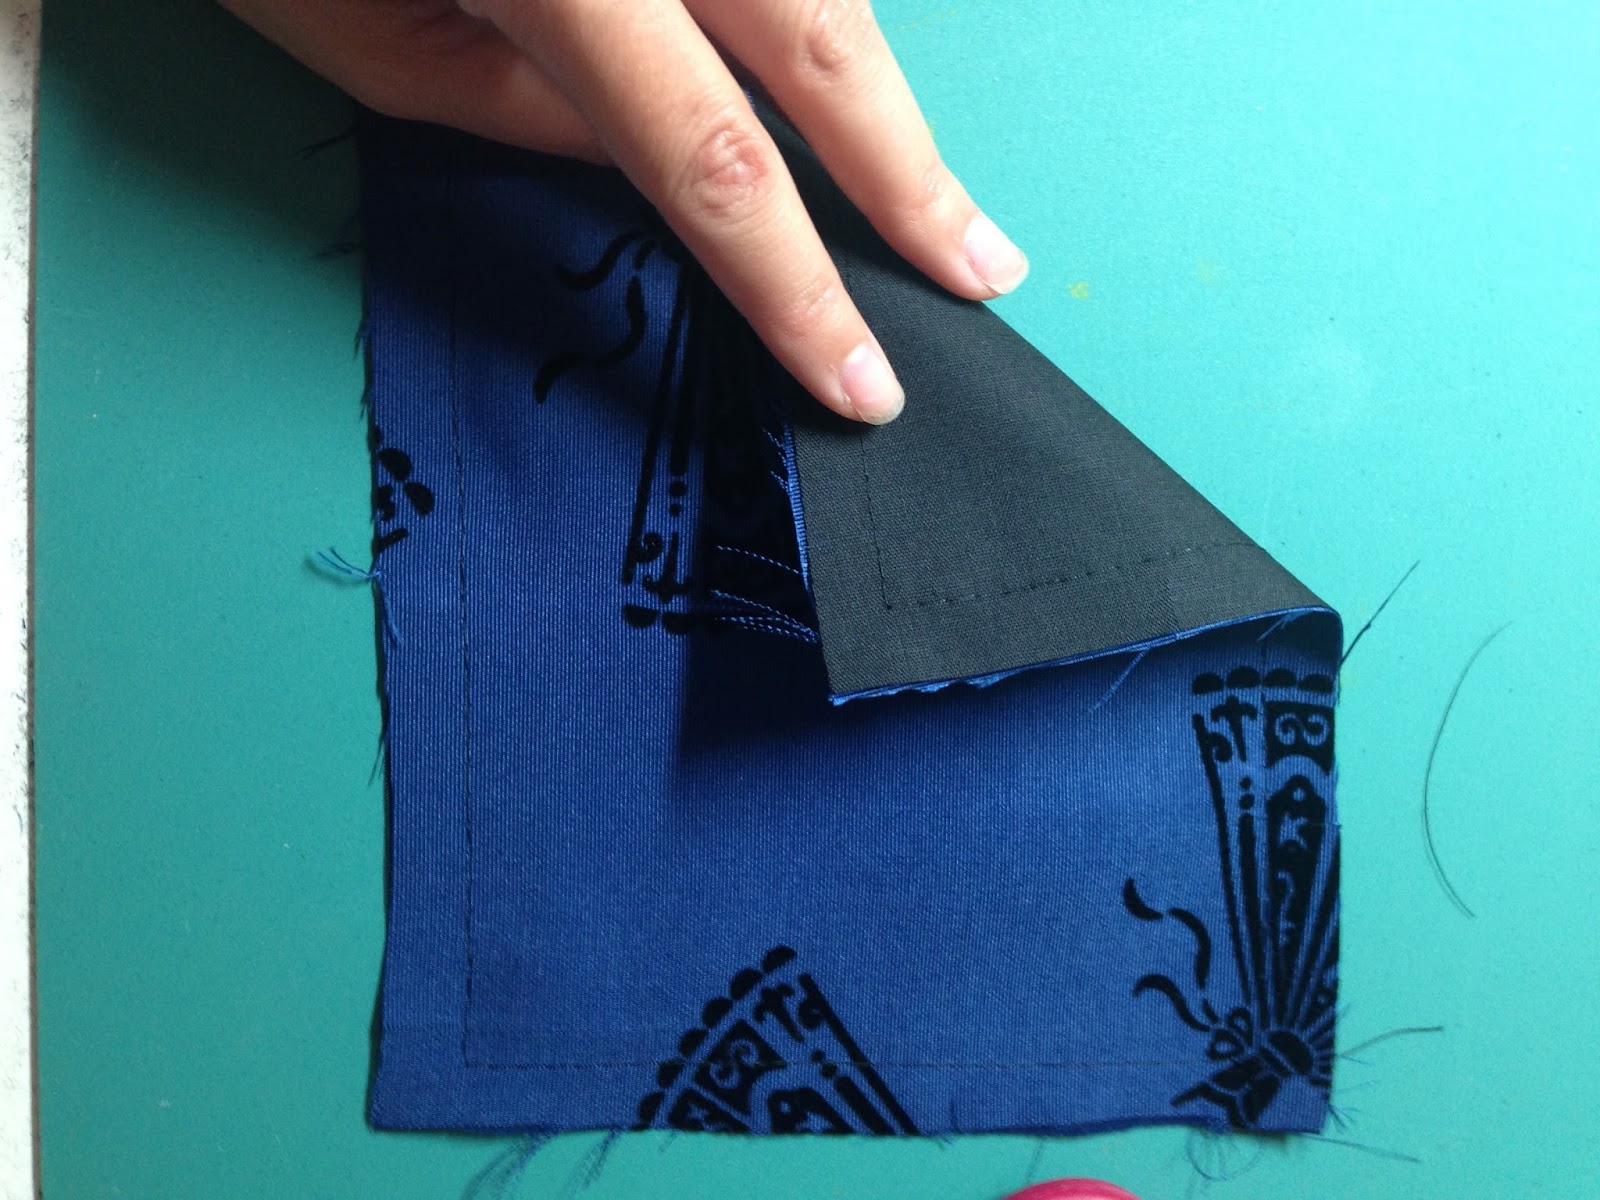
 Chiffon can be tricky to sew, of course. I used French seams for a nice finish on the inside. For the facings, I used this technique of "facing a facing" which gives a really clean edge. I used plain grey chiffon, interfaced with grey tulle. Here is the facing, pinned to the neckline.
  This gave a nice sheer finish from the outside.
I wore a camisole underneath but I might try being super daring and just wear a bra sometime. Anyway, I'm so in love with these little flocked poodles!


October 14, 2015
Cover Reveal! Gertie's Ultimate Dress Book
 I've been so excited to blog this one because I am IN LOVE with this cover! My next book, Gertie's Ultimate Dress Book, is now up on Amazon for pre-order. It's releasing in March 2016.
Here's a little info on the book:
Every vintage-obsessed sewist dreams of having a closet full of gorgeous dresses. The follow-up to the popular Gertie’s New Book for Better Sewing and Gertie Sews Vintage Casual, Gertie’s Ultimate Dress Book is packed with all the information and patterns you could ever need to create a wardrobe filled with stunning vintage frocks. The book begins with all the essential techniques for dressmaking and includes instructions and patterns for 23 dresses for a variety of occasions. Elements of each pattern can be mixed and matched, allowing readers to customize the bodice, skirt, sleeves, pockets, and details of each dress for a truly unique creation.The dress on the cover is called the Emerald Faille Party Dress and it's made from an amazing silk faille. It has a super structured boned bodice and very full skirt: it's a circle skirt with box pleats all around. The skirt and bodice are basic patterns included with the book, and then I show you how to make your own special details for each dress, like the halter strap (it closes with little rhinestone buttons in the back) and the bias band that goes across the bodice. There are tons of construction techniques like lining, underlining, using horsehair on hems and necklines, working with lace and beaded fabrics, and lots more.
I can't wait to show you more from the book!
P.S. Did you spot Henry on the cover?
October 13, 2015
Making a Quilted Skirt, Part 2
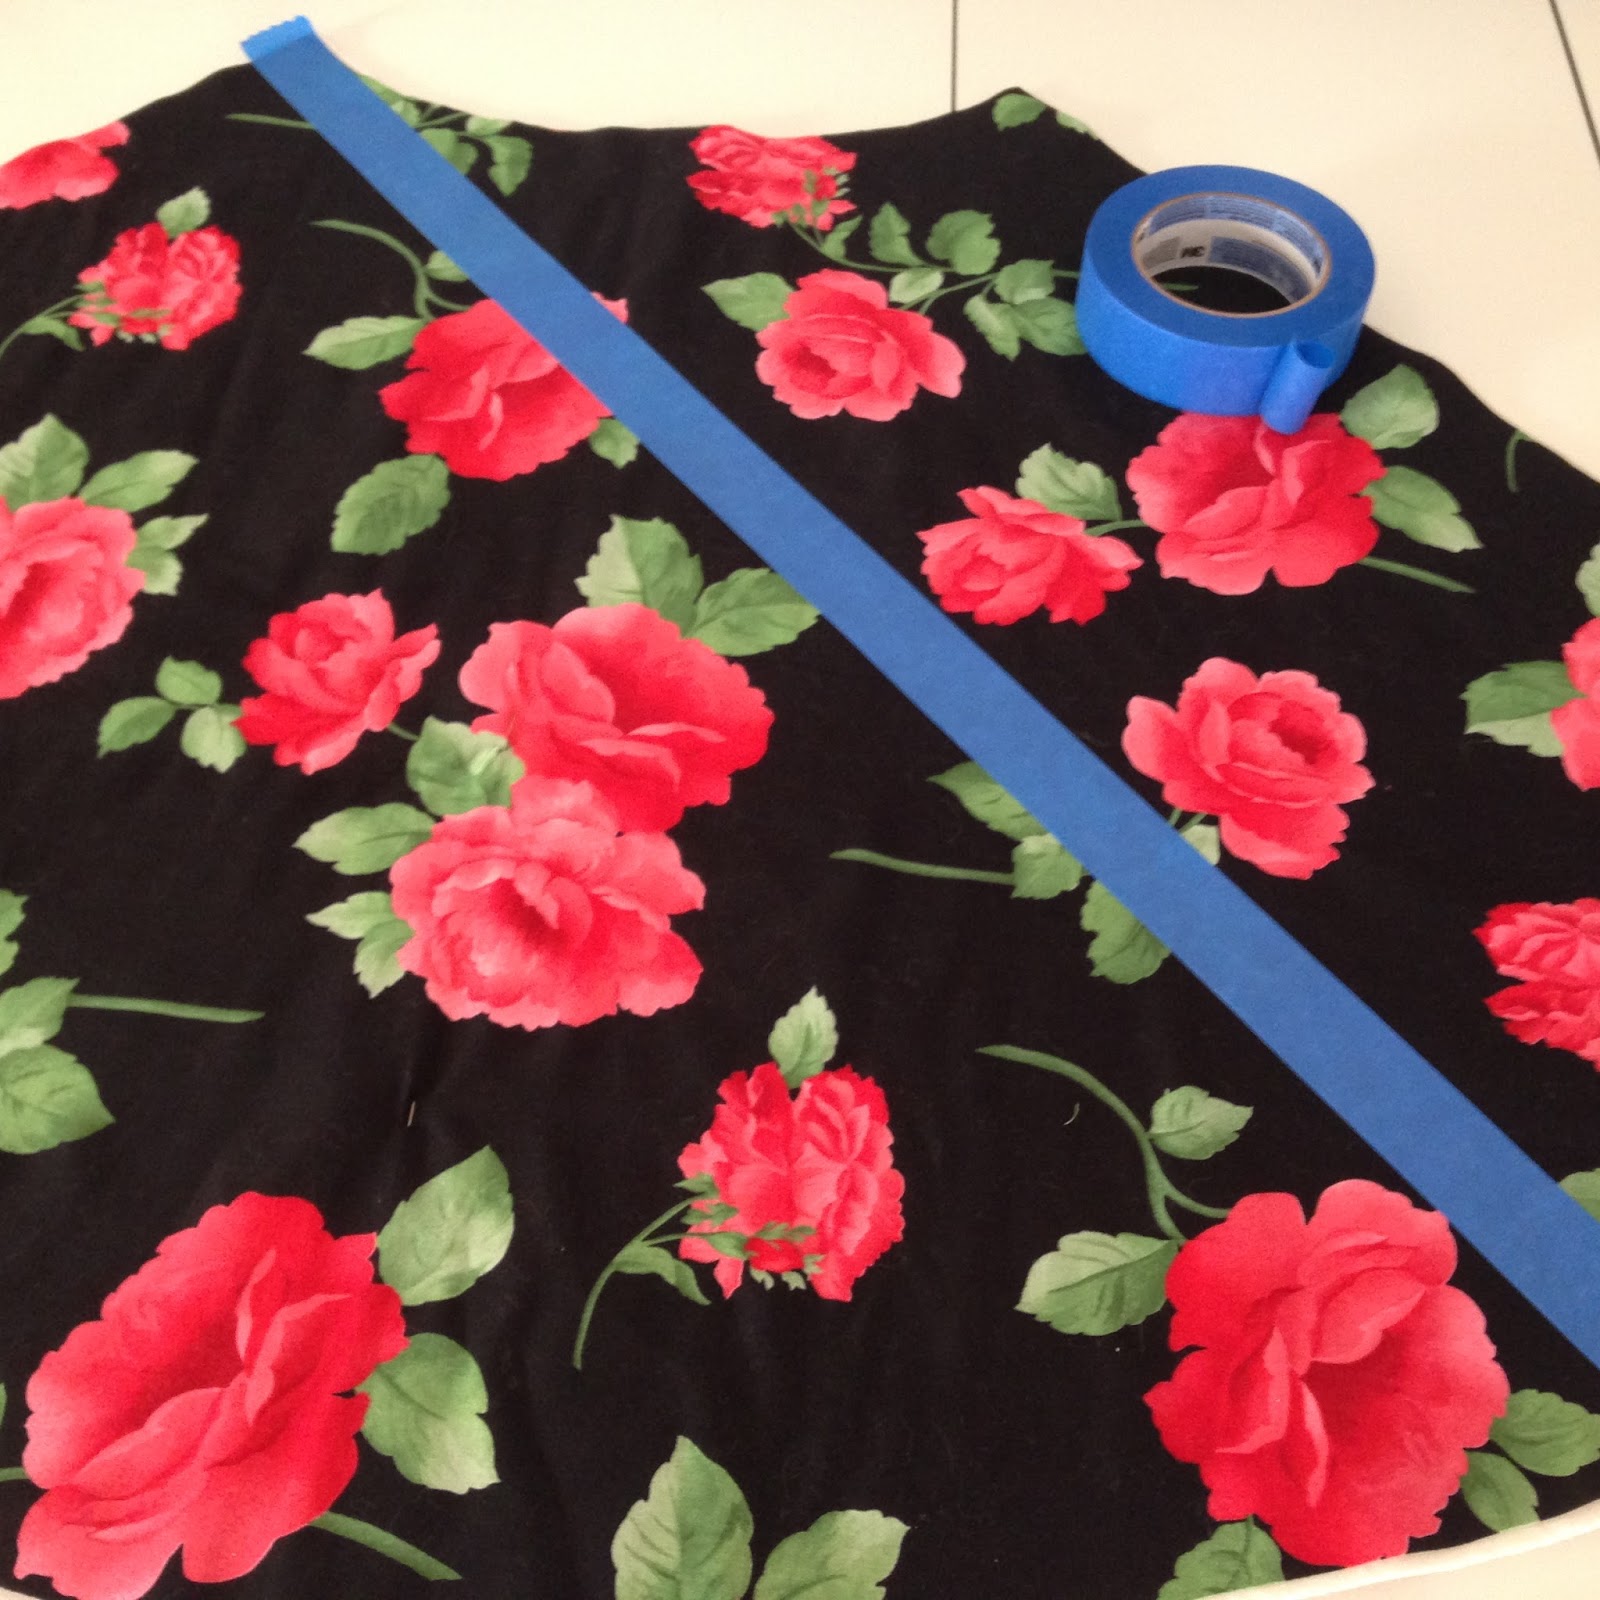
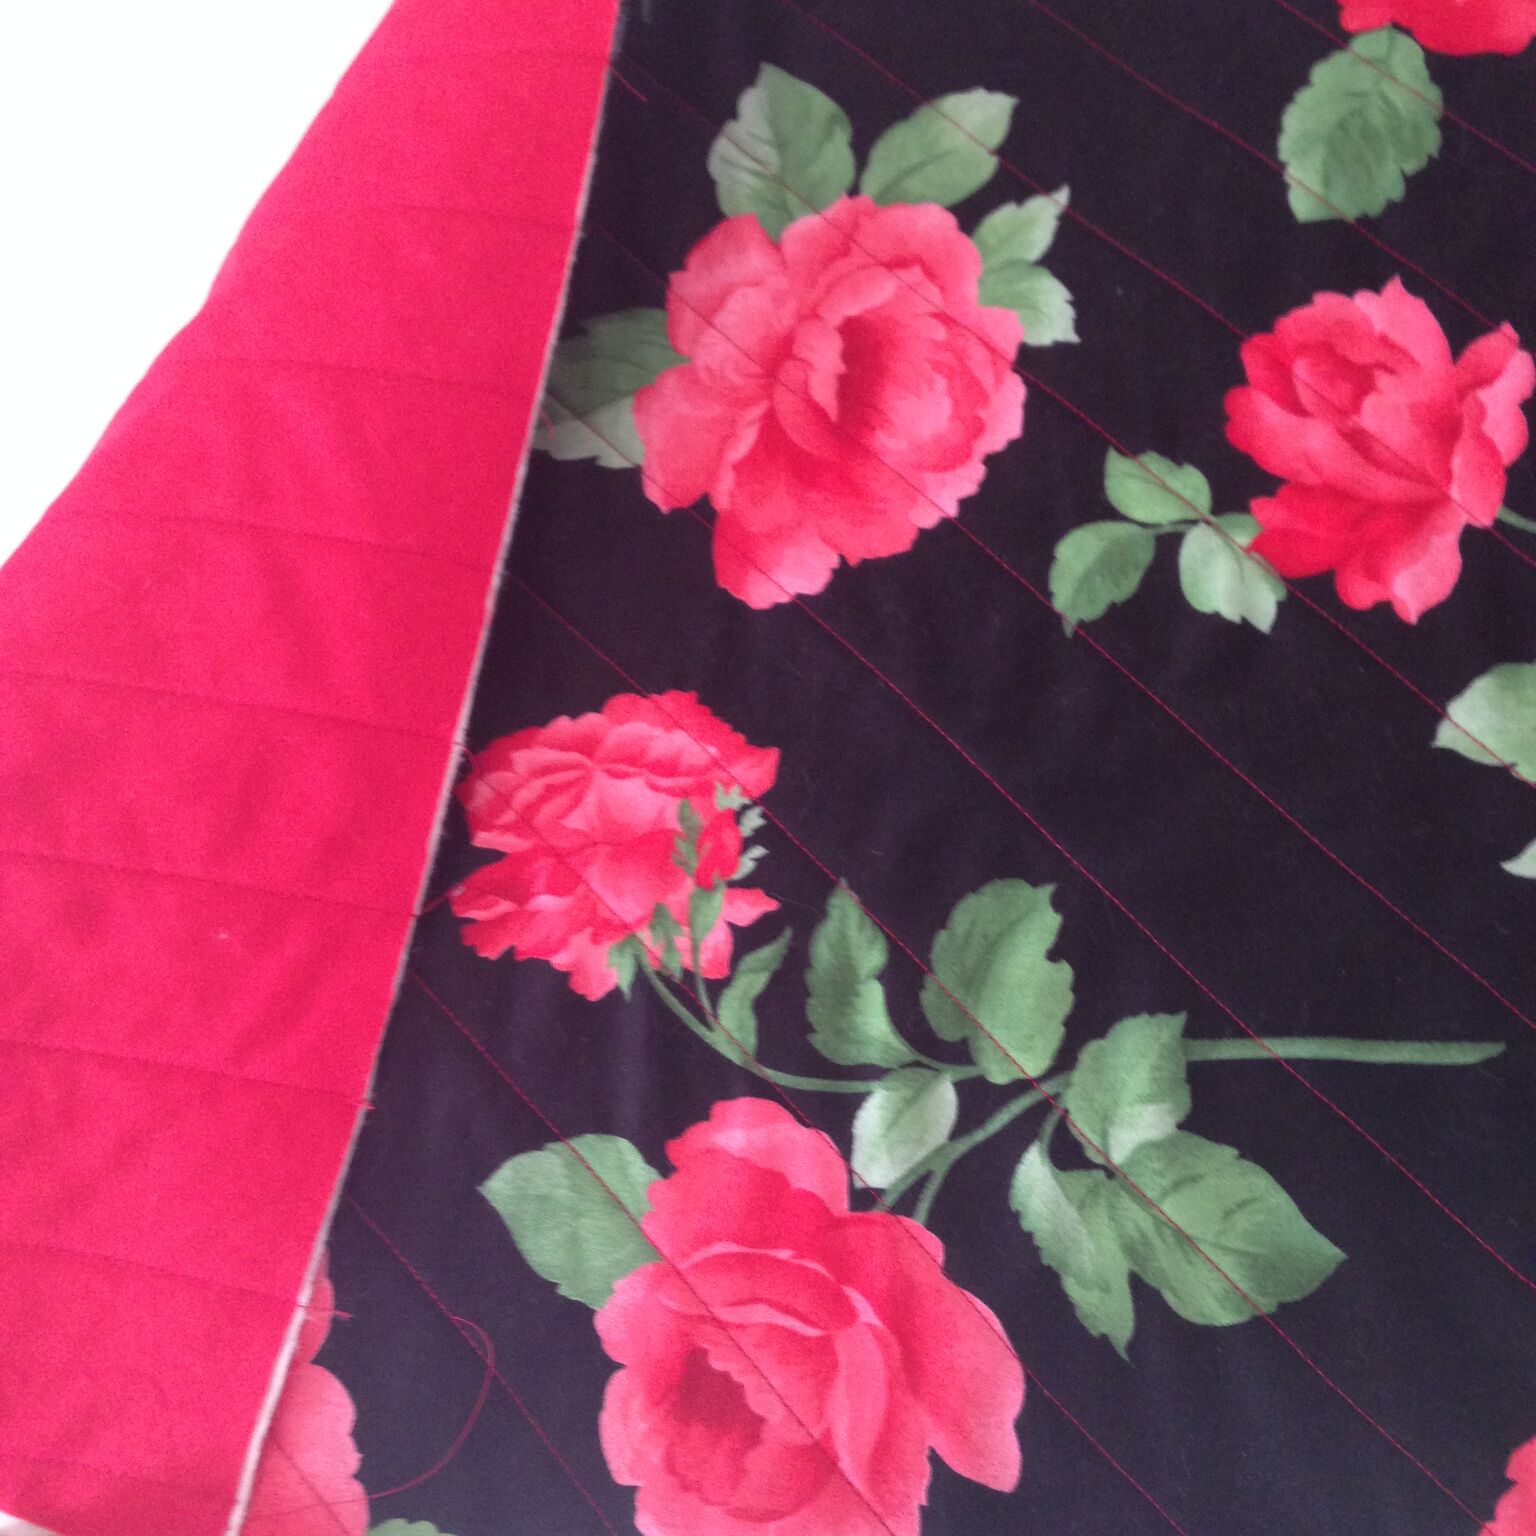
 First, some vital information: Here's part 1 of this tutorial! And here are pictures of the finished skirt.
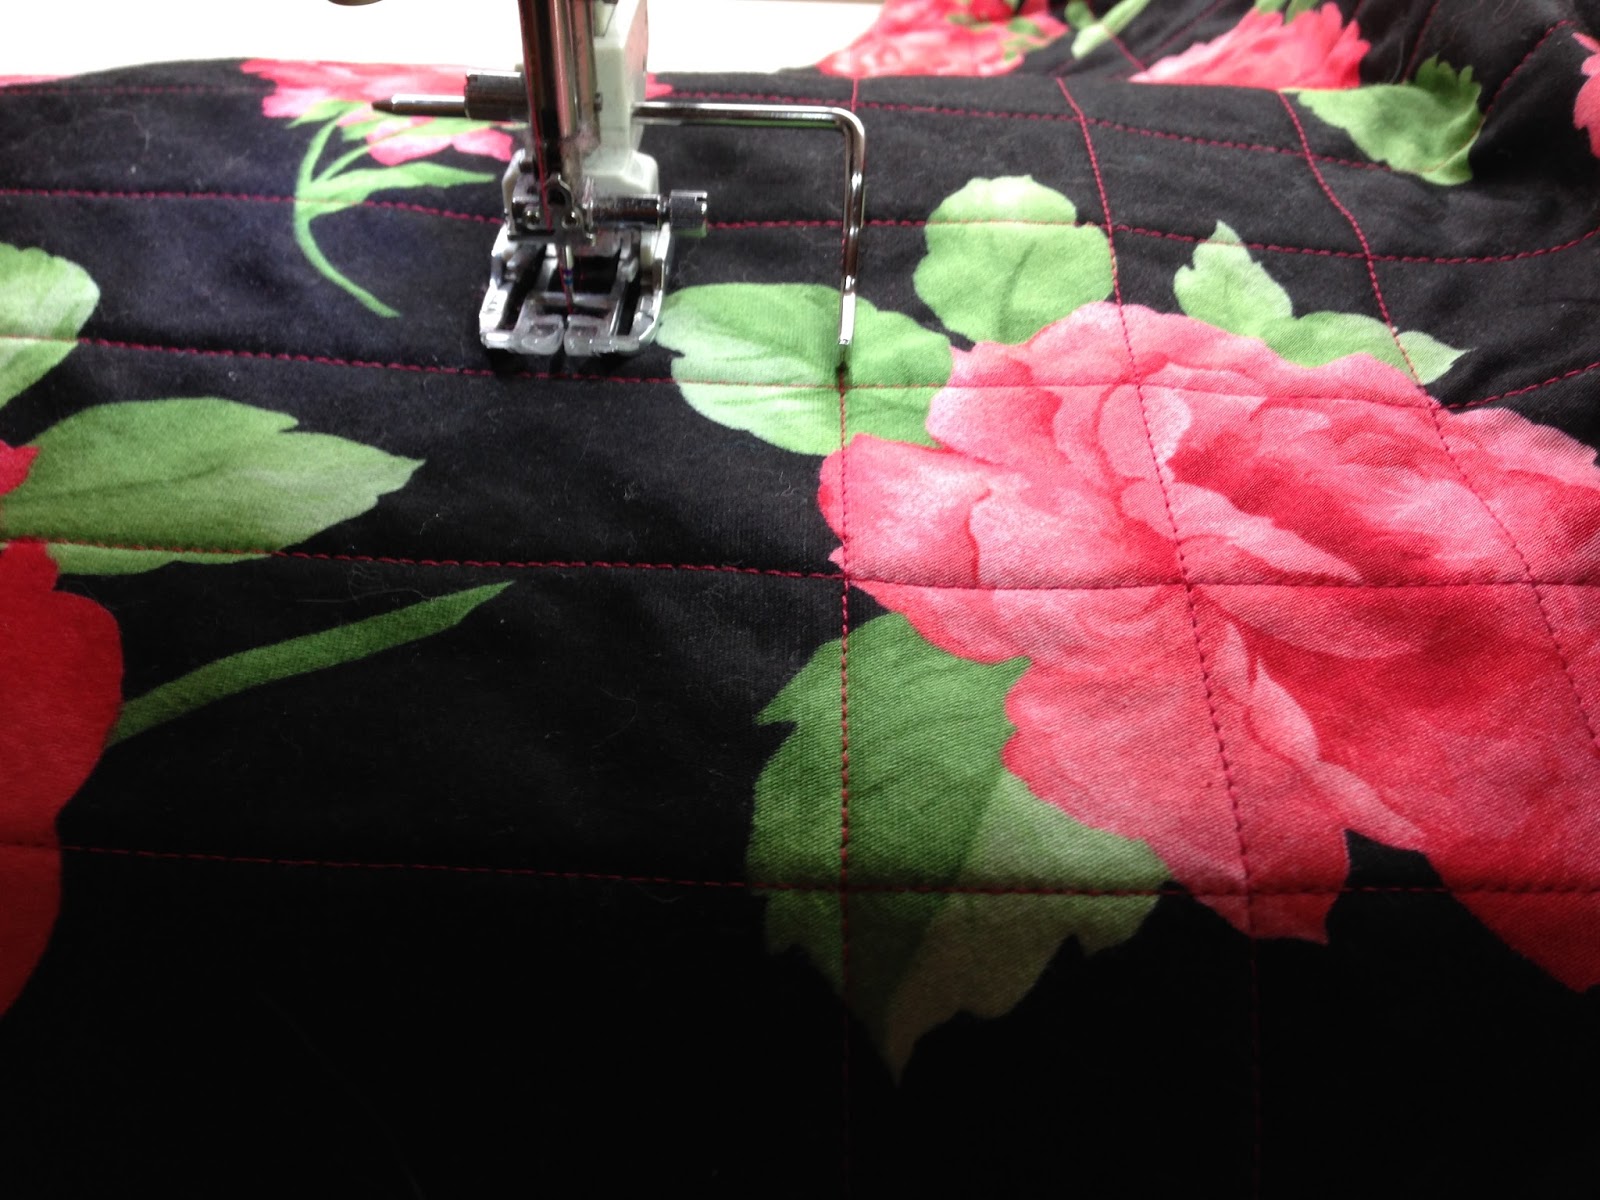
Okay, at this point in the process you have the front skirt, with quilted lines going on the bias in one direction. I marked your original line with blue painters tape, and used a quilting guide on a walking foot to keep the rest of the lines even.
Now we need to do the criss-crossing lines. They should start at the same point in the opposite corner of the skirt, and be perfectly perpendicular to your first set of lines. You can check this with a clear ruler.
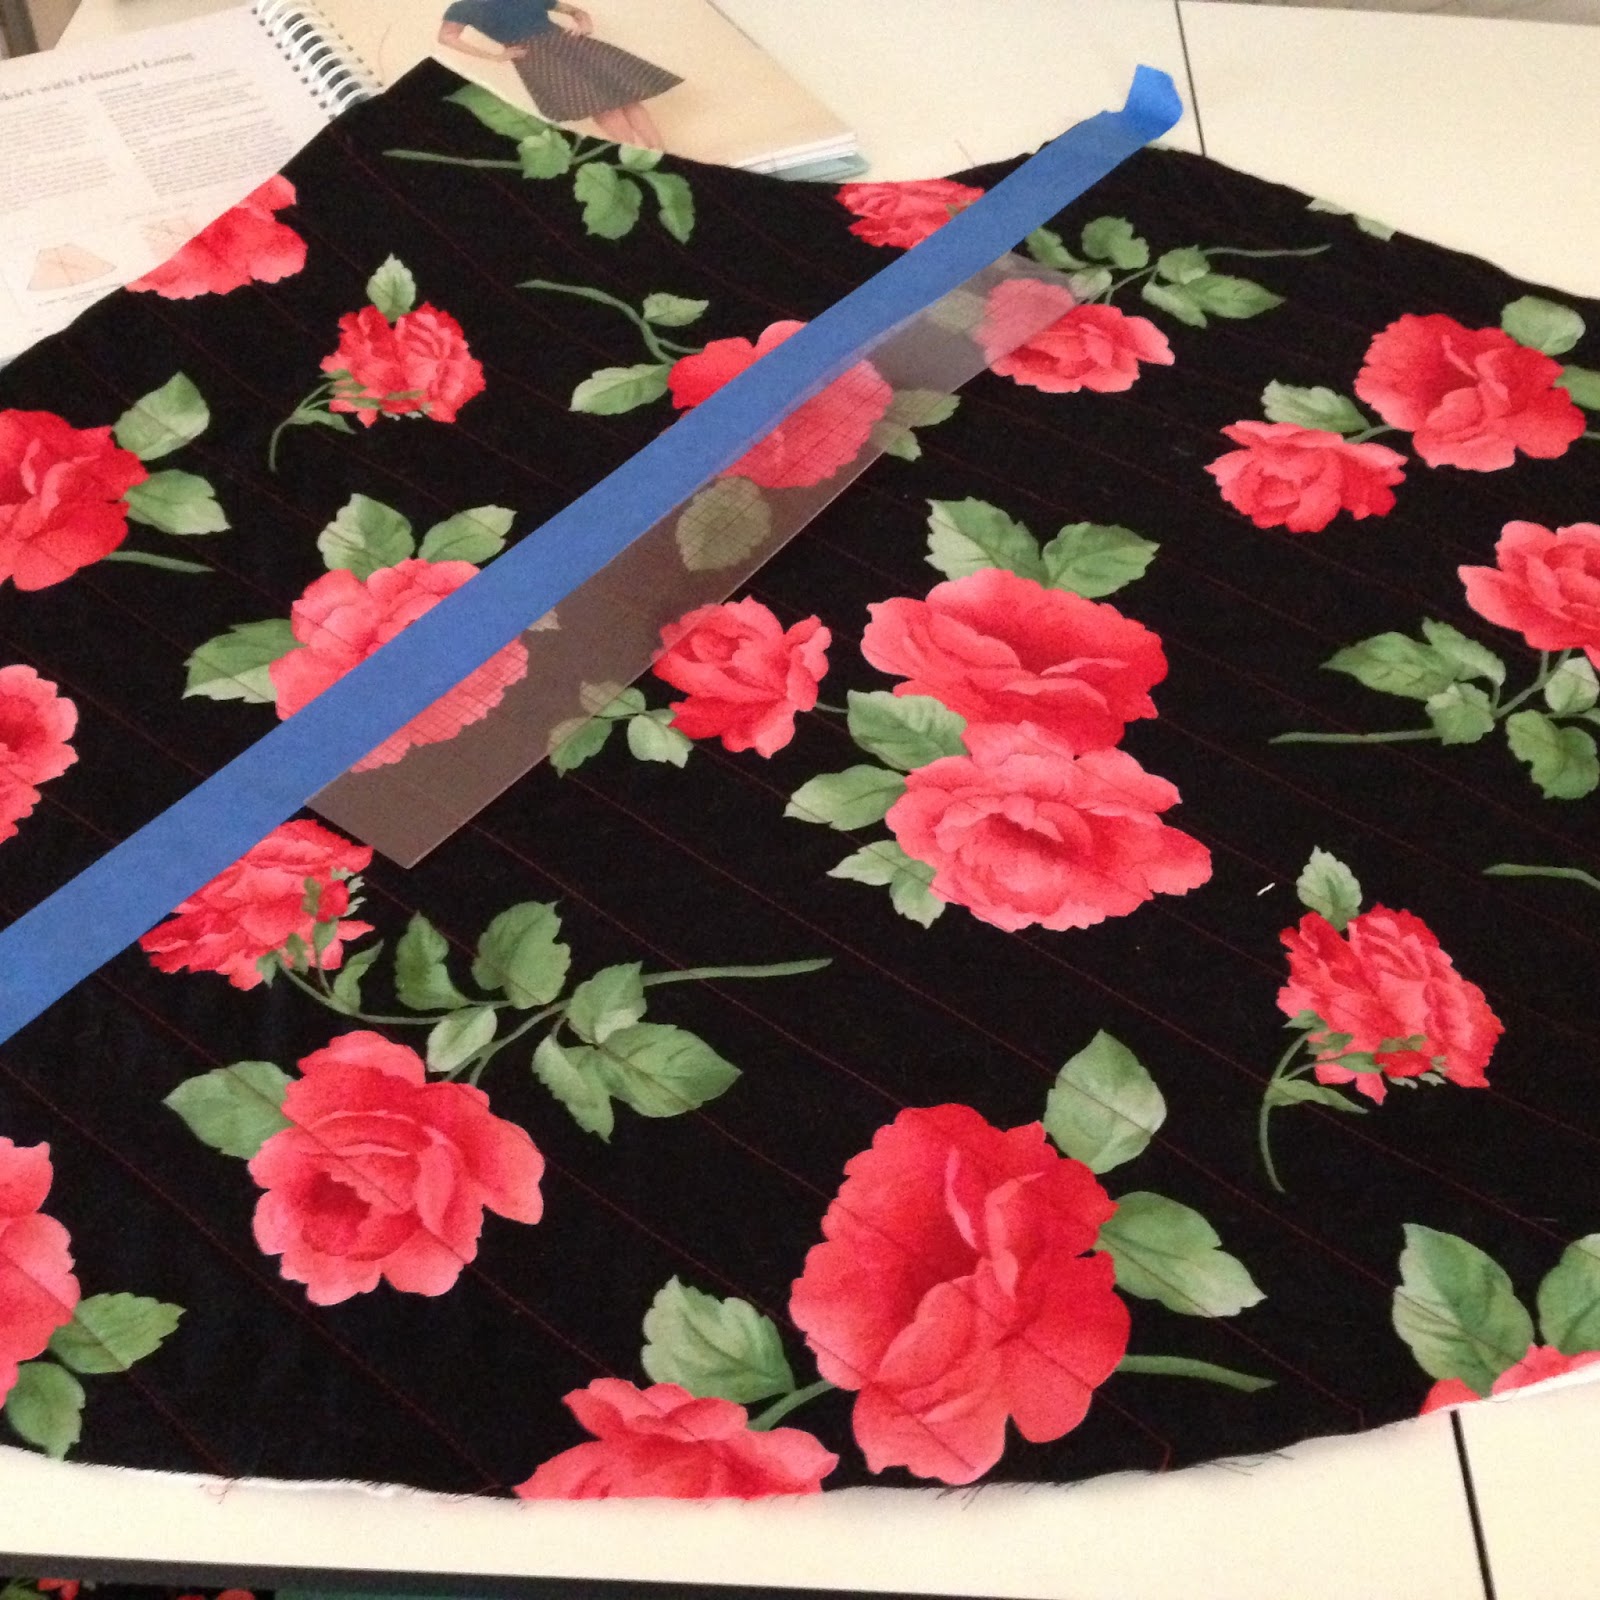
Use the blue tape to stitch your first line, and then your quilting foot guide to make the rest of the lines. You'll have a nice and neat grid.
Now to quilt the back pieces. Use the same method of marking the first lines with blue tape. Start the tape in the upper corners like you did with the skirt front, and have the lines go at a 45 degree angle. Make sure that they will meet at the same point in the center back, in a V shape.
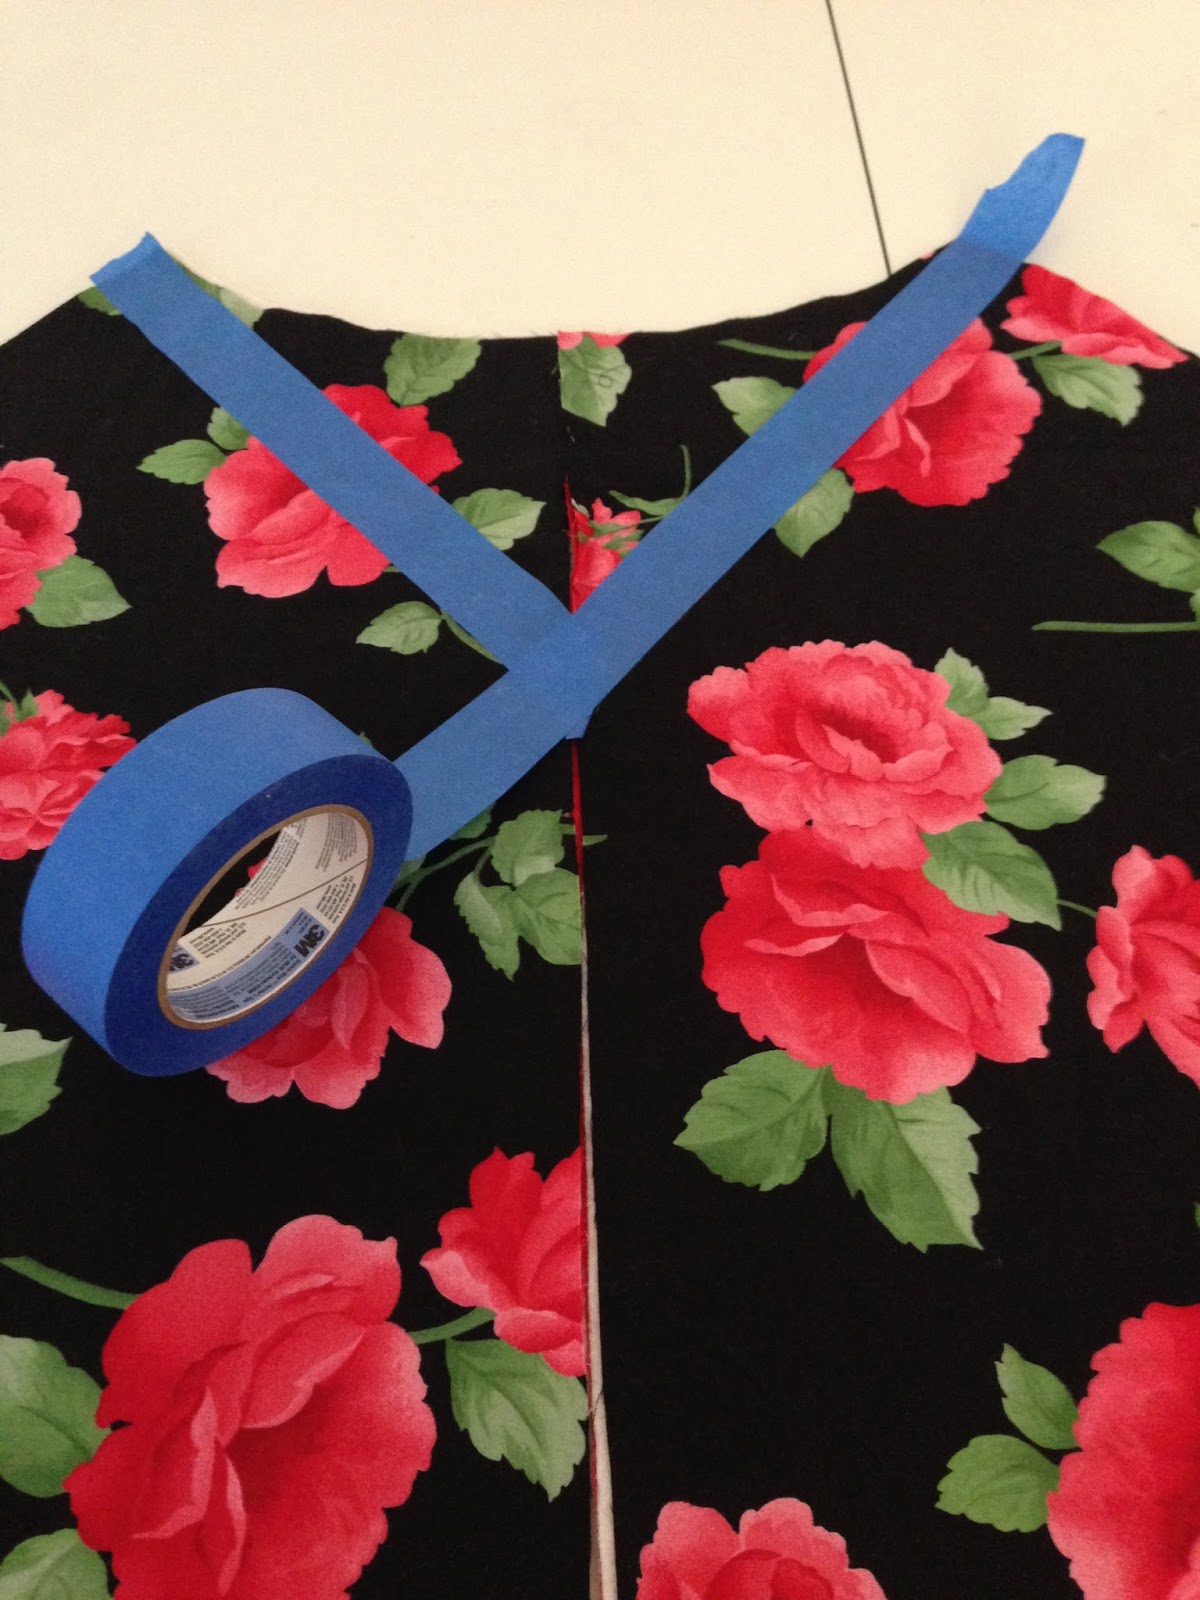
Quilt the two back pieces in both directions. Now all three pieces are quilted!
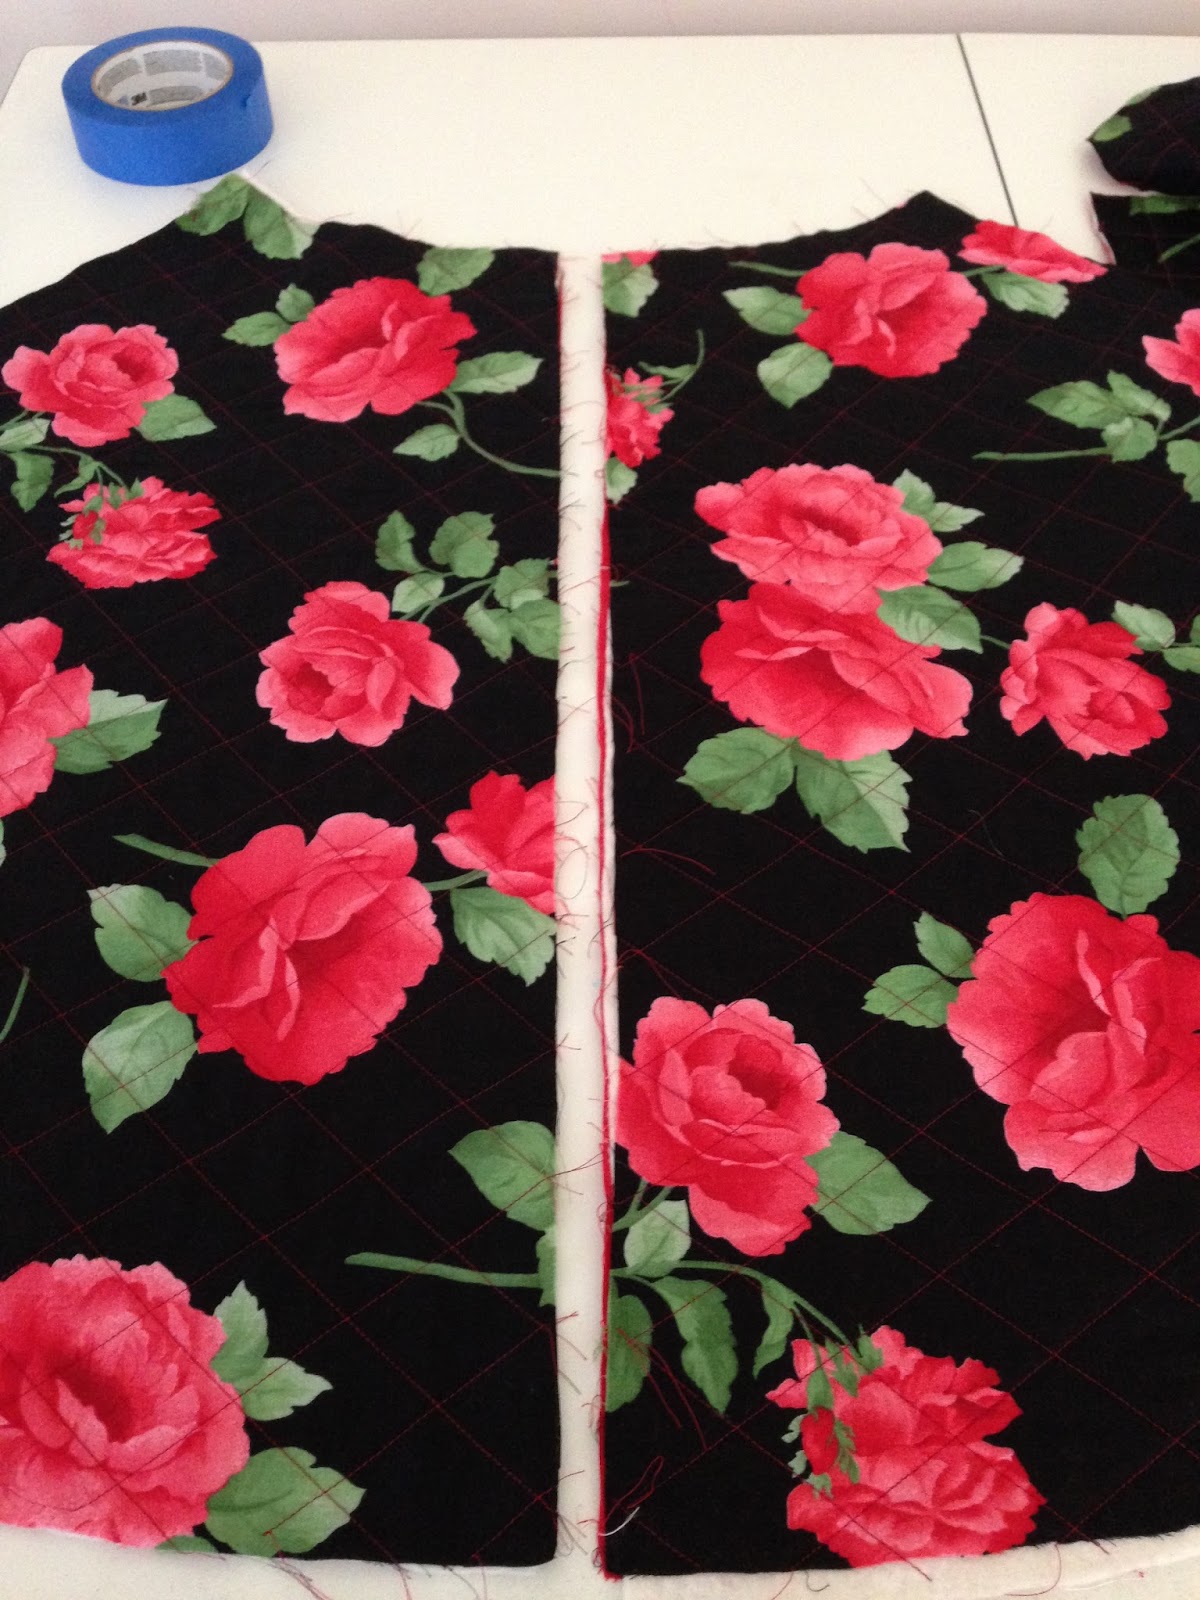
Now it's time to sew the side seams. Place the back pieces right sides together with the front piece. Match the quilting lines as best you can by using a pin as a guide. Poke the pin through the fabric, and then adjust the two layers of fabric until the pin is going through the two lines of stitching that you are matching up.
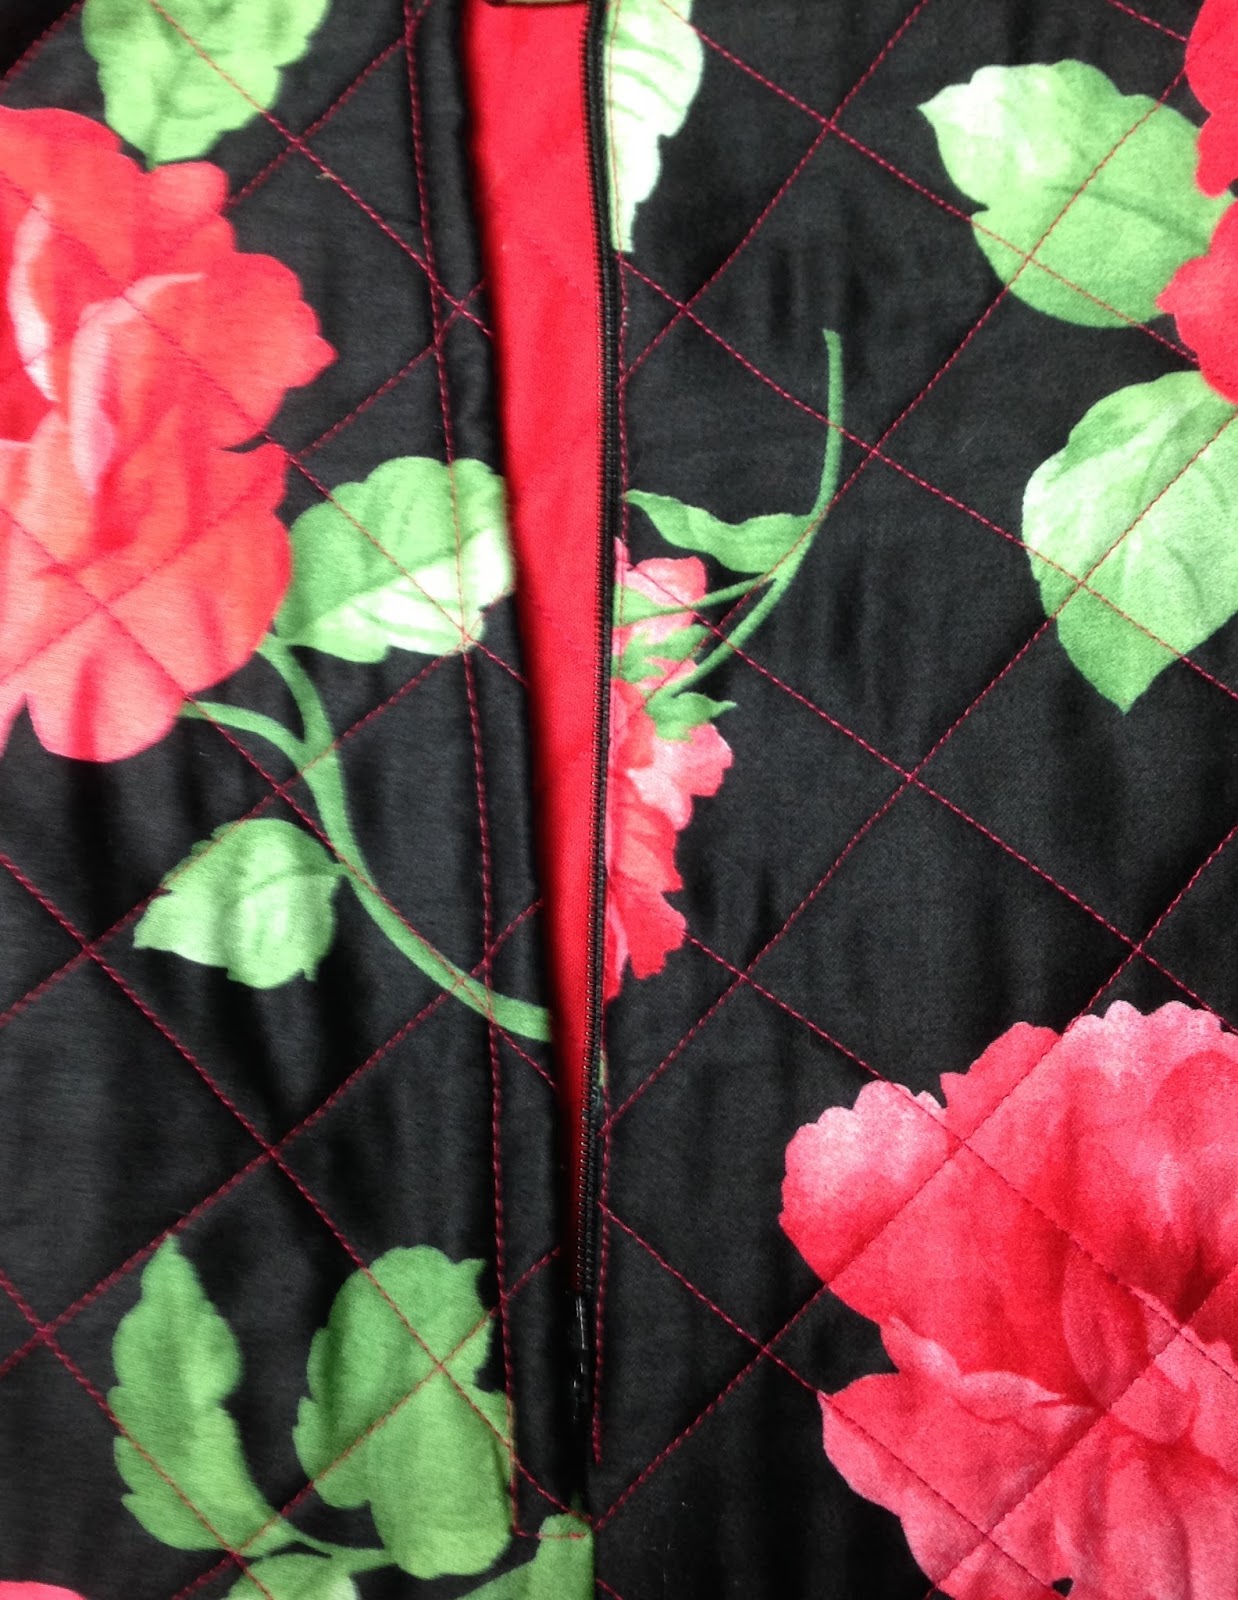
Next, sew the center back seam, but only up to the point where the zipper will be inserted.
Press all seam allowances open.
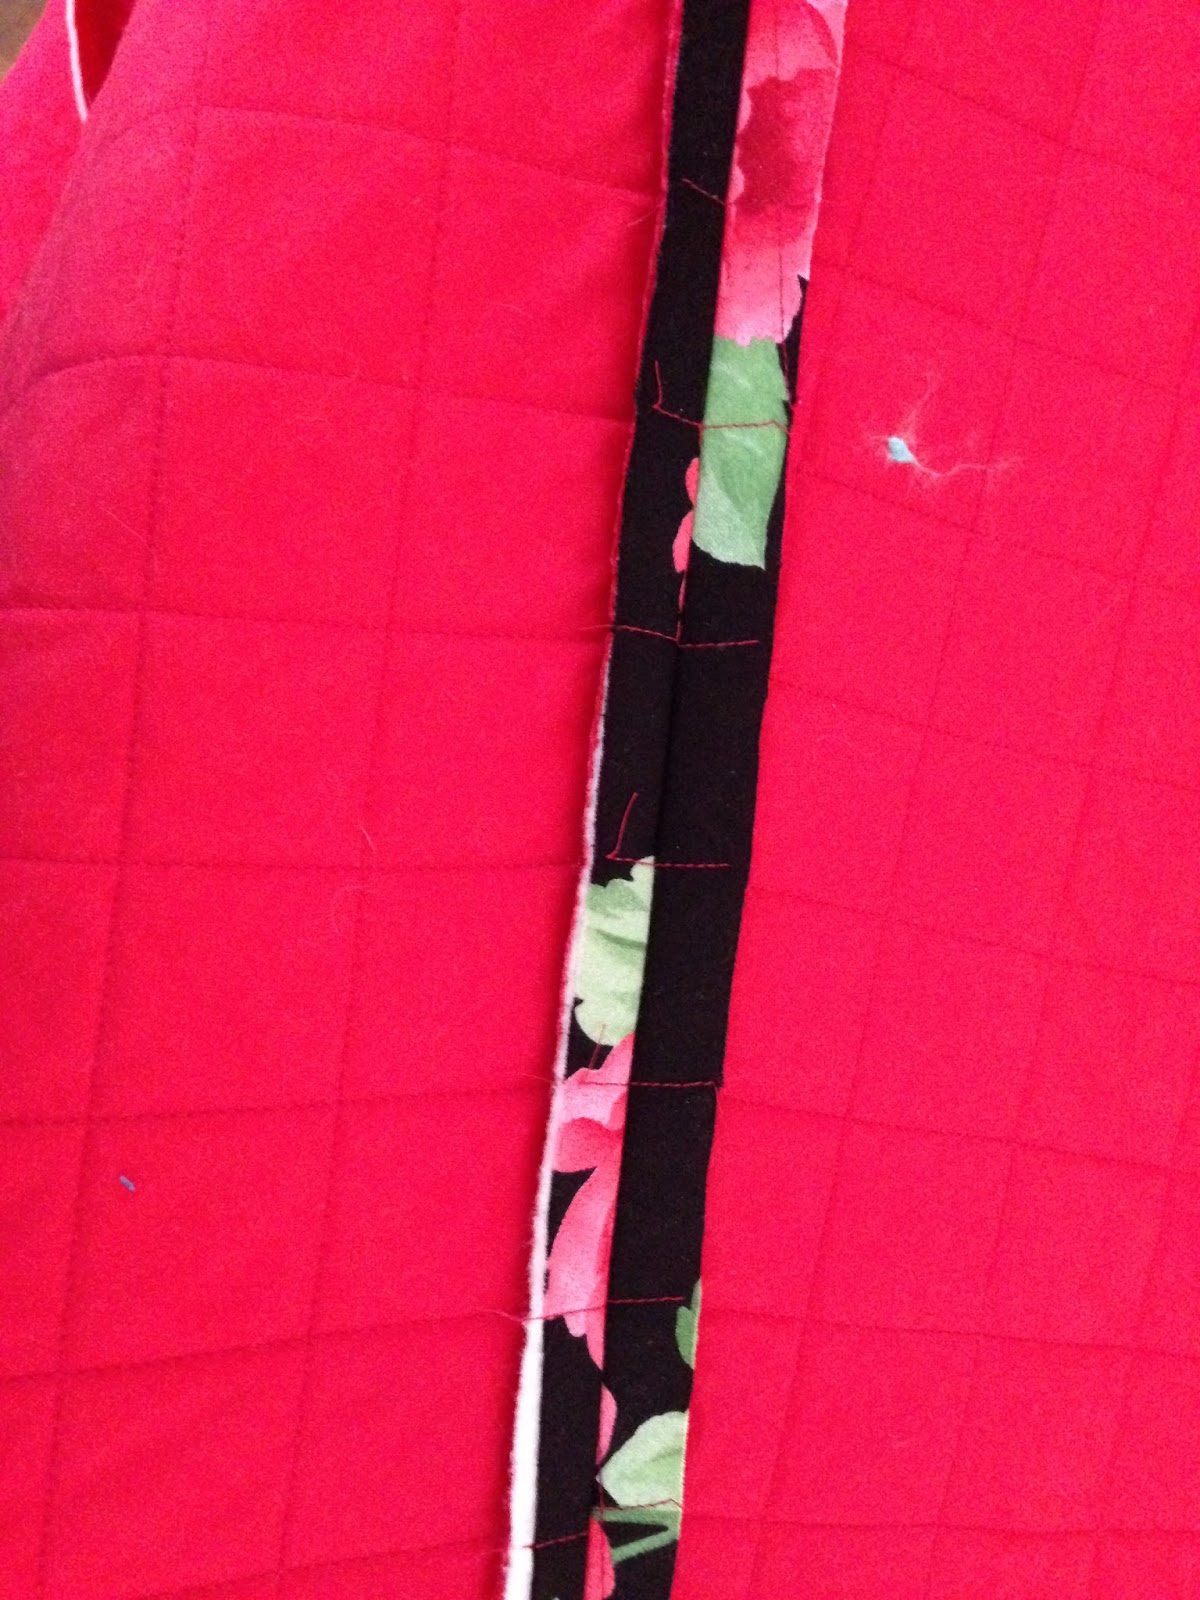
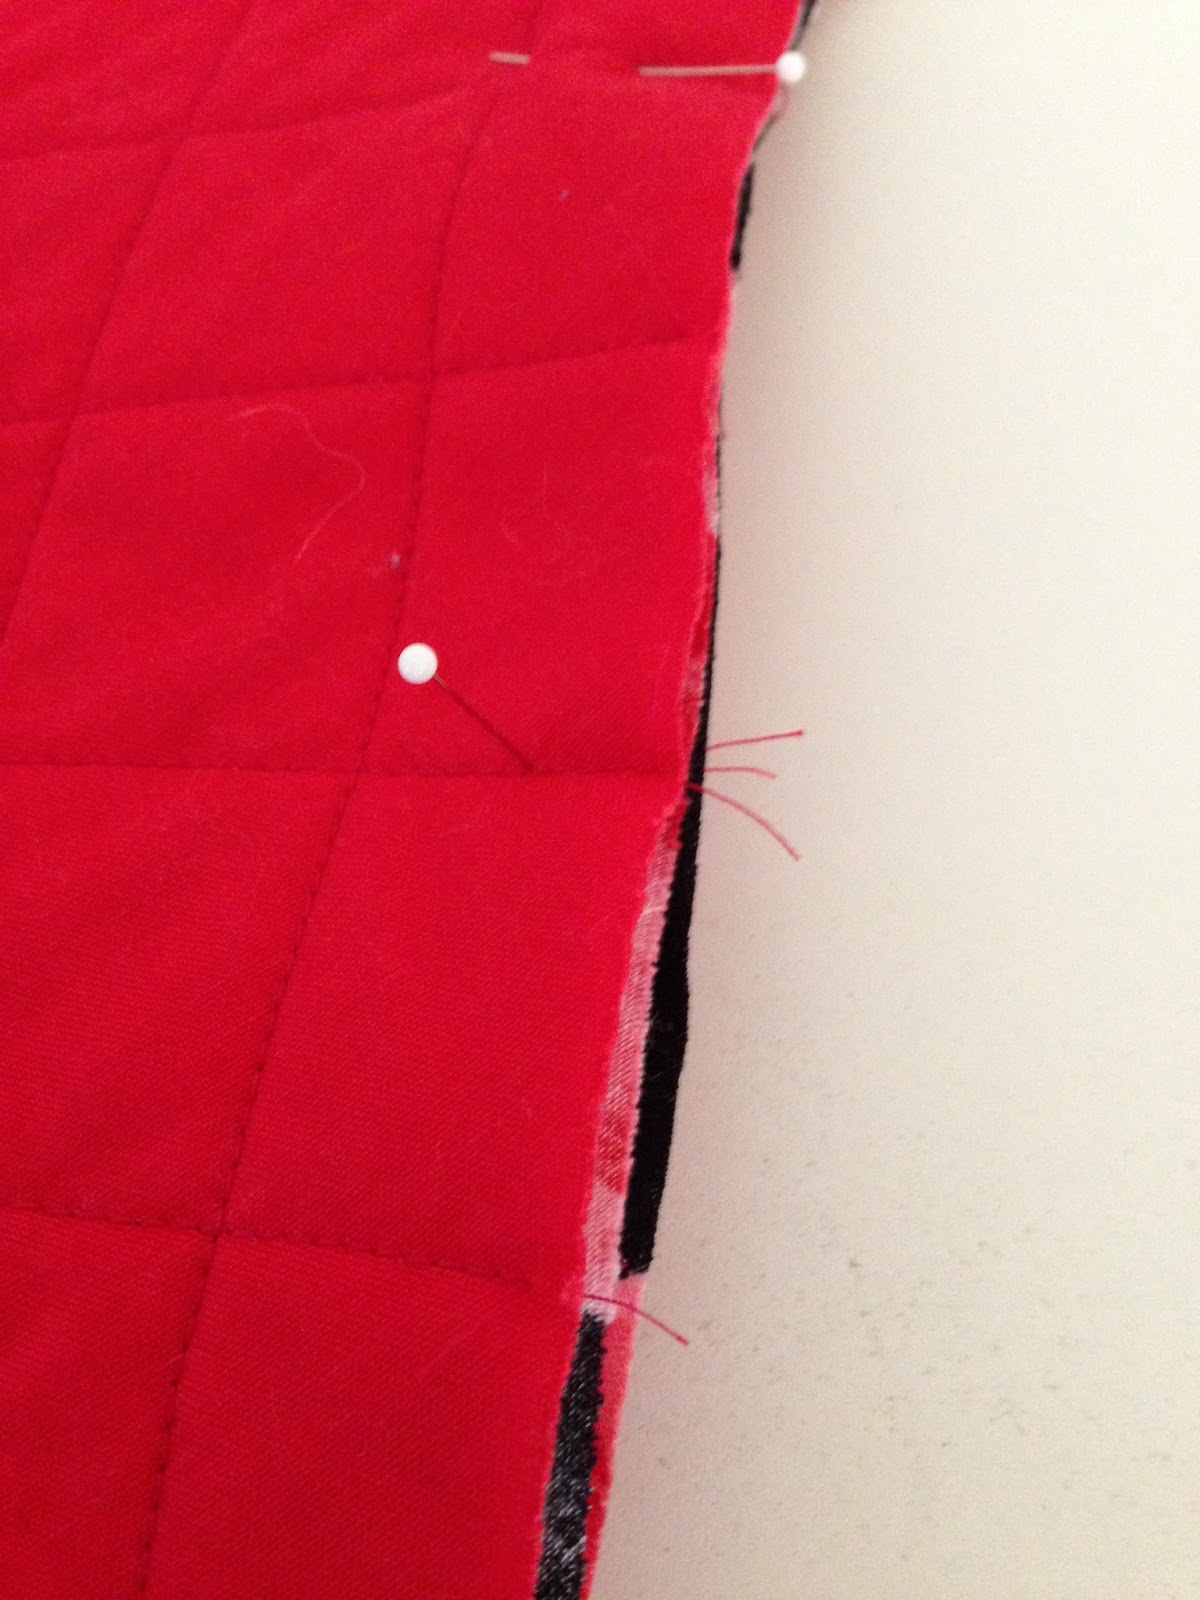
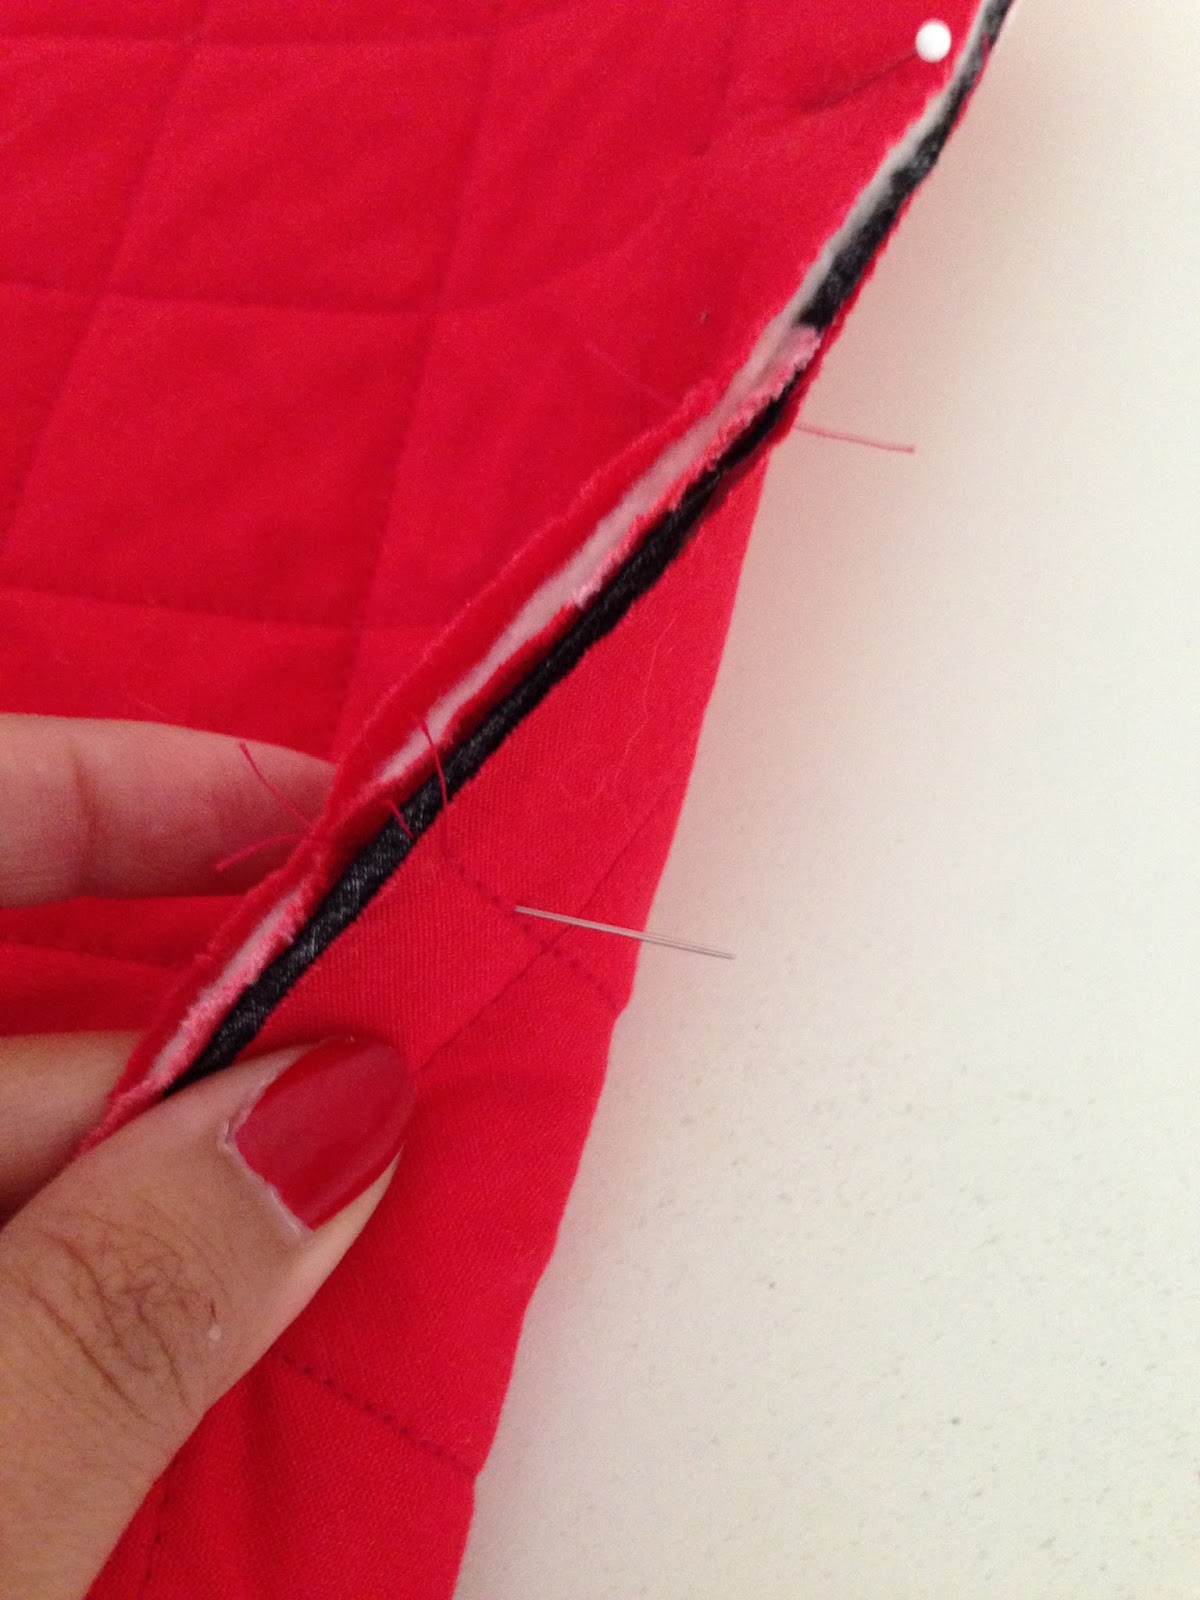
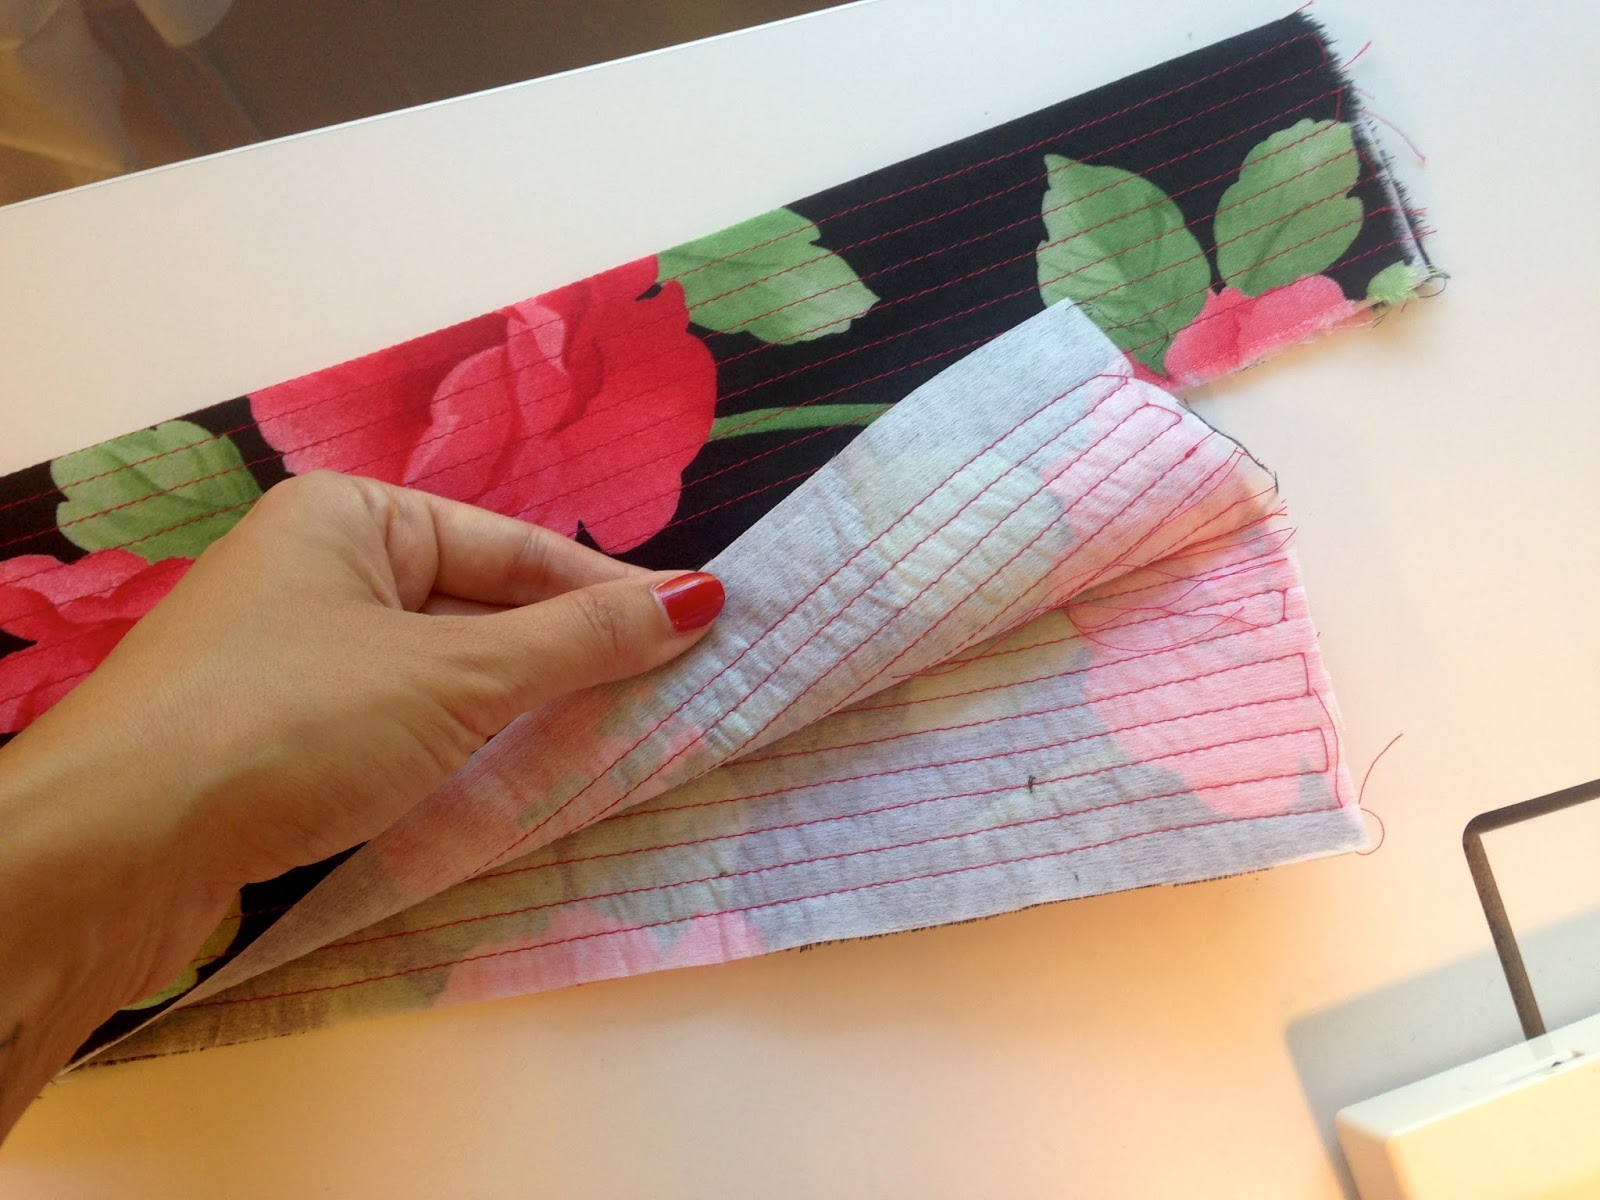
I chose Hong Kong seams for my skirt, and used the contrast quilting fabric. Finish all seams, including the back zipper opening.

Insert a zipper at center back. I used my favorite method, the lapped zipper.
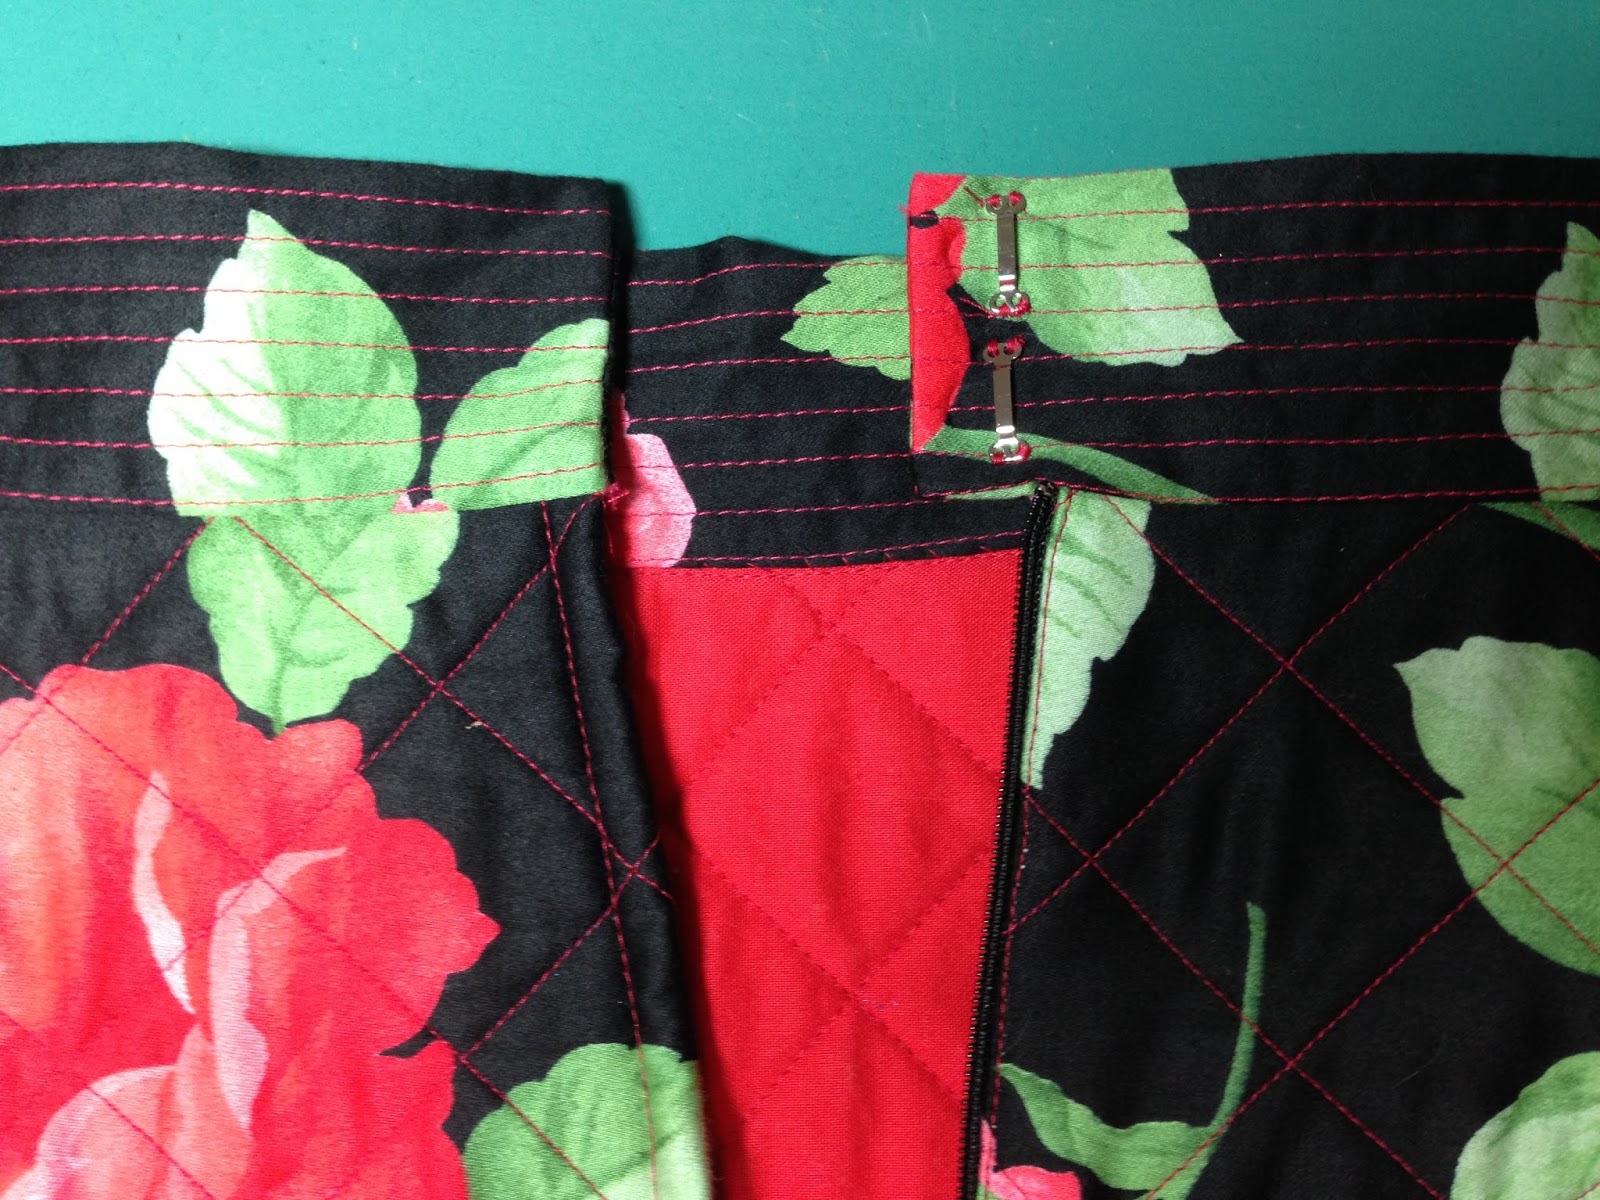
Next, I cut the waistband, leaving seam allowances and 1" for an underlap. The waistband is 1.5" wide when finished.
I used a nonwoven medium weight interfacing on my waistband. To give a slightly different look, I used 1/4" channel stitching on the waistband. This provides both stability and visual interest.
I sewed on the waistband, leaving the 1" underlap at the right back. The waistband closes with a hook and eye.
I turned up a narrow hem, and finished the raw edge. Hem lace is perfect for this purpose.
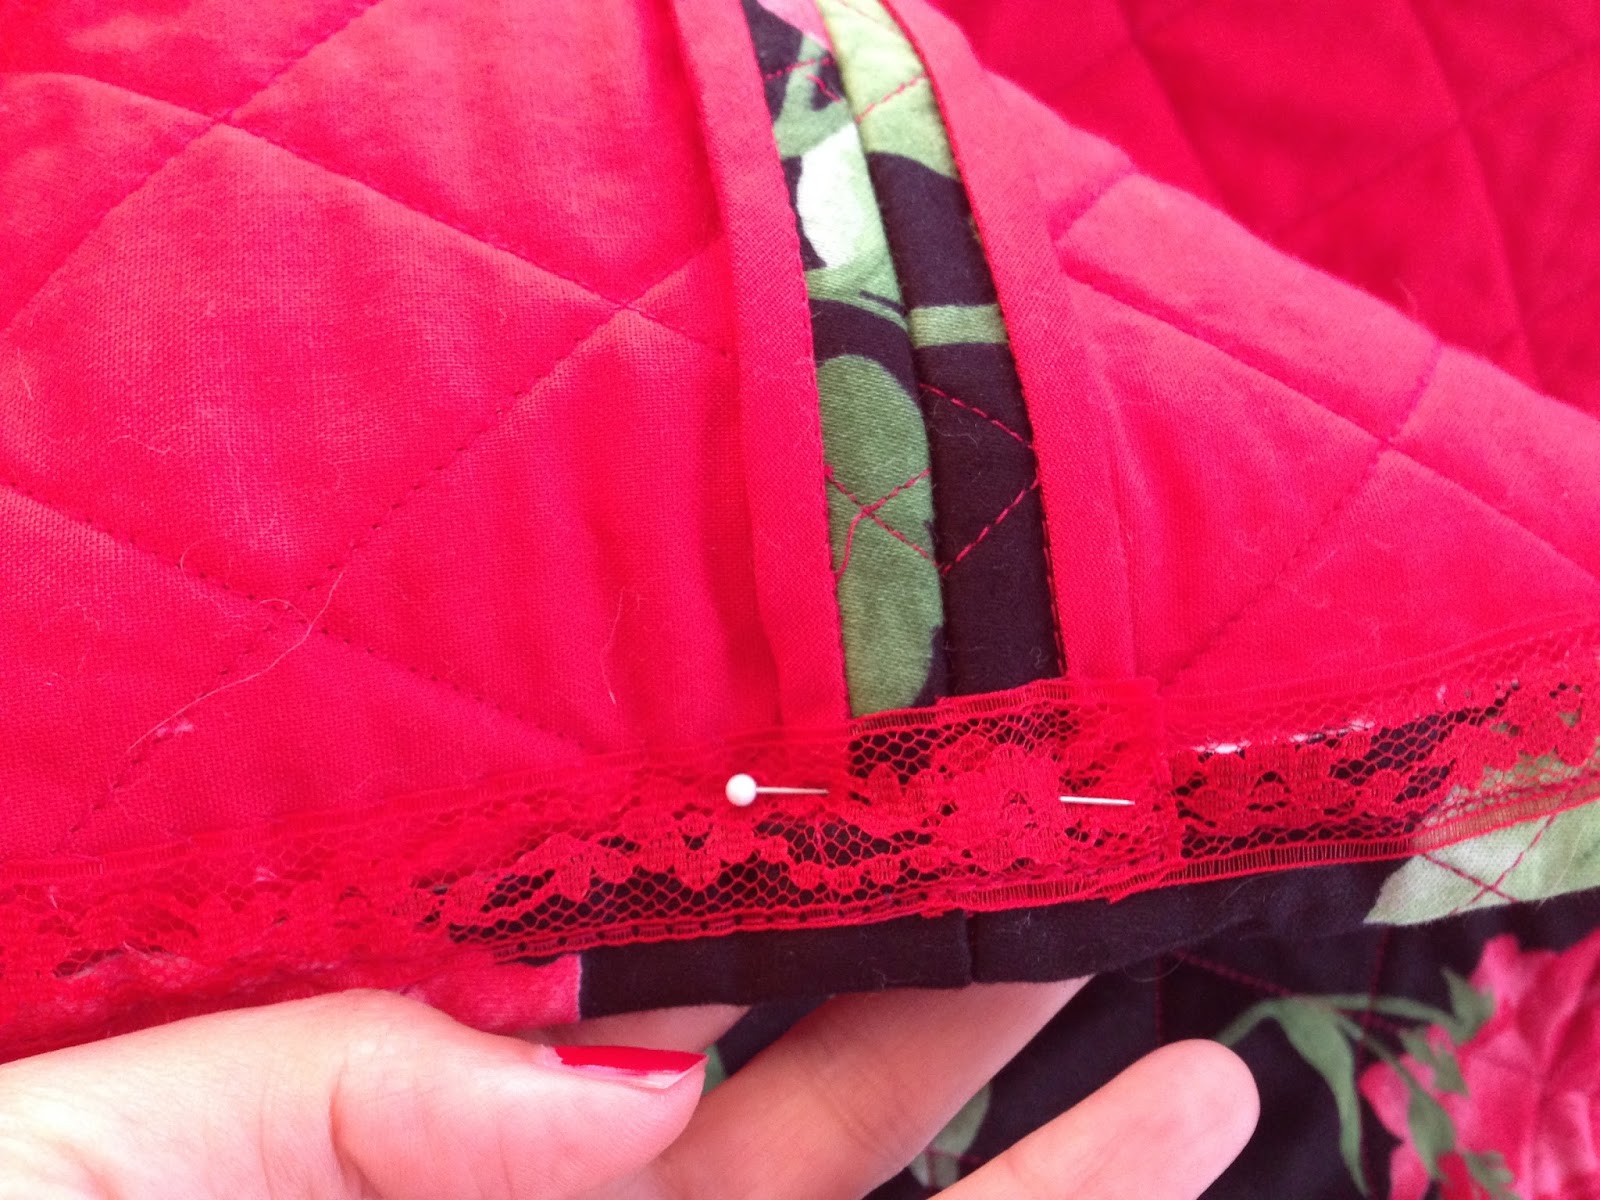 I finished the hem with a slip stitch, stitching the lace to the inside of the skirt.
And that's it! You have a cozy, perfectly '50s-style quilted skirt!
October 9, 2015
Finished! Butterick 6167 in Flocked Faille
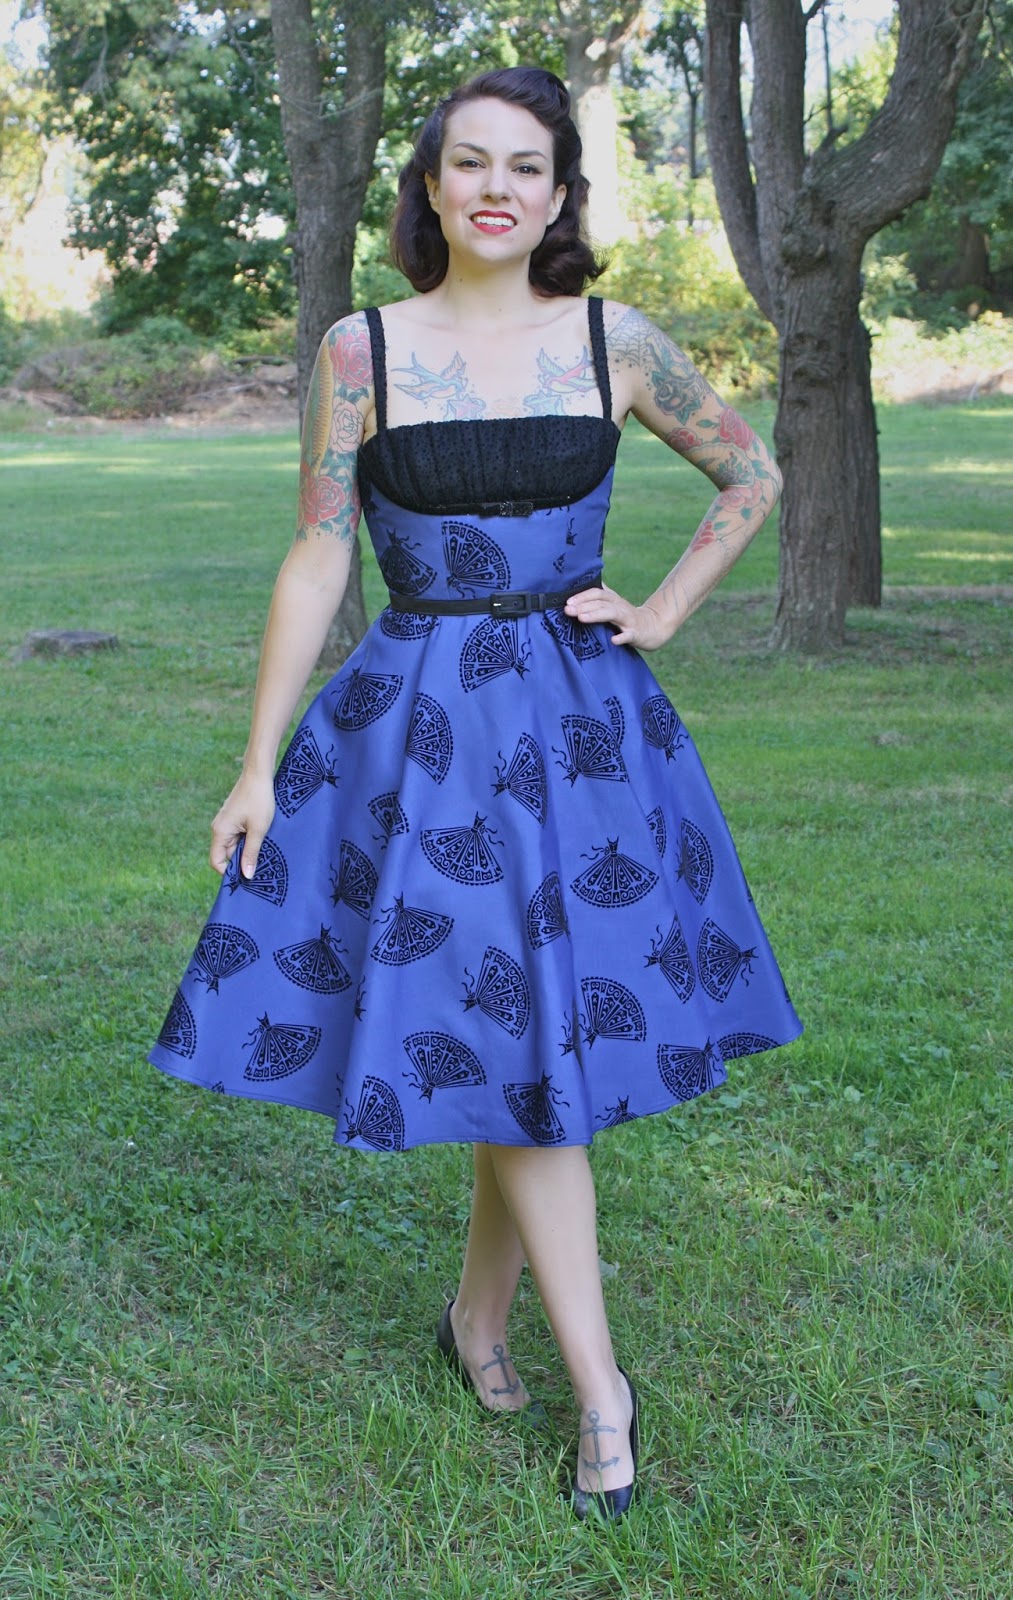
I'm also calling this the "Meta Dress" because it has little dresses flocked on it! Dresses on dresses, readers. YES. This is my pattern design B6167 done up in my new flocked faille, just out at Joann.
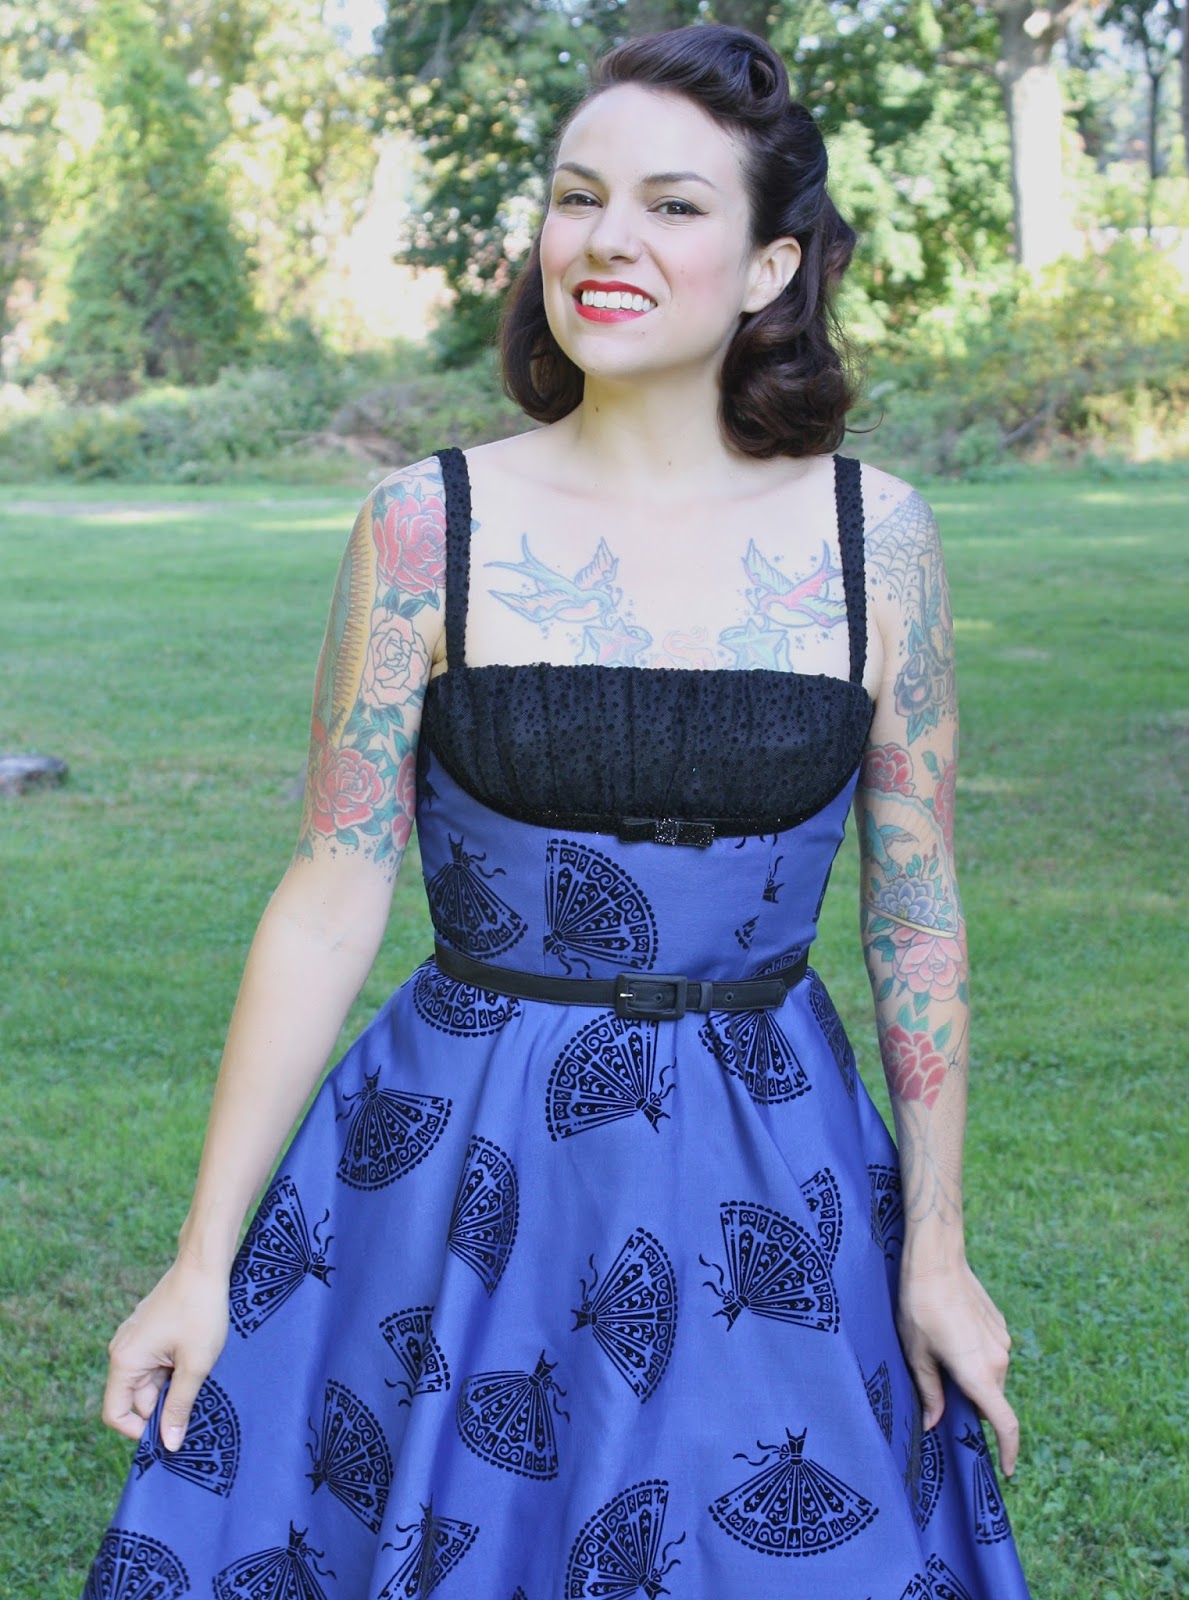
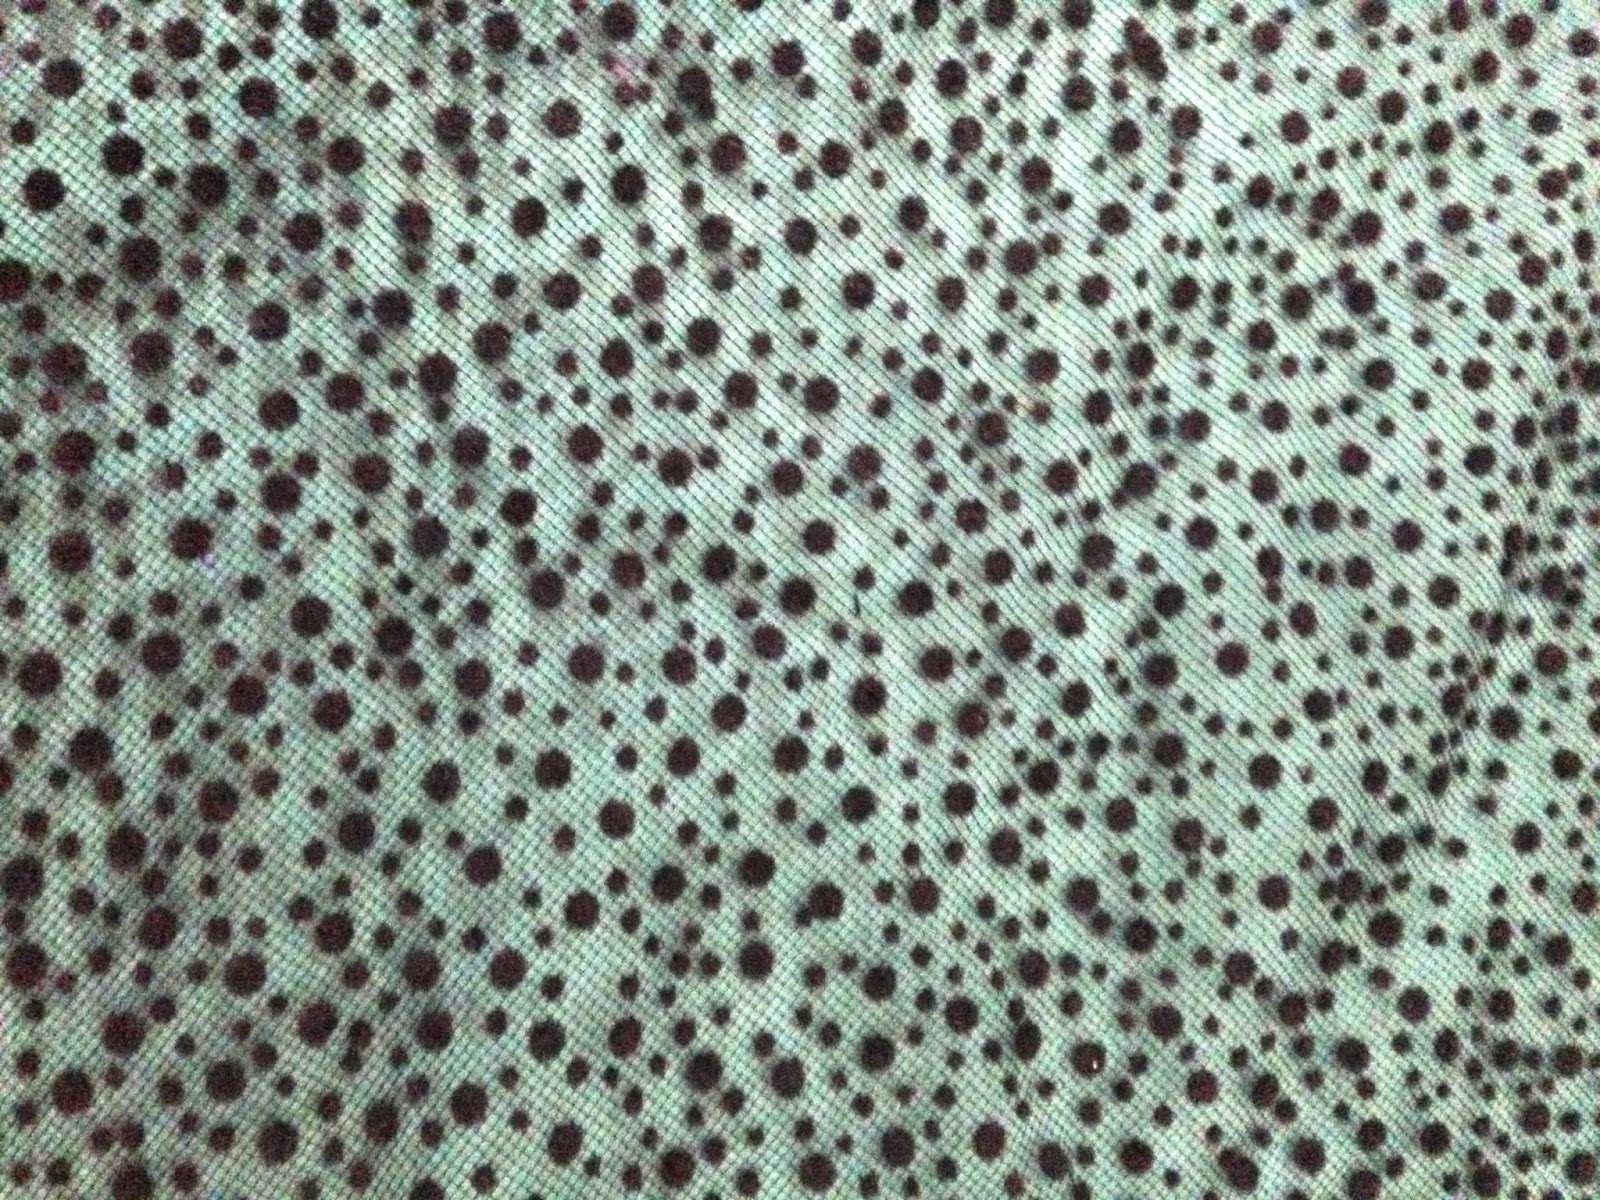
I did make a couple changes to the pattern. First, I used a contrast fabric for the bust inset and the straps. It's a black tulle flocked with tiny dots all over it, a perfect match for the main fabric. Here's a picture of the texture.
 I layered the tulle over black Kona cotton for opacity. When you use a sheer for the gathered inset, you will probably want to cut two of the bust stay: one for the lining, and one to underline the gathered inset with (this way you don't see the inside of the stay through the sheer fabric). Here are my two bust pieces during assembly. The gathered tulle is basted to the second bust stay, and the second bust stay is for the lining (note that it also has a strip of white fusible interfacing to stabilize the neckline).
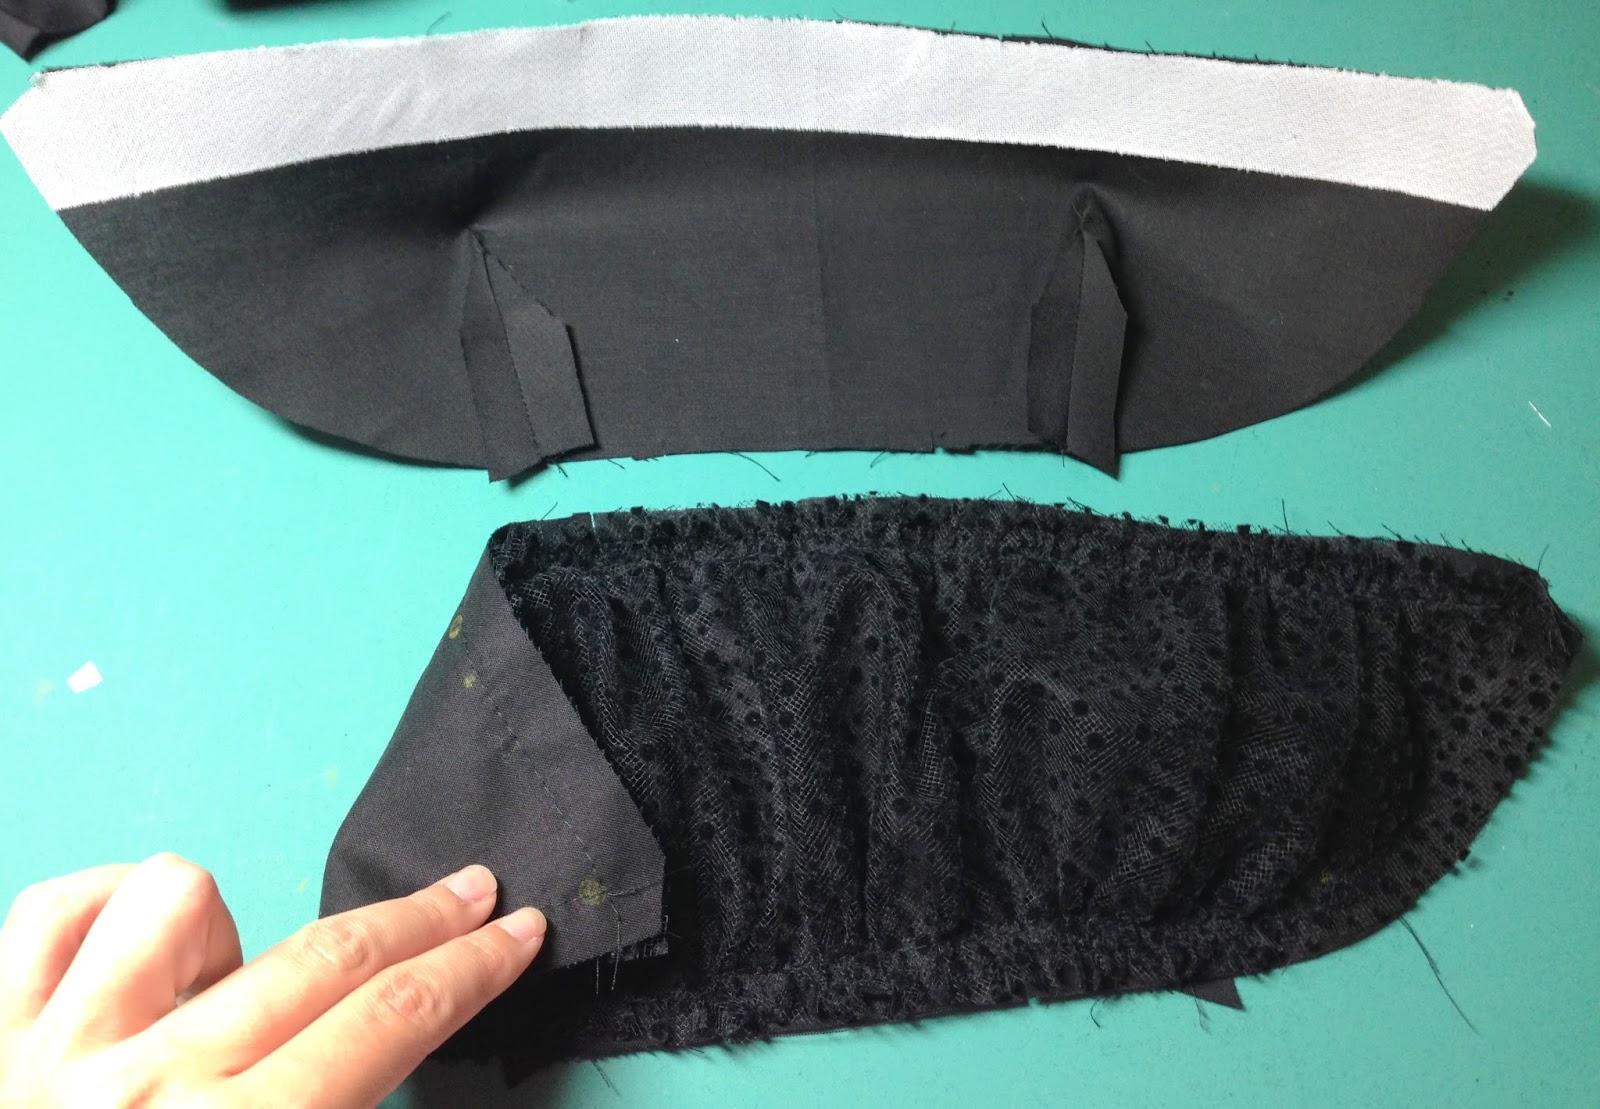
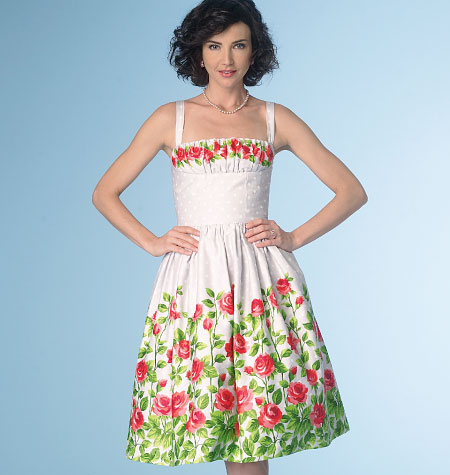
I also changed the skirt design. The original design was made up in my rose sateen border print, so the skirt was a gathered rectangle.
 The faille, however, doesn't gather very nicely because of its stiffness. So I used a three-quarter circle skirt pattern I have instead. I just measured the pattern pieces before cutting to make sure everything would fit together and match at the side seams.
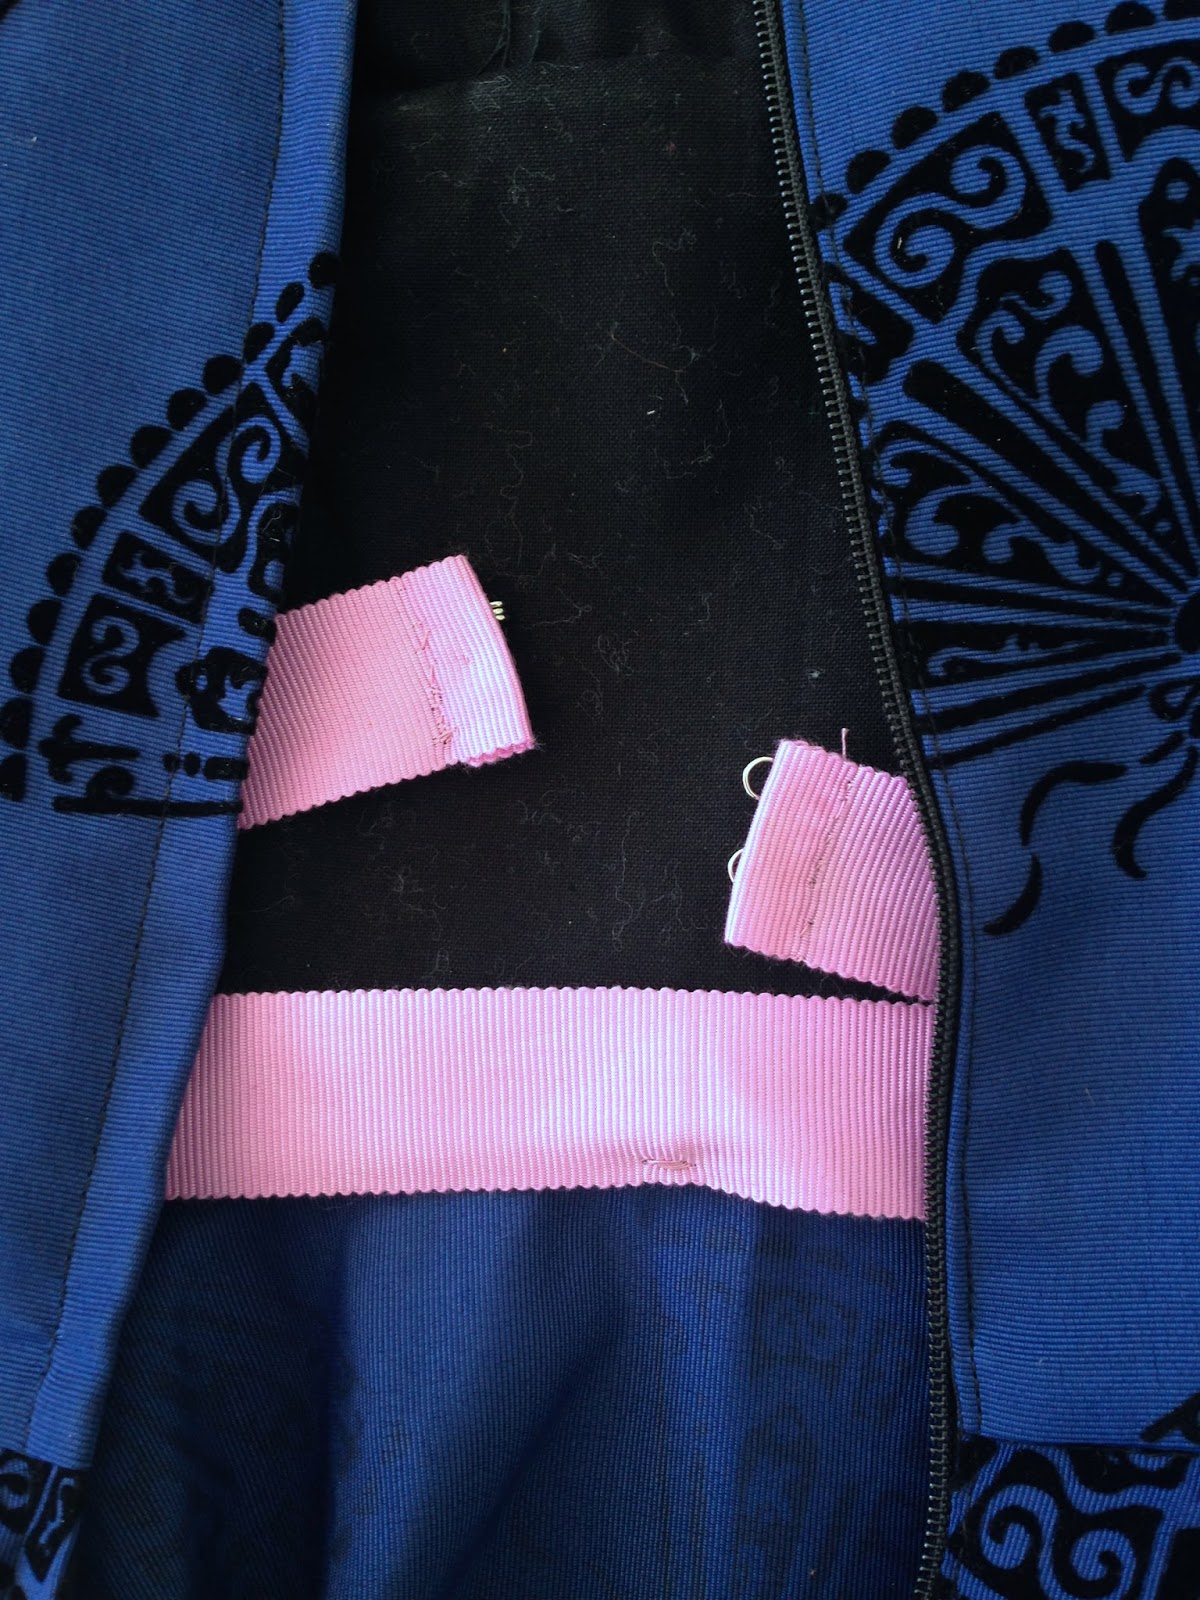
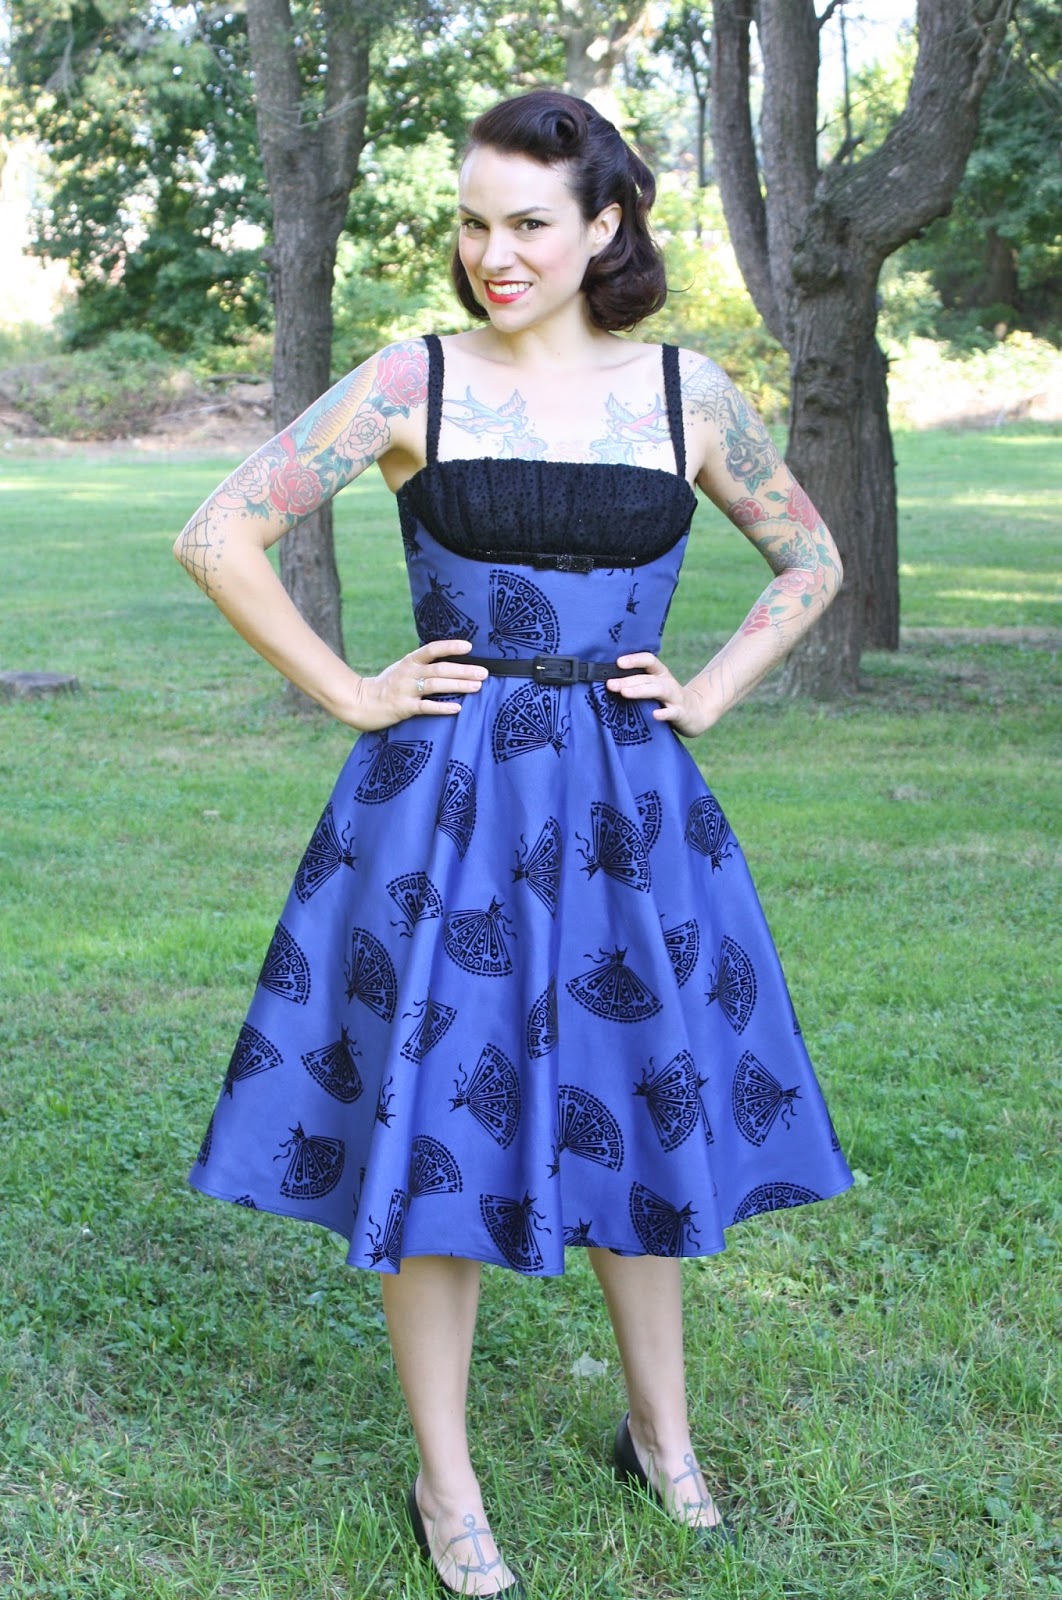 I also added a little glitter velvet ribbon underneath the bust, with a bow at center front. I liked the idea of having a little "border" between the bust inset and the midriff.
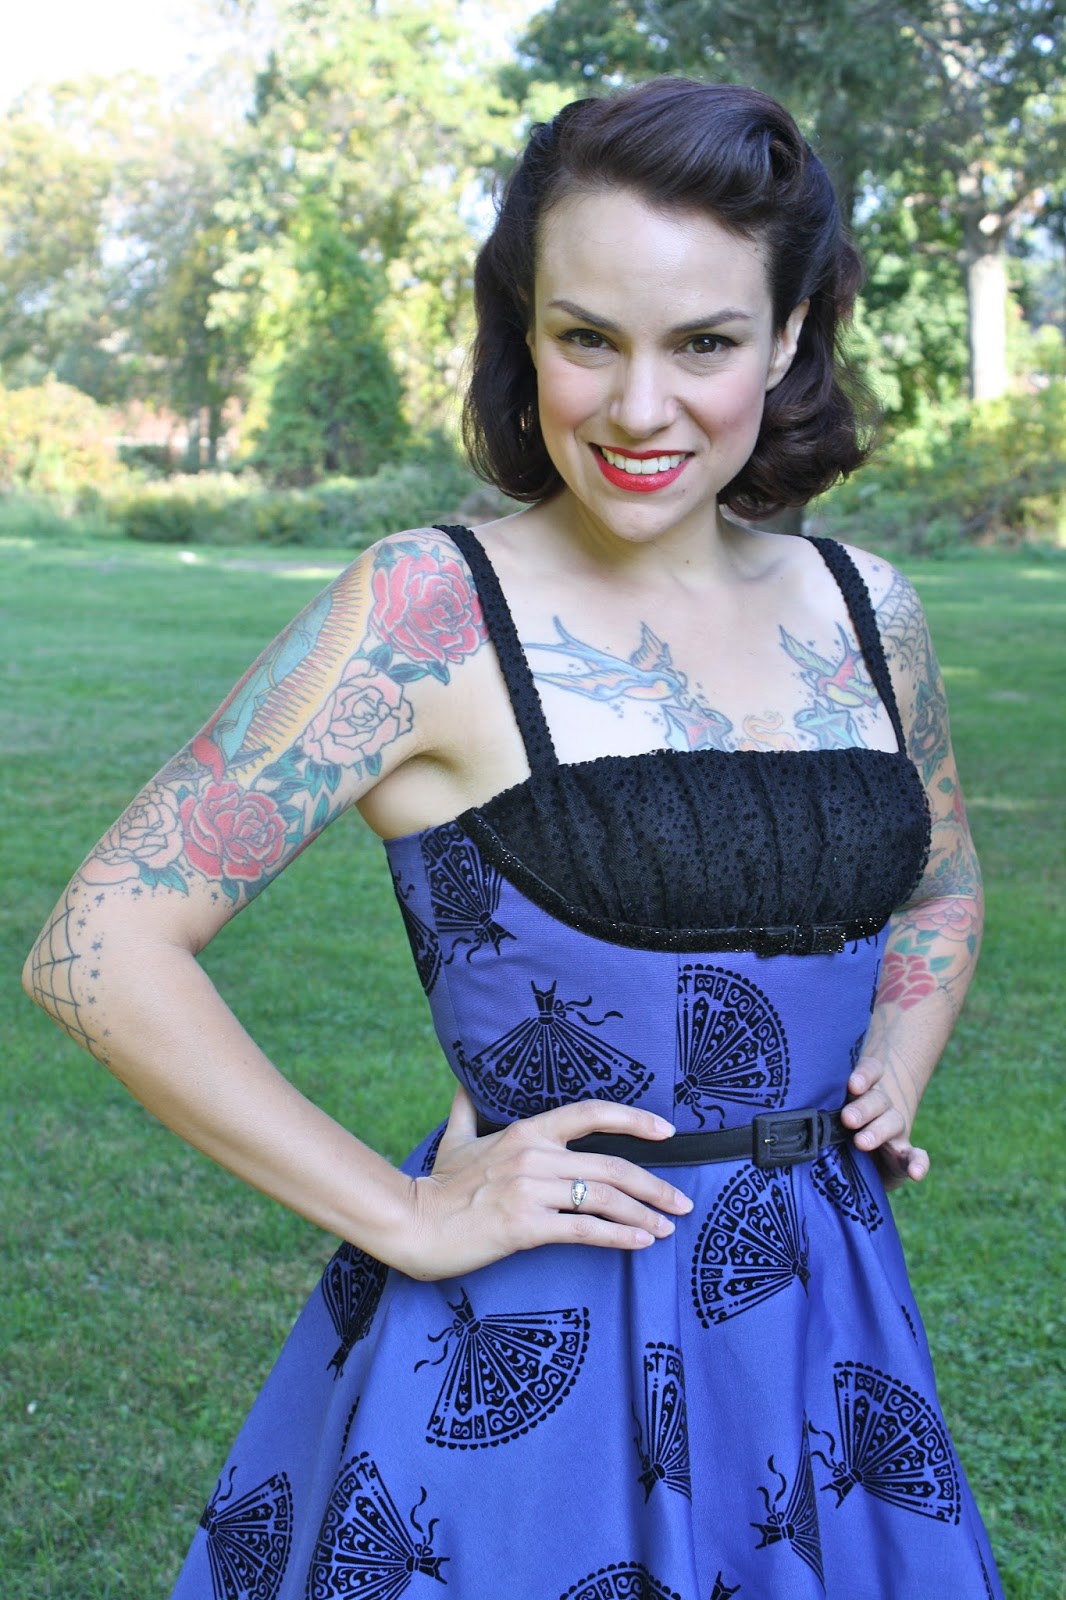
I also wore a black satin belt with it for extra vintage flair. Also, a chiffon petticoat!
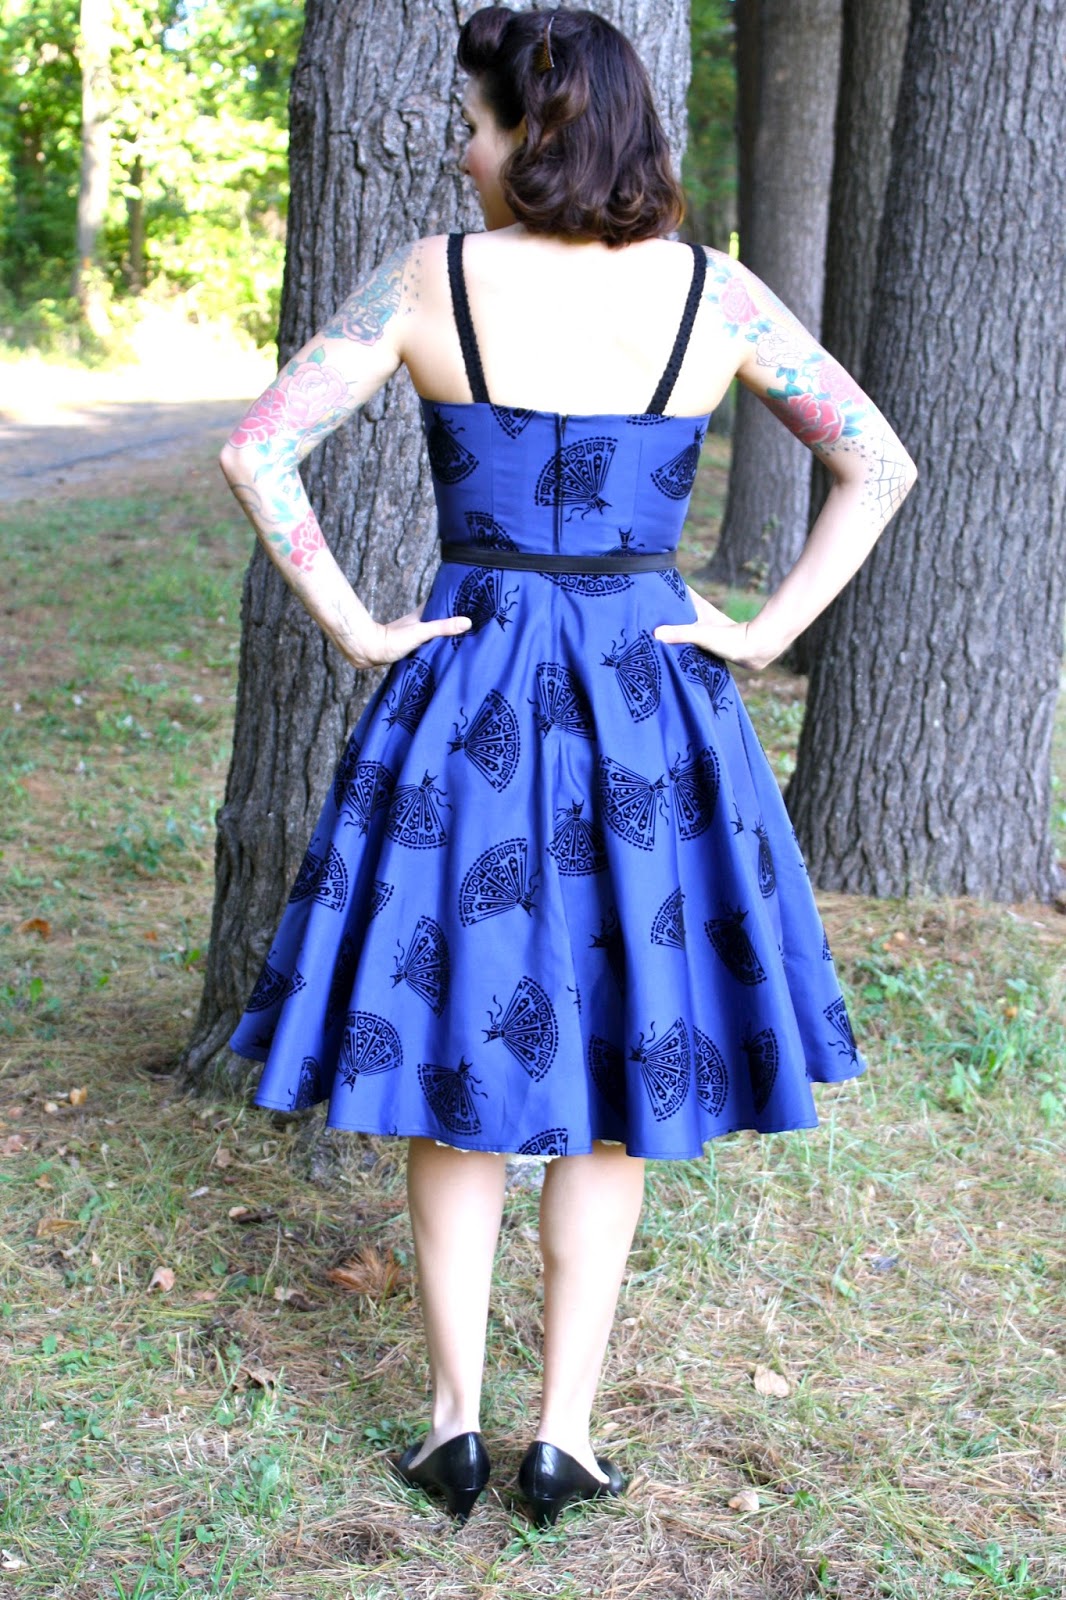 As for matching the print along the seams: I had great intentions of doing it on all the seams, until I realized that I would have to drastically shift the grainlines on the side bodice pieces to make that work. So I made do with matching the dresses along the center back seam, as you can see in the photo above.
Construction-wise, I made a small amount of changes. This pattern design was originally conceived as a casual sundress, so the pattern only calls for boning at the center back and the side seams. As this is a more formal look, I decided to add more structure. (Also, I love using steel boning so much that I get a little carried away!).
I added extra channels on the princess seams below the bust and diagonally on either side of the bust. Here's a picture of the inside of the bodice lining.
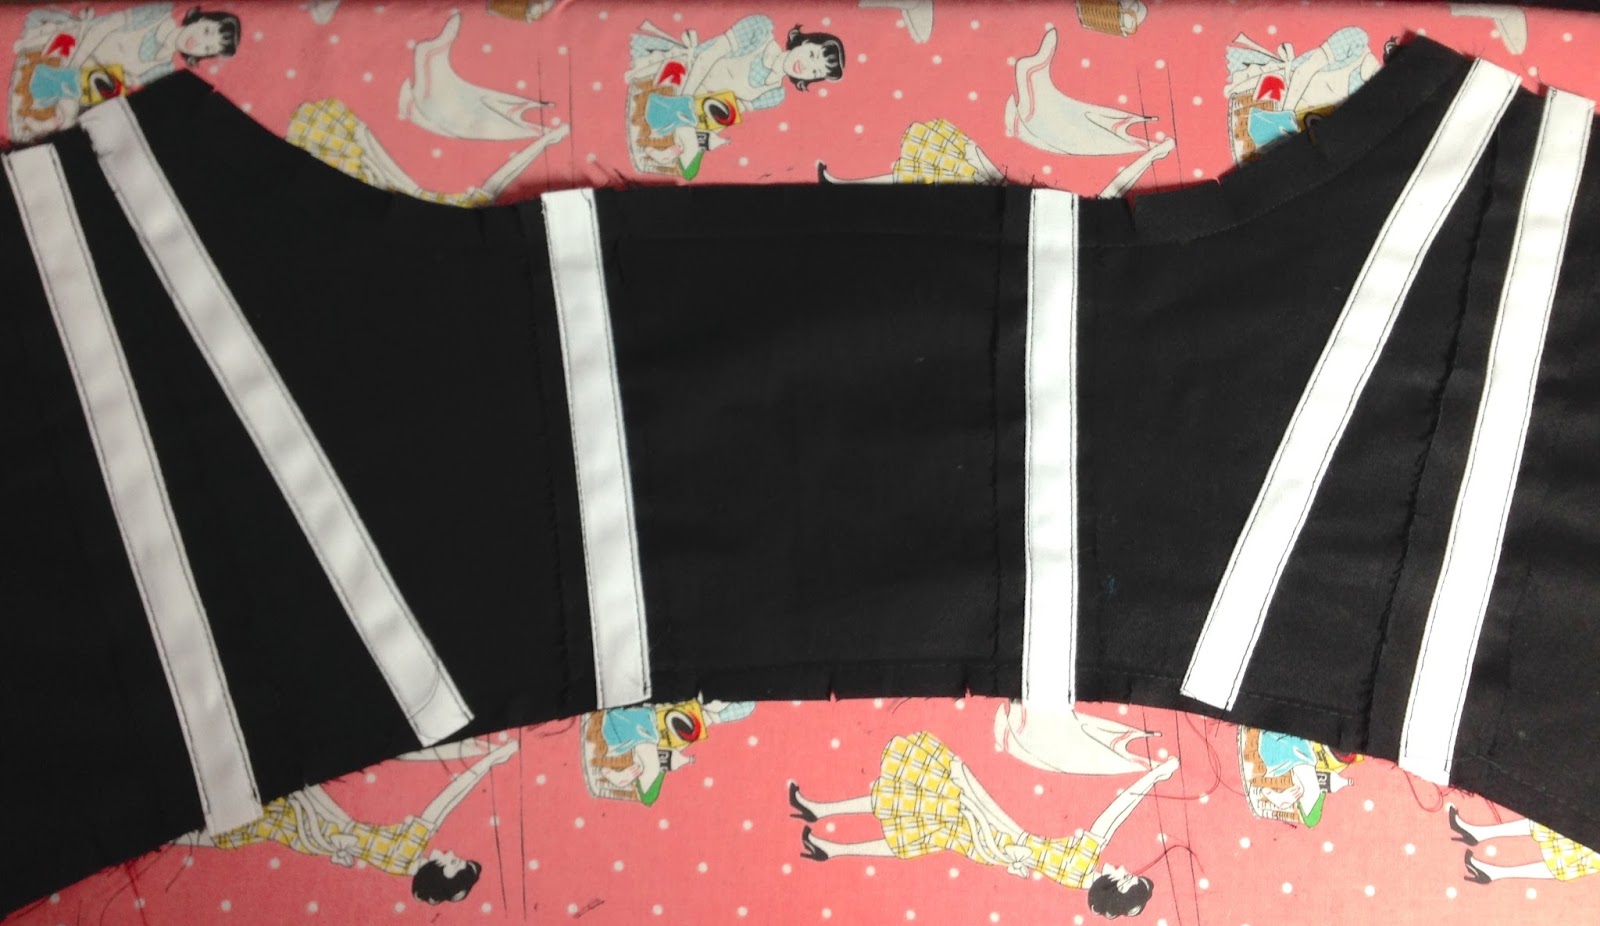
I used black sew in interfacing for the outer bodice. You can press the faille lightly, but it's better to now use too much steam or pressure on flocking. So sew-in interfacing is best. You can baste it to your fabric by hand or machine (but only if the machine doesn't cause puckering).
I made my waist stay in lavender petersham.
As for the fit. I used my bodice lining as my muslin, and it worked out just fine. I made a size 12, which had to be taken in just a little at the side seams. I also had to raise the waist seam 1/4". I made the A/B cup size, which fit very well. I'm so glad this pattern also has C and D cup sizes, as the bust fit is so important.
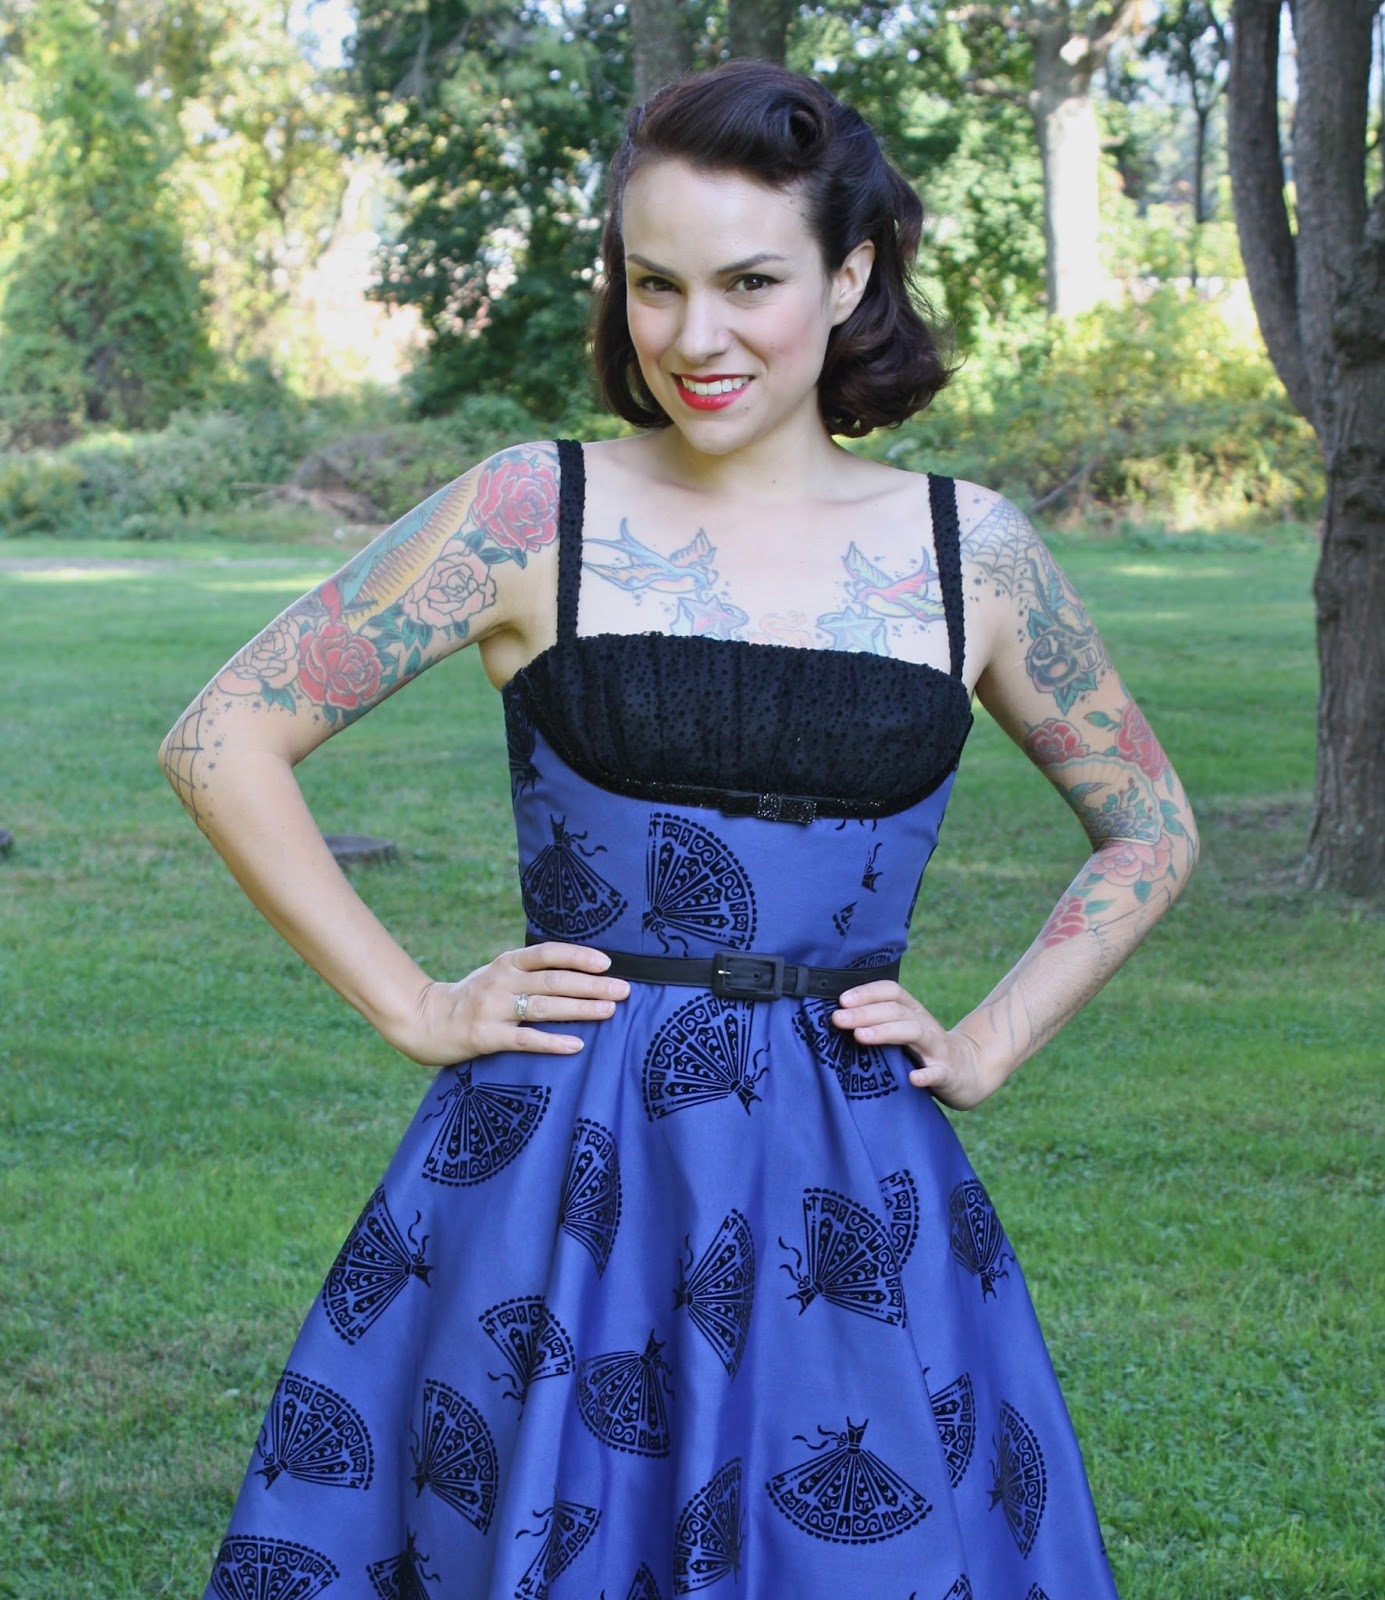
I'm so loving this dress. It feels like it was made for dancing. And it's been wonderful having time to sew things in my patterns and fabrics. I hope you're enjoying the results!
October 7, 2015
Giveaway Winners for Gertie's New Fashion Sketchbook

The winners are birdmommy, Rosie, and Sue Couldwell! Congrats, ladies. I hope you use the books to make lovely body-positive sketches that inspire you!
Thank you to all who entered and to Abrams for providing the books.
October 6, 2015
Make This Top! Free Vintage-Inspired Knit Project
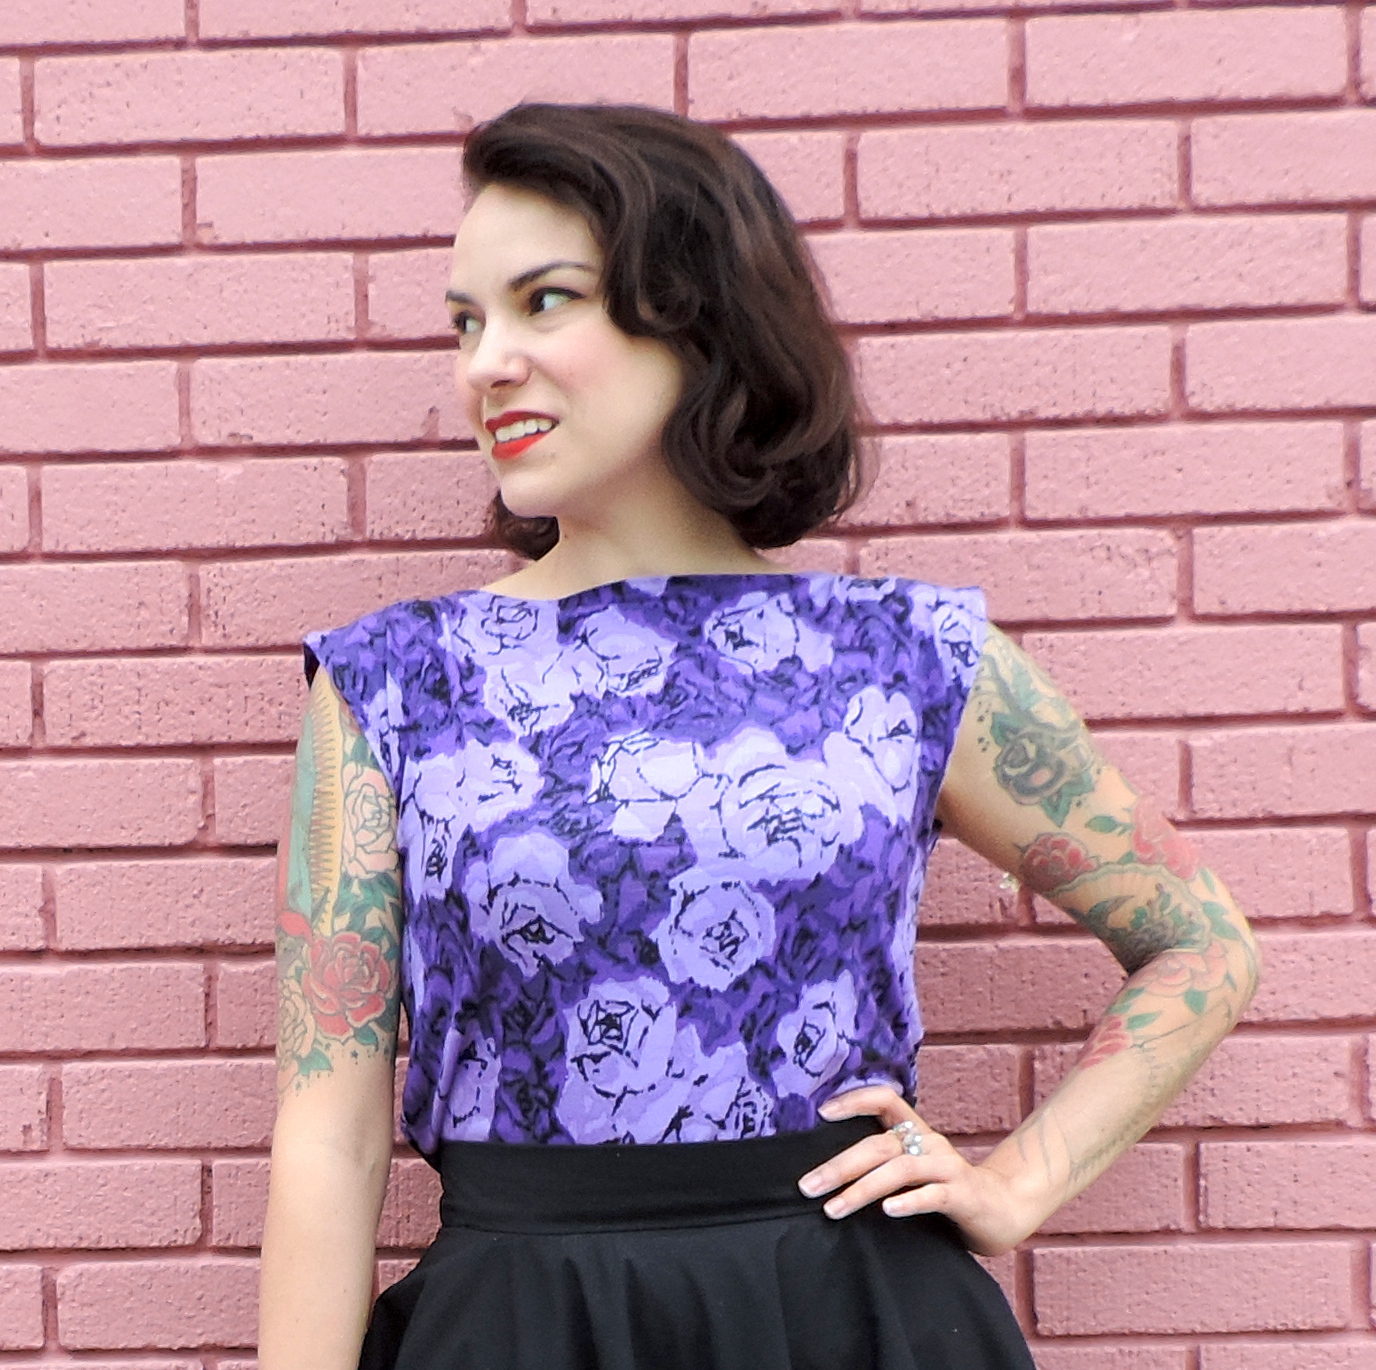
I've wanted to do a tutorial for a simple knit top for the longest time! Well, Joann Fabrics asked me to do a free project to coincide with the release of my new fabric line, which includes knits. So this seemed like the perfect time to finally make this thing happen.
I'm happy to share the Simple Knit Top project, with free instructions on the Joann site. This sample is made in my new Rayon Spandex Floral Knit in purple (also available in red and gray). This knit is surprisingly easy to sew with, and it has a lovely drape and hand.
 The top takes an hour or even less to make! What makes it so easy is that it's just two rectangles sewn together, with openings left for the neck and arms. The dimesions on the Joann site are for roughly a size medium, but you can adjust them depending on your shoulder and hip width. (If this doesn't make sense, don't worry: I'm planning a post with more detailed instructions with photos.)
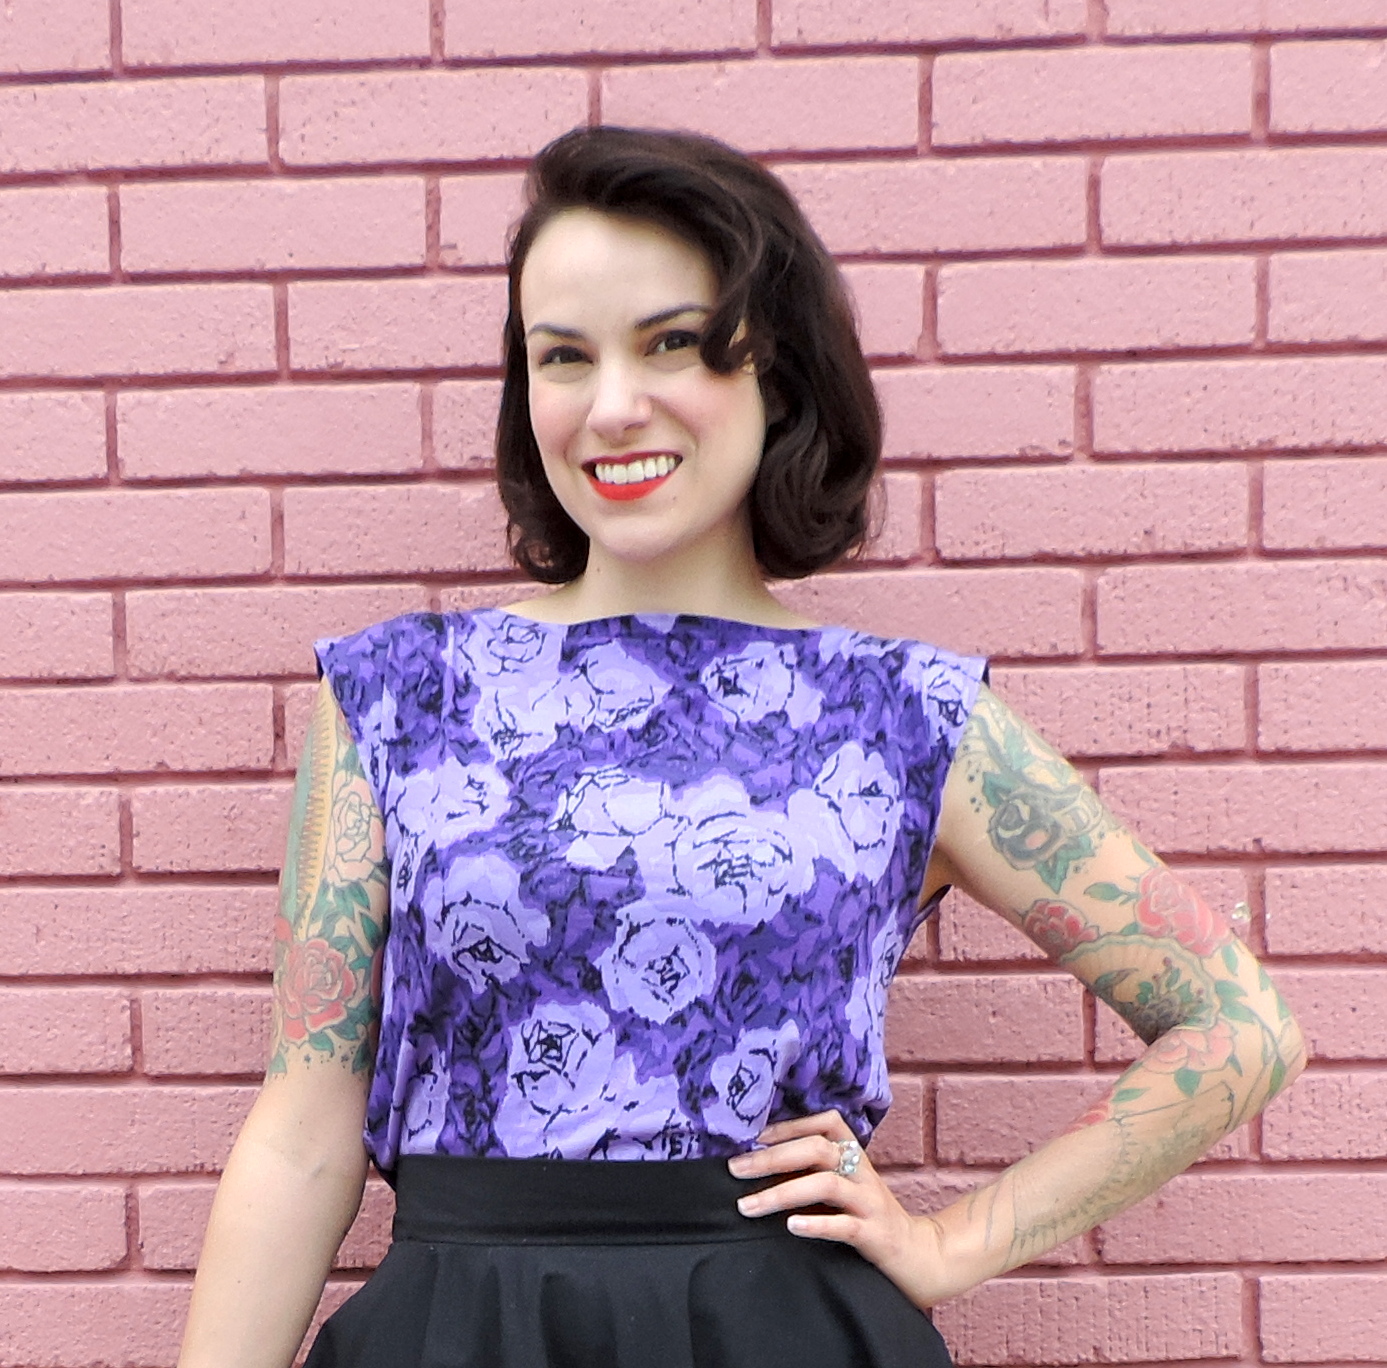
It's a great top for layering and pairing with a '50s style skirt (either slim or full).
 Stayed tuned for another post on this, and check out the project on Joann in the meantime!
October 2, 2015
Giveaway for Gertie's New Fashion Sketchbook!
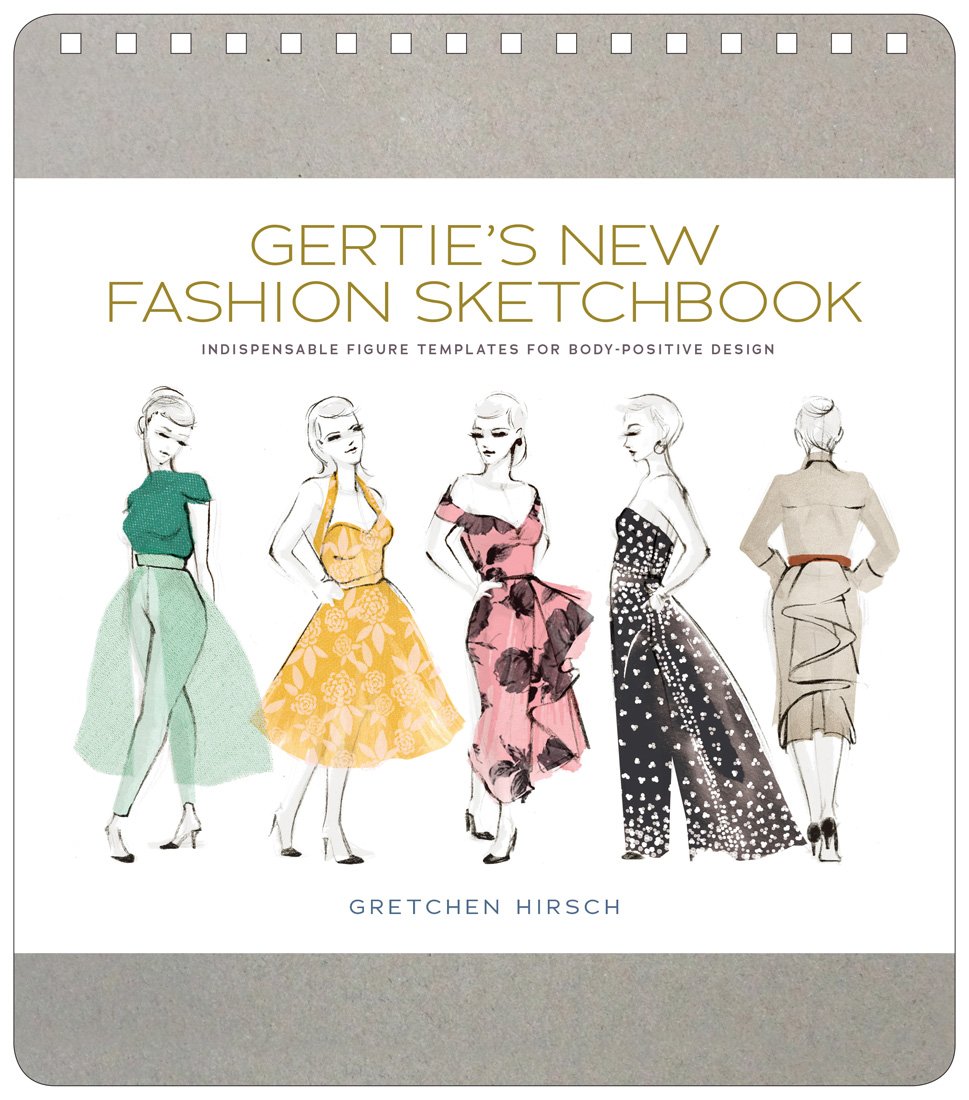 Great news, readers! I have three copies of Gertie's New Fashion Sketchbook: Indispensable Figure Templates for Body-Positive Design to give away. As I've written about, this is a collection of croquis (figure templates) that are of realistic height proportions and allow you to easily draw in differently proportioned body types.
To enter, all you have to do is leave a comment here. Make sure that there is some way for me to get in touch with you (either leave your email address or use a login that links to your contact info). All countries eligible. I'll pick three winners at the end of the day on Tuesday the 6th.
A big thank you to Abrams for providing the books!
October 1, 2015
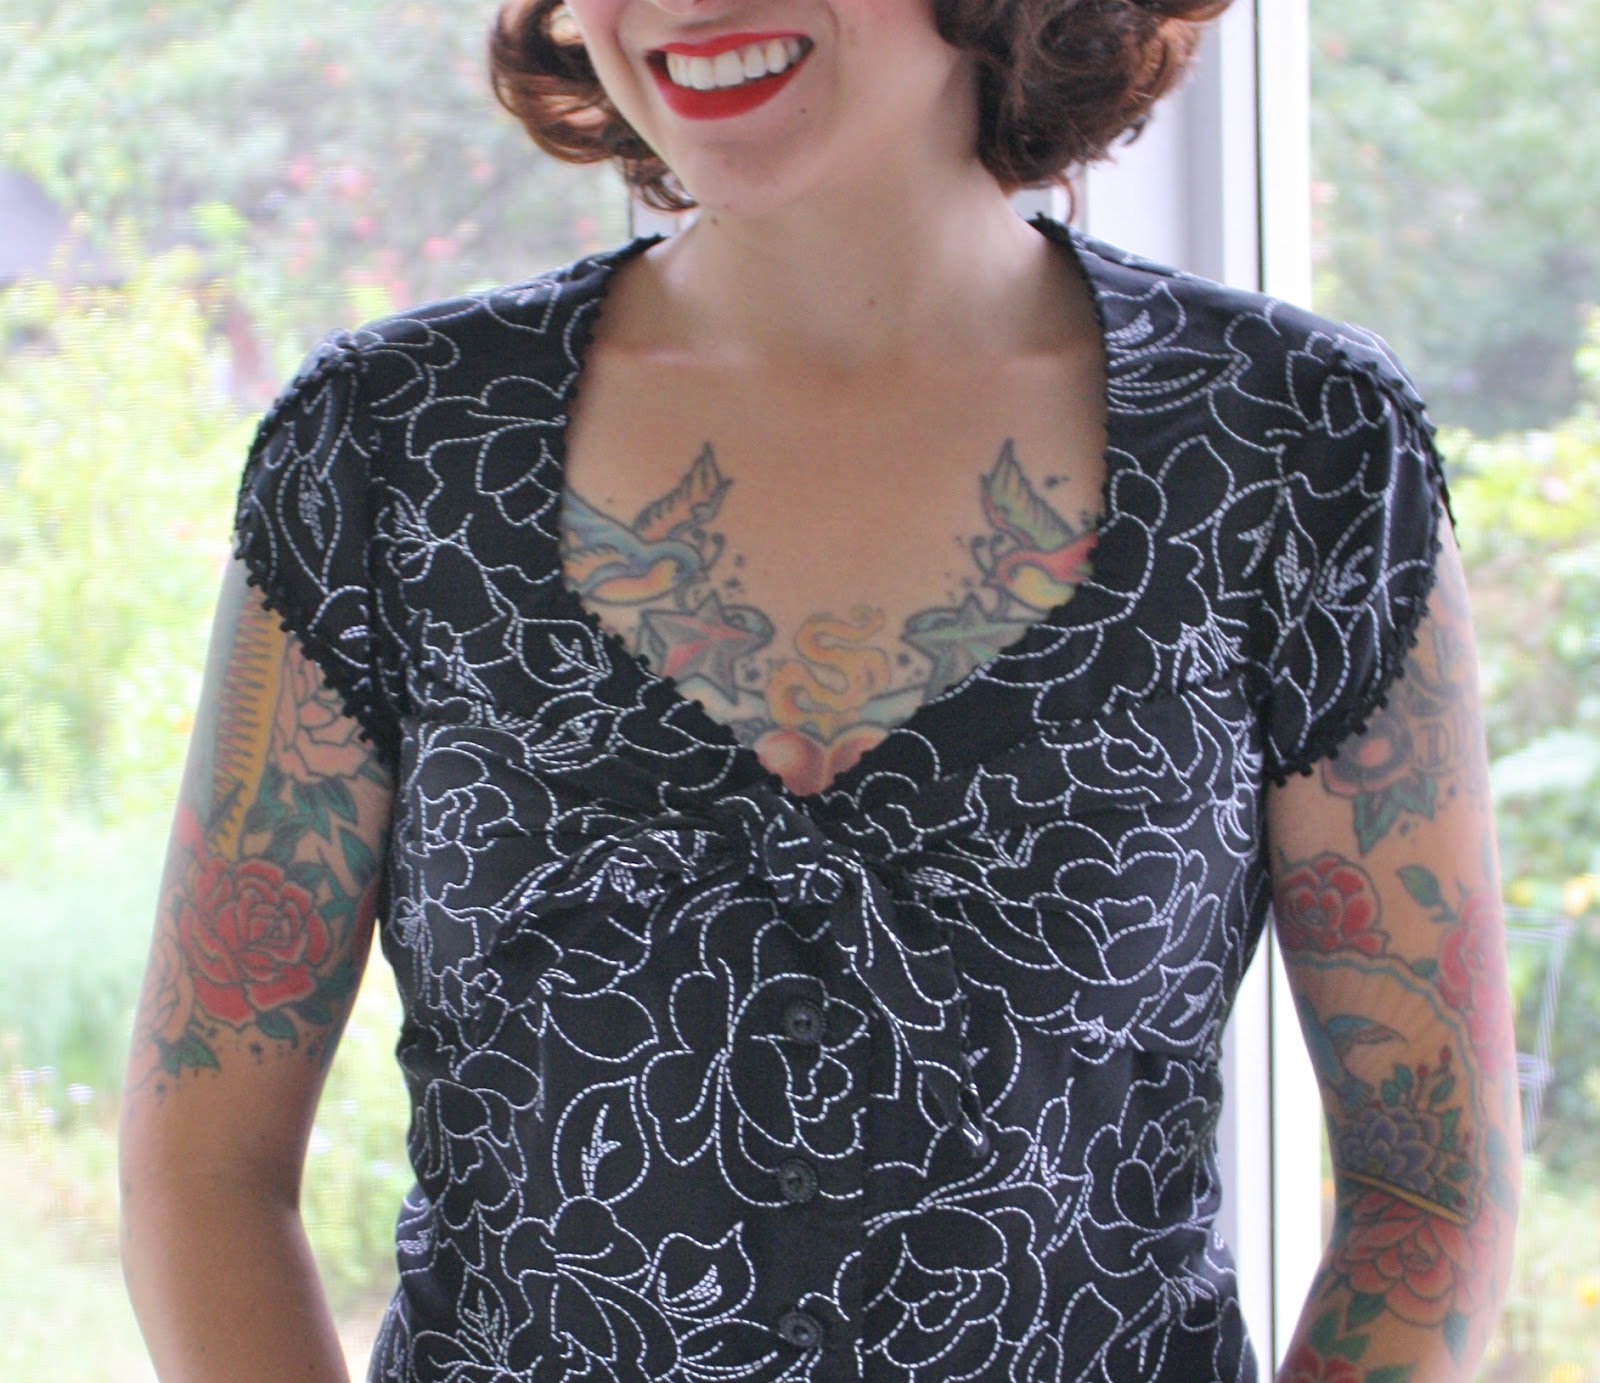
Butterick 6217 in Stitchy Rose Challis
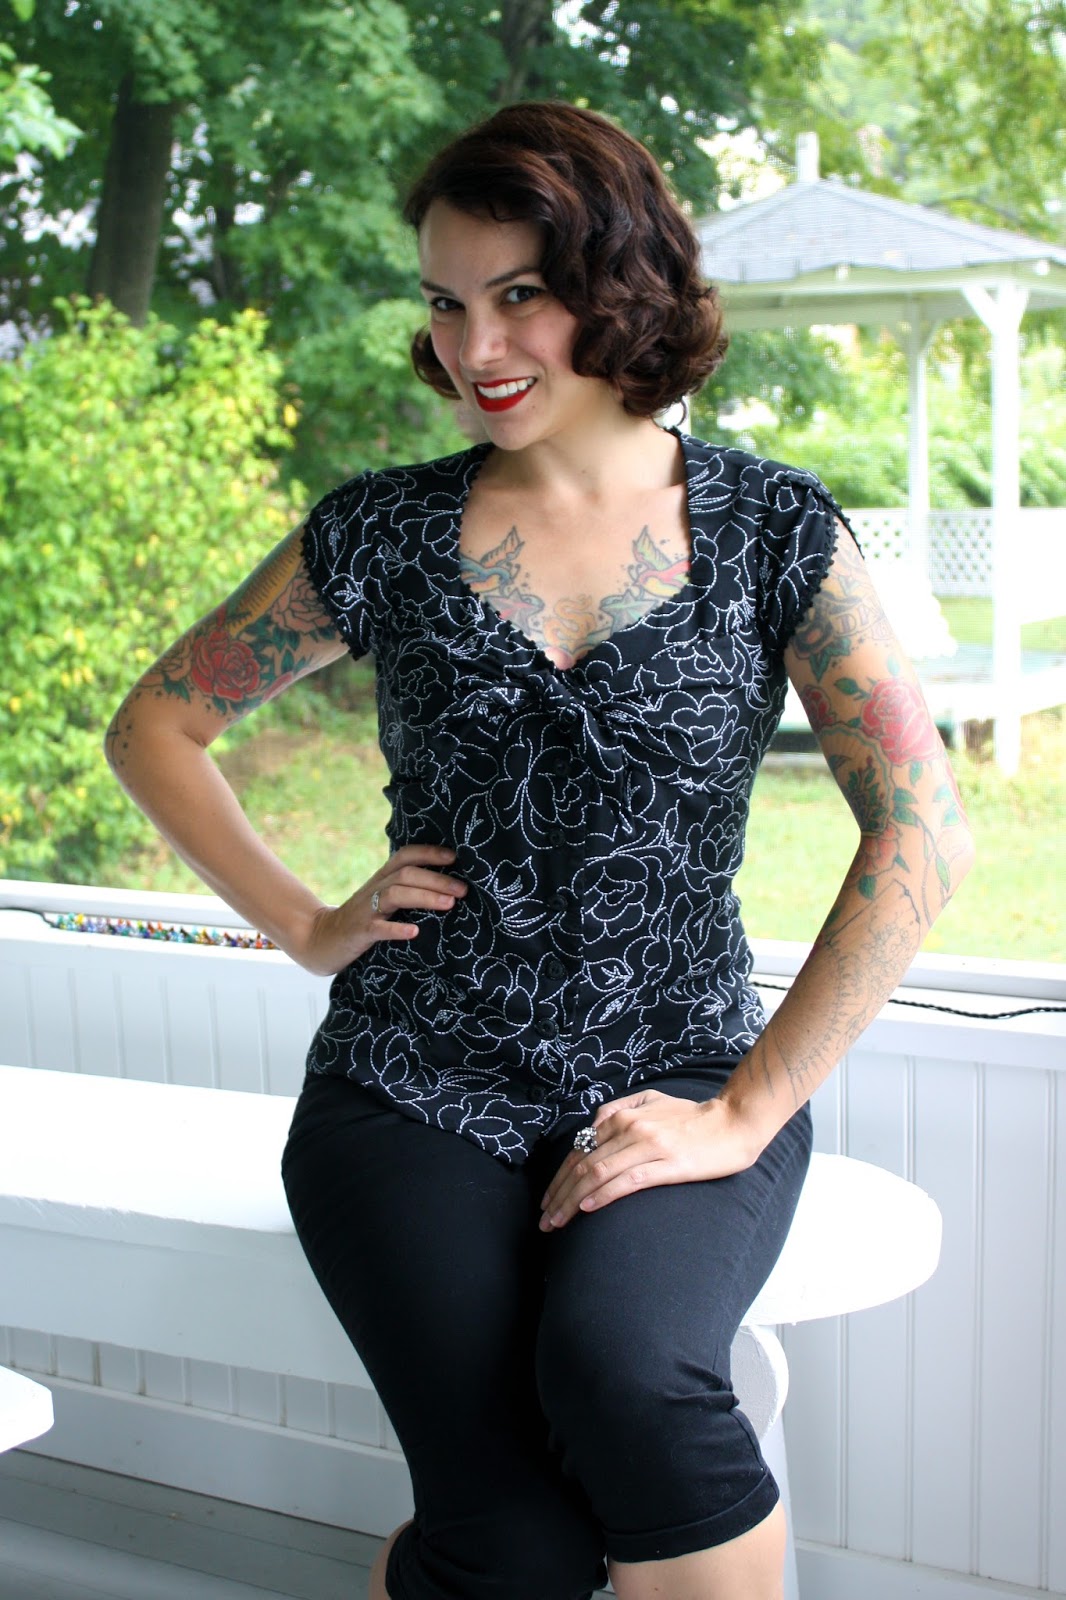 Just finished! This is Butterick 6217 made up in one of my new fall fabrics. This is a rayon challis that has a rose pattern in little white stitches!
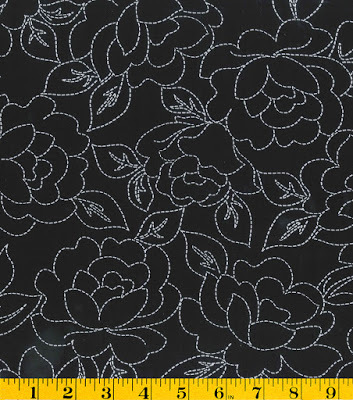 Rose Stitch ChallisThe challis is nice and drapey, making it a perfect match for this pattern. This is View A, which has a cute little bust tie and tulip sleeves. There are several other mix-and-match options.
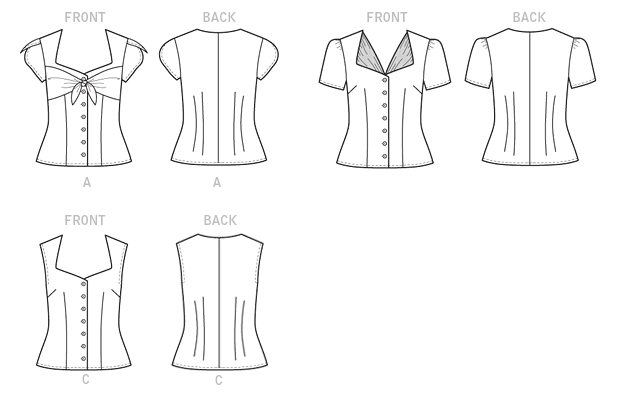
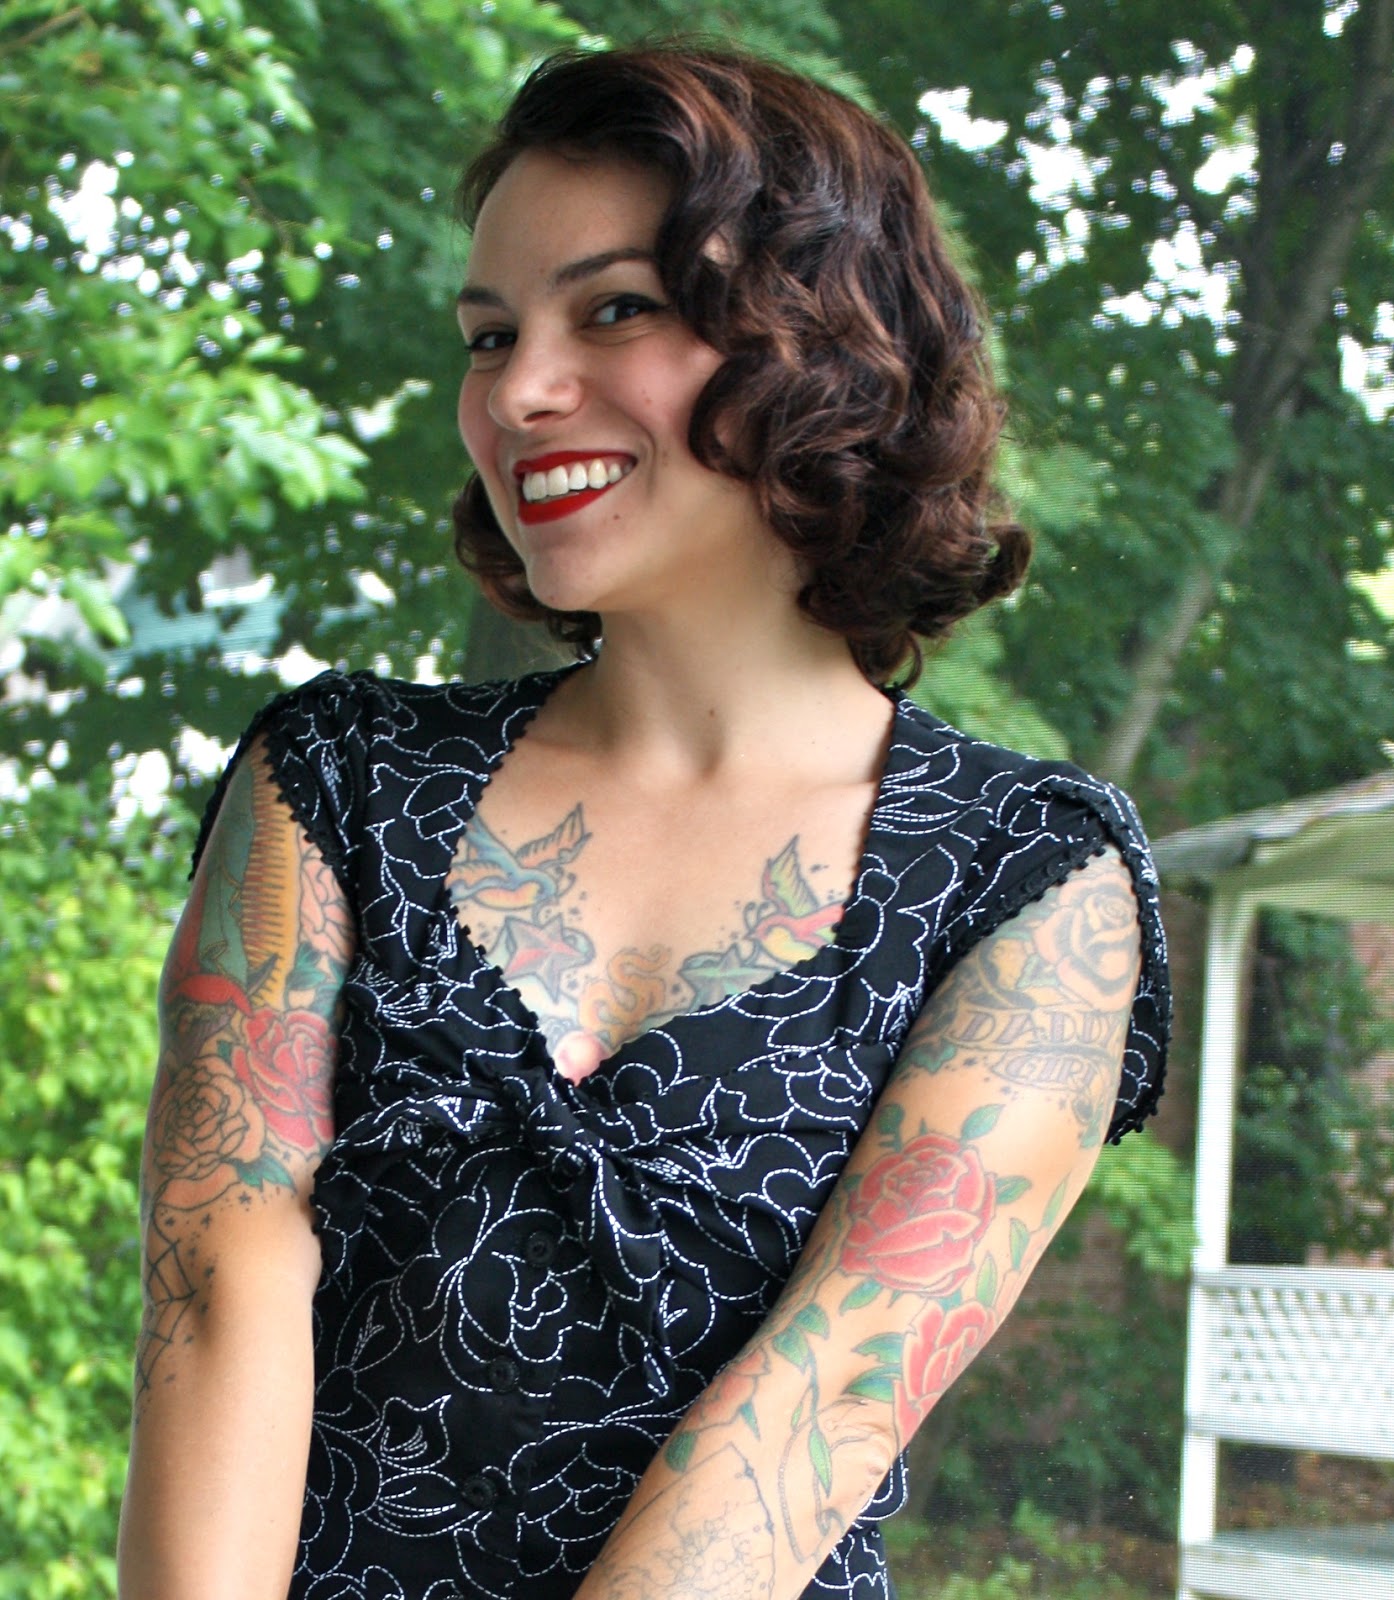
I used a narrow lace trim around the sleeve hems.
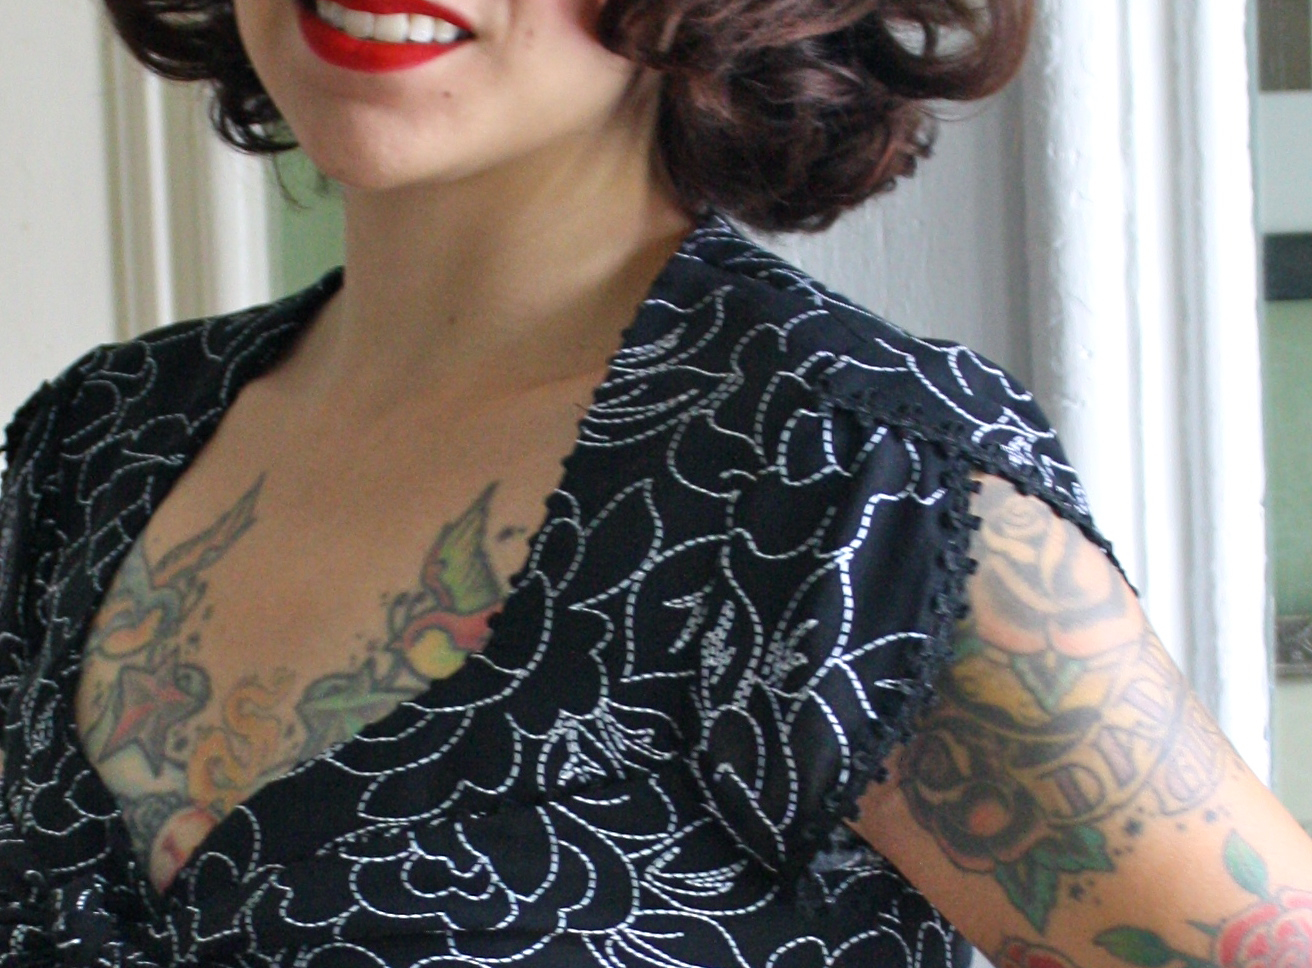
I used the same trim around the neckline, blouse fronts, and upper edge of the tie. Instead of stitching it on flat here, I inserted it into the seams like you would with piping. Here's a picture of it stitched to the bust tie before the seams are stitched. Just the little bumpy side of the trim sticks out, making a really subtle effect.

Here you can see the difference in the trim application on the sleeves and the ties.
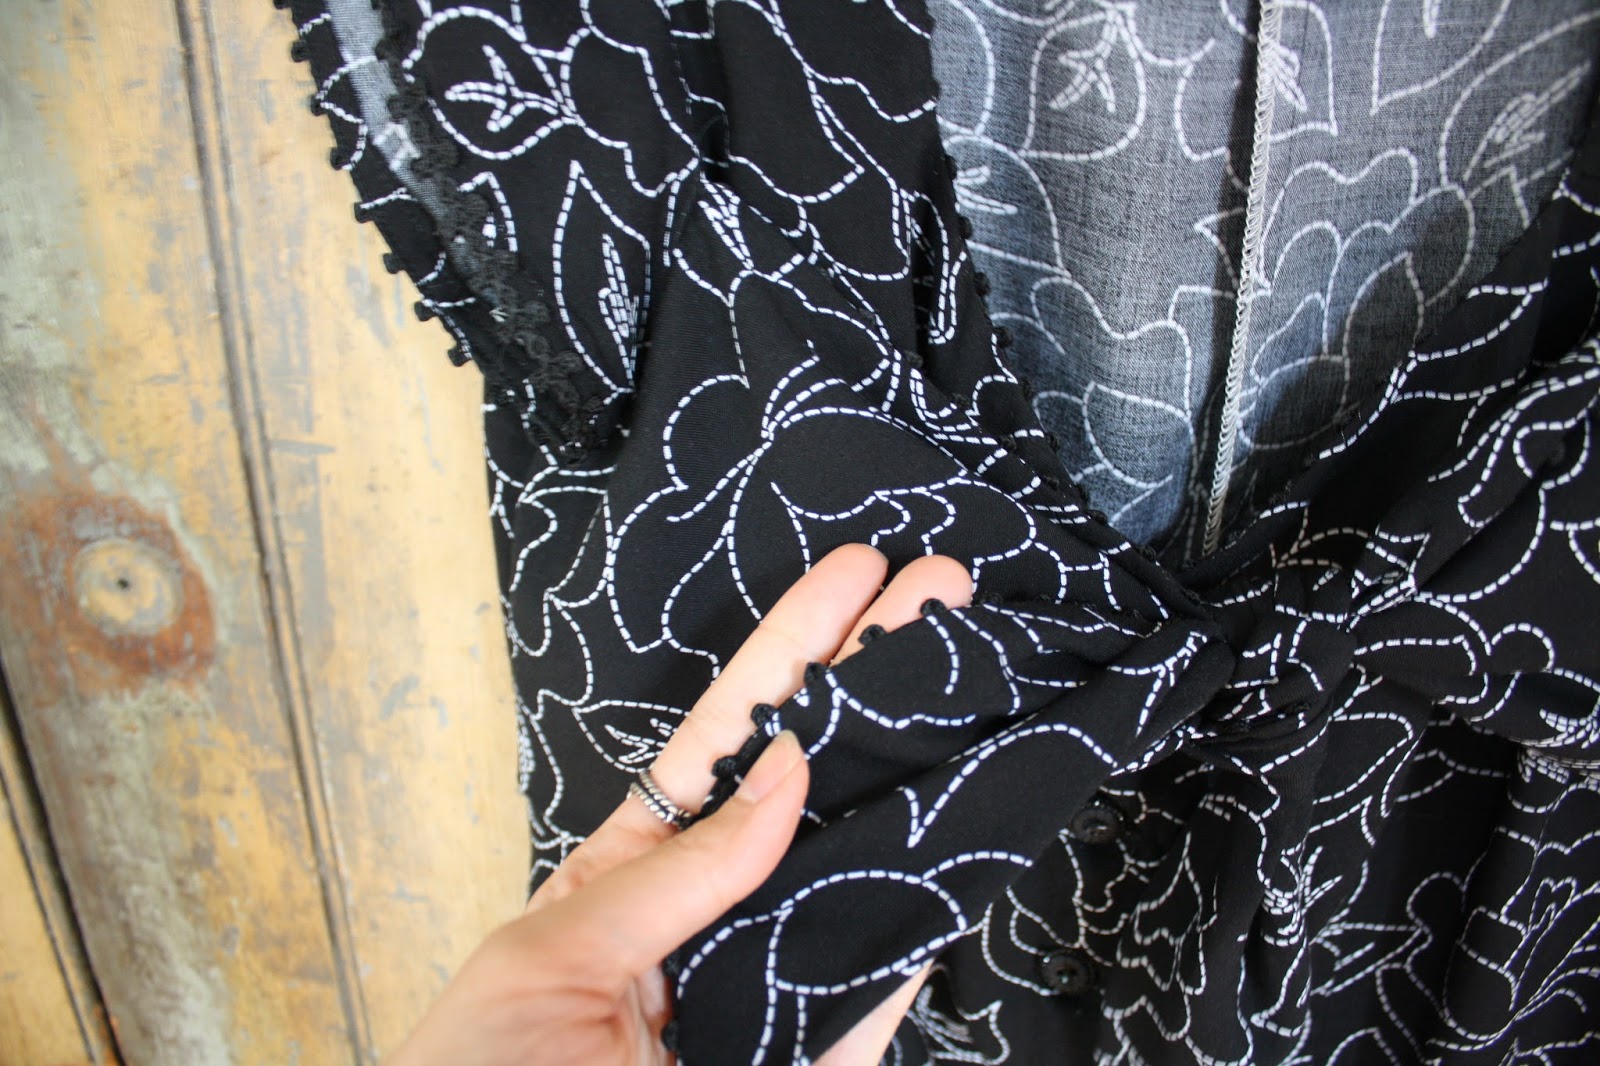
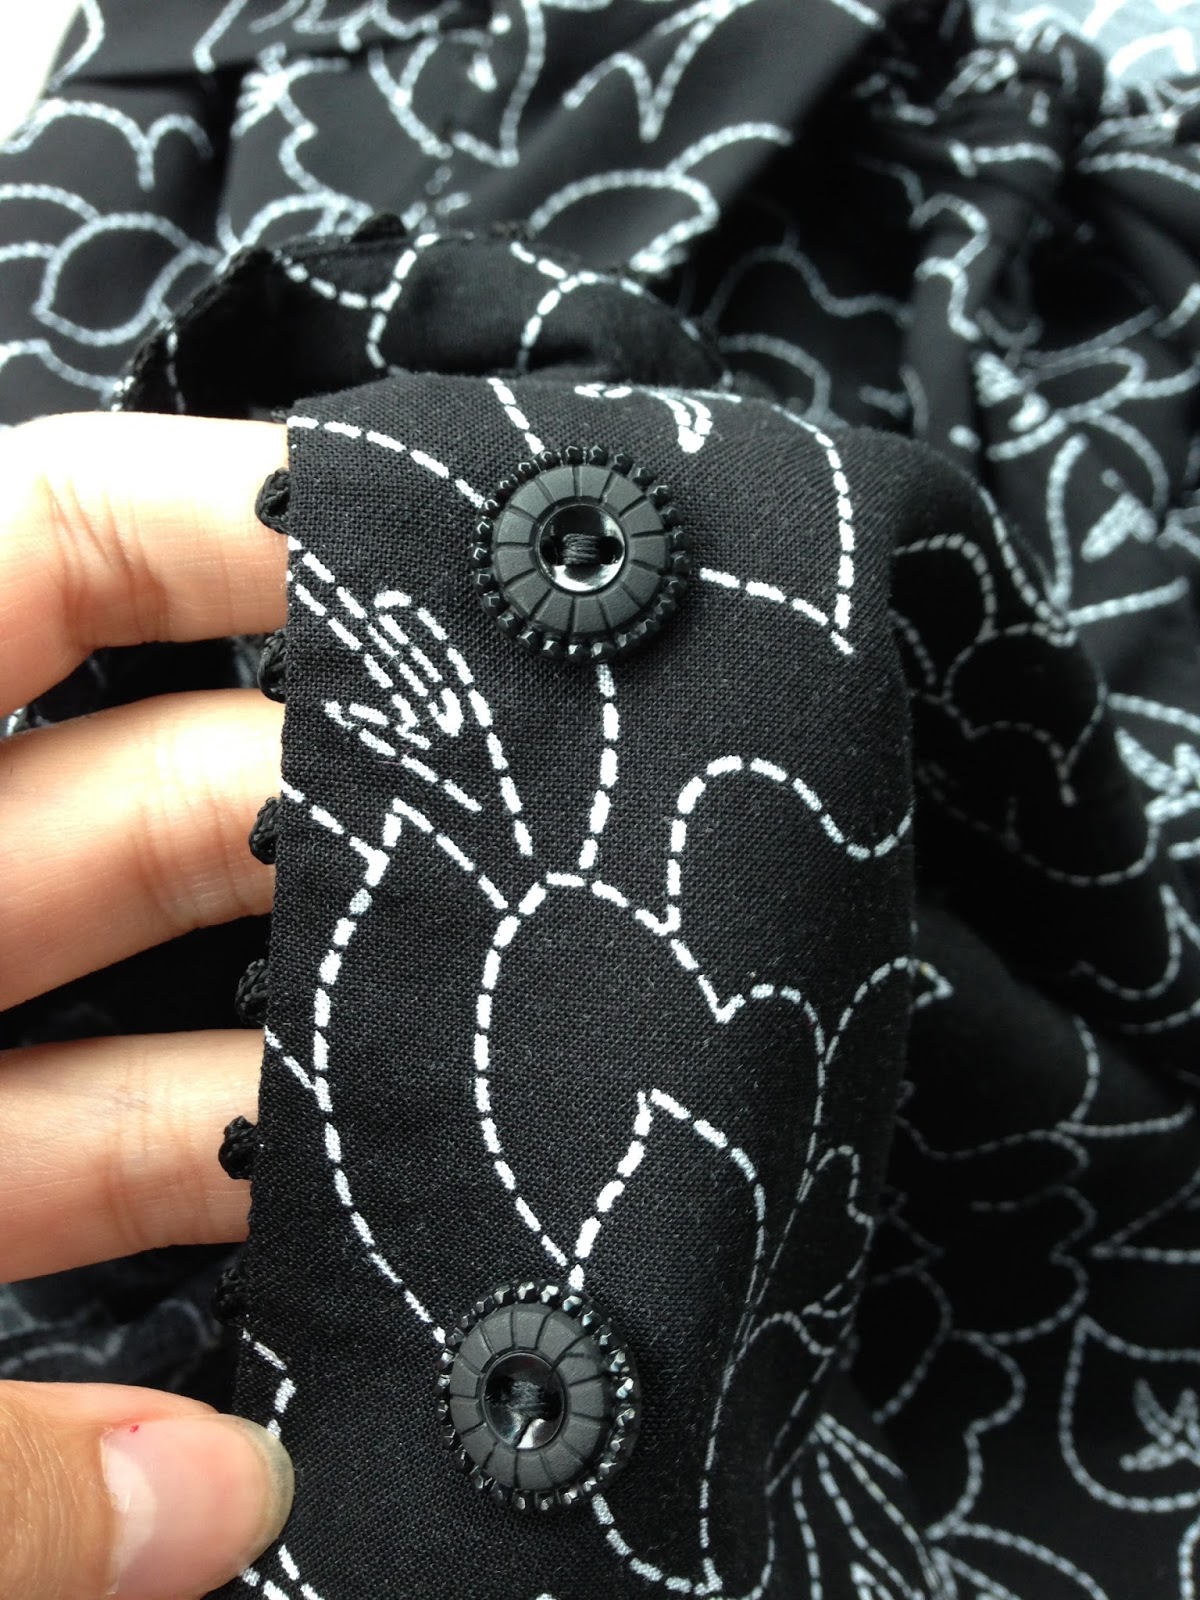
I lightened this picture so you can see the trim and the buttons a bit better. Black is tough!
Here you can see the detail on the buttons, and the trim at center front.
A great thing about this pattern is that it's quick. I think I spent about 5 hours from cutting to completion. It's also very flattering, though I would recommend sizing down if you want a fitted look. I'd normally be a size 12, but I made a size 10 here. If comfort is more important to you, make your usual size.
 I'm hoping to make a few more versions of this blouse. It looks great with or without the bust tie, and you can also make it sleeveless or with a short gathered sleeve. It also works nicely with pants or skirts, and you can layer it with a cardigan now that it's getting chilly out there.
September 29, 2015
New Fall Gertie Fabrics!
 As you may recall, my first line of retro-inspired apparel fabric hit Joann's stores in March. The response was fantastic, so I now have a fall line arriving in stores as I write. Like the spring collection, fall features vintage-themed prints on apparel-friendly fabrics. For fall, we went a little more rich and jewel-toned and we have some exciting choices: knits and jacquards and flocked chiffons, for instance! Here's a look at the collection, with links to purchase online.
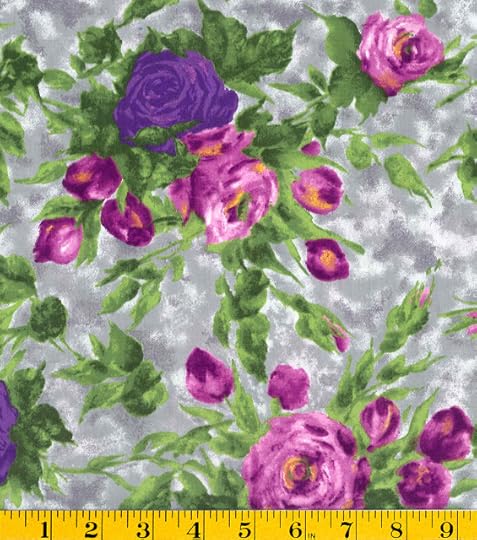
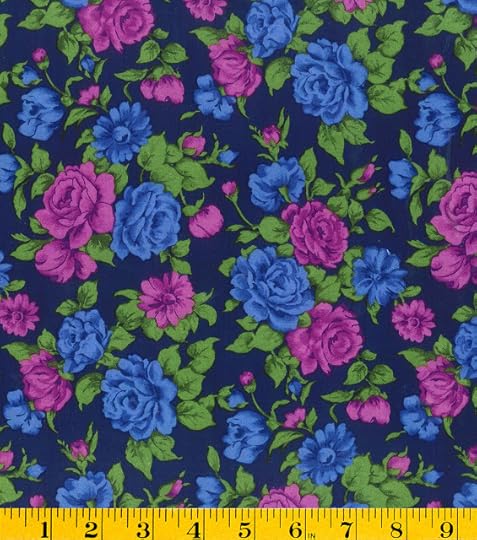
First, a beautiful floral cotton sateen in greys and purples.
 Grey Floral SateenAlso on sateen, a retro atomic jacks print in both purple/grey and black/white.
 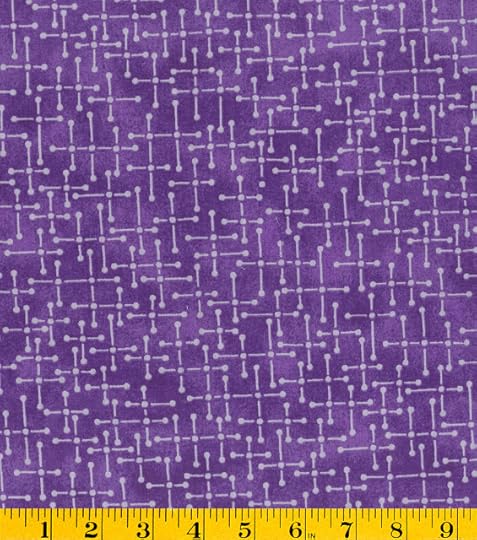 Purple/Grey Jacks Sateen
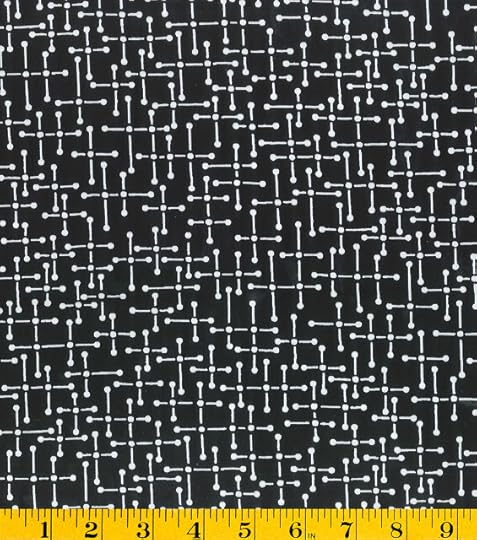 Black/White Jacks Sateen
I love the drape of rayon challis, and we have some beautiful ones this season. First, a retro rose floral in both blue and black colorways.
 Blue Floral Rayon Challis
 Black Floral Rayon ChallisI love this faux-stitch floral print on black.
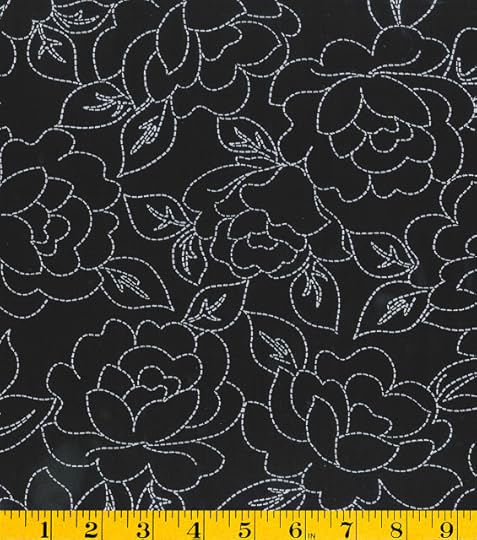 Stitch Rayon ChallisAlso on rayon challis is this sophisticated dot pattern.
 Gray and Purple Dots Rayon ChallisI adore velvet flocking on fabric, and I knew that would be a must for a fall collection. To start, we have little dresses flocked on blue faille!
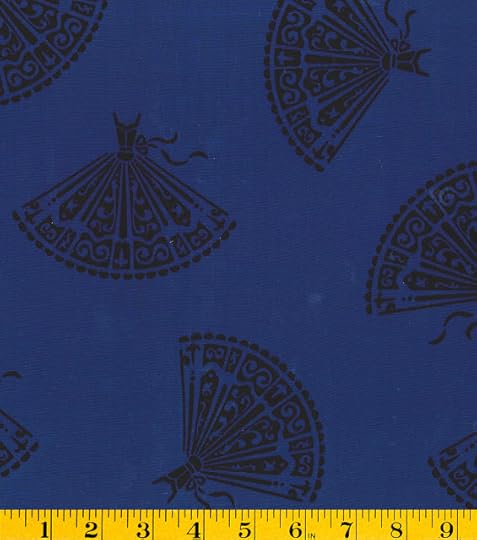 Flocked Dresses on Blue FailleNext, flocked poodles and dots (!!!!) on grey chiffon.
 Flocked Poodles on Grey Chiffon
Then these lovely rich jacquards in blue/black and grey/black. These have really nice body and a subtle sheen.
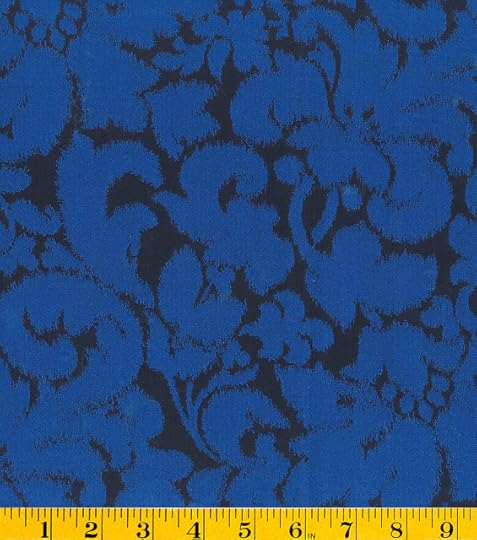 Blue/Black Jacquard
 Grey/Black JacquardFinally, knits! This rose pattern was inspired by an actual '50s dress and it comes in monochromatic red, purple, and grey on a luscious rayon-spandex knit. It has fantastic drape. This fabric is way easier to sew than I anticipated too!
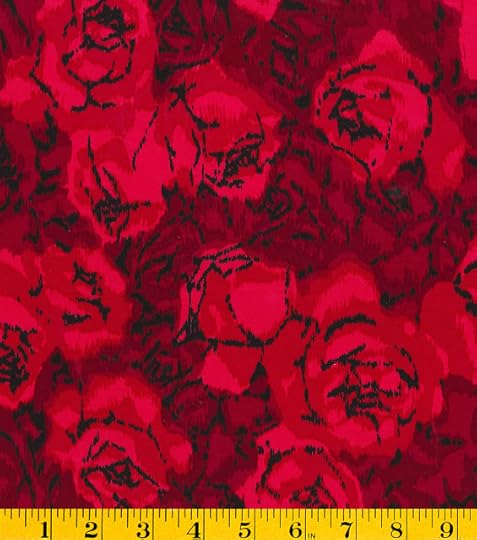 Red Floral Rayon/Spandex Knit
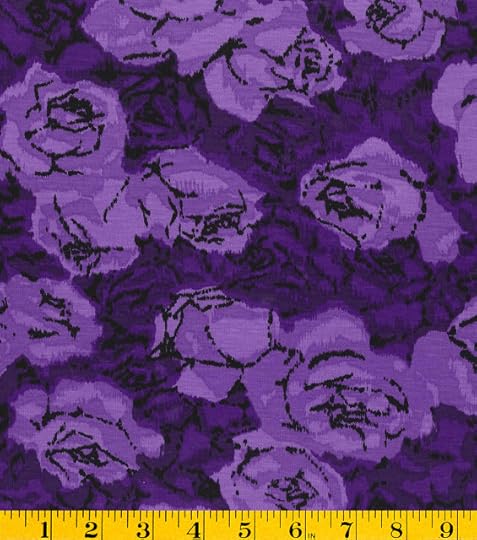 Purple Floral Rayon/Spandex Knit
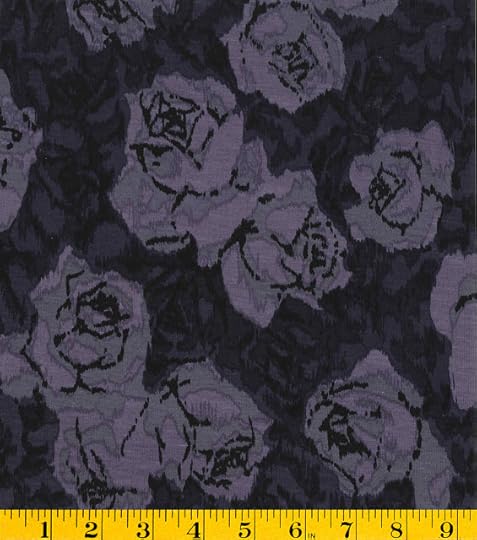 Grey Floral Rayon/Spandex KnitWhat do you think? Do you have any favorites? I hope you love them, readers! A huge thanks to both Fabric Traditions and Joann Fabric and Crafts for putting these out.
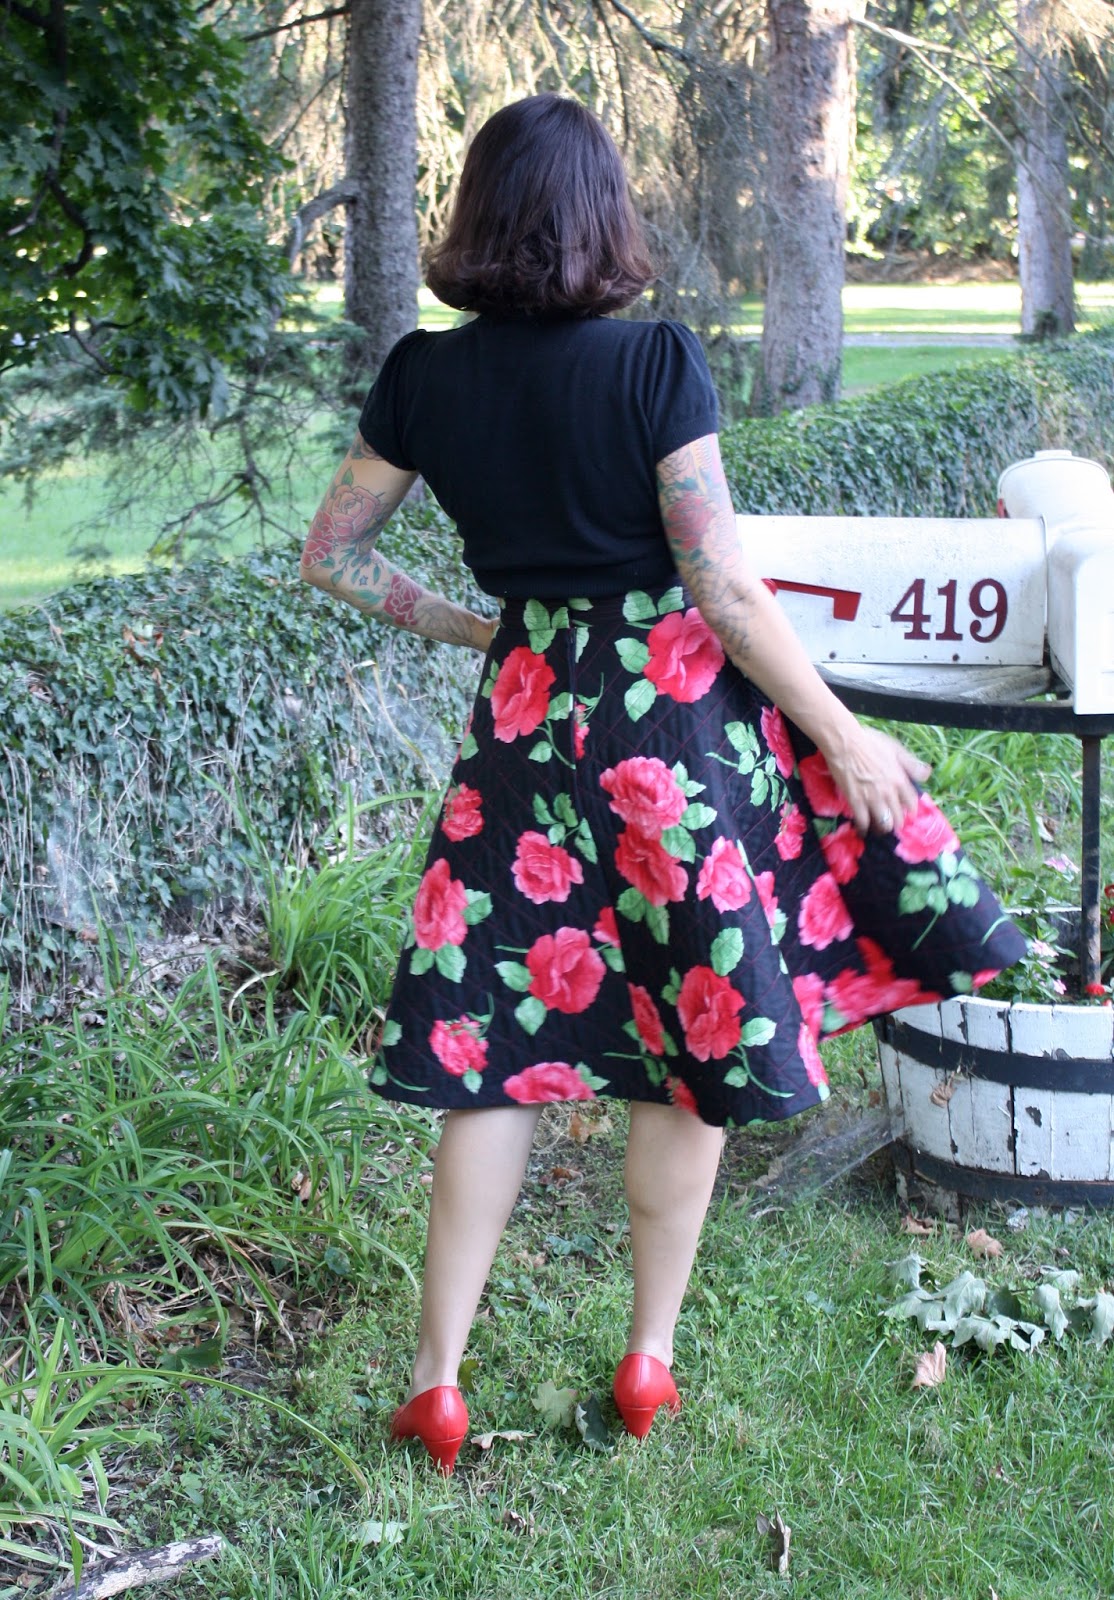
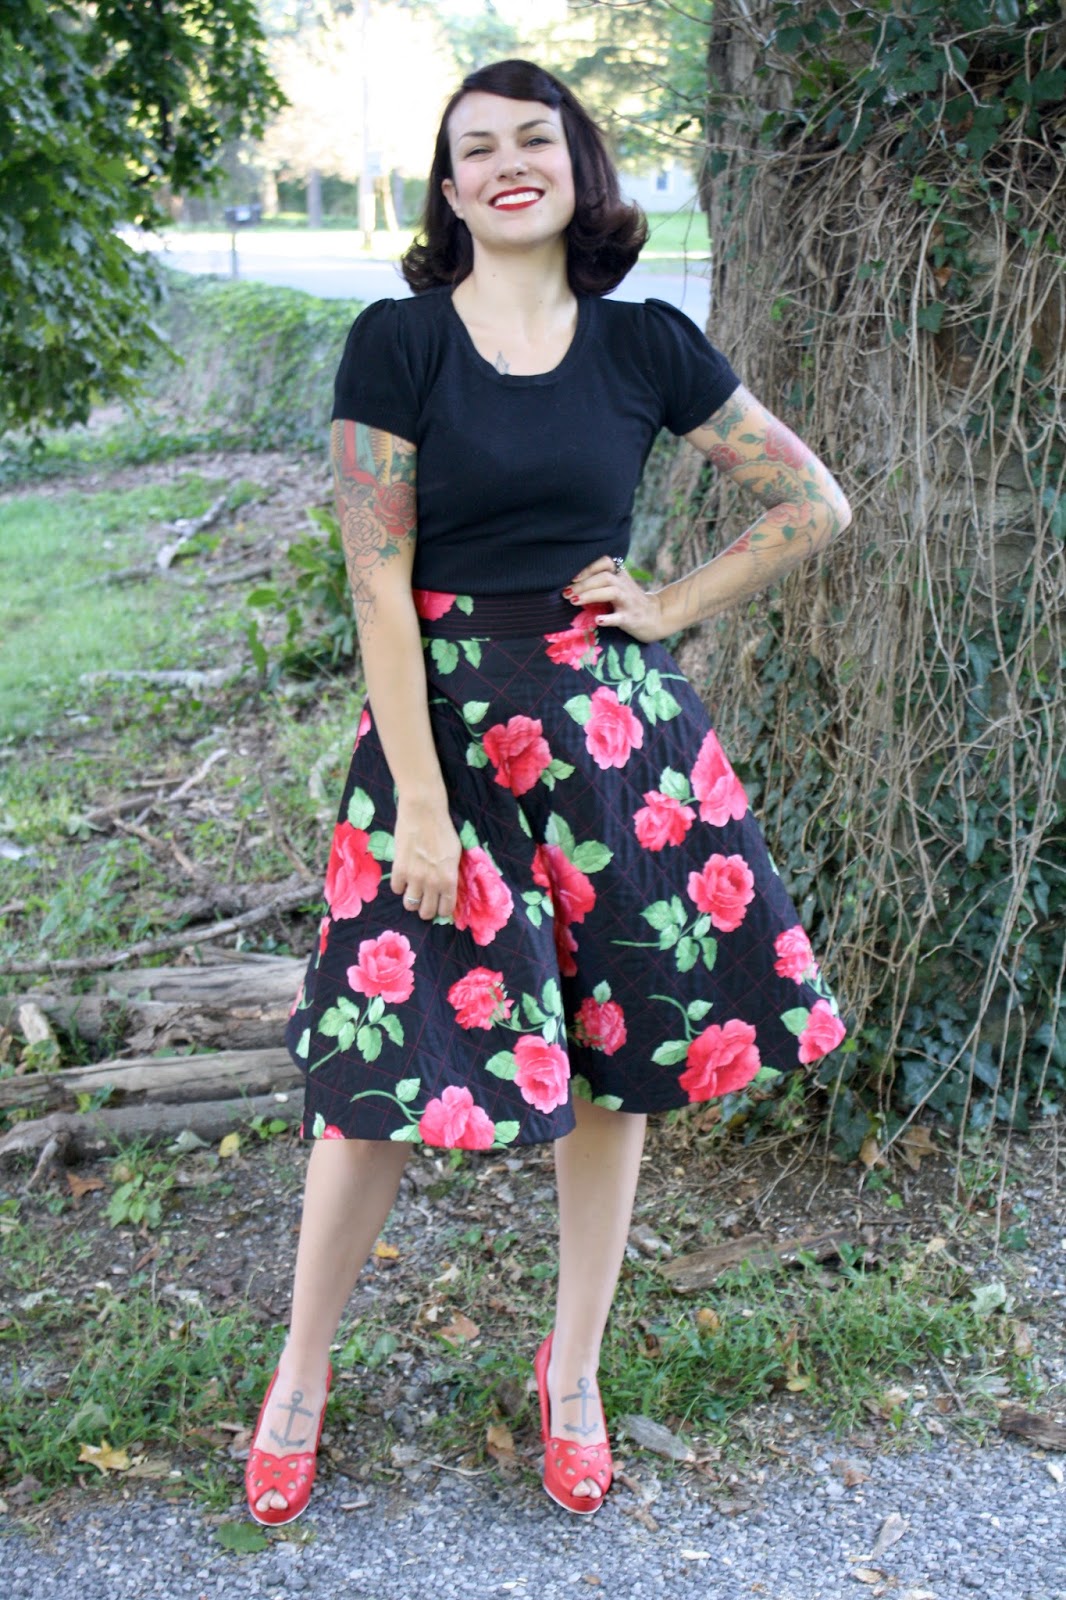
September 25, 2015
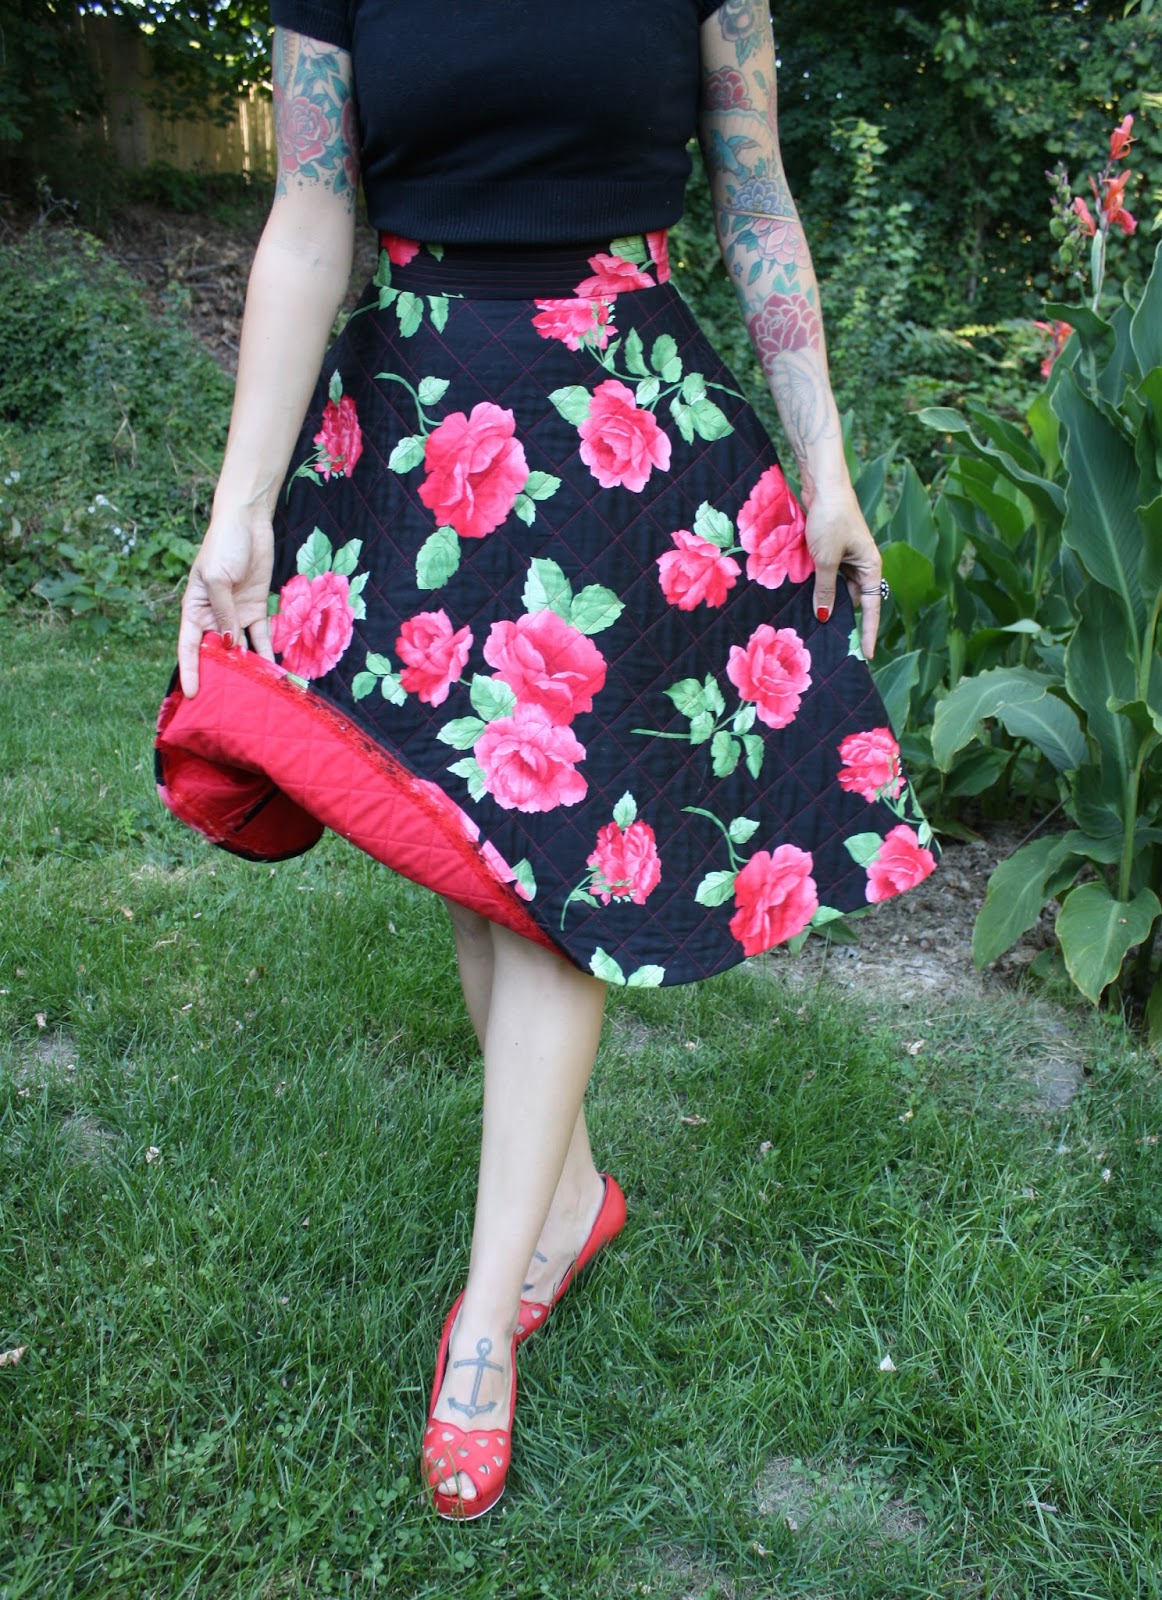
Finished Quilted Skirt
 It's finally finished! I wrote "Making a Quilted Skirt, Part One" earlier this year and then life and book writing took over. I finally finished the skirt last week, so here I am modeling it. Part two of the tutorial is coming up!
The skirt is made from the rose print sateen from my spring 2015 fabric line. (This color is sold out online, but it's available in yellow and coral on poplin here.) It's sandwiched with red Kona cotton and cotton batting. The quilting gives it incredible shape and body--no petticoat needed!
 The pattern I used the the Flared Skirt from my book Gertie Sews Vintage Casual. It's a half circle, though it looks much fuller with the quilting.
There's a high waistband and a back lapped zipper. The waistband is interfaced with non-woven sew-in interfacing and then has rows of channel stitching rather than quilting. I'll be writing more about this.
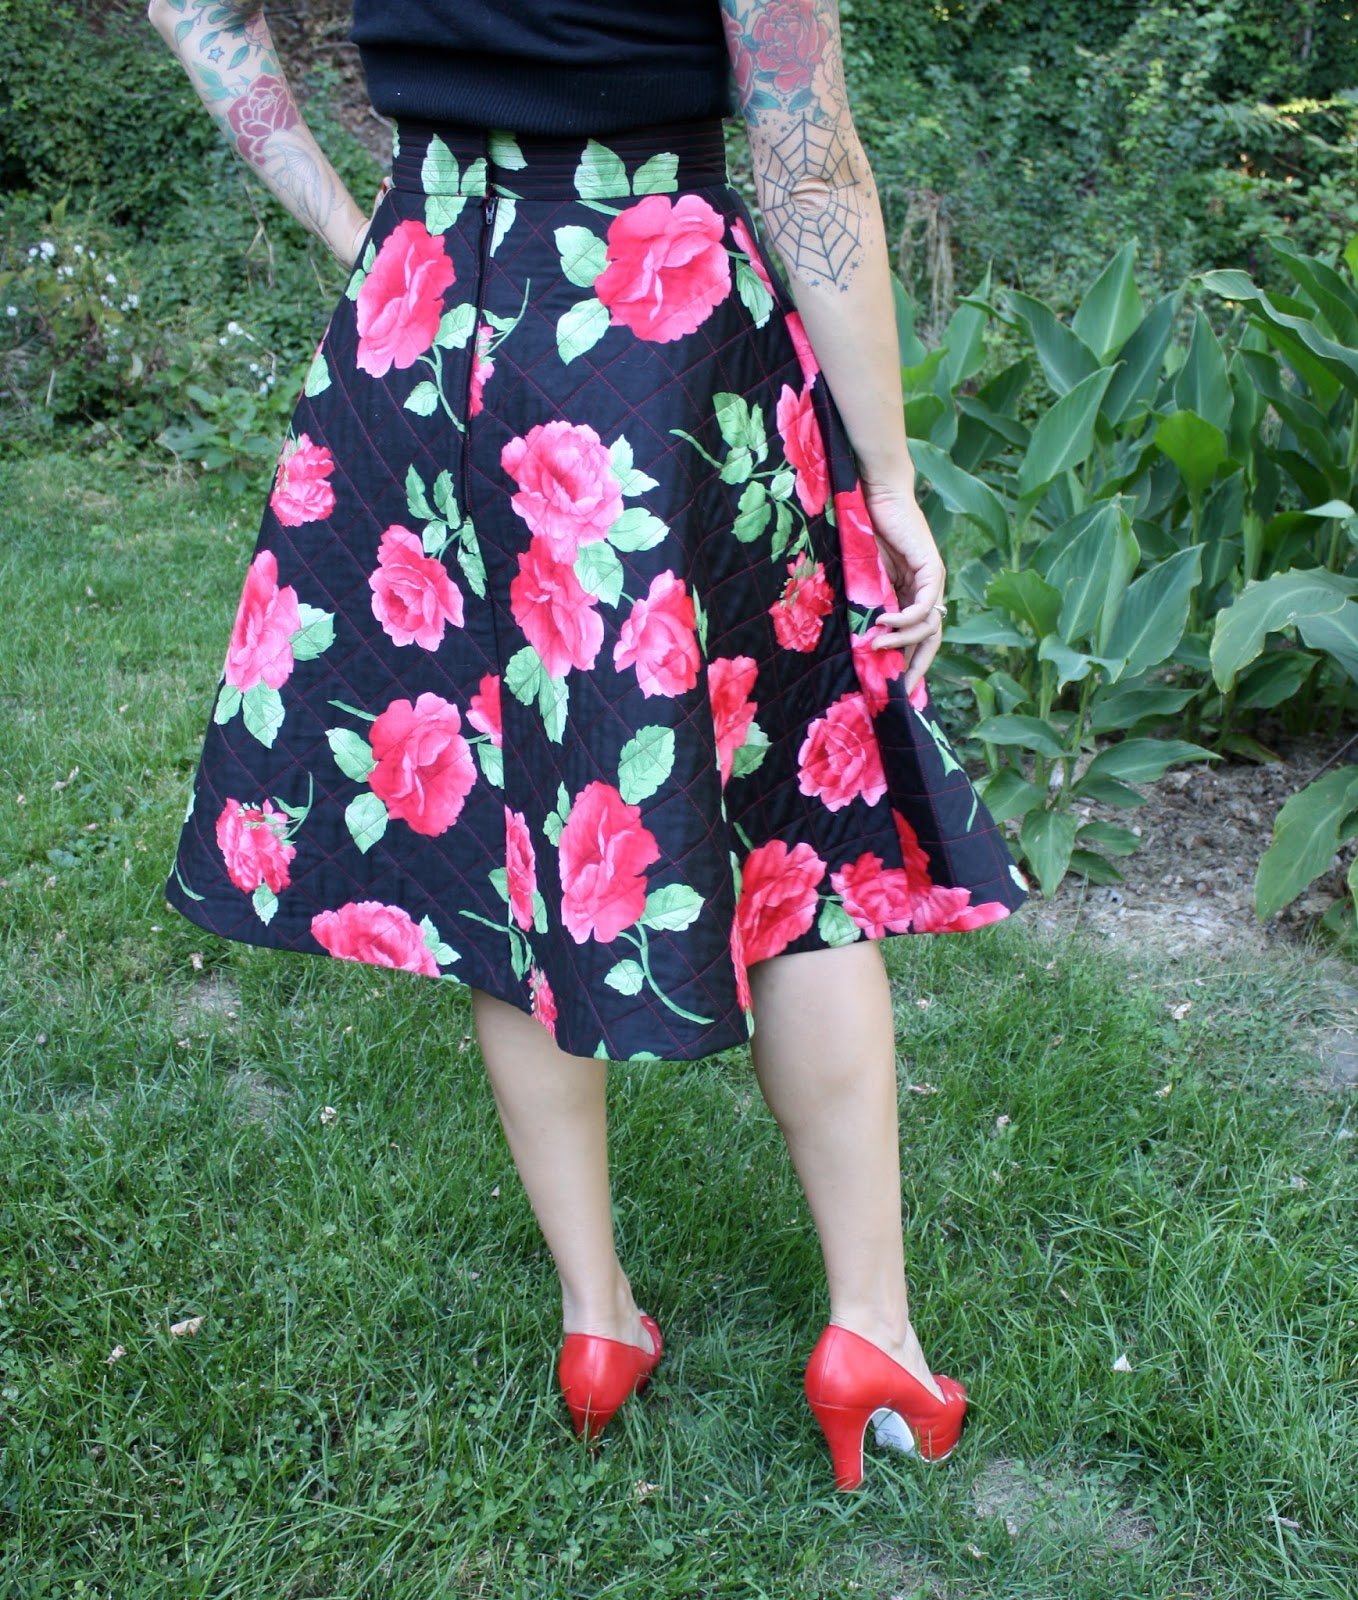
The quilting adds such a fun texture and overall shape.
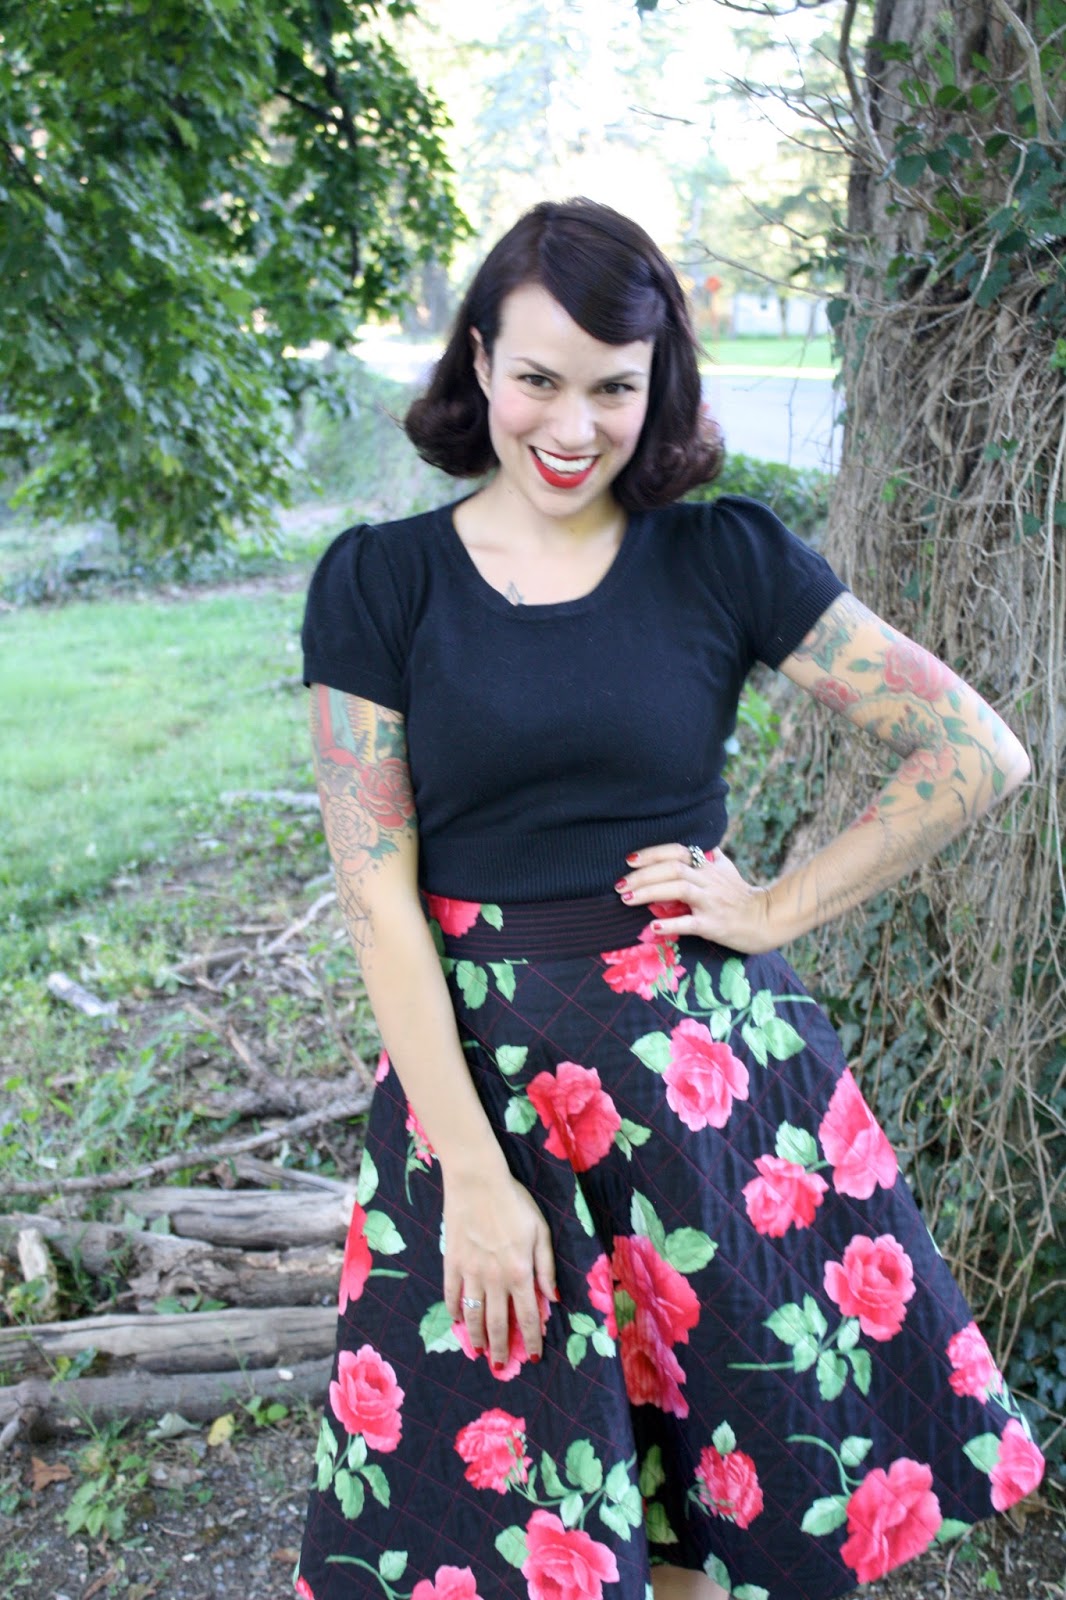 I wore the skirt out fabric shopping in the city yesterday and got so many compliments. Seriously, I felt like a celebrity. (I found some great fabrics for my dirndl, readers! More to come.)
Look out for part two of the tutorial next week!
I wore the skirt out fabric shopping in the city yesterday and got so many compliments. Seriously, I felt like a celebrity. (I found some great fabrics for my dirndl, readers! More to come.)
Look out for part two of the tutorial next week!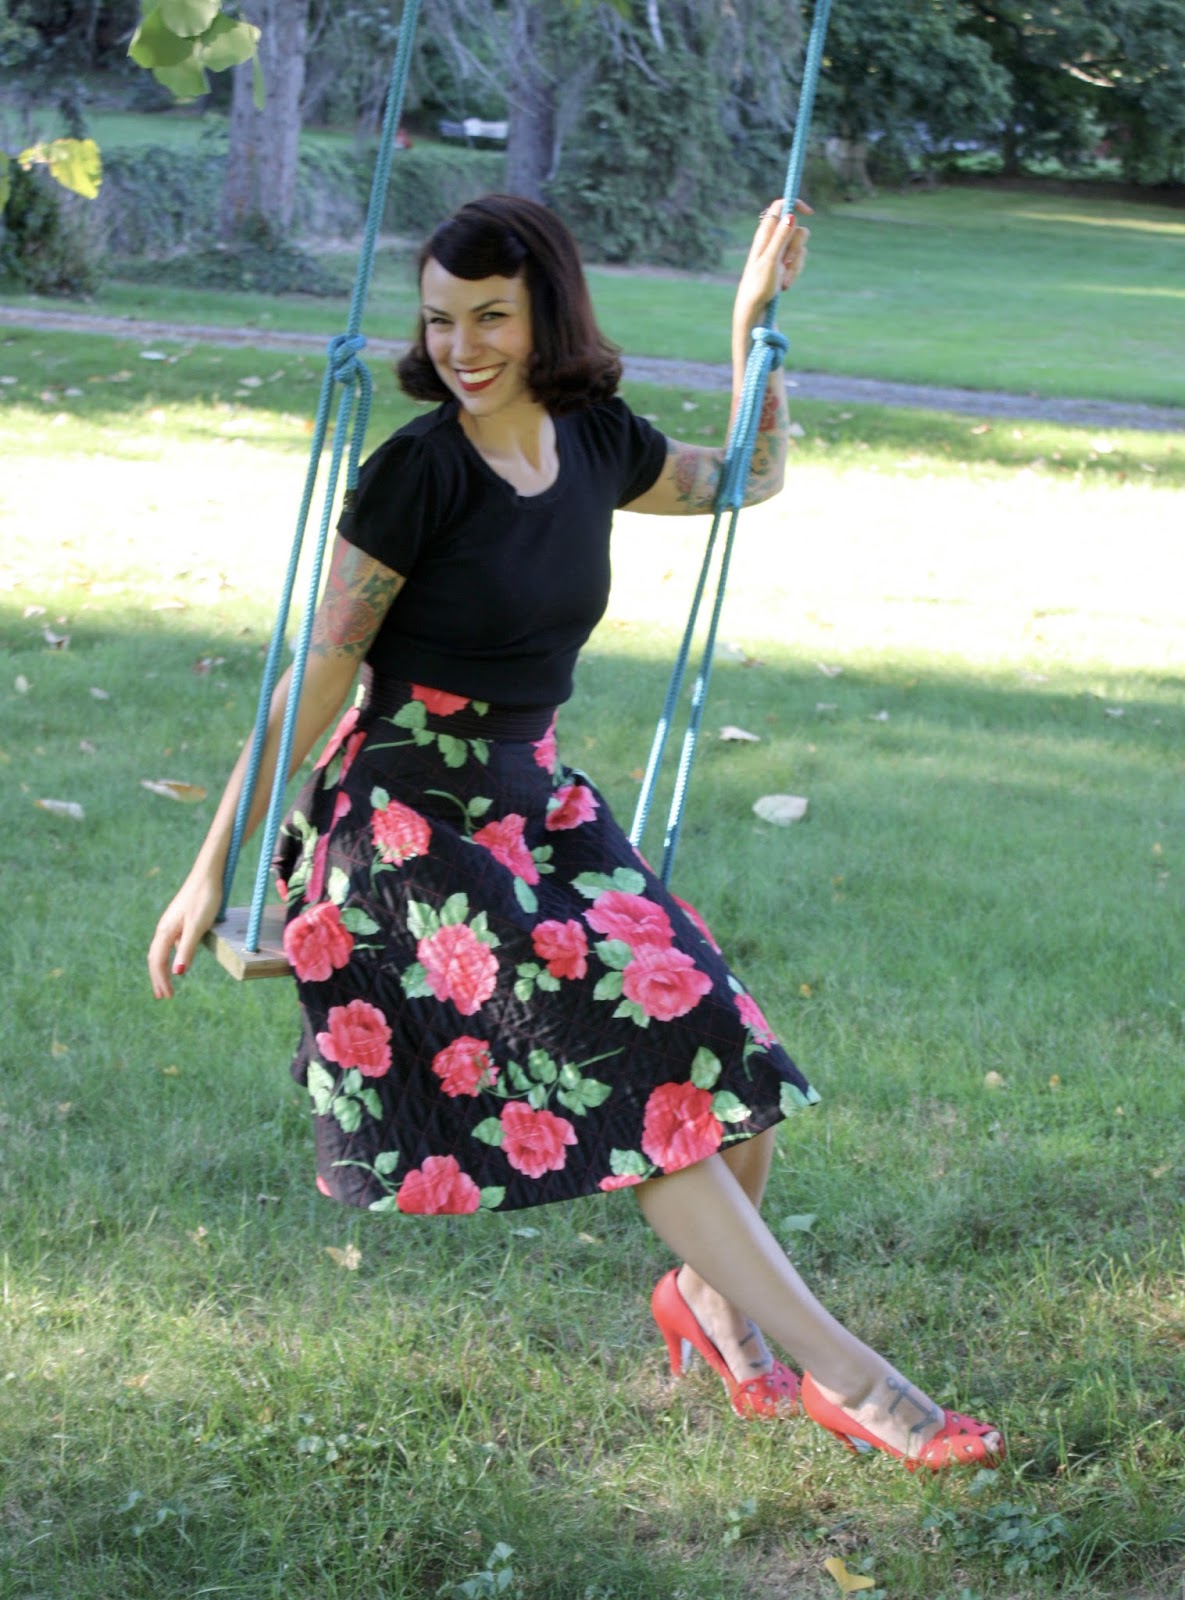
Gretchen Hirsch's Blog

- Gretchen Hirsch's profile
- 49 followers
Gretchen Hirsch isn't a Goodreads Author
(yet),
but they
do have a blog,
so here are some recent posts imported from
their feed.

