
Gretchen Hirsch's Blog, page 2
March 24, 2017
B6453 Sew Along: Sewing the Skirt, View A
 Time to sew this skirt! This is always satisfying because it really starts to look like a dress.
For these steps, please follow along closely on the pattern instruction guide sheet. It can be difficult to photograph these large pieces, and I often find it easier to look at the illustrations.
First, if you're serging your edges, I recommend doing that to the pockets and skirt pieces before they are sewn. It's very tricky to serge the pockets after they're attached because of curves and corners.
Serge your skirt pieces on the side seams only. Do not remove any fabric with the serger's blade, just finish the edges.
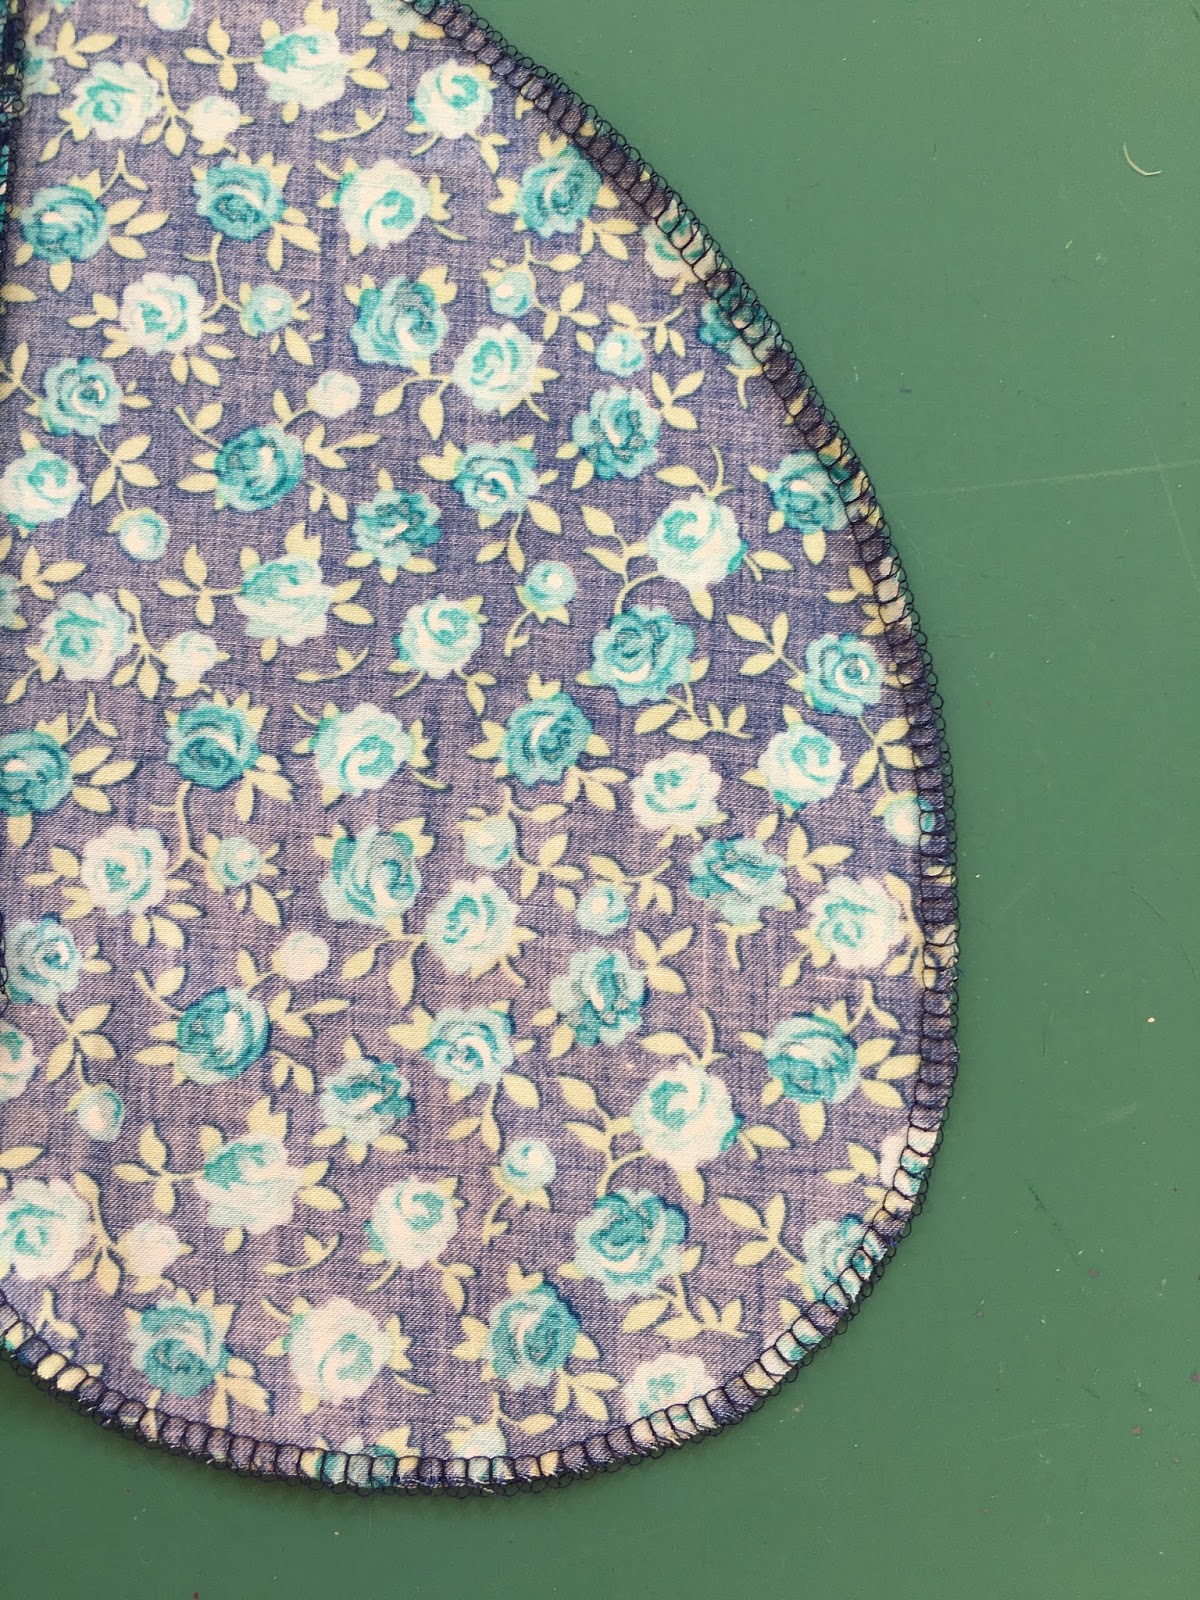
Serge around all sides of all four pockets.
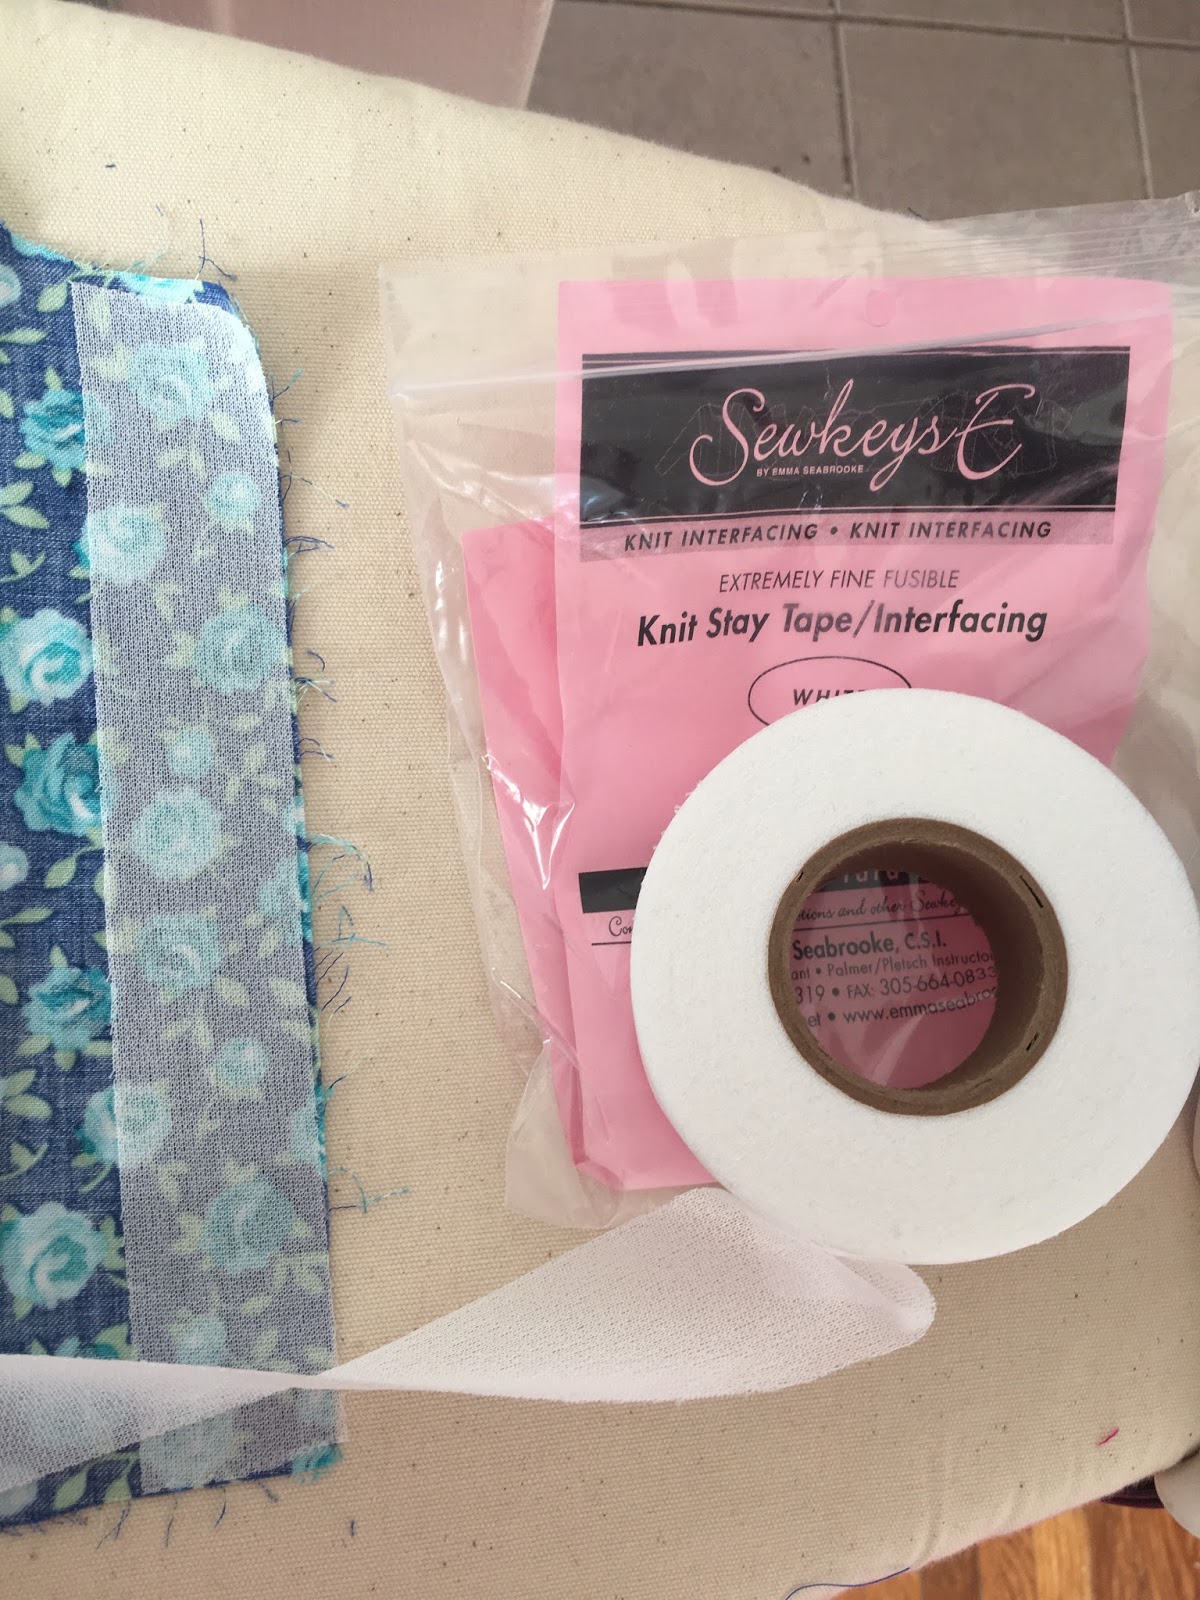
 Next, stabilize the skirt backs above the zipper circle mark. I use 1-1/4" fusible strips for this.
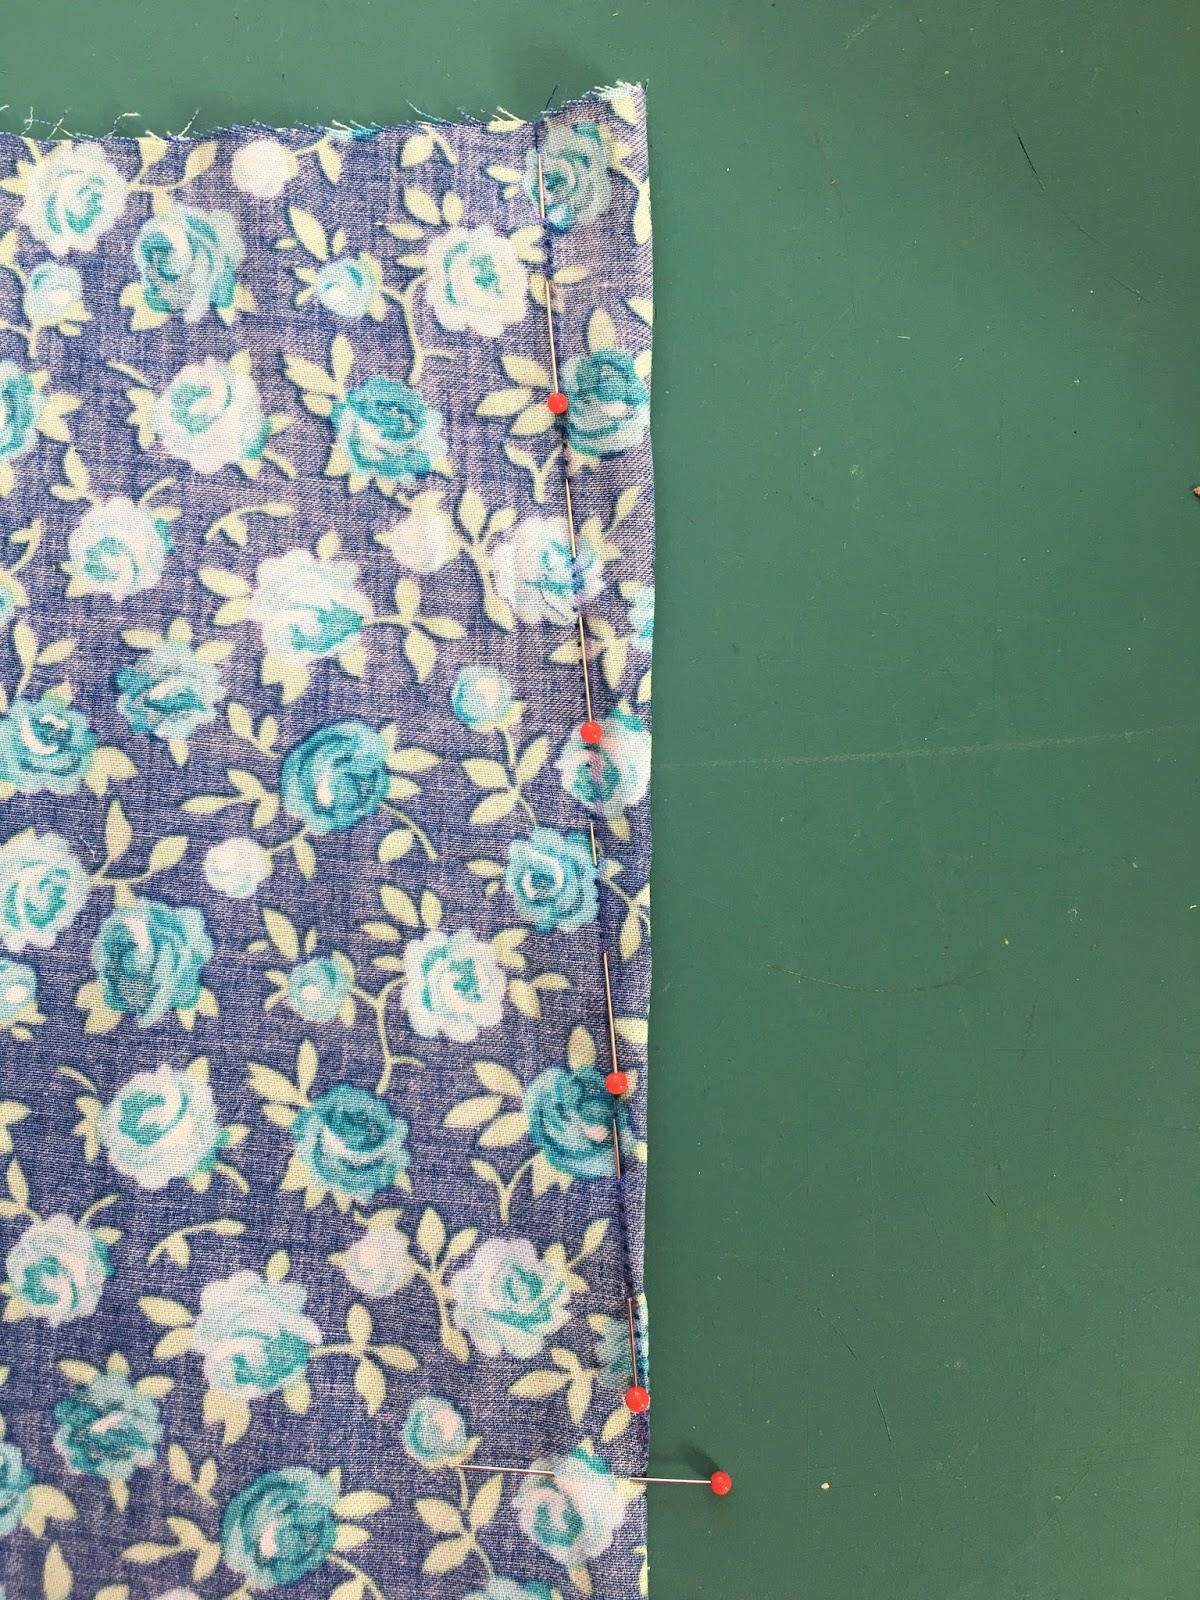
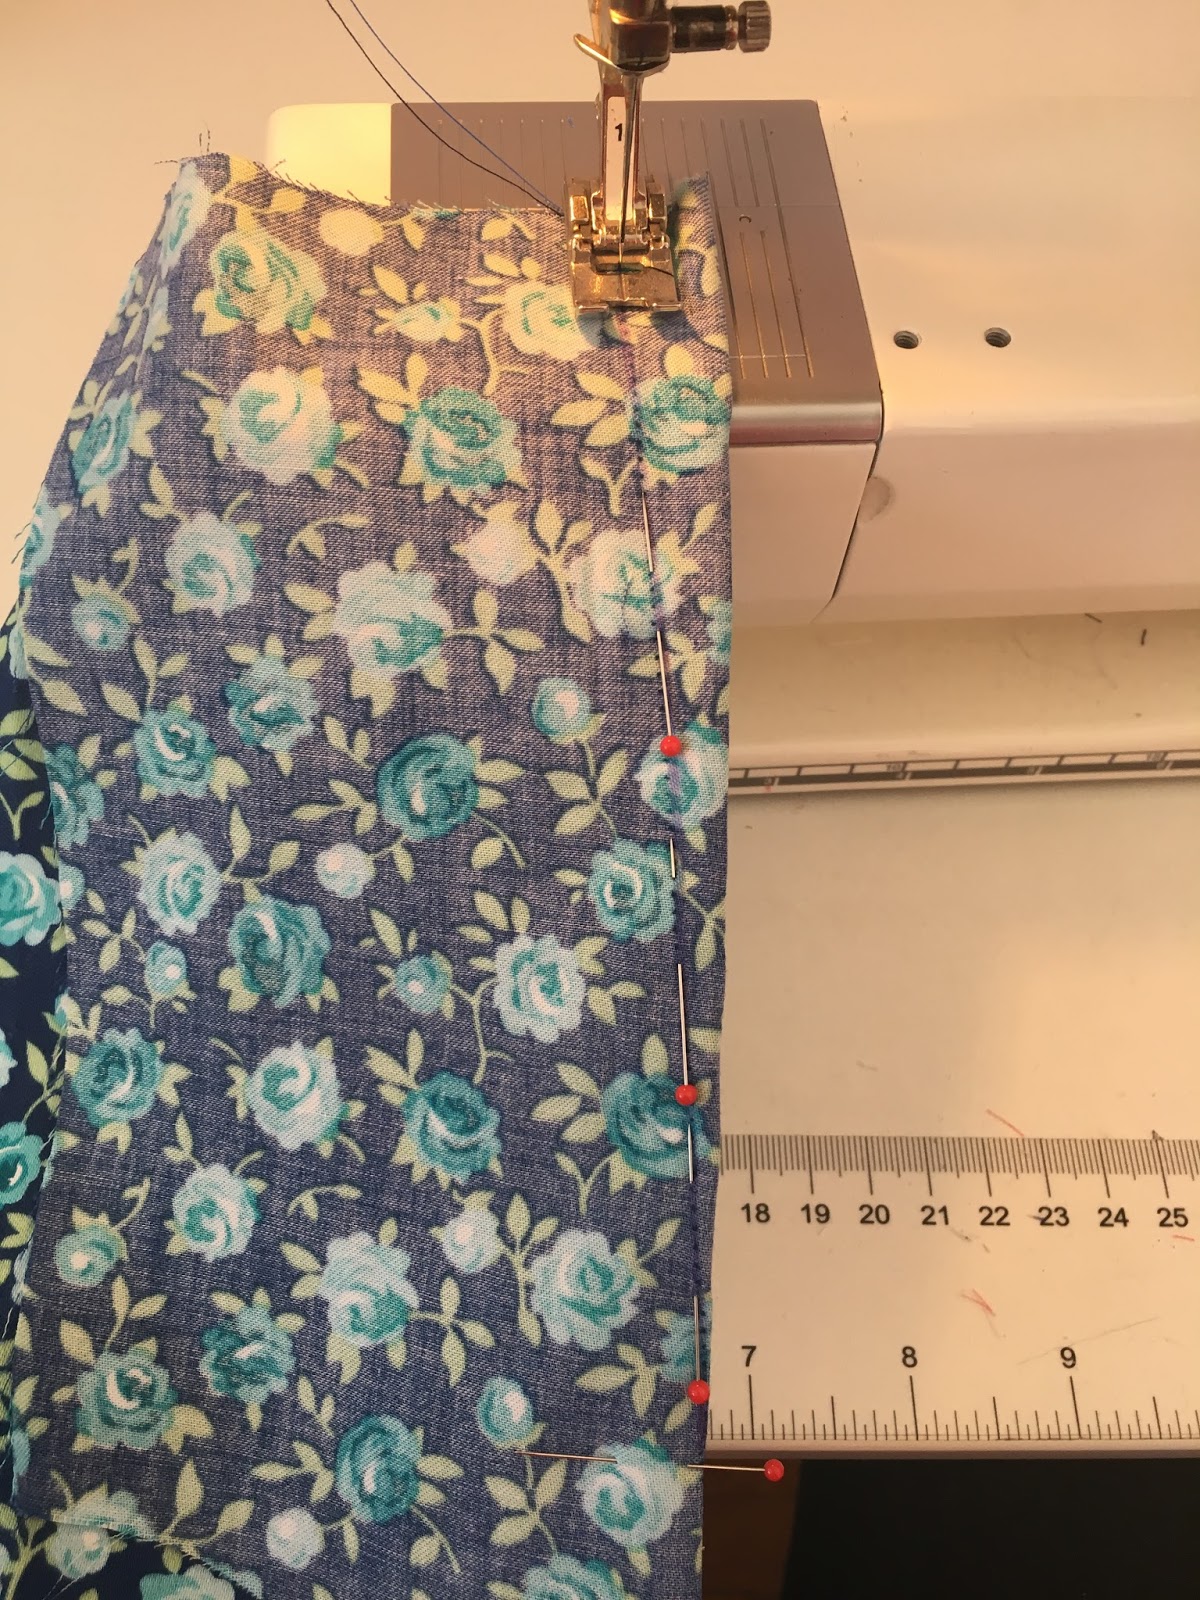
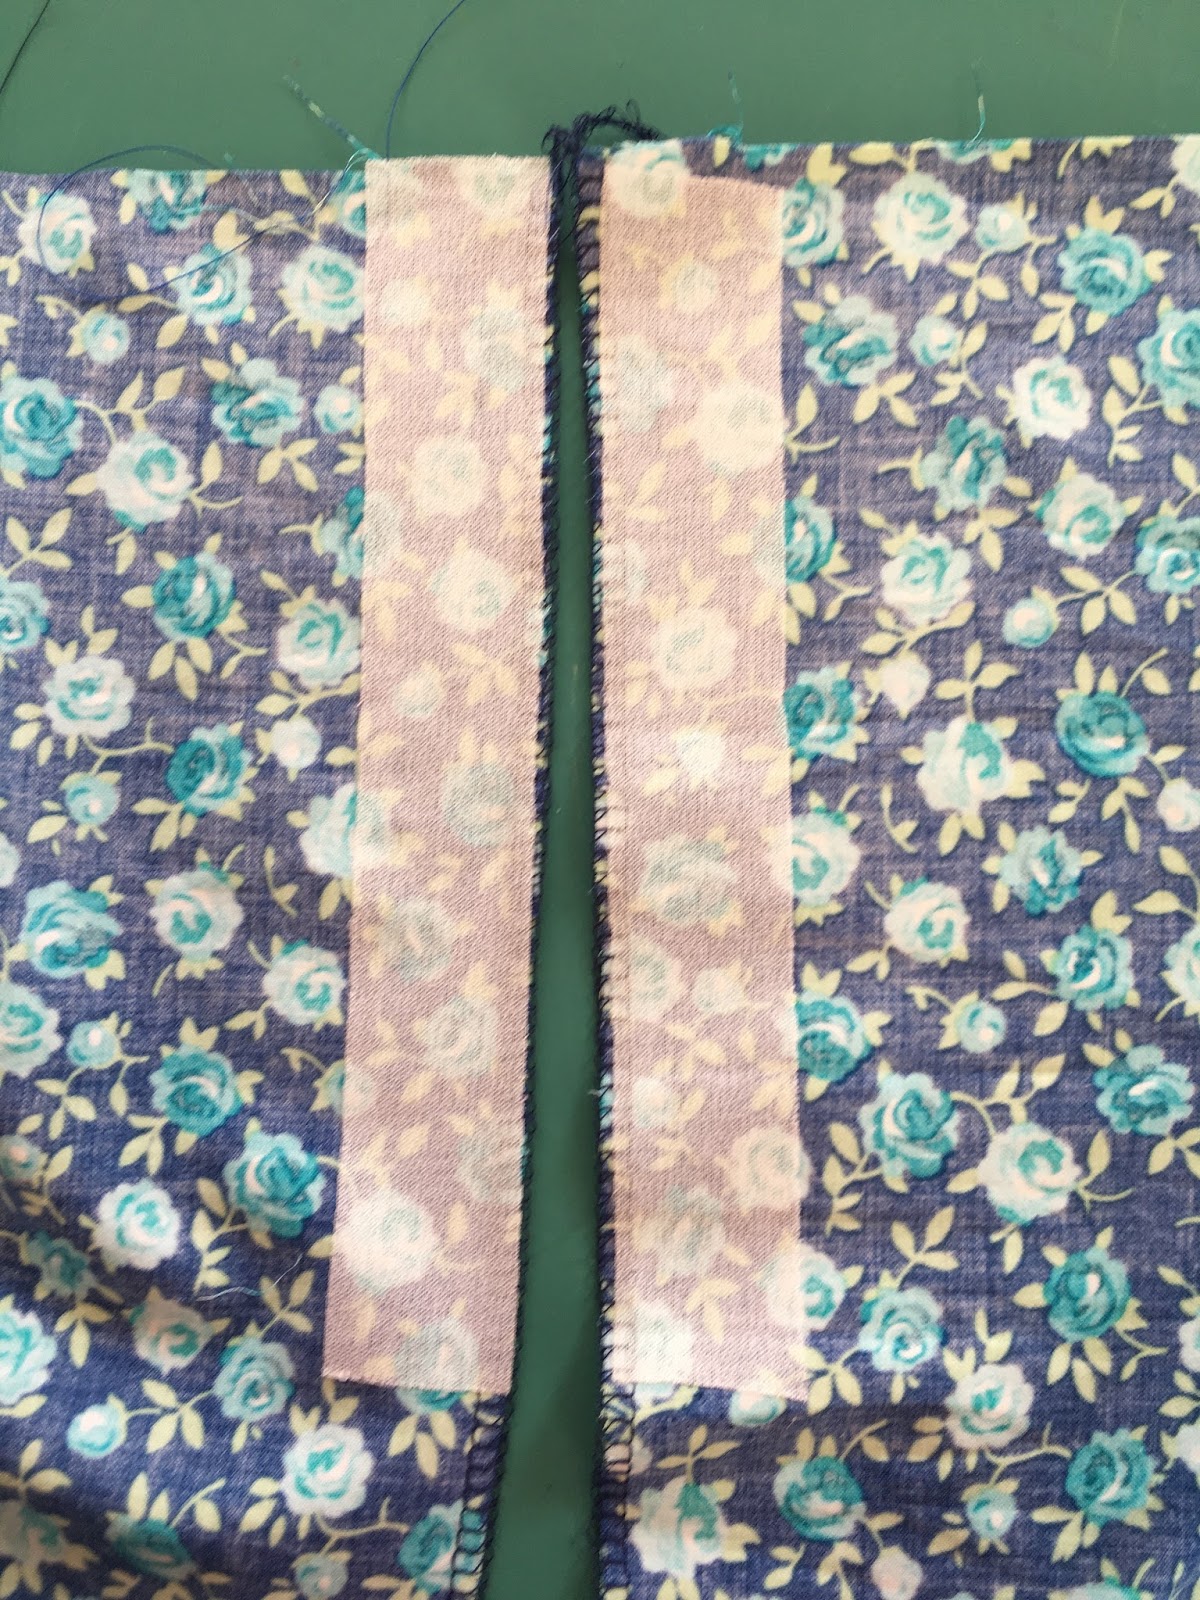 Stitch the back skirt pieces together, right sides together, at the center back seam, ending at the zipper circle mark.
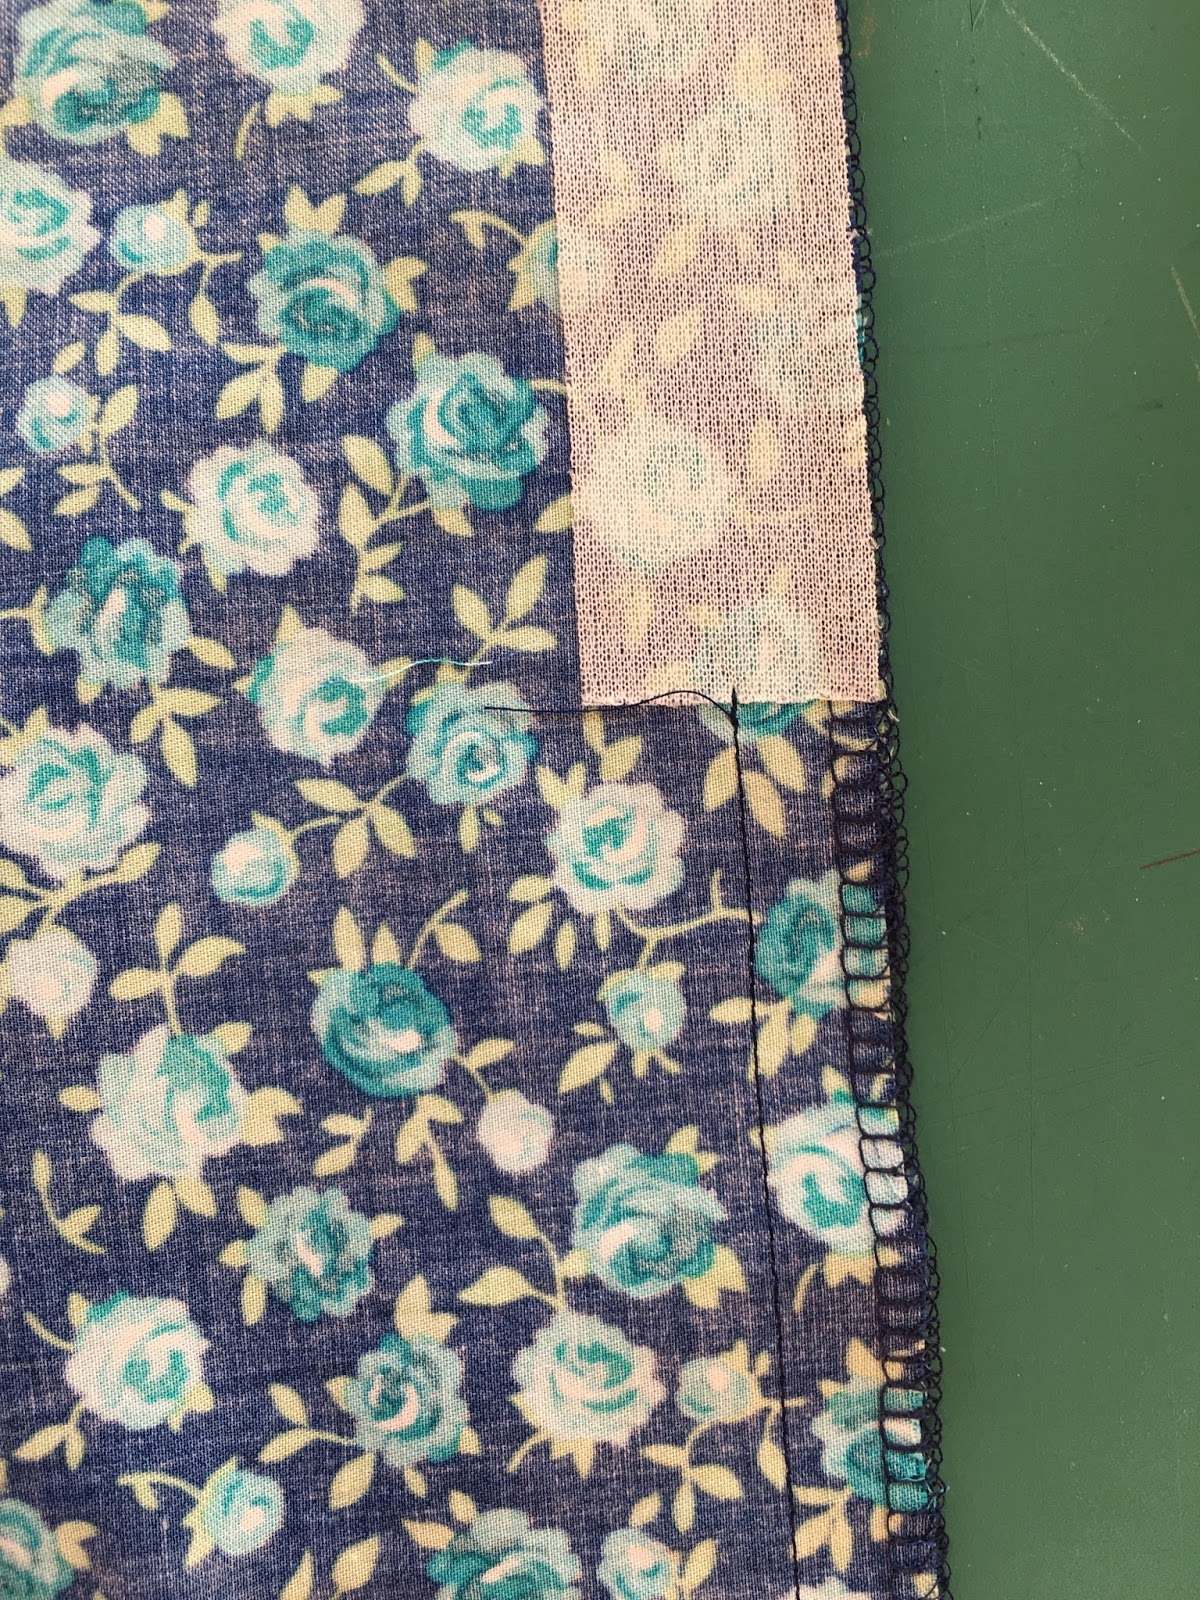
 Press this seam open.
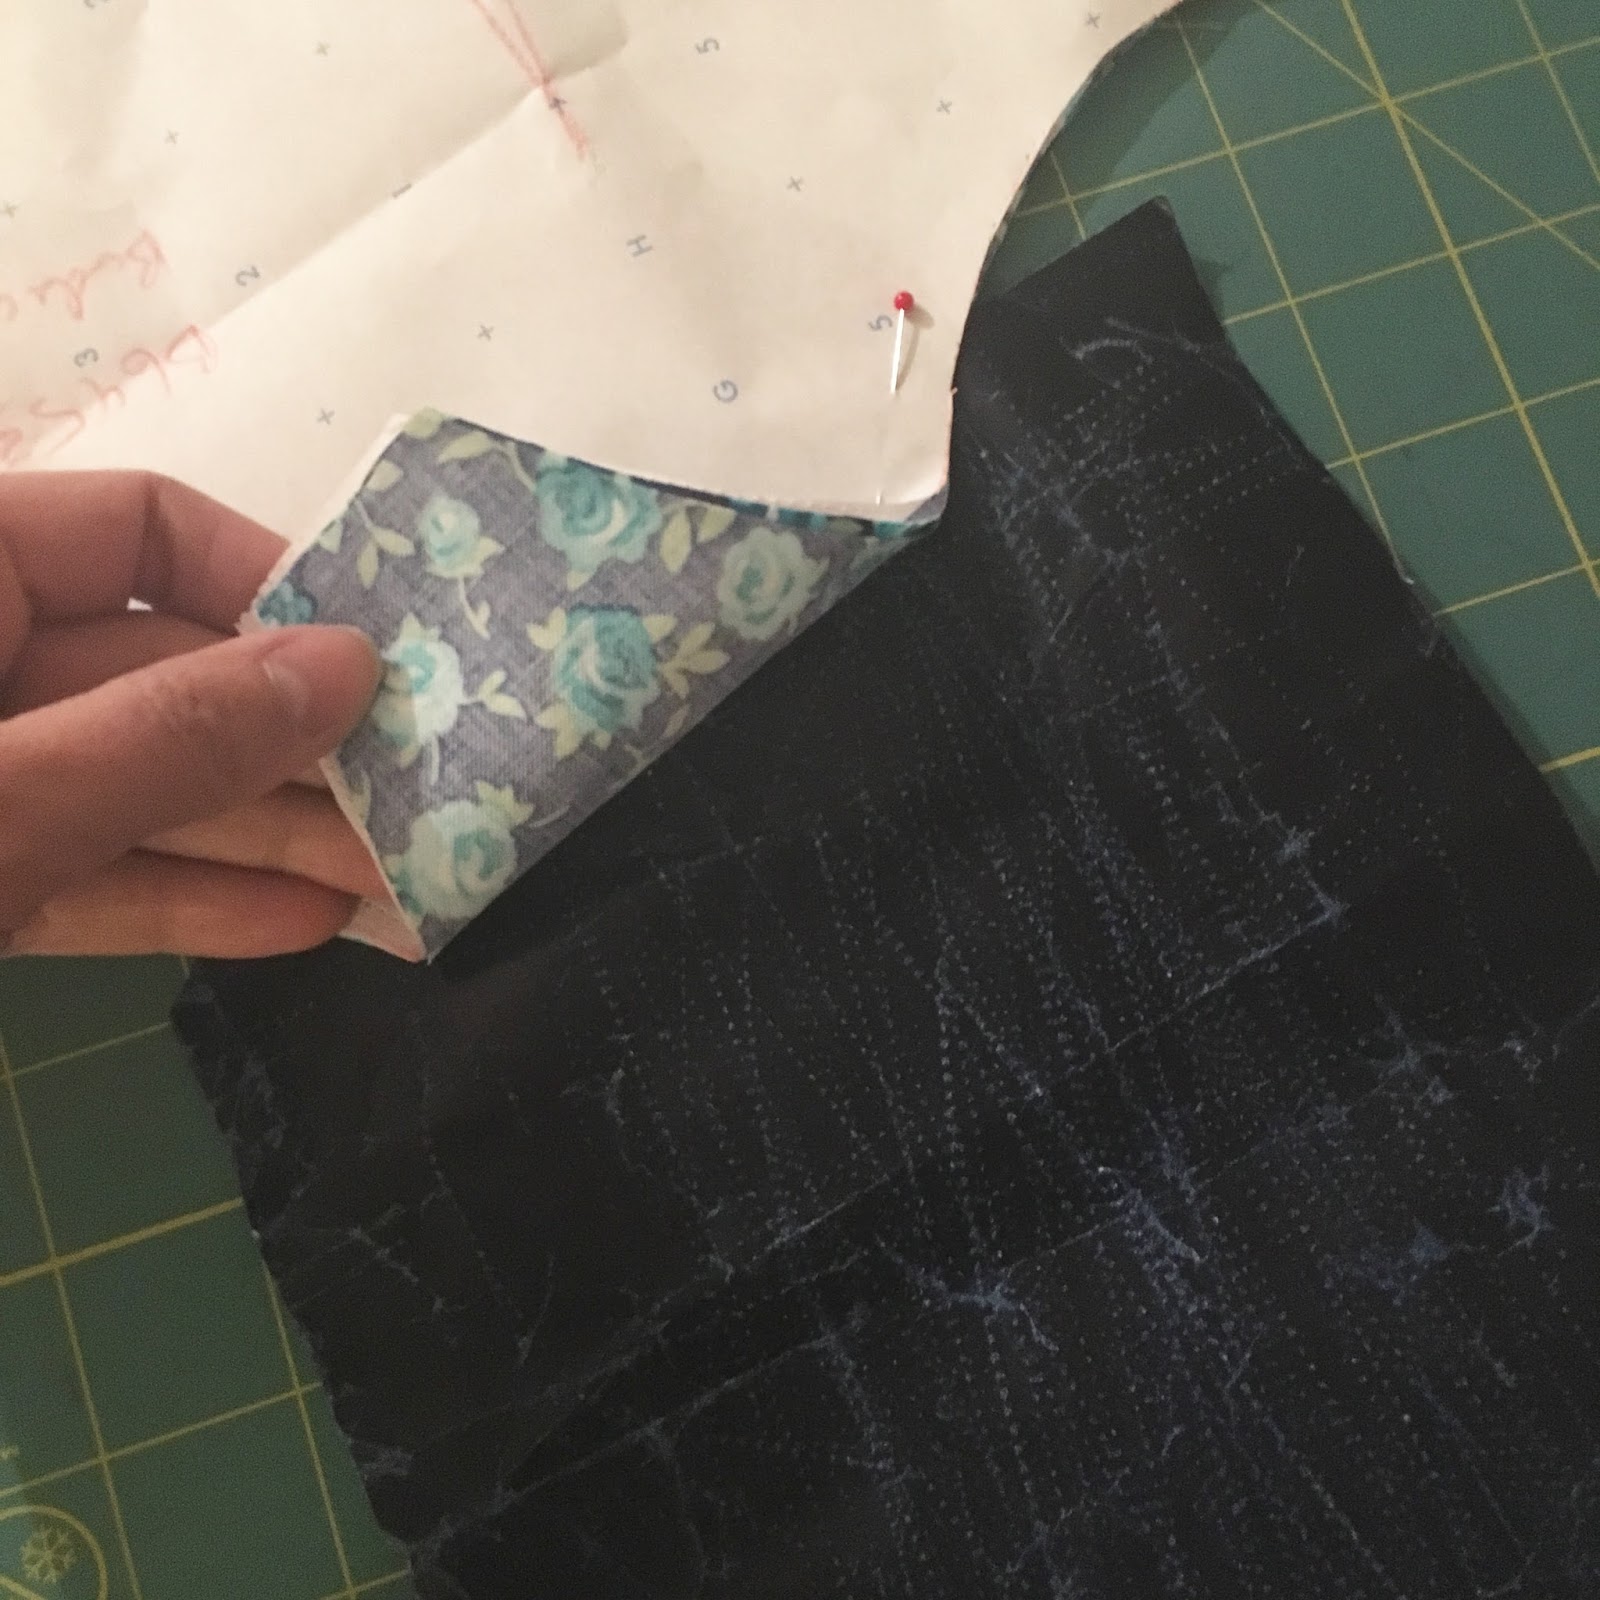
 Now it's time to attach the pockets. You have four pocket pieces. With right sides together, pin the pockets to each skirt side seam, on the front and back skirt. There is a notch to help you match these pieces. Stitch the pockets to the skirt pieces using a 1/4" seam allowance.
 Press the pockets so they're flipped away from the skirt. The seam allowances should be facing the pockets.
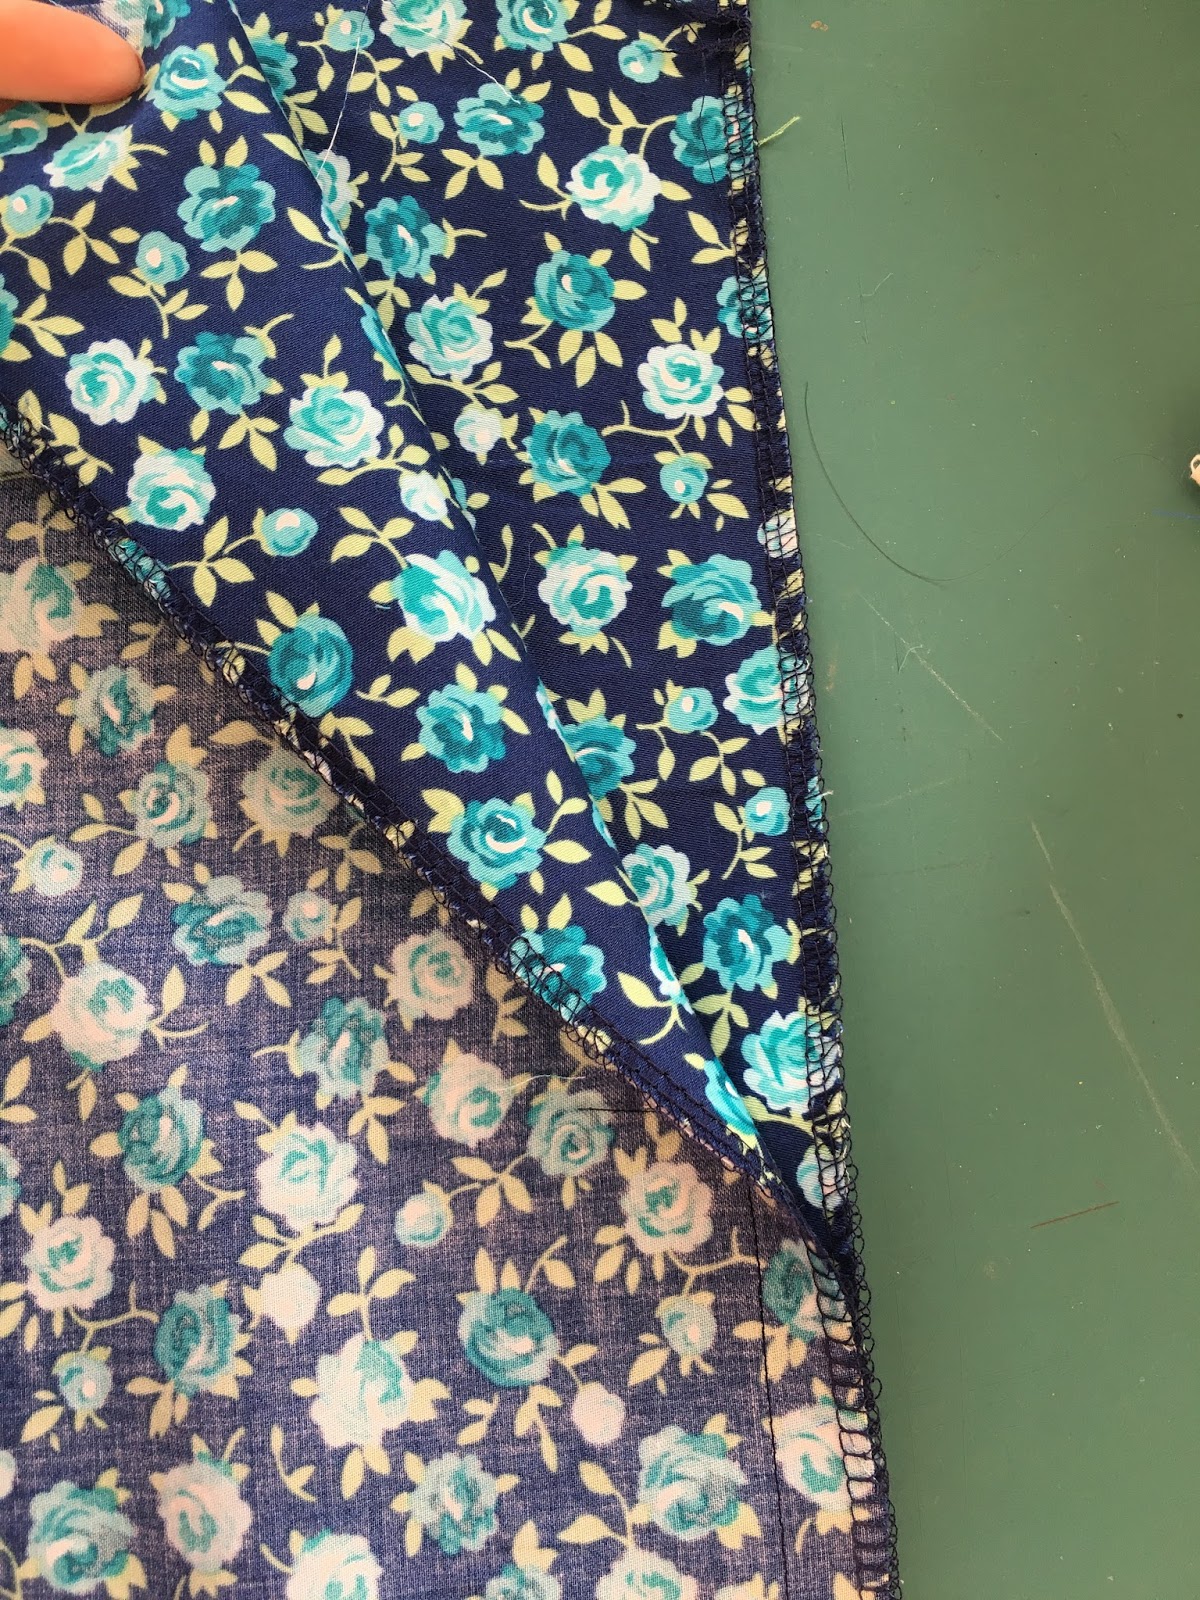
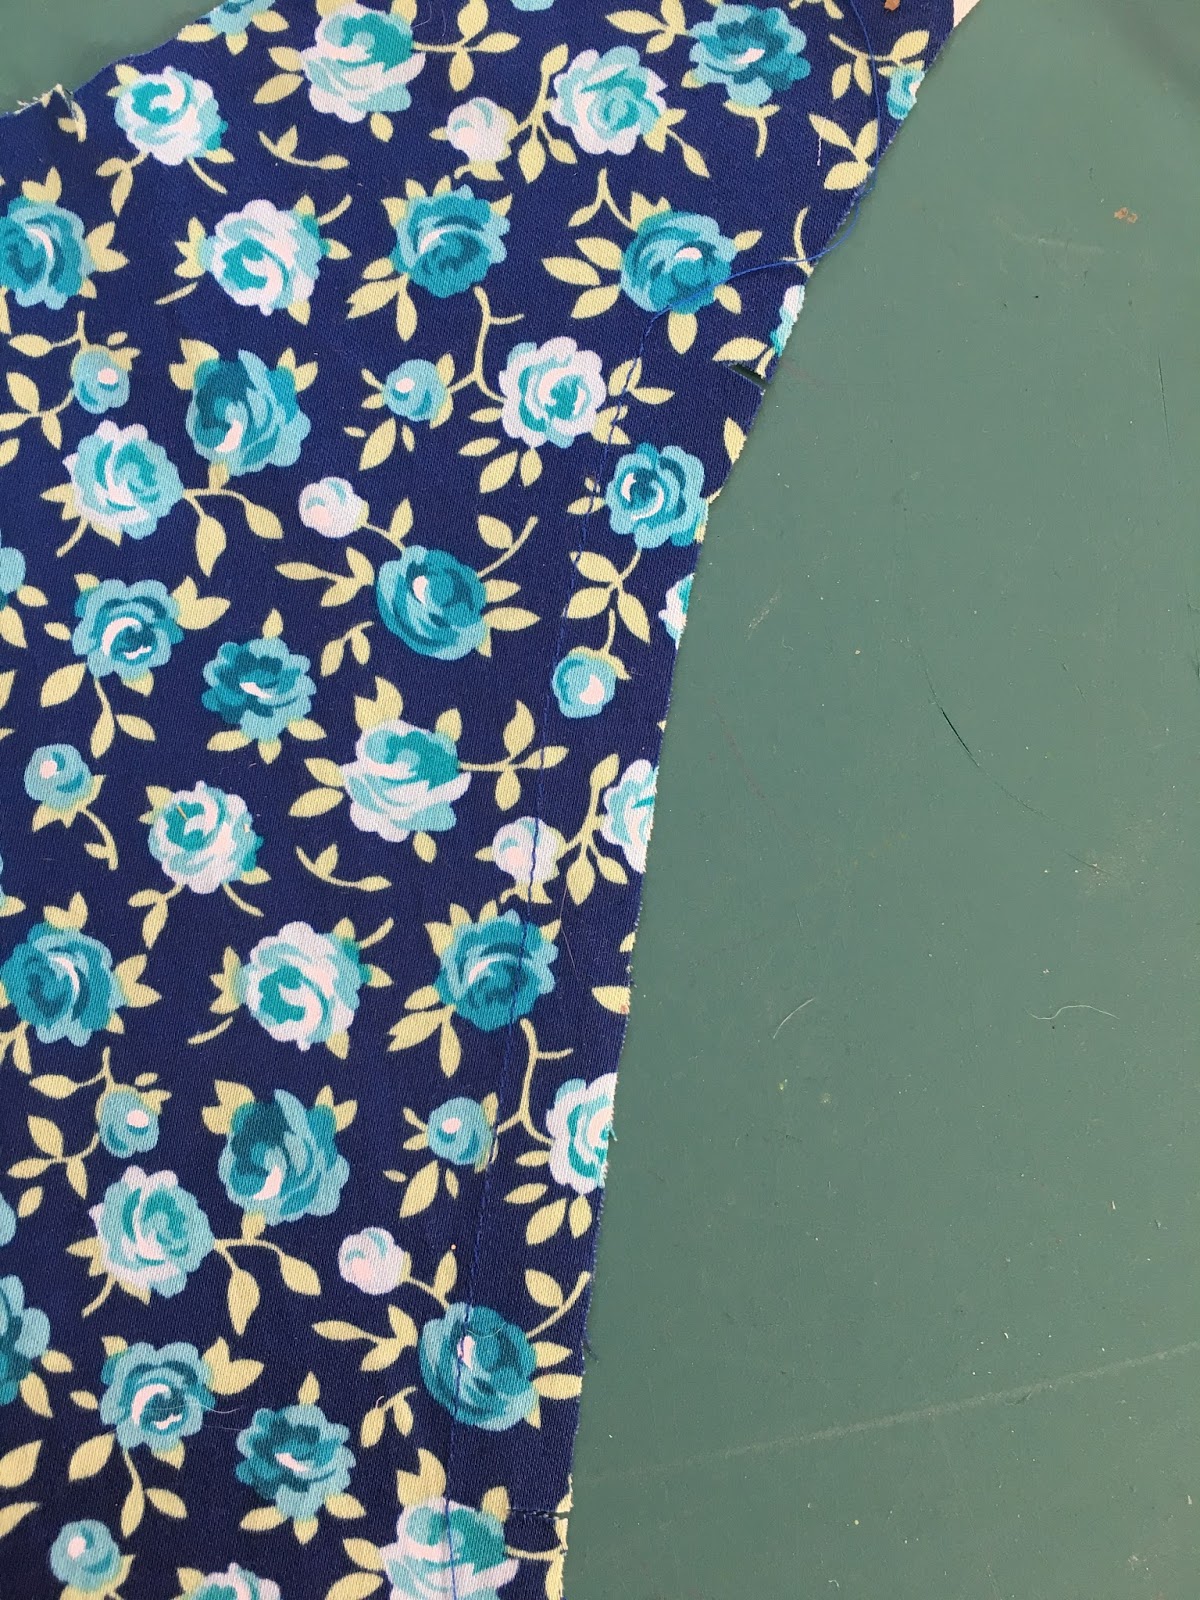
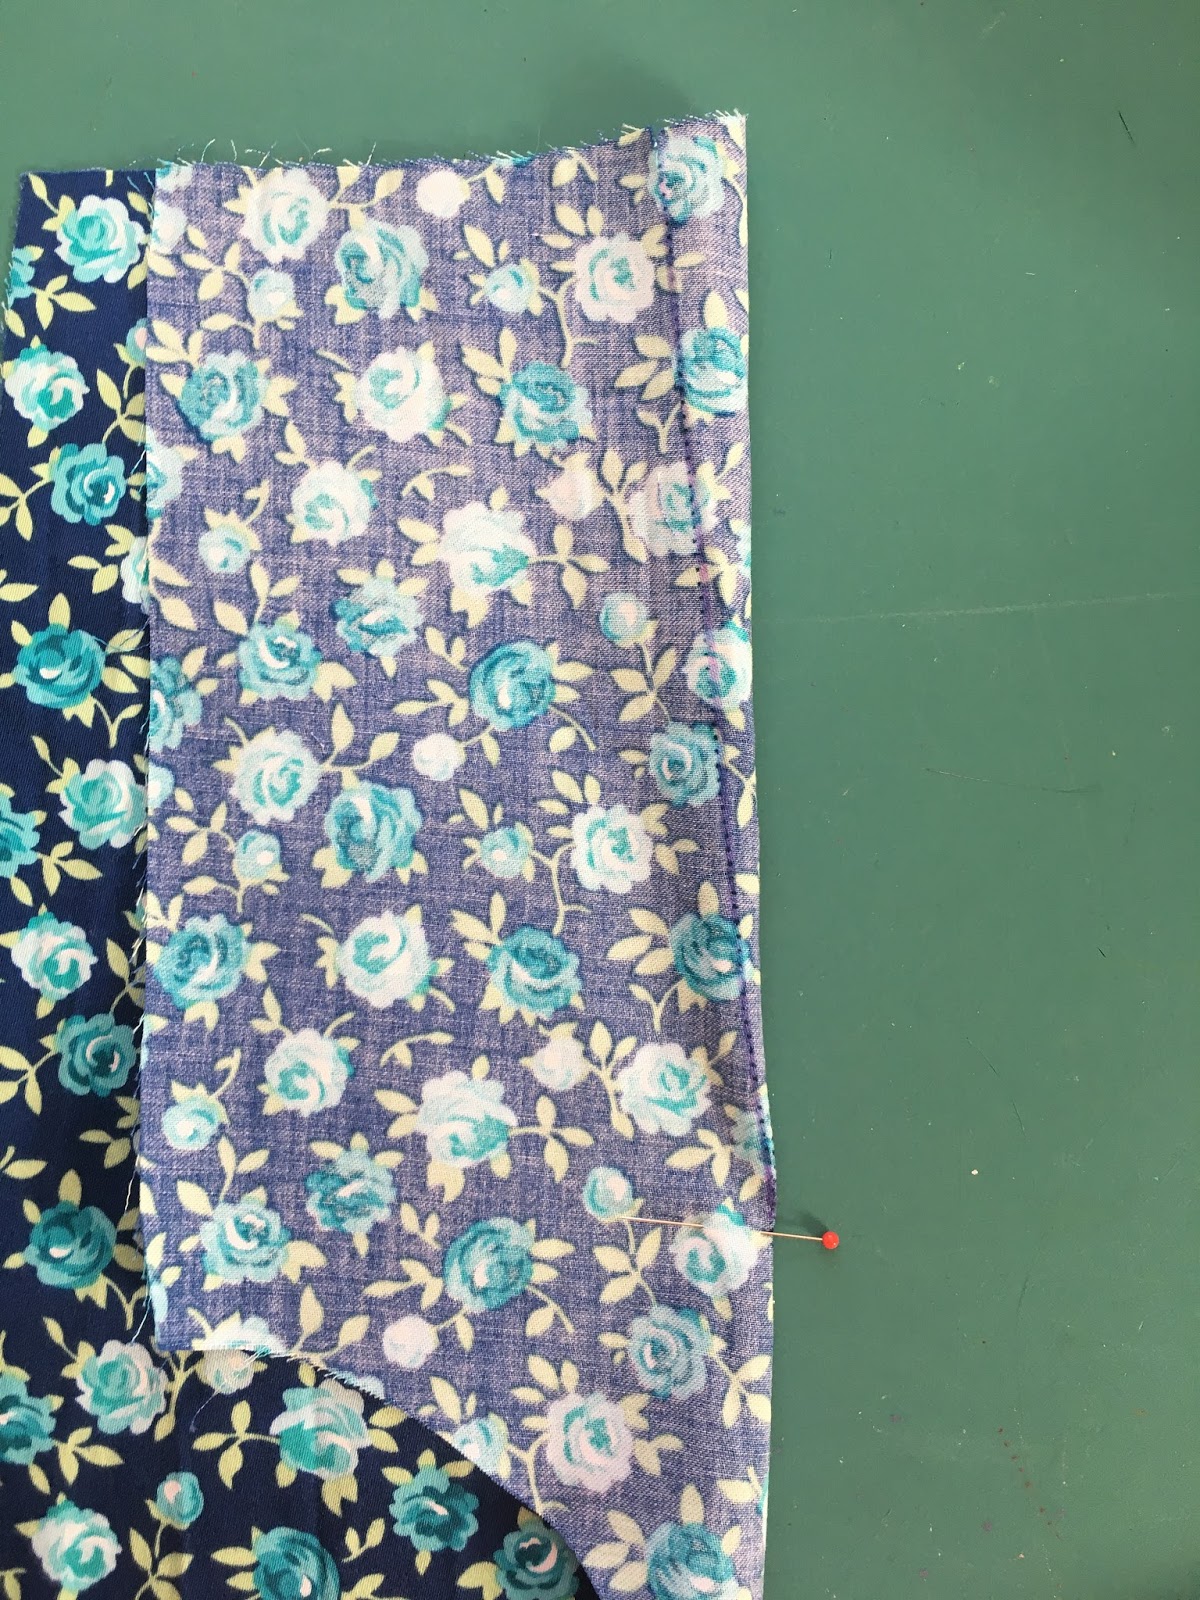
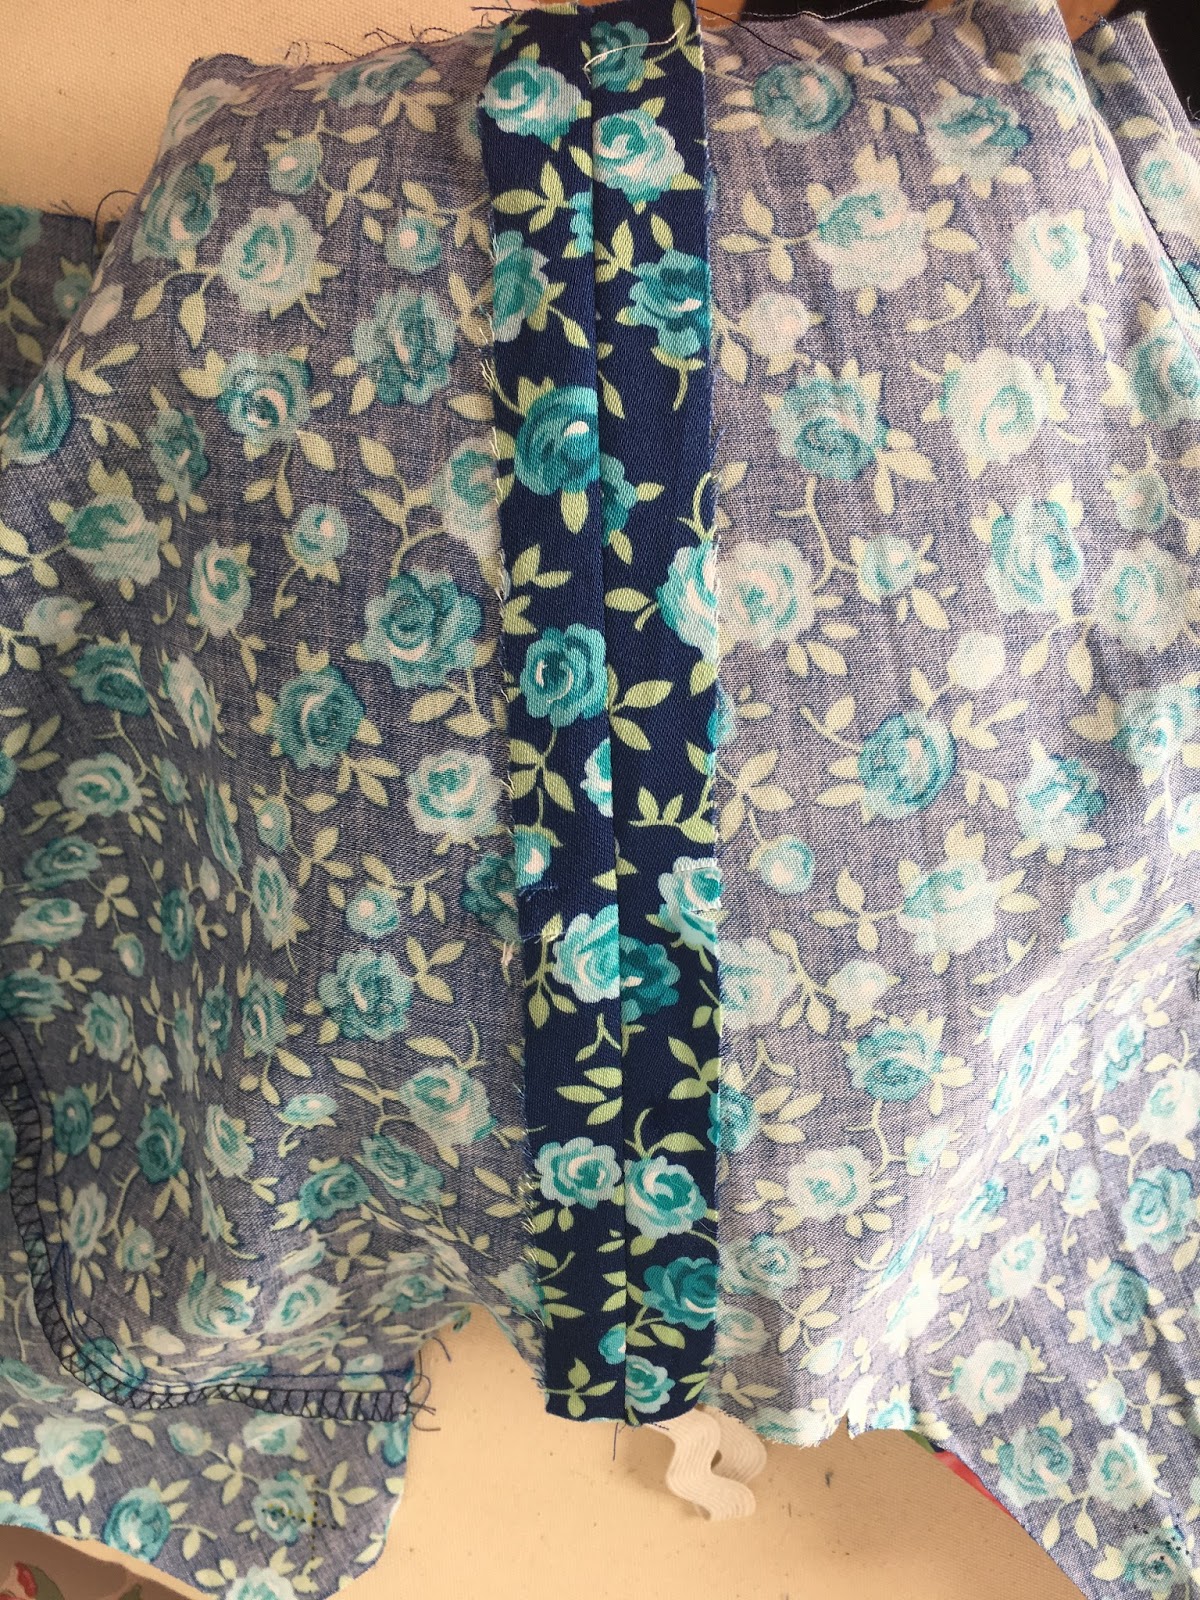
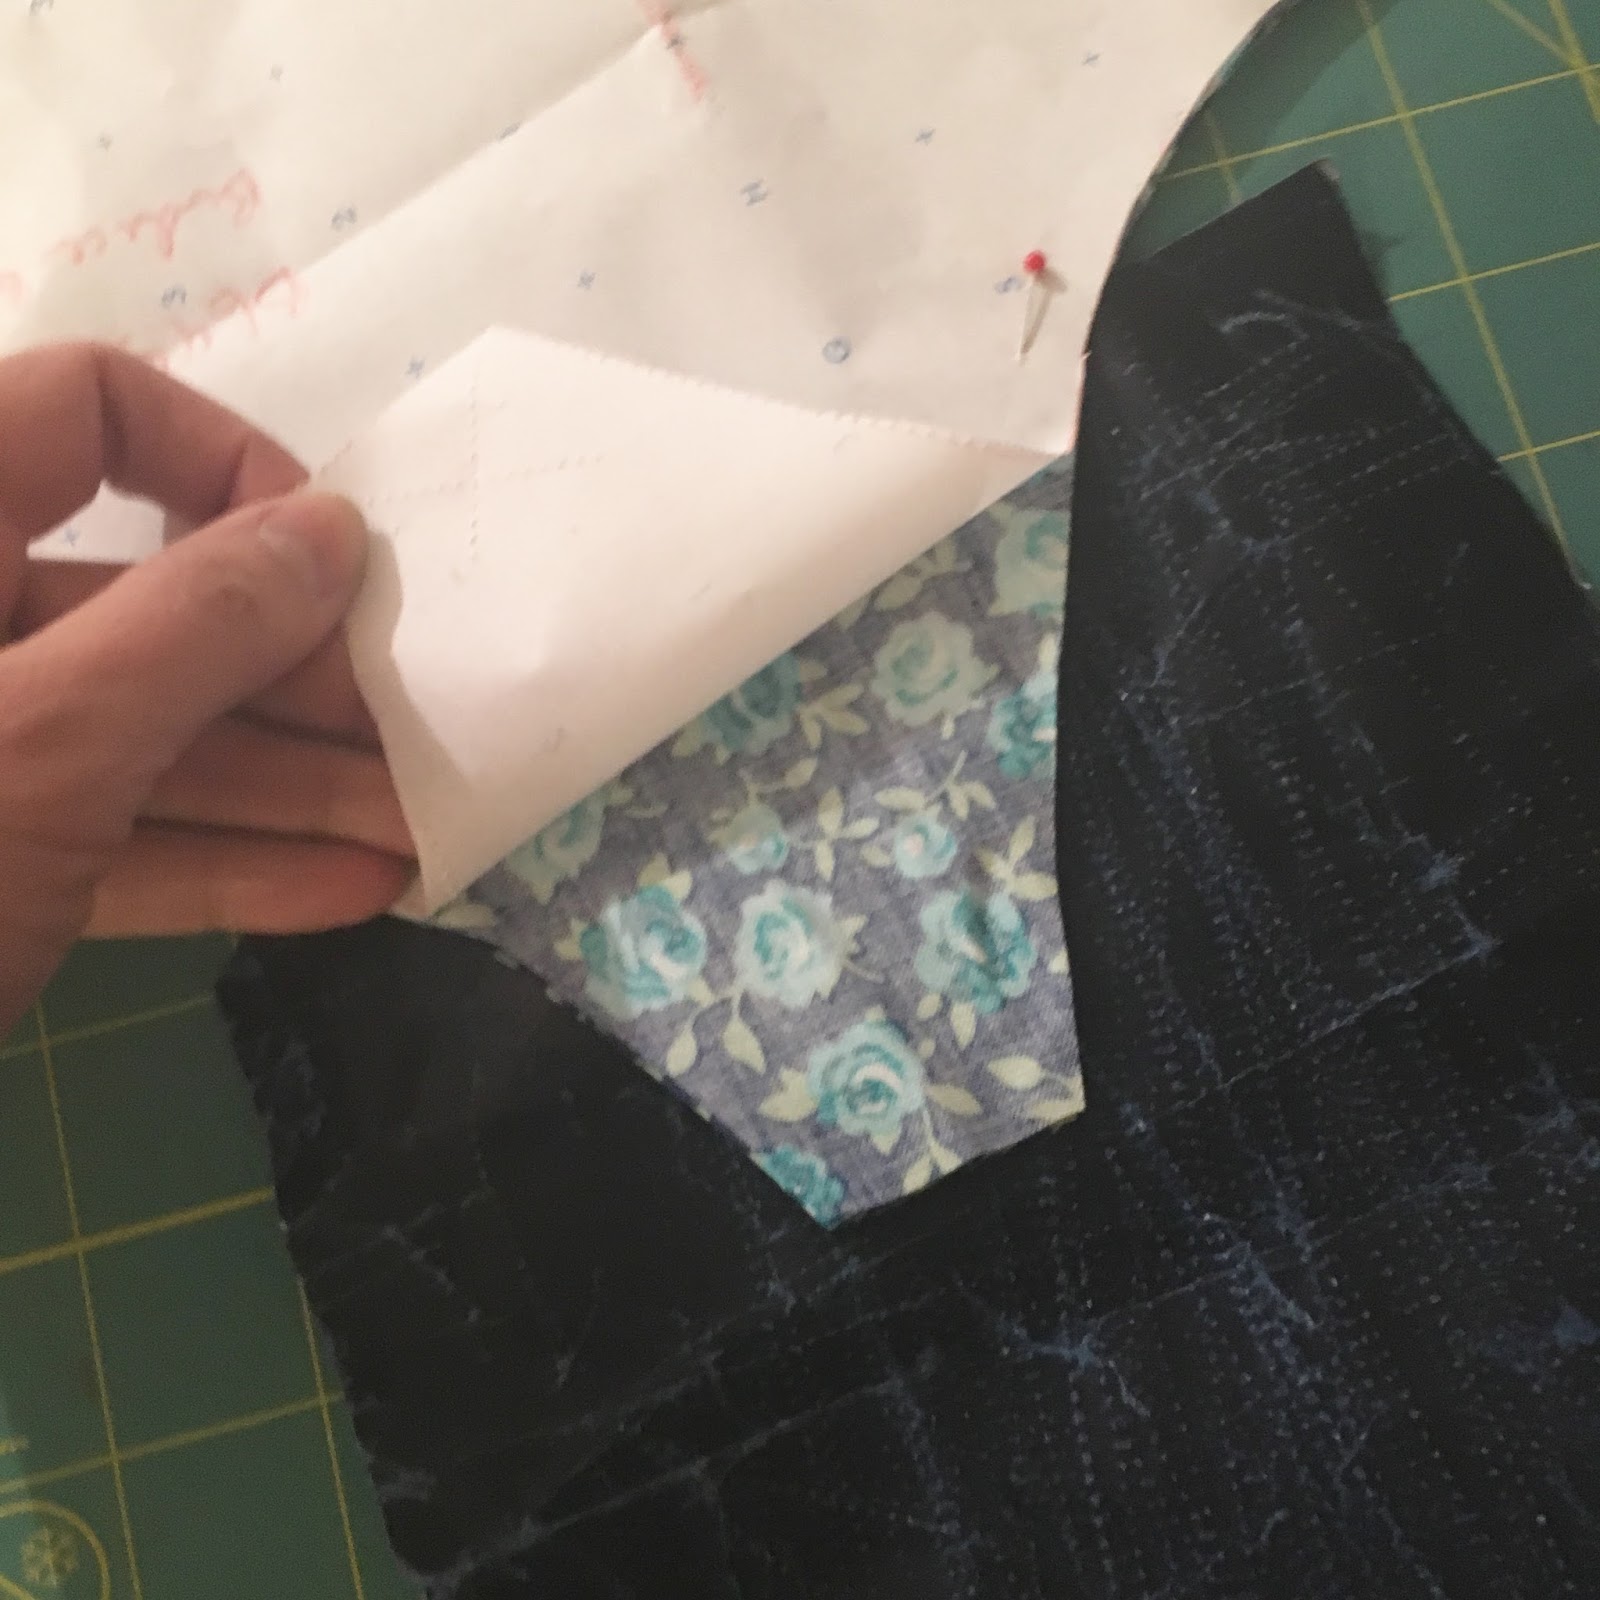
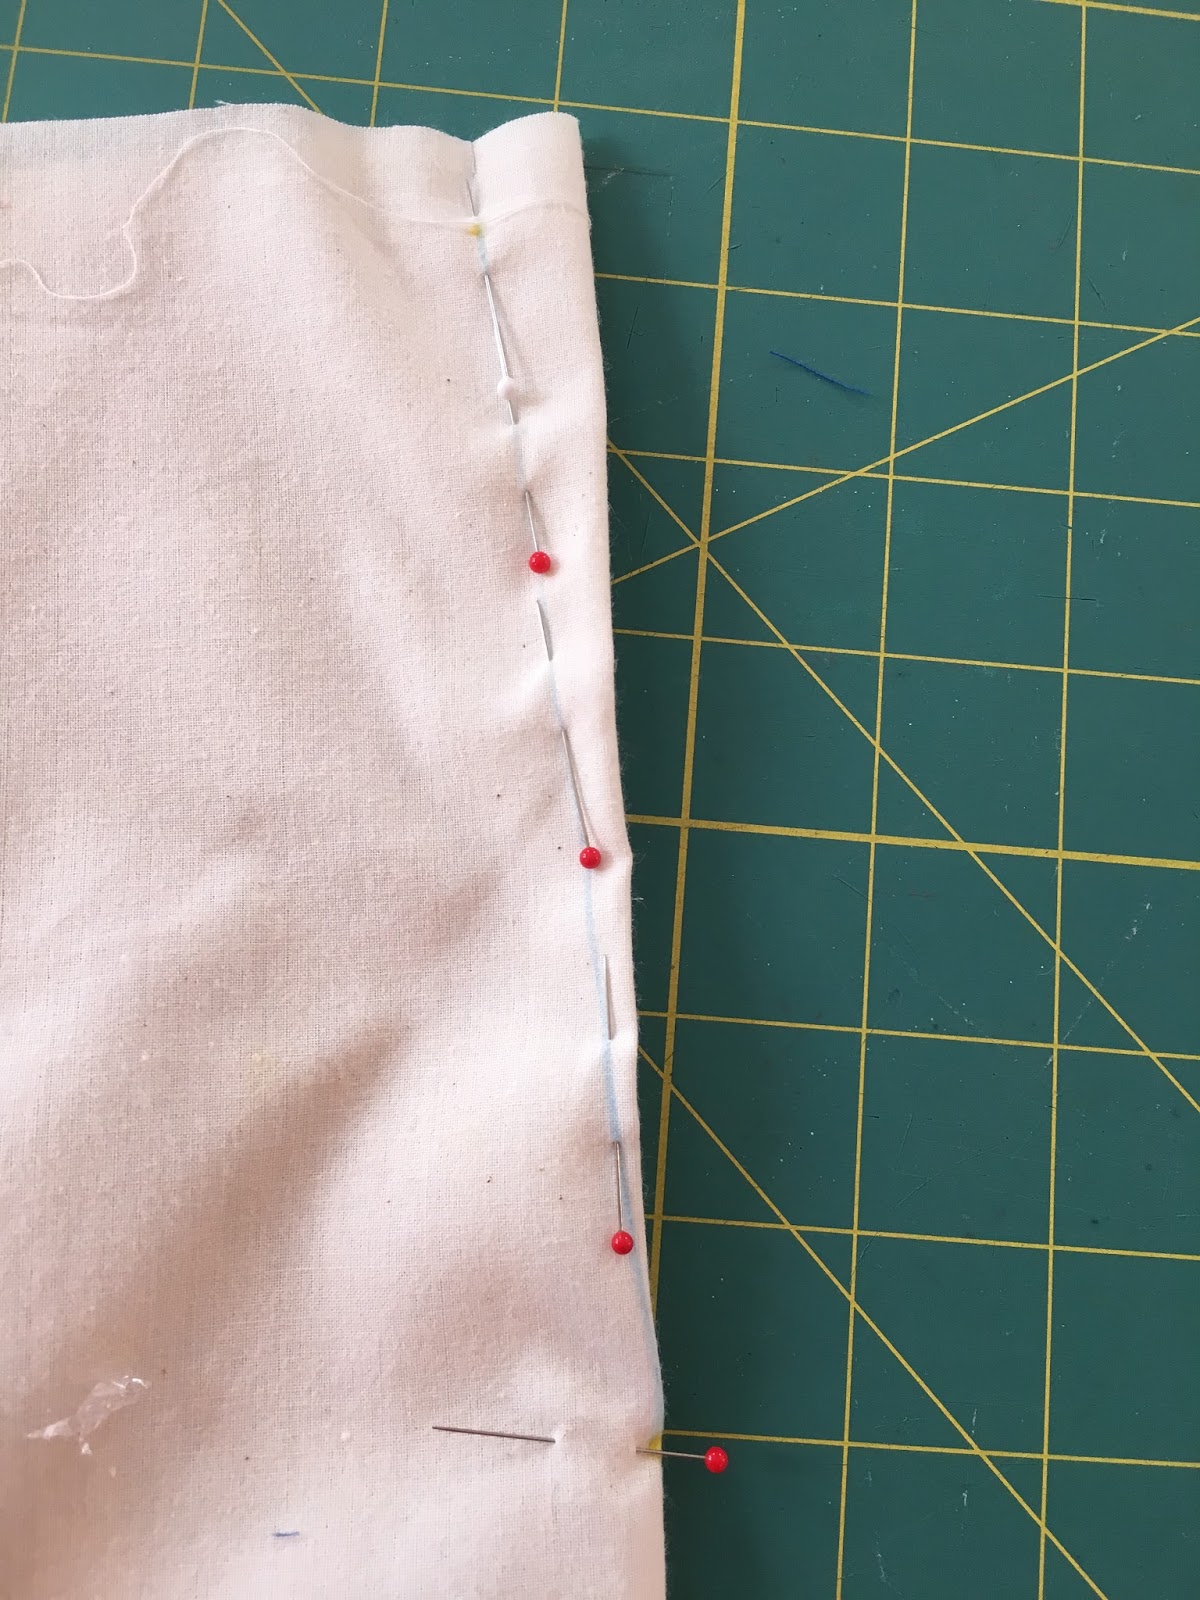
Next, sew the skirt front to the skirt back using your regular 5/8" seam allowance, right sides together. Pivot at the circles above at the top and bottom of the pockets, stitching around the outside of the pockets.
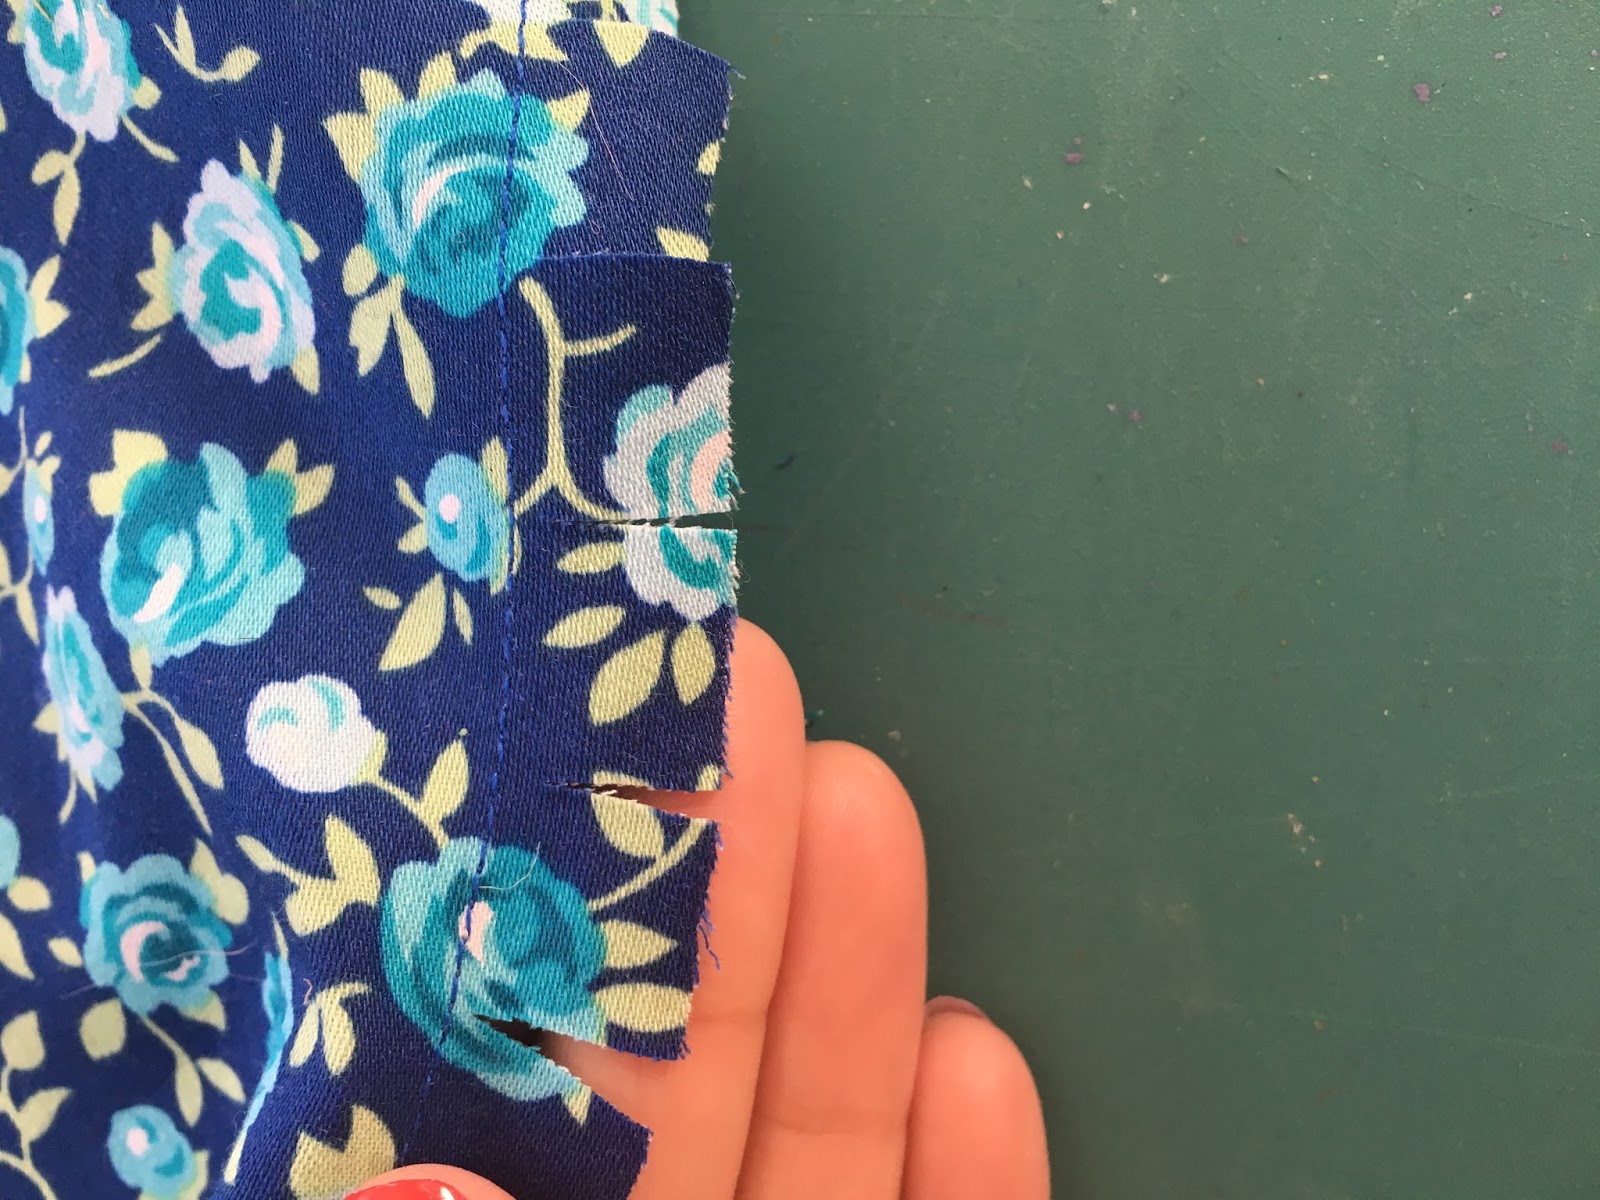
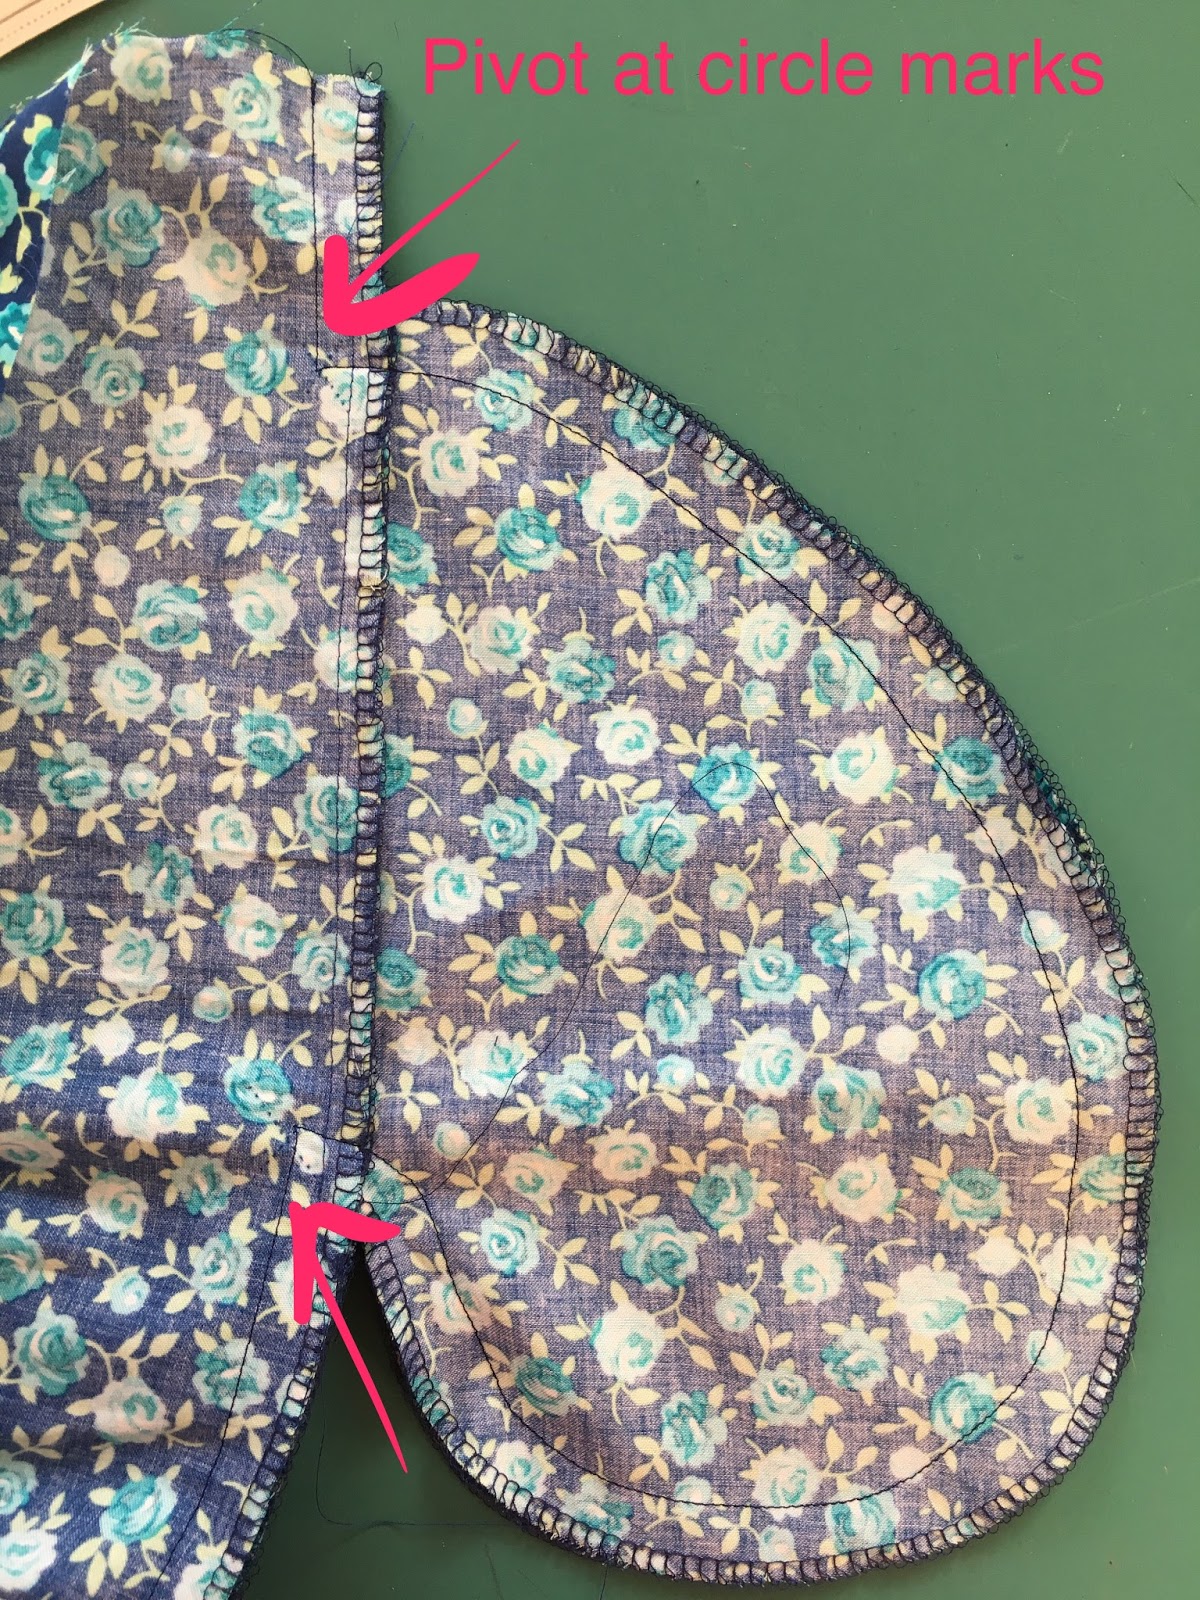 Clip into the back seam allowances only at the top and bottom of the pockets, up to the circle marks where you pivoted.
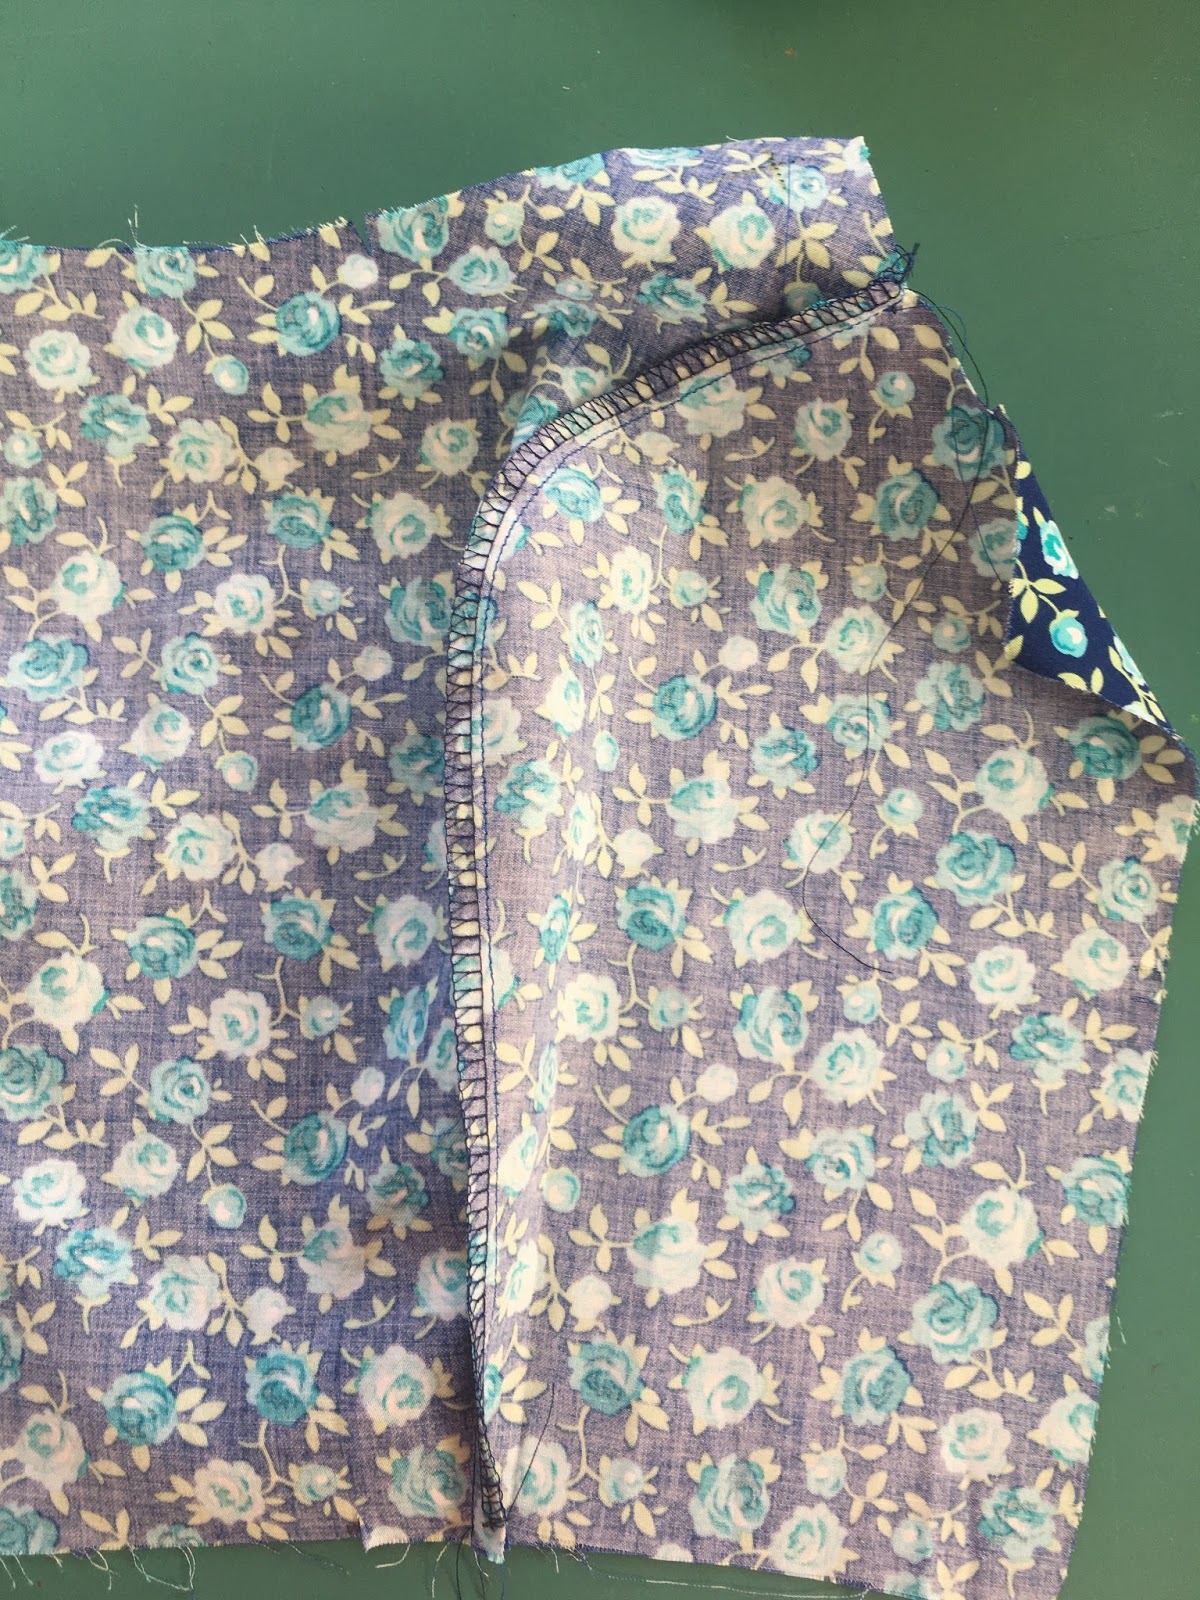
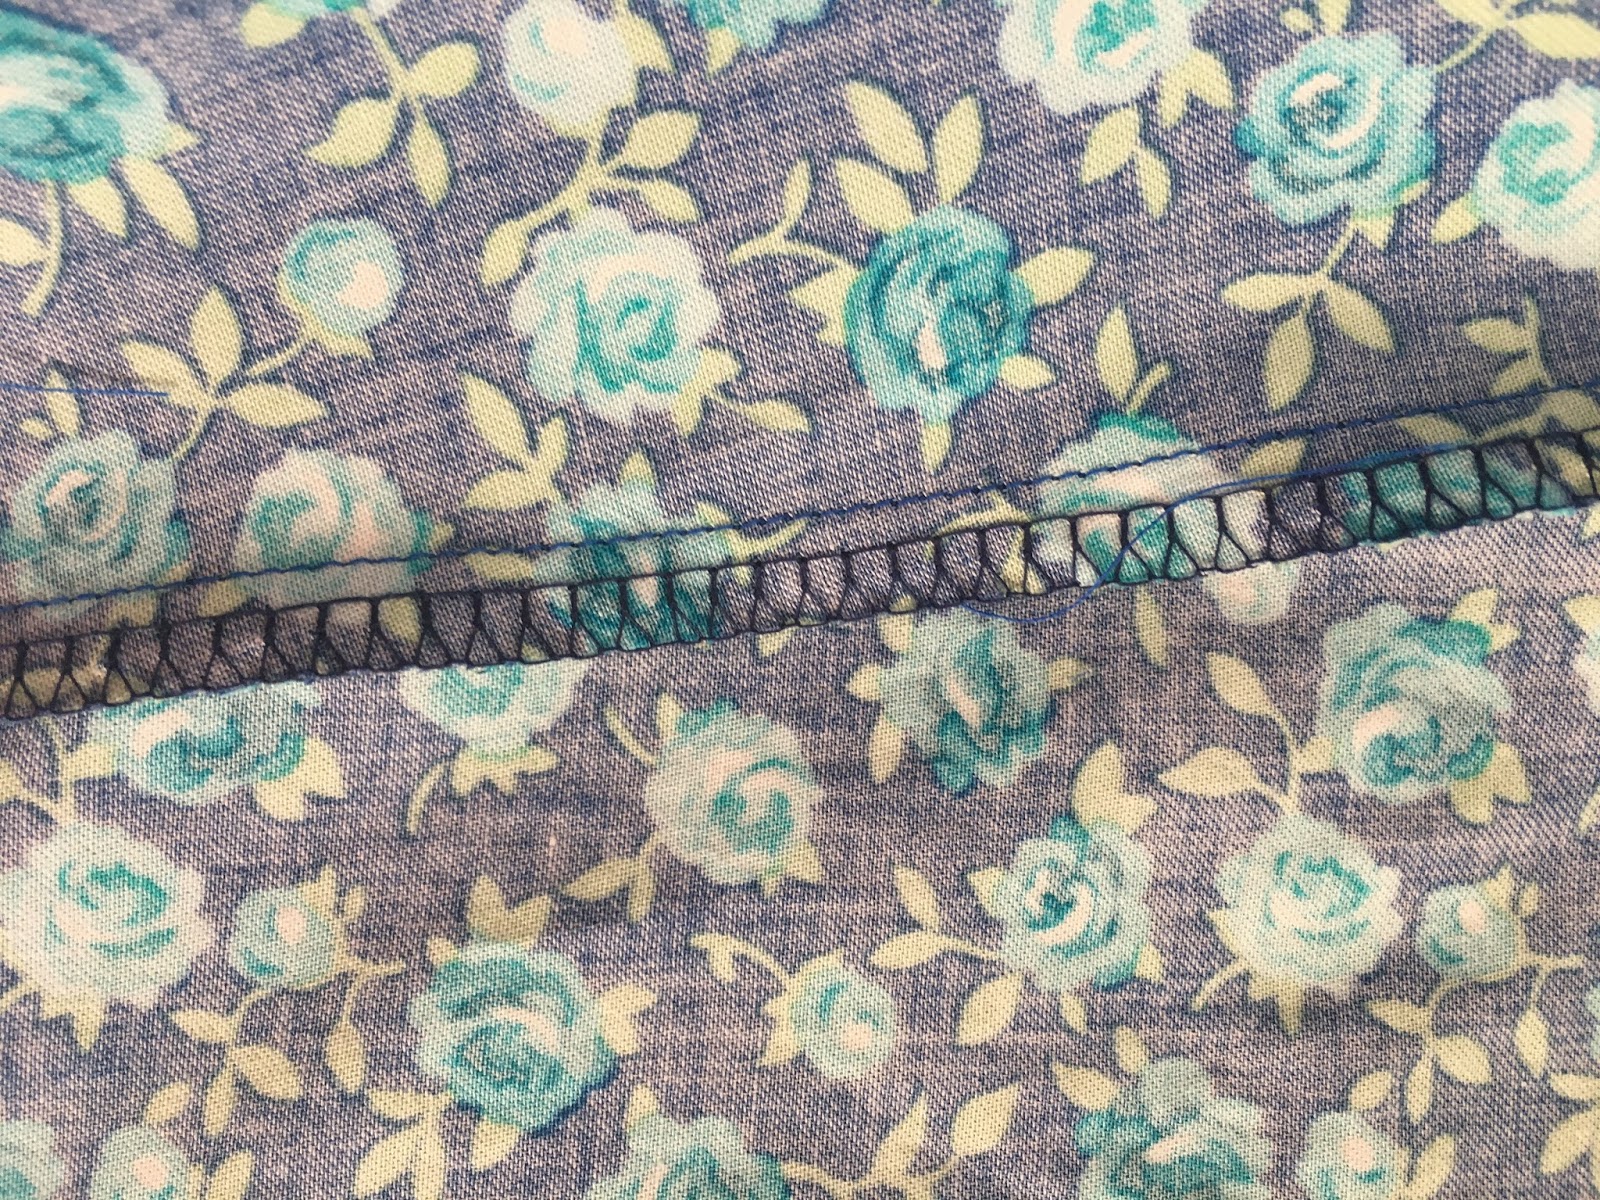
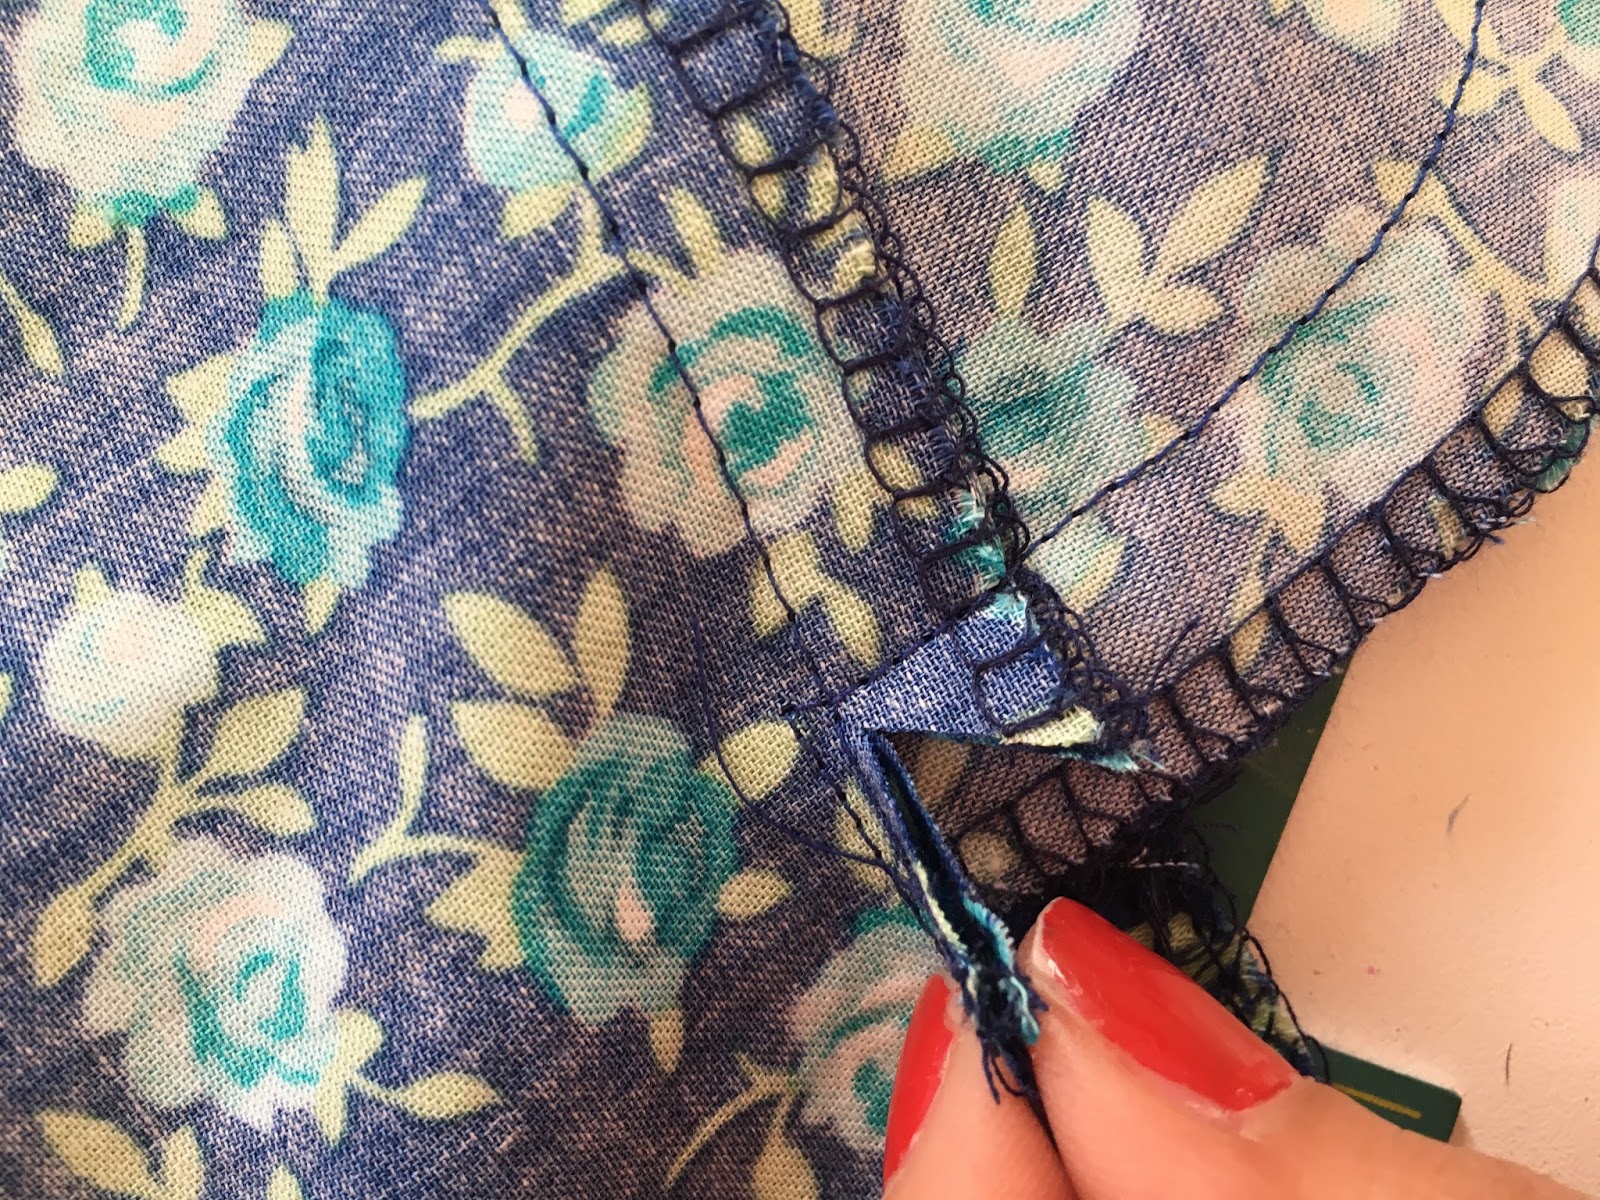 Press the side seams of the skirt open and press the pockets to the front of the skirt. (Those clips you made allow you to press the pockets to the front while pressing side seam allowances open.)
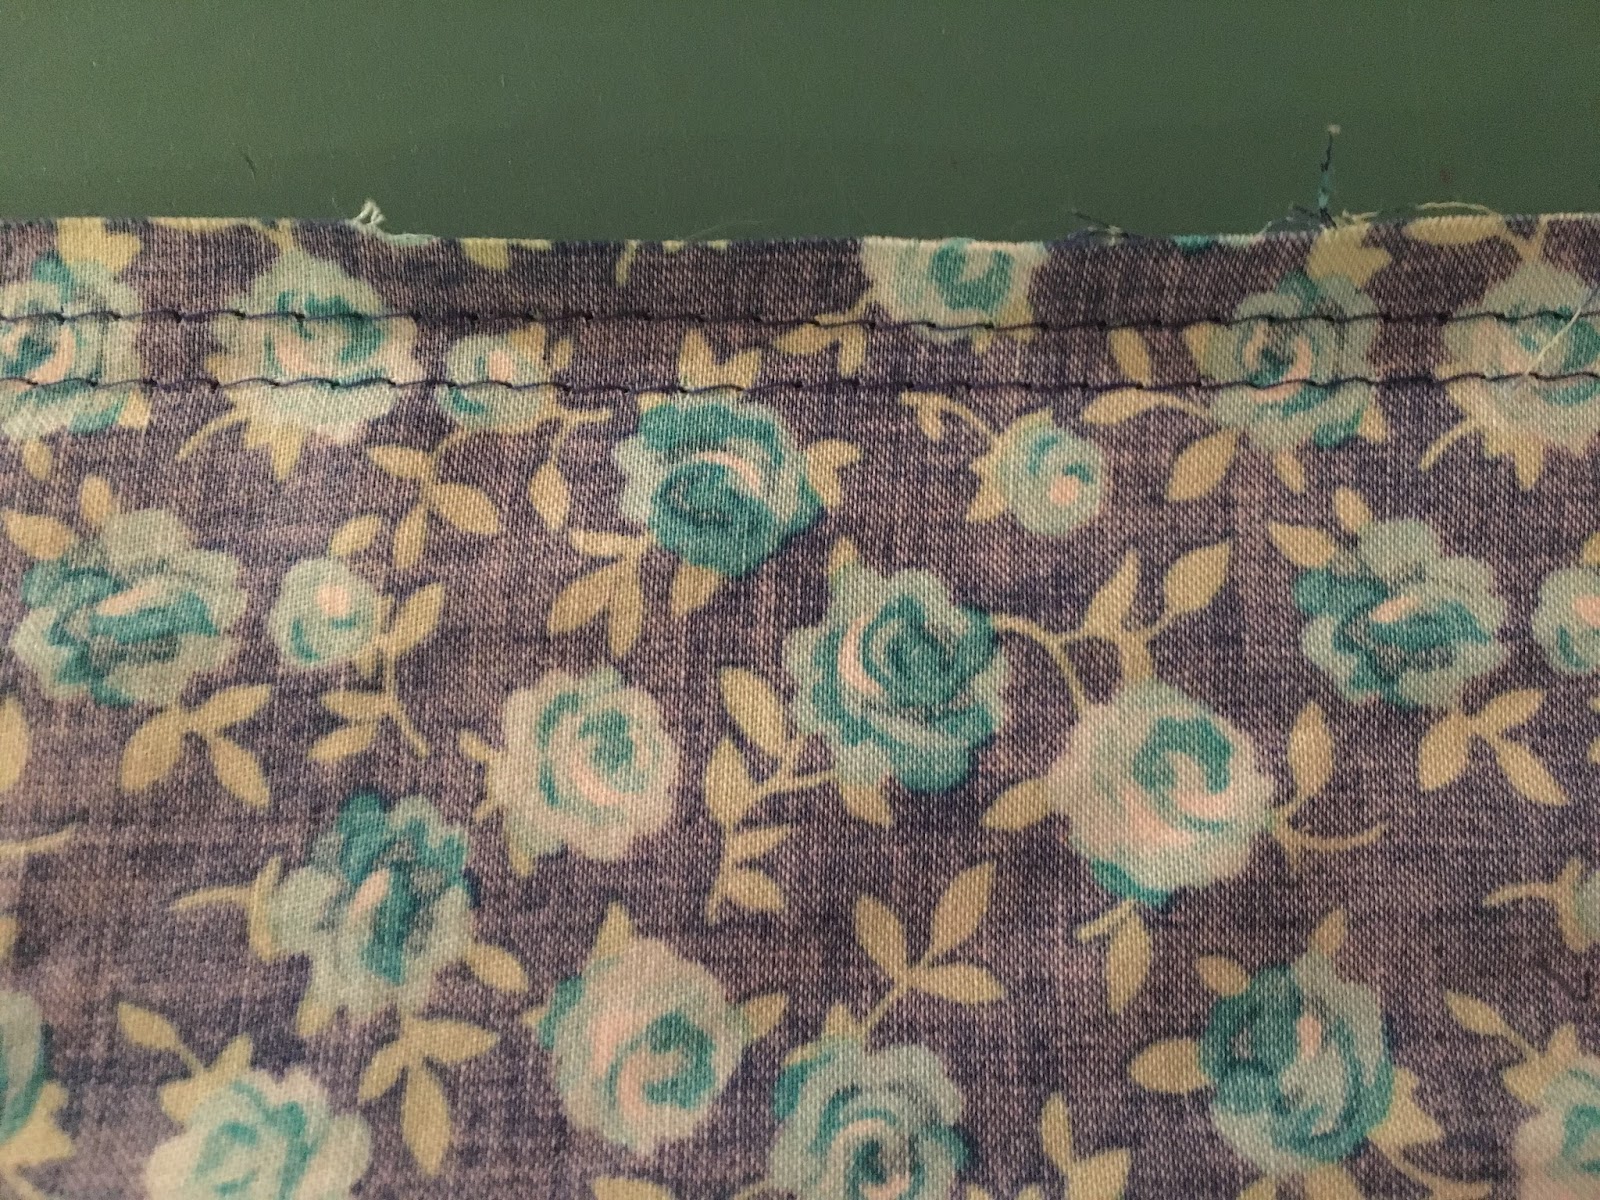
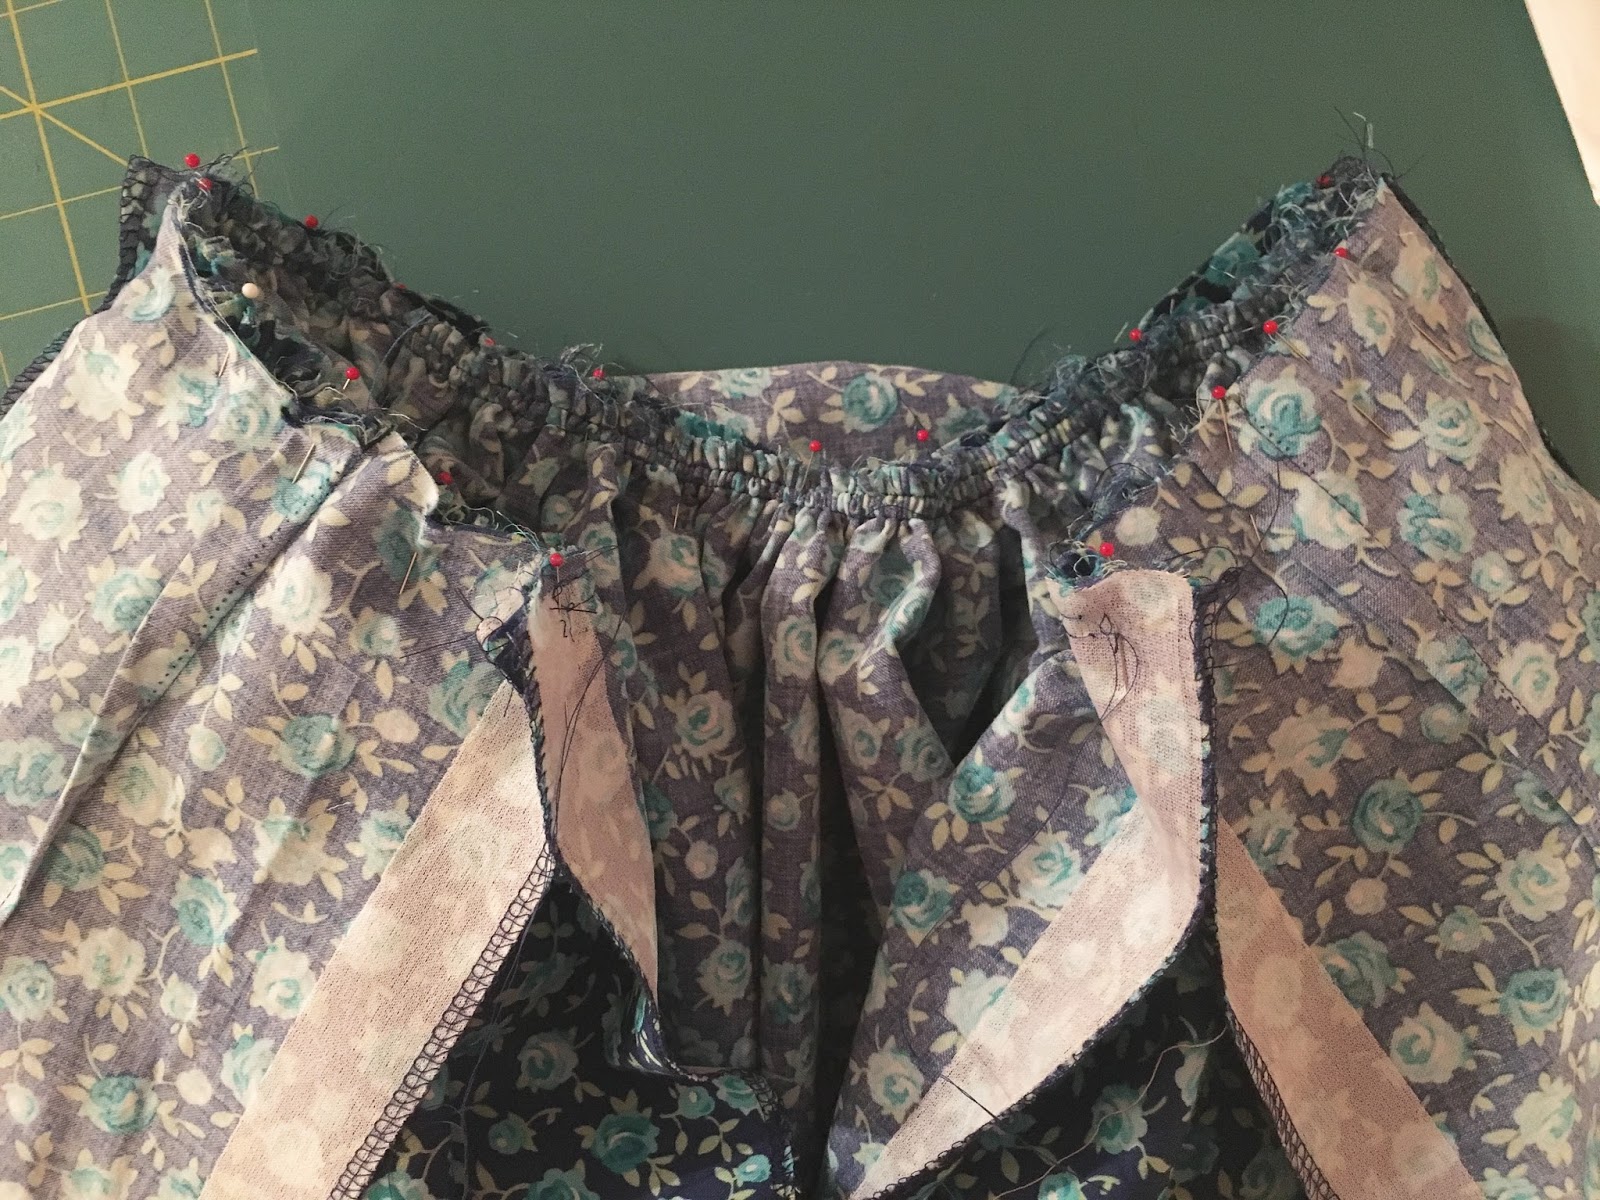
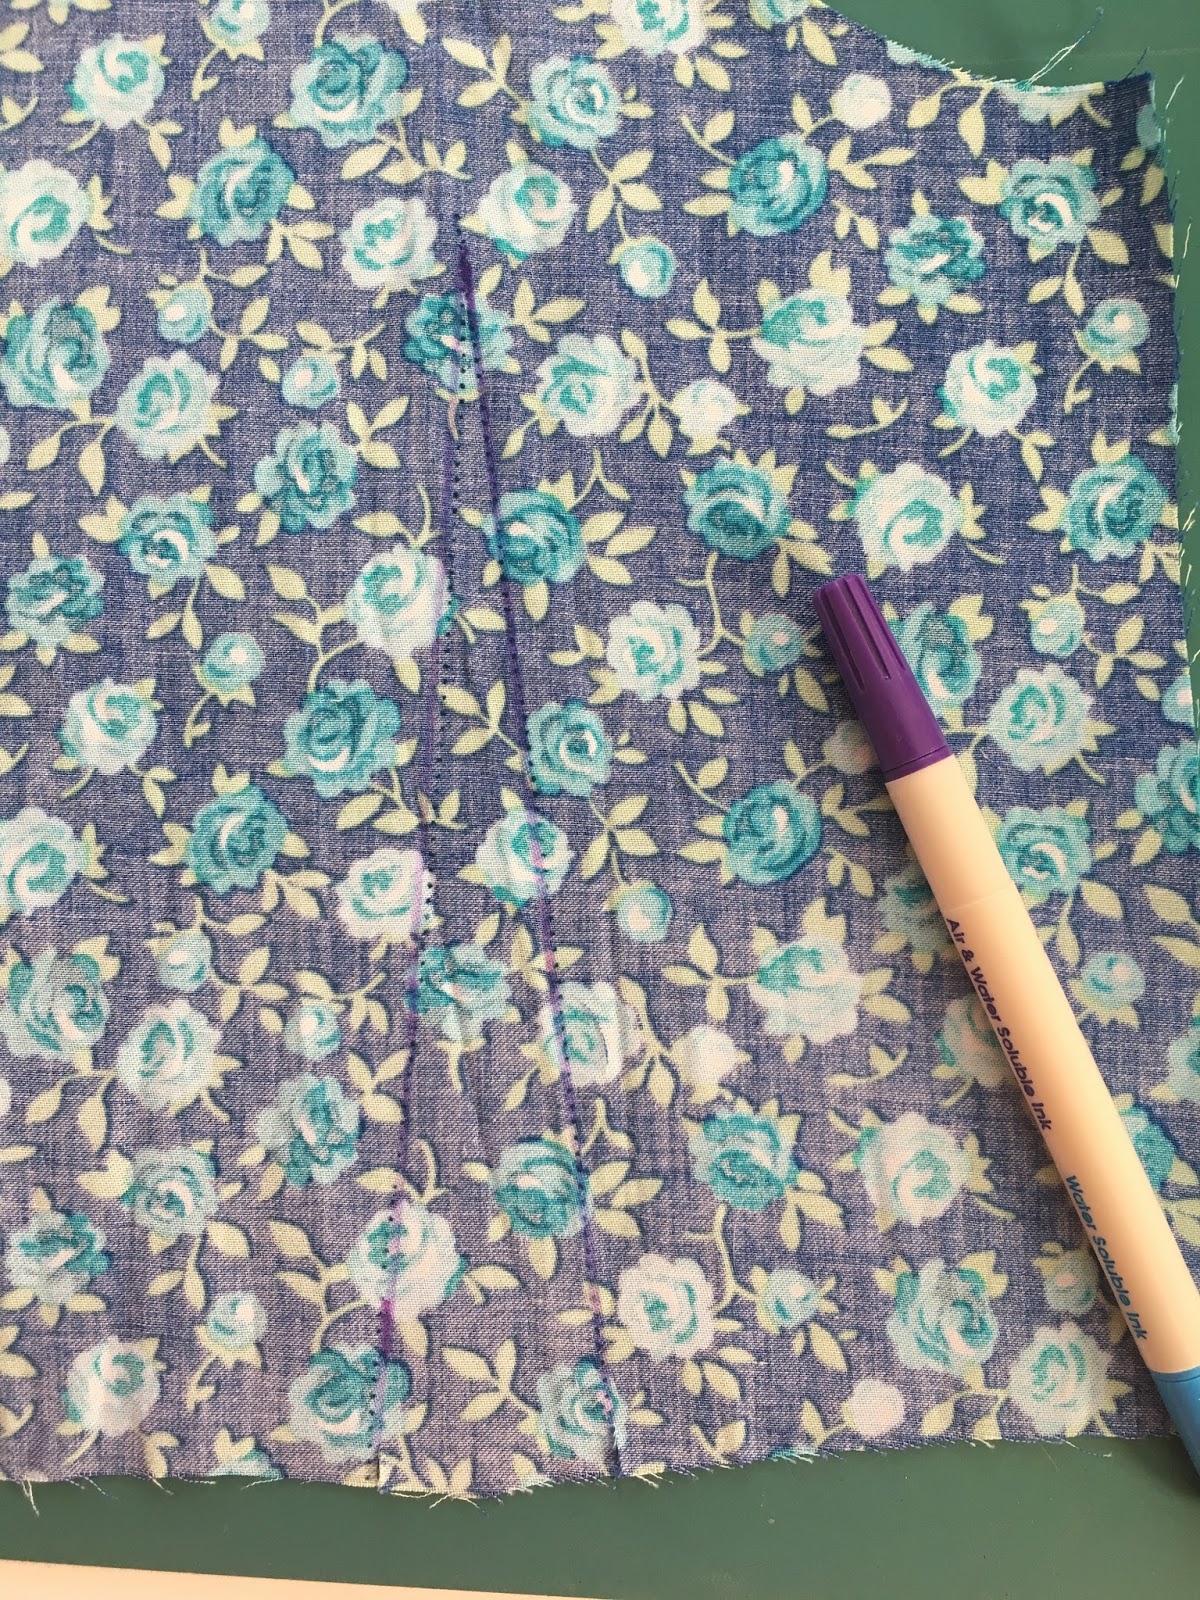
Time to gather the skirt! There are lots of different ways to make gathers (in this video skirt tutorial I show you how to use dental floss!) but here I'm using the traditional method of doing two lines of basting stitches. The first line is at 1/2" seam allowances, and the second line is at 1/4". This method works well for thin and soft fabrics like this sateen. Start your basting stitches at the small circles.
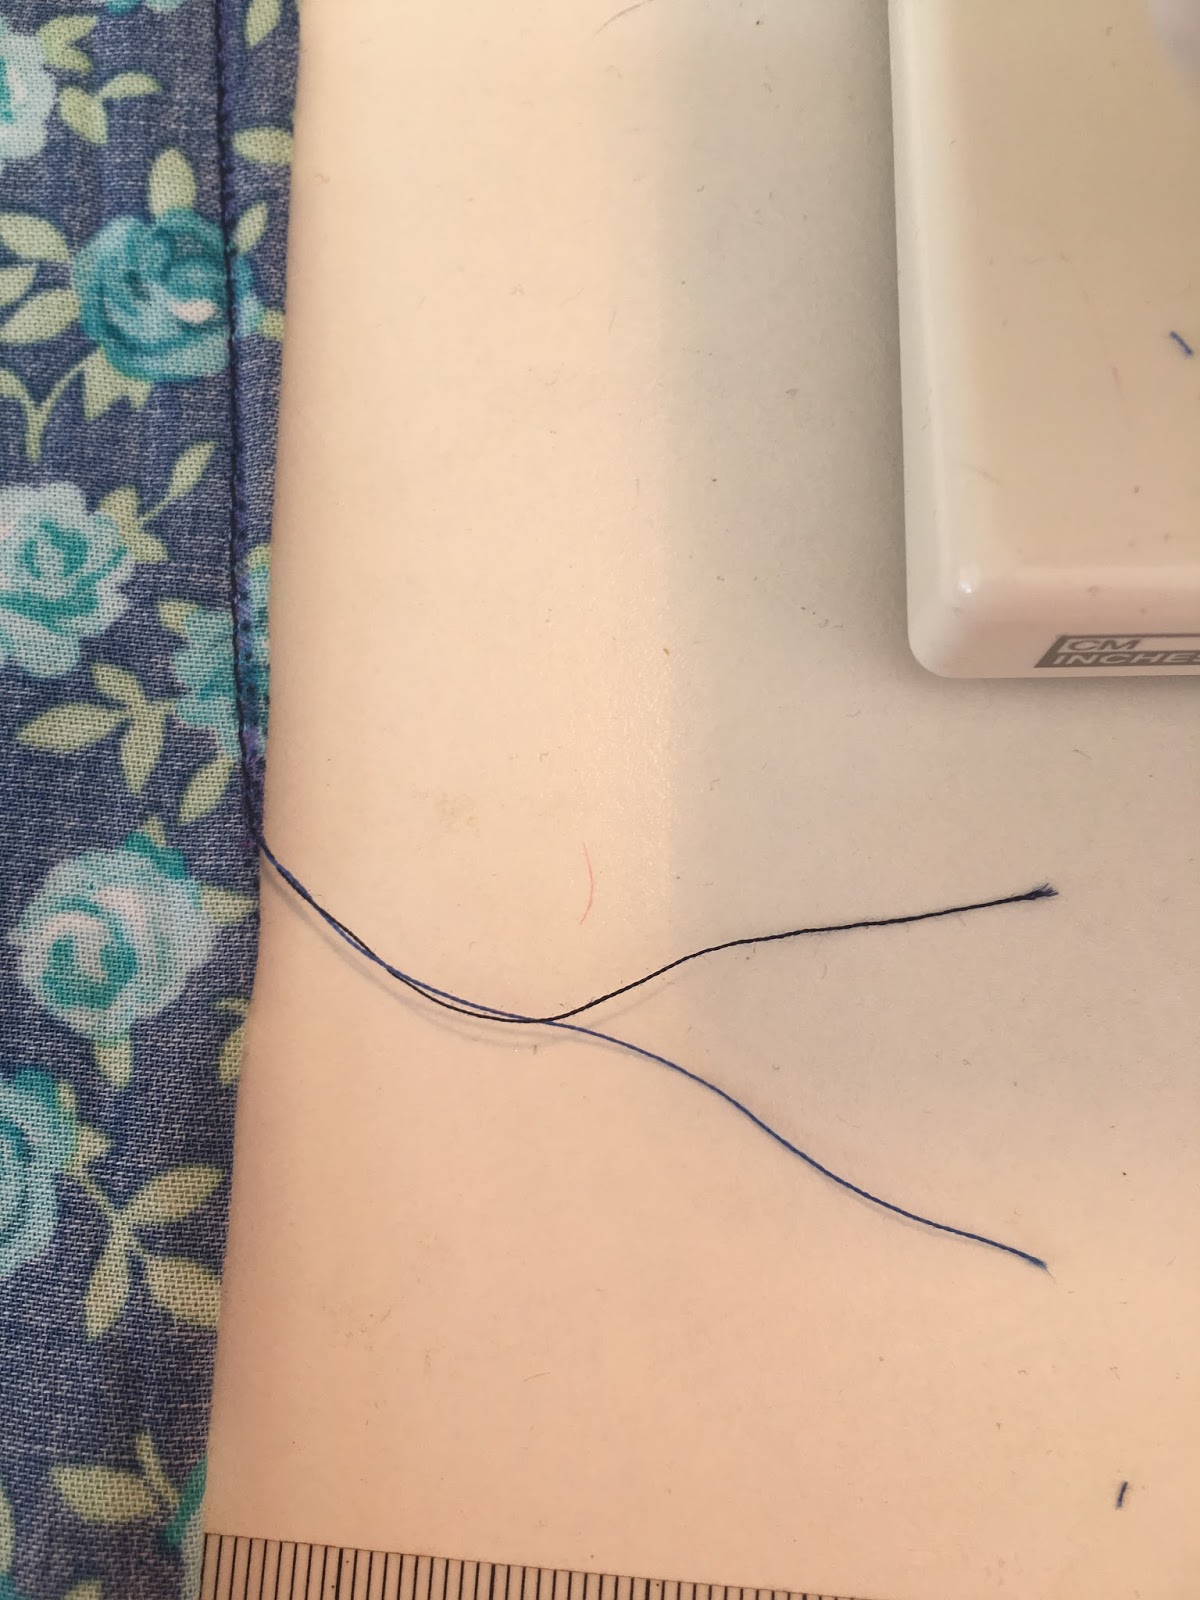
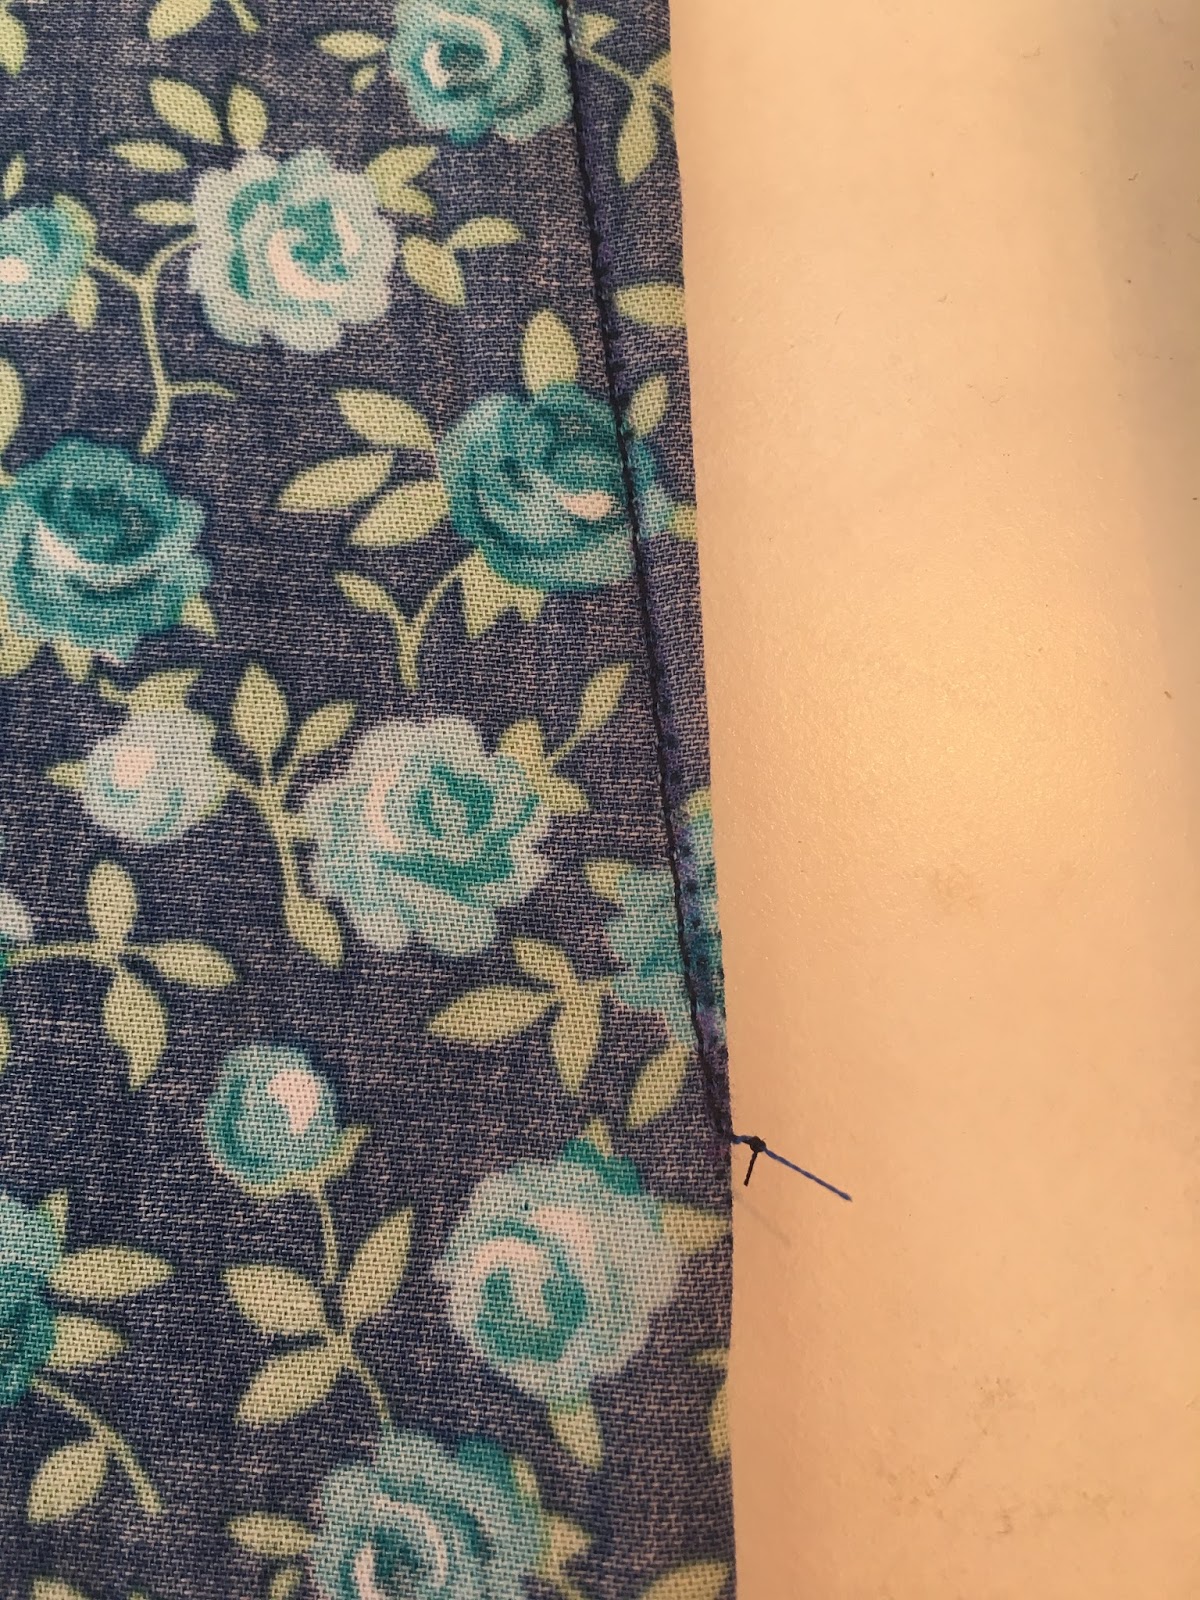
Pull up both bobbin threads to create gathers. Be patient and do not pull against any resistance, as you will break your threads, and we all know how frustrating that is! Create enough gathers so that the skirt is roughly the size of your bodice waist. It's a lot of gathers, which gives the skirt its extra full look.
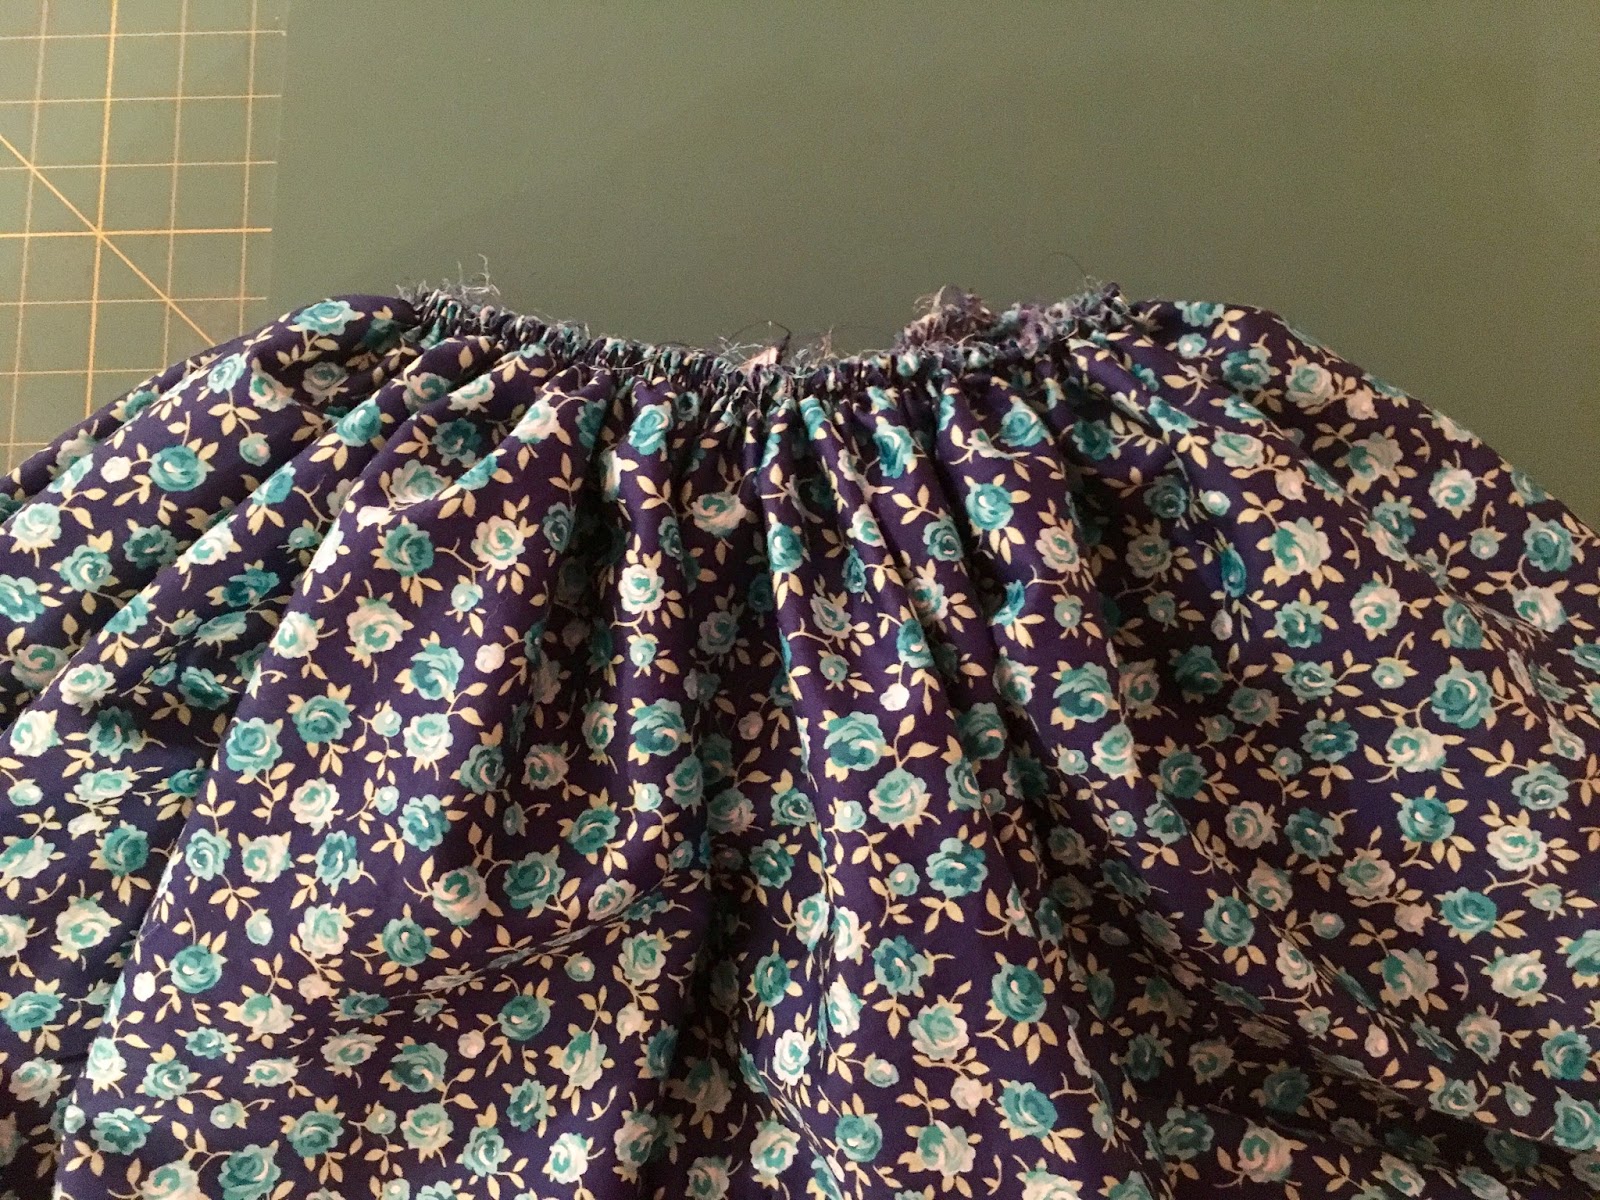
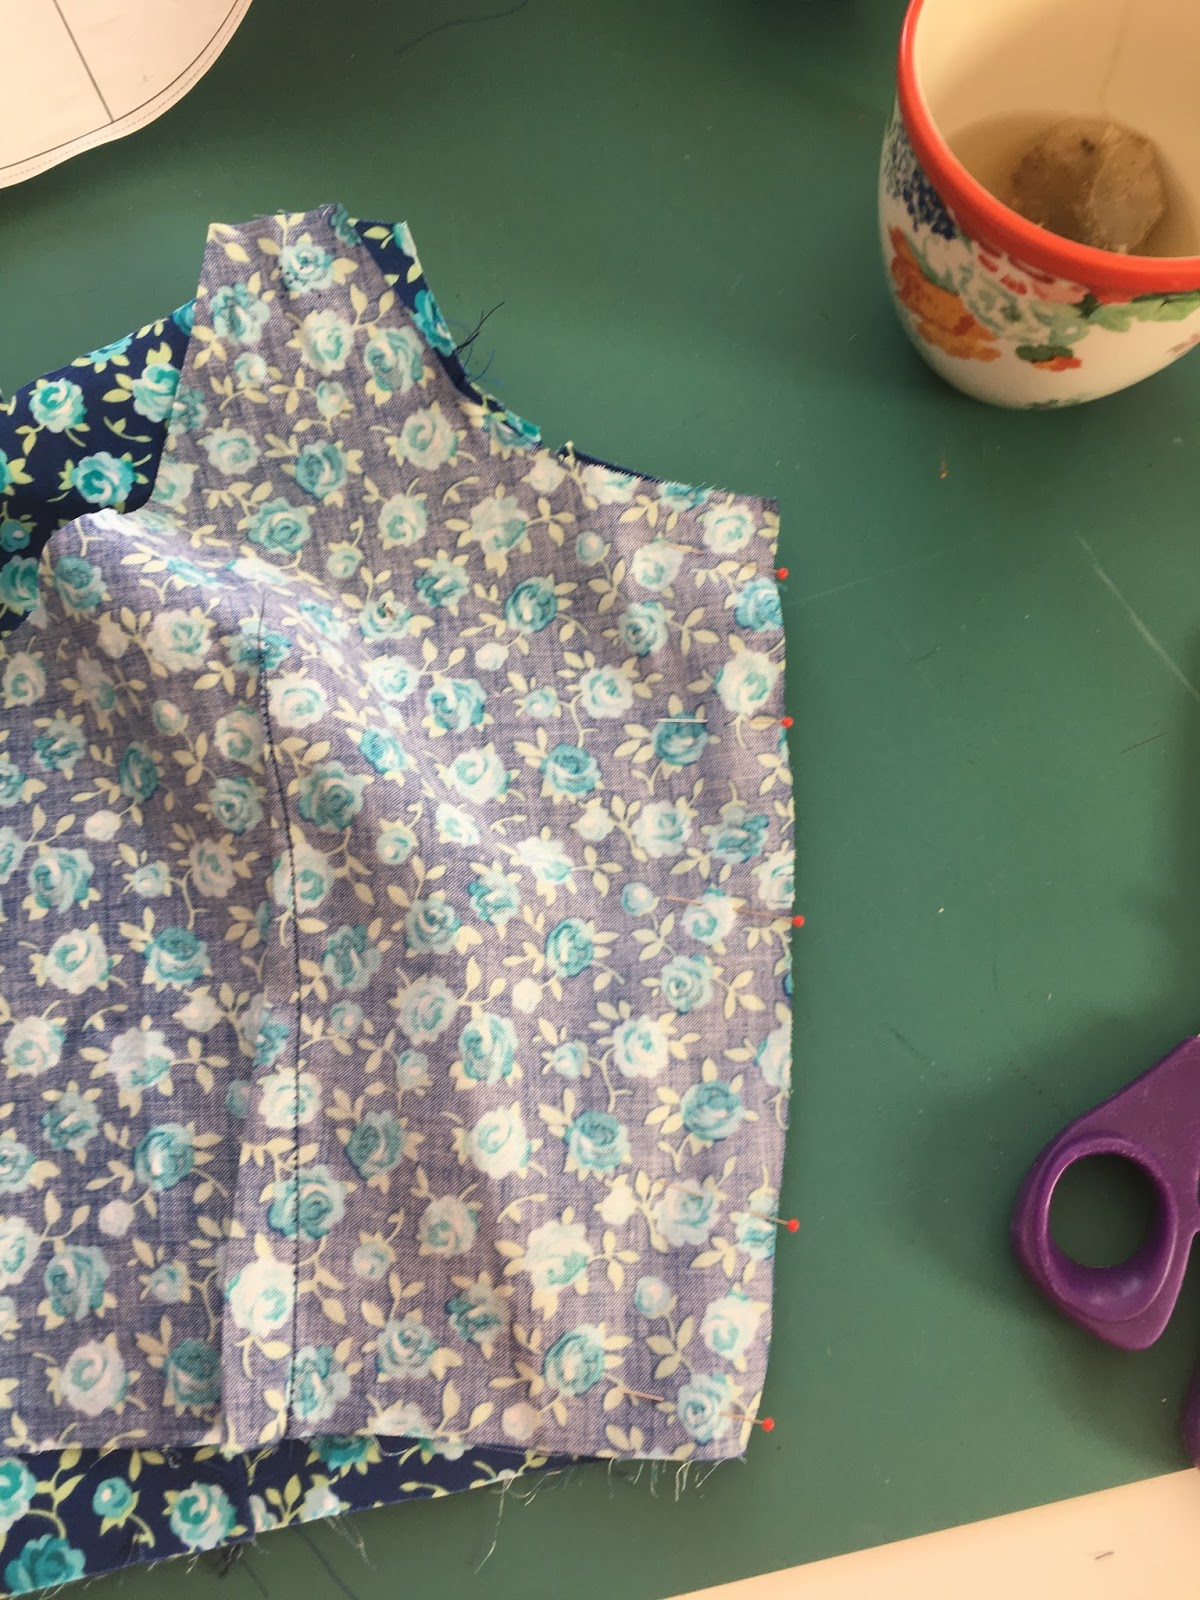
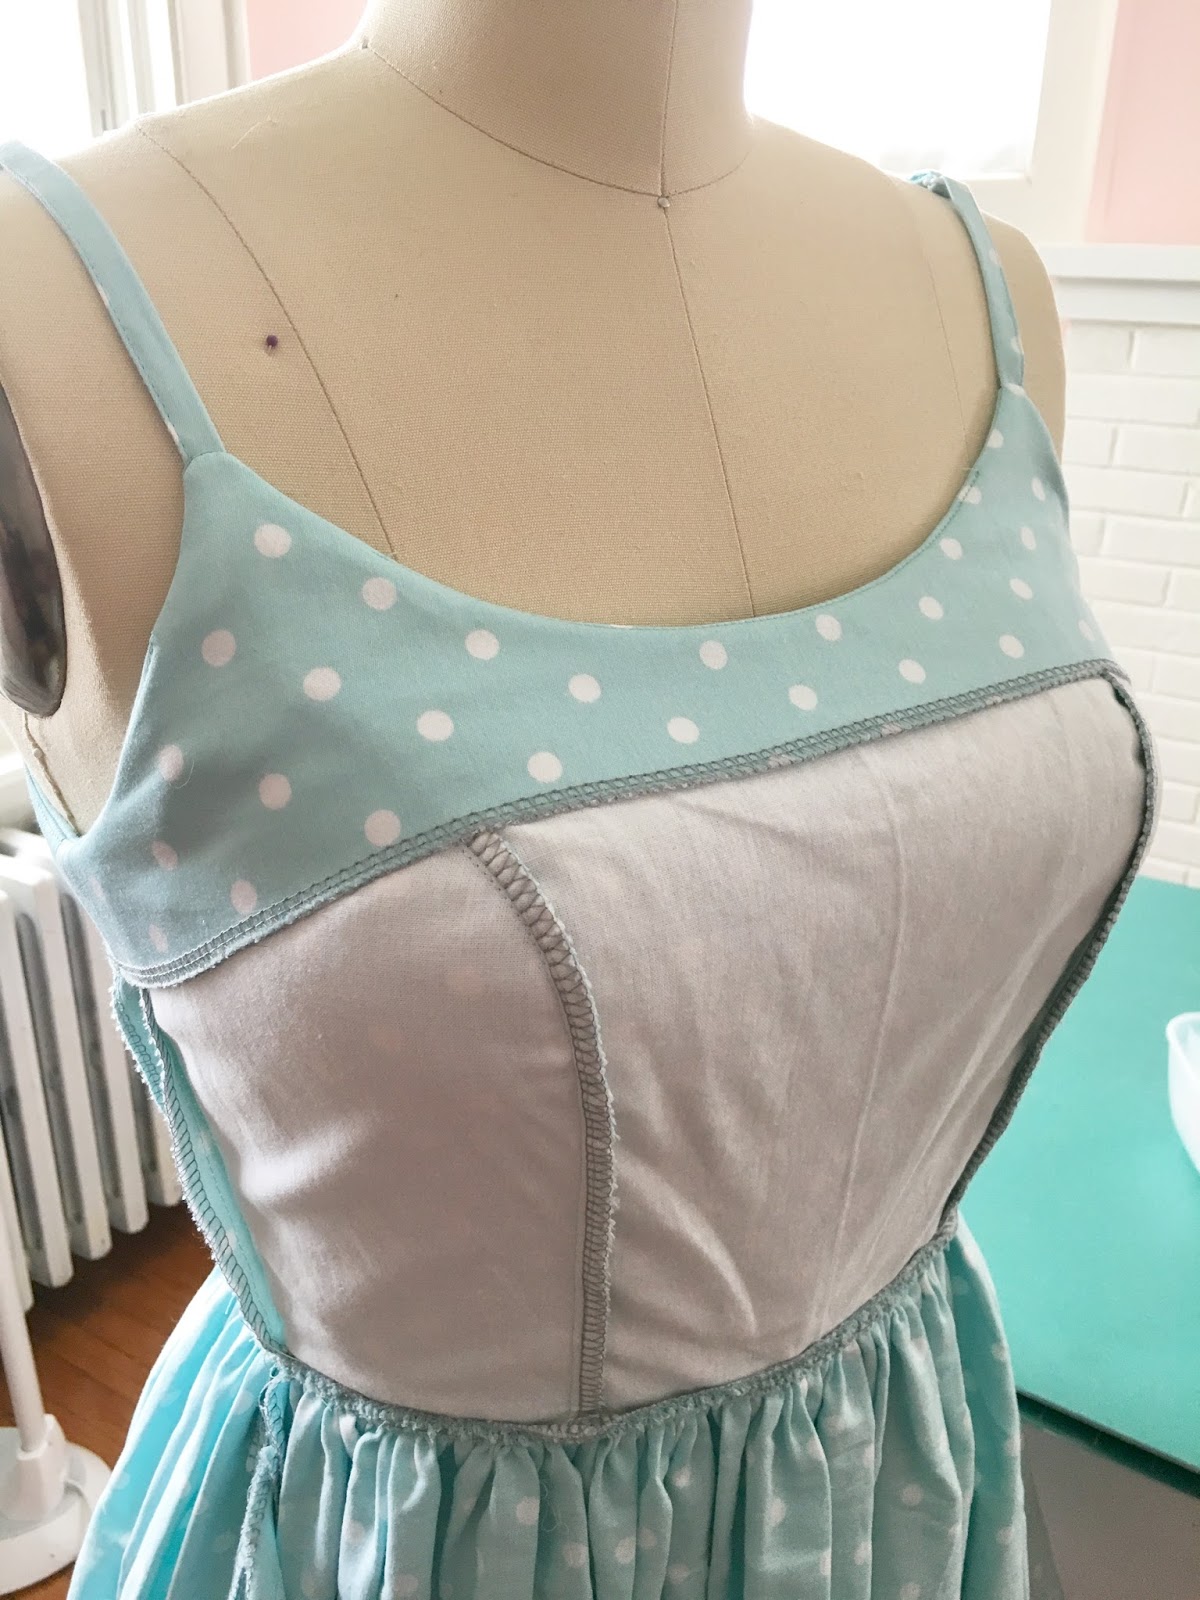
With right sides together, pin the skirt to the bodice. Start by matching your side seams, and adjust the gathers from there. Make sure that your side seams stay pressed open, your princess seams pressed toward center front, and your back darts pressed toward center back. (It's easy for things to get flipped around at this stage.)
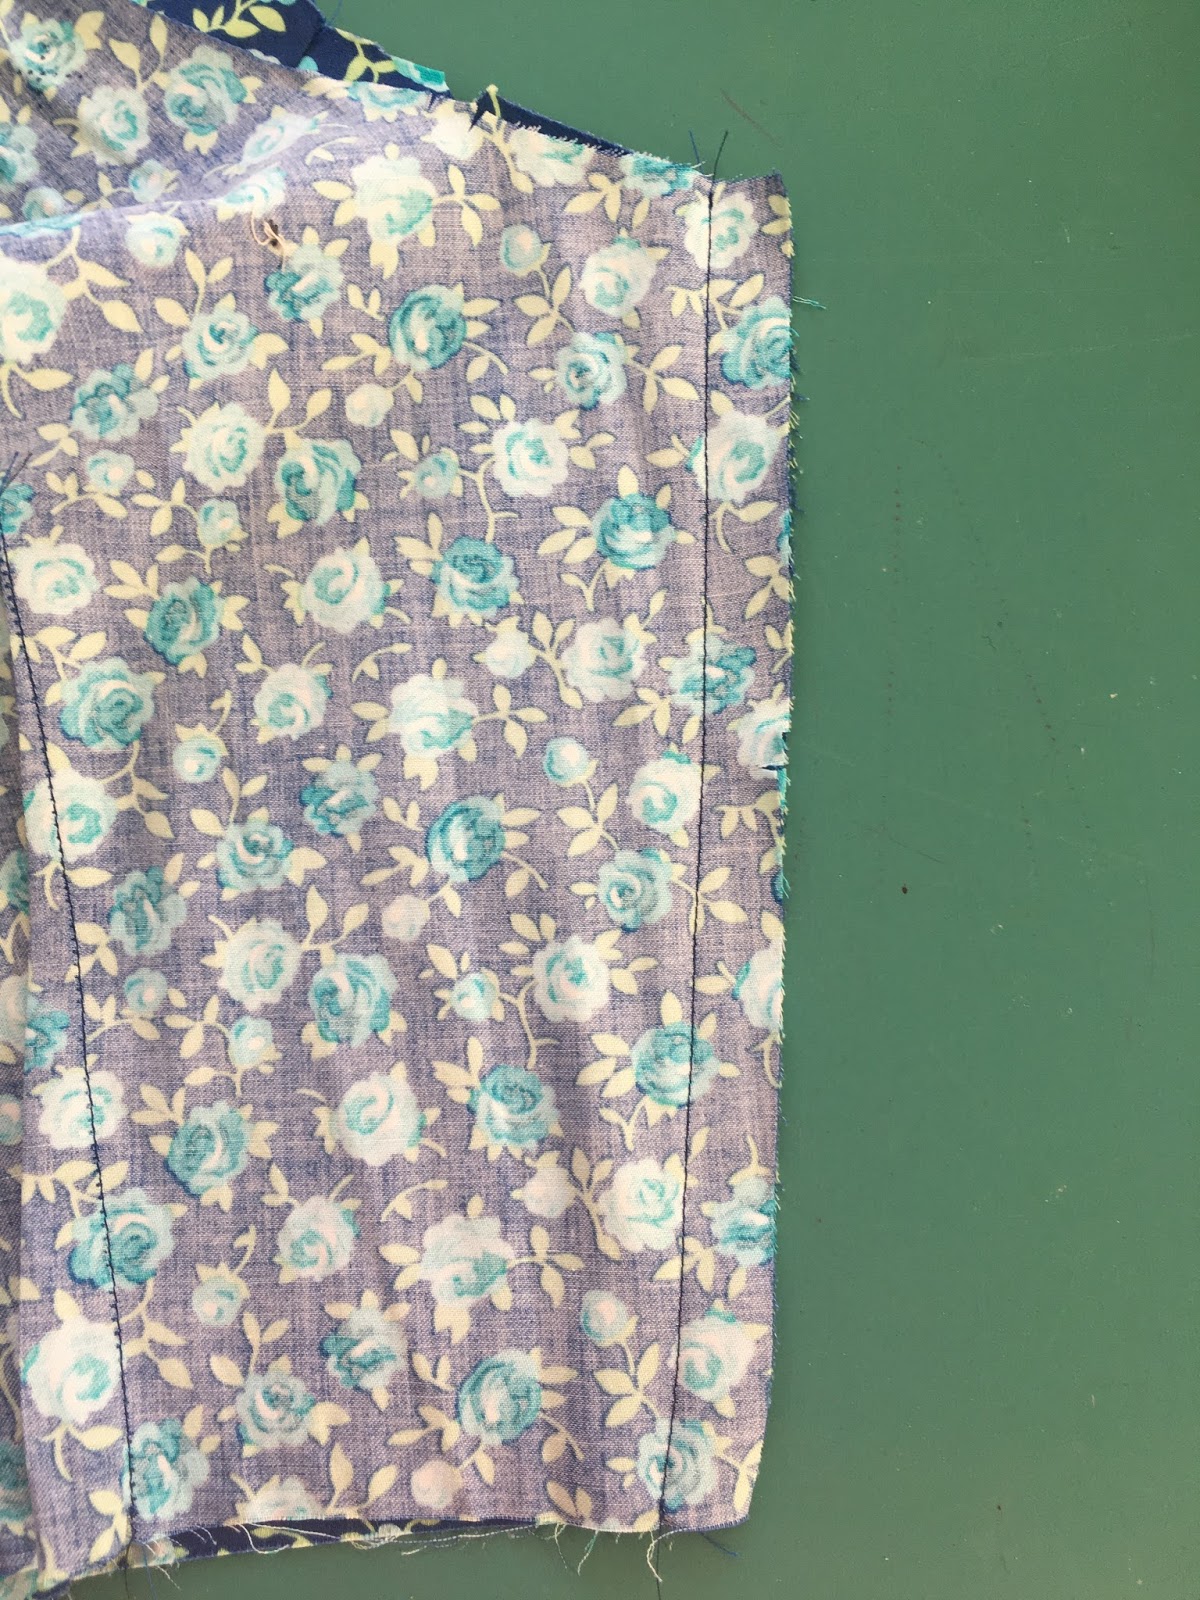
Stitch the skirt to the bodice, going slowly and keeping the gathers as straight as possible so they don't bunch up under the presser foot. You can stitch with the gathers on top or the bottom; people have strong preferences for each so just see which works best for you!
After you stitch, examine your gathers closely to see if there are weird bunches anywhere. I usually have to take out at least one spot and neaten up the gathers!
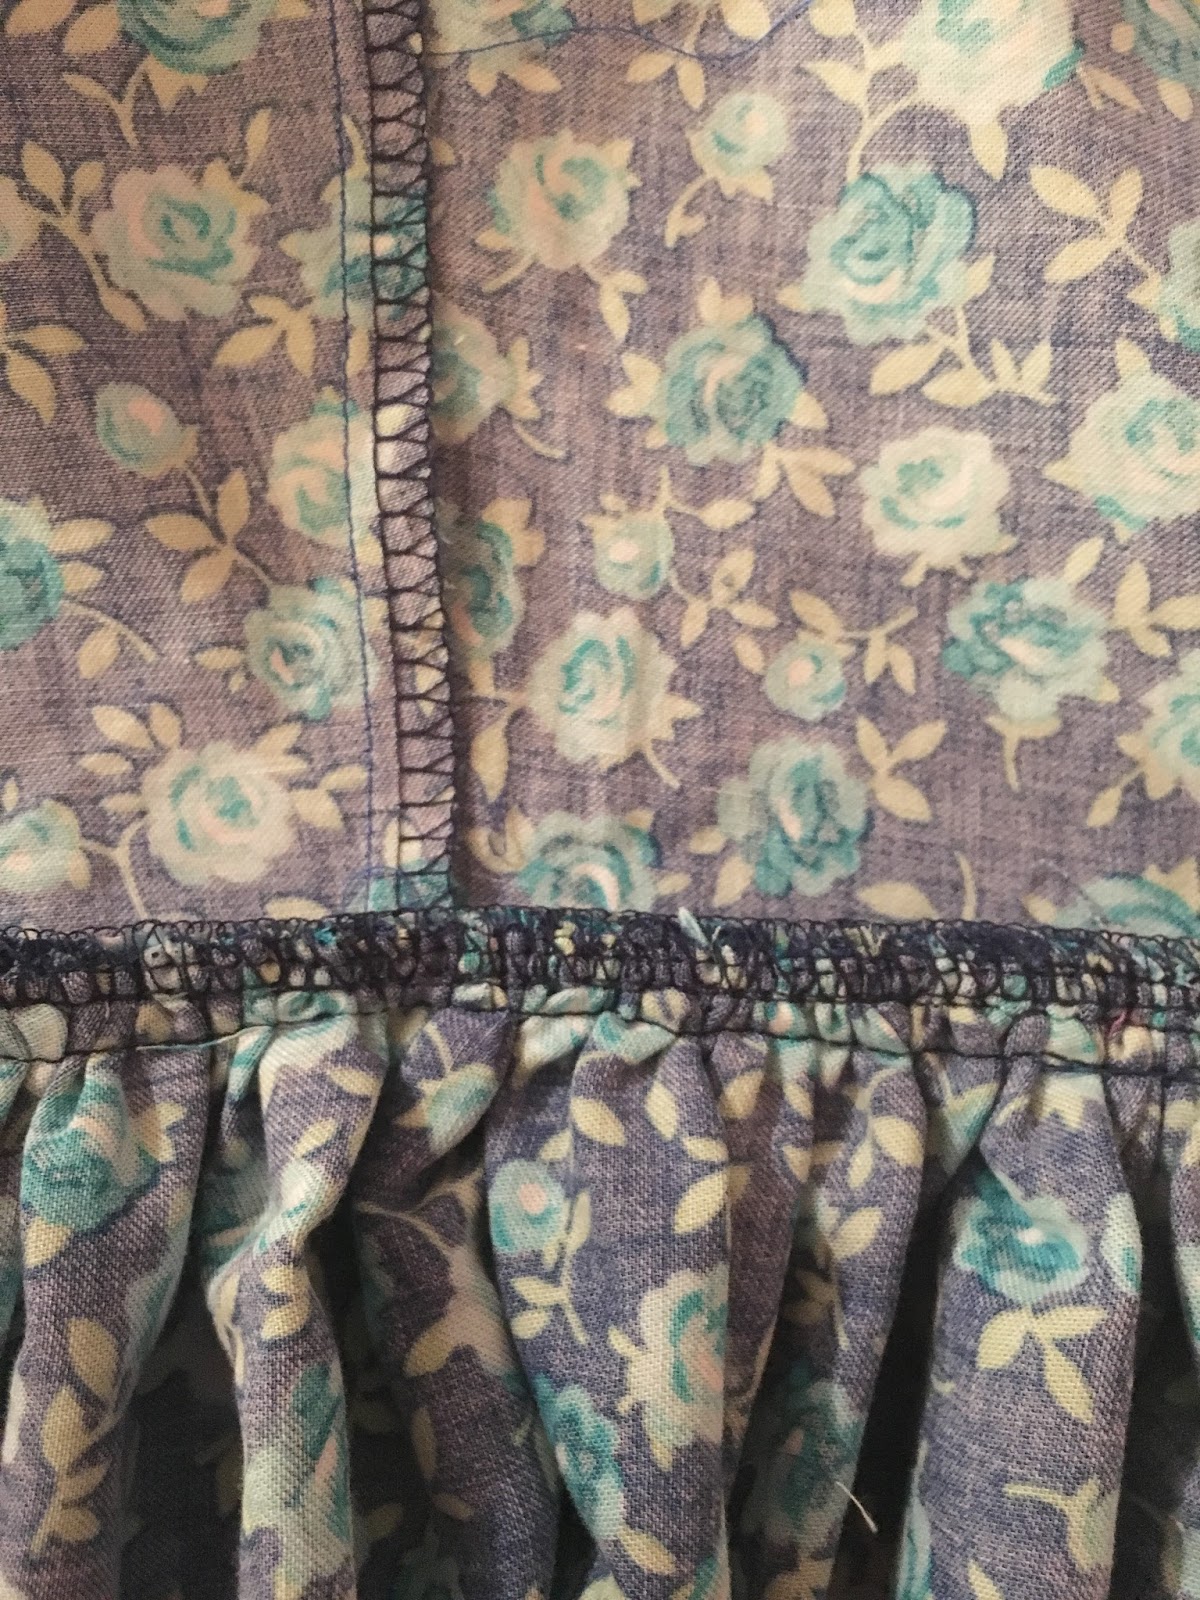
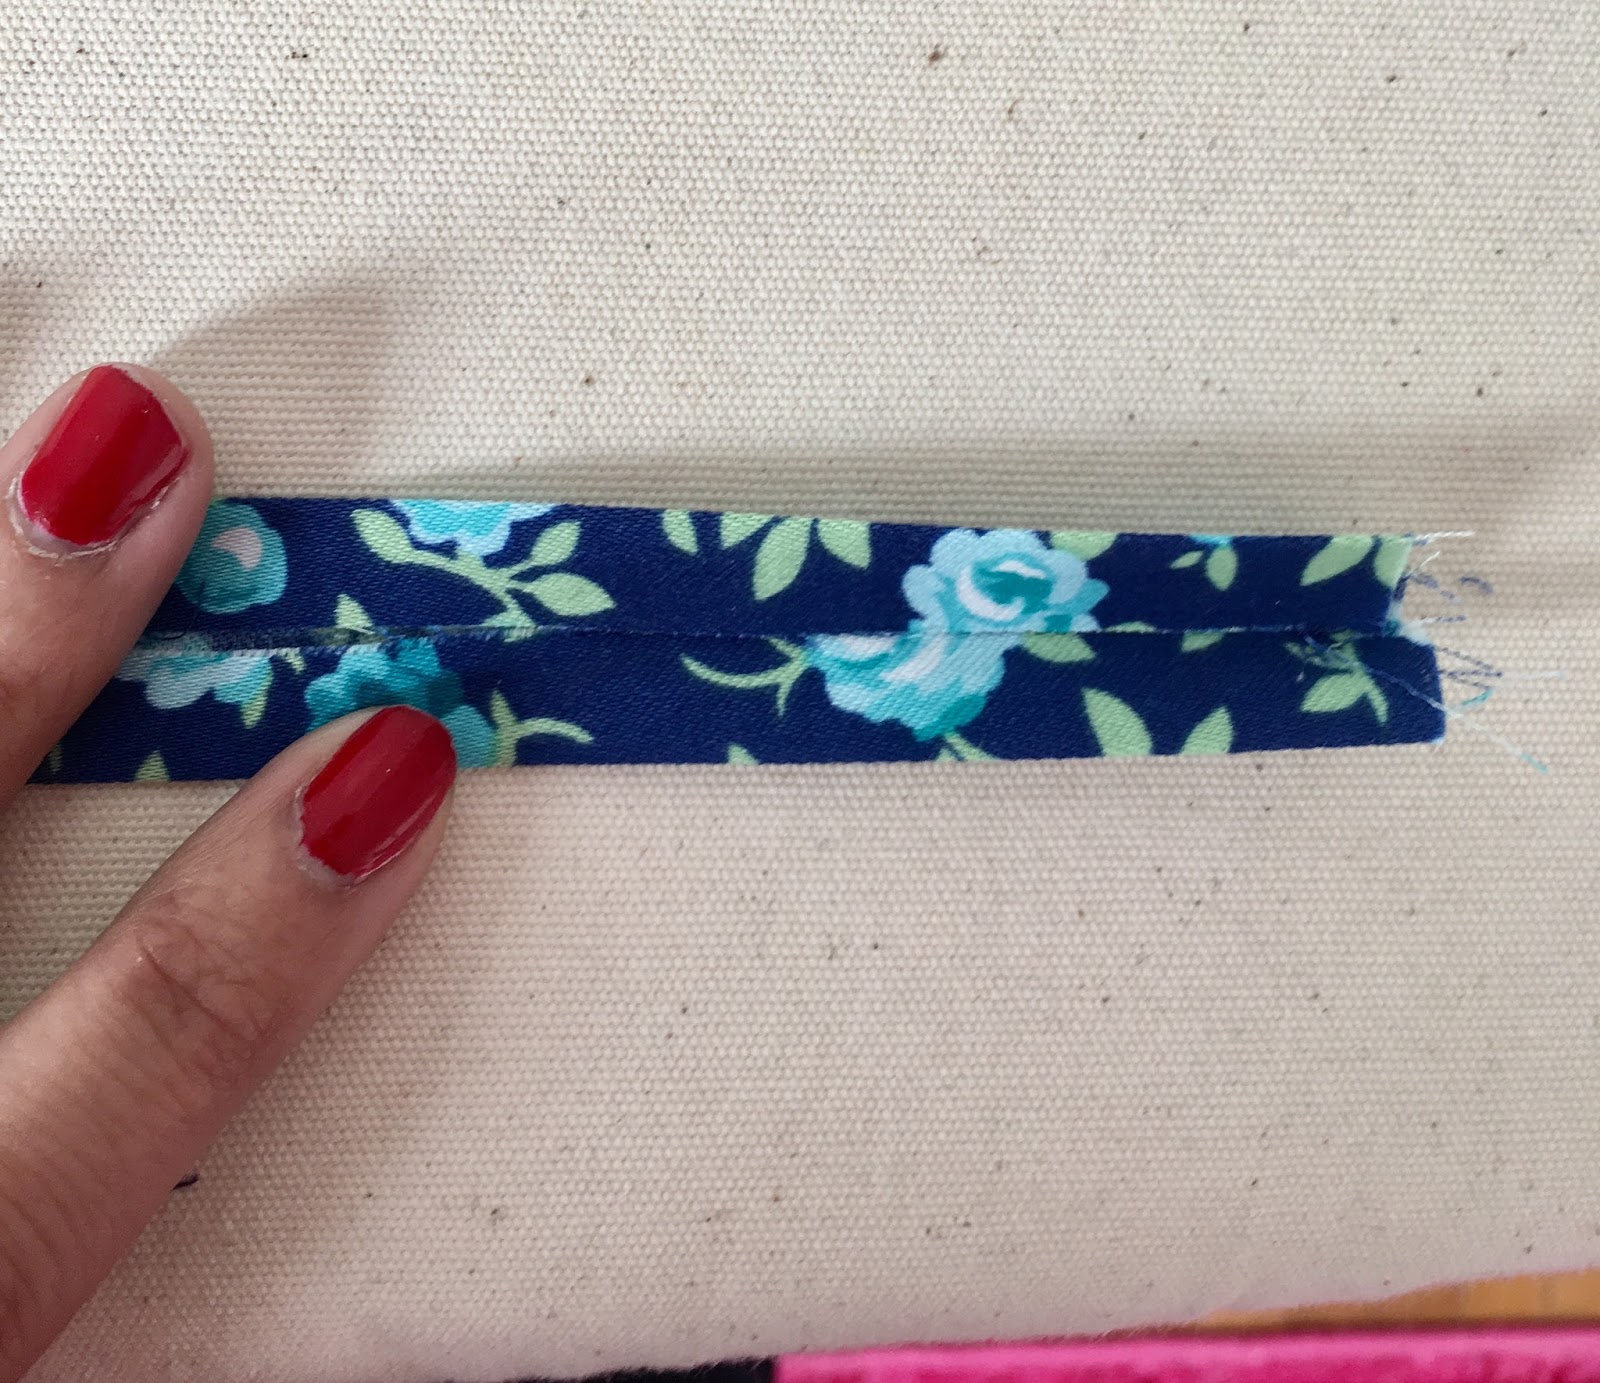
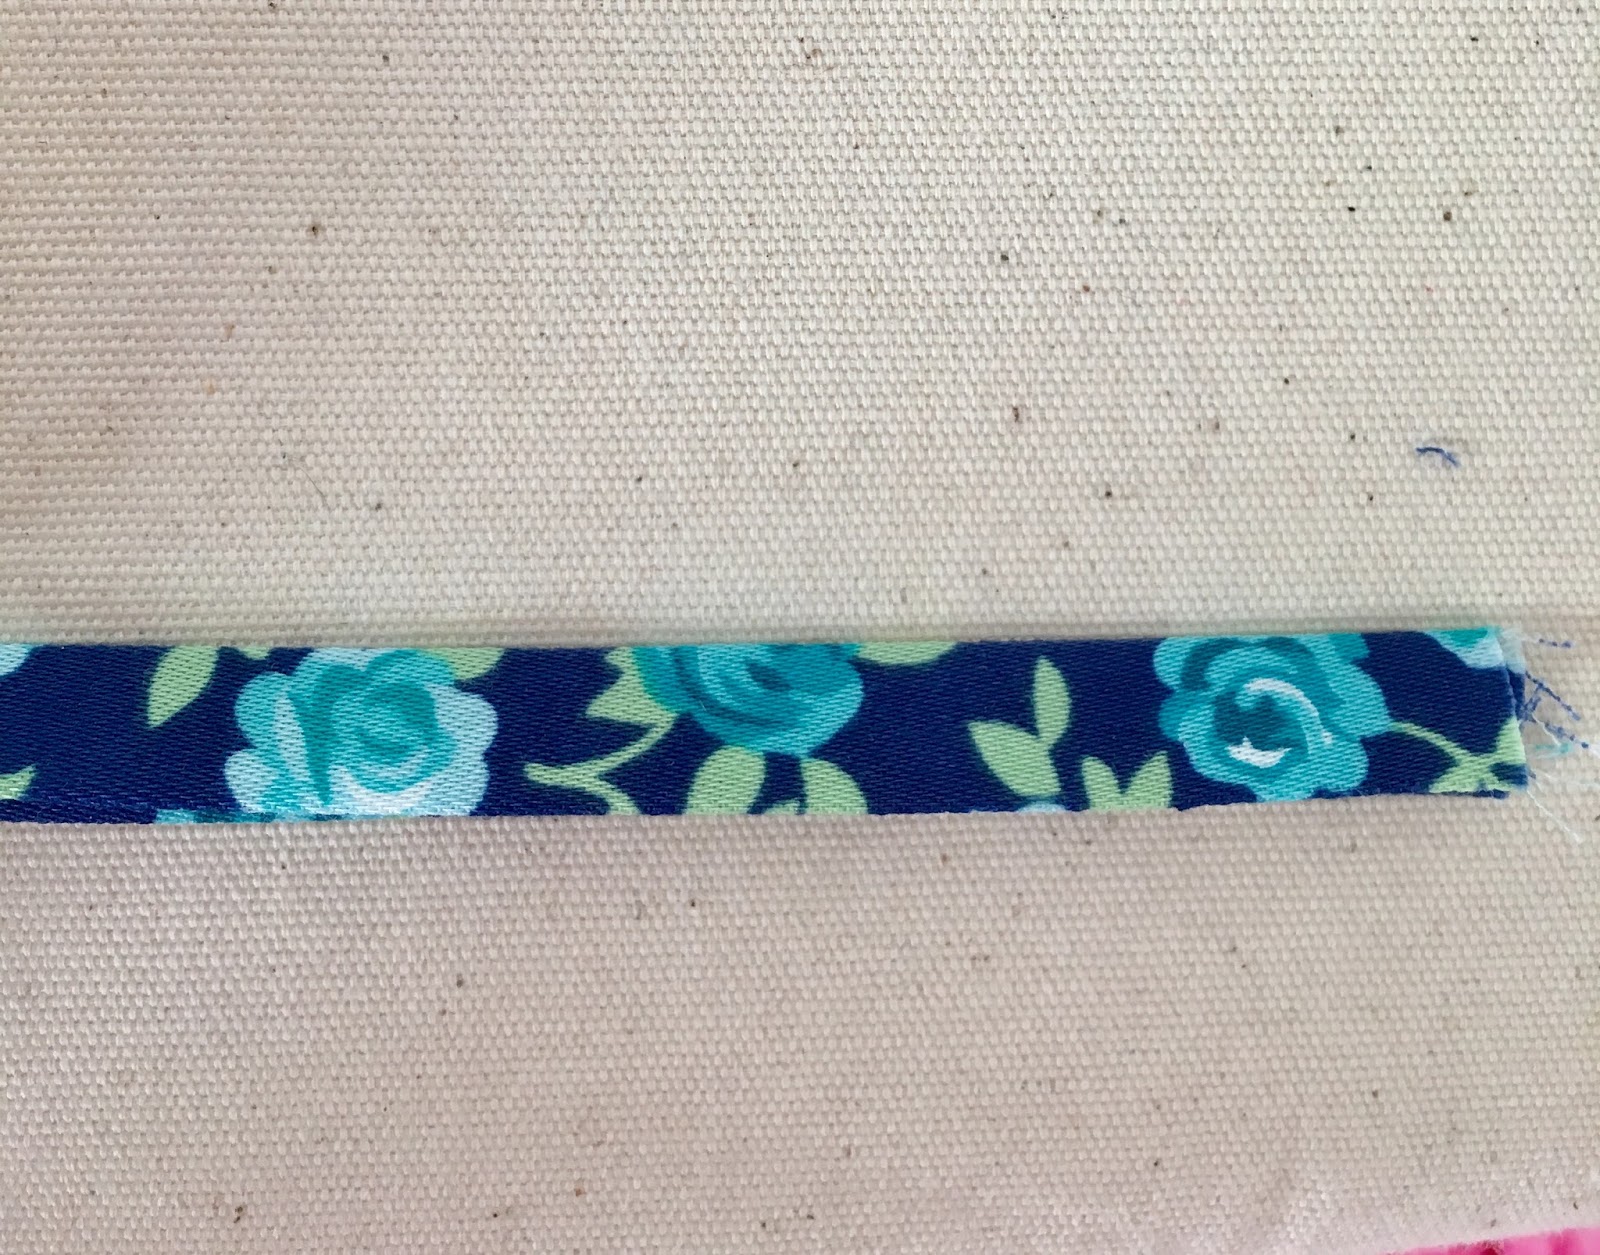
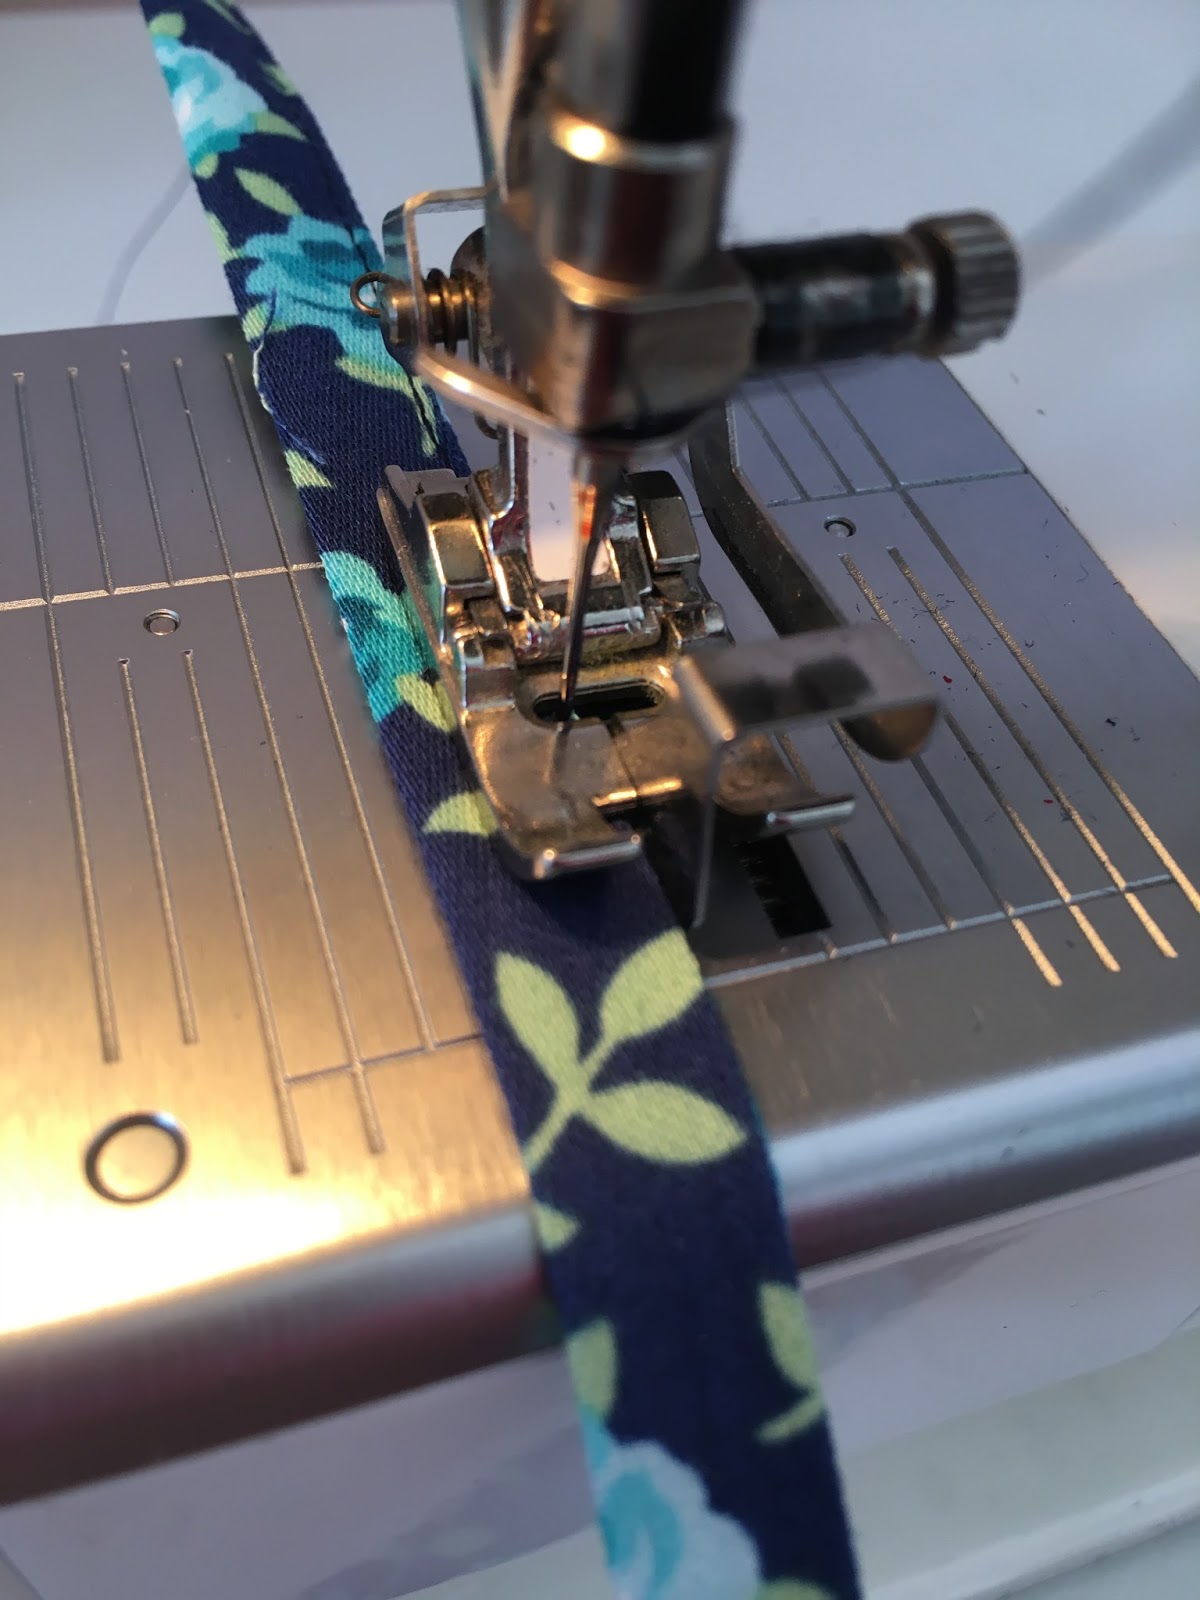
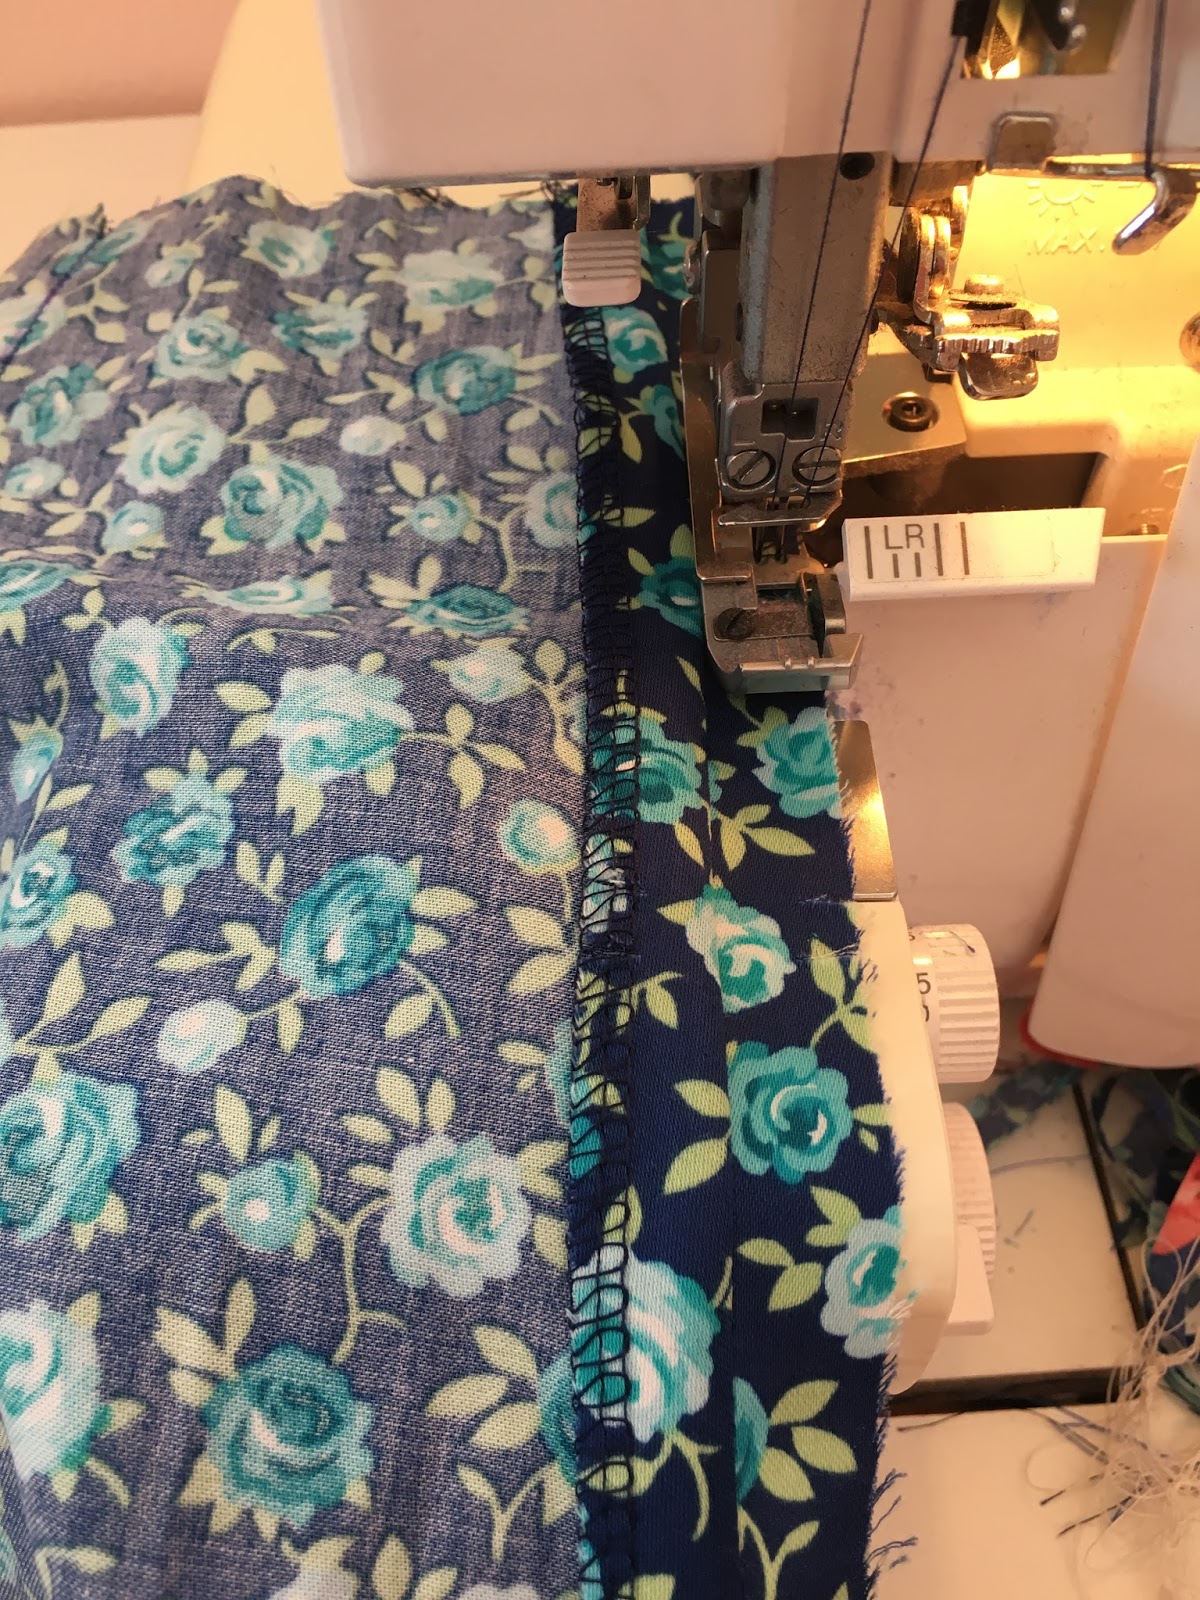
Finally, press your seam toward the bodice and finish the seam allowances as one. I have a special way of doing this to reduce bulk. I trim the gathered seam allowance down to about 1/4", holding my scissors at an angle toward me. This trims the seam allowance so that it's beveled slightly. Then trim the bodice seam allowance to 3/8". Next, run both seams together through the serger, without catching any fabric in the blade. The seam allowances are serged, but also graded! (You could also use a wide zigzag on your sewing machine in place of the serger.)
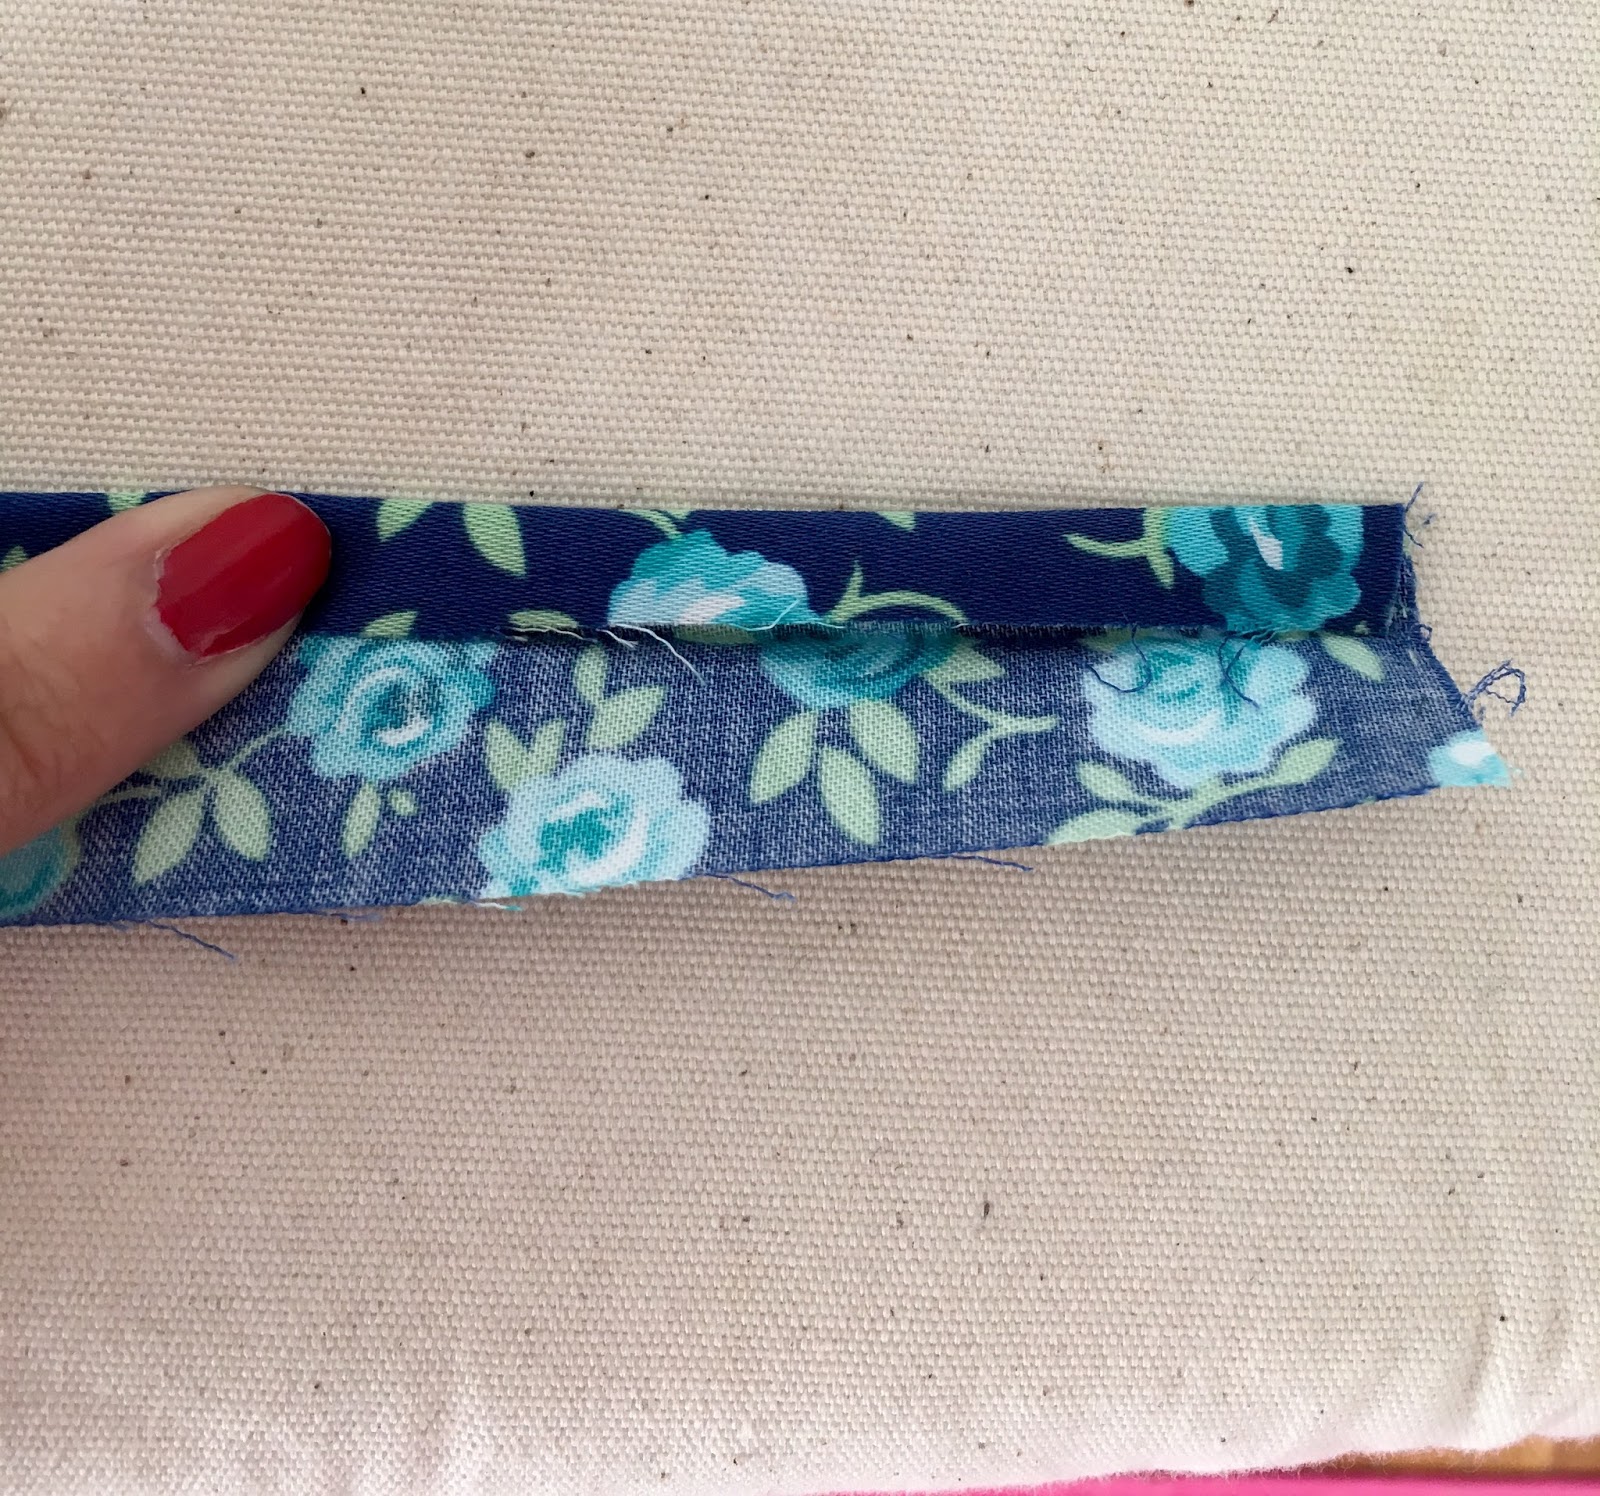
 Another method I have used successfully on this waistline is to stitch a grosgrain or petersham ribbon to the waistline (I prefer cotton or rayon ribbon if possible since poly can feel uncomfortable so close to the body.) Stitch it through both seam allowances, as close to your waistline seam stitching as possible. Fold down the ribbon and grade the seam allowances as described above. Press the ribbon up and tack it in place at the side seams. It will both cover your waistline seam and keep your waistline from stretching! It's a great option if your fabric has stretch, to keep the dress from getting bigger over time.
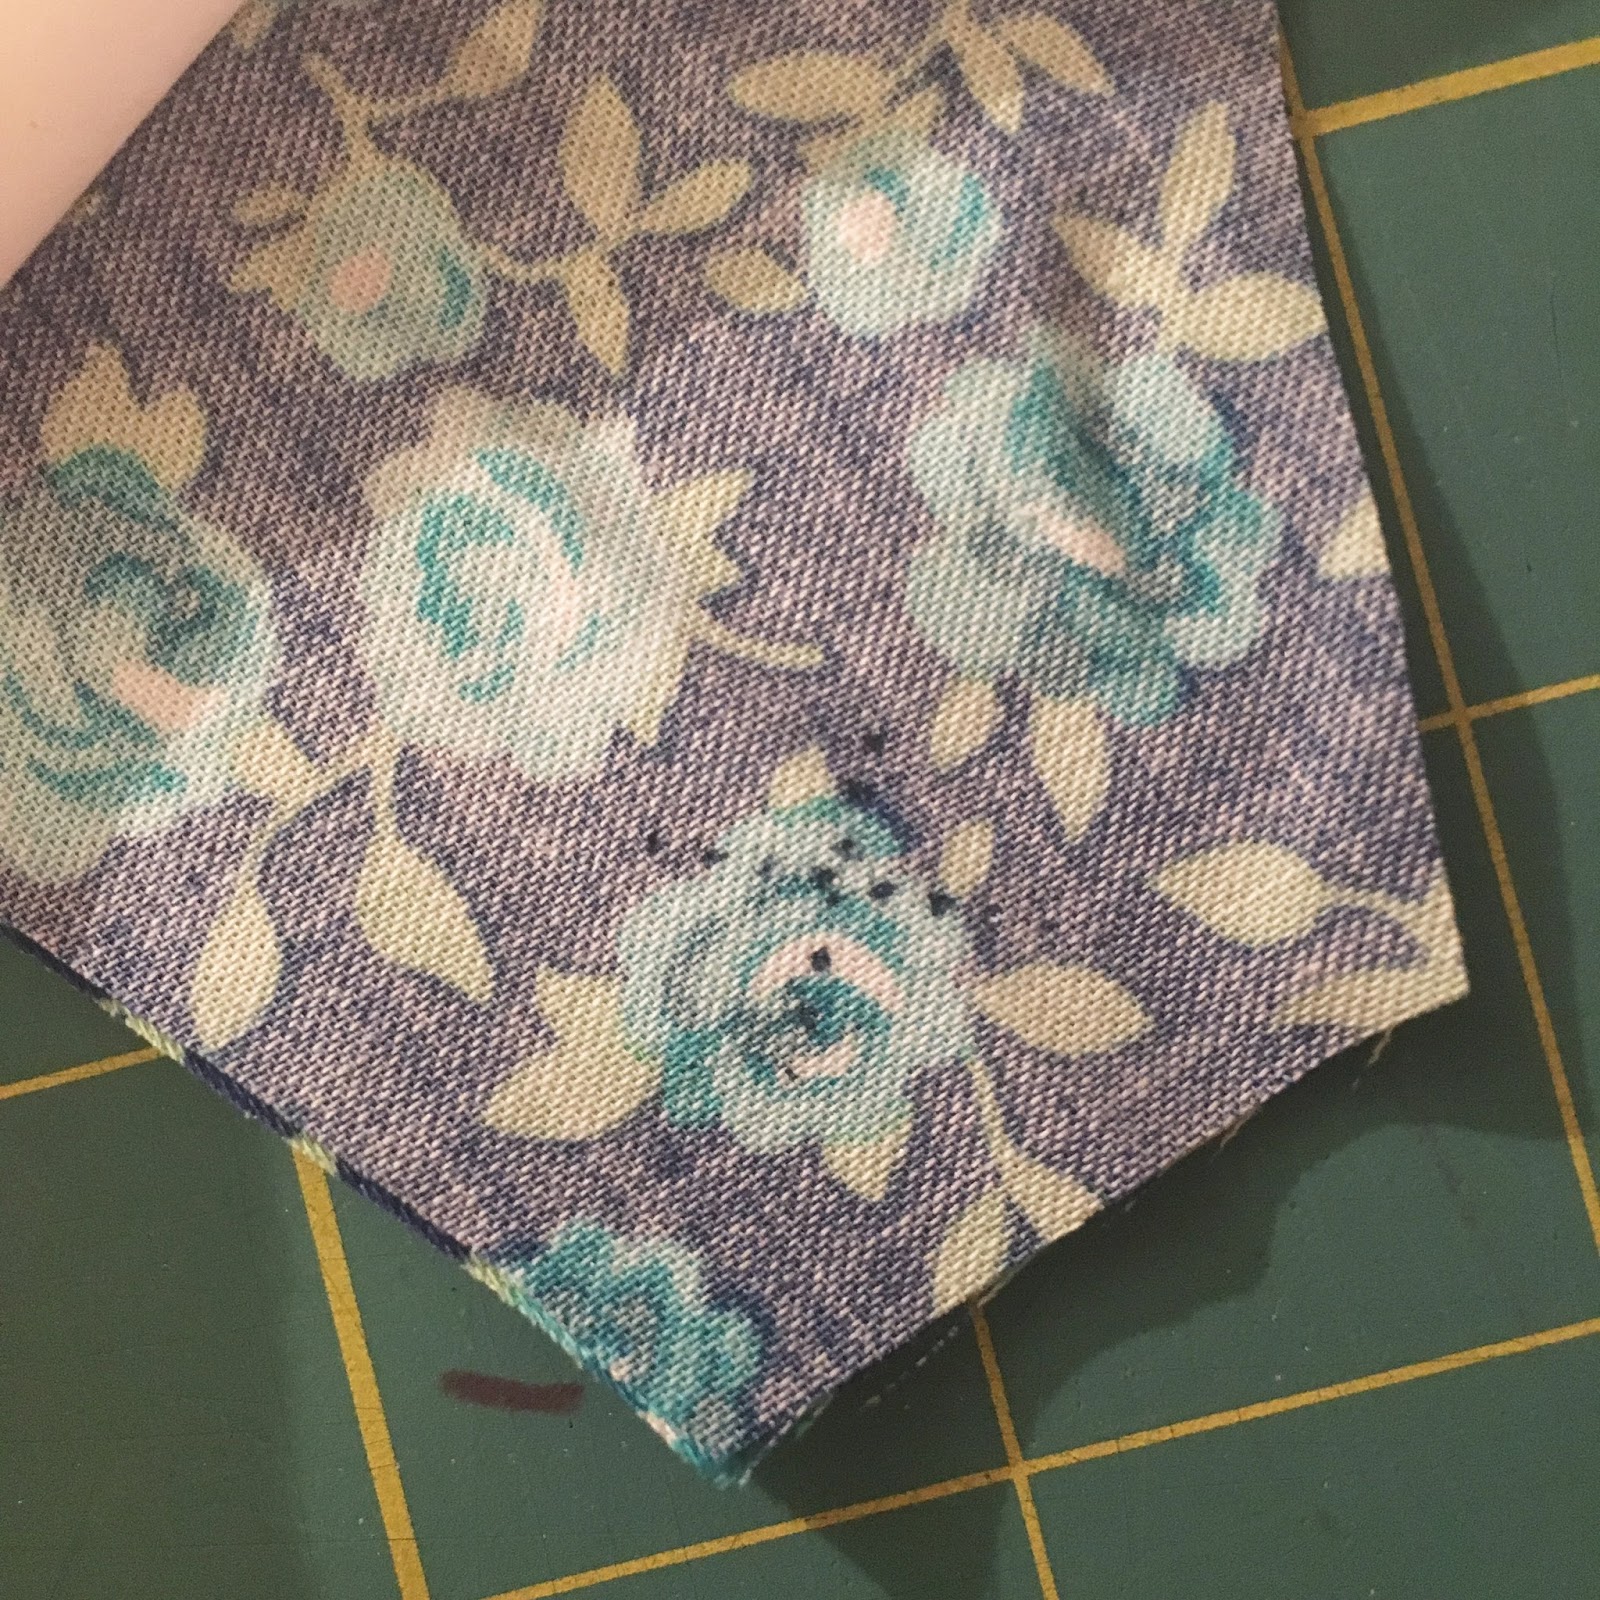
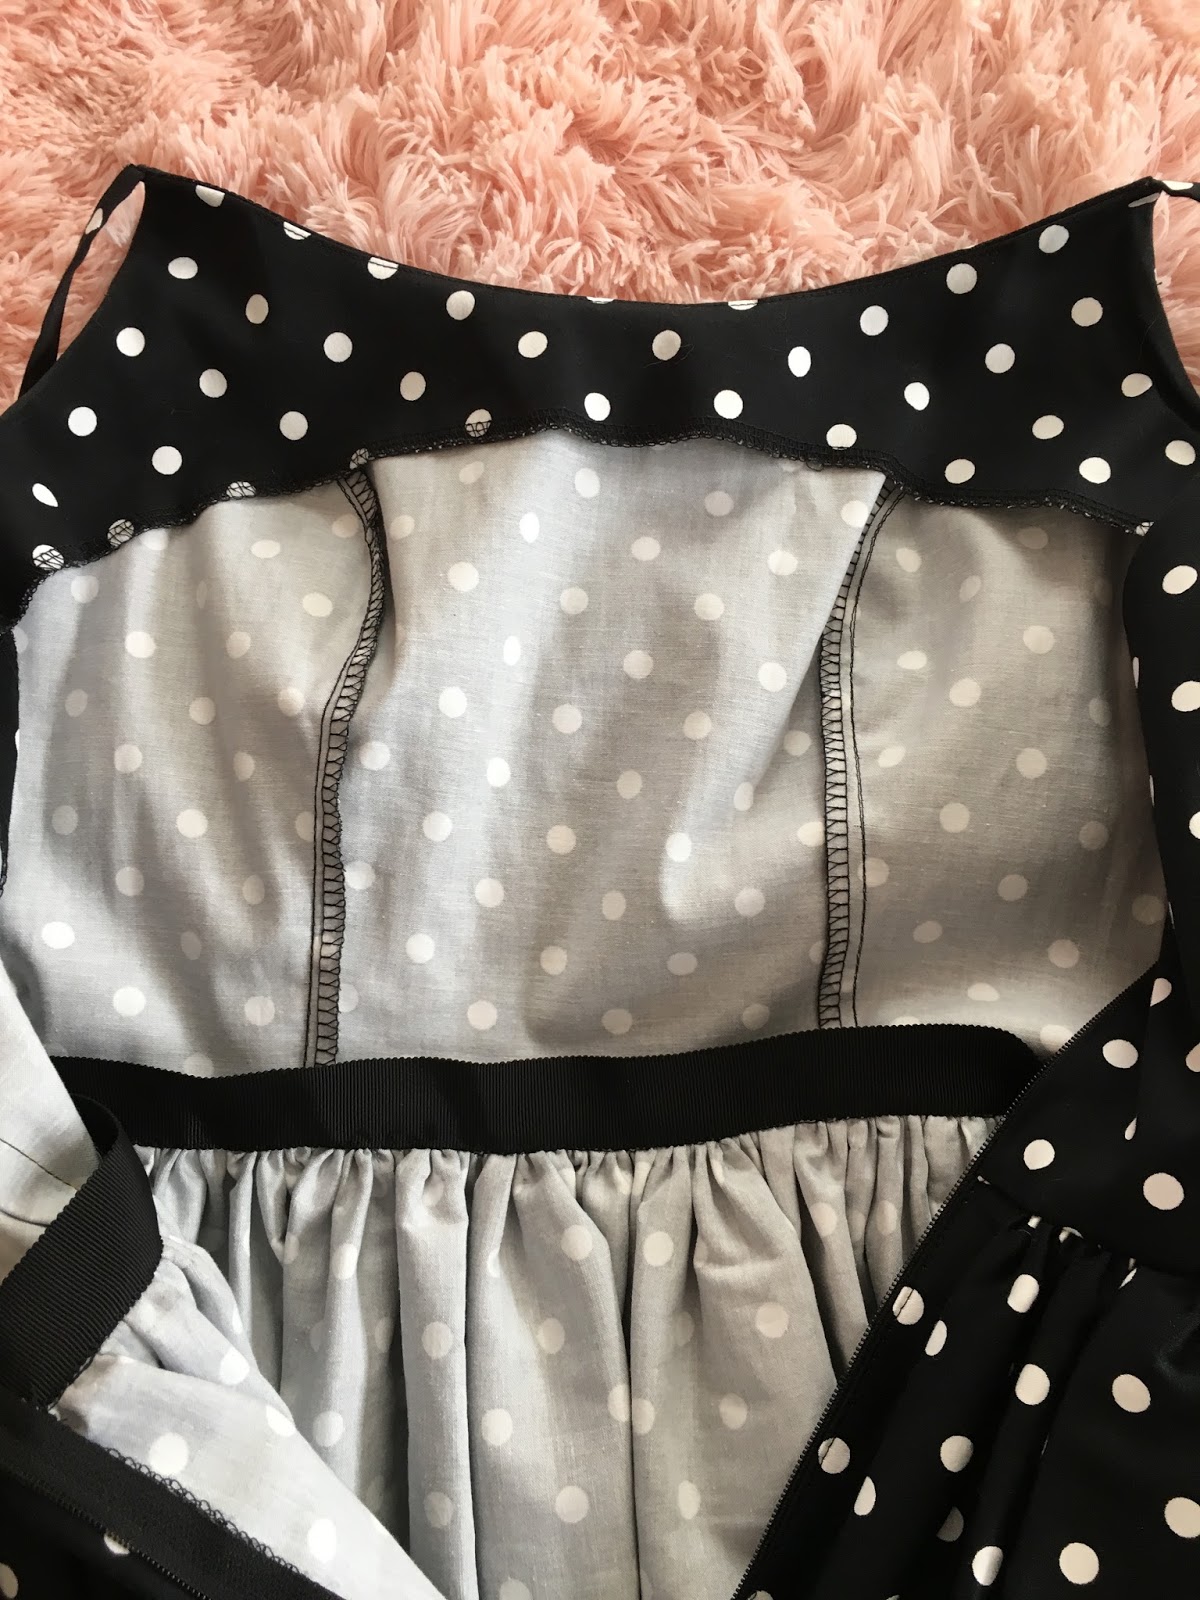 Here's how it looks when you fold down the ribbon:
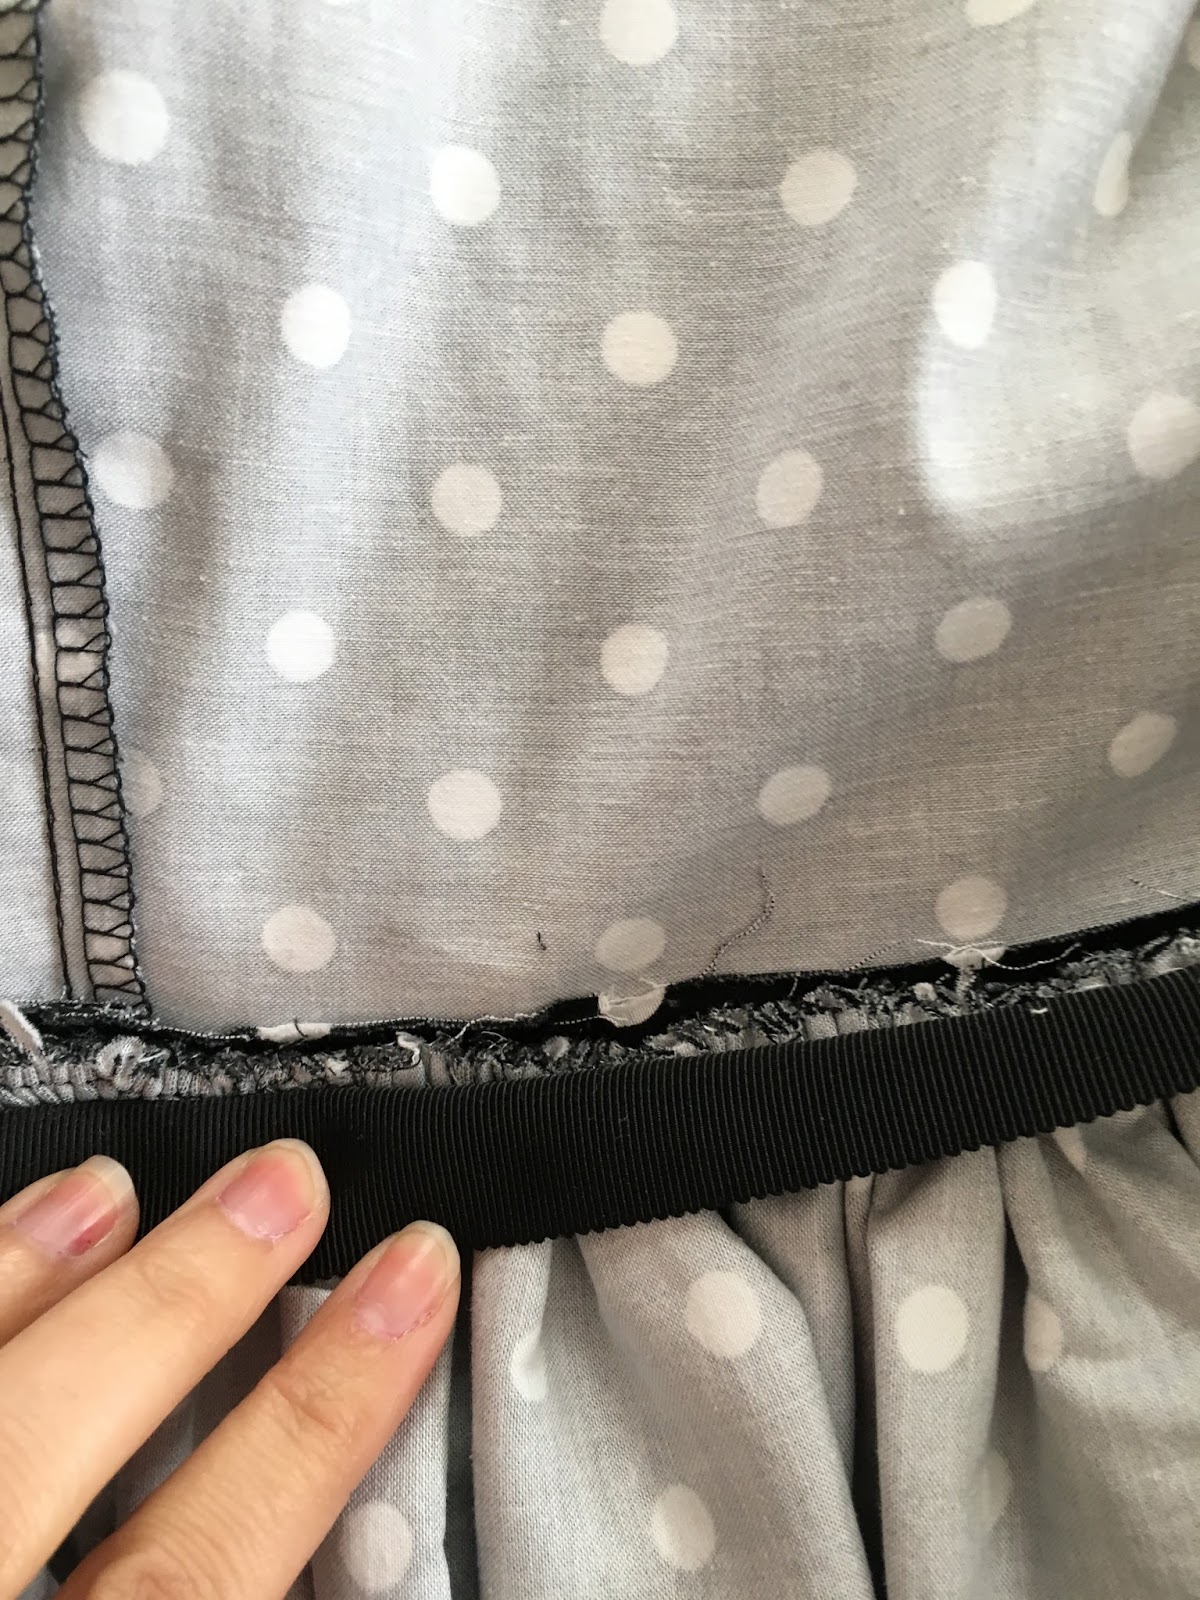
That's it for this week! I'll be back next with with instructions for the pencil skirt, and then the zipper!


March 21, 2017
B6453 Sew-Along: Sewing the Straps
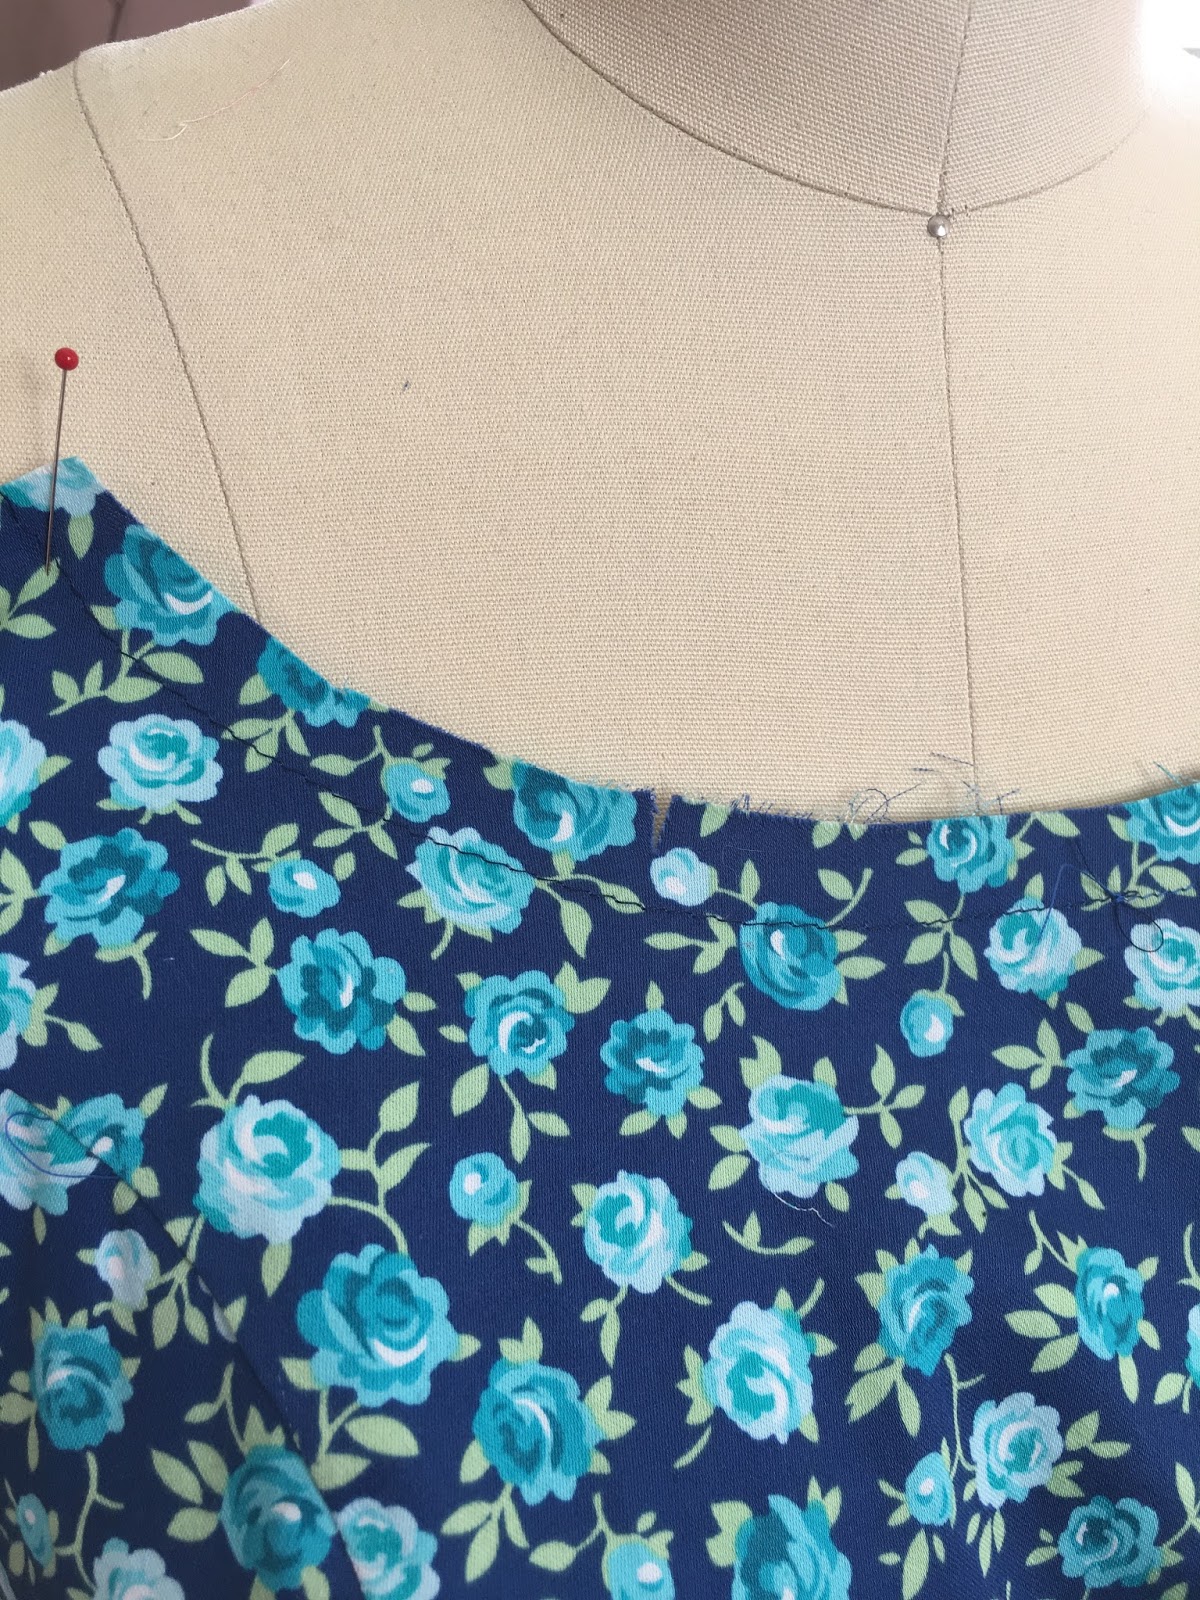
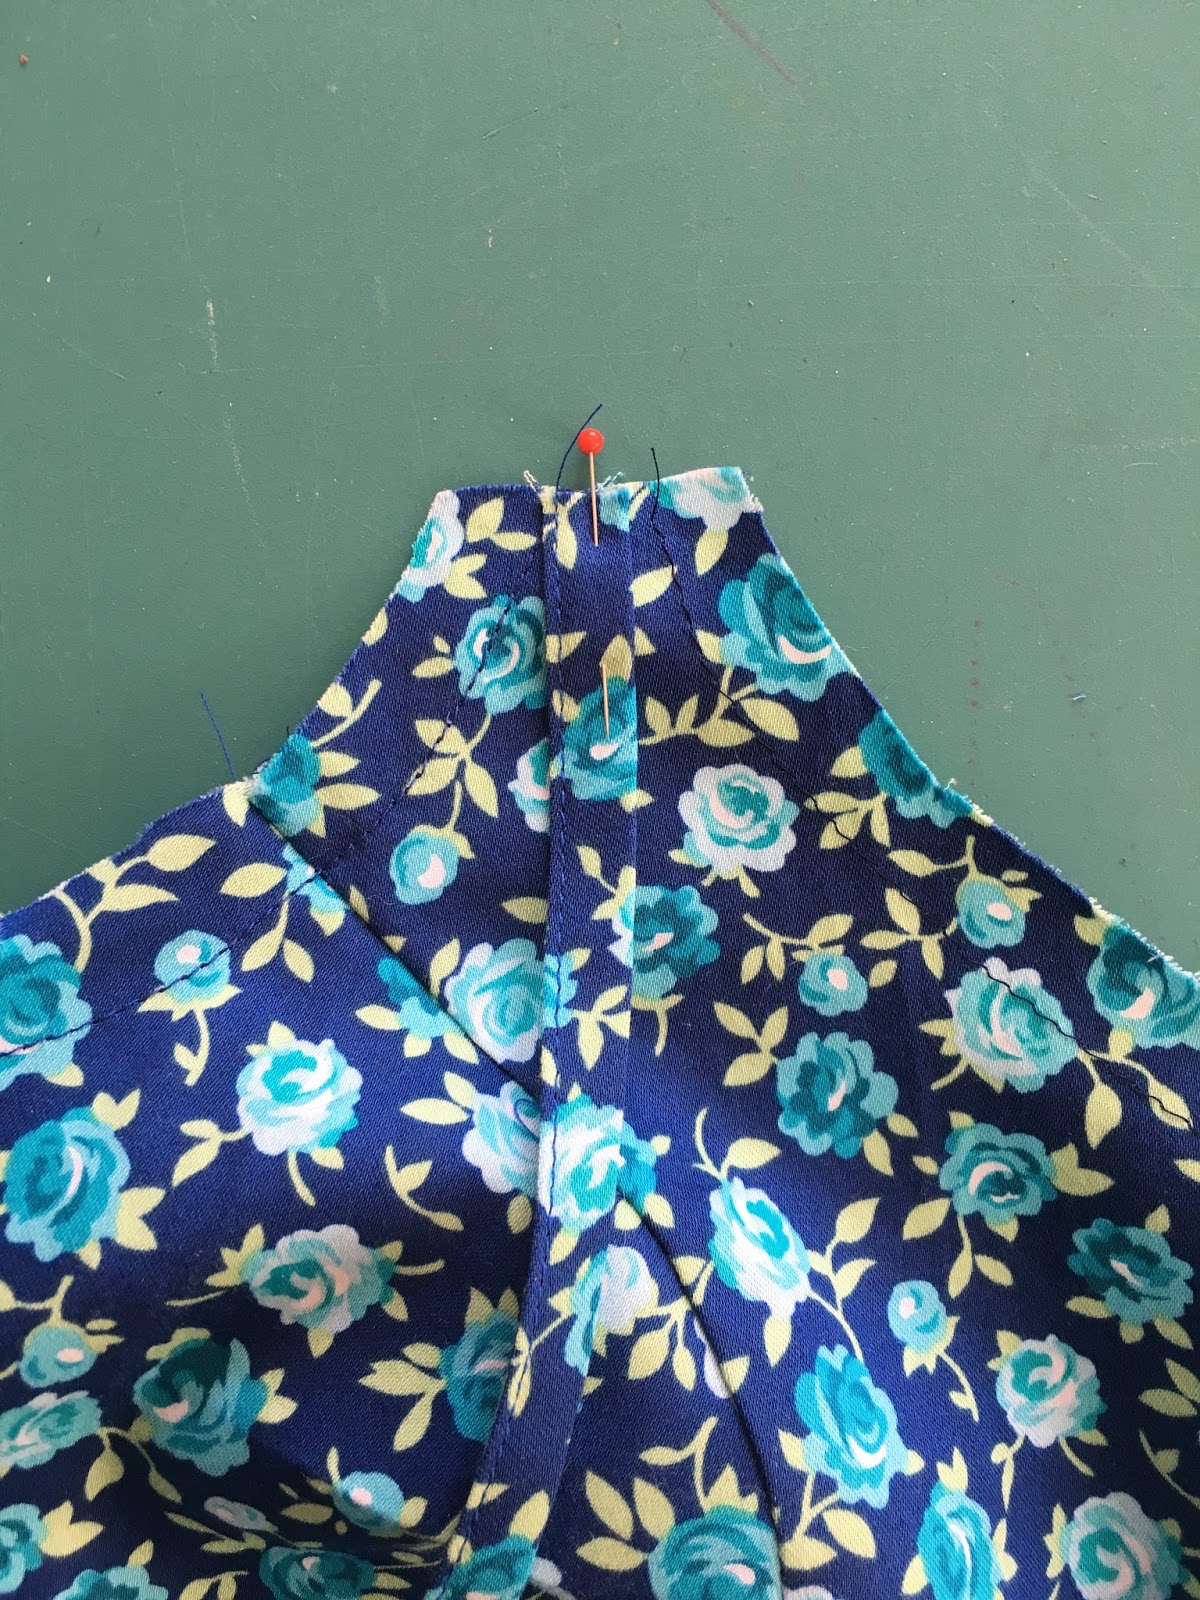
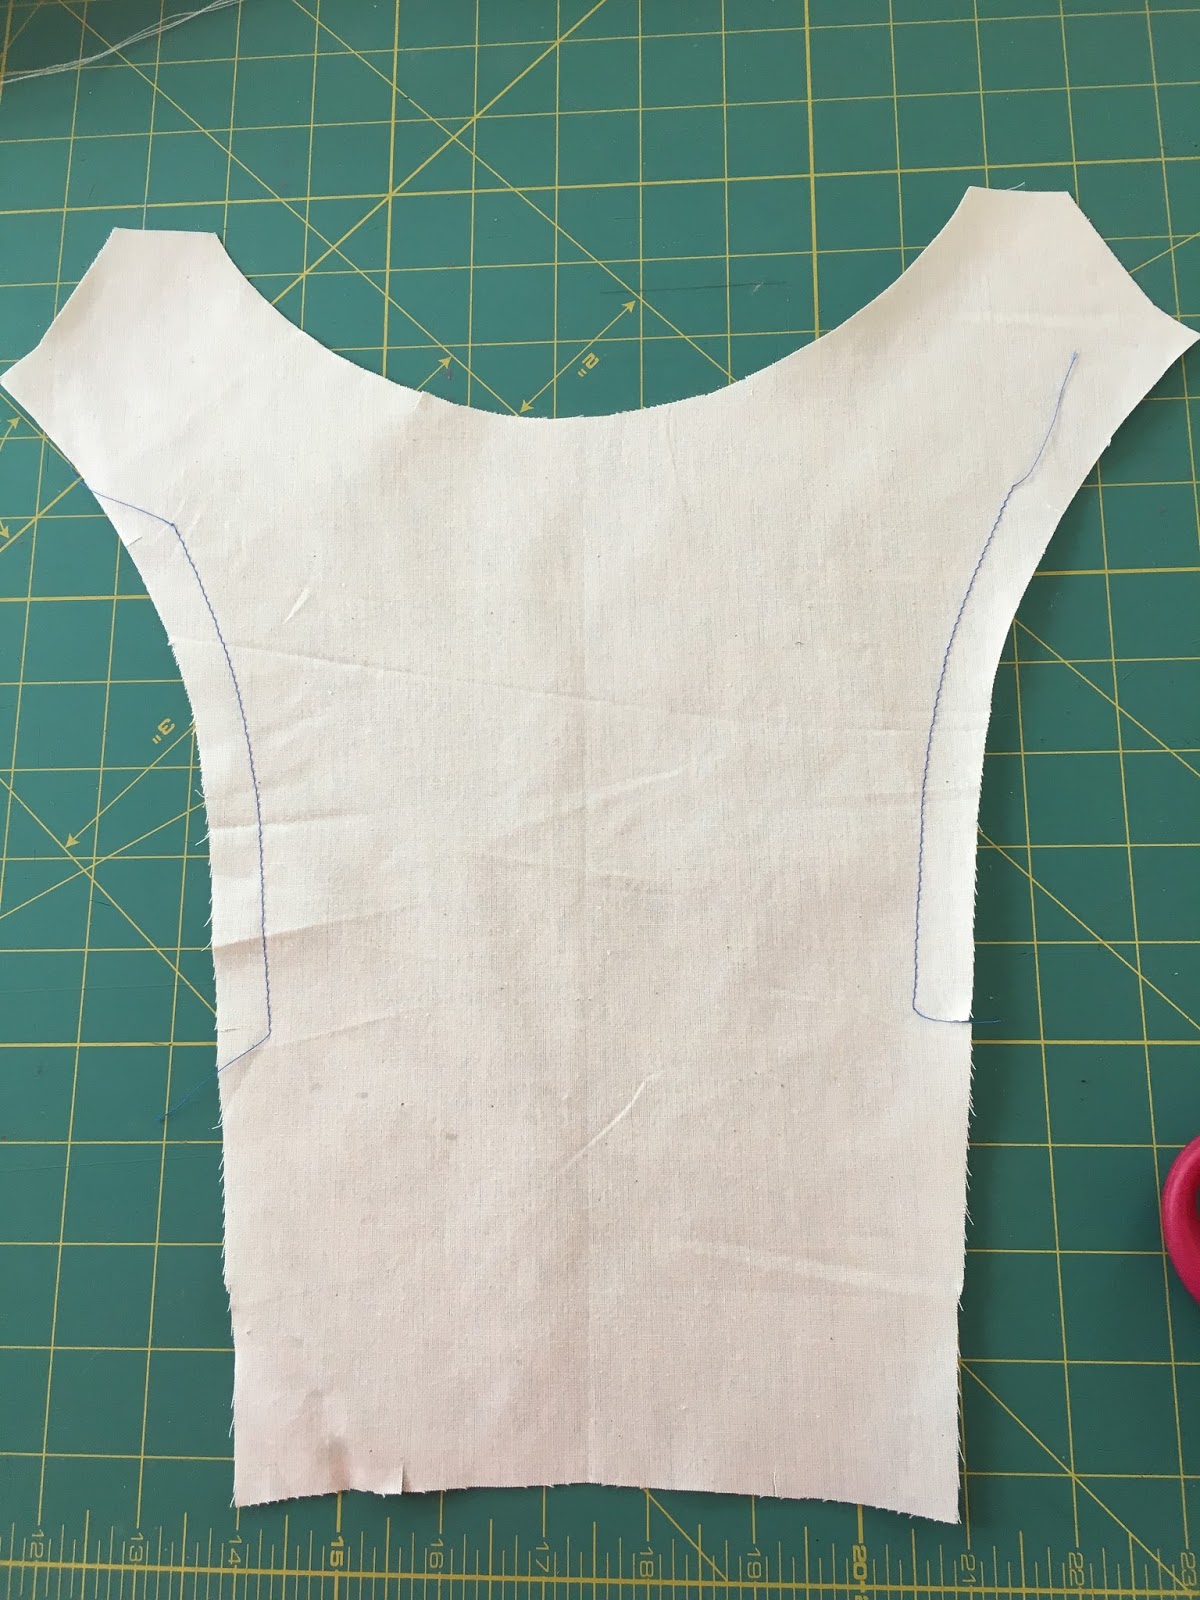
Before we start, a note: If you haven't already, I'd recommend stay stitching the neckline and armholes now that all your bodice pieces are assembled. Do a line of stitching at a 1/2" seam allowance all around, to stabilize the curves around your neckline. It's best to do this directionally, starting at the top of the curve, and always ending your stitching at the lowest point of a curve. This keeps your pieces from stretching from being stitched in opposing directions.
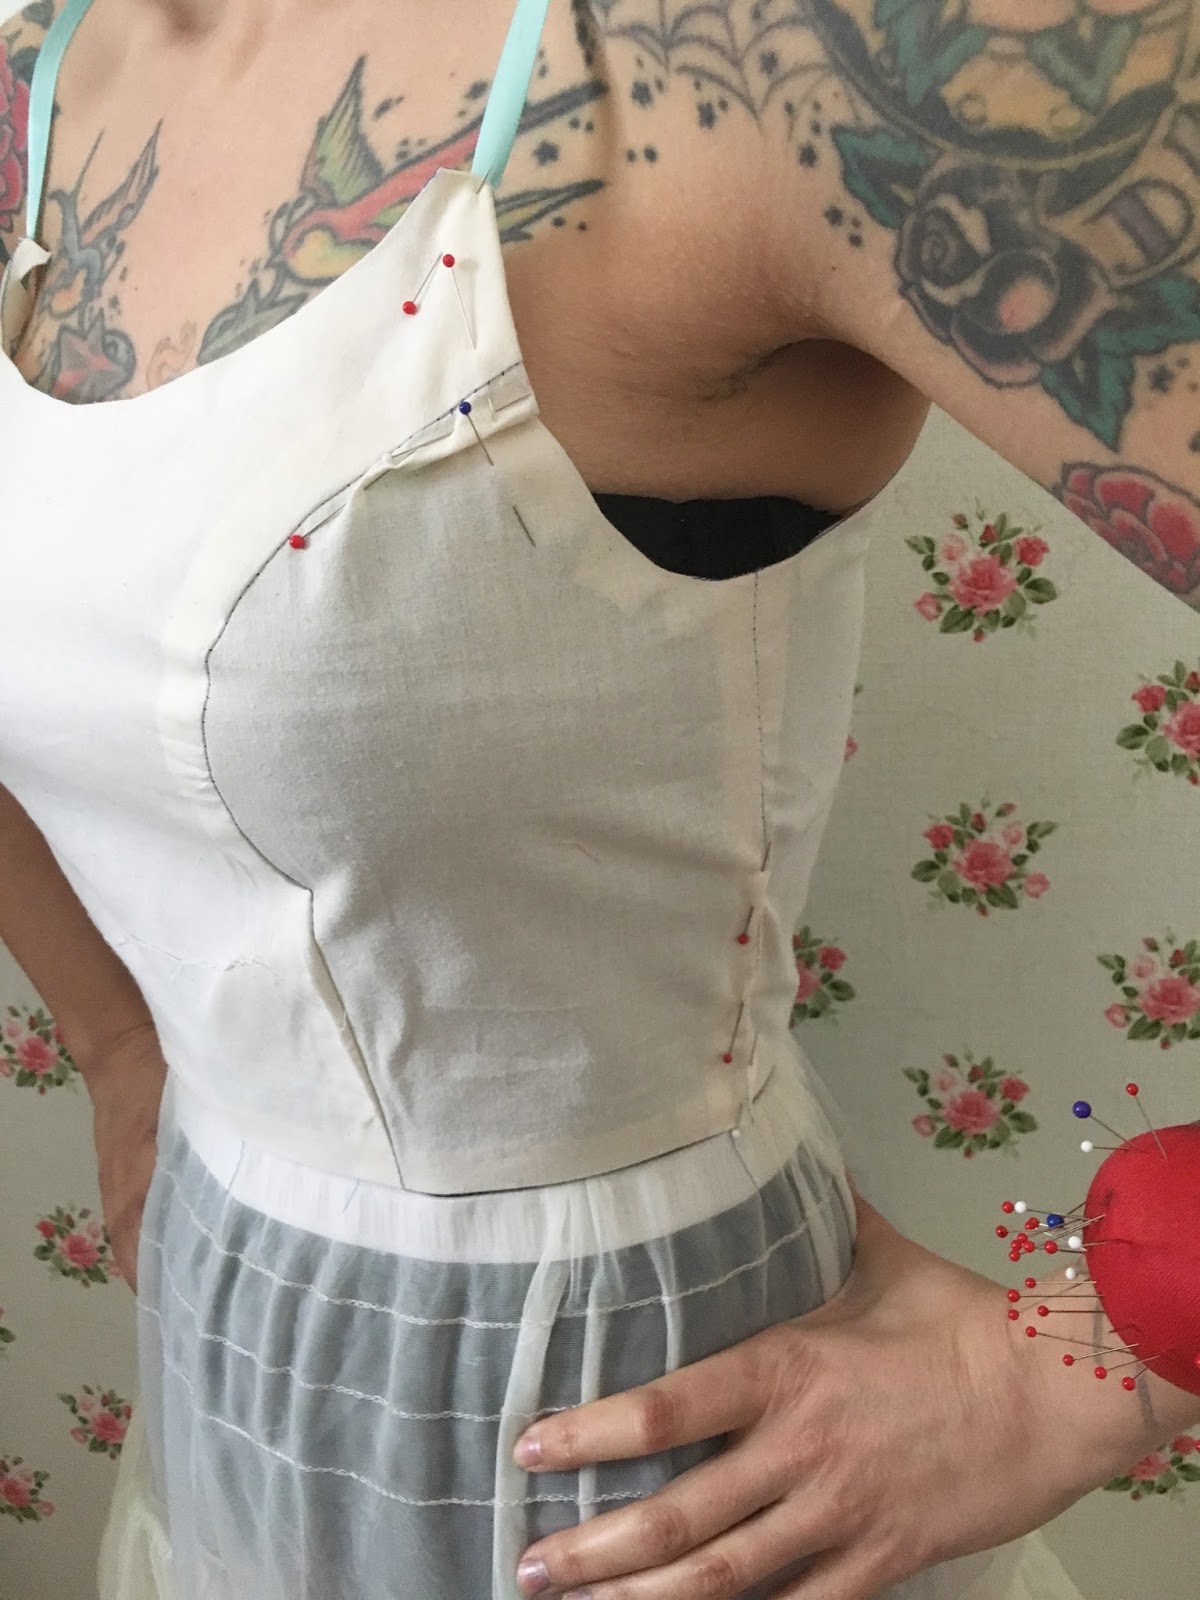
Okay, time for your straps. Remember how we taped the two strap pieces together? So you'll just have two long strips for both the front strap and the back loop.
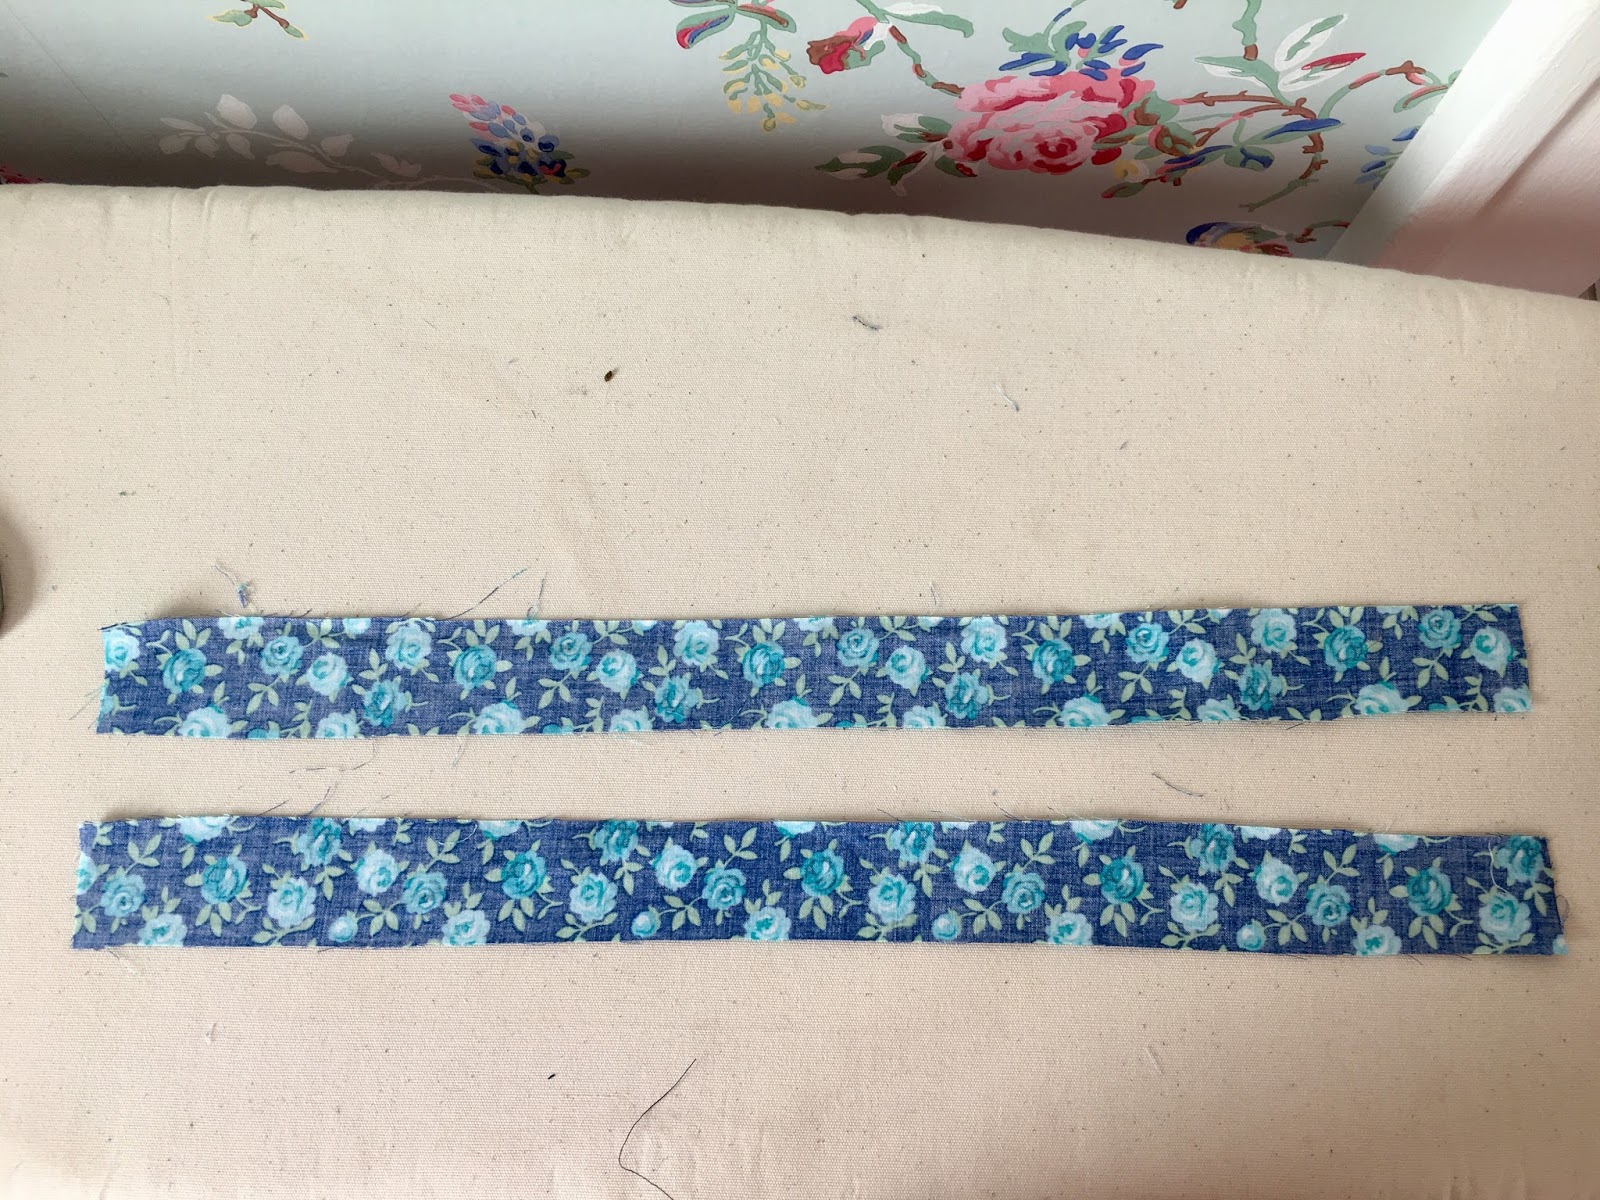
Now I'm going to show you a different way to sew the straps rather than stitching and turning them, as in the pattern directions. I'm going to turn in the straps and edgestitch, which means no turning is involved. Yay!
Fold each strip in half lengthwise and press a crease.
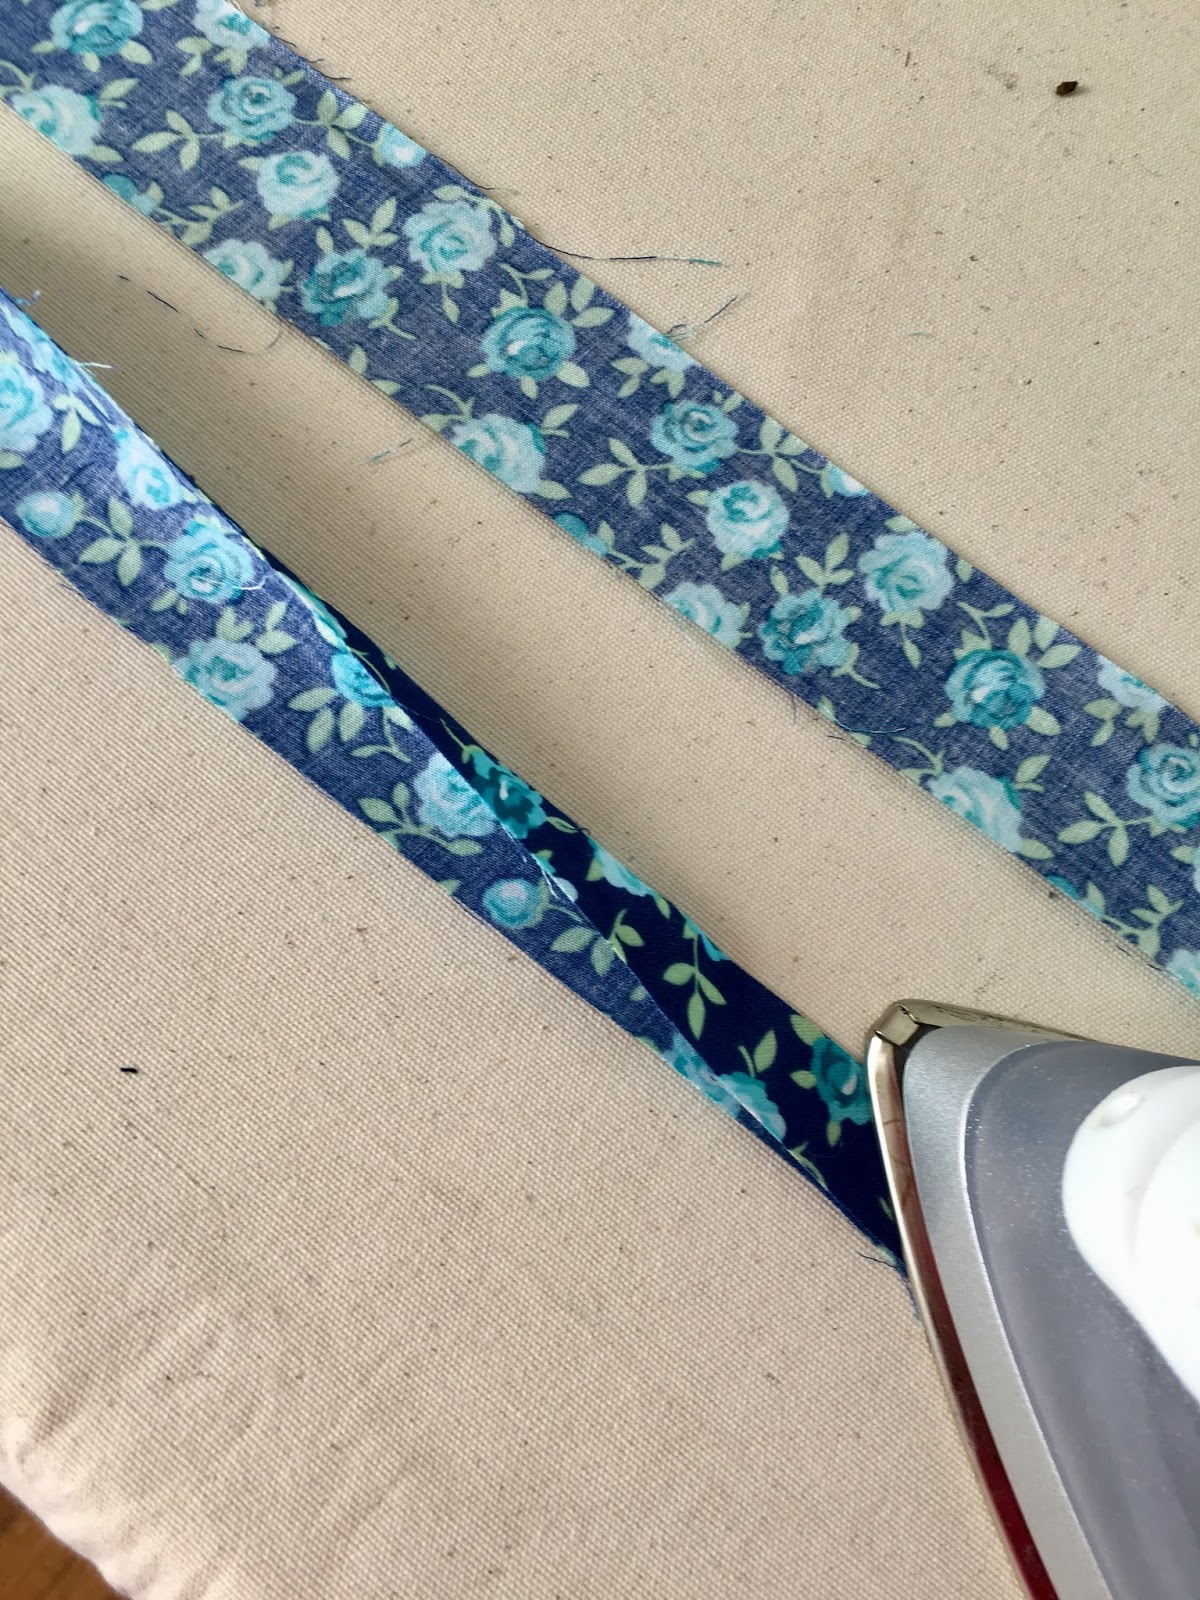
Then turn in each side to meet the crease. Use the tip of your iron along the very edge of the fold so you don't press out your first crease.
Now fold in half along the original lengthwise crease.
Edgestitch along the open side. I use my #10 Edgestitch Foot for this.
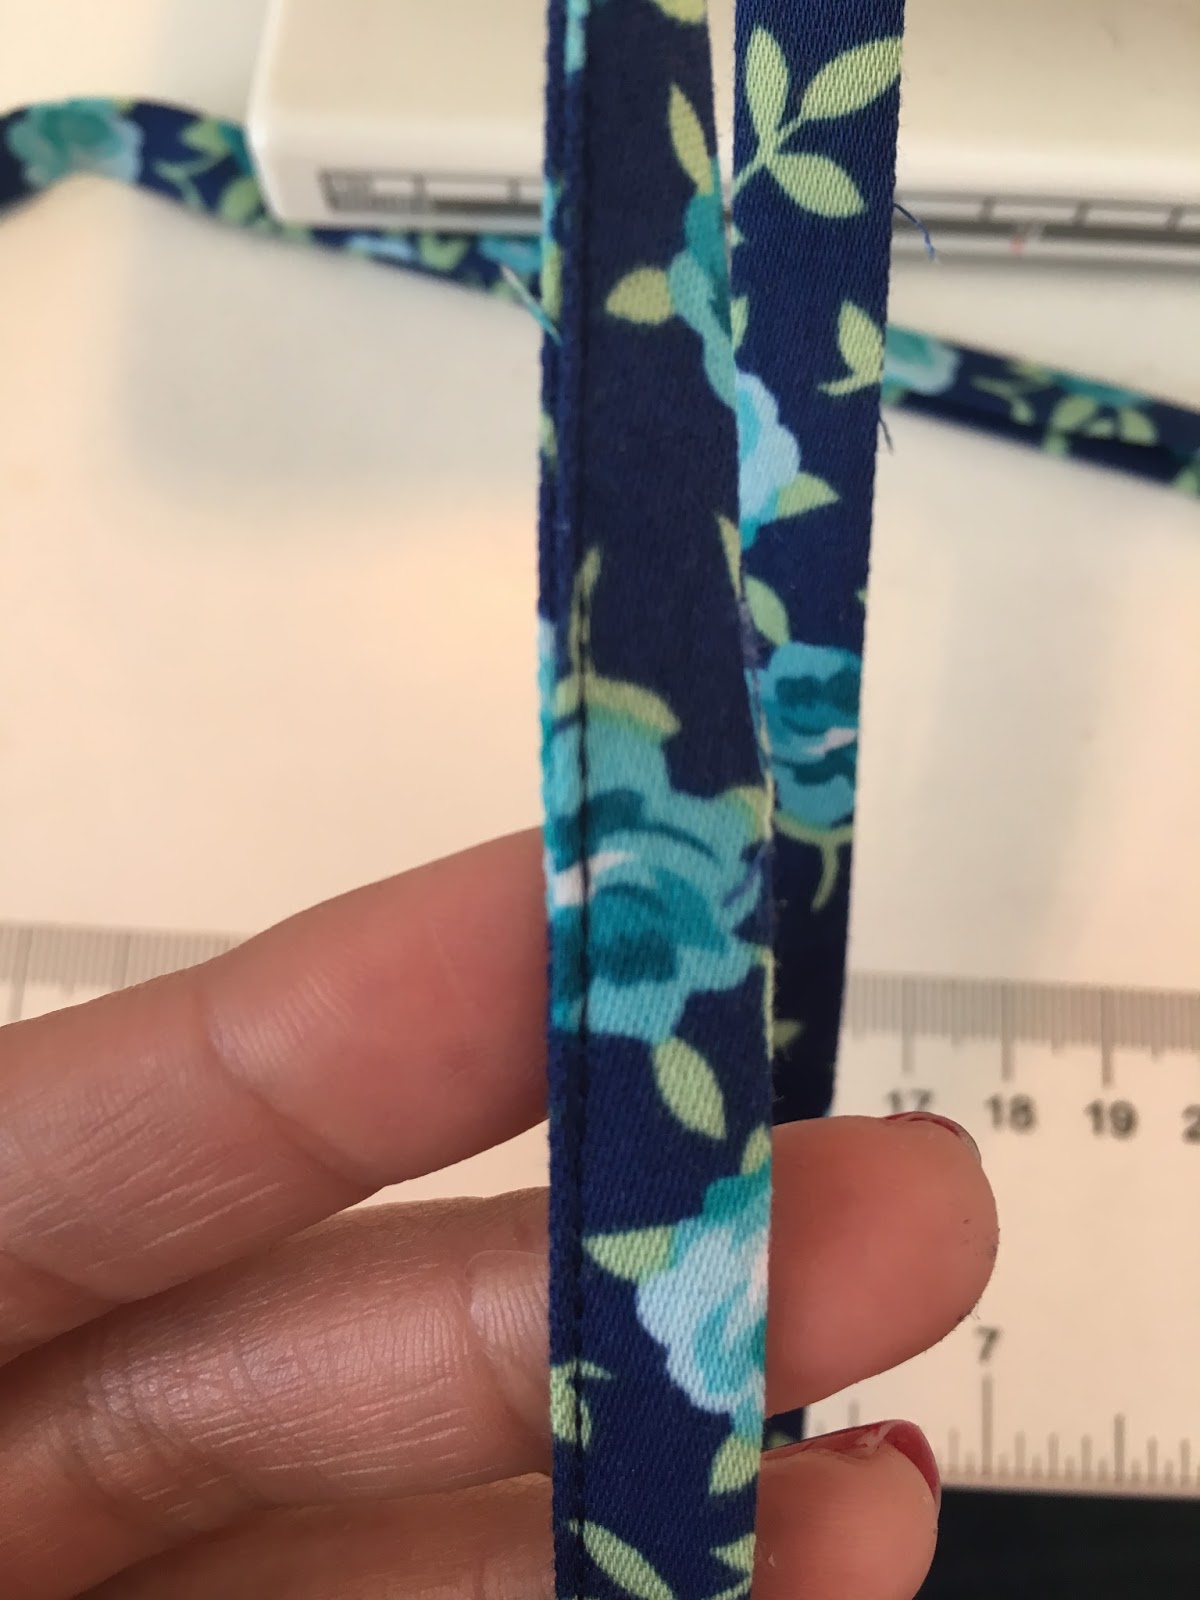
Finished straps, no turning involved.

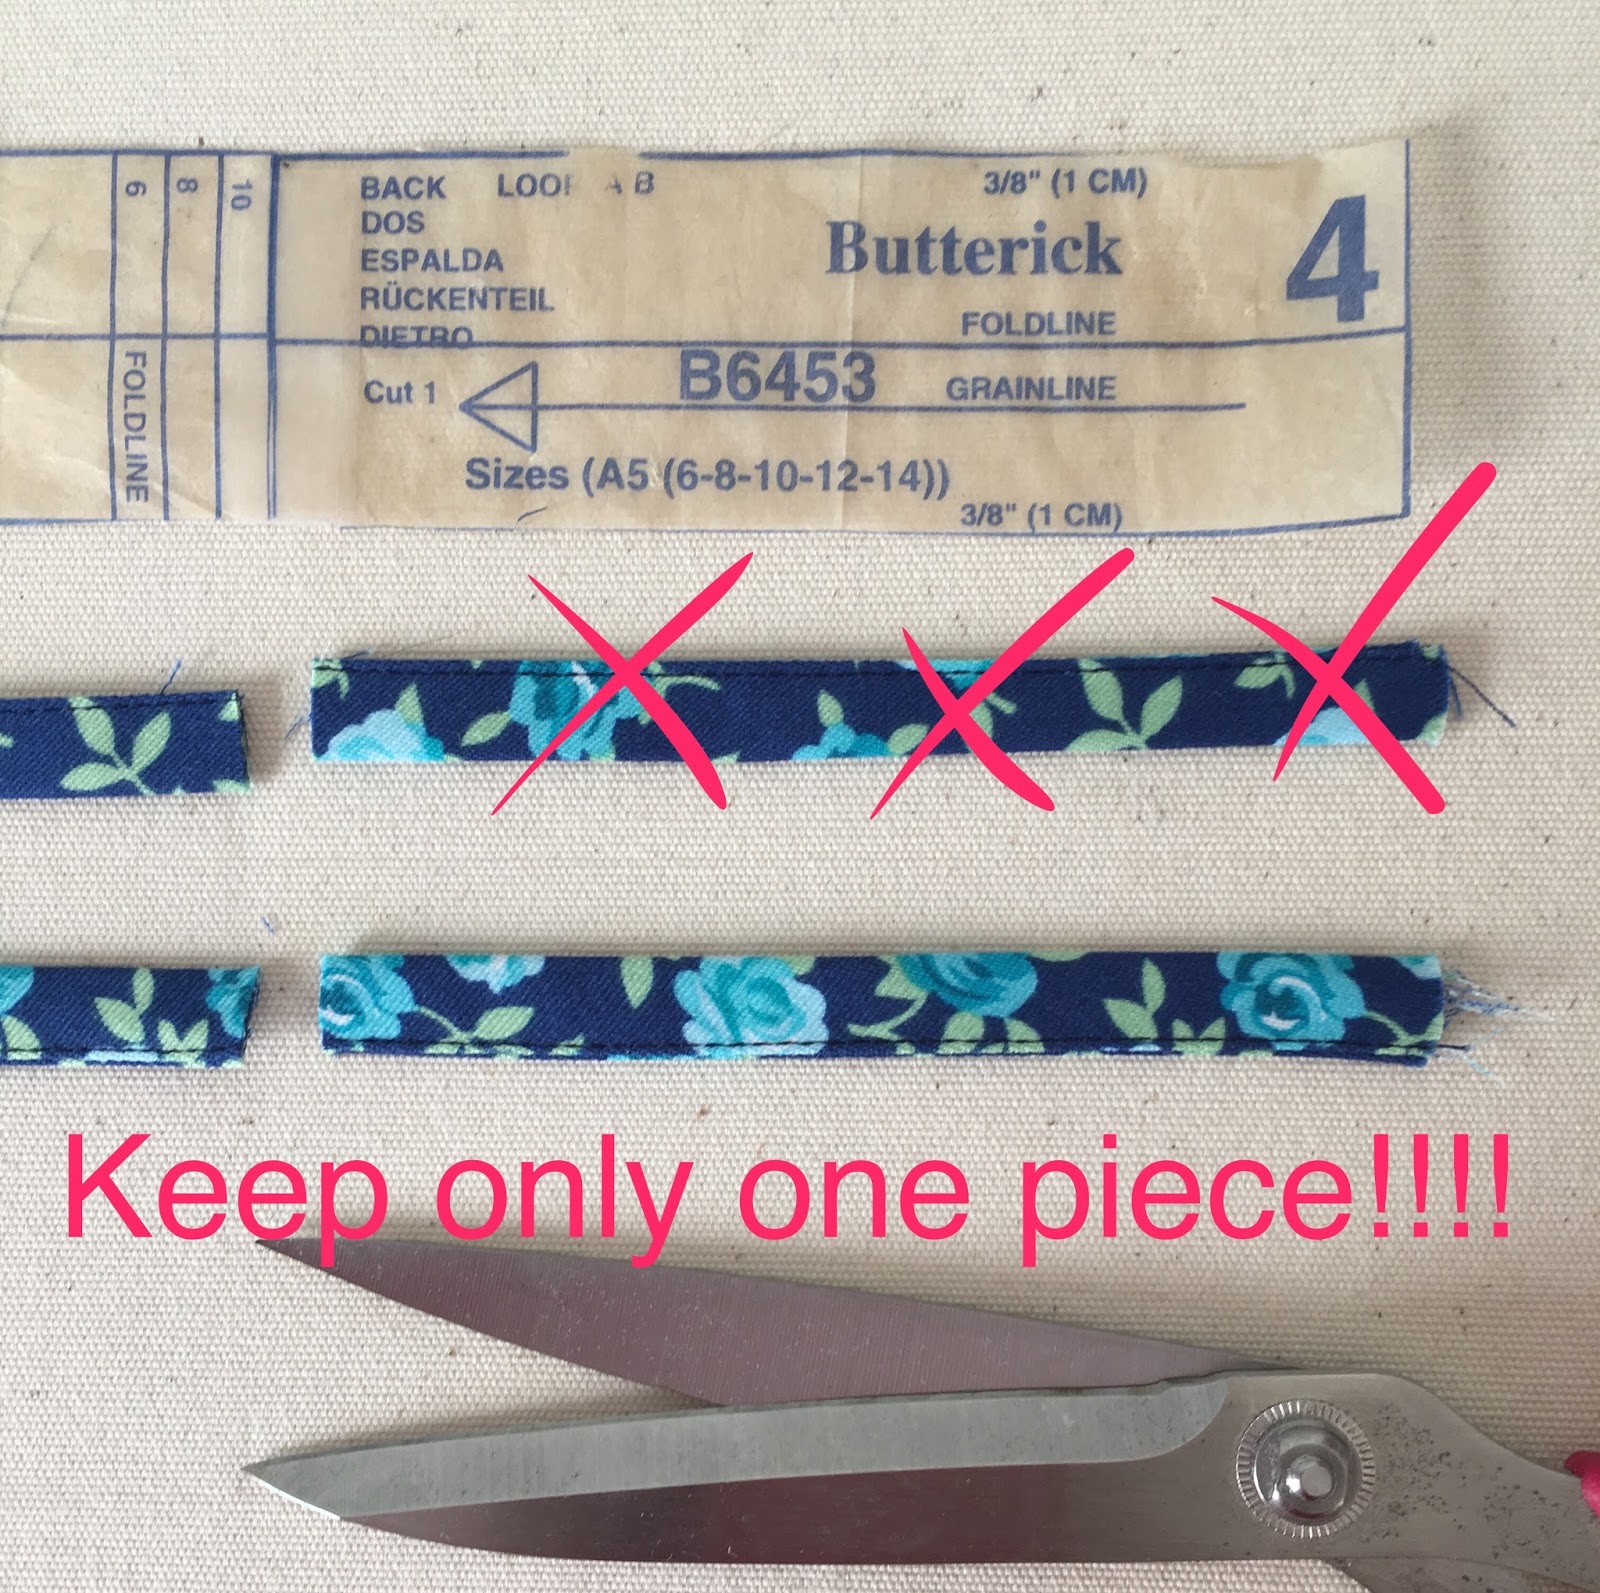
Okay, take your pattern piece and chop off the ends where you joined the two pattern pieces.

Now get rid of one of those pieces; you only need one!
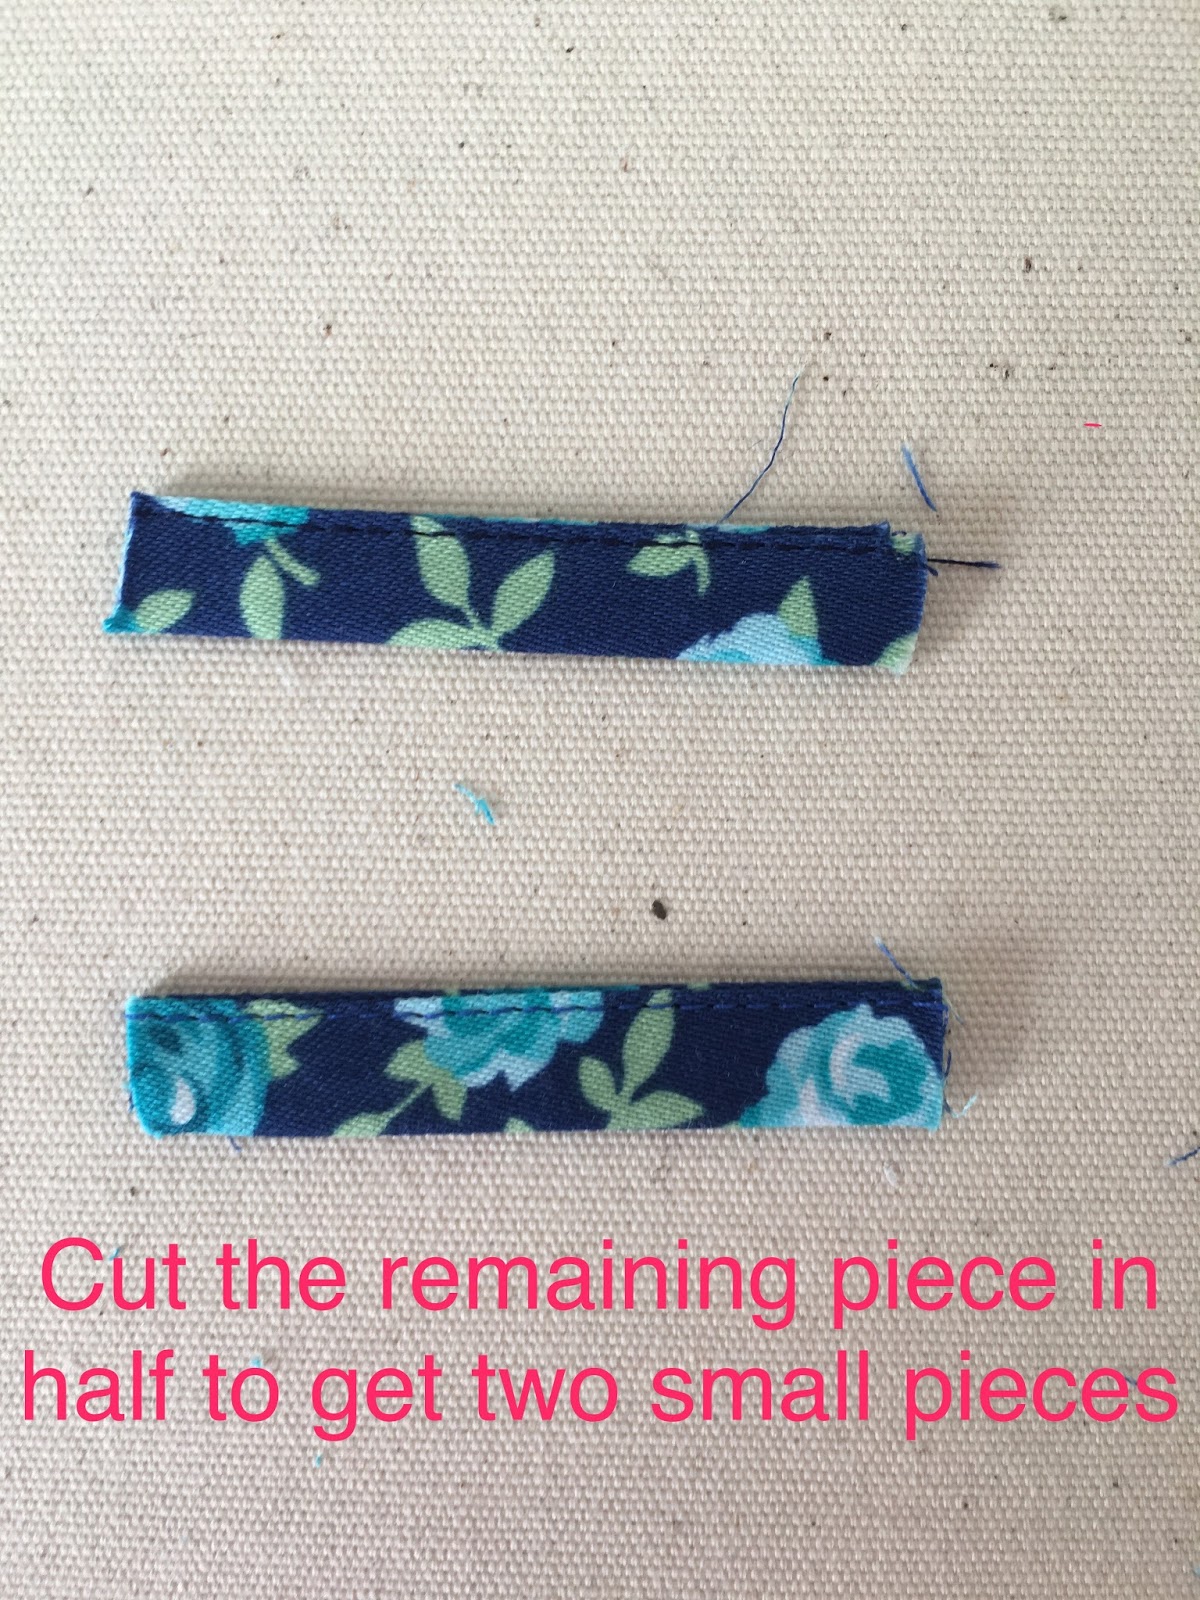
Now cut that remaining piece in half to get two small pieces. These are your back strap loops.
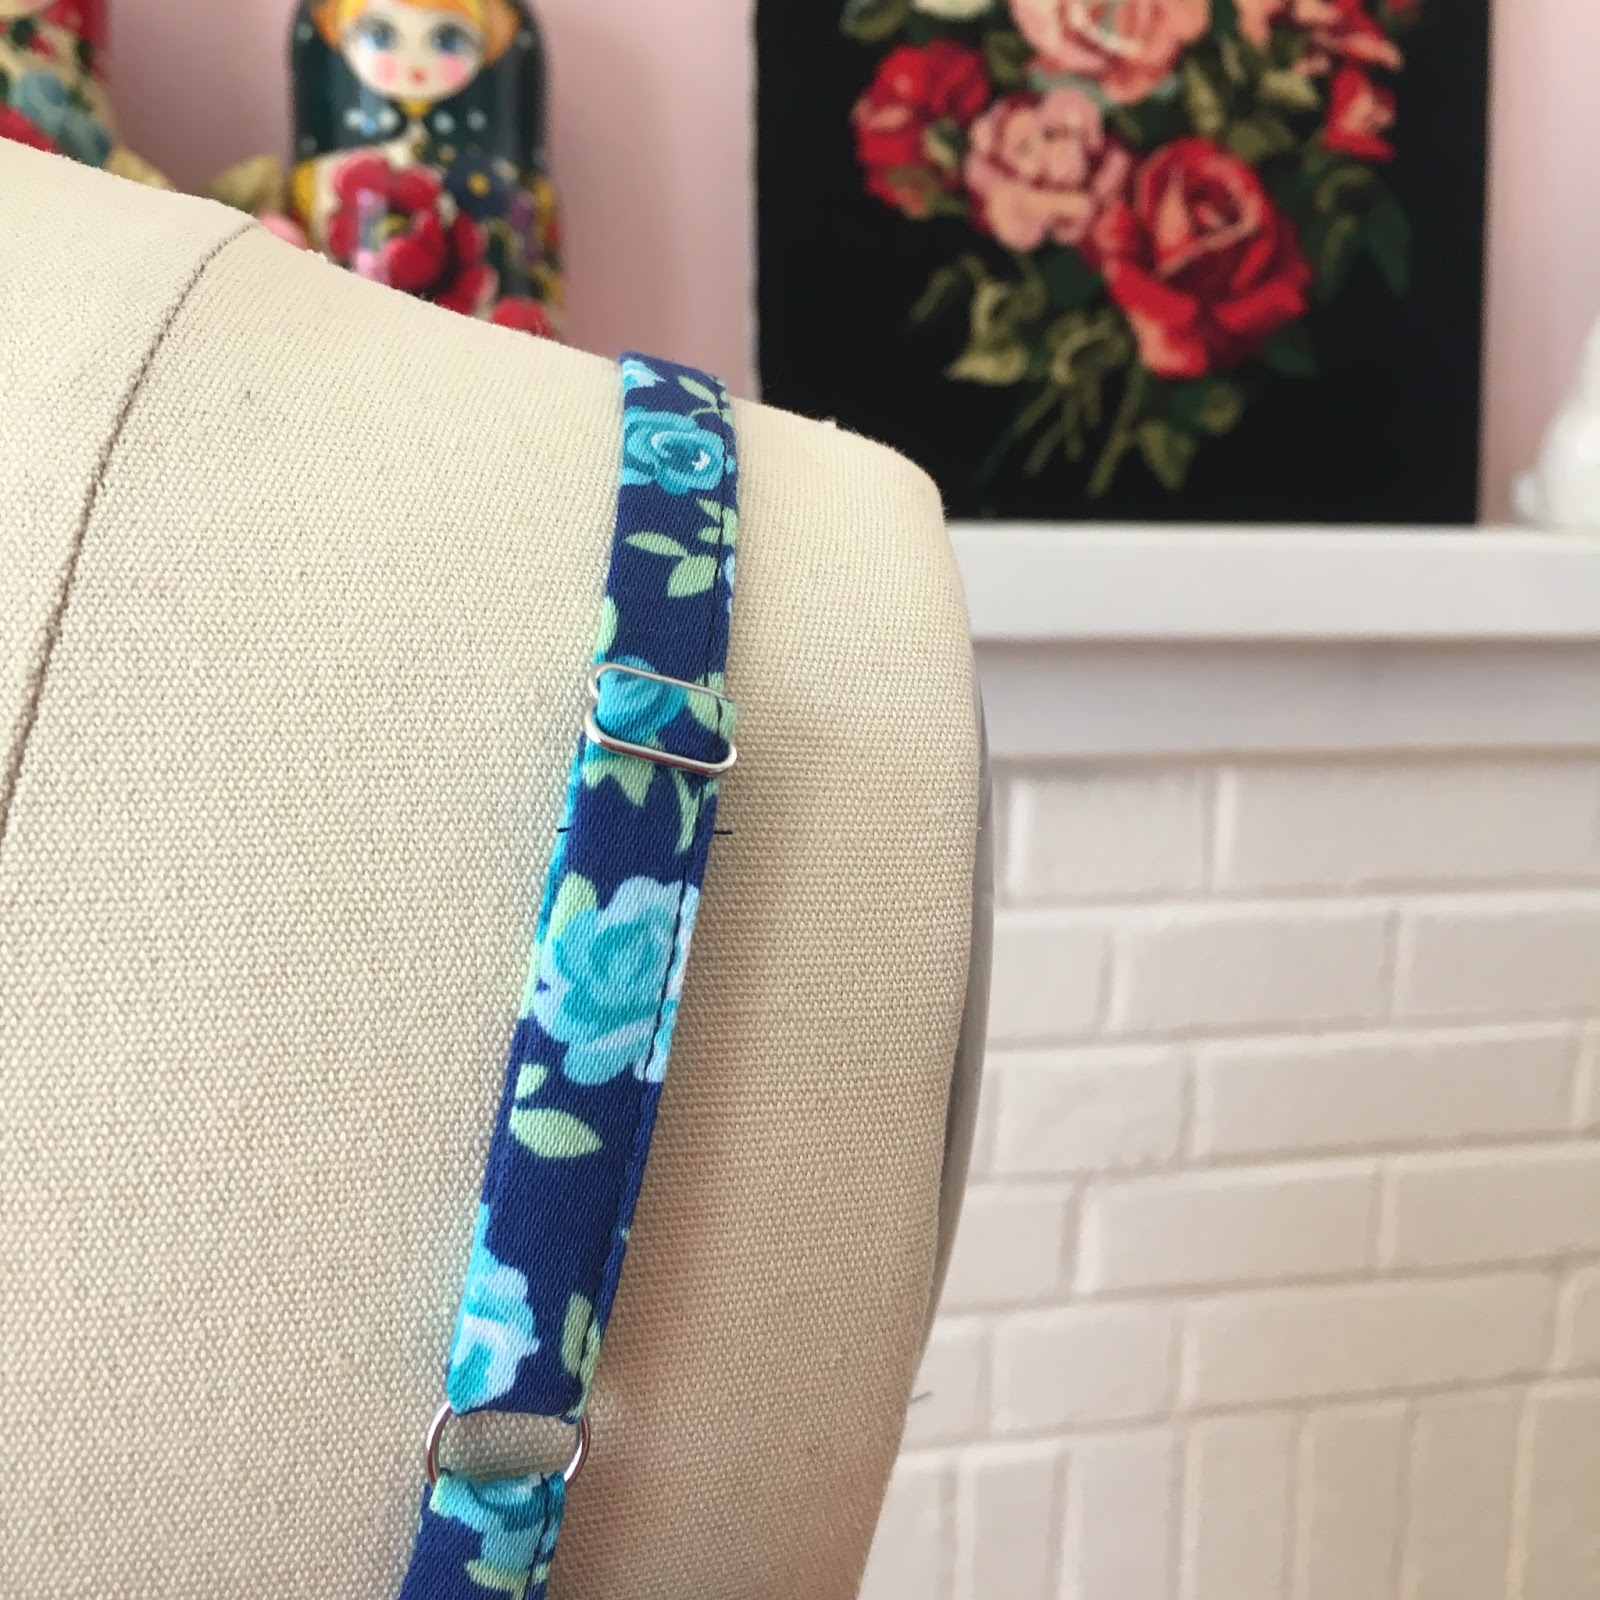
Thread a ring onto each small loop, like so:
 Fold in half and pin to your dress bodice back, centering over your circle marks (which I mark with an X for accuracy). I position them with the edge stitching on the outer (shoulder edge of each) so it looks symmetrical.
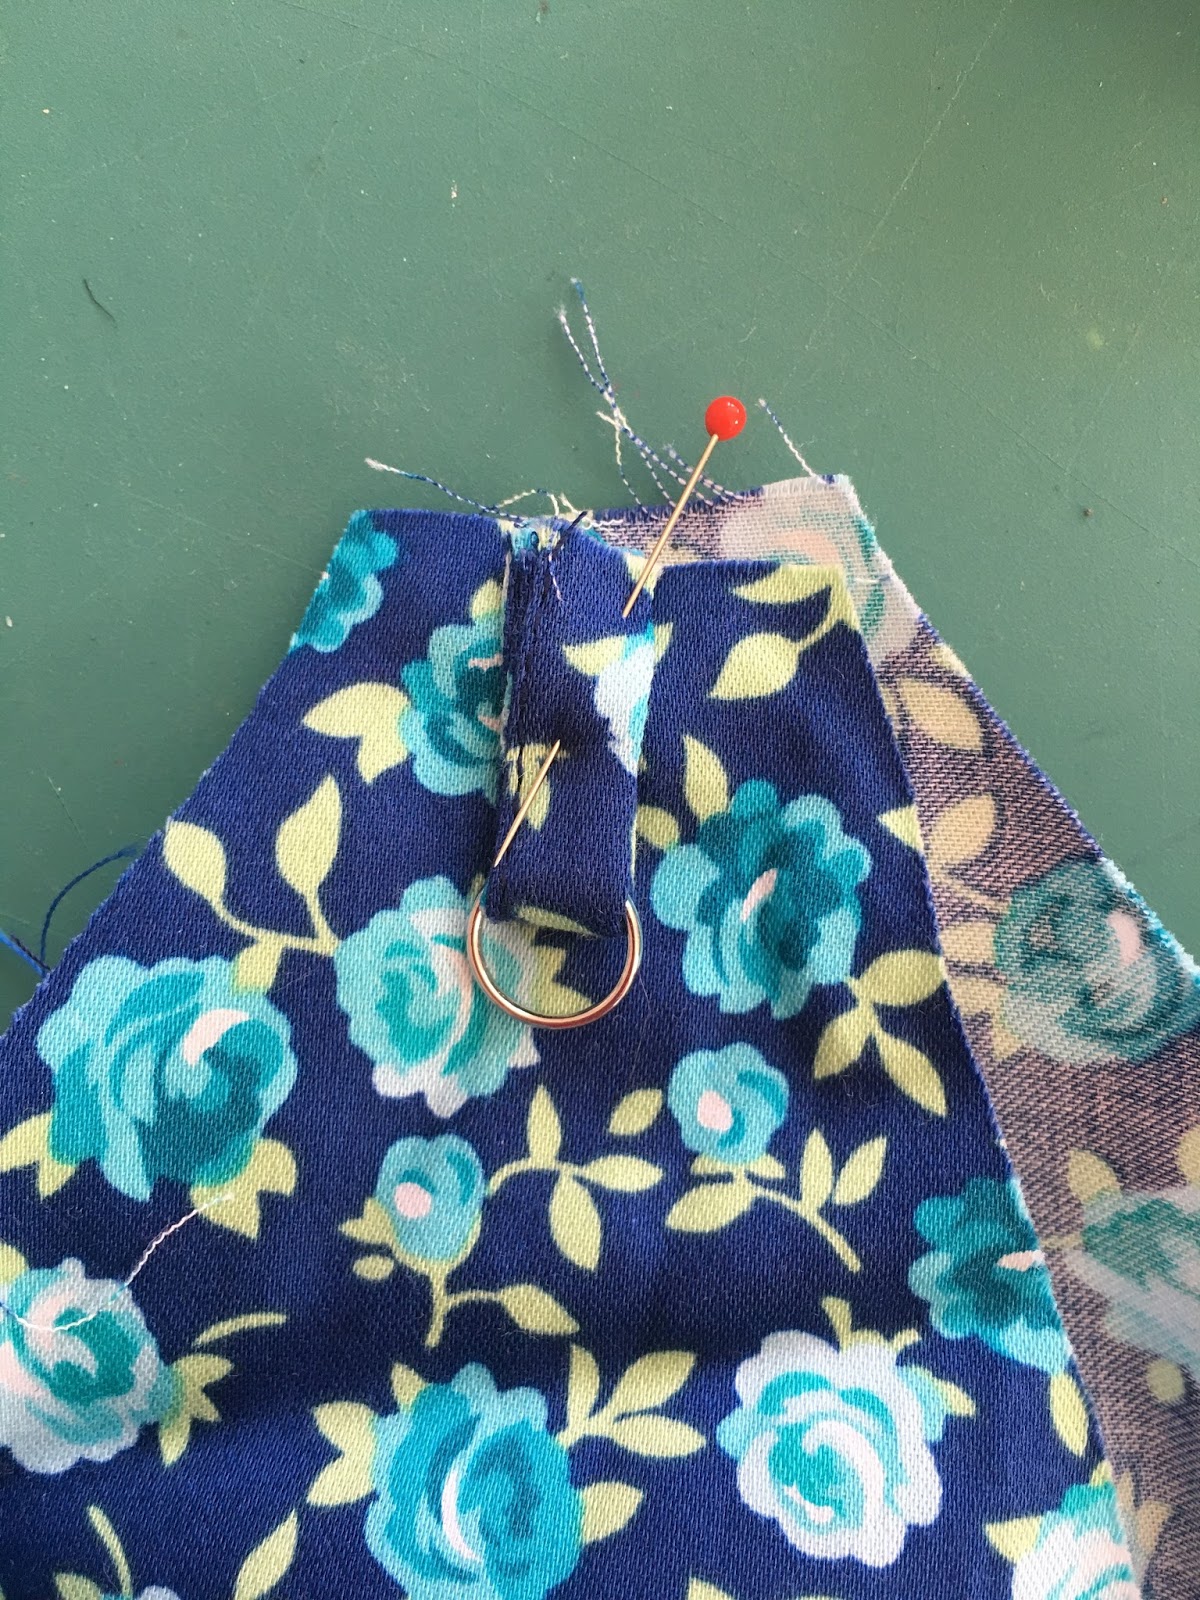
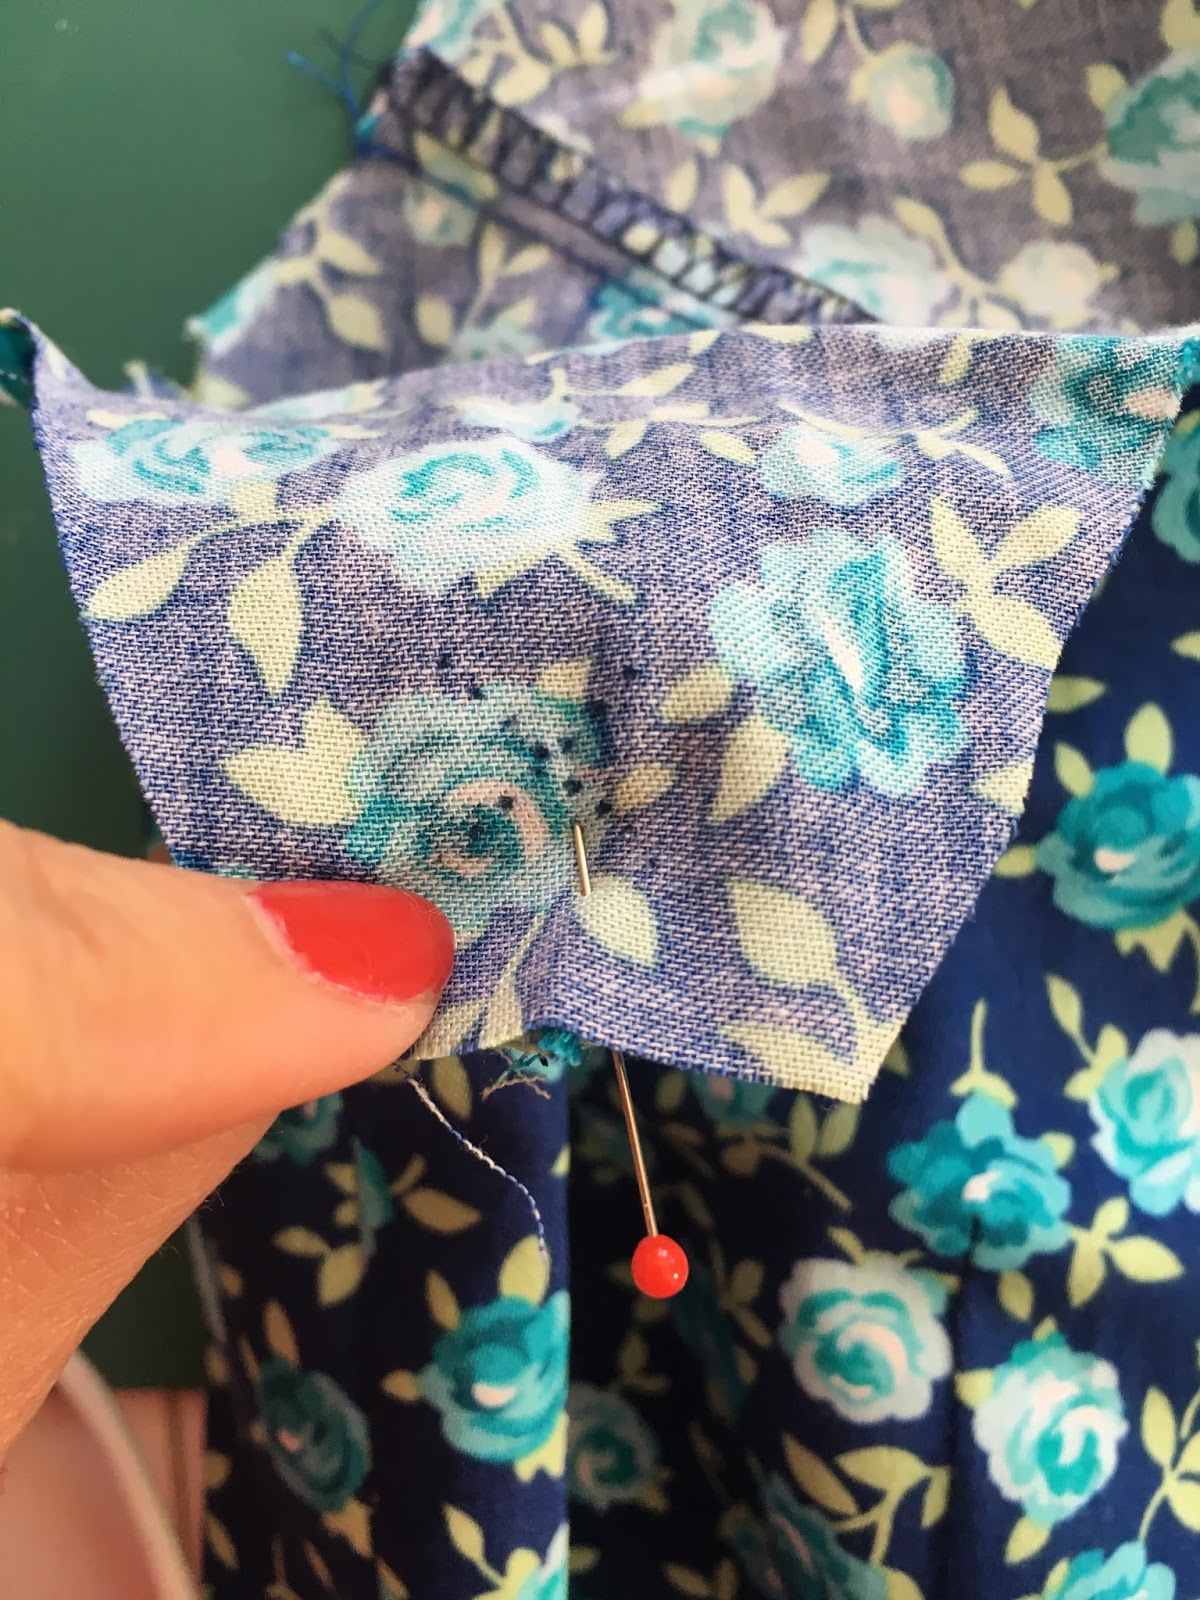 Baste the strap onto the dress.
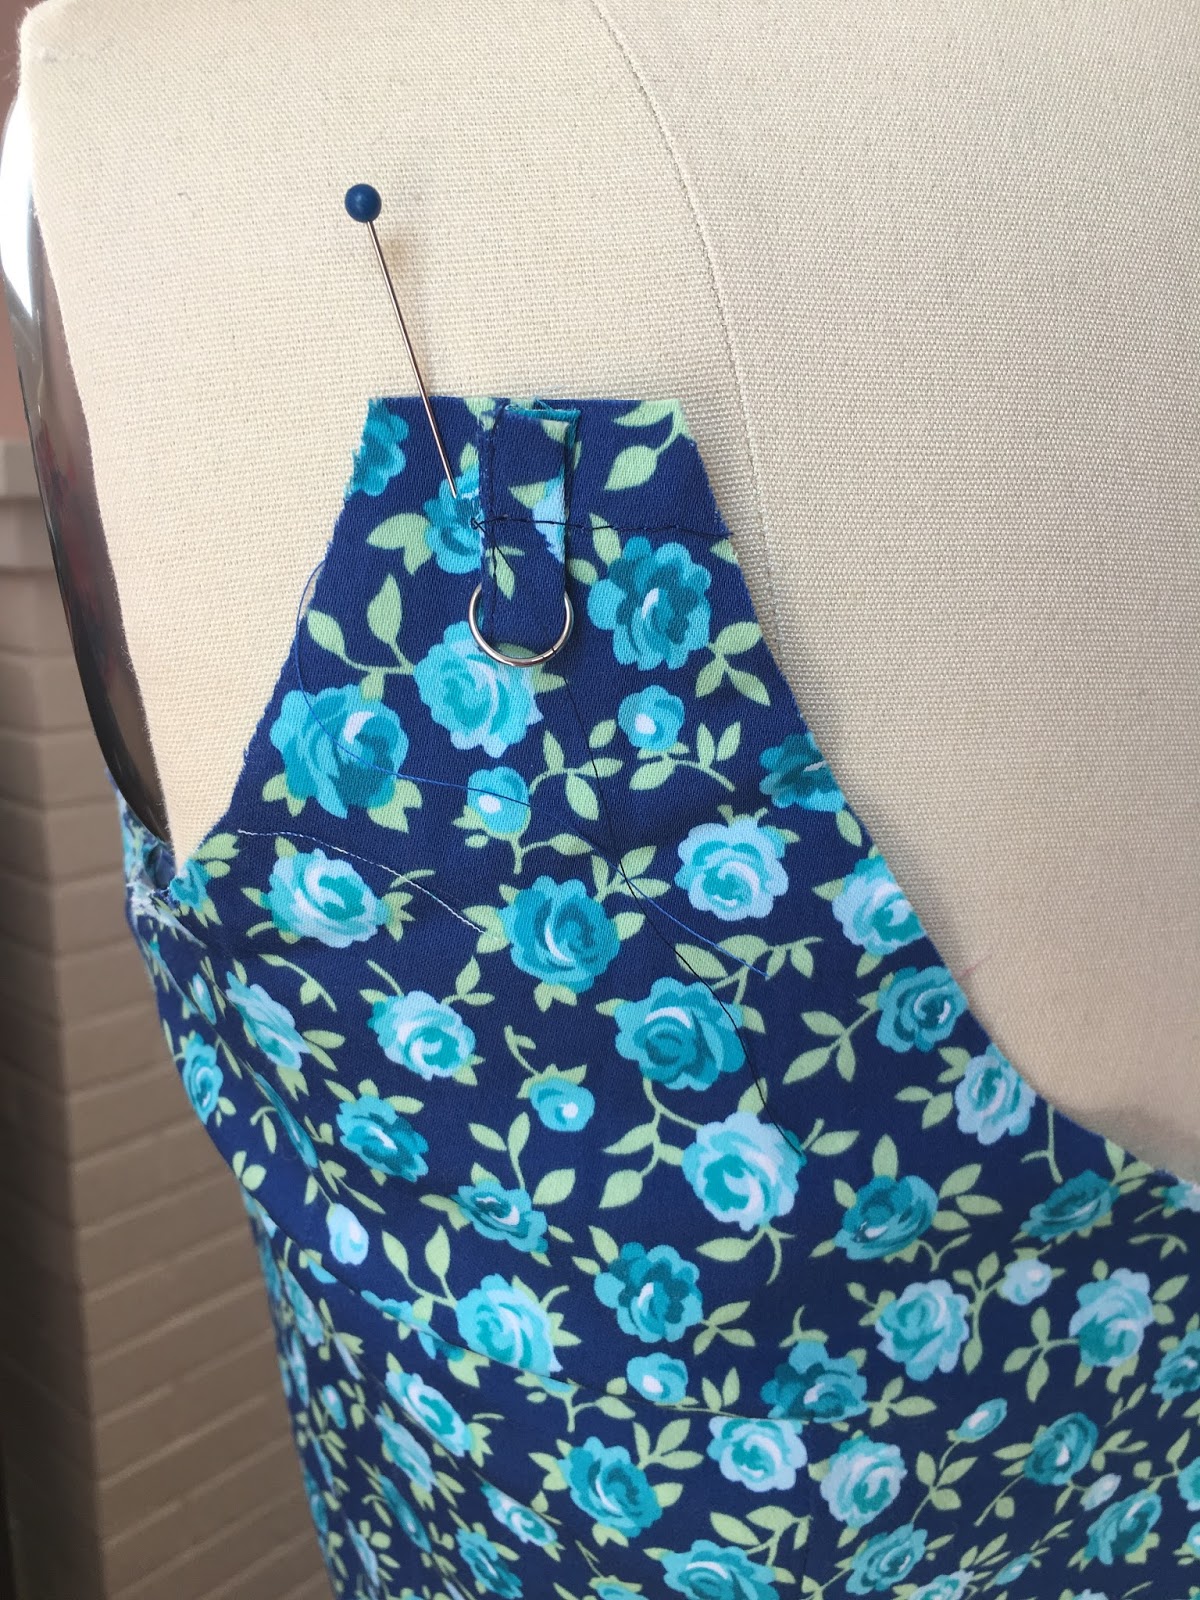
Okay, the next part required a video to explain. It's a but tricky to see (and to do on camera) but I hope it makes sense.
Attach that little bit to the strap using a zipper foot so you can stitch close to the slider.
Finally, attach the end of the front strap to the front bodice just like you did for the back bodice, centering over the mark, with the strap facing down.
There you have it: fully adjustable straps!

March 17, 2017
B6453 Sew Along: Steps 1-4
Time to sew! Today we're doing steps 1-4 on the pattern instruction sheet. My next post will be on Tuesday, so you'll have the weekend to catch up!
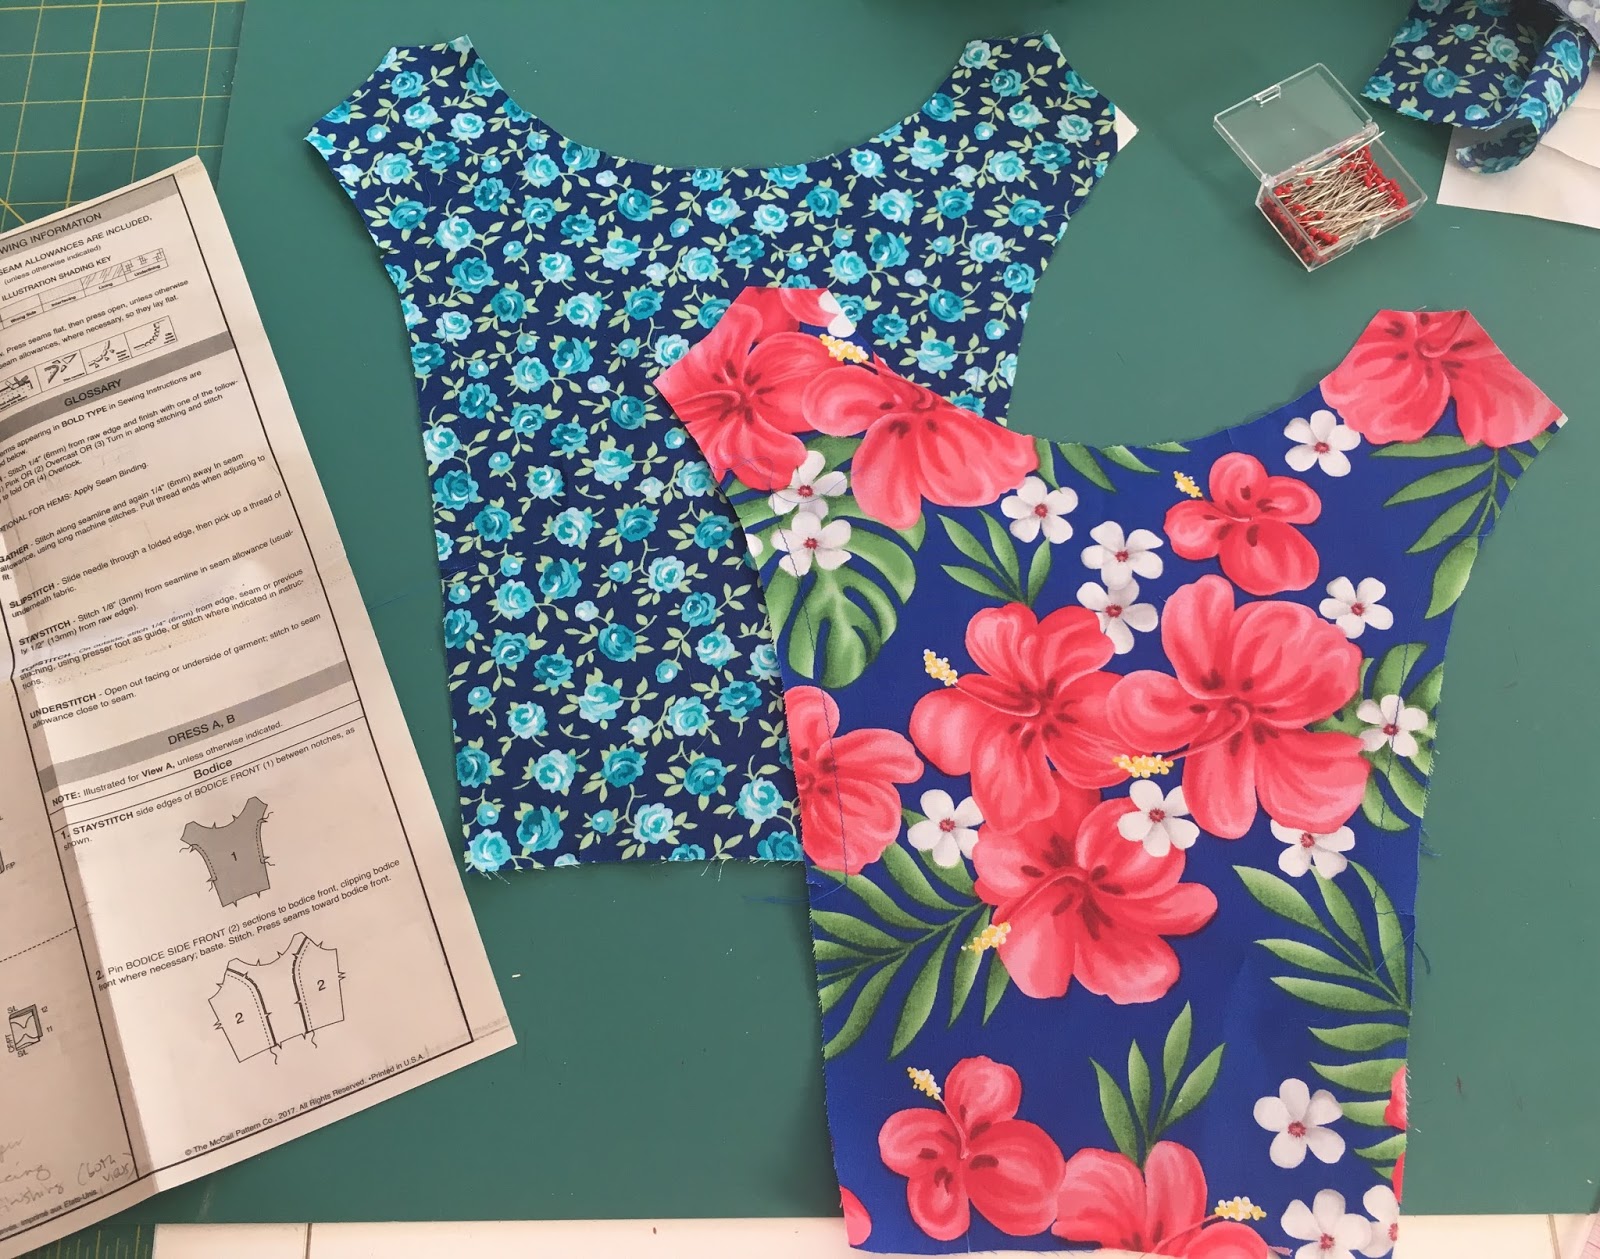
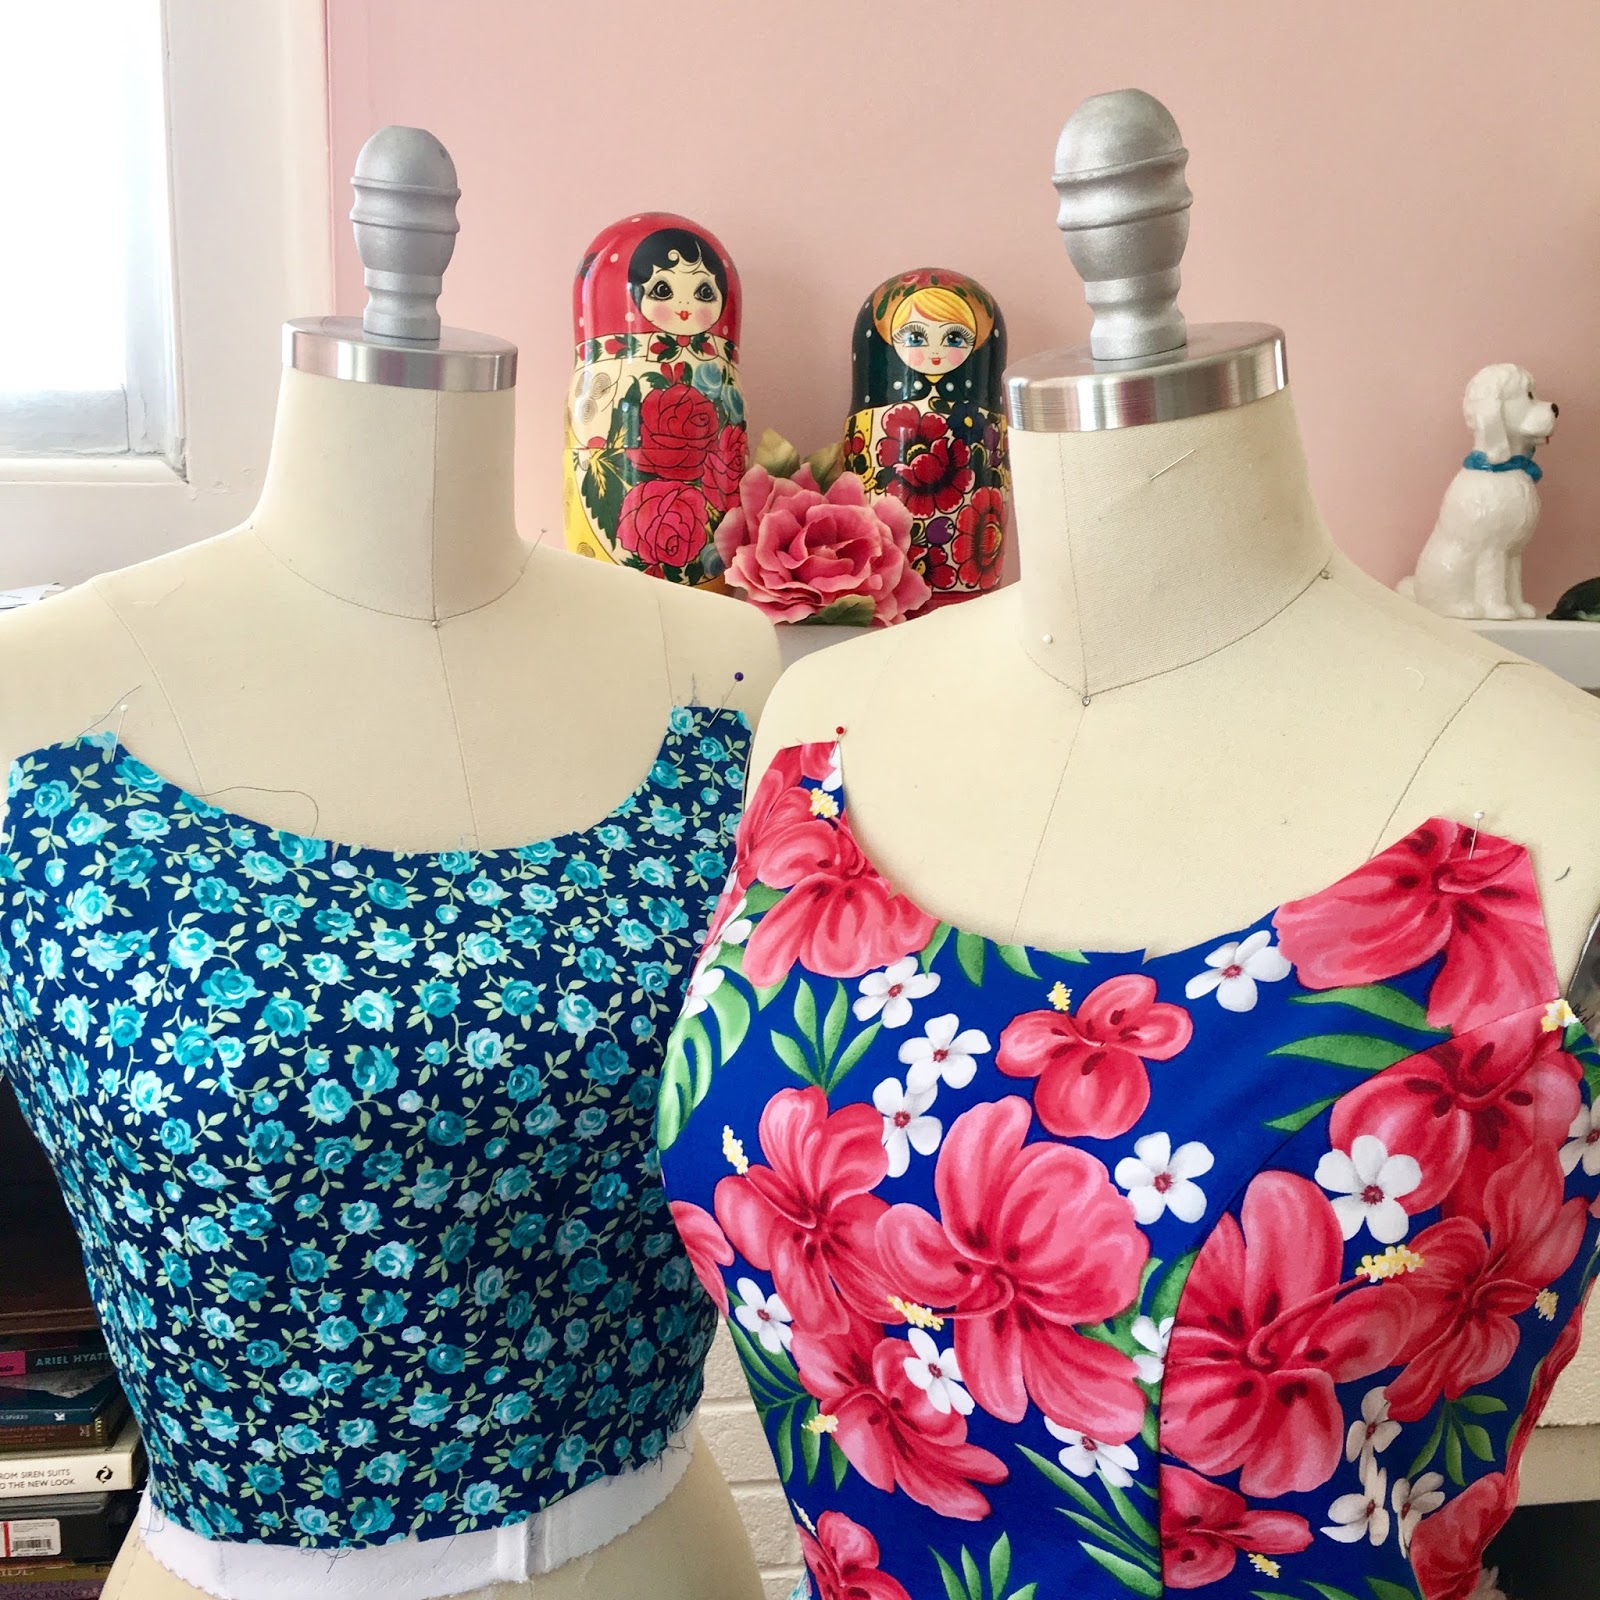
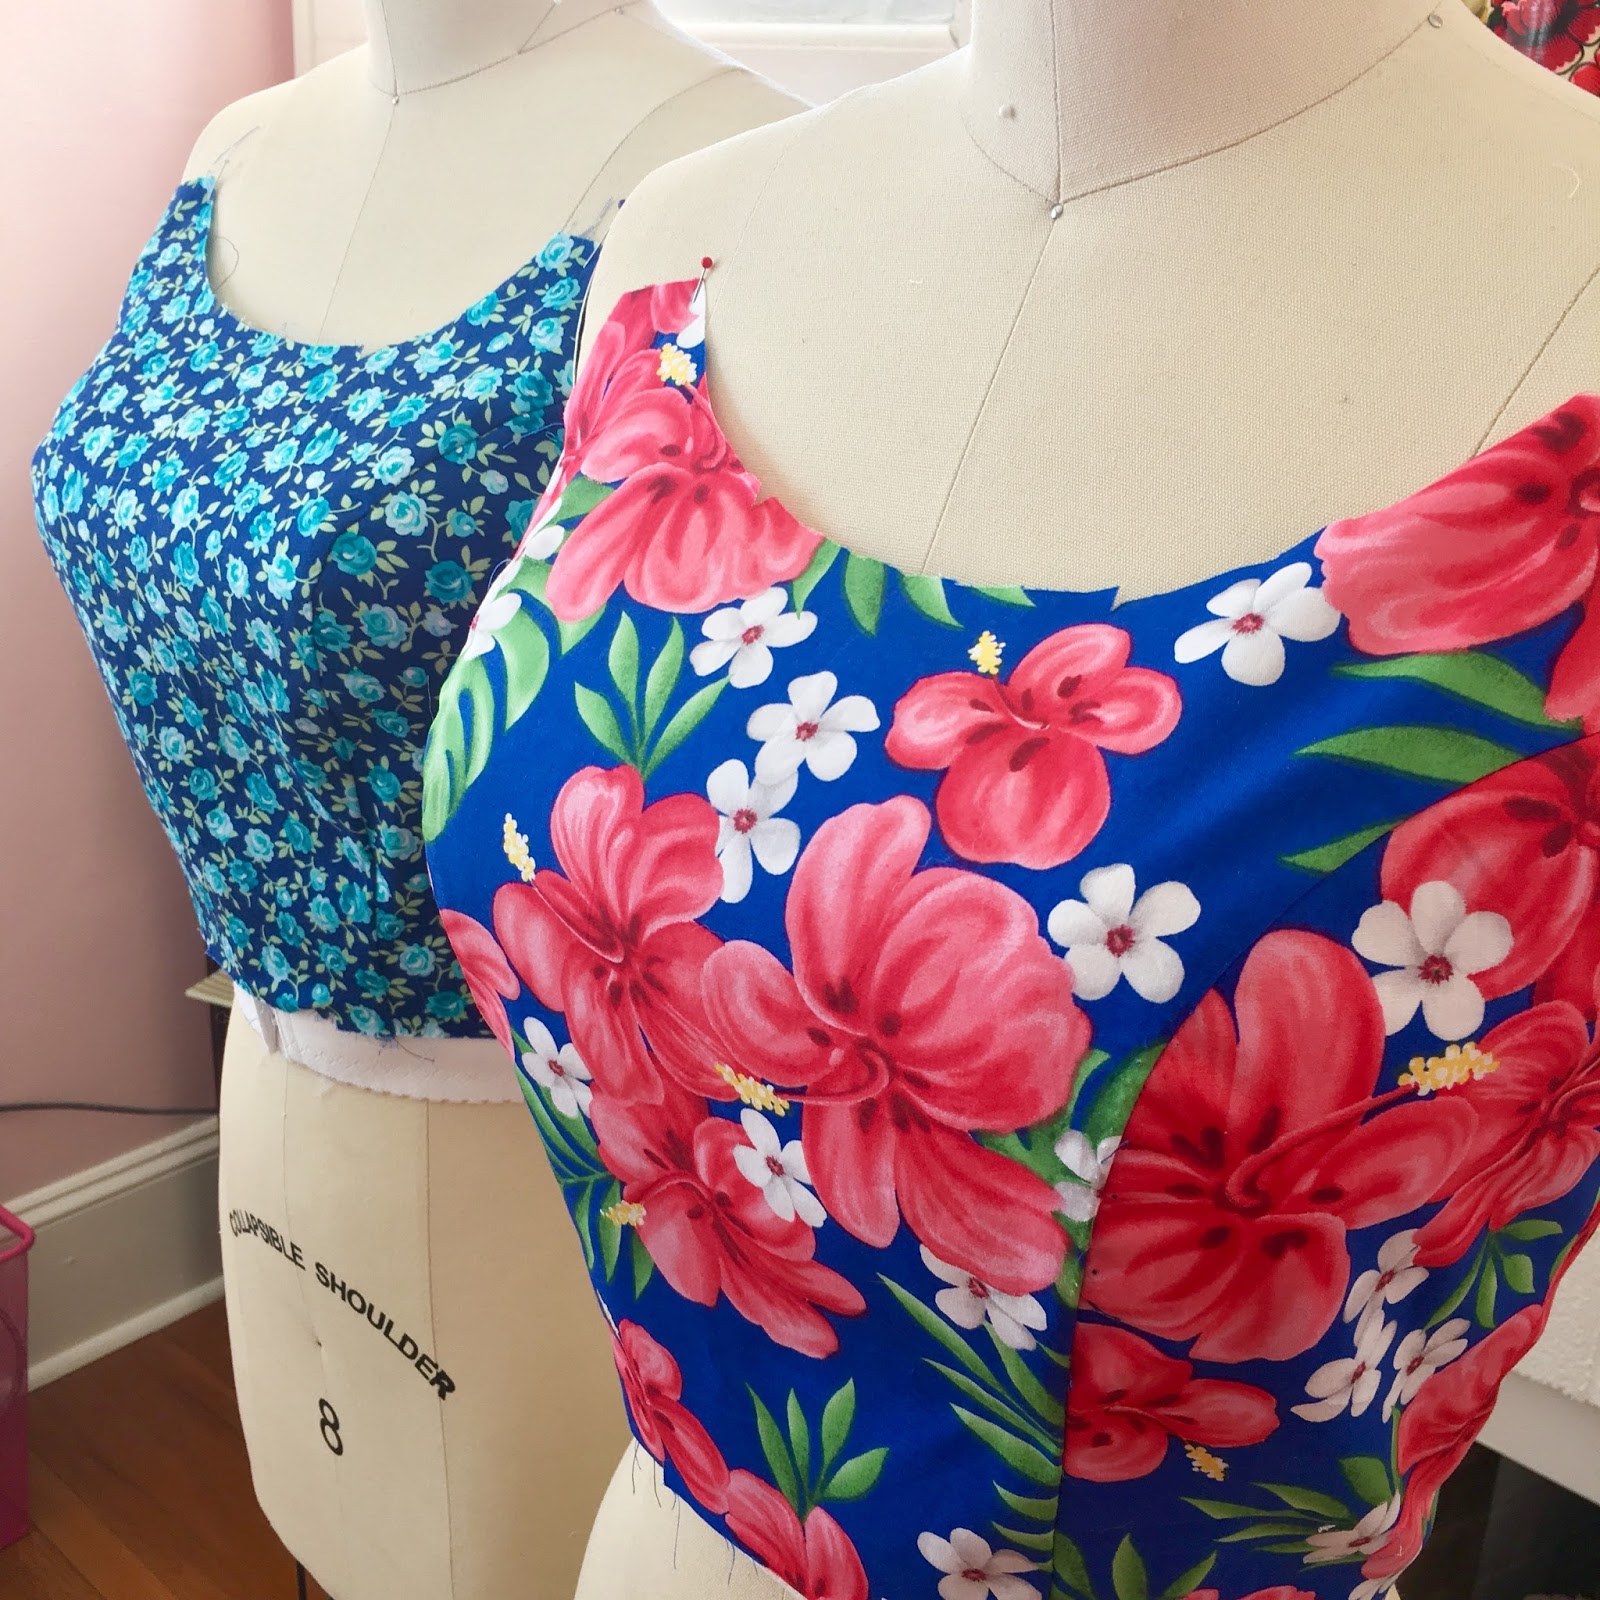
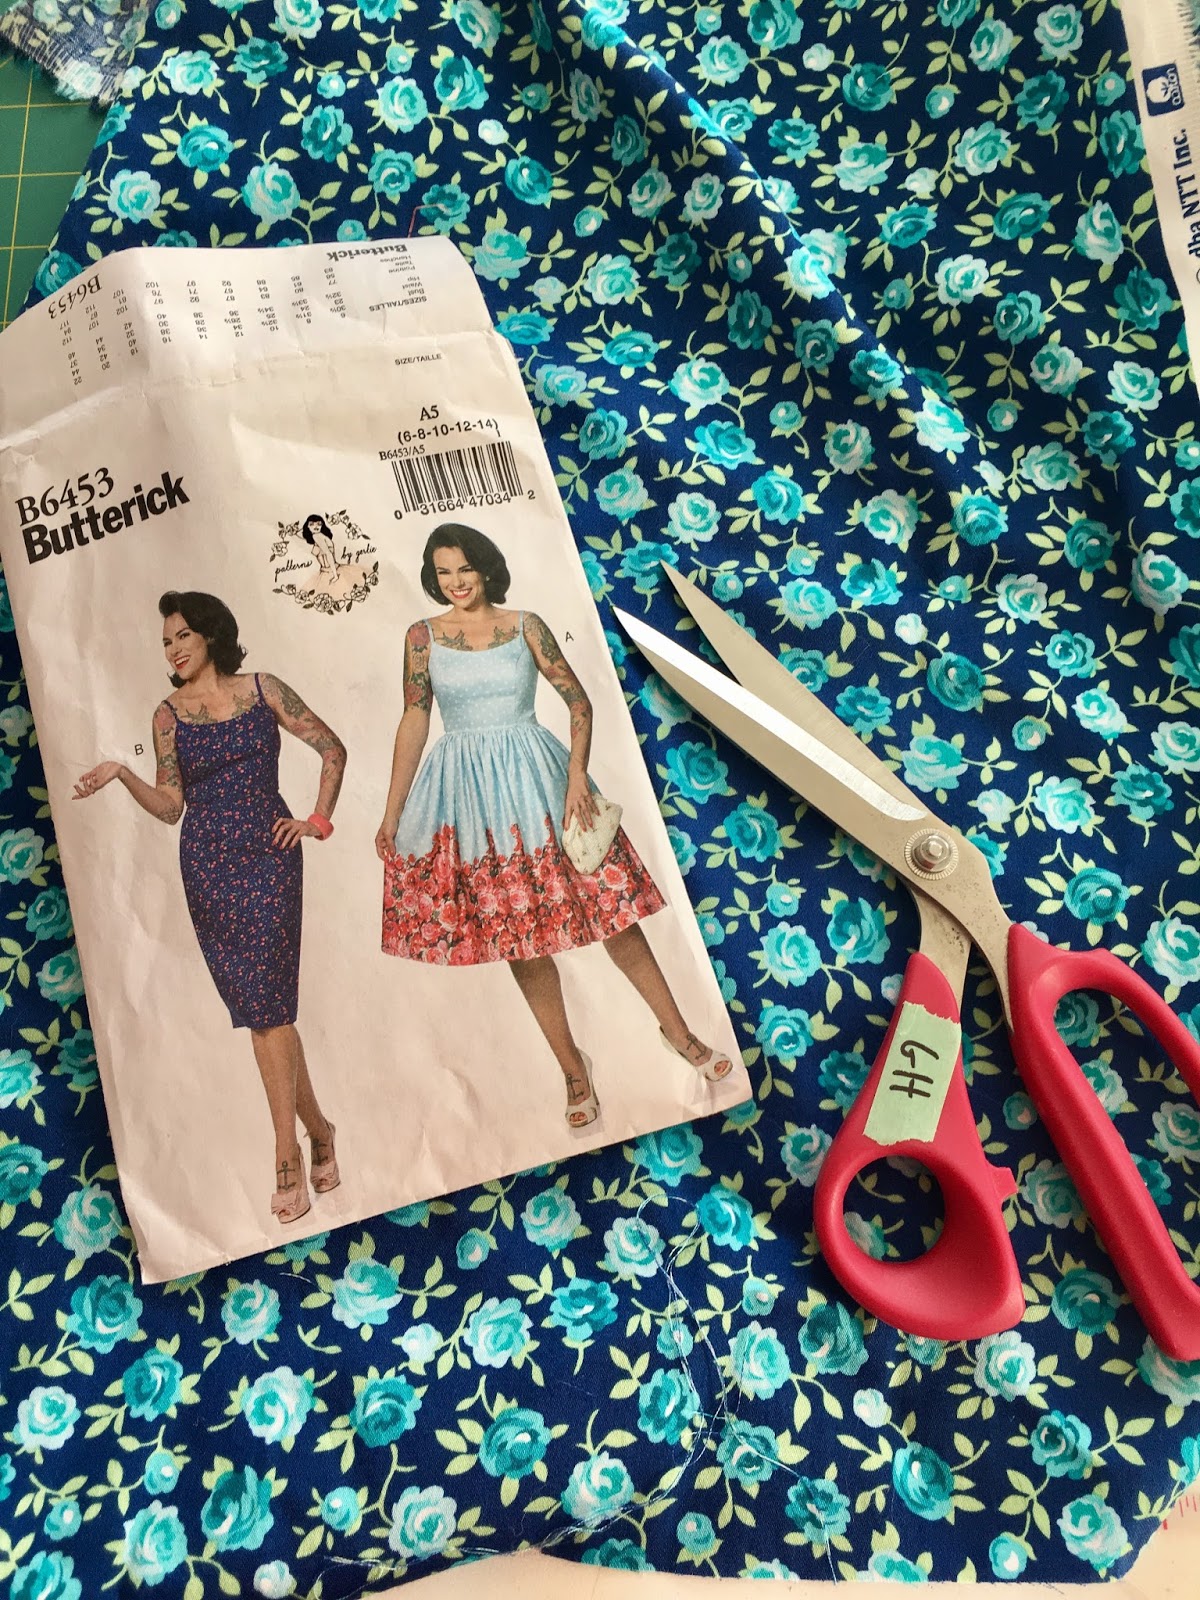
Start with your bodice center front. I'm sewing two at once! The small rose print will be View A, and the tropical will be View B.
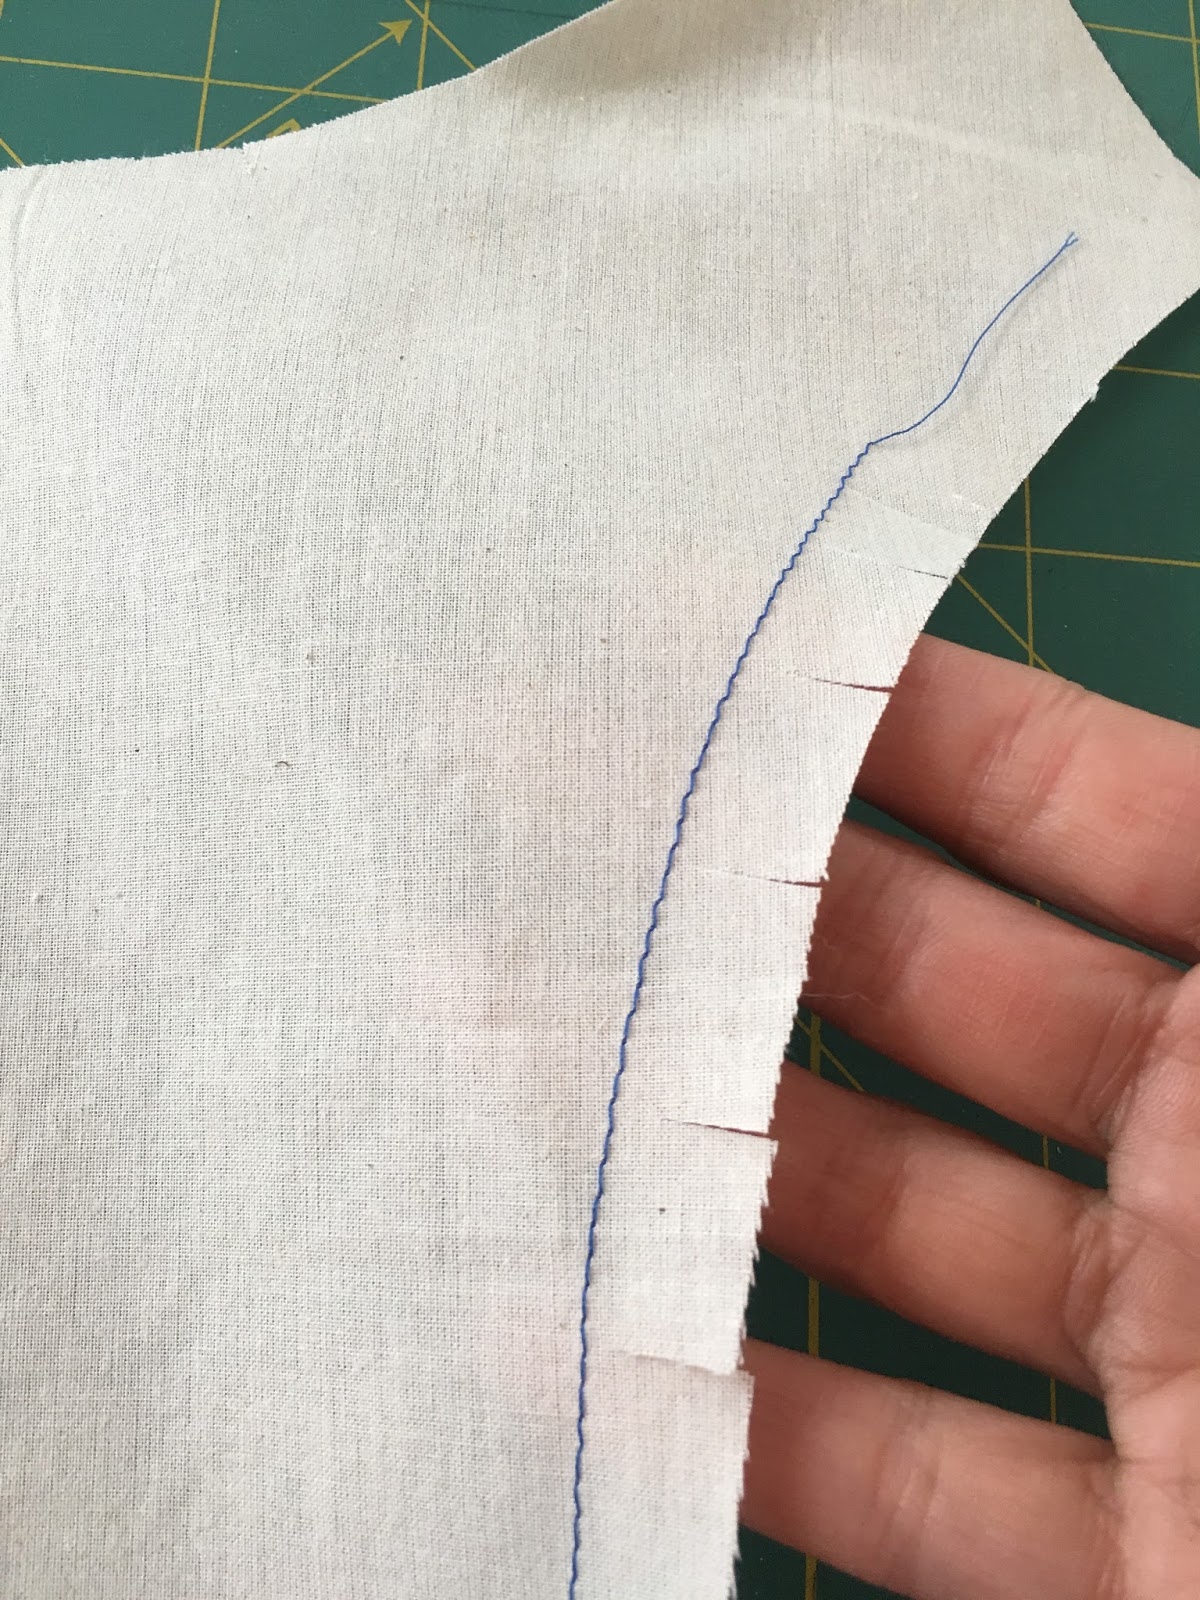
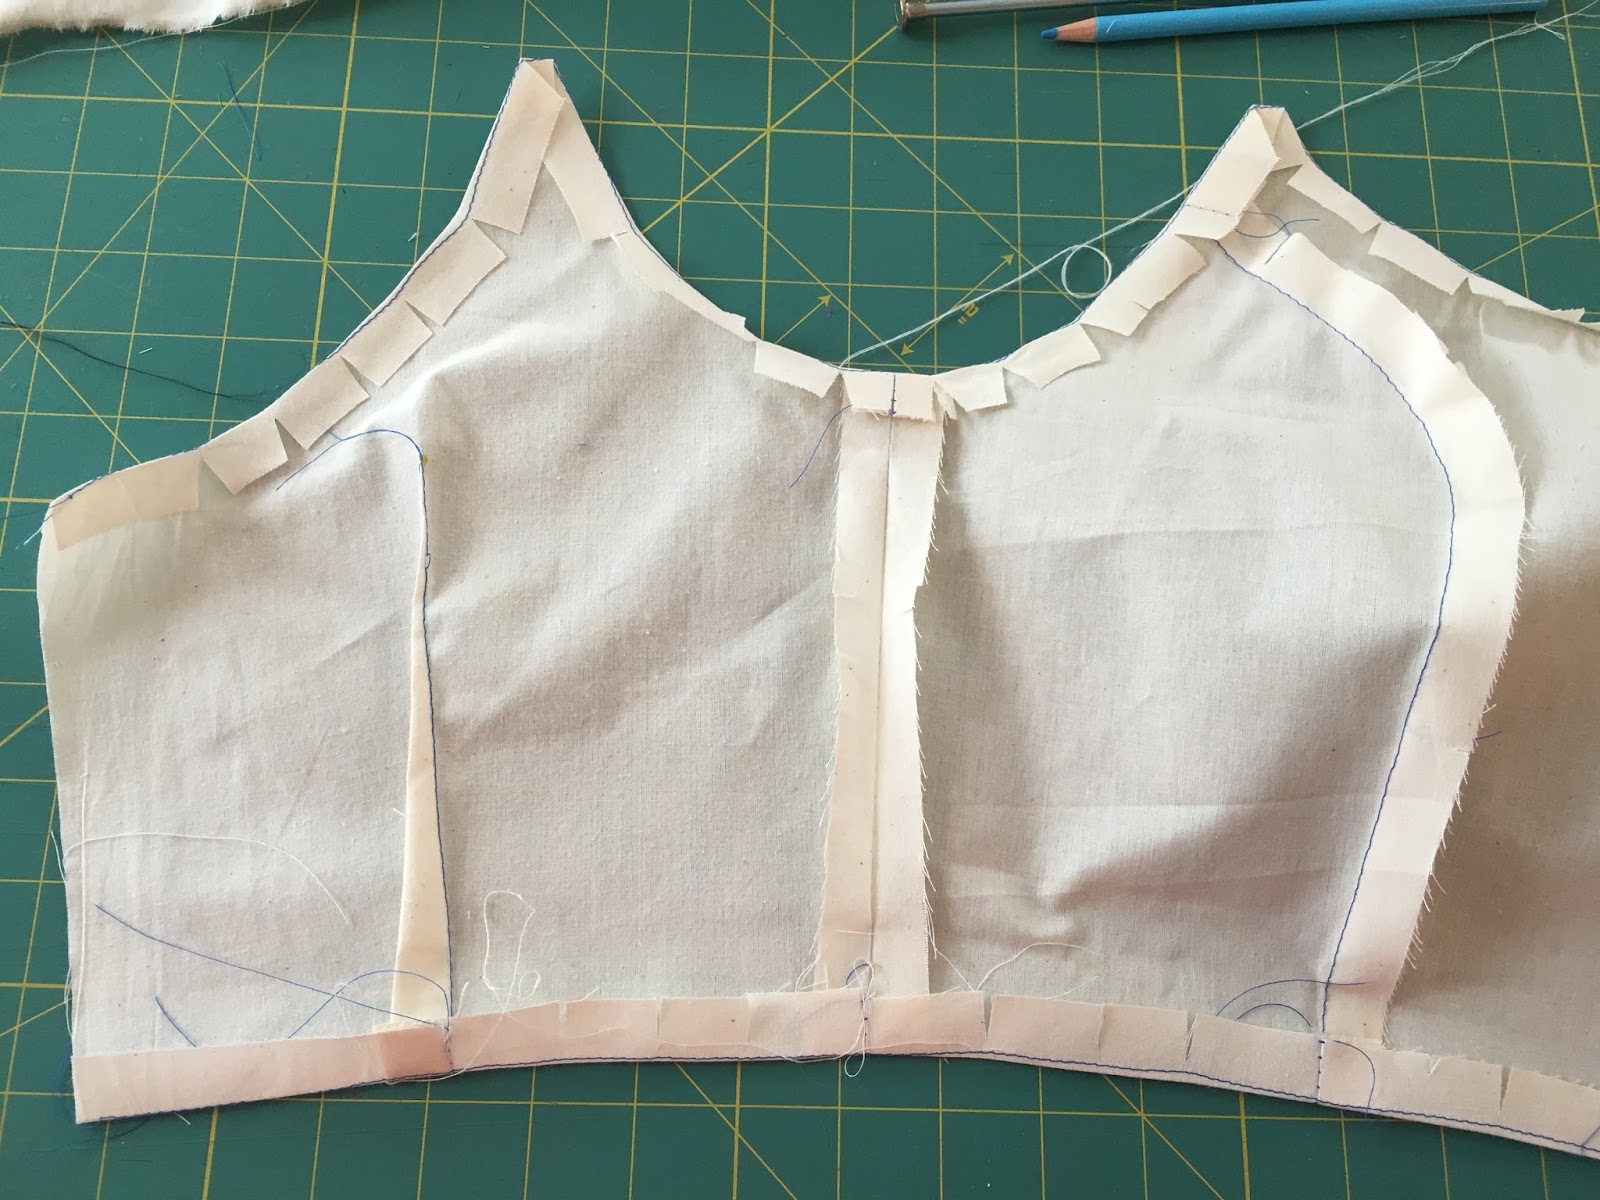
Staystitch between the princess seam notches on both sides of the bodice center front. Staystitching is a line of regular straight stitching that only goes through one layer of fabric. It should be just inside your 5/8" seam allowance line. I find a spot just between the 1/2" and 5/8" lines on my machine as my guide. No need to back stitch.
Make clips between the notches, using just the point of your scissors, cutting as close as you can to your staystitching. The clips should be about 1/2" apart from each other. These will allow you to sew this piece to the curve of the side front princess seam.
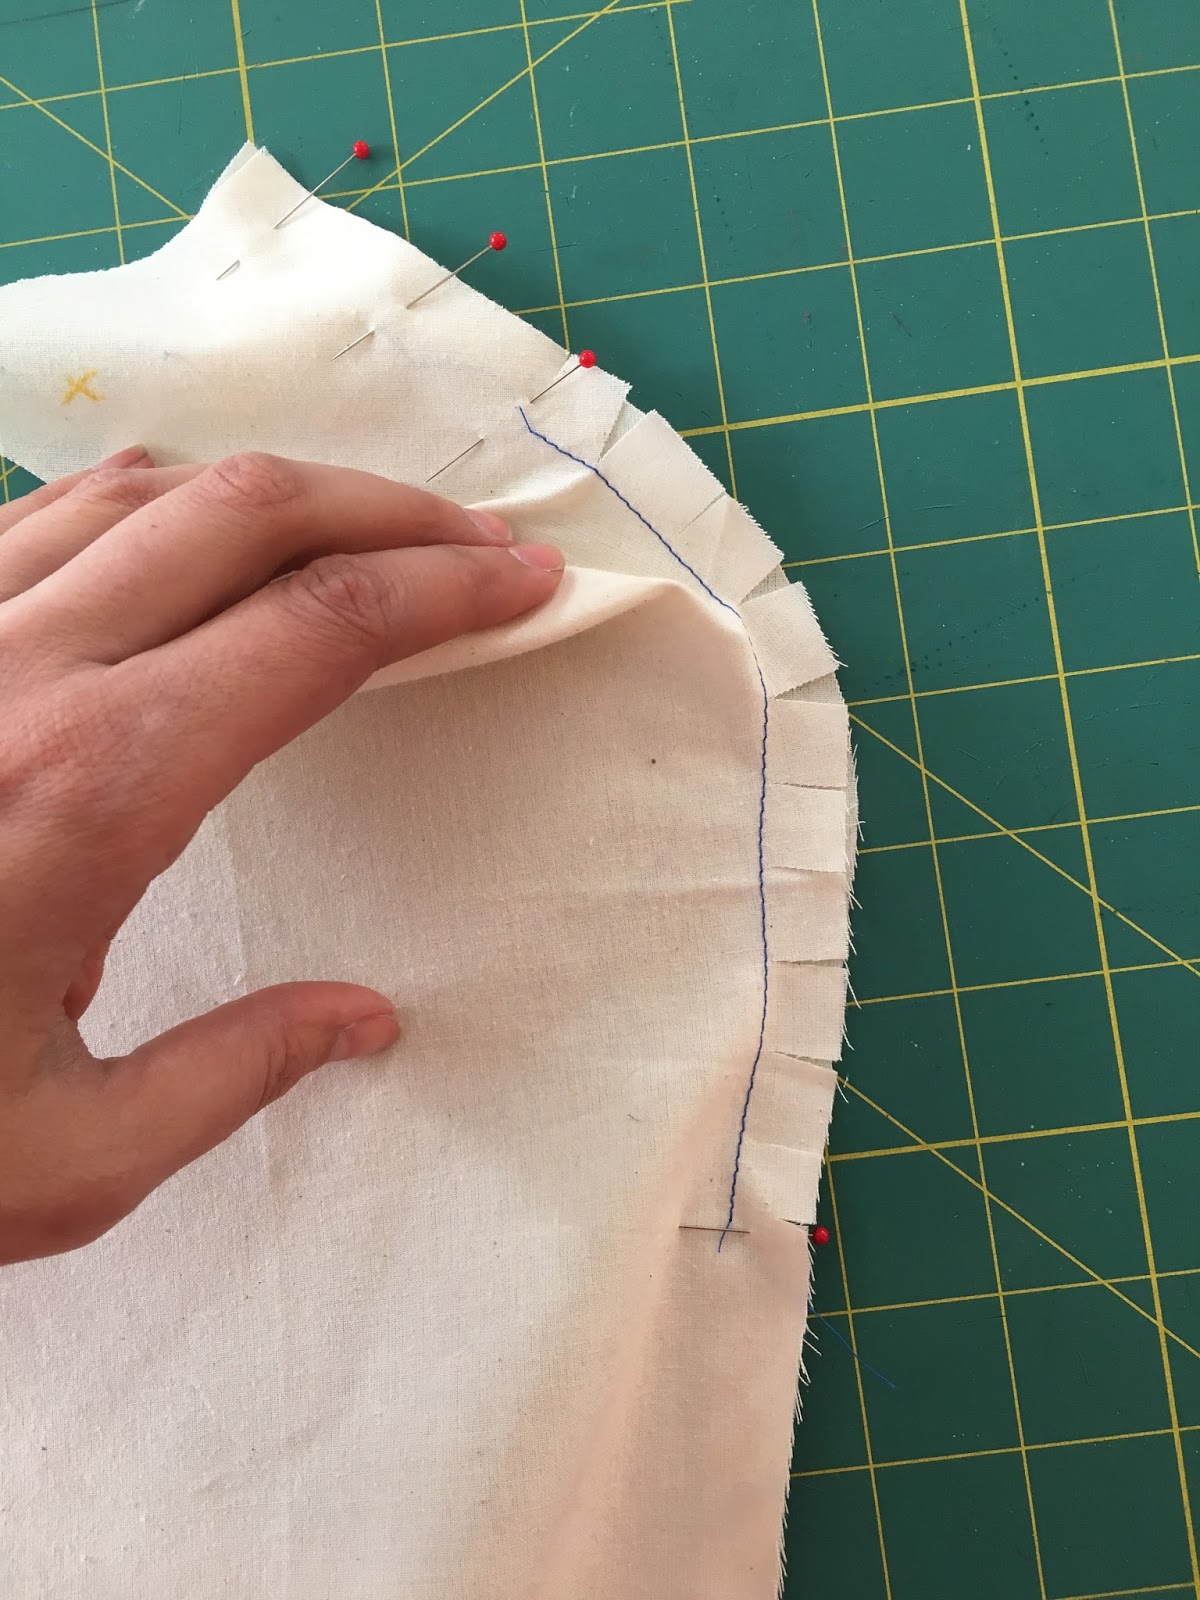
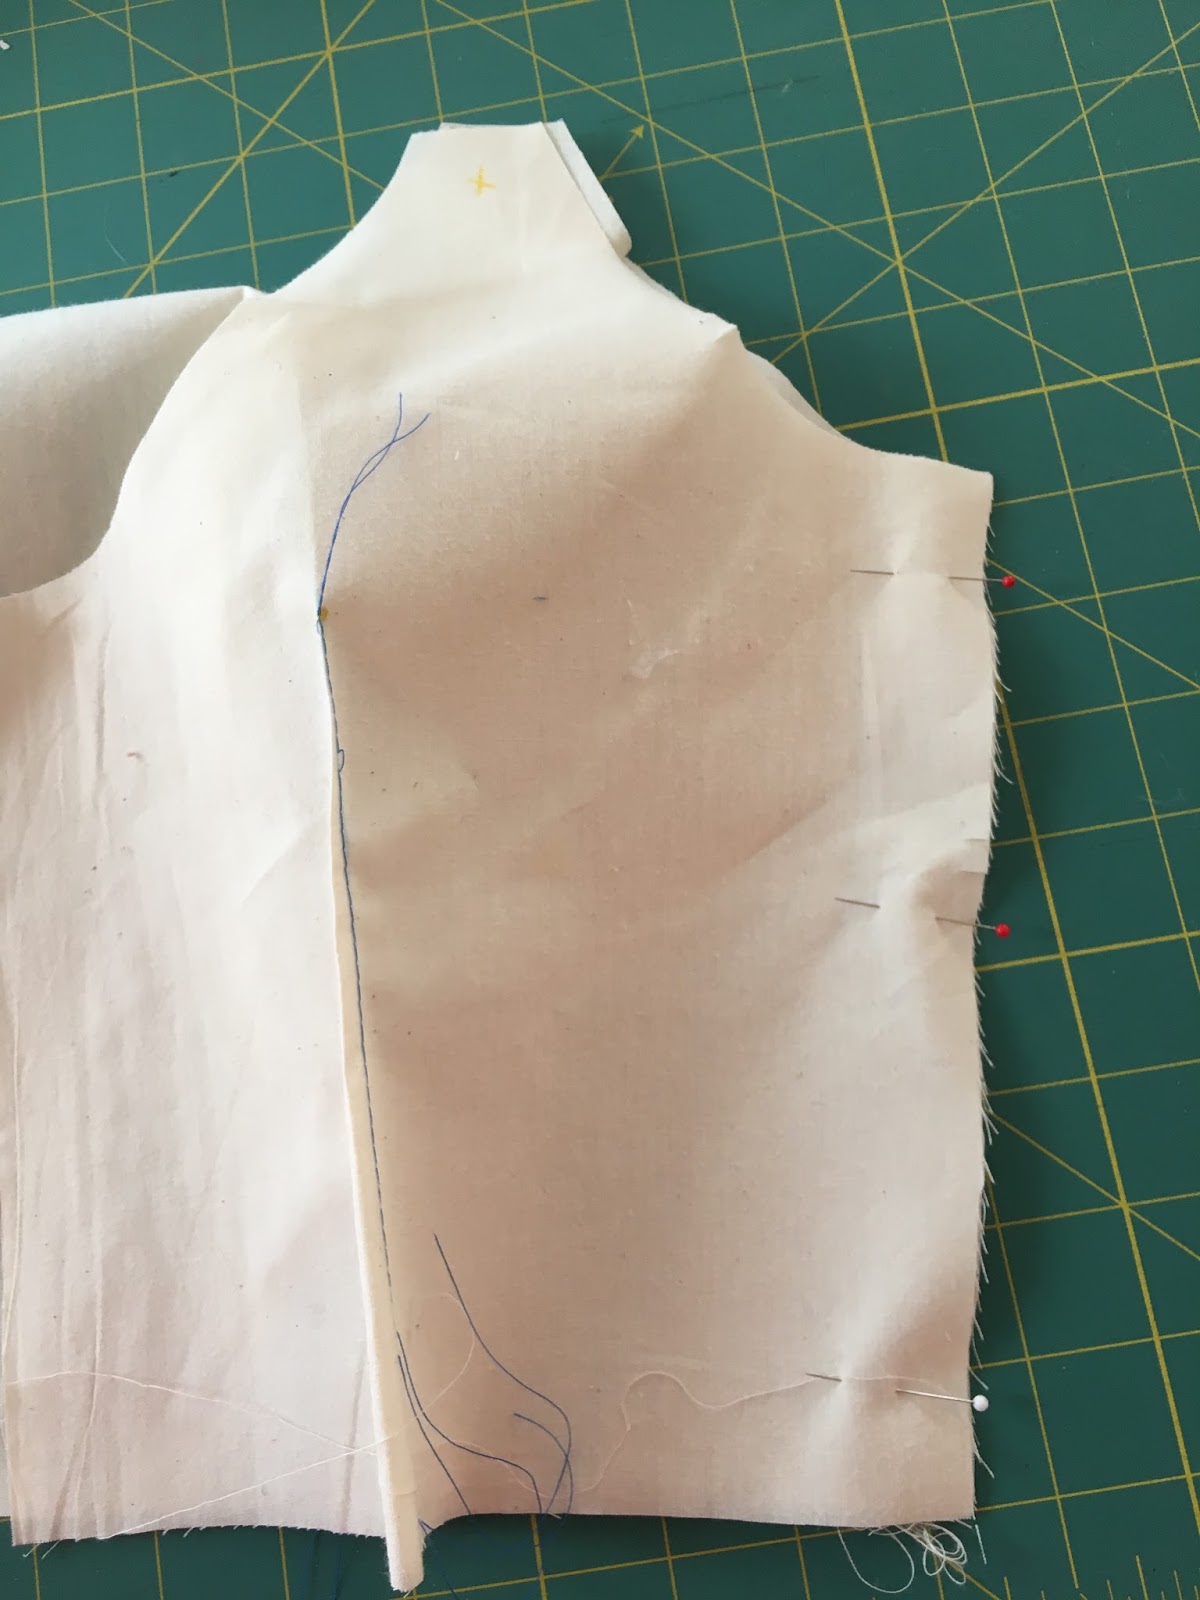
Now we're going to sew the princess seams.

Pin the center front to the side front, with right sides together, matching your notches. With the center front piece on top, spread the clips so that the curves of the two pieces match. Pin and stitch the two pieces together. Repeat on the other princess seam.

Press the princess seams toward the center front, holding each side of the seam taut.You can use a tailor's ham to help you.


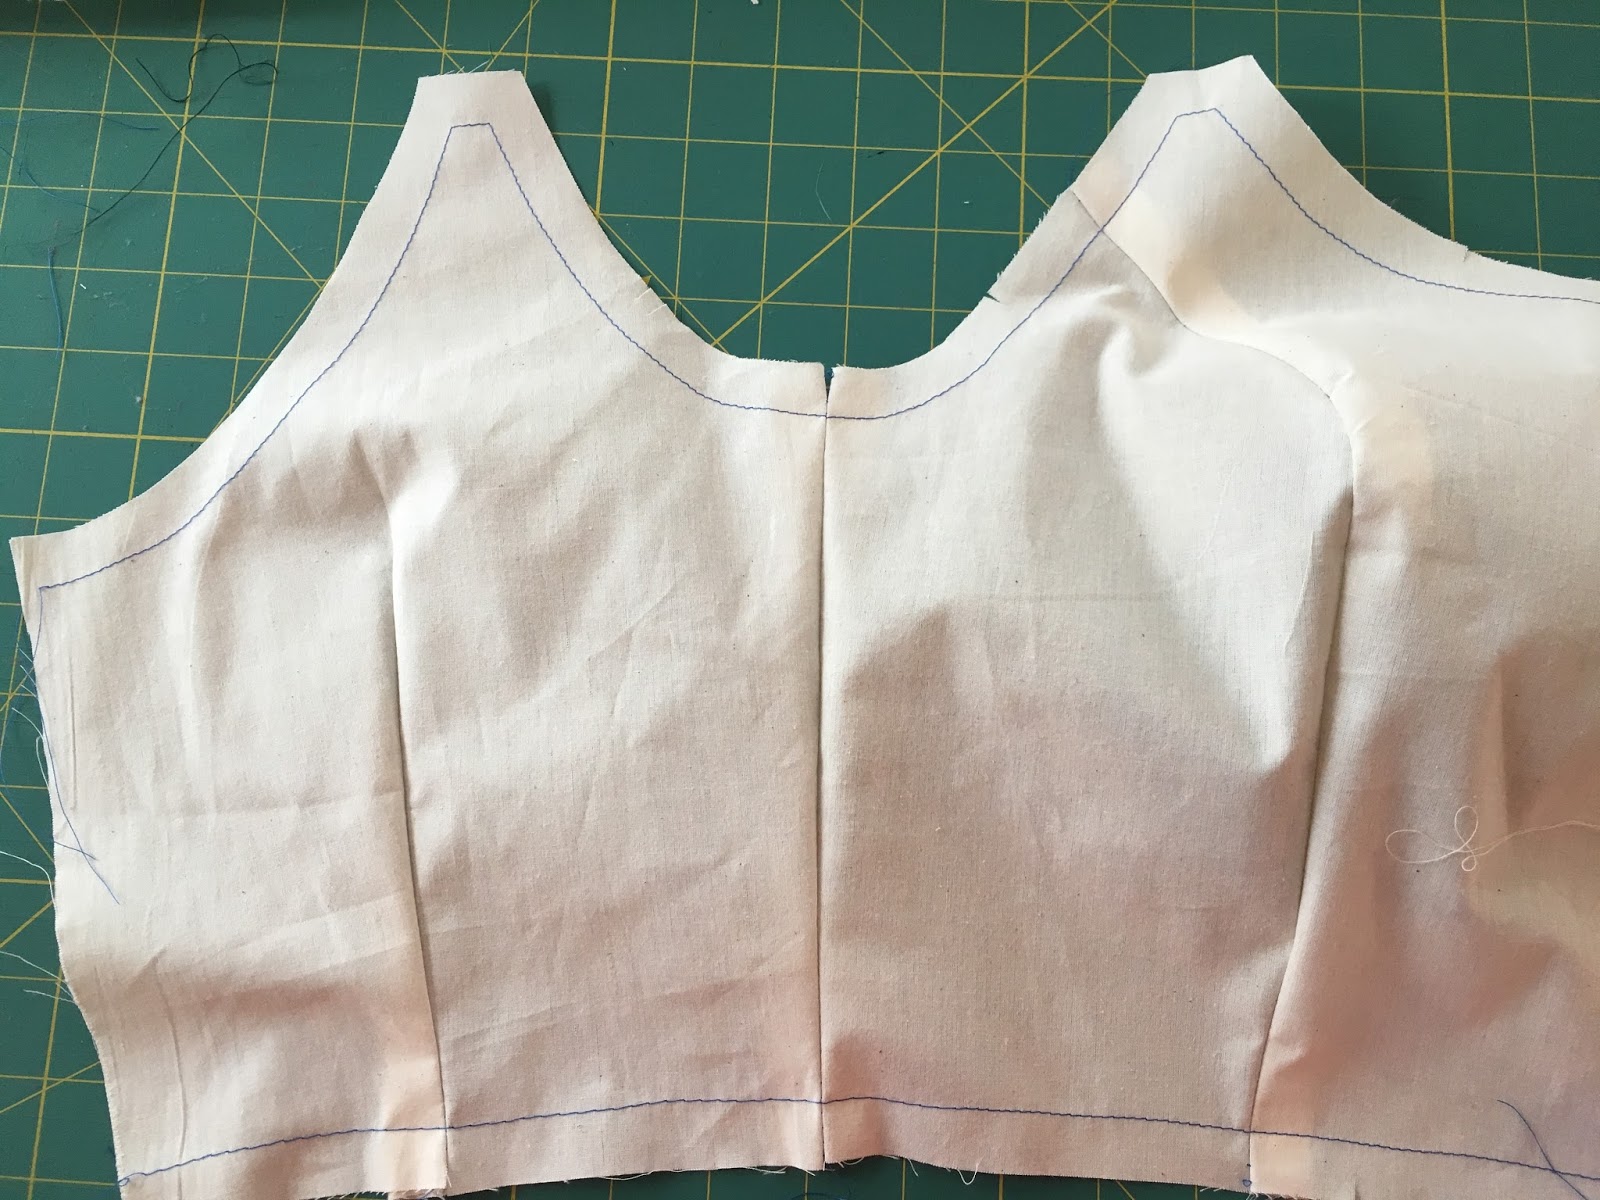
Now finish your princess seams as one, trimming them to about 3/8". I'm using my serger for this step, but you could use pinking shears or a zigzag stitch instead.
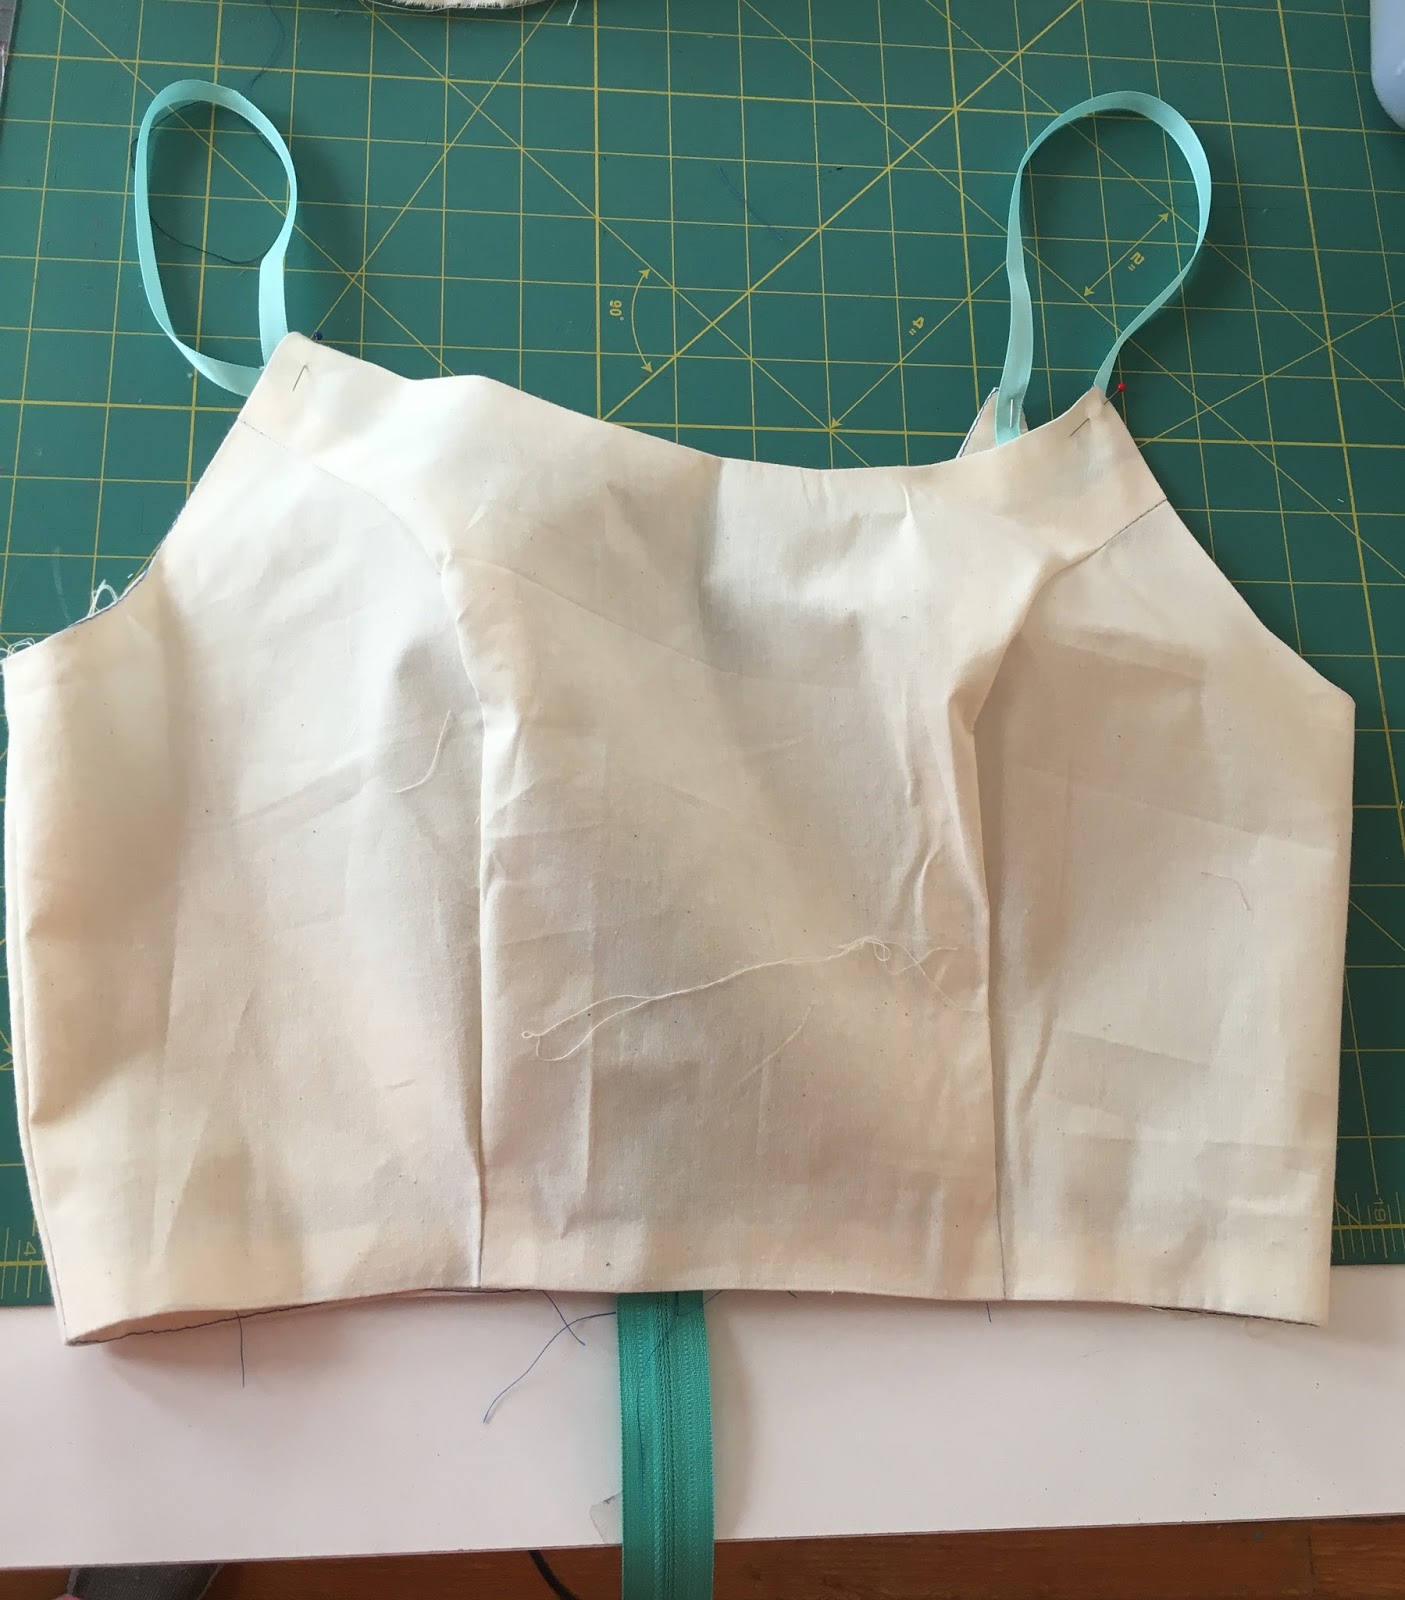
Next, we're going to sew the darts on the bodice back.
Fold the dart in half, positioning it like this (i.e. how you will put it into the machine, with the point closest to you and the fold on the right):
Start by placing a pin horizontally at the dart's point. This will tell you where to stop sewing.
Next, pin vertically up the legs of the dart, making sure that the dart lines are exactly on top of each other as you're pinning.
Sew up the leg of the dart. Back stitch at the beginning. Remove your pins as you go!
When you get to the point, sew the last couple stitches right on the fold of the fabric.

Do not backstitch, but leave tails that are at least a couple inches.
Tie the tails into a double knot and trim close.
Press the darts toward the center back, using a tailors ham if you have one.
Side seams! Place the front and back right sides together at the side seams, matching notches. Pin and stitch.
Press the side seams open.
Finish the seam allowances with the method of your choice.
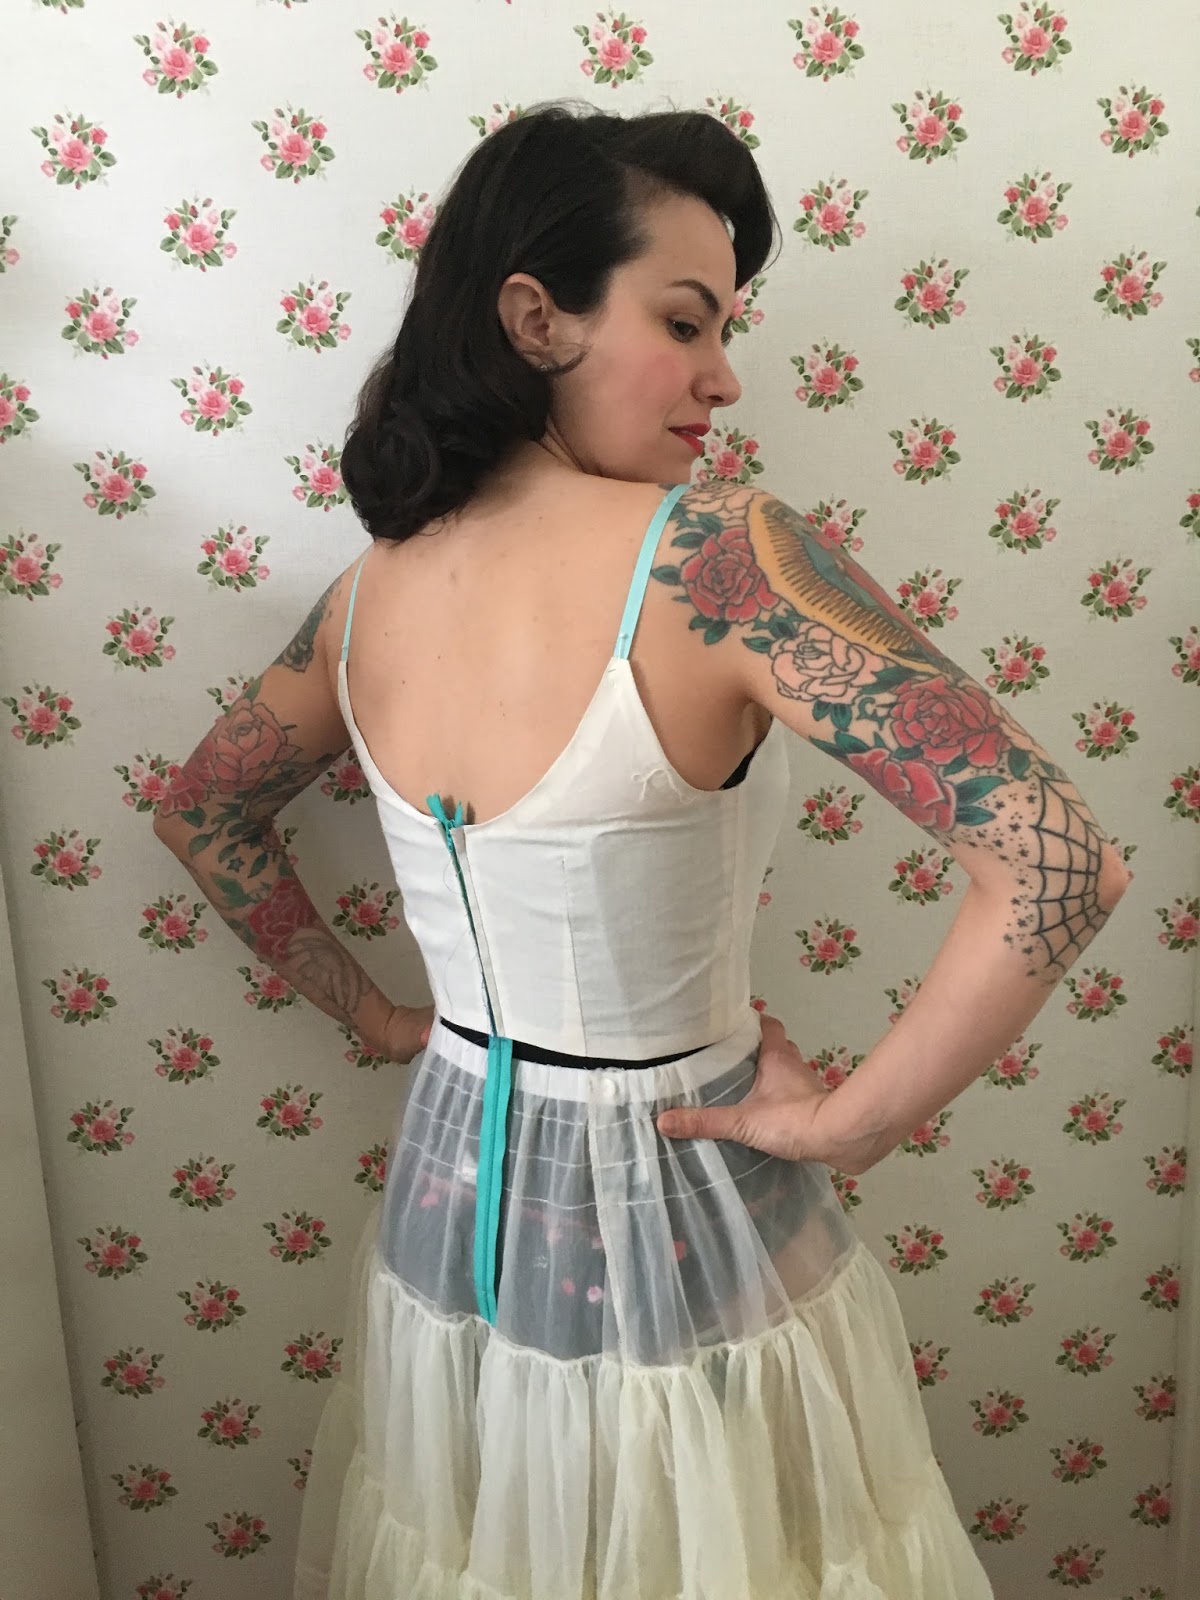
Now's a good time to try on your bodice if you want to double check the fit!
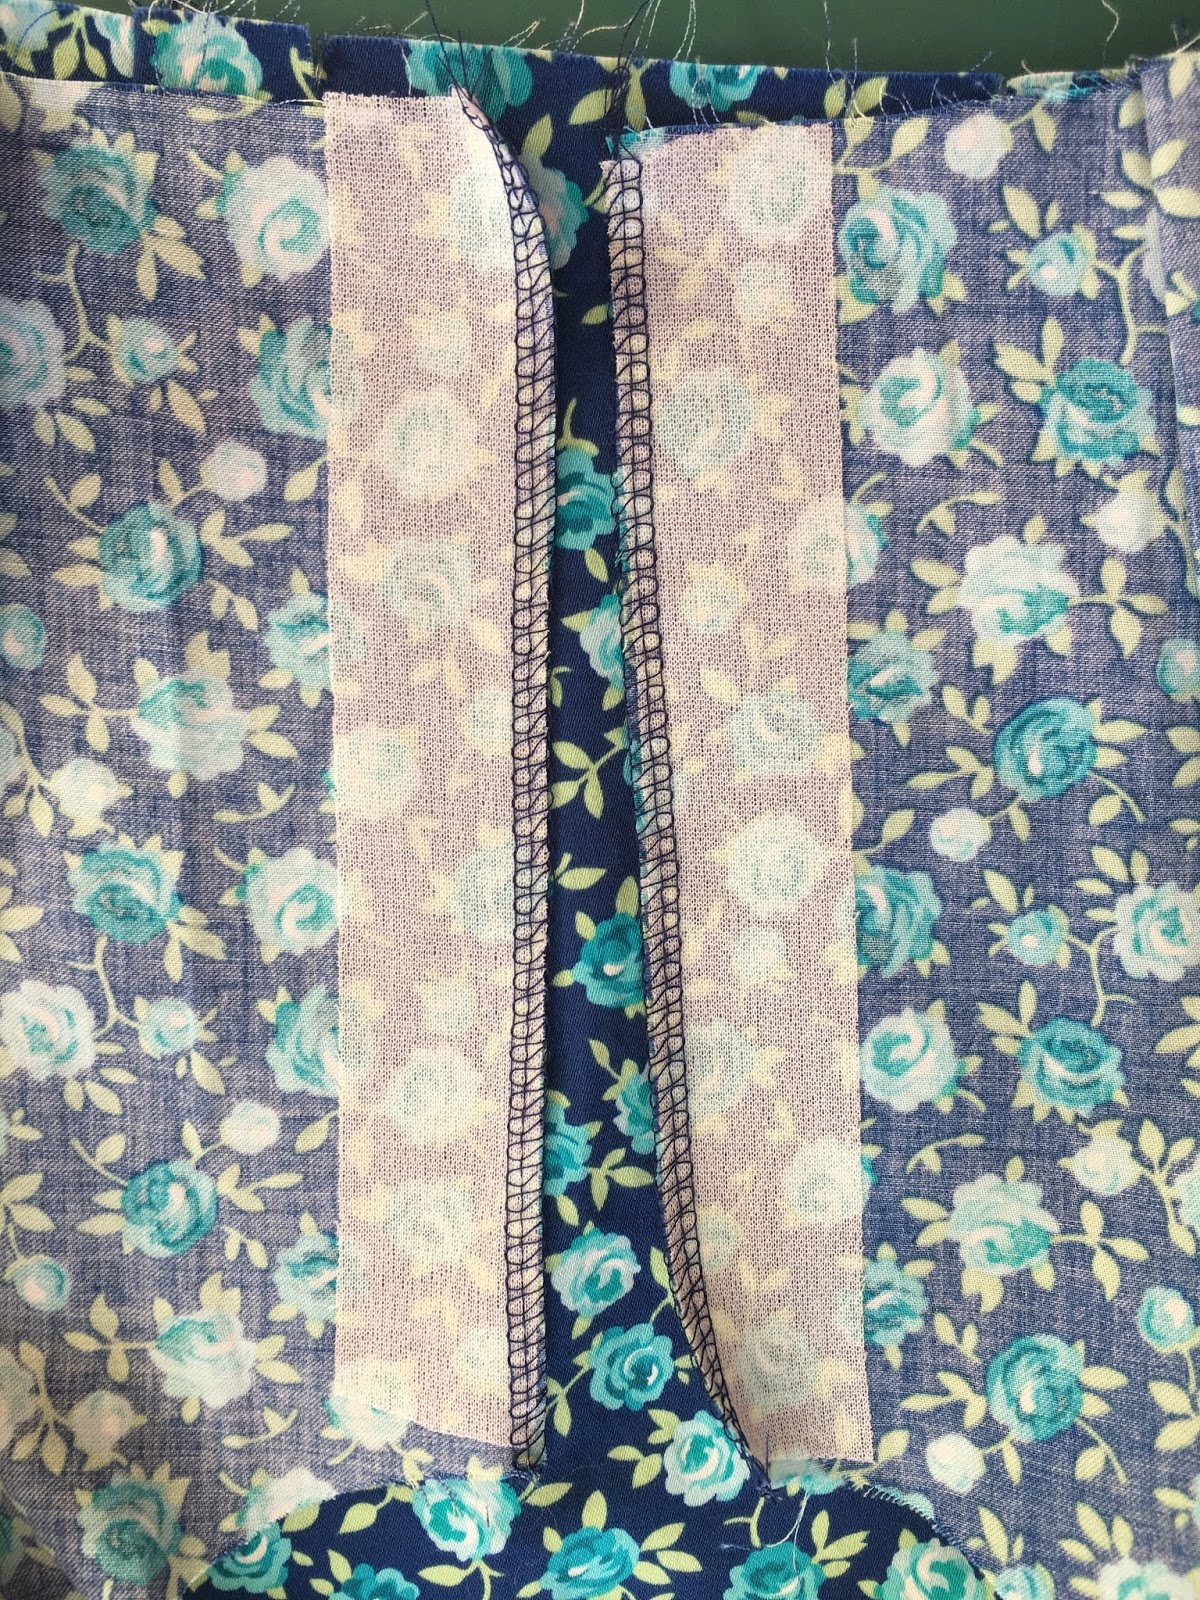
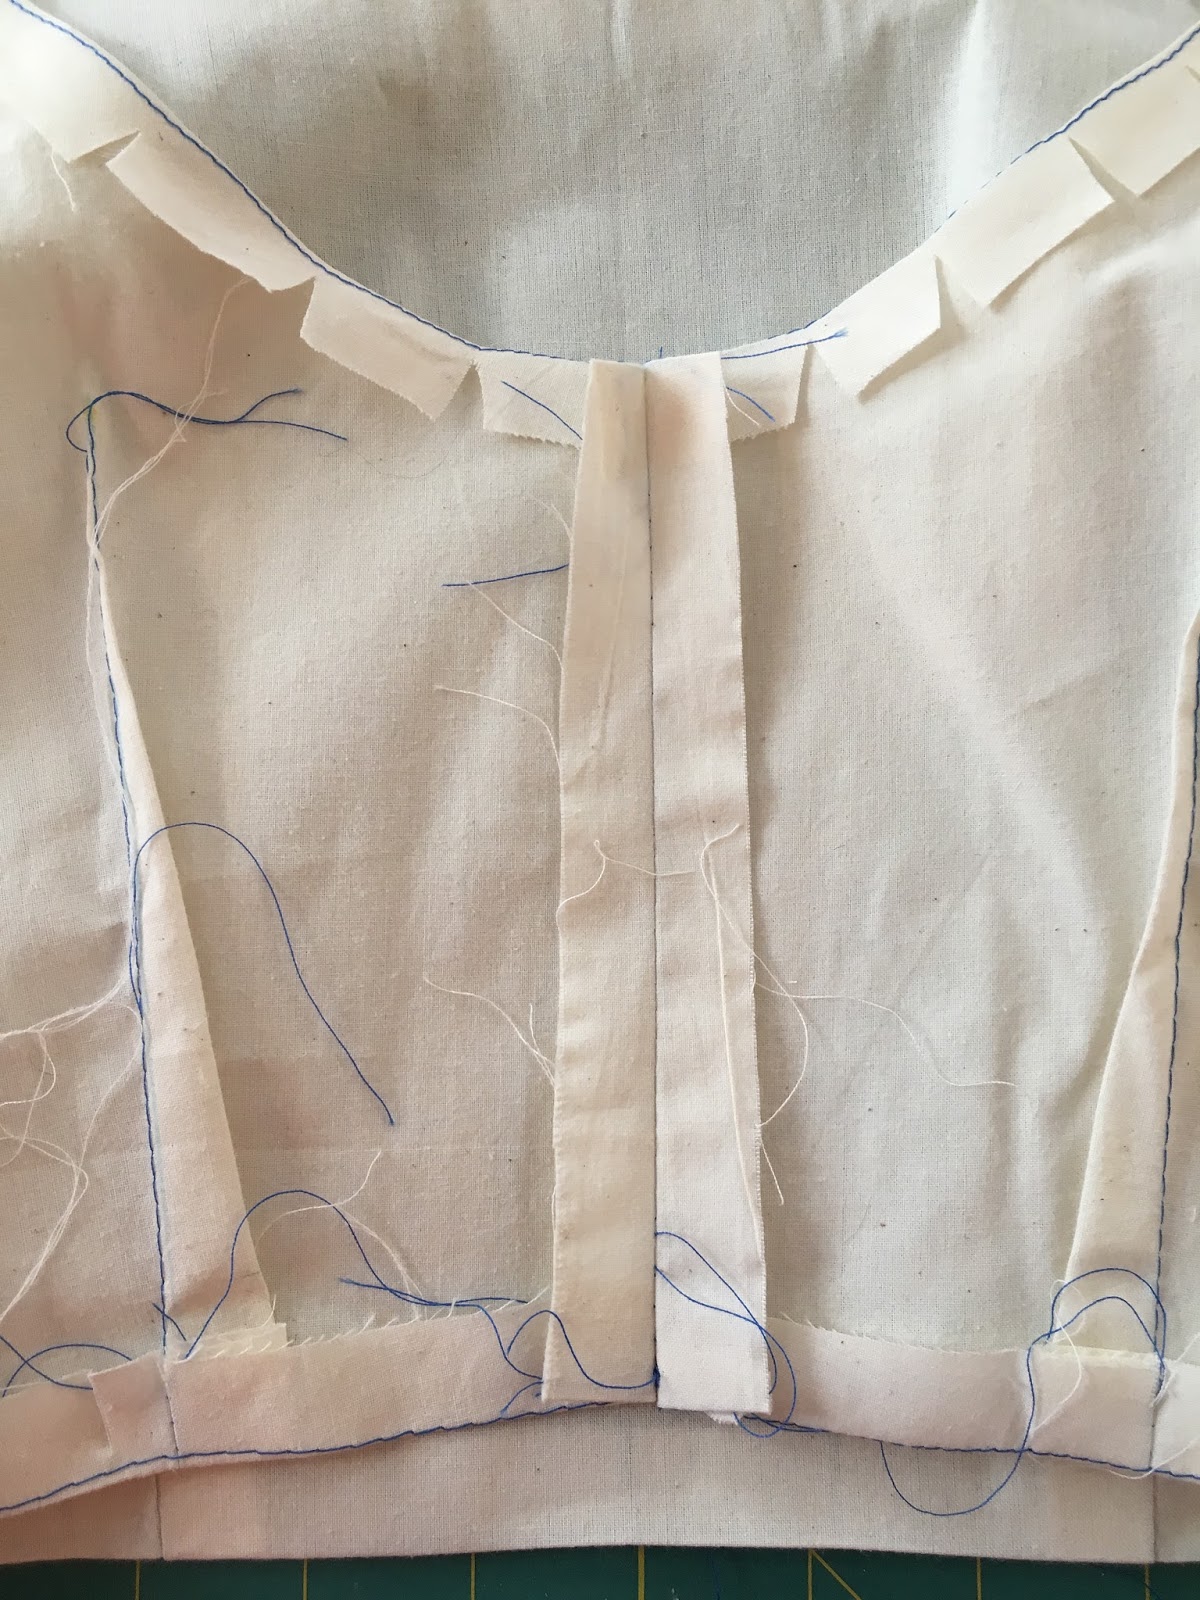
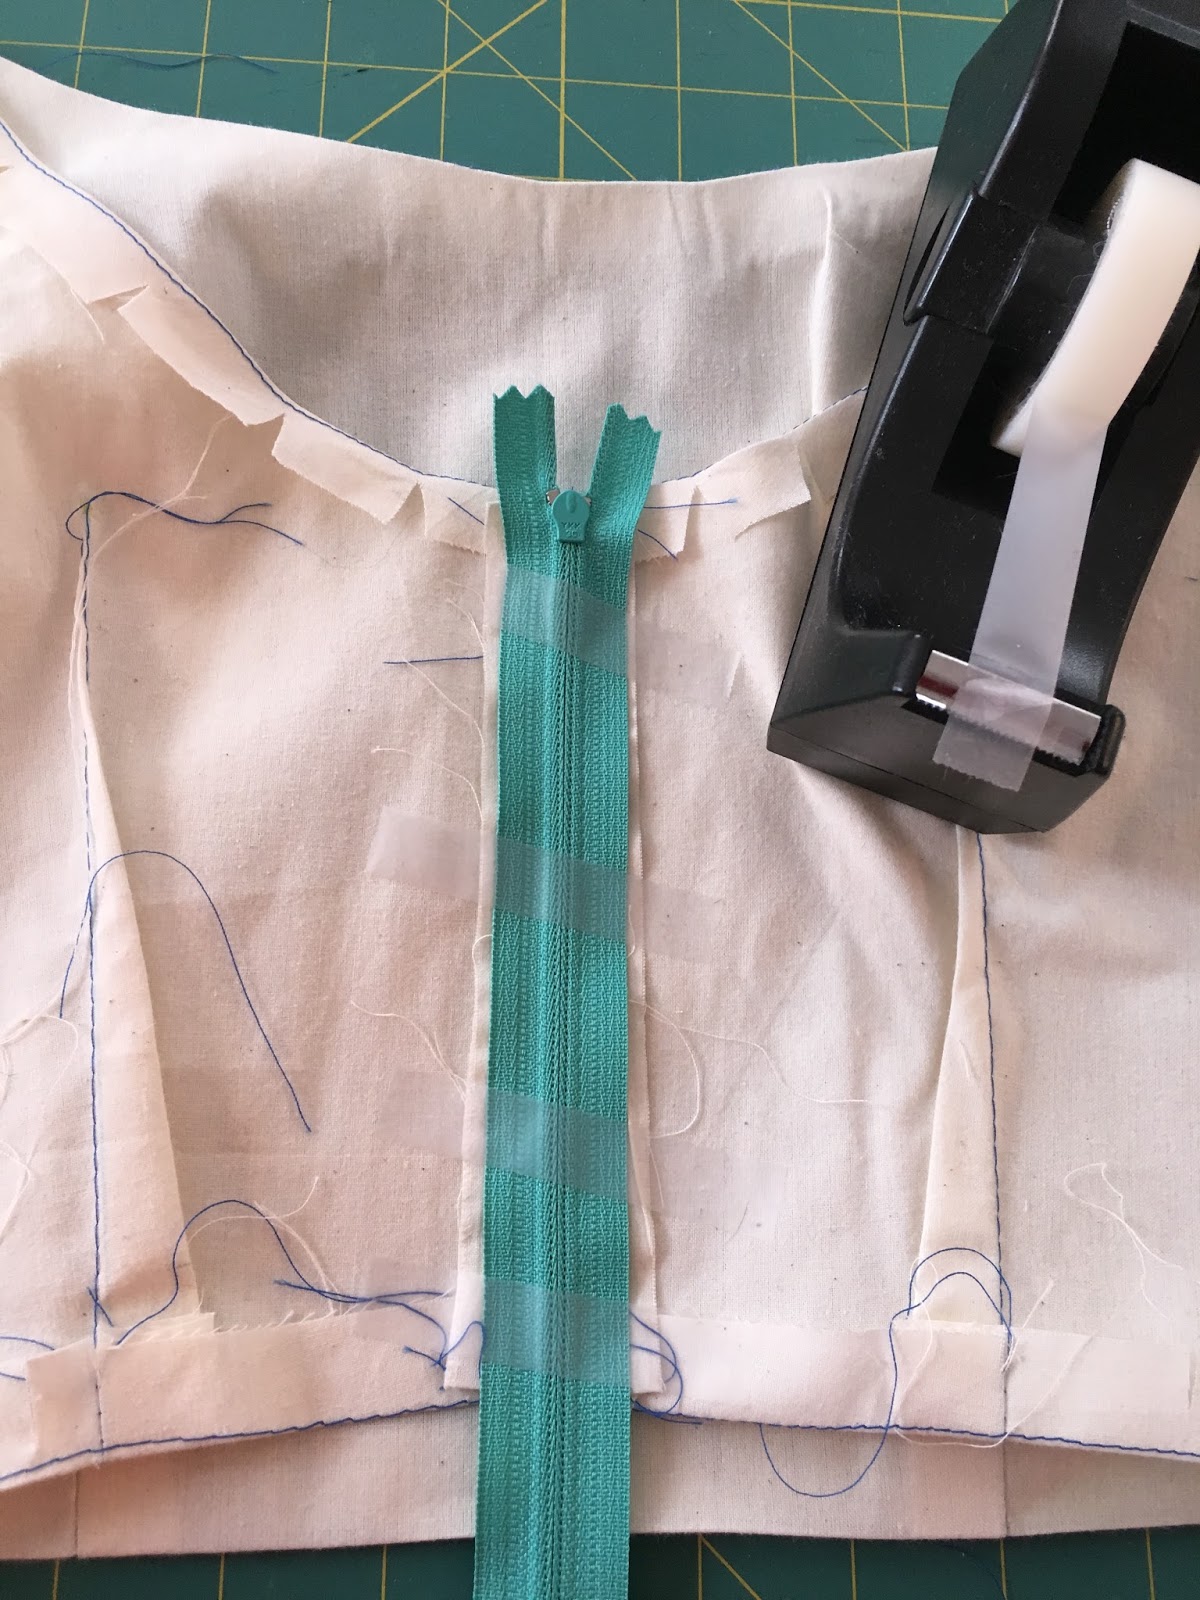
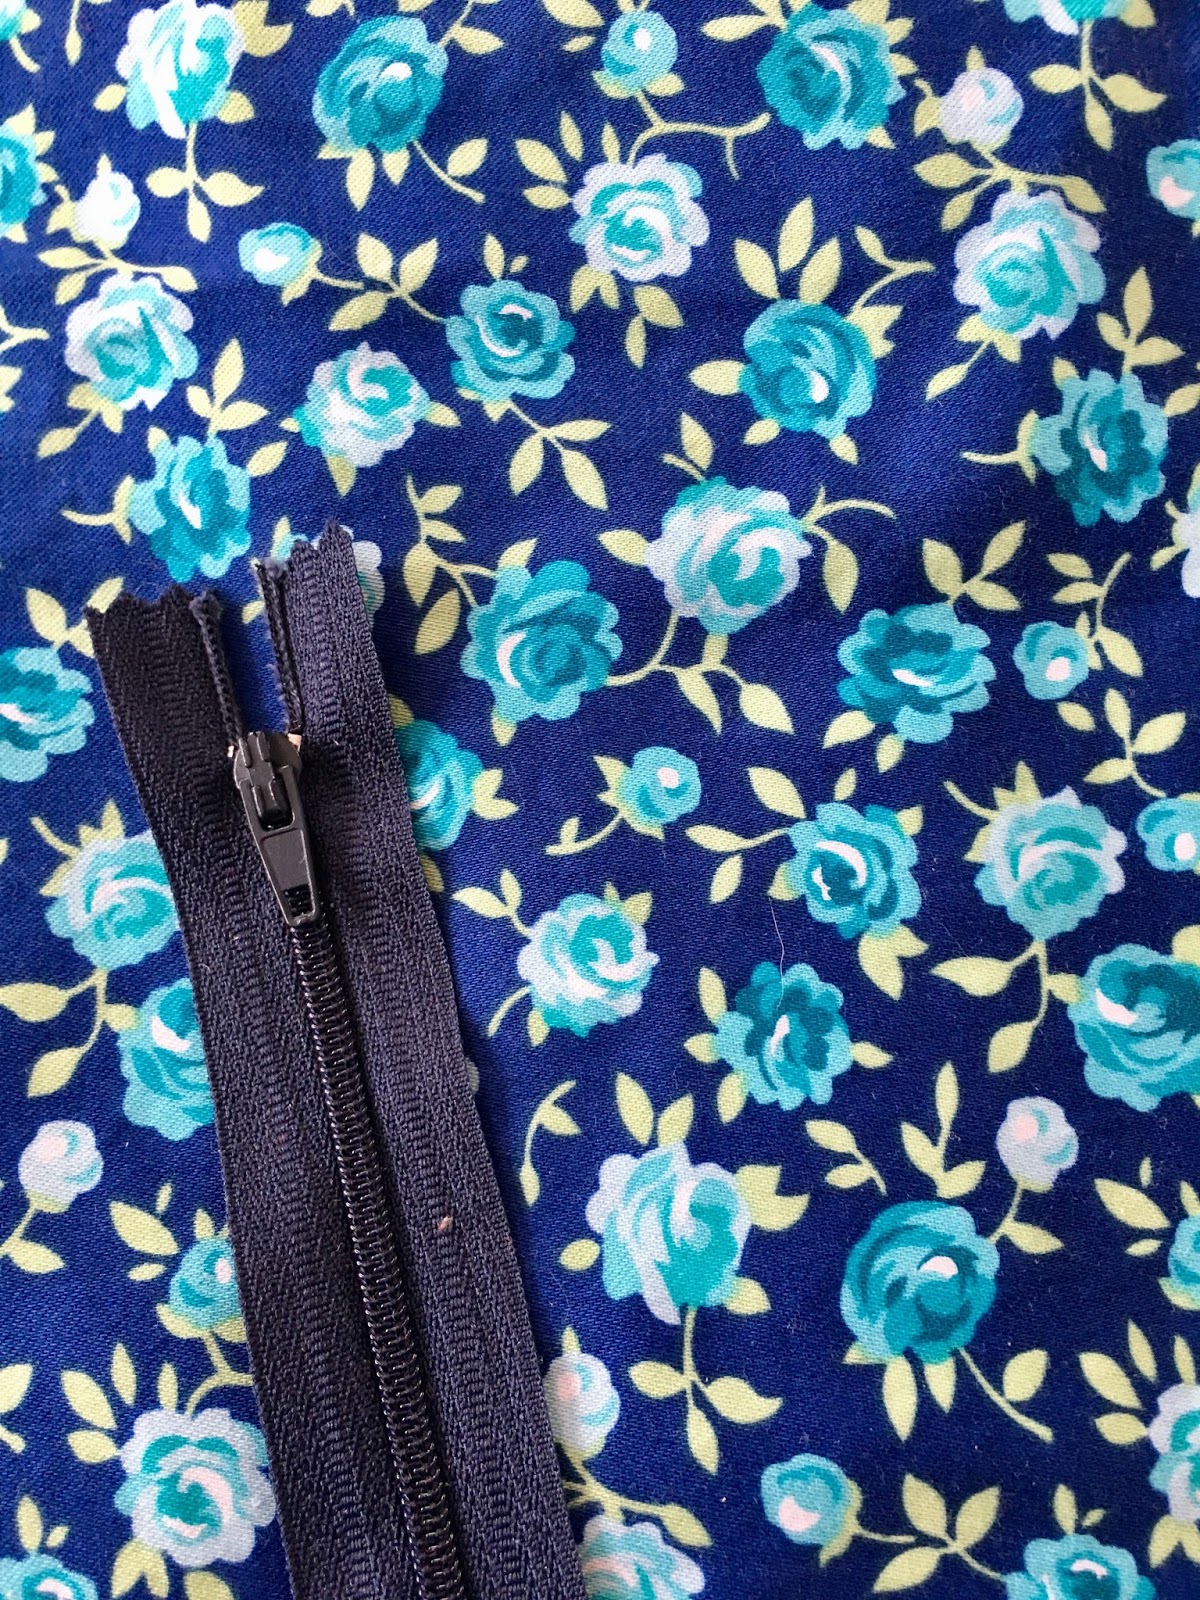
Finally, I always recommend stabilizing your zipper openings. I use this fusible tape, but you can also easily cut 1" strips of fusible interfacing for this purpose.
If serging, you can finish you back bodice openings now.
You have a partially assembled bodice! Next Tuesday: straps!
March 16, 2017
B6453 Sew Along: Cutting!
 Woo hoo, time to get cutting! I know a lot of sewers hate the cutting process, but it just means you're one step closer to sewing. So hurrah!
Okay, actually. A few small things before you cut.
First, if you made any adjustments to your neckline, bust, or armhole, you need to make the same adjustments to your facing patterns. I raised my armhole 3/4", so I did the same on facings. I took the same amount off the bottom of the facing so it remains the same width.
I moved the notches up since they would have been cut off. Repeat on the back.
I also had to do a slight slash and spread (not shown) on the front facing like I did on the bodice front for my FBA. So if you did an FBA or SBA, keep that in mind!
Also, if you are making View B and you made any bodice adjustments (like taking in or letting out seams), you will need to do the same adjustments to your skirt. If you've lost track of those changes (so easy to do!), you can also just pin closed your darts, draw in your seam allowances, and then "walk" the pattern pieces together to make sure they still match.
 Draw in seamlines, close darts
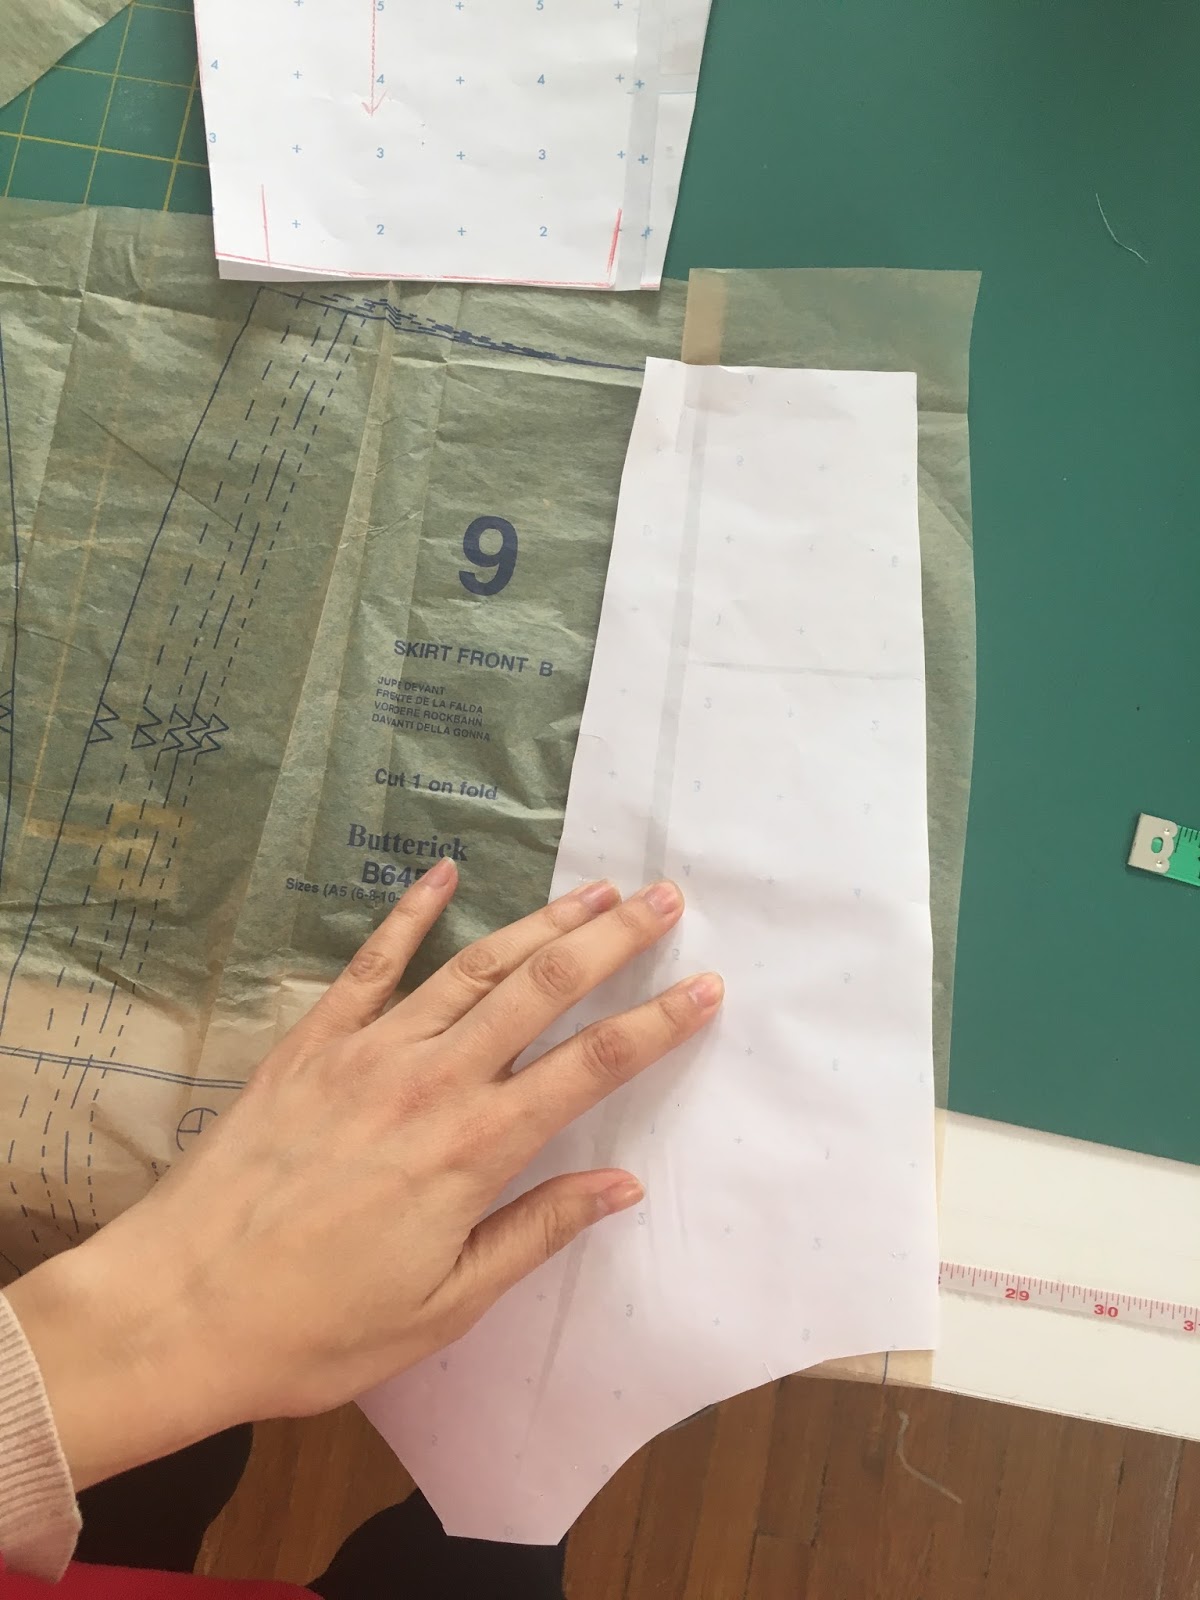 Compare the pattern pieces by walking them together as they would be sewnNext, one little pattern change that I highly recommend: tape your strap pieces together. Just butt the edges together and tape on the front and back.
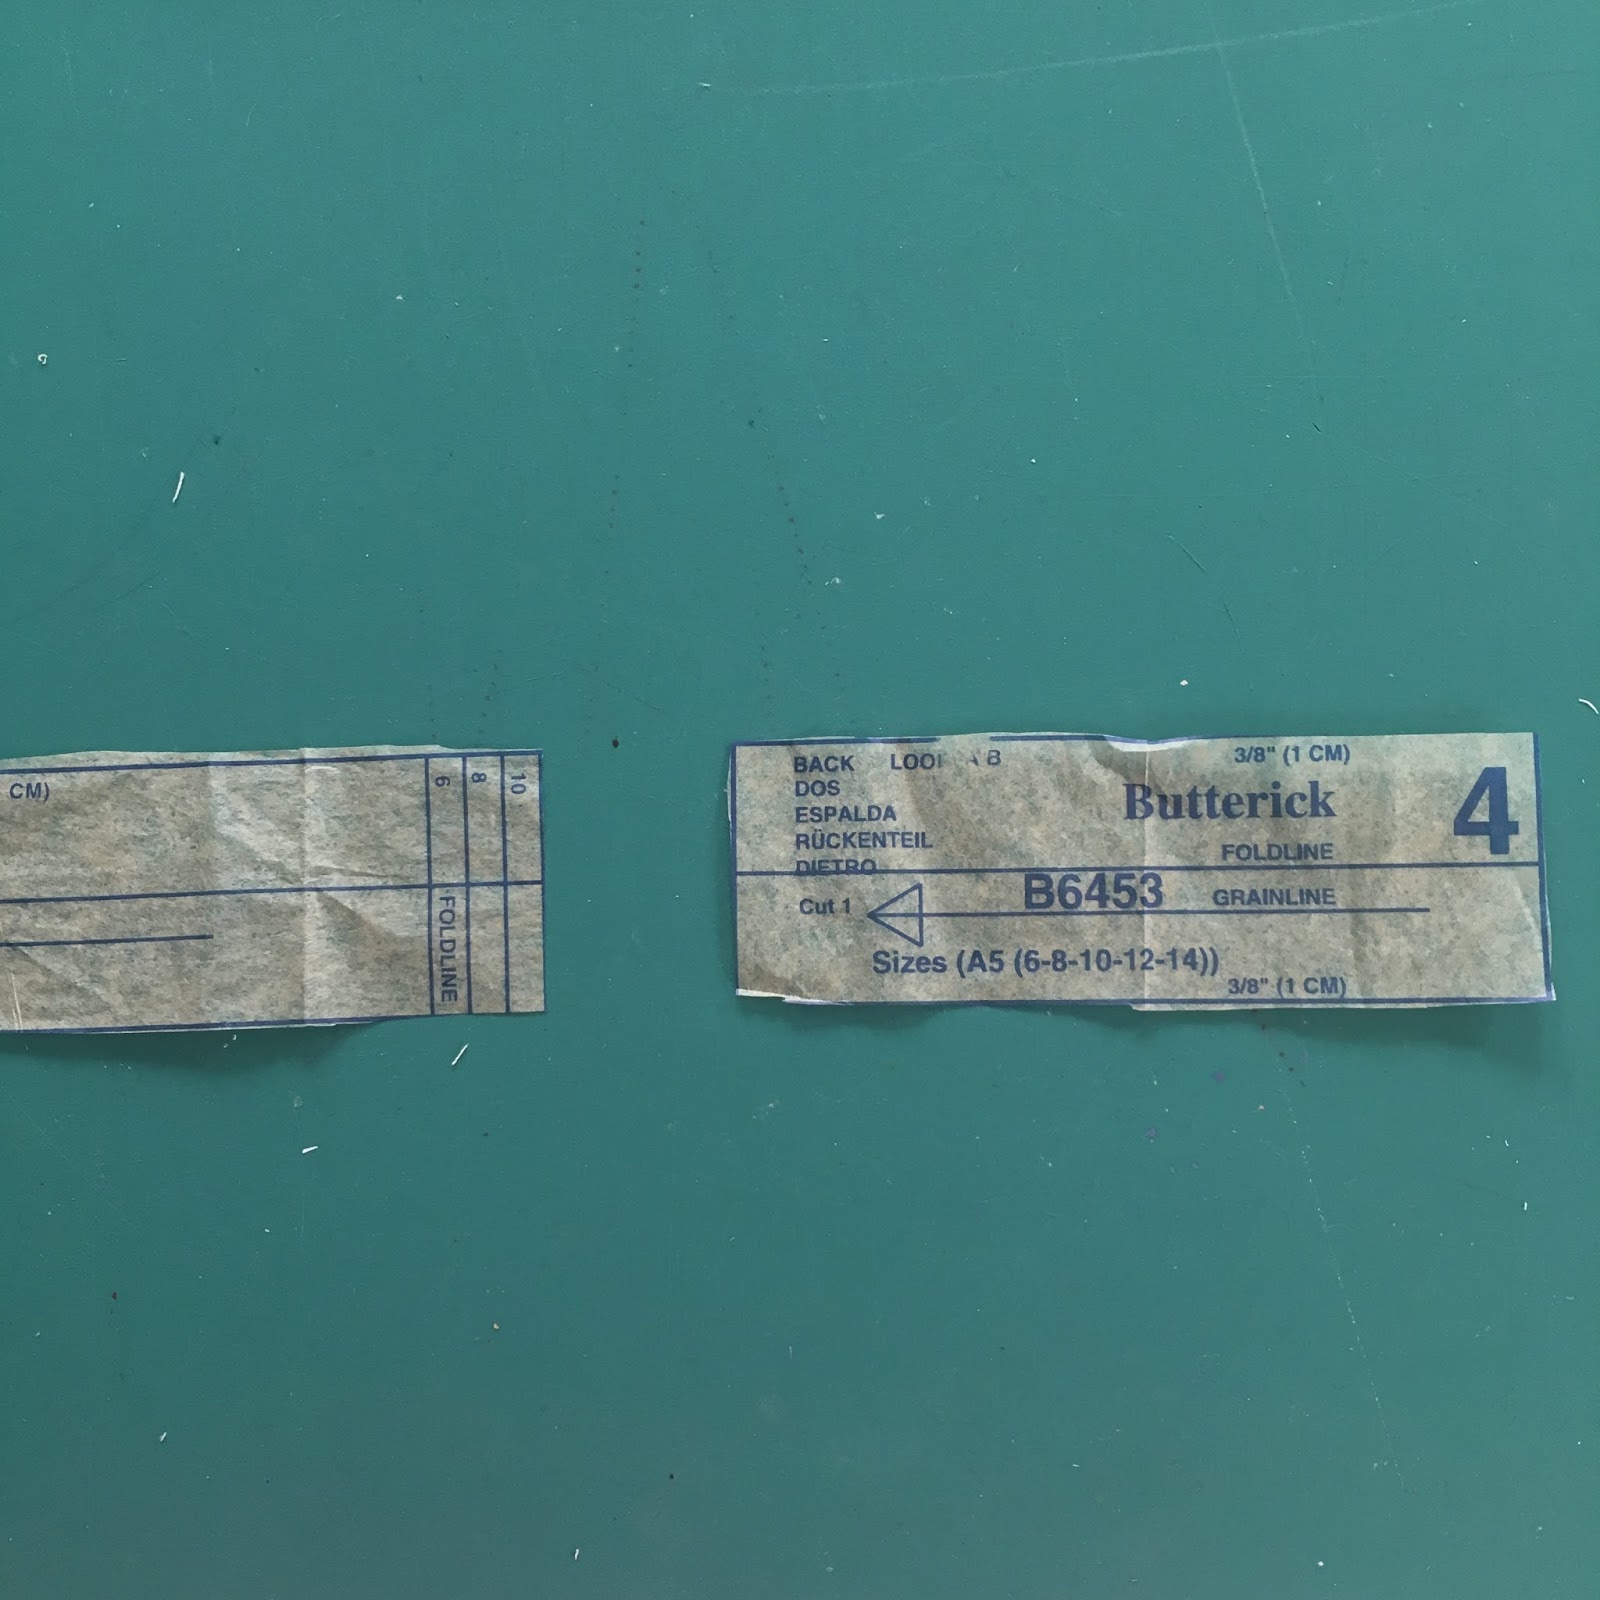
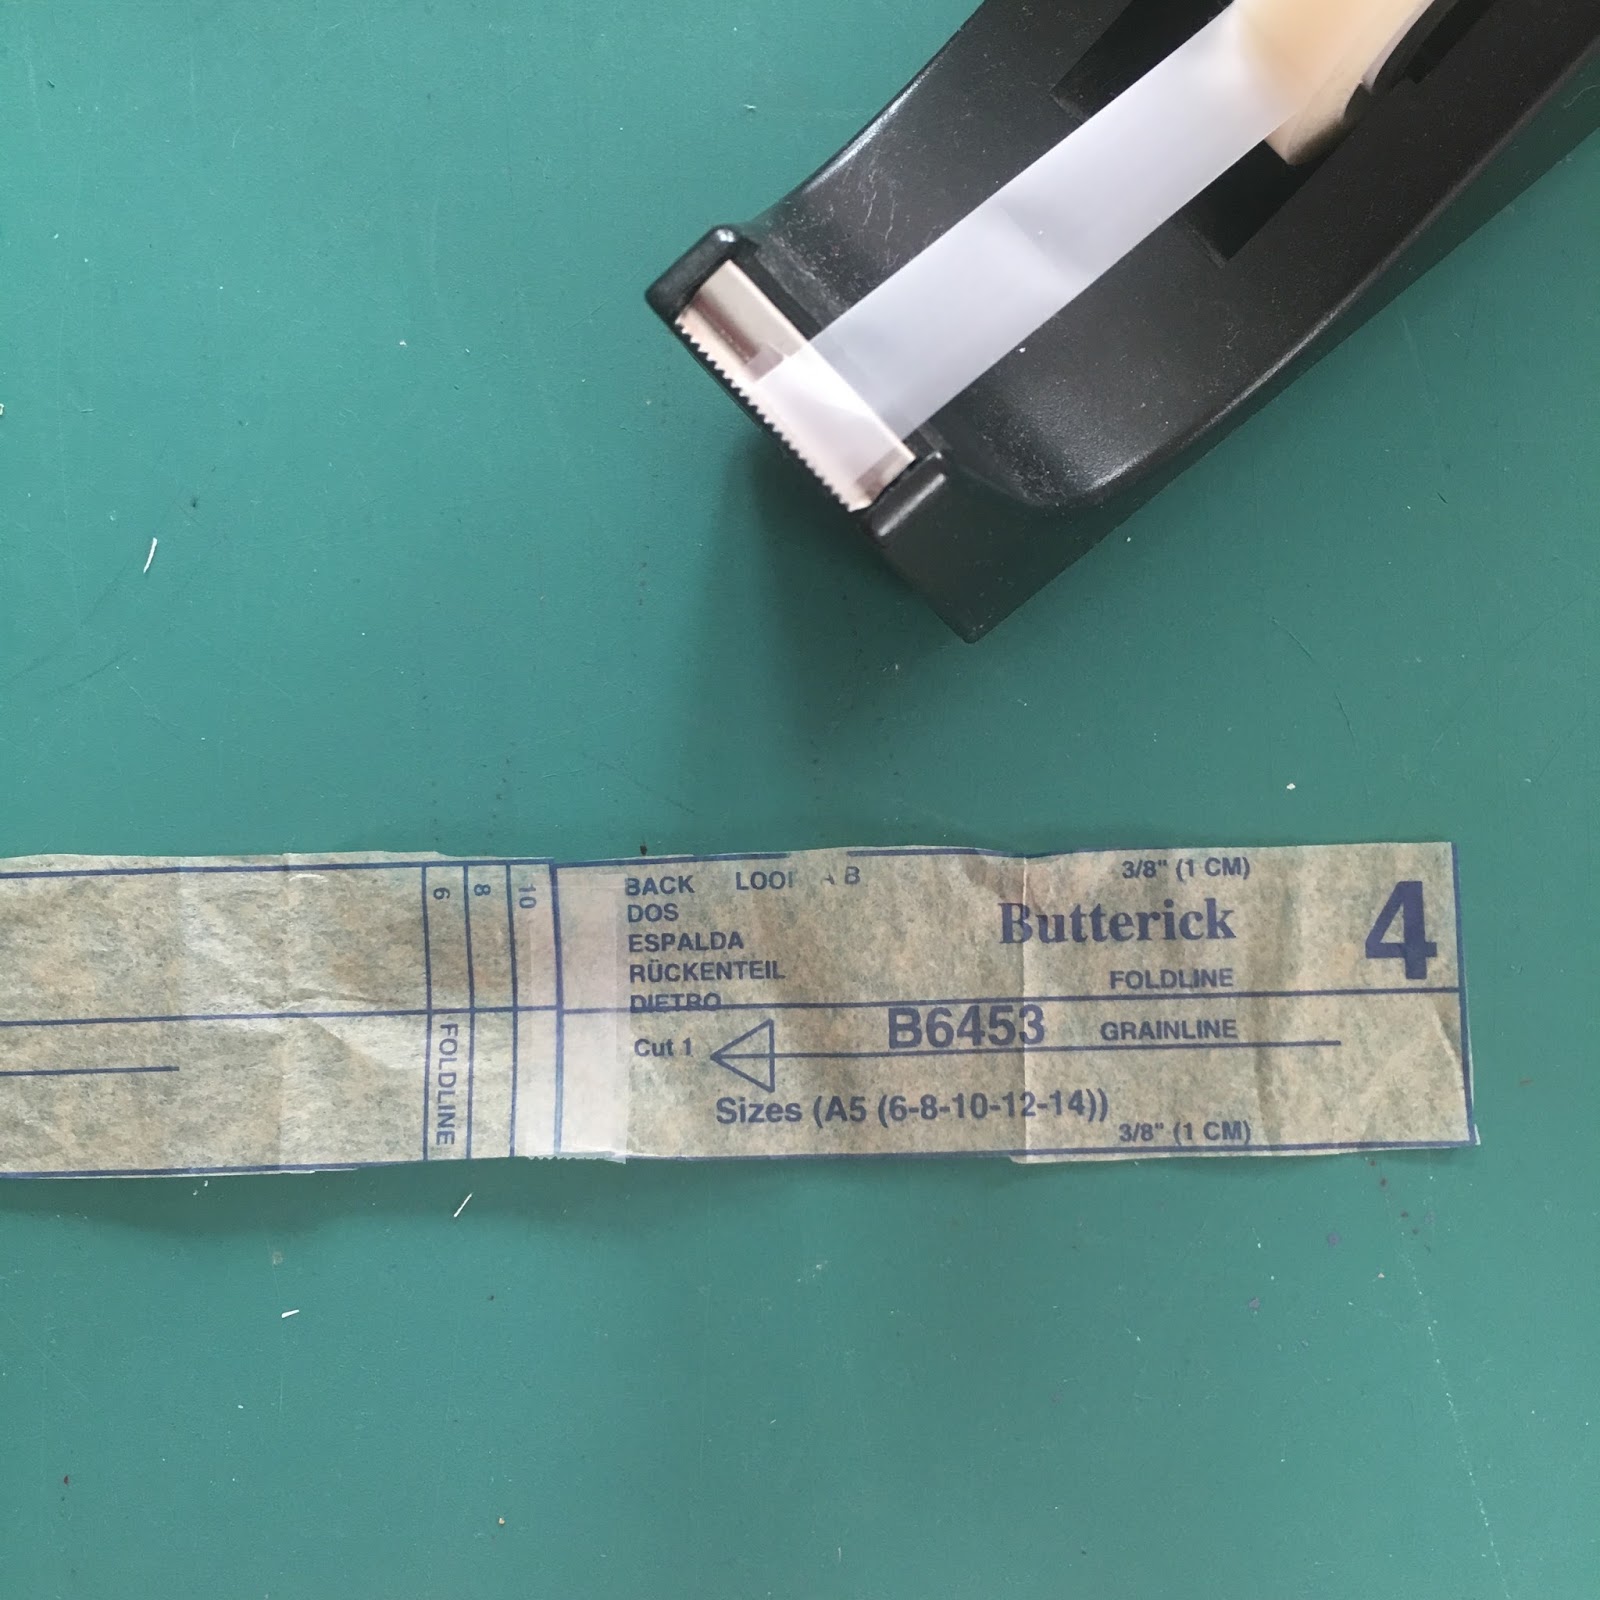
This will make sewing the straps much easier as you can sew them and then trim off the smaller piece. Not necessary but a big help, in my opinion.
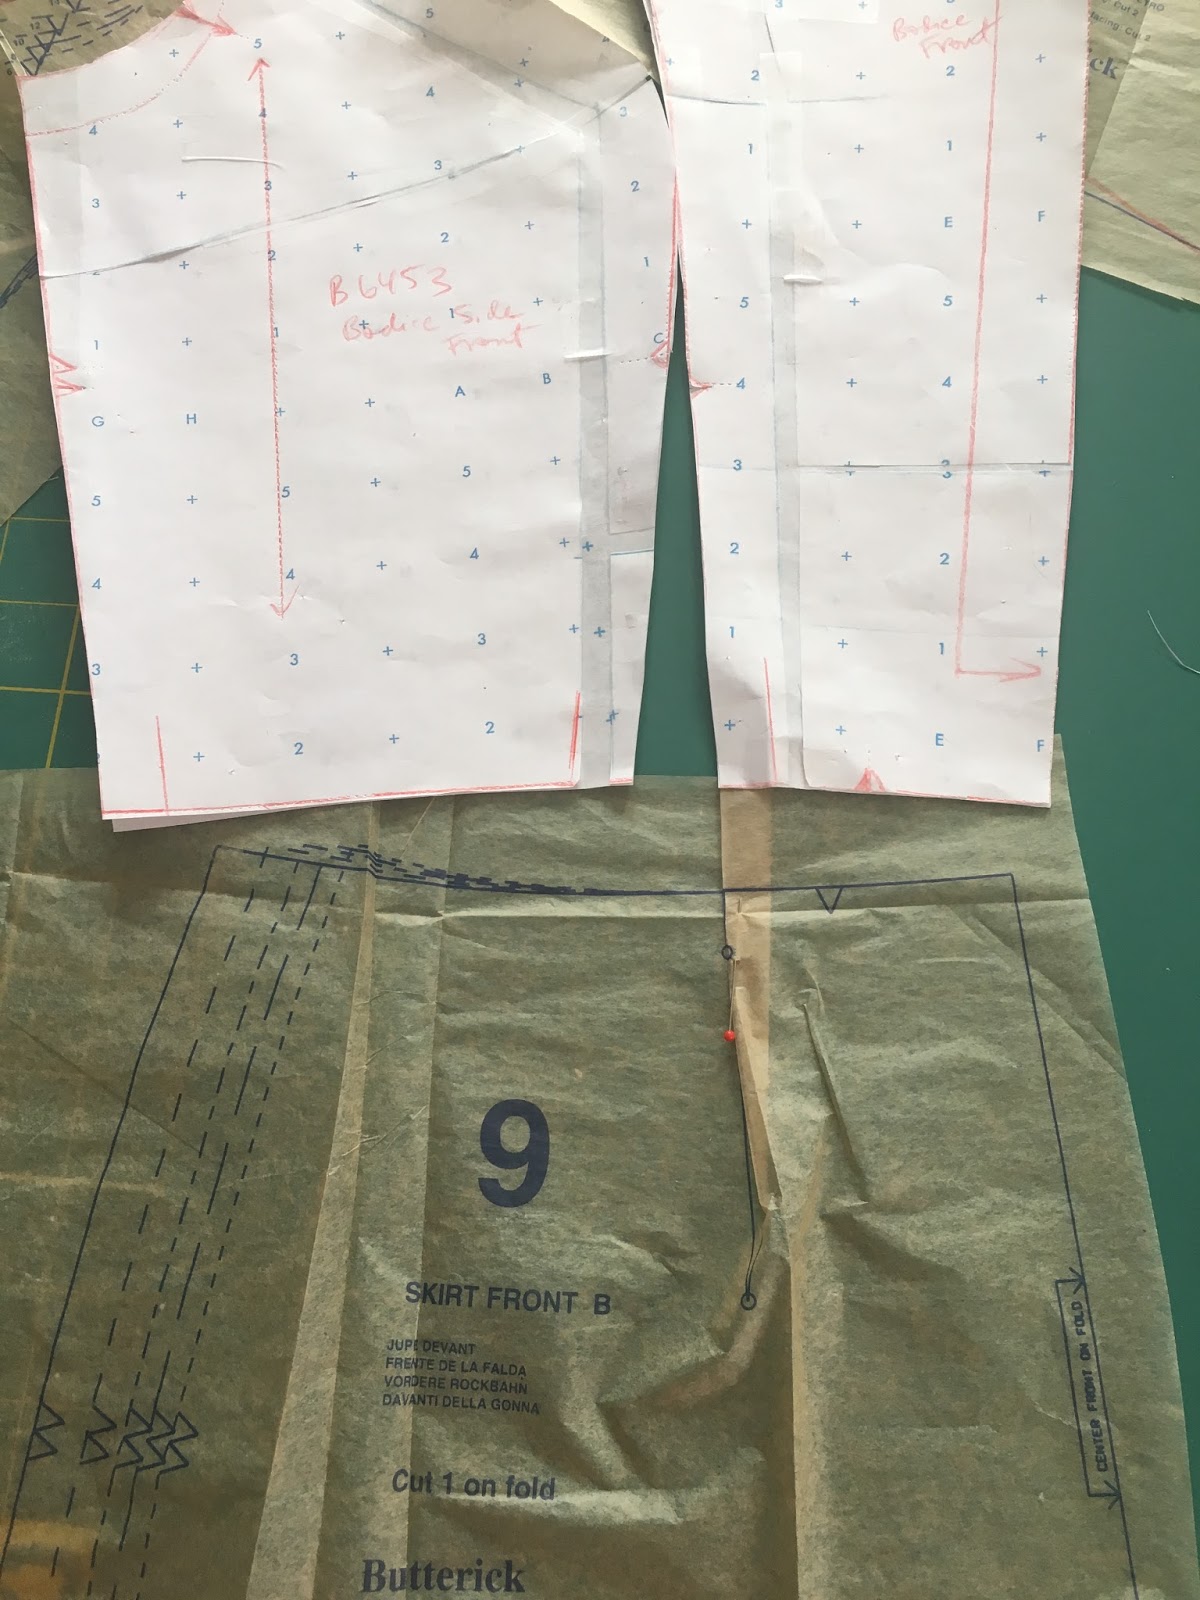
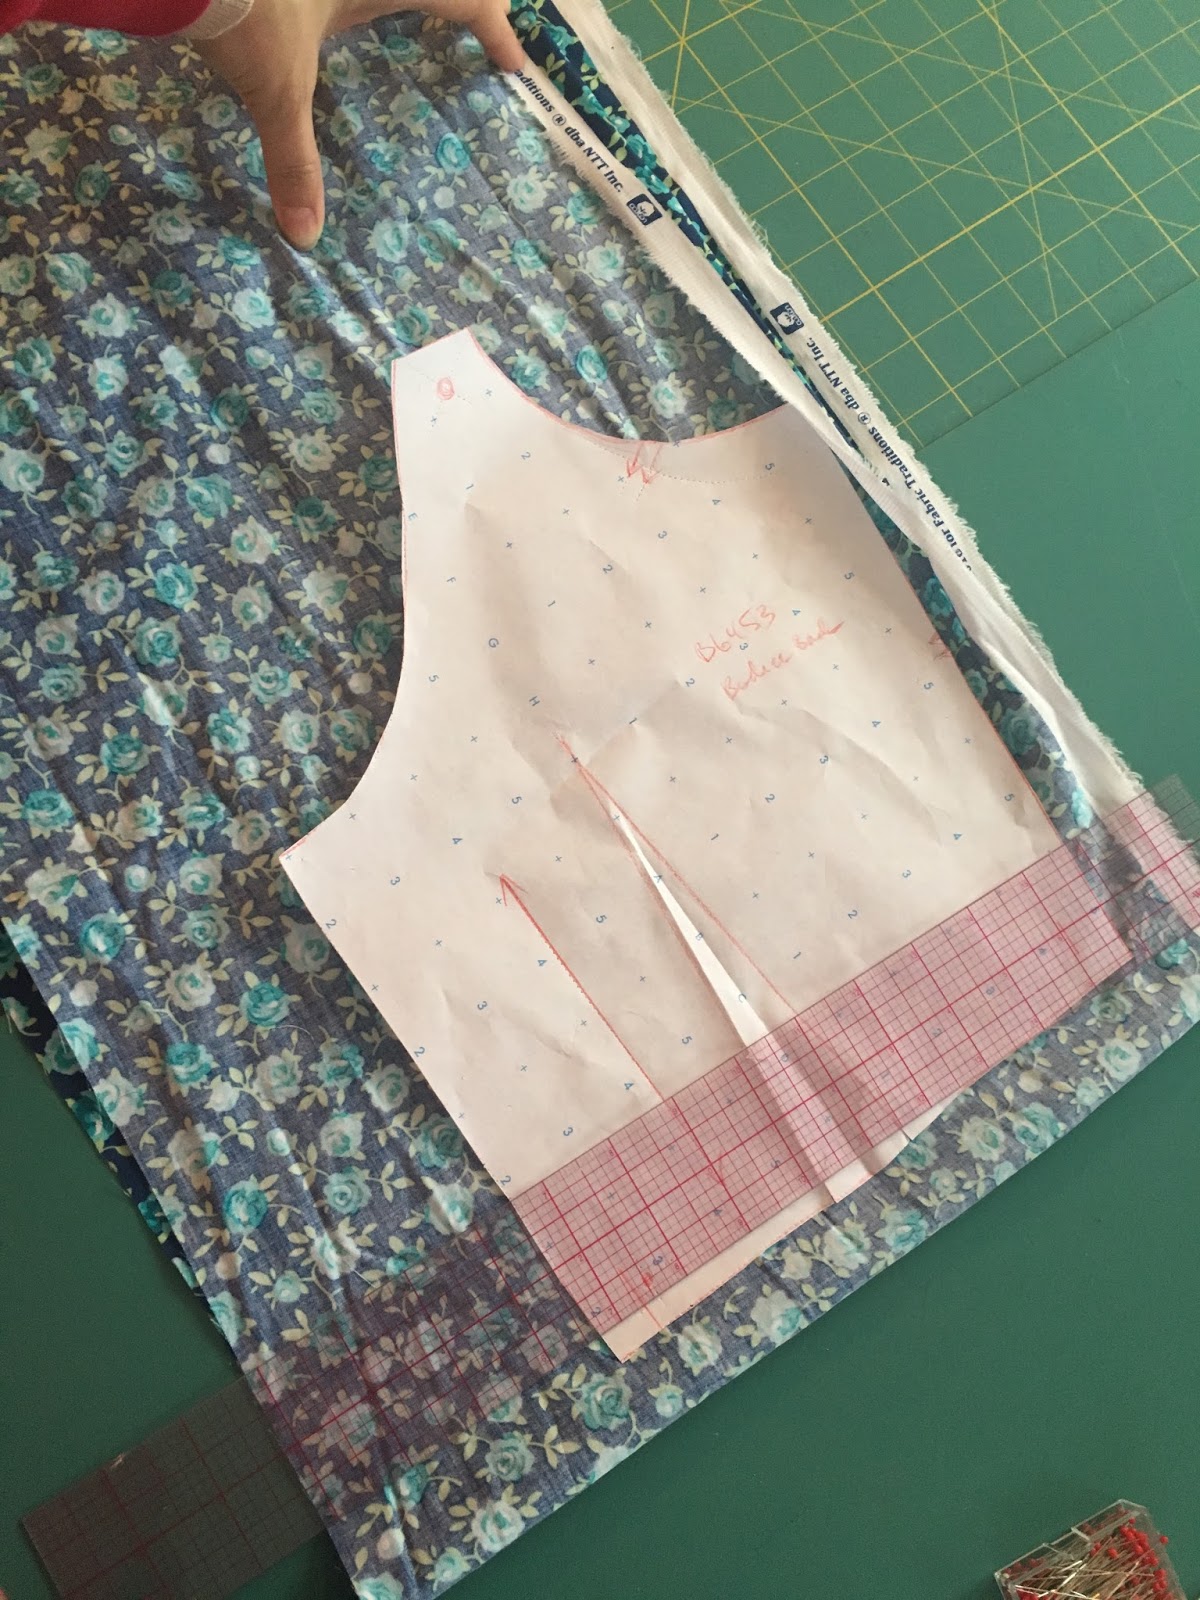
Okay, let's cut! I'm going to focus on the cutting for View A as it needs more explaining.
I recommend cutting in stages, starting with your skirt pieces. They are BIG and need to be cut on the crosswise grain. Do we all understand what this means? Normally we cut on the lengthwise grain by making a fold that runs horizontally down the length of your yardage, and the selvages go on top of each other like so:
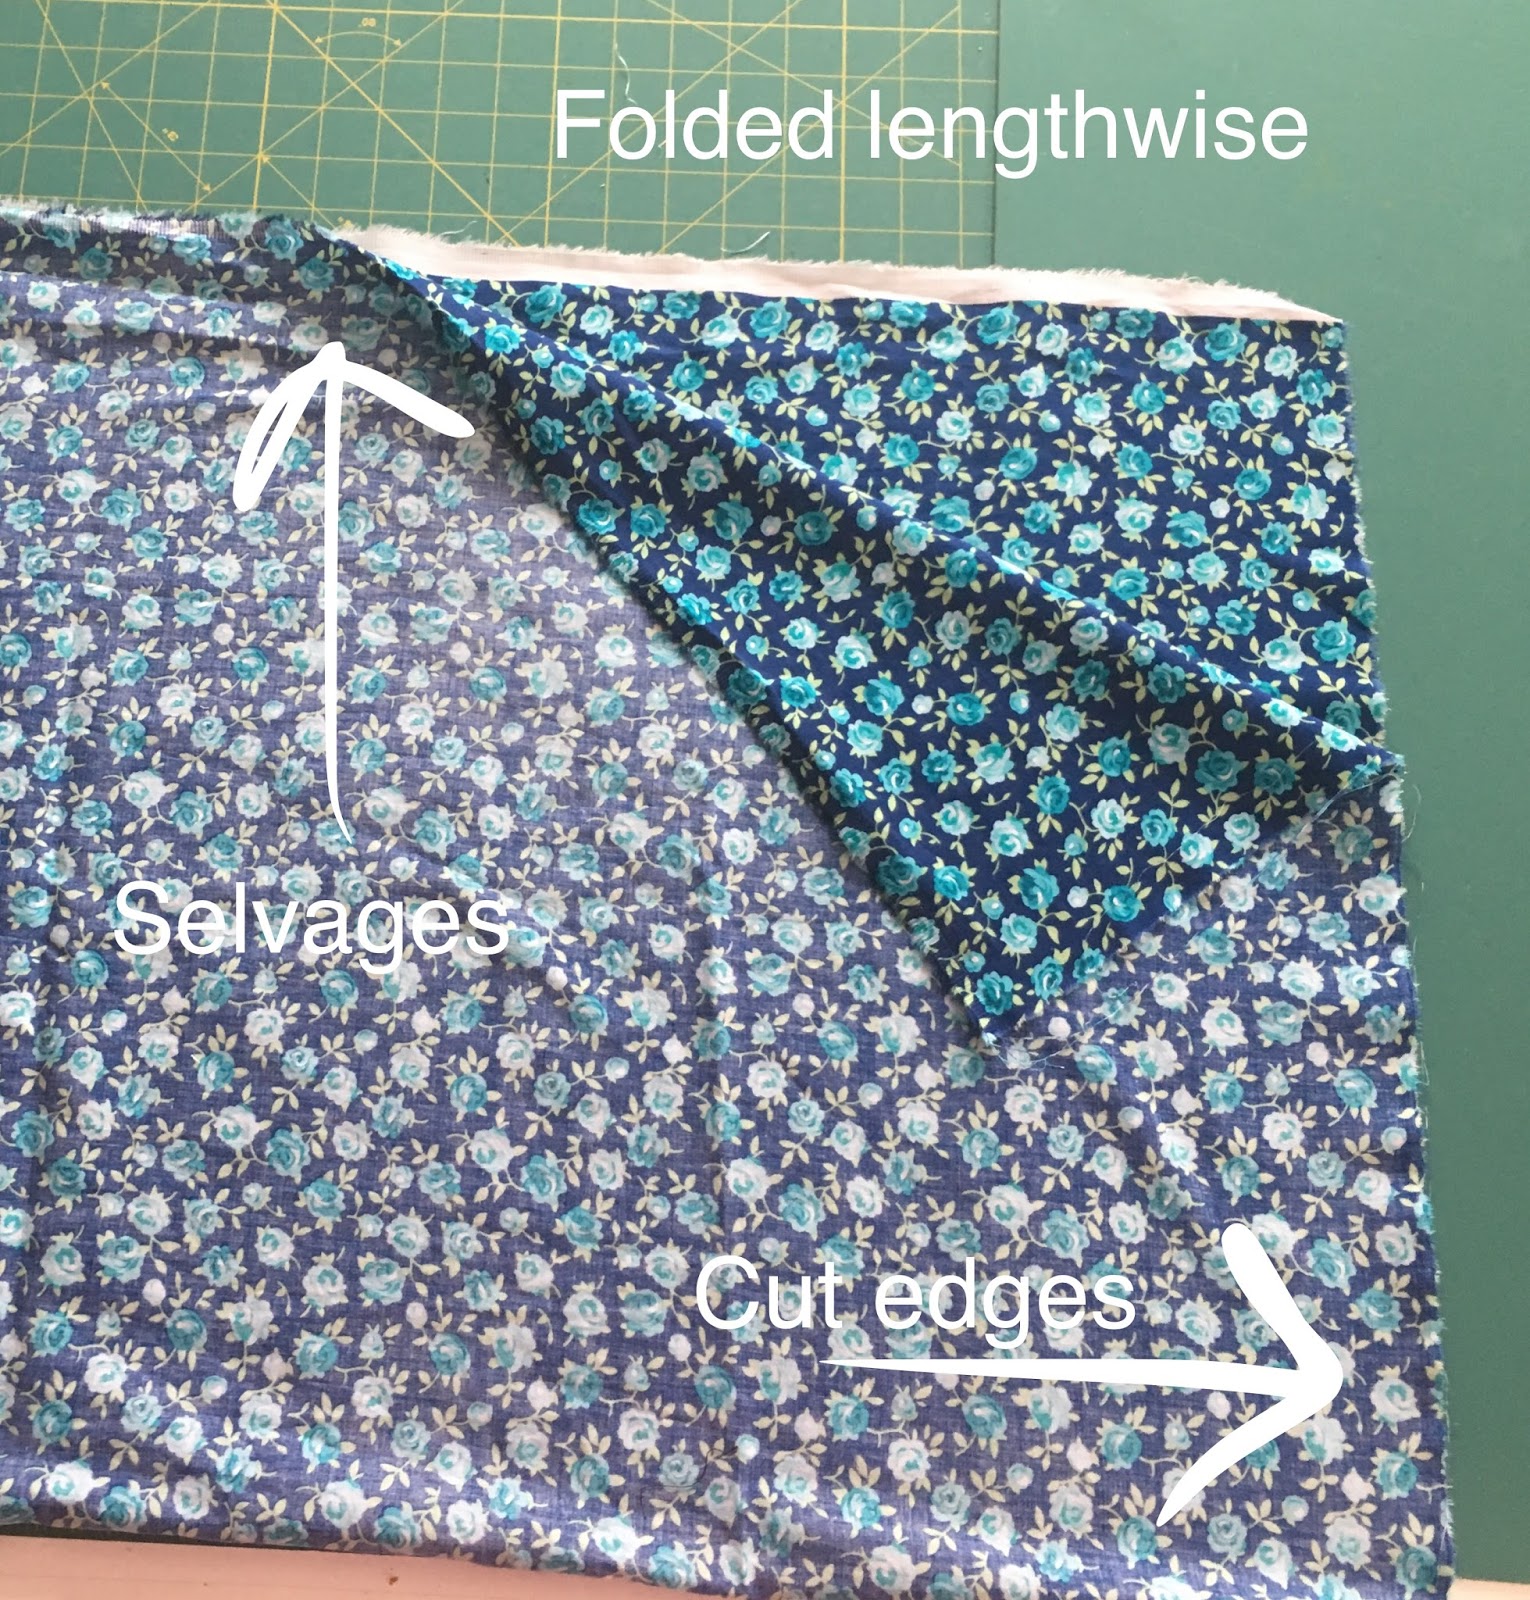
Instead, we're going to make a fold that runs vertically from selvage to selvage. So you have a big width of fabric with selvages on top of each other at the top and bottom, like so:
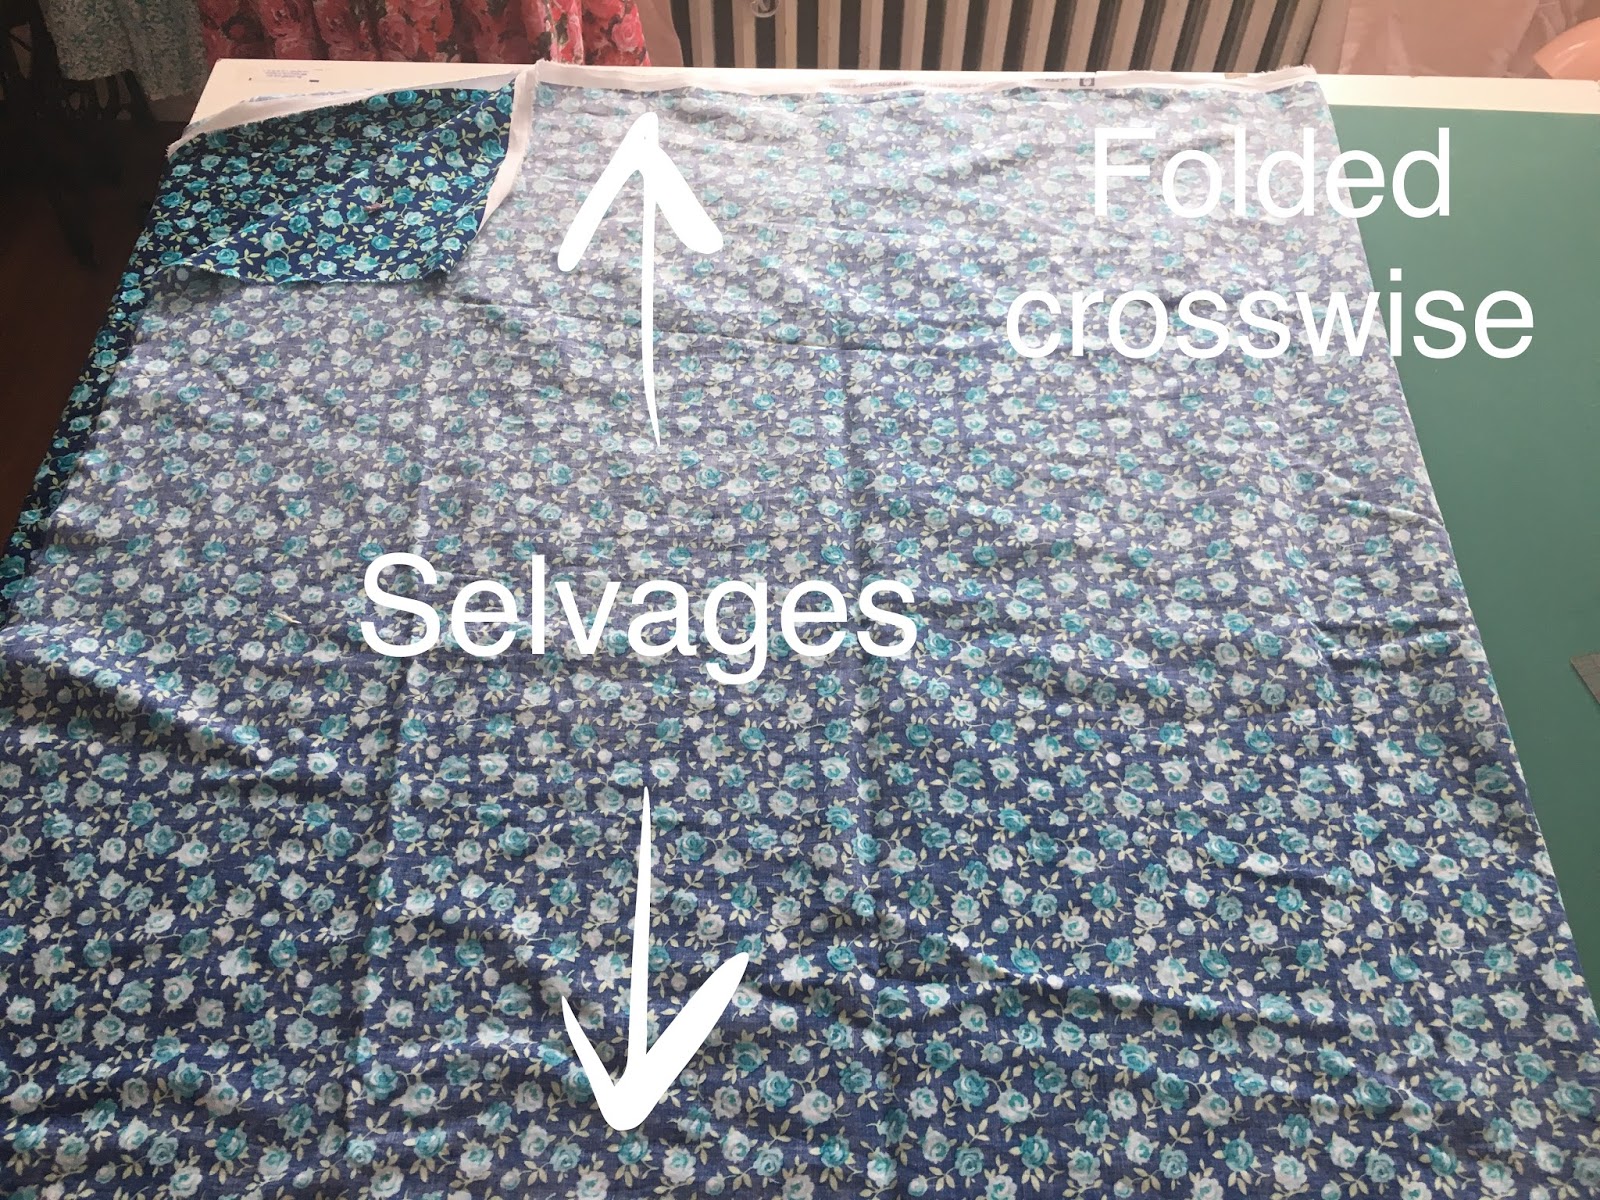
Make sense?
With your fabric folding on the crosswise grain, lay out your skirt pattern pieces along one selvage. The front is cut on the fold and the back is not. After you cut out your skirt pieces, you will have a long skinny bit left on one selvage that looks like this:
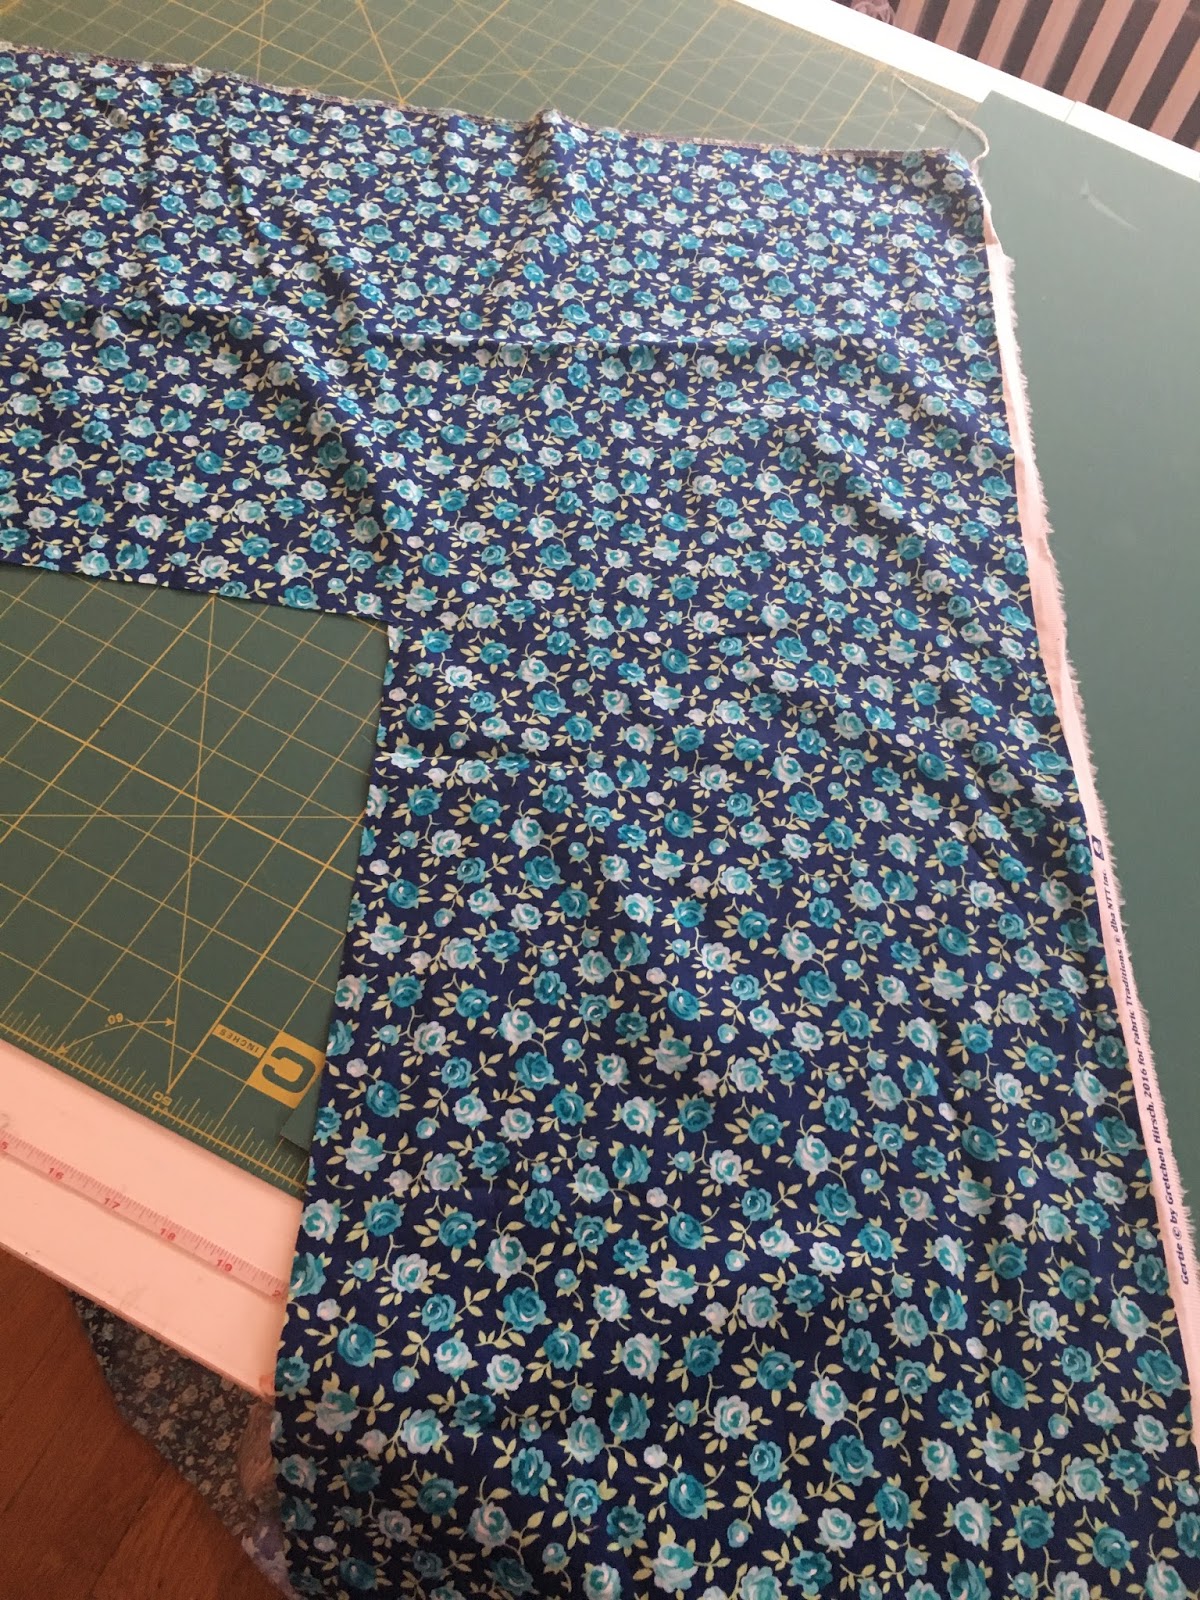
Cut the bodice center front by making a narrowly folded piece from the leftover yardage.
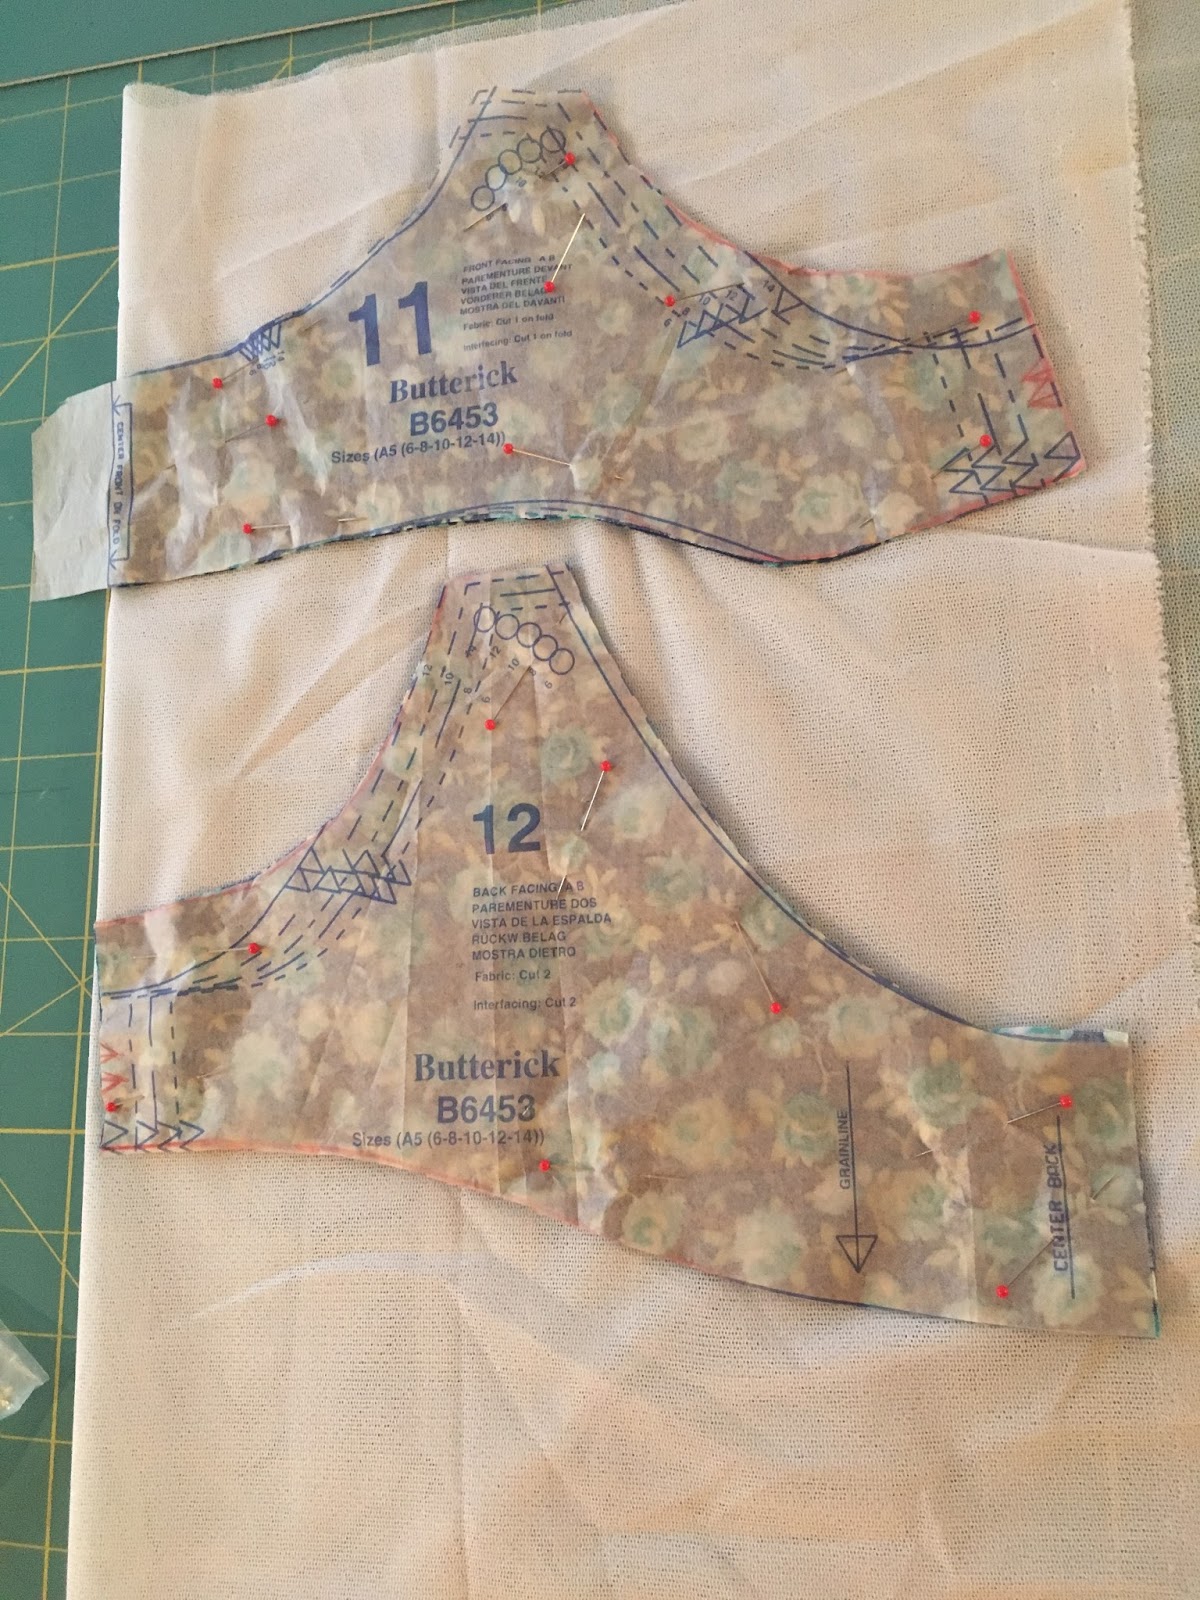
Then double up the rest of the skinny piece and cut the rest of the pattern pieces: pockets (cut twice to get a total of four pockets), bodice back, bodice side front, straps, and back facing. The fold the remaining and cut the front facing on a fold.
Next, cut your interfacing for the front and back facings. I'm using this Palmer/Pletsch sheer interfacing that Pati Palmer herself gave me when I visited her in Portland! She told me it's a great match for cottons.

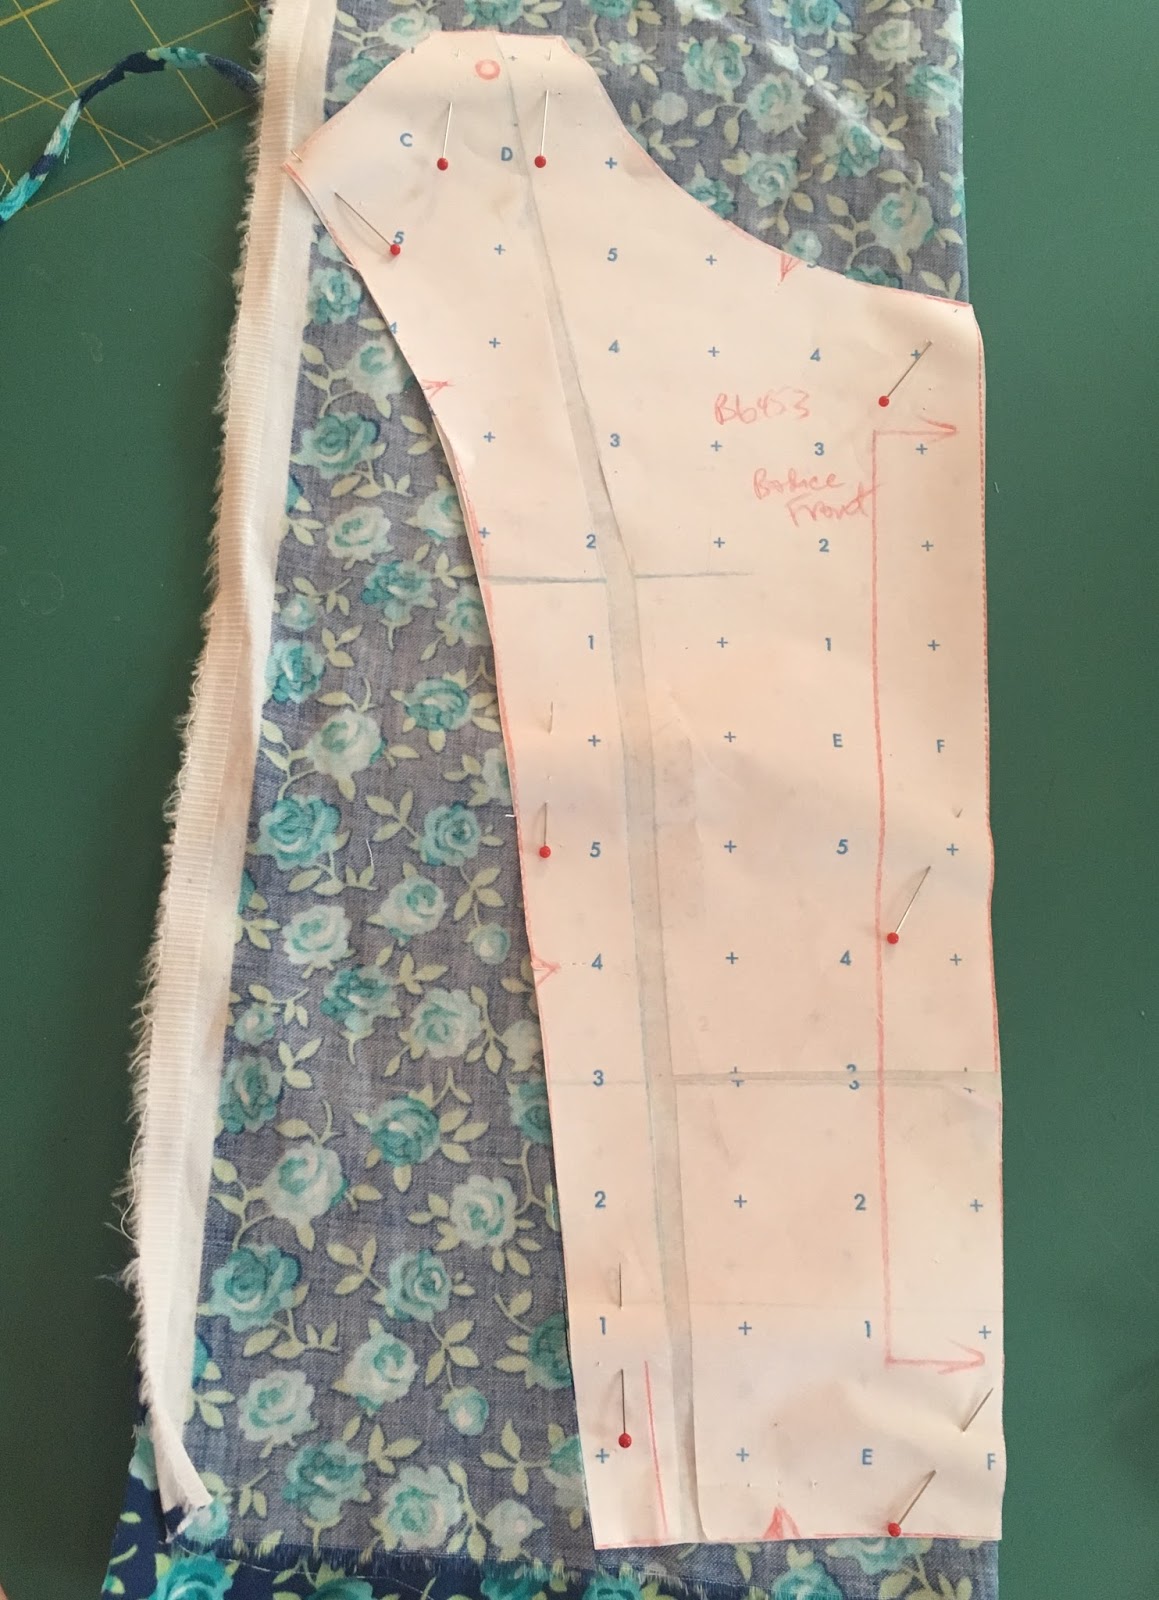
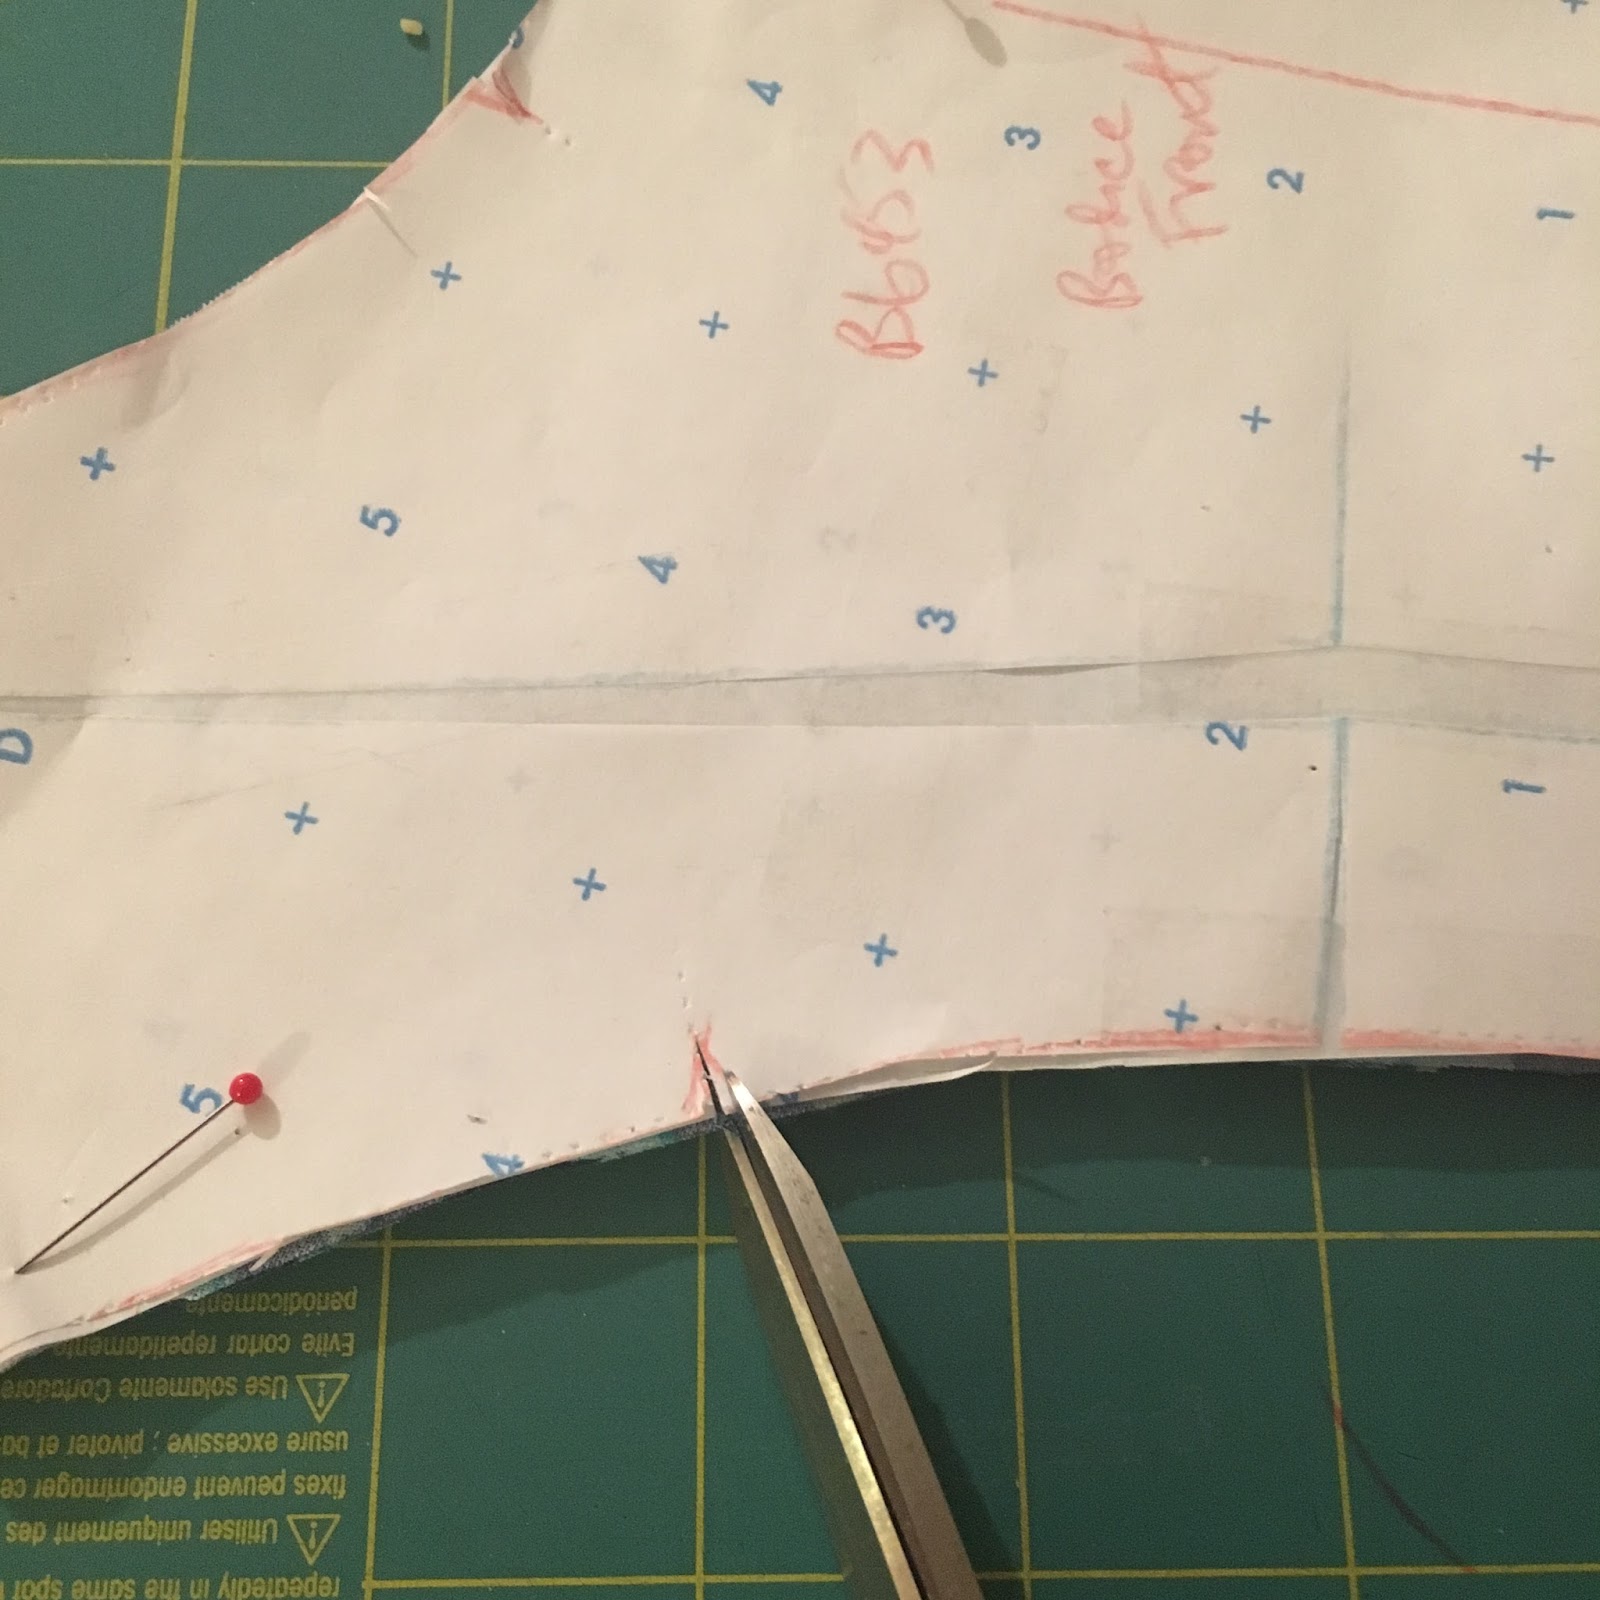
Go over all your pieces are transfer any notches by snipping into the point of the notch.
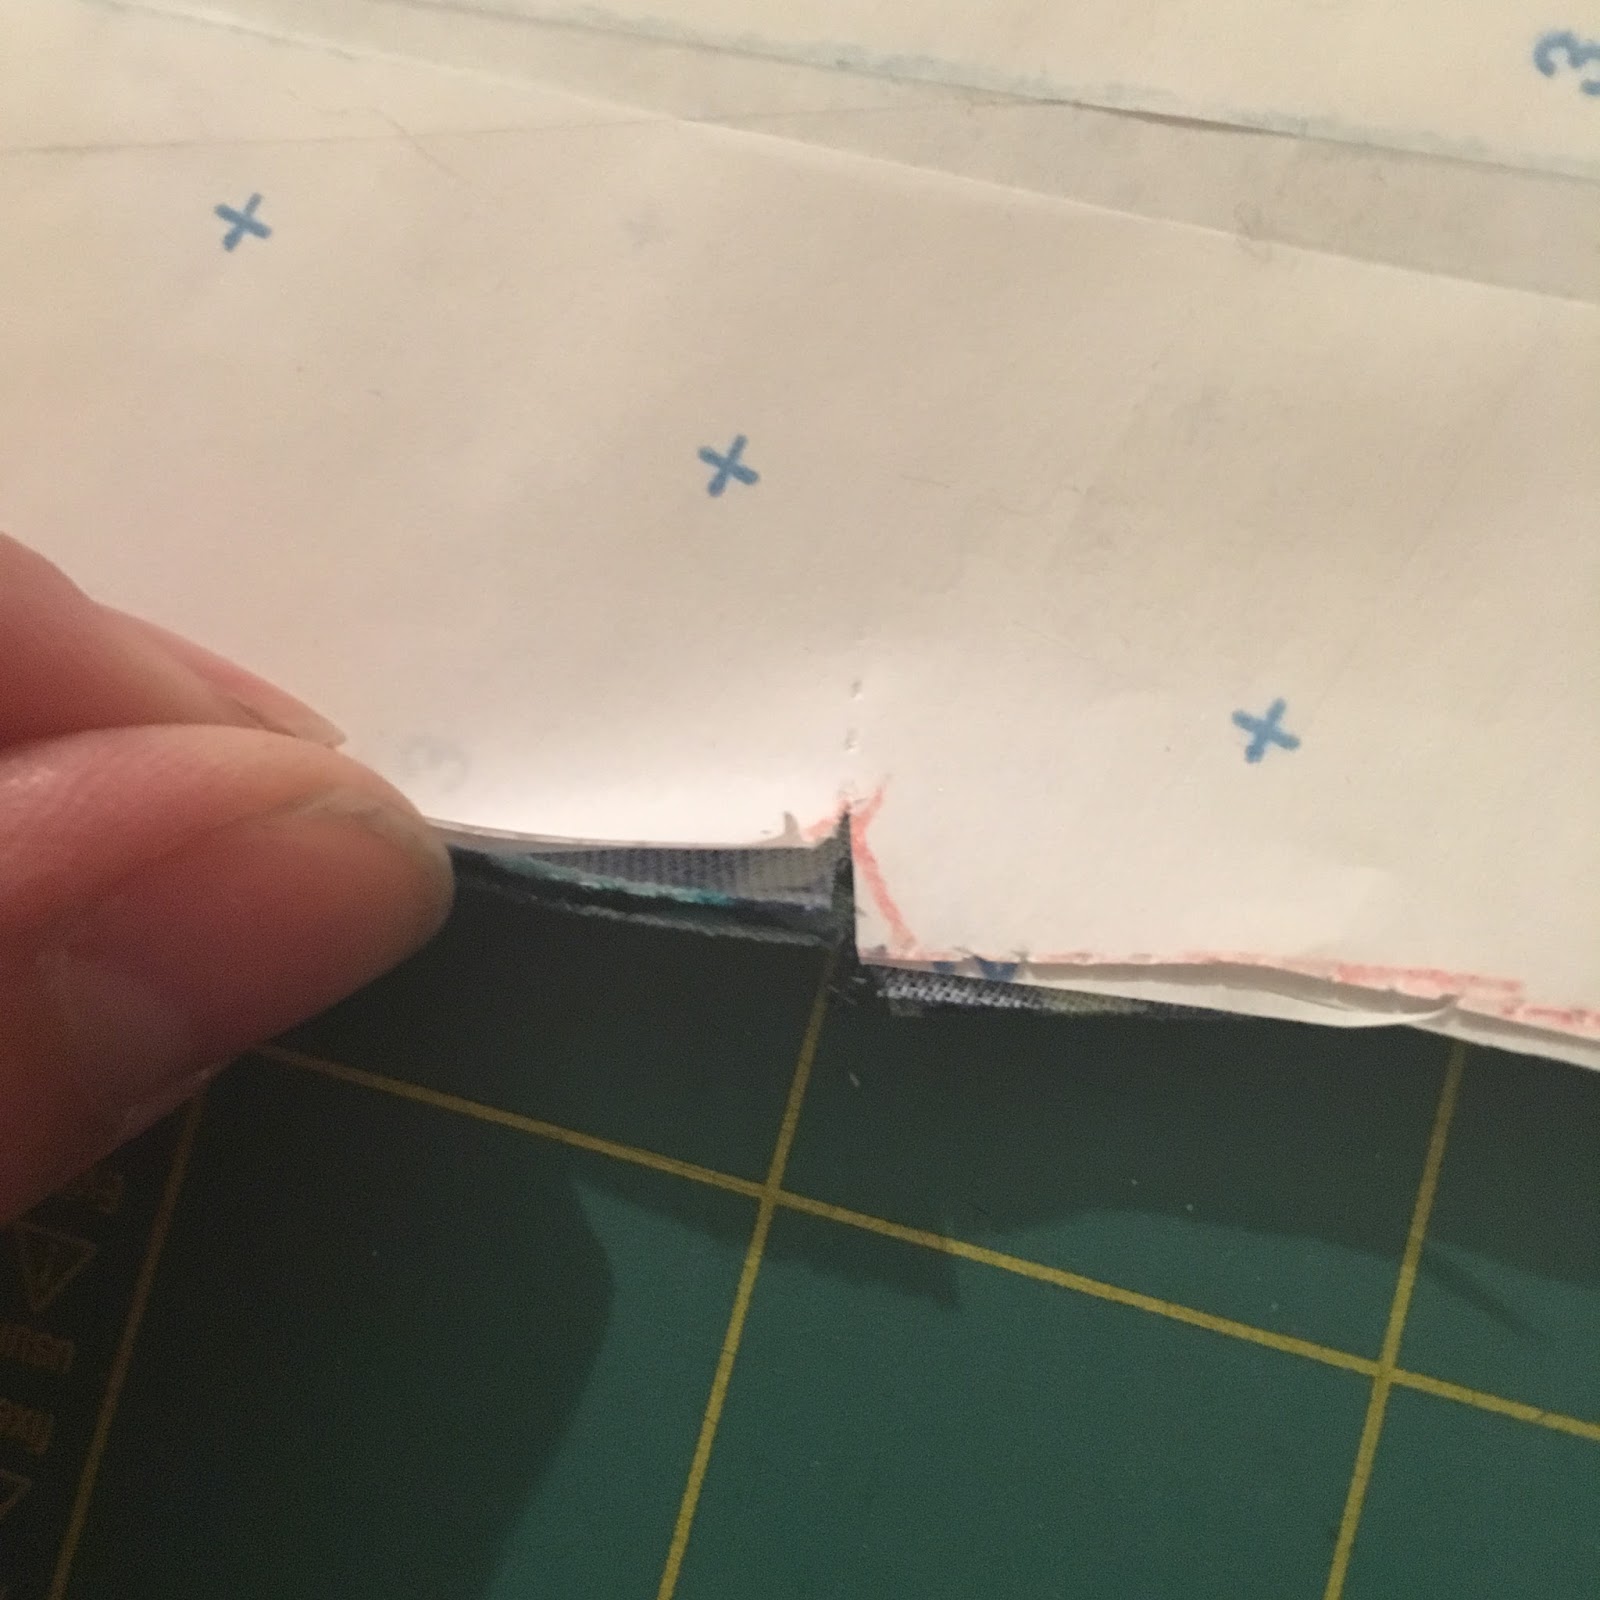
Also transfer your circles and the back dart. I do this using wax tracing paper and a spiky tracing wheel. Make a sandwich by putting one layer of tracing paper face up under your bottom layer of fabric, like so:
Then put the other side of the tracing paper wax-side down on top of the other layer of fabric.
 Lastly put the pattern on top of all the layers.
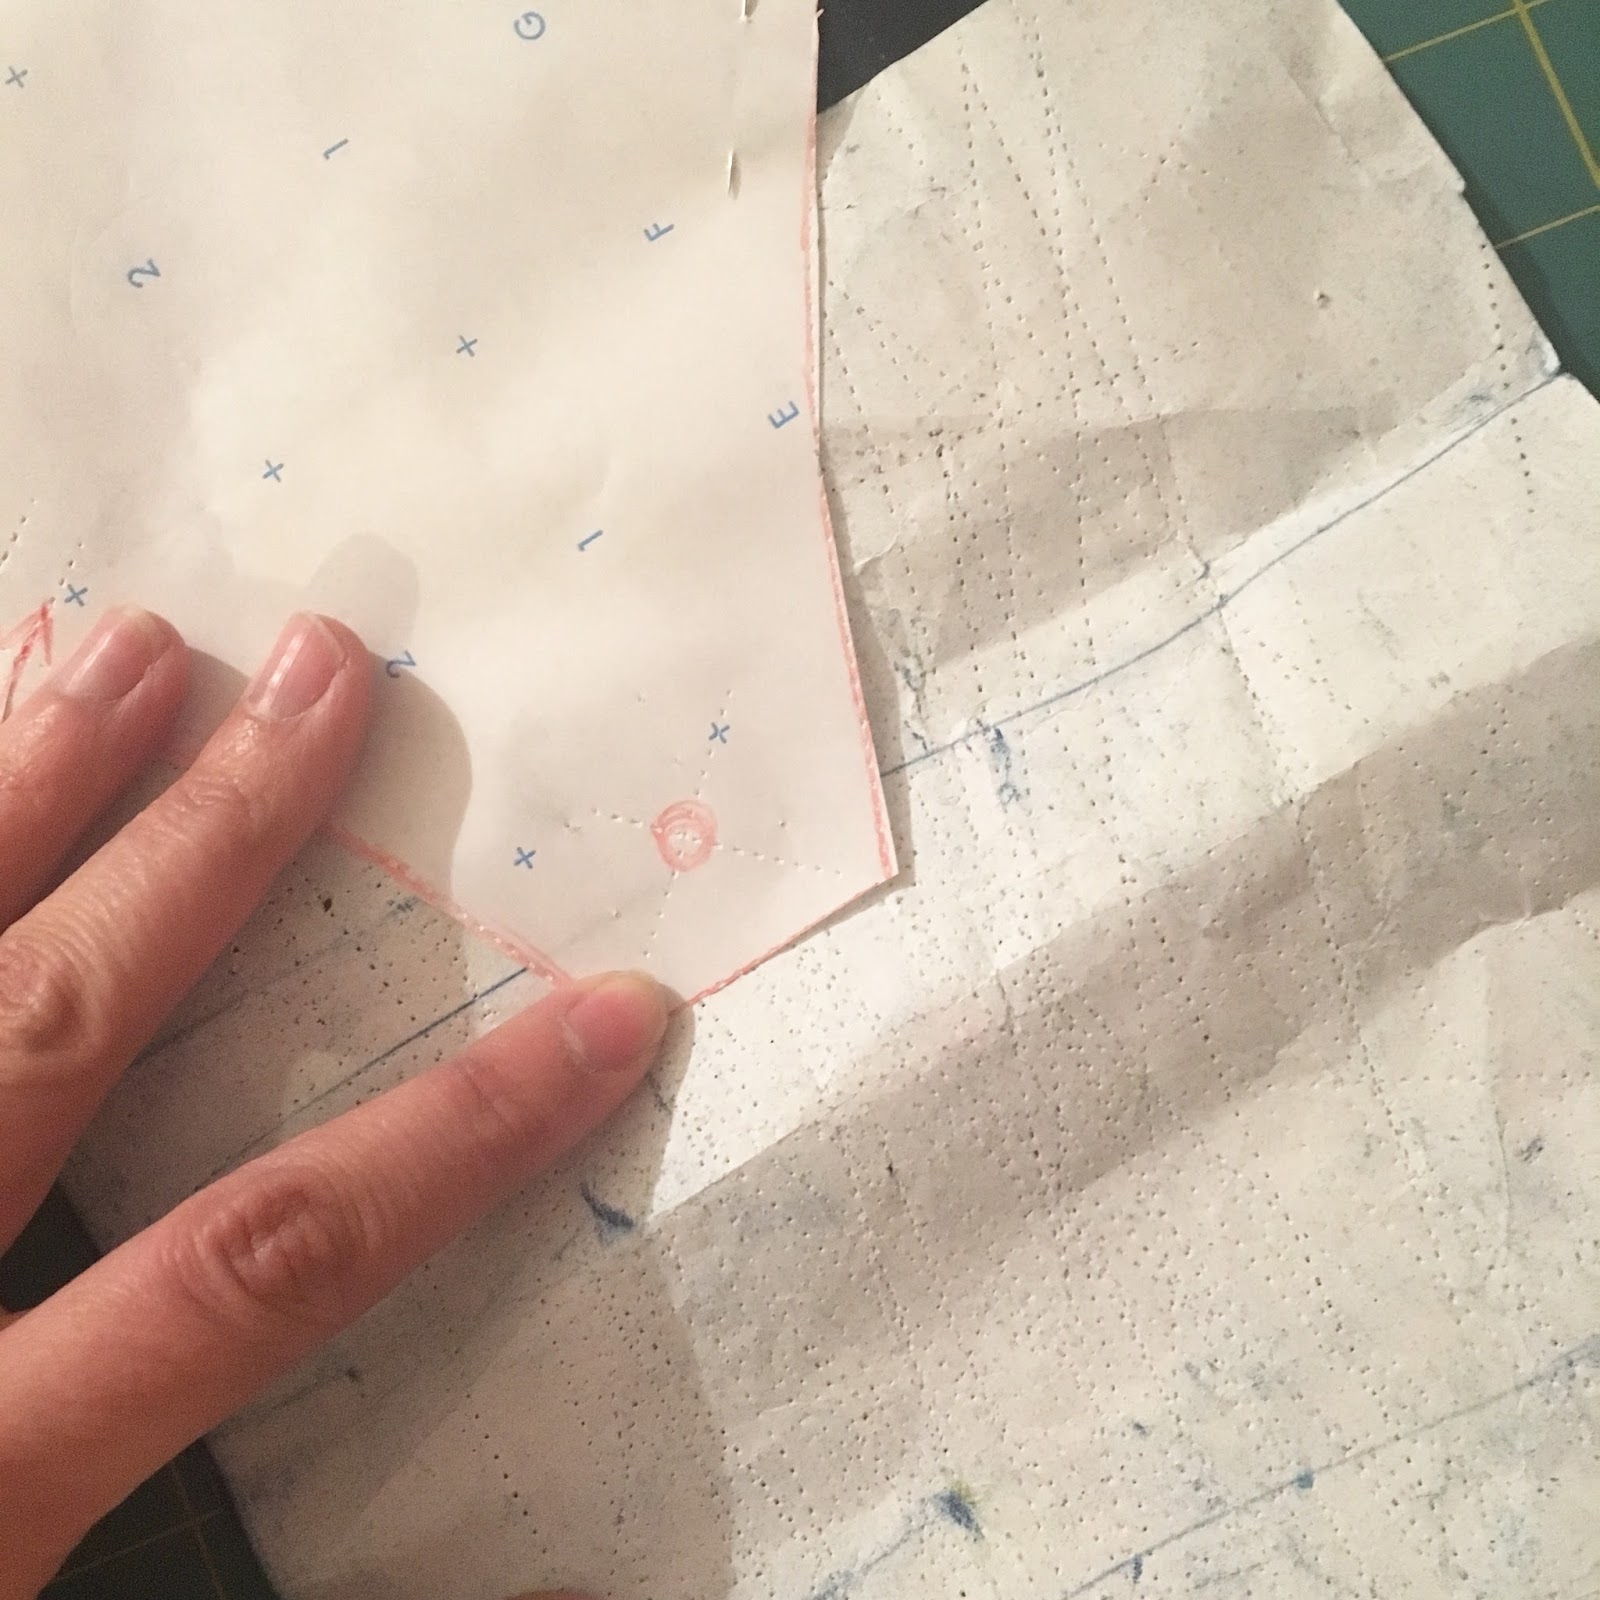 I mark an X through my circles.
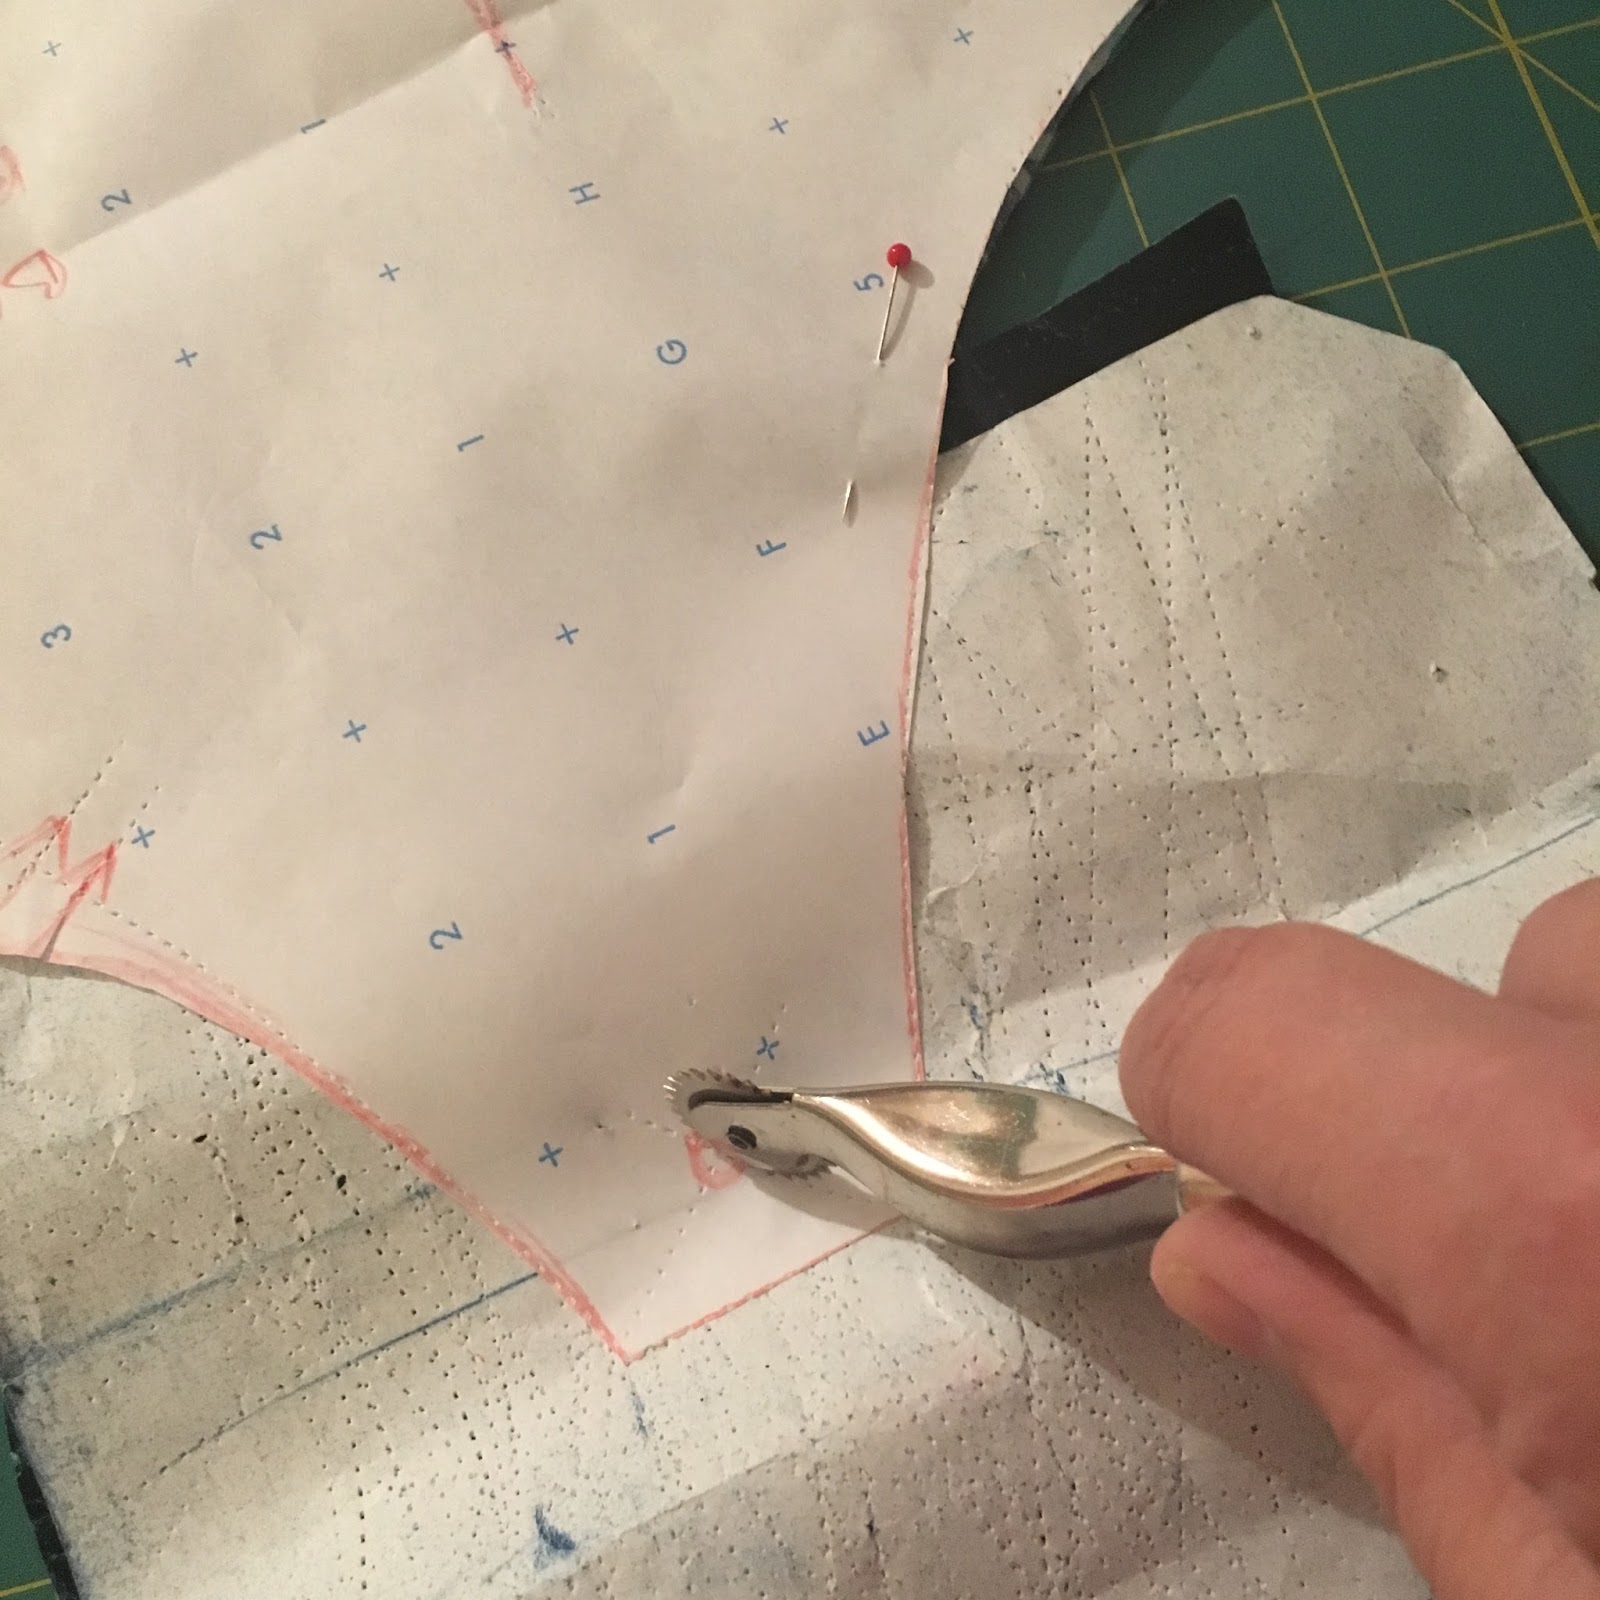
Now that you've cut out your pattern and marked it, it's time to sew! I'll be back tomorrow with our first sewing post.
March 15, 2017
B6453 Sew Along: Making a Bodice Muslin

Okay, I vowed to keep the muslins and fitting stuff to a minimum but I feel I really want to touch on this. It seems a lot of ladies in the Facebook Group are new-ish dressmakers, which I love! And since there are some things you can do to make muslin-making easier, here's a look into my process.
The most important things I do are to always put a zipper into my muslins, and to turn in the seam allowances at the neckline and waistline so I can see where the actual seamlines fall.
Note: you can do all of the stitching in the following steps with a long basting stitch (4-5mm). This is faster to sew and easier to remove if necessary.
Size note: I cut a size 12 based on the finished measurements on the pattern tissue. The size chart would have put me in at least a size 14, which would have been too big. This is why using the finished garment measurements are so important! (I'm fitting mine from scratch, to go through the process with you.)
First, I cut the three bodice pieces (front, side front, and back) in the muslin. Those are the only pieces you need, no straps or interfacing. I only needed a half yard of muslin to make the bodice!
Second, sew the princess seams as you would normally. I always staystitch and then clip the bodice center front between the notches.

This makes it easier to pin the side front to the center front along the curved princess seams. Stitch the princess seams. Finger-press the seams up. I don't worry about pressing them at this point.
Next, sew the back darts from the edge of the fabric to the tip. This is how I pin my darts for sewing:
Sew the bodice front to the bodice back at the side seams.
Next, stay stitch around the neckline and the waistline at 5/8". Clip into the seam allowances up to the stay stitching around any curved areas.
Press the seam allowances in along your stay stitching.
Baste up the center back seam and press open.
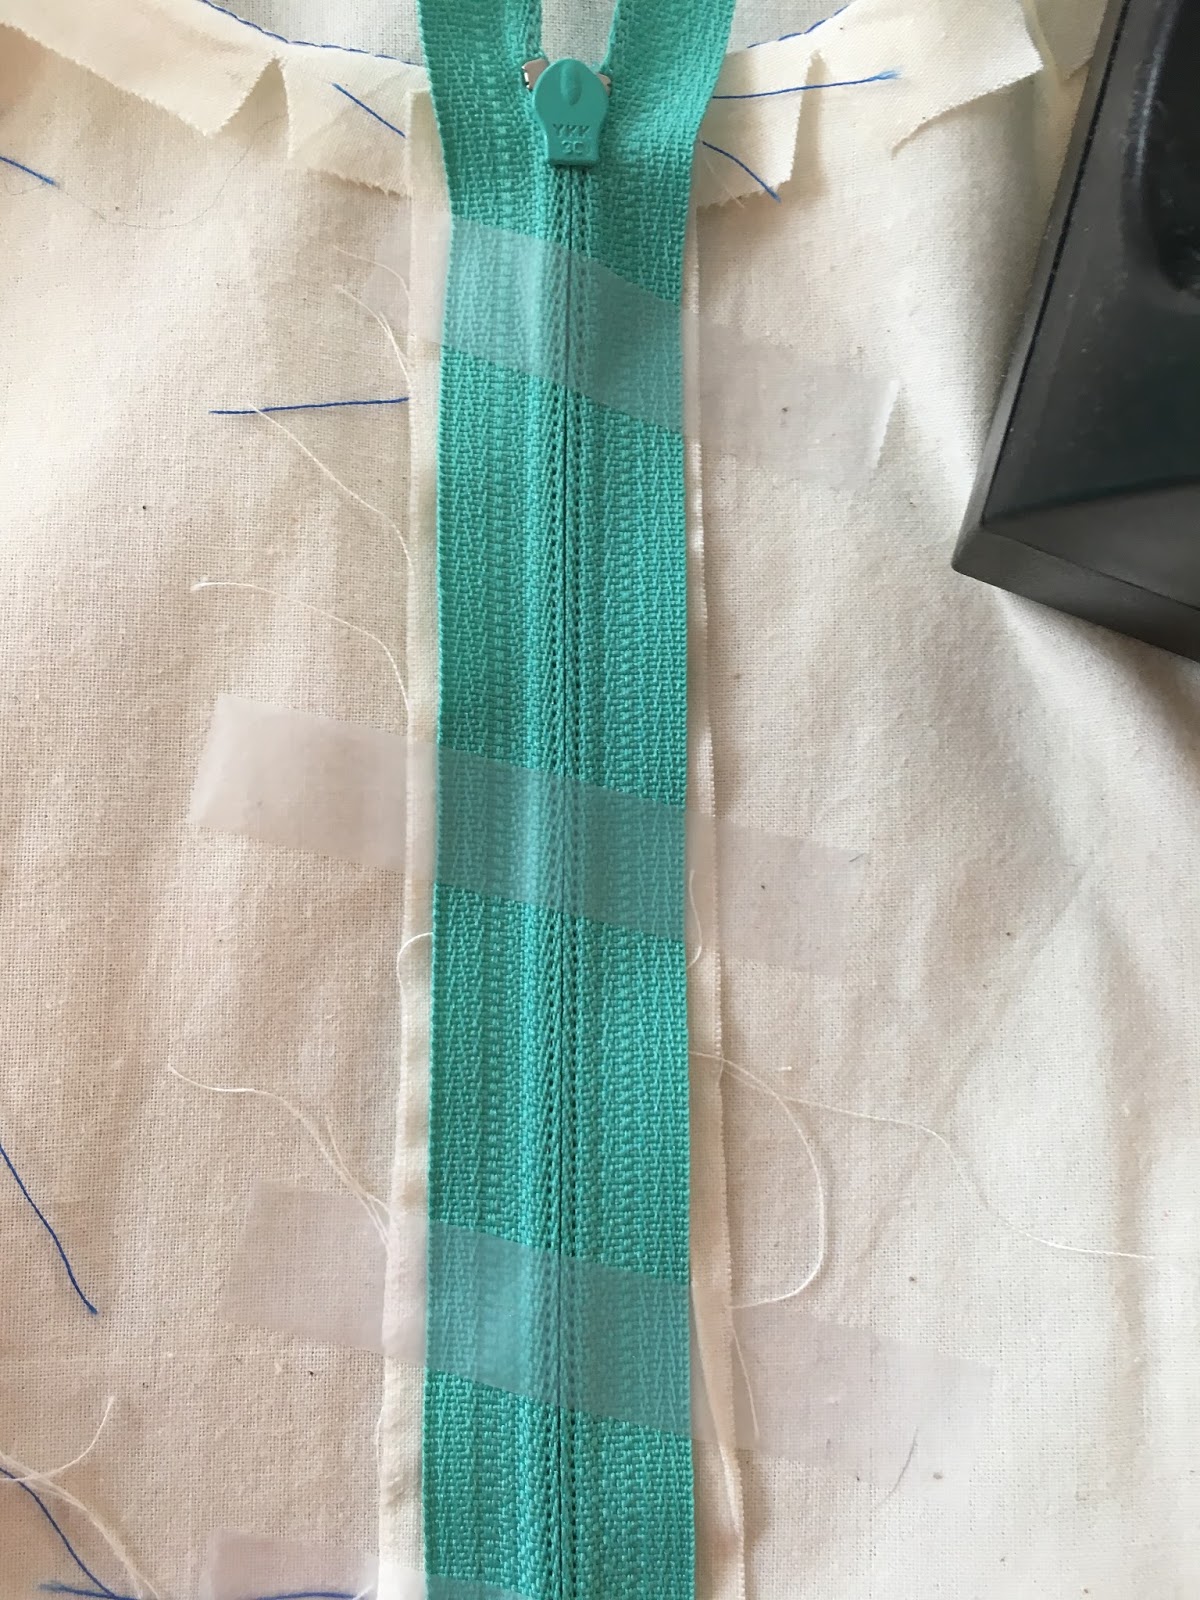
Using the same length zipper that you would use for your dress (14") place the zipper face down and scotch tape it in place. Yep, we're going fast and easy here. Just make sure your zipper teeth are exactly centered over the seam.
On the right side, use a zipper foot to stitch about 1/4" to either side of the seam. Straight stitching doesn't get extra points here. You'll have excess zipper hanging below the waistline seam.
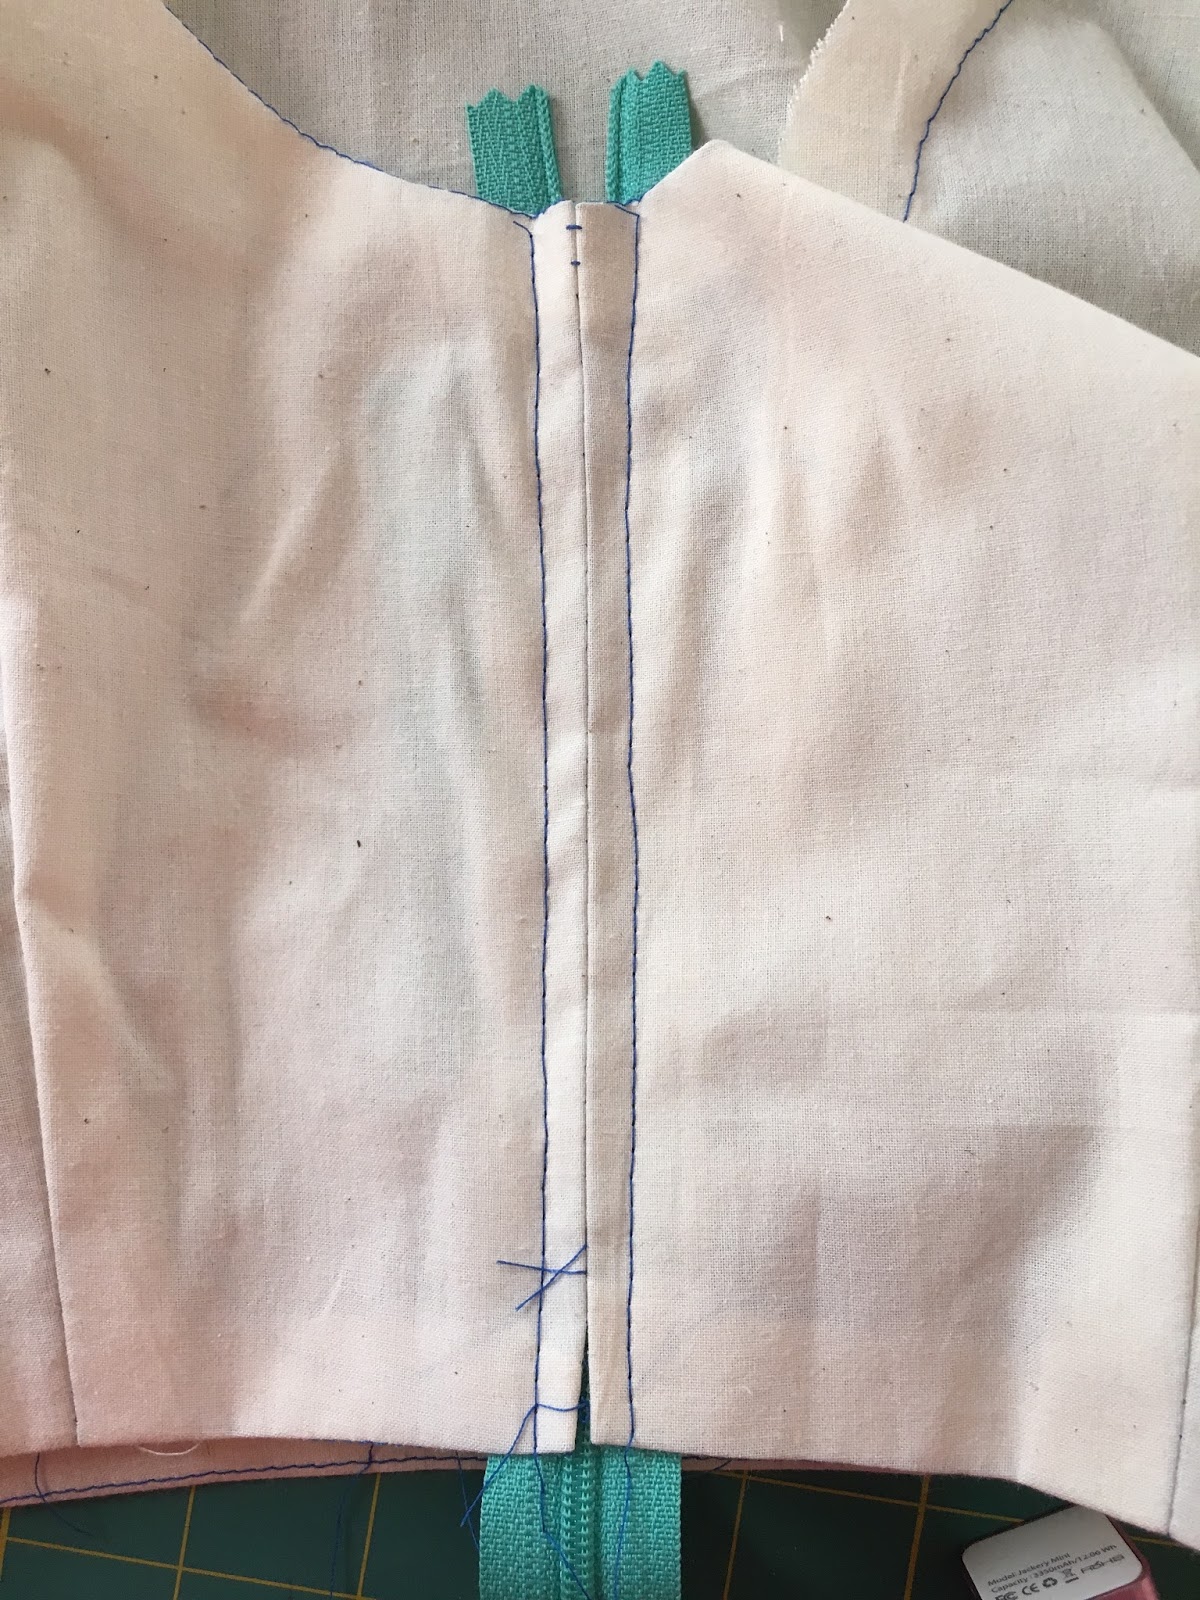 Open up the basted center back seam and remove any tape that's in the way of you opening up the zipper.
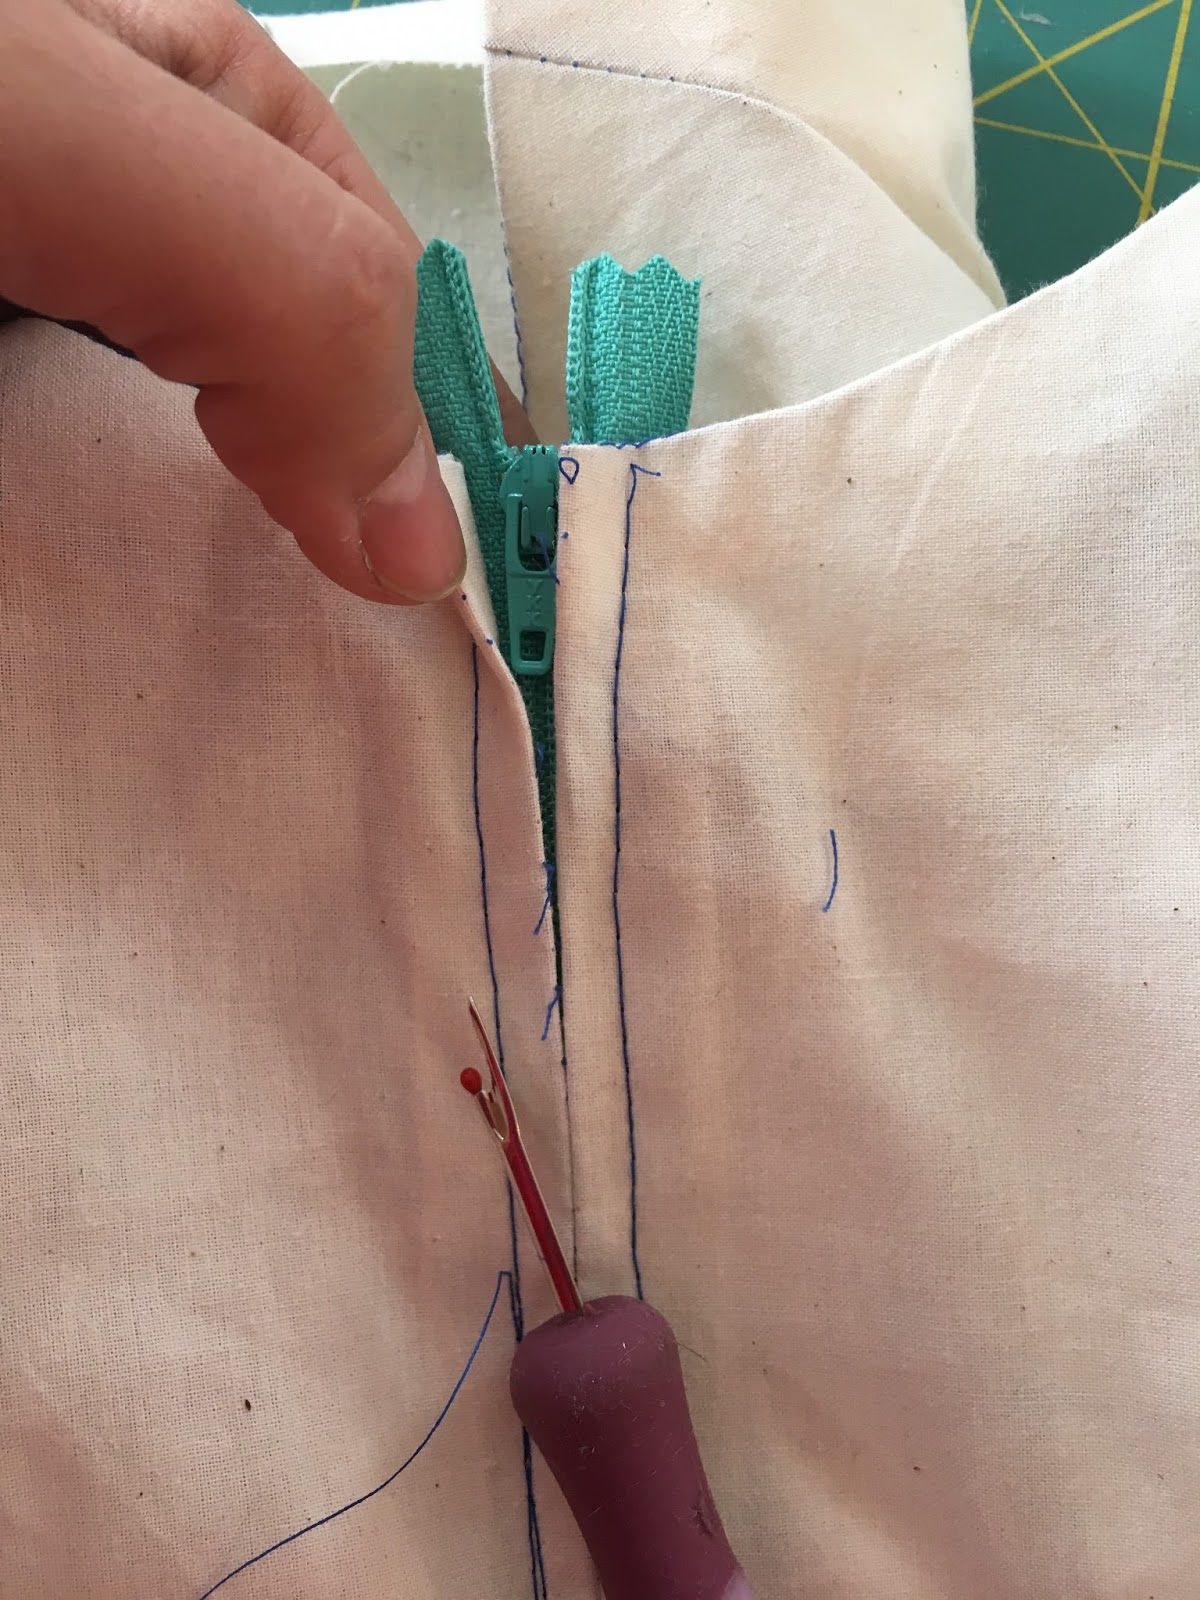
(Tip: you can rip out the zipper and use it again for your next muslin!)
Pin 3/8" ribbon in place of the straps. A 14" length of ribbon was more than enough for each strap.

Zip yourself into your muslin! You should always wear the undergarments that you plan to wear while wearing the dress. You'll have a fancy zipper tail.
If you're overwhelmed looking at your bodice, check out the Fitting Order Sheet provided by Palmer/Pletsch.
You can see mine is low around the armholes, has tightness throughout the bust, excess around the armhole princess seam, and is slightly loose throughout the waist.

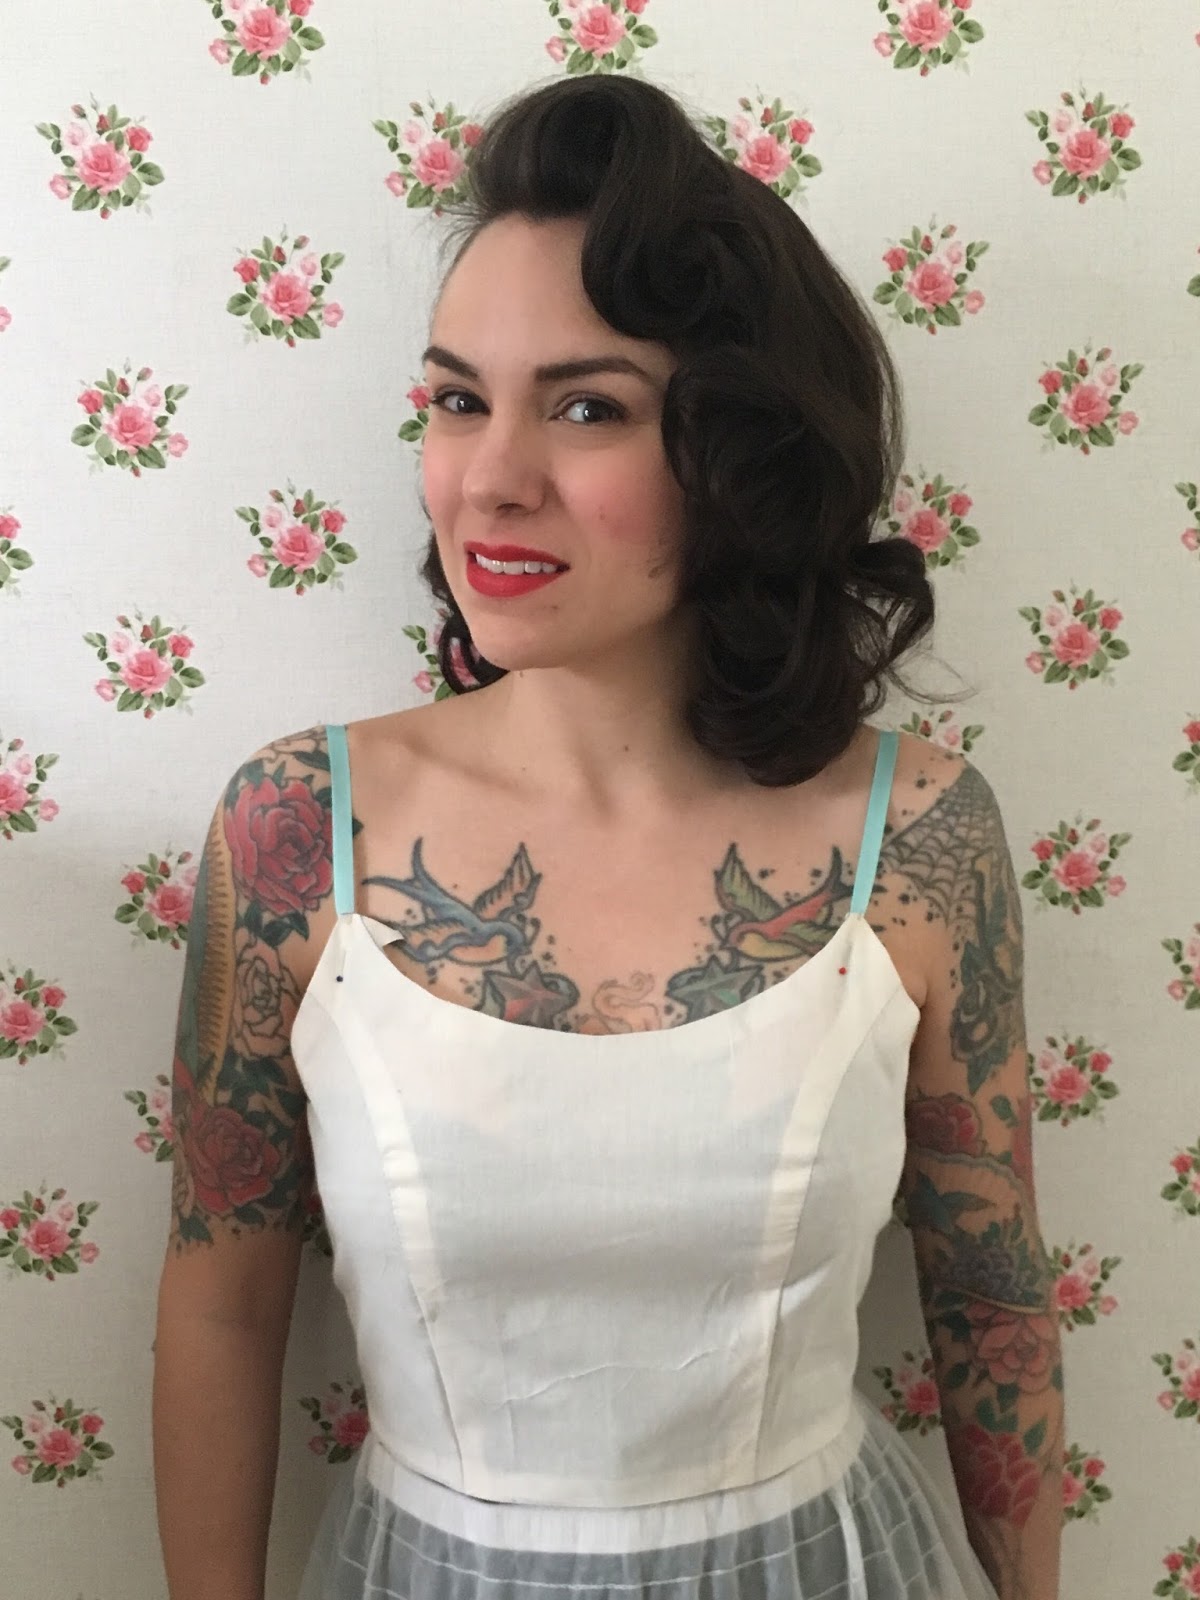
I pinched out some excess at the side seams and the princess seam at the armhole.
I also made a very small FBA (1/2" per side) following the Palmer/Pletsch directions I posted earlier this week. I also raised the armhole 3/4" at the underarm to conceal my favorite bra. All of these changes resulted in a much better fitting bodice!
Once you've made your muslin, please post to the Facebook Group if you have questions about what to change.
Next up: cutting and sewing!
March 13, 2017
B6453 Sew Along: How to Do an FBA

Hi ladies, a lot of you have been asking about how to do an FBA (Full Bust Adjustment) on this dress. I have teamed up with Palmer/Pletsch in order to provide you with some information. First, check out their Fitting Order information. It can often be confusing figuring out where to start with fit adjustments, especially when there are several things that need changing.
Next! Look at the Princess Bust Alterations document, specifically the information on an armhole princess adjustment. The method that Palmer Pletsch uses is tissue fitting, and there is step-by-step info on how to do this. Tissue fitting will tell you how much you need to add at the bust, and then you can make a muslin to test your fit.
Please post your muslin and fit pictures to the Facebook Group! It's been a great resource for questions of all kinds.
A huge thanks to Palmer Pletsch for allowing me to reprint this information on bust adjustments!
Fit documents: Copyright © 2016 by Palmer/Pletsch Incorporated (May be reproduced for educational purposes with credit). Information from Fit For Real People by Pati Palmer and Marta Alto. palmerpletsch.com
March 10, 2017
B6453 Sew Along: Supplies and Prep
 Okay, let's get this party started! I'm happy to report that the Facebook group for the Sew Along is almost up to 900 members. Please join here if you'd like. It's a great place to post photos, get advice, and generally cheer each other on.
In this post, I'll be talking about supplies you need and then answering some frequently asked questions about things like pre-washing, sizing, and making a muslin.
What supplies do I need?
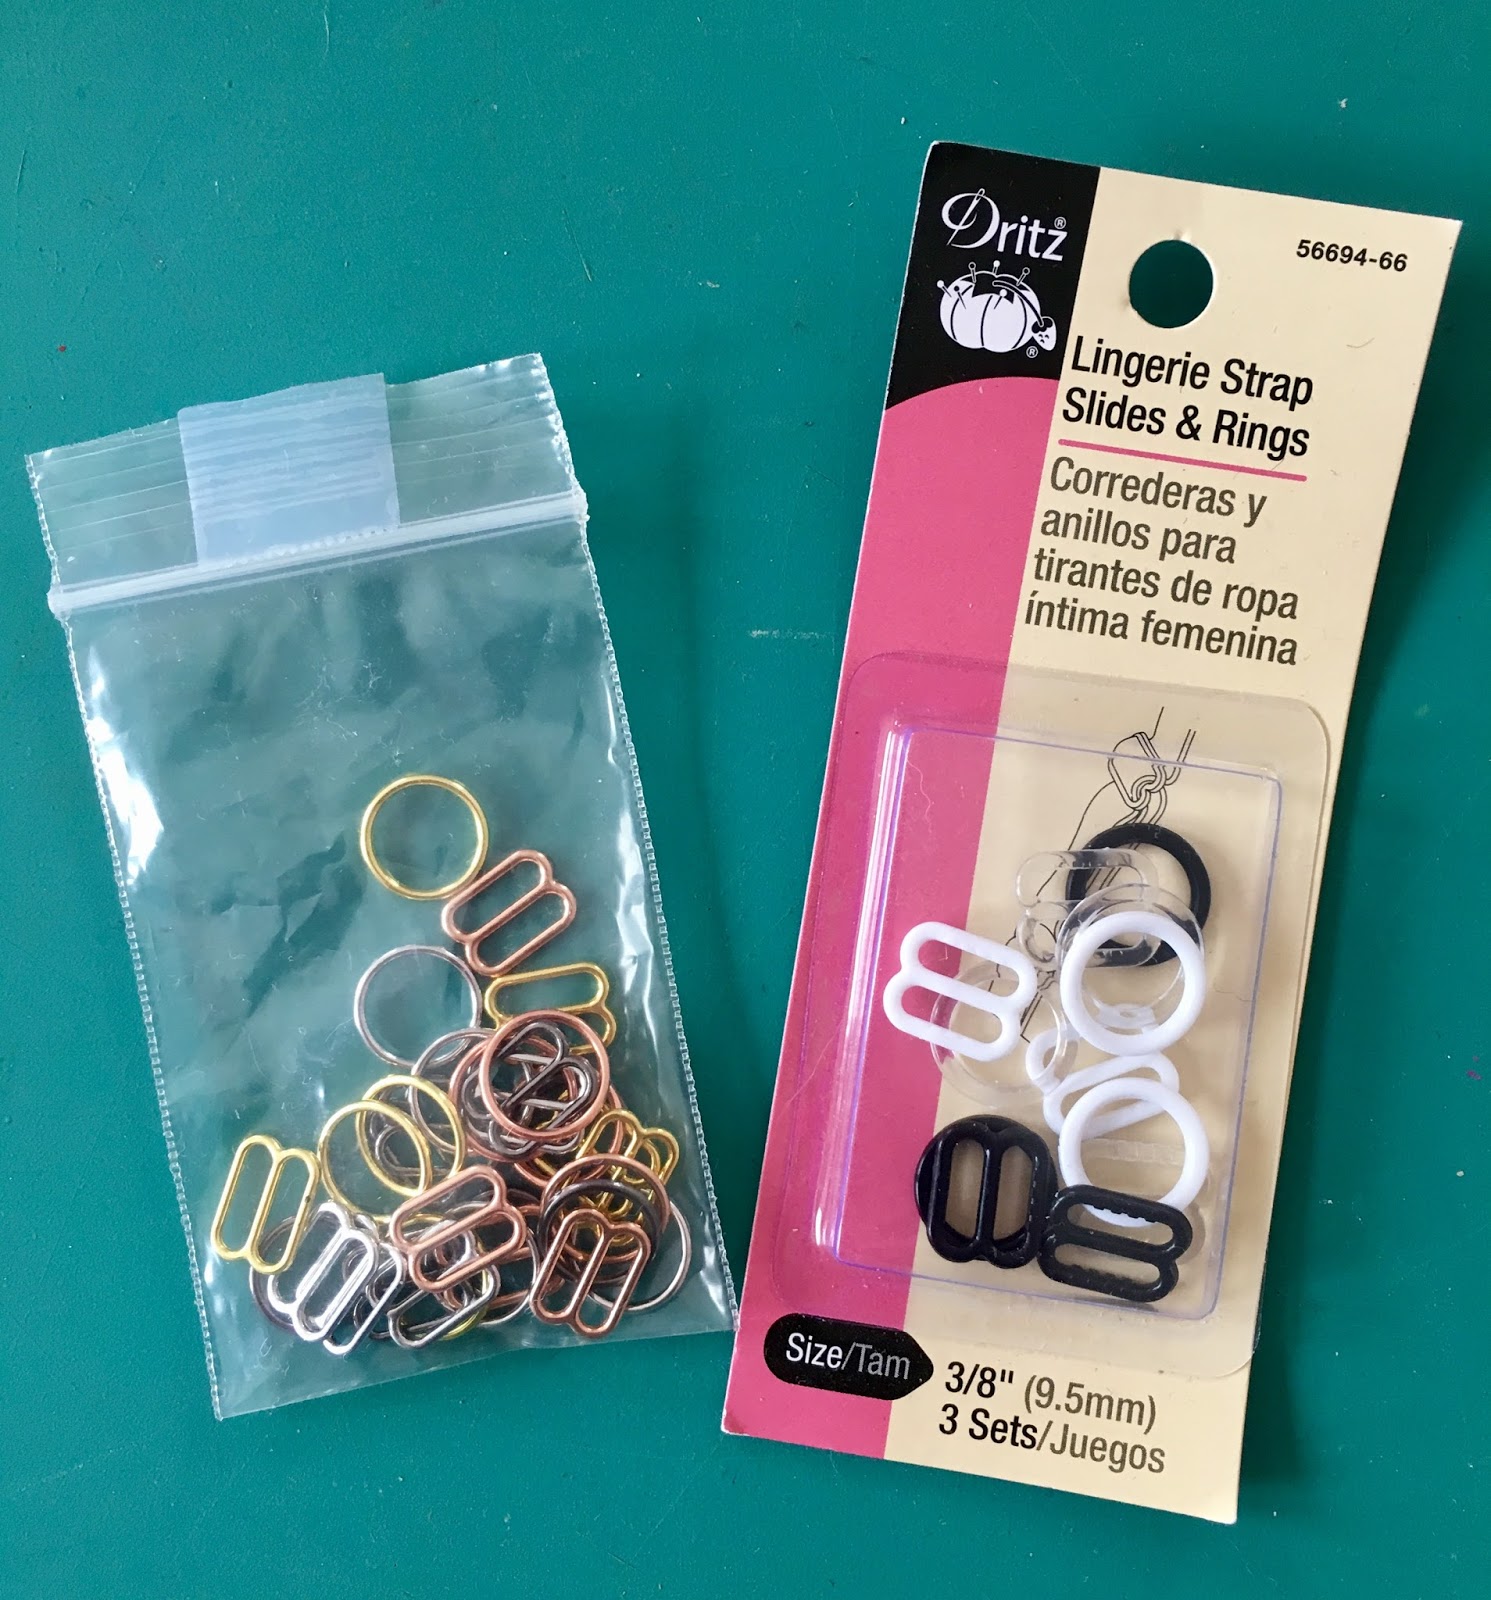
The pattern for Butterick 6453Fabric in the amount listed on the back of the envelope and on the yardage tab on the pattern page. Interfacing. Lightweight woven and tricot are my two favorite interfacings for garments. I avoid non-woven interfacing since it gives your gament a stiff, papery feel that I dislike.A 14" regular (not invisible) zipper. I use lapped zippers almost all the time for an authentic vintage look.A pair of 3/8" rings and sliders. Dritz sells them in sets with three colors, and you can find these at stores like Jo-Ann. I also love the metal rings and sliders that Tailor Made sells.
What are the best fabrics to use?
I love this dress in cottons like sateen, lawn, and poplin. Border prints could be used for either view, but are especially great on the full skirt version. I've also made it very successfully in rayon challis, which gives a much slinkier, softer look. Some silks and wools could work, but I would avoid anything too thick, as the straps would get too bulky, as would the skirt gathers on View A.
I'm using one of my new sateens in a cute floral print, now arriving in Jo-Ann Fabric and Craft Stores.
Should I pre-wash my fabric?
Cottons are easy to pre-wash, so yes if that's what you're using! I'm using one of my Gertie cotton sateens, and I like how they soften with machine washing and drying. My usual rule of thumb is to pre-wash if I intend to machine wash the garment after sewing. If I plan to dry clean or hand wash in cold water, it's not as important.
What size should I make?
The biggest piece of advice I can give you here is to go by the finished pattern measurements which are printed on the tissue paper. These include the pattern ease, and are bigger than the body measurements on the size chart (fold on the flap of the pattern envelope). Butterick tends to add more ease than expected, so please check those pattern tissue sheets for the finished measurements! You will probably make a size smaller than you expect to from the size chart.
What's the deal with all the ease?
This is a tricky topic to discuss, but the ease conforms to Butterick's standards. However, in the photo on the envelope, the garment has much less ease. I fit this garment on myself with 0"-.5" of ease in the bust and waist, while Butterick gives the pattern 2.5" of ease. This means that if you want the garment to fit as it does on the envelope and in my pictures (with a tight vintage fit), you will probably need to go down 1-2 sizes from what the size chart says.
 Size chart is on the envelope flap
 Finished garment measurements can be found on the pattern tissue
What if my fabric is a little sheer? Can I line it?
The border print sample you see on the envelope was a little sheer in the bodice so I underlined it! I used white cotton batiste and cut out it in the bodice pieces only. Then I basted the batiste to the sateen using a 1/2" seam allowance. The pieces are treated as one after basting. I finished the dress with a facing in the usual manner. Here's a photo of the inside of the dress.
You can definitely line your dress (though I won't be covering instructions for that). You can consult references like my book Gertie's Ultimate Dress Book for information on how to line a dress.
Should I make a muslin?
I almost always make a bodice muslin, and now would be a good time to do that. Just use the main bodice pieces (not the facings) and sew them together along the princess and side seams. Stay stitch in a darker thread color along the neckline and waistline seamlines so you can get a good sense of where the neckline and waistline fall on your body. You can use ribbon or twill tape as a temporary strap for fitting. Pin up the back and check your fit. (Tip: you can also insert a dress length zipper into a bodice muslin for ease of fitting. The zipper will hang down to your hips, extending past the bodice muslin, which will help you get it on without help pinning.)
If you're concerned that you'll need an FBA (full bust adjustment), I'll have info on that next week. The Facebook group is a great place to post muslin pictures and ask for fitting advice. I love how everyone is supporting and helping each other in the group!
That's all I have for today; please let me know (or post in the FB group) if there are any other questions you have.
March 4, 2017
Announcing the B6453 Sundress Sew-Along!
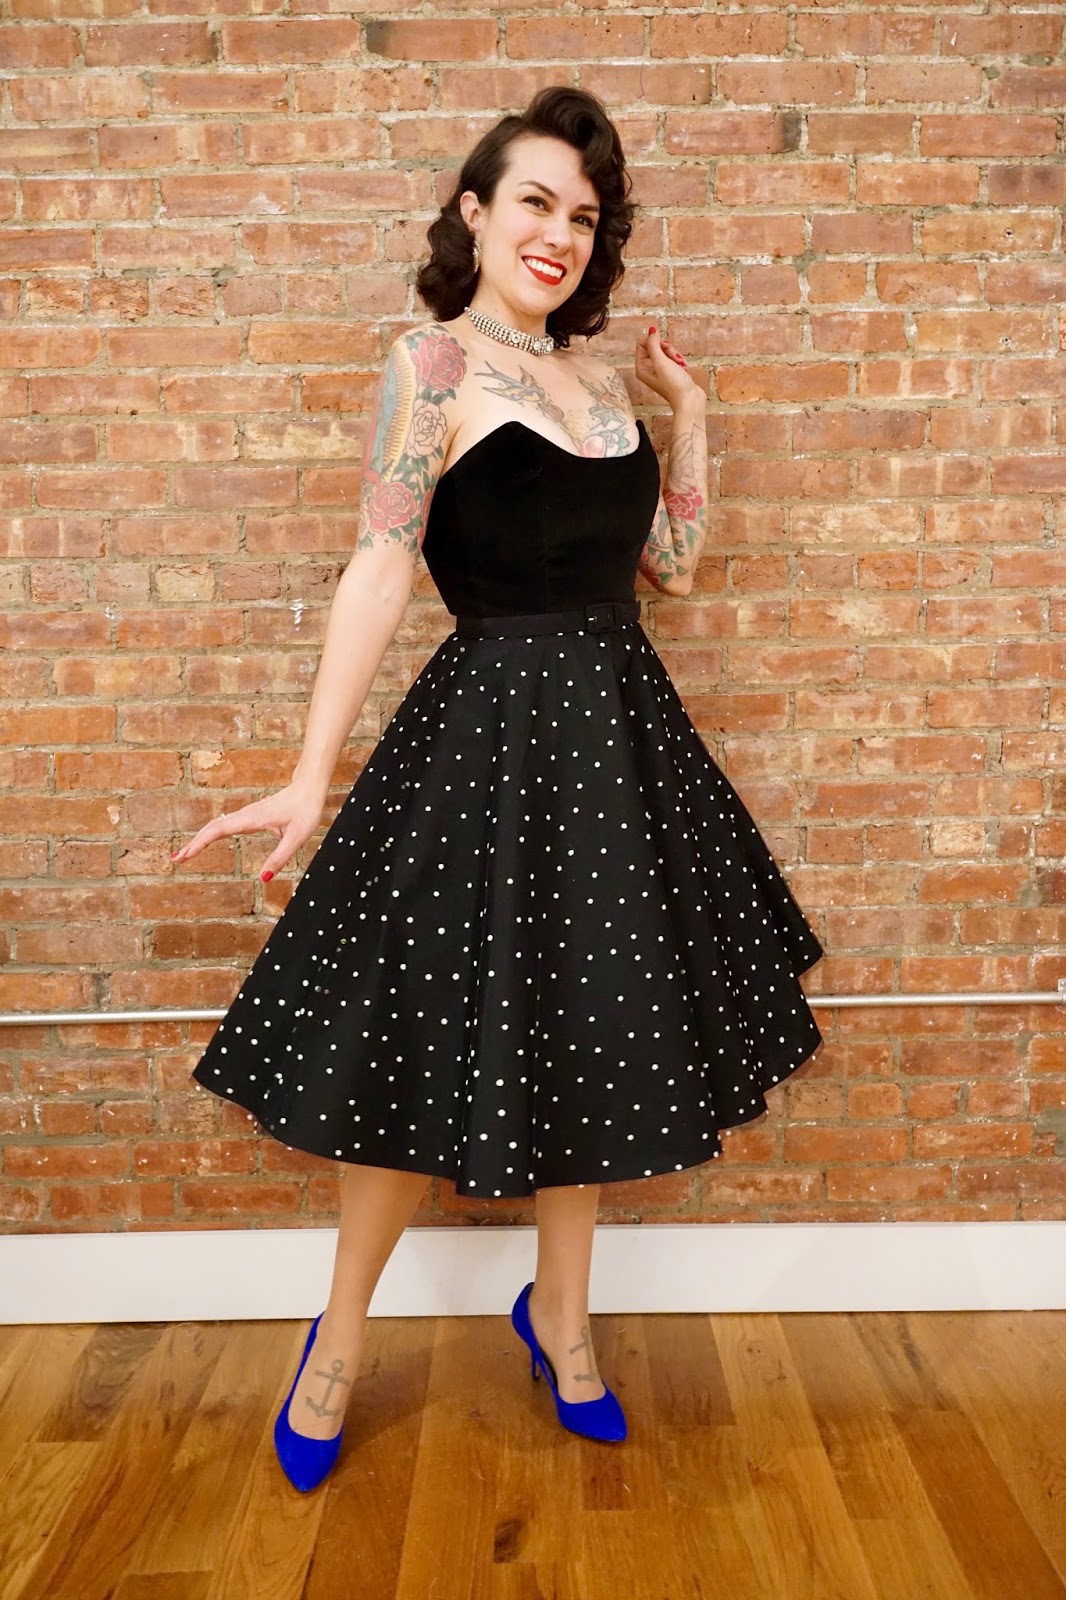
 Yay! It's been a while in the making, but I'm happy to announce that the Sew-Along is starting up. We'll be sewing my new sundress pattern B6453 from start to finish. You can sew either view you like, full or slim skirt. I will cover steps for both.
To join the sew-along, you can either just follow along here or you can join the special Facebook Group. Joining the Facebook Group is certainly not necessary, but I really like how others have used these groups as a landing page for sew-alongs and I wanted to give it a try. The benefit of having the group is that you can post your own pictures, ask for fitting advice, and show off your finished results! I think it will be fun, but don't sweat it if Facebook isn't your thing. (I will also be updating Instagram regularly as usual, so that's another way to get connected.)
Here is the rough schedule:
March 10: Supplies and Prepping
Week of March 13: FBA post, steps 1-4 (princess seams and back darts)
Week of March 20: steps 5-19 (straps and skirt View A)
Week of March 27: steps 20-27 (skirt View B and zipper)
Week of April 3: steps 28-32 (facing)
Week of April 10: Finishing (both views)
Please keep in mind that you can sew ahead if you like, or take your time and catch up on posts later. Go at your own pace!
I really hope you'll join in the fun. Won't it be awesome to have a flirty new sundress for spring?
January 3, 2017
Dita-Inspired New Year's Eve Dress
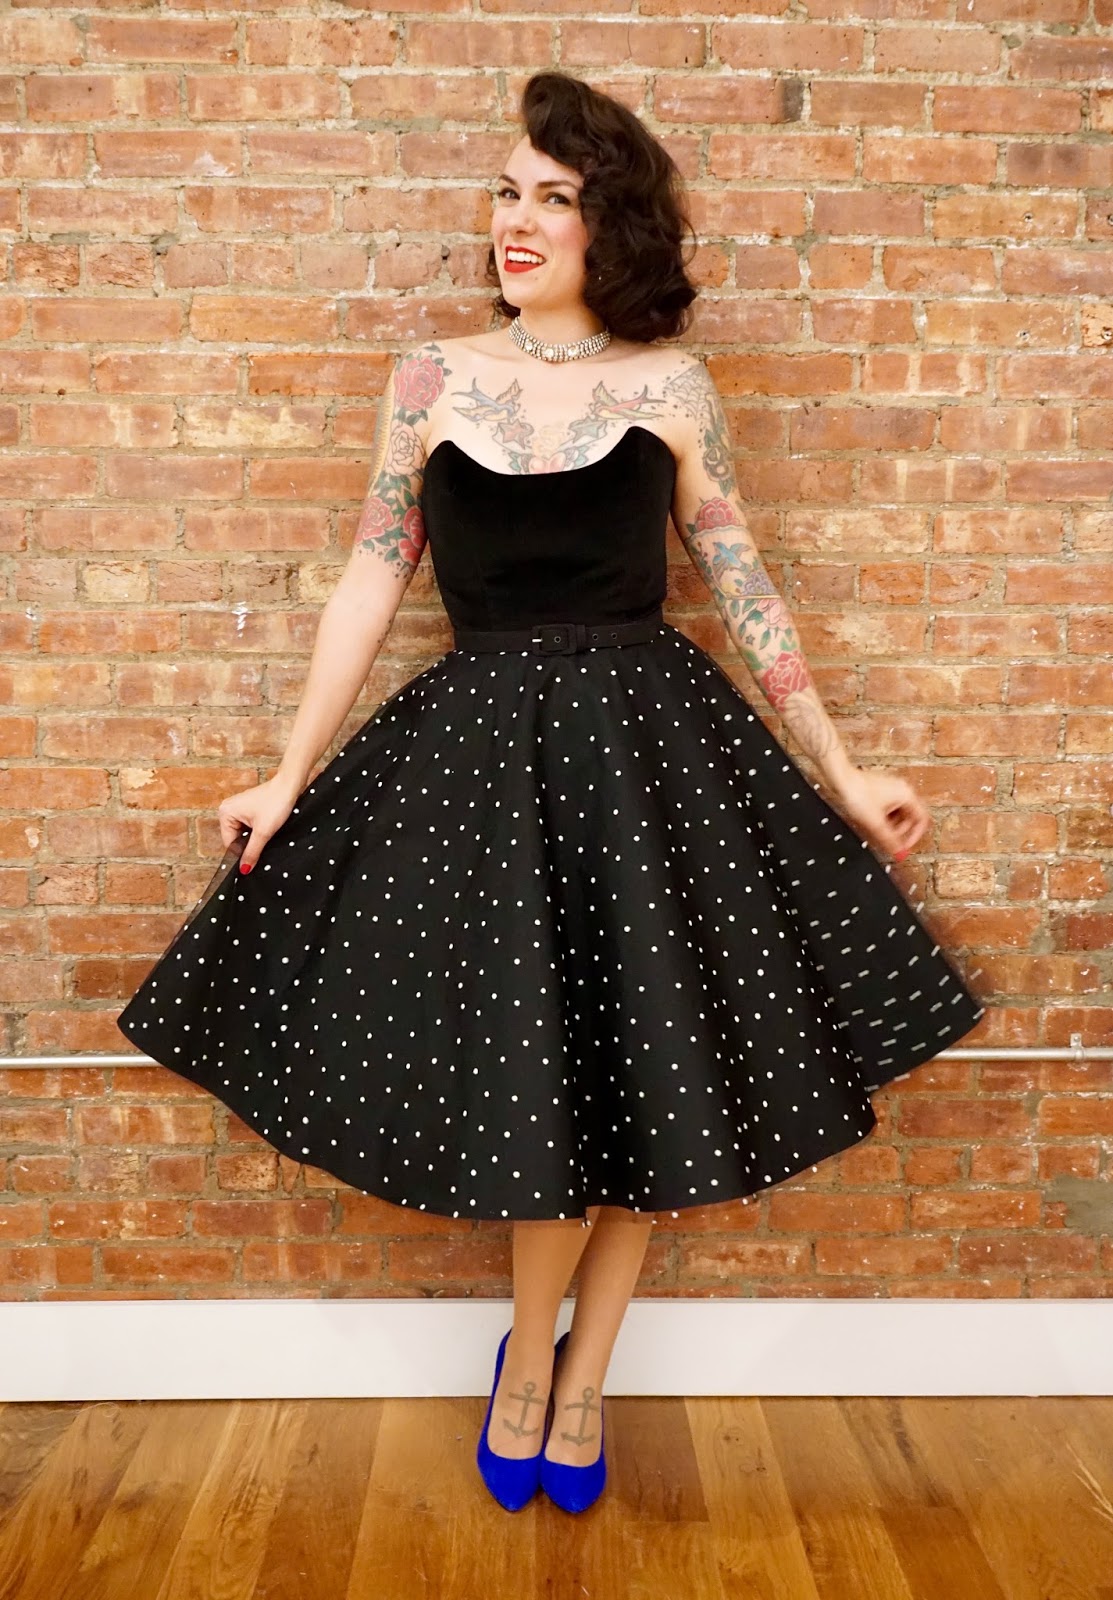
I went into an absolute frenzy of last minute sewing over the holidays! I posted all of it on my Instagram and Facebook, but I do want to detail some of it here as well. My favorite dress was the result of a completely hare-brained idea to make a party dress in less than two days for a New Year's Eve swing dance party, after seeing this picture of Dita Von Teese:

I love that neckline so much and wanted to attempt to recreate it, but adding a swingy skirt to dance in. It turns out that it was much easier than I expected! Here's my final neckline result, which I was pleased looks almost exactly like Dita's:

To get this result, I modified the Strapless Sweetheart Bodice from my book Gertie's Ultimate Dress Book . You only need to change the center front piece, and it's pretty easy. Here's how I did it:
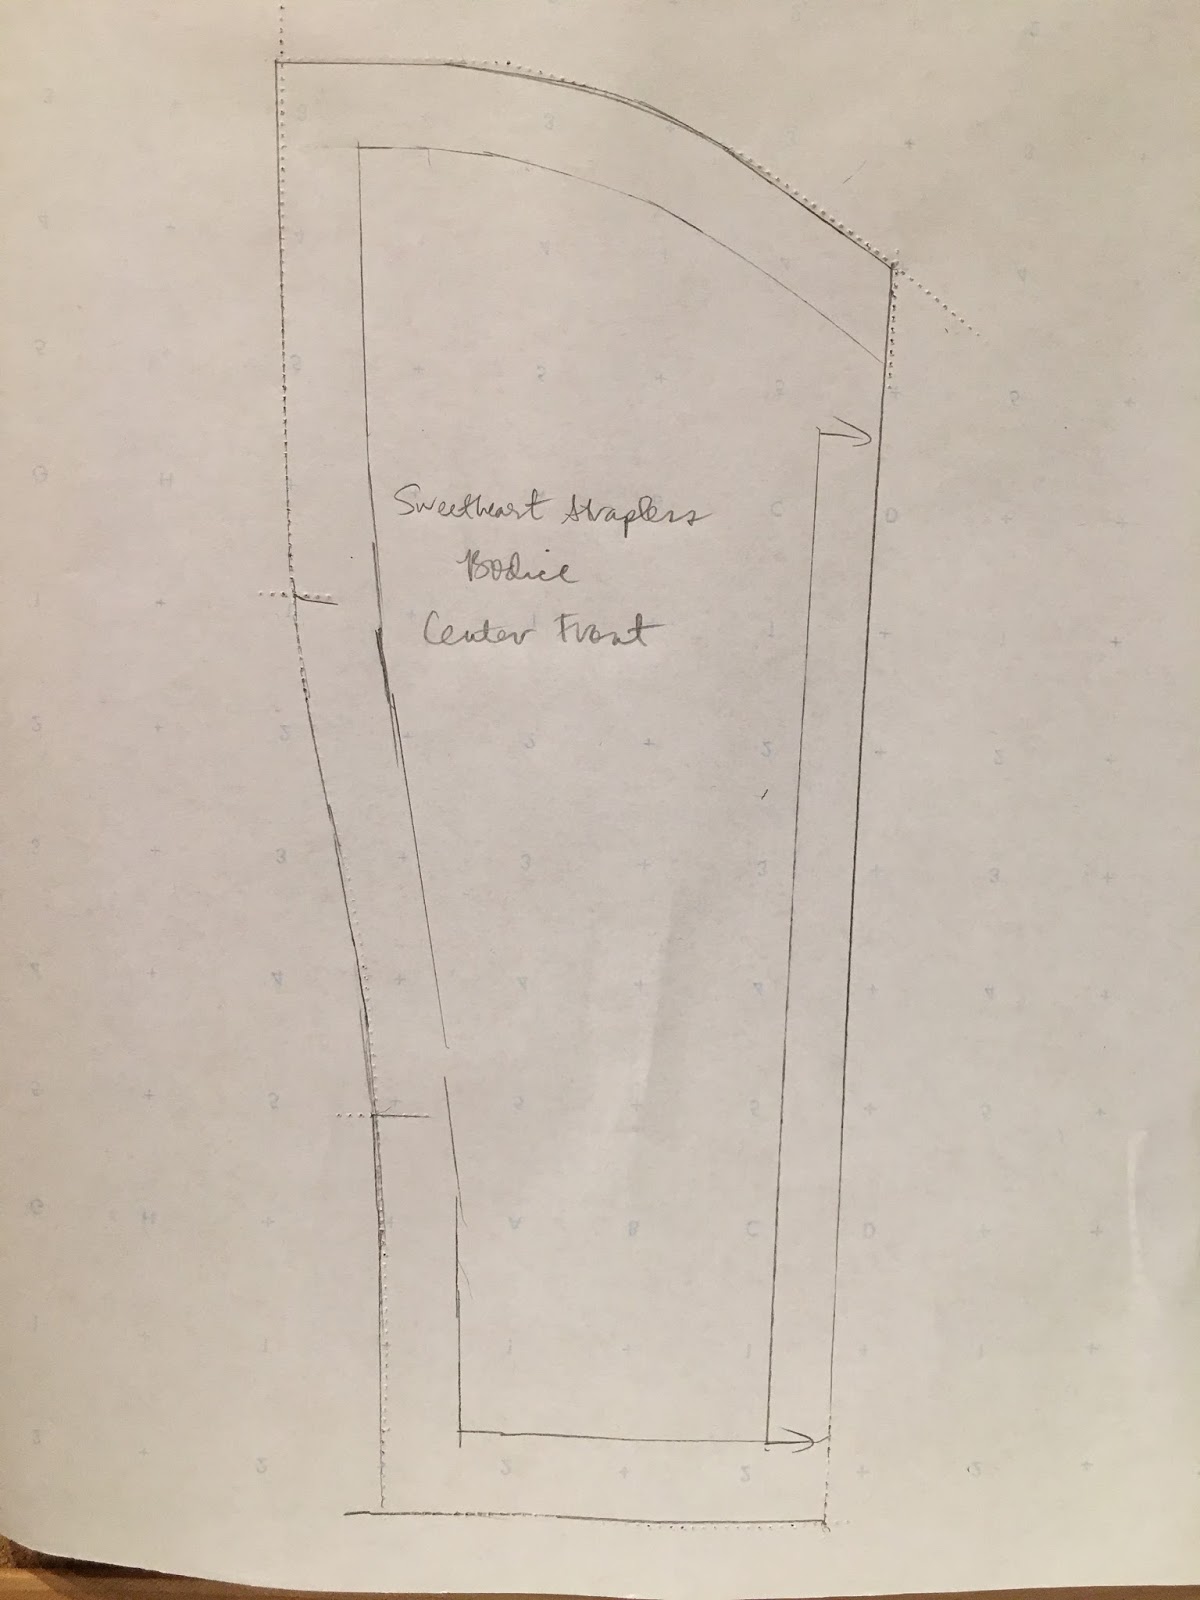
That's the original pattern piece above. Make sure you have the seam lines drawn in 5/8" from the edge. On all the instructions below, work on the actual seamlines, not the seam allowances.
Make an inch-long horizontal mark at center front that is 1.5" below the sweetheart center front neckline. This line should be exactly perpendicular to the center front line. Here it is in orange pencil:
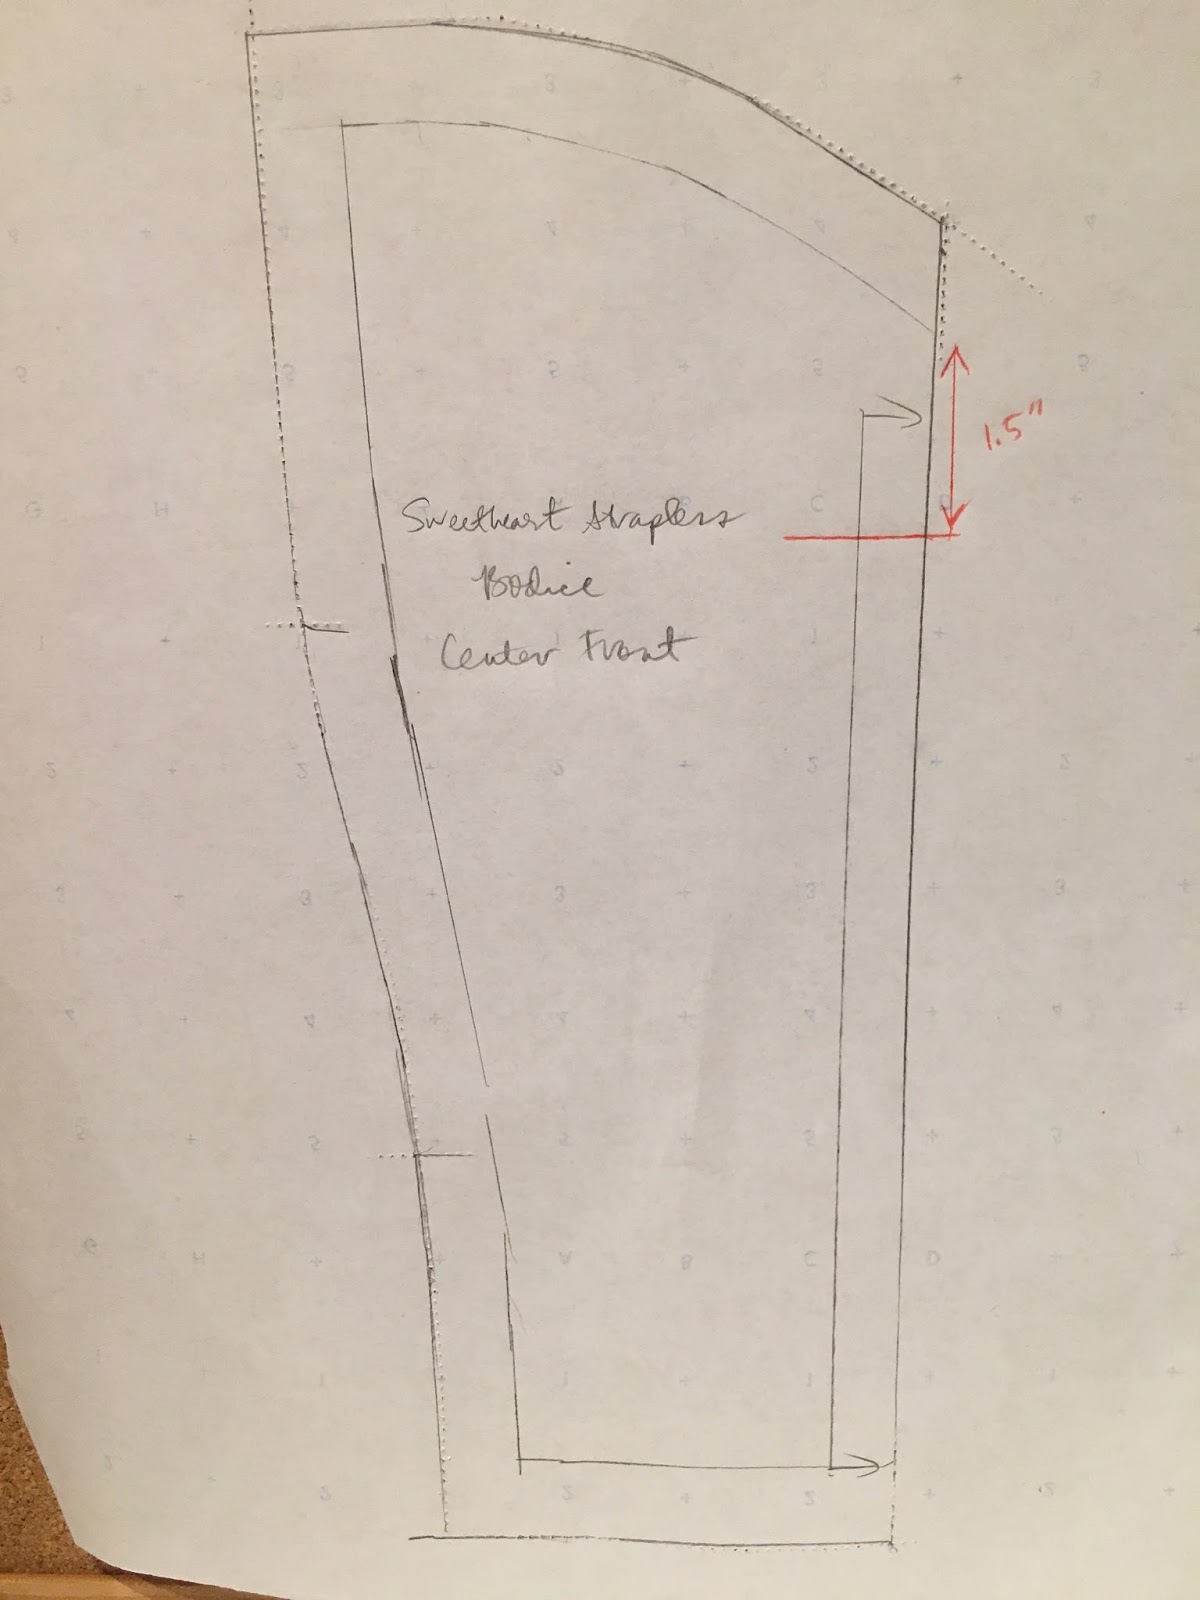
Next, make a little mark that is .25" to the right of the princess seam line.
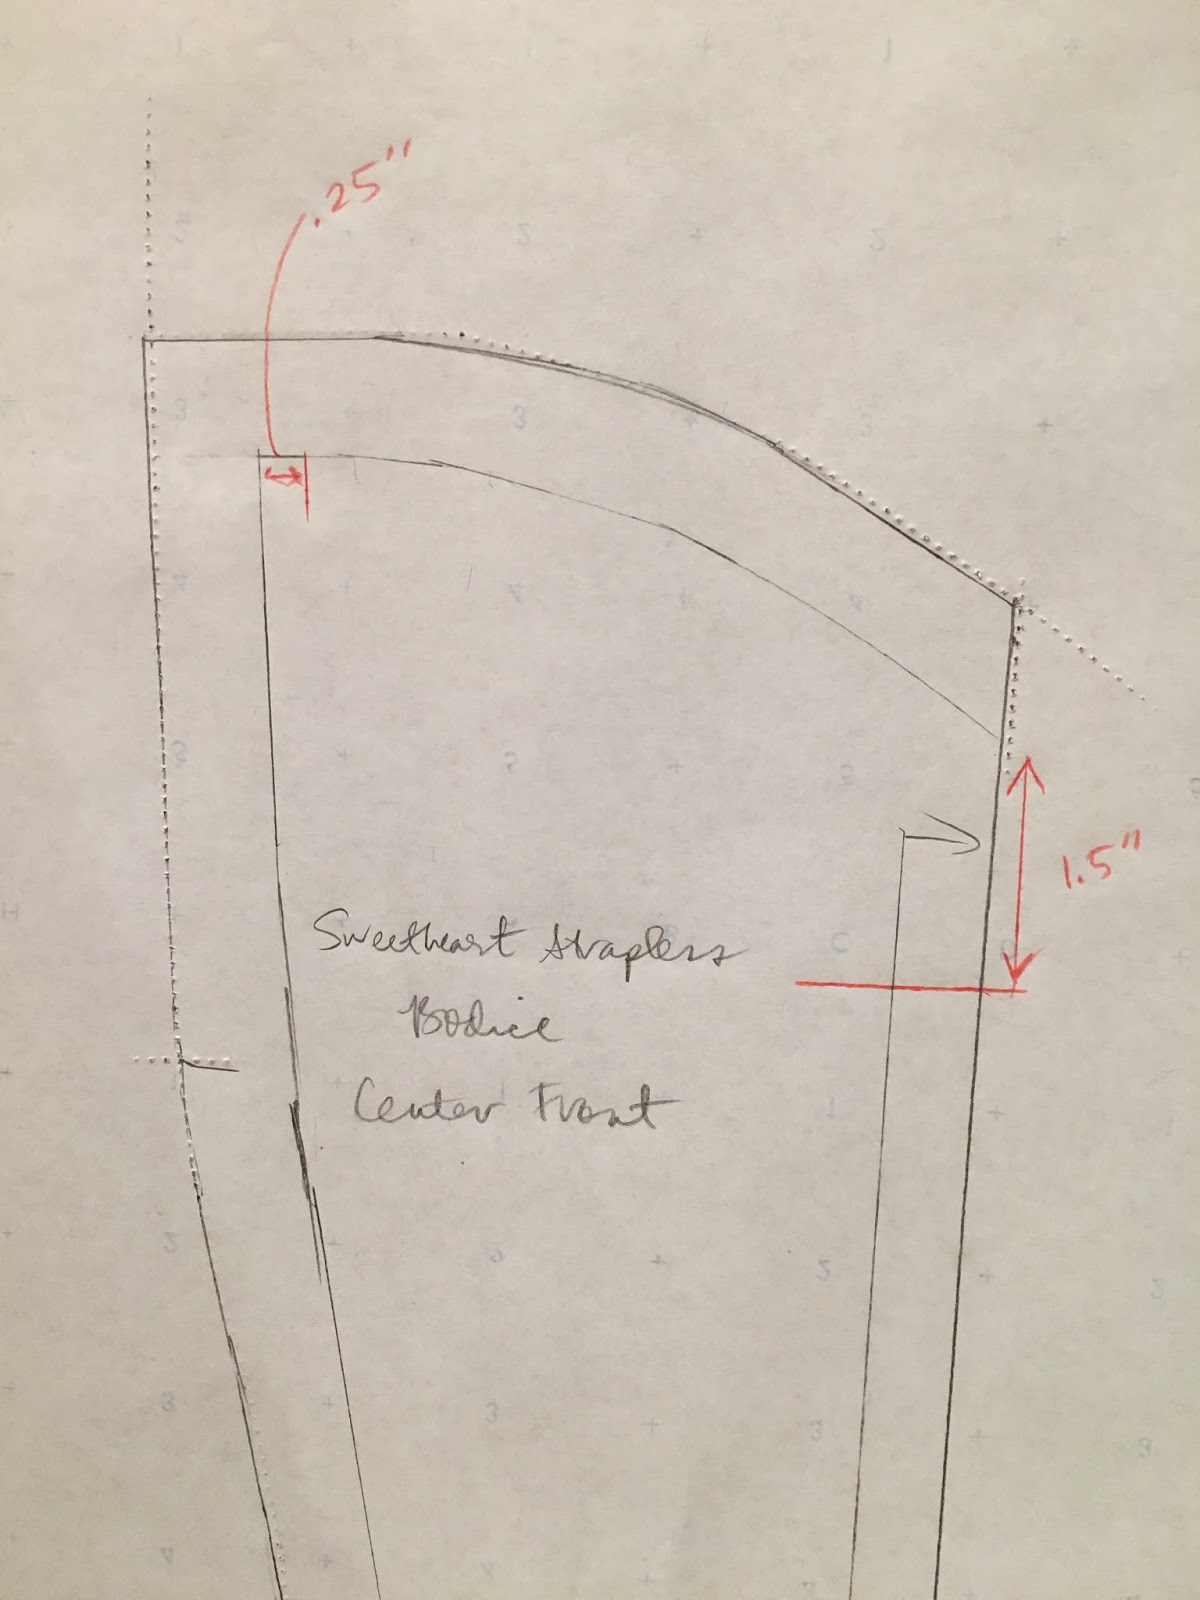
Use a French curve to connect the two marks you've made.
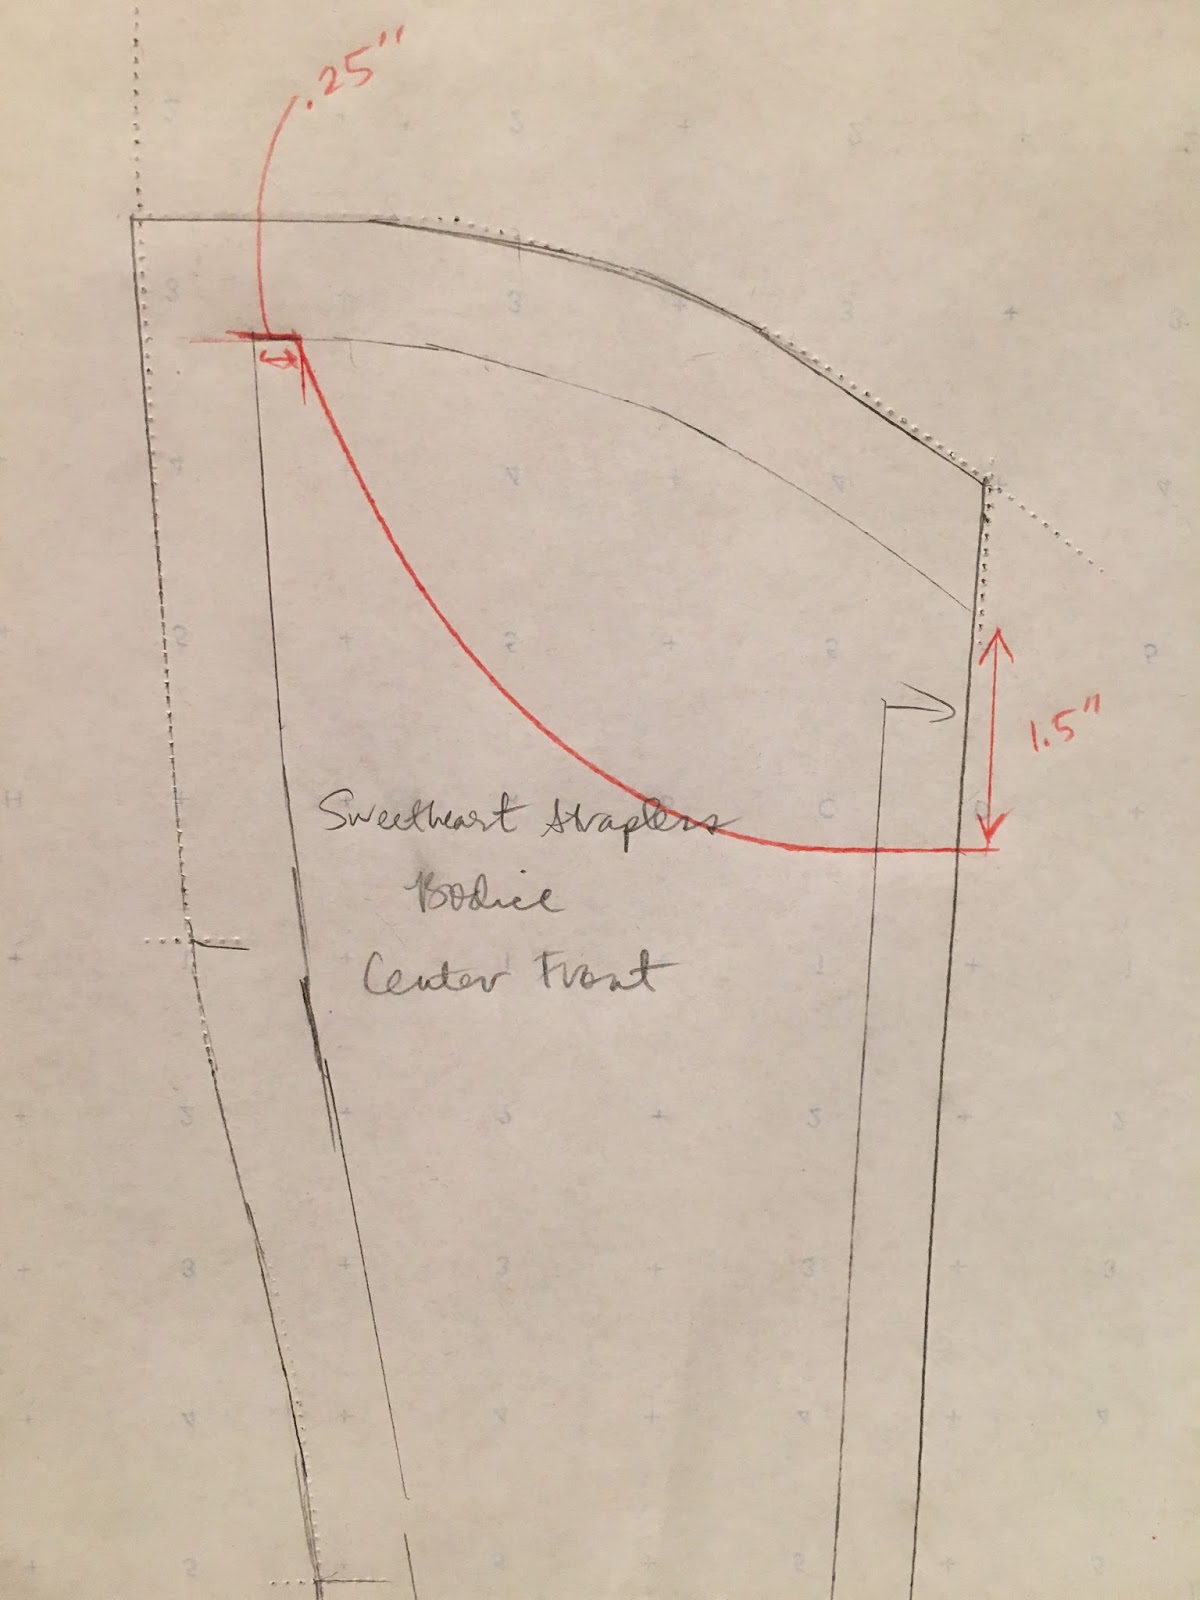
That's the shape of your new neckline! Add a 5/8" seam allowance to the adjusted neckline.
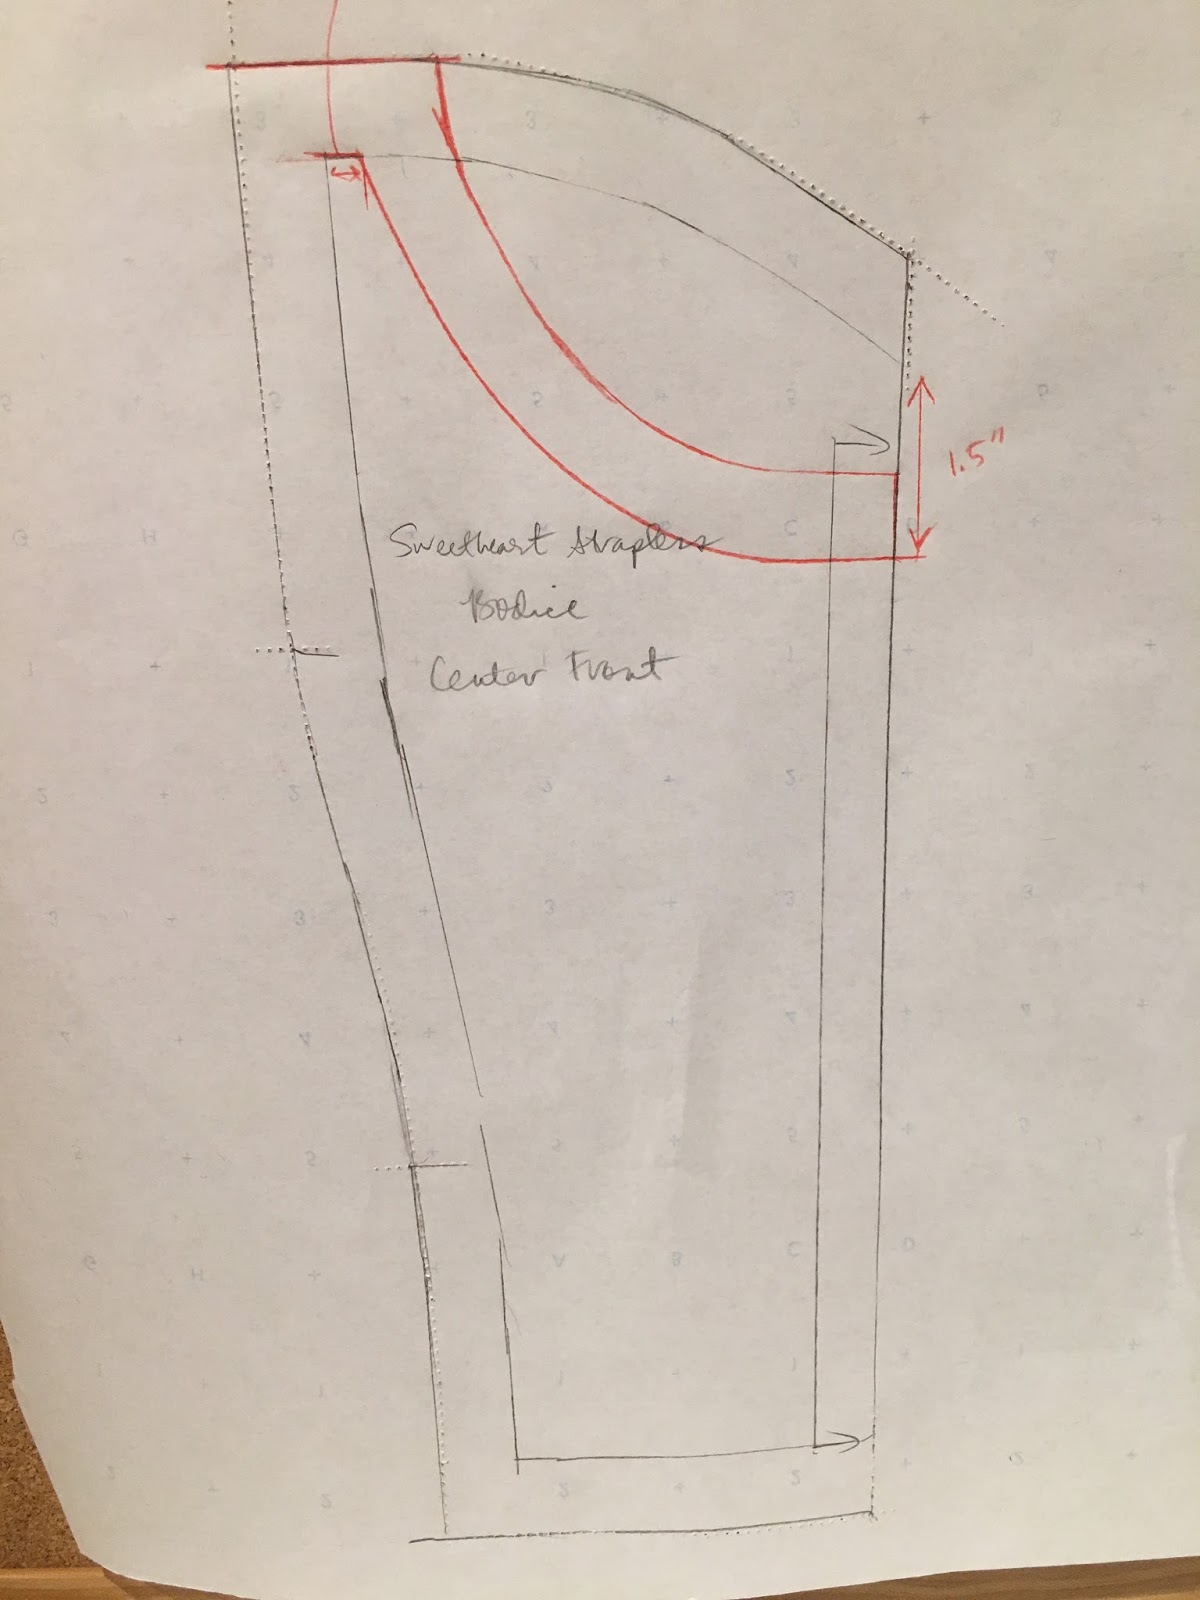
Cut away the old lines.
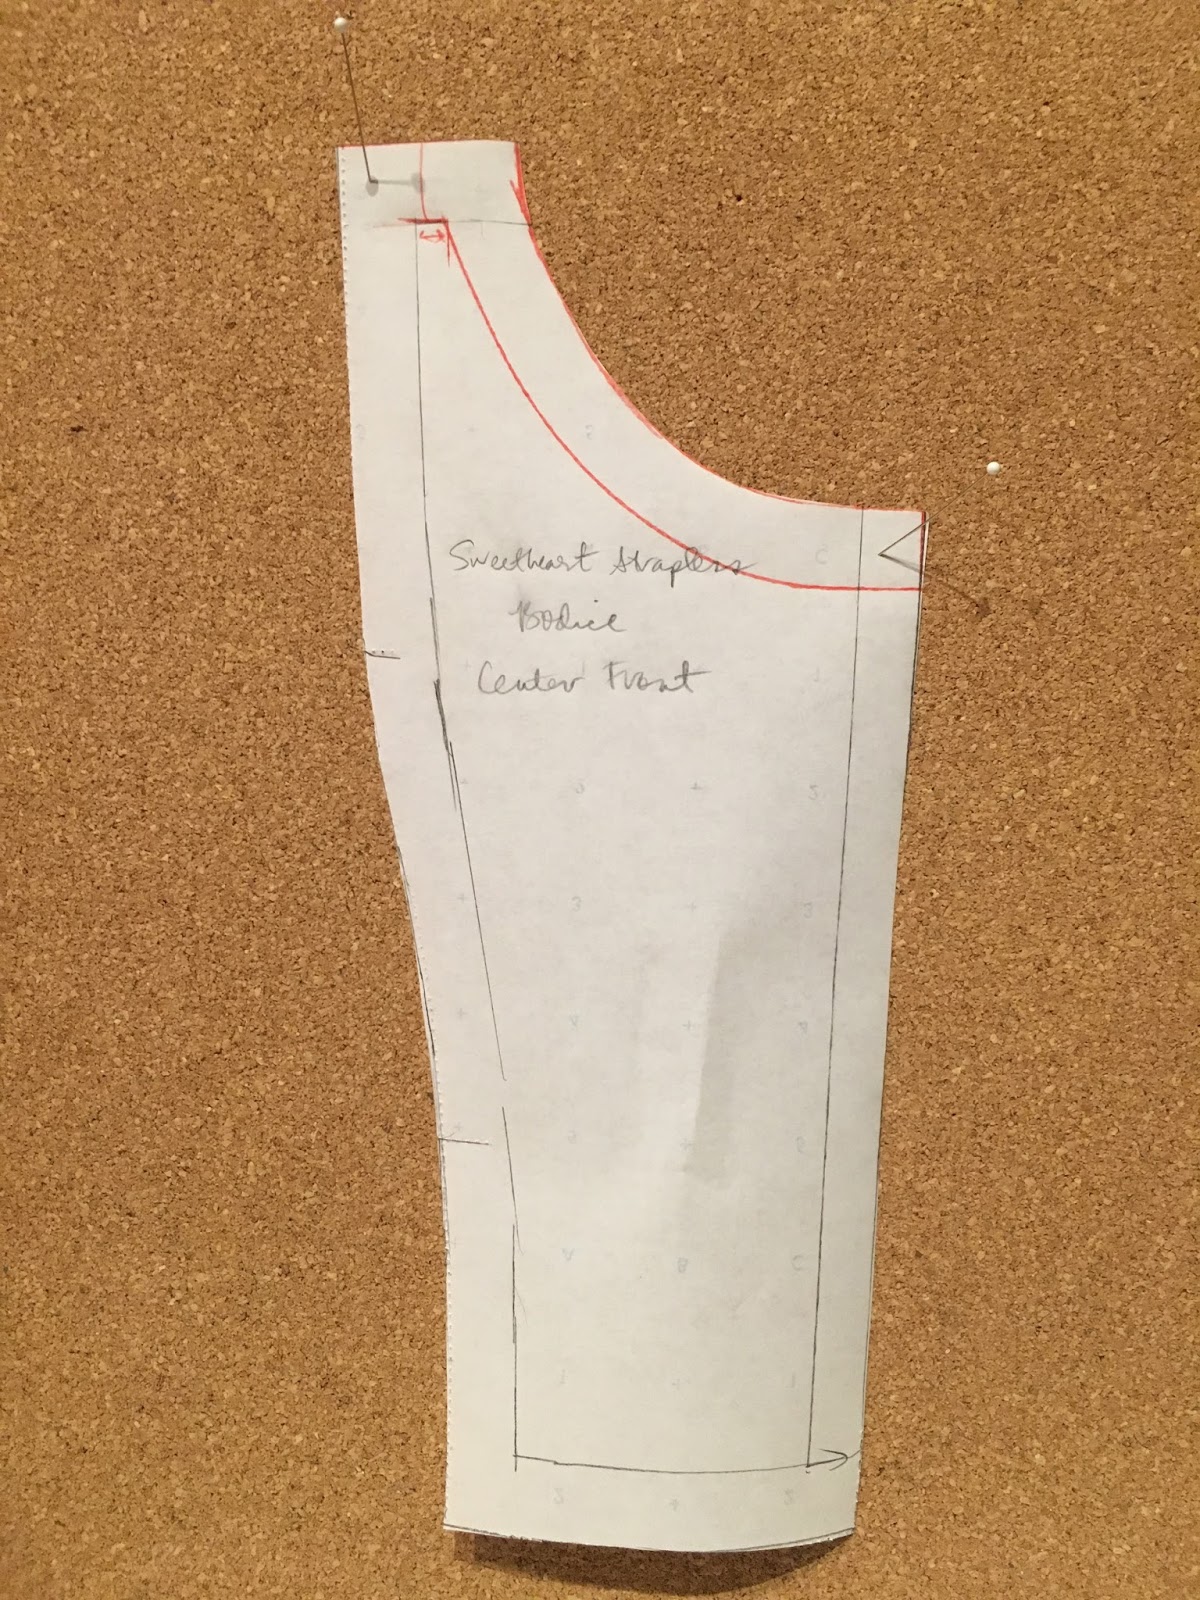 That's all there is to it!
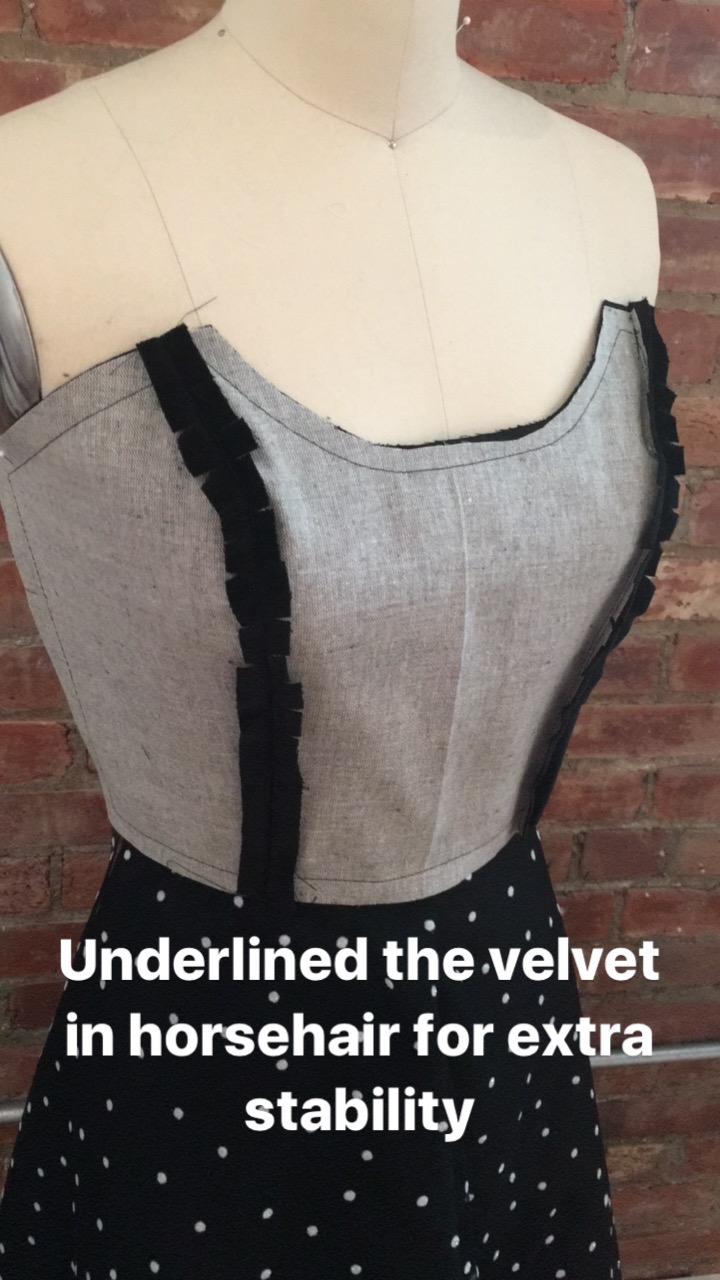
As far as construction goes, I sewed it pretty much like any other strapless bodice, using an underlining, steel boning, and a waist stay. The outer fabric is cotton velvet, and then I underlined it in horsehair interfacing. (I usually use muslin for this purpose, but I wanted something a little stiffer for this dress.) The below photo is from my Instagram Stories, where I've been posting step-by-step photos of my sewing projects with caption. (If you're not familiar, Stories is the new Snapchat-like feature of Instragram. I've never understood what Snapchat is, so I'm thrilled to have an alternative on a platform I already understand!).
 I lined the entire dress in acetate taffeta, which is always my choice when I want something with some stiffness. It's especially great for the skirt lining, since it helps it stand out on its own. (Plus it swishes when you walk!) The boning is applied to the lining. As usual, I used 1/4" spiral steel boning. I was out of boning casing, so used single fold bias tape as an alternative. It's important to have a bone going up each princess seam, and I also place them diagonally on the bodice side front. (Boning placement is detailed in the book.)
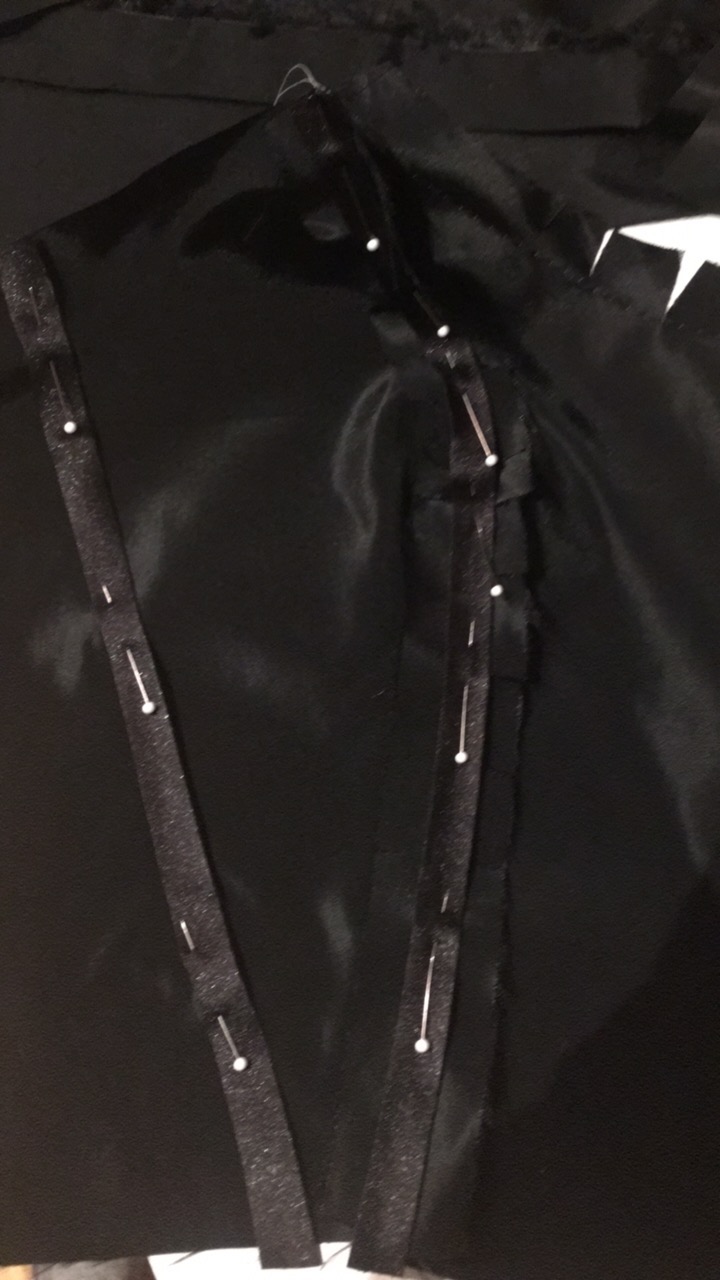 A waist stay is important in a dress like this; I always use cotton petersham or grosgrain for this purpose. Hot pink!
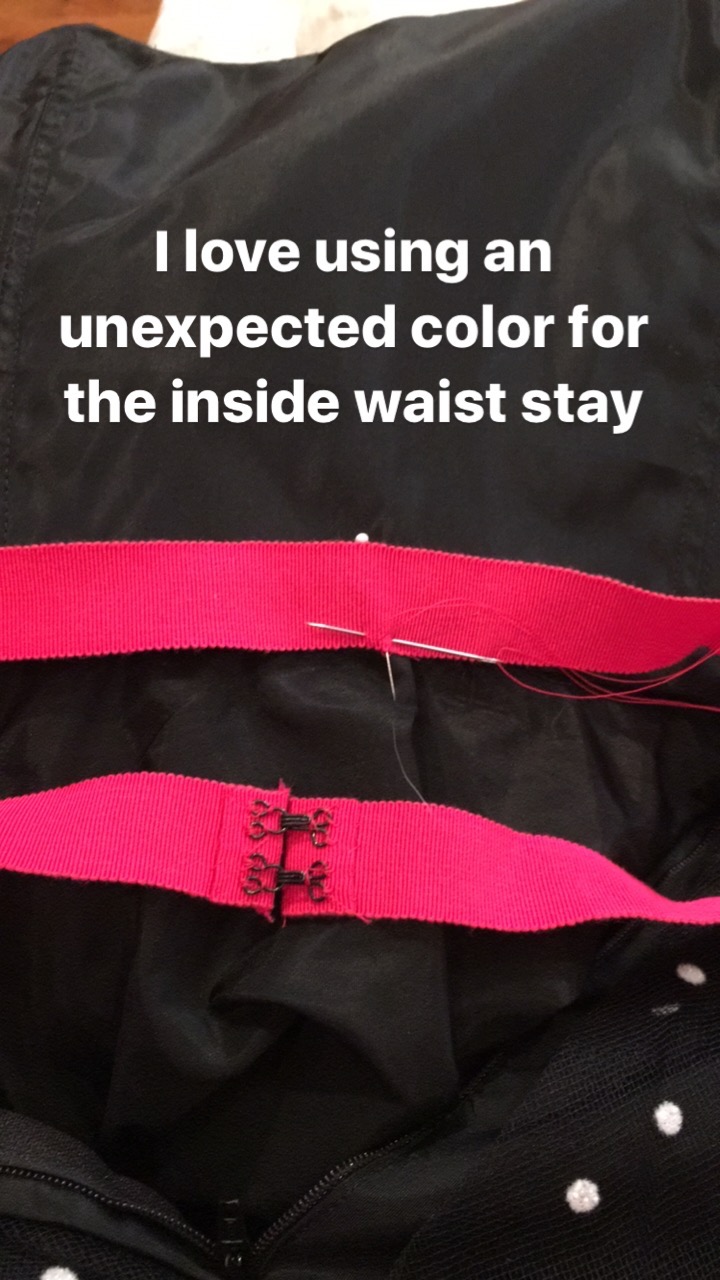
The skirt is the 3/4 circle skirt pattern, also from the book, and it has two layers: the taffeta and then a sparkle dot-flocked tulle. (The sparkles didn't really show up, sadly, but I am left with glitter everywhere.)

The tulle doesn't need a hem, it can just get a clean cut (I use a rotary cutter for this). Then make a narrow hem on the lining. Everything else is finished as usual, including hand stitching the bodice lining around the zipper and the waistline on the inside.
Add some sparkly vintage costume jewelry and some statement shoes and you're done!

I adore this neckline modification, and I'm thinking I might even use it for some summer dresses when the time comes. Hope you're all having a fabulous new year so far!
December 8, 2016
Dressmaking Retreat Photos (Plus New Spring Sessions!)
 My fall dressmaking retreats here in Beacon, New York, went so well that I've decided to add three new sessions for Spring! These are very small (4-5 people) weekend getaways where we just sew and sew and sew. Participants come on a Friday evening, and then we have a lovely welcome dinner and spend the rest of the evening fitting bodice muslins. On Saturday and Sunday we work on your dresses all day, taking many tea and snack breaks, of course. If you're interested in signing up for a retreat, all the info is here.
Here are a few of my favorite photos from the fall retreats! Here I am fitting Amy's beautiful Faux Sarong Dress.
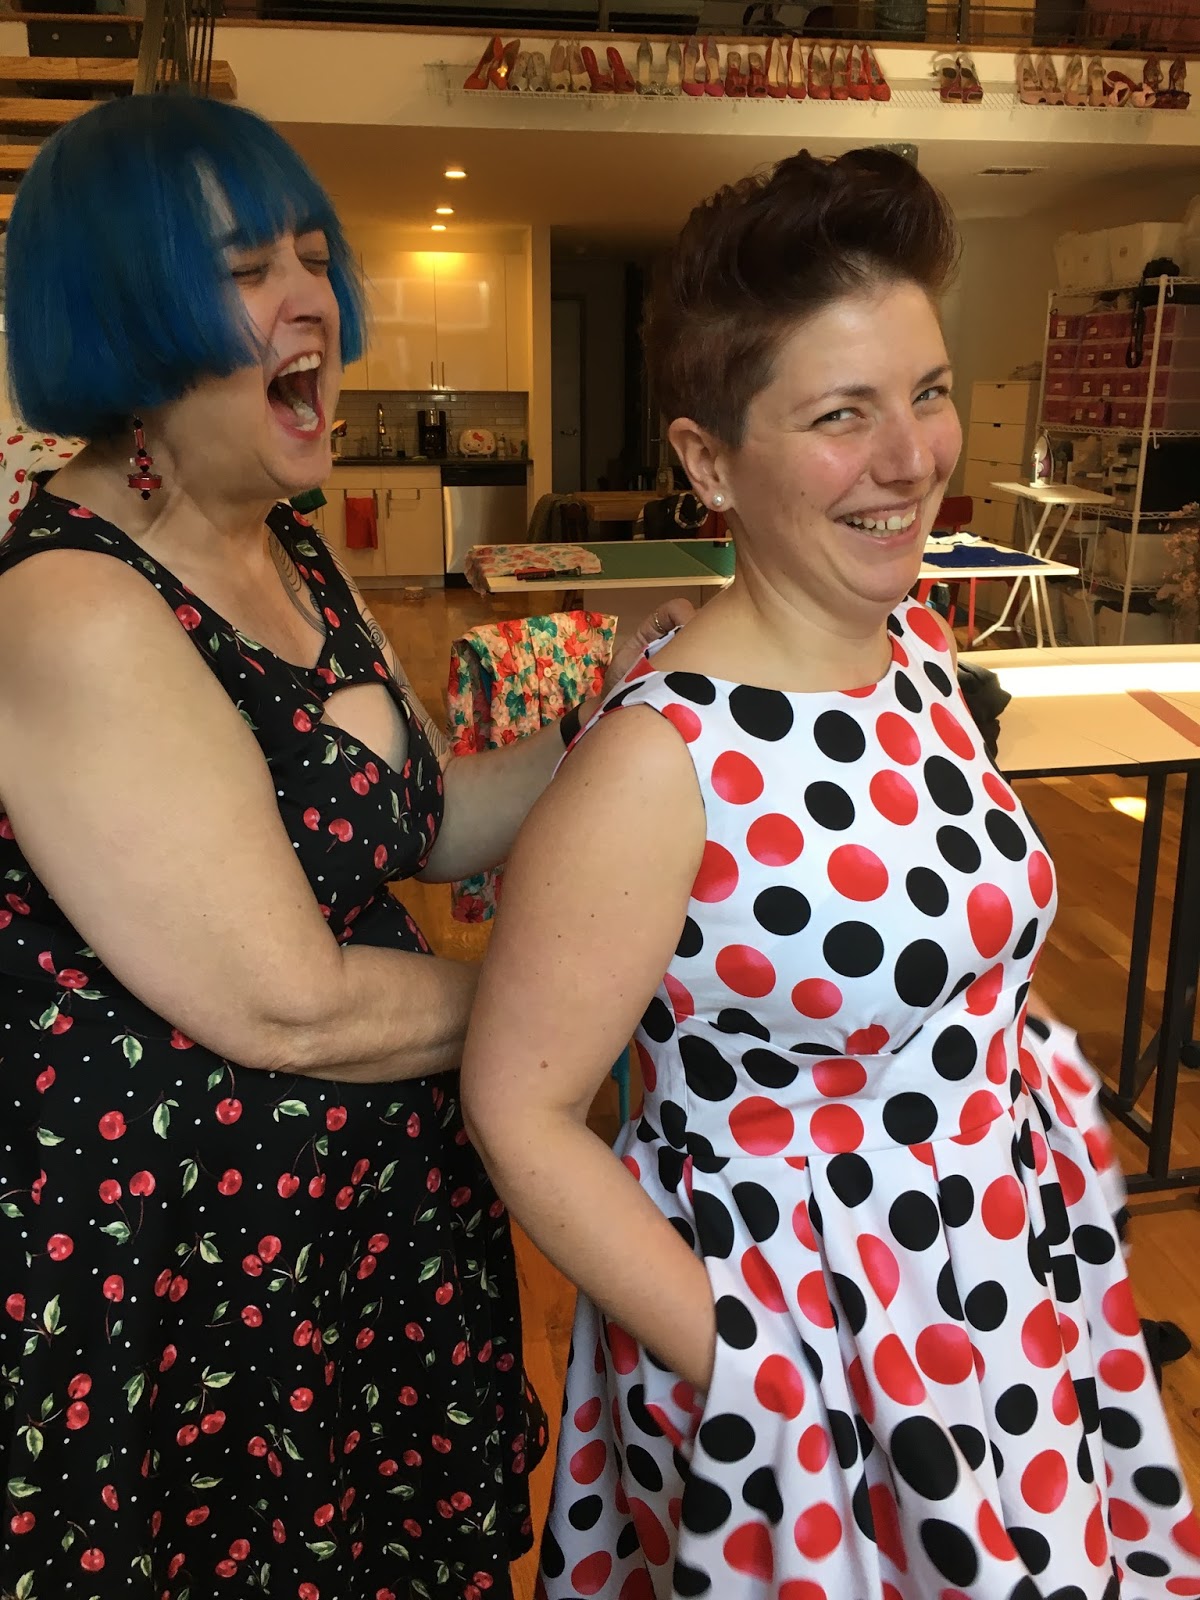
Kaye and Chrissie getting a little bit silly while admiring Chrissie's new Polka Dot Day Dress.
Vicki's gorgeous version of the Cherry Print Corduroy Dress in a sapphire blue wool crepe.
Sometimes passionate discussions about seam matching break out.
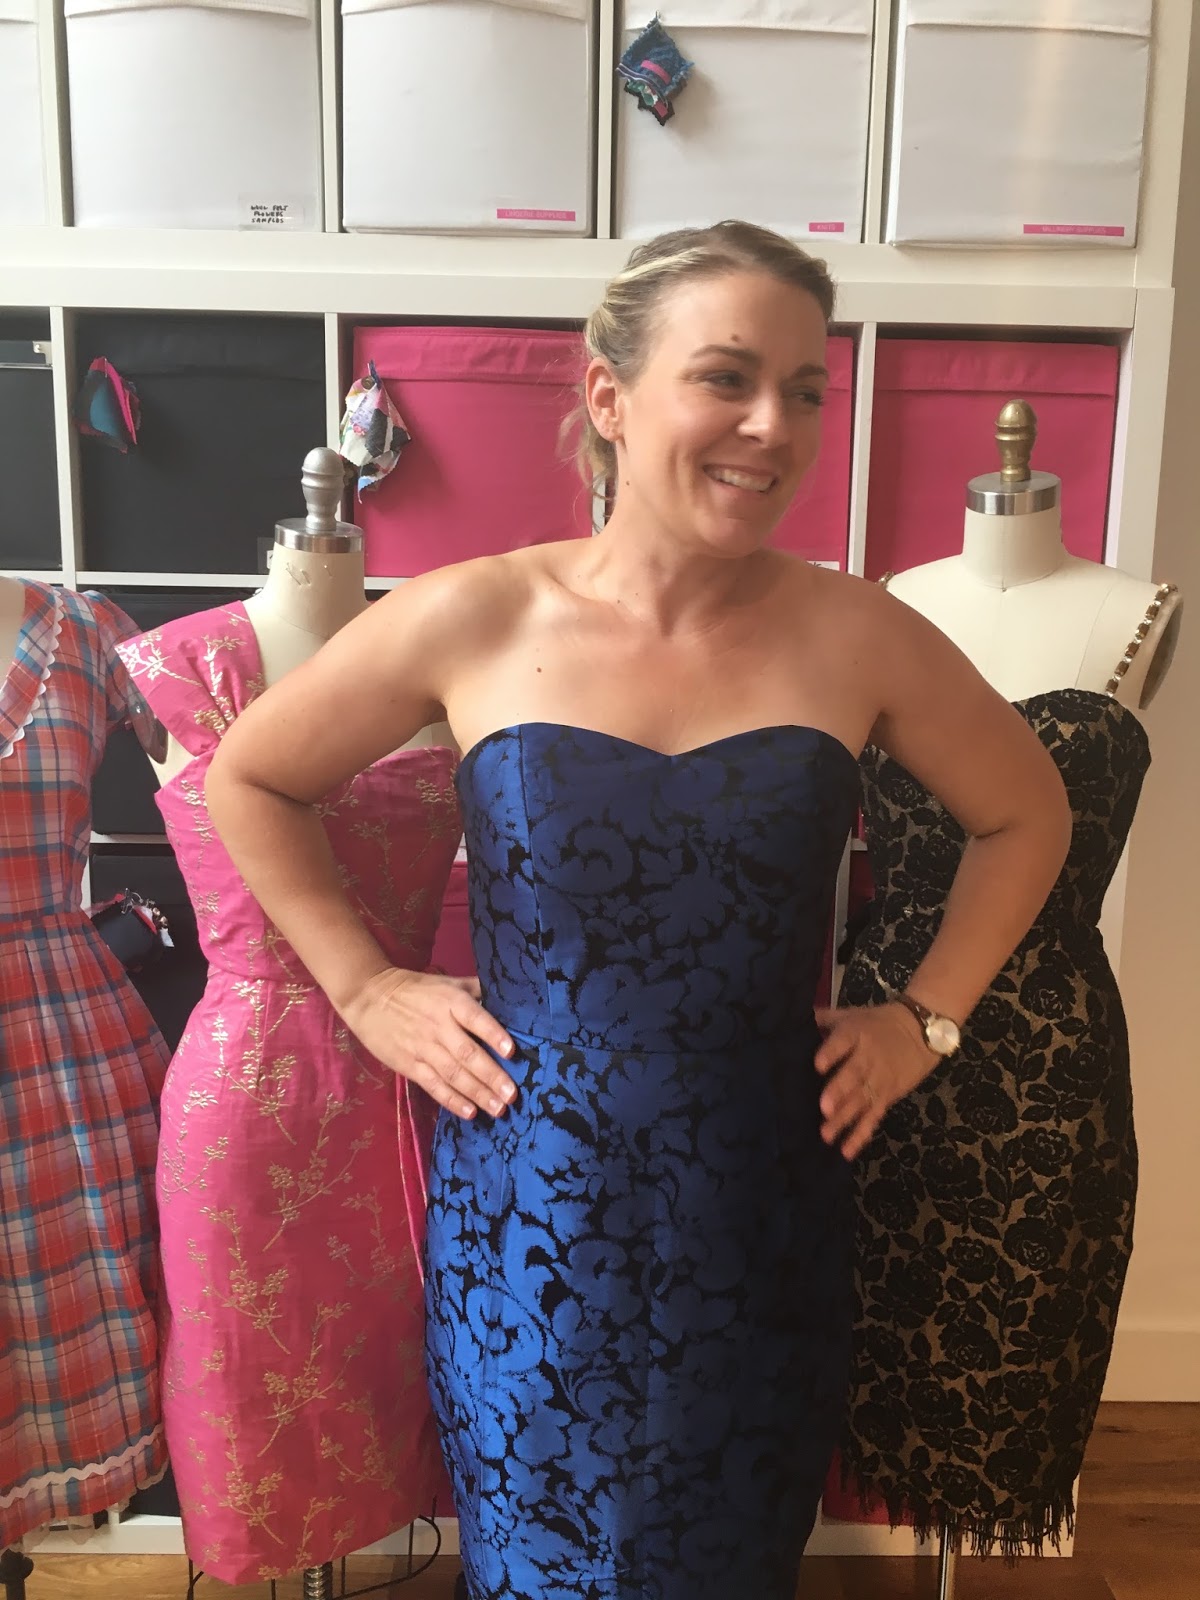
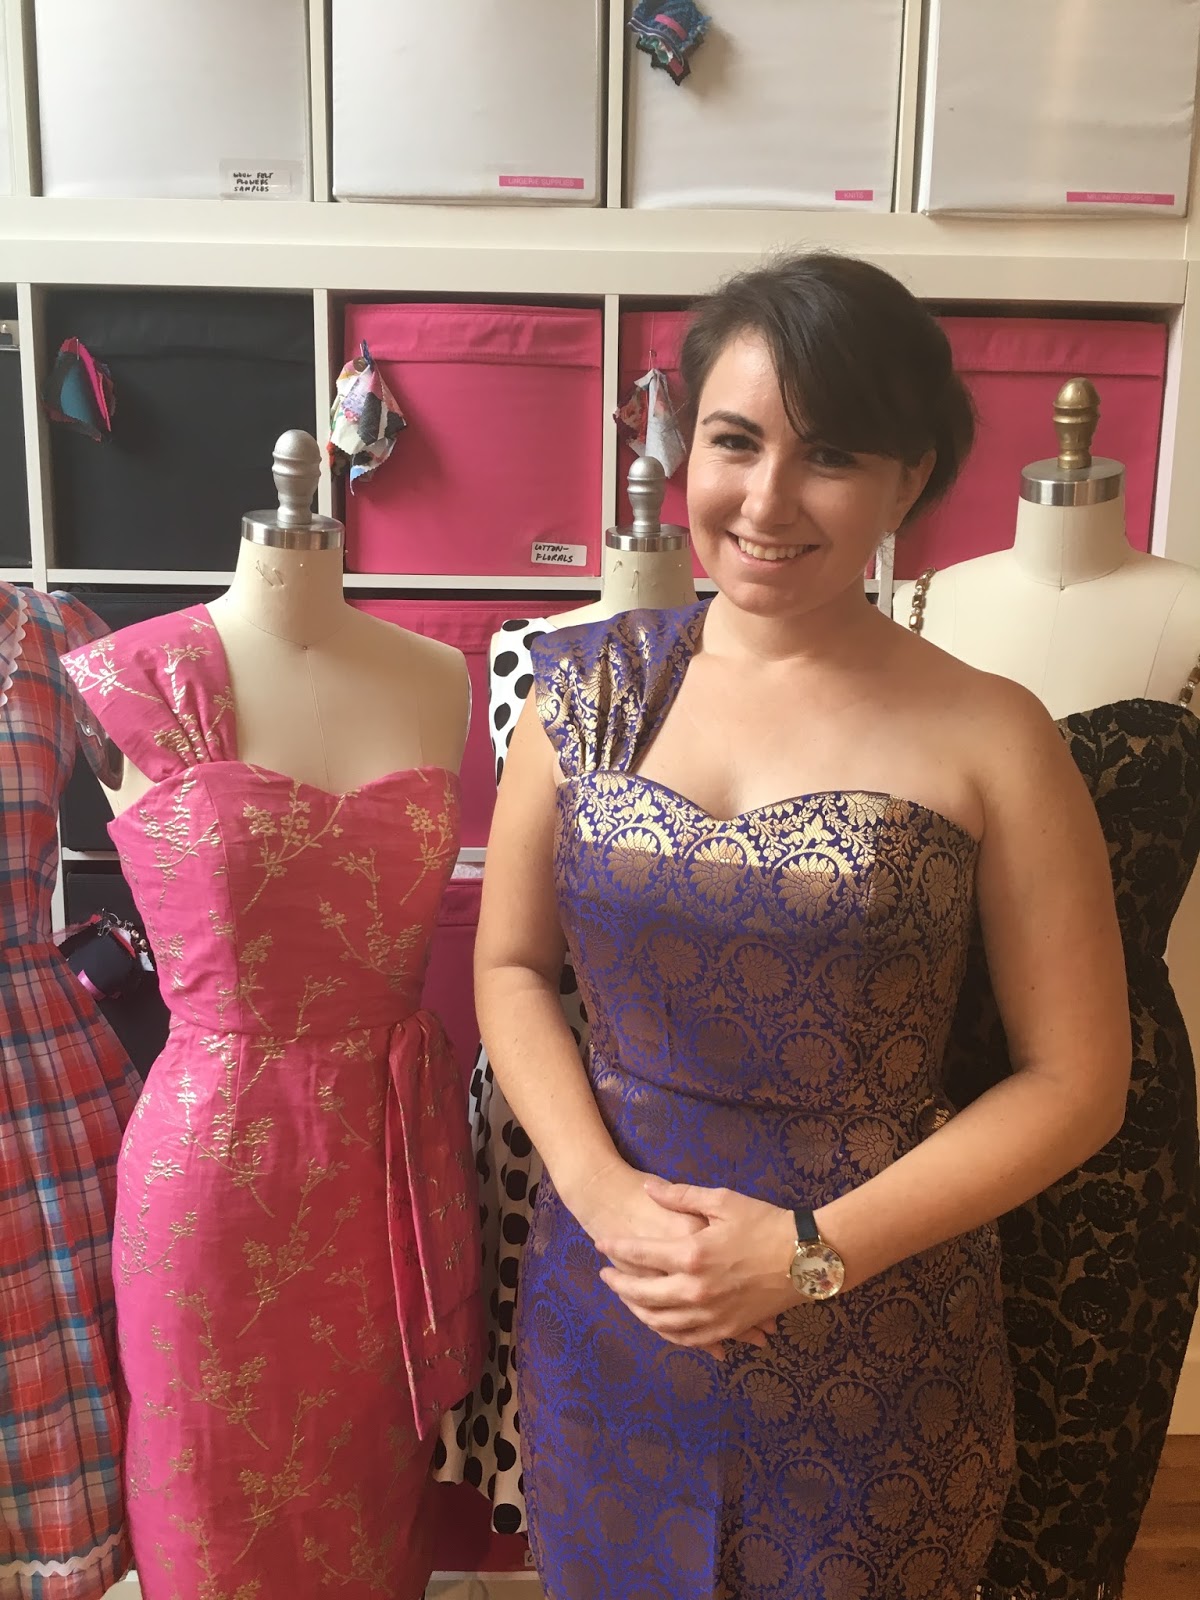
Vanessa in her gorgeous strapless party dress.
I had two Amys, and they both made the Faux Sarong Dress! (Coincidence? Yeah, probably.)
Henry showing a clear lack of boundaries.
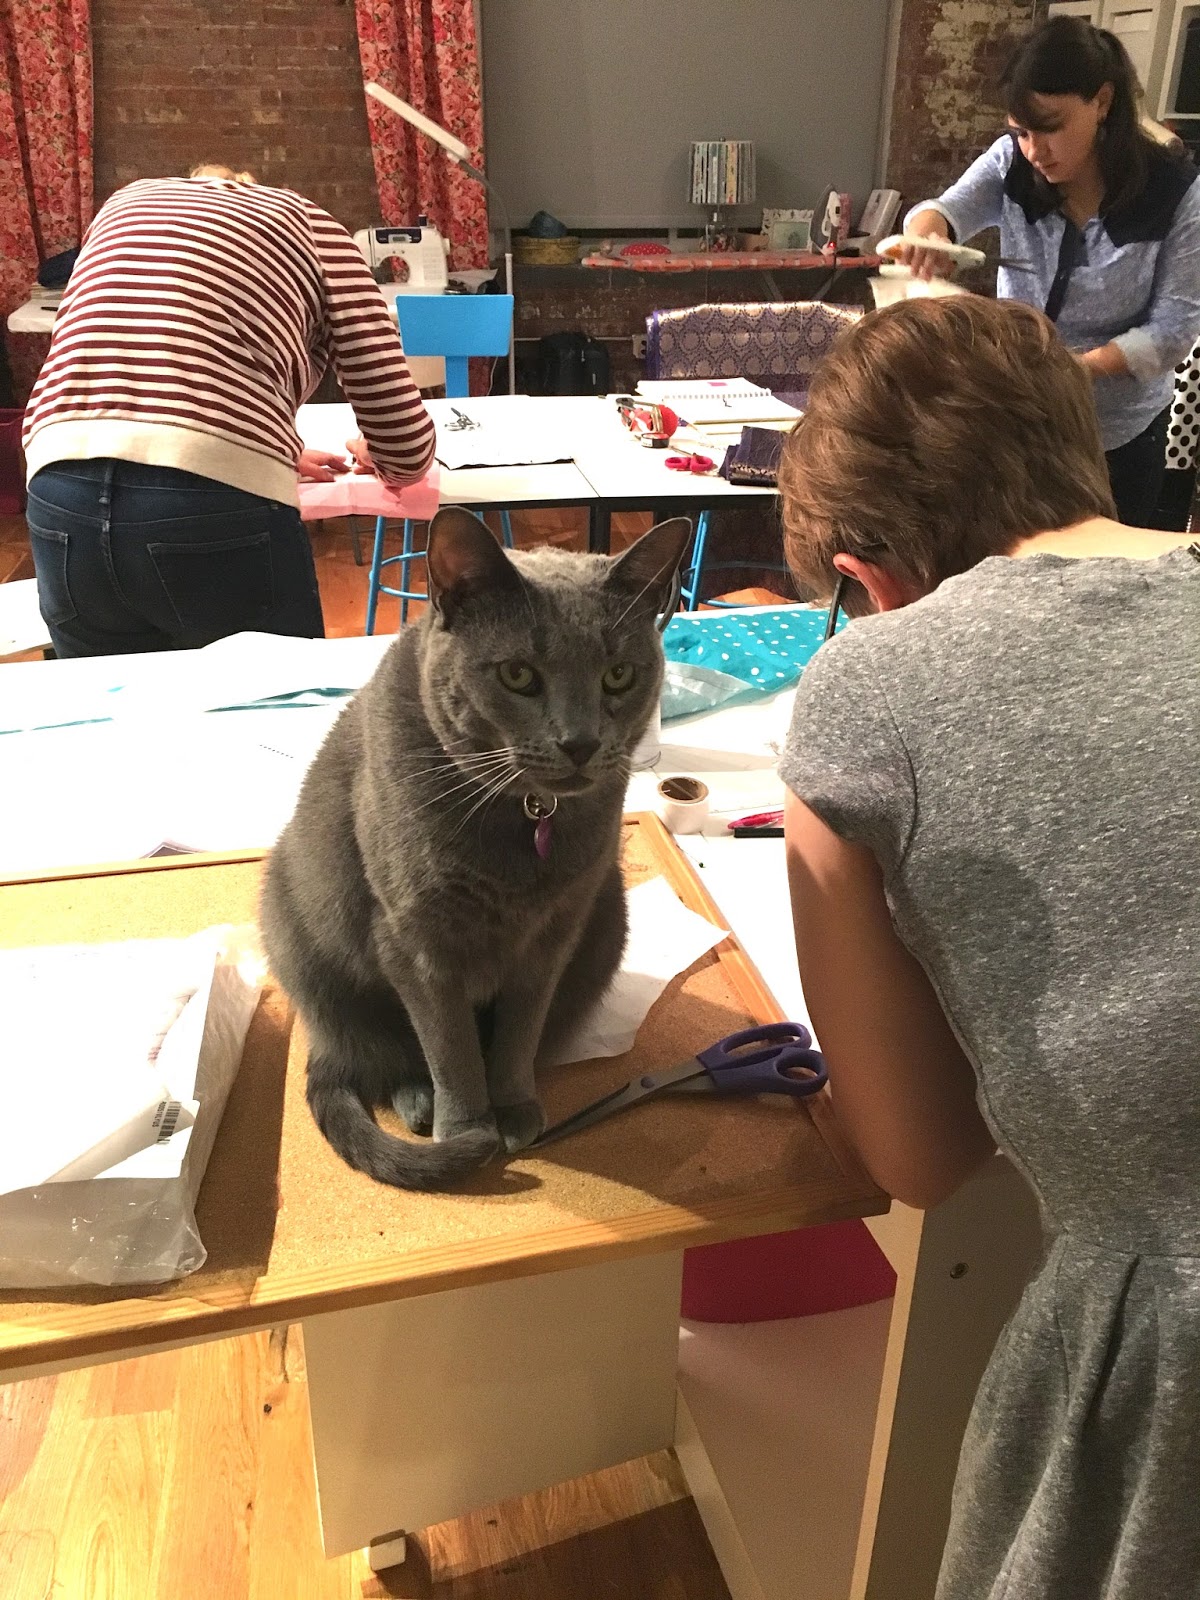 Hattie, teaching assistant.
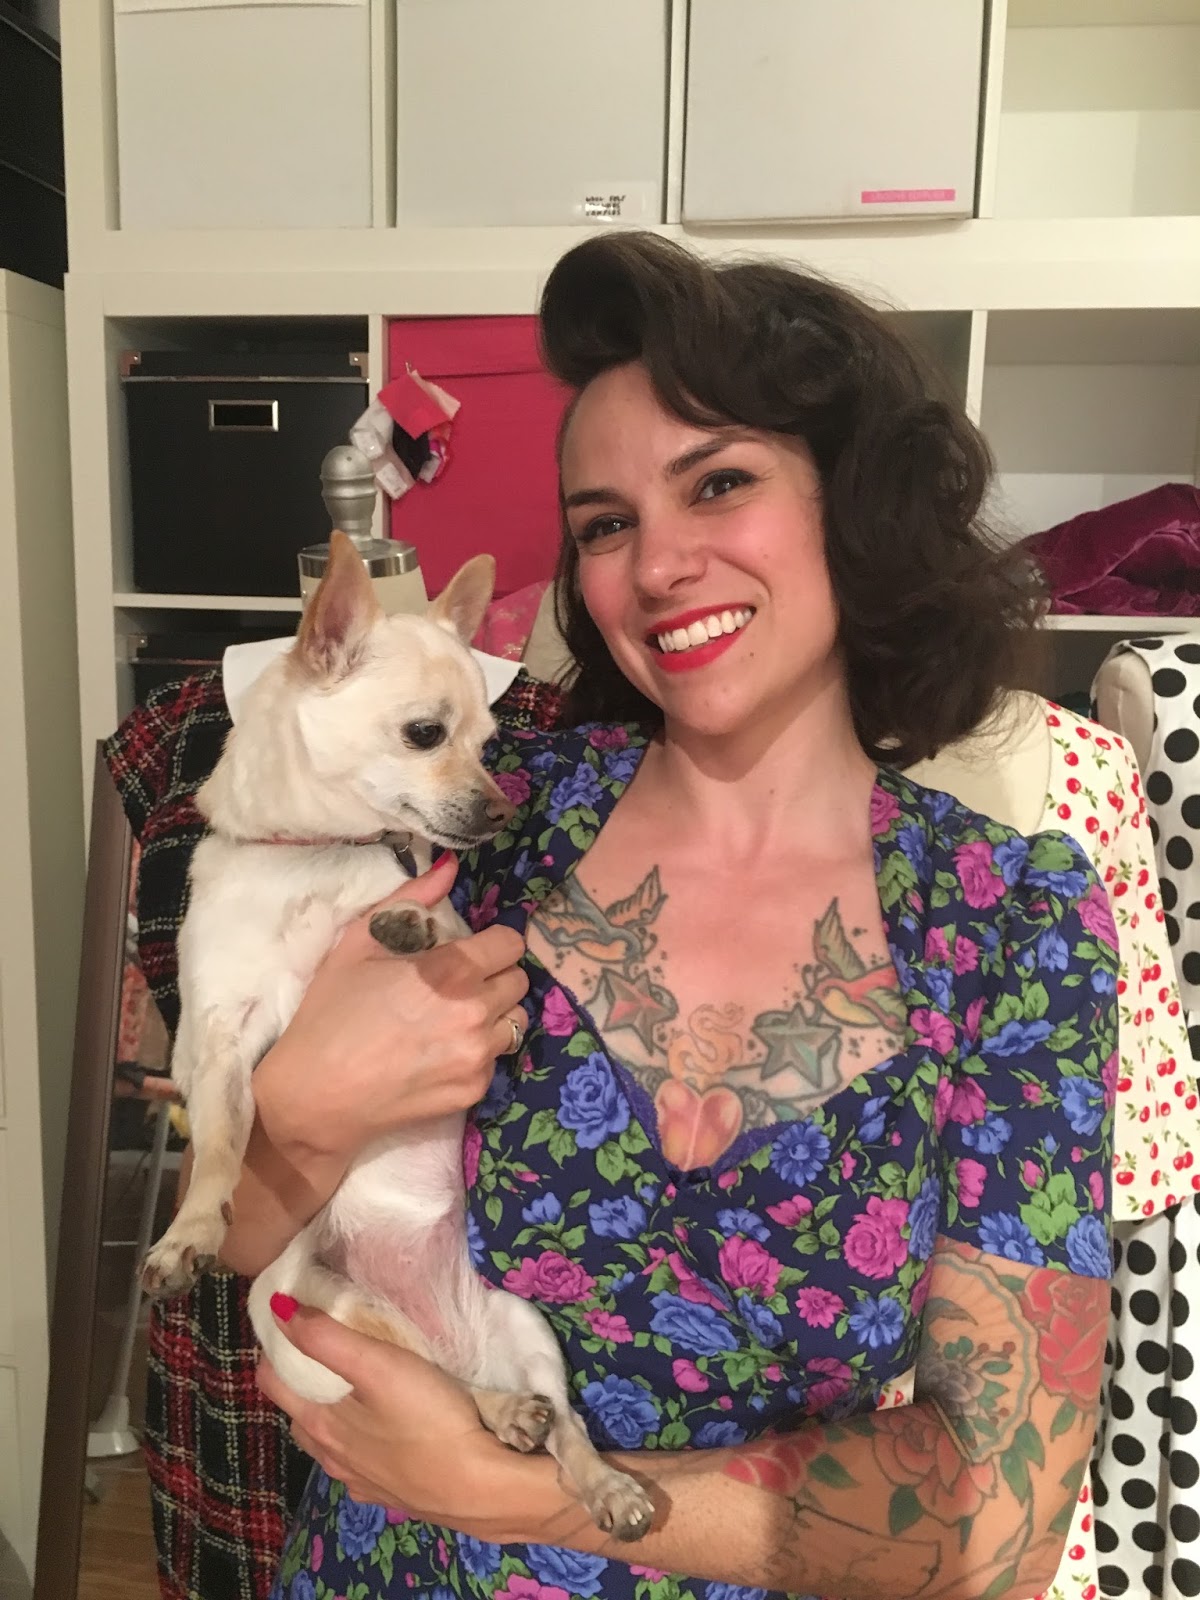
As you can probably tell, the last retreats took place in my personal studio, which is a spacious live/work loft. (Hence the furry assistants.) But if all goes well, I'm moving to a cute little house in a month so I had to find a new teaching space. As luck would have it, a fabulous new sewing studio is opening right here in Beacon, called Beetle and Fred (rhymes with needle and thread, get it?). It's so new that it hasn't had its official grand opening, but I can tell you that it's a lovely modern space right in the heart of Main Street, and it will have a fully equipped classroom.
I'm pretty psyched for a whole new group of students in a whole new space! Email me if you have any questions about the retreats.
Gretchen Hirsch's Blog

- Gretchen Hirsch's profile
- 49 followers
Gretchen Hirsch isn't a Goodreads Author
(yet),
but they
do have a blog,
so here are some recent posts imported from
their feed.

