
Gretchen Hirsch's Blog, page 6
December 11, 2015
Dirndls with Zippers?

Readers, I'm finally starting to sew that dirndl I've been talking about. I'm using Burda 7443 as a starting point, but the fit has been eluding me so far--I'm on muslin number 4 at the moment! If you're considering this pattern, you should know that it is extremely low-cut. In fact, I think it's meant to sit underneath the bust rather than at the mid-bust point like a typical dirndl. Also, the underarms are very high and the straps very wide-set, which created some fitting issues for me. I had intended to blog the whole muslin process but it became a little overwhelming with so many changes. I really feel like I'm challenging myself with this project, though, so that's a good thing.
Anyway, I know many of you are experienced dirndl wearers and sewers, so I wanted to get your thoughts on the closure. The Burda pattern has a zipper closure, as does my dirndl that I bought in Passau. I've lightened the picture below so you can see the zipper below the lacing. (Perhaps it's more typical to use a zipper when there will be lacing to conceal it?)
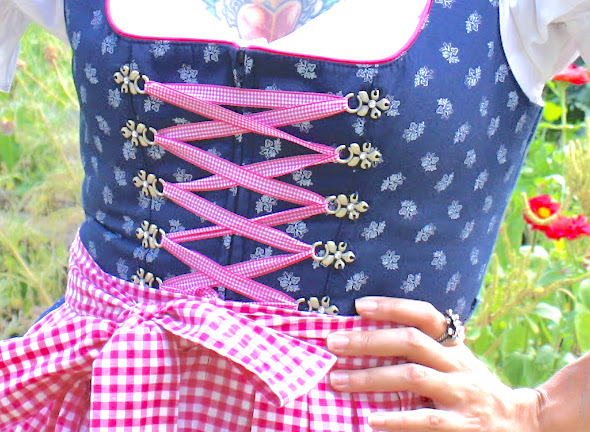
I've since had the chance to examine higher-end dirndls by Tostmann Trachten, Lena Hoschek, Julia Trentini, and Gossl--and they all close with either hooks and eyes or buttons.
 Lena Hoschek DirndlI love the clean look that this Lena Hoschek dirndl achieves with hooks and eyes, for instance. Also, dirndls take a lot of pressure since they're so tightly fitted, so I've begun to wonder if a zipper will be strong enough to withstand that pressure.
As a side note, the Burda pattern calls for an invisible zipper, which just seems like madness to me. I've had invisible zippers split from the stress of just a fitted sheath dress in a medium weight fabric, so I can't imagine what an interfaced dirndl bodice would do to one--probably chew it up and spit it out.
So I'm definitely leaning towards hooks and eyes to get a nice clean finish. But I'd love to hear your thoughts on the matter, readers. What do you think of the zipper closure on a dirndl?


December 10, 2015
Knit Wrap Top Sew-Along #4: Sewing Steps 1-4
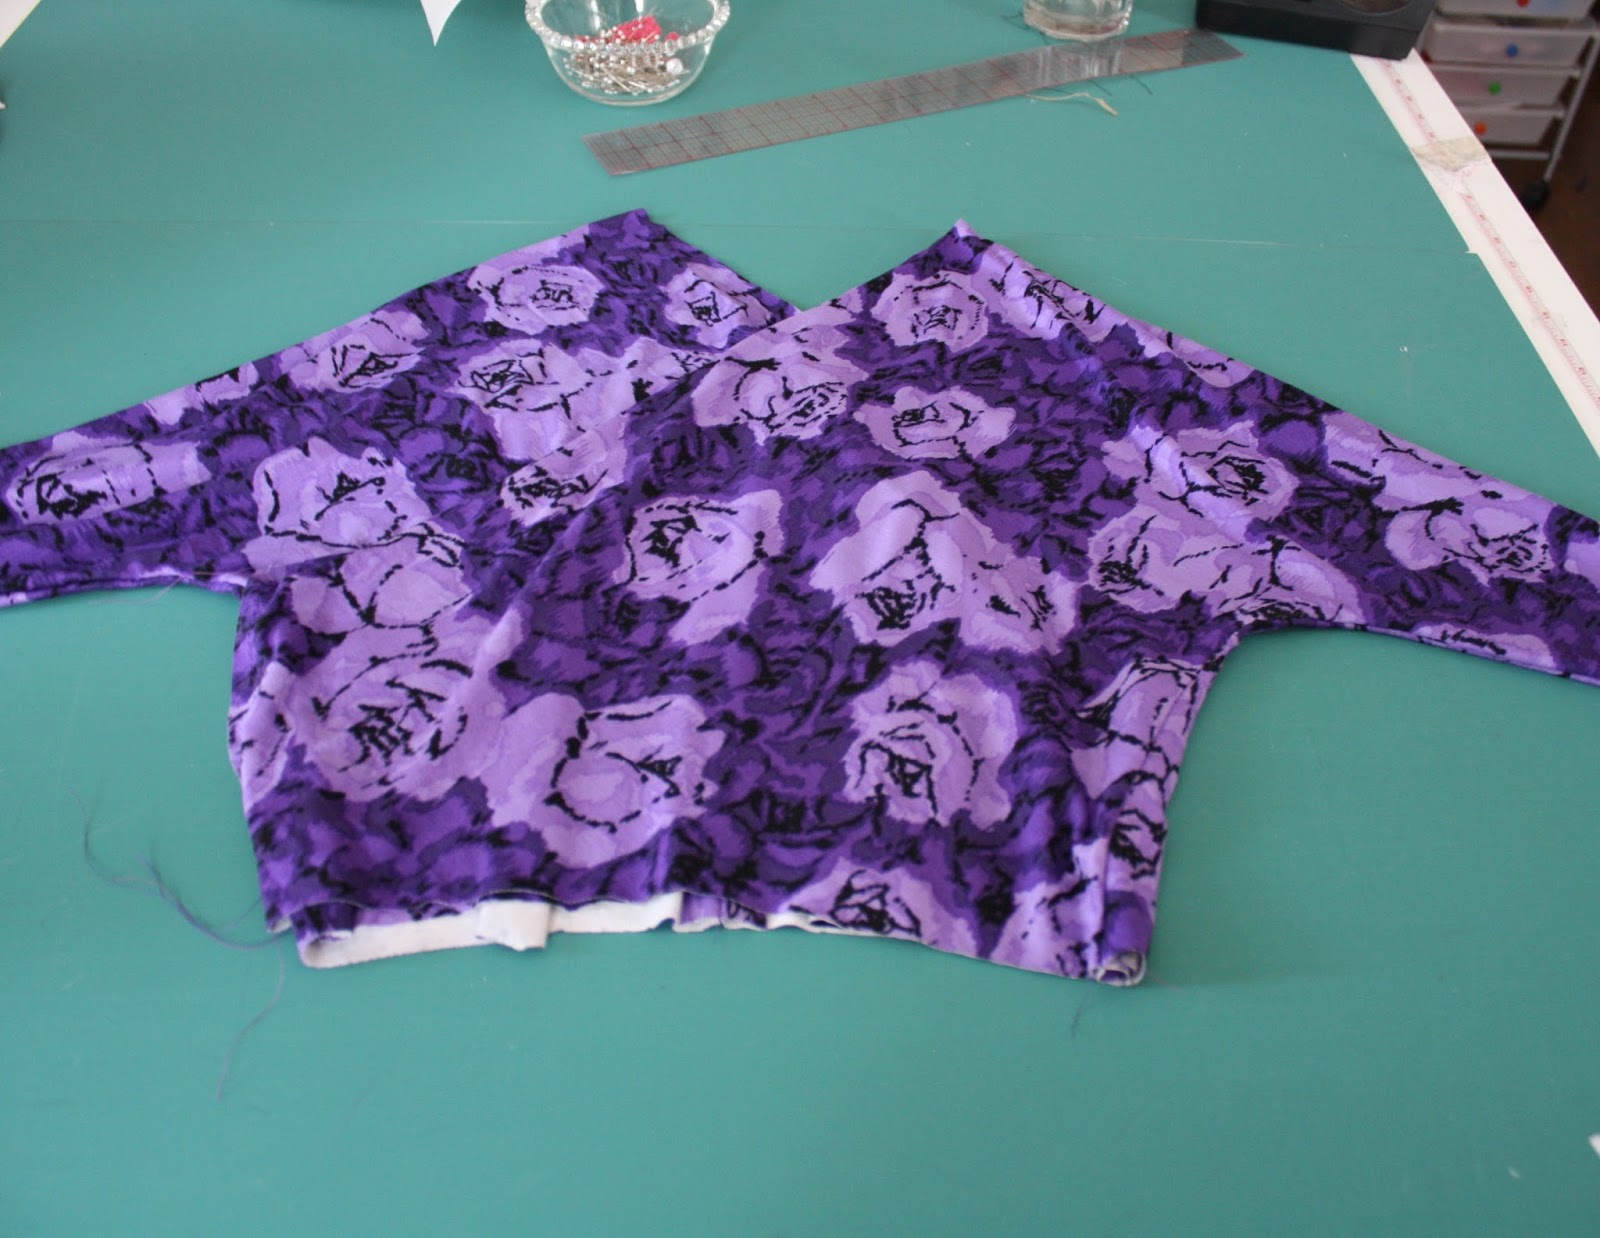
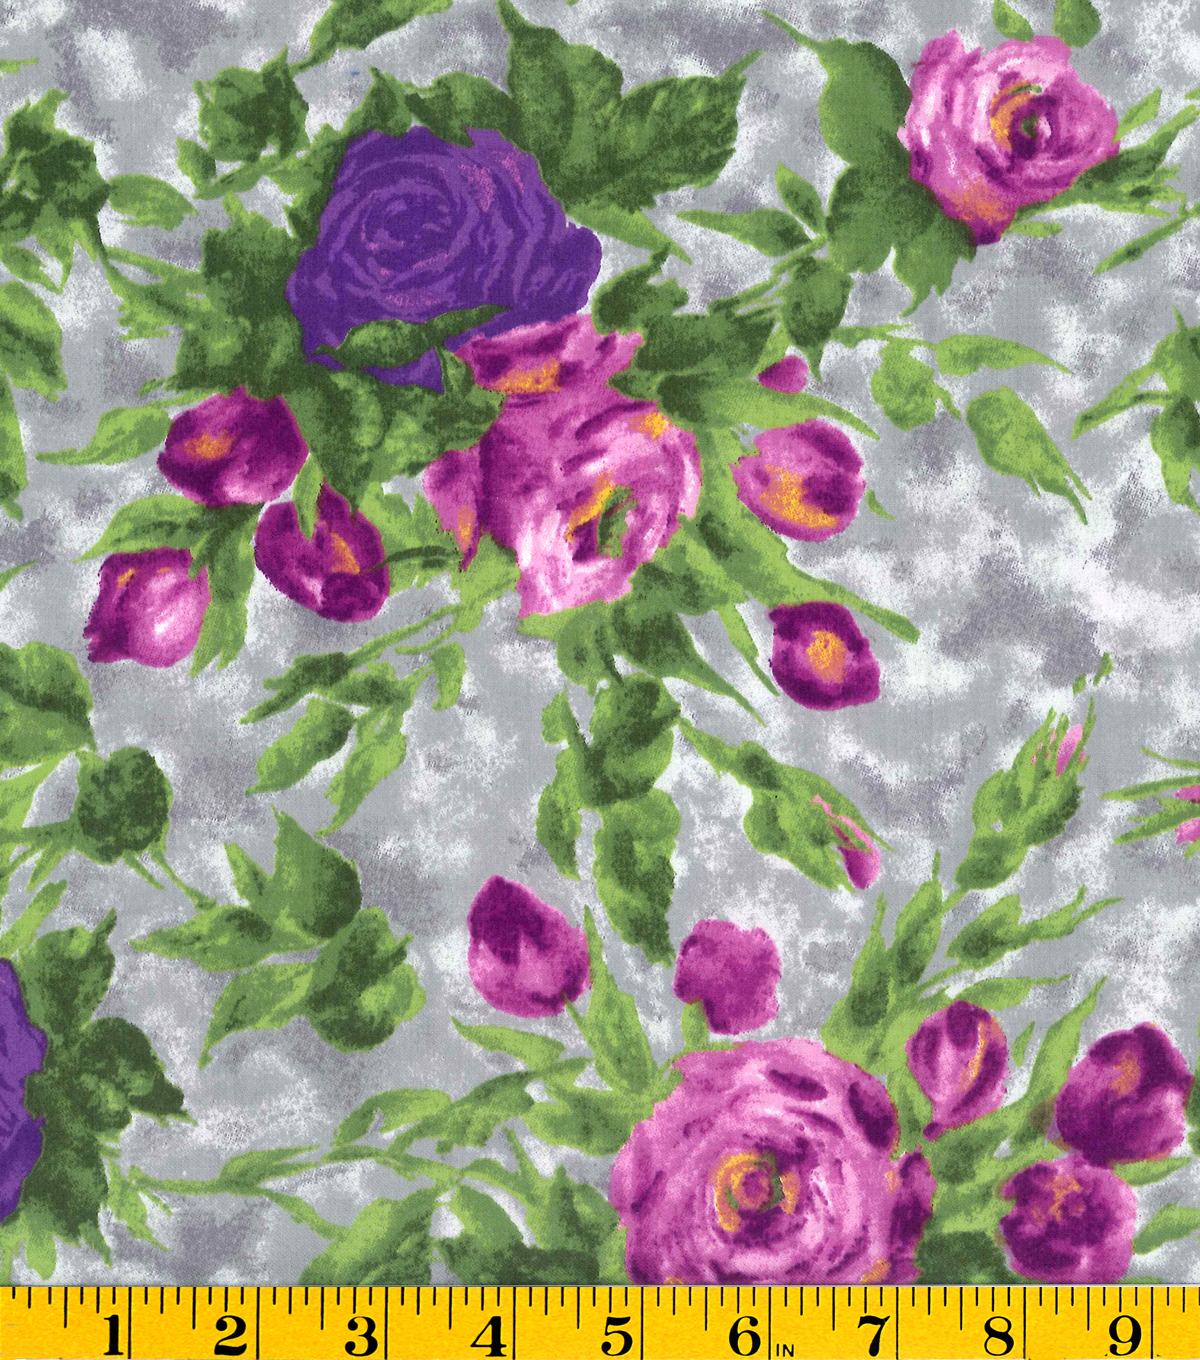
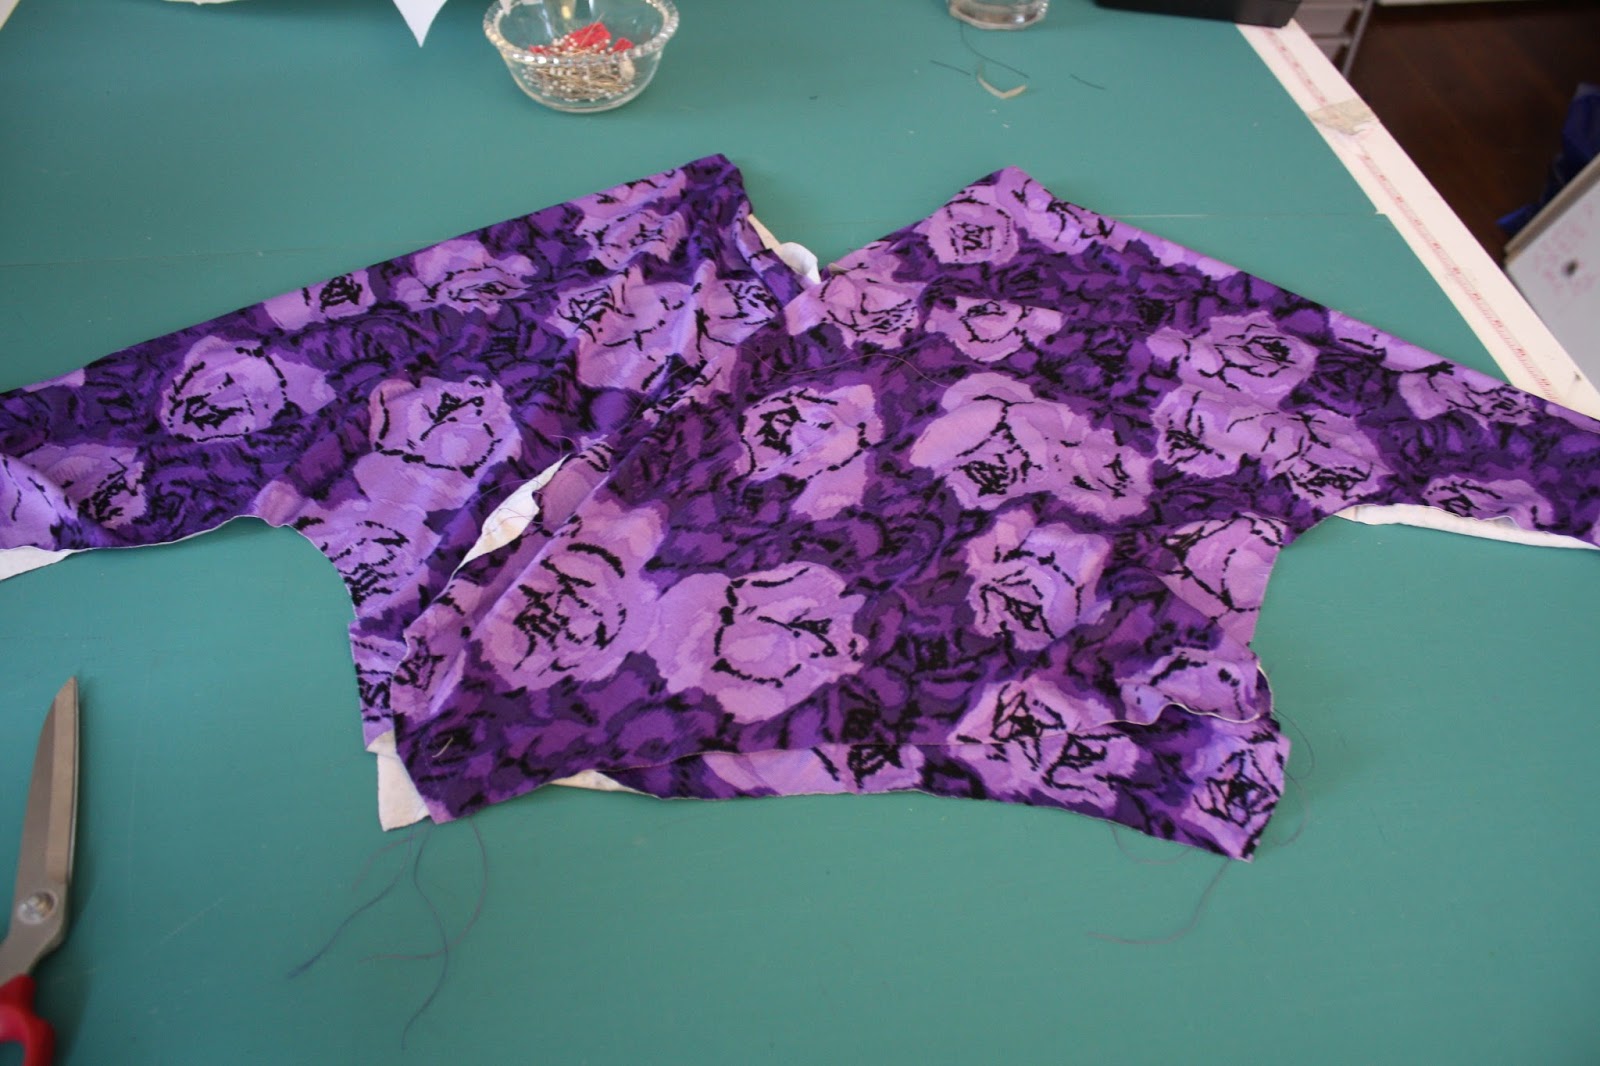 Ooh, I'm already loving how my top is going to look in purple roses! Okay, how did everyone do with cutting and marking? At this point, we can move on to sewing.
A few preliminary pointers:
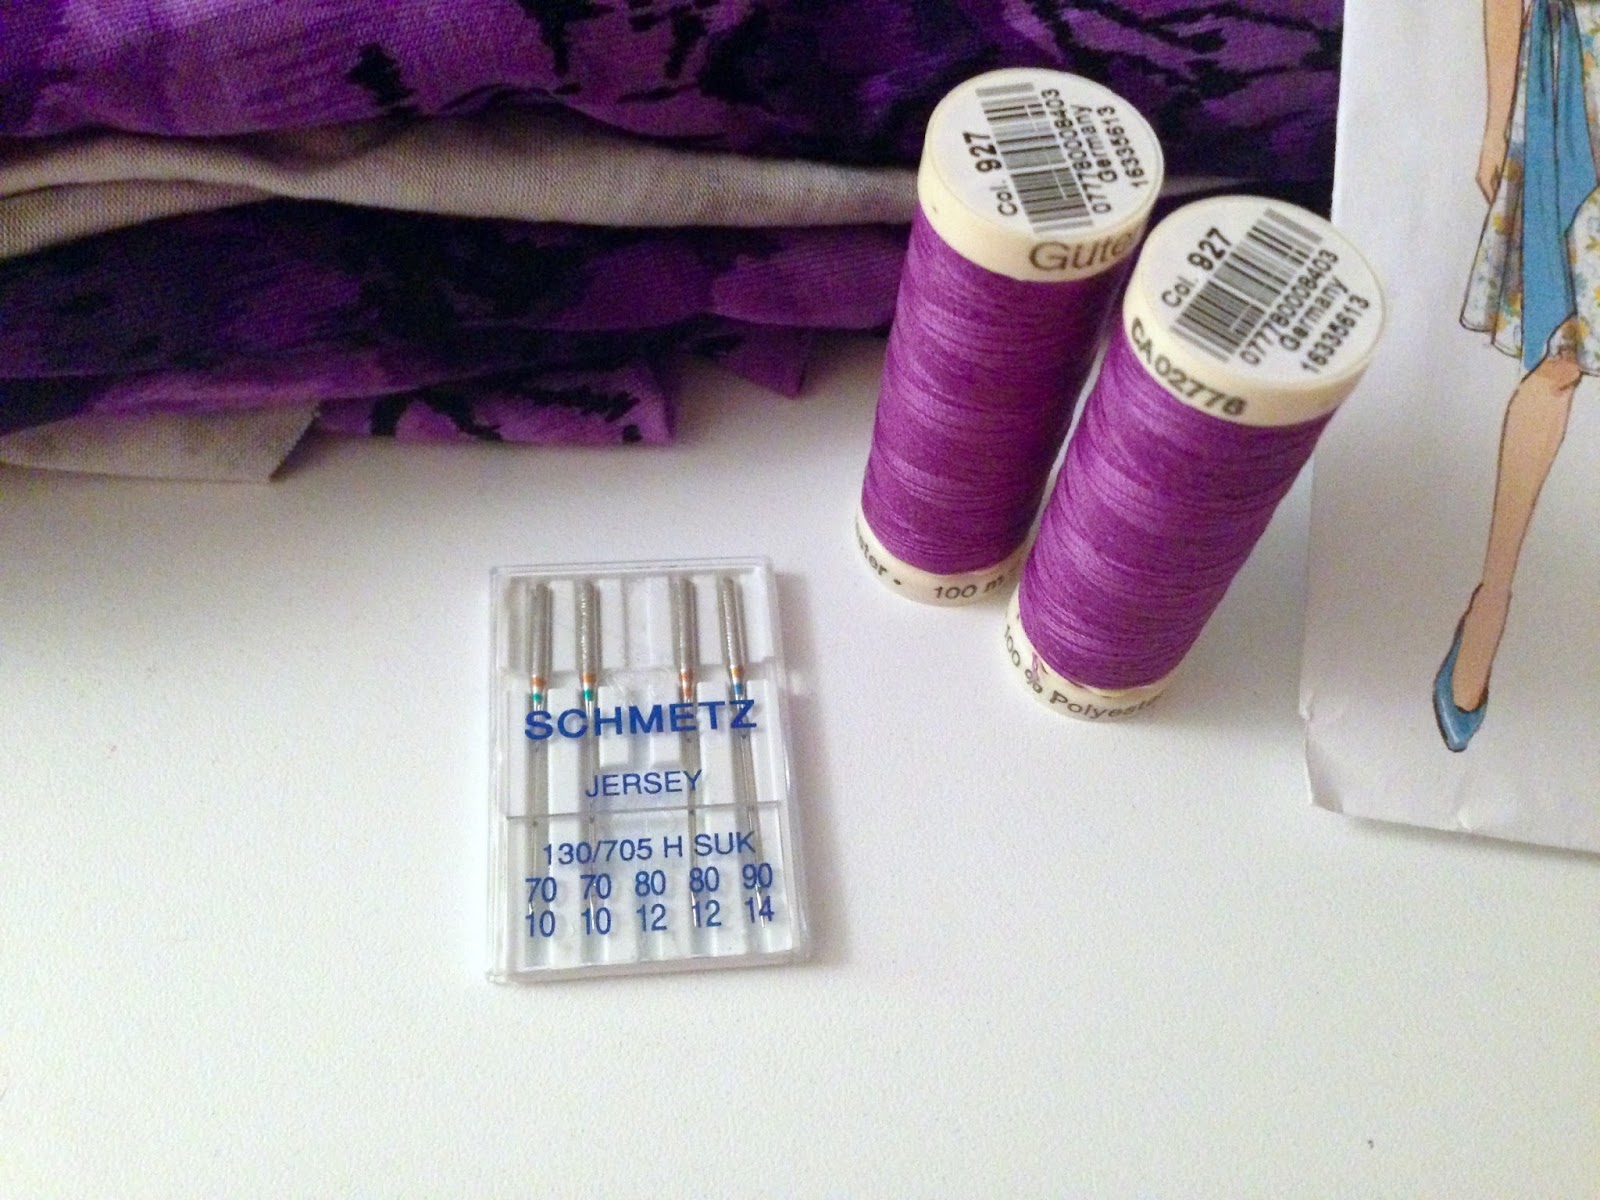
Start by prepping your sewing machine. Make sure you have a jersey needle inserted and thread your machine with all-purpose poly thread to match your fabric. For the entire top, we will be using a straight stitch. However, at times we will slightly stretch the fabric to ensure that stretch is built into the stitching. Do a test seam with some scraps of jersey. If your fabric is not feeding through the machine properly, there are a few things you can try: 1) holding the fabric taut in front of and behind the needle, 2) using a walking foot, and 3) reducing the presser foot pressure and/or thread tension.
Today we're just focusing on steps 1-4 in the pattern directions.
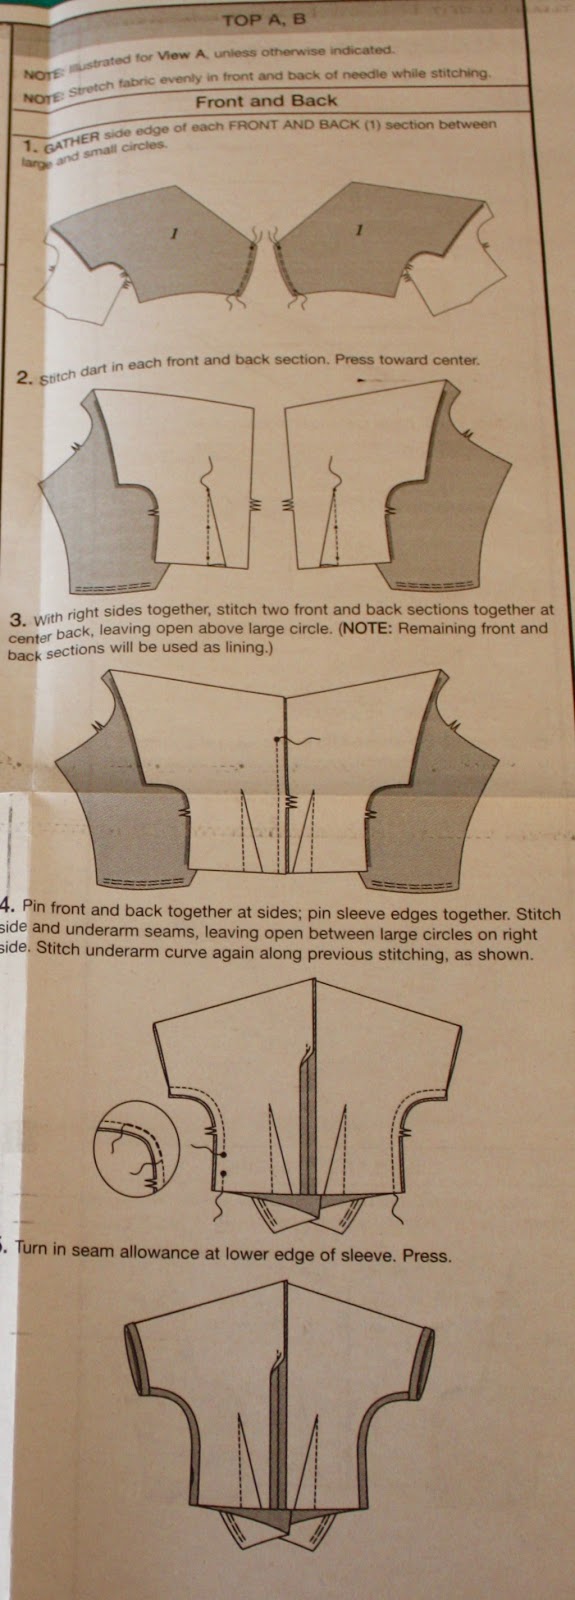
In step one, you'll make two lines of gathering stitches between the circles on both sides of the front opening. Use your longest machine stitch. The first row of stitches should have a 1/2" seam allowance, and then the second should have a 3/8" seam allowance. Do not stretch the fabric as you sew.
Step 2! Next we'll sew the darts in the bodice backs. Use a 2.5 mm stitch length and stretch the fabric just slightly as you sew. Fold the dart legs together, and then stitch from the edge of the fabric towards the point of the dart. Tie off the threads at the point (don't backstitch) and finger press the darts toward center back.

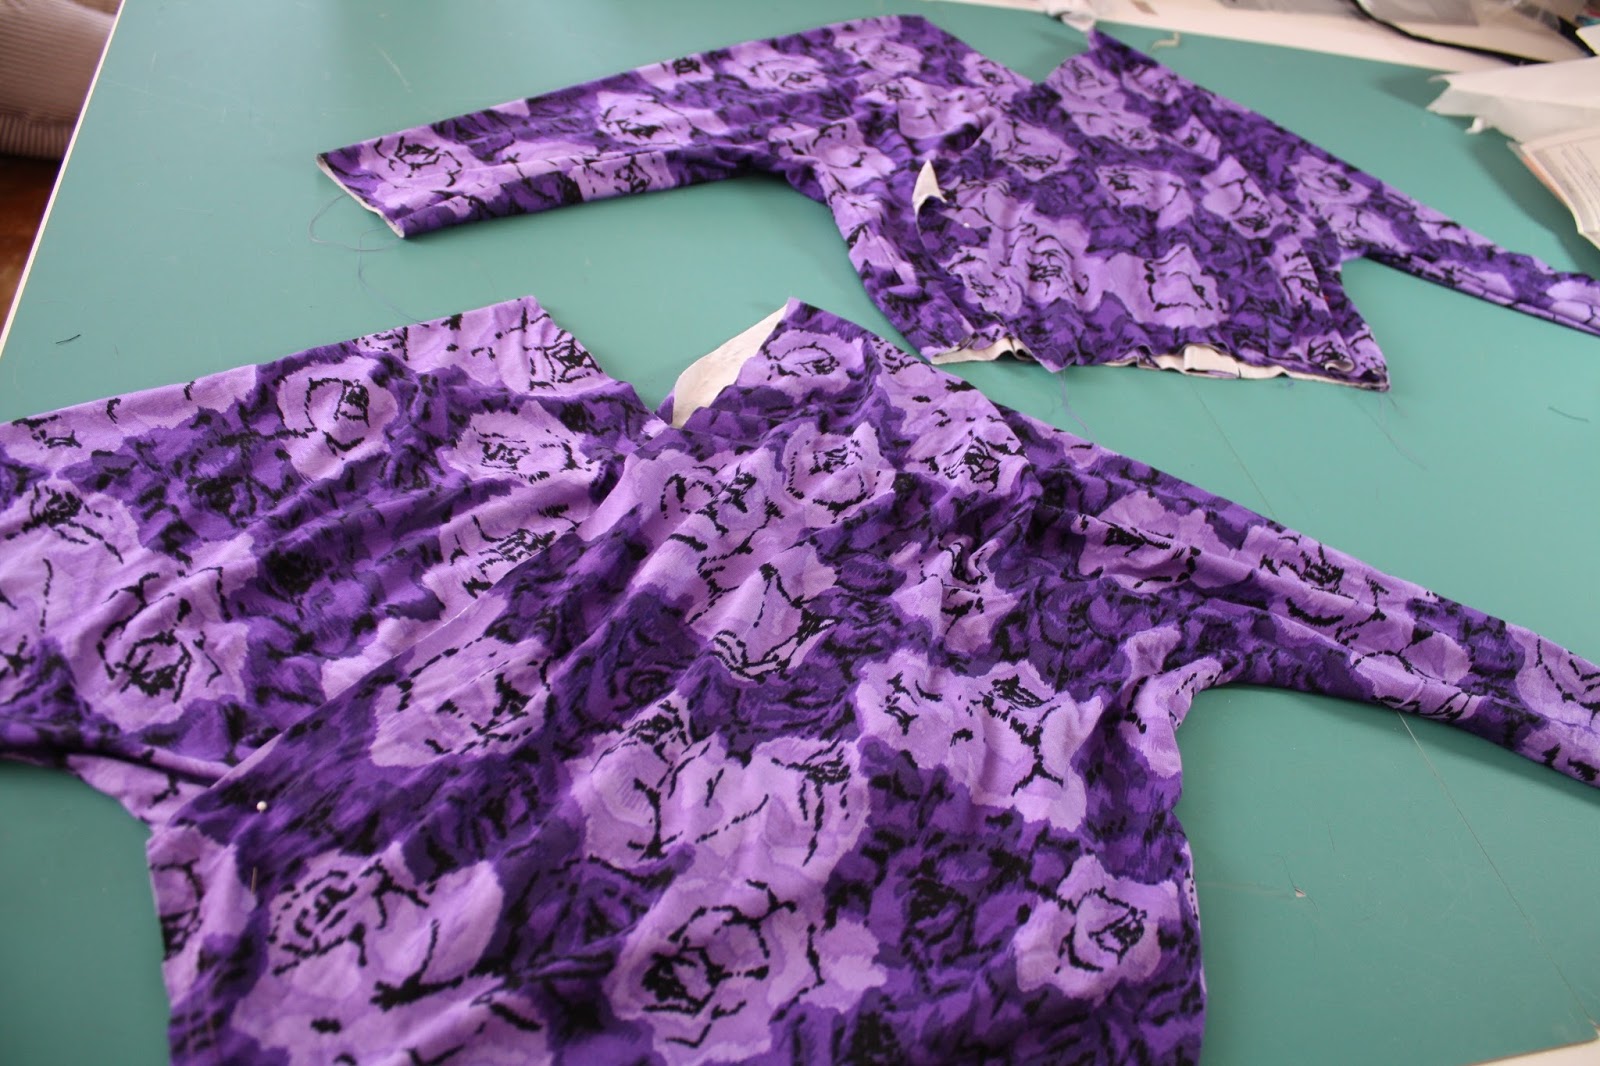
Step 3: Stitch the bodice pieces together at the center back, up to the circle. Stretch the fabric slightly as you sew. Press the seam allowances open.
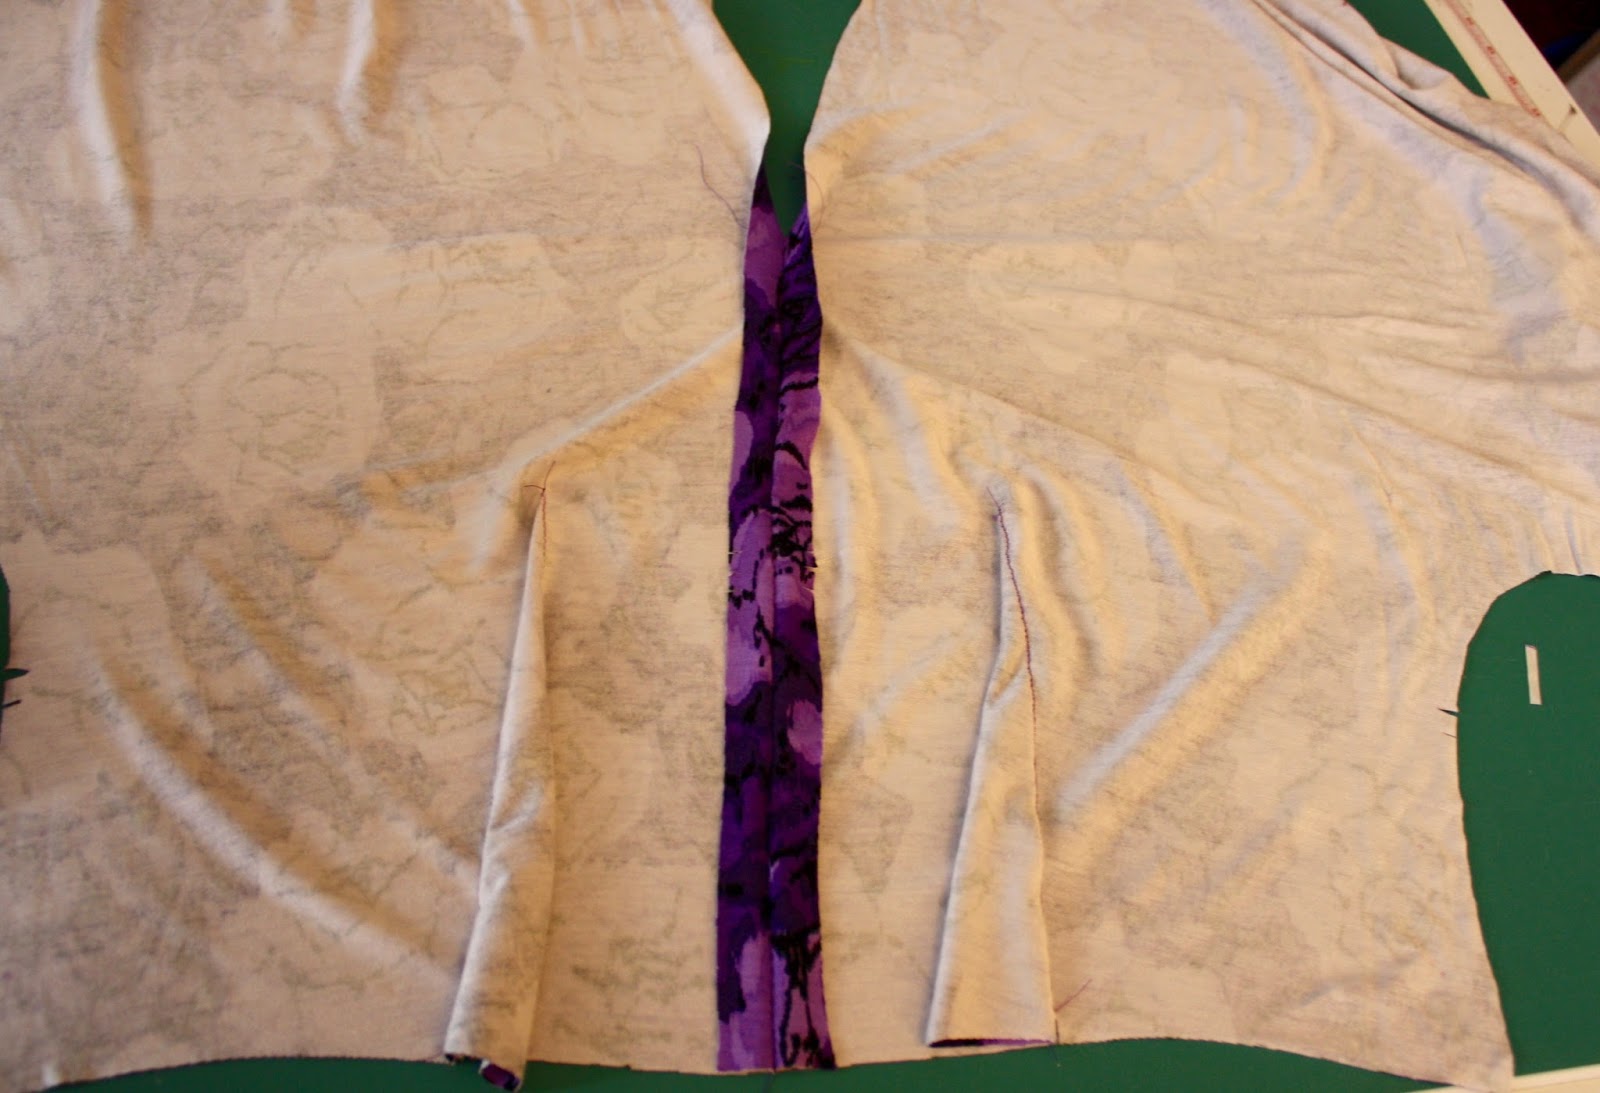
Step 4: Fold the sleeves down so that they are right sides together and then stitch the underarm seam. Stretch the fabric slightly as you sew. VERY IMPORTANT!: you must leave an opening between the circles on the right side seam. (This means the right side as you wear the top.)
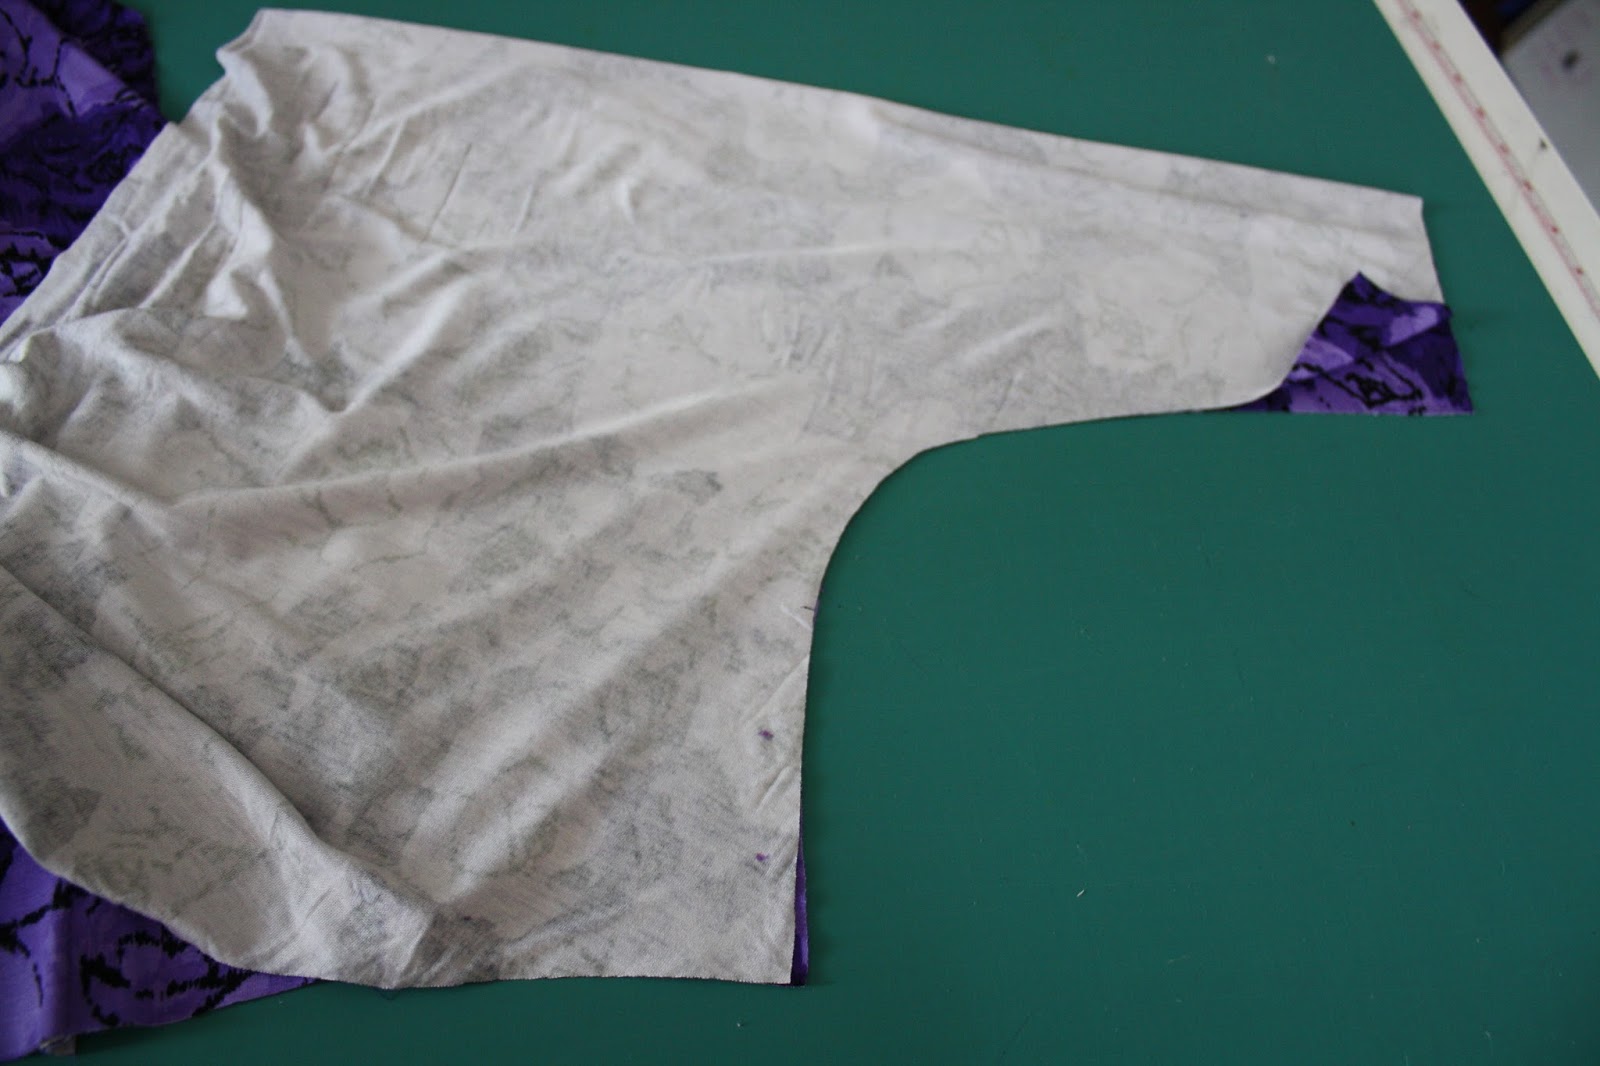
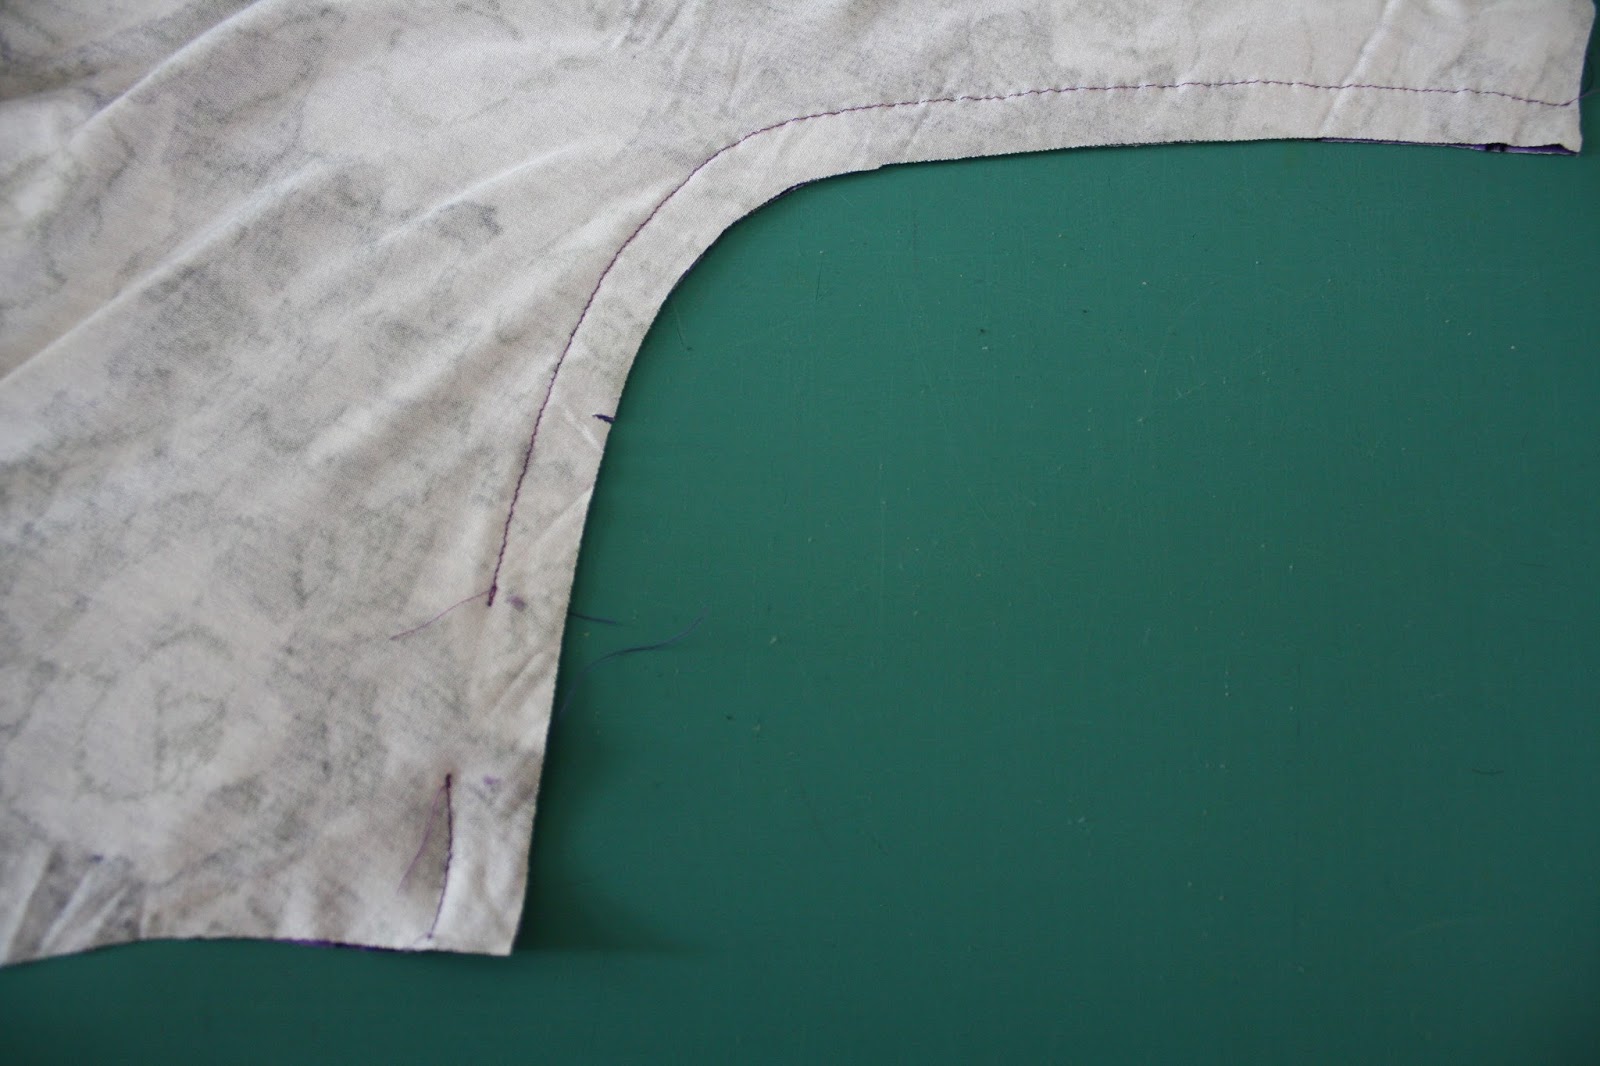
Clip into the underarm curves. This ensures that the curve will not bunch or wrinkle once it's turned right side out.
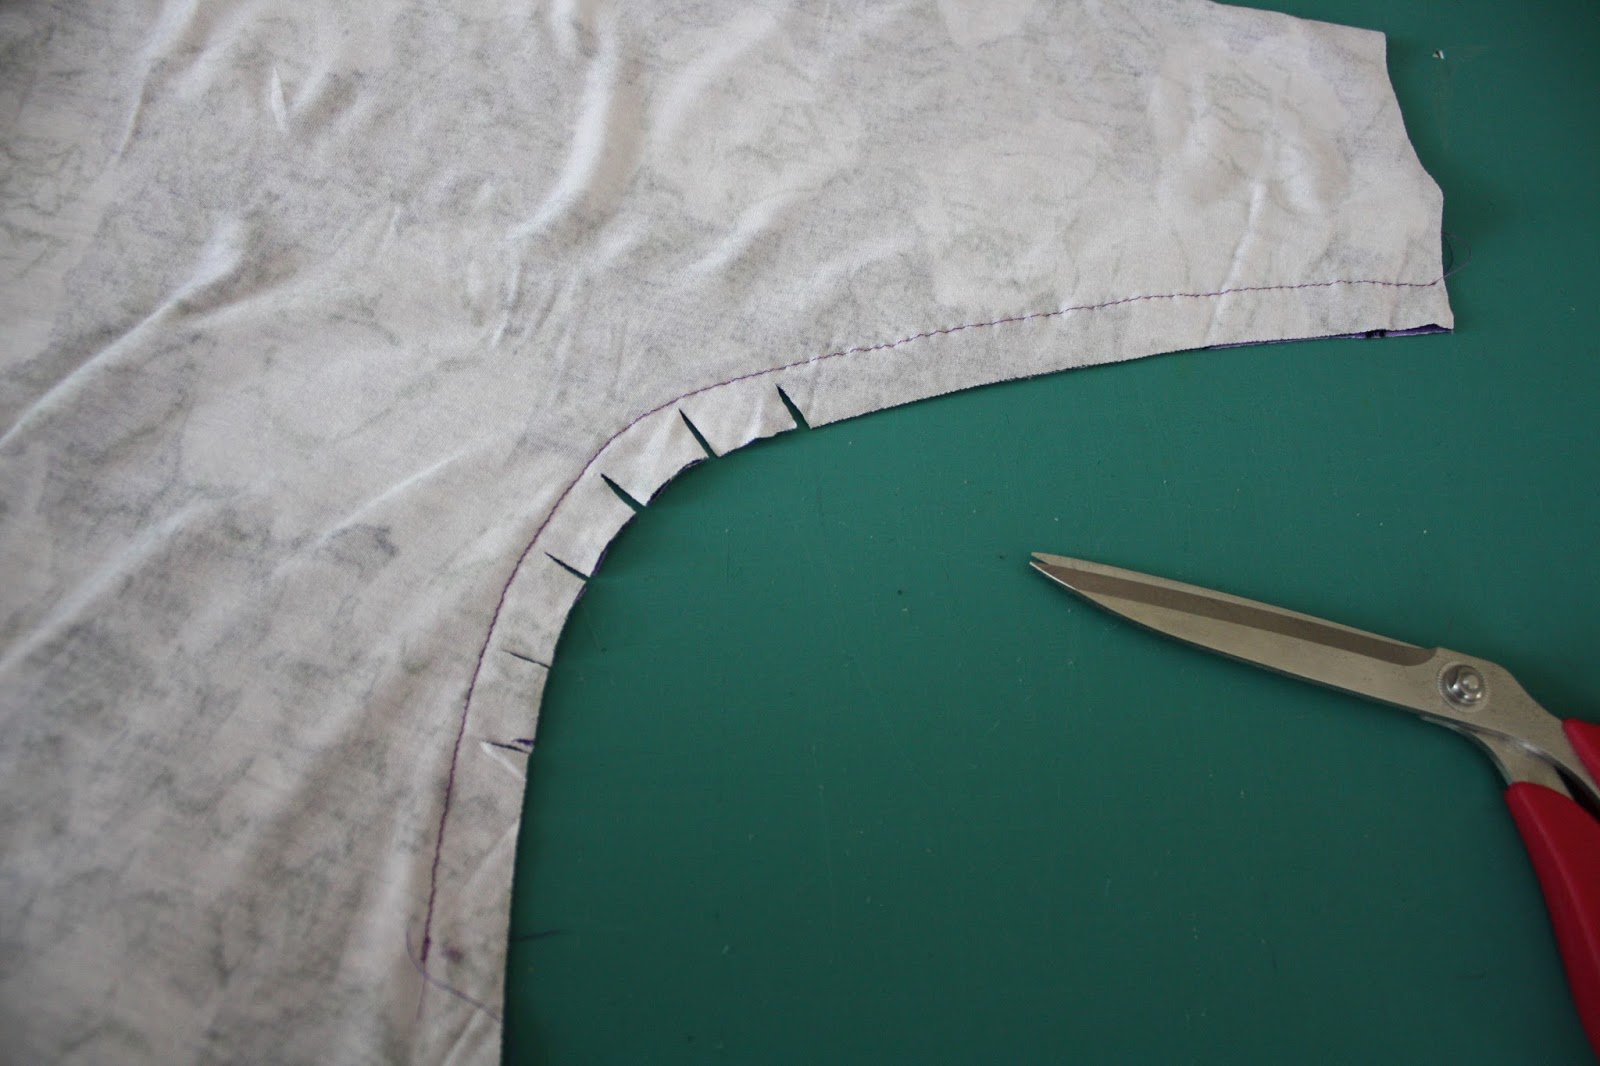
On the left side, stitch the entire seam and ignore the circles. You have what is now starting to look like a top!
Extra credit! If you have extra sewing time right now, repeat all these steps on the second set of pattern pieces. VERY, VERY IMPORTANT: leave the side opening on the OPPOSITE side on this set. It's the lining, so it's worn wrong side out.
Questions? Please ask! In the next installment, we'll sew the ties.
December 9, 2015
Holiday Insta-Outfit!
 Hey, you know what's fun? Sewing. Especially when you can knock out a couple pieces, without needing a pattern, in just a couple short sewing sessions!
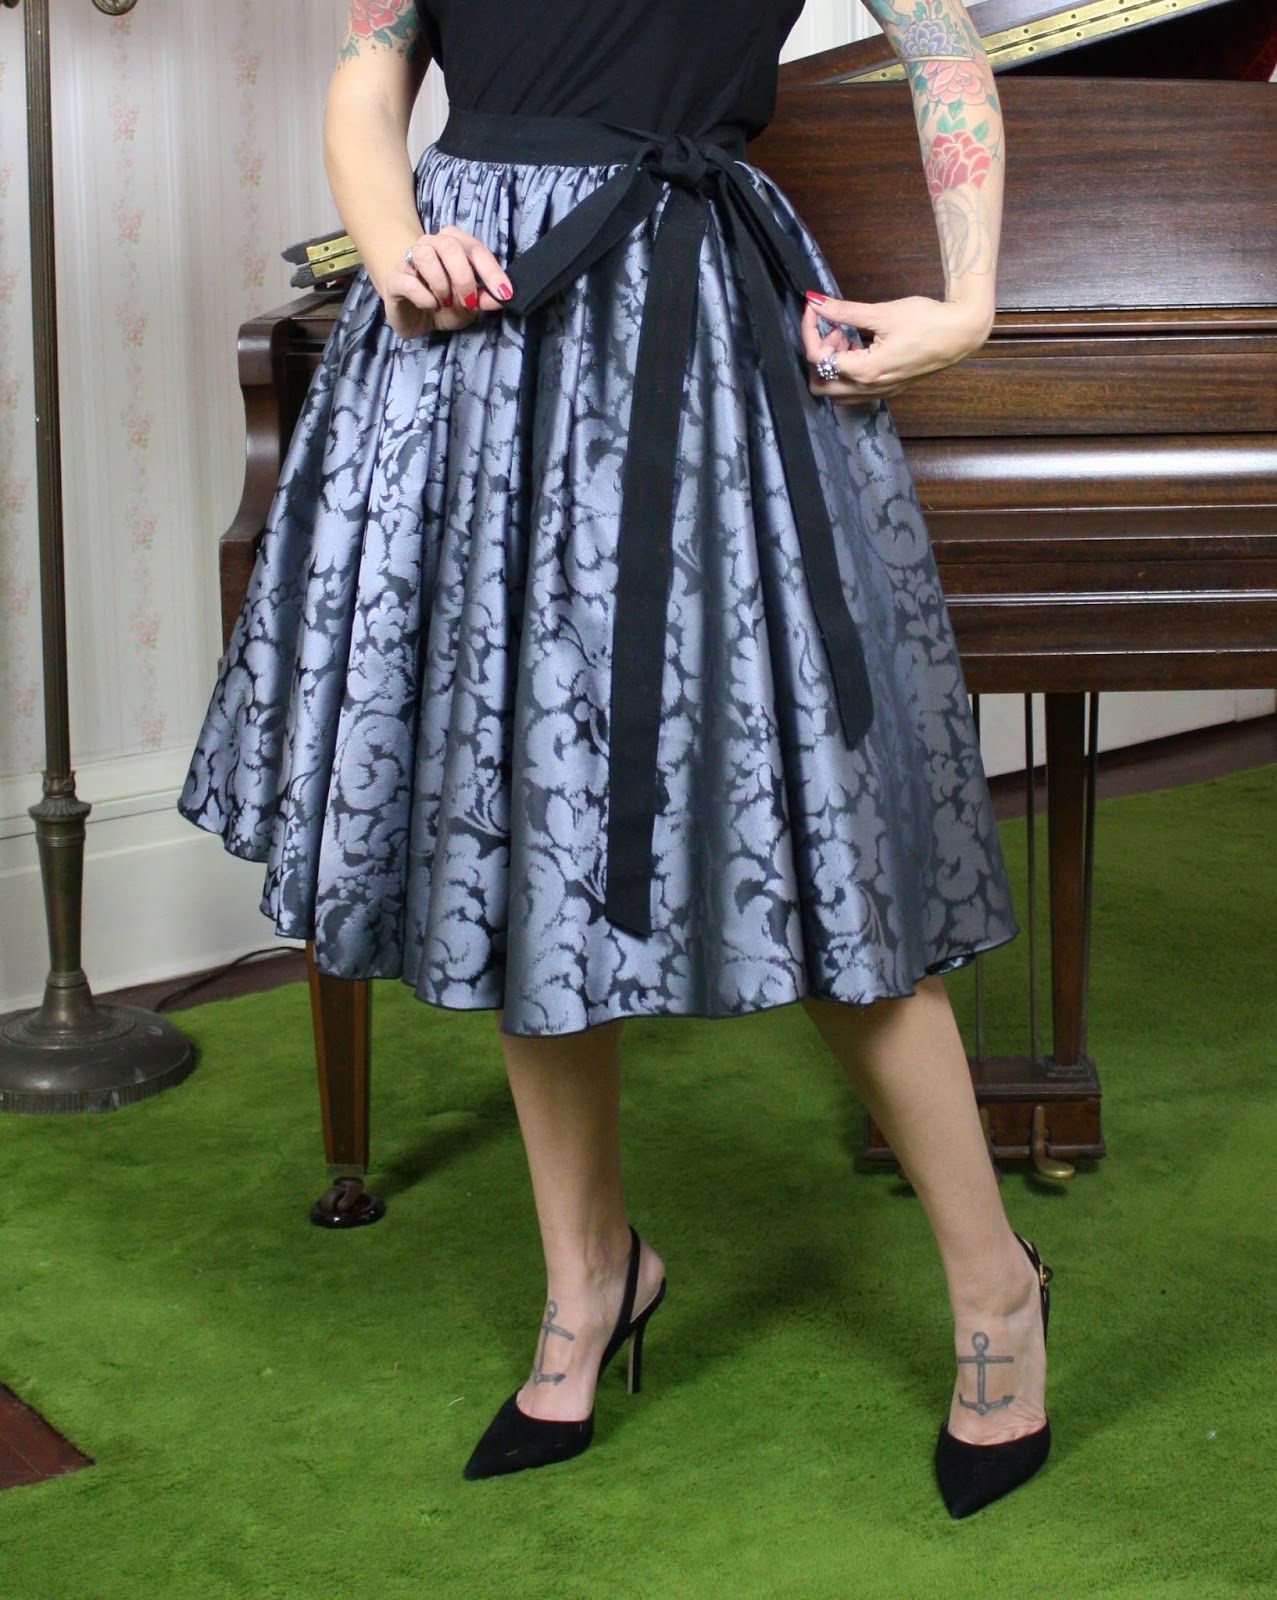
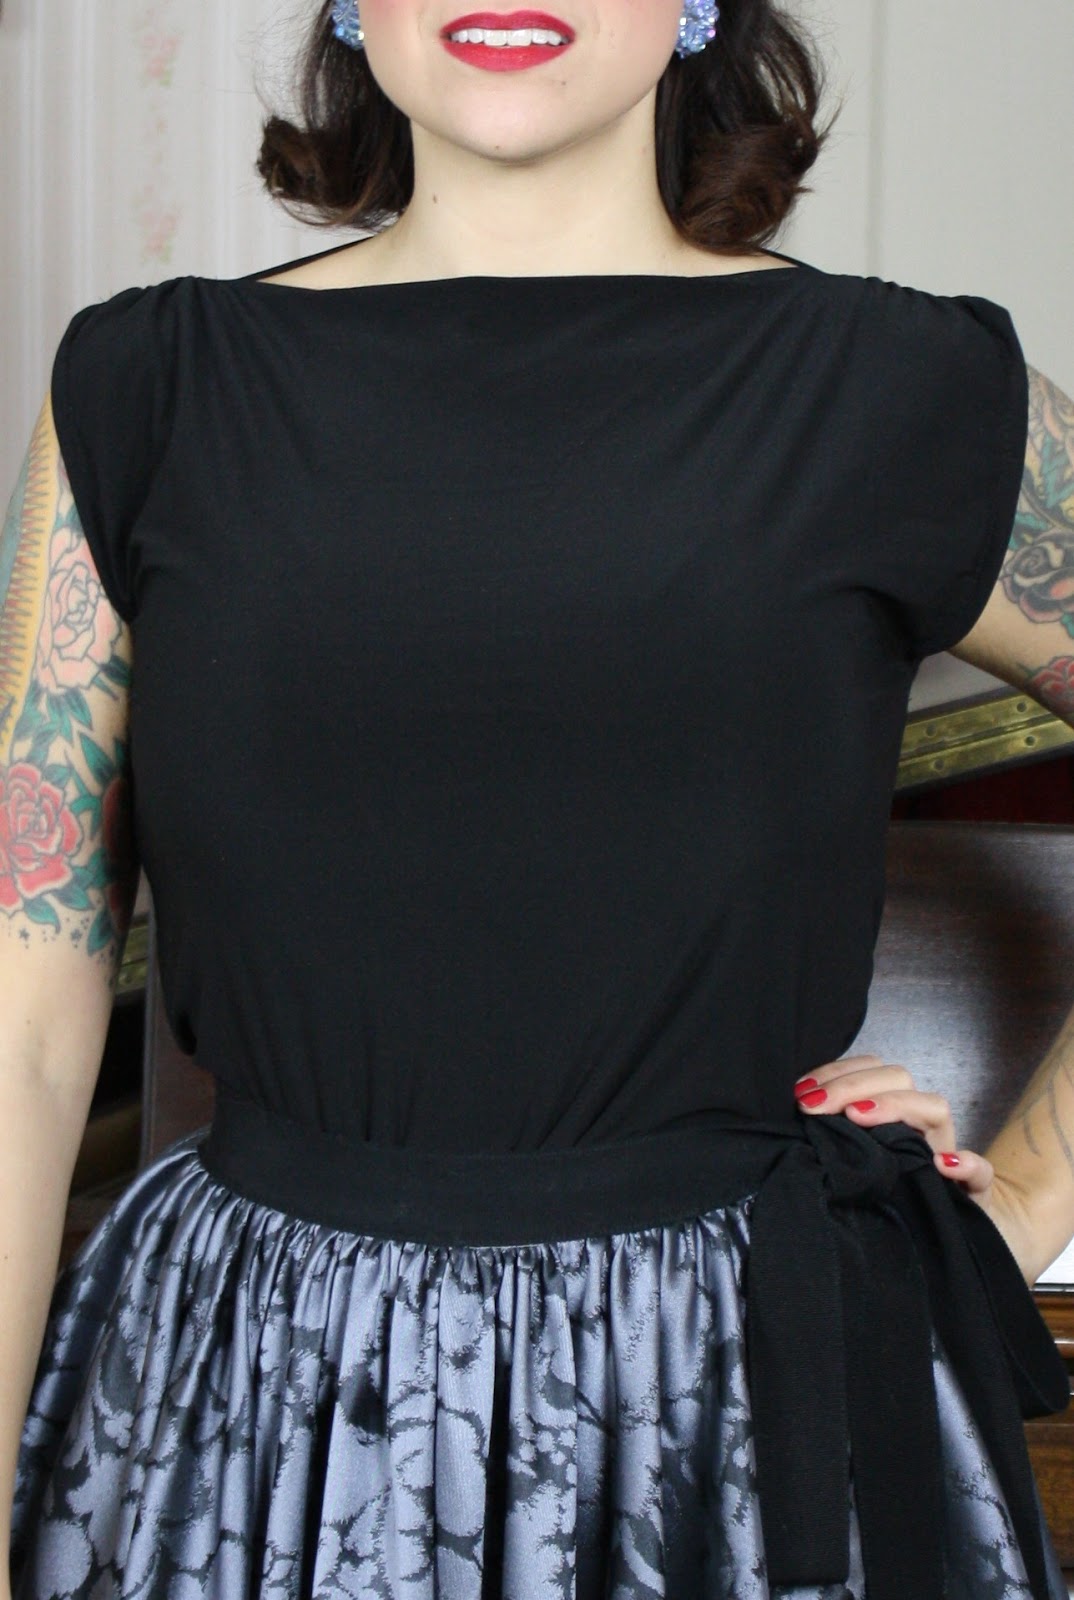
This little ensemble is made up of a gathered circle skirt in Black and Grey Jacquard from my fall collection, paired with this Simple Knit Top project in black matte jersey.
 Let's talk about the skirt, shall we? I've been wanting to make a gathered circle skirt for a while. This is a circle skirt made to a waist circumference waaaaay bigger than your own, and then you gather the excess into a waistband. For those times when you just need MORE circle skirt.
I multiplied my waist circumference by 2.5 to get the pattern circumference (and then divided by two and made one pattern for both the front and the back).
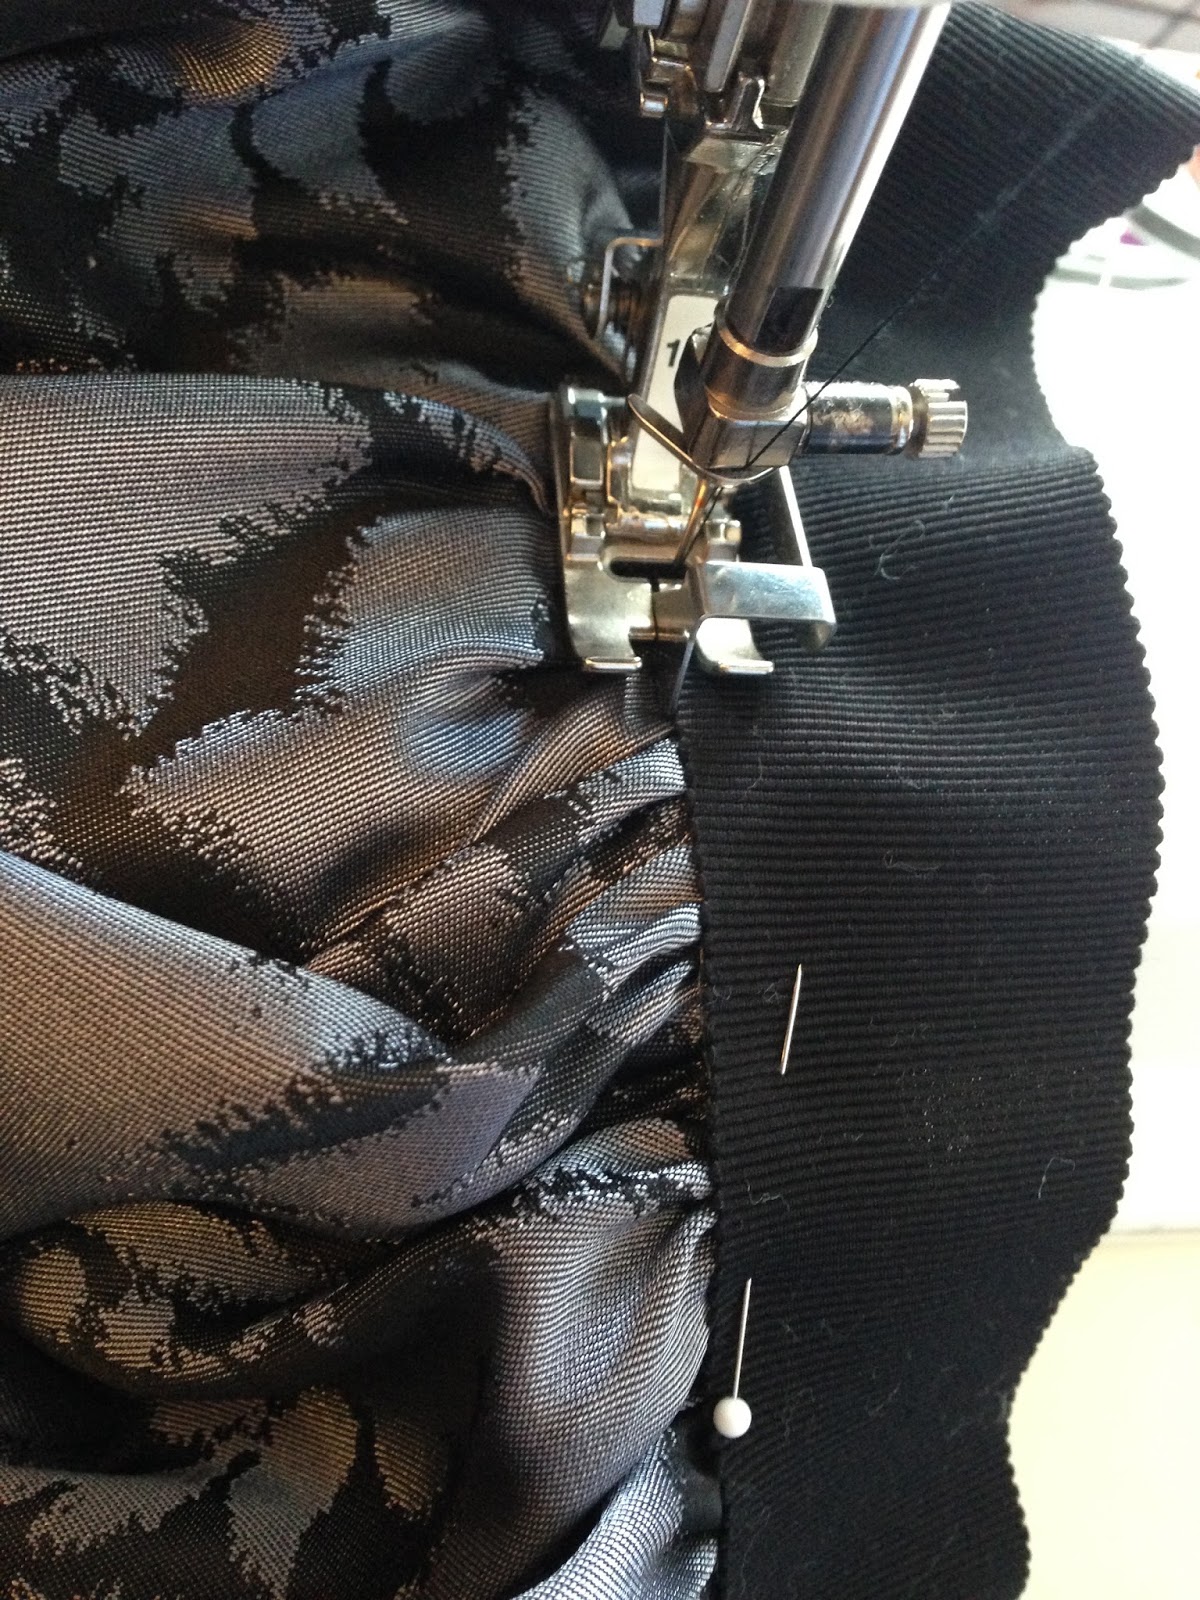
The waistband is grosgrain ribbon, with long ties at the side zipper so you can make a bow.
 To make the waistband, you need a lot of ribbon. I think I used about 6.5 yards. Half is used for the outer layer, and the other half is stitched to the inside to hide the seam allowances, so the two ribbons sandwich the skirt waistline. Leave long tails past the side zipper, and gather the skirt and pin it to the ribbon. The gathered circumference should now match your waist circumference.
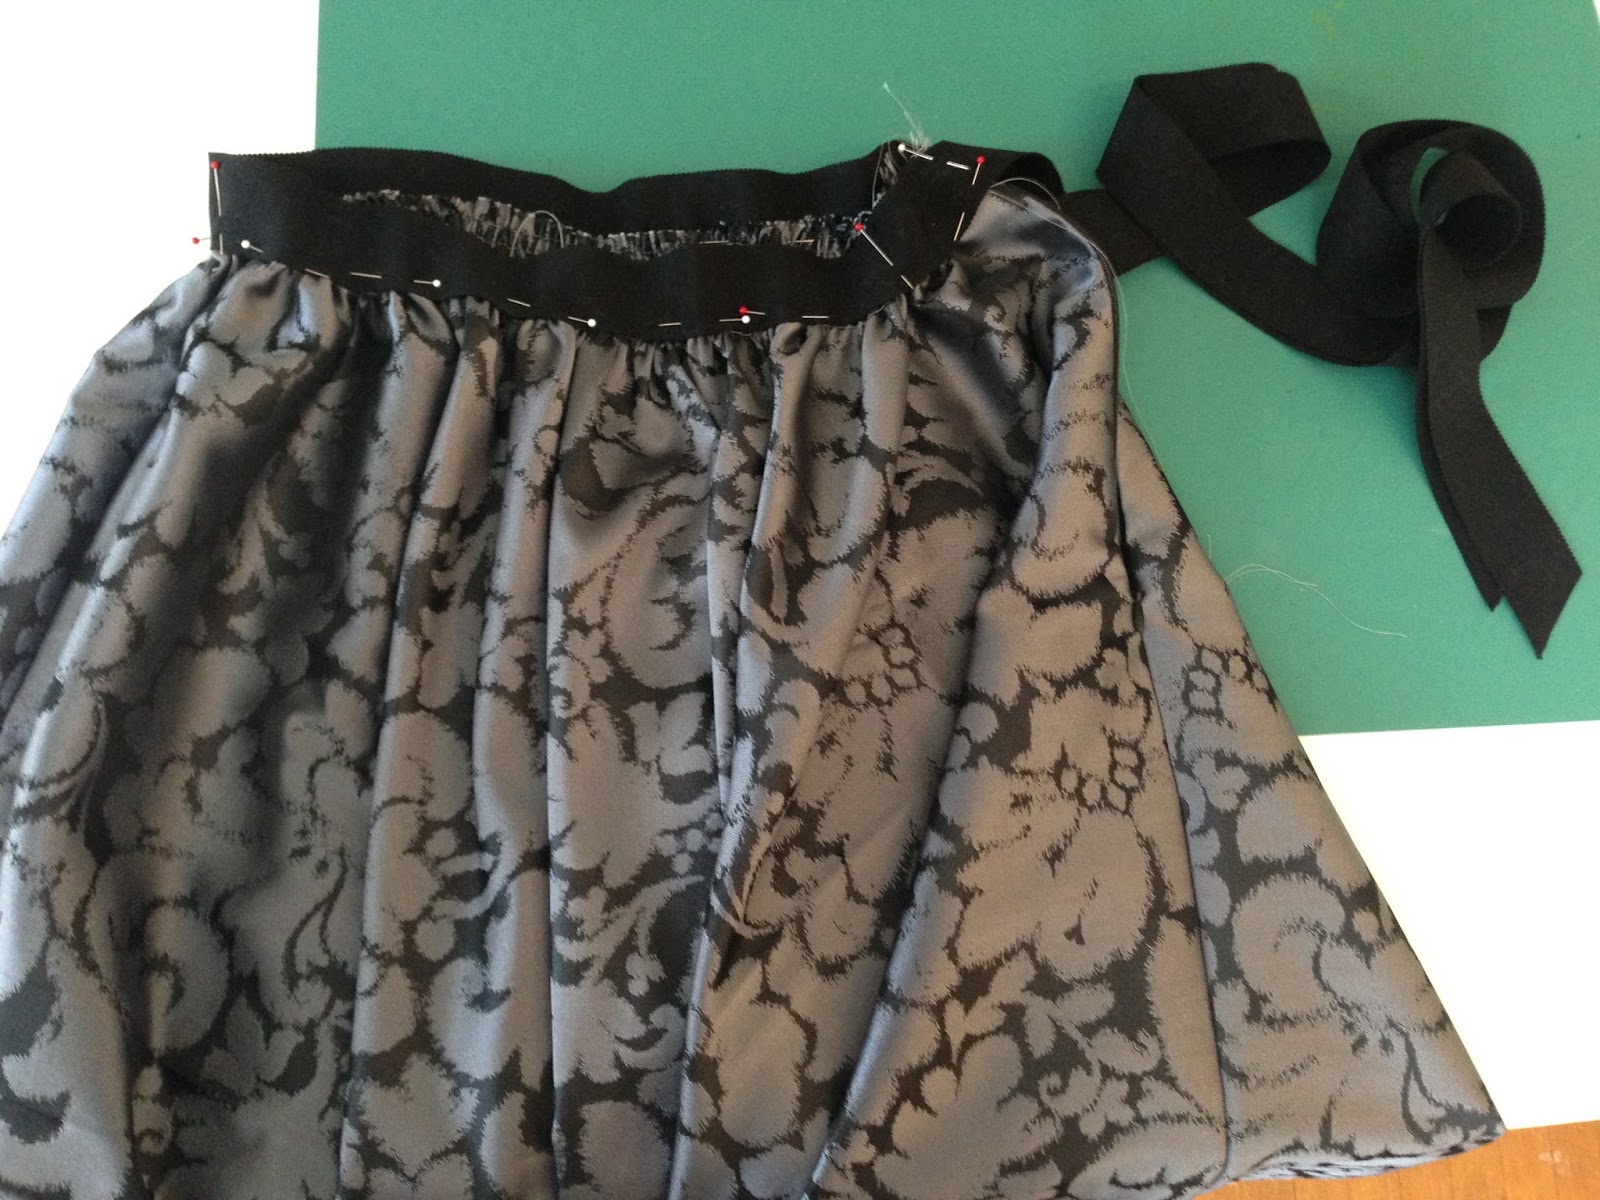
I edge stitched the grosgrain to the skirt.
Trimmed the seam allowance with my scissors on an angle (to get less of a blunt, bulky cut).
 And then pinned and stitched the second ribbon to the inside, edge stitching all the way around.
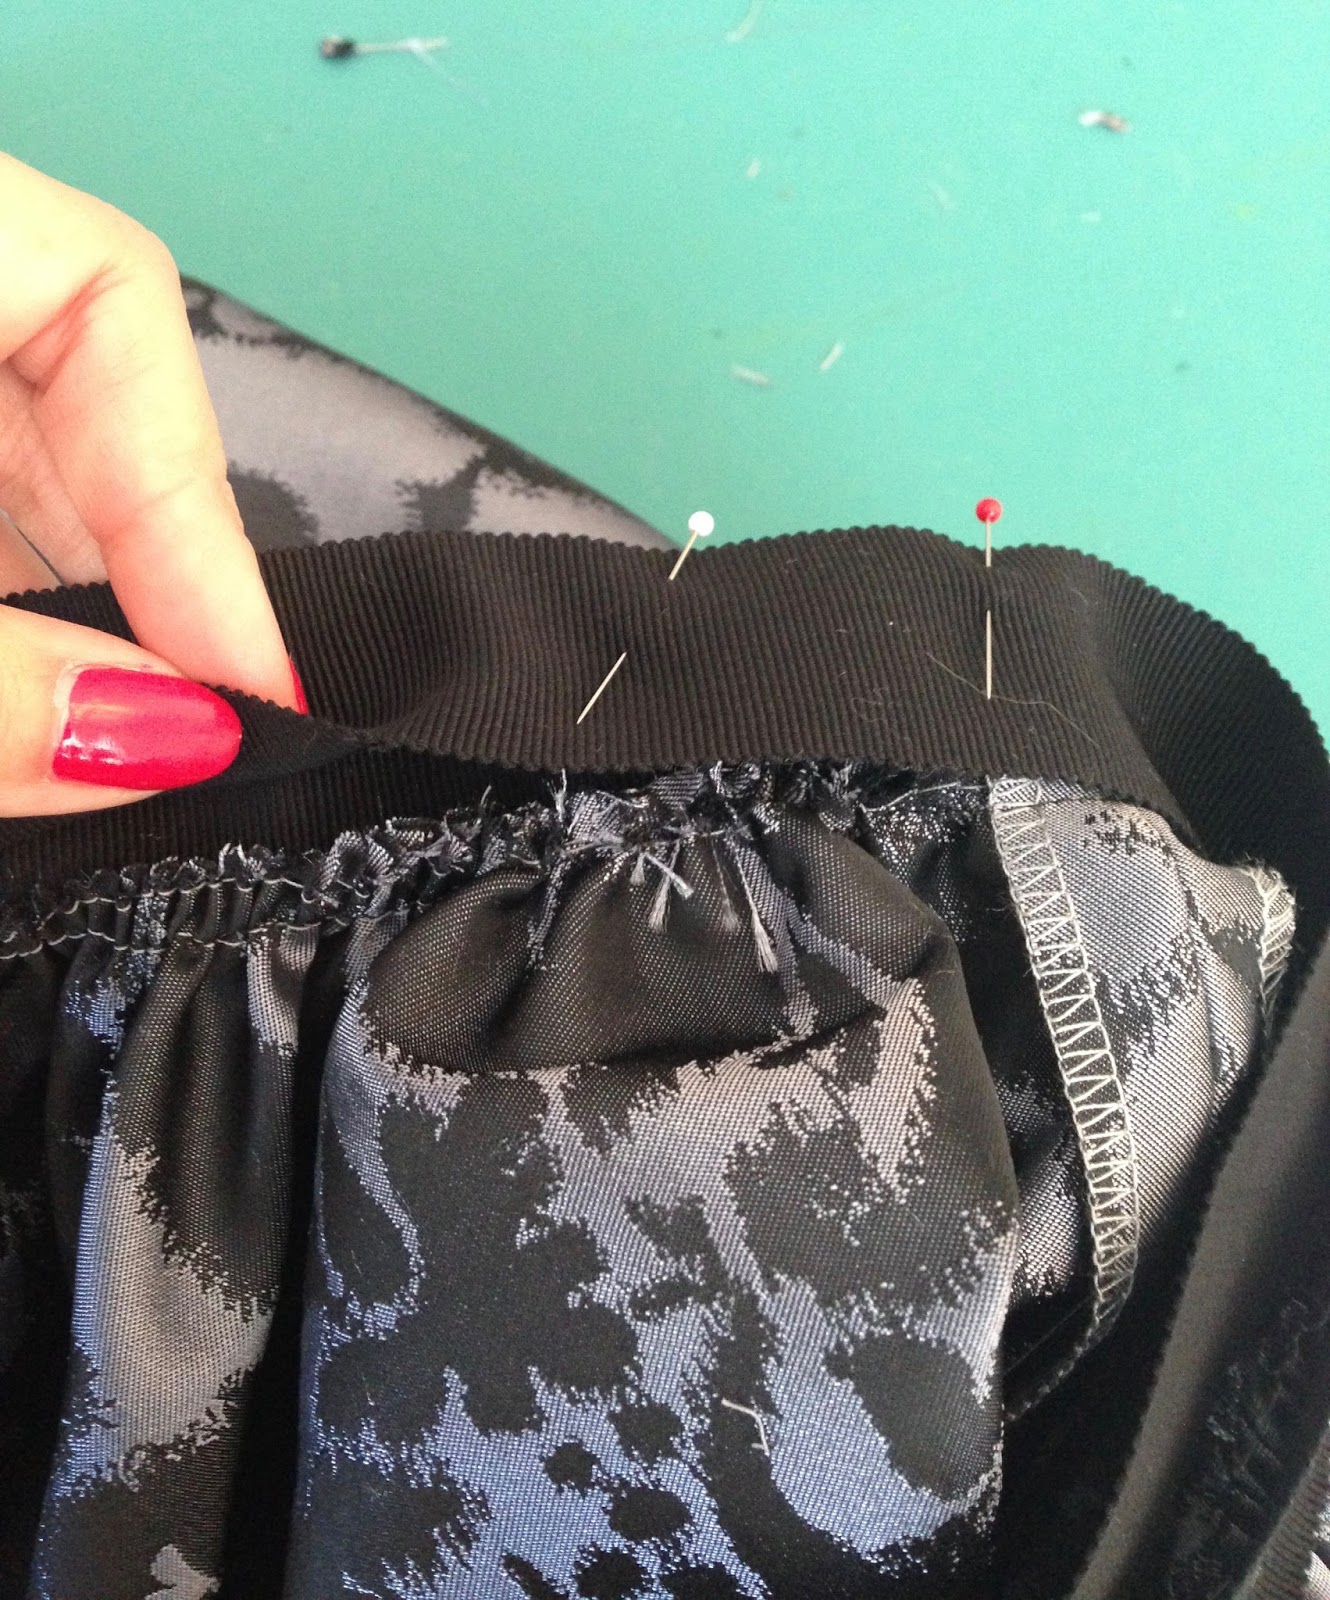 I finished the bottom hem with the rolled hem feature on my serger. This looks especially nice if you use Wooly Nylon thread in the loopers to get a satin-y finish. That's all there is to it!
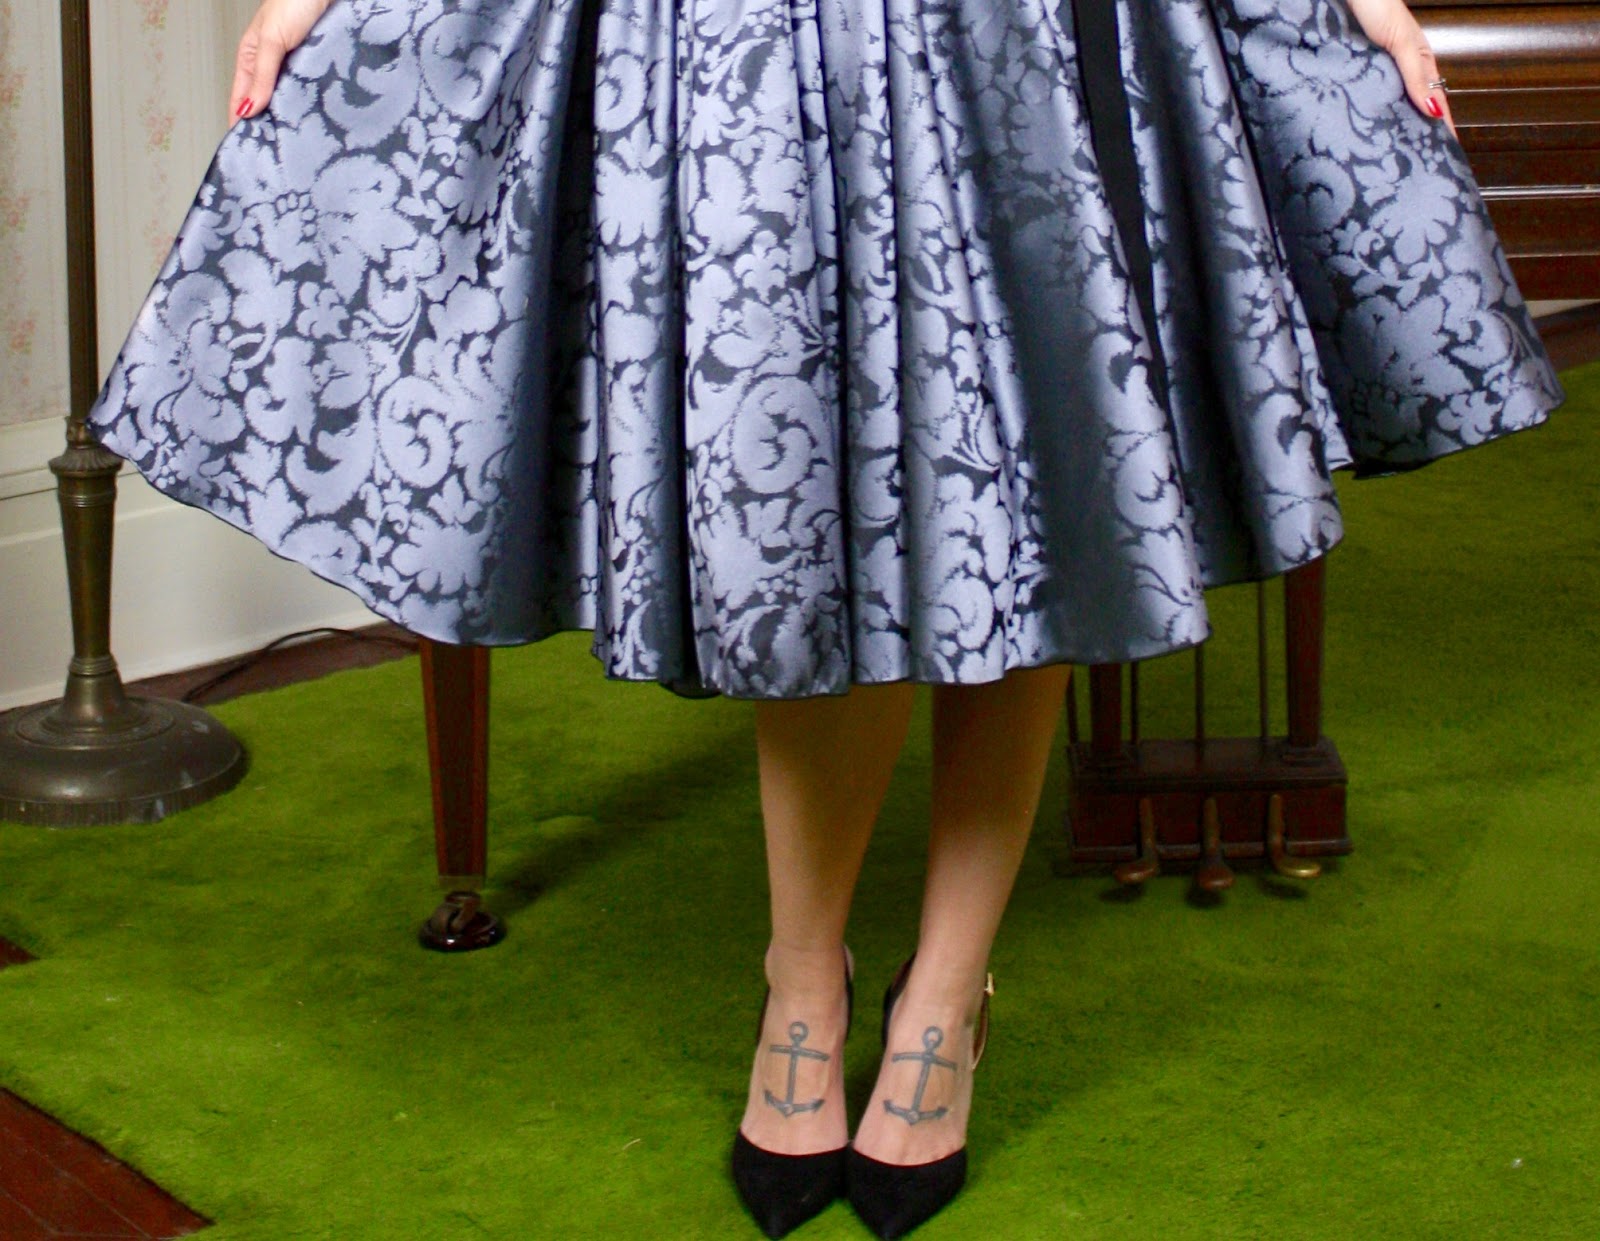
I'm wearing a chiffon petticoat for a little extra fullness.
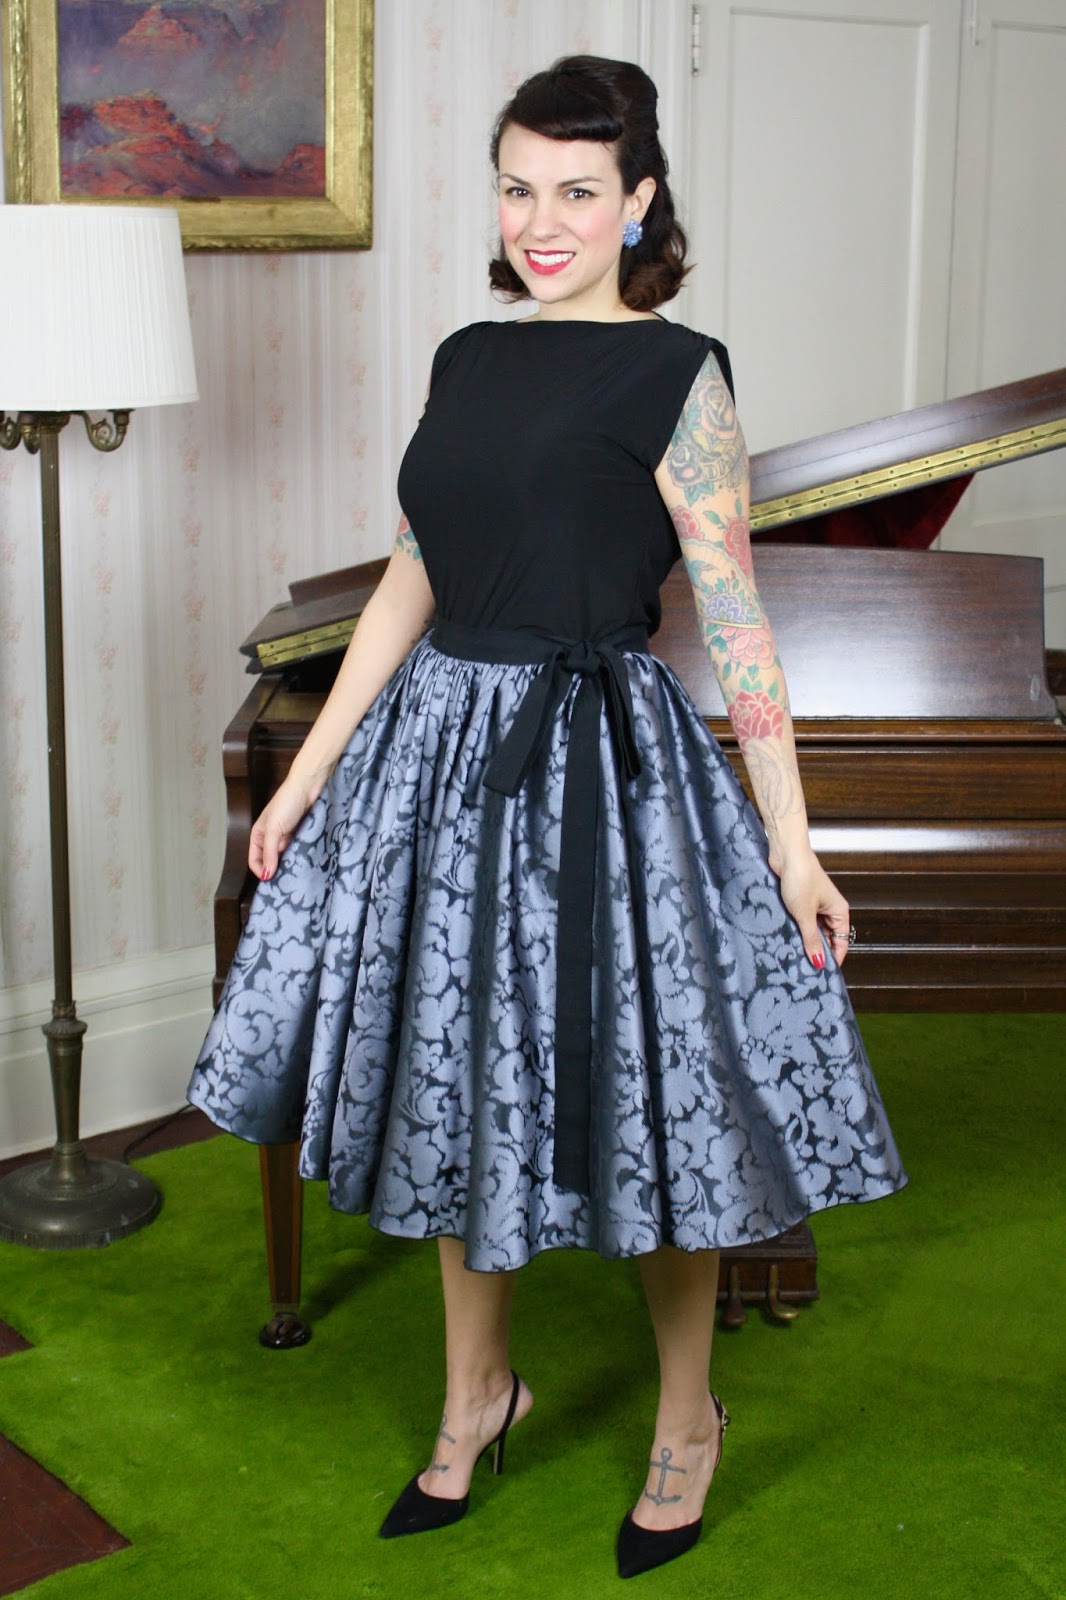
I made one little design change to the Simple Knit Top project. I sewed gathers at the shoulders for a pretty drapey look.
 Here's to holiday sewing!
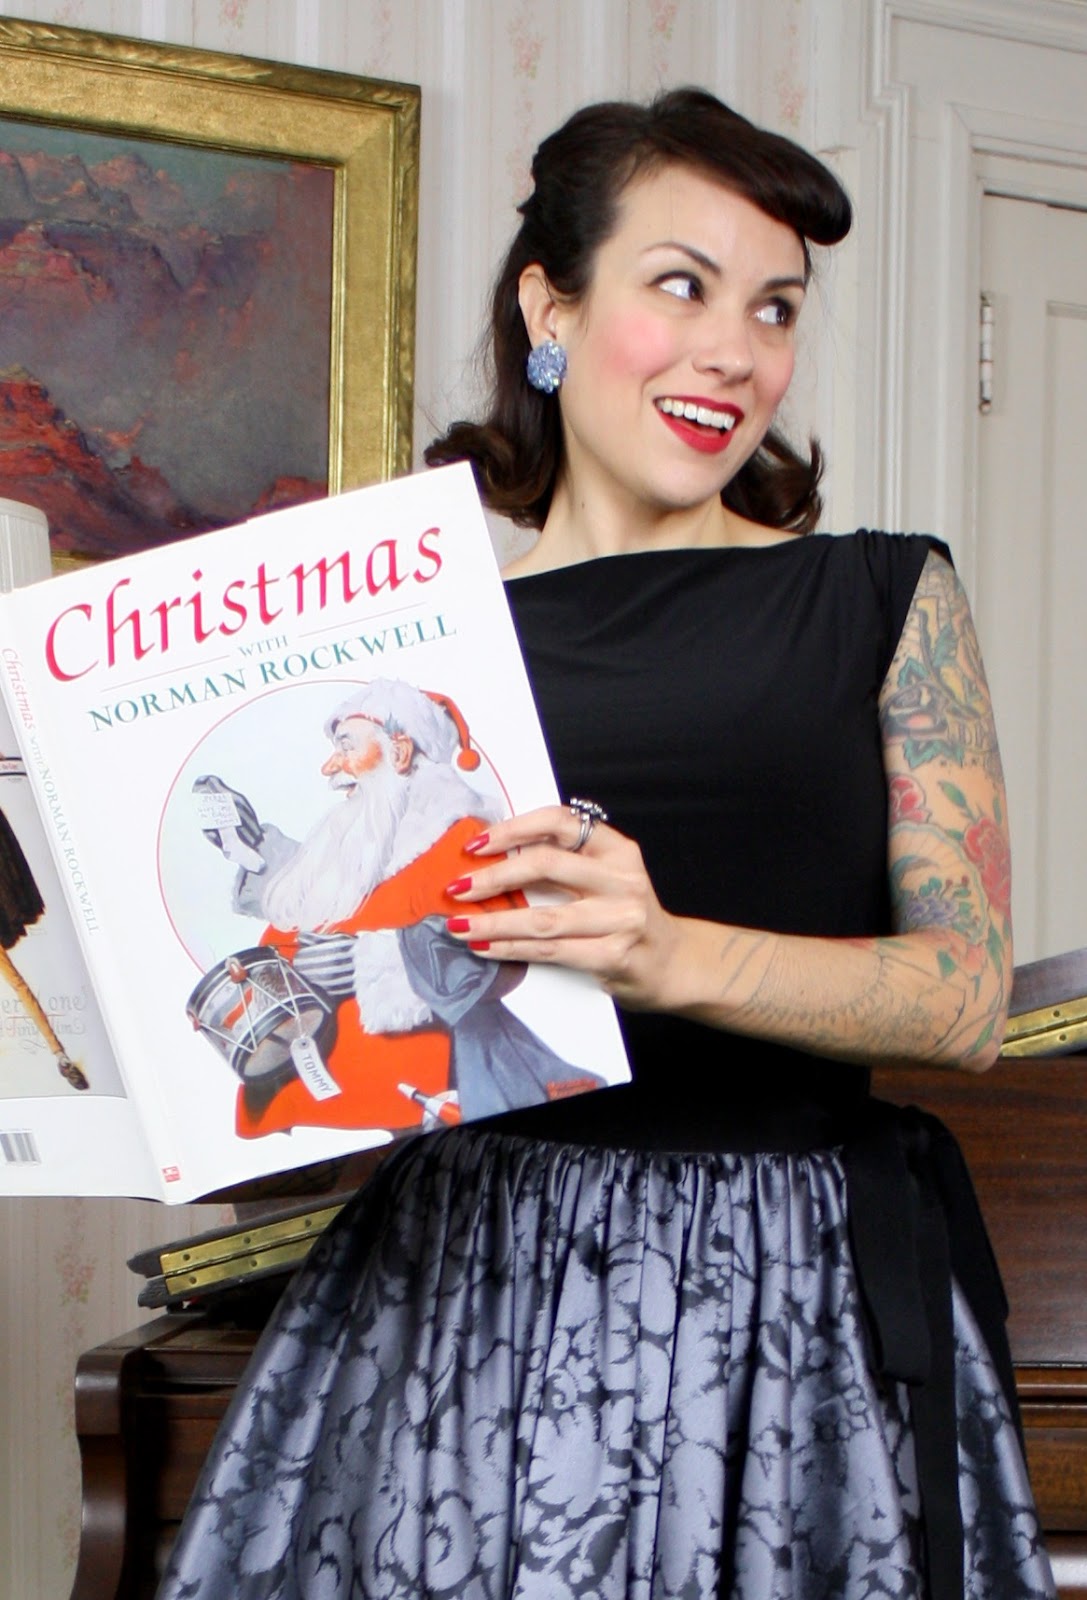
December 8, 2015
Knit Wrap Top Sew-Along #3: Cutting and Marking
 B6285 wrap top with the ties knotted in the backReady? Okay! Time to cut and mark our B6285 wrap tops.
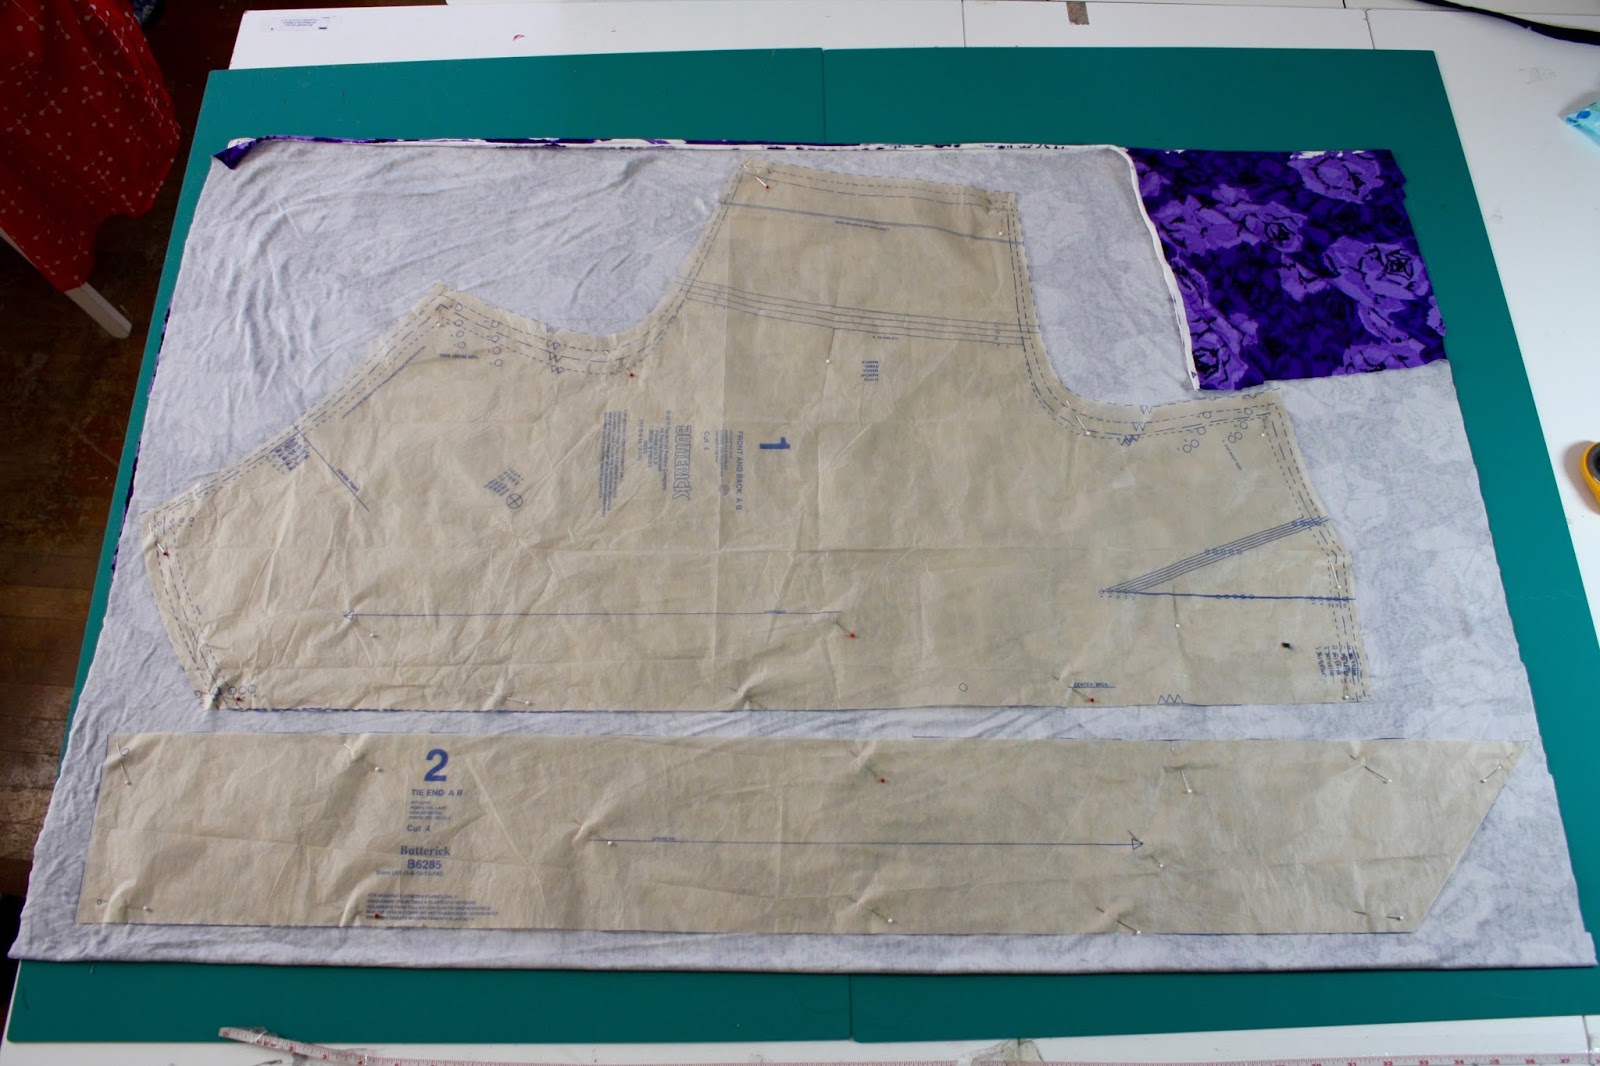
Now, the most important thing I want you to know is this: This top is self-lined. That means it looks the same on the inside as the outside (anyone want to try a reversible one?!). This also means that you need to cut doubles of everything--it's like making two tops.
Here is what I suggest. We're going to cut and mark one set of pattern pieces, and then repeat this process for the lining set. If you're in a rush, you can try making two double layers of fabric and cutting both sets at once, but it gets tricky and less accurate when you're cutting four layers of jersey.
You only have two pattern pieces.
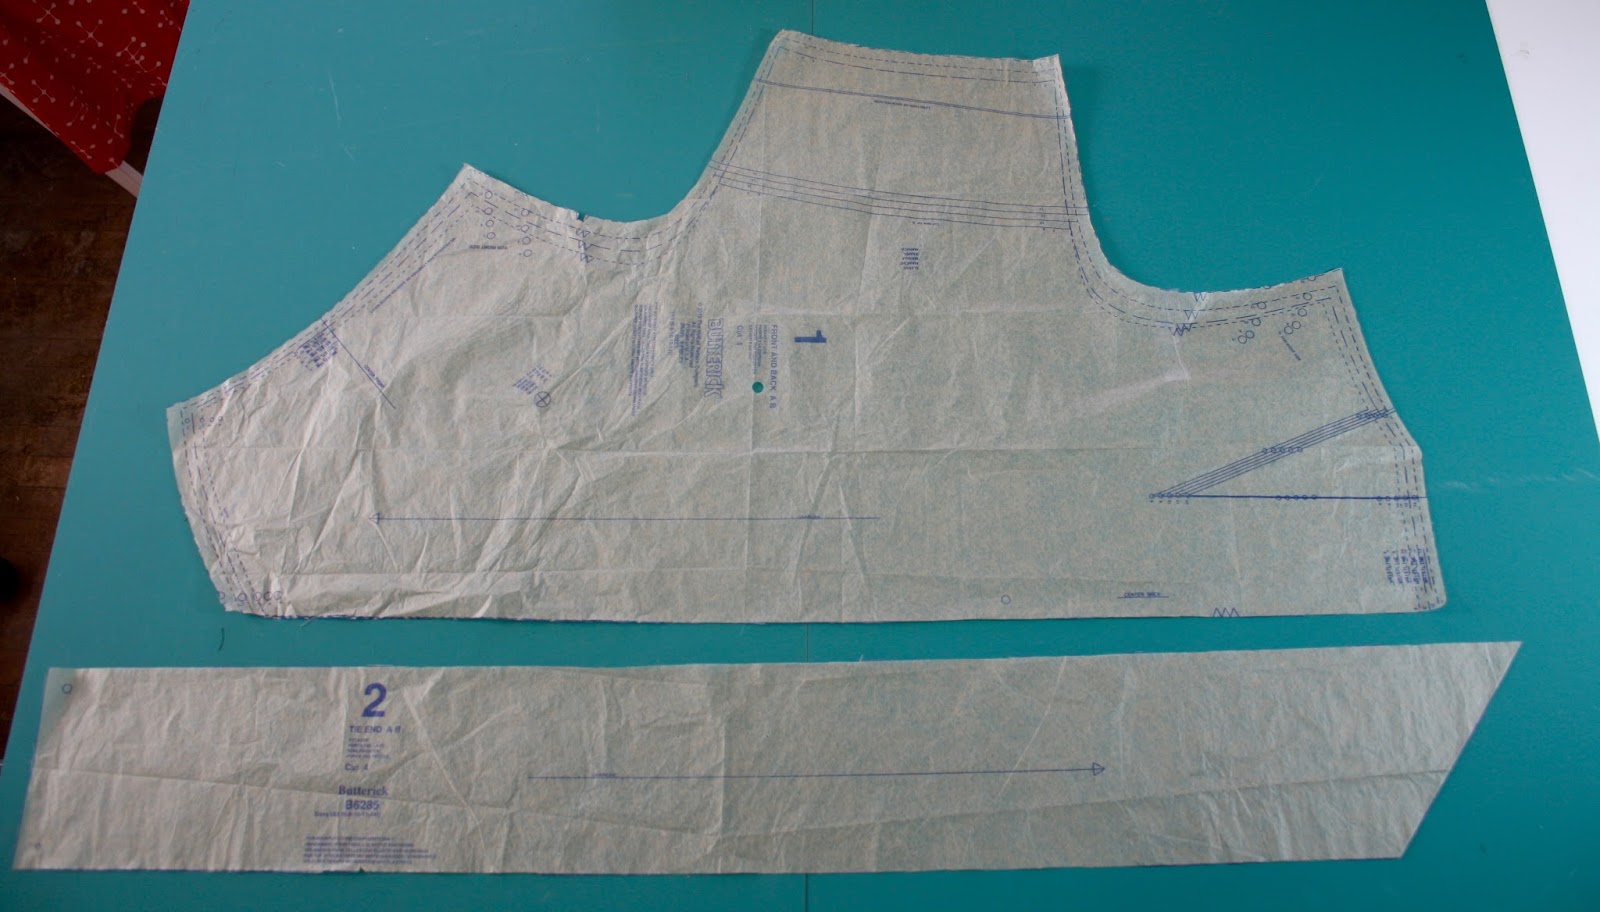
Piece #1 is the top front and back. There's no shoulder seam, so it's all one piece. Piece #2 is the tie.
They get cut out on a double layer of fabric, with the selvages matching at the top and the fold at the bottom.
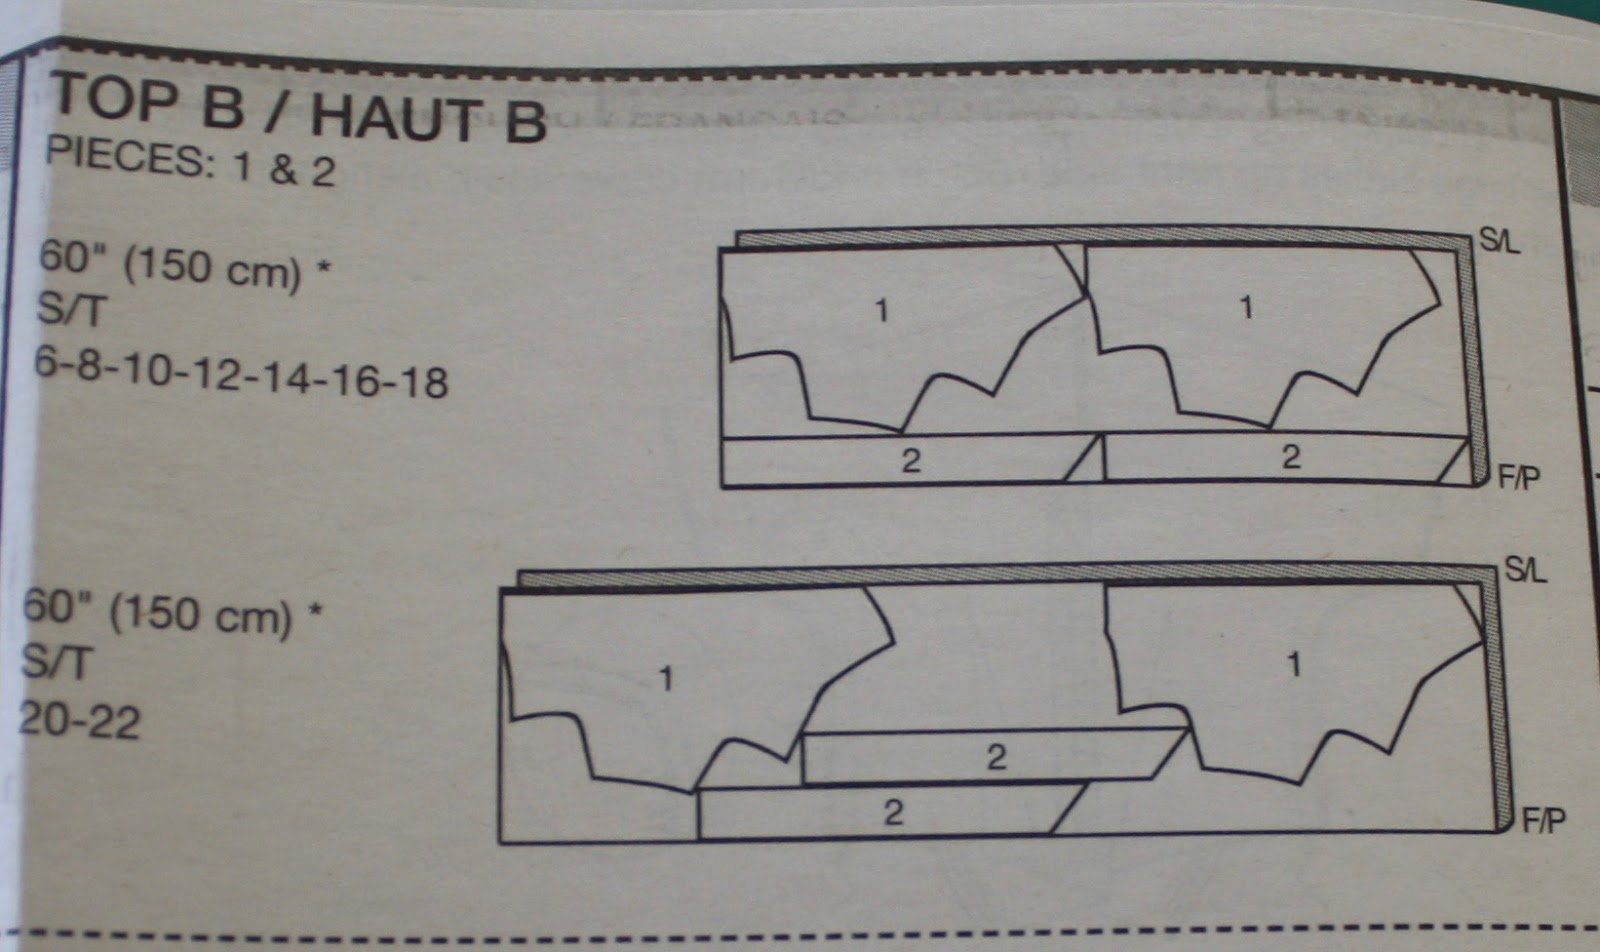
So lay out your fabric on your table with the right sides together, and place the pieces like this. Make sure the fabric is as smooth as possible, and that it doesn't twist as you're laying it out.
See how the selvages are on top of each other at the upper right corner? And then the fold is at the bottom.

After the pieces are pinned in place, cut! This is a great time to use serrated cutting shears (they grab the jersey so it doesn't slip around) or a rotary cutter.
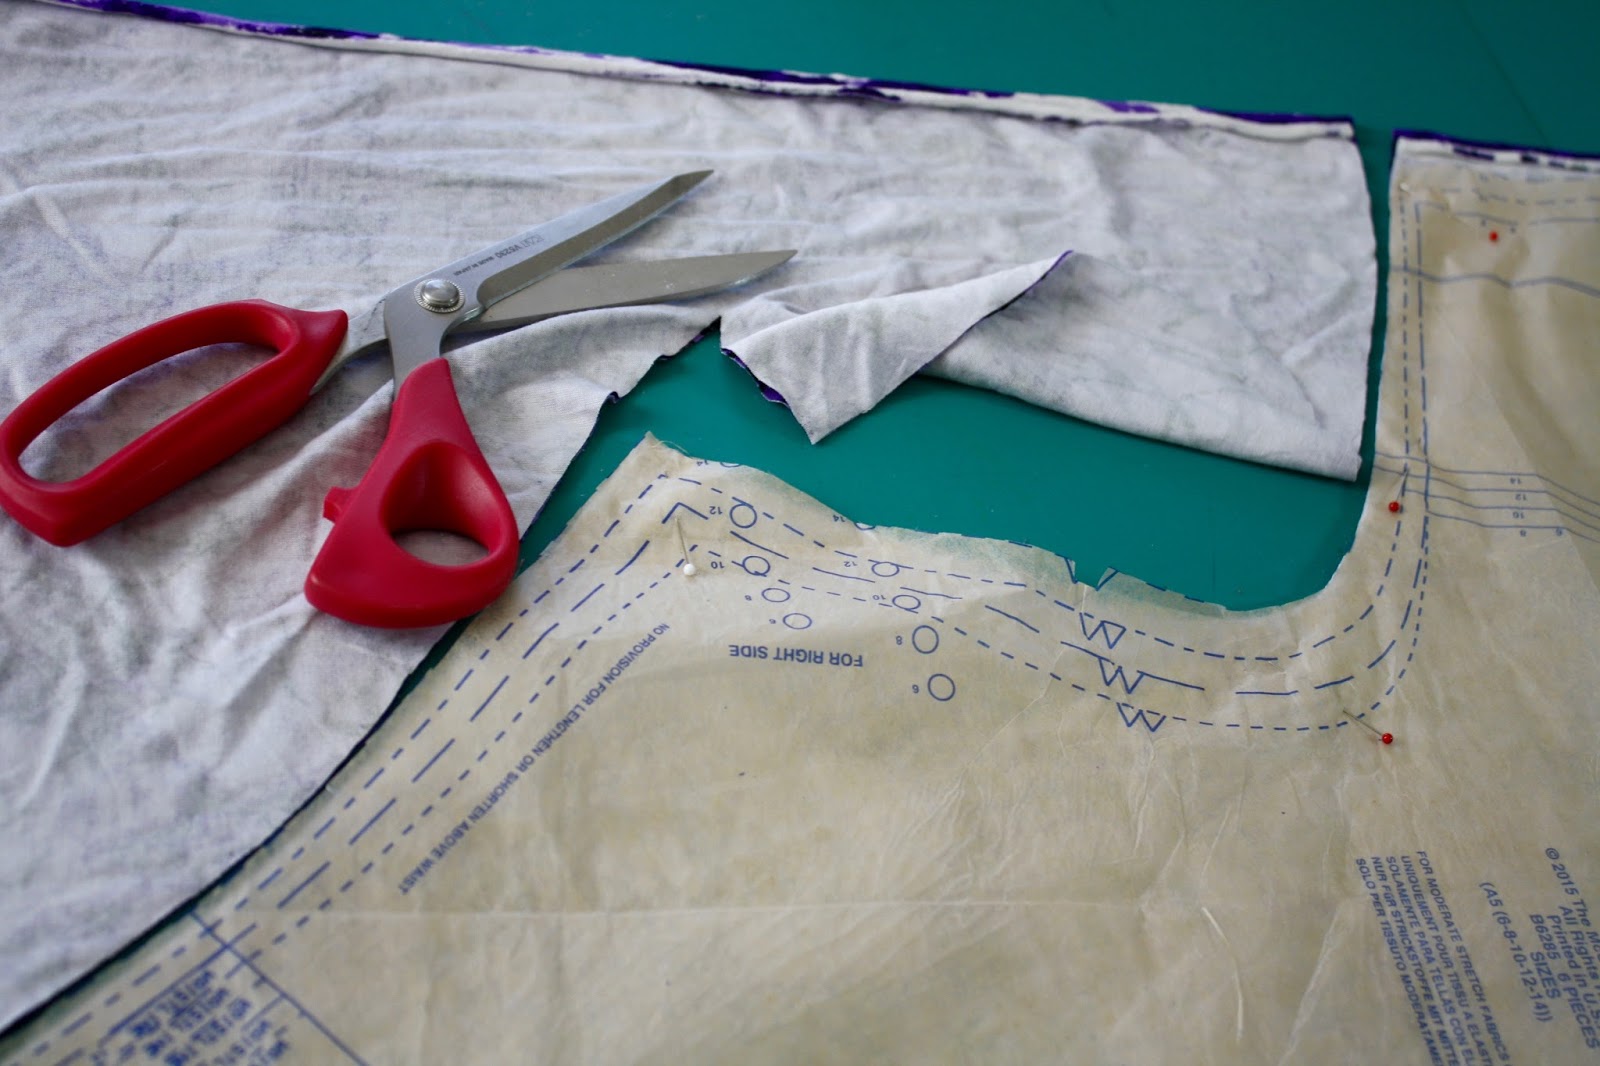
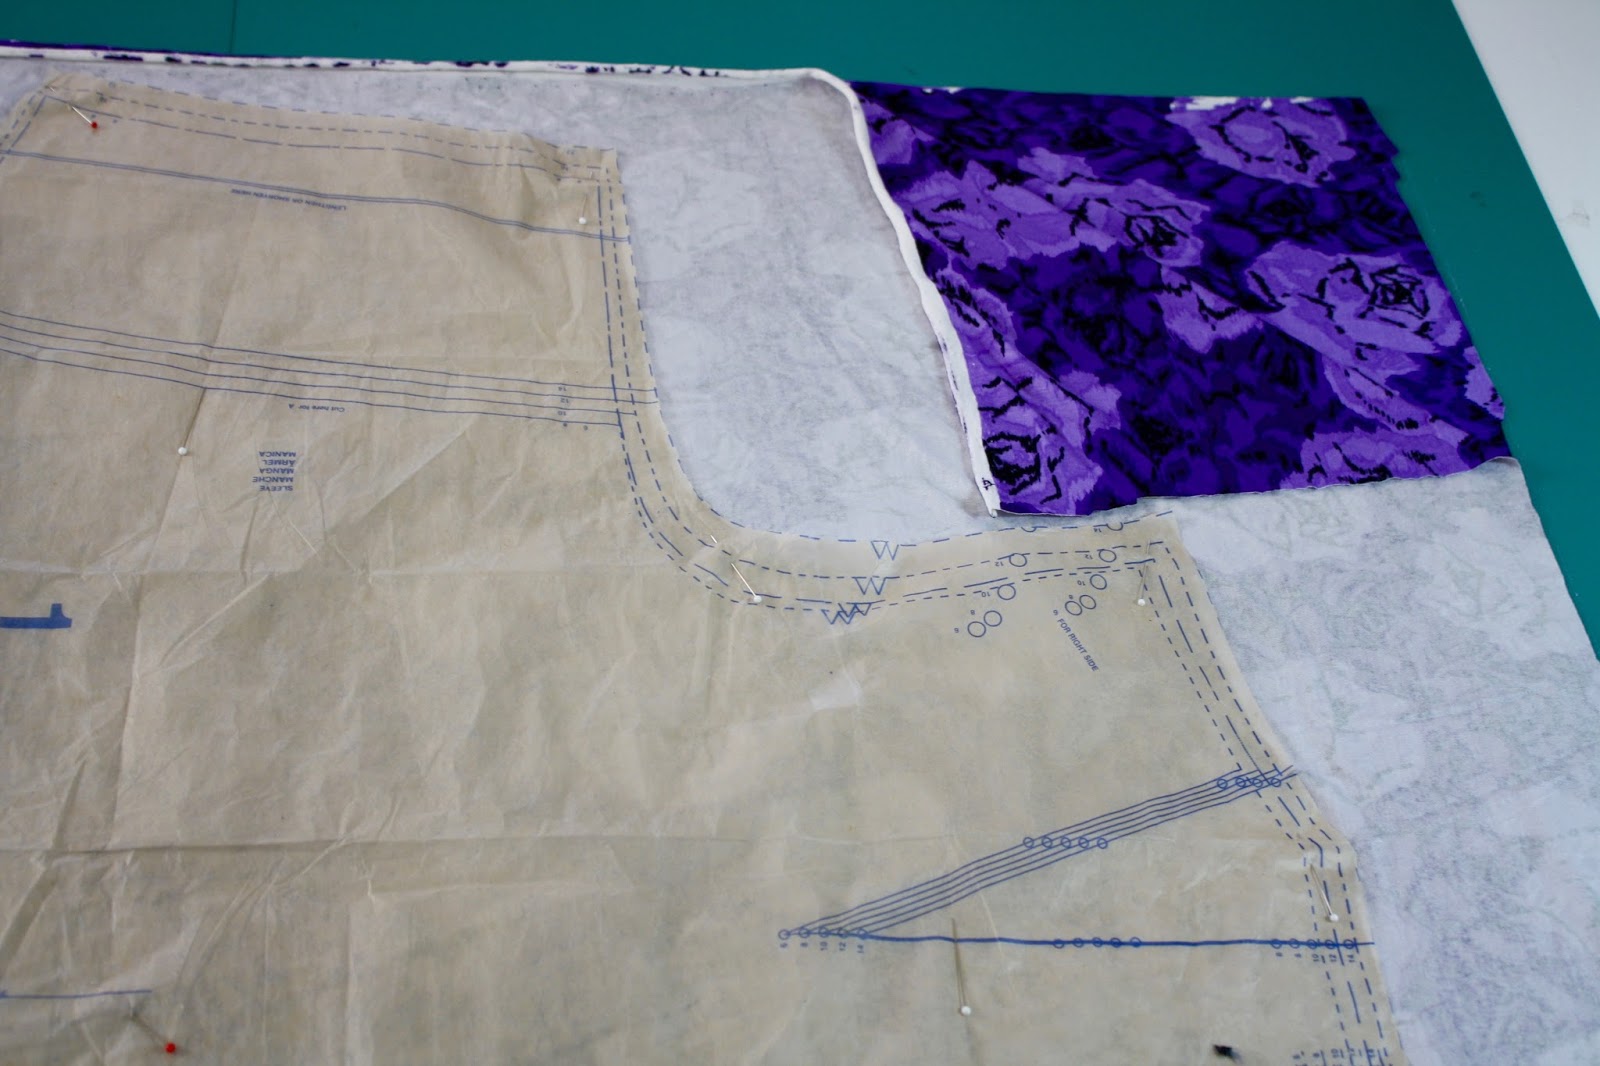
Once you've cut around the two pieces, start by clipping into any notches. It's much easier to just make one little snip into the point of the notch rather than try to cut out the triangle shape of the notch.
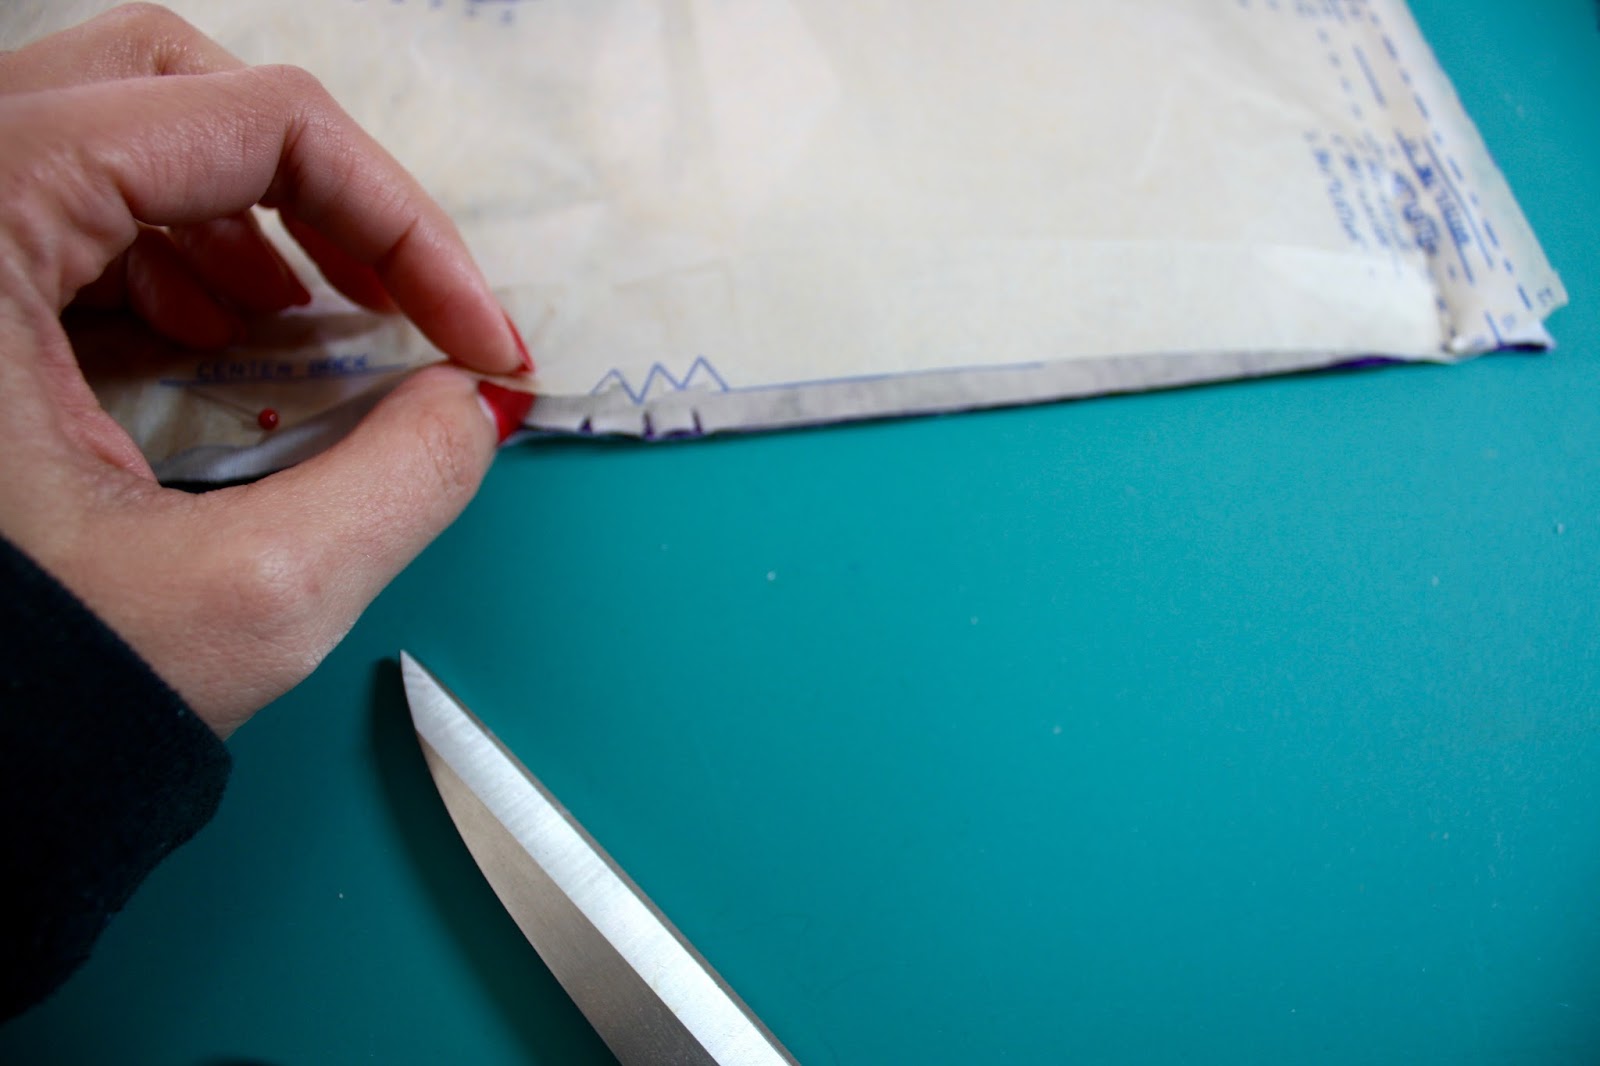
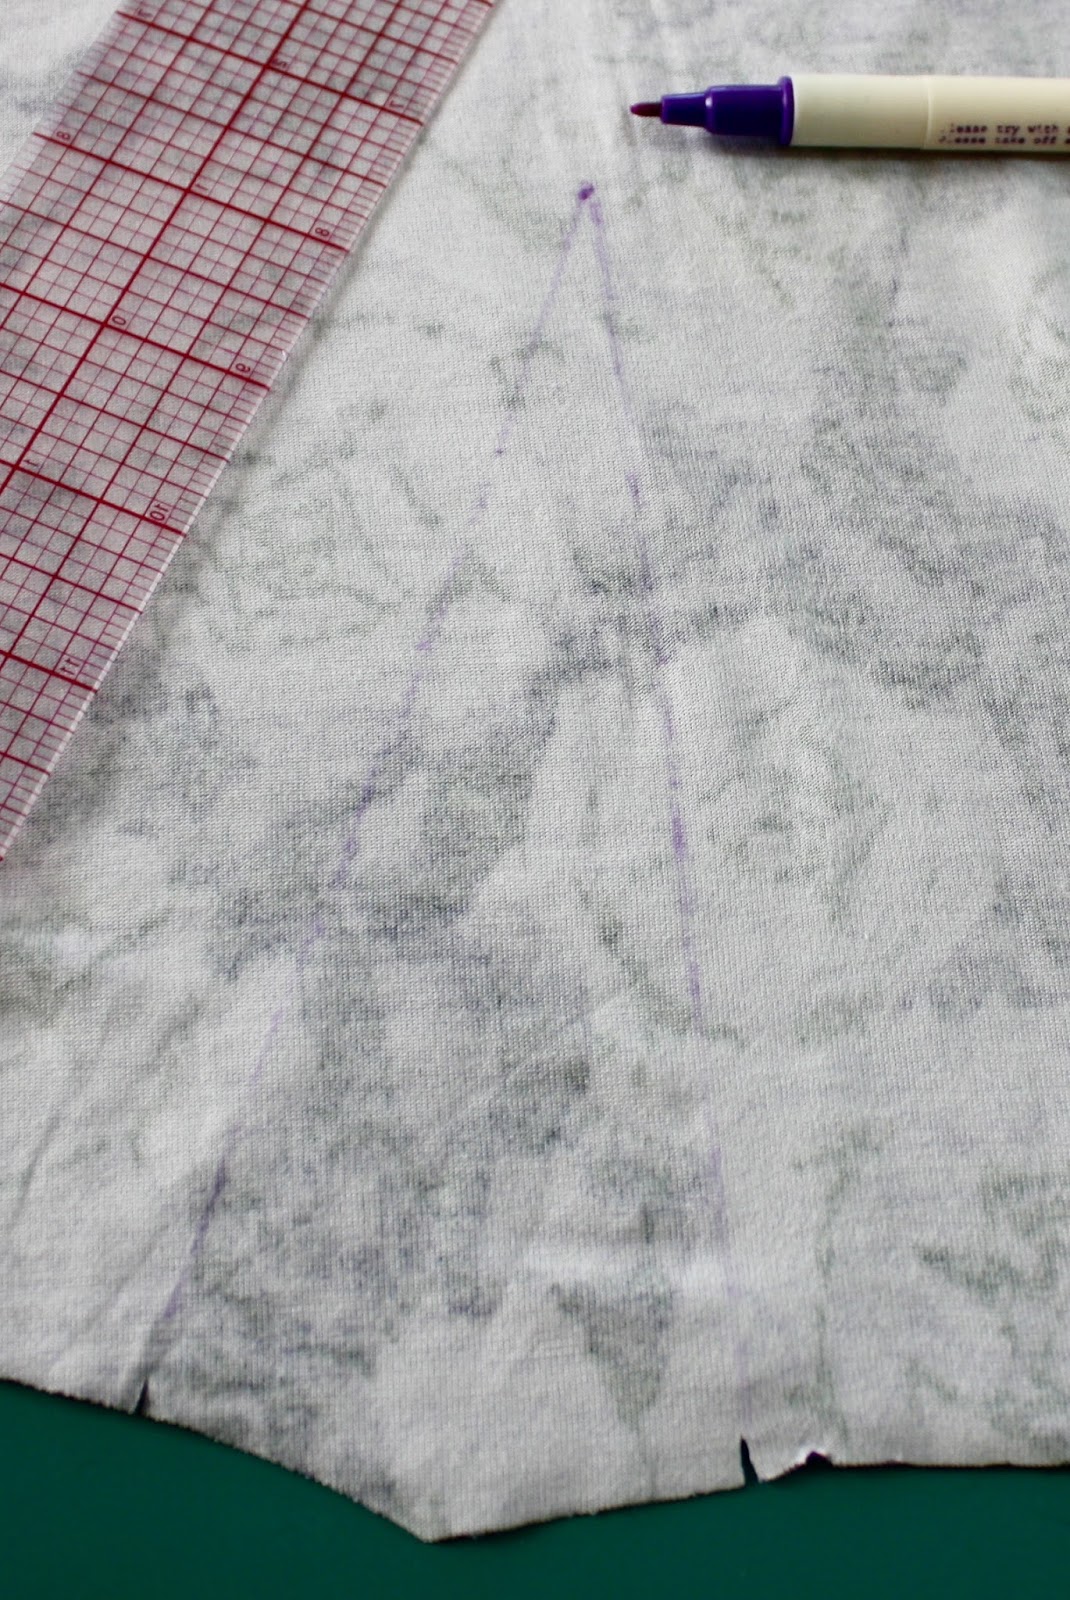
Next, transfer any circles, like the ones on the end of the ties. I like to do this with a disappearing ink pen. First, place pins into the center of the circle.
Then, use your marking pen to make a circle on both wrong sides at the pin point.
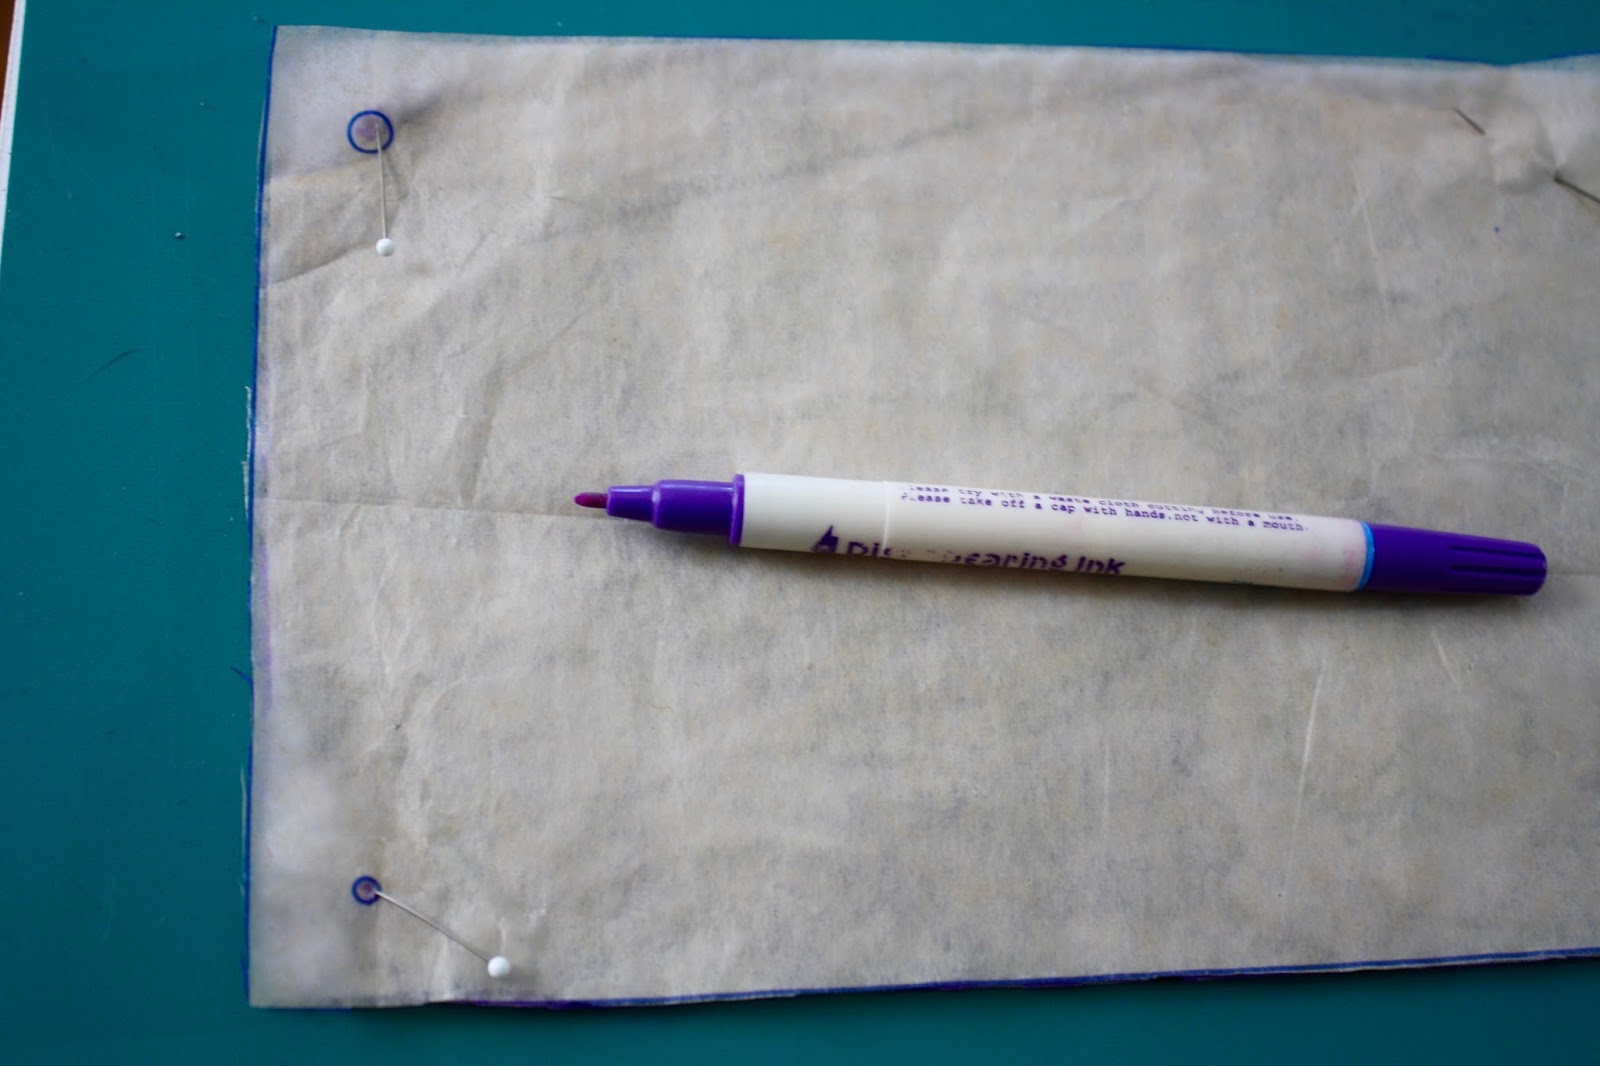
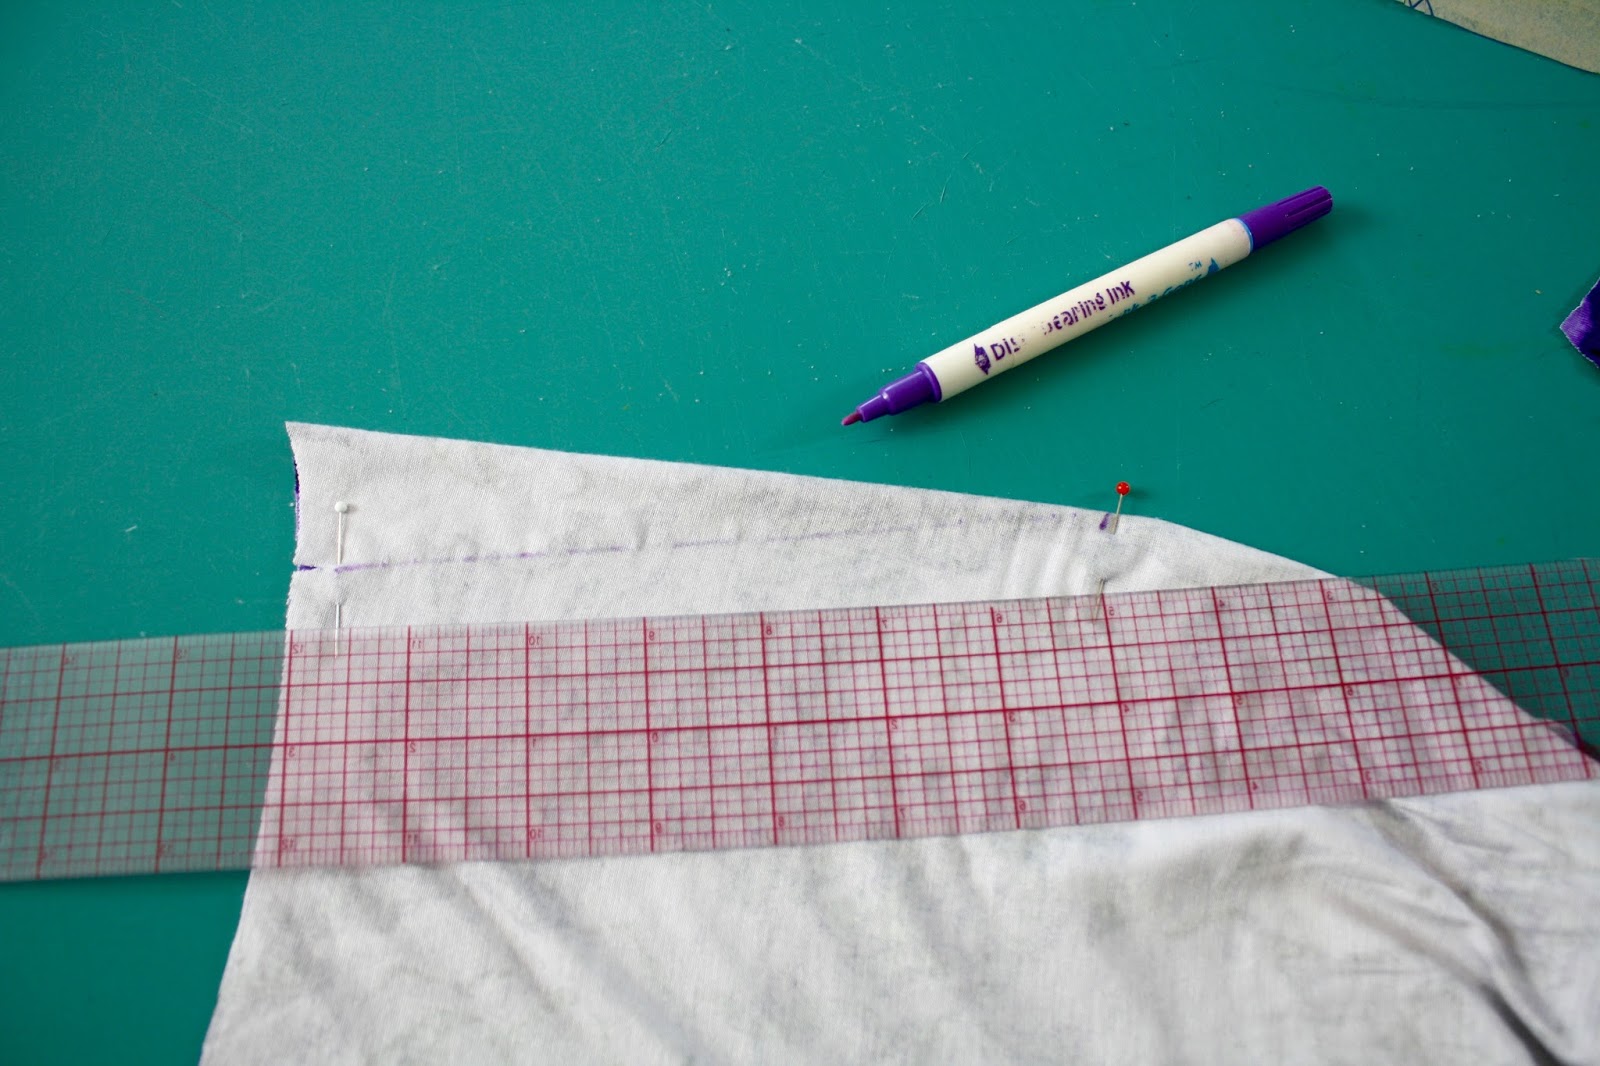
Other important circles to mark are located at the Center Back on piece #1 (above the triple notch):
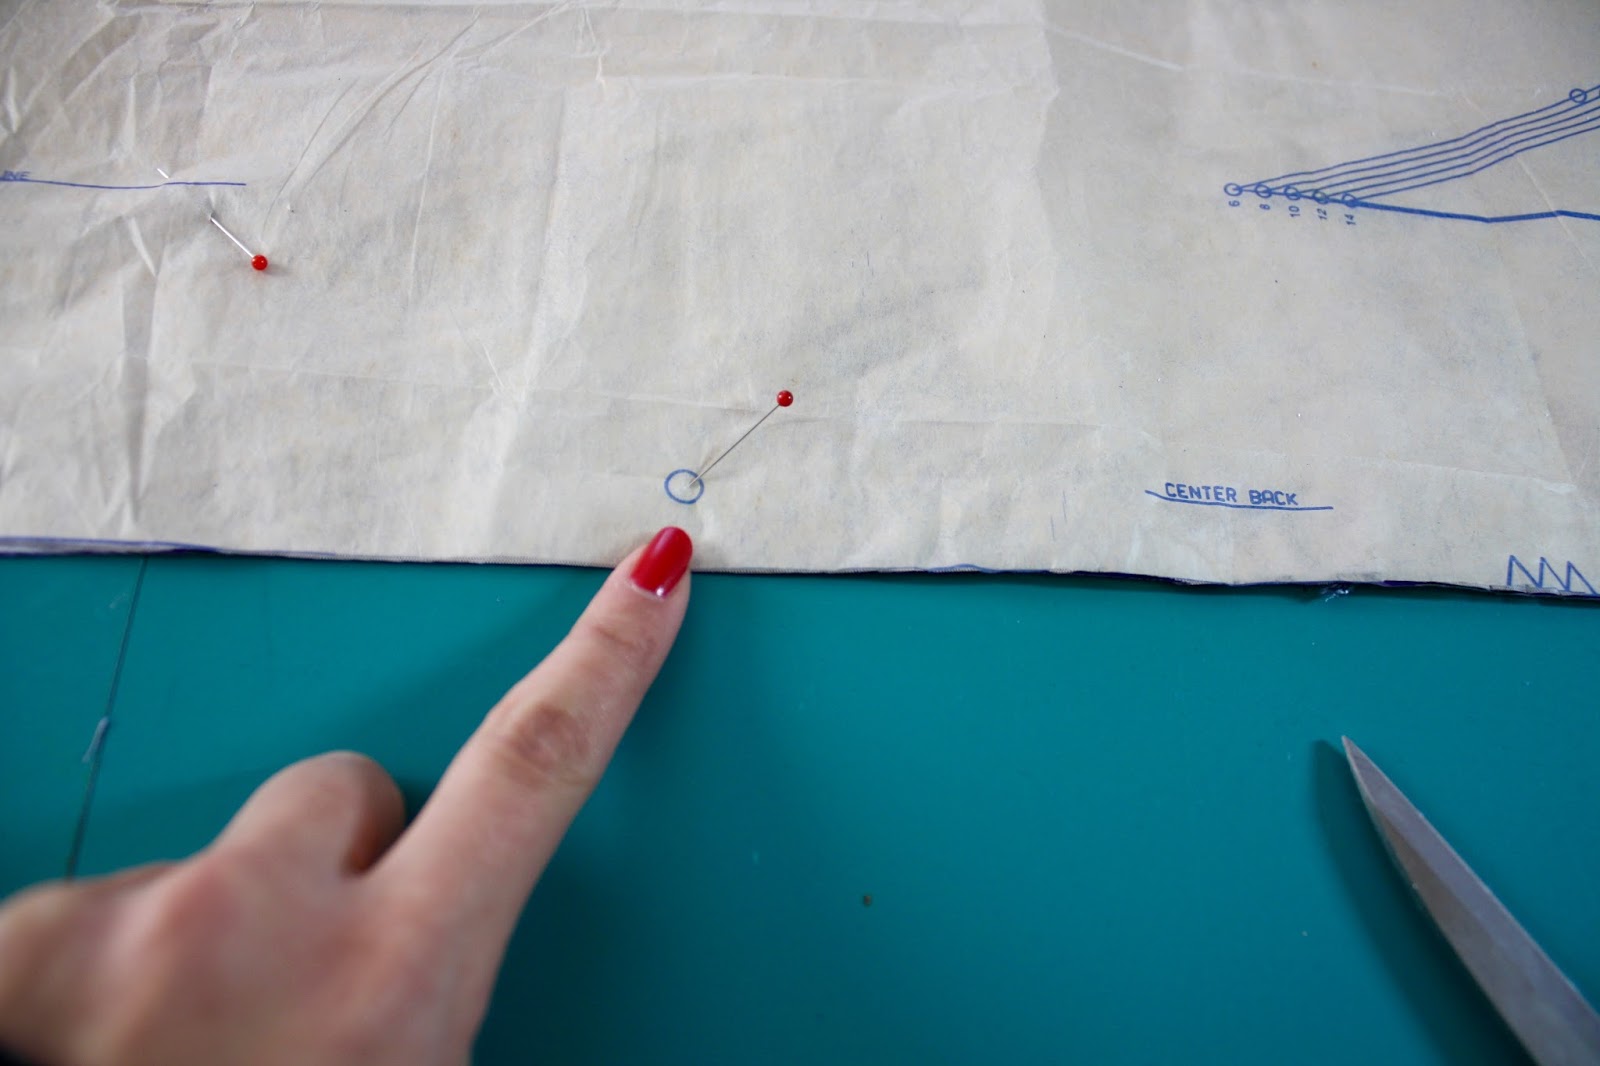
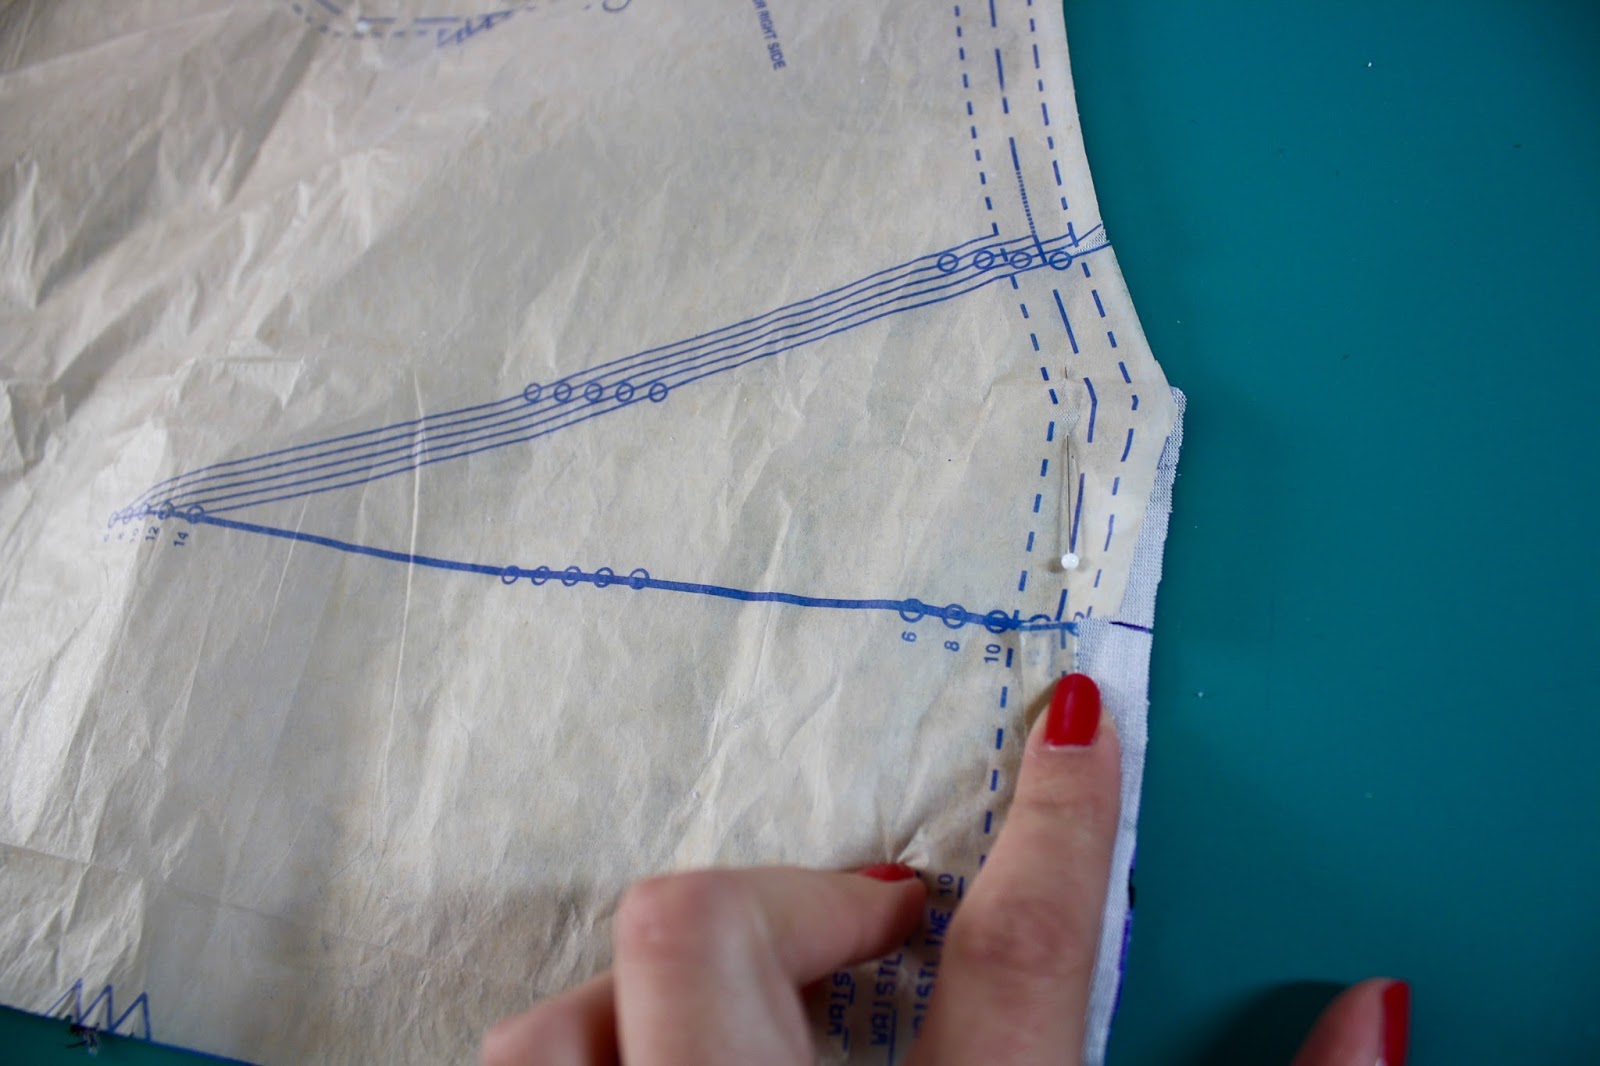
And the side seam of piece #1, where there are two circles.
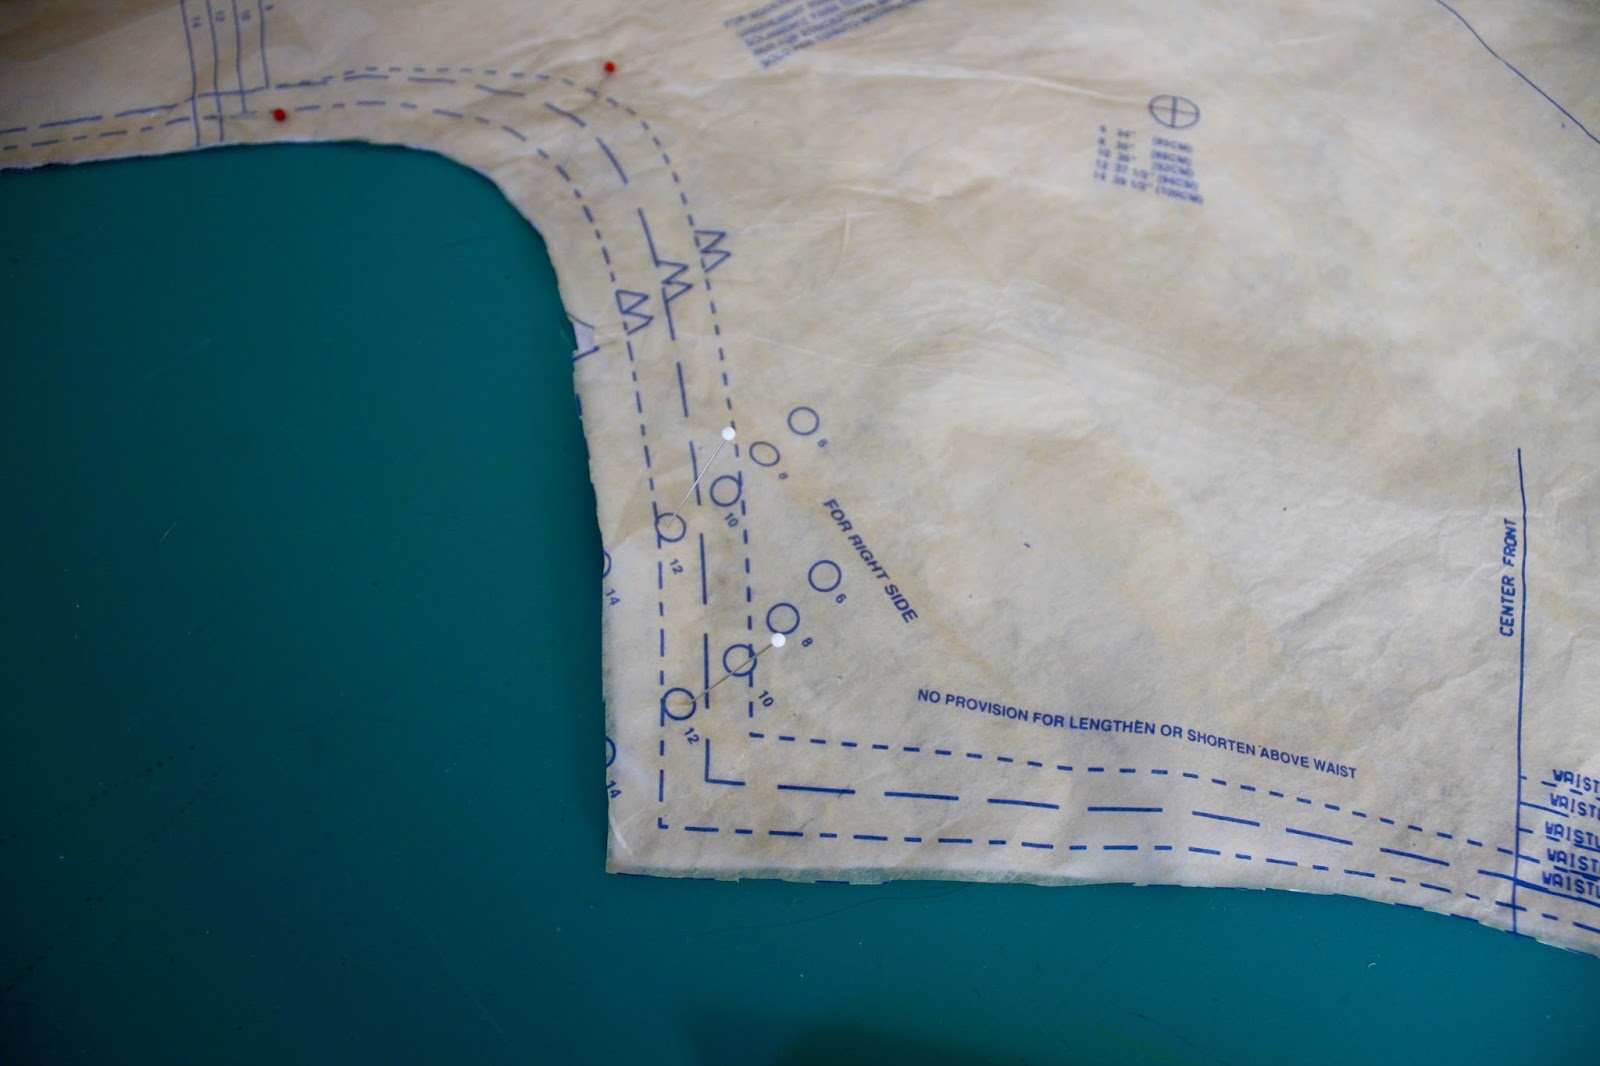
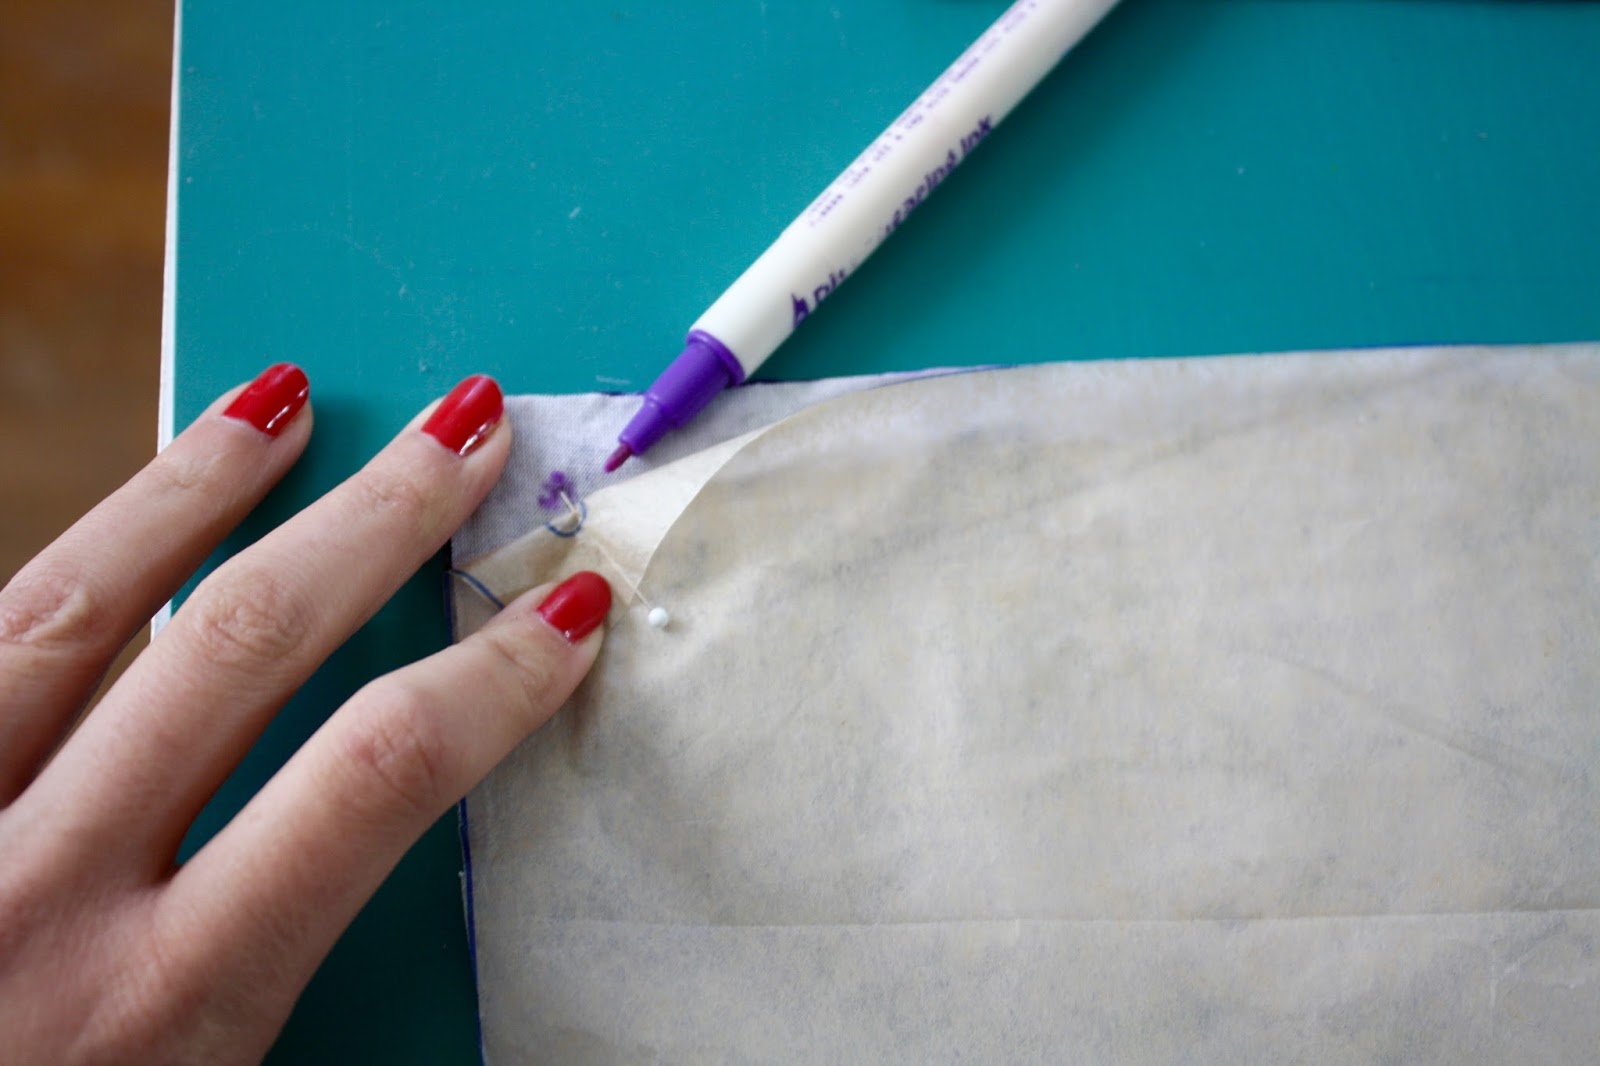
Next, mark your dart on piece #1. It can be difficult to use a tracing wheel on knits, so here's how I do it. First, clip into the legs of the dart.
 Then, mark the little circle at the top of the dart, using the pin method as above.
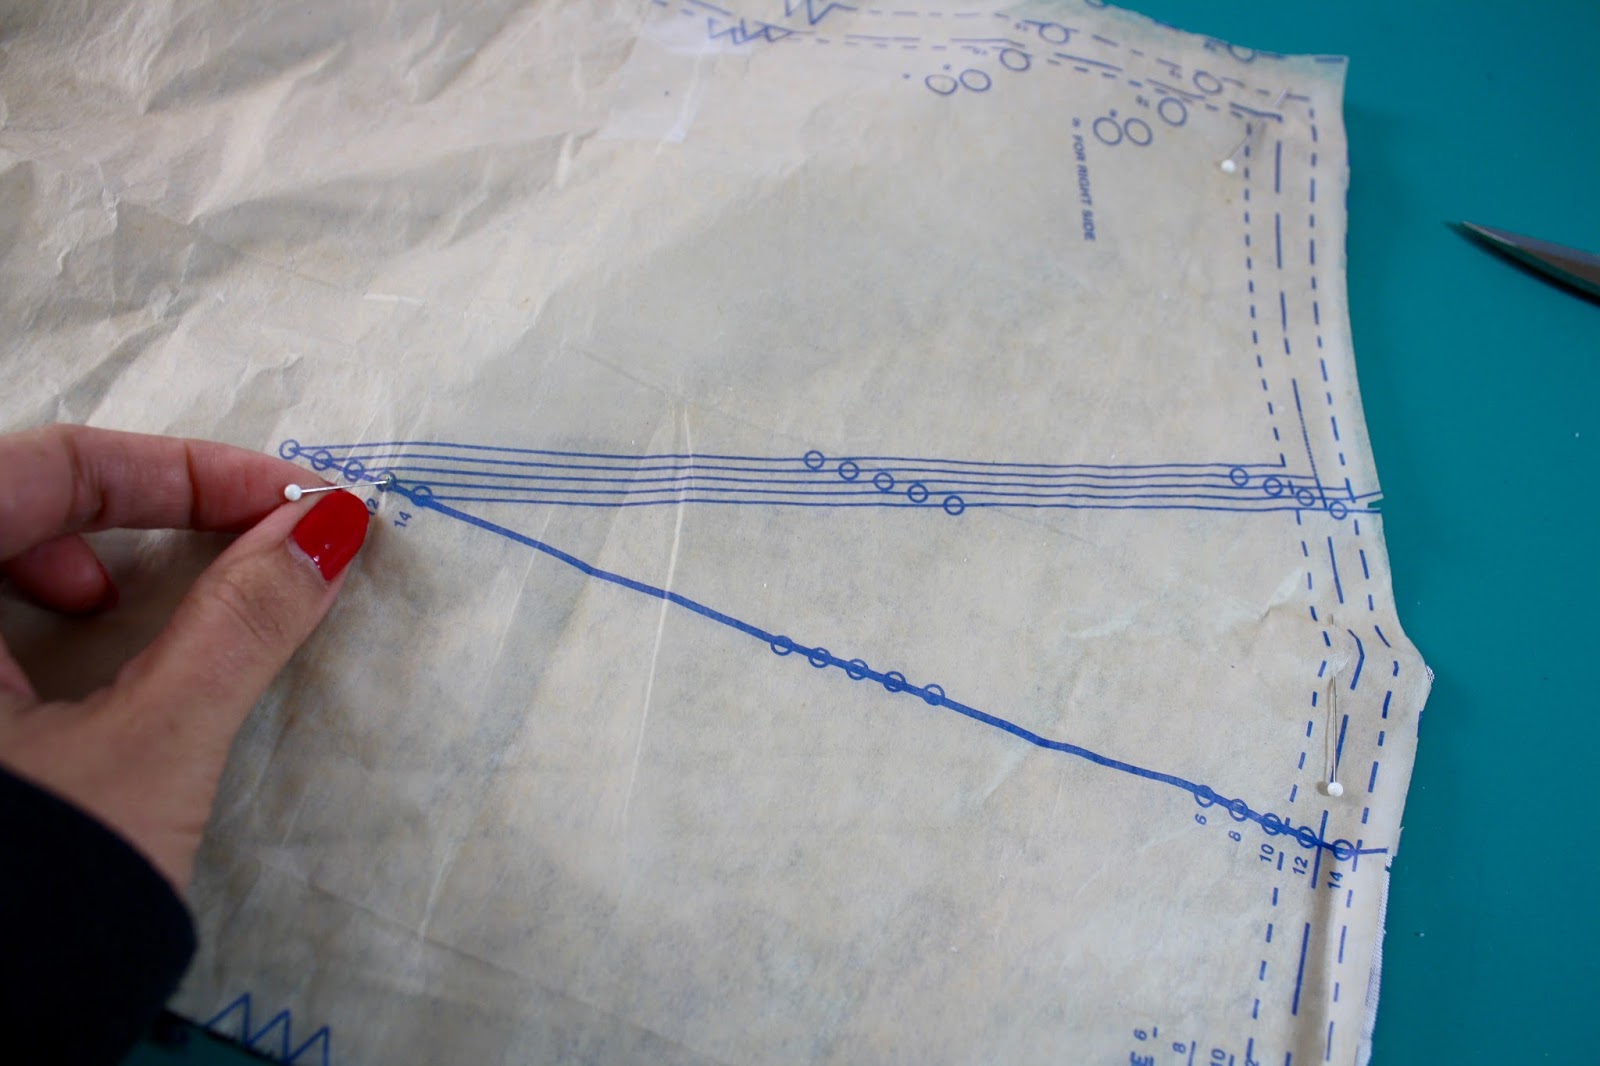
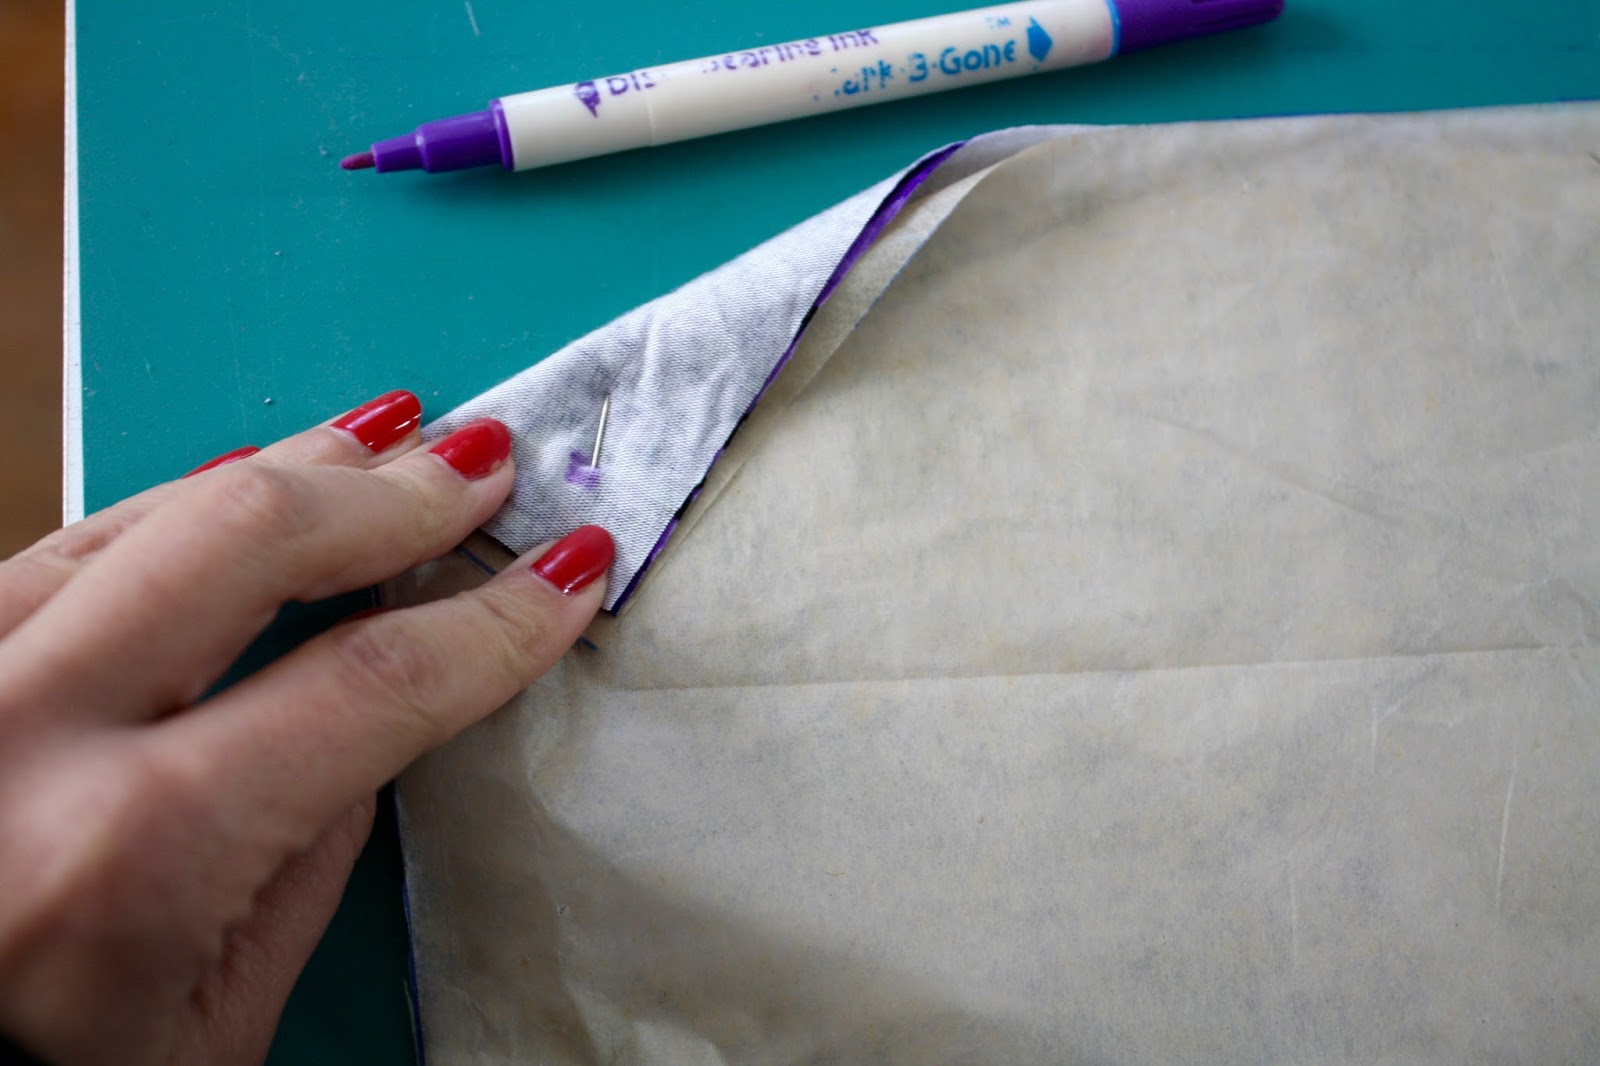
When you take off the tissue, you can use a ruler and your marking pen to connect the clips to the circle.
Alternatively, if you're feeling gutsy, you can just use the clips to fold together the dart and then stitch in a (hopefully) straight line to your circle point when you sew the dart.
Okay, now all your circles and darts are marked, and you have made little clips into all the triangular notches. Remove the pattern tissue from your cut pieces, and then repeat the whole process so that you have two sets of everything!
Now you have two pairs of pattern piece #1 and two pairs of pattern piece #2.
Next time, we'll start sewing! In the meantime, let me know if you have any questions.
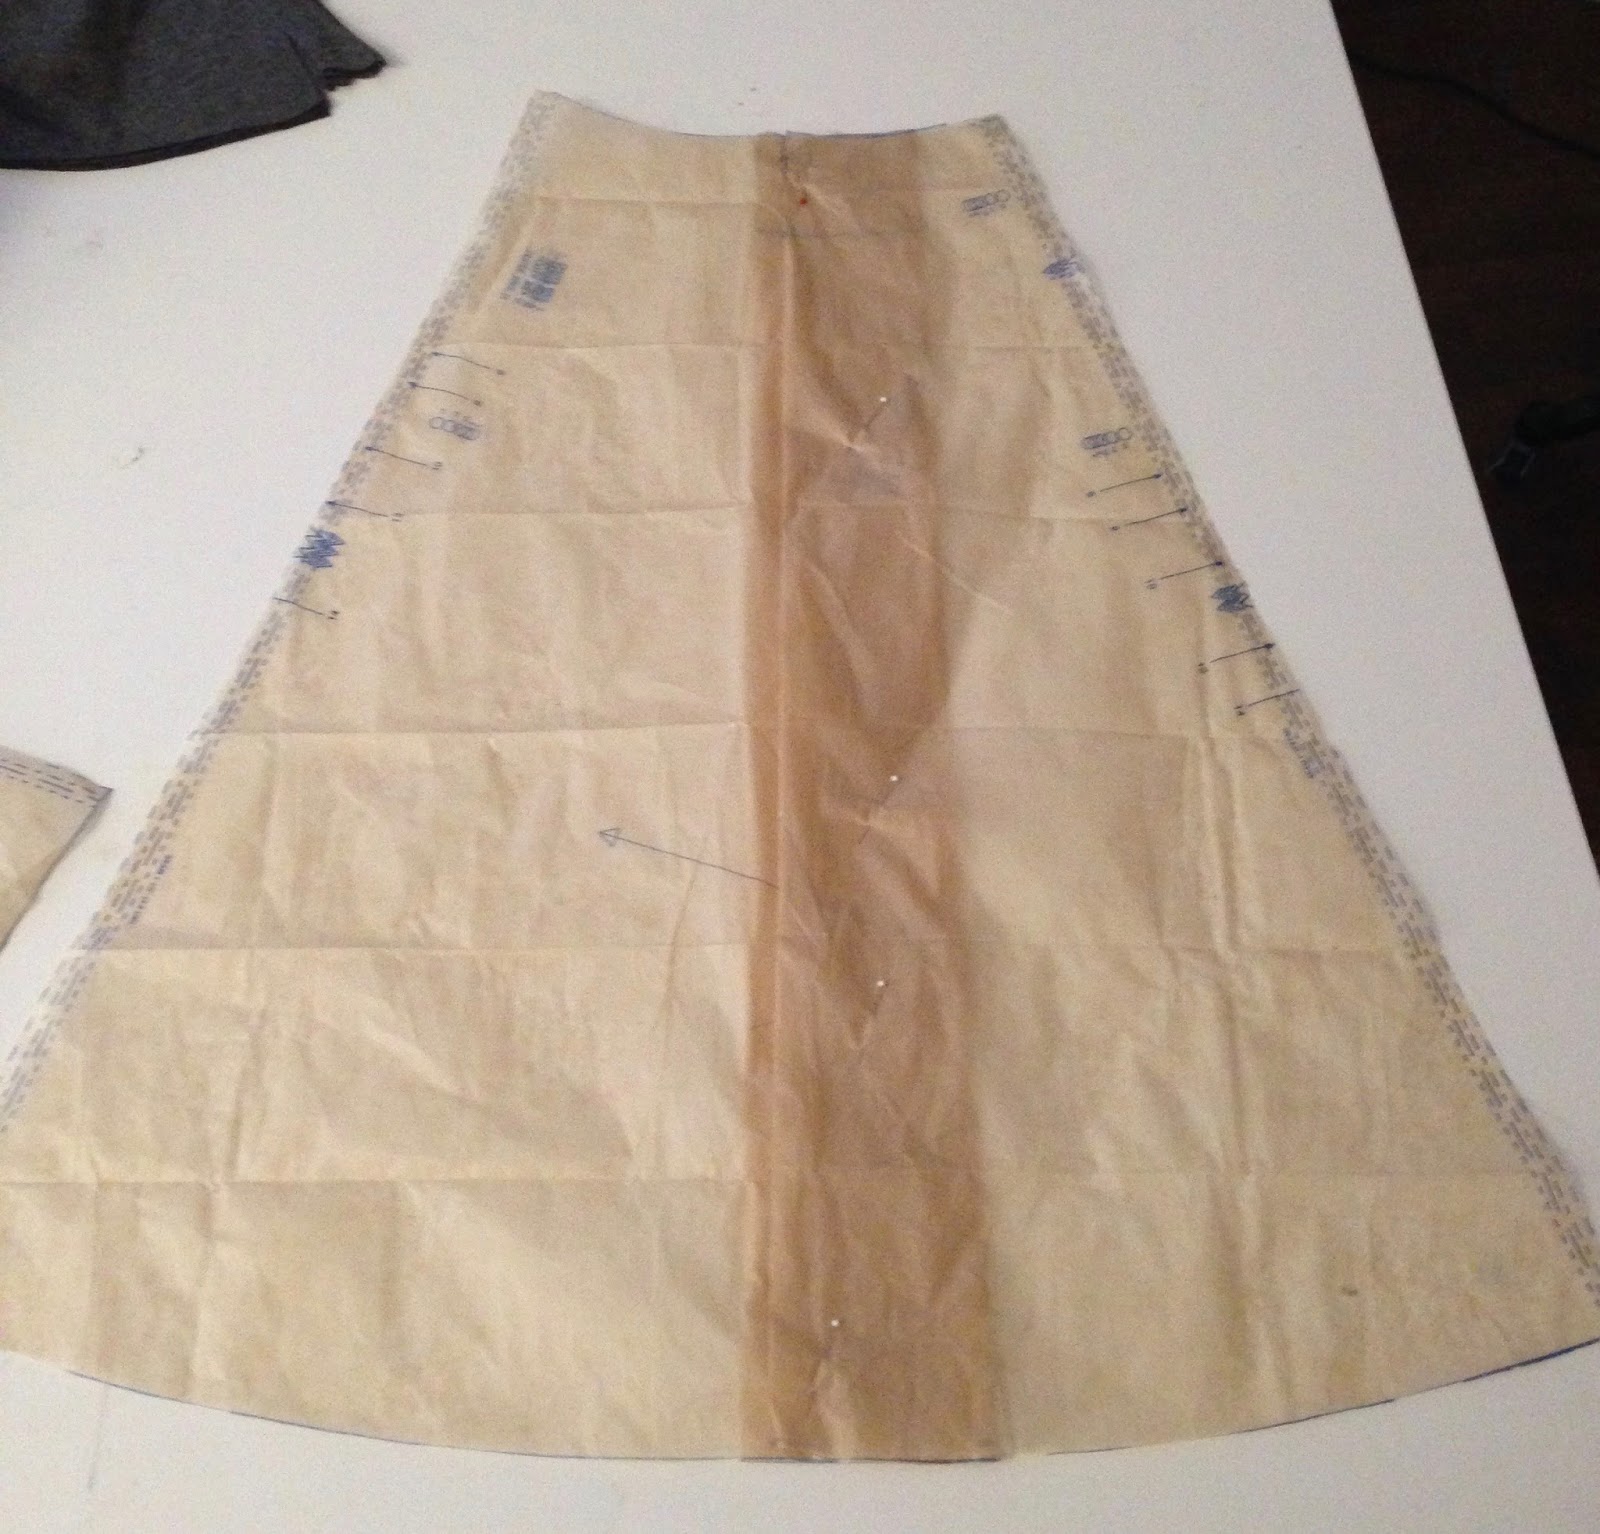
Update: in response to the FBA issue! Here's a quickie idea. Cut along the green lines indicated in the photo below:
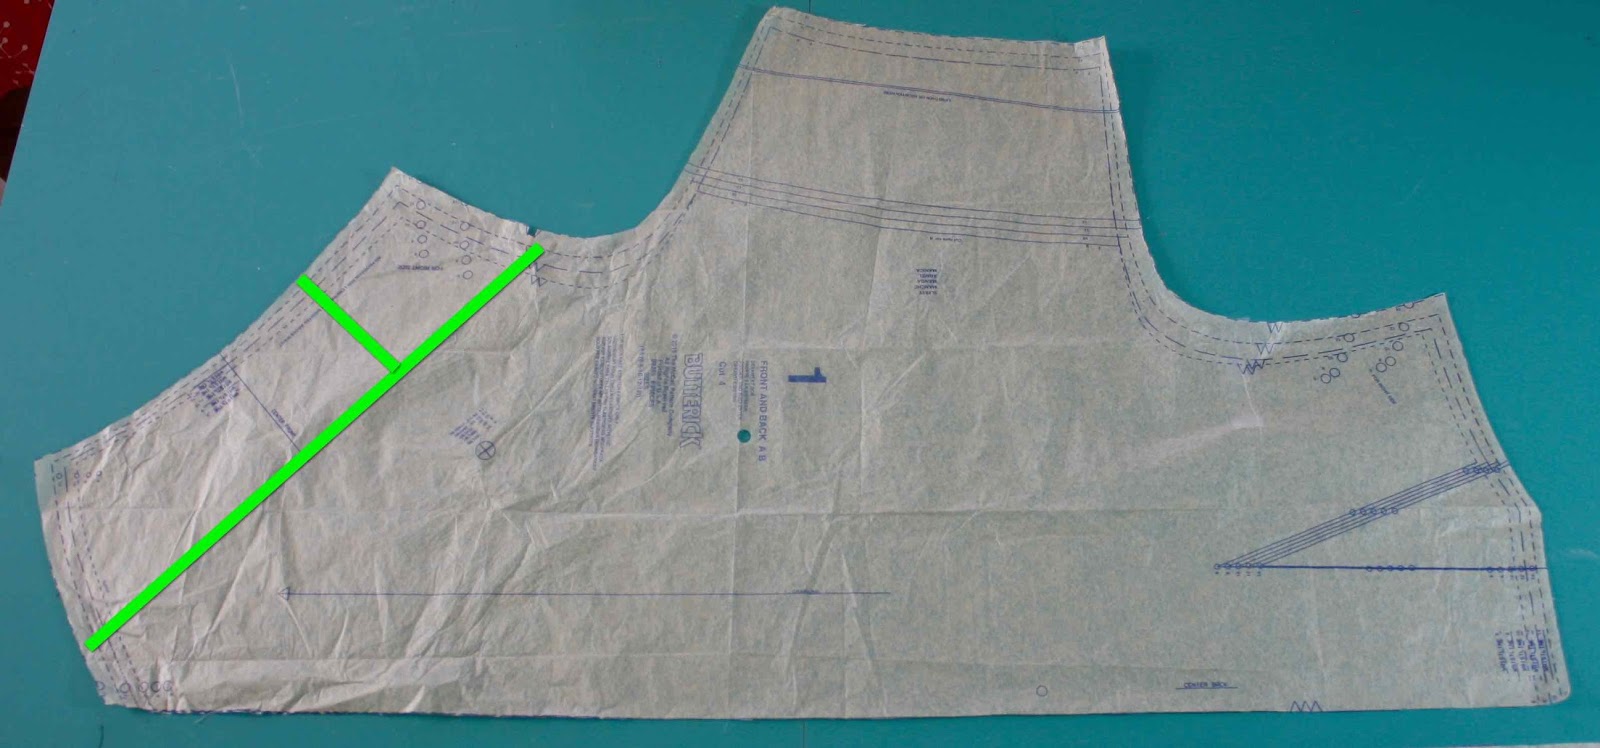 Slash and spread to get the required extra width and length. You will need to make a side bust dart to account for the extra length on the side seam, so that it matches the back side seam.
Keep in mind that even if you're busty, you may not need an FBA since this is a knit and can also be worn below the breasts, as in the photo at the top of this post.
December 7, 2015
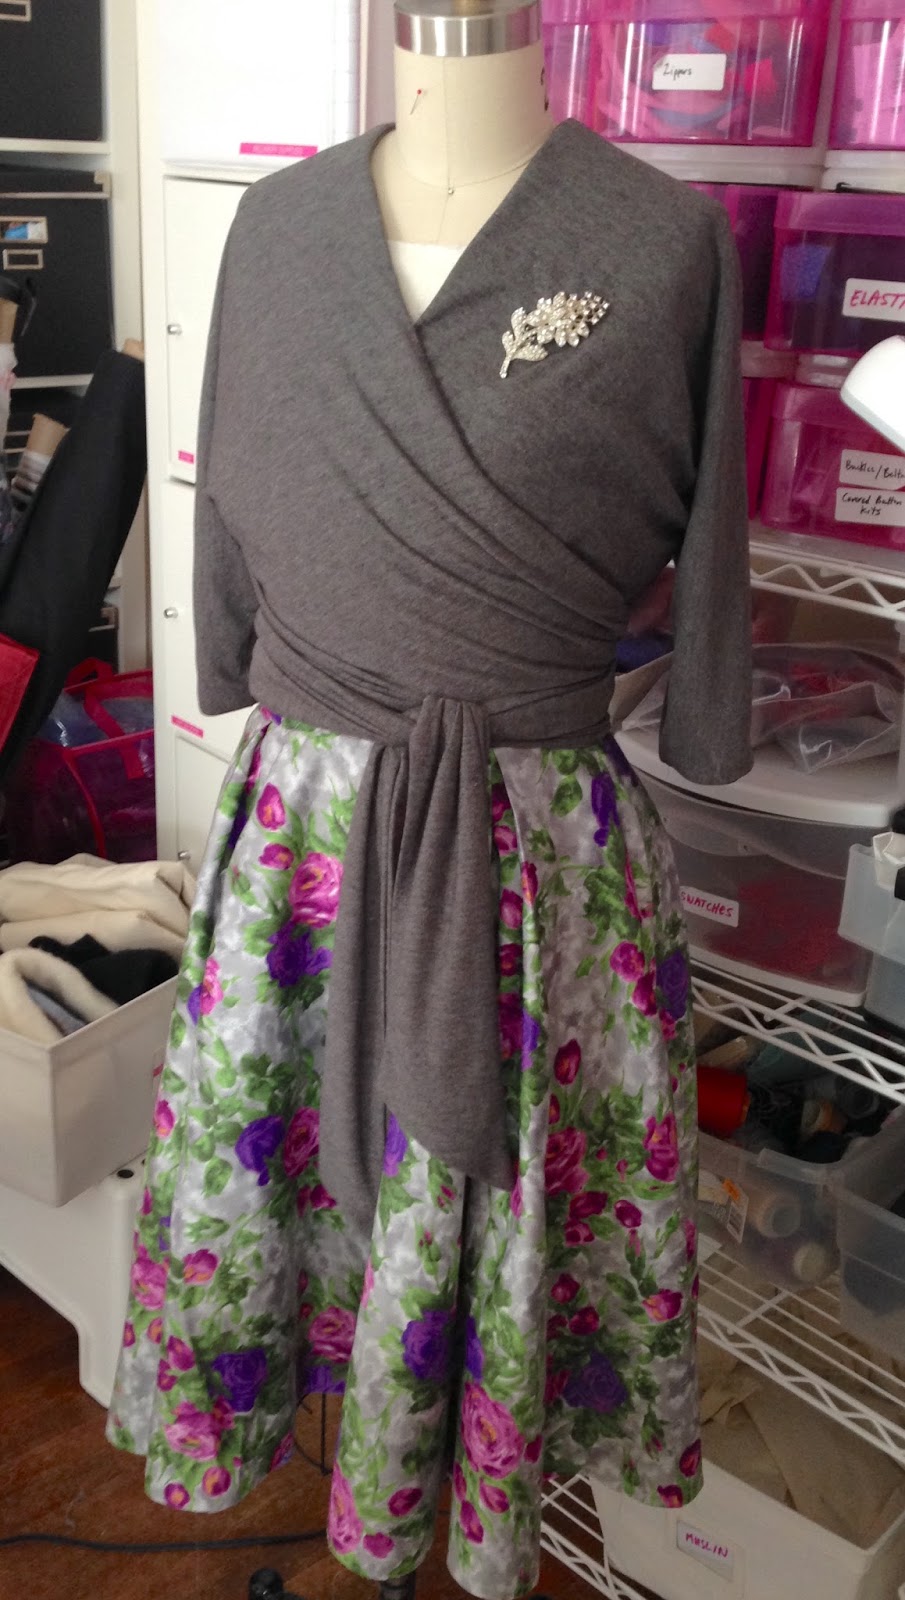
B6285 Wrap Top and Skirt: The Grey Floral Version!
 With our Knit Wrap Top Sew-Along in full swing this week, I wanted to show another version of the B6285 ensemble. The original version is bold and graphic in red rose jersey and black jacks sateen:
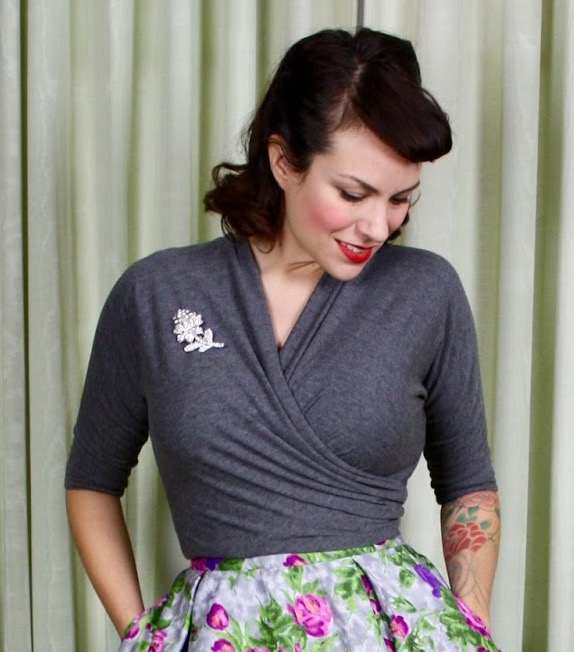
But it can have a much softer look in neutral florals! I made the top in a grey heather rayon spandex from Joanns and the grey floral sateen from my fall line.
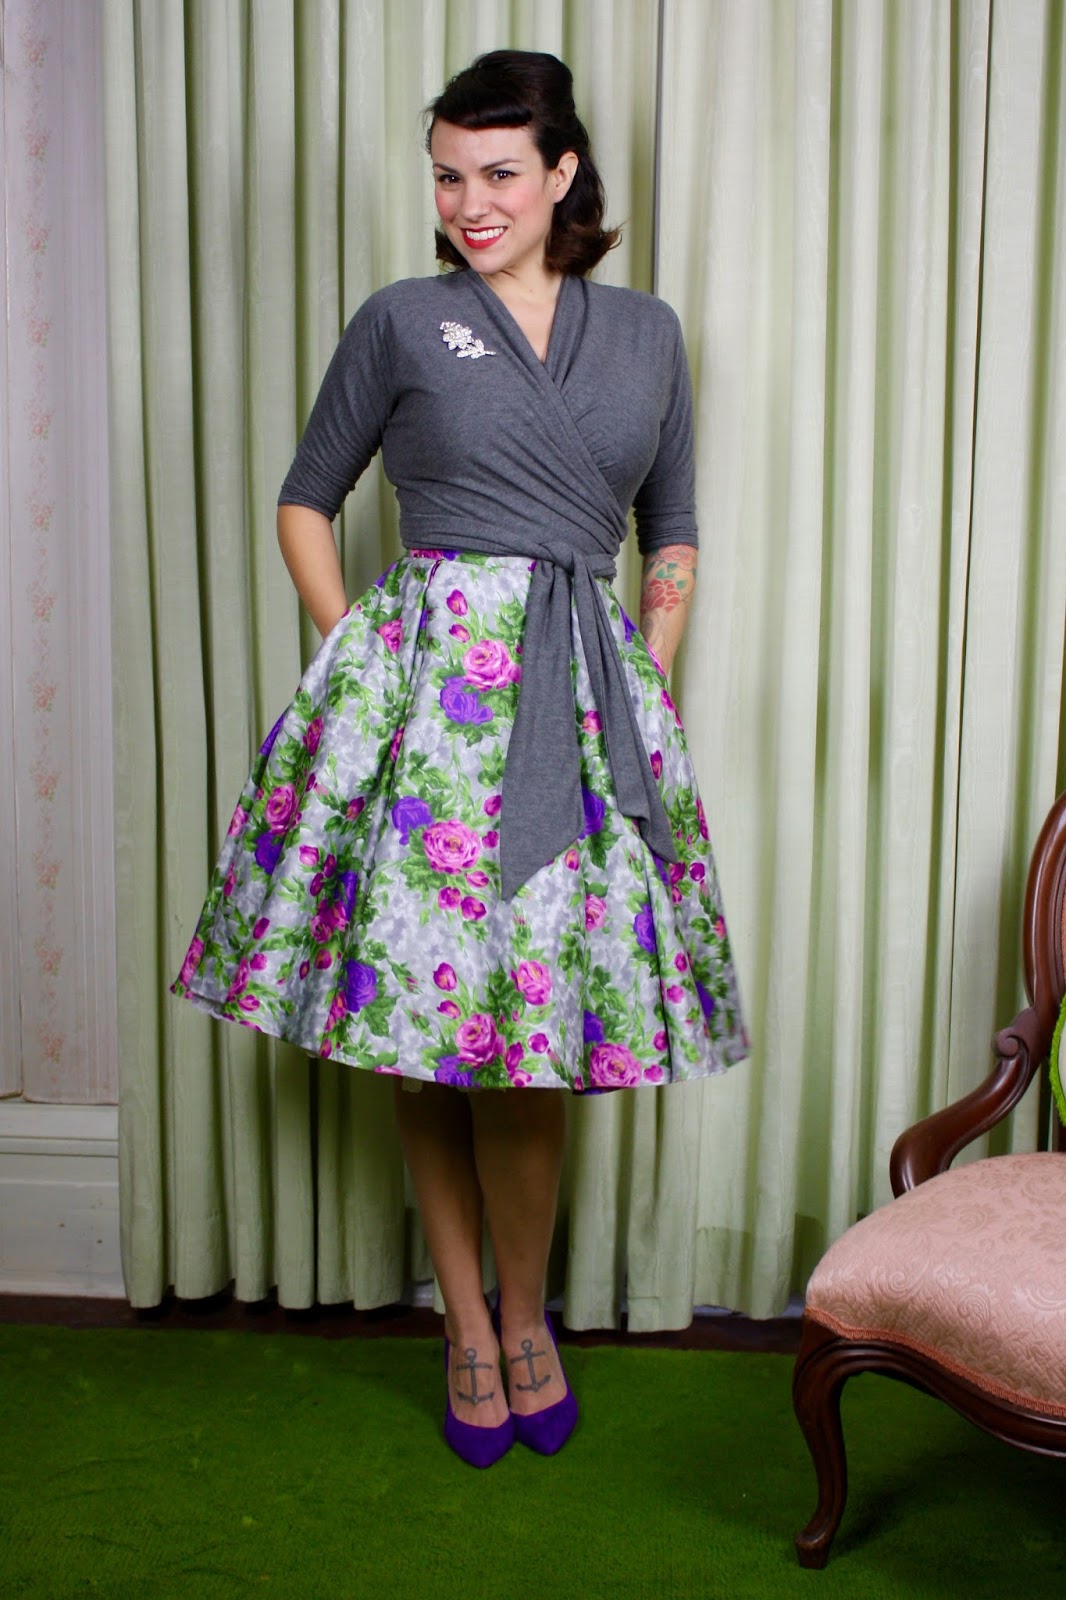
I also wanted to mention that there are a couple ways you can wear the top. You can do the ties in front or in back. In the front, you get the drape of the ties as a design feature on the skirt.
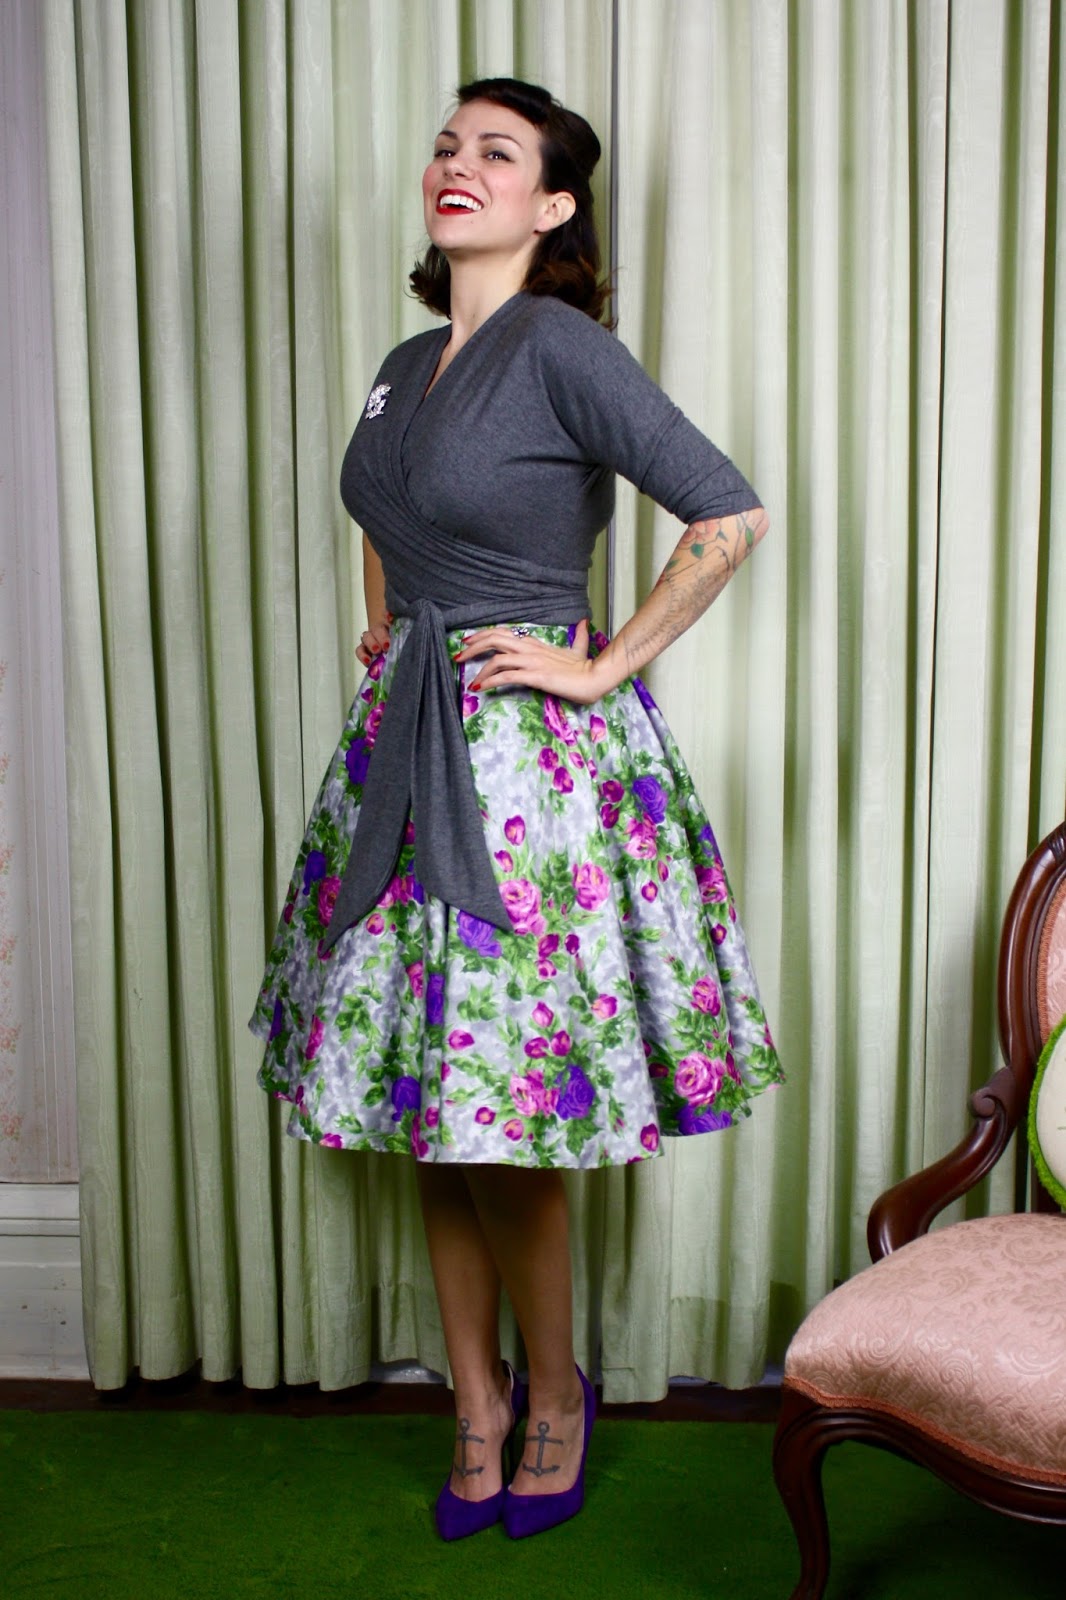
Tie them in the back in a bow, and you get a nice clean finish in the front.
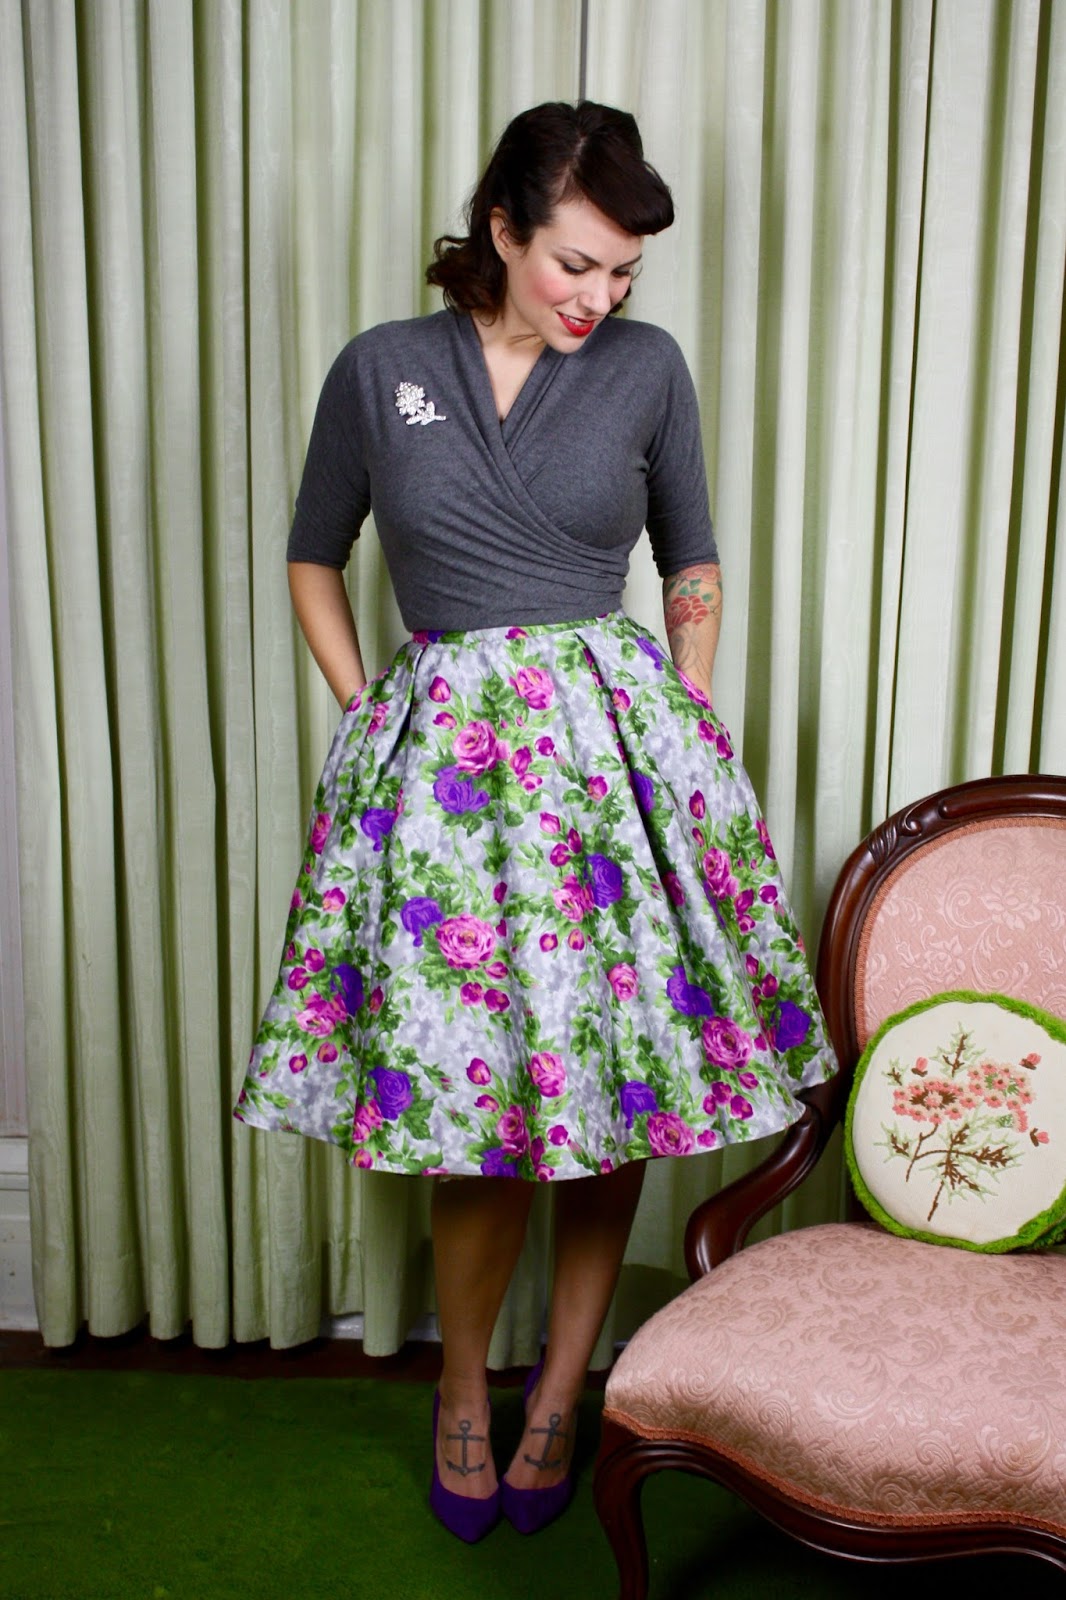 And you can also wear the wrap underneath the breasts or on top. Change it up and see how you like it! The top has a soft structure to it, and different folds and gathers will be created depending on how you wear it.
I'm wearing a chiffon petticoat in these photos, and I also added a lining to the skirt.
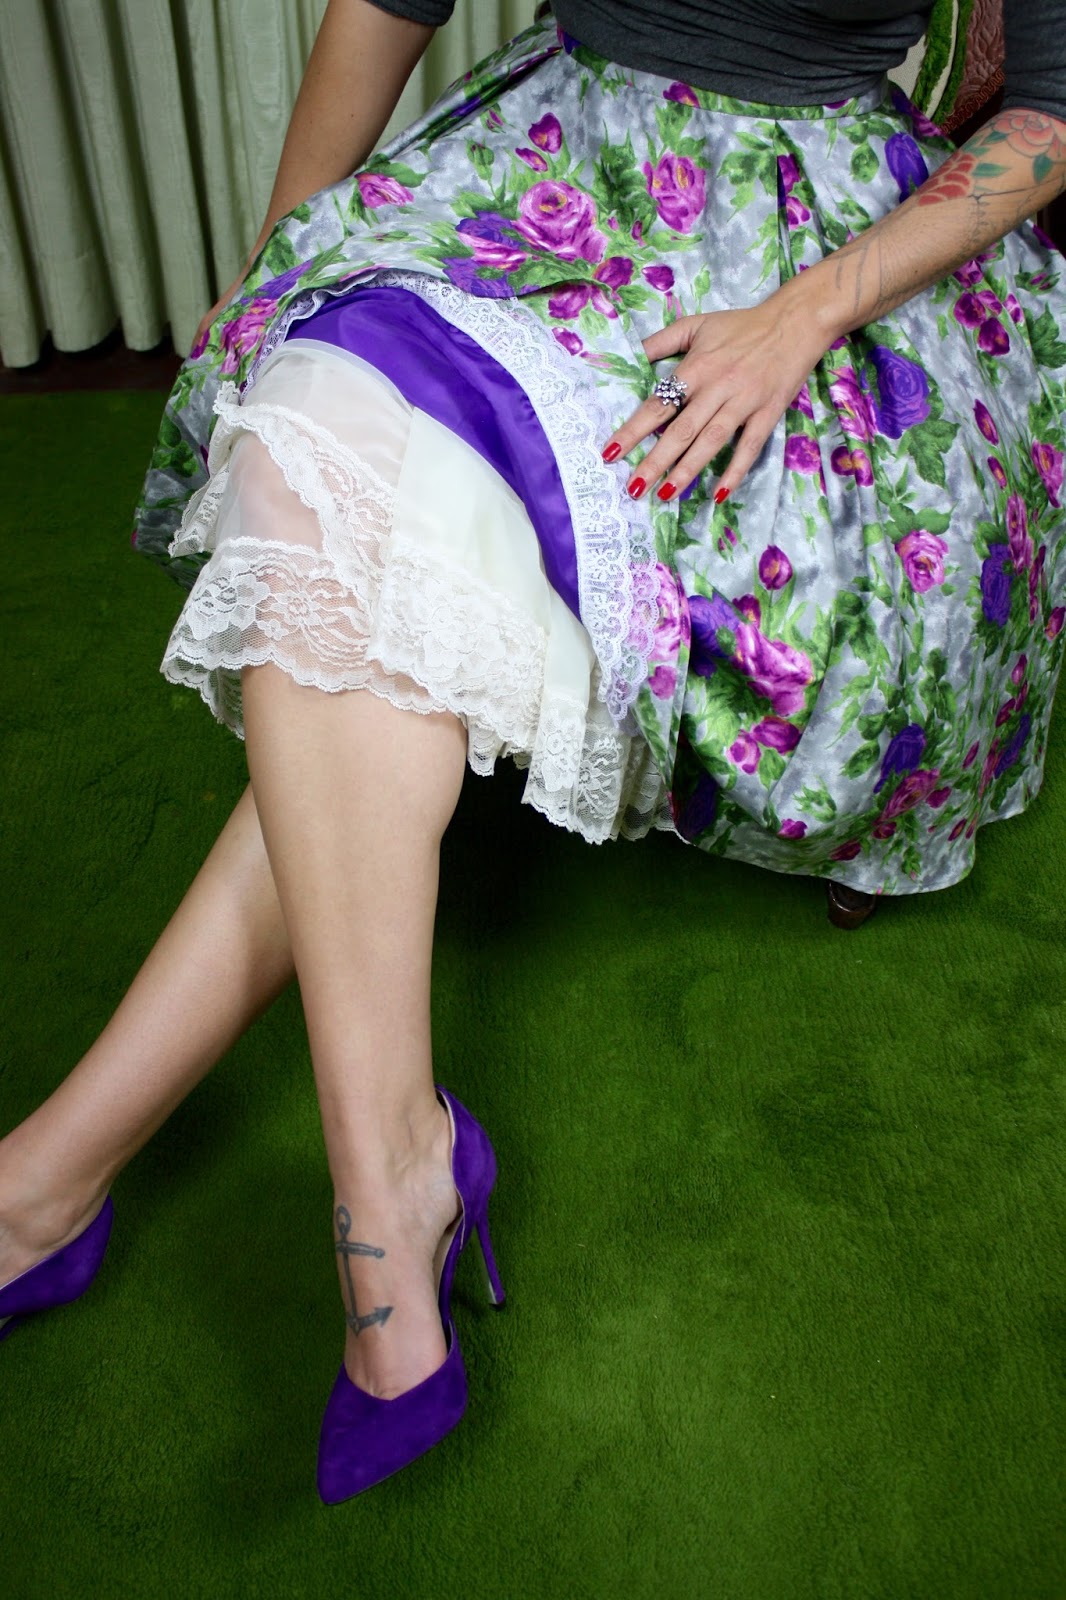 The skirt has double box pleats, which gives it extra fullness.
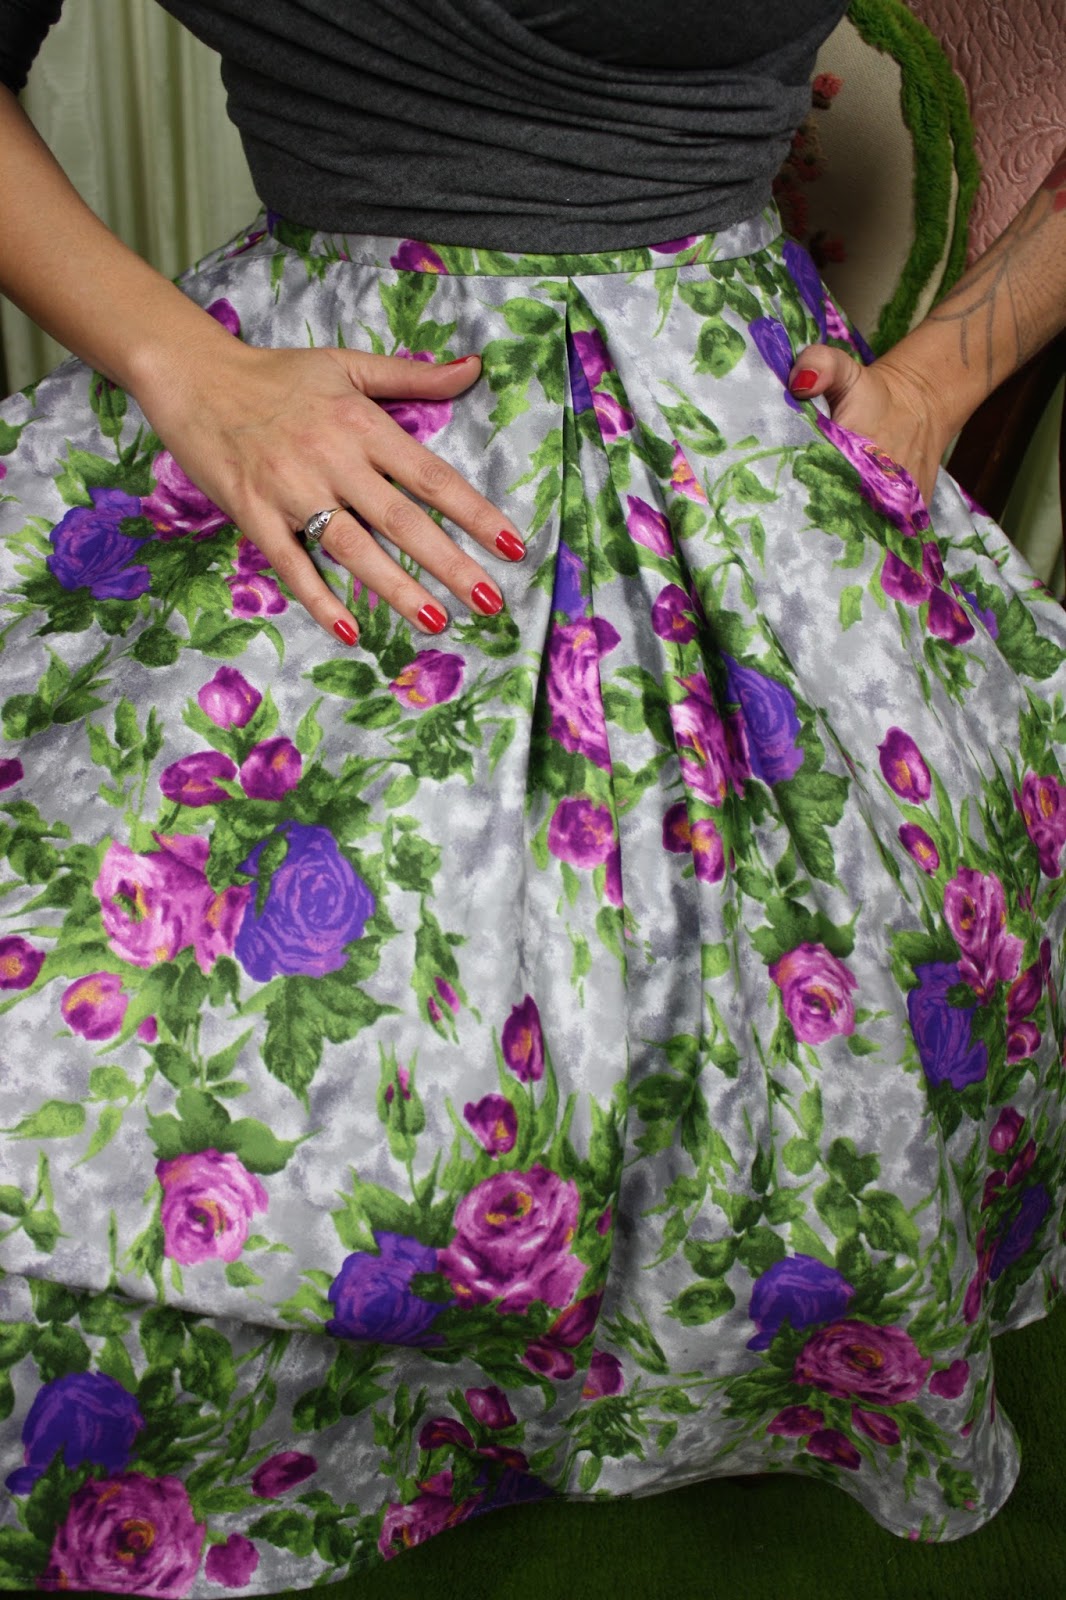
To add a lining to this skirt, it's a good idea to fold in the pleats on the pattern tissue before cutting. That way, you don't have to deal with the bulk of the pleats on the lining. Just overlap the tissue so the pleat lines meet and pin in place.
I stitched a cute lavender and white lace trim to the lining.
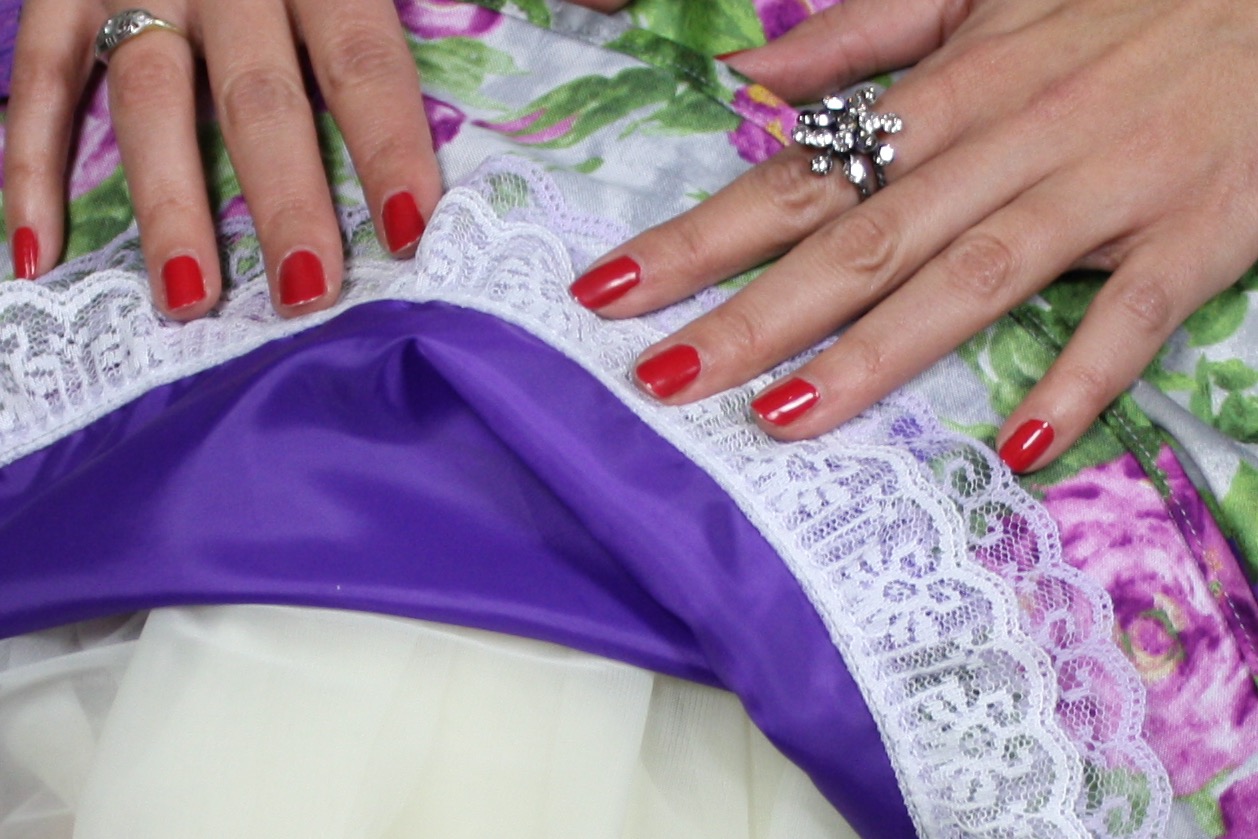
In true Gertie fashion, I had to buy special shoes for the outfit. These purple suede heels are a perfect match for the sateen.
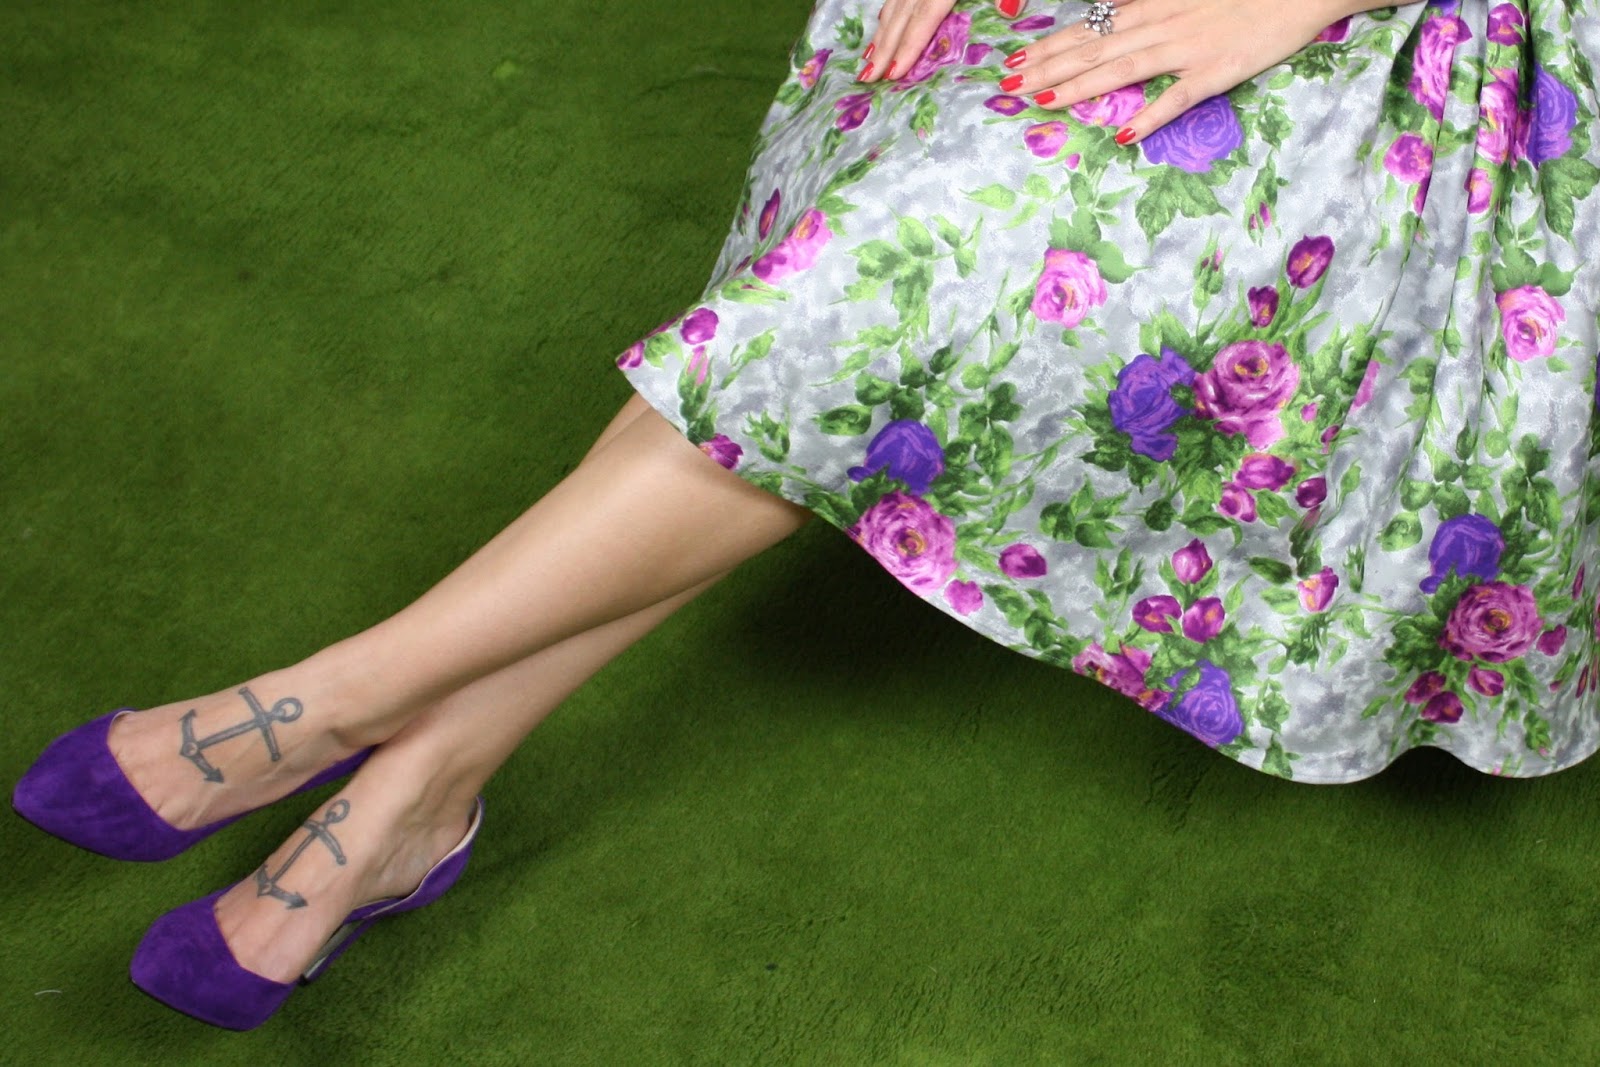 But they'll also go with my purple pom pom skirt and the purple roses jersey I'm making the wrap top in for the sew-along. Gosh, I'm so practical!
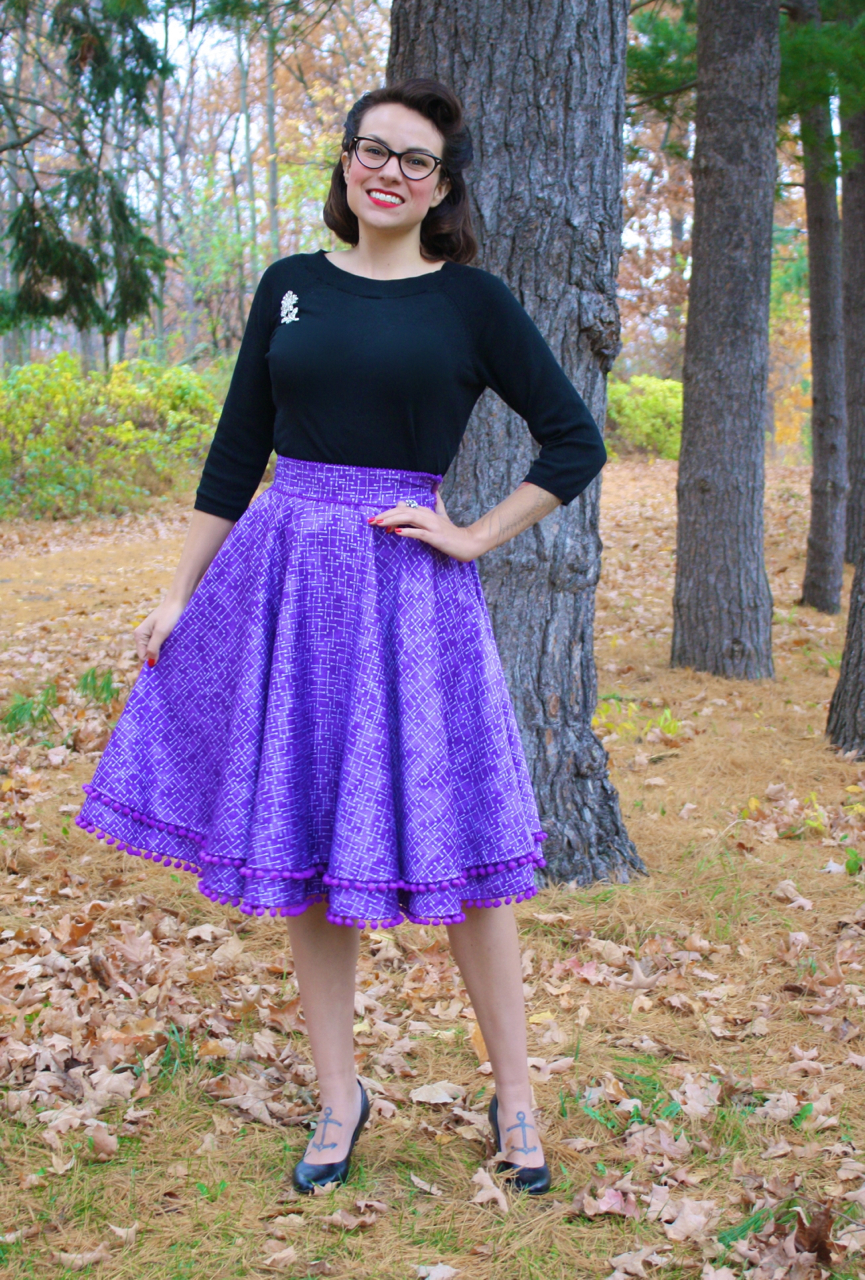
Come back tomorrow for the next sew-along post!
December 4, 2015
Knit Wrap Sew-Along #2: Tie Length and Two/Four-Way Stretch
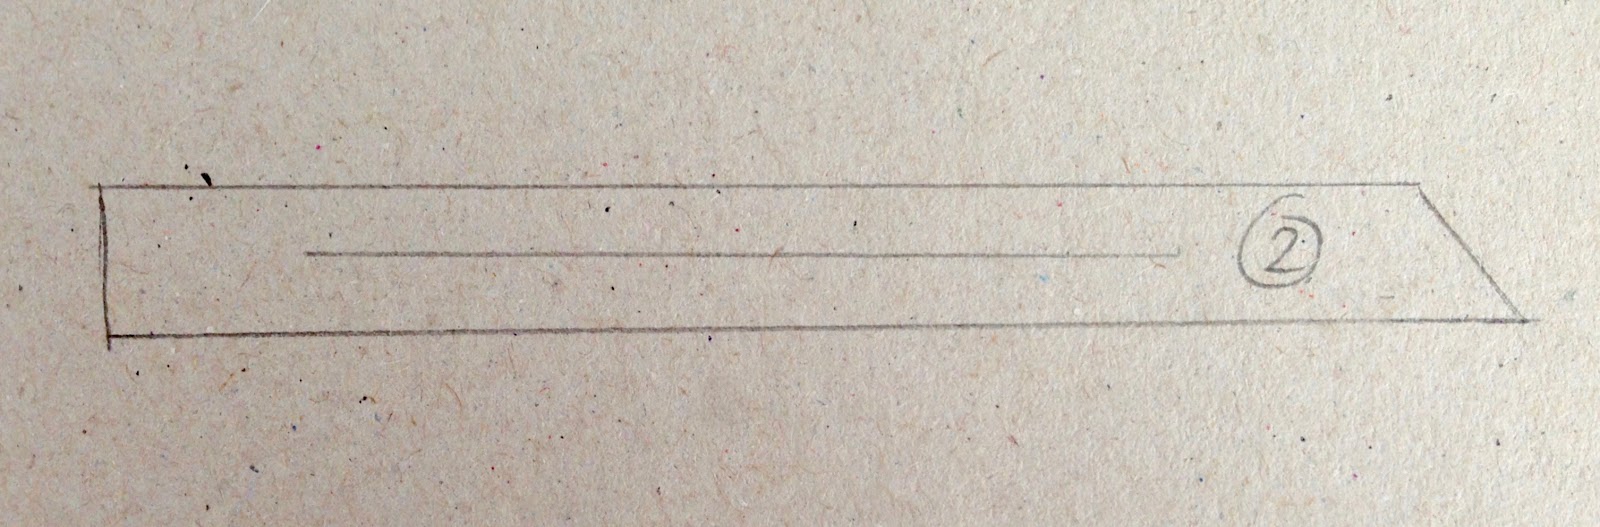
 I made the above outfit from Butterick 6285 and haven't had a chance to model it for pictures yet! But I wanted to show it to you before we cut out our wrap tops for the sew-along. It happens that there's a discrepancy in the length of the wrap ties on the pattern and the sample, shown in red below:
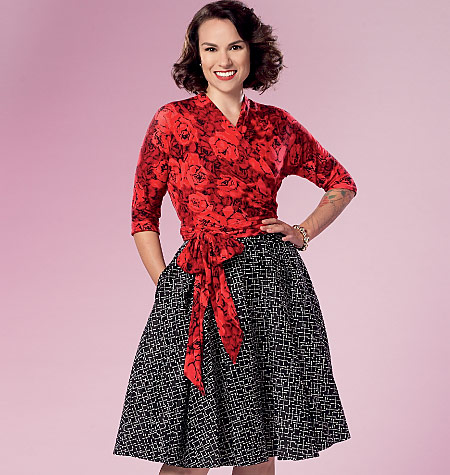
The grey version was made from the pattern, as packaged. This version has you cut two ties the exact same length. They're long enough to tie into a simple knot but not quite long enough for a bow.

The red version was made from my original personal pattern, in which I did a fussy thing where one tie is longer than the other. Sometimes patterns go through changes in the process and I imagine this one was made to avoid an over-complication of the pattern pieces to gain a relatively minor design feature! After all, the ties appear to be different lengths anyway once you tie them to one side, though perhaps not as exaggerated as in the picture below.
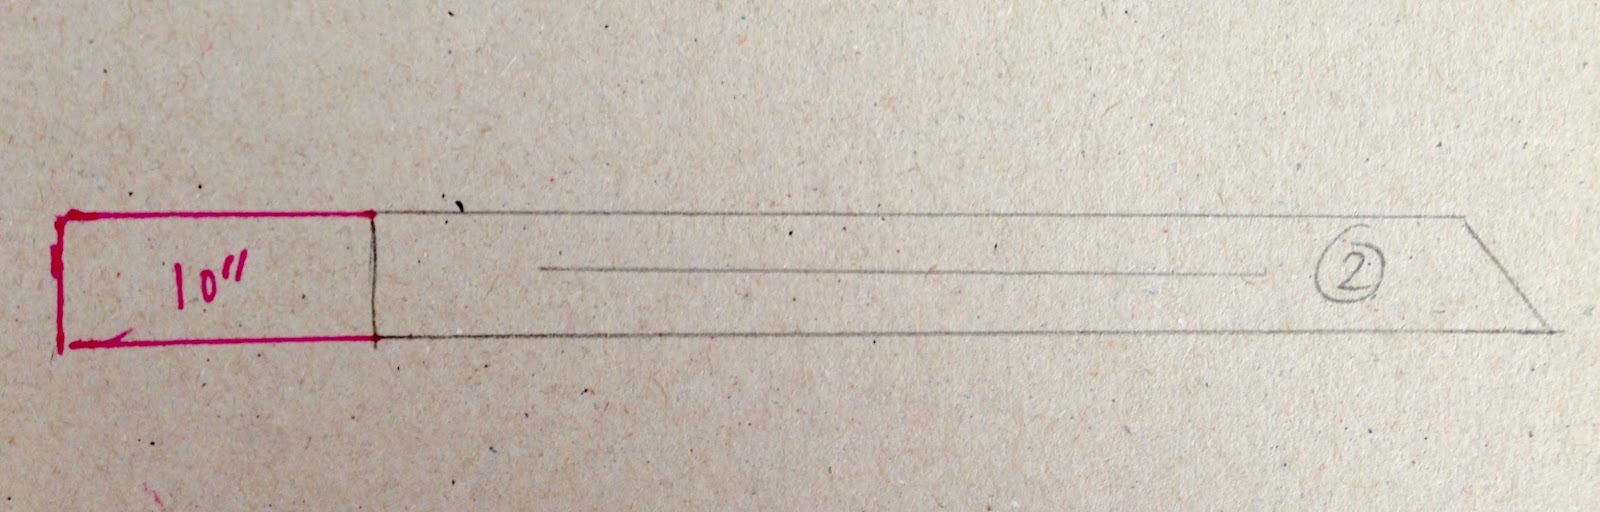
I'm not trying to confuse you, I promise. Here's the take-away: If you want to be able to tie the ties into a bow with long tails, you'll need to make a pattern change. Here's what I would suggest for a fuss-free alteration: Simply extend the tie pattern piece (it's labeled #2 on the tissue) by 10". Your ties will be long enough to tie into a bow this way.
Here's a little sketch:
Okay, now let's talk about a hot-button issue: two- vs. four-way stretch! Two-way jerseys stretch across the fabric widthwise but not lengthwise. Four-way jerseys stretch in both directions. Which should you use for this top? The great news is that you can use either! The red roses jersey shown is a four-way stretch, with slightly more widthwise than lengthwise stretch. The grey jersey at the top of this post is a two way stretch, with the stretchiness going across the body.
You can use either, but your choice will effect the feel of your top. The four-way stretch has a softer, less stable feel to it. Also, the ties stretch, meaning that they wrap further around the body and result in a longer, floppier bow.
The grey top, made in two-way stretch feels more firm and stable, and the ties do not stretch, giving them a shorter look and firmer feel.
Please let me know if you have any questions! Next we'll be cutting out our pattern.
December 1, 2015
Styling the Knit Wrap Top Over Dresses
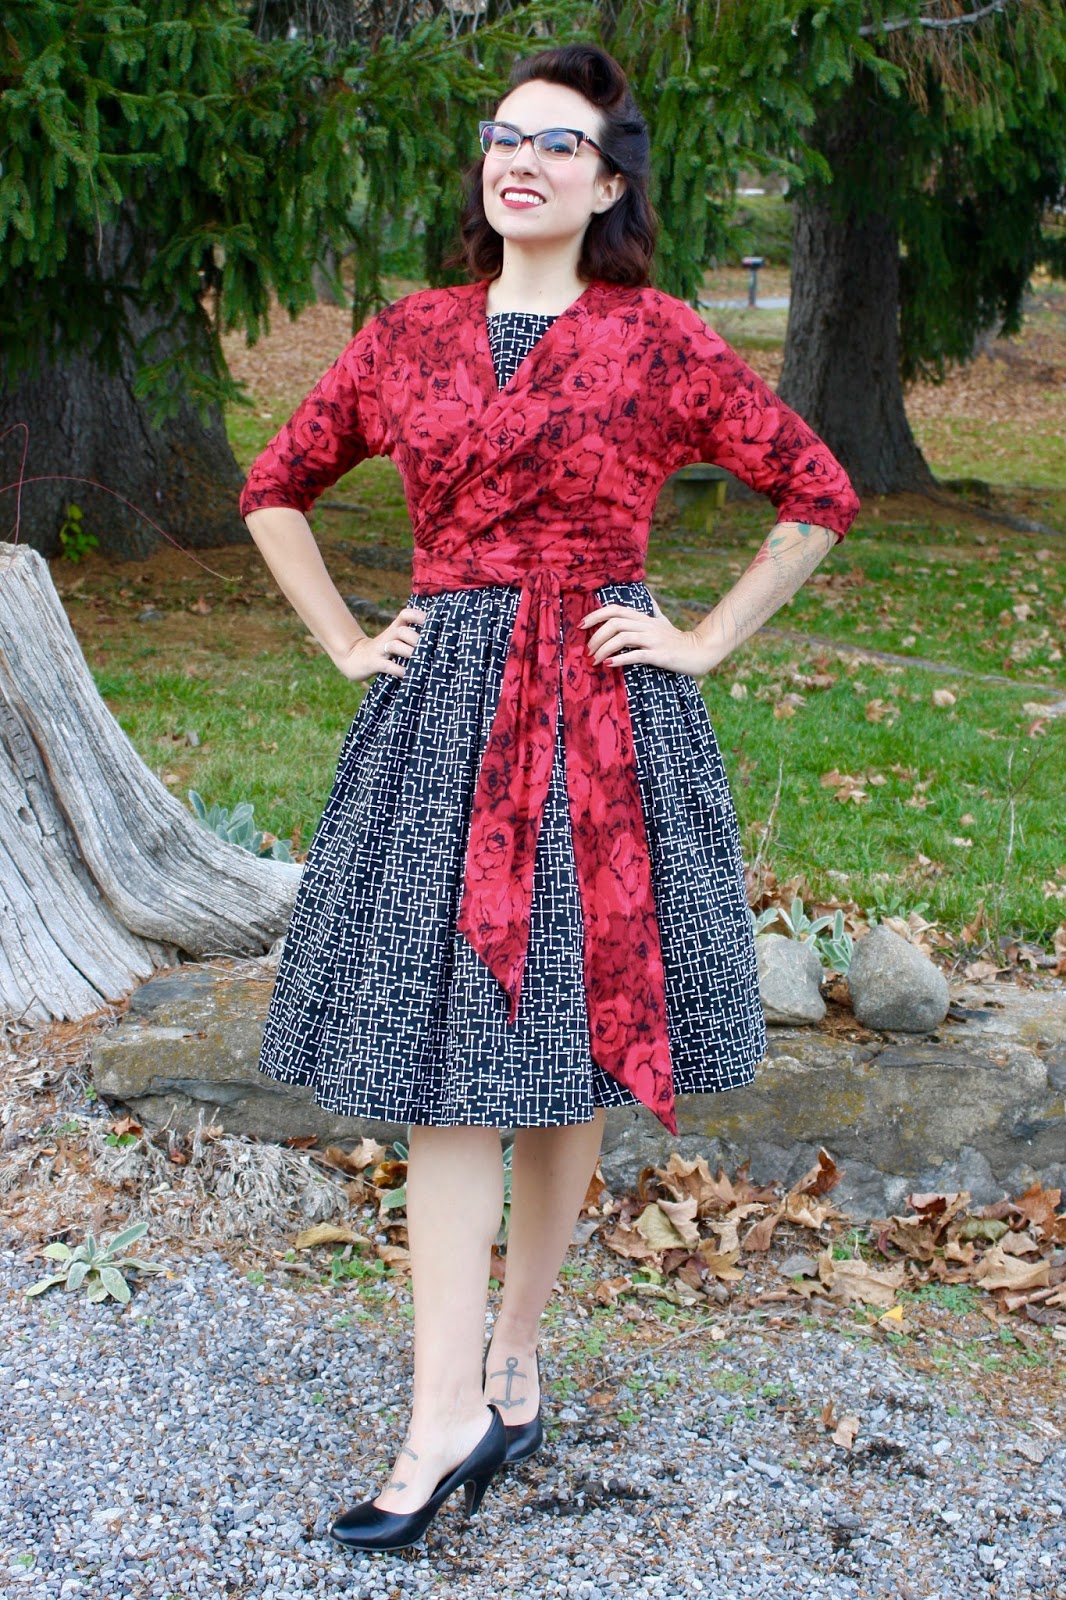
 And we're back! I hope all who celebrated had a nice Thanksgiving. I'm prepping a bunch of sew-along posts for you, but in the meantime, I thought you might enjoy seeing another styling option for the B6285 knit wrap top, shown here in red rose print jersey.
This is a pretty cropped design, meant to end right at the natural waist. So it works wonderfully with high-waisted skirts and trousers, but it's also a great layering piece!
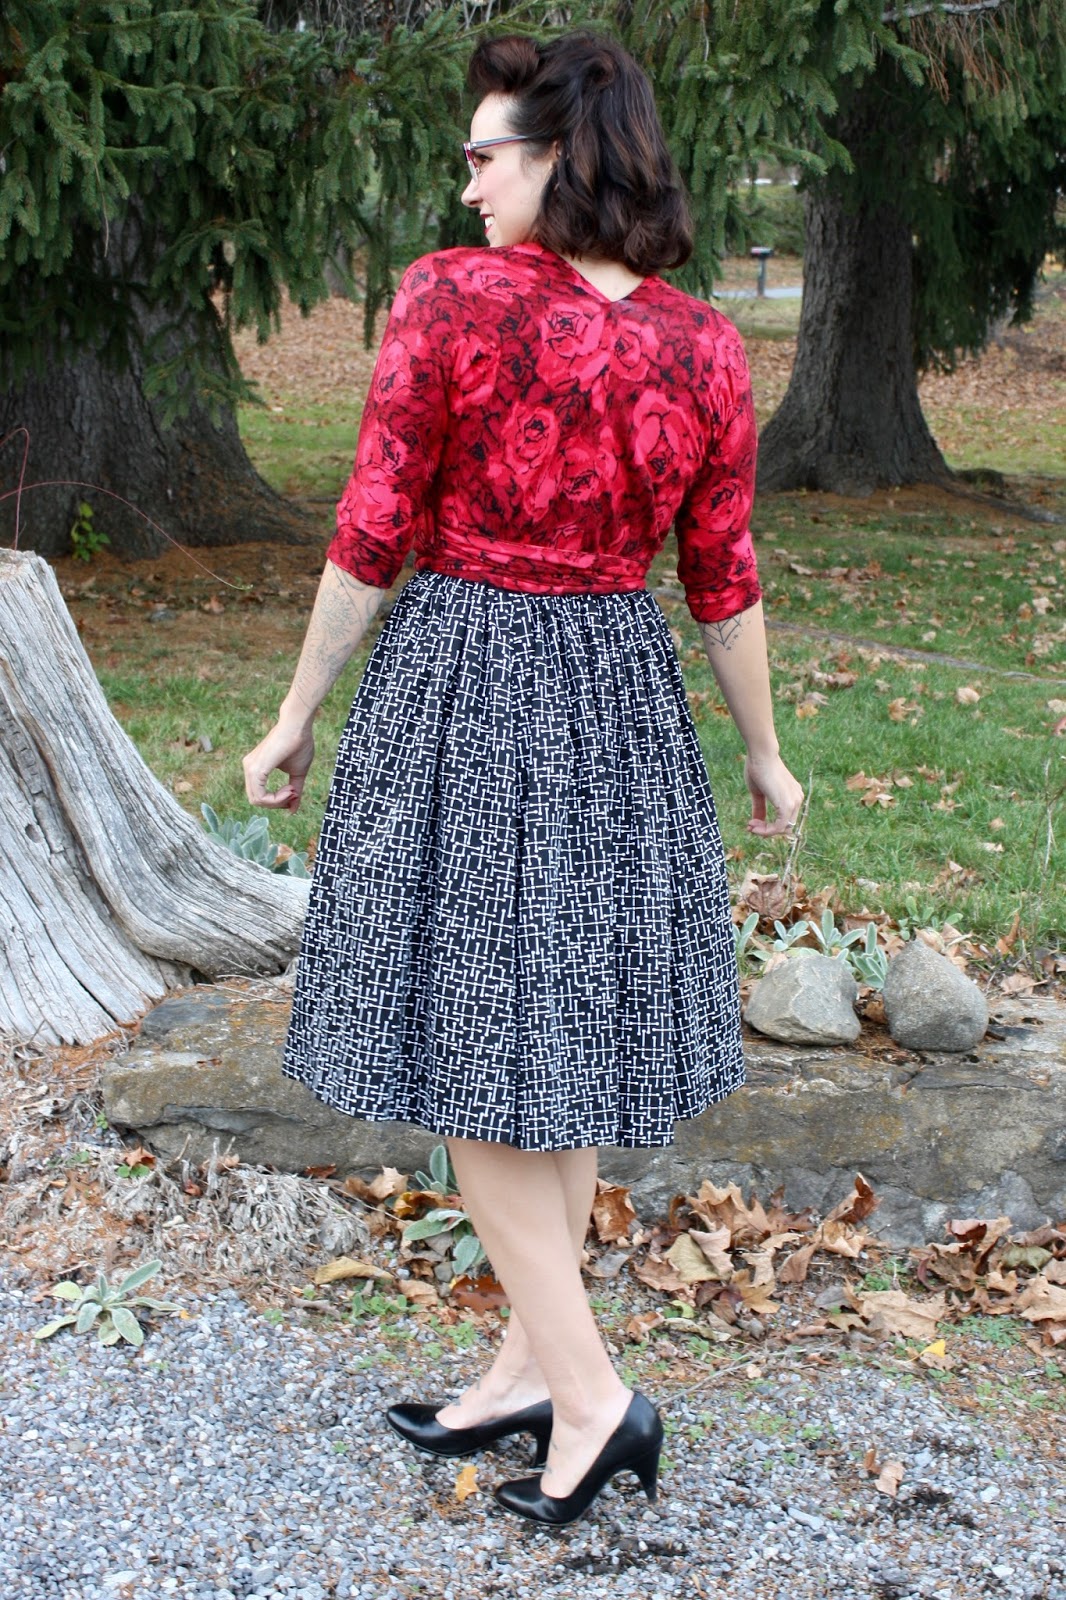
 Here I am, wearing it over B6284 in black and white sateen.
It's a totally different outfit than how I originally styled it.

From the back:
I also like the idea of wearing the wrap top over jeans and a long cami for a casual-modern look. Lots of possibilities!
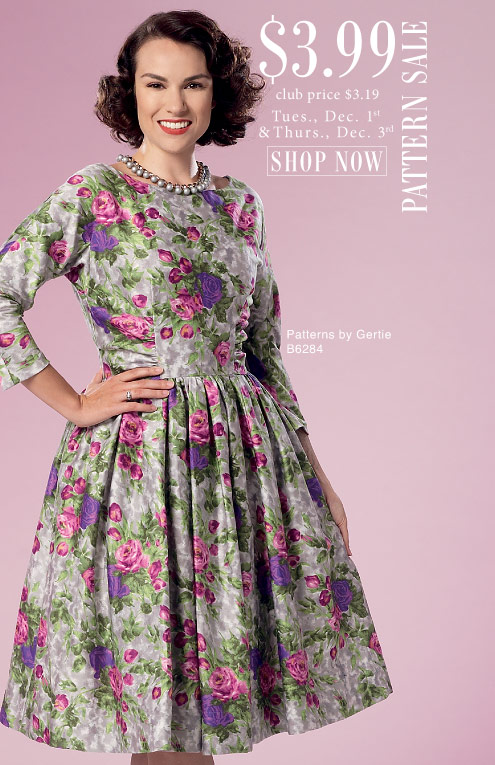
P.S. You might also be interested to know that Butterick is having a $3.99 sale right now!
November 20, 2015
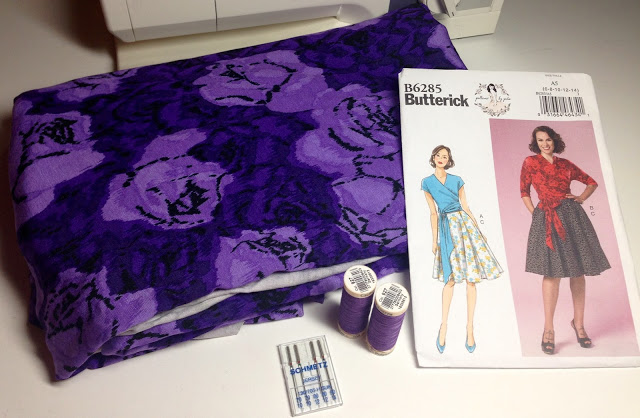
Knit Wrap Top Sew-Along #1: Supplies
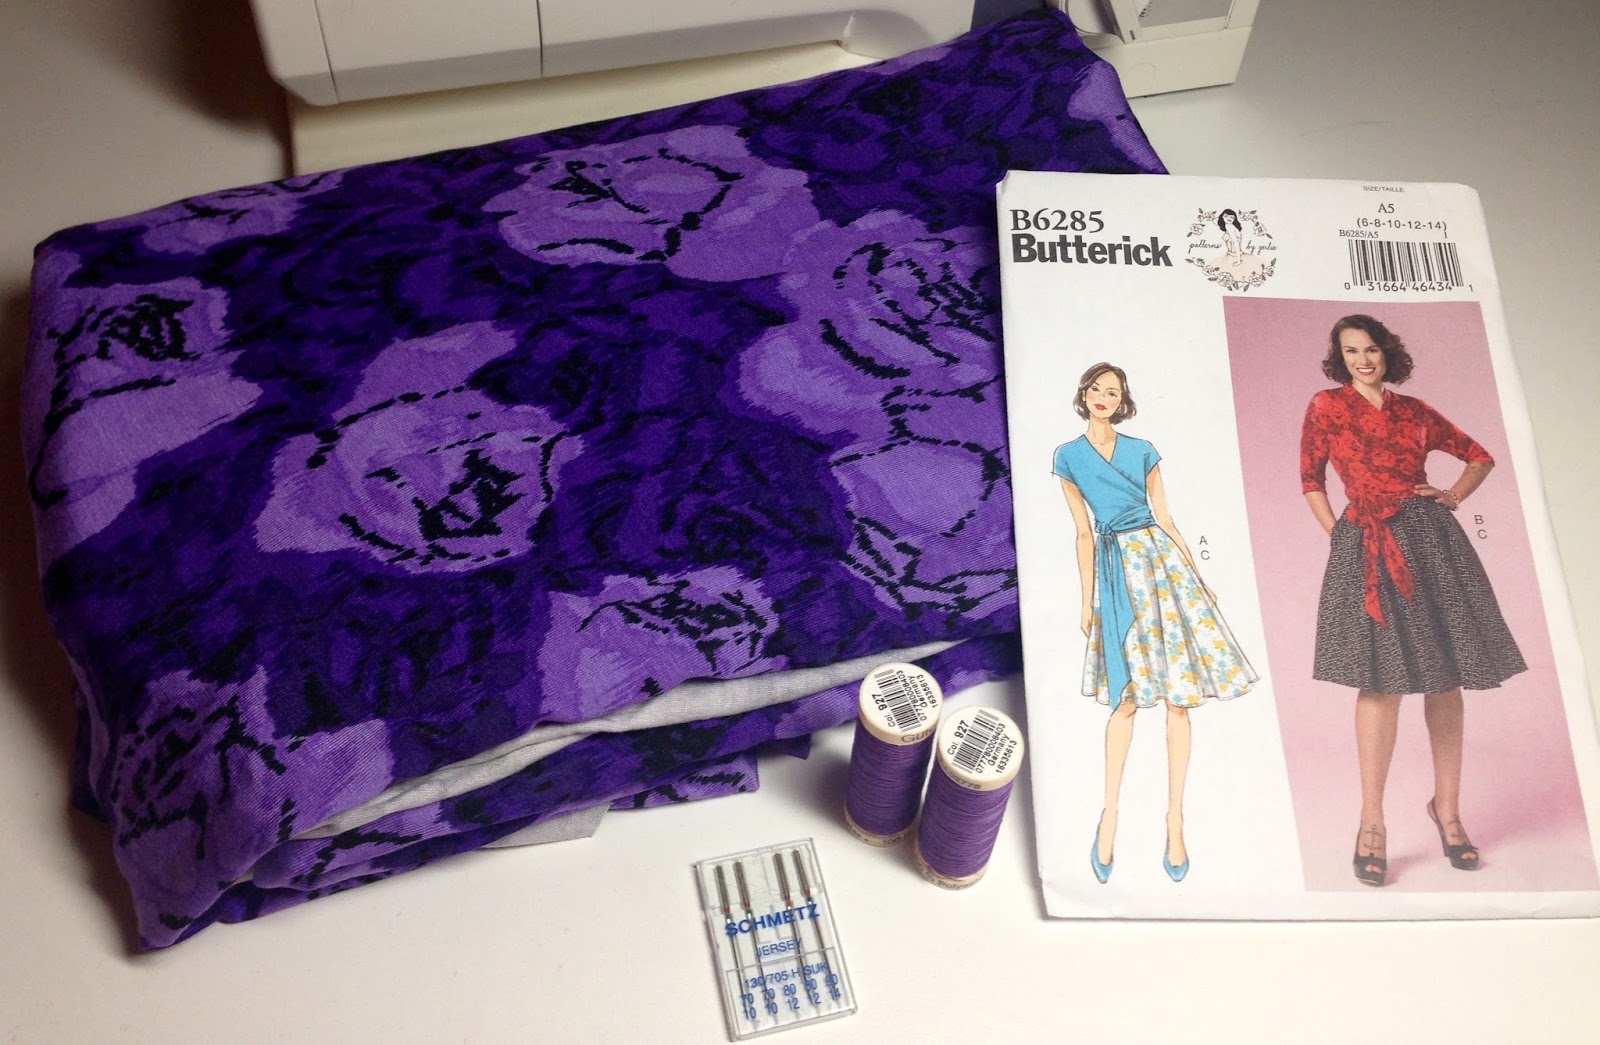
It's that time! Time to begin gathering supplies for the sew-along. This top is relatively simple and few supplies are needed.
Pattern: Butterick 6285. Fabric: choose a lightweight moderate stretch jersey. The fabric pictured on the pattern envelope is a rayon spandex jersey, which can be purchased at Joann in red, grey or purple. Check the pattern page for how much to buy. All purpose polyester thread to match your fabric.Jersey or stretch needles. A sewing machine with a straight stitch. No serger needed!
 And that's it!
Trying to figure out what size to make? I would say this top is pretty typical to Butterick patterns (size chart here) in that you'll probably want to make a size smaller than your measurements. My measurements fall between a 12 and 14, but the 12 fits just fine. Actually, a size 10 fits fine too. There's more wiggle room with knits, of course. But if you're questio;/k,ning what size, I would err on the smaller side.
If you're looking for additional sources for knits, Joann always has nice rayon-spandex solids, and I really like the selection at Emma One Sock as well.
That's it for now. We'll begin sewing next week. In the meantime, let me know if you have any questions!
November 19, 2015
Enter the Great Gertie Giveaway!
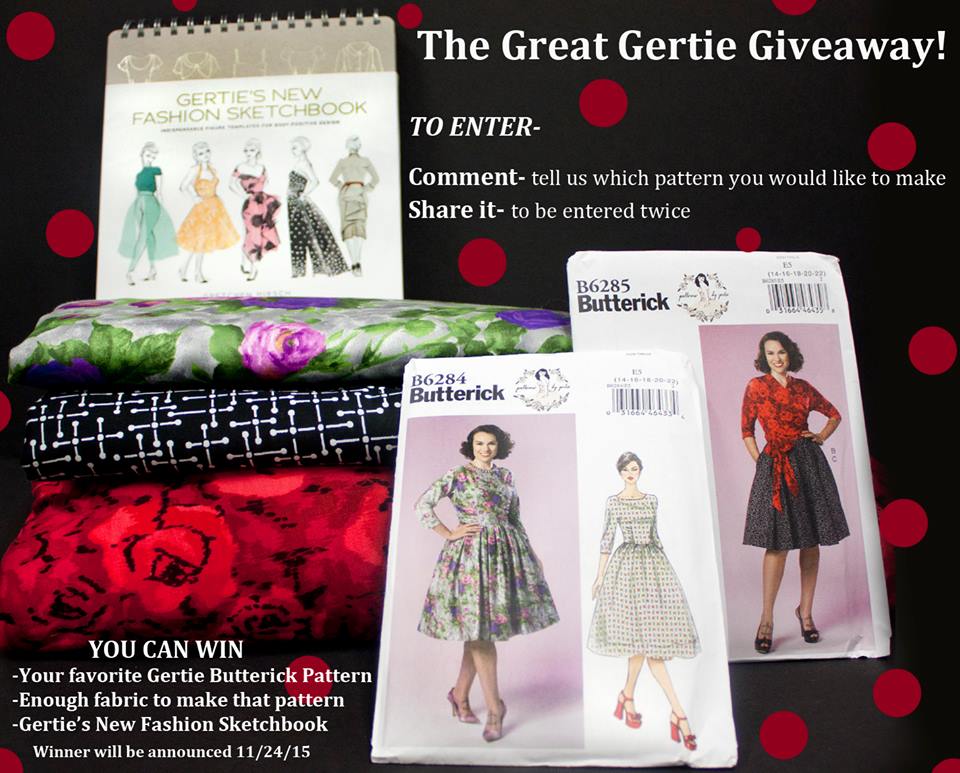
Fabric Traditions is hosting a fantastic giveaway right now. You could win your favorite of my two new patterns (B6284 or B6285) and enough fabric to make the pattern, plus a copy of Gertie's New Fashion Sketchbook !
To enter, comment on this post and say which pattern you would like to make. If you also share the post on Facebook, you will be entered twice. While I always love your comments, don't comment here to be entered! Go to this post.
A big thank you to Fabric Traditions for hosting a fabulous giveaway!
November 17, 2015
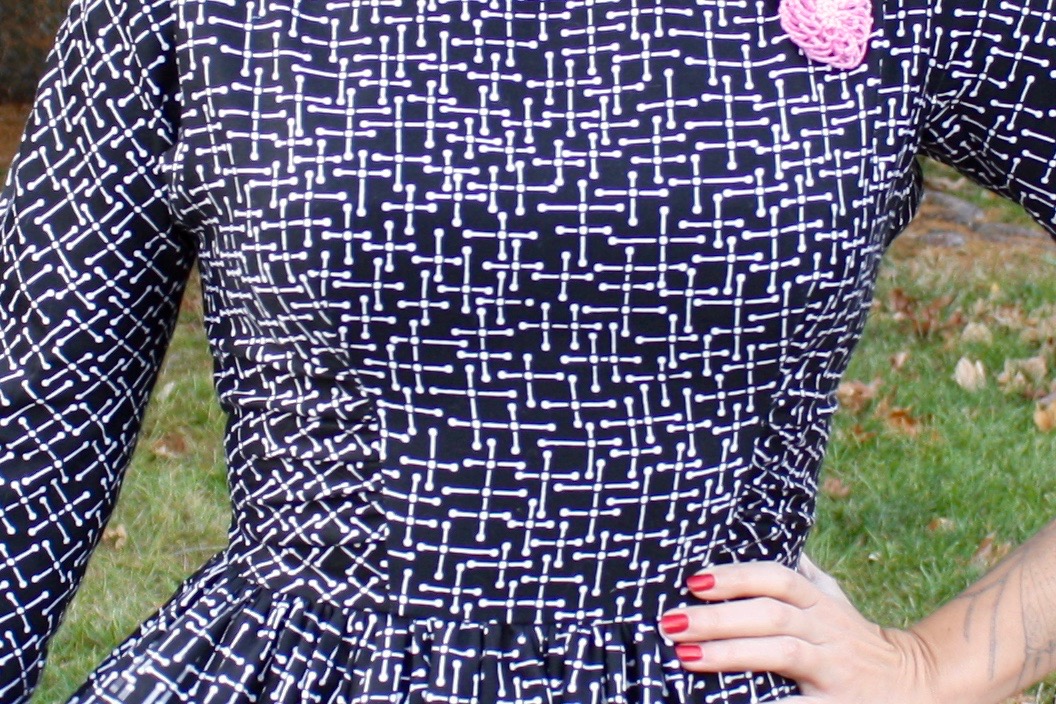
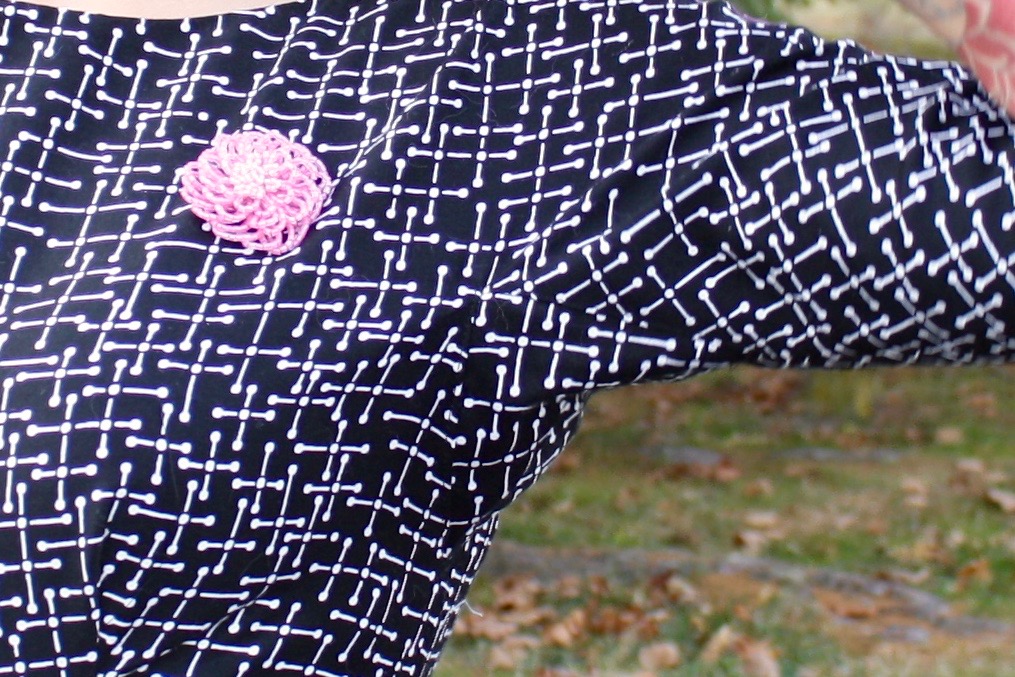
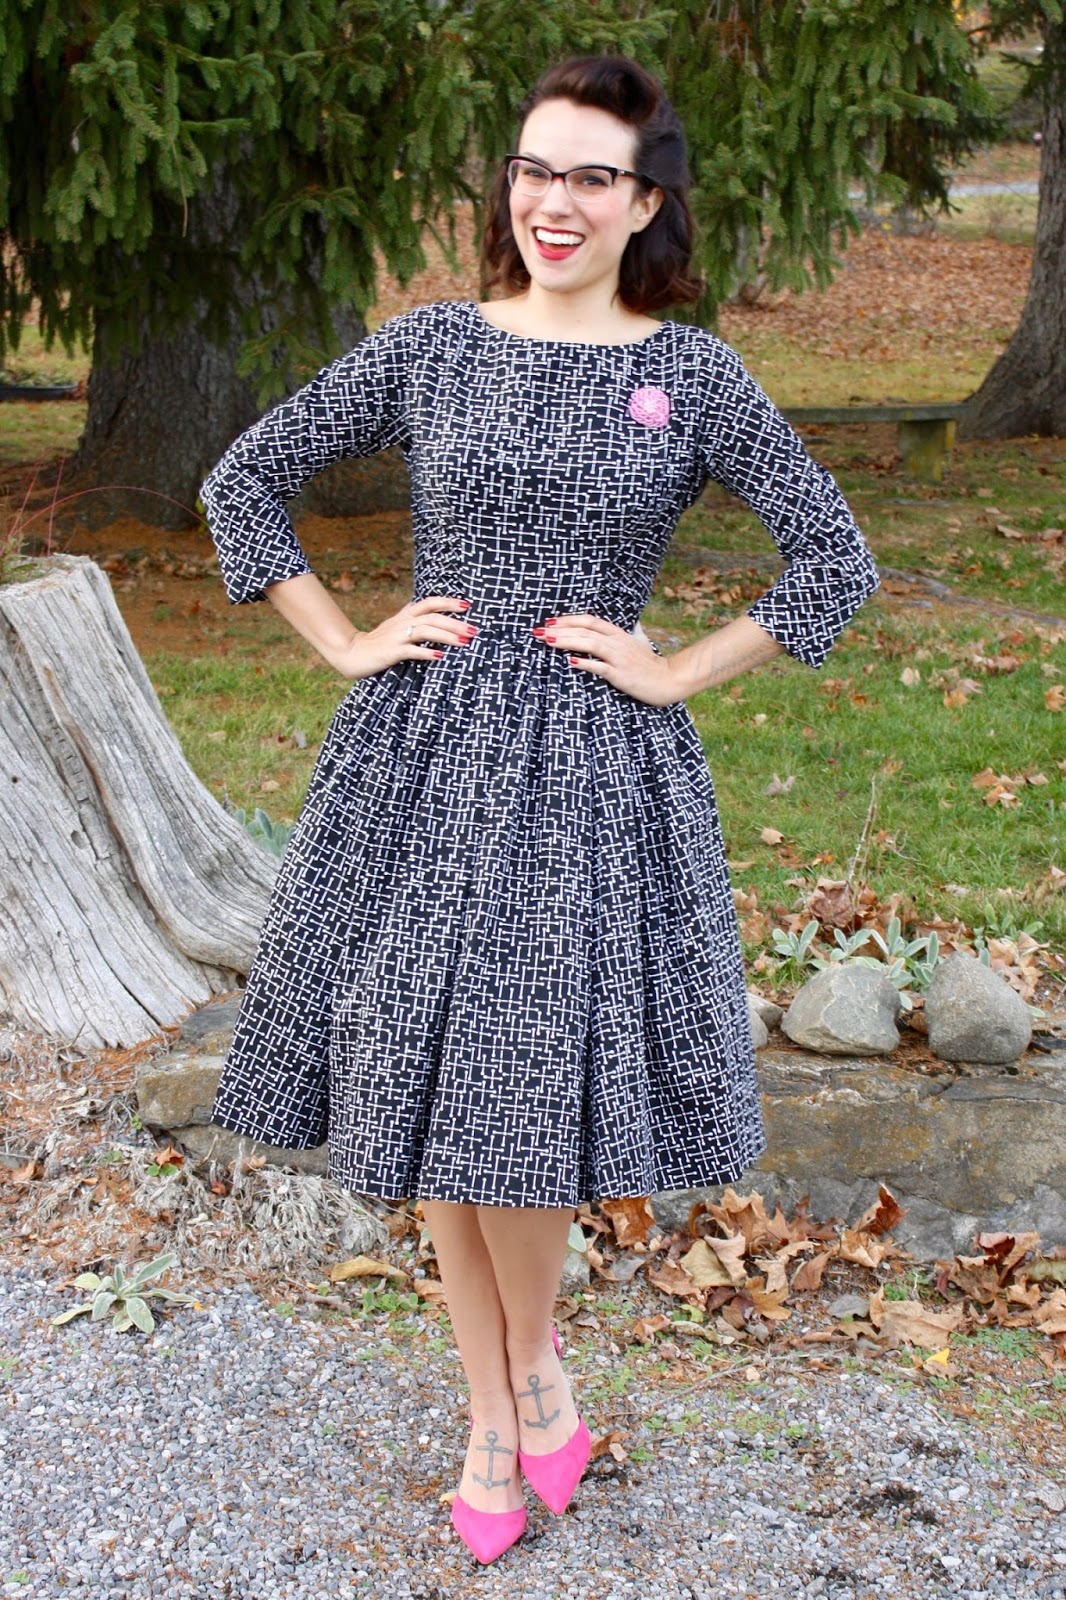
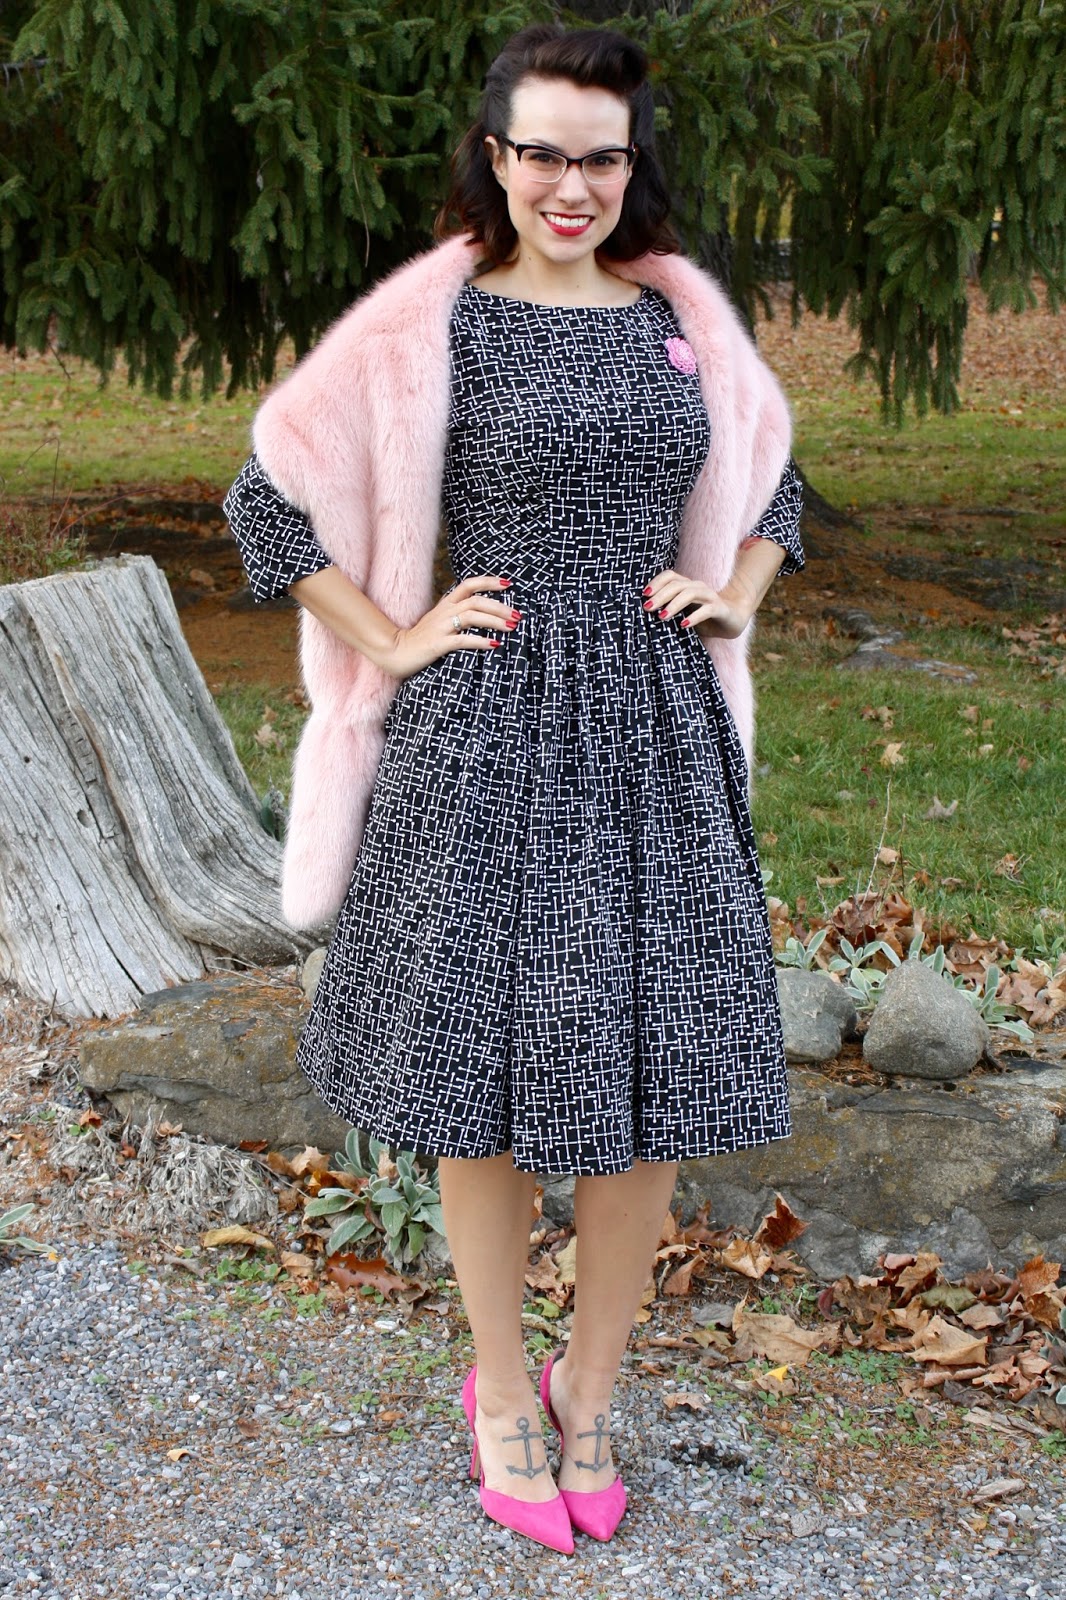
B6284 in Jacks Print Sateen
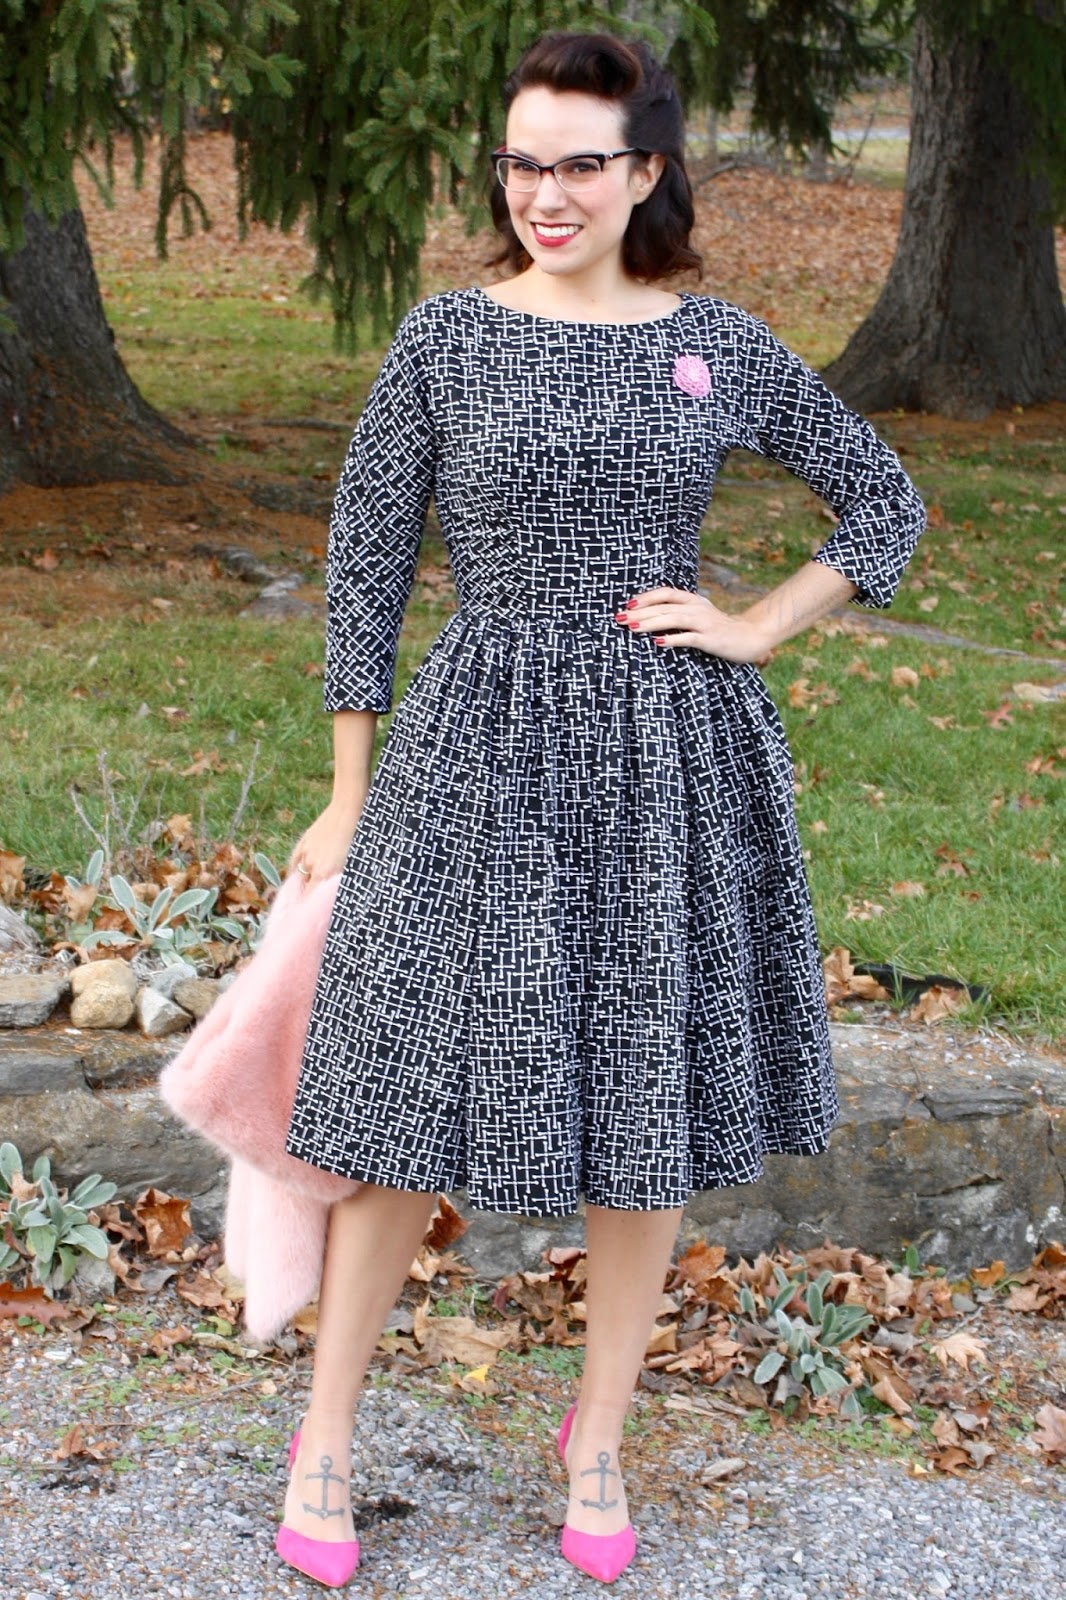
My quest to make something in each and every one of my fall fabrics continues! This time it's my new dress pattern B6284 in black and white jacks print sateen.
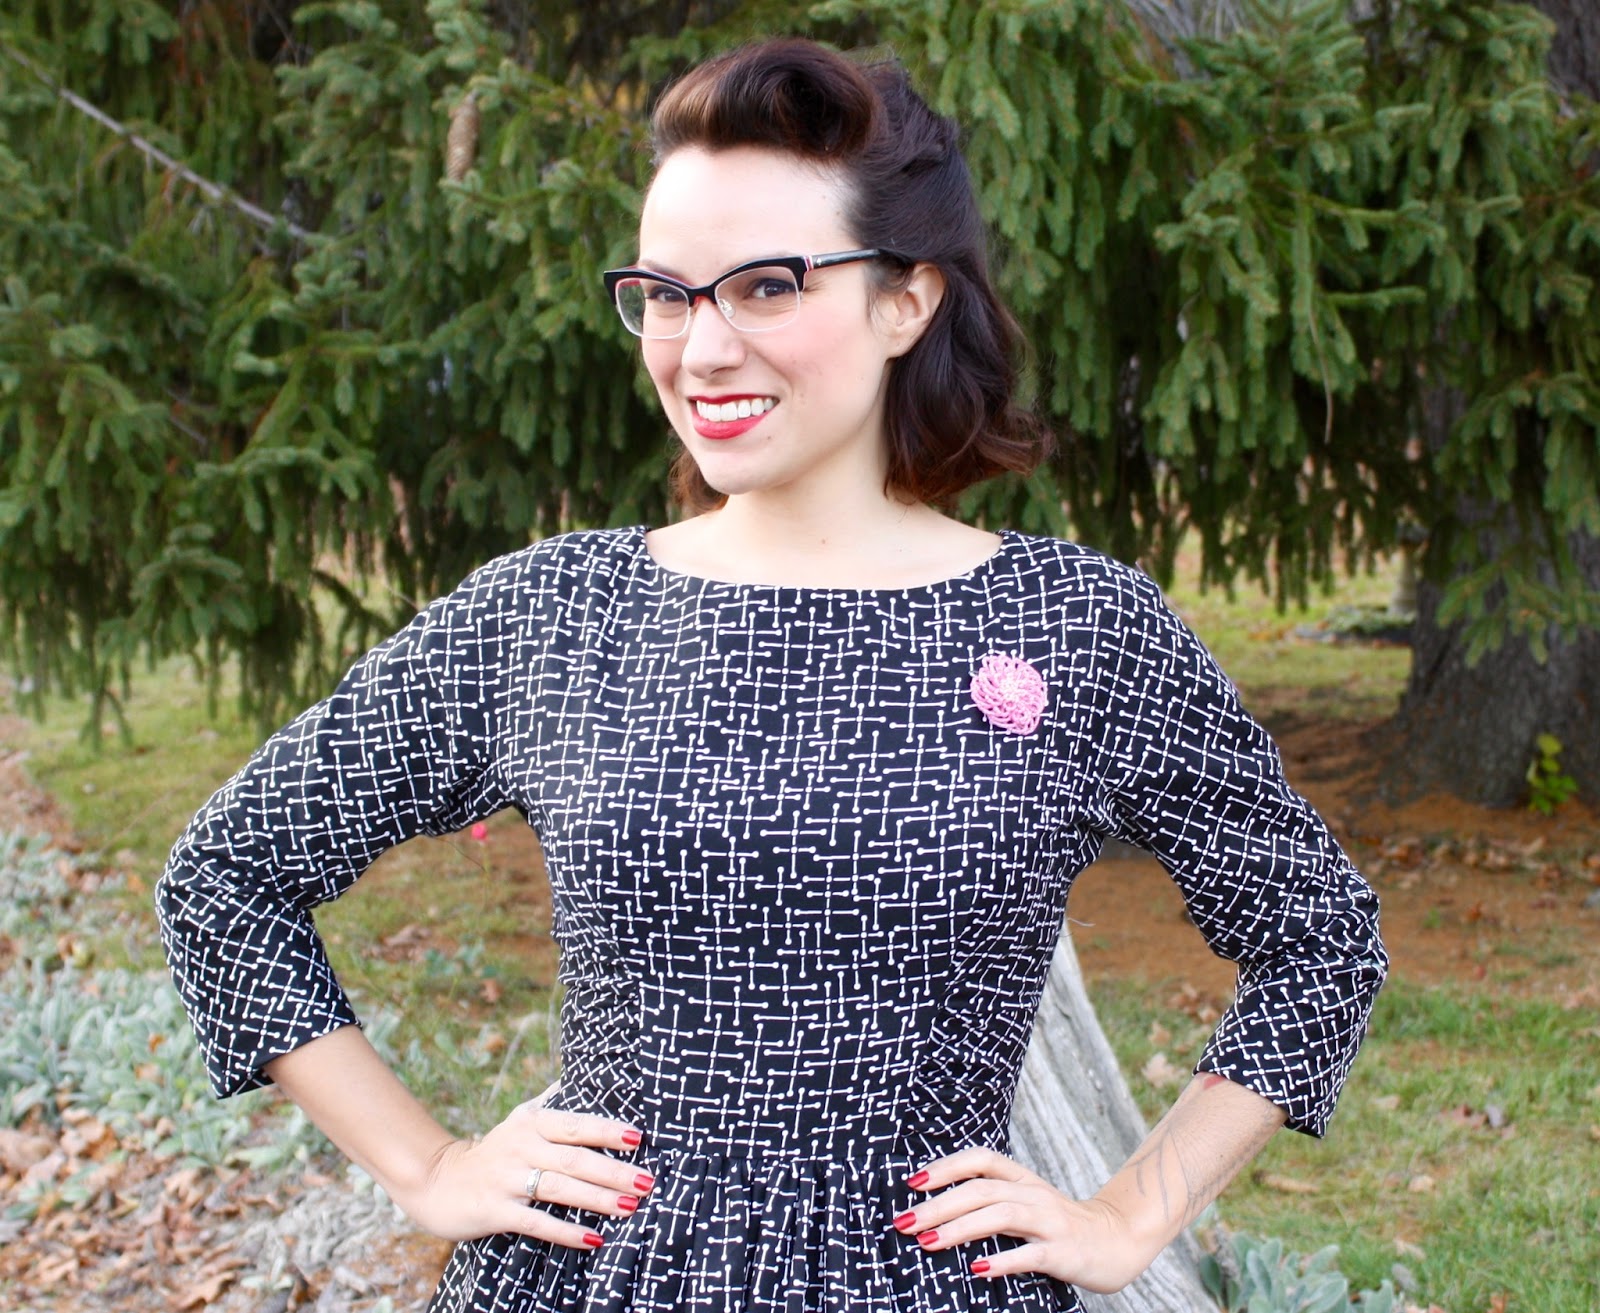
First, a little about the dress. I really wanted to design something that was meant for a variety of occasions, and could be dressed up or down with different fabrics. Sleeves were important, since this is an everyday winter dress.
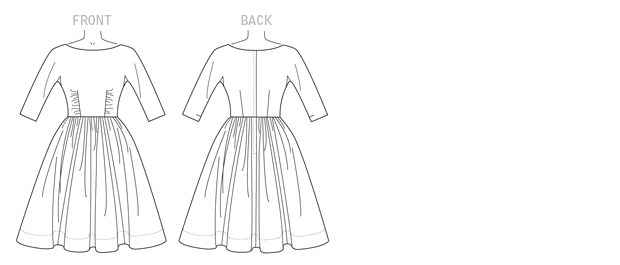
There are gathered front darts, which provides some visual interest and can also be very flattering.
Plus underarm gussets so the kimono sleeves have a nice close fit. Here's a tutorial on this type of gusset. You can use organza or scrap fabric to stabilize the point of the gusset.

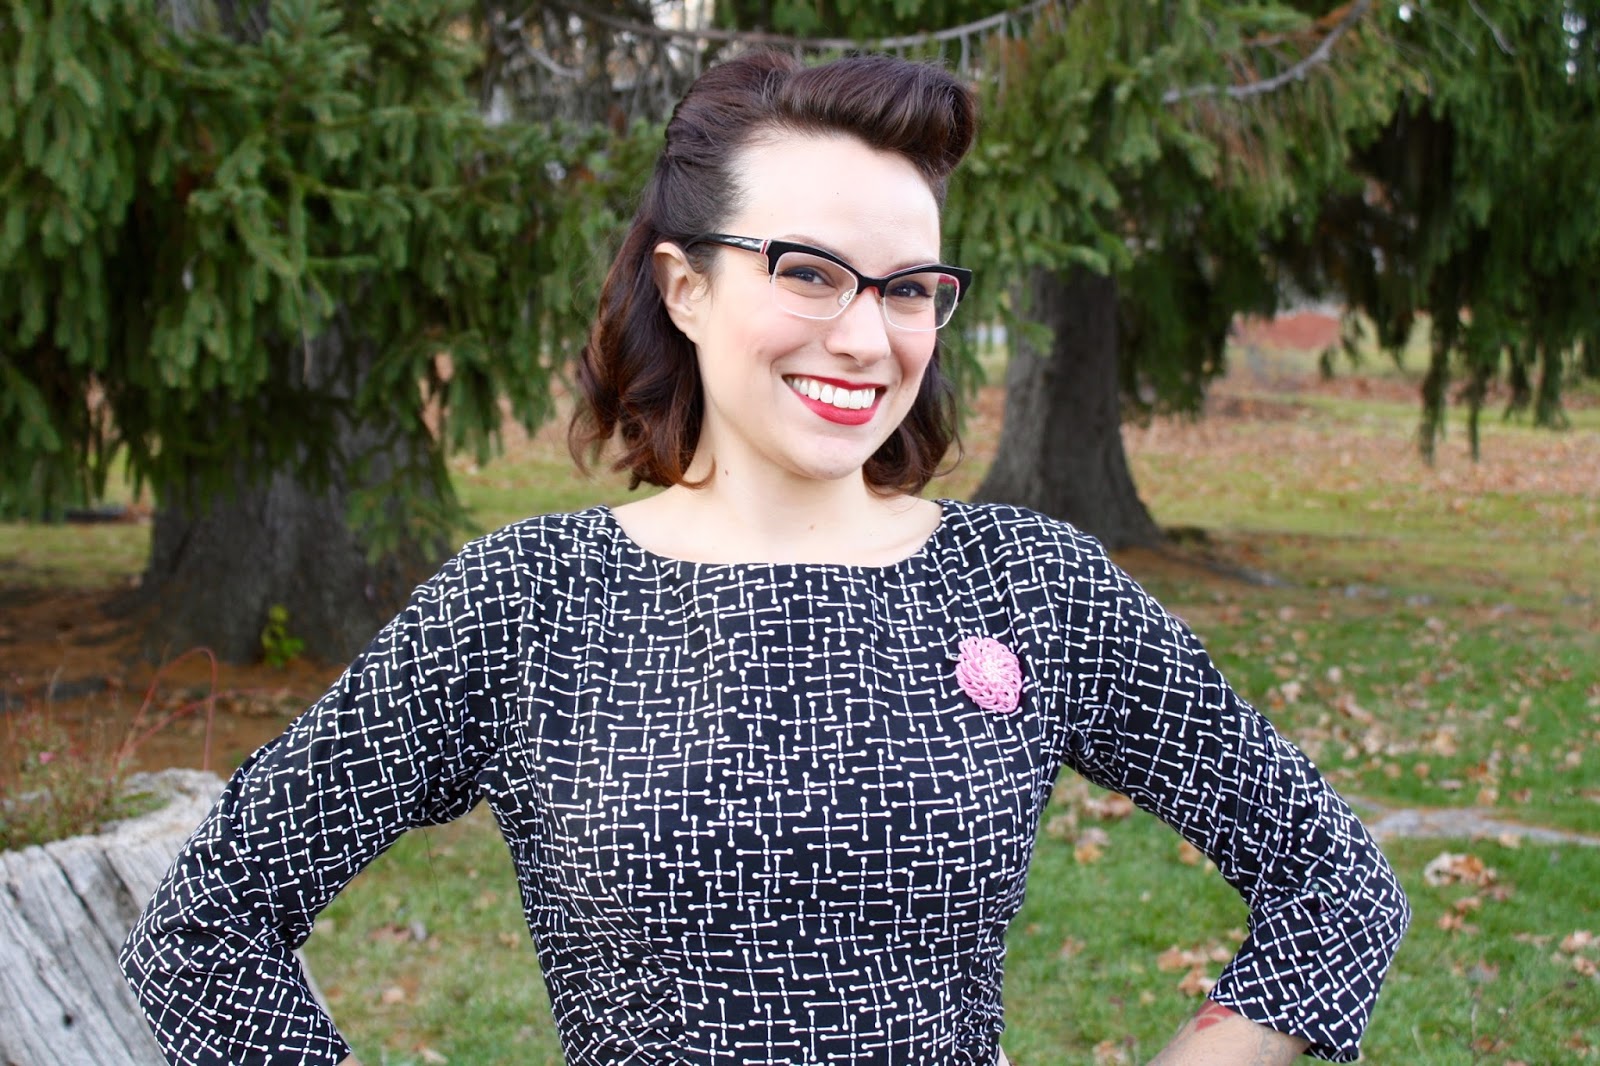
There's a back lapped zipper.

The skirt has six gathered sections and is slightly flared. I'm wearing a chiffon petticoat underneath for a little fullness.

I made a size 12 but ended up taking it in, so I will probably make a 10 next time. Even though I design these patterns and the original sample garment, I still sometimes have to make adjustments to the final published pattern. There's some editing that's done in between stages which means the commercial pattern is a little different from the original paper pattern I sent in to Butterick.
The fabric is an apparel sateen that's easy to sew but has a nice drape. I punched it up with some pink suede heels and a little pink brooch.
And a pink faux fur stole, just because.
Oh! A second pair of new glasses. These are Kate Spade and I got them at BJs for a good deal.

Next up in the fall fabric frenzy: the B6285 box pleat skirt in this grey floral sateen. And of course the wrap top sew-along!
Gretchen Hirsch's Blog

- Gretchen Hirsch's profile
- 49 followers
Gretchen Hirsch isn't a Goodreads Author
(yet),
but they
do have a blog,
so here are some recent posts imported from
their feed.

