
Emily Henderson's Blog, page 70
November 22, 2023
READ THIS POST BEFORE You Buy Any Gifts (Or Start Decorating For Christmas:))

Since a lot of us are prepping for Thanksgiving, we thought we’d write an easy post that’s here to help once the leftovers are securely in the refrigerator. If you use Black Friday weekend to buy all of your holiday gifts but still need some suggestions on what those gifts should be, just below are all of the gift guides we’ve posted so far. Easy peasy. We truly work so hard on them and the recommendations are wholeheartedly endorsed.
HOWEVER, we also wanted to give you a little Christmas decorating inspo since we know that decorating will be starting big time this weekend. This way you can get inspired and even more prepared. So check out the gift guides first and then head to all of the inspiration we’ve pulled together!


Emily really wanted to hone in on gifts that most anyone would LOVE to receive. Most are her tried and trues but she added in a good amount that’s new and exciting:)
Brian’s Guide is definitely giving you a ton of great ideas that are perfect for the cool dad/modern casual man in your life. I actually got these sweatpants for my dad from Brian’s gift guide last year and he asked for a link to get more. THE BIGGEST WIN! Basically, trust Brian’s recs.

Suz (Emily’s MIL for those who don’t know) did it again with a list of amazing gift ideas for the Boomer gal in your life. She and her friends all contributed so don’t go for the standard gift again this year. Get her something that’s exciting for her!
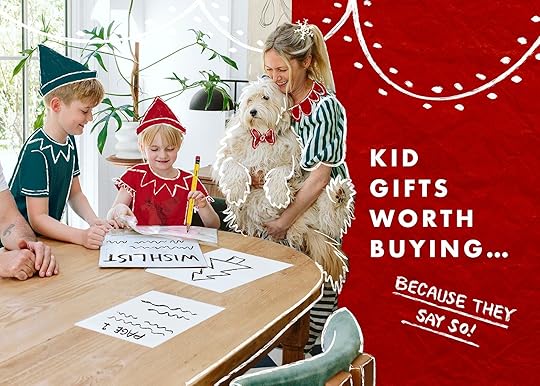

Kid’s Gift Guide | Gen Z/Teen Gift Guide
Emily really took the time to talk with her kids and go through all of their favorite toys over the years. The last thing we all want are toys that are headed for a landfill in under a year. This will hopefully help avoid that possibility. She also goes over what she’s planning to buy them this year too! I think that’s always fun to see.
Since Em’s kids aren’t teens yet and there is a lack of them in our lives in general, we took to Instagram and asked you what they wanted. The answers were awesome, funny, and SO helpful. If you have a teen in your life please go check out this very thorough and comprehensive gift guide.
Ok, enough with gifts and onto decorating!
Color Palette IdeasWhile there is the traditional color palette, we believe you can do whatever you want! It’s your Christmas, decorate how you see fit:)
Classic Reds
 photos by sara ligorria-tramp | left from: my first “refined traditional” holiday look…target style | right photo by kaitlin green, from: holiday around our farmhouse – this year “done is better than perfect”
It makes the most sense to start with a classic palette and move our way to the least (?) traditional. Red is kinda THE Christmas color and Em has used it in a few different ways.
Last year she went red and green but in a sweet vintage style. The tone and patterns you use for your colors are very important. For the farmhouse, Em used vintage soft red quilts and forest green on knitted pillows and plaid fabric-wrapped presents. The colors weren’t light but they weren’t highly bold and saturated. Then in 2018, Emily decorated the Portland project for Christmas but went “luxe refined traditional”. The reds looked ruby, the greens were dark and in nice materials, and black was a major accent color. Both spaces are red and green but due to color tone (and home style), they look and feel different.

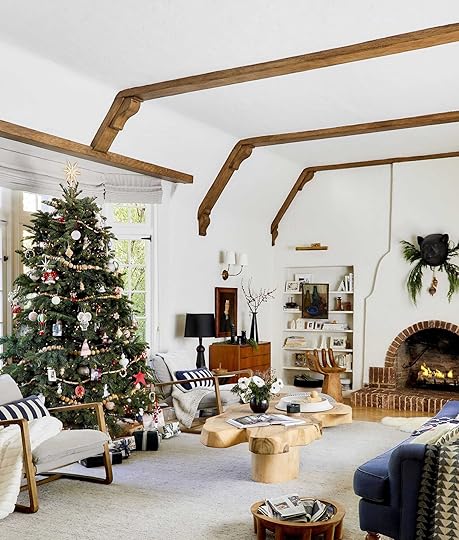 photo by sara ligorria-tramp, from: emily’s “messy” but full of memories christmas family room | right from: our living room, dressed up for the holidays
Red was also a big player in the Mountain House family room and LA living room years back. But in these spaces, Emily used dark blue as a third accent color (very EHD of her:)). It made sense given the room’s already established decor.
 photo by sara ligorria-tramp | from: our scandinavian (and easy, mess-free) holiday living room reveal
But sometimes red can be used as more of an accent color rather than the star of the show like in the Mountain house’s living room a few years ago. Cream and light wood tones were the main characters and it was a Scandinavian dream:)
Baby Blues photo by sara ligorria-tramp | from: our living room holiday reveal
Ok, maybe red really isn’t your thing. That’s ok! Are cool tones more of your style? Lean into blues, rose golds, and whites. So pretty and very wintery!
Very Berry
 photos by sara ligorria-tramp | from: jess’ bold berry-infused, cozy modern holiday apartment
Maybe you still want warm tones but it’s just that traditional red that isn’t your style. Try a berry! This was my last apartment and I loved using that deep juicy color. Plus I added some navy and gold to match the decor of the space. Such a fun year!
Ochre And Green Gathering
 photos by sara ligorria-tramp | from: arlyn’s warm (& sort of last-minute diyed) holiday reveal
Arlyn leaned much more into the ochre, gold, and green vibe. So chic and unexpected while still having a classic feel.
Soft Blush And Cream photo by sara ligorria-tramp | from: how we decked our halls for christmas
This is where things get crazy! Blushes and mauves?! It may not be traditional but it is BEAUTIFUL. I love this soft, warm vibe. The key here is to use a lot of textiles to make it feel real cozy.
FUN Metallics

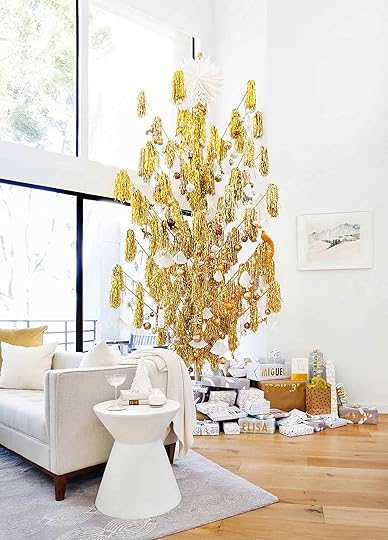 photo by tessa neustadt, from: 12 days of instagram with target | photo by sara ligorria-tramp, from: elliot’s metallic holiday reveal | photo by tessa neustadt, from: a very orcondo christmas
And this is where things get really fun. Why not have have much sparkle as possible?! Use hot pinks with bright whites or softer pinks with silver or truly go for the gold! That tree Orlando has was INCREDIBLE. I saw a similar one at Downtown Modernism this year and almost thought about snagging it because it was so awesome in person.
StockingsMantel Mania (But Simple)

 photo by sara ligorria-tramp, from: arlyn’s warm (& sort of last-minute diyed) holiday reveal | photo by sara ligorria-tramp, from: brady’s holiday decor | photo by tessa neustadt, from: at home with ginny for christmas
Nothing too crazy here in terms of inspo but what I love is that all of these are fairly simple to achieve yet they make a statement. I love Arlyn’s mismatched stockings all on one side with mismatched stocking holders. Brady is the master at simple and chic and that is exactly what that extra-long garland over the fireplace is. Pair it with two neutral, matching stockings and you are set. Then finally on the far right, Ginny separated her stockings making the wood chip garland the center of attention.
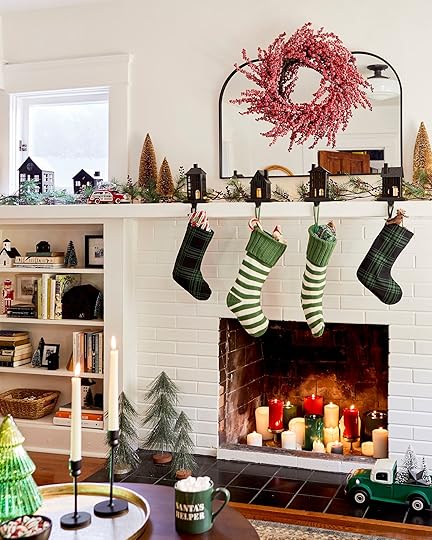 photo by sara ligorria-tramp | from: how sara created her first traditional but youthful christmas (with all target)
Sara however, used her long mantel to create more of an elaborate scene! She mixed faux garland, bottle brush trees, house figurines with matching stocking holders, and a little Christmas car. Oh, and she also went for a slightly mismatched stocking look. It’s so cute and adds so much ambiance to the whole room!
No Mantel, No Problem
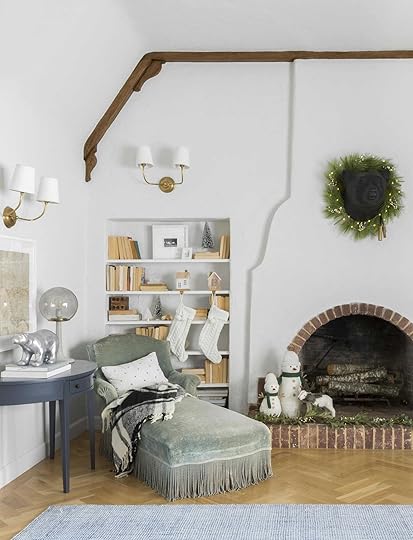 photos by sara ligorria-tramp | left from: target’s holiday assortment is here to make all our gatherings look and feel extra special this year | right from: our living room holiday reveal
But not all of us have a mantel so you might need to improvise. No problem! Do you have a self? See how cute both of these photos are? Both living rooms had fireplaces but they didn’t have mantels. Using neighboring shelves is a great alternative. Or any shelves will do!

 photo by jayme burrows for ehd, from: california winter wonderland glam | photo by zeke ruelas for ehd, from: ginny’s christmas bedroom
But maybe you don’t have any shelves. Also not a problem. Hang them from a console, a dresser, or even a bedframe if you live in a studio or just like the look:)
 photo by tessa neustadt for ehd | from: 12 days of instagram with target
This hack is really great if you don’t have a mantel. Just wrap some presents (make sure they are weighted) then stack them high enough to throw some stocking holders and stockings on. DONE!
VignettesNow what Christmas home would be complete without a little vignette or two (or at least a little extra razzle dazzle)??
Happy Entry
 photos by sara ligorria-tramp | left from: decorating for the holidays – family friendly style | right from: our living room, dressed up for the holidays
If you have an entry bench and or cabinet, it’s nice to add a little holiday cheer to the first thing you and your guests see when they walk into the door. Pillows, some garland (ideally fabric or faux since they make less of a mess), or some sweet pictures from old Christmases. Holiday figurines are always a good idea as well.
Festive Surfaces

 photos by sara ligorria-tramp | left from: decorating for the holidays – family friendly style | middle from: my first “refined traditional” holiday look…target style | right from: our living room, dressed up for the holidays
See? Whether the figurines are snowmen, bottle brush trees, little houses, or reindeer, just pair them in groups of two or three in different sizes, and add some garland (real or fake it doesn’t matter here!).
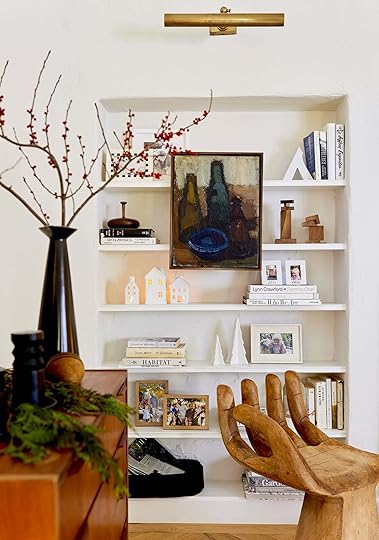
Greenery Accents
 photos by sara ligorria-tramp | from: jess’ bold berry-infused, cozy modern holiday apartment
A little greenery will go a long way. I love real cedar that you can get from places like Trader Joe’s. It’s delicate enough to put on shelves or even picture frames for some Christmas visual drama:)
House Party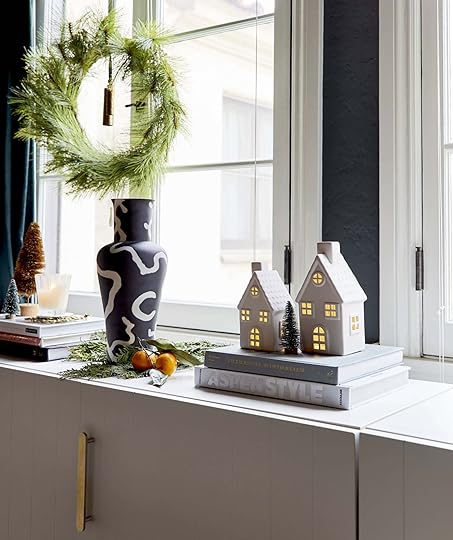
 photos by sara ligorria-tramp | left from: arlyn’s warm (& sort of last-minute diyed) holiday reveal | right from: our living room, dressed up for the holidays
But the real MVP of Christmas vignettes are little houses. You don’t have to create a whole little village but a few scattered around in little duos or trios (especially if they light up) will add the sweetest Christmas feeling to your home. Take these two examples above as proof and feel free to copy them:)
Hope this was fun and helpful! See you Friday for our annual Black Friday Sale round-up post and then a VERY special reveal on Saturday:)
Love you, mean it.
Opening Photo Credit: Photo by Kaitlin Green
The post READ THIS POST BEFORE You Buy Any Gifts (Or Start Decorating For Christmas:)) appeared first on Emily Henderson.


November 21, 2023
Want One Of Our Rugs??? Now Is The Time For A 25% Off Discount! (+ See How They Work With ANY Style)

Hello! The sense of pride and giddiness I feel when I get to talk about our rug line is pretty huge. Emily and I really thought about all of you when we were creating it (duh). We knew and wanted it to be super versatile (so relatively neutral) but of course still special (aka not boring). And in case you haven’t heard this is a pretty massive sale month meaning if you are in the market for a new rug, now would be an ideal time to maximize on savings.
Today, I not only wanted to show you our rugs again (well, most of them at least ha) but I also wanted this post to include a service. I know that when it comes to choosing things like rugs, lights, paint colors, etc., for a whole house, people tend to get overwhelmed. And look it can be overwhelming! So I thought I would mix and match a “plush rug” with a more “utility-style rug” and show you them in seven different styles. I think it’ll show their versatility and might spark some rug ideas for your home. Honestly, I could have created a hundred combos because these rugs work so well together but it’s a holiday week and we don’t have all day! So enjoy and let me know what you think:)
The Classic EHD Combo:)
Blue Oregon Plaid Wool Area Rug | Natural Hillcrest Jute and Wool Area Rug
Tonal gray-blues, whites, wood tones, some pattern…it’s EHD in a nutshell! Sure some unlacquered brass is missing but currently we are leaving metals out of our rugs:) I just think this is SUCH a pretty combo and feels effortless in Emily’s farmhouse. So while all of these rugs are “EHD farmhouse-approved,” if you want to guarantee that classic EHD vibe you cannot miss with one or both of these rugs in your home.
Actually, the Oregon is currently one of our top sellers and we are not surprised. We instantly fell in love with it because the blues were perfect and the handstitched look made it look so much more expensive than it is. It also comes in black and a beige/rust! The Hillcrest was another instant, “Oh, this is good,” when we saw the sample. Also, this material blend is softer than a typical jute so cute easily be a living or bedroom rug too.
Soft Modern
Ivory Rowena Checked Wool Area Rug | Natural Molino Jute Area Rug
I might be partial to this one:) Currently, the Molino is in my kitchen (sorry my kitchen is not ready for the internet) and I’ve been eyeing the Rowena for my bedroom. I was playing with it in a few mood boards this weekend so I’ll keep you posted!
Honestly, the Rowena is one of those rugs that’s a shapeshifter. It can effortlessly go more traditional, but then totally neutral farmhouse, or a little modern with the right furniture pieces. Plus it’s a two-pile rug and has a ton of personality with that medium-scale grid pattern. Now the Molino will automatically give your space that cool chic vibe. The medium dark tones and modern “random” asymmetrical pattern are both very on trend yet not so trendy that it won’t look cool in five years.
Contemporary Cool
Blue Fountain Checked Wool Area Rug | Natural Oberlin Striped Jute Area Rug
Now, if your style is more contemporary we’ve got you too! Look at how fun these cuties are together. Bold, graphic, and colorful (well, one is colorful:)). In the early stages, I was concerned that this drop might not have enough contemporary options but boy I was wrong! I think this looks so fresh and playful together. But what’s also cool is to see the Oberlin in our Portland photographer, Kaitlin, cottagecore-esque Scandinavian bedroom. While this combo leans modern, Kailtin’s bedroom is totally different vibe. See? Versatile.
Modern Eclectic
Grey Blue Jay Colorblocked Wool Area Rug | Blue Lake Striped Jute Area Rug
This combo feels very “cool” to me and I LOVE IT. I also can’t not fall in love with every abstract geometric shape I see. It’s a problem. I actually also have the Blue Jay on one bedroom mood board too:)
I think these two work so well together because not only are their names in reference to the same area (hint hint) but the color palette is great, there’s a mix of slightly warm and cool tones, as well as pattern scale variation. They both have lines and geometric shapes but in two very different ways. 10/10 combo…if I do say to myself.
Organic Minimalism
Ivory Waverly Broken Stripe Area Rug | Natural Geneva Tasseled Jute Area Rug
This one is for my organic California casual people! Soft, textured, and interesting. I love that the Waverly is a mix of a broken stripe and a grid pattern but in the most subtle way since it’s all one color (but two different pile heights for interest and foot massages). Then the Geneva is just incredibly cool and fun. It feels like the wild child of the group. It will make any room instantly more exciting but not in an overly loud way. It is a neutral-toned rug after all:)
Modern Farmhouse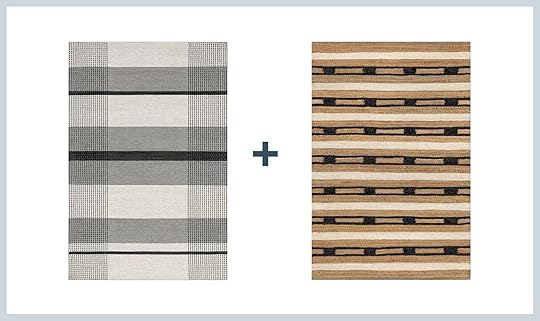
Grey Portland Plaid Wool Area Rug | Natural Raleigh Striped Jute Area Rug
Keeping the colors still at bay, this combo is also fun and bold but in a modern farmhouse kind of way. But hey, if you want a little color don’t worry because the Portland also comes in blue…obviously, it’s our signature color! But if you love the Raleigh (as we do), but aren’t a farmhouse-style person then please come this way…
Neutral Eclectic
Ivory Hyperion Tasseled Cotton and Wool Area Rug | Natural Raleigh Striped Jute Area Rug
Boom! Modern. This combo is equally as interesting but has a totally different feel. God, design is fun. The Hyperion is the sibling to the Merrick (another bestseller and one of Em’s favorites). It’s the kind of rug that will elevate your space, making you look like you know how to make cool design choices without it actually being a risk since it’s in two safe and forgiving colors. That white has a good amount of color variation making it surprisingly forgiving.
So what do you think? Was this visually helpful? Are you needing to buy a rug? Have you bought one? How is it!?? We truly are so proud of these and want them to make your homes even more special. We also HIGHLY recommend a rug pad as they always make rugs more comfortable (obviously) and look more high-end. From tomorrow (11/22) to the November 30th Rugs USA is having its biggest sale of the year with 25% off sitewide! So now would be a great time to snag one of ours or any other rug on their site. We love them and you so hopefully we can all be in love together:) Happy rug shopping!!
Love you, mean it.
Opening Image Credits: Styled by Getteline Rene | Photos by Mark Weinberg
The post Want One Of Our Rugs??? Now Is The Time For A 25% Off Discount! (+ See How They Work With ANY Style) appeared first on Emily Henderson.
November 20, 2023
A Beautiful Bedroom Makeover Reveal For My Friend, With Some Of My Favorite Bedding


In this midst of Black Friday inundation on the internet, I’m so happy to give us all a break and show you a bedroom makeover we did for our friend and photographer, Kaitlin Green. After an extensive Covid remodel, Kaitlin and her husband Corey ran out of steam to pull together some of the rooms, and like many of us, we de-prioritize our bedrooms choosing instead to finish the rooms that are more guest-facing. It was a white box with leftover starter furniture. So when Brooklinen reached out for a bedding feature we figured it was the perfect excuse to redo her room (and FAST). And while it’s the busiest time of the year over here, this came together strangely easily and was so much fun to decorate, style, and shoot. Teamwork makes the blog work 🙂
I want you to keep scrolling and see Kaitlin’s beautiful photos (skill trading FTW) but I also want you to watch the FULL Webisode on Youtube that Brian shot and Gretchen edited (family teamwork also FTW). For those of you who like a shorter-form video, you can watch this one as well (Just wait for the short ad to play):
The Room Two Months Ago…

I feel like this room is so relatable. With two small kids, parents are often just a bit exhausted, and it feels almost impossible to put your time/resources towards yourself, especially after a draining remodel. So they prioritized the main living spaces – the kitchen/living room and we are doing the rest over time. It’s a real win/win (we trade for photos).
Jumping Off Point – The Wallpaper
I swear, wallpaper makes decorating easier because you need so much less for the rest of the room once you have a pattern on the walls. Kaitlin and Corey have great style – a touch more safe and contemporary than mine, and like warmer tones than I usually go for (see her basement reveal we did last year HERE), but I think I really get them. With almost no architectural interest in the room, we figured wallpaper was the way to go, but with a more calm pattern (the room isn’t big and again, they have two small kids). I pulled out my stash of neutral wallpapers, brought them over, and almost immediately we chose this wildflower floral by Kelly Ventura. It’s SO PRETTY.
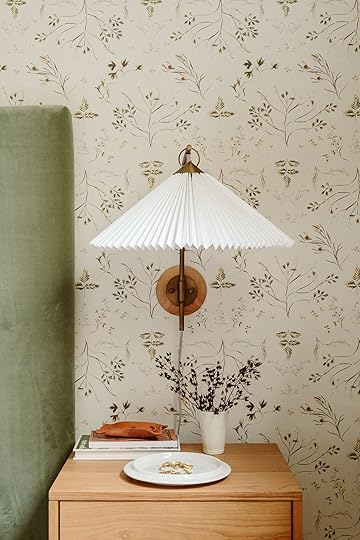
Wallpaper | Sconce | Leather Catchall (similar) | Ceramic Dish (unavailable) | Ceramic Cup (similar)
The wallpaper is hand-drawn (Kelly is incredible, please follow her Instagram for painterly inspiration – it’s one of the few accounts I constantly show Birdie who wants to be an artist). We then took the colors from the wallpaper and chose the bedding from Brooklinen’s fall line, which worked PERFECTLY.
The Bedding – A Mix of Percale And Washed Linen
Linen Pillowcases | Striped Pillowcases | Striped Sheet Set | Duvet Cover | Throw Blanket
Kaitlin and Corey had never prioritized bedding in their budget (again, they just remodeled which can be so depleting, trust me). So I was ECSTATIC to give them the gift of Brooklinen bedding (once you go Brooklinen it’s hard to go back). There is a reason their percale sheets and duvet covers make it on my gift guide every year (and I’ve tried many, I promise). I specifically love some of their patterns, like these sheets, because they aren’t wild and bold, but just classic and neutral (with more interest than just white). I asked them if she wanted to mix percale with washed linen after touching it and they were really into it, so we added that raisin-colored duvet cover which is so gorgeous, and the olive/ochre pillow shams. You know I have feelings about linen bedding in general (there are two types of people – linen bedding lovers and percale bedding lovers), but I had forgotten that not all linen bedding is the same and Brooklinen’s is extremely soft and cooling. I feel like maybe I got burned by some less-than-great Target linen bedding in our guest room (which is pretty, but just a bit rougher). So the maker truly matters when it comes to bedding and Brooklinen’s linen is not only gorgeous, but still VERY soft.

We mixed in this extremely soft and pretty throw (LOOK AT THOSE COLORS) which I’m stealing for our holiday living room – the colors are perfect for me. Here’s my case for a slightly patterned sheet – I love light bedding (not totally opposed to dark, but prefer a darker duvet) but bright white doesn’t have the longevity that I want (methinks the self-tanner is the problem, of which I won’t quit), but with a small pattern like this the bedding lasts YEARS. I also really like pale tones for this reason.
 The Furniture
Velvet Headboard | Bed Frame | Nightstand | Bench | Rug
That green velvet paneled headboard is soooo good, y’all. With only a month to produce this makeover, we reached out to a consistently incredible furniture partner, Article, and ordered this headboard, oak bed frame, and nightstands. They came within two weeks and are excellent. The headboard was installed with a cleat that the panels sit on (you can rest it on the floor but we wanted more height). It’s such a pretty color and created enough of a statement/focal point that we didn’t need to hang anything above it. The bench is from Bed Bath & Beyond and we bought the sconces from Crate & Barrel.
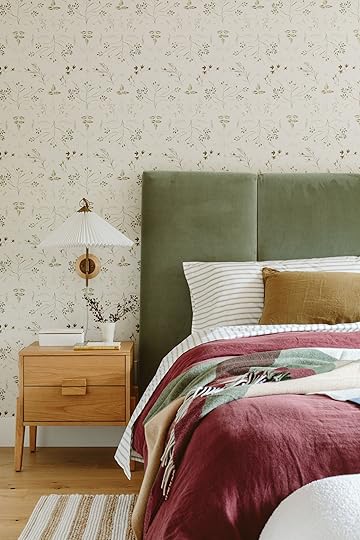
We didn’t have a ton of space for nightstands because of her closet (and their need for a king-sized bed), so these provided nice storage for being petite, and the sconces freed up the nightstand space.

Dresser | Art | Wicker Lamp | Tray (similar) | Vase (similar) | Ceiling Fan
The other side of the room houses their dresser and usually a Frame TV above it, but we shot the day after the wallpaper was installed and instead just leaned a couple of pieces of art I had in storage (from Crate & Barrel).
The lamp, fan, and bench are all from Bed Bath & Beyond (The dresser is West Elm, which they already had).

Wall Mirror (similar)
The Rug (AKA The Oberlin From Our RugsUSA Line)
We brought in the Oberlin rug, a jute and cotton mix which is WAY softer than most jutes and has a nice broken stripe. It paired so well with the wallpaper (both neutral) being more graphic against the smaller floral pattern.

The colors all worked so well together, even impressing ourselves 🙂 Obviously, all our partnerships helped make this possible with our timeline, so a huge thanks to, of course, Brooklinen for partnering on this makeover/post. And we couldn’t have pulled it off so quickly without Article, RugsUSA, and Bed Bath & Beyond. Look Mom, we did it!!
Now for the really good news:) Right now Brooklinen is having their Black Friday Sale and all Brooklinen items are 20% off through November 29th. You can save even more by stacking this with their bundle discount so I’d recommend getting the Hardcore Bedding Bundle which can save you up to 40%. Maybe this is your time to finally refresh your bedding or get a jumpstart on your holiday shopping since this is their largest sale of the year!

Peeking into her room gave us all a lot of joy, so we had to capture it 🙂

….And then when your friend/designer/colleague/client poses awkwardly in your bed in the name of getting a portrait. There’s that!


Thanks, Brooklinen for making such pretty and soft bedding, and Kaitlin for shooting her pretty room with me. I hope this makeover (although sponsored,of course) was a nice reprieve from the sales content this week. xx
*Design and Styled by Emily Henderson (me!)
**Photos by Kaitlin Green
The post A Beautiful Bedroom Makeover Reveal For My Friend, With Some Of My Favorite Bedding appeared first on Emily Henderson.
November 19, 2023
The Link Up: The Henderson’s New Favorite Family Show, Caitlin’s VERY Affordable “Plump Lip” Hack, And A BIG PIECE OF NEWS

Happy Sunday everyone! This is by far our busiest time of the year meaning we are creating as much content as possible for your viewing design pleasure. Let’s just say, get ready for tomorrow:) But for now, we have a bunch of very fun Sunday links. Enjoy!
Ok, actually we can’t keep tomorrow’s reveal a secret! We partnered with Brooklinen to give our amazing Portland photographer, Kaitlin and her husband a bedroom makeover. Here’s a fun Webisode on Youtube that Brian shot and Gretchen edited! But for a little taste of the video, watch below! (Just wait for the short ad to play):
Also, right now Brooklinen is having their Black Friday Sale and all Brooklinen items are 20% off through November 29th. FYI, you can save even more by stacking this with their bundle discount – we’d recommend getting the Hardcore Bedding Bundle which can save you up to 40% off the regular price. Maybe this is your time to finally refresh your bedding or get a jumpstart on your holiday shopping since this is their largest sale of the year!
Speaking of sales…we sweet talked the team at Anthropologie again, and they’re opening up their Black Friday sale A WEEK EARLY just for you. Use code EMILY30 for 30% off clothing, accessories, and home and an extra 40% off sale items. This is legitimately the same Black Friday offer that folks will be getting later this week, so you have first dibs! Click here and here to check out everything that’s on sale. (They’re special areas of the site – not everyone will be able to find these deals!)
This week’s house tour is a magical home in the Bay Area of California. Surrounded by nature, Ayni Raimondi Vienna and Sean Vienna, found their dream 1921 home and fully brought it back to life with the help of designer, Shelbie Cox, and contractor, Abel Maldonado. Go see all of the beautiful Douglas fir beams!
From Emily: The new show that the kids and PARENTS are watching together. Life on Our Planet, narrated by the closest man to God we have, Morgan Freeman, is so educational and entertaining and a real feat of CGI magic. It starts from the beginning of time (literally) and we are in the middle of the dinosaur part. IT’S SO GOOD. So right now we waffle between that and The new Babysitters Club 🙂
From Arlyn: Is there such a thing as slipper season? My vote is yes and we’re in it. I’ve gone through my fair share of slippers and my comfy house shoe of the moment are these RockDove Teddy Fleece slippers I got at Target a few months ago. Veronica recently shot my kitchen and when I greeted her at the door with slippers in tow, she immediately looked down, and said “These are cute, send me the link for them,” so here I am now sharing them with you, too! They’re roomy, comfy, warm but not overly hot and, best of all, on sale for around $24 right now. RUN!
Need some beautiful and colorful wallpaper? Blessed Little Bungalow’s just came out with her new wallpaper line and it’s awesome. Go check it out!
From Jess: I finally found my new pair of sneakers! As much as I want to lean into the chunky sneaker/jean look, I’ve found that I prefer a more slender sneaker to wear with my jeans. So when I found these I was pumped! They are classic but not overly popular and easy to pair with almost anything. I highly recommend.
Caitlin: On today’s edition of “Caitlin’s cheap skincare staples,” I gotta tell y’all about a little affordable swap I’ve made in my routine: I’ve officially eschewed the famous, trusty Laniege lip mask in favor of this $9.99 balm. I’ve been wearing it non-stop for the past month and during that time, THREE of my closest friends (like, we’re talking best friends here – the people I see every week!) asked if I’d gotten lip filler. It’s not a plumping gloss – so there’s no burning or anything like that – but it just has such a nice, rich consistency and a subtle shine that leaves my lips SO HYDRATED. The tube is a real PITA (I thought mine was broken when I opened it, TBH, but it’s just bad packaging) but the product is so good that I will happily tolerate the inconvenience. I’m hoping that this set of 6 goes on sale next weekend because I now want ALL THE COLORS!
Mallory: HUGE NEWS!! If you’re in NYC at all next year The Notebook is becoming a musical and my boyfriend, Chase is playing Lon (the James Marsden character) and understudying Noah (the Ryan Gosling character)!! You might recognize him from my MOTO🙂 The music is by Ingrid Michaelson so, ladies it’s gonna be good. See you guys in NYC!!!!!
Colin King can’t stop creating beautiful things and this time it’s a stunning bedding line with Culitver. It’s luxe, it’s linen, and we LOVE this bedcover🙂
Gretchen: Pants. Everyone is wearing them! I typically stick to vintage Levi’s, comfy leggings, or my Old Navy pull-on linen pants–I love them and have them in five colors but sometimes they can lean a little pajama-y. I’ve been wanting to find some more “profesh”-looking trousers and would especially love it if they could still feel as comfortable as PJs. I ordered a bunch of the Abercrombie Sloane pants because I’d heard rave reviews, but I have to say, the fit was not for me. I tried them in black, light brown, navy satin, and even in the jean version. Each one fit a little differently, none to my liking. I dropped roughly $90 on each pair (will be returning) and was done spending beaucoup bucks, so I hopped onto Amazon and found these! Spoiler alert: I love them. While technically more “palazzo” than “trouser,” they fit like a dream, have a stretchy waistband so I can actually move around, and still have pleats in the front. They’re definitely very wide-leg (which I prefer) potentially a little short, but for just $30, I’m keeping them and adding two more colors to my cart!
That’s it for today! See everyone tomorrow. xx
Opening Image Credits: Photo by Kaitlin Green | From: Family Room Reveal – By Far The Coziest Room In The House And Here’s Why
The post The Link Up: The Henderson’s New Favorite Family Show, Caitlin’s VERY Affordable “Plump Lip” Hack, And A BIG PIECE OF NEWS appeared first on Emily Henderson.
November 18, 2023
Our Favorite Kids Toys And Gifts For Each Age (As Told To Us By Them) + What We Are Giving Them This Year

As a parent with an 8 and 10-year-old (WHERE DID THE TIME GO??!!!), I was STUMPED on what to give them until a few weeks ago. Listen, all they really want is endless YouTube time (no chance), crop tops (not yet, ma’am), video game ANYTHING, and any sort of tech that they definitely don’t need….yet. I feel increasingly old school, wanting them to go outside or just engage in something without a screen. I’m so glad I didn’t publish this post a few weeks ago as planned because I’ve done so much more research/shopping and found stuff I’m really excited to get them – let’s just see/hope if they agree. I’m also just going to pepper in photos of my kids when they were toddlers, when I felt more ok to put them on the internet (because they didn’t look like who they were going to become yet). Y’all, they might be the cutest kids on the planet.
 **the year I bought all these vintage action figures for charlie from a thrift store and he played with them for two minutes.
 But first, for this year’s kids’ gift guide, I’ve asked our kids their favorite toys from every age that they can remember (I filled in ages 1-3), and then at the end I’m telling you what we are giving them. I shopped long and hard to find some new things this year that I really hope they’ll like. But on Christmas days they can act like monsters so who knows?!??!
Listen, these are the waters that we swim in – the Christmas consumer conundrum. So if we are doing this let’s just have them be great hits and things they’ll love and play with for a long time, shall we?
Ages 0-1
0-1 is the year to buy them toys and clothes that YOU like to look at because you get 100% control (which will change). I feel far away from the baby years (but would have another if I could snap my fingers – read about Brian’s vasectomy here) so there are likely other blogs that will do this better, but the classics and the goods are always classic and good.

Both of our kids were obsessed with these blankies with faces – the face was soft but gave them a sense of a buddy, but the blankie part was extremely soft. Be prepared for them to have an outsized obsession with this guy and not be able to sleep without it.
 Activity Gyms + Quiet Books + Busy Boards


First Quiet Book | Triangle Activity Center | Busy Board
Both our kids loved activity gyms or blocks (for multiple years) and I didn’t discover the quiet book til I had Elliot (amazing for restaurants, flights, anywhere they need something to do with their hands). Definitely good for toddlers, too. Busy boards are GREAT, too.

6 Piece Water Block Building & Color Mixing Learning Toy
These are both pretty and so fun to play with. Even I loved to build with them at the end of the day.

Rocking anything – you’ll worry about them falling off, but the moments between terror and joy will be worth it.
Ages 2-4 (Or Up)
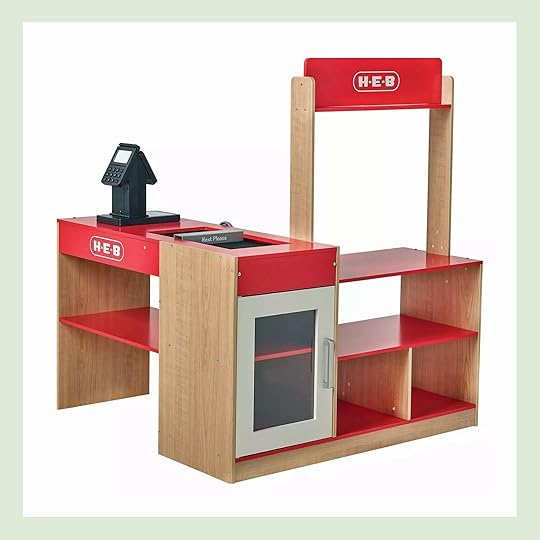
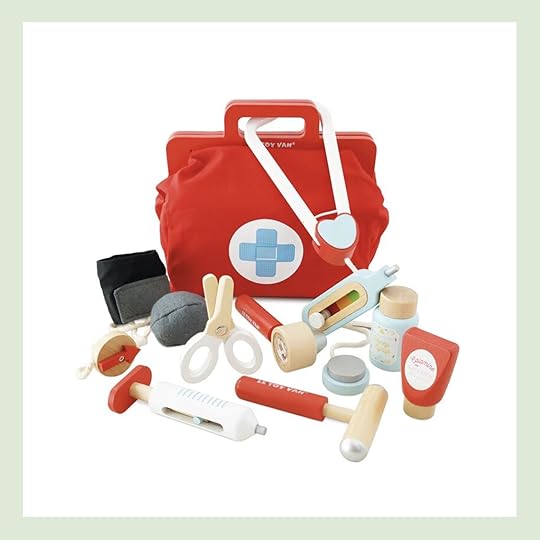
Grocery Store + Food | Doctor Set
Imagination toys were my favorite things to play with the kids when they were toddlers. This grocery store (while big and not my favorite aesthetically) was so much more fun than a kitchen because they felt like they had a grown-up job, with credit cards and money. They played with it til they were 5 and 7. The belt actually moves and every item beeped when you scanned it. Our kids rarely played with the toy kitchen but played “store” for hours and hours.


Faux Wood Blocks | Colorful Foam Blocks
We had the larger version of these faux wood blocks and they were a huge hit for YEARS – they could go so high without fear of tumbling on them when they were little. These colorful ones are also a classic.

Hours and hours of tactile fun.

Go for a big inventory! Both our kids loved legos of course (A LOT), but these are more fun, less messy, and strangely rewarding to play with.

Because getting them into the bath every night is like hazing for a fraternity over and over. Sure, some nights it’s fun but for others, you need some extra tools. Colorful bath bombs always helped.


Princess Dress Up | Medieval Shield and Helmet Playset
Costume party: For Birdie, it was a Princess dress-up set with tiaras (or for Charlie he loved anything with shields, swords, masks, etc).

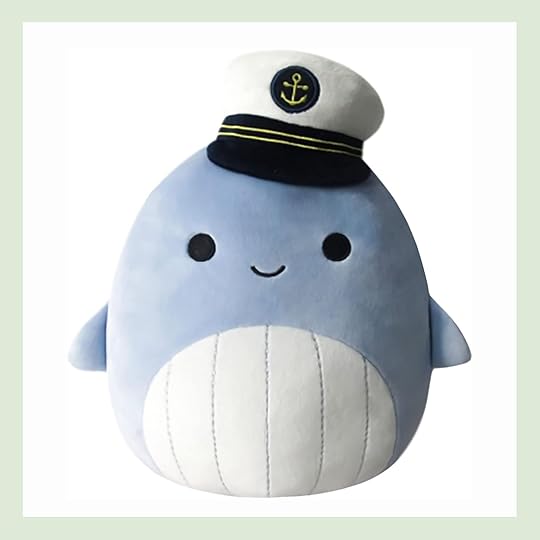
Anything Jellycat and Sqishmallow – whatever secret magical formula these companies have created makes the kids go nuts. It’s like cat nip for kids. Be careful.
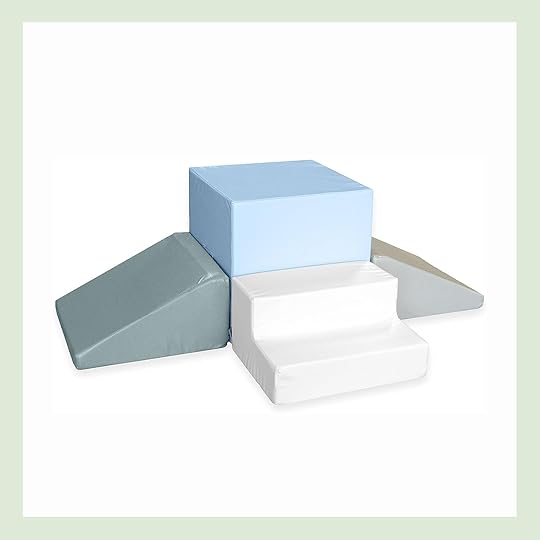

Indoor Foam Playset | Nightfall Blue Foam Kids Arc Playset
Huge wood play-on blocks – We had a version of these til we moved here (kids loved them until 6 years old or so), but these are much cuter (but not sure if they can stack as well).

Washable, no-stress nail polish so that you can have a mani-pedi with them without ruining their clothes, your carpet, or your life.
Ages 4+

Jewelry Boxes (or any secret boxes with a key). Elliot has the Pottery Barn ones (and I let her buy trinket boxes when she vintage shops with me). Most kids just like a box that only they can open that feels secret and private (same:)).

I’d like to introduce you to one of the presents that looks like garbage but they continue to LOVE so it makes the gift guide every year. She ain’t pretty or cool, but they can’t wait to manage their money inside. (Just make sure they write down the pin, it’s annoying to reset). This toy expires around age 9 FYI, but we are still enjoying it with our youngest.


If cats already creep you out this will not be your friend. It’s weird and expensive (so try to snag it on sale next weekend). This is a comfort pet for senior citizens but our kids LOVE THESE SO MUCH. It’s animatronic, and meows, purrs, and cleans its own paws, rolls over to pet tummy, etc. WHY OWN AN ACTUAL CAT???? Do some people think it’s creepy? SURE! But it was the second stand-out toy from last year (behind the 3D printer which they still play with). It’s so fun TBH. Perhaps this was more for me.
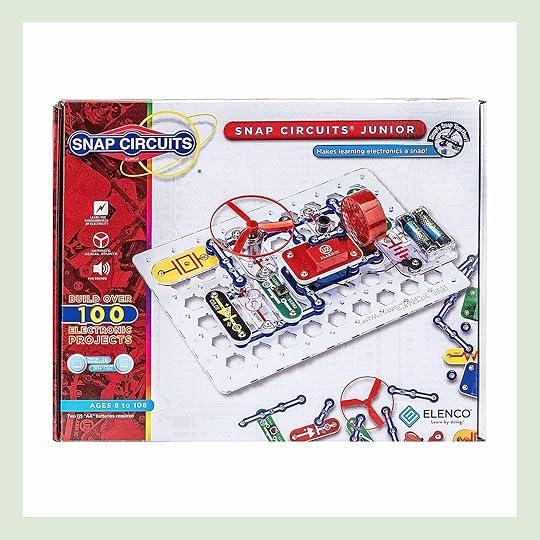


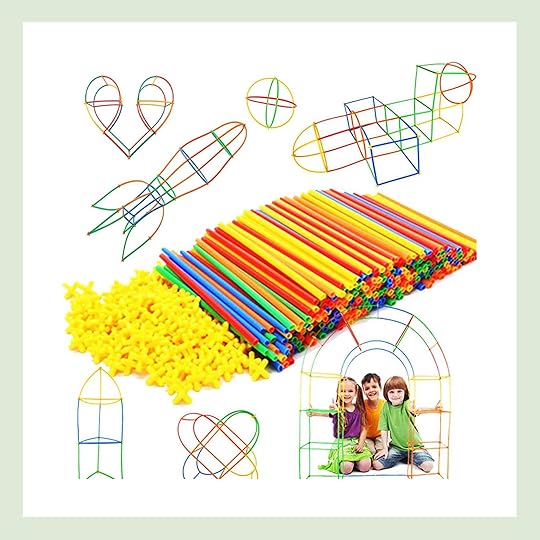
Snap Circuits Jr. SC-100 Electronics Exploration Kit | Star Flex STEM Building Toys | Magnetic Marble Run
These take some adult help at times, and are the types of toys that they resist playing with, calling them boring or “educational” but then once they start hours go by and you can check that stem box.

My mom got Elliot one of these a couple of years ago and we all loved it. Just throw it in the microwave and it’s so awesome.
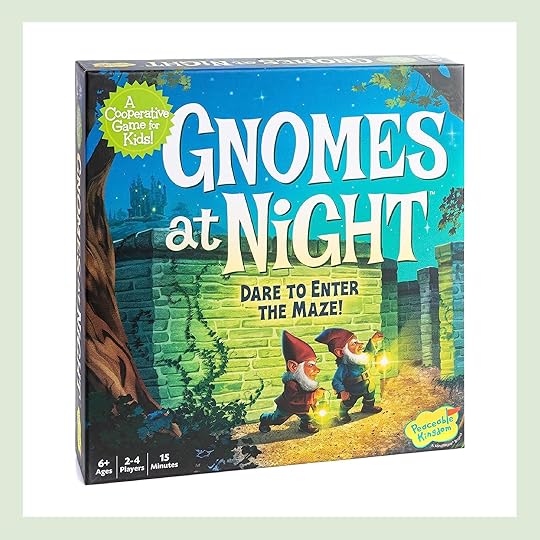

Gnomes at Night | The Secret Door
These are their (well, our) favorite cooperative games and they make us feel way better than turning on the TV.

These wood blocks may look boring but aren’t. The kids LOVED them.
They pulled this out recently again and played for a couple of hours (started at age 4).
Ages 6 + And What I’m Giving Them This Year
Rainbowcorns Epic Golden Unicorn Surpris e
Truly not one I understand, but Birdie and her friends (ages 6-8) are obsessed with these. Shrugging emoji. 🙂

This was their main joint present three years ago during lockdown. You can hook it up to music and play along with songs which is fun, and yes use headphones so it’s much quieter. After we moved we kept it in storage and I feared that it was not going to interest them anymore, but we pulled it out six months ago and sure enough a huge hit still and Charlie is legit into playing the drums, almost every night. So this is specific to your kid, but our kids love this (as do their friends).


This was their big present last year and was and remains a huge hit that they spend hours doing. It requires an app to create on (or just select an option), but they mastered it very quickly (within minutes) and even yesterday when we had eight kids over during the teacher’s strike they all took turns, for hours, making different little objects with no adult supervision (just how I like it). It’s a splurge and does require some adult setup/learning curve at first, but it has been a huge hit for a full year (and it’s super easy, Brian set it up and we haven’t had to troubleshoot since we got it last year).
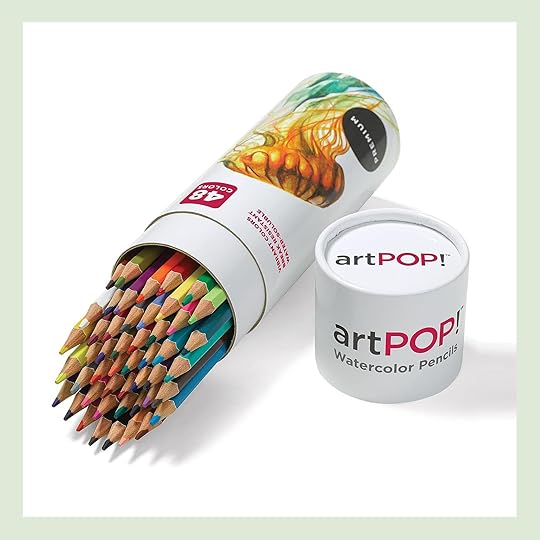
Both of our kids take watercolor classes at their school, they love it. So I was marketed these pencils which you just dip in a cup of water and paint and boom, in my cart. I haven’t tried them yet but they have good reviews (and seem so much easier, and less messy than paints).

My kids have currently given up begging for the elusive phone, so my hope is that between their Gabb watches (that they use daily and we love as parents) and these MP3 players, they can be satisfied without hating us like I did my parents for not having Keds or Guess jeans. These MP3 players have no internet/social media and lots of parental controls (and they can’t add any apps). Spotify and Amazon music are pre-installed so we just have to add them to our accounts. I haven’t bought this yet (although I’ve done a lot of research) so if anyone has it let us know! Imagine Dragons and Olivia Rodrigo will be on repeat, I’m sure as well as a lot of kid podcasts.

I know that Birdie would love this for her room, so here’s to hoping it lasts and isn’t too janky.
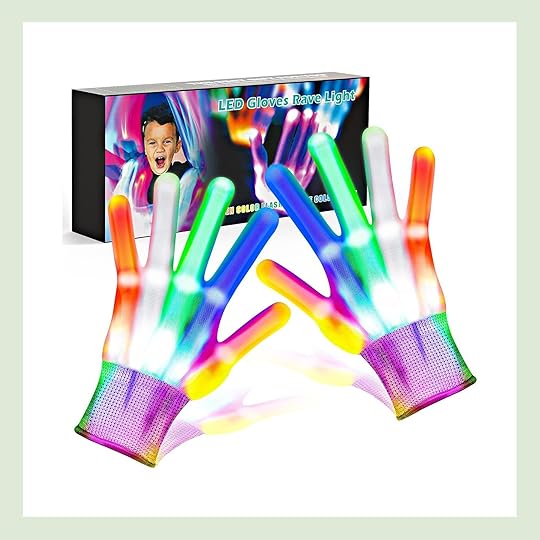

LED gloves | Disco Ball Lightbulbs
Here’s to hoping that these gloves don’t become landfill material, but I KNOW my kids will love them so much (they love any “lights off” toys, like the disco ball. Speaking of which, this year we are getting them these disco ball lightbulbs, they can just put them in lamps!

Create Your Own Video Game Set
For Charlie (video game obsessed and a constant battle over here), this DIY Video 8-Bit game will (I’m hoping) scratch an itch. Reviews are GREAT and at least teaches him coding and stem stuff.


Rubberband Bracelet-Making Kits | Fuse Beads Kit
Both our kids love these rubberband bracelet-making kits and y’all, Fuse beads are still a HUGE time grabber over here. Again, during this teacher’s strike, so many kids have been over here fusing all day (just make sure to get extra templates or shapes to form cool stuff).

Our kids just got these from the Switch Witch (we exchange all Halloween candy for a toy). They are OBSESSED with these.
From Elliot: I like it because it’s like a little computer, it can open up. It’s fun and you can get 15 different pets and you can level them up by caring for them. it’s like a pet but in your pocket.”
Do I get it? NOPE. But the satisfaction and time consumption boxes are checked with these little boxes.
I know the last thing any of us want is to get gifts for our kids that they aren’t going to enjoy so hopefully, this list will minimize that as much as possible! Good luck folks:) xx
Opening Image Credit: Photo by Kaitlin Green | From: We Had Portraits Drawn Of Our Pups By A Professional Artist – You Have To See Them!!
The post Our Favorite Kids Toys And Gifts For Each Age (As Told To Us By Them) + What We Are Giving Them This Year appeared first on Emily Henderson.
November 17, 2023
The Traditional But Still Cool Sofas I Told My Friends To Buy For Their Living Rooms (Where They Also Watch TV – It’s A Challenge)

Here’s one of the best/worst things about me: I have a shopping addiction (all stylists do – it’s an occupational hazard like a bartender with alcohol) and right now I have nothing that I NEED to put in the cart (as we are mostly done decorating the farmhouse). That means my Saturday mornings are empty, and my dopamine levels are low unless I’m shopping for someone else (or say, working out or cold plunging, LOL). Lucky for me/them I have not one but two friends who recently moved and are in dire need of new living rooms that fit a particular mold: Traditional (both 1920s white homes with black shutters), but not huge meaning no sectional (living rooms weren’t big back then), that need to be comfy (because they are also the TV room) and yet they don’t want boring/suburban/generic (duh, they are rad). So I got to work and pinned all my current favorites that I felt were good contenders (most are readymade and fast to ship). There are so many others that are cool and more contemporary that didn’t make the list for a variety of reasons, but these did.
Eleanor Sofa
The bench seat (read = comfy) and the arm detail make it both cozy and comfortable. I love this sofa and it comes in a lot of different fabrics, too. It’s been on my list of “must sit on and try” since it came out. SO GOOD (and I trust Lulu and Georgia’s construction and comfort from experience).
Mardones Velvet Sofa
SO PRETTY. This is a real contender right now for one of my friends who likes a Soho House vibe. I just ordered the fabric sample in both this camel and in a dark gray velvet. That arm swoop is SO PRETTY. CB2 is just KILLING it these days.
Niven Sofa
This came up over and over and over. That bench cushion (modern) with the arm swoop (pretty, inviting, and traditional) makes this a very top contender for me. The seat depth is shallow with the second layer of cushions but deep if you take them off. And that cognac color is PERFECT.
Fabienne Sofa
We have two of these in our living room and I love them so much. They check the “traditional” and also the modern box really well. The turned legs obviously read classic, but the single bench and back are simple and modern (see a pattern here?). If only our silly dogs would stop sitting on the TOP CUSHION as if they are birds and it’s their nest. PUNKS!
Marconi 3-Seater Tufted Velvet Sofa
This sofa almost won out but the room that we are putting this in already has so much green. The leg detail on the side is SICK (the leg is exposed halfway up the sofa, sexy lady). The color and wood base are PERFECT. I haven’t sat on this and wondered if the tight upholstered seat would be too bouncy and not “sink-in-able” enough, but that green velvet is so pretty.
Giroud Sofa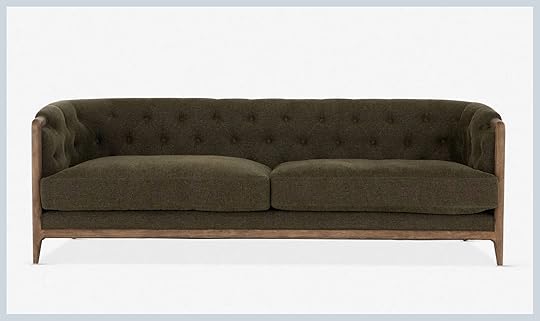
Another sofa with more traditional tufting and possibly not the most comfortable tight back, but with a few pillows it would just be so pretty. I love a mixed material and the wool + tuft + wood base/arm is really pretty (and avoids the generic label quickly).
Durant Velvet Sofa
While this sofa is decidedly more contemporary, I think the simplicity lends itself to a traditional home because you can layer on the more decorative pieces (and the $1,799 price is pretty insane). I almost bought two of these for our living room but the lead time was too long. I think that arm swoop keeps it from being too boxy and chunky and it just looks soooo comfortable.
Rupert Sofa
Again, I know this sofa is more contemporary but I’ve seen it in the homes that Sara Sherman Samuel’s has designed and it just looks so comfortable and cloud-like. And remember, simple sofas are easy to layer on fun/decorative things. I think being in this rather delicious cognac velvet is what helps lend itself to a more traditional space (whereas a linen would feel colder with less texture/reflection).
Malea Velvet Sofa
This sofa is a new one that I’ve been eyeing – that slight rolled arm is so good and we all know that a double cushion, double back combo is SOOOO comfortable. I’m also super drawn to these warmer tones but unsure if this one veers to orange for me (or maybe just a really pretty rust tone?).
Bacio Leather Sofa
Neither of my friends wanted leather (it’s cold in the PNW) and those cushions admittedly look really bouncy (not cushy) but it’s such a pretty sofa! That narrow arm swoop is so good.
Westlake Sofa
I love so many of Rosa Beltran’s sofas, and while they do have a lead time she has so many with such pretty shapes and she is a wonderful person. If you can wait, she can customize anything at a great price and super high quality. We love so many of her designs.
Sinuous Curved Sofa
I went in person to sit on this for our own home. I LOVED sitting on it and only wished that it weren’t in bright white. I’m hoping they make it in other colors (the burnt orange velvet was a bit too extreme/shiny for me). The shape is so pretty and the curved front felt so special. It’s gorgeous. Athena’s collection for Crate & Barrel is excellent.
Crawford Slipcovered Sofa With Box-Pleated Skirt
This is another one where I LOVE the shape of the sofa, just wishing that it were in a more forgiving fabric (not cream linen). This comes in a really pretty brown, too, but that’s not right for either home. We’ll see if they make this Jake Arnold x Crate & Barrel sofa again in more “life living” colors. The shape is so pretty and the pleating is gorgeous (and such a nice reprieve from traditional skirted sofas).
Hornsby Sofa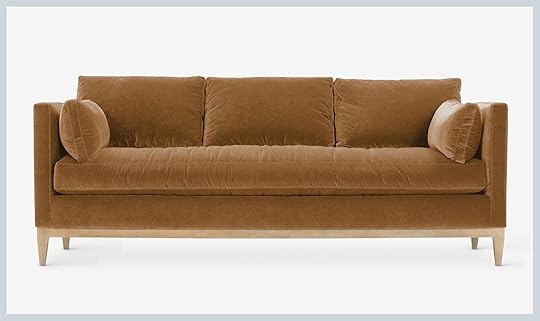
Here we go back into the mid-century world – a little boxy but not too stuffed (what with all the cushions). Mid-century is coming back BTW as the year of the curve (or 5 years) is likely to wane. This sofa is pretty much the midcentury version of our more traditional sofa (the Fabienne). He is very handsome.
Burrard Sofa
Speaking of mid-century, I love this sofa from Article and have owned the sectional version. My whole family loved it. Basically, I know it’s super comfortable and perfect for watching TV.
Ginny’s Rivington Sofa
I love an English roll arm so much and was so delighted when Ginny (a former EHD designer for 5 years – WE LOVE GINNY) designed this sofa with Lulu and Georgia. It’s so pretty and classic and is a real contender in my friend Robyn’s living room.
Opening Image Credits: Design by Emily Henderson and ARCIFORM | Photo by Kaitlin Green
The post The Traditional But Still Cool Sofas I Told My Friends To Buy For Their Living Rooms (Where They Also Watch TV – It’s A Challenge) appeared first on Emily Henderson.
November 16, 2023
The Ultimate (Highly Crowdsourced) Gift Guide For All The Teenage/Gen Z People On Your List

First and foremost I want to thank everyone on Instagram who helped make this such a WILDLY comprehensive gift guide for every Gen Z and (older Gen Alphas) on each of our lists! The suggestions ranged from things I predicted to pieces I am still laughing about because they gave me BIG 2002 flashbacks. But that’s the thing, right? No matter what, in about 20-30 years things always come back around making your childhood “vintage”. Ha. But since getting these suggestions, I’ve been observing “youths” in the wild and let’s just say this list is SPOT ON. I also want to say that while there will be a couple of categories that are gendered, what I love so freaking much about these generations is that more than ever they are throwing gender rules out the window – whether it’s clothes, accessories, or hobbies! This is all to say that you know your “youth” best and every category on this list is meant for everyone. So throw on your oversized sweatshirt and your butterfly hair clips, cuz baby, this is the only teenage/Gen Z guide you’re going to need.

1. Beats Studio3 | 2. Apple Airpods Pro | 3. Apple Airpods Max
I think it’s safe to say that music is important to everyone but it’s especially a lifeline when you’re in high school/college. That means you are going to need some headphones. Now Airpods are still on the youths’ wishlists, but more and more they want “over the ear” headphones. Of course, these are way cooler than the ones of the early 00s because they are noise canceling, wireless, AND have built-in microphones for phone calls. All three of these picks above were mentioned over and over so I think they are safe bets and go in order of most affordable to most expensive. Any of these would be an incredible “big gift.”
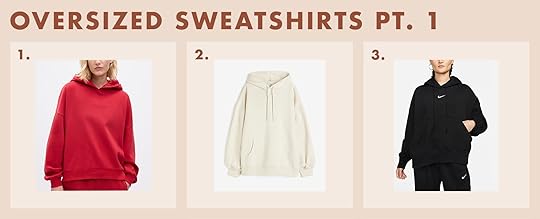
1. Vintage Soft Hoodie | 2. Oversized Hoodie | 3. Women’s Over-Oversized Pullover Hoodie
This suggestion was no surprise to me but a great reminder. I have seen countless TikTok videos of people simply wearing massive oversized sweatshirts or talking about them. So if your person loves an oversized sweatshirt these are all great! But remember to GO BIG. These are all meant to be oversized but maybe go a little bigger than their traditional size. They want to nearly be swimming in them.

1. Two Tone Hoodie Sweatshirt | 2. Men’s Fleece Crewneck Sweatshirt | 3. Pewter Solid Hoodie
Now the look is either crisp and new or kind of random and vintage (like #1). This also means if you don’t find any online you like feel free to go to your local vintage shop! The only risk you take is if they want to return it, it’s a little harder.

1. Cargo Sweatpant | 2. Nike Basketball Pant | 3. Russell Athletic Straight Sweatpant
And why stop at oversized sweatshirts when you can also have oversized sweatpants? Now, these don’t need to be as oversized as the tops. Just large enough to be loose and comfortable. The three above are perfect for exactly that. In general, classic brands like Nike, Adidas, Russell Athletic, Champion, etc. are all very cool and safe bets when you are searching.
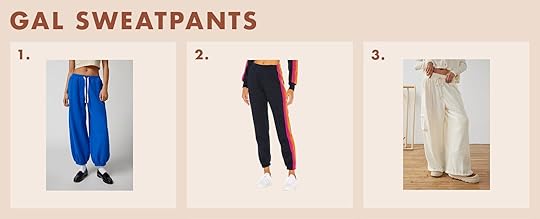
1. Jogger Sweatpant | 2. 5 Stripe Sweatpant | 3. BouncePlush Jogger Pant
Sweatpants that are traditionally designed for girls still should have that loose, lowrise, roomy look to them. We were specifically told that Aviator Nation (#2) was a brand that the girls wanted!
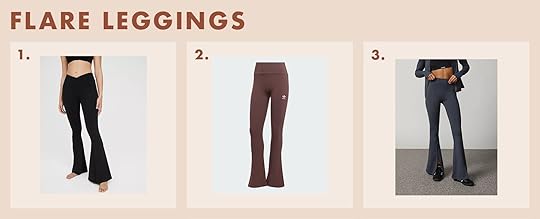
1. Aerie Super Flare Legging | 2. Essentials Rib Flared Pant | 3. Full Force Flare Pant
But of course, not everyone wants a loose fit. In fact, the flare legging is VERY IN and #1 was specially requested by Mallory’s BF’s younger sister. Actually, she made a whole PowerPoint of gifts she wanted to give to her family. Not only was it incredible to look at but also VERY helpful for this post:)

1. Custom Vans | 2. Air Jordan 1 High OG “Royal Reimagined” | 3. Samba OG Shoes
Sneakers were suggested over and over and over. So this would be a great gift. One very cool option is to get them Vans or Nikes they can customize! That way it’s unique to them and you don’t have to worry about picking the wrong shoe. But if you want to get them a cool shoe, a Nike Hightop or the Adidas Samba sneaker are solid picks. Sambas are still VERY MUCH the “it” shoe and come in a few different colors.

1. Tidepool Cell Phone Grip | 2. Popsockets Phone Grip | 3. Checker Cell Phone Grip
I was kinda surprised that Popsockets were still such a hot item but they were suggested a ton! There are ENDLESS options to choose from but since “Millennial fashion” is so hot at the moment, these three seemed perfect. Did anyone else draw endless Ying and Yang symbols and collect those alien head stickers in 1999???

1. Opalite and Pearl Phone Strap | 2. Good Vibes Phone Charm | 3. Beaded Phone Strap and Tech Lanyard
Phone charms were another big suggestion. I mean why stop at a phone case and Popsocket?? Let’s get some charms on these phones! Well, they are meant for your wrists so actually it’s a functional gift that happens to be very cute. These are all fun and trendy if you ask me:)

1. Slim Portable Charger | 2. Portable Charger with Lightning and Android Cables | 3. Juicebox MagSafe Charger
But what good is a phone if it’s cute but dead?? A handful of people recommended a portable phone charger which is a pretty great idea. These are all slim which is great and all are HIGHLY rated (#2 even has some more metallic color options).

1. Stanley Quencher H2.0 FlowState Stainless Steel Vacuum Insulated Tumbler | 2. Owala FreeSip 24oz Stainless Steel Water Bottle
These two water bottles were mentioned A LOT. I think by now we know the wonders of the Stanley Quencher (it comes in sooo many colors and sizes too) but apparently, the Owala FreeSip is the next “it” bottle. Who knew? Now we do:) It also comes in a bunch of different colors.

1. Carhartt Beanie | 2. LA Dodgers Beanie | 3. Nike Beanie
These babies want beanies, y’all. You can’t miss with a Carhartt beanie (or jacket for that matter). But it’s a cool and standard beanie that has a bunch of color options. But having a classic sports team on your beanie like the Dodgers or Yankees is also pretty cool. And then you have Nike which might be the most classic. Who wouldn’t be pumped to get a Nike beanie, right? You have 10 colors to choose from!

1. Textured Fleece Bucket Hat | 2. Theo Plush Bucket Hat
This suggestion made me laugh a little but hey, these kids should be able to express themselves however they want! And if a fuzzy bucket hat is the cool hat of their time then they should wear it:) Plus TBH it’s probably really comfortable. Also, these are from Lululemon and Princess Polly which are two places the cool kids love.
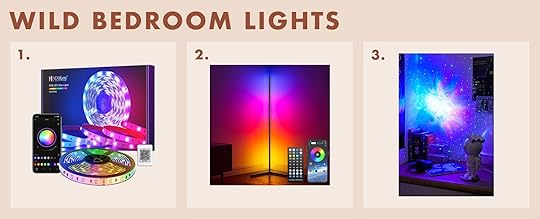
1. 100 ft LED Lights | 2. Corner Lamp | 3. Galaxy Projector Nightlight
Another suggestion I knew was coming! Even Em’s little kids had asked for colorful LED lights for their rooms at one point. I mean it’s fun and weird and cool and looks great when you are making videos. Each of these is a little different. I’m most familiar with the LED light strips but the corner light is cool and avoids any potential wall damage. But that little astronaut galaxy projector is the coolest in my opinion:)
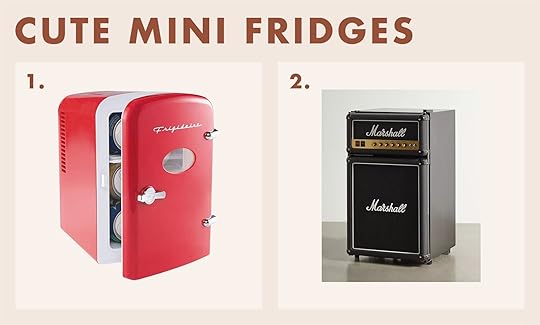
1. Frigidaire Mini Portable Fridge | 2. Marshall Mini Fridge
Mini fridges were another surprise suggestion! I guess since kids these days have computers or phones they are asking for mini fridges rather than TVs or a landline. Honestly, the idea of having some cold drinks in your room for when you are doing homework late or have friends over is pretty cool. I’m in.

1. The Tennis Collection Bezel Set Crystal Necklace | 2. Hialeah Necklace | 3. Strawberry Beaded Necklace
One of my favorite topics…jewelry! The Tennis necklace trend took me by surprise but I really like it. I like it even more when said necklace costs under $70. But let’s talk color. I found this colorful yet delicate necklace on Princess Polly so I feel confident it’s a slam dunk with the teens. But so is this beaded strawberry necklace from Etsy. Beaded jewelry is also super popular.
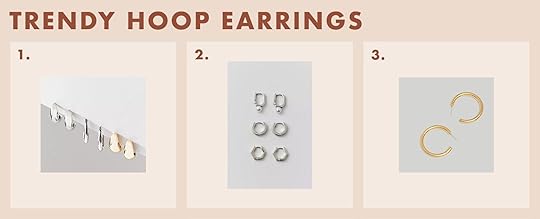
1. Teardrop Hoop Earring Set | 2. Angus Hoop Earring Set | 3. Chunky Medium Hoop Earrings
Hoop earrings were specifically called out when we asked so here are a few great options! The teardrop style is very cool right now so this set is great for more than one option. The same goes for this silver set. Cool, small, but bold. However, a classic gold chunky hoop is a staple in anyone’s collection. If they don’t have them then it’s a perfect gift.

1. Jewelry Storage Stand | 2. 3 Drawer Accessary Box | 3. 3 Tier Jewelry Stand
Hmm, all this great jewelry with nowhere to properly put it. Jewelry organizers were kind of a surprise suggestion that probably shouldn’t have been. It’s the kind of thing you always think about getting but never do…just me?? Well, show your person the glory of having your pieces organized with any of these three very cute options!

1. Tweed Asymmetrical Shoulder Bag | 2. Classic Curved Crossbody | 3. Lock & Key Chain Handle Bag
Bags were, of course, highly suggested. But the younger folk want more of an over-the-shoulder more than a crossbody so it seems (unless it’s a fanny pack:)). So #1 and #3 were on the PowerPoint we borrowed from and #2 was a hot brand that a follower suggested, Stoney Clover Lane. And yes, I know it’s a crossbody:)
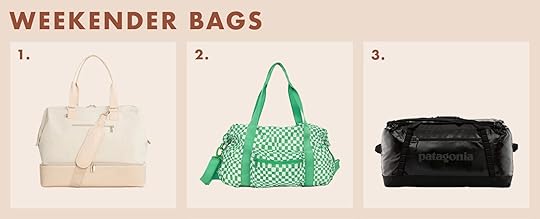
1. Weekender Bag | 2. CALPAK Compakt Duffle Bag | 3. Patagonia Black Hole Duffle
So while purses made sense to be highly suggested, I didn’t think weekender or duffle bags would be as big of an ask as they are this year. When these kids go for a sleepover or a short trip they want to do it in style. Who can blame them? All three of these are truly great bags they can have for a loooong time.
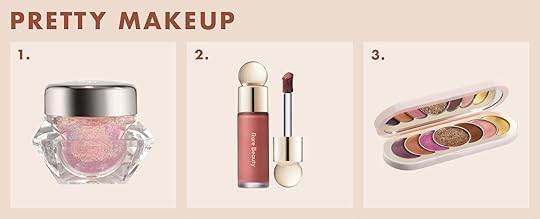
1. Multichrome Gel for Eyes and Face | 2. Rare Beauty Liquid Blush | 3. Rare Beauty Discovery Palette
What, did you think we’d make it through this list without talking about makeup?? No way. Ok, so this Danessa Myricks Multichrome Gel for Eyes and Face is SO cool and was specifically called out as a great gift. They have a ton of other colors and the product is incredible. But, of course, Rare Beauty by the one and only Selena Gomez was a hot rec. I have that blush and it’s so pretty. 10/10 but you can’t go wrong with any of her products.

1. Makeup Brush Set | 2. Total Sponge Set | 3. Halo Glow Powder Puff
Since they are younger, it’s nice to set them up with some helpful makeup tools. A brush set is so great to have and makes playing around a lot easier. Then you can’t ever go wrong with sponges and this is a perfect set. Lastly, I’ve come to realize the importance of a powder puff so if they love makeup, I know they’d love this if they love makeup.

1. Dyson Corrale™ Hair Styler Straightener | 2. Boar Bristle Slick Back Hair Brush
Ok, so I only put this straightener on her because it was suggested a few times! It’s definitely on the “big gift” side of things but I’m sure they’d have it for a very long time which is great it won’t break after a year or so. Then I was introduced to this hair brush on TikTok and was convinced it was THE brush to use if you want to slick your hair back (which if you’ve noticed, it’s a huge hair trend).

1. Flower Stretch Headband | 2. Heart Barrette Set | 3. Pearl Mini Claw Clip Set
“Millennial hair accessories” were what was suggested so this is what I chose! Those headbands were SO COOL growing up. Mine never had cute flowers so this one is a setup. Now the Barrett set feels a bit more goth and pretty cool. And then instead of actual butterfly clips, I chose these mini pearl cuties since pearls are still very much on-trend.
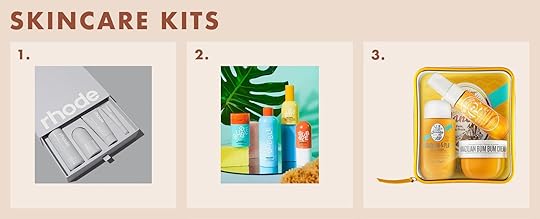
1. The Rhode Kit | 2. Bubble Skincare Rise & Shine Set | 3. Brazilian Bum Bum Jet Set
Poor teens are dealing so a lot of skin stuff so that was another popular suggestion. Hailey Bieber’s Rhode line was mentioned A LOT. I’m sure it has nothing to do with wanting the same skin as Hailey’s:) But it also has good reviews so it sounds like a great gift. A skincare brand I hadn’t heard of but was recommended a bunch is Bubble Skincare. They have a bunch of sets but the Rise & Shine Set seems like a good place to start. All the kids want it! Last but not least is the Brazilian Bum Bum Jet Set. I mean it smells incredible. Who wouldn’t want it??

1. Beauty Fridge | 2. Lip Sleeping Mask Intense Hydration with Vitamin C | 3. LED Mirror Beauty Fridge
Beauty fridges are a real thing so if your person is a skincare LOVER then a beauty fridge wouldn’t be sick! Oh, and that Laneige Lip Sleeping Mask was asked for over and over again. It’s good.

1. Skin Camp Acne Patches | 2. Squish Flower Power Acne Patches | 3. Little Twin Stars Blemish Patches
Teens (and adults) get pimples! Since they are an inevitable evil why not make your face incredibly fun?? Cute pimple patches were a real request and a good one at that!
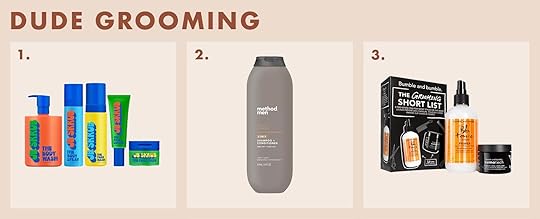
1. JB Skrub Ultimate Bundle | 2. Method Men Shampoo/Conditioner | 3. Grooming Short List Kit
I wish all skincare and haircare marketing were targeted at everyone but we all know that’s not the case. So here are some truly great options to help your maybe stinky child get clean and look sharp. JB Skrub was created by two boy moms (one being Modern Family’s Julie Bowen) who wanted to help their teen boys with their hygiene. It’s fun and sustainable making this set a great gift! Speaking of smelling good let’s move onto hair. Normally, I wouldn’t promote a 2-in-1 shampoo and conditioner but for your average teenage boy, the fewer steps the better. Plus Method’s products are awesome. But if your “youth” wants to spend a bit more time on their hair then go for this great Grooming Short List Kit.
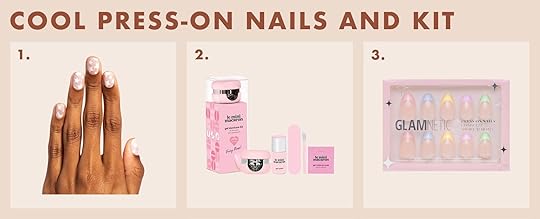
1. Olive & June Press-On Fake Nails | 2. Mini Gel Nail Polish Kit | 3. Glamnetic Press-On Nail Kit
Man oh man do I love a manicure and here are two options for CUTE press-on nails that aren’t too long and a great gel nail polish kit!

1. Gah! Nail Art Stickers | 2. Stay Groovy Nail Art Sticker Sheet | 3. Mod Floral Nail Art Stickers
I also used to LOVE nail stickers when I was little and am happy they are back! But this time, they are muuuuch cooler. Look at these options above!
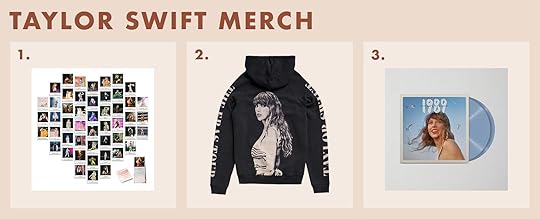
1. Eras Tour Poster | 2. Eras Tour Hoodie | 3. 1989 (Taylor’s Version) Vinyl
I don’t think I need to explain this one too much. Merch is BIG right now and the biggest might be for Miss Taylor Swift herself. I love the Eras tour poster collage A LOT because it’s a little DIY, the hoodie sweatshirt is epic and from the official site, obviously, and the 1989 (Taylor’s Version) album is the most recent to drop. Any of these would be a great gift for a Taylor fan:)

1. Friends Fanny Pack | 2. Friends Planner Sticker Book | 3. Friends Boyfriend Fit Tee
I was a little surprised by these next too! Who knew Friends was making such a comeback?! I guess people are in the know with the cool kids. I think all of these are great Friends gifts.

1. Hedwig Plush Head Throw Blanket | 2. Sew On Patches | 3. Floating Candle String Lights
I didn’t realize how big the resurgence of Harry Potter was until I was a little girl with a backpack COVERED in Harry Potter patches. So that’s where I started with these patches. Then to be a fan AND want to be cozy, I thought this Hedwig Plush Head Throw Blanket was pretty cute, no? And what’s Harry Potter merch without a little magic (or batteries)? These light-up floating candles are an HP fan’s dream.

1. Turntable with Bluetooth Receiver | 2. Checkered Crosley Royale | 3. Crosley Cruiser
LOTS of requests for record players. I think since they are for younger people, playing with color and pattern like #2 and #3 is awesome. But if you have a kid that loves true-looking vintage things then #1 is ideal.

1. Fujifilm Instax Camera | 2. 1080p Digital Camera | 3. Kodak Digital Camera
Yep, the kids want old-school digital cameras! Teens seem to want to go back to older technology since what we have now is so intense. I fully support this! I also support them wanting a Polaroid camera.

1. G920 Driving Force Racing Wheel and pedals for Xbox Series X|S, Xbox One, PC | 2. Switch 32GB Lite
The teens like to game so why not make it more fun with this follower’s suggestions of a Driving Force Racing Wheel and pedals. It looks SO COOL and works with a bunch of different systems. But if they are just starting out, a Nintendo Switch is extremely fun and they will love it!
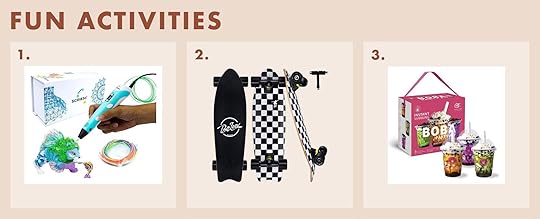
1. 3D Printing Pen | 2. Cruzer Skateboards for Beginners | 3. Boba Tea Kit
While gaming is great, there were awesome non-screentime suggestions. I think this 3D Printing Pen is so fun and silly but stimulates their creative mind! Skateboarding wouldn’t take them outside which is even better and this board is meant for beginners. But maybe cooking is more up their alley! This boba kit (that was recommended) Looks easy and really fun.

1. Singer M3500 Sewing Machine With Accessory Kit & Foot Pedal – 110 Stitch Applications | 2. Brother CS7000X Computerized Sewing and Quilting Machine, 70 Built-in Stitches, LCD Display
The cool thing about social media is that it opens peoples’ minds to the possibility of what they can do…like making dope clothes! Both of these machines are great for beginners. Love this reader’s suggestion.

1. North Face Thermoball Traction Slippers | 2. UGG Women’s Disquette Slipper | 3. Nike Burrow Women’s Slippers
Maybe it was lockdown, maybe it was always this way, or maybe these teens just know how to be cozy! #1 looks like a cool house shoe that will never let your toes get cold. The UGGS are so cute! Also warm but so soft. Then I love the pink ones (they come in other colors) because they have a zipper on top for some money, a single key, a credit card, you name it. Cute and practical!

1. Stuffed Animal Storage Bean Bag | 2. Sherpa Fleece Throw Blanket | 3. Stance Quarter Socks
More cozy stuff! Bean bags are definitely back and this brand was recommended. Lots of colors and affordable! Now tell me that blanket doesn’t look like heaven? You can’t and it also looks cool. V important:) Then for the socks, they just look cool and retro. This brand was also recommended and they have a ton of other styles and colors. I just love this one:)

1. Fitted Racer Moto Jacket | 2. Brooklyn Faux Leather Long Coat | 3. Off-The-Shoulder Sweater
Most of these are straight from the Gen Zers mouth (Mallory’s BF’s younger sister)! Now, I do have to say I really like that moto jacket and think it’s a piece they could have for a very long time. The long coat on the other hand is just pure fun! The cuffs are incredible. But man, that off-the-shoulder sweater is giving millennial SO HARD. But hey it’s pretty and comes in other colors. I’m sure they’d love it!!

1. Mock Neck Tank | 2. Slinky30 Black | 3. Soft Lounge Tank
These tops are very cute and actually look soft and comfortable! Recs for our Gen Z sister:) Oh, Skims is for sure a hot store to buy from. Trust that you will look cool giving something from there. But the icing on the cake are those shoes. I used to have a pair, my mom had a pair, and I never thought I’d see them again. Well, the joke’s on me cause they are cool again.

1. Cameo Gift Card | 2. Ticketmaster Gift Card | 3. YouTube Premium
Last but never least are gift cards. Do they feel the most personal? No. But they are so great and the person can then get whatever they want. I do love the idea that was given a couple of times to buy a cameo of the person’s favorite TikTok star, actor, or athlete! So fun and thoughtful. Or a chance to go to a concert or show is so special! But letting them choose when and where is ideal hence the Ticketmaster gift card. And finally, teens and a little older LOVE LOVE YouTube. So if they don’t already have YouTube Premium this would be a killer gift.
Thanks for reading! Hope it helped and again, thank you to everyone who contributed! Good luck, y’all:)
Opening Image Credit: Photo by Veronica Crawford | From: When You Think You Can’t Pull Off Certain Trends And Then Maybe You Can? We Test Some ‘Best Sellers’
The post The Ultimate (Highly Crowdsourced) Gift Guide For All The Teenage/Gen Z People On Your List appeared first on Emily Henderson.
November 15, 2023
Need Some New Holiday Decor?? We’ve Found All The Best (And Cutest) Options For You

Now that December really isn’t all that far away, I think it’s time to chat about holiday/Christmas decor. And look, this post is truly meant for those of you who maybe want to refresh a few things or who are just starting on their Christmas decor journey! What this post is not meant for is to make you feel like what you have isn’t good enough. NOPE. The team actually had a whole big conversation about how none of us really needed anything new this year… well that was until I saw a few things that are now clearly on this list. But as of now, I’ve resisted. So I hope this is both helpful and/or can serve as some very joyful eye candy. Let’s deck these halls:

Decorative Paper Floor Trees | Paper Tree Christmas Decoration | Shape Studies Tabletop Trees
I don’t remember how many decorative trees I have for my ONE BEDROOM apartment (I think over 29??? Yikes!) but y’all they are such a fun and easy way to add instant holiday and a sculptural moment to your home. See those extra-large Acordian paper floor trees? As of now, they are the only things that Em has and plans to buy this year, and I don’t blame her. They are so awesome and the large versions of her favorite tabletop ones. I have the smaller ones too and love them. But if you also want the tabletop size then the ones in the middle photo are great and come in other colors. But if you want a more minimal Scandi vibe then the ceramic ones are so pretty.

Glittered Sisal Christmas Bottle Brush Tree Set (Set of 2) | Faux Potted Alpine Tree w/ Pine Cones | Sisal Christmas Bottle Brush Tree Set (Set of 6)
Bottlebrush trees are really what the bulk of my loot is. They are just so cute and come in a ton of different sizes and colors. I am more of a neutral gal but you can easily go big with color. Also how wonderful are those faux potted trees?! I adore the wood planters. Those could easily stay out all winter if you wanted!

Handcrafted German Pyramid & Candle | Flameless Christmas Window Candle | Blanche Snowflake Candle Holder
Lighting is so important for optimal coziness and candles just know how to get it done right. These three are so sweet each in their own way. The Handcrafted German Pyramid is so beautiful and charming! It comes in a variety of styles that you have to see. But if real fire isn’t what you want then this electric candle is a very cute alternative. Big fan of that wood base. But if taper candleholders are what you’re after then I don’t think you can go wrong with these snowflake ones🙂

White Travertine Nutcracker | Marble and Metal Star Figural | Female Soldier Nutcracker
Holiday figurines are another decor staple! I have a handful from my childhood that I have and love (despite their very real creepiness:)) These, however, are not creepy AND can stay with you and your family for years. This travertine nutcracker is the coolest and trendiest one on this list but is a beauty. I love this star and think it would be so pretty on a fireplace mantle in a little Christmas vignette. And I really love this female soldier nutcracker! We definitely didn’t have female soldier nutcrackers growing up (I don’t think they were an option?) and I think it’s so wonderful.

Plush Deer Wearing Scarf | Forest Friends Snowball Fight Felt Critters | Black Deer Looking Forward
A plush deer with a scarf? Get outta here. But if red isn’t in your color palette, there are 5 other color options. The black one is less “cutesy” but perfectly modern if that’s your look. I love both styles. But these little forest friends are what Christmas village dreams are made of. I picked the snowball fight for the graphic but they have a few that are equally as perfect! Buy them all! Do it for me and your village.

Pure Wood Light-Up Advent Calendar | Cindy Advent Calendar | Battery Operated Lit Wood Ski Lodge Christmas Advent Calendar
I always LOVED our advent calendars growing up. Sure ours were the chocolate ones from the grocery store but I love the idea of getting one that you can reuse year after year that can also add so much to your holiday decor. For a simple minimal one (that lights up!) go for the pure wood one. If you want a lot of whimsey I love the Cindy Advent Calendar. While $78 is not cheap I thought it would be a lot more. And for something in between, the ski lodge option is so so sweet and also lights up! You can’t lose with any of these.

Scalloped Metal Christmas Card Holder | Christmas Tree with Photo or Card Clips Display | Metal Bell Christmas Garland with Clips
The Bunges are BIG holiday card people but for as long as I can remember we’ve just put the ones we’d get in a bowl. Not the worst but we could’ve done better. I, on the other hand, display mine on my mantel (to be fair I maybe get about six each year so it’s a little more manageable) but having a wonderful little holder like that scalloped metal cutie would make them look even better. But that tree card holder is also very cute and the bell garland would be perfect hanging from a (non-working) fireplace or hung from your curtain rod!

Preserved Grass Leaf & Snowberry Christmas Wreath | Metal Mistletoe Wreath | Faux Cedar Hoop Christmas Wreath with Bell Ornaments
I know I did a post about faux trees and wreaths but I couldn’t help myself! I love the organic feel of that Preserved Grass Leaf. Another item you can keep up all winter long. Then if you are a modern lover, a metal wreath could be so fun! But if you want to keep it a little more classic then how wonderful is that faux cedar wreath with bells? 10/10.

Colorful Fabric Tree Decorative Christmas Wall Garland | Merry Christmas Garland | Metal Leaf Christmas Garland
Last year I had the grand idea of DIYing a felt garland. Was it worth it??? Well, I like how it turned out but it took daaays to make. So if you want to spare yourself hand cramps and hotglue burns I love all of these options. The “Merry Christmas” one is so freaking cute! It’s both joyful and simple. But if you want joyful but colorful then those little trees are a great pick! I’ve been really loving the idea of accenting with metal garland so that metal leaf one is pretty perfect.

Tarnished Brass Bell Garland | Ceramic Bell Garland | Constellation Iron Garland
But so are these brass bells and stars! There are too many good choices. Good luck picking:) The other “non-foliage” option that I found and LOVED are these ceramic bells. I think they are just beautiful.

Scallop Christmas Stocking | Reversible Christmas Holiday Stocking | Chunky Rib Knit Christmas Stocking
So there are two items on this list that I still might try to snag and one is that green scalloped stocking. IT’S SO PERFECT! Plus I’m trying to bring in more “happy color” into my Christmas decor. Should I?? I’ll get back to you. But two other wonderful options for my more neutral-loving friends are that reversible brown/gold velvet beauty and that classic chunky knit one. You can’t go wrong with any of them.

Felt Elf & Tree Stocking | Haptic Lab X FP Watercolor Stocking | Shorn Green Sheepskin Christmas Stocking
However, maybe you want a little more flare? Something personalized?? I love these felt Christmas scene ones! They have a bunch of them on the site so each person in your family can have their own unique design with their name on it. Then how beautiful is that watercolor stocking? So unique and supports a small brand (Haptic Lab that is). And while a solid color the texture of that green sheepskin stocking is SO GOOD! It’s fun without being “too crazy”.
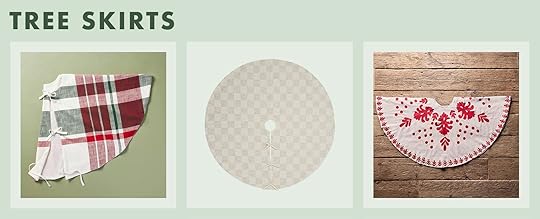
Festive Plaid Christmas Tree Skirt | Bronson Tree Skirt | Leafy Embroidered Tree Skirt
Traditional, modern, and eclectic – one for each style! The large-scale pattern of the plaid makes the traditional look feel really fresh. Then I’m sure it will come as no surprise that I also VERY MUCH want to buy that checkerboard tree skirt. It would look so good in my apartment! Maybe it would look good in yours too:) And finally, that embroidered one is extremely special. Like keep in your family for generations special. Basically, you can’t lose with any of these.

Botanical Christmas Tree Topper with Clip | Hugging Polar Bear Tree Topper | Hedy Tree Topper
Why not add some whimsy to the top of your Christmas tree?? That little Santa polar bear couldn’t be sweeter. The stars and sun beauty is just that…A BEAUTY! A total stunner that I also now kinda want since I don’t have a tree topper. But for a great and very affordable option, I love this golden botanical one. I think it looks like a snowflake:)

Botanical Clip Christmas Ornaments (Set of 10) | Gold Clip On Candle Lights (Set of 10) | Paper Christmas Ornament
Ornaments are very personal so these are going to mostly be your base layer types, not the sentimental ones. And since keeping things easy is ideal when decorating a tree, ornaments that clip on sound like a dream! How cute are those little golden-leaf ones?? Then those clip-on candles are what my Christmas tree dreams are made out of! A vintage feel that won’t burn down your tree sounds goooood to me. Now, this beautiful pink paper ornament is not what I could call a “base layer” ornament but it was too good not to include (especially when it’s only $4).

Wood Accordion Christmas Ornaments (Set of 4) | Brass Leaf Ornaments (Set Of 4) | Christmas Ornaments (Set of 6)
Here are a few more base layer beauties. For the minimal Scandi crowd, these wooden accordion ornaments are awesome. For the modern folks, brass foliage is IN this year but feels classic enough to stand the test of time meaning these brass leaves are perfect for your tree. And for my Christmas traditionalists, these red and white ornaments are festive and perfect to add some fun to your tree.

Woven Plaid Square Throw Pillow | Oversized Lumbar Woven Tree Pillow | Bubble Quilted Fur Pillow Cover
Sometimes changing a pillow or two can really change the feel of a room. Personally, I like holiday pillows that capture the holiday feeling rather than spelling it out. All types are great but I love these three. You might even keep that quilted white one on for the whole year! But the green and lumbar ones are also perfect for all winter long.

Winter Plaid Woven Throw Blanket | Andy Throw Blanket | Chunky Knit Throw Blanket
I also like to keep the blankets season-friendly rather than holiday-friendly. You just get more use out of them. How wonderful is that green plaid and that chunky cream knit?? Now the navy one in the middle is a little more holiday but I love love the colors and those blankets remind me of my mom (she used to make coats out of them… and yes, we had many holiday versions:)).

Battery Operated Lit Wide Ceramic House | Battery Operated Lit Metal House | Ceramic House LED Tea Light Holder Set (Set of 3)
Holiday villages = childhood Christmas! We actually had a bunch of the California missions that Mervyn’s used to sell but I digress. A little holiday village, even it’s it’s only a few, is the perfect way to create a happy vignette. They also add a little mood lighting with the space since a lot of them light up. Again we have three different houses in three different styles (they each have more than one style of house so your village can look collected:)) – the white one with the glitter roof is more traditional, the black one is cool and modern, and the tan ceramic ones are minimalist!
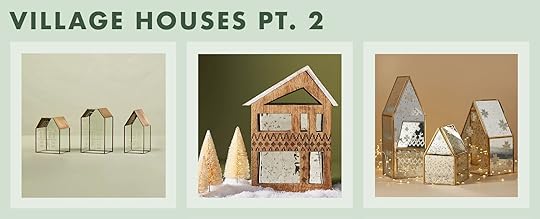
Decorative Glass & Brass Christmas Houses (Set of 3) | Phillipe Woody Blood Orange & Conifer Wooden House Candle | Fair Isle Glass House
These are all a bit more eclectic! Glass, wood, mirrors oh my! They could even mix and match a little which would look so fun and interesting. Style. Play, Every. Day. 😉

Damask Embroidered Cotton Runner | Modern Farmhouse Hand Embroidered Linen Table Runner | Woodland Deer Paper Placemats (Set of 12)
We’re not saying you need your table set at all times during the holidays – absolutely NOT! But, a pretty table runner is an easy way to “holiday up” your table and still have full access to it. The red and white embroidered one is the cousin to the tree skirt from earlier. I love this style so much it had to be on here twice. However, I also deeply love the blue one which could also be used year-round. Then I had to add those paper placemats because I think they were too beautiful not to show you.
Ok, all done! Hope this helps fill any holiday decor holes and happy decorating!!
Love you, mean it.
Opening Image Credits: Photo by Sara Ligorria-Tramp | From: How Sara Created Her First Traditional But Youthful Christmas (With All Target)
The post Need Some New Holiday Decor?? We’ve Found All The Best (And Cutest) Options For You appeared first on Emily Henderson.
November 14, 2023
No More Scarves! The Ultimate, Non-Boring Gift Guide For Boomer Moms And Grandmothers (Sourced From The Woman Who Knows :))

Every year I ask my mother-in-law, Suz, for my annual favor – to crowdsource from her friends what Boomer moms really want for Christmas. When we first started this series I was shocked and enlightened at some of the answers (no more framed photos, yes to more experiences). Most Boomers are downsizing, have too much stuff and yet have finite dough (most are retired) so they are gratefully very specific about what to get and NOT to get them. Suz and her friends did it again which I can’t thank them enough. Ladies, I owe you a round of golf on me:) Take it away Suz!
Let me begin by thanking many friends who provided me with their best gift ideas and memories. All of us ladies over 70 agree that we don’t want cutesy vases or ceramic decorations as we are all trying to downsize and be rid of those things. Rather, we want experiences and new learning opportunities to keep that dementia devil at bay.
Here we go:


La Roche-Posay Lipikar Balm AP+ Intense Repair Body Lotion for Dry Skin | Kate Somerville Dry Skin Saver | Augustinus Bader The Body Lotion

Shiseido Ultimate Sun Protector Lotion SPF 50+ Sunscreen | EltaMD UV Lotion Broad-Spectrum SPF 30 Plus | Supergoop! PLAY Everyday Lotion SPF 50
We all suffer from dry skin. We go through body lotions by the gallon. Sunscreen creams too. Just check to make sure they aren’t heavily scented or too thin. These three are highly rated!


Vitamin C and Hyaluronic Acid Serum Ampoule | Dermalogica Super Rich Repair Moisturizer
We all need face creams and most are now using the Vitamin C serums. I love Dermalogica Super Rich Repair and ISDIN Vitamin C serum. I’ve even got Em hooked on that vitamin C serum:)

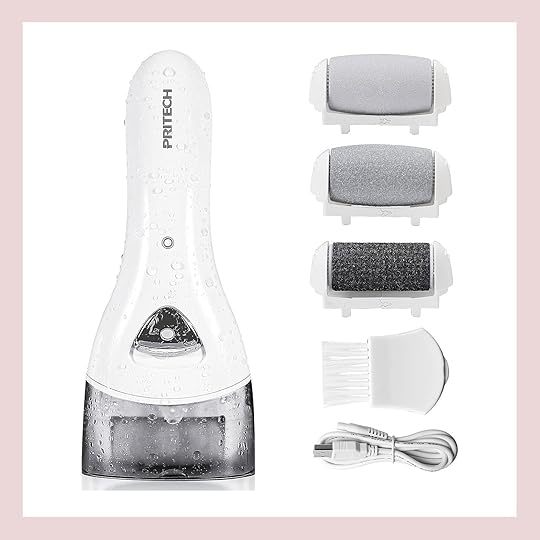
Baby Foot Moisturizing Foot Mask | Electric Feet Callus Removers
Most of us dread wearing sandals and flip-flops in the summer as our feet have become shriveled and crusty. We love good home treatments like hydrating foot masks and callus removers.
 photo by kaitlin green | from: my winter workout gear – what i’m wearing and loving both indoors and out when it’s chilly (and even freezing)
One year my kids treated me to six months of pilates at my favorite studio. One of my all-time favorite gifts. If they don’t love or do pilates, find out what activity your mom or grandmother does like and treat them to it. It’s a guaranteed winner.


Go-To Gift For Her | ASICS Women’s Gel-RENMA Pickleball Shoes
Pickleball is huge with our age group. I don’t play, but friends suggest paddles, balls, shoes & socks.


Ellen Merchant Bocce Ball Game | Bocce Ball Set | Bocce Ball Lawn Game
Bocce ball is all the rage too. If there is a club nearby that requires membership, that would be a good gift. But if they haven’t played before (or in a while) but you think they’d like it, consider grabbing them a set to play with.


Foliage Fine Art: Watercolor Workshop
Learning opportunities: In-person painting classes or even online virtual classes like a Foliage Fine Art Watercolor workshop looks like a good one.


Black Faux Leather Mahjong Game Set | Leather Bridge Game Set
Mahjong and bridge are very popular and lessons would be great.

I went kayaking for the first time in Whitefish, Montana with my best friend from college. Loved it and would love lessons. Paddleboarding lessons too! P.S. Check out Groupon for local options!


Callaway Women’s 2023 X-Tech Golf Glove | Callaway Golf 2021 Supersoft Golf Balls | Women’s Golf Ankle Sock 3-Pack
Lots of us golf and can always use balls, gloves, socks, golf lessons, and golf cart seat covers for winter when vinyl seats are cold.
 photo by kaitlin green | from: my journey to find the most comfortable pajama set ever – and i found them
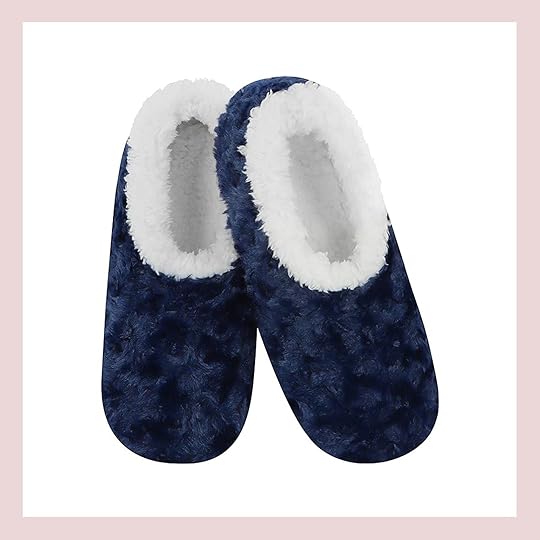
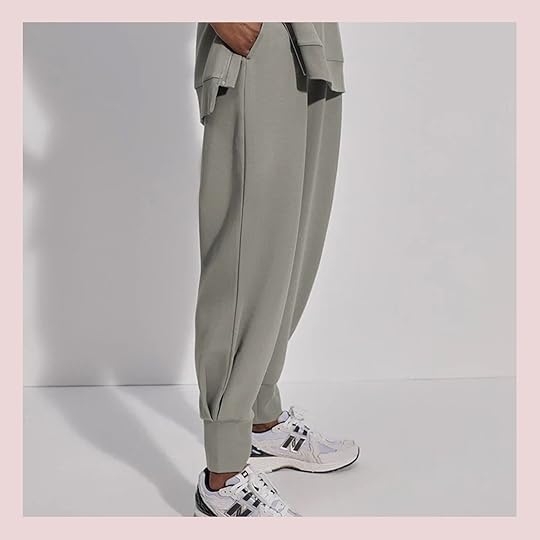
Snoozies Womens Slipper Socks | The Relaxed Pant 27.5″
Everyone loves cozy loungewear, PJs, nighties, or slippers. One friend loves slippers called Snoozies. They are washable which is always ideal.
 photo by sara ligorria-tramp | from: an at-home spa day for the ehd team
We’re always in need of mani-pedis. Or a really nice spa day… Massages are also very welcome. Who doesn’t like a massage??


Ticketmaster Gift Card | AMC Gift Card
Love outings and would appreciate movie tickets, tickets for local theatre, lecture series, or concerts. Remember, experiences are the best.


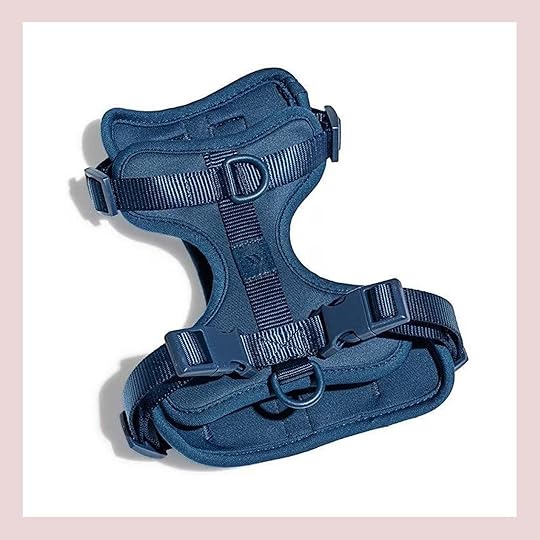
Luxury Stripe Dog Bed | Adjustable Rope Dog Leash | Adjustable Cushioned Dog Harness
So many of our friends are getting puppies or rescue dogs! I don’t get it, but any pet toys or gear would probably be a great gift.


Fun Size Burlap Wrapped Bouquet | Flowerbx Subscription | The Blouqs Co. Subscription
One of my friends receives a bouquet of fresh flowers each month from her kids. Love that idea.
 photo suraya barbee
I had several suggestions from friends for capturing grandparents’ memories:
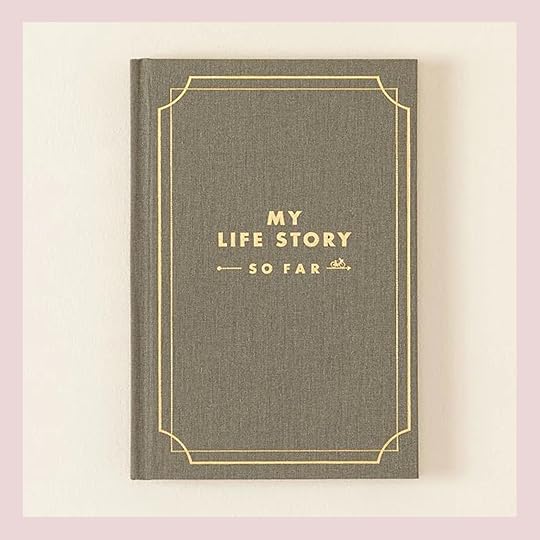

My Life Story – So Far Journal
“My Life Story – So Far” from Uncommon Goods is great. I like it because it requires writing out answers to questions. Bob’s parents did something similar years ago and I like seeing the actual handwriting.

Storyworth is very popular too. Requires weekly email exchanges where questions are selected and all answers are compiled into a book at the end. A gift for them and you:)

A game called “Life Story Interview Kit” is a game in which children and grandchildren draw cards with questions for the grandparents. I love that this is interactive.


7″ Digital Picture Frame with Mat Natural Wood | Aura Carver 10.1″ WiFi Digital Picture Frame
Digital picture frames are a hit with many friends. An easy way to experience your family and your adventures without the pictures taking over your home.

INNO STAGE 10 Piece Gardening Hand Tools Set with Garden Storage Seat
I love to garden and saw a cute gardening kit – INNO Stage makes a 10-piece gardening tools set with a storage bag and most importantly, a seat to save back strain.

Green Acres Gift Card (CA and TX)
A gift certificate to Green Acres or any local nursery would be loved by any gardener.


Helen’s Wine Club | Woman-Owned Wineries Wine Club
Membership in a wine club is a great gift for those who enjoy wine. These are great nationwide options but if they live by wine country, a local winery would be great too.

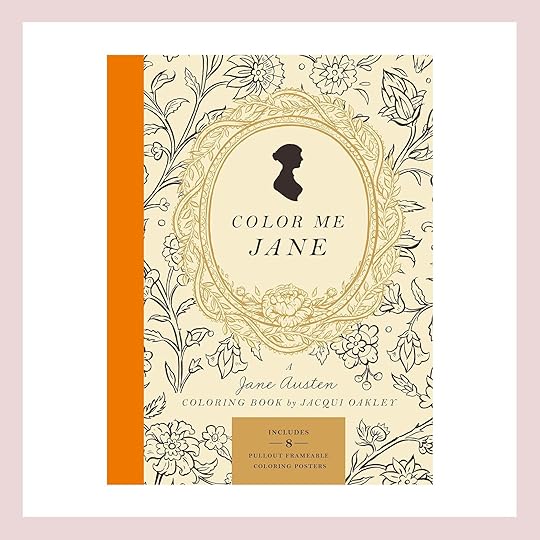
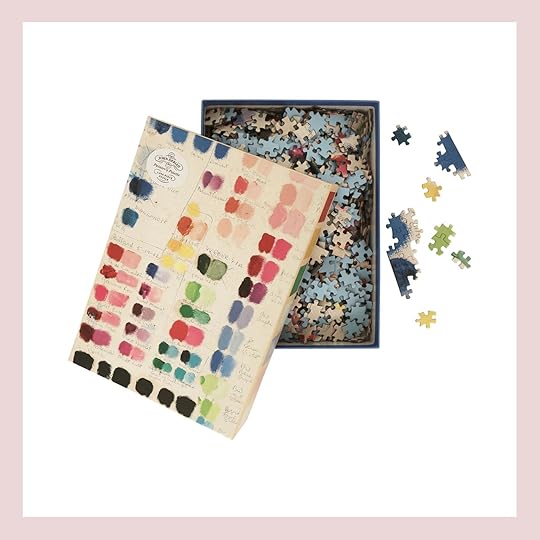
1000+ Sudoku Puzzles for Adults |
Color Me Jane: A Jane Austen Adult Coloring Book | Painter’s Palette Puzzle
For rainy days and plane trips: Magazine subscriptions, adult coloring books, jigsaw puzzle books, and Sudoku books. Helps to have something fun to do and keep your mind working.
 working on my masterpiece


Poppy Flowers Paint by Numbers | Green Adult Paint-By-Numbers Kit | Simple Flower Oil Painting (Set of 6)
I still love paint-by-number kits, but not real complicated ones. There are so many great ones out there right now.
 photo by sara ligorria-tramp | from: making mother’s (or grandmother’s) day memories with artifact uprising
I would love photo books of Thanksgiving and Christmas gatherings over the years. Companies like Shutterfly, Artifact Uprising, Chatbooks, etc. can all do them.
Another great idea that came up while having lunch with high school friends was one of them said her favorite gift was photo book called “What I Love About Grandma” (or Sue Sue, or Yaya, etc). Under the photos were captions from grands like “because she reads to me, because she hikes with me, bakes cookies, dances, etc.

For those who like perfume, that’s always a nice gift. Be sure to ask what’s a favorite. Personally, I love Grace by Philosophy.


Parker Layering Set | Born Ready (Waterproof!) | Zenyu Fan Chain Necklace Set
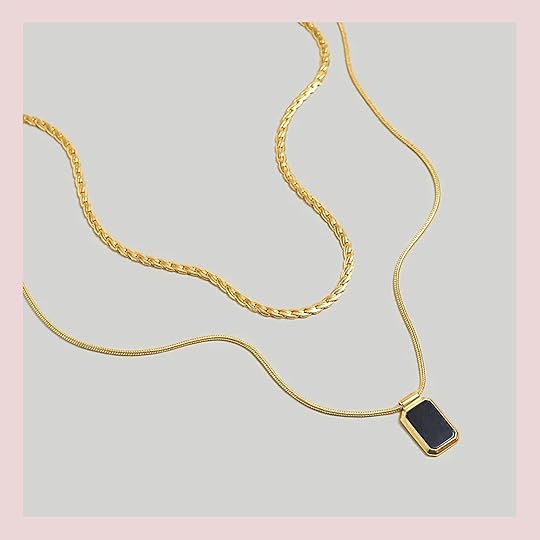

2-Piece Watch Chain Necklace Set | Toggle Chain Necklace Set
Stylish jewelry is a great and thoughtful gift. My group and I like the layered chain look. It’s a big hit now.

One friend loved a gift of M&Ms with pictures of their grandkids on them. Great for someone with a sweet tooth.
 me and my boys
Several friends said that one of their favorite gifts was a surprise weekend trip with just their adult children and no spouses. (No offense, Ems!) Other friends said they loved destination trips with their entire families. One was surprised in Hawaii when the whole clan showed up in shirts that matched her dress. Obviously, these are big gifts but so incredibly special if possible.
 our sweet grandkids!
 I love it when Brian and Emily fly the grandkids to our home for a week in the summer so Bobba and I can spoil them rotten. And last, but not least, we love handmade gifts and writings from our grandchildren. Also, for those of us who have grandchildren who live far away, a regularly scheduled, weekly FaceTime call would be great. It’s all about staying connected that means the most.
Thanks for reading and thank you to all my friends who gave their ideas. Hope this helps!
The post No More Scarves! The Ultimate, Non-Boring Gift Guide For Boomer Moms And Grandmothers (Sourced From The Woman Who Knows :)) appeared first on Emily Henderson.
November 13, 2023
Family Room Reveal – By Far The Coziest Room In The House And Here’s Why

I’m so excited to show you our family/TV room today. I love it so very much, as exemplified with my romantic cuddle session with Lady Buttercup. It’s dark and cozy and I honestly don’t think I’d change one thing about it. I love landing on that sectional in the corner, two kids piling on and watching TV (especially in the winter). This ended up being far more of a TV room, not really a family room as the kids don’t tend to play in here, but living in the PNW in the winter we sure do love to spend time in here at night and on the weekends.
We, of course, made a really fun YouTube video for this room! Go check that out HERE and for a little preview, watch below (just wait for the short ad to play:)):

If you are just popping by (welcome!) head over to the process post if you want to see how this room came together (it was a totally different color when we first moved in). This room is right off the living room, separated by a pocket door, and the perfect room to throw children in when we have friends over while we hang in the living room.

Wall Color | Sconces | Art (vintage) | Table Lamps | Sectional (no longer available but this is similar) | Solid Velvet Pillows | Striped Pillow | Patterned Throw Blanket | Faux Fur Throw Blanket
The sectional is incredibly comfortable (gets more comfy with more use – they are always on the stiffer side at the beginning). Sadly it’s currently unavailable. We added a lot of velvet pillows to up the cozy factor and two of my favorite throws – a pretty wool one and that faux fur blanket I won’t stop talking about. The lamps were pretty much made for this room – the dark blue linen is perfect, the shape of the shade contrasts so well with all the squares, and the gold detail just ties it all together. The sconces light the art so beautifully and are on a dimmer so we can keep them so low and create quite the vibe.

Dog (Butter) | Coffee Table (Unavailable) | Vase (vintage) | Rug | Rug Pad (similar)
The rug is so beautiful – it’s wool and has so much movement in it, with color variation, making it forgiving. Don’t forget to add a 1/2″ memory foam carpet pad for a lot of plushness. The coffee table I’ve had for over 10 years (originally from Anthropologie) and the striped pillow was a splurge from Lost and Found LA.
Let’s talk paint color – Stillwater by Sherwin-Williams is on the wall and it’s PERFECT. Now if you have a brightly lit room (natural light) you should know that it can be a really bold/saturated color (almost like a bright teal) but with our lighting and vibe, it goes super moody. I could not be happier with the level of saturation and color in here (any darker could look black and any lighter would be too bold or light).

Art (vintage) | Framer
I continued the thread of this vintage plaid Boro fabric that we have throughout the house (in the powder room and living room) and this time framed it as a piece of art on the wall. Dave, our framer, mounted it expertly preserving the edges and imperfections. We chose to not put glass or plexi on it because it would make the piece hard to see and would essentially just reflect the outside that it’s facing. I LOVE it.

In case you missed it, I did a whole blog post and reel about how to hang a gallery wall in this room. Those seascapes make me so happy and while I never say this (and likely shouldn’t) I don’t think I’m ever going to touch them.

On the opposite wall, we have one last seascape given to me as a gift from Julie, our antiques dealer/client of the kitchen we did last year for Crate & Barrel. It’s so perfect! The art light above it really shows it off (and contrasts nicely with the sconces over the gallery wall – both from Rejuvenation).
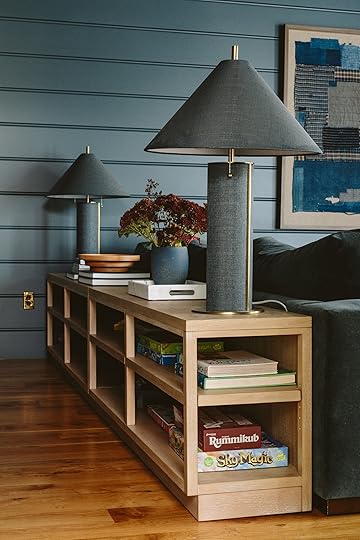
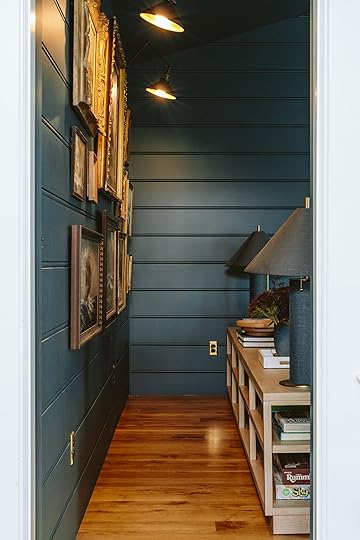
Wood Flooring | Bookcases | White Marble Tray (similar) | Vase (vintage) | Wood Bowl | Switch Plates
We didn’t need a ton of storage in here, just enough for games and puzzles really. But the real problem that we had was not having a surface for lamps or drinks. Since the sofa is slammed up against the far wall and there was hardly any room for a side table on this side of it, we needed a sofa table. Enter this bookcase from Pottery Barn that fits PERFECTLY along the back of the sofa and is where my wine or tea sits when I’m watching TV (as well as those gorgeous lamps). It looks fully integrated and almost like it was professionally designed!

Fireplace | Frame TV | TV Bezel | TV Art Store | Knitted Throw Blanket
The sofa faces the TV and fireplace wall, and if you missed my spiel about how that piece of art is actually our Frame TV (with an awesome Bezel around it) head to this blog post. If you are building or remodeling I love this configuration of a TV wall – with a stove fireplace next to it. We worked with Vermont Castings on this fireplace – it’s gas direct vent fireplace. It warms up the room quickly so we use it mostly on the chilly nights and that ambiance, obviously, is quite the mood boost during what we call “the long great dark” up here. While I truly wanted to stay off the grid with natural gas where possible, the electric fireplaces that were available at the time were aesthetically not something we could put in a 100-year-old farmhouse (they have since gotten better, btw, but it’s still tricky to make them work in all environments). It’s definitely a luxury and perhaps not something you need in all lower/warmer states, but up here it takes a dreary/depressing night and turns it into an event to look forward to.
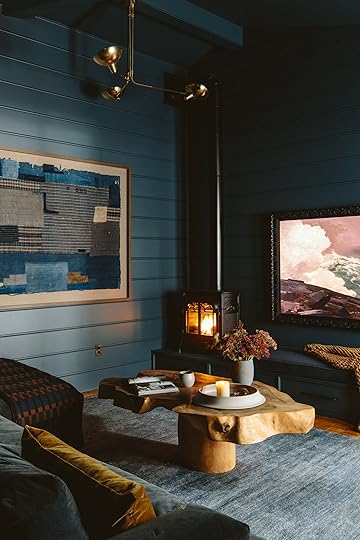
That chandelier is from Rejuvenation and I’m so sorry I didn’t shoot it with the light on! We just did a reel about it, showing how it lights the ceiling in such a pretty and soft/glowy way. You can configure that fixture so that it lights down or up but we didn’t want to look up into a bulb (and we have recessed lights should we need more) so we faced them up and love how it gives the ceiling an ambient glow.
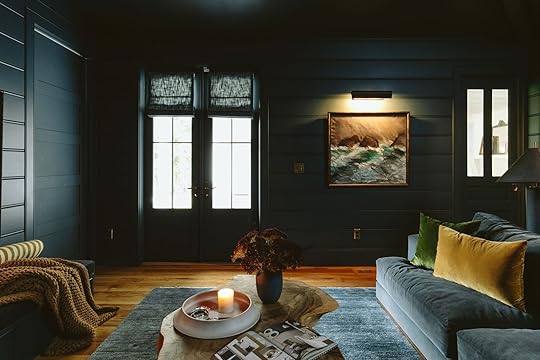
Striped Bolster | French Doors | Roman Shades | Picture Light (similar) | Art (vintage) | Door to Living Room (vintage)
Lastly, you’ll see the French doors to the patio, which I don’t really think that we needed but it creates nice exterior symmetry with the sunroom on the opposite side. What we didn’t predict (well I did but nobody would believe me) is that the afternoon summer light (that stays light til 10 pm) blasts through here and makes it impossible to watch TV (or perhaps I’m sensitive to that) so we put shades on the doors (from Twopages that are so lovely) and we ended up installing a swing door into the hallway that is also flooded with light. So you can truly shut it all out, like vampires, even on the sunniest days 😉


The detail of the rug really shows off the texture of it. I’m getting inspiration from Enkay for our next rug launch. I know that this kind of quality, weave, and texture is usually quite expensive (hand-dyed yarn, artisanal weaving) but my goodness it’s so pretty. Now for some good old-fashioned before and afters of this room. But wait, let’s go back in time to remind you what it looked like when we bought the house:

She has come a loooooong way. Here you go!


I can’t BELIEVE it was ever that light/boring and wrong. This room always wanted to be dark.


Here (above) you can get a sense more of the Ponder paint color, which I really did like for a lighter room but looked dead in here).


I hope you enjoyed this room process as much as I enjoy this room. If I could have you all over to experience this level of vibe and cozy I would. Thanks to all involved and don’t forget to watch the Youtube video of the whole process with really pretty reveals.
Family Room Resources:
Paint Color: Still Water by Sherwin-Williams
Wood Floors: Oregon White Oak by Zena Forest Products
French Doors: Sierra Pacific Windows
Roman Shades: Twopages Curtains
Entry Door: Vintage
Sconces: Rejuvenation
Chandelier: Rejuvenation
Table Lamps: Crate & Barrel
Switch Plates: Rejuvenation
Art: Vintage
Picture Light: Rejuvenation (similar)
Sectional: Rejuvenation (no longer available)
Bookcases: Pottery Barn
Coffee Table: Anthropologie (unavailable)
Rug: Enkay
Fireplace: Vermont Castings
Art Framer: Limitless Creations
Bench Cushion Fabric: Sunbrella
Bench Cushion Upholstery: Raleigh Hills Upholstery
Cushion Bench: Dinihanian Design Build
*Design by Emily Henderson and ARCIFORM
**Photos by Kaitlin Green
The post Family Room Reveal – By Far The Coziest Room In The House And Here’s Why appeared first on Emily Henderson.
Emily Henderson's Blog

- Emily Henderson's profile
- 10 followers

