
Emily Henderson's Blog, page 68
December 11, 2023
Birdie’s Bedroom Reveal!! Designing WITH (Not For) Your Kids, And How We Exploded This Room With Color

Welcome to the reveal of my 8-year-old daughter’s room, and while she is desperate to be a teenager it truly represents her personality, her sparkle, her happiness, and her love of color. I’m really crossing my fingers that we have years with most of the pieces. And y’all it was SO MUCH FUN. I know I’m extremely lucky to have a child who is currently really into what I’m also into (design) and that might not always be the case, so for now, I’m full-on celebrating this very special 2-year collaboration and I’ll always remember the first room that we designed TOGETHER. (As a caveat, if your kid doesn’t seem to care, then just do whatever you want (or don’t), both of my kids have real design and style OPINIONS which I absolutely appreciate and want to honor so I work closely with them).

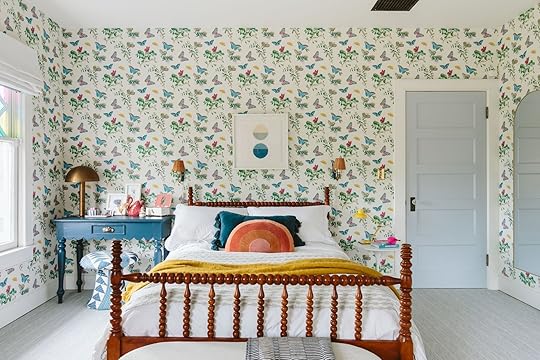
My goal was to let her take the lead, knowing that this room needed to match her personality which is very fun, energetic, colorful, and happy and she has OPINIONS about design and color, which I love. She mostly just loves all the colors – thus the Schumacher Butterly wallpaper we chose (which is the main thing I’m nervous that she’ll beg to change as a tween, TBH). I wrote about it a while ago here, but one of the bigger mistakes I almost made was trying to mute the colors and tame it down a bit, fearful that it was going to look just chaotic and not have longevity. We were working on her dollhouse together when I heard her squeals of excitement for the colors and wallpaper we were using on it (which were WILD), and that’s when I let it all go and said, “ok girl, let’s make this room YOU”. (See below at the bottom on what my takeaway from that is now). Now onto the room!!!
WAIT! You Rearranged!
Ok, so two days before the shoot (and we really try to stick to deadlines these days), I flipped the bed on the opposite wall and all our problems were (almost) solved. It fixed the nightstand debacle because we didn’t have the limitations of the windows OR the closet door anymore. HOT TIP: Kids do NOT like to come home to their rooms rearranged, I think it feels weird to them, but it only took her a couple of hours to be on board which I fully understood. Once we put the bed here we played with our furniture again, the scallop table worked in the corner. Now, one of the only things I don’t love here is my vintage white Saarinen table (on the right) simply doesn’t read enough to make it look balanced, but in person, it is actually fine. Maybe one day I’ll stumble upon the perfect nightstand (maybe not). Anyway, thanks to all for encouraging the room to flip – IT WORKED.
The Art Studio Corner
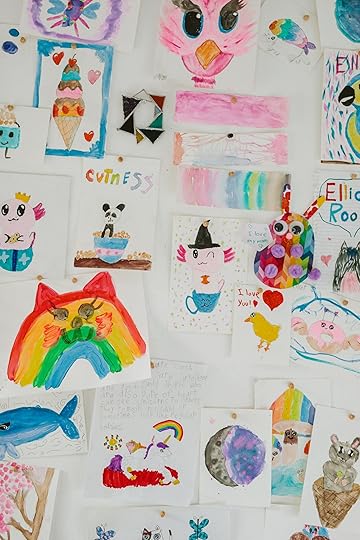
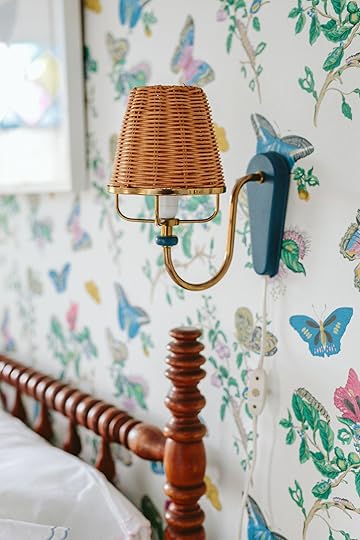
This corner is my favorite because it is so functional for her to do arts and crafts, and yet so lively and fun, stylistically. She wants to be an artist and while I don’t need to give my opinion on how good she is, she is extremely prolific (produces 2-3 pieces a day), dedicated, and passionate and will sit there for hours and draw. I don’t know what I love more – the bulletin board we made together (see this DIY post), the hanging fringed lamp we bought together at the Monticello Antique Mall, or just how we kept the IKEA pedestal table I’ve had forever and found the right art cart to hold her supplies. It took a few tries to figure out how to arrange the room but in this corner (and with just one hanging light) it works so well.

Oversized Pink Lampshade (vintage) | White Tulip Table | Blue Task Lamp (vintage) | Chair (vintage) | Corkboard (DIY) | Large Wood Paintbrush | Disco Ball
And why yes, that is a disco ball on the ground (it’s where the sun hits the longest in the morning actually) and a giant paintbrush made by local artist Purl (@total_nonsequitur). We shot on the GLOOMIEST day, with no sun at all, so Gretchen used the flashlight on her phone to reflect light on the disco ball, but when there is sun it is extremely dreamy and reflects colorful light (from the window films) all over the room.


Art Cart | Green Pencil Holder

I LOVE that now the first thing you see is that vintage painting that I bought from local art dealer Fabius Grange. My goodness, it’s just incredible. It pulls in every single color in the room.
I got the art cart from Bed Bath and Beyond. It took me FOREVER to find one that would sneak under the table that didn’t look like a kitchen utility cart. This one is more suited for paints, but we were able to take out a shelf and put in crafting tools. Both of our kids take a watercolor class after school one day a week and they LOVE it. Typically we don’t allow painting up here (carpet and all) but I might put down a washable rug and let her paint with washable watercolor (I got these watercolor pencils for her for Christmas so I’m curious if this would make it less dangerous). I would love to change the wheels on the cart to something less office-y but I probably won’t at this point 🙂 I’ve had the desk chair forever (vintage Paul McCobb) and I bought the blue task lamp on Facebook Marketplace when we first moved here for $60.


Wallpaper | Trim Color | Door Color | Desk (vintage) | Desk Paint Color | Mushroom Stool (custom upholstery with vintage quilt) | Gold Lamp | Sconces (vintage) | Art | Bed (vintage) | Duvet + Sham Set | Tassel Lumbar Pillow | Arch Pillow | Yellow Throw | White Side Table (vintage) | Yellow Task Lamp (vintage + similar)
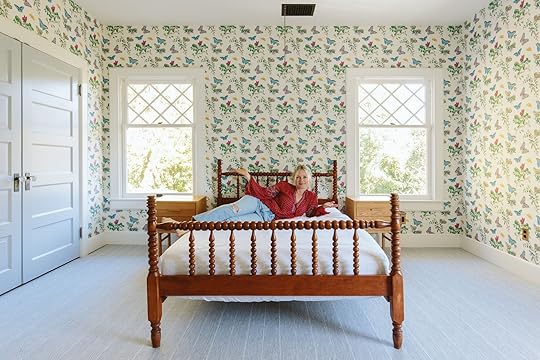
Now for the other side of the room…TBH this is my least favorite shot because the side table just doesn’t show up!! Again, in person, it looked fine but here there is a clear imbalance and it drives me nuts. So I might change the table, but I wanted you to show how the room was laid out (also nice bed pillow styling, Emily, so messy). I mean, I could just paint that vintage tulip table, I’ve had it forever and shape-wise it’s a great contrast to the blue scallop table…TBD.

Desk (vintage) | Desk Paint Color | Mushroom Stool (custom upholstery with vintage quilt)
But this vintage scalloped table is SO CUTE now. I bought this also on Facebook Marketplace and it was awaiting its moment. Well, here it is. We painted it the week of the shoot this super dark blue/green called Rainstorm by Sherwin–Williams and it turned out PERFECT. This was one of the decisions that Birdie and I didn’t agree on (she wanted a bright teal or a purple). I pulled rank and said that if she didn’t like it we could repaint it together after the shoot, but I need to do what’s best for the whole room and this darker color would ground the corner and I think she would love it more long term. She came home from school and loved it.
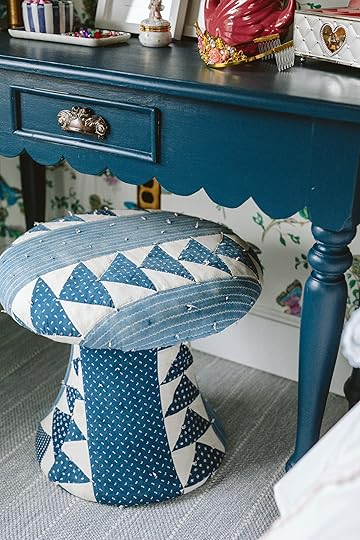
You are probably staring at the CUTEST mushroom stool EVER. I bought the vintage quilt from Shop Wilma (a local awesome vintage dealer) and had ADF Upholstery make it into one of her signature mushroom stools. The kids fight over this stool (Charlie uses it for his drum set) so I want to find another quilt and make another one so they each have their own because my goodness they are perfect. Farmhouse, but make it playful.
Storage Bench | Patterned Throw Blanket (unavailable)
The storage bench has her costumes and adds a little bit of softness to the bedframe (which I still want to switch out for something more simple, modern, and upholstered but she really doesn’t want to so at this point I think we are keeping this rickety bed until we need to upgrade).
The sconces though…I’ve been hoarding these for a while, unsure where they should go. And while they are far too fancy for an 8-year-old’s room, they are perfect in here so somehow she’s the winner of these 1970s Italian beauties. They are incredible.


The table/desk is one of two places where she keeps all her “stuff” and she’s collected the porcelain swans while antiquing with me. And like I said, I’ve had that Saarinen side table and the yellow lamp forever – both vintage.
Did You Change The Window Shades?
Colorful Window Film | Brass Switchplate | Window Shades
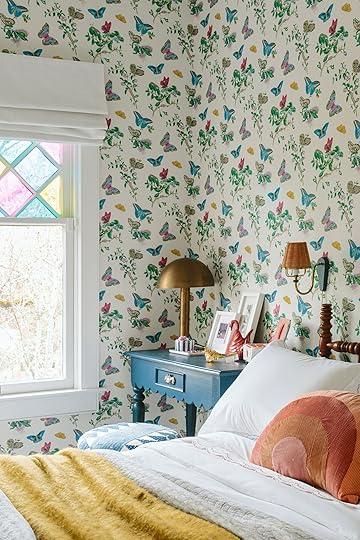
You might notice that the window shades have changed. The function of the easy Decorview shades (and how insulating they are) was not something we could give up, but I didn’t love how they looked at the top of the vintage diamond windows. So I reached out to Twopages because I was really impressed with the shades in our family room, and within weeks these custom-sized and lined white Roman shades arrived. I designed them to be fully functional, of course, but what I LOVE is that they act as a valance and actually hide the insulation shades underneath, so we leave them up for the most part! Since the glass is original (and therefore very thin) we keep the “undershades” closed most of the day in the winter to not waste heat. I just love how the Romans made the room look so finished while keeping it looking cozy and modern.

Chair (vintage) | Round Pillow | Wicker Ottoman (vintage)
On the opposite side of the room (next to the painting) I put my second vintage Swedish chair (that no 8-year-old deserves but here we are) and it’s perfect. I may end up stealing it if it works in a more prominent room (the other one works perfectly in our guest room) but the scale works so well and I love how it pulls from the pink in the wallpaper, yet is a bit deeper and richer in a good way.

Wall Mirror | Jane Denton Wall Art | Shelves | Shelves Paint Color
Now for the other side of the room – we hung these cute scallop shelves (that we painted Silken Peacock by Sherwin-Wiliams) to display all her treasures, books, and art. We actually had to take off the brackets from the shelves and screw them into the wall because they hung off the wall in a slanted way, FYI, but once up, they are sturdy and so cute (I feel like it’s a design flaw and for $80 each should sit flush against the wall so I wanted to warn you).
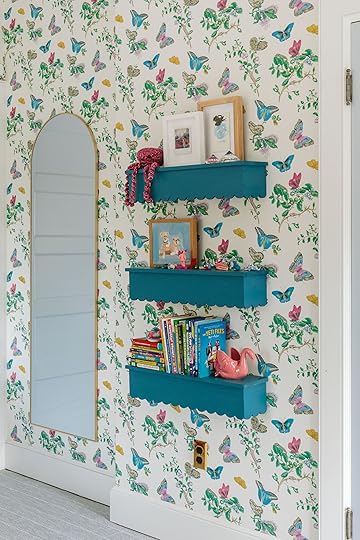

I’m obsessed with her little clay sculptures and that painting she made of Oscar and Buttercup (with her COVID nanny who was an incredible artist).
 What Do I Want To Add/Change?
I like to play a new game called “If I could snap my fingers” which is an exercise on what I would change if I could, obviously, just snap my fingers. For this room, I really want to add crown molding. We tried a DIY that totally failed the week before the shoot (I’ll show you in a bit) but it just feels unfinished. We are working on Charlie’s room in 2024 so I want to wait until we know for sure if I want it in there too. If so I’ll hire someone to do them both. And yes, I would like to simplify the bed to help the room look more like the rest of the house, but I’m in no hurry anymore. Maybe I’ll find a different nightstand to balance out the blue table, but again, would likely be something vintage I stumble upon (and sadly the wicker-skirted table is too wide and high).

Listen, it was not without some style/decision bumps along the way. We didn’t agree on everything and we had a few conversations about complaining (and entitlement, my kryptonite) but we landed in a good place – aka “No I will not buy the $13 purple and lime green polyester canopy with LED lights you found via Pinterest, but yes, of course, you can use your own money to buy what you want after the photo shoot that is for our family business and I’ll happily help you:)” Of course now it’s all done she loves it so much and I get to hear her telling her friends how she made the bulletin board and chose all the colors (selective memory, I def had to tweak them when she wasn’t noticing). And after much begging, I even let her be in the YouTube video with me (where she proceeded to tell her friends she’s on YouTube. I was legit mortified that people thought that I’m encouraging my 8-year-old old to have a YouTube channel! I am not!!).
Designing WITH your kids instead of FOR your kids can be challenging and I’m very lucky that this was easy for me to challenge (this was my dream room when I was a kid). My best advice is to limit the choices, don’t let them shop online by themselves – even on Pinterest, and let them express themselves in the lower stakes pieces (like the window films), making sure that any major investments have longevity or flexibility. And you can always do what I shamelessly do and bribe her with shopping money and a doughnut to go vintage shopping with me, where we found so many cute things in her room.

Don’t forget to watch the long-form YouTube video! Below is a fun short version (Just wait for the short ad to play:))
Bedroom Resources:
Wallpaper: Schumacher
Carpet: Stark
Door Color: SW 6239 Upward
Trim Color: SW 7006 Extra White
Windows: Vintage
Colorful Window Film: See this post
Roman Shades: Twopages
Insulated Blinds: Decorview
Switchplates: Rejuvenation
Vintage Desk Paint Color: SW 6230 Rainstorm
Mushroom Stool Upholstery: ADF Upholstery
Gold Table Lamp: Schoolhouse
Shelves Paint Color: SW 9059 Silken Peacock
Wall Mirror: Bed Bath & Beyond
Large Wooden Paintbrush: Purl Samoheyl
Bed: Vintage
Bench: Bed Bath & Beyond
White Side Table: Vintage
Sconces: Vintage
Art Table: IKEA
Art Card: Bed Bath & Beyond
Wood Chair: Vintage
*Design by Emily and Elliot Henderson (and ARCIFORM)
**Photos by Kaitlin Green
The post Birdie’s Bedroom Reveal!! Designing WITH (Not For) Your Kids, And How We Exploded This Room With Color appeared first on Emily Henderson.


December 10, 2023
The Link Up: The Disco Lightbulbs Emily’s Kids LOVE, Gretchen’s $10 Cure For Motion Sickness, And A Clutch Purse That Fits A Whole Wine Bottle

Happy Sunday everyone! This week we had a mini EHD retreat in LA that was quickly derailed by the flu. Cool, cool, cool. But we had one wonderful day of blog planning (yay!), connecting, and of course, eating. We also hope you had a nice (and healthier) week! Alright, before we get into this week’s links we have BIRDIE’S YOUTUBE REVEAL VIDEO ready with a little teaser version for you below (just wait for the short ad to play).
This week’s house tour is a 575-square Brooklyn loft that designer Holly Waterfield transformed into a three-bedroom for her and her two kids. It’s full of life, vintage, and a swing! It’s a really special space that will make you smile! Go check it out here.
From Emily: OK. As a mom of two kids who both love to party hard and dance in their rooms (curious where they got that), we’ve been a disco ball family since they were 4 and 6. The truth is most kids, given the chance to blast their own music with lights dancing on the ceilings, LOVE IT. So this year I found two different disco ball rotating LIGHT BULBS, meaning you don’t have to hang anything from the ceiling and you get mostly the same (if not cheaper) effect. One plugs directly into the wall and the only issue with it I found is that if something is directly above it, it might obstruct the light source but otherwise, it’s easy, cheap, and SO FUN. The other one I bought and tried is a lightbulb that you can put in your ceiling light (hard) or just a lamp (EASY). The lamp obviously can’t be one with a metal shade but if it’s a fabric shade it worked GREAT. I did a story about these on Instagram to demonstrate both of them so head over there today and check it out.
From Gretchen: I’ve dealt with car sickness all my life. It only happens when I ride as a passenger and weirdly doesn’t affect me in any other form of transportation, except the car. When it decides to rear its ugly head, it’s bad and nothing seems to help. BUT my friend recommended these motion sickness glasses because she said they’d helped her, and as stupid as they look (VERY), they really do work! The water inside them helps to maintain a horizon line, making the motion sickness subside pretty fast. I always keep these on me now!
From Mallory: I bought this throw pillow recently and think it’s so cute and fun — it looks good literally anywhere so it would make an awesome gift!!

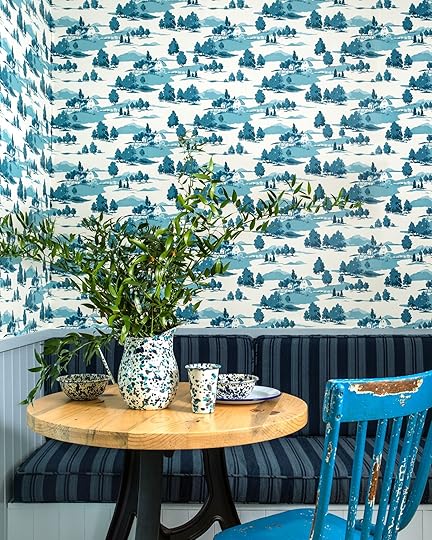
Pacific Northwest | Farm Toile
Max Humphrey just came out with his second wallpaper line with Chasing paper! It’s another perfect PNW collection that we really love. Go see all seven new designs here!
From Arlyn: Do you constantly have random oil and food stains all over your clothes and you can’t figure out why? WELL MY FRIENDS, IT’S BECAUSE YOU NEED TO WEAR AN APRON WHEN YOU COOK! I swear, I was a magnet for destroying a shirt with a blob of oil on my first wear. Did I already own a few old, crunchy, and frilly aprons that were rolled up in a ball in my laundry closet? Yes, yes I did. Turns out, I need an apron I actually like to want to fetch it every time I cook (which with a kid is like 6 times a day). Anyhow, I’ve wanted a Hadley & Bennett apron for about a year but just can’t justify spending over $100 for one. Then I saw this one from Target’s new Figmint line which is similar in look but only $15!!! I love the pockets in the front, the adjustable neck strap and the fact that it wraps properly around my wider-than-average hips. Grab one for yourself and a friend and then have a Christmas cookie bake date. 🙂
From Caitlin: Coming in hot with one final $50 gift recommendation for all the hard-to-shop-for people on your list: THE WINE CLUTCH PURSE. I grabbed one of these for a gift exchange with my skating team and it was a total hit (I did the pink champagne clutch, but the gold champagne clutch or red wine clutch are also very traditionally festive!). It’s a really nice way to dress up the bottle of wine you might give to a (fun :)) coworker or distant relative (and it’s novel enough to DOMINATE a white elephant, too, as I’ve learned). Full disclosure: I selfishly also bought one for myself (because I lack self-control) and I’m very excited to have an easy-to-carry bag for safely schlepping wine to some outdoor Cinespia screenings in the park next summer. A win all around!
From Jess: I found a new candle I love! I needed a candle because the whole EHD was coming over to my apartment and I wanted it to look AND smell good. I decided against a “holiday” scent and wanted to go fresh instead. This candle has notes of garden mint, lily of the valley, cucumber, citrus, and more. It’s subtle but SO lovely and would be a perfect gift too since it’s only $32 (a hard price to come by with luxury-smelling candles) and the dark glass jar is beautiful (and looks expensive). I will definitely be repurchasing this one.
Thanks for reading, have a great rest of the day, and see you tomorrow for Birdie’s full reveal:) Oh and here’s the link again for the full video!
Opening Image Credits: Design by Arlyn Hernandez | Styling by Emily Edith Bowser| Photography by Veronica Crawford | From: Arlyn’s Rental Kitchen Reveal Just Might Have You Wishing You Had Brown—Or Even Cherry— Cabinets (Yes, Really)
The post The Link Up: The Disco Lightbulbs Emily’s Kids LOVE, Gretchen’s $10 Cure For Motion Sickness, And A Clutch Purse That Fits A Whole Wine Bottle appeared first on Emily Henderson.
December 9, 2023
We Asked And You Delivered AGAIN – Here Are The Best Trader Joe’s Appetizers, Dips, And Food Hacks

A couple of years ago, I crowdsourced the best Trader Joe’s appetizers, dips, and food combinations and the response was AWESOME. I was so grateful! So since this is still such a great resource for delicious, affordable apps and snacks for any holiday party (or hanging at home), we wanted to see what was new on the Trader Joe’s shelves that were things not to miss. Again y’all did not disappoint so thank you! We put all of the new suggestions at the top but you can still see everything from the original post after. Everything is still just as tasty:)
I needed help and you seriously delivered. I’m bookmarking this page forever. I shopped exclusively from Trader Joe’s in my 20s (in New York) then in my 30s in LA until we moved back to Los Feliz and I couldn’t handle the 15 minutes it took to wait for parking, not to mention the line to check out. But now that I’m back in Portland, where running mom errands is a JOY. But I literally didn’t know what to bring to an appetizer/crafting get-together a couple of weeks ago. So we put it out there on social media and y’all seriously hooked us up. What we loved so much was how consistent you were – there are CLEAR favorites and not only that but so many of you recommended a combination of two apps that we would have never done (see below). So whether you are hoping for some easy cozy snacks while playing games or serving others this year, here are some appetizer recommendations from Trader Joe’s (unsponsored obviously).
Ok, first the new additions!

1. Unexpected Cheddar Cheese Spread: This was maybe the #1 suggestion when we asked people for their new favorite Trader Joe’s dips and spreads. Gretchen also made SURE it was on the list because she thinks it’s incredible. That’s a lot of praise across the board so y’all this should probably be on all of our shopping lists if you eat cheese.
2. Chunky Artichoke & Jalapeño: This was a big repeat suggestion and it’s easy to see why. Artichokes and jalapeños are incredibly delicious so matched in a dip only makes sense. Then grab a bag of delicious chips and you are set.
3. Vegan Carmelized Onion Dip: Another big repeat suggestion! This also sounds delicious and it’s always nice to have a vegan/dairy-free option for people that doesn’t skimp on flavor.

1. Organic Corn Chip Dippers + Everything and the Elote: Everything and the Elote dip was suggested A LOT. Very excited to try it. But when someone suggested the corn chip dippers it sounded like such a fun and easy combo that would be a huge crowd-pleaser.
2. Organic Jalapeño Seasoned Corn & Rice Puffs: This combo was actually a Gretchen rec! As stated before the Unexpected Cheddar Cheese Spread is a crowd favorite, to say the least. But there weren’t a ton of recommendations on what to eat it with. However, Grethen says they are incredible with the Jalapeño Seasoned Corn & Rice Puffs. According to her, “The puffs have just the right amount of spice and the spread finished it off perfectly”. She also loves the texture combo together!
3. Buffalo Style Chicken Poppers: These poppers were also recommended by a bunch of you and man do they look good! Fried, lots of flavor, and melted cheese? Sign us up.

1. Fig & Olive Crips + Cream Cheese + Fresh Cranberry Orange Relish: Talk about a perfect seasonal appetizer! Who doesn’t love those fig and olive crisps? And then you add that season relish on top of a little cream cheese? Try to keep me away:)
2. Triple Ginger Cookie Thins + Goat Cheese + Fresh Raspberry Jam: Another little delicious snack to assemble yourself or put on a cheese board for others to make themselves! This one is a little more of a dessert since the base is a cookie which I don’t think anyone will complain about. Ha.
3. Raisin Rosemary Crips + Goat Cheese + Honey: If you love the fig and olive crisps and you for some reason haven’t tried the raisin rosemary, then you are in for a treat! This combo is a total crowd-pleaser.

Baked Lemon Ricotta Cheese: I keep hearing about this cheese and how it’s more like a dessert! Y’all recommended pairing it with a berry compote which sounds so good. Definitely is a dish that is going to look and taste fancier than the price tag.

1. Spanakopita: So many of you recommended this. Everyone swears it’s a party hit and is great to have in a pinch.
2. Parmesan Pastry Pups: Sign me up for fancy pigs in a blanket any day of the week. Great for kids and adults!
3. Samosas: The samosas were another greatest hit in our DMs. You guys insist they are a super popular at parties or for a quick and easy snack.

1. Fried Stuffed Olives: I can’t wait to try these. They are breaded fried olives with cream cheese so I can imagine they would be gone very quickly at any gathering.
2. Bacon-Wrapped Dates with Goat Cheese: I am not at all surprised to hear these are fantastic. Jess Note: They are actual pieces of heaven on your mouth.
3. Chicken Cilantro Wontons: I know the frozen chicken potstickers are great but I haven’t tried these yet. I am excited to buy them next time I go to TJ’s.
4. Feta Cheese and Caramelized Onion Puffs: Oh these sound so delicious. A LOT of you said these are the best so I am very excited to try.

1. Buffalo Chicken Dip: This buffalo chicken dip is another clear winner. Y’all suggest pairing with bread or crackers and I imagine there are some great recipes you can use this in too.
2. Vegan Tzatziki Dip: You all said this is great paired with veggies and is a perfect vegan alternative for a dressing or dip.
3. Truffle Dip: If you have had anything truffle based you know it is RICH so I bet this dip would pair so well with celery or carrots.

1. Baked Brie: This baked brie en croûte looks delicious. It looks and tastes fancy and everyone loves bread and cheese, right?
2. Corn Salsa: I didn’t realize tomato-less salsa is such a thing but now I know. We are told that pairing the corn salsa with their blue corn tortilla chips is absolutely delicious.
3. Spinach Artichoke Dip: Almost everyone in the DMs noted that the frozen spinach and artichoke dip is killer.

1. Cooked Lentils + Crumbled Feta + Bruschetta Sauce: We were all blown away by how many of your recommended this combination. You guys suggest putting the mixture on a crostini, crackers, or just serving as a salad. I can’t wait to try.
2. Croissants with Spinach Artichoke Dip: YUM. Bread
+ creamy spinach and artichoke dip never misses.
3. Triple Cream Brie with Raisin Rosemary Crackers: So many of you swear by the triple cream brie cheese and a huge number also suggest pairing it with the raisin rosemary crackers.

1. Roll Goat Cheese in Everything But The Bagel Seasoning and Serve with Crackers: I knew Everything But The Bagel Seasoning was popular and now I am so excited to try it with goat cheese the next time we do a charcuterie board.
2. Pair Brie with Fig Butter on Crackers: Again, the triple cream brie was a very popular suggestion and the fig butter is supposed to pair with it perfectly.
3. Blueberry Goat Cheese and Pepper Jelly: This is a very interesting pairing that I am intrigued to try! A TON of you told us the pepper jelly is a staple and pairs well with so many things.
Big thanks to everyone who sent us their recs and please if you have more drop them in the comments. xx
Opening Image Credit: Design and Styled by Jess Bunge | Photo by Sara Ligorria-Tramp | From: How To Have Great Holiday Cocktail Party In A Tiny Apartment (All the Hacks You Need to Know)
The post We Asked And You Delivered AGAIN – Here Are The Best Trader Joe’s Appetizers, Dips, And Food Hacks appeared first on Emily Henderson.
December 8, 2023
How We Used Colored Window Film On Birdie’s Windows – Spoiler: It Was A Super Fast, Cheap, And Easy DIY

Last summer, while at the famously neutral mountain house, Birdie and I had, let’s just say a “debate” about my use of color. She was fearful that my taste/style was rather boring. I really understood but I wanted to reassure her that I still got it (hilarious that I was desperate to prove to my 7-year-old that I can do “young” and “fun”). So I went on the internet and showed her a few of the past rooms that she hadn’t seen, including the Ban.do office – full of disco balls and colorful window film and she squealed with delight. It reminded both of us how much fun color can be and while her room was already dripping with a lot of it, I agreed that putting colorful films on the diamond pattern of her windows would be so fun (and so easily removable should it be “too much”).

As you can see the room has the most beautiful vintage windows, shaky glass and all. And while the room didn’t need more color, there was certainly an opportunity to take it up a notch and ensure that my now 8-year-old thinks I’m “the coolest, forever” (her words, not mine and she pinky swore).


So I ordered WAYYYY too much, mostly because on the internet when they were all rolled up I couldn’t tell what they would really look like.

So I ordered yellow, teal, hot pink, and green (along with some opaque ones that just looked like weird floral privacy glass).
[image error]The whole thing was pretty easy besides making sure that the squares and triangles measurements were perfect (shout out to Gretchen for helping with that).


It’s honestly the simplest process – you just need a spray bottle of water and a squeegee. You spray the window and then place the film which attaches itself immediately. Then squeegee out the excess water, spreading it around evenly. Catch the excess water with a towel and then move on to the next. So obviously if you don’t have the grids or don’t have, say 114-year-old windows with no real 90 degrees, then it would be easier 🙂
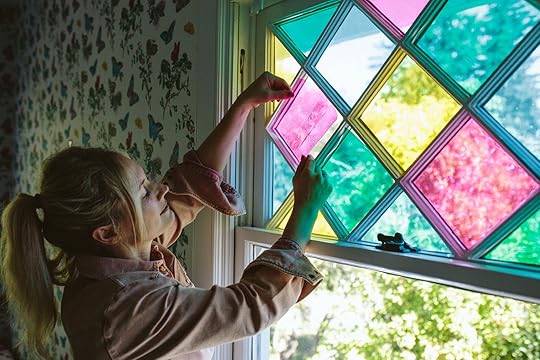
It was so easy I clearly was taking a nap while installing on camera. Anyone can do it! In your sleep!


And there you have it (and she LOVES IT). Now the ONLY downside to this, which I didn’t notice til we were done is that window you see above, is that they are double-sided and you can also see these colored windows from the outside. So when you are driving up it looks like three windows are stained glass in non-historic pastel colors. I don’t really care because we live very off of a neighborhood road, but I suppose if our house faced the front in a neighborhood it could look weird. Again, because it’s so easy to remove I’m not worried about it (but it is screwing up my fantasy of wreathing all our windows, which I fear might just need to happen next year anyway).
*Photos by Kaitlin Green
The post How We Used Colored Window Film On Birdie’s Windows – Spoiler: It Was A Super Fast, Cheap, And Easy DIY appeared first on Emily Henderson.
How We Used Colored Window Film To Birdie’s Windows – Spoiler: It Was A Super Fast, Cheap, And Easy DIY
Last summer, while at the famously neutral mountain house, Birdie and I had, let’s just say a “debate” about my use of color. She was fearful that my taste/style was rather boring. I really understood but I wanted to reassure her that I still got it (hilarious that I was desperate to prove to my 7-year-old that I can do “young” and “fun”). So I went on the internet and showed her a few of the past rooms that she hadn’t seen, including the Ban.do office – full of disco balls and colorful window film and she squealed with delight. It reminded both of us how much fun color can be and while her room was already dripping with a lot of it, I agreed that putting colorful films on the diamond pattern of her windows would be so fun (and so easily removable should it be “too much”).
As you can see the room has the most beautiful vintage windows, shaky glass and all. And while the room didn’t need more color, there was certainly an opportunity to take it up a notch and ensure that my now 8-year-old thinks I’m “the coolest, forever” (her words, not mine and she pinky swore).
So I ordered WAYYYY too much, mostly because on the internet when they were all rolled up I couldn’t tell what they would really look like.
So I ordered yellow, teal, hot pink, and green (along with some opaque ones that just looked like weird floral privacy glass).
[image error]The whole thing was pretty easy besides making sure that the squares and triangles measurements were perfect (shout out to Gretchen for helping with that).
It’s honestly the simplest process – you just need a spray bottle of water and a squeegee. You spray the window and then place the film which attaches itself immediately. Then squeegee out the excess water, spreading it around evenly. Catch the excess water with a towel and then move on to the next. So obviously if you don’t have the grids or don’t have, say 114-year-old windows with no real 90 degrees, then it would be easier 🙂
It was so easy I clearly was taking a nap while installing on camera. Anyone can do it! In your sleep!
And there you have it (and she LOVES IT). Now the ONLY downside to this, which I didn’t notice til we were done is that window you see above, is that they are double-sided and you can also see these colored windows from the outside. So when you are driving up it looks like three windows are stained glass in non-historic pastel colors. I don’t really care because we live very off of a neighborhood road, but I suppose if our house faced the front in a neighborhood it could look weird. Again, because it’s so easy to remove I’m not worried about it (but it is screwing up my fantasy of wreathing all our windows, which I fear might just need to happen next year anyway).
*Photos by Kaitlin Green
The post How We Used Colored Window Film To Birdie’s Windows – Spoiler: It Was A Super Fast, Cheap, And Easy DIY appeared first on Emily Henderson.
December 7, 2023
How We Made A Custom Corkboard For Birdie’s Bedroom

Y’all, I’m not a big DIYer, but there is a huge hole in the market for large and fun bulletin boards so we had to tackle this one and I’m soooo proud of us. Of course, it ended up being a little expensive and quite laborious (like most good DIYs are – ask all the DIY content creators out there) but it was fun and not “hard”. Just required some time/money (but I have good ideas on how you could recreate it and be much cheaper). A huge thanks to Gretchen’s mom, a former teacher, for giving me this huge school-grade bulletin board.

The vintage bulletin board we had to work with (admittedly hard to find) was 6′ x 3′ – so she was BIG and also very heavy. Initially, I wanted to redo it and lean it vertically over here. But let’s just get into the DIY steps:)
Step One: Paint It White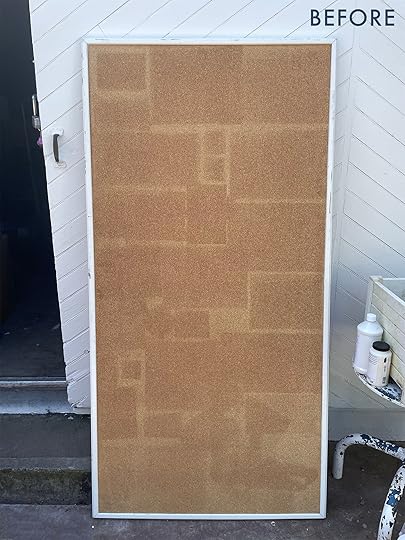

We used acrylic paint in a creamy white (matched to the wallpaper) so that it doesn’t look too yellow or too stark.
Step Two: Prepping The Wooden Ball KnobsPlaying off the Jenny Lind bed style (yes, the one that I might change) I wanted this beaded frame look. So playful and fun (and certainly a trend). But there weren’t any fun cork boards that were big and so many that were small. So we would have to make it.
The Inspiration:
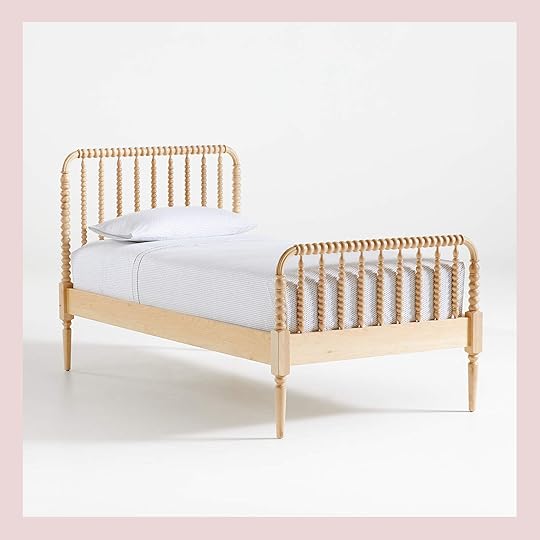

Rowan Valley Linden Bed | Jenny Lind Kids Maple Wood Spindle Bed | Webster Bed

Instead of buying 1/2 balls, we found these knobs that almost have that “full ball look” (surely there is a more technical term) and committed to gluing them on. You can also buy strips of this look which I think is a way more affordable and easier thing to execute, but we went full balls to the walls on this one (quite literally).

Gretchen spearheaded this one and shoved them all on popsicle sticks in order to be able to paint them completely. This was the summer so we could do it outside.
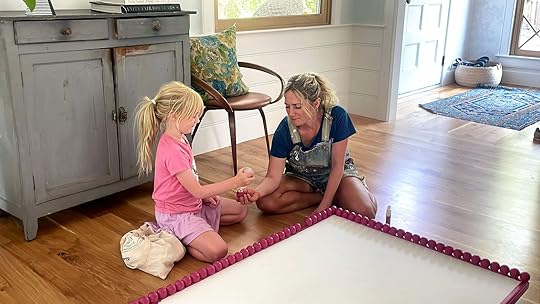
Step Three: Paint Them Pink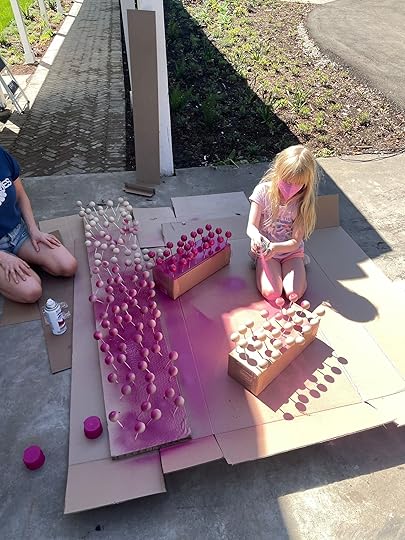

I should say that Birdie chose the color and I didn’t push back. It’s SO FUN and I knew this could be a place where she could assert her style. Obviously, spray painting was a VERY fun place to involve her (she helped with the gluing, too).

This setup made all our guests triple-take – WHAT IS THAT? They took two coats and we got super messy, but shoving them into cardboard worked really well.
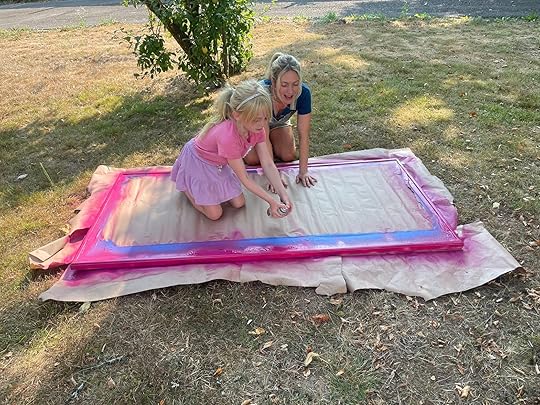
Step Four: Paint The Frame Pink
Then we spray-painted the frame itself knowing that you’d see the frame underneath the balls.
Nothing makes me happier than doing these projects with my kids, in the name of work. And we all know that involving them in the design AND hard work/process makes them more invested and value it all more. Not all kids want to be as involved, but she does which is why the room has stayed so true to her.
Step Five: Glue On The Pink, Wooden Balls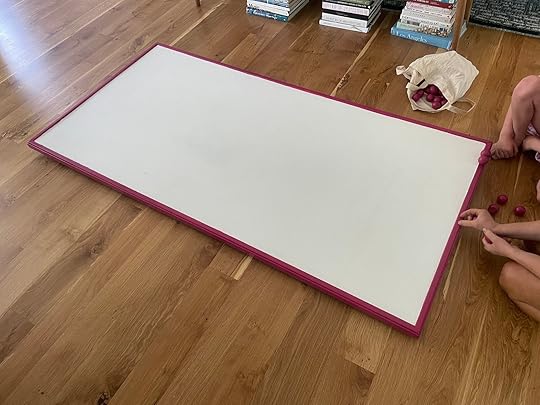
Ok here’s where we learned a few things. We popped the wood off the popscilce sticks and got to glueing. We bought two different types of gorilla glue, not realizing that one would try clear and the other beige. We stopped after like 12 balls, but they were already adhered and you could see it outside of the pink.

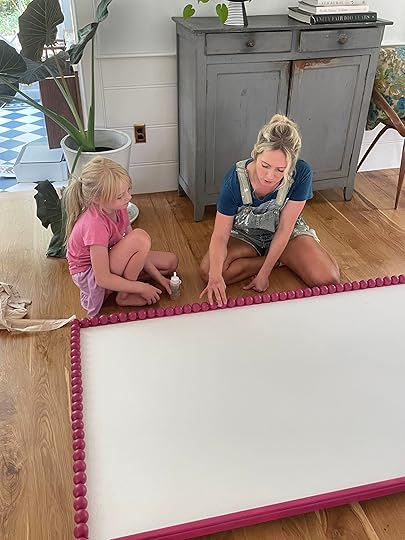
It was hard to keep them super straight and not wonky along the frame. The clear glue totally worked, but don’t use any non-clear glue. We still plan to go back and touch up, but it requires us to spray the spray paint into a bowl and use a tiny brush. You can barely see it, but it does bug me.
Step Six: Add Art & Hang!

Originally I wanted to just lean it, but Birdie REALLY wanted it hung. I think in her mind it would look more like a grownup board and more professional if it’s hung on the wall horizontally, which I totally get.
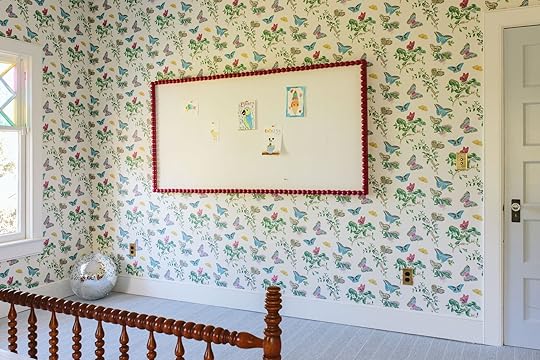
We centered it on the wall, knowing that her round white art table (which isn’t my favorite but so functional) makes the whole thing work for her needs (and you bet the disco ball reflects the light so perfectly.


It turned out pretty darn cute. And as you can see, using the *almost* full wooden balls versus a 1/2 ball gave it more texture and dimensions. I also think the scale of them worked really well with the scale of the bulletin board. Projecting out further like they do helps it look really “high-end” and intentional.
*Pretty Photos by Kaitlin Green
The post How We Made A Custom Corkboard For Birdie’s Bedroom appeared first on Emily Henderson.
December 6, 2023
Stumped On Actually GOOD Affordable Gifts?? We’ve Got 50 Ideas Under $50 That Everyone Will Love And Use

Look, as much as we’d love for money to not be a factor in our gift-giving…it is. And sure, there are always those nearest and dearest that we may splurge a little extra on each year. However, the amount of gifts can add up fast! So not only do you have a list of people you want to shop for, but you also want to come up with actually good ideas because what’s worse than getting someone a gift they’re not even going to use?? This is at least what I have experienced most years. I wanted to come up with a really great list of gifts that are not only all under $50 but also can be given to anyone on your list! Ok, maybe kids aren’t the key target for these suggestions but go to our kids and Gen Z gift guides for those gift recommendations. Ok, let’s start crossing off that list!

I genuinely want one of these!! They are perfect for travel (stick one in your suitcase if you check your bag), and are a great way to keep track of your keys or purse. I actually had a friend who was able to track down her lost luggage because of one. There are so many ways to use them so for under $30, it’s an excellent and practical gift.


Wireless Charger | Wireless Running Earbuds
Two other great tech gifts are a wireless charger and a pair of earbuds that will actually stay in your ears. I love how pretty and simple that linen-covered wireless charger is! It’s neural and special and would look great in any home. Then these are Em’s favorite earbuds full stop! I will admit they are a couple of dollars over the $50 limit but they come SO highly recommended that I couldn’t not include them. It’s the only one over $50, I promise! Here is what Em has said about them in the past:
“As an avid podcast listener (2-3 hours a day between walking dogs, cooking, and cleaning), I have tried many headphones and it’s been hard to find any that stay in my ears comfortably without falling out, getting lost, last a long time without needing a charge, and aren’t glitchy. These are extra good because they last the longest (hours and hours – I feel like I plug in every other day) and can be far away from the phone should you be cleaning and set it in another room. I’ve tried 3-4 different others since lockdown (eventually I’ll lose one of them – I don’t know how people don’t) and these are by far my favorites (and HOT TIP! I only walk dogs and clean house with one in at a time so I can hear surroundings). They do not have a mic though, so they aren’t for phone or Zoom calls.”


NY Yankees Baseball Cap | LA Dodgers Baseball Cap
Baseball hats are such a good gift. Why? Well, if you have a sports fan in your life then they’ll likely love this kind of merch and B. Baseball hats are very on trend right now in general (I know that sounds dumb since people never stopped wearing them but they are more popular than maybe ever.) And while I don’t want to start any fights, Yankees and Dodgers hats are the most popular baseball hats to wear (fan or not). SORRY TO THE OTHER TEAMS! But what I love about these particular hats is the black-on-black. They are a little more subtle, look cool, and anyone can wear them. I do have the Dodger hats and get compliments on it almost every time I wear it.

C a r h a r t t Knit Cuffed Beanie
Look, it’s going to be cold for a while so might as well gift the coolest beanie out there, the Carhartt knit cuffed beanie. It’s that “I’m not trying to be cool” cool beanie that anyone can rock (teens are fans too FYI).

Emily has said it before but gifting a beautiful cruet is SUCH a great gift! It’s the kind of thing you rarely buy for yourself because it feels like a silly luxury. But the beauty it brings to a kitchen is A LOT. My cousin actually gifted me the amber one above last year and it makes me smile every time I walk into my kitchen.


Cook This Book: Techniques That Teach and Recipes to Repeat | More Is More: Get Loose in the Kitchen
While I’ve only cooked from Cook This Book a couple of times it’s SO GOOD! Julie had long been trying to get me to buy it and once I did I understood. Molly Baz, the chef and author, explains things so easily but also includes a bunch of QR codes throughout the book that show you a how-to video of what she’s trying to explain. It’s awesome and DELICIOUS. More Is More just came out so if your person already has the first maybe snag the second. Or get both! The combo adds up to about $50:)


Pickling Kit | Triple Threat Sauce Trio
Keeping on the food train, either of these would be great for the food lover in your life. This pickling kit just sounds fun and a cool activity for even a noncook like me! And if you haven’t tried a sauce from Fly by Jing then maybe you should also buy this trio for yourself. They’ll make any dish taste better.

Gooseneck Electric Water Kettle
This is such a useful thing to have if they don’t own one. I know this because I used to have an electric kettle and now I don’t. I just need to buy one already! This is the one above is what Em has and she loves it. For $30 it’s so cute and wildly functional. For the tea drinker, the Cup of Noodles eater, and everyone in between will use and love this gift.


Now, this has been on my list for a minute. Sure, being able to make a mini waffle is great but there are soooo many other things I’ve seen people make with it. Like this spicy salmon crispy rice meal! Plus it’s so small that you can easily tuck it away. Considering it’s only $15 I really just need to buy it for myself.


Abi Spoon Rest | Cotton Striped Oven Mitt and Pot Holder Set
Want more pretty kitchen accessory ideas that people tend to not buy for themselves? A big one is a spoon rest. I don’t even have one! Ridiculous, I know:) It’s helpful to know their style but this one is gorgeous and very in while being totally classic. They also have a butter dish and salt and pepper shakers if you’d prefer those instead. Or if you want to go for a super but pretty safe option, a new oven mitt and pot holder set with a simple striped pattern, like the $10 one above, goes with almost any style and always comes in handy.

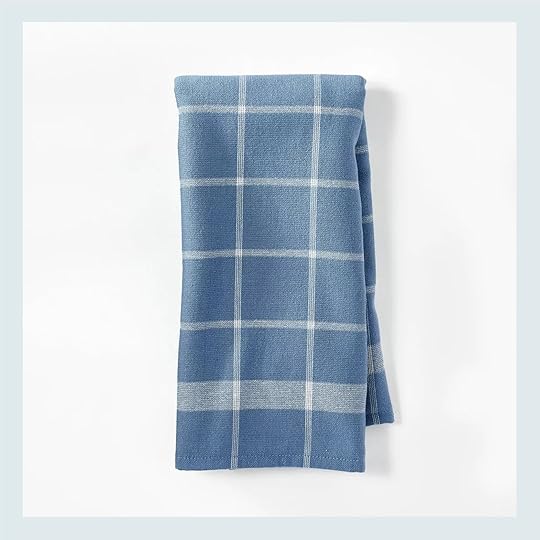

Dual Sided Terry Kitchen Towels
Another useful and safe gift? Kitchen towels! These are from Target’s new line called Figment. Each one is only $3 so you can grab a few if you want for the same person or grab a few to give to different people and maybe add one of your favorite recipes on a card to go with it. Easy and thoughtful.


A “simple but special” vase or planter is almost always a gift someone is going to love! I have personally bought two people the bow vase and they both loved it. Actually, that was the vase I gave Arlyn when I did the first “compliment jar” for our EHD Secret Santa years ago! The other chalice is one I have my eye on that I might just have to snag for myself:) The shape is so pretty, classic, yet a little unexpected so it’s a win-win-win.

A pair of pretty clippers is one of those things you are so happy you have when you all of a sudden need them! I love the mixed metals of this one and how classic they look. Throw in a bouquet of flowers if you want to add to the gift a little.


Wrapped Stones | Cast Iron Match Striker
More decor? Why of course! Y’all these wrapped stones are SO PRETTY and are perfect for the person who has everything and loves design. This isn’t something that you’d usually spend money on for yourself but we promise the recipient will be thanking you for making their home look and feel cooler. A matchstriker also falls into the “won’t buy yourself but want” category. This one is interesting but simple and works with any style. Who doesn’t have candles that need to be lit? Light those babies in style!
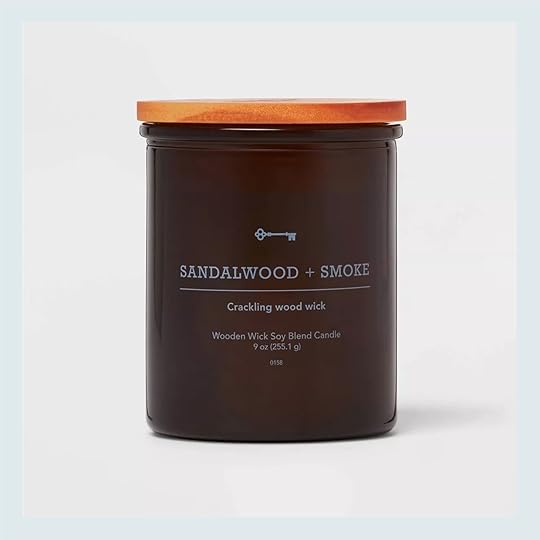


Sandalwood + Smoke Lidded Wood Wick Jar Candle | Forest Fir Jar Candle | Maison Louis Marie Candle
Speaking of lighting candles here are three we highly endorse. The first one is Threshold’s Sandalwood + Smoke. It’s earthy which I LOVE and has a crackling wood wick so it sounds like a fireplace. Huge fan and it’s only $13. Then Forest Fir is Target’s version of the famous Fraiser Fir but a bit more affordable since they start at $5 and max at $30 for the big one. It’s basically a Christmas forest in your home but in the best way. Last is one of my favorite candle brands, Maison Louis Marie. It’s a little bit more expensive at $38 but they are incredible. One of my favorites (Thanks to Sara) is the Neige De Printemps. 10/10.


Black Metal Snuffer | Brass Finished Candle Snuffer | Metal & Wood Candle Snuffer
Now to round out the candle talk, a snuffer is a great additional or stand-alone gift. These all range from $10 to $16 and are so cute! Another slightly forgotten-about but fun and pretty tool!
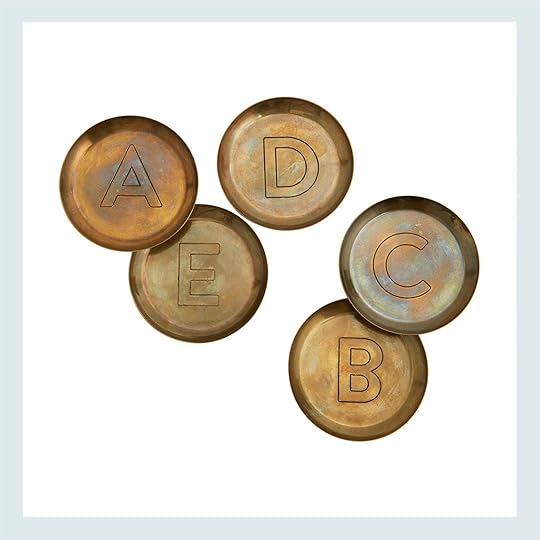
Chances are your person drinks out of cups and has a first or last name. Enter these beautiful coasters! My neighbor fell in love with these coasters when we were designing her and her husband’s bedroom. Of course, then we got one for her and one for her husband with each of their initials. NO STEALING! But truly, the patina on the brass is so pretty and I think anyone would love to get one or two of these.


Checkerboard Fleece Throw | Textured Faux Fur Reversible Throw Blanket
We are people that believe in cozy and beautiful things so these two fuzzy throws fit the bill perfectly. I love the subtle but graphic pattern on the blue one so much! It is on sale for $39 at the moment so if you think the person on your list would love it I would snag it sooner than later. Then the beautiful faux fur one on the right is a Henderson favorite! They used to argue over them so Emily bought one for each family member (pretty doable since they are $25). That was convincing enough for me to buy my best friend one for Christmas last year and she loves it. It also comes in three other pretty colors!


Scalp Revival Shampoo + Scalp Massager Gift Set | Complete Scalp & Hair Oil, Air Dry Cream and Recovery Serum Set
If your person has a scalp then a little TLC will likely be super appreciated! Especially if it’s from either of these incredible brands. I’ve used Briogeo before and loved their products. I haven’t tried this shampoo yet but it has a 4-star rating from 3k people soooo…I think should. Plus with this gift set, you are also getting them a scalp massager. Win-win! Then with the JVN Essentials gift set, I have tried both the air dry cream and the instant recovery serum (a heat protectant) and truly love both of them. I am telling you either of these gifts would kill and are both under $33.

Nothing says “I care about you and want you to live a long time” than giving someone the gift of sun protection. But seriously, our team loves all of these sunscreens. You can’t go wrong and with this set, they can see what they like best! They’ll be thanking you<3

I bought this for my trip to London because I was trying to avoid showing up as a dry piece of sandpaper when I arrived. The internet was raving about it so I gave it a try! And well, I love it and have continued to use it as a moisturizer when my skin is extra dry. But you can also just use it as a mask. It’s very versatile and $26 for the “mini” size. I promise it’s not that mini and worth it.


Everyday Oil | Peptide Lip Treatment
I’ve talked about this body/face oil before and knew it was perfect for this list. It smells so good that one could skip their perfume. But the smell is beautiful and super natural. Oh, and it can also be used as an oil cleanser or makeup remover. What can’t it do? But if you want to go “trendy” but actually good, people have been ALL about this lip balm/treatment. It comes in clear but also a few colors if you want to try to pick one out for your person. Sometimes getting to try a viral internet product is really fun:)

Henry Rose Unisex Perfume Discovery Set
Did you know Michelle Pfeiffer created a fine perfume brand with ingredient transparency? You should really listen to her whole story on this podcast episode because it’s so interesting and inspiring. And what came out of it was a stunning unisex perfume brand, Henry Rose. My friend got their Discovery set last year and was obsessed with it! It’s such a fun gift for you person to get to play with lots of different sophisticated scents:)


Le Labo Hinoki Shower Gel | Aesop Reverence Aromatique Hand Wash
Want more wonderfully scented luxuries?? You might remember me raving about the Le Labo shower gel a few months ago and I still love it just as much. It really makes every shower better. So maybe someone in your life could use a little luxury that they wouldn’t spend on themselves…do it for them! And then while it’s not a new product, the Aesop hand wash is also just out of this world special. Yes, $41 is a lot for soap but it always lasted me so long and made me love washing my hands. The scent is amazing and your hands feel so soft. I would LOVE to get this as a gift.
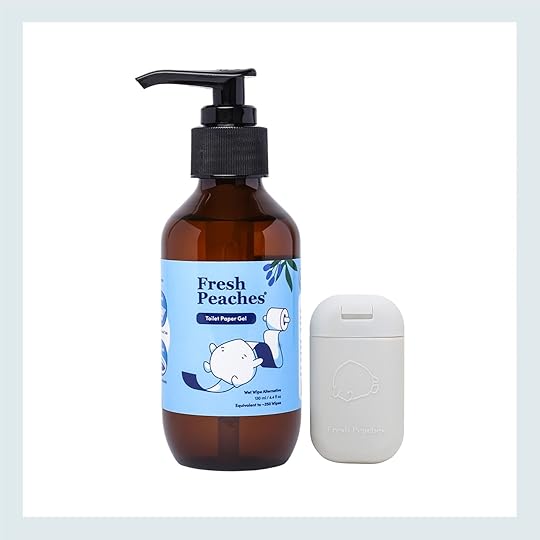
Fresh Peaches Toilet Paper Gel
Maybe you’d want to gift this gift to a close friend or family member (or it’s an EXCELLENT white elephant gift). This toilet paper gel makes any piece of toilet paper a wet wipe! It doesn’t make the toilet paper too soft so there’s no breakage (I do fold a few pieces together FYI). But seriously, it’s such an amazing product and is way better for the earth since your toilet paper is actually safe to flush. It might be a funny gift at first but trust me they will be thanking you.


Indoor/Outdoor Camping Hammock with Tree Straps | Portable Garment Steamer
Mallory and Emily have convinced me of the hammock lifestyle so I highly endorse getting this hammock for any person on your list that likes to be outside. The “outside” they love could even just be their backward with two trees. Or this could be another great white elephant gift idea! Oh and one last white elephant idea or regular gift idea for that matter. I can’t tell you how much I use my steamer. It’s a godsend because it’s easy and I use my iron waaaaay less. It’s for sure a “practical” gift but a great practical gift if they don’t have one.
Hope these were helpful and you were able to cross a bunch of people off your list! Happy shopping and for more ideas you can always head to our gift guide page🙂
Love you, mean it.
Opening Photo Credits: Photo by Kaitlin Green | From: The OFFICIAL First Farmhouse Christmas! (+ A Great Ribbon Hack And My Dream Color Palette)
The post Stumped On Actually GOOD Affordable Gifts?? We’ve Got 50 Ideas Under $50 That Everyone Will Love And Use appeared first on Emily Henderson.
December 5, 2023
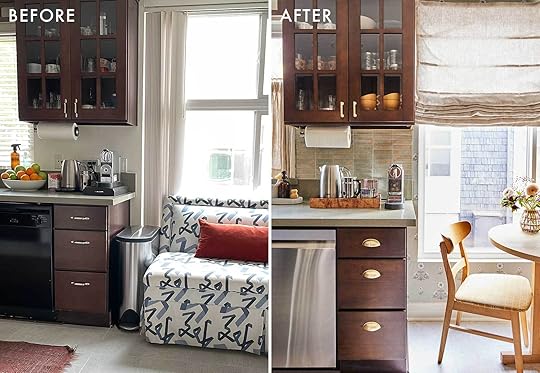
Arlyn’s Rental Kitchen Reveal Just Might Have You Wishing You Had Brown—Or Even Cherry— Cabinets (Yes, Really)

Picture this: You’re given a can of paint and told that you have to make the color work in your home no matter what it is. You prop open the lid and see a hue that you frankly just don’t like. But the rule states that sorry, gotta use it and good luck making it look good. Well…that’s kind of how it works when you live somewhere with a specific tone on your kitchen cabinets you don’t love with no power to change them.
The twist here is this is my favorite type of challenge. The challenge with hard limitations. It forces me to try new things and come up with solutions I wouldn’t have had to think through if I started with a blank slate or even had some choice in the matter.
Is this my dream kitchen? No. I can’t say that it is. But is it a kitchen that I made visually work for me that now feels so much more welcoming? I’d say so. I’m really happy with how this turned out, even if many parts of it require a “don’t look too closely” warning label (keep reading). The act of pulling open my little cafe curtains every morning to let the sun stream in is ritualistic at this point, as is lifting the Roman shades in the breakfast nook. It’s what happens just before the kitchen is saturated with the smell of brewing espresso, the rush of a family of three prepping breakfast, and the beginning of a parade of toys being scattered across the floor throughout the day. I love it. And I hope you do, too.

So, let’s take a look, shall we? Welcome to my little perfectly imperfect rental kitchen makeover.

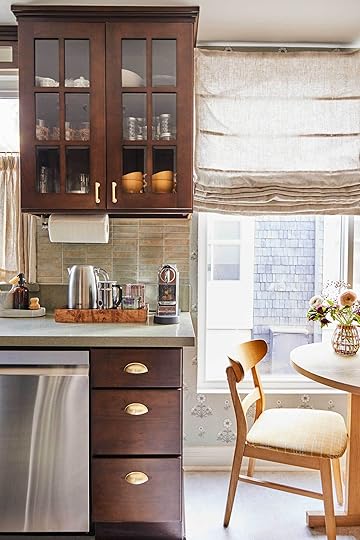
Step Stool | Peel and Stick Backsplash | Checkerboard Cutting Board | Brass Cabinet Handles | Brass Cabinet Cup Pulls | Mini Lamp (Similar)
How I Reimagined the Cherry Cabinets in My Rental KitchenThe biggest change in this space is the backsplash you see in the above photo. When we first moved in, it was just a semi-gloss white textured wall. It felt stark against the not-quite-green-not-quite-yellow-sort-of-brownish countertop, which in turn made the dark brownish cherry cabinet stain feel even stronger. It was all too much contrast, and I knew I needed to mellow things out by bringing in tonal materials, adding a helping of lighter wood finishes and then just making it as charming as I could without veering too close to the grandmother’s cottage from Little Red Riding Hood.
Miss Honey’s cottage from Maltida, though? That…that was more in line with what I wanted. Admittedly, the visual notes were very different in my memory than they were in real life when I referenced photos from that movie, but it still works, IMHO.
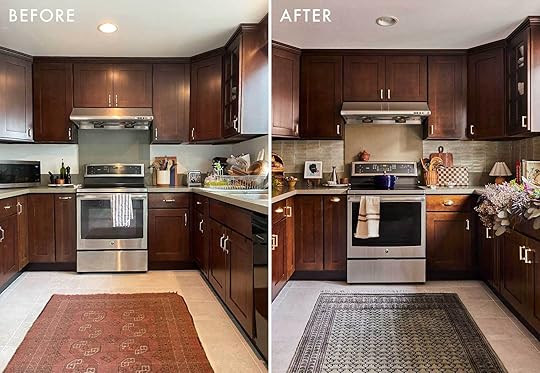
As a quick reminder, this is a rough checklist of what I wanted to accomplish and/or change here:
Add a removable (peel-and-stick) backsplashChange hardware to something warmer and less 2003Swap rug to limit the amount of red in the room Get appliance finishes to match Find a better storage solution to clear off all the small appliances on the countersCreate breakfast nookReplace broken vertical blinds in the breakfast nook with some sort of drapery or fabric situationSwap mini blinds by sink windowAdd color and personality somehowMaybe improve the floorsReplace flush mount in breakfast nook with something softer (The light was intense)You can read through all my “whys” and see more before photos in my original post as well as this update post.
Besides the floors (more on that in a bit), I was able to accomplish everything on my list. And the difference it has all made makes me *like* my cabinets. If I were my own teacher, I’d give myself an A for effort. 🙂

Black Pedestal Fruit Bowl | Potato and Onion Storage | Terracotta Garlic Keeper | Blue Staub Dutch Oven (similar) | Rug (vintage) | Art Print | Brass Frame Holding Art Print | Mini Easel (vintage) | Marble Lazy Susan
This little corner is where I essentially live in this kitchen. It’s where I do all my chopping, plating, and prepping for meals. I used to have my microwave caddy cornered there and every single day, I hated it. For some reason, it felt like a problem I had no control over changing, and then one day, I said ENOUGH, and moved it over next to the fridge and never looked back. Instead of two chopped-up slivers of counter to work with, I opened up a proper expanse of surface area and I don’t know why such a simple solution never crossed my mind prior. Funny how that can be sometimes, huh?
While I wish I didn’t have to eat up a quarter of my counters with a microwave, the truth is, we use it every day and there was no room for it anywhere else that made sense. Some people in my original intro post suggested I move it to the area where the breakfast nook is now, but there isn’t a plug on that wall and a giant extension cord is not something I wanted to look at every day. So this is where it lives now, and honestly, it’s fine. Everything doesn’t have to be “Instagram perfect” to work for your life. In fact, it’s usually more convenient when it’s not…
The other improvement to my workflow was creating a produce station here. Before, I had a bowl of fruit (strangely) over by the sink/coffee area, a two-tiered produce basket where the microwave is now, and another small bowl kind of propped wherever I could fit it because there were too many gosh dang things on the counter. It’s not a large space, so it didn’t cost me much to turn around and grab a lemon from the other side but still…it wasn’t efficient. Now, I use up the large, deep corner that wouldn’t be useful to me in any other way with all my produce (in real life, there’s an additional large bowl here holding even more fruit because we are a produce-obsessed household and I needed more vessels than looked pretty for a shoot).
 A Serendipitous Rug And A Crappy Backsplash
I explained in this article how I got to this rug but I’ll quickly rehash it for anyone who doesn’t want to leave my pretty images to look at another process post (who could blame ya?). The red rug I used to have here was a holdover from three apartments ago. I just moved it from kitchen to kitchen to kitchen even if it wasn’t ideal, and it was *really* not ideal in here. It was a $20 vintage number I bought at ReStore nearly a decade ago and it was scratchy, produced a ridiculous amount of weird blackish lint and never looked or felt clean, even if I had just cleaned it. I picked a pretty Ruggable rug instead with the appeal of being able to throw it in the washing machine whenever it needed it. But the colors didn’t match what I fell in love with about it online, and every day I’d walk in, look down at it, and think “Bummer.”
I was OVER spending money, so I hit up Facebook Marketplace on a whim one day and saw this beauty for $100. It was exactly the size and color I wanted/needed and after a touch of haggling (I would have to drive down to Long Beach to get it which is a trek from Pasadena), we settled on $80. I put my toddler in her car seat faster than food burns under a broiler, drove the hour south and scooped up my dream rug. I’m SO happy with it and because it has a dense wool pile, it cleans very easily. So far, we haven’t had any major spills and I hope for it to stay that way.
Another bummer is actually the backsplash I picked, sadly. Yes, as a whole, I like the way it ended up looking, but it started peeling off the wall meer days after installation. Every day, I have to press in detached pieces. I’ve added more tape and other adhesives and no-go. I know the semi-gloss paint and wall texture are the main culprit here so perhaps you’d have better luck with it, but…it sucks.

Striped Drapery Fabric (gifted) | Cafe Curtain Rod | Cafe Curtain Mounting Hardware
Creating Charm With DIYed Cafe CurtainsThis is my favorite photo of the entire bunch because it’s just a tad ludicrous. No one has a sink full of blooms and branches ever but I asked Bowser to make it happen (remember…Miss Honey’s Cottage inspo at work here). Besides that, the little cafe curtain moment is darling, isn’t it? I picked this pinstripe linen fabric from Tonic Living very early on, and it couldn’t be more perfect. Up close, my sewing handy work is…a bit wonky, but from afar you can barely notice that my seams are crooked! Huzzah! I bought some pinch pleat tape from Amazon, sewed that on, and then hand-sewed the pleats together at each meeting point. I hung the curtain at the point where we couldn’t see our back neighbor’s kitchen window but there was still plenty of room above for sunlight and moonlight (about 2/3 up is usually a safe bet).
The rod was such a mission that came together in quite a serendipitous moment. My friends, I ordered three tension rods to try here. The first one was flimsy and buckled in the middle. The second one didn’t even fit in the very narrow frame allowance (it’s under two inches). The third one fit but felt so bulky. It was too late to order a custom-cut rod from Rejuvenation, so I was kind of panicking. That is until a designer I follow posted about a store called Shade Doctor of Maine from which she had just bought a custom-cut cafe curtain rod. I immediately clicked over and saw the price was super affordable ($25 for the custom-cut rod and $10 for the inside-mount brackets), and it could be made and shipped on time. The owner even called me the next day to confirm all my measurements and mailed it straight away after that. It was a design godsend, I tell ya.
I opted not to worry about the fact that my faucet was still brushed nickel. Would a beautiful brass fixture have been great here? Yeah, but…I just didn’t care enough by the end. It’s totally fine, and frankly, works well to pick up the brushed stainless of the appliances.
Oh, and the hardware? Bought it for SUPER cheap on an Amazon Prime Day deal back in July. I confess I hated them when they arrived, being sort of a frosted light brass but after a few days of living with them, I was okay. I love what the cup on all the drawers adds. Traditional and hearty, like a good beef stew.
Burlwood Tray | Sink Caddy | Glass Cannisters | Striped Roman Shade Fabric (gifted)
Here’s our little coffee and tea station, which didn’t change much. I just corraled everything in a pretty tray, swapped a bulky espresso pod holder that used to live under my Nespresso machine for some glass canisters, and never looked back. It works, it’s pretty enough, and yeah…a tray is the one great design elixir of life.
I do have to admit something. A trash can typically lives between the side of the cabinet and the chair you see here. SUE ME! PUT ME IN JAIL. It’s a very slim profile Simplehuman I’ve had for five years and we are all surviving. Is it as pretty as this? No, but real life is ugly-ish sometimes, readers. Charles and I talked about putting small cans under the kitchen sink, but as we are not Rockefellers, we do not have the luxury of extra storage space and need to leave that open for other things. So alas, it lives where it lives, even if I have to lie about it in a photo on the Internet.
 Yes, I Bought All My Appliances Secondhand
LOOK AT THIS BIG GIRL WITH HER MOMMY IN A VERY WRINKLED DRESS STRAIGHT OUT OF THE PACKAGING!!!! I cannot get this child off this stool. You’ll usually find her standing at the counter with my knee pressed up against her back as she cuts a banana with a butter knife. It’s the only way I can cook without having to hold her to see what I’m doing (and yes, a proper learning tower is on our list to buy which will be a better option).
Before moving on to the breakfast nook, I just want to appreciate how hard I worked (truly) to find matching appliances all secondhand on budget. I talk a little more about it here (and fully go into every single detail on a post I wrote on a different site if you’re interested), but it took me since last March to make this happen. Quick anecdote: I found a wonderful KitchenAid French door fridge for $600 that the owner just wanted out of her house (she was moving). It took days to talk her down in price because that was my max budget knowing delivery would be another $200ish. I just ASSUMED a standard size would fit, so I celebrated my win prematurely, ordered a pick-up service and when they were on their way to the lady’s house to grab the fridge, I decided…you know what…let me just measure. AND IT WOULDN’T HAVE FIT. The counter is cut just a touch too long on the right side and the opening is at max 35.5″. A standard width fridge is 36″ (but actually 35.75″ to build in space around it for ventilation). I immediately canceled the delivery service and felt awful and deflated.
The lady was nice enough to let me go to her home, measure the fridge just to be sure it was larger than 35.5″ (it was), and then I had to walk away from it. Let me tell you…finding a 33″ fridge in a counter depth (this space required that) was near IMPOSSIBLE. I’m not exaggerating when I say they make I think three models that fit that bill. ON THE ENTIRE MARKET. And then to try to find one of those secondhand, well, Everest territory.
BUT I DID IT. And the rush of exhilaration I felt is what I imagine stock brokers feel when they do stock broker things that make them a lot of money. I love our fridge, and while you don’t see it that well in these photos, it makes me quite happy every day.
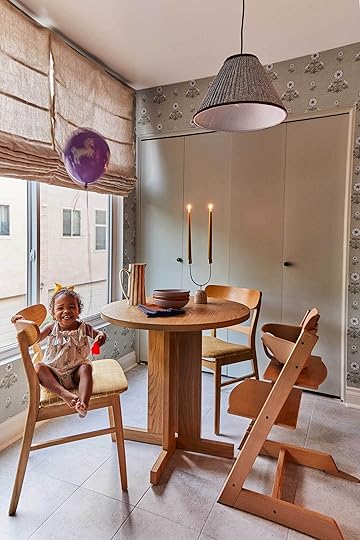
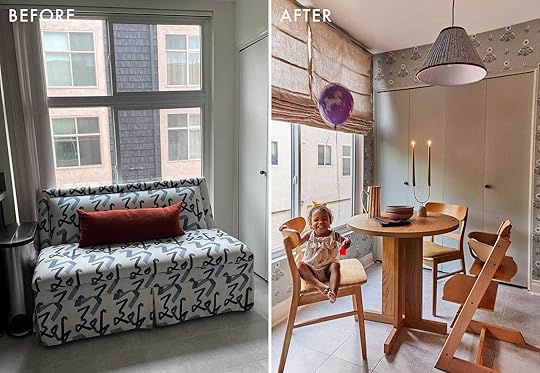
Bistro Table | Chairs | Chair Seat Fabric (gifted) | High Chair | Peel and Stick Wallpaper (gifted) | Laundry Closet Door Paint | Cute Baby (she’s mine, not for sale)
Carving Out A Breakfast Nook (& My ~$35 Roman Shade Solution)LOOK AT THIS BIG GIRL IN HER NEW BREAKFAST NOOK WITH A FREE BALLOON THE PAVILIONS CASHIER GAVE HER BECAUSE SHE WAS THE CUTEST BIG GIRL IN THE WORLD. I LOVE this breakfast nook. I LOVE IT. I sit in that same chair as Evelyn every day drinking my morning coffee, looking out onto the street and the trees and no one can steal that joy from me.
Just like everything in here, finding a table in the finish I wanted but in the size I needed was also not an easy feat. Anything wider than 32″ would not fit in here with chairs and room to open the laundry doors. West Elm came in clutch with this bistro baby I called around all of Los Angeles to find. The Craftsman-like profile is an ode to the outrageously charming original Craftsman houses on the street where I live, while the neutral wood finish nicely balances the red cabinets.
The chairs were another Facebook Marketplace find for around $60. Just a few bolts tightened, some cleaning and new upholstery were all it took to make them work perfectly in here. With banana hands constantly touching my fabrics, I opted for a bullet-proof performance Sunbrella x Pindler textile, gifted to me by its designer, Max Humphrey.
As the backdrop to it all is one of my favorite elements of the whole space: that Chasing Paper peel-and-stick wallpaper, designed by Jenni Yolo. It’s the crown jewel of the room I think, really delivering a lightheartedness that’s needed with such heaviness happening on the other side of the room. It was my first time installing wallpaper in any form and while the first panel is (purposefully and luckily) hidden behind the cabinet, the rest was super easy to get up. So easy, even a 21-month-old can do it! Because she did (I’m kidding, Evelyn just rolled the seam roller around the wall a few times and always seems to be trying to take credit for my hard work in here). 😉 I then pulled a sage green from the paper and painted the laundry doors rather than replacing them. It’s a decision I don’t regret for even a moment.
Oh gosh, and the Roman shades! Figuring out how to cover this exceptionally large window took me quite a while, but I ended up DIYing Romans from that same Tonic Living striped linen using two very cheap cordless lift mini blinds. It was so easy and I’d be happy to do a DIY for you if you’re interested (spoiler: it cost me under $75 to make both of those!). Ignore the darker spots where I got too heavy-handed with the fabric glue.

Fluted Glass-Front Storage Cabinet (gifted)
When in Doubt, Move The PantryThis Arnika Dining Cabinet from All Modern is so sturdy and beautifully made that both Charles and I were in awe of it after building it. I thought the fronts were going to be some kind of plexi but they’re a thick fluted glass and the rest of the cabinet is metal with adjustable shelves. I decided to turn it into my pantry and use the space in the cabinets I was designating as my pantry to stash away all my small appliances and get them off my countertops. It’s been a frankly life-changing solution. Sure, it’s a little annoying to have to walk over here to grab granola or pasta or bread, but I’ll choose it any day over digging through a dark, narrow and deep cabinet to find a can of cannellini beans stacked above the tuna I forgot I had because it’s impossible to see.
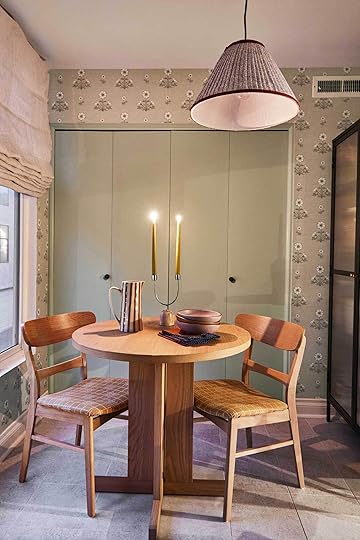
Striped Pitcher | Napkins | Candelablra | Bowls | Taper Candles | Pendant Shade (used for DIY) | Mini Pendant Kit (used for DIY) | Pendant Shade Fabric
Before wrapping, let’s talk about these floors, shall we? They aren’t what I wanted them to be. I dreamed of a checkerboard design underfoot and ordered many samples to try out. My favorites were by Chris Loves Julia for Wallpops but they were constantly sold out. About a week before the shoot, I reached out to them and they were going to possibly help facilitate but it just didn’t work out timing-wise. And it’s okay. Would it have felt more complete in here with a white and taupe marble checkerboard floor? I think so. But does the room still work without it? I also think so. Rentals aren’t always ideal in their design choices, and at least these aren’t offensive.
And finally, my little DIYed pleated pendant lamp that I made from an affordable shade and some clearance sheets from Target. My first attempt was dismal, but thankfully I found this instructional video that helped guide me to redo what I originally had created to this finished product. I think it adds just a touch of whimsy that I think every room needs to not take itself overly seriously. A little banding of maroon bias tape at the top and bottom harken back to the cabinetry.
In Conclusion…I Love It (+ What’s Next)So there she is. My little sweet rental kitchen. I’m so glad to be done with it to share with you all and also to just enjoy it. When I go back and look at the before, I can’t believe how far it’s come with truly not a drastic amount of work. Yes, it took time—five months give or take—but I work and also take care of a baby and a family so such is life. Everything is going to be easily removable when we decide to leave this place, but hopefully, we’ll get to call it home for a while.


I’m in the midst of giving a similar rental overhaul treatment to my boring powder bathroom and putting the finishing touches on my dining room, which I hope to share early next year so stay tuned. Thanks for reading my thousands of words and for walking through my home with me. 🙂
Until next time.
Your friend in design, Arlyn
*Design by me (Arlyn Hernandez) | Styling by Emily Edith Bowser| Photography by Veronica Crawford
The post Arlyn’s Rental Kitchen Reveal Just Might Have You Wishing You Had Brown—Or Even Cherry— Cabinets (Yes, Really) appeared first on Emily Henderson.
December 4, 2023
My Nightstand Debate…What Do We Do For Birdie’s Room??

Well, Birdie’s room is coming along, and like her, it’s full of happiness and a lot of colorful energy. But I’ve been hung up on the furniture since day one and it hasn’t gotten easier. First off, I fear that the Facebook Marketplace bed is too busy and twee – it’s just a LOT going on in the room. So I will likely find and order a simpler upholstered bed to calm it down a bit. But that’s not even the biggest issue, let’s get into it.
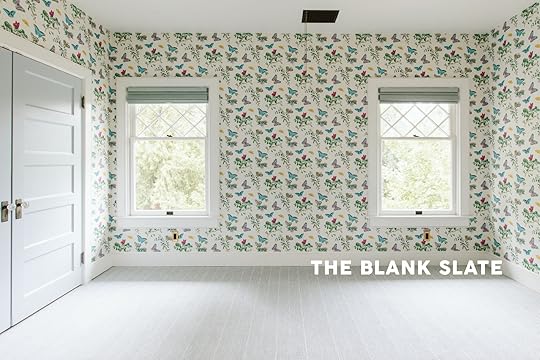
Here’s what we have that we can’t change – the wallpaper, the carpet, the windows, and the location of the closet doors. While I LOVE those original windows, obviously, they are low thus creating quite the nightstand challenge. Furthermore, the closet door needs to be able to open so finding the right nightstands has been hard.
So while I was stumped I went into my vintage inventory and pulled everything out, placed them in the room, and played and played to see what felt right.
Option 1: Eclectic But Fun?
This configuration is technically balanced in color and we lived with this for a while. The closet door opened fine because the skirted wicker table was shoved a bit over. Is it quirky and fun? Sure. Do I love the idea of all of this vintage? Sure. But it felt like a different house and just needed to be more calmed down.

Because what you might be forgetting is that we found these incredible Art Deco shades at an antique mall and we really want to use them in this room. We had them flanking the bed, hanging in front of both windows for a long time and loved it, but they are so big that they are creating even more of a problem with the nightstands. Should they go really high? Maybe? Should they just be on the right side and staggered? Maybe (see further below).

If I had to prioritize what cuckoo vintage to keep in this room it would 100% be the hanging shades. I LOVE THEM. Sure, I love the wicker ghost table (from Shop Wilma in Portland) but I know that I can use that elsewhere. I also like that sweet dresser I got on Facebook Marketplace for $100 and I don’t mind it in front of the window, but again, it just feels like a totally different house. The bed isn’t helping (I tried to order this bed but it’s out of stock so I’m trying to figure out what other options we have).
Option 2: Painted And Cut Down?
Then I have these two tables that I’ve been hoarding, both vintage from Craiglist/Facebook Marketplace. Both could get painted but BOTH are too high so they’d need to get cut down from the bottom of their legs. Doable? Sure. Does it feel totally right? Nope. I LOVE the scalloped table so much and it’s narrow enough that it could go on the left side of the bed and the closet door could still open, but then what do I put on the right? Y’all, I LOVE SYMMETRY IN A BEDROOM. I think that’s where I struggling…
Option 3: Not This But Maybe?
Ok, so here we put the scalloped table on the left and then brought their costume trunk on the right (which fits really nicely in front of the window. Then I threw this vintage quilt top on top to envision reupholstering it (and it just got busier and busier). HMMM…staring at these photos a month later I’m realizing that these two are a great option if we were to reupholster the trunk in something simple and then paint the scallop table (once cut down a bit) a balanced color. And if you are wondering if I’ve thought about painting the bed, I SURE HAVE. Birdie is adamant not to and she says it’s “really grounding and pops off the wall well”. Y’all, hearing her learn from and totally parrot me is a secret joy that I don’t know how to express. So I want to honor her input, but would the bed be better if it were a lighter, more muted tone? Sure. But then maybe just a simple upholstered bed would be better anyway, and I could donate this bed to a neighbor pretty easily. So I don’t want to spend more time/money on a piece that maybe shouldn’t be in here in the first place.

Here I wanted us all to envision what the lamps would look like in here – because like I said, they are my #1 priority to make work. For months I was like, “Let’s just go for it, make it crazy AF, and just lean into eccentric English granddaughter”. But with the mess/stuff that her life brings in, the room just feels like A LOT. If I could go back in time and choose a less busy wallpaper I would (I love this paper, but it’s a LOT so we need to calm it down).
Option 3.5: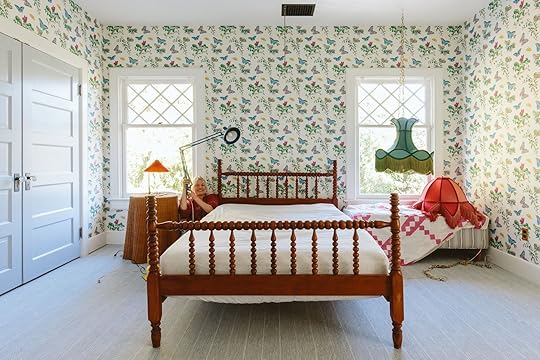
You can see the process of me losing my mind, in real time. Here is where I thought maybe I’d reupholster the bench on the right, bring in the skirted table back, hang BOTH lamps on the right (staggered), AND THEN to balance out the lamps bring in a standing colorful lamp to be the friend to the skirted table (which is now centered on the window). So far, this is our favorite “idea” but it’s certainly not there. Another thing you should know is that the lampshades are REAL BIG, and if they hang low they feel really huge next to any nightstand but if you hang them high they cover the prettiest parts of the window. Should I just forego them altogether and use them in the barn/playhouse I want to do for the kids for summer play? MAYBE. But they bring such a jolt of joy every time I see them…
Option 4: Symmetrical And Boring
I couldn’t not try some basic symmetrical nightstands. We brought these from LA and they are simple and fine but they look dumb and small over here. Do I like the symmetry in a bedroom? I SURE DO. But I want them to be wider, a bit lower, and still shallow as to not come in front of the closet. Like two low dressers (of which I’ve searched high and low for). But this is where I started considering replacing the bed with a simpler solid upholstered one. If it were a medium blue upholstered headboard (no footboard, I secretly don’t like a footboard) and then I had two custom-made low and wide dressers made, THEN you hang the lamps on both sides and it is still super fun, but calms it down. If I could snap my fingers that’s what I would do, but I also really just want to shoot this soon and get it out there.
I think long term I know where I’m headed, but in the short term, I want to show you what I can pull together with what we have on hand. After this shoot for this post I stared at the photos for hours, I had a thought to flip the room completely, put the bed on the opposite wall facing the windows, and put her bulletin board over here in between the windows with her round art table in the corner. And I JUST might!

For now, I’m working with what we have here (unless I find something else in town) because we are shooting this room this week and honestly I’m excited to see what we can pull together for now (knowing that I have more long term goals to add more modernity and symmetry in here). This week you’ll see what we did to the windows (which admittedly did NOT help to calm it down) so the crazy train has left the station, and we are excited to show you where we arrived on round one of Birdies room. WISH US LUCK. 🙂
*Photos by Kaitlin Green
The post My Nightstand Debate…What Do We Do For Birdie’s Room?? appeared first on Emily Henderson.
My Nightstand Debate…What Do We Do For Birdie’s Room??
Well, Birdie’s room is coming along, and like her, it’s full of happiness and a lot of colorful energy. But I’ve been hung up on the furniture since day one and it hasn’t gotten easier. First off, I fear that the Facebook Marketplace bed is too busy and twee – it’s just a LOT going on in the room. So I will likely find and order a simpler upholstered bed to calm it down a bit. But that’s not even the biggest issue, let’s get into it.
Here’s what we have that we can’t change – the wallpaper, the carpet, the windows, and the location of the closet doors. While I LOVE those original windows, obviously, they are low thus creating quite the nightstand challenge. Furthermore, the closet door needs to be able to open so finding the right nightstands has been hard.
So while I was stumped I went into my vintage inventory and pulled everything out, placed them in the room, and played and played to see what felt right.
Option 1: Eclectic But Fun?This configuration is technically balanced in color and we lived with this for a while. The closet door opened fine because the skirted wicker table was shoved a bit over. Is it quirky and fun? Sure. Do I love the idea of all of this vintage? Sure. But it felt like a different house and just needed to be more calmed down.
Because what you might be forgetting is that we found these incredible Art Deco shades at an antique mall and we really want to use them in this room. We had them flanking the bed, hanging in front of both windows for a long time and loved it, but they are so big that they are creating even more of a problem with the nightstands. Should they go really high? Maybe? Should they just be on the right side and staggered? Maybe (see further below).
If I had to prioritize what cuckoo vintage to keep in this room it would 100% be the hanging shades. I LOVE THEM. Sure, I love the wicker ghost table (from Shop Wilma in Portland) but I know that I can use that elsewhere. I also like that sweet dresser I got on Facebook Marketplace for $100 and I don’t mind it in front of the window, but again, it just feels like a totally different house. The bed isn’t helping (I tried to order this bed but it’s out of stock so I’m trying to figure out what other options we have).
Option 2: Painted And Cut Down?Then I have these two tables that I’ve been hoarding, both vintage from Craiglist/Facebook Marketplace. Both could get painted but BOTH are too high so they’d need to get cut down from the bottom of their legs. Doable? Sure. Does it feel totally right? Nope. I LOVE the scalloped table so much and it’s narrow enough that it could go on the left side of the bed and the closet door could still open, but then what do I put on the right? Y’all, I LOVE SYMMETRY IN A BEDROOM. I think that’s where I struggling…
Option 3: Not This But Maybe?Ok, so here we put the scalloped table on the left and then brought their costume trunk on the right (which fits really nicely in front of the window. Then I threw this vintage quilt top on top to envision reupholstering it (and it just got busier and busier). HMMM…staring at these photos a month later I’m realizing that these two are a great option if we were to reupholster the trunk in something simple and then paint the scallop table (once cut down a bit) a balanced color. And if you are wondering if I’ve thought about painting the bed, I SURE HAVE. Birdie is adamant not to and she says it’s “really grounding and pops off the wall well”. Y’all, hearing her learn from and totally parrot me is a secret joy that I don’t know how to express. So I want to honor her input, but would the bed be better if it were a lighter, more muted tone? Sure. But then maybe just a simple upholstered bed would be better anyway, and I could donate this bed to a neighbor pretty easily. So I don’t want to spend more time/money on a piece that maybe shouldn’t be in here in the first place.
Here I wanted us all to envision what the lamps would look like in here – because like I said, they are my #1 priority to make work. For months I was like, “Let’s just go for it, make it crazy AF, and just lean into eccentric English granddaughter”. But with the mess/stuff that her life brings in, the room just feels like A LOT. If I could go back in time and choose a less busy wallpaper I would (I love this paper, but it’s a LOT so we need to calm it down).
Option 3.5:You can see the process of me losing my mind, in real time. Here is where I thought maybe I’d reupholster the bench on the right, bring in the skirted table back, hang BOTH lamps on the right (staggered), AND THEN to balance out the lamps bring in a standing colorful lamp to be the friend to the skirted table (which is now centered on the window). So far, this is our favorite “idea” but it’s certainly not there. Another thing you should know is that the lampshades are REAL BIG, and if they hang low they feel really huge next to any nightstand but if you hang them high they cover the prettiest parts of the window. Should I just forego them altogether and use them in the barn/playhouse I want to do for the kids for summer play? MAYBE. But they bring such a jolt of joy every time I see them…
Option 4: Symmetrical And BoringI couldn’t not try some basic symmetrical nightstands. We brought these from LA and they are simple and fine but they look dumb and small over here. Do I like the symmetry in a bedroom? I SURE DO. But I want them to be wider, a bit lower, and still shallow as to not come in front of the closet. Like two low dressers (of which I’ve searched high and low for). But this is where I started considering replacing the bed with a simpler solid upholstered one. If it were a medium blue upholstered headboard (no footboard, I secretly don’t like a footboard) and then I had two custom-made low and wide dressers made, THEN you hang the lamps on both sides and it is still super fun, but calms it down. If I could snap my fingers that’s what I would do, but I also really just want to shoot this soon and get it out there.
I think long term I know where I’m headed, but in the short term, I want to show you what I can pull together with what we have on hand. After this shoot for this post I stared at the photos for hours, I had a thought to flip the room completely, put the bed on the opposite wall facing the windows, and put her bulletin board over here in between the windows with her round art table in the corner. And I JUST might!
For now, I’m working with what we have here (unless I find something else in town) because we are shooting this room this week and honestly I’m excited to see what we can pull together for now (knowing that I have more long term goals to add more modernity and symmetry in here). This week you’ll see what we did to the windows (which admittedly did NOT help to calm it down) so the crazy train has left the station, and we are excited to show you where we arrived on round one of Birdies room. WISH US LUCK. 🙂
*Photos by Kaitlin Green
The post My Nightstand Debate…What Do We Do For Birdie’s Room?? appeared first on Emily Henderson.
Emily Henderson's Blog

- Emily Henderson's profile
- 10 followers

