
Cybele Pascal's Blog, page 5
November 14, 2013
Stuffed Acorn Squash with Millet, Spinach, Cranberries, and Hemp Seeds
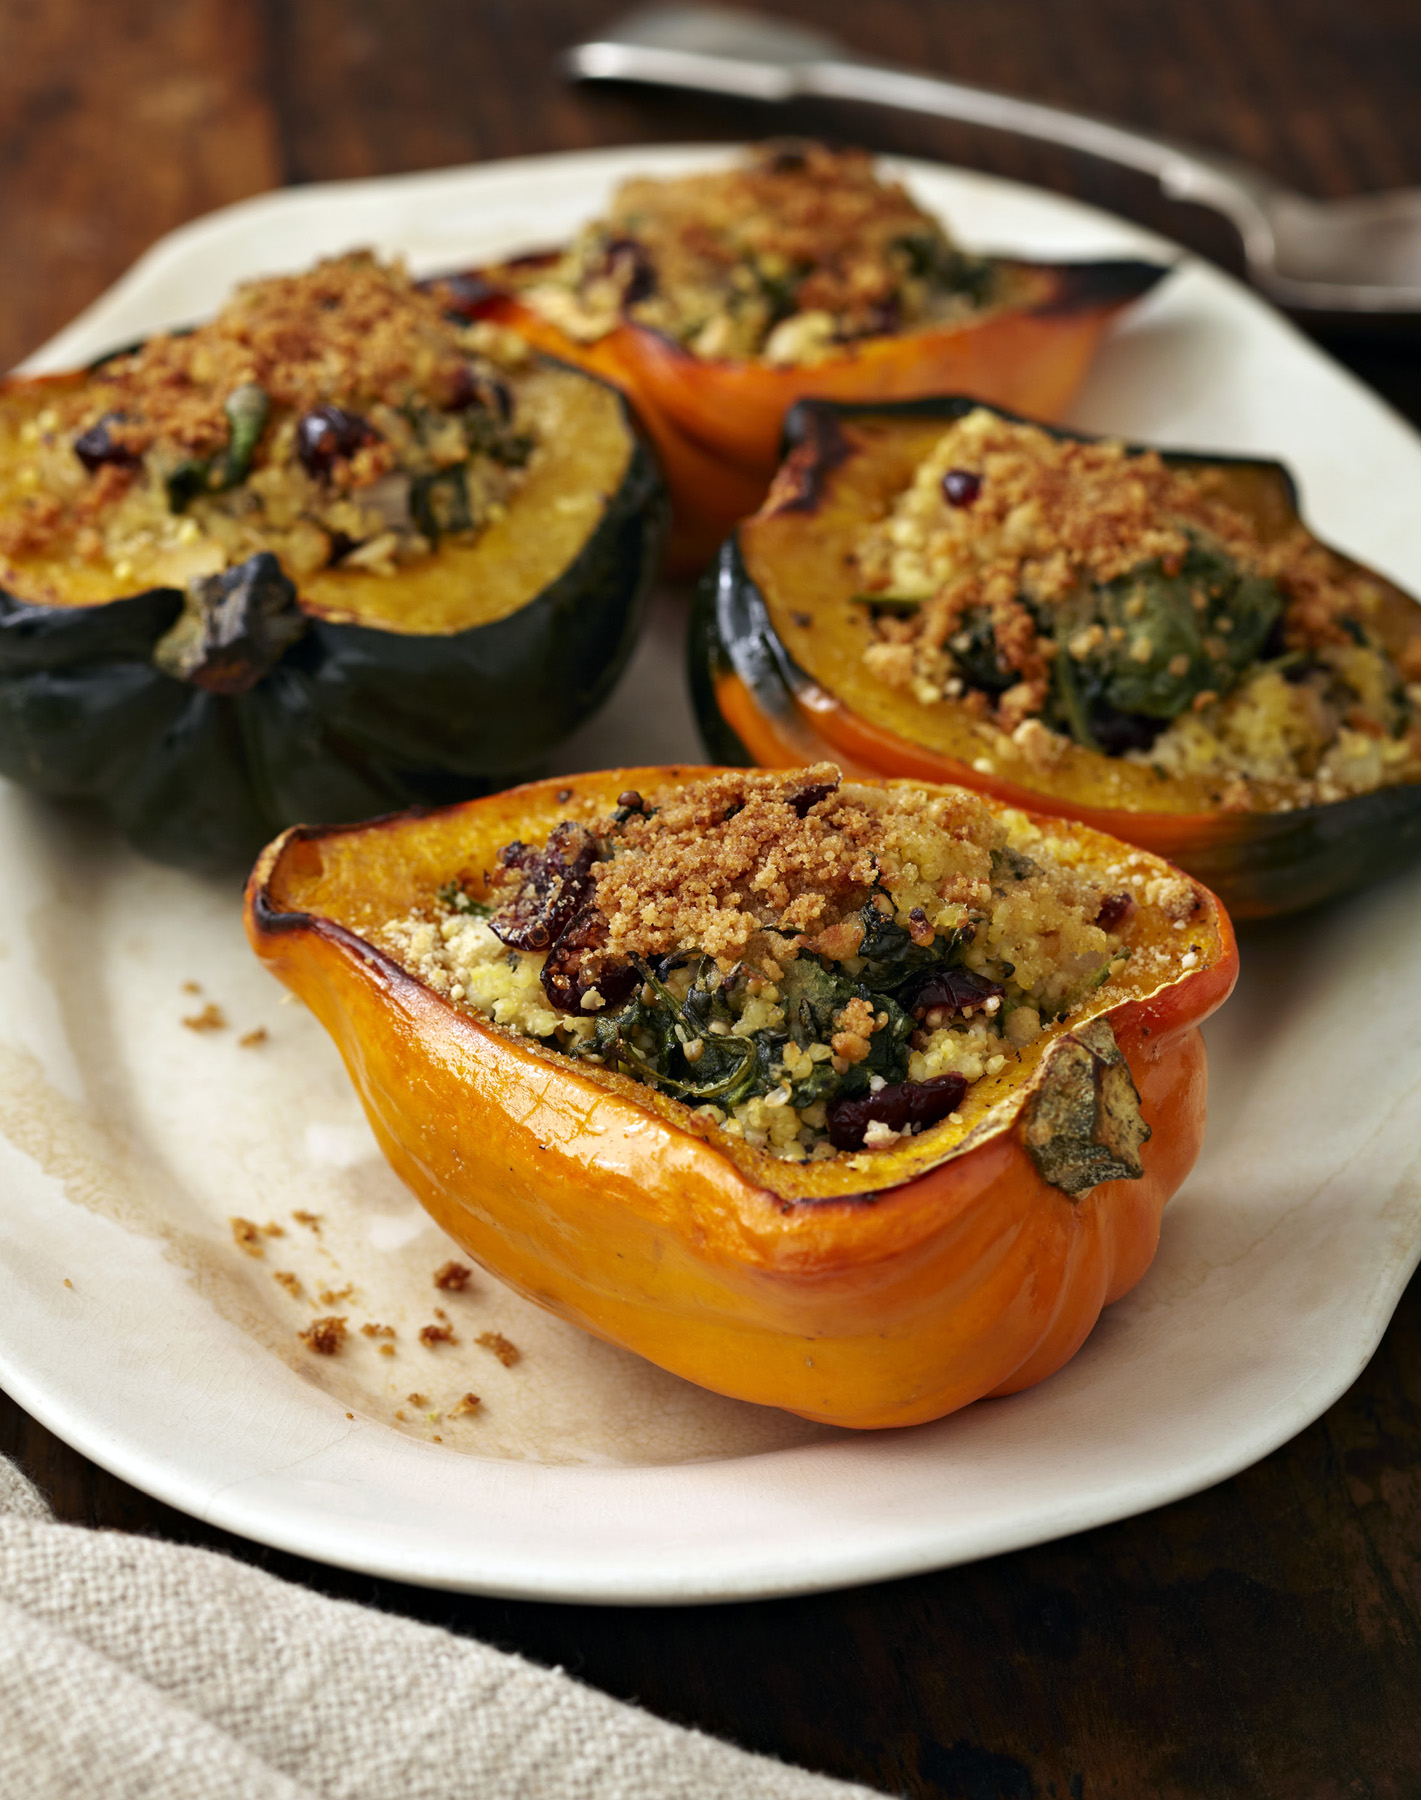
Stuffed Acorn Squash with Millet, Spinach, Cranberries, and Hemp Seeds
serves 4
Who says millet is just for the birds? Not anymore, it’s not! This old-world gluten-free grain is high protein and delicately flavored. It’s the perfect stand-in for couscous if you cook it right. Read on for the most delicious stuffed squash, packed full of nutrients galore. And so easy! I was shocked by how much my kids loved this, and I will be making it in heavy rotation now.
1/2 cup millet
11/2 cups water
2 small acorn squash, halved and seeded
Salt and freshly ground pepper
1 tablespoon olive oil
1/2 cup chopped sweet or yellow onion
2 large cloves garlic, minced or pressed
1/4 cup dried cranberries
1 (5- to 6-ounce) bag baby spinach
1 tablespoon cider vinegar
1 teaspoon sugar
1/4 cup shelled hemp seeds, toasted (see note)
4 heaping teaspoons fine gluten-free breadcrumbs (I like Ener-G for this)
4 heaping teaspoons Earth Balance soy-free buttery spread or olive oil
1. Combine the millet and water in a small pot over medium-high heat. Bring to a boil, reduce the heat to medium-low, and simmer, covered, for 18 minutes, until the water is absorbed. Don’t stir the millet or it will become creamy. You want it to cook up like rice, and refraining from stirring will accomplish this.
2. Meanwhile, spray the insides of the acorn squash halves with cooking spray or brush lightly with olive oil. Sprinkle with salt and pepper. Place face down on a large microwave-safe dish (I just use the microwave tray). Cover (I use a large mixing bowl—it’s okay if the squash halves have to overlap a bit) and cook for 16 minutes, or until the squash is tender.
3. Meanwhile, heat the olive oil in a large heavy pan over medium heat. Add the onion and cook for 2 minutes, until tender. Add the garlic and cranberries and cook, stirring, for 1 minute. Add the spinach and cook, stirring often, until wilted, 2 minutes. Add the vinegar and sugar, stir, and season with salt and pepper. Cook, stirring, for 1 minute. Remove from the heat and stir in the hemp seeds.
4. While the millet is cooking, preheat the broiler on high.
5. Once the millet is cooked, fluff it lightly with a fork. Combine 1 cup of the millet with the spinach mixture and toss. Put the squash halves cut side up in a broiler-safe pan or on a rimmed baking tray. Divide the filling evenly among the squash halves, mounding it slightly. Top each squash half with 1 heaping teaspoon breadcrumbs and dot each with 1 heaping teaspoon buttery spread. Broil 8 inches from the heat source for 4 to 5 minutes, until browned.
* Note: To toast hemp seeds, heat a small frying pan or skillet over medium heat. Add the hemp seeds and cook, stirring often, for 2 to 3 minutes, until golden and aromatic.
“Reprinted with permission from Allergy-Free and Easy Cooking: 30-Minute Meals Without Gluten, Wheat, Dairy, Eggs, Soy, Peanuts, Tree Nuts, Fish, Shellfish, and Sesame by Cybele Pascal (Ten Speed Press, © 2012). Photo credit: Chugrad McAndrews.”


November 12, 2013
Allergy Free Cornbread and Wild Mushroom Stuffing
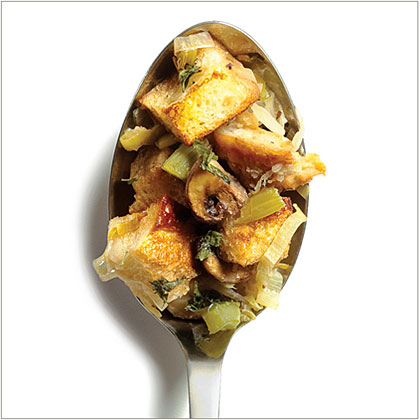
This picture is one of my all-time favorite examples of brilliant food styling. So much beauty, emotion, and texture, represented with such economy. All the lines are perfect, and the photo does exactly what it’s supposed to, it makes you want to reach through the page or the screen and EAT THAT FOOD. This scrumptious little spoon was styled by Karen Shinto, who styled both my Allergen-Free Baker’s Handbook, and Allergy-Free and Easy Cooking. This is a photograph by Annabelle Breakey for Sunset Magazine. This is what my stuffing would look like, if Karen and Annabelle were here. In fact the recipe is an homage to this picture. I hope you enjoy it even half as much as I enjoy looking at this spoon full of stuffing!
Allergy-Friendly (Gluten-Free) Cornbread and Wild Mushroom Stuffing
Serves 4-6.
This allergy-free, gluten-free stuffing can be made vegan or non-vegan, depending on personal preference. Either way, it is rich-tasting, exotic, healthy, and delicious.
3 cups allergen-free cornbread (I’ll post that recipe next!), preferably stale so it’s dried out a bit
1/2 cup diced nitrite-free pancetta (optional, omit if making vegan — otherwise, look for artisanal brands at stores like Whole Foods)
4 Tbsp. olive oil
5 large shallots (both halves), minced fine
2 large stalks celery, chopped into 1/4-inch pieces
1/2 lb. wild mushrooms (I like shiitake, but you could also use chanterelles or morels, quartered, or cut into eighths if very large)
1 tsp. fresh thyme, chopped
1 tsp. fresh rosemary, chopped
1/4 tsp. kosher salt
1/4 tsp. pepper
1/4 cup white wine
1/4 cup rice milk
1/3 cup chicken broth (or vegetable broth if making vegan – Kitchen Basics is Allergen-Free
1. Preheat oven to 350 degrees. Cut cornbread into 1-inch-thick slices and place on baking sheet. Bake until golden brown and dried out a bit, about 10-15 minutes, turning the slices once. Keep a close eye on it, because you don’t want it to burn. Remove from oven and let cool.
2. Heat a heavy skillet over medium-high heat. Once pan is really hot, add the pancetta and cook until crispy.Remove pancetta from pan and set aside. (Skip this step if making vegan).
3. Add olive oil to skillet, then shallots and celery. Cook, stirring occasionally, until soft, about 3 minutes. Add the mushrooms, thyme, rosemary, salt and pepper. Cook, stirring occasionally, until slightly soft, about 4 minutes. Add white wine and cook, stirring until it’s been absorbed, about 1 or 2 minutes. Add rice milk and cook about 1 minute more. Remove pan from heat.
4. Crumble the cornbread and measure out 3 heaping cups. Add to the pan. Add the crispy pancetta bits (if using). Toss gently. Oil a 9×13-inch pan (or whatever you’ve got that’s comparable) with olive oil. Spoon in the stuffing and drizzle with chicken broth or vegetable broth. Bake at 350 degrees until crusty and golden brown, about 30 minutes.
Allergy-Friendly Cornbread and Wild Mushroom Stuffing
© 2010 by Cybele Pascal
October 31, 2013
Allergy Free Halloween Cupcakes

Still looking for a safe treat for your Halloween party? These Top 8 Allergen-Free Gluten-Free Cupcakes are easy to whip up, and so very festive. Top them with your favorite Halloween party favor (such as a plastic spider or bat ring), and you’ve got a perfect Halloween party treat.
Halloween Velvet BooCakes
Free of the top 8 Allergens, Gluten-Free, and Vegan, but full of flavor and fun.
1¼ cups + 2 tablespoons my Basic Gluten-Free Flour Mix (recipe follows) or Authentic Foods GF Classical Blend
2 tablespoons unsweetened cocoa powder
¼ + ⅛ teaspoon xanthan gum
¾ teaspoon double-acting baking powder
¾ teaspoon baking soda
¾ teaspoon salt
¾ cup rice milk
¾ teaspoon cider vinegar
¼ cup + 2 tablespoons dairy-free, soy-free
vegetable shortening
¾ cup granulated sugar
2¼ teaspoons Ener-G egg replacer mixed with 3 tablespoons
rice milk
½ teaspoon pure vanilla extract
1 tablespoon natural red food coloring
1 recipe Velvet Frosting (recipe follows)
- Natural orange food coloring
1. Preheat oven to 350 degrees. Line a muffin pan with 12 liners.
2. Measure out flour mix by spooning flour into a dry measuring cup and leveling it off with the back of a knife. (Do not scoop the flour directly with the measuring cup or you’ll wind up with too much flour for the recipe). Whisk together the flour mix, cocoa powder, xanthan gum, baking powder, baking soda, and salt. Set aside.
3. Combine the rice milk and cider vinegar. Set aside.
4. In the bowl of a stand mixer fitted with the paddle attachment, combine the shortening, sugar, egg replacer and vanilla. Beat on medium speed until light and fluffy, about 2 minutes. Add the natural red food coloring and mix until combined, scraping down the sides of the bowl as necessary. Sift in the flour mixture in three batches, alternating with the rice milk mixture and beginning and ending with the flour mixture. Beat until smooth, about 30 seconds, scraping down the sides of the bowl as necessary.
5. Divide batter equally among muffin liners, smoothing down the surface with a frosting spatula or butter knife.
6. Bake cupcakes in the center of preheated oven for 18 minutes, rotating the pan halfway through baking time.
7. Let cool in the pan on a cooling rack about 5 minutes. Transfer cupcakes to cooling rack to cool completely before frosting.
8. Once the cupcakes have cooled completely, frost with Velvet Frosting. Top each with a Halloween party favor. Once frosting has set, store covered at room temperature. Extras can be frozen for eating later.
Velvet Frosting
ENOUGH TO FROST 12 CUPCAKES
½ cup dairy-free, soy-free vegetable shortening (like Spectrum)
- Pinch of salt
1½ cups confectioners’ sugar
1½ tablespoons rice milk
1½ teaspoons freshly squeezed lemon juice
½ teaspoon pure vanilla extract
1. In the bowl of a stand mixer fitted with the paddle attachment, cream the shortening and salt on medium speed for 1 minute.
2. Add the confectioners’ sugar in three batches, beating after each addition.
3. Add the rice milk, lemon juice, and vanilla. Beat on medium speed until smooth, creamy and fluffy, about 5 minutes.
4. Add a few drops of natural orange food coloring to the frosting until desired shade has been reached. Frost cupcakes and decorate with Halloween party favor.
My Basic Gluten-Free Flour Mix
MAKES 6 CUPS
4 cups super-fine brown rice flour
1⅓ cups potato starch (not potato flour)
⅔ cup tapioca flour/starch
1. To measure flour, use a large spoon to scoop flour into the measuring cup and level it off with the back of a knife. Do not use the measuring cup to scoop your flour when measuring. It will compact the flour and you will wind up with too much for the recipe.
2. Combine all ingredients in a gallon-size zipper-top bag. Shake until well blended. Store in the refrigerator until ready to use.
TIP Super-fine brown rice flour is available from Authentic Foods, authenticfoods.com. To make your own, process brown rice flour in a food processor or a clean coffee grinder or food processor until super-fine.
Reprinted with permission from The Allergen-Free Baker’s Handbook: How to Bake Without Gluten, Wheat, Dairy, Eggs, Soy, Peanuts, Tree Nuts, and Sesame. Copyright © 2009 by Cybele Pascal, Celestial Arts, an imprint of Ten Speed Press, a division of the Crown Publishing Group, Berkeley, CA.
September 28, 2013
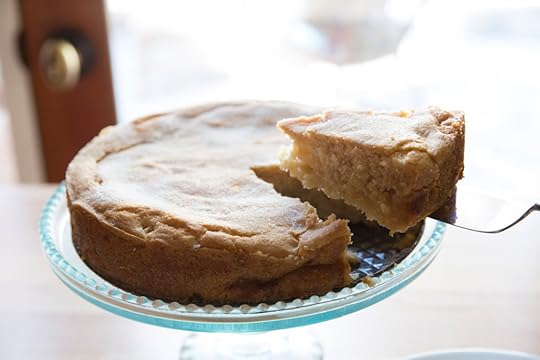
Allergy Free French Apple Cake
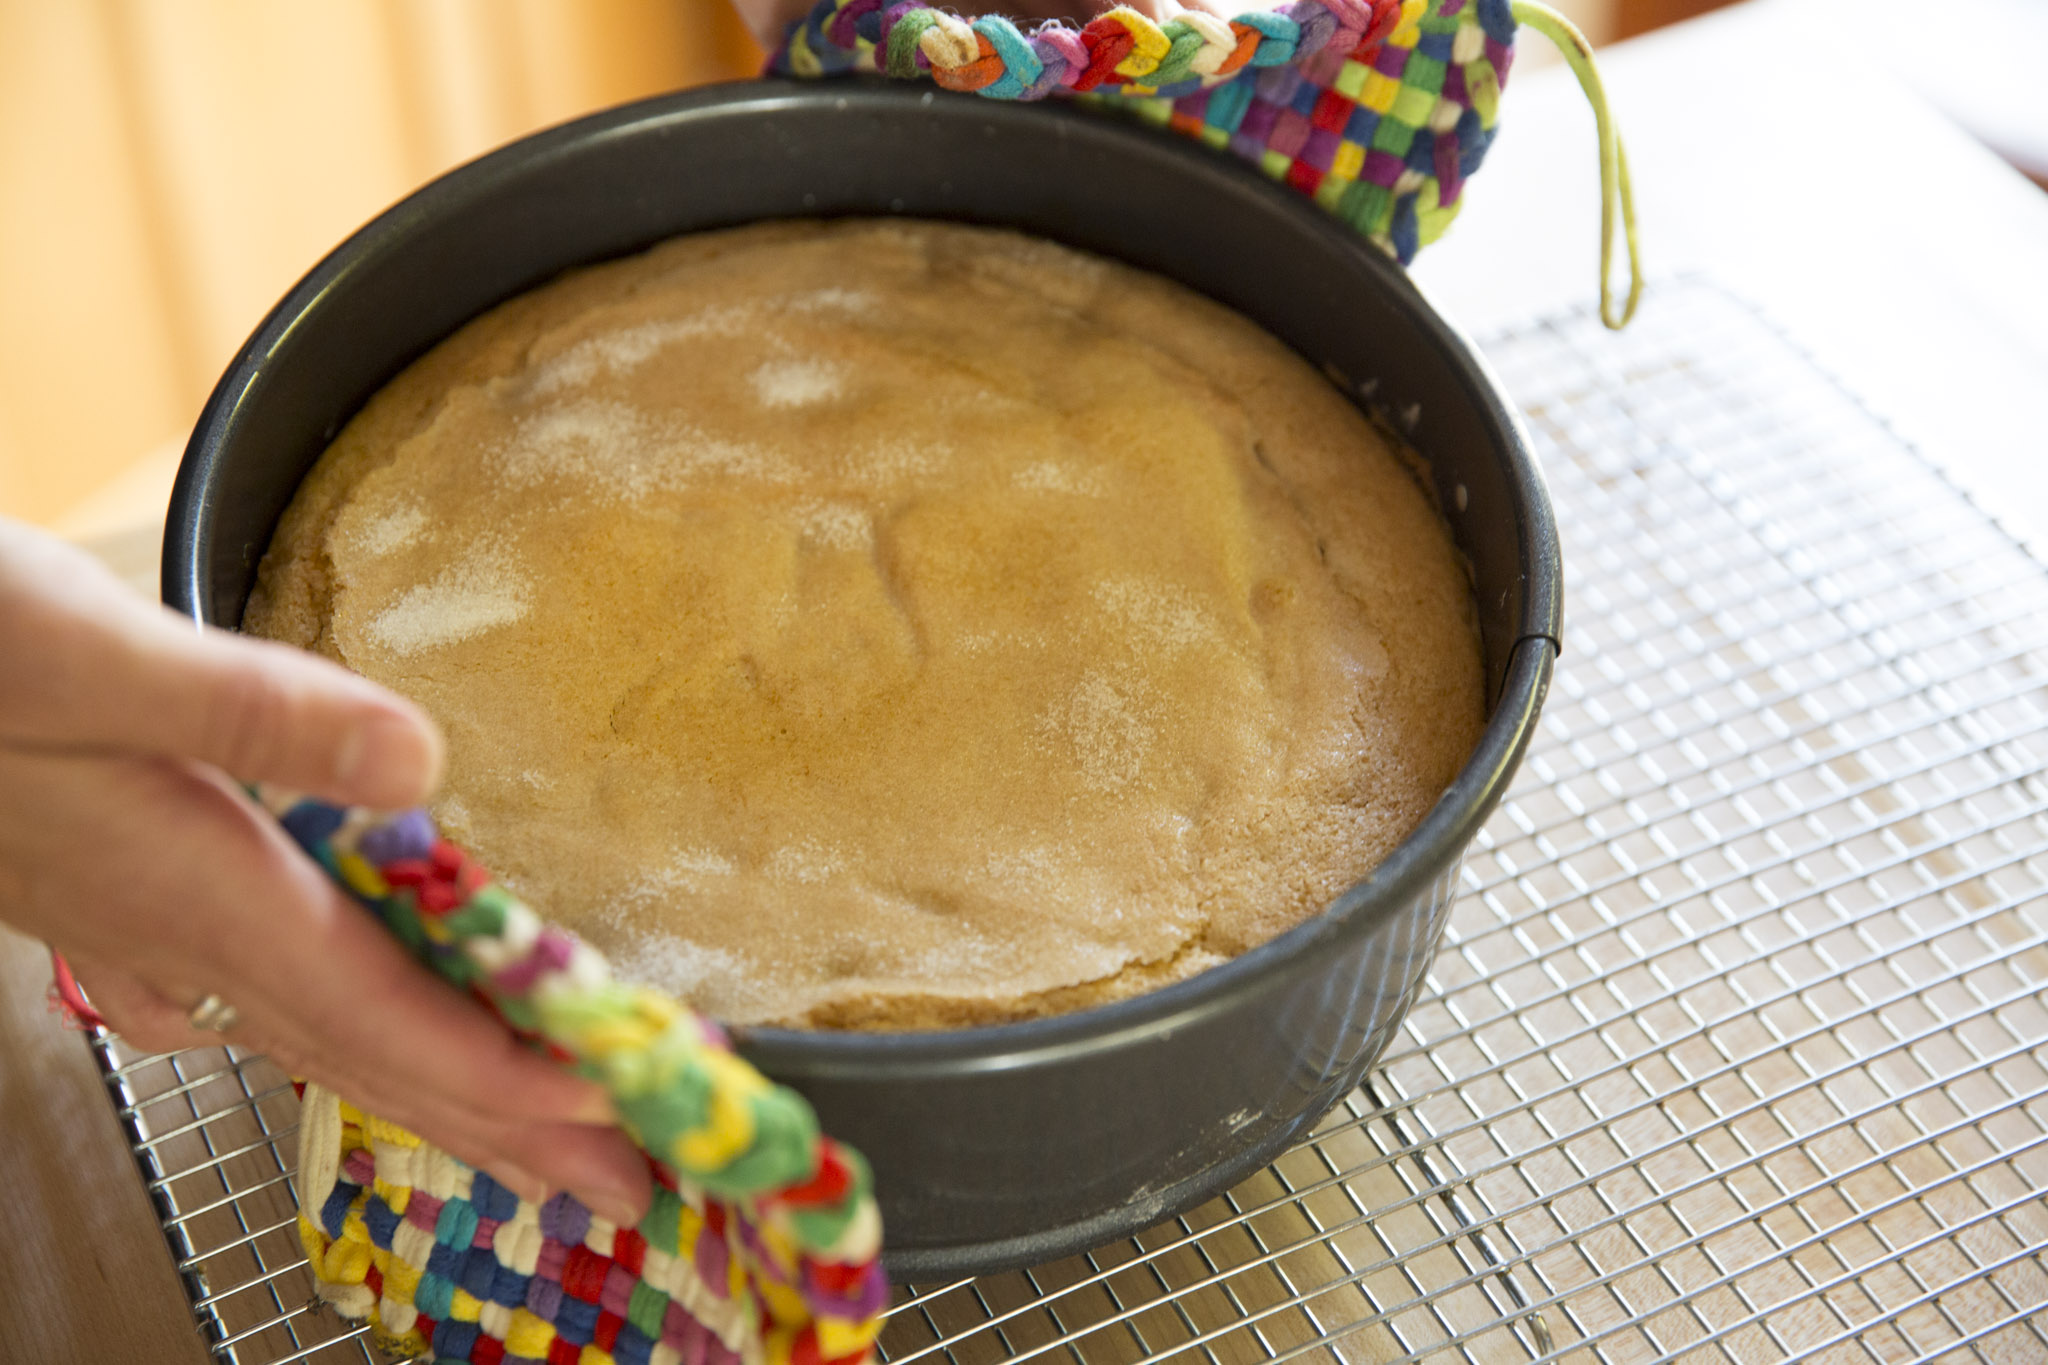
French Apple Cake is a rich tasting healthy cake that is wonderful for teatime, as a seasonal dessert, or perfect for celebratory brunches. I’ve whipped up a gluten-free, vegan, and top 8 allergen-free version that will knock your socks off. Allergy-Free French Apple Cake is one of my new favorites, and as apple season comes into full swing, I hope it will be one of yours’ too!
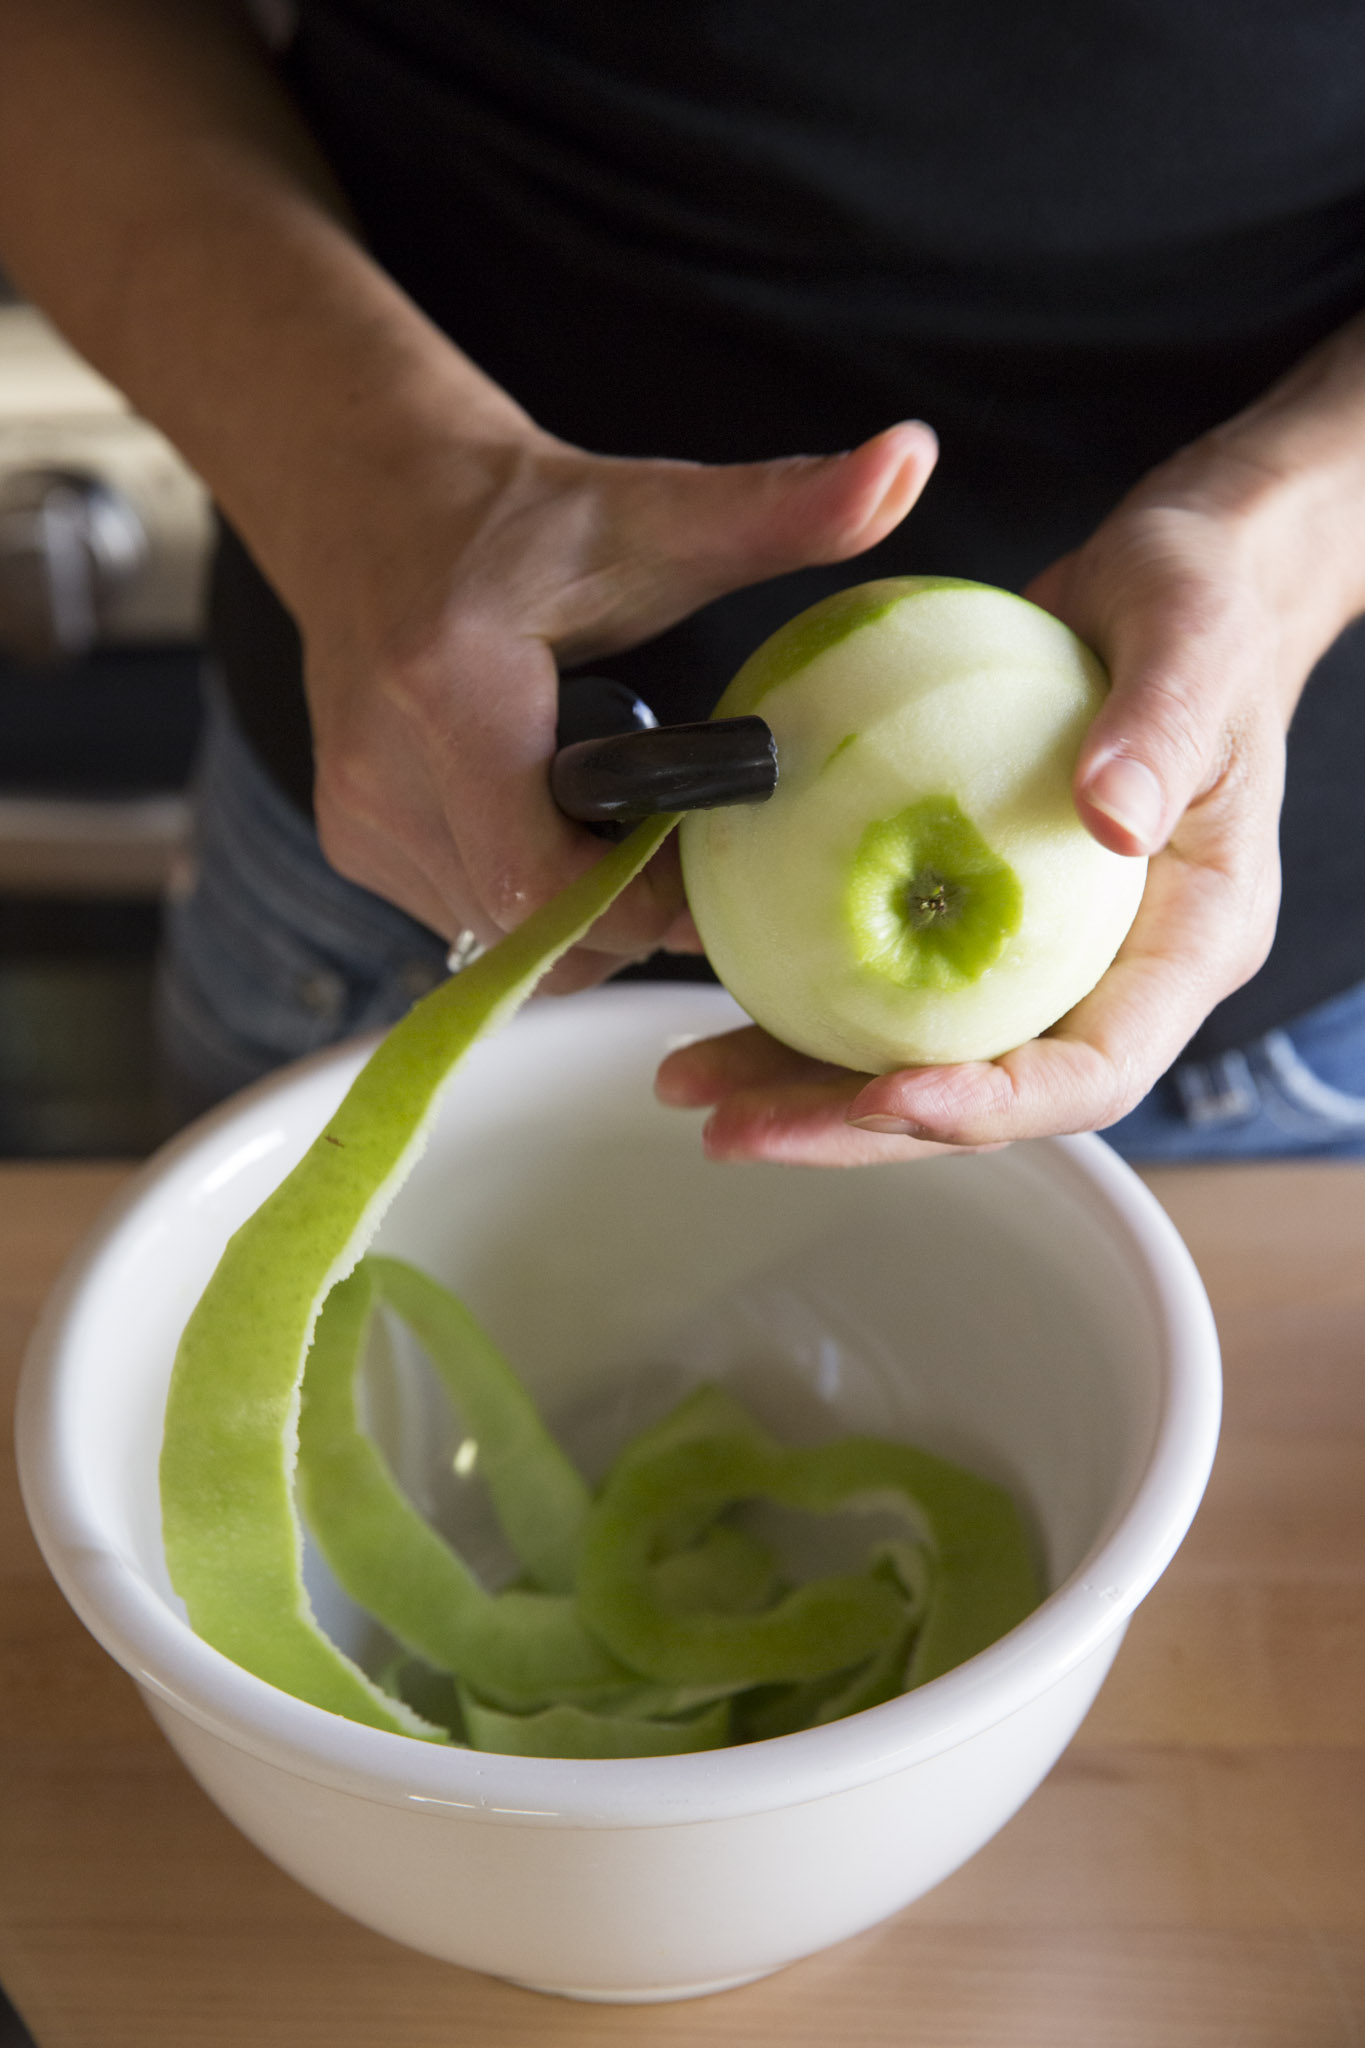
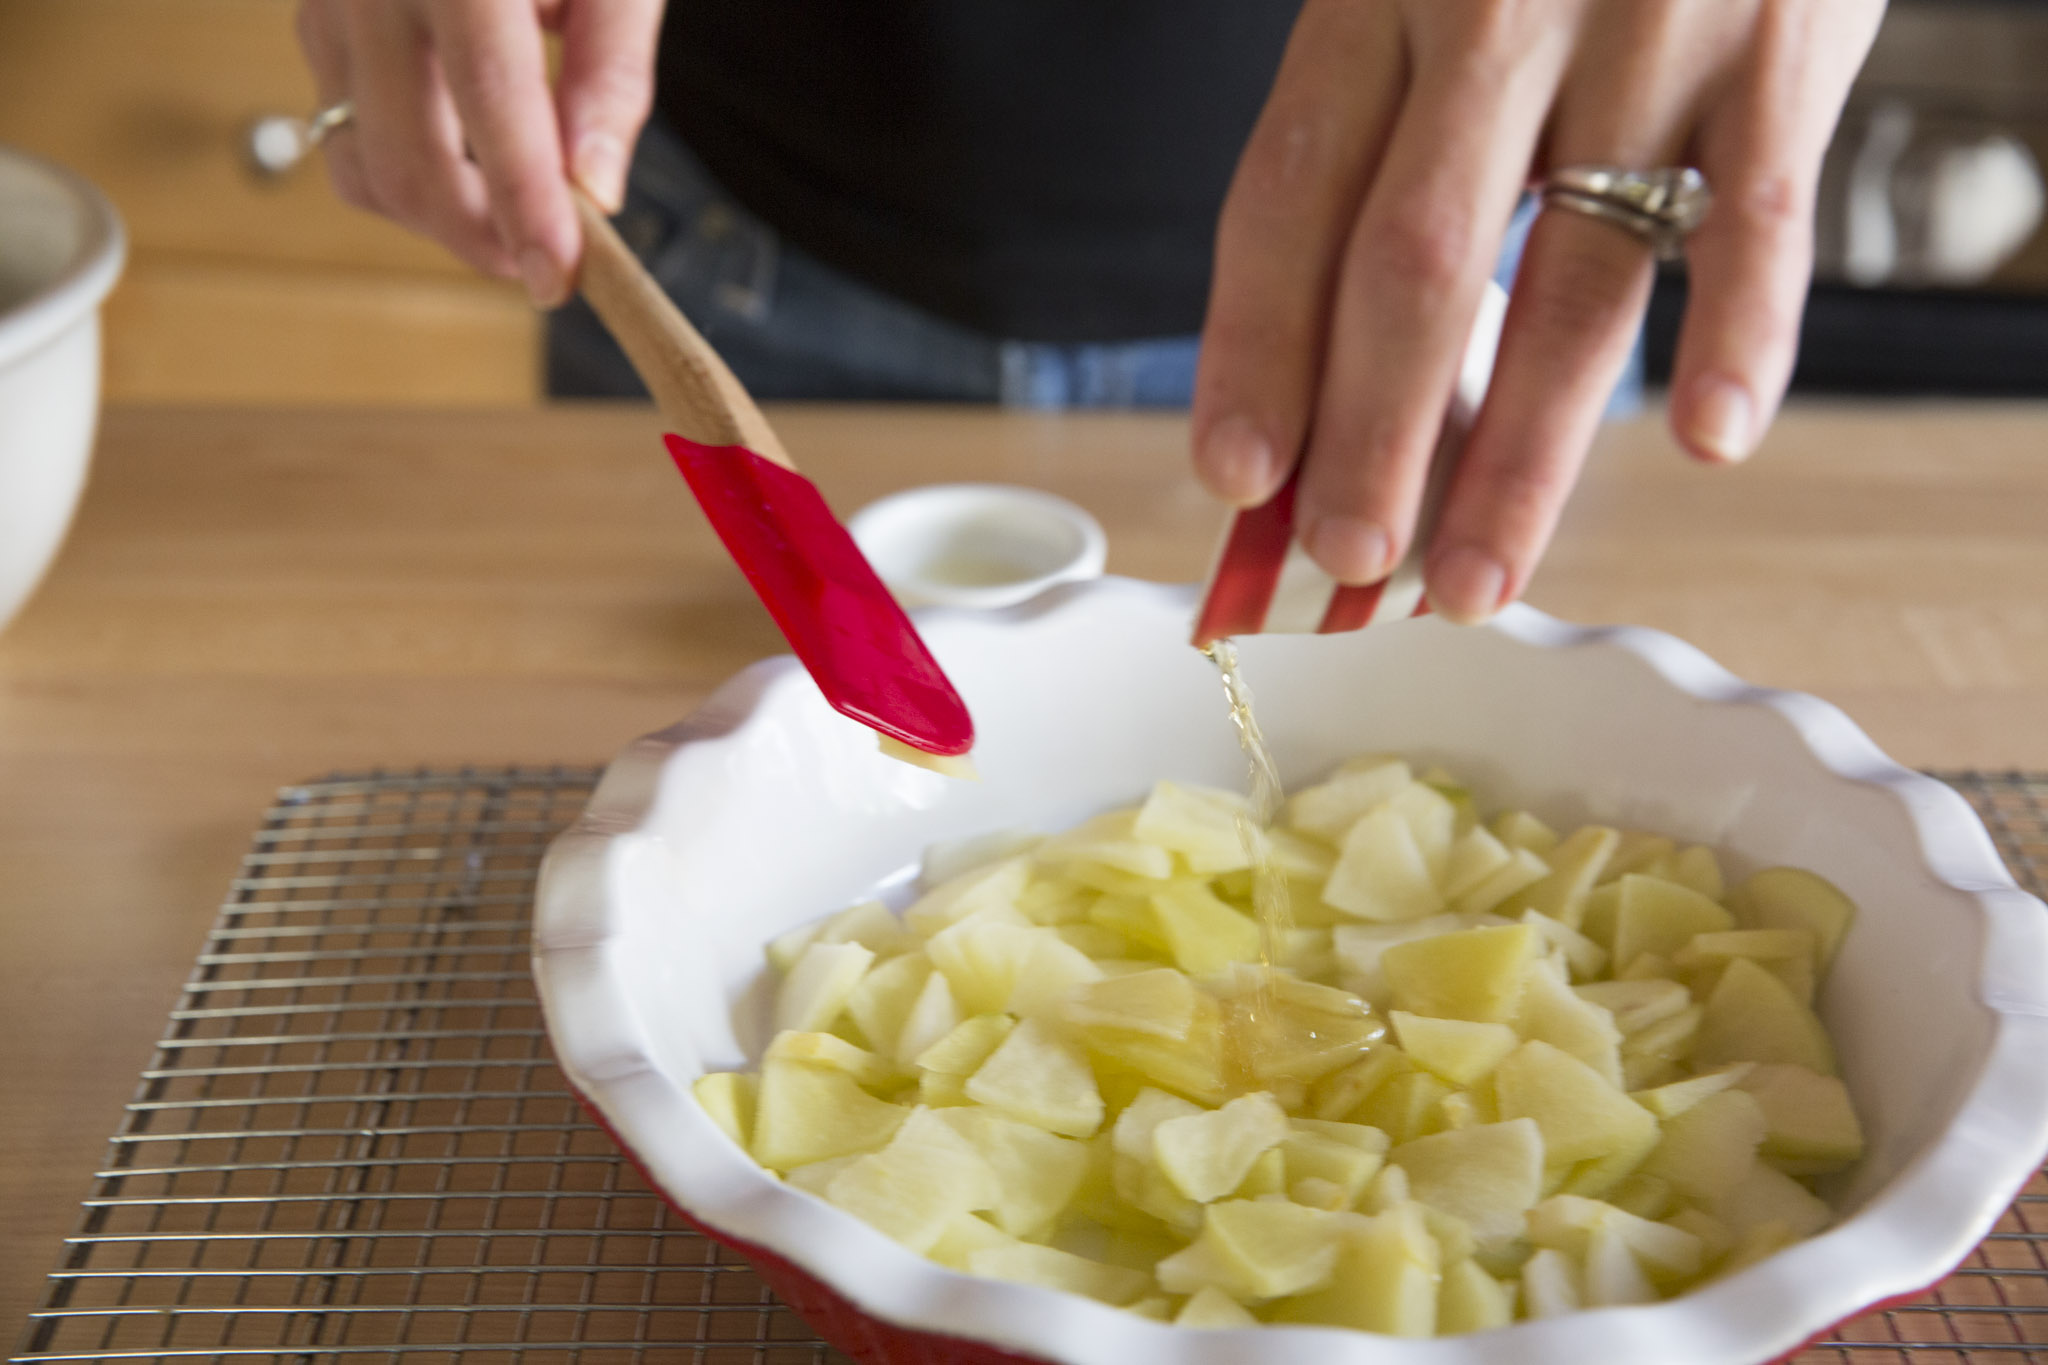
The key to this cake is precooking the apples for 3 minutes in the microwave. This ensures you’ll have tender apples without them releasing too much moisture into your cake.
Allergy-Free French Apple Cake
Serves 8 to 10
prep time: 20 minutes
bake time: 60 minutes
2 large granny smith or other large baking apples (1 lb), peeled, cored, cut into 8 wedges, and sliced 1/8th inch thick crosswise
2 teaspoons brandy (Calvados if you have it)
¾ teaspoon freshly squeezed lemon juice
2 cups Authentic Foods GF Classical Blend or my Basic Gluten-Free Flour Mix
½ teaspoon xanthan or guar gum
1 Tablespoon double-acting baking powder
1 teaspoon salt
¾ cup dairy-free, soy-free vegetable shortening
¾ cup firmly packed light brown sugar
½ cup plus 1 Tablespoon granulated sugar
4 ½ teaspoons Ener-G egg replacer mixed with 6 Tablespoons rice milk
1 teaspoon vanilla extract
¾ cup rice milk
1. Preheat oven to 350°F. Line a rimmed baking sheet with aluminum foil. Grease a 9-inch springform pan, sprinkle with a little gluten-free flour mix, tapping out any extra, and place prepared pan onto baking sheet.
2. Place apple slices in a microwave-safe pie plate, cover and microwave 3 minutes until apples are slightly tender and pliable, toss with brandy and lemon juice, and set aside on a wire cooling rack to cool.
3. Whisk together flour mix, xanthan gum, baking powder, and salt. Set aside.
4. In the bowl of a stand mixer fitted with the paddle attachment, combine shortening, light brown sugar, and ½ cup of the granulated sugar. Mix on medium-high speed for 1 minute, or until fluffy. Whisk egg replacer with 6 Tablespoons rice milk, till frothy.

5. Add egg replacer and vanilla extract, and mix for 20 seconds.
6. Reduce the speed to medium and beat in one-third of the flour, mixing for 15 seconds.
7. Add half the rice milk, mixing for 20 seconds.
8. Beat in half the remaining flour, then the remaining rice milk, and finally the remaining flour mixture, scraping down the sides of the bowl as necessary.
9. Scoop out 1 1/3 cups of the batter and set aside.
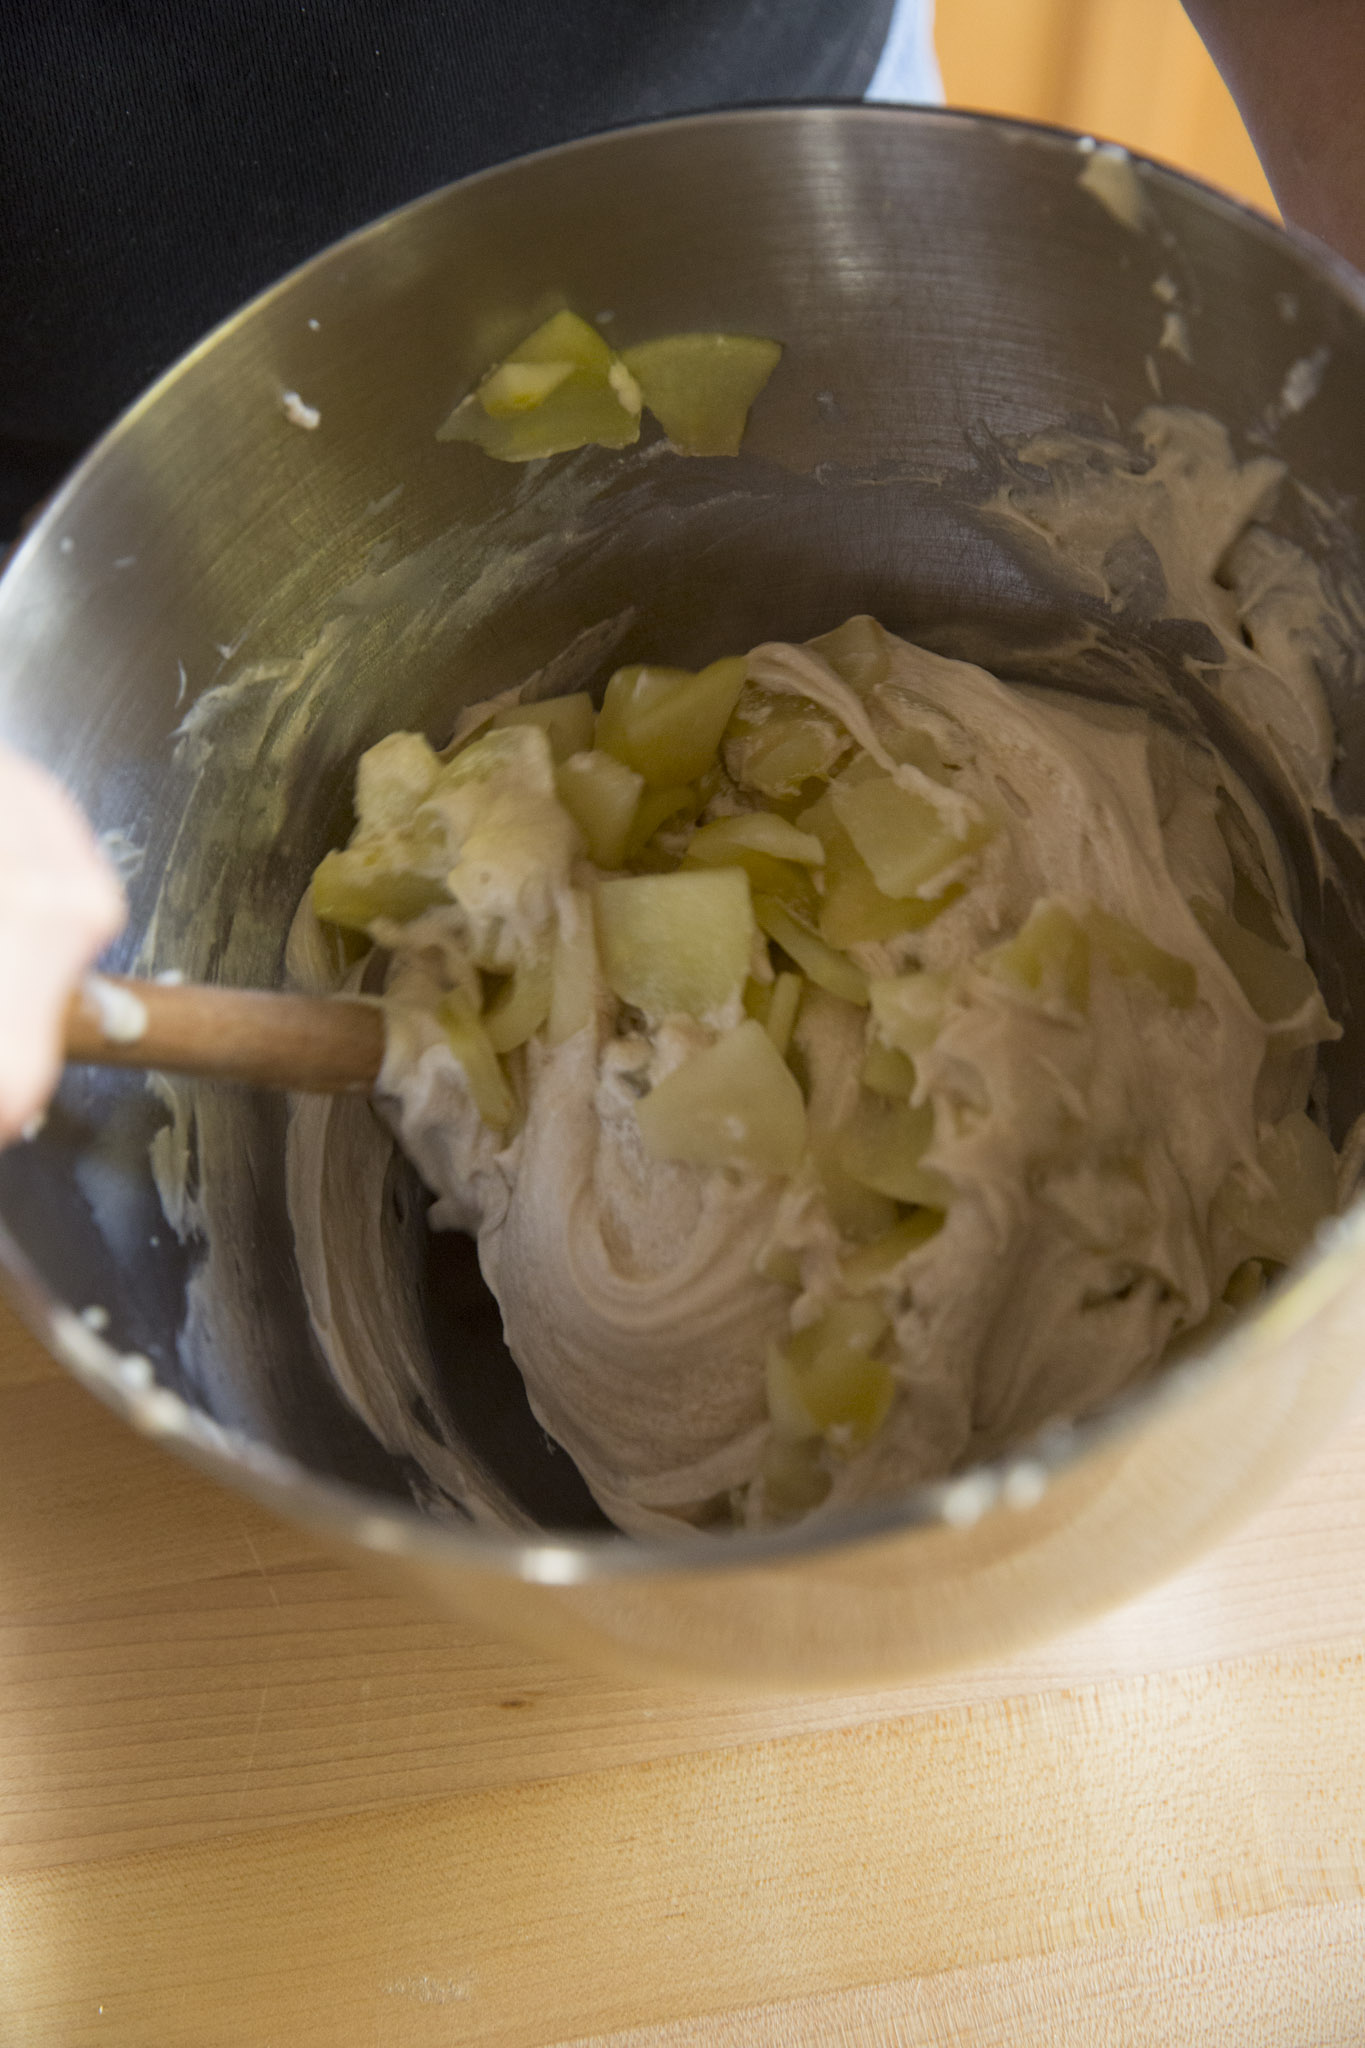
10. Using a rubber spatula, gently fold cooled apple slices into the remaining batter. Transfer to the prepared springform pan, smoothing batter evenly to edges of pan.
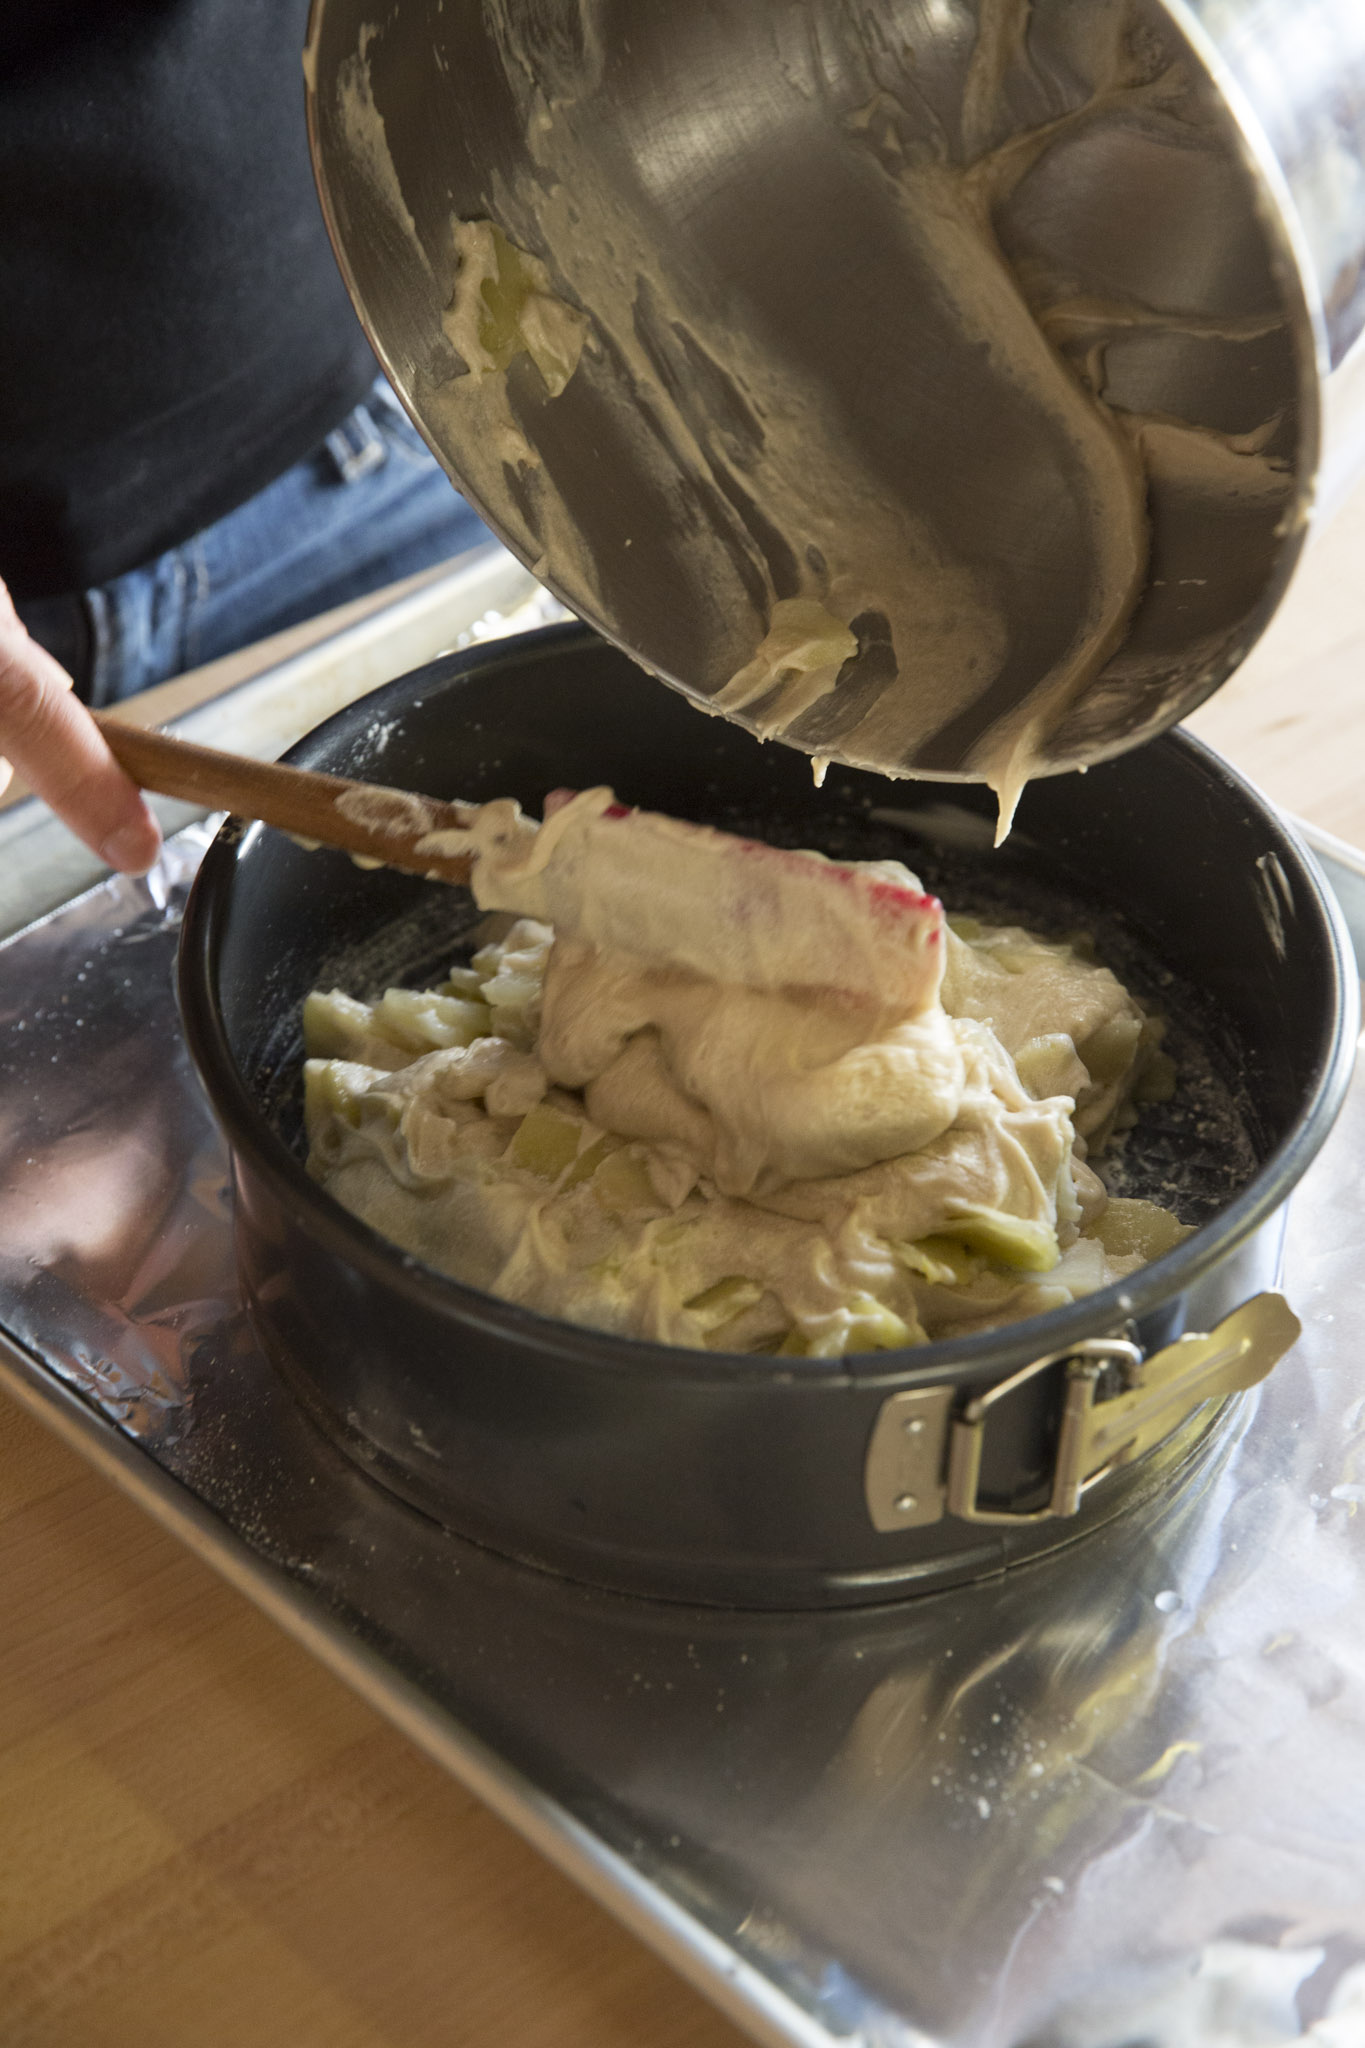

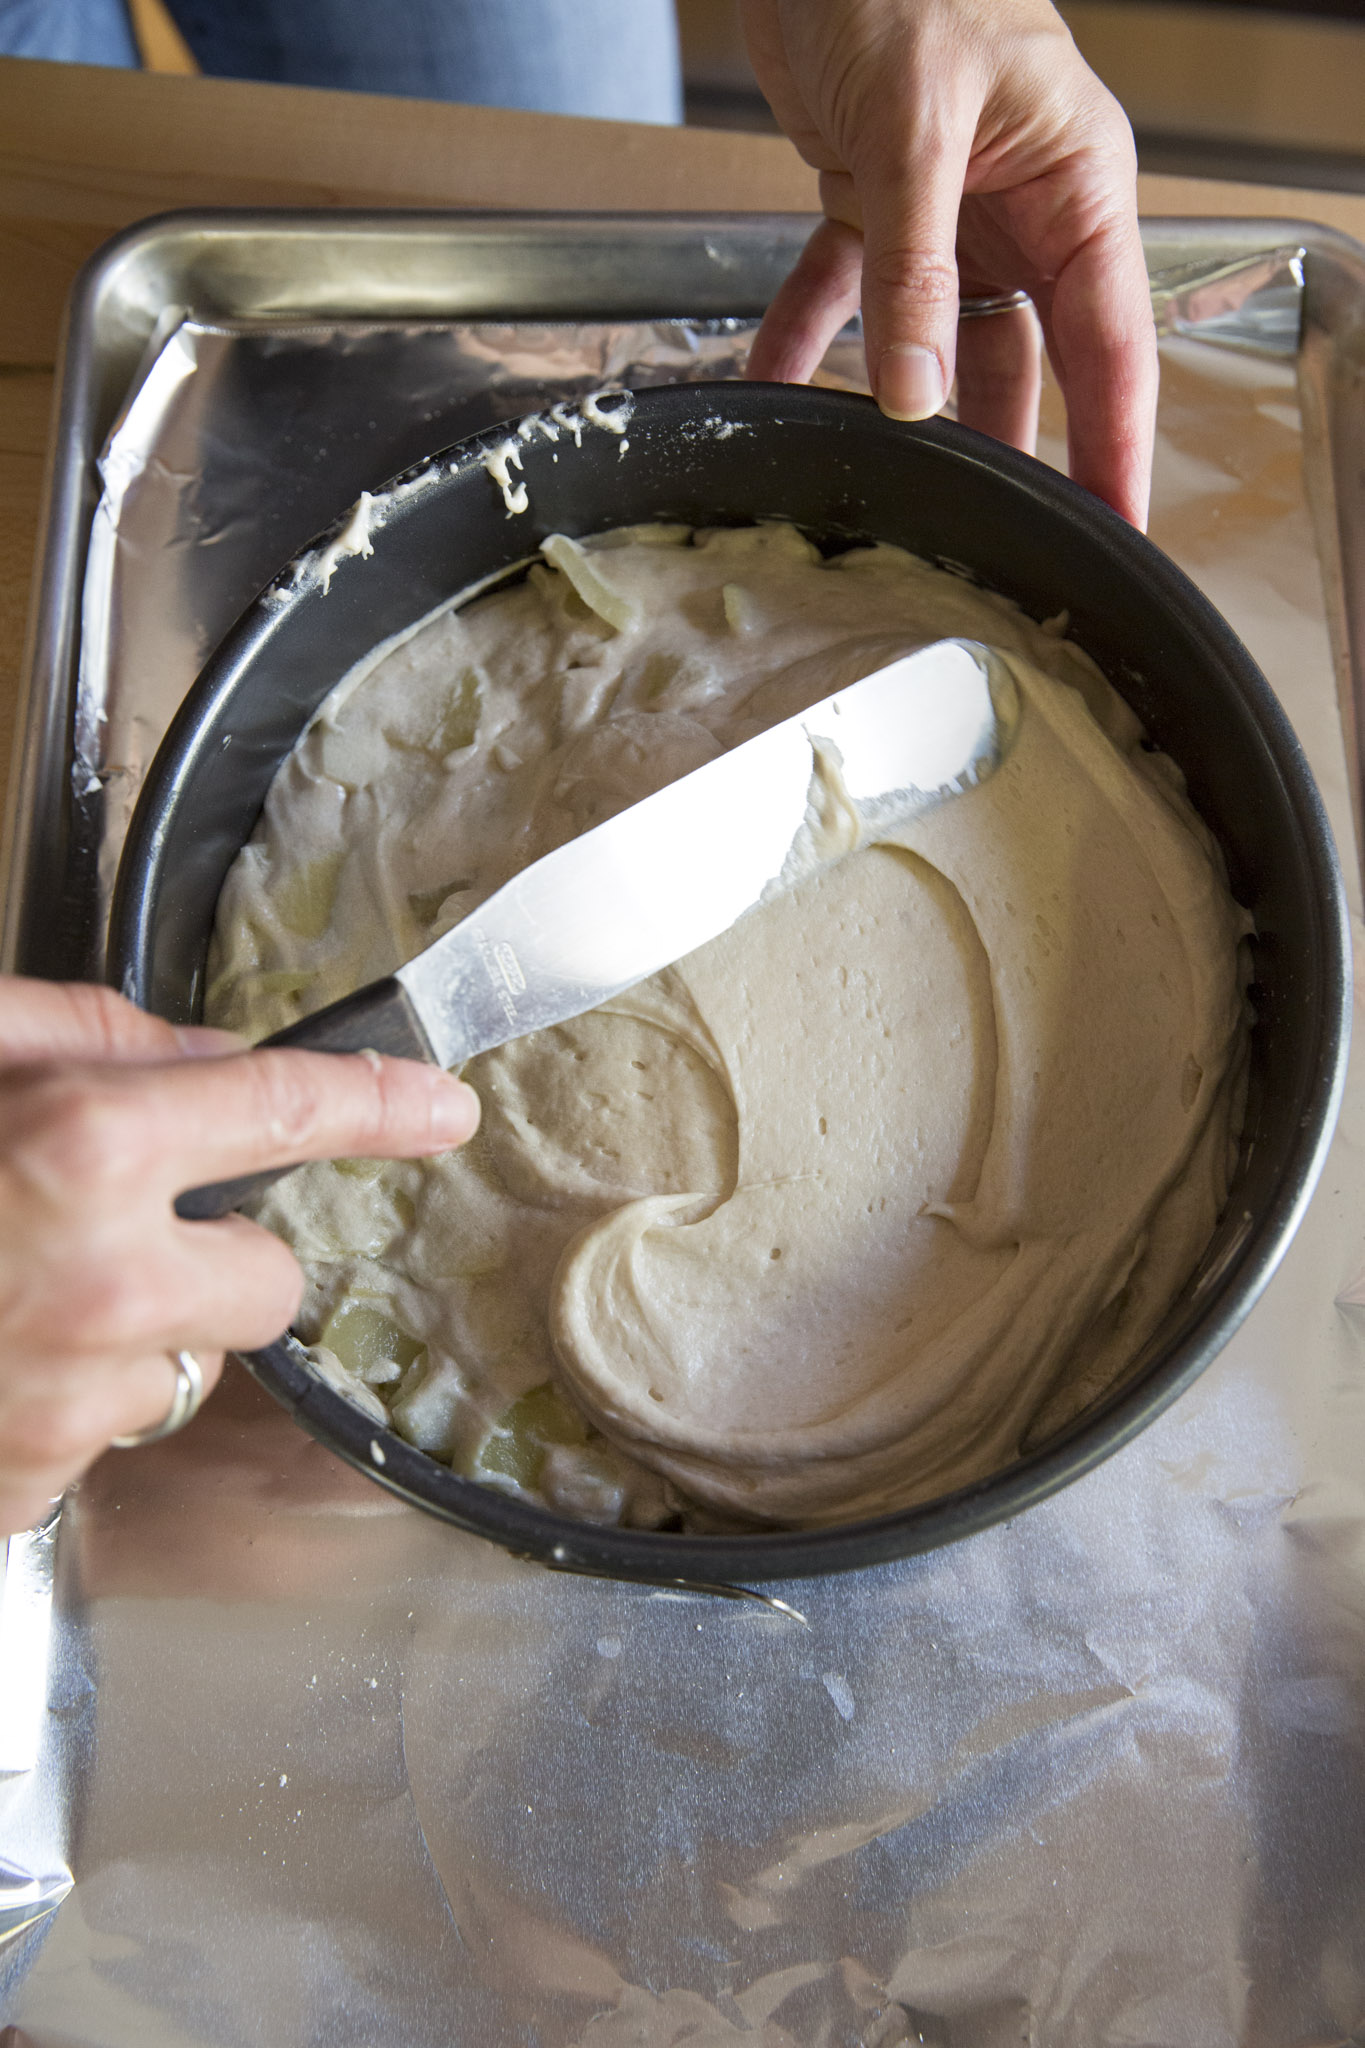
11. Top with the reserved batter, using an offset spatula or rubber spatula to smooth batter evenly to edges of pan. Sprinkle top evenly with the remaining 1 Tablespoon of granulated sugar.

12. Bake in center of oven until top is golden and pulling away slightly from the sides of the pan, and a toothpick inserted into the center of the cake comes out clean, about 1 hour. Transfer cake pan to a wire cooling rack. Let cool about 10 minutes, then run a butter or pairing knife around the sides of the pan, and let cool completely, 1 to 1 1/2 hours. Cut into wedges and serve. Store covered with a cake dome at room temperature. May be reheated at 350°F for 10 to 15 minutes the following day to freshen and be served warm.
Allergy-Free French Apple Cake © 2012 by Cybele Pascal Photos by Stephen Scott Gross
(Please note that all my recipes are completely free of all top allergens (wheat, dairy, soy, eggs, peanuts, tree nuts, sesame, fish, shellfish, and gluten), so as many people as possible can enjoy them. Additionally, all the ingredients are available atWhole Foods, and online at Amazon.com. If you have trouble finding something, let me know and I’ ll help you find it.)
SAFETY NOTE: Because each person’s food sensitivity and reaction is unique, ranging from mild intolerance to life-threatening and severe food allergies, it is up to the consumer to monitor ingredients and manufacturing conditions. If manufacturing conditions, potential cross contact between foods, and ingredient derivatives pose a risk for you, please re-read all food labels and call the manufacturer to confirm potential allergen concerns before consumption. Ingredients and manufacturing practices can change overnight and without warning.
September 15, 2013
New England Pear Soup with Chervil

I get very excited when So Delicious comes out with new products. Their dairy-free offerings open up all sorts of new recipe possibilities. Which is why I felt gleeful when they rolled out their “Greek Style” coconut milk yogurts this year. This new yogurt can be used most places you’d use sour cream or Creme Fraiche. If you can eat dairy, by all means, go for the Creme Freiche, it’s hard to find excuses to eat full fat dairy. But bare in mind, the So Delicious Greek Style yogurt has no cholesterol and 9 grams of fiber per 6 ounce container! Have your tried this yogurt yet? Is it in your stores? Leave me a comment and let me know.
New England Pear Soup with Chervil
Makes 4-6 servings.
This warm pear soup is light and elegant. It’s the perfect way to dress up lovely fall pears. My husband calls it “Divine!” And if you know my husband, yes, he really said that.
Ingredients:
3 Tbsp. lemon juice
6 large pears (Comice, Anjou, Bartlett, etc. – just under-ripe is perfect because they’ll be firm enough to work with easily)
3 Tbsp. sunflower oil (or other mild flavored oil, such as safflower or canola, try Spectrum)
1 1/2 large shallots, minced (1/4 cup + 2 Tbsp.)
3 Tbsp. honey
3 cups organic vegetable broth
white pepper (black pepper will NOT do for this)
1 1/2 Tbsp. fresh chervil (or chives), finely minced
So Delicious Plain Greek Style yogurt, (or Creme Fraiche – try Bellwether Farms)
Directions:
Put lemon juice in a bowl. Peel, core, and dice pears into 1-inch chunks, adding to the bowl and tossing them in lemon juice as you work, to prevent pears from turning brown.
Heat sunflower oil in a large pan over medium-high heat. Add shallots and cook 2 minutes, stirring often. Add pears and drizzle with honey. Cook 10 minutes, stirring often.
Transfer pears to a food processor and pulse. Pulsing will prevent them from overflowing. Once pears are almost smooth, run food processor about 1 minute until completely pureed.
Return puree to pan, add broth and stir to combine thoroughly. Add a few turns of freshly ground white pepper, (or a couple pinches if it’s already ground). Stir in chervil. Heat soup to just below simmering point, do not boil.
Remove from heat, ladle into bowls and top each with 1 Tbsp. Greek Style yogurt or creme fraiche. Swirl through soup gently.
New England Pear Soup with Chervil © 2013 by Cybele Pascal (this recipe originally appeared on Gaiam.com)
(Please note that all my recipes are free of all top allergens (wheat, dairy, soy, eggs, peanuts, tree nuts, sesame, fish, shellfish, and gluten), so as many people as possible can enjoy them. Additionally, all the ingredients are available at Whole Foods, and online at Amazon.com. If you have trouble finding something, let me know and I’ll help you find it.)
SAFETY NOTE: Because each person’s food sensitivity and reaction is unique, ranging from mild intolerance to life-threatening and severe food allergies, it is up to the consumer to monitor ingredients and manufacturing conditions. If manufacturing conditions, potential cross contact between foods, and ingredient derivatives pose a risk for you, please re-read all food labels and call the manufacturer to confirm potential allergen concerns before consumption. Ingredients and manufacturing practices can change overnight and without warning.
September 10, 2013
Fall Harvest Crops Across the U.S.
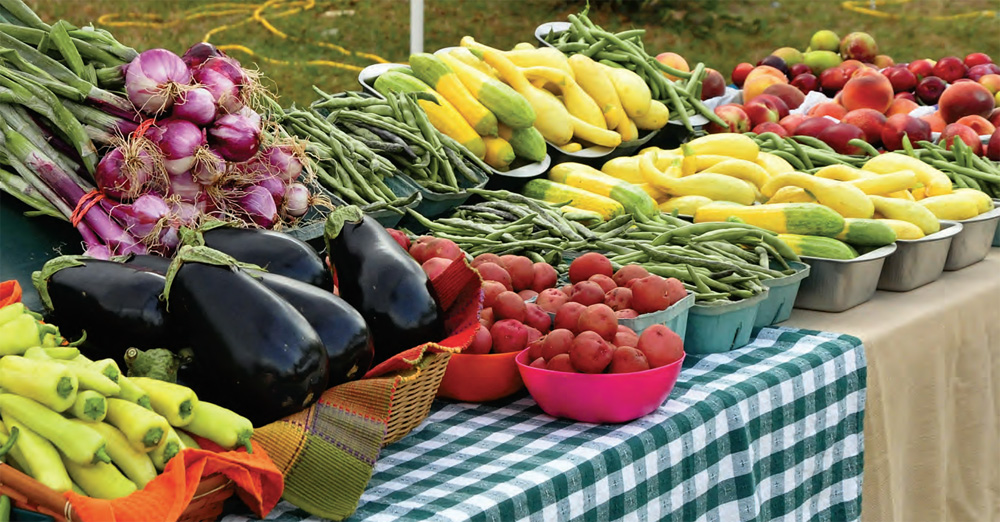
Fall is the season of plenty. Planted in spring and nurtured all summer long, a colorful bounty of crops pours into farmers markets across the country, making it easier than ever to eat a wide variety of local, seasonal ingredients. Having grown up in the Northeast, I associated fall with apples, pears, and maple syrup. Several years ago, however, I moved to the West Coast, and discovered a whole new fall harvest–from persimmons, to dates, to quince.
That got me to thinking. What other crops are being treasured all over the continental U.S.? What are people in Atlanta, New Mexico, Ohio and New York looking forward to eating?
The following are comprehensive lists of fall crops across the US, highlighting regional stars–from apricots, to wild mushrooms, to wild rice. One of the easiest ways to eat allergen-free is by cooking from scratch, and cooking from scratch is never as easy as it is when you have an abundance of local seasonal produce to source. The possibilities are practically endless. Use these harvest shopping lists (as they suit your specific dietary needs), so that no matter what part of the county you live in, you can be sure to base your menu on what’s in season. Happy harvest!
Find your region below:
THE SOUTHWEST
Fall Harvest: apples, beets, collard greens, daikon, dates, edamame, green chilies, gourds, kale, kohlrabi, leeks, melons, peas, persimmons, pistachios, pumpkins, radishes, shallots, soybeans, turnips, winter, squash.
Still in Season: arugula, carrots, Chinese greens, garlic, lettuce, mushrooms, mustard greens, onions, raspberries, salad greens, spinach, Swiss chard, tomatoes, wheat.
THE SOUTHEAST
Fall Harvest:apples, arugula, asian pears, beets, blackberries, broccoli, cabbage, carrots, Chinese greens, collard greens, gourds, grapes, kale, leeks, lettuce, mustard greens, peas, pumpkins, radishes, raspberries, spinach, sweet corn, sweet potatoes, Swiss chard, turnips.
Still in Season: cucumber, eggplant, green beans, hot peppers, okra, salad greens, summer squash, sweet peppers, tomatoes, winter squash, zucchini.
THE MIDWEST
Fall Harvest: apples, broccoli, brussels sprouts, corn, gourds, onions, parsnips, pears, pumpkins, radishes, rutabagas, sweet potatoes, turnips, wild rice, winter squash.
Still in Season: barley, beets, blackberries, buckwheat, cabbage, carrots, cauliflower, cucumber, eggplant, garlic, green beans, green onions, hot peppers, leeks, lettuce, melons, mustard greens, peas, potatoes, soybeans, spinach, sweet corn, sweet peppers, tomatillos, tomatoes, raspberries, summer squash, walnuts, watermelon, wheat, zucchini.
THE NORTHEAST
Fall Harvest: apples, apricots, brussels sprouts, cabbage, cranberries, gourds, hot peppers, kale, leeks, maple syrup, nectarines, peaches, pears, potatoes, pumpkins, radishes, raspberries, sweet potatoes, turnips, winter squash.
Still in Season: arugula, beans, beets, blackberries, broccoli, carrots, cauliflower, Chinese greens, collard greens, corn, eggplant, endive, escarole, grapes, green onions, lettuce, melons, onions, plums, sunchokes, sweet peppers, Swiss chard, tomatoes, watermelons.
THE NORTHWEST
Fall Harvest: apples, asian pears, brussels sprouts, burdock figs, grapes, kiwis, leeks, mushrooms, pears, pumpkins, rice, sunchokes, sweet potatoes, Swiss chard, turnip, greens, walnuts, winter squash.
Still in Season: beets, broccoli, cabbage, carrots, cauliflower, collard greens, corn, cucumber, garlic, hazelnuts, hot peppers, kale, kohlrabi, lettuce, okra, onions, potatoes, radishes salad, greens, soybeans, summer squash, tomatillos, strawberries, zucchini.
THE WEST
Fall Harvest: apricots, almonds, cranberries, gourds, grapes, grapefruit, limes, persimmons, pumpkins, quince, winter, squash, chestnuts, hazelnuts, peanuts, pecans, pistachios, walnuts.
Still in Season: apples, asian pears, avocados, blackberries, boysenberries, carrots, celery, Chinese greens, dates, eggplant, garlic, green onions, kale, leeks, lemons,lettuce, mushrooms, mustard greens, olives, radishes, salad greens, spinach,strawberries, sweet peppers, swiss chard, summer, squash, tomatillos, tomatoes, turnips, zucchini.
August 2, 2013
Greetings from the Field of Dreams: If you bake it, they will come

Dear Friends:
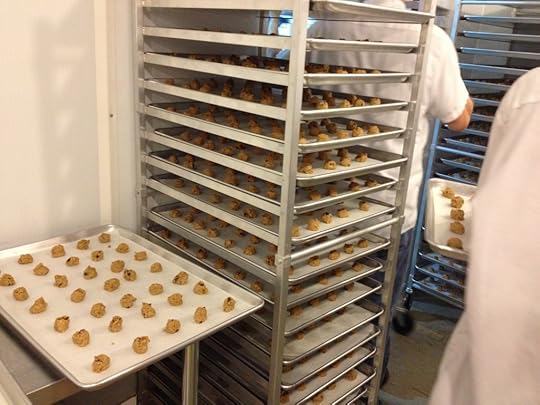
I spent last week in lovely majestic Iowa, where we manufacture our allergy-friendly Cybele’s Free-to-Eat cookies. We make them right next to the Field of Dreams. There’s something about that, that’s achingly poetic. Every time I start to feel defeated or beaten down by the business, I think to myself “If you Bake it, they will come”.
Here are some kids, eating our cookies.
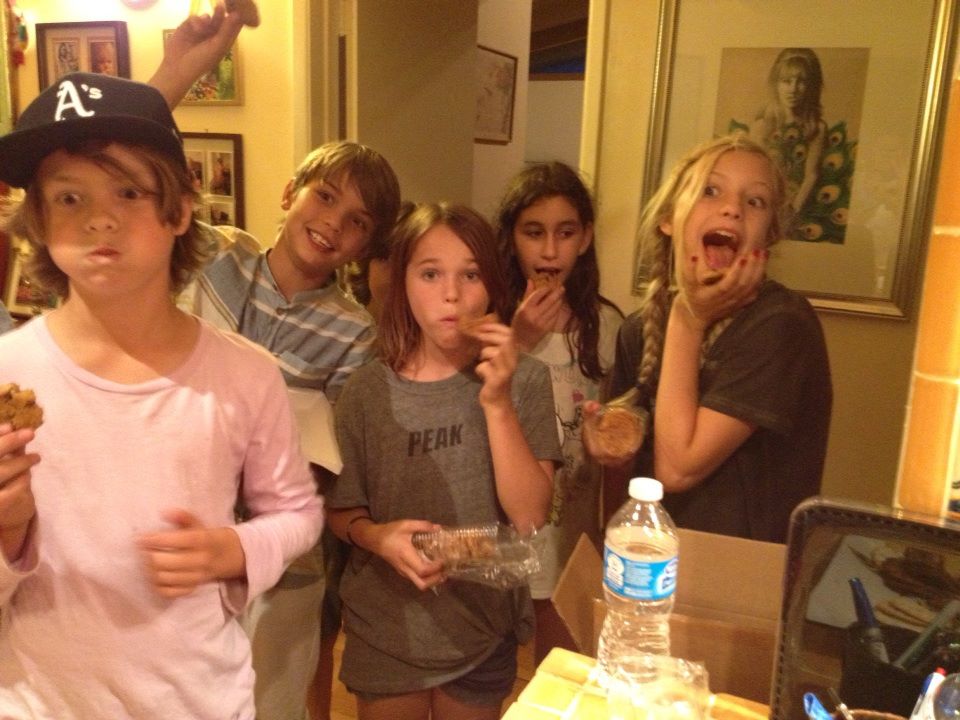
This picture was taken in Los Angeles, the night before I went to Iowa… to bake more cookies. Because IF YOU BAKE IT, THEY WILL COME. And you will need to make more cookies. Which is exactly what we did. 216,000 cookies, to be exact.
In the next couple of weeks, please look for our cookies in all Kroger brand stores. That means Kroger, King Soopers, Fred Meyer, Ralphs, QFC, etc. We will be in the core cookie set, so look for us there, in the cookie aisle. Let me know if you find them. And please let me know if you don’t!
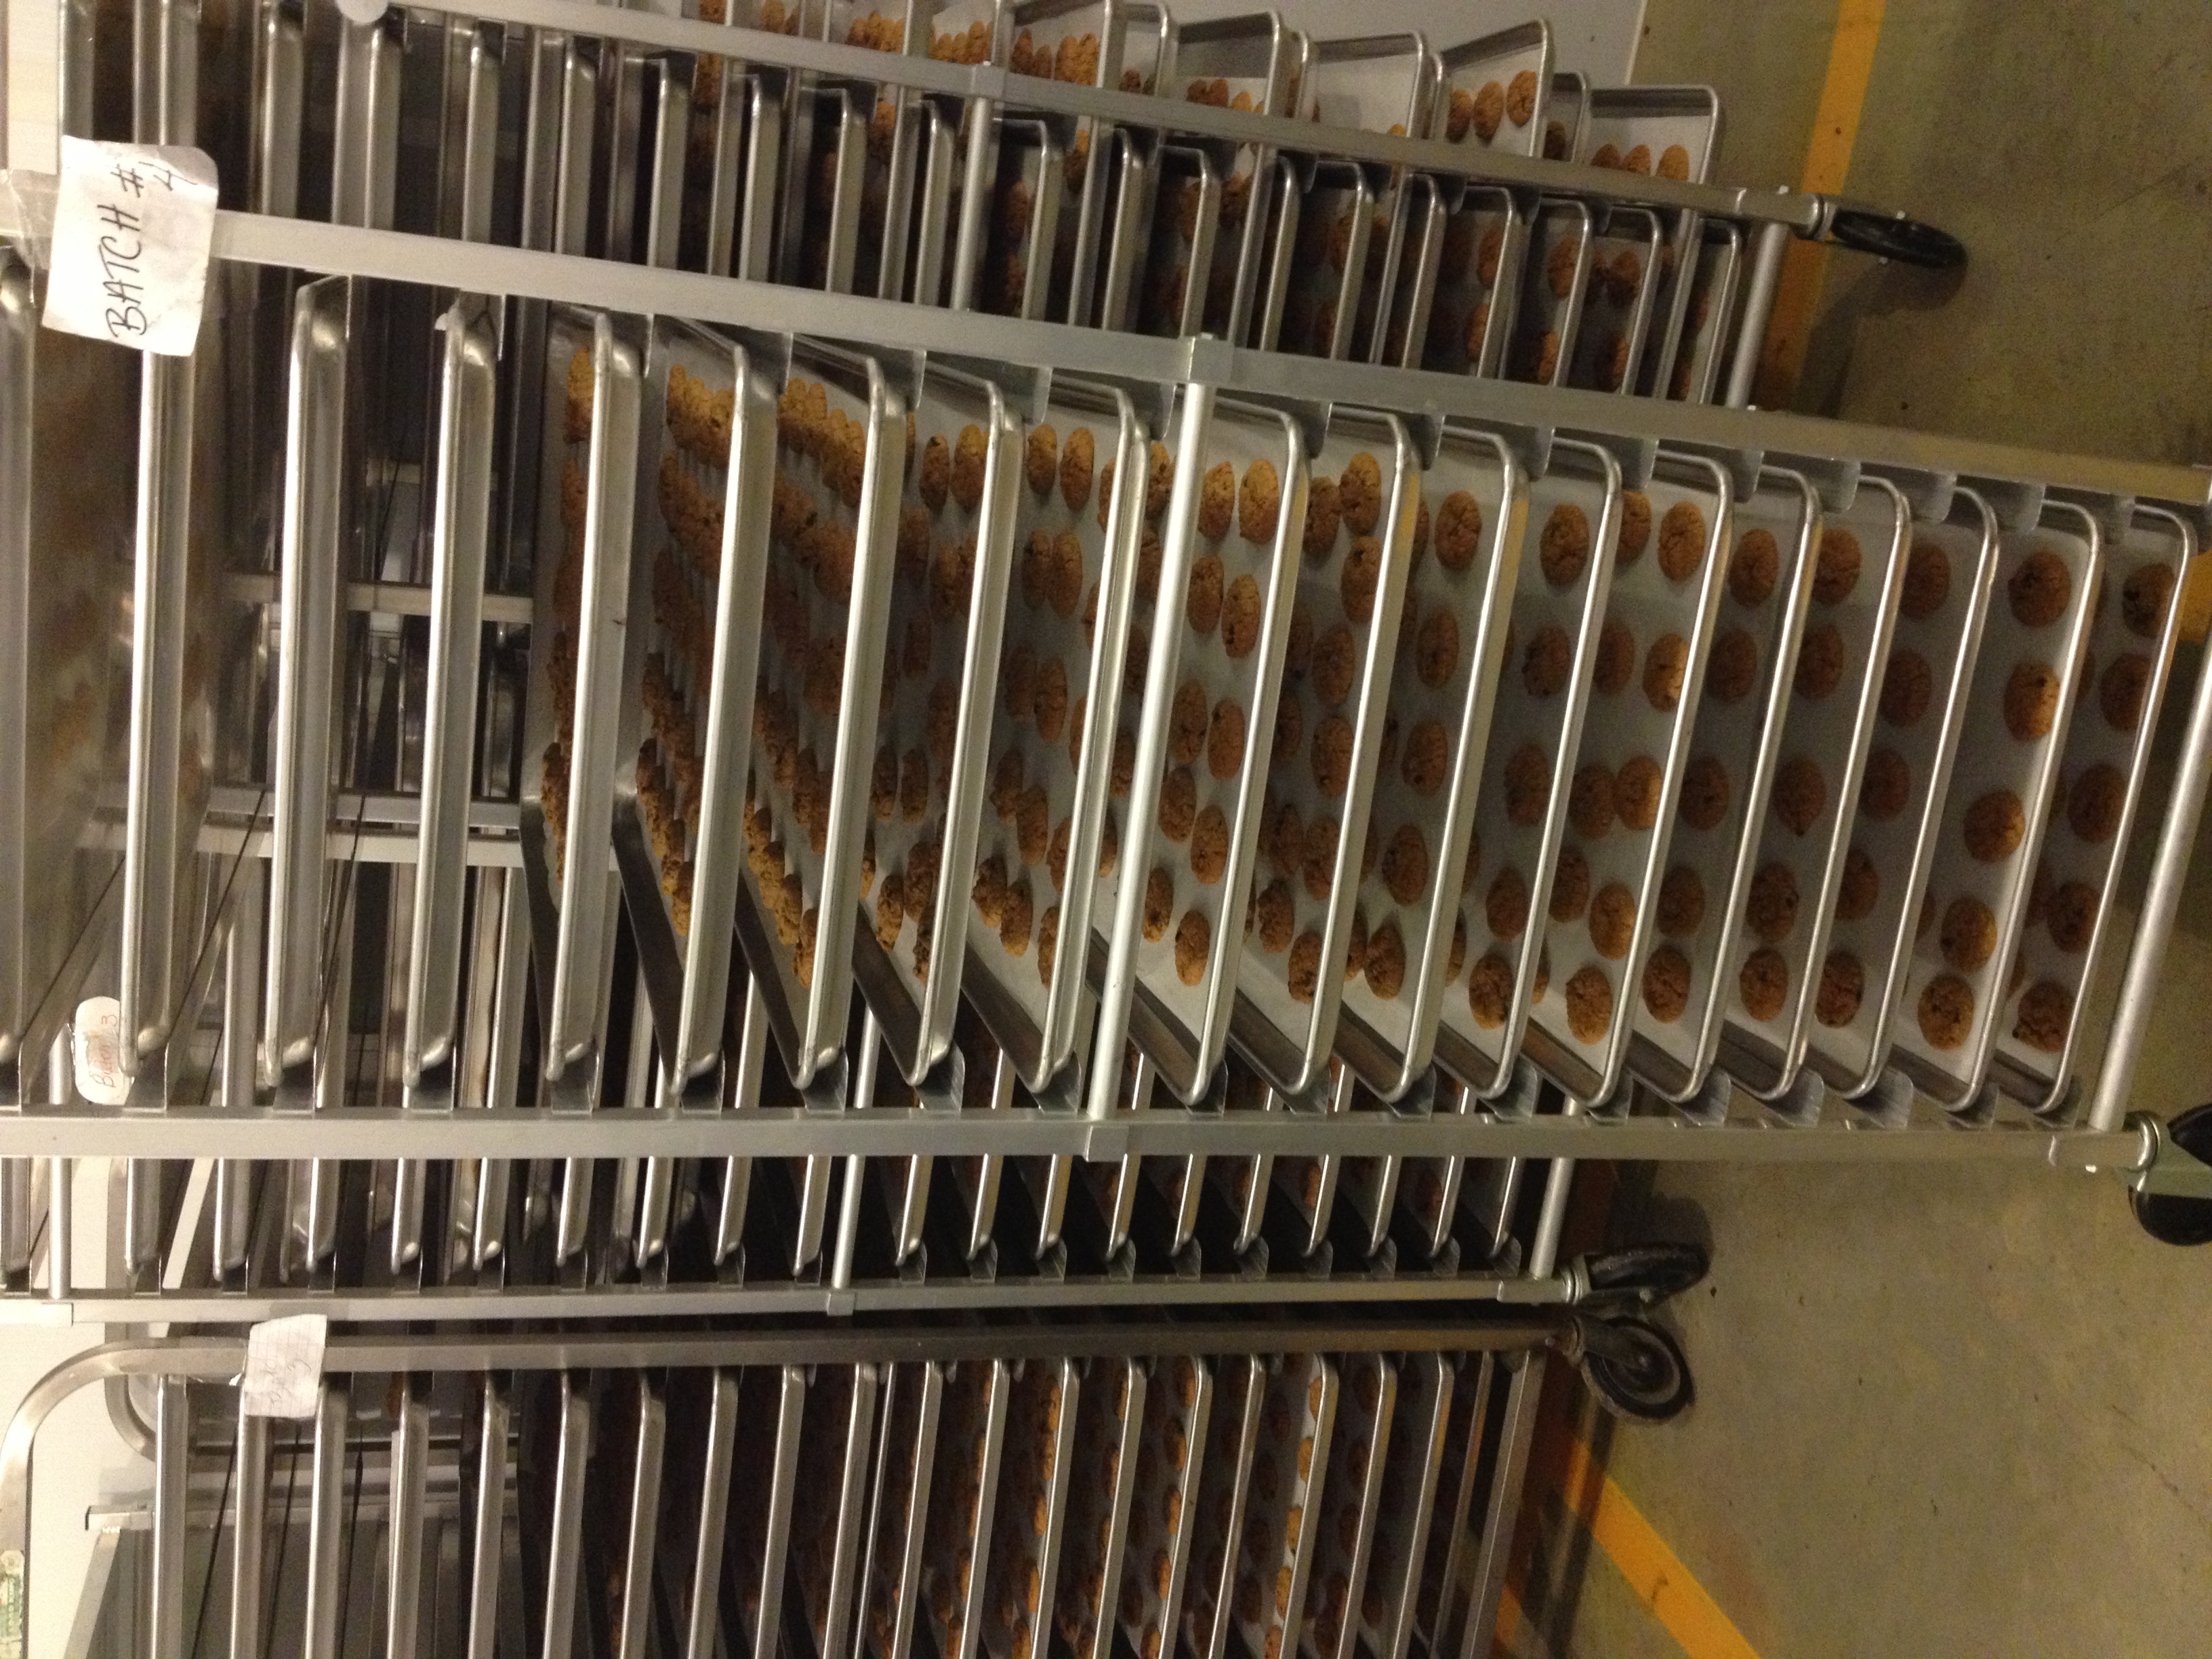
Here are cookies being trayed to bake….
And cookies cooling….
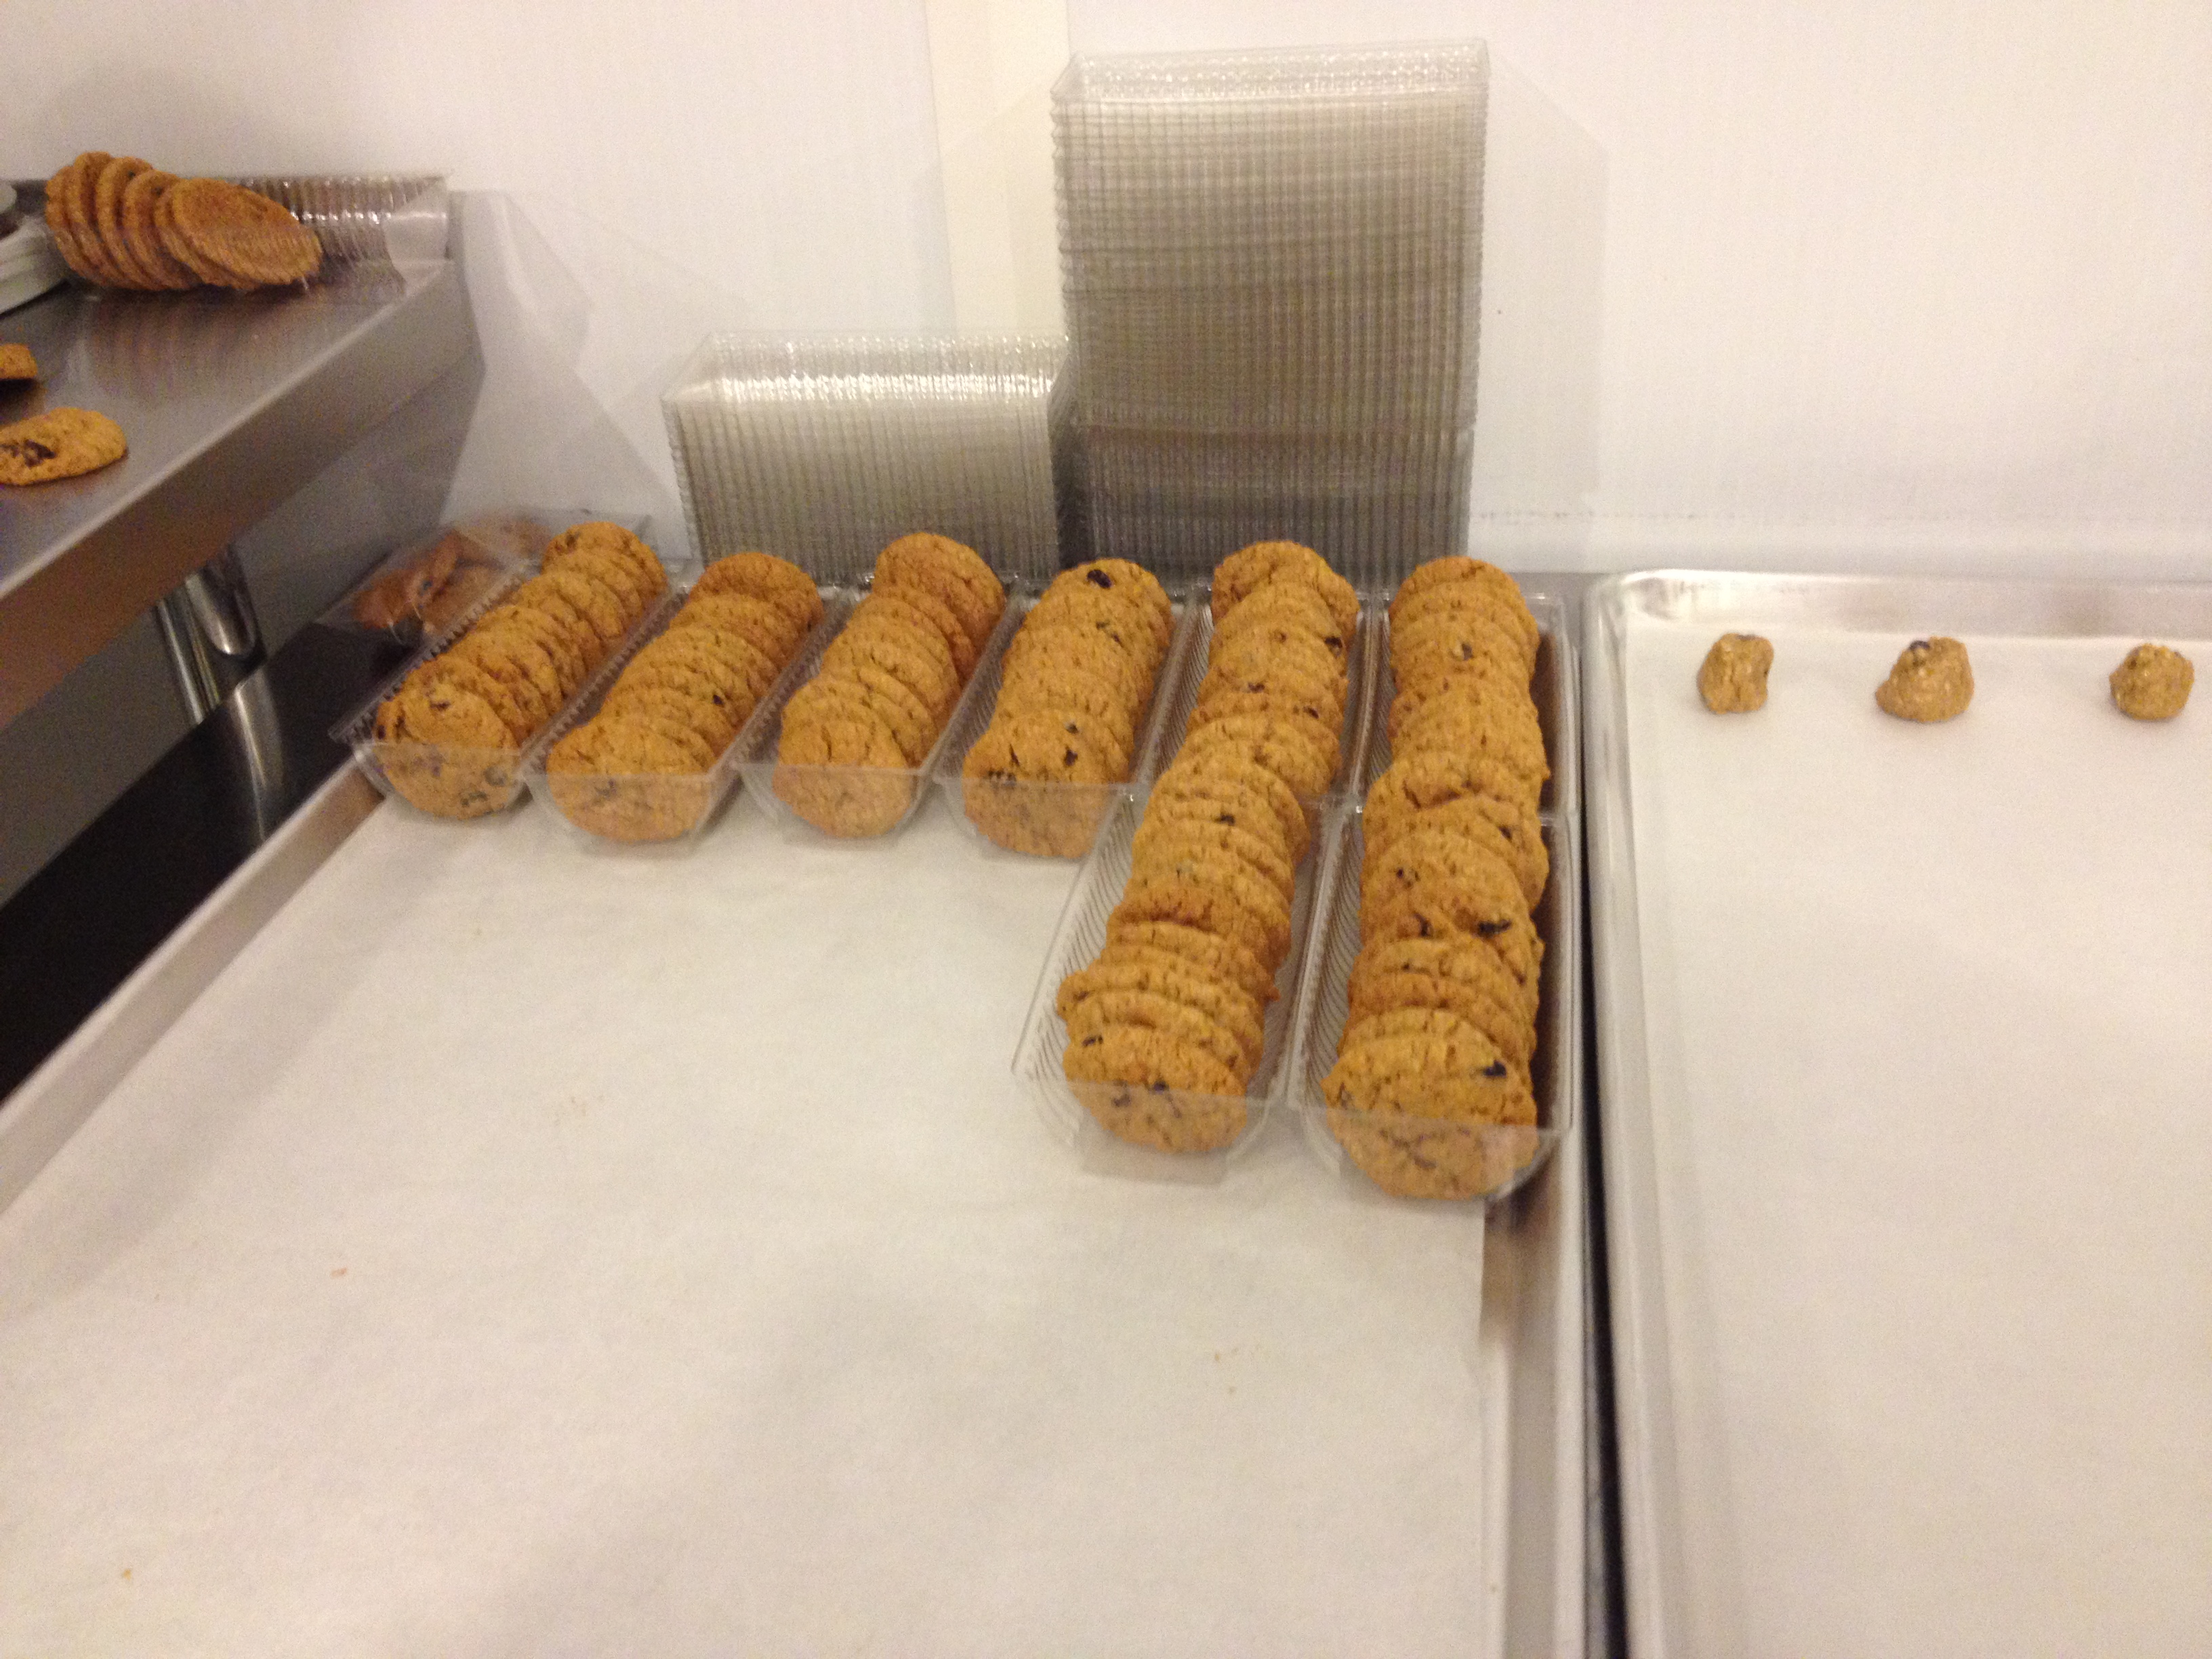
And cookies being sorted….
Meanwhile… outside the window of my motel….

This helicopter took off and landed all day long. It’s an Agriculture and Pest Control copter. They seemed to have some serious business to attend to!
It’s the heartland for corn here. Yup, that’s corn. All along the horizon.

All in all, it was a good time Lots of cookies baked. And lots of cookies shipped. Can’t wait to go back, to the Field of Dreams.
July 2, 2013
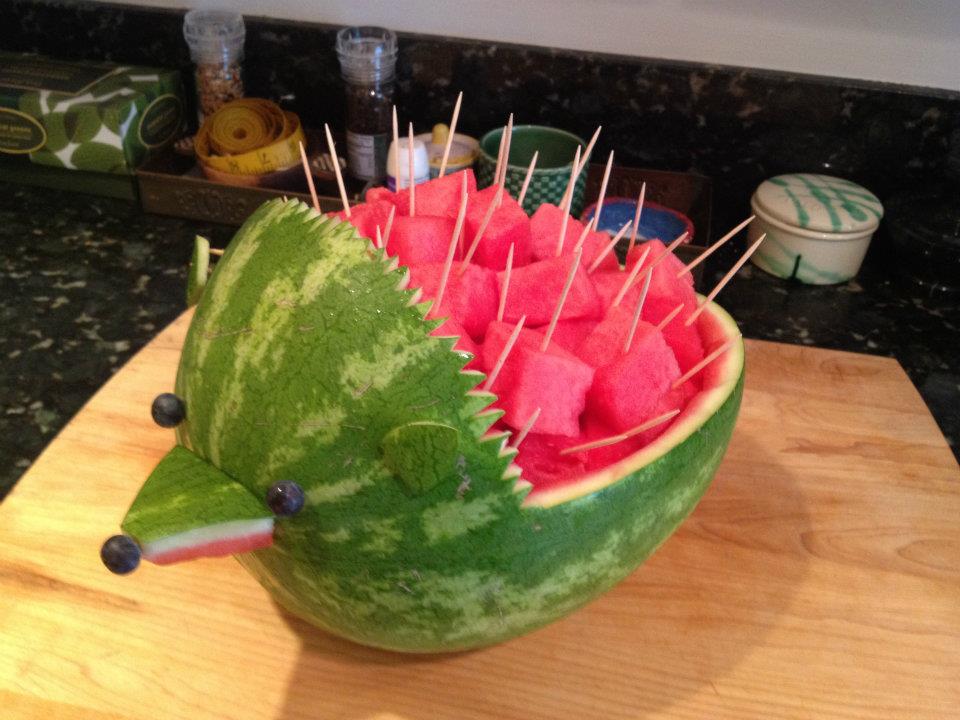
How to make a Porcupine Watermelon
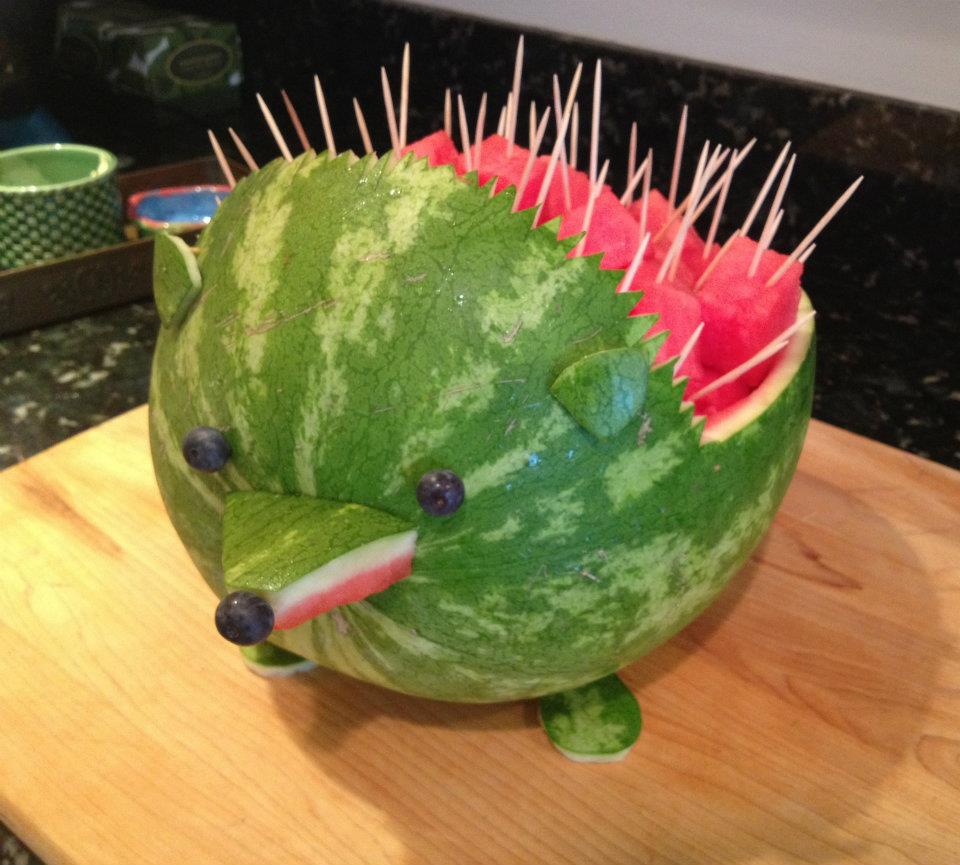
Dear Readers, are you looking for the perfect allergy-frirendly picnic or potluck dish? Look no further than the Porcupine Watermelon. This baby is as fun to make as it is to eat. Read on for step by step instructions to creating the cutest food art I’ve ever carved up. Enter, the Porcupine Watermelon!
♥♥♥
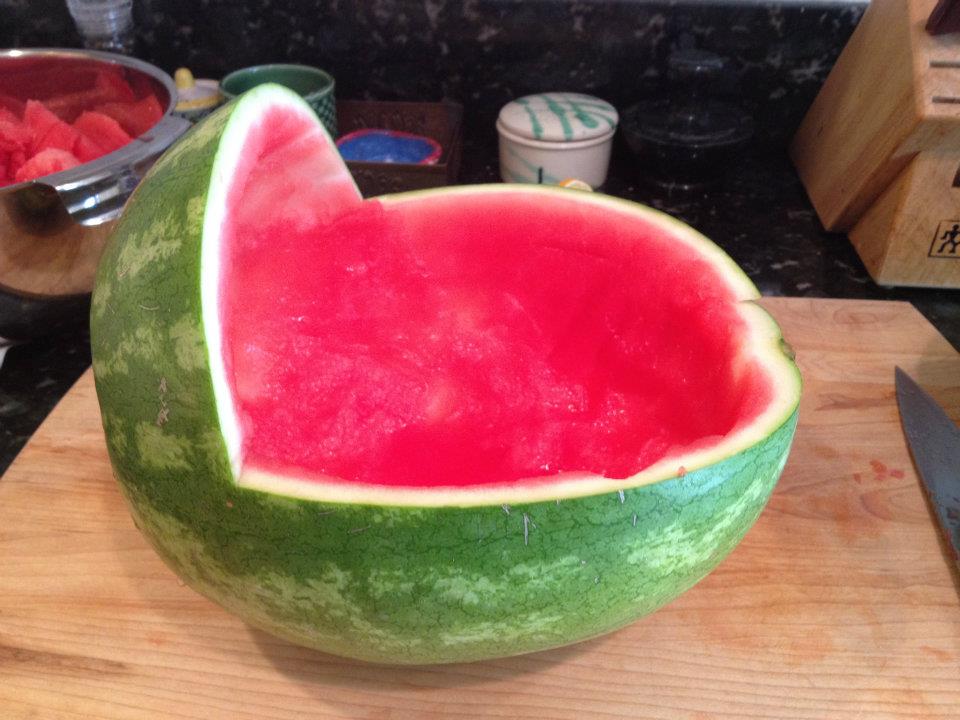
1. Using an 8″ or 9″ chef’s knife, cut the watermelon into a baby rocker shape. Remove the top, and refrigerate to keep cool. Use the knife to cut around the edges of the watermelon flesh, and use a large spoon to scoop out the insides. Put in a large bowl, pour off extra watermelon juice and refrigerate.
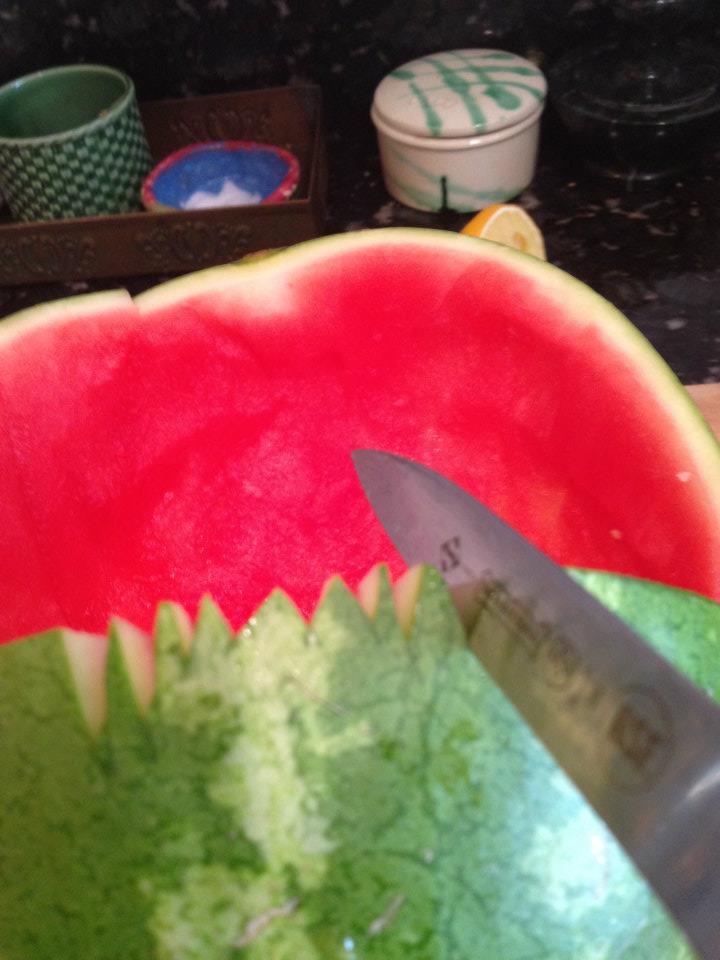
2. Use a small paring knife (I know it looks big in this pic, but it’s just the angle!), to cut the top of the head into a jagged edge by cutting out little wedges.
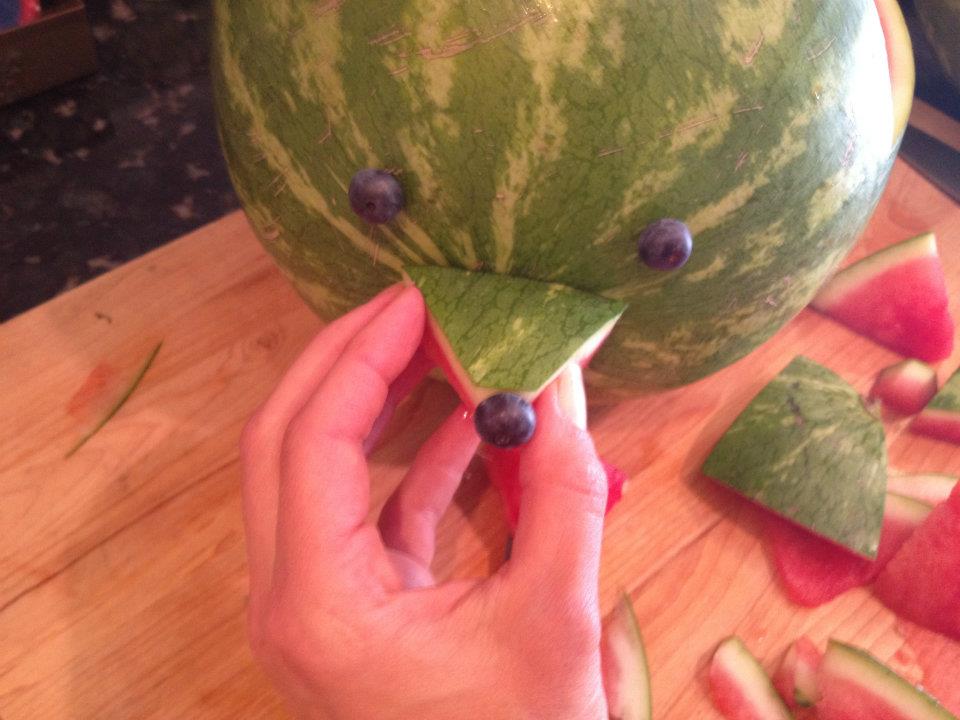
3. Use toothpicks to adhere two blueberries for eyes, by skewering them through from the inside of the melon. Remove the top half of the melon that you cut off in step one, with rind still in tact, from the fridge. Use the small paring knife to cut out a triangle for a nose. Leave some pink along the bottom, but trim it down. Cut the tip off so it’s flat so you can adhere the blueberry for the tip of the nose. Break a toothpick in half, and skewer the flat tip of the nose. Attach the blueberry. Then attach the nose, by sticking at least three toothpicks through the rind from the inside through the nose. Line it up on the little brown spot in the center of the melon.
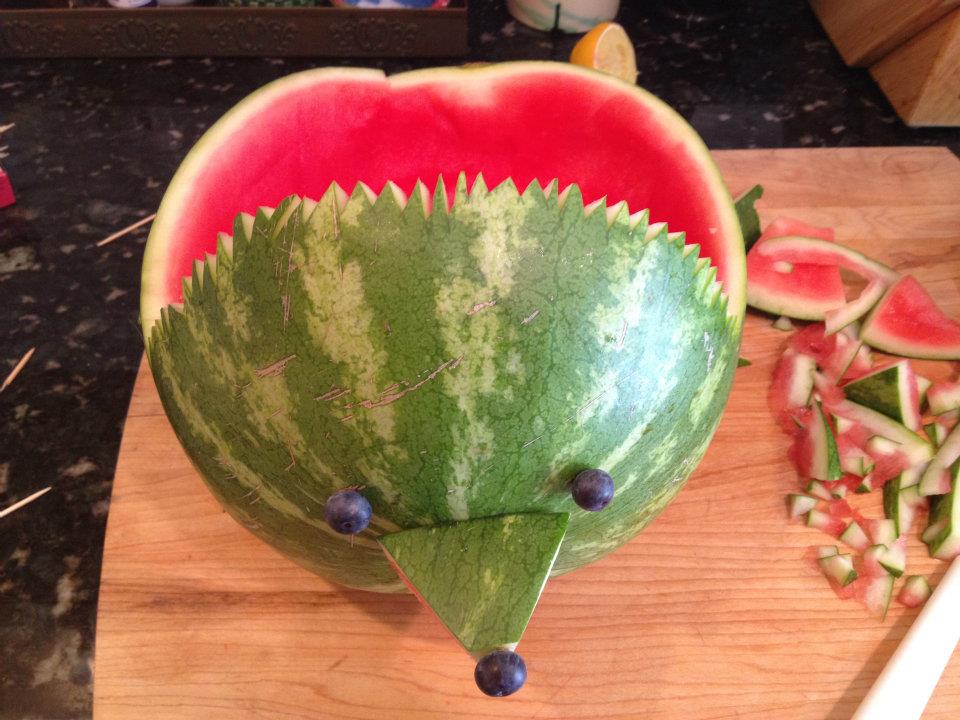
4. Nose and eyes attached. Next onto the ears.
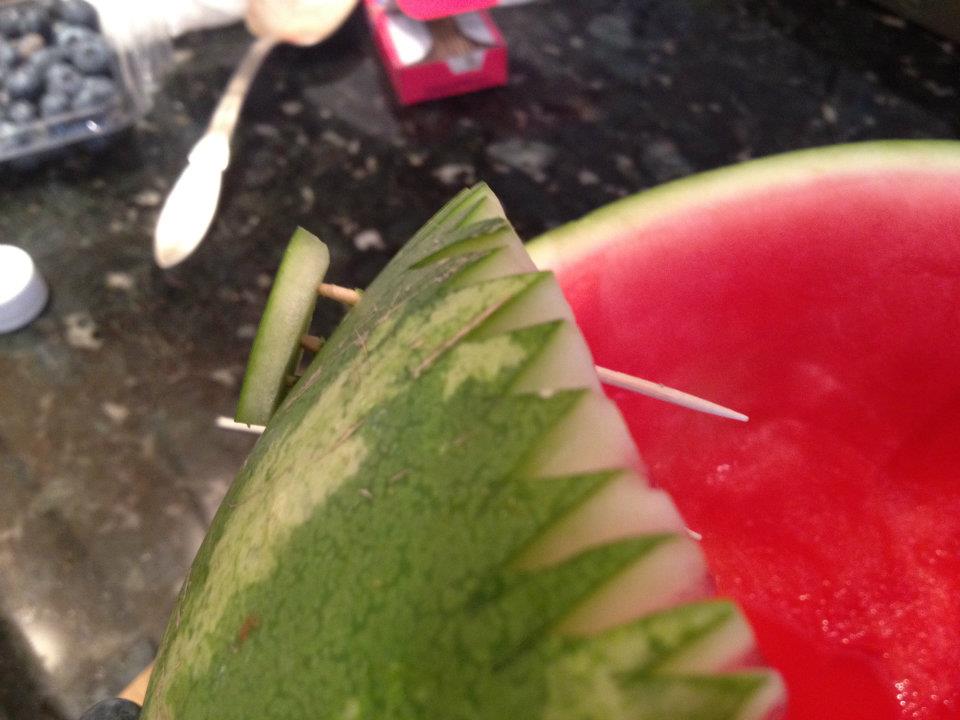
5. To attach the ears use three tooth�picks, skewering through from the back of the rind. Push the top one out farthest, so the ear is perky at the top.

6. Here’s a profile shot.
7. Fill with cubes of watermelon, and then insert a couple of toothpicks into each cube. I added a lot more after this pic was taken as I realized it didn’t look spiky enough.
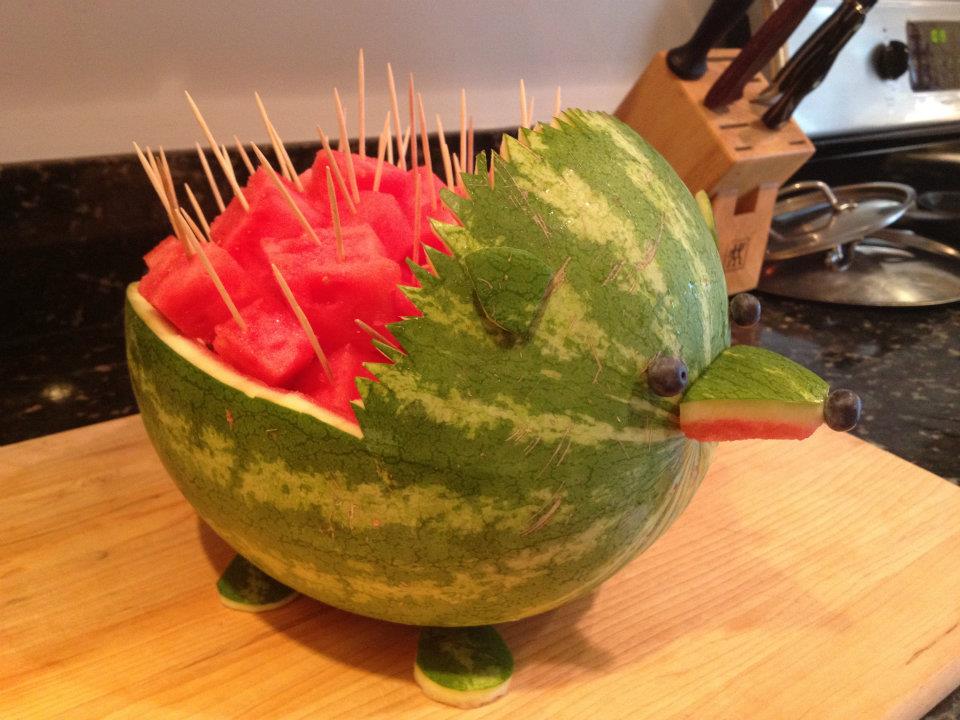
8. Add the feet. be sure the bottoms have been trimmed flat so the lay flat.
9. Porcupine Watermelon! Serve with extra toothpicks on the side and keep adding them to the cubes as your guests eat down through the layers. Keep back-up watermelon cubes in the fridge to refill. Be sure to pour off watermelon juices of backup cubes or they’ll get boggy and soggy. Enjoy! And share!
June 27, 2013
Allergy Free Strawberry Cupcakes with Strawberry Frosting

With strawberry season in full swing, local farmer’s markets are overflowing with these sweet little beauties. Take advantage of their cheaper price tag, and bake strawberries into all your favorite treats. Brimming with vitamin C and fiber, strawberries make these lovely cupcakes almost a health food! So pretty in pink, these gems are great for birthdays, class parties, or an afternoon tea. And don’t forget your summer barbecues, they are perfect for those too. Don’t they look like they must be bad for you? Nope, 100% natural, gluten-free, vegan, and free of all top food allergens. Now, that’s a berry special treat.
Allergy-Free Strawberry Cupcakes
(Gluten-free, Vegan, Nut-free)
Makes 12 cupcakes
1 cup fresh strawberries, sliced
1/4 cup rice milk
1 teaspoon lemon juice
1 1/2 teaspoons pure vanilla extract
1 1/2 cups Authentic Foods GF Classical Blend, or my Basic Gluten-Free Flour Mix
1/2 teaspoon xanthan gum
3/4 teaspoon double-acting baking powder
3/4 teaspoon baking soda
3/4 teaspoon salt
1/4 cup + 2 Tablespoons Spectrum Organic Vegetable Shortening
1 cup granulated sugar
2 1/4 teaspoons Ener-G egg replacer mixed with 3 Tablespoons rice milk
1 recipe Allergy-Free Strawberry Frosting (recipe follows)
12 small strawberries
1. Preheat oven to 350°F. Line a cupcake pan with 12 liners.
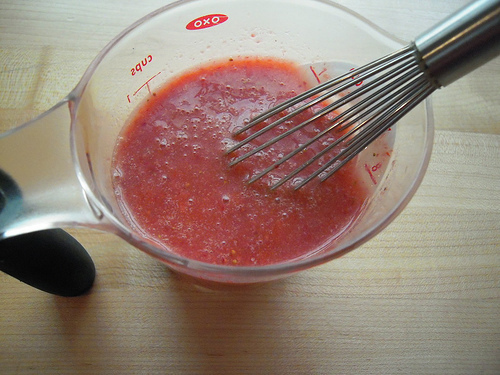
2. Puree strawberries in blender, until reduced to 1/2 cup liquid. Add a few more strawberries if necessary.
3. Combine 1/2 cup strawberry puree with 1/4 cup rice milk, lemon juice, and vanilla extract. Set aside.
4. Measure out flour mix by spooning flour into a dry measuring cup, then leveling it off with a straightedge, or the back of a knife. (Do not scoop the flour directly with the measuring cup or you’ll wind up with too much flour for the recipe). Combine flour mix with xanthan gum, baking powder, baking soda, and salt. Whisk well. Set aside.
5. In the bowl of a stand mixer fitted with the paddle attachment, combine vegetable shortening and granulated sugar. Mix on medium speed 2 minutes.
6. Add egg replacer to bowl of stand mixer. Mix on medium speed 1 minute more.
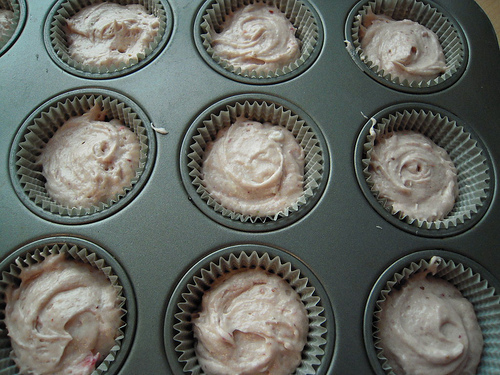
7. Using a sifter, sift in the flour mixture in three batches, alternating with strawberry mixture, beginning and ending with flour mixture, and mixing until combined, about 30 seconds. Once batter is smooth, spoon about 1/4 cup batter into each liner, filling the liners about three-quarters full. Do not overfill the liners, or they will rise too high.
8. Bake in the center of the oven 20 minutes until a skewer or toothpick inserted into the center of a cupcake comes out clean, and cupcakes are a lovely berry color. The cupcakes won’t be pink, they bake up more berry blue. (The frosting is pink!)
9. Remove from oven and transfer cupcakes to a cooling rack to let cool completely before frosting. Either pipe frosting or use a frosting spatula to spread it. Top each cupcake with a strawberry.
Allergy-Free Strawberry Frosting
Makes enough for 12 Cupcakes
1/2 cup fresh strawberries, sliced
1 cup Spectrum Organic Vegetable Shortening
pinch of salt
3 1/2 cups confectioners sugar, sifted
1/2 teaspoon pure vanilla extract
1. Puree strawberries in blender. Set aside.
2. In the bowl of a stand mixer fitted with the paddle attachment, cream shortening and pinch of salt on medium speed, about 2 minutes.
3. Add confectioners sugar in three batches, beating after each addition. Add 3 Tablespoons of the strawberry puree, and vanilla extract and beat until smooth and fluffy, about 3 minutes.
Allergy-Free Strawberry Cupcakes © 2011 by Cybele Pascal
(Please note that all my recipes are completely free of all top allergens (wheat, dairy, soy, eggs, peanuts, tree nuts, sesame, fish, shellfish, and gluten), so as many people as possible can enjoy them. Additionally, all the ingredients are available atWhole Foods, and online at Amazon.com. If you have trouble finding something, let me know and I’ll help you find it.)
SAFETY NOTE: Because each person’s food sensitivity and reaction is unique, ranging from mild intolerance to life-threatening and severe food allergies, it is up to the consumer to monitor ingredients and manufacturing conditions. If manufacturing conditions, potential cross contact between foods, and ingredient derivatives pose a risk for you, please re-read all food labels and call the manufacturer to confirm potential allergen concerns before consumption. Ingredients and manufacturing practices can change overnight and without warning.
June 23, 2013
Allergy Friendly Summer and the Super Moon!

Happy Summer! Who saw the Super Moon?! It is amazing! Apparently, it’s the closest the moon has been to earth in many years. We watched it rise last night, and tonight it will be at its peak!
While last week’s Allergy-Friendly Father’s Day had few links, those that were posted were unusual and extraordinary! Of particular note were:
Chocolate Sweet Potato Frosting from Sandi’s Allergy Free Recipes
Trout Unparmesan from Live Free, Gluten Free
Mashed Turnips with Bacon and Chives from Allergy-Free Vintage Cookery
Remember, the featured recipes are also being featured on my Allergy-Friendly Friday Highlights Pinterest board, so check them out there, along with other featured allergy-friendly recipes from weeks past. If you have been featured, I encourage you to grab the Allergy Friendly Friday Badge from my right sidebar and share it on your blog, so others know you’ve got a featured recipe on Allergy-Friendly Friday.Please add your allergy-free and/or gluten-free recipe links to Allergy-Friendly Friday. PLEASE remember you have to link back from your post, for me to feature your recipe. That means link WITH A HYPERLINK THAT LINKS BACK HERE. When you link back to this post, you can share both your own and everybody else’s.And remember, I specialize in creating gluten-free recipes that are free of the top 8 food allergens, but yours do not have to be. They just have to be allergy-friendly in SOME way.
Just remember:
Please link back to this post so your readers can find all the recipes. This is a sharing page.
Link to your recipe, not to your homepage.
Recipes do not have to be completely allergen-free, just allergy-friendly in some way.
When you link, let us know who you are. For example, I might add Allergy-Friendly Halloween Cupcakes (cybele@cybelepascal.com)
Cybele Pascal's Blog

- Cybele Pascal's profile
- 8 followers

