
Cybele Pascal's Blog, page 3
December 11, 2014
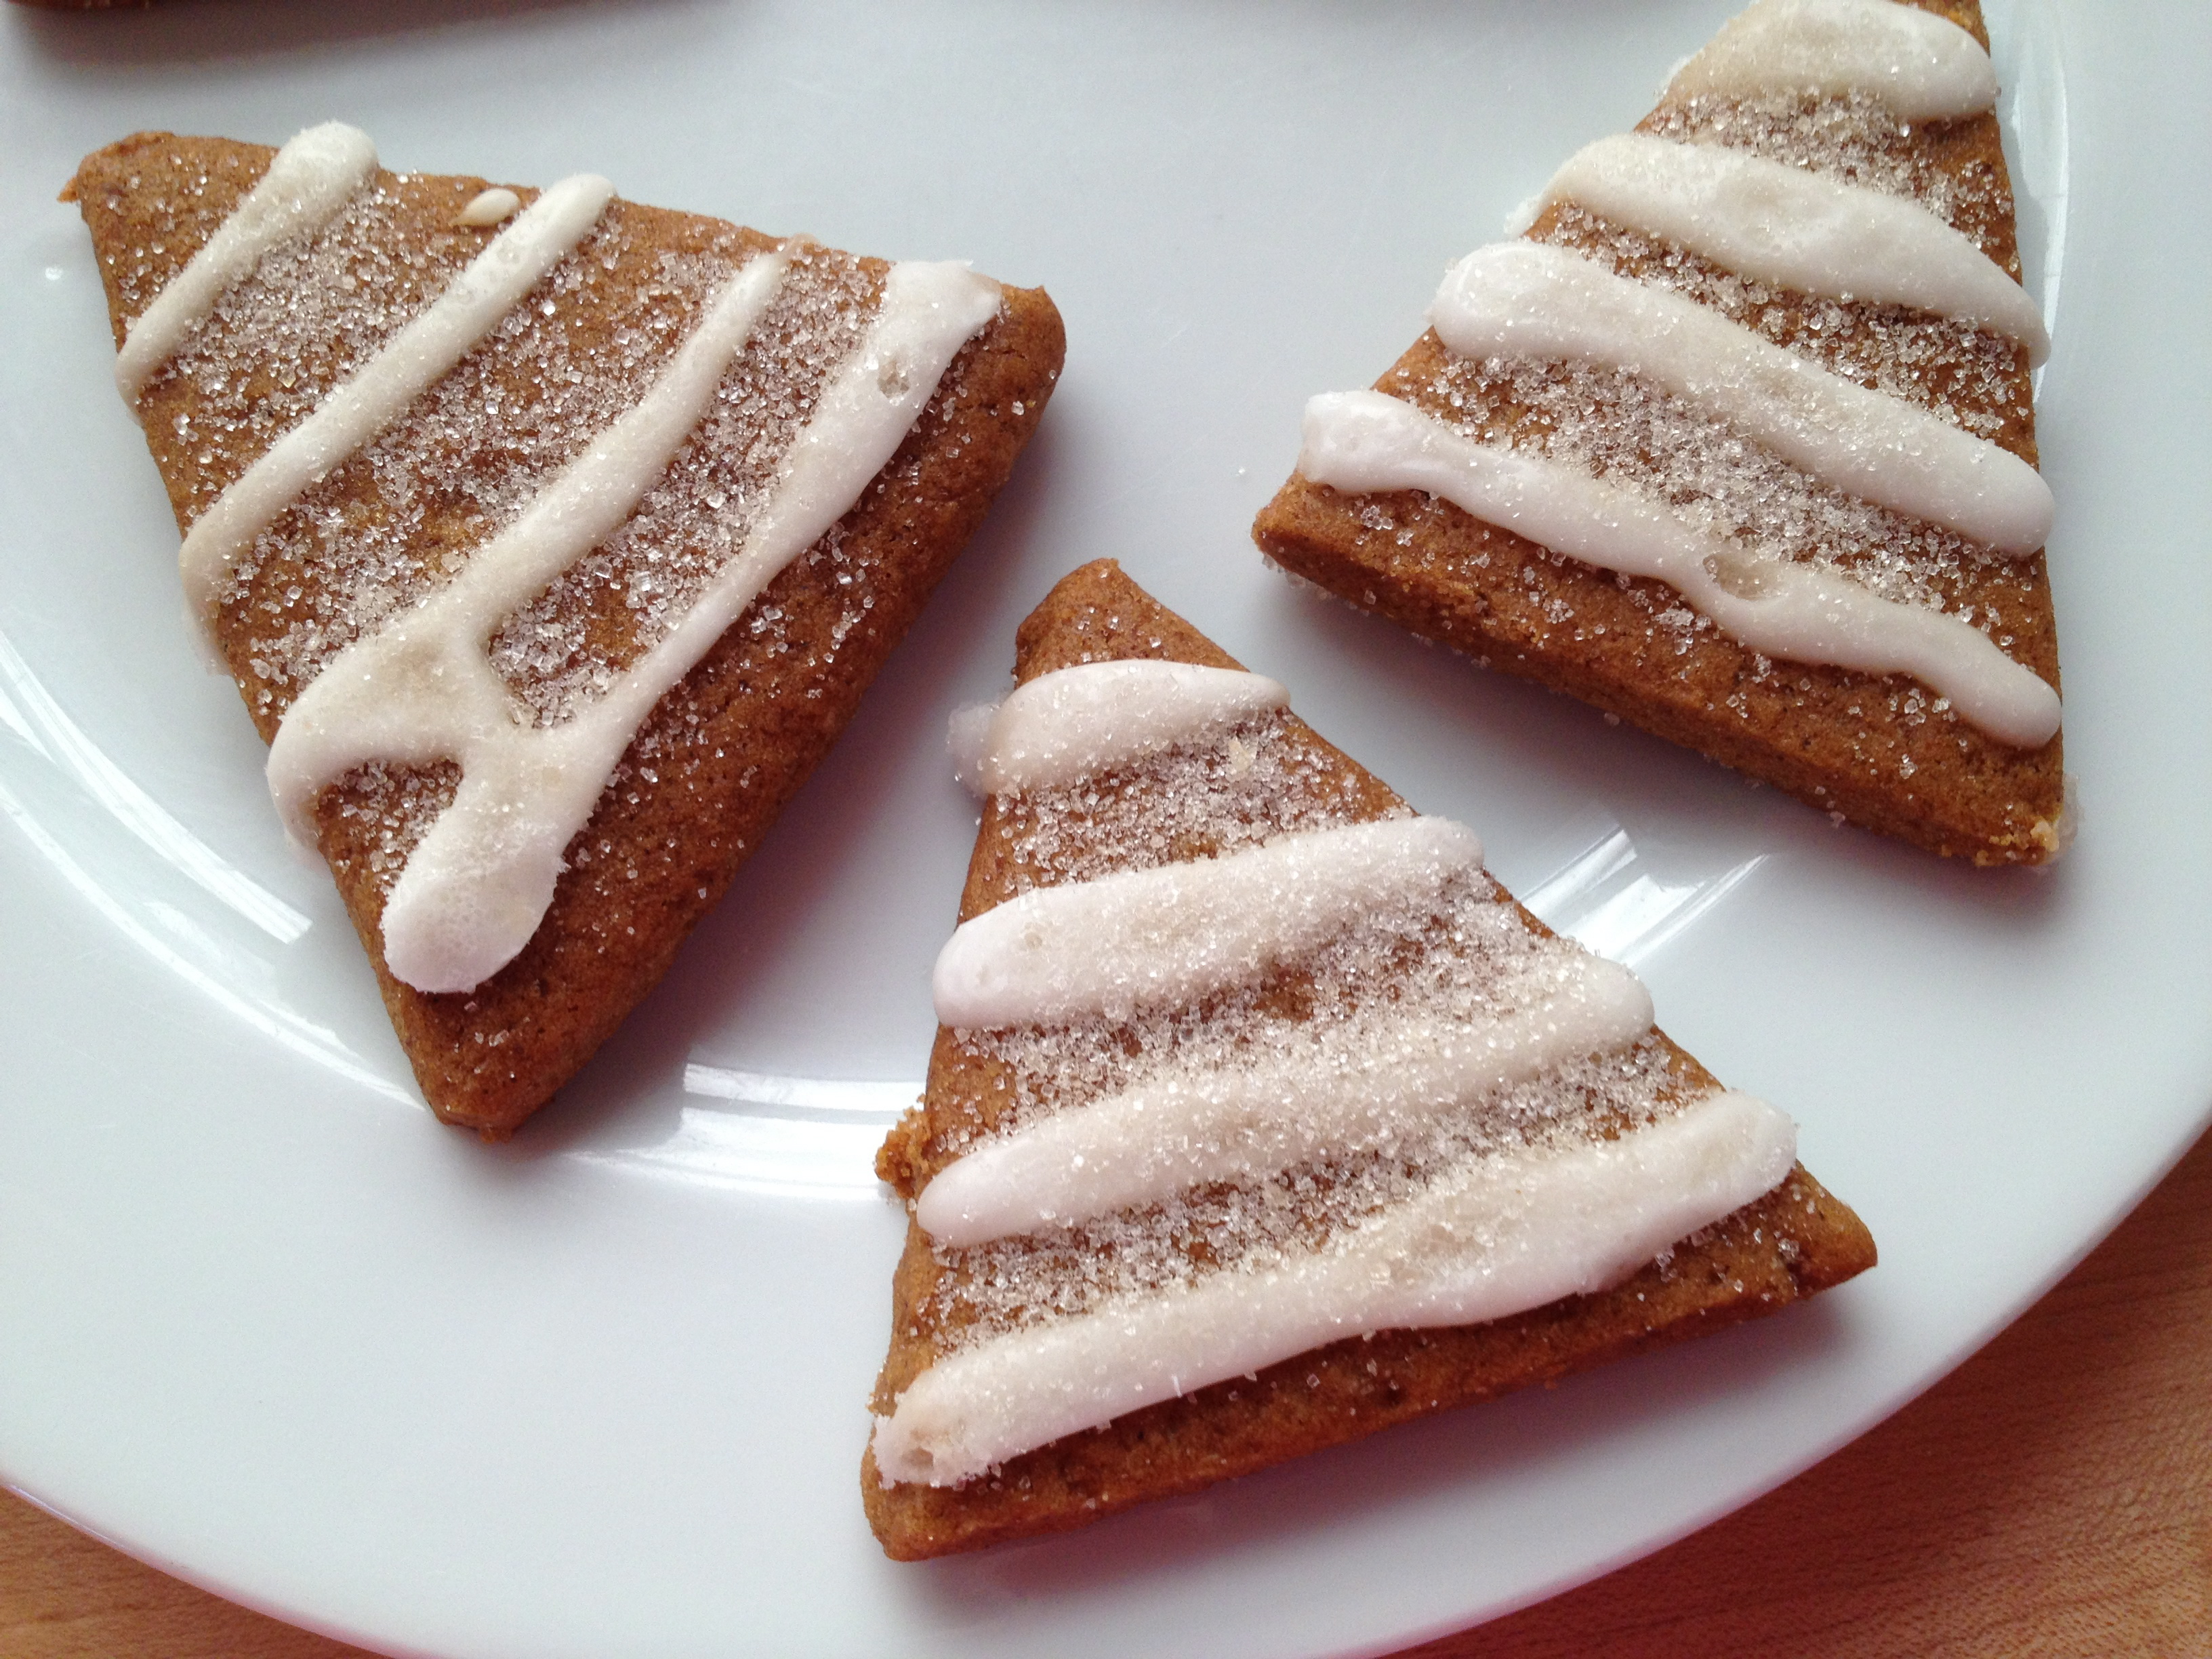
Allergy Friendly Gingerbread Trees with Lemon Icing
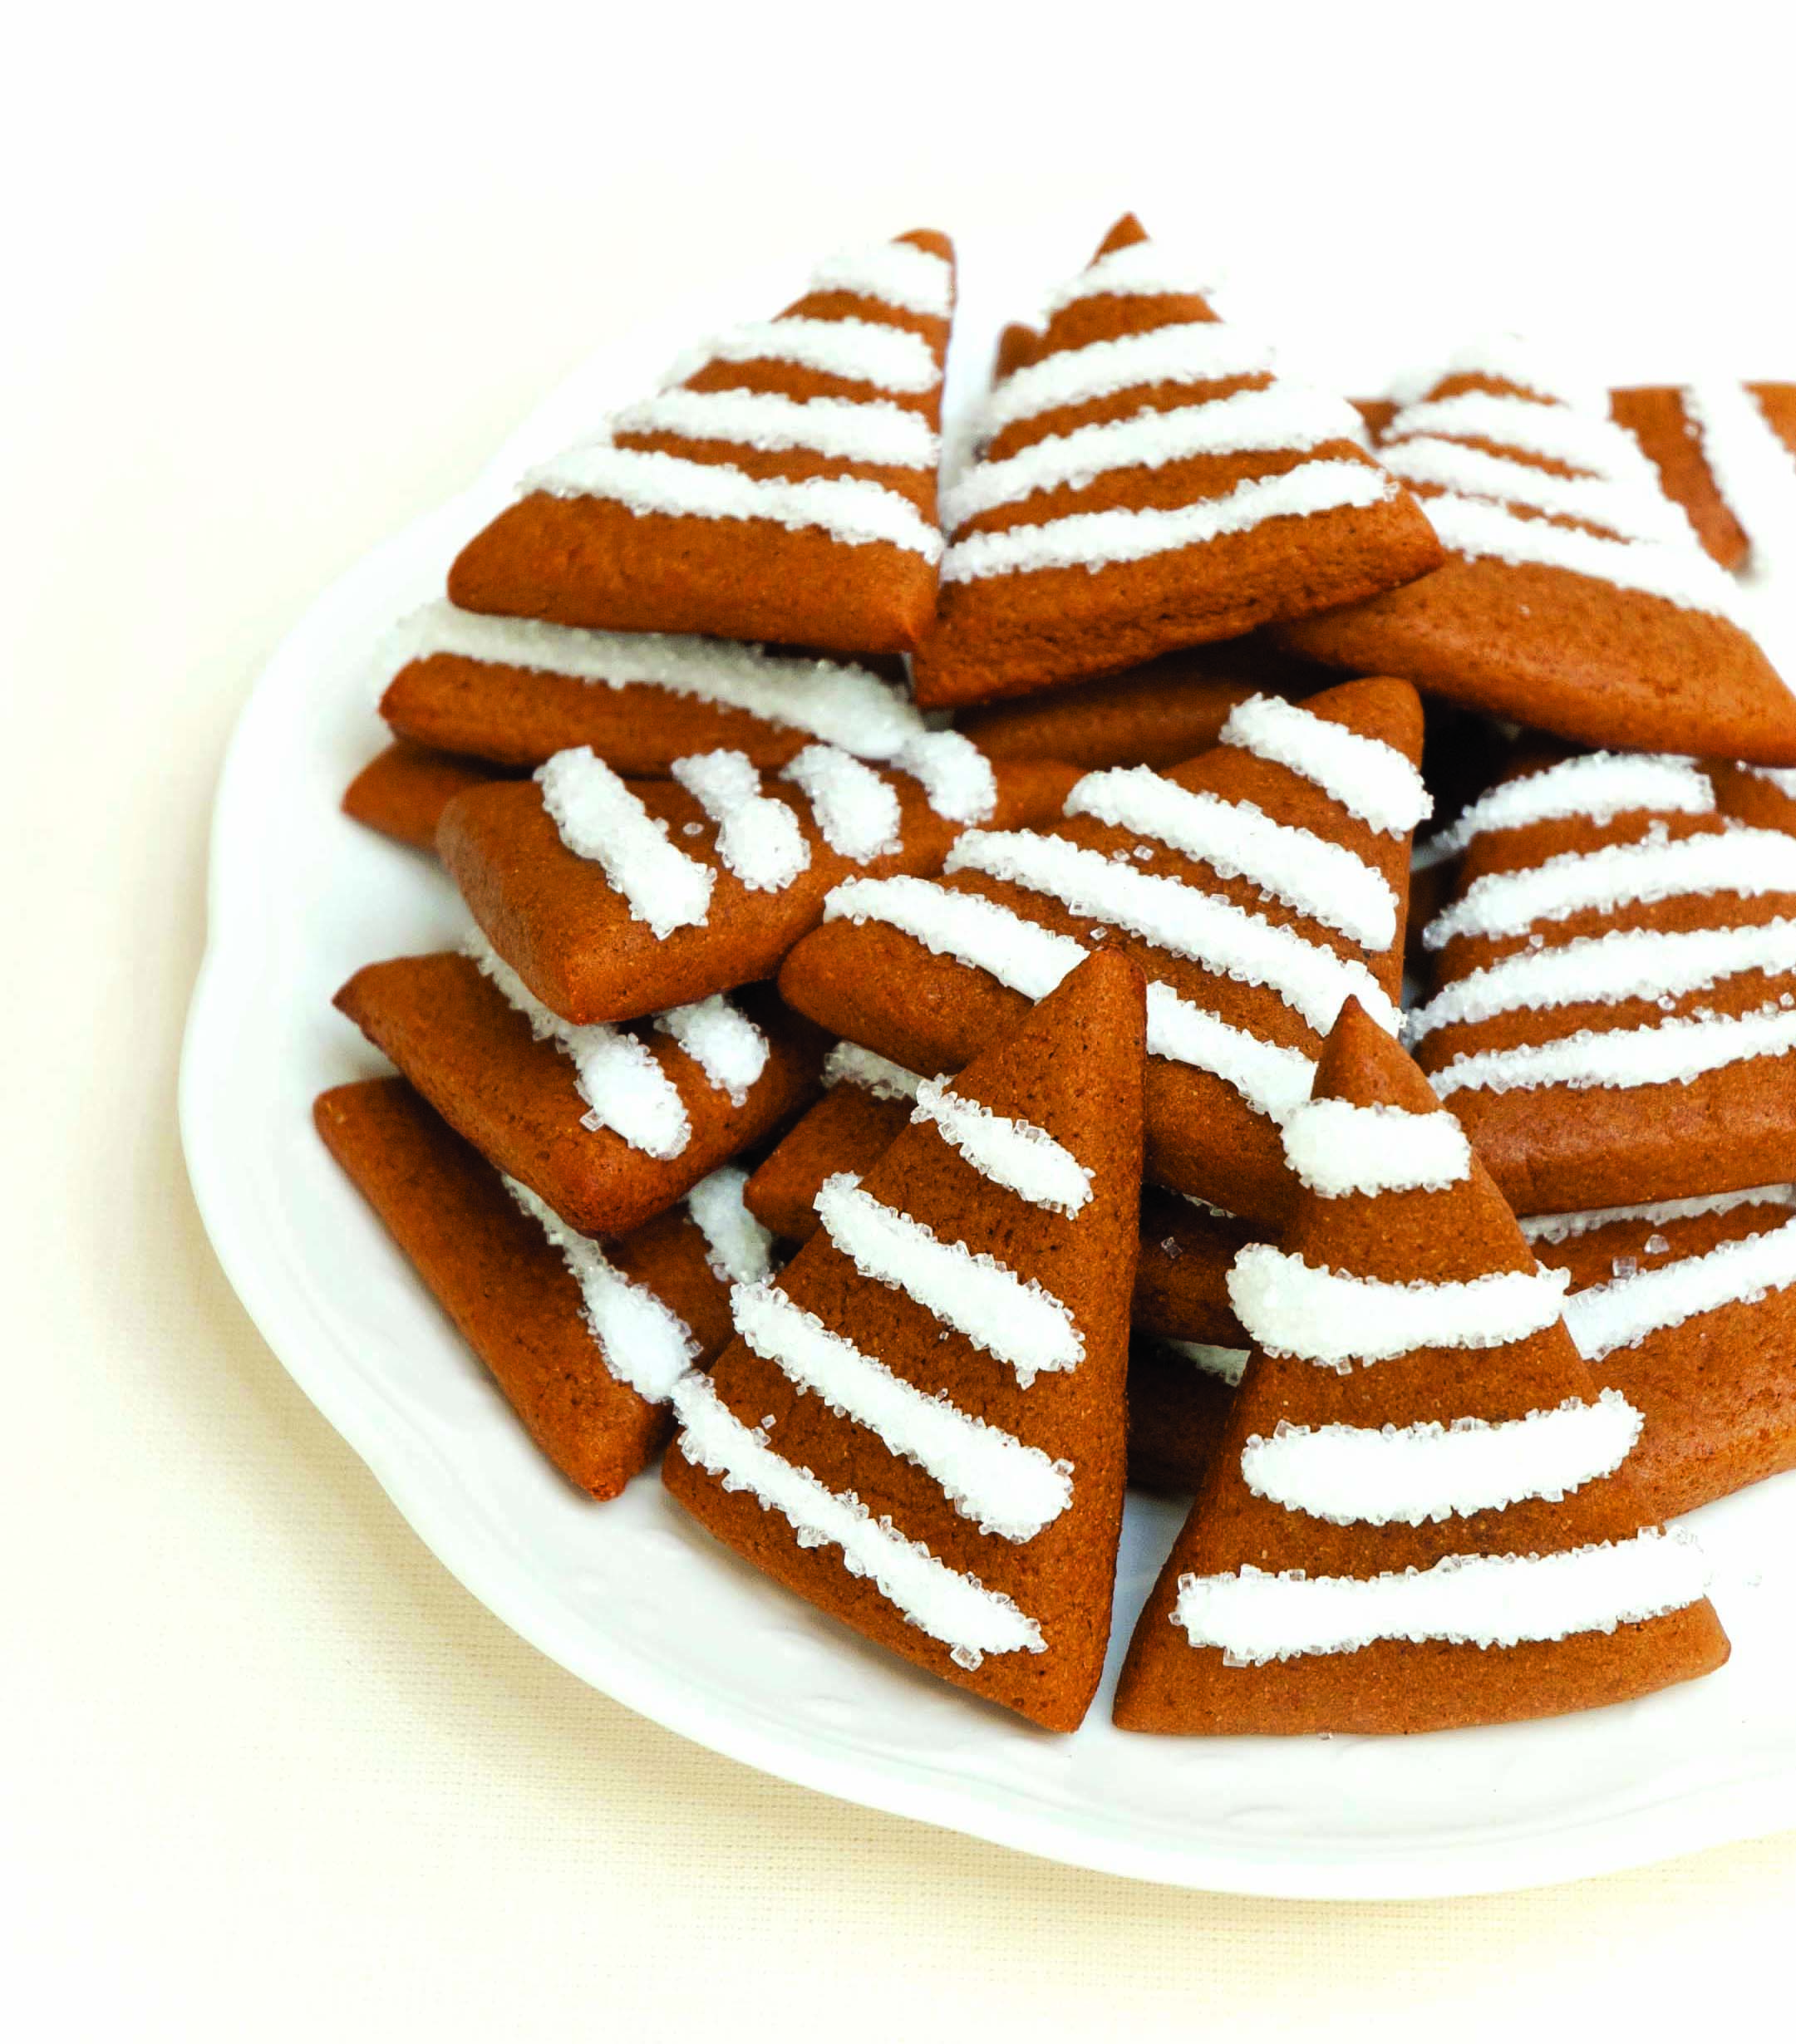
Allergy-Friendly Gingerbread Trees with Lemon Icing
Fill your home with a delicious aroma and let the family join in as you roll, cut and bake these delectable cookies. A simple icing tops these pretty little trees, but don’t hesitate to add sparkling sugar for a snow-kissed look.
Makes 40 2½-inch cookies
Free From: gluten and all top allergens
Cookies
2½ cups my Basic Gluten-Free Flour Mix or Authentic Foods GF Classical Blend
1 tsp ground ginger
¾ tsp baking soda
¾ tsp salt
⅝ tsp xanthan gum
½ tsp ground cinnamon
½ tsp ground cloves
½ cup packed light brown sugar
½ cup dairy-free soy-free vegetable shortening, cut into 8 pieces
¼ cup + 2 tbsp applesauce
¼ cup unsulphured molasses
Icing
1⅓ cups confectioners’ sugar
2 tbsp fresh lemon juice
Decorating, sanding or coarse sugar (optional)
In bowl of a stand mixer fitted with paddle attachment, mix flour blend, ginger, baking soda, salt, xanthan gum, cinnamon and cloves on low speed for 30 seconds. Add brown sugar, mix 30 seconds more.
Add shortening pieces and applesauce to flour mixture and mix on low speed for 90 seconds, or until the consistency of a fine meal. With mixer still running, add molasses and mix for 30 seconds, scraping down the sides of bowl as necessary.
Lay 2 large sheets of parchment paper on your work surface. Transfer dough to one sheet of parchment. Pat dough into a disk and cover with other piece of parchment. Roll out dough into a ¼-inch thick, long rectangle.
Transfer dough with parchment paper to the freezer (place on a cleared rack or baking tray) and chill until firm, at least 20 minutes.
Preheat oven to 350° F with racks in upper and lower thirds. Line two baking sheets with parchment paper.
Remove dough from freezer and place it on a work surface. Peel back the top sheet of parchment paper, then replace it. Flip, peel off other sheet of parchment and discard it. This is a good technique to avoid over-handling and breaking the rolled dough.
Cut dough into long 2½-inch wide strips then cut each strip into triangles with 2-inch wide bases. Place the dough triangles on baking sheets, 1 inch apart. Gather any remaining dough scraps, roll into ¼-inch thick rectangle and cut into triangle shapes.
Bake 10 minutes, or until the cookies are golden. Let cool for 5 minutes on baking sheets, before transferring the cookies to a wire rack to cool completely.
For icing, whisk confectioners’ sugar and lemon juice in a small bowl until smooth. Drizzle over cooled cookies wiith a very small spoon or knife, making 3 or 4 horizontal lines across each cookie. Sprinkle with coarse sugar. Let set then shake off any extra sugar.
Allergy-Friendly Gingerbread Trees with Lemon Icing © 2013 by Cybele Pascal
This recipe first appeared in the Winter 2013 issue of Allergic Living Magazine


December 1, 2014
Allergy Friendly Lemon Raspberry Thumbprint Cookies

Lemon Raspberry Thumbprint Cookies
It’s December, folks, which means it’s time to really get baking! These tender “buttery” cookies are sure to be a favorite at your holiday parties, or left out for Santa. Nobody will ever know they are gluten-free, vegan, and free from the Top 8 Allergens.
Thumbprint is really a misnomer for these little gems, as you actually use your index finger to make the little jam pools in the center. Either way, they’re oh-so-pretty with festive red centers and a snowy dusting of powdered sugar.
Makes 24 2-inch cookies
Free From: gluten and all top allergens
¾ cup dairy-free soy-free vegetable shortening
½ cup sugar
½ tsp double-acting baking powder
1 tbsp lemon juice
1 tsp lemon zest
¾ tsp Ener-G egg replacer mixed with 1 tbsp plain rice milk alternative
½ tsp vanilla extract
1¾ cups my Basic Gluten-Free Flour Mix or Authentic Foods GF Classical Blend
⅜ tsp xanthan gum
⅛ tsp salt
⅓ cup raspberry jam
confectioners’ sugar, for topping
Preheat oven to 350° F. Line two baking sheets with parchment paper.
In bowl of a stand mixer fitted with paddle attachment, mix shortening and sugar on medium speed for 30 seconds. Add baking powder, and mix until just combined. Add lemon juice, lemon zest, egg replacer and vanilla and mix for 30 seconds.
In a separate bowl, whisk together flour blend, xanthan gum and salt. Add flour mixture to shortening mixture and beat on low speed until thoroughly combined. You want it doughy but soft, so it can be balled together, like new playdough.
Scoop dough by the heaping tablespoon, roll into smooth balls and place on baking trays (12 per tray).
Lightly flour your index finger and make indents in the center of each ball. Gently pinch together the edges if they split. Fill each indentation with scant ½ teaspoon of raspberry jam.
Bake in center of oven for 18 to 20 minutes, or until jam is bubbling and cookies are just lightly golden around edges. Cool on baking sheet for 5 minutes before transferring to a wire rack to cool completely.
Prior to serving, dust with confectioners’ sugar. For bold red middles, lightly wet finger and trace over the jam surface to dissolve the confectioners’ sugar on the center only.
Allergy-Friendly Lemon Raspberry Thumbprint Cookies © 2013 by Cybele Pascal
This recipe first appeared in the Winter 2013 issue of Allergic Living Magazine
November 2, 2014
Japanese Style Chicken Curry
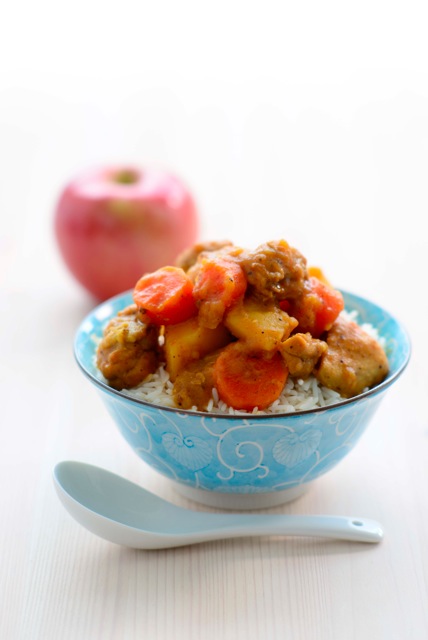
Japanese-Style Chicken Curry (Wafuu Chicken Curry)
Serves 4
Free of: gluten and all top allergens
Wafuu Chicken Curry is a very popular weeknight meal in Japan. It’s mild, and richly comforting. The combo of potatoes and apples makes it a great fall recipe, and the mild slightly sweet flavor is a big hit with kids.
Traditional ingredients used in this recipe often contain soy, gluten/wheat, peanut, and sometimes bonito flakes (fish). I’ve replaced these allergens with delicious allergen-free substitutions, without the slightest sacrifice to flavor.
Feel free to double this recipe so you have leftovers throughout the week, as it only gets better on days two and three!
4 cups chicken broth (look for allergen-safe brands)
3-inch square piece Kombu seaweed
1 pound boneless skinless chicken thighs, cut into 1-inch pieces
Kosher salt and freshly ground pepper
4 tbsp canola oil, divided
1½ cups diced yellow onion
2 tsp finely minced or grated fresh ginger
2 tsp finely minced garlic
2 tbsp curry powder
1/8 tsp cayenne pepper
3 tbsp brown rice flour (preferably superfine)
2 tbsp crushed tomatoes
2 tsp apple cider vinegar, divided
2 large carrots, peeled and cut into ½-inch rounds
1 pound Yukon Gold potatoes, cut into 1-inch pieces
1 bay leaf
1½ Fuji apples, peeled, cored and roughly grated (1 cup)
2 tsp honey
4 cups cooked white rice
1. Combine chicken broth and Kombu in a medium pot. Bring to a simmer over medium-high heat, reduce heat to medium-low and simmer for 15 minutes.
2. Generously season chicken with salt and pepper. Add 2 tbsp oil to a large skillet or Dutch oven over high heat. Once oil is just starting to shimmer, add chicken and cook, stirring often, until golden brown on all sides, about 6 minutes. Remove pan from heat and transfer chicken to a plate.
3. Return pan to stove, reduce heat to medium-high, and add remaining 2 tbsp oil. Add onion, ginger and garlic, and cook, stirring often, until onions are starting to soften, about 2 minutes. Add curry powder and cayenne, and cook, stirring, 1 minute more. Sprinkle in the brown rice flour, and cook, stirring continuously, until browned and aromatic, about 2 minutes.
4. Remove pan from heat and add ½ cup broth, stirring vigorously to combine. Add two more ½ cups broth, stirring vigorously after each addition, and incorporating any browned bits from bottom of the pan.
5. Return pan to heat, remove Kombu, and add remaining chicken broth, crushed tomatoes and 1 tsp cider vinegar. Stir well to combine, scraping up remaining browned bits from bottom of pan.
6. Add carrots, potatoes, reserved chicken, and bay leaf. Bring to a boil, reduce heat to medium-low and loosely cover. Cook at a slow simmer, stirring often, for 30 minutes, or until potatoes are just tender when pricked with a fork.
7. Add shredded apple, honey, 1 tsp apple cider vinegar and a big pinch of salt. Stir well and loosely cover. Continue to cook at a slow simmer for 15 minutes, or until the apples have melted into the curry, and the potatoes and carrots are really tender.
8. Serve over steamed rice.
Japanese-Style Chicken Curry (Wafuu Chicken Curry) © 2013 by Cybele Pascal
This recipe first appeared in the Fall 2013 issue of Allergic Living Magazine
October 20, 2014
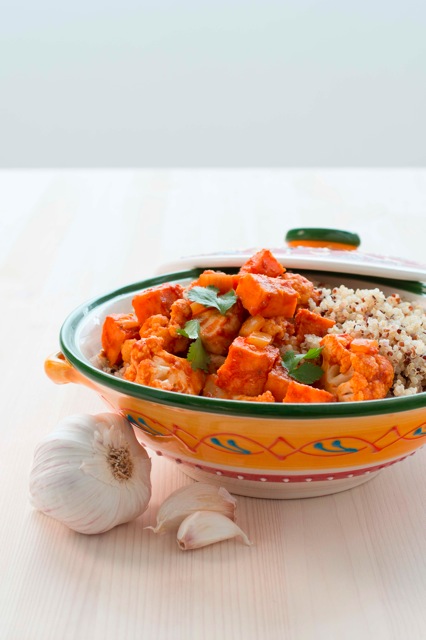
Chicken, Sweet Potato and Cauliflower Vindaloo with Quinoa
Along with the bounty of the fall harvest comes cooler days and longer nights, and a craving for hearty dishes that bring you back to the warmth of the stove. We turn to comforting inexpensive staples like potatoes, carrots, apples, and grains, for rich autumnal inspiration. The desire for comfort is universal, and a simmering pot is the marker of fall.
Instead of armchair traveling, I suggest you travel via your kitchen, and explore global cuisine. Take a trip from Tokyo, to Goa, to Naples to Budapest, all in the course of a week. Following on my last post for Pasta e Fagioli with “Cheesy” Garlic Croutons, this week, I’m sharing an Indian dish. Come back next week for Japanese-Style Chicken Curry (Wafuu Chicken Curry).
Chicken, Sweet Potato and Cauliflower Vindaloo with Quinoa
Vindaloo hails from Goa India, and can be made with pork, prawns, lamb, chicken or beef. Goa was settled by the Portuguese, and this dish is a direct reflection of that influence with the tangy combo of vinegar and spice. Portuguese Vindaloo usually includes malt vinegar, which is derived from barley. To keep it gluten-free, I opt for apple cider vinegar.
Serves 4
Free of: gluten and all top allergens
Ingredients
2 tsp finely minced garlic
1 tsp finely minced or grated ginger
2 tsp curry powder
1 tsp garam masala
½ tsp cayenne pepper
Large pinch cinnamon
4 tbsp canola oil, divided
1 pound sweet potatoes, peeled and cut into 1-inch pieces
2 cups diced yellow onion
1 pound boneless skinless chicken breast, cubed into 1-inch pieces
3 whole cloves
8 peppercorns
1 tsp sugar
½ tsp salt
¼ cup apple cider vinegar
1 medium head cauliflower, cut into bite-sized florets (about 5 heaping cups)
1 14.5-ounce can crushed tomatoes (1¾ cups)
1 cup chicken broth (look for allergen-safe brands)
4 cups cooked quinoa
½ cup coarsely chopped fresh cilantro
1. Grind the first 6 ingredients into a paste with a small food processor or a mortar and pestle. It will be dry.
2. Heat oil in a large pan over medium-high heat. Add sweet potatoes and sauté until golden, about 8 minutes. Use a slotted spoon to transfer to a bowl.
3. Add onions to the pan and sauté until translucent, about 3 minutes.
4. Add chicken, cloves, and peppercorns, and cook stirring often, until chicken is no longer pink, about 6 minutes. Add sugar and salt, and sauté 3 minutes more until chicken is turning golden brown.
5. Stir in the spice paste and sauté for 1 minute. Stir in vinegar, then cauliflower, tossing well to coat. Add tomatoes and chicken broth and bring to a boil. Reduce heat to medium, loosely cover and simmer, stirring often, for 5 minutes.
6. Add reserved sweet potatoes, loosely cover and cook 3 minutes more.
7. Serve over quinoa and garnish with cilantro.
Chicken, Sweet Potato and Cauliflower Vindaloo with Quinoa © 2013 by Cybele Pascal
This recipe first appeared in the Fall 2013 issue of Allergic Living Magazine
October 6, 2014
Allergy Friendly Pasta e Fagioli with “Cheesy” Garlic Croutons
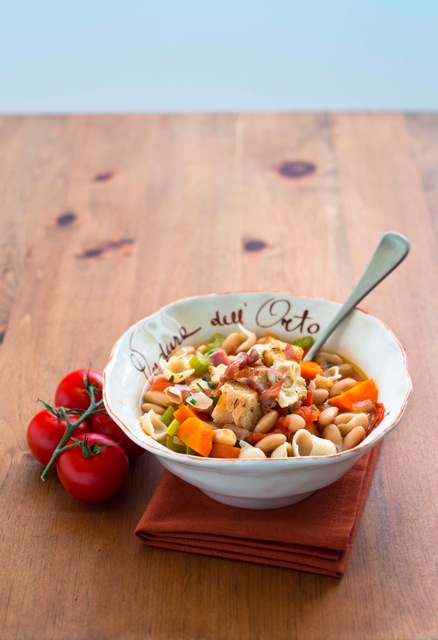
PASTA E FAGIOLI WITH “CHEESY” GARLIC CROUTONS
Serves 8
Free of: gluten and all top allergens
Pasta e Fagioli is about as comforting as a bowl of soup can get. The hearty combo of vegetables, beans, and pasta make a complete meal, perfect for any chilly fall night, or wonderful for lunch the next day. The “Cheesy” Garlic Croutons are an added bonus. Store them tightly covered at room temp… but don’t expect them to last, as kids devour them like candy.
This recipe makes enough for a hearty meal for 4, plus leftovers. I’ve swapped out the traditional allergens of gluten/wheat, anchovies (fish), egg, and dairy usually present in this dish, with olive oil, gluten-free pasta, dairy and soy-free “cheese”, and allergy-friendly bread. To make this vegan, swap vegetable broth for the chicken broth, and omit the prosciutto.
2 tbsp extra-virgin olive oil
2 ounces nitrite-free prosciutto, chopped (½ cup)
2 cups diced yellow onion
3 stalks celery, chopped
2 large carrots, chopped
1 tbsp finely minced garlic
1 tbsp finely minced fresh rosemary
½ tsp crushed red pepper
¼ cup dry white wine
Big pinch salt
4 cups low-sodium chicken broth, plus more as needed
1 28-ounce can diced tomatoes
1 cup gluten-free pasta shells (I like Tinkyada brown rice pasta for this)
2 15-ounce cans cannellini beans, drained and rinsed
¼ cup chopped fresh parsley
½ teaspoon lemon zest
Salt and pepper, to taste
‘Cheesy’ Garlic Croutons (recipe follows)
1. Heat oil in a large pot or Dutch oven over medium-high heat. Add prosciutto and cook 3 minutes, or until crispy. Transfer with a slotted spoon to a paper towel lined plate to drain.
2. Add onion, celery and carrot to the pot and cook 7 minutes, or until the vegetables start to soften. Stir in garlic, rosemary and crushed red pepper and cook 1 minute. Add white wine and salt, and cook while stirring to deglaze bottom of pan, until almost all wine has evaporated. Incorporate chicken broth, diced tomatoes and pasta with a gentle stir. Bring to a boil, reduce heat to medium and simmer uncovered until the pasta is tender, about 12 to 15 minutes.
3. Mash half of the beans. Stir the mashed beans and whole beans into the pot and cook 5 minutes more. Add more chicken broth as necessary if the soup is too thick.
4. Remove from heat, stir in reserved prosciutto, parsley and lemon zest. Add salt and pepper, to taste.
5. Ladle into bowls and top with croutons.
‘Cheesy’ Gluten-Free Garlic Croutons
Makes 3 cups
These crunchy croutons can be stored tightly covered at room temperature, but don’t expect them to last as kids devour them like candy.
6 tbsp extra-virgin olive oil
1 tbsp finely minced garlic
½ tsp Kosher salt
½ tsp dried oregano, crushed between your fingers
5 heaping cups gluten-free* bread, cut into ½-inch cubes (about 6 slices, preferably stale)
1 cup dairy-free cheese alternative shreds (such as Daiya or Go Veggie!)
1. Preheat oven to 350° F.
2. Combine oil, garlic, salt and oregano in a small bowl, whisking well to combine.
3. Put bread cubes in a large bowl. Drizzle with the olive oil mixture, tossing gently with a rubber spatula to evenly coat.
4. Transfer bread cubes to a baking tray, spaced into a single layer. Sprinkle liberally with cheese alternative.
5. Bake 20-25 minutes, turning once, until lightly golden and dry. The cheese may seem goopy at first but it will become crunchy.
6. Transfer the crouton tray to a wire rack, and let cool to room temperature.
7. Break apart any croutons that have clumped together.
* For allergy-friendly bread that’s gluten-free and free of the top-8 allergens, seek Ener-G brand.
Allergy-Friendly Pasta e Fagioli with “Cheesy” Garlic Croutons © 2013 by Cybele Pascal
This recipe first appeared in the Fall 2013 issue of Allergic Living Magazine
August 16, 2014
Allergy Friendly Butterscotch Bars
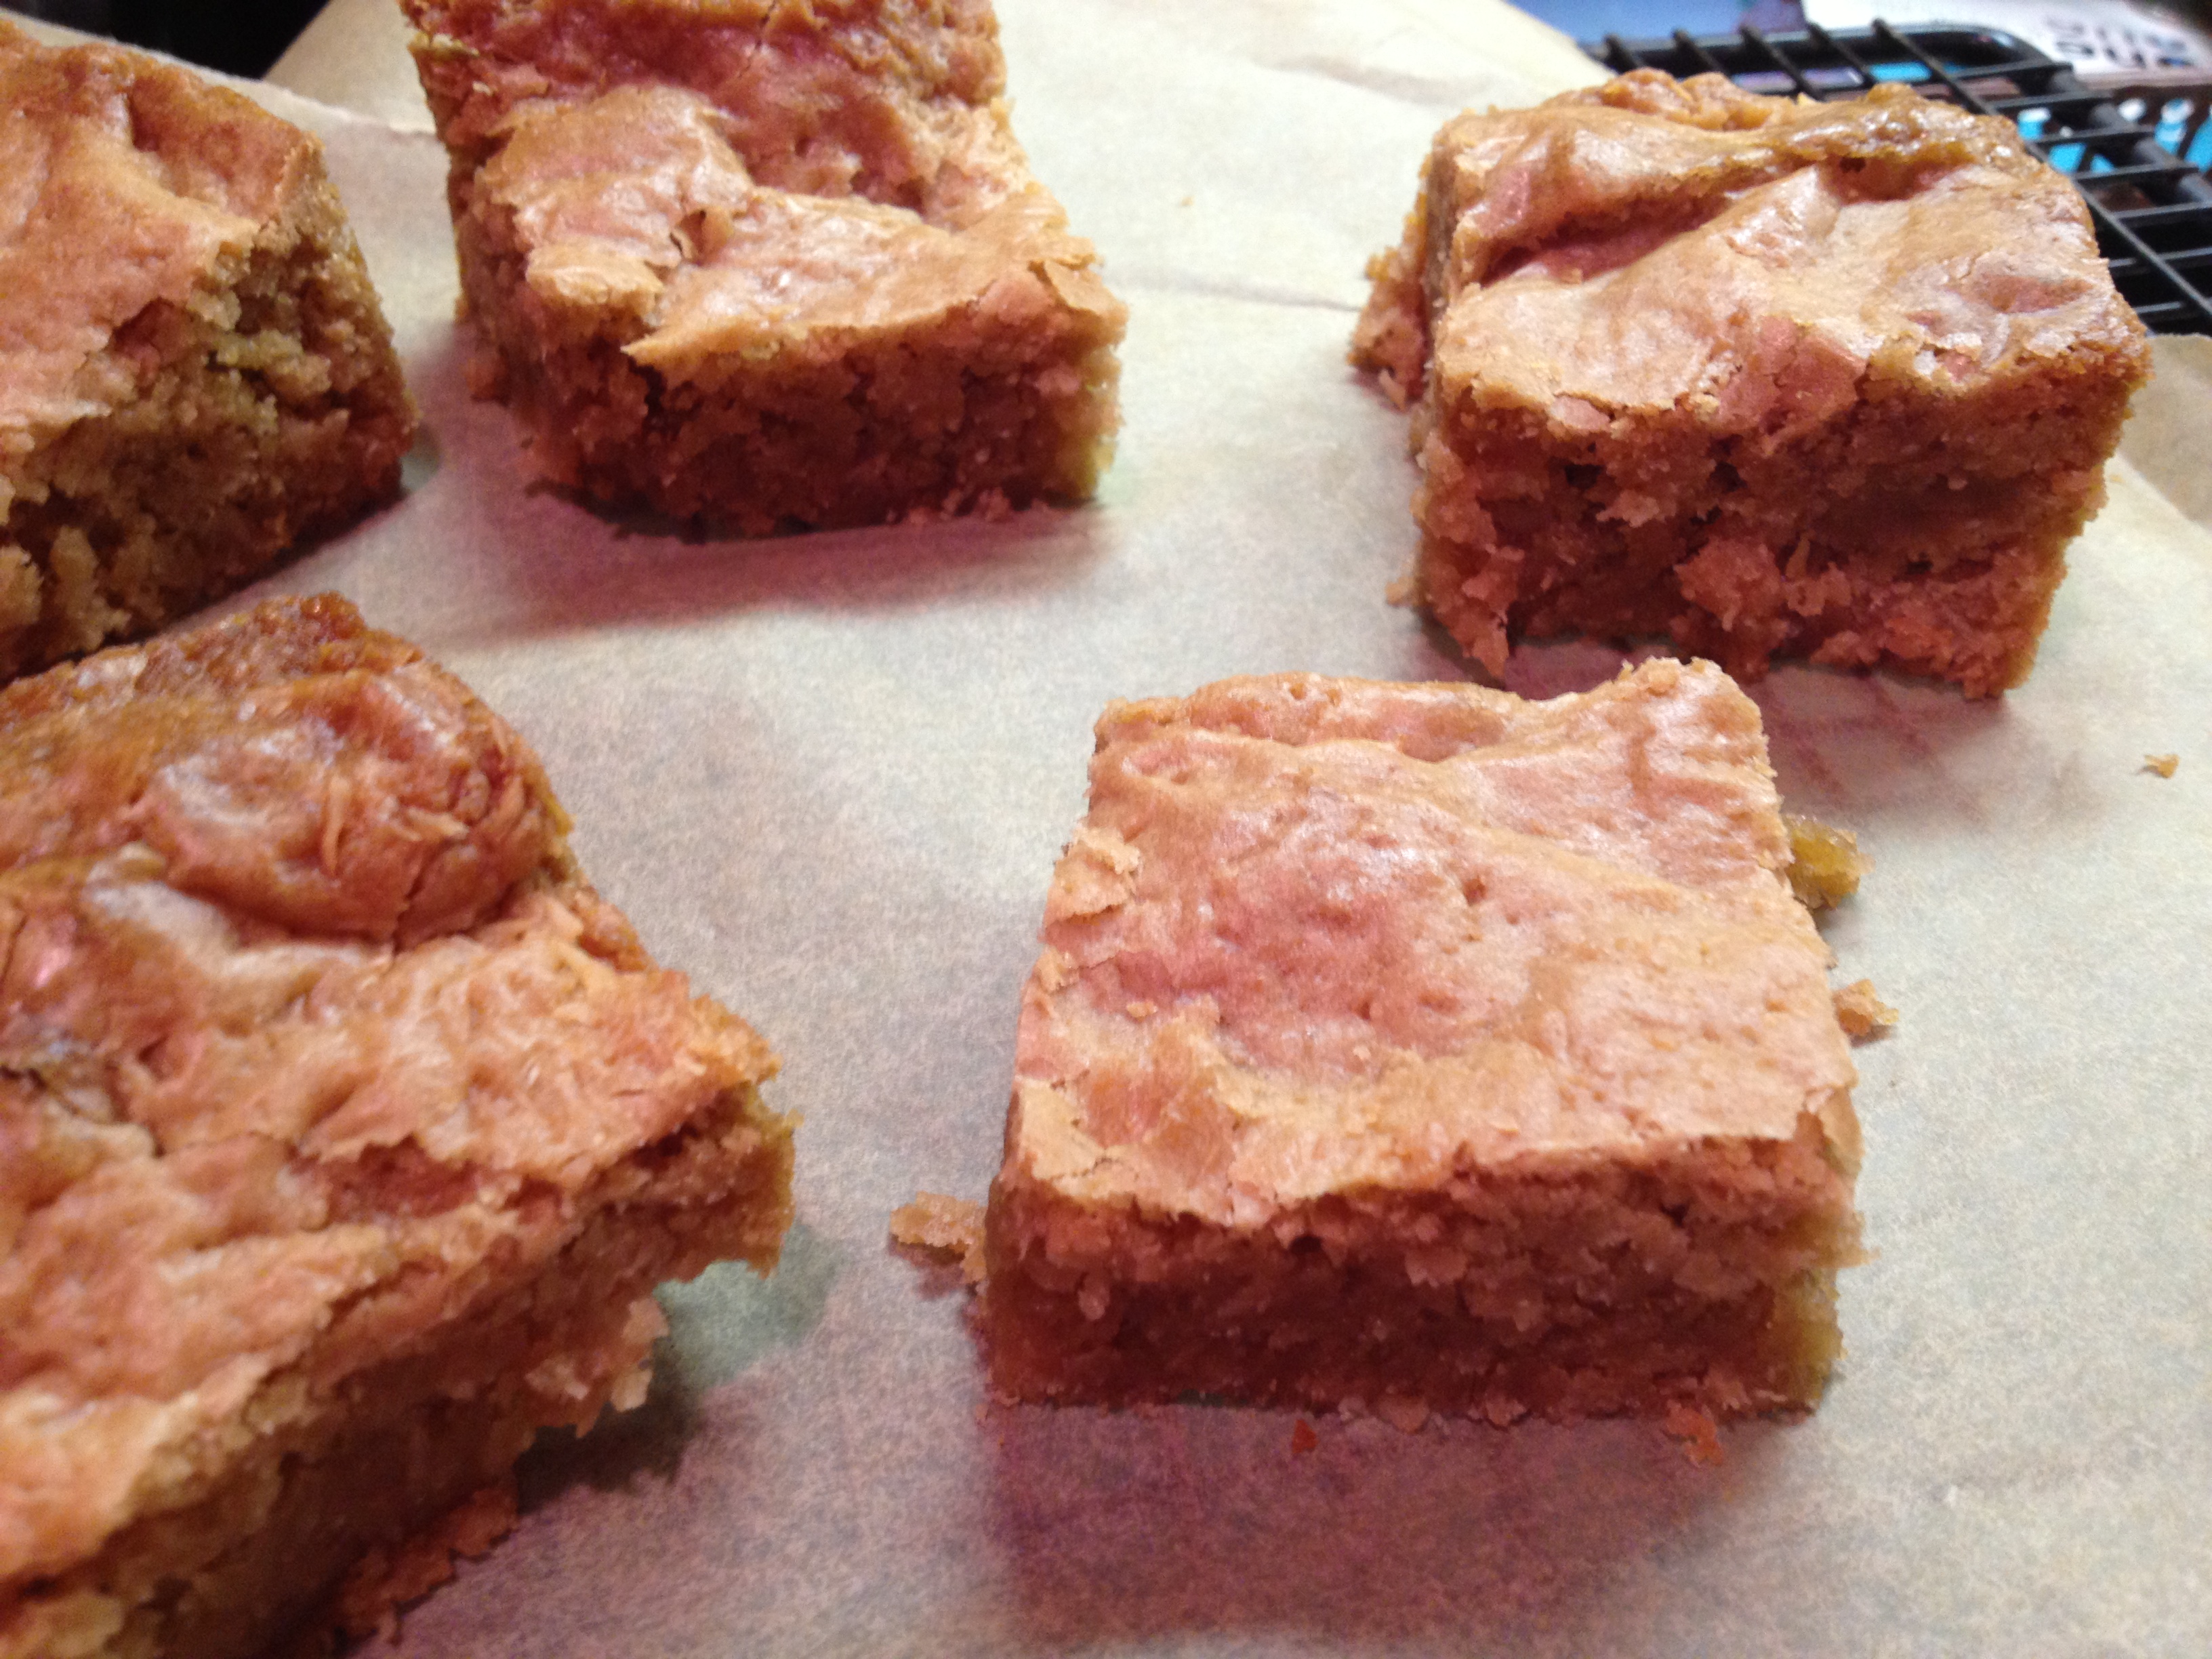
Allergy-Friendly Butterscotch Bars
With a lack of allergy-friendly butterscotch chips on the market, I decided to create a homemade butterscotch base that would fulfill our sweet cravings. If you can use butter, feel free to substitute, but Earth Balance Buttery Spread makes darn good butterscotch for these moist and chewy bars. Please note that shortening isn’t a suitable replacement, since it doesn’t emulsify when heated.
Make these gluten-free, top 8 allergen-free, vegan bars of heaven for your end of summer picnics, or to send along to school for parties for a treat that will truly “wow” the whole class!
Makes 16 2-inch bars
Free of: gluten and all top allergens
2 cups packed light brown sugar
½ cup dairy-free, soy-free margarine / buttery spread
1 tbsp Ener-G egg replacer mixed with ¼ cup canned coconut milk (shaken to distribute coconut cream)
1 tsp vanilla extract
2 cups my Basic Gluten-Free Flour Mix or Authentic Foods GF Classical Blend
2 tsp double-acting baking powder
½ tsp xanthan gum
¼ tsp salt
1 cup shredded unsweetened coconut
1. Combine brown sugar and margarine in a heavy pot over very low heat. Cook while stirring continuously until melted and just starting to bubble, about 10 minutes. Don’t rush or you risk burning the sugar. Remove from heat and let cool for 30 minutes, stirring occasionally to prevent the sugar from setting up. It will become thick, like caramel.
2. Preheat oven to 350° F. Grease an 8×8-inch pan.
3. Using an electric mixer on medium-high speed beat in egg replacer until creamy. Mix in vanilla.
4. In a separate bowl, whisk together the flour blend, baking powder, xanthan gum and salt. Add dry ingredients to pot with butterscotch and mix on low speed until fully incorporated. Add coconut and mix until well-distributed.
5. Transfer dough to the prepared pan. Press dough to edges of pan and smooth into an even layer; it will be very sticky and dense.
6. Bake 30 minutes in center of oven, or until the dough has a rich golden hue, glossy top and is just beginning to pull away from edges of pan. Set on a wire rack and let cool completely in the pan. Use a serrated knife to cut into squares.
Allergy Friendly Butterscotch Bars © 2013 by Cybele Pascal
This recipe first appeared in the Holiday 2013 issue of Allergic Living Magazine
July 6, 2014
Crunchy Cucumber Salad
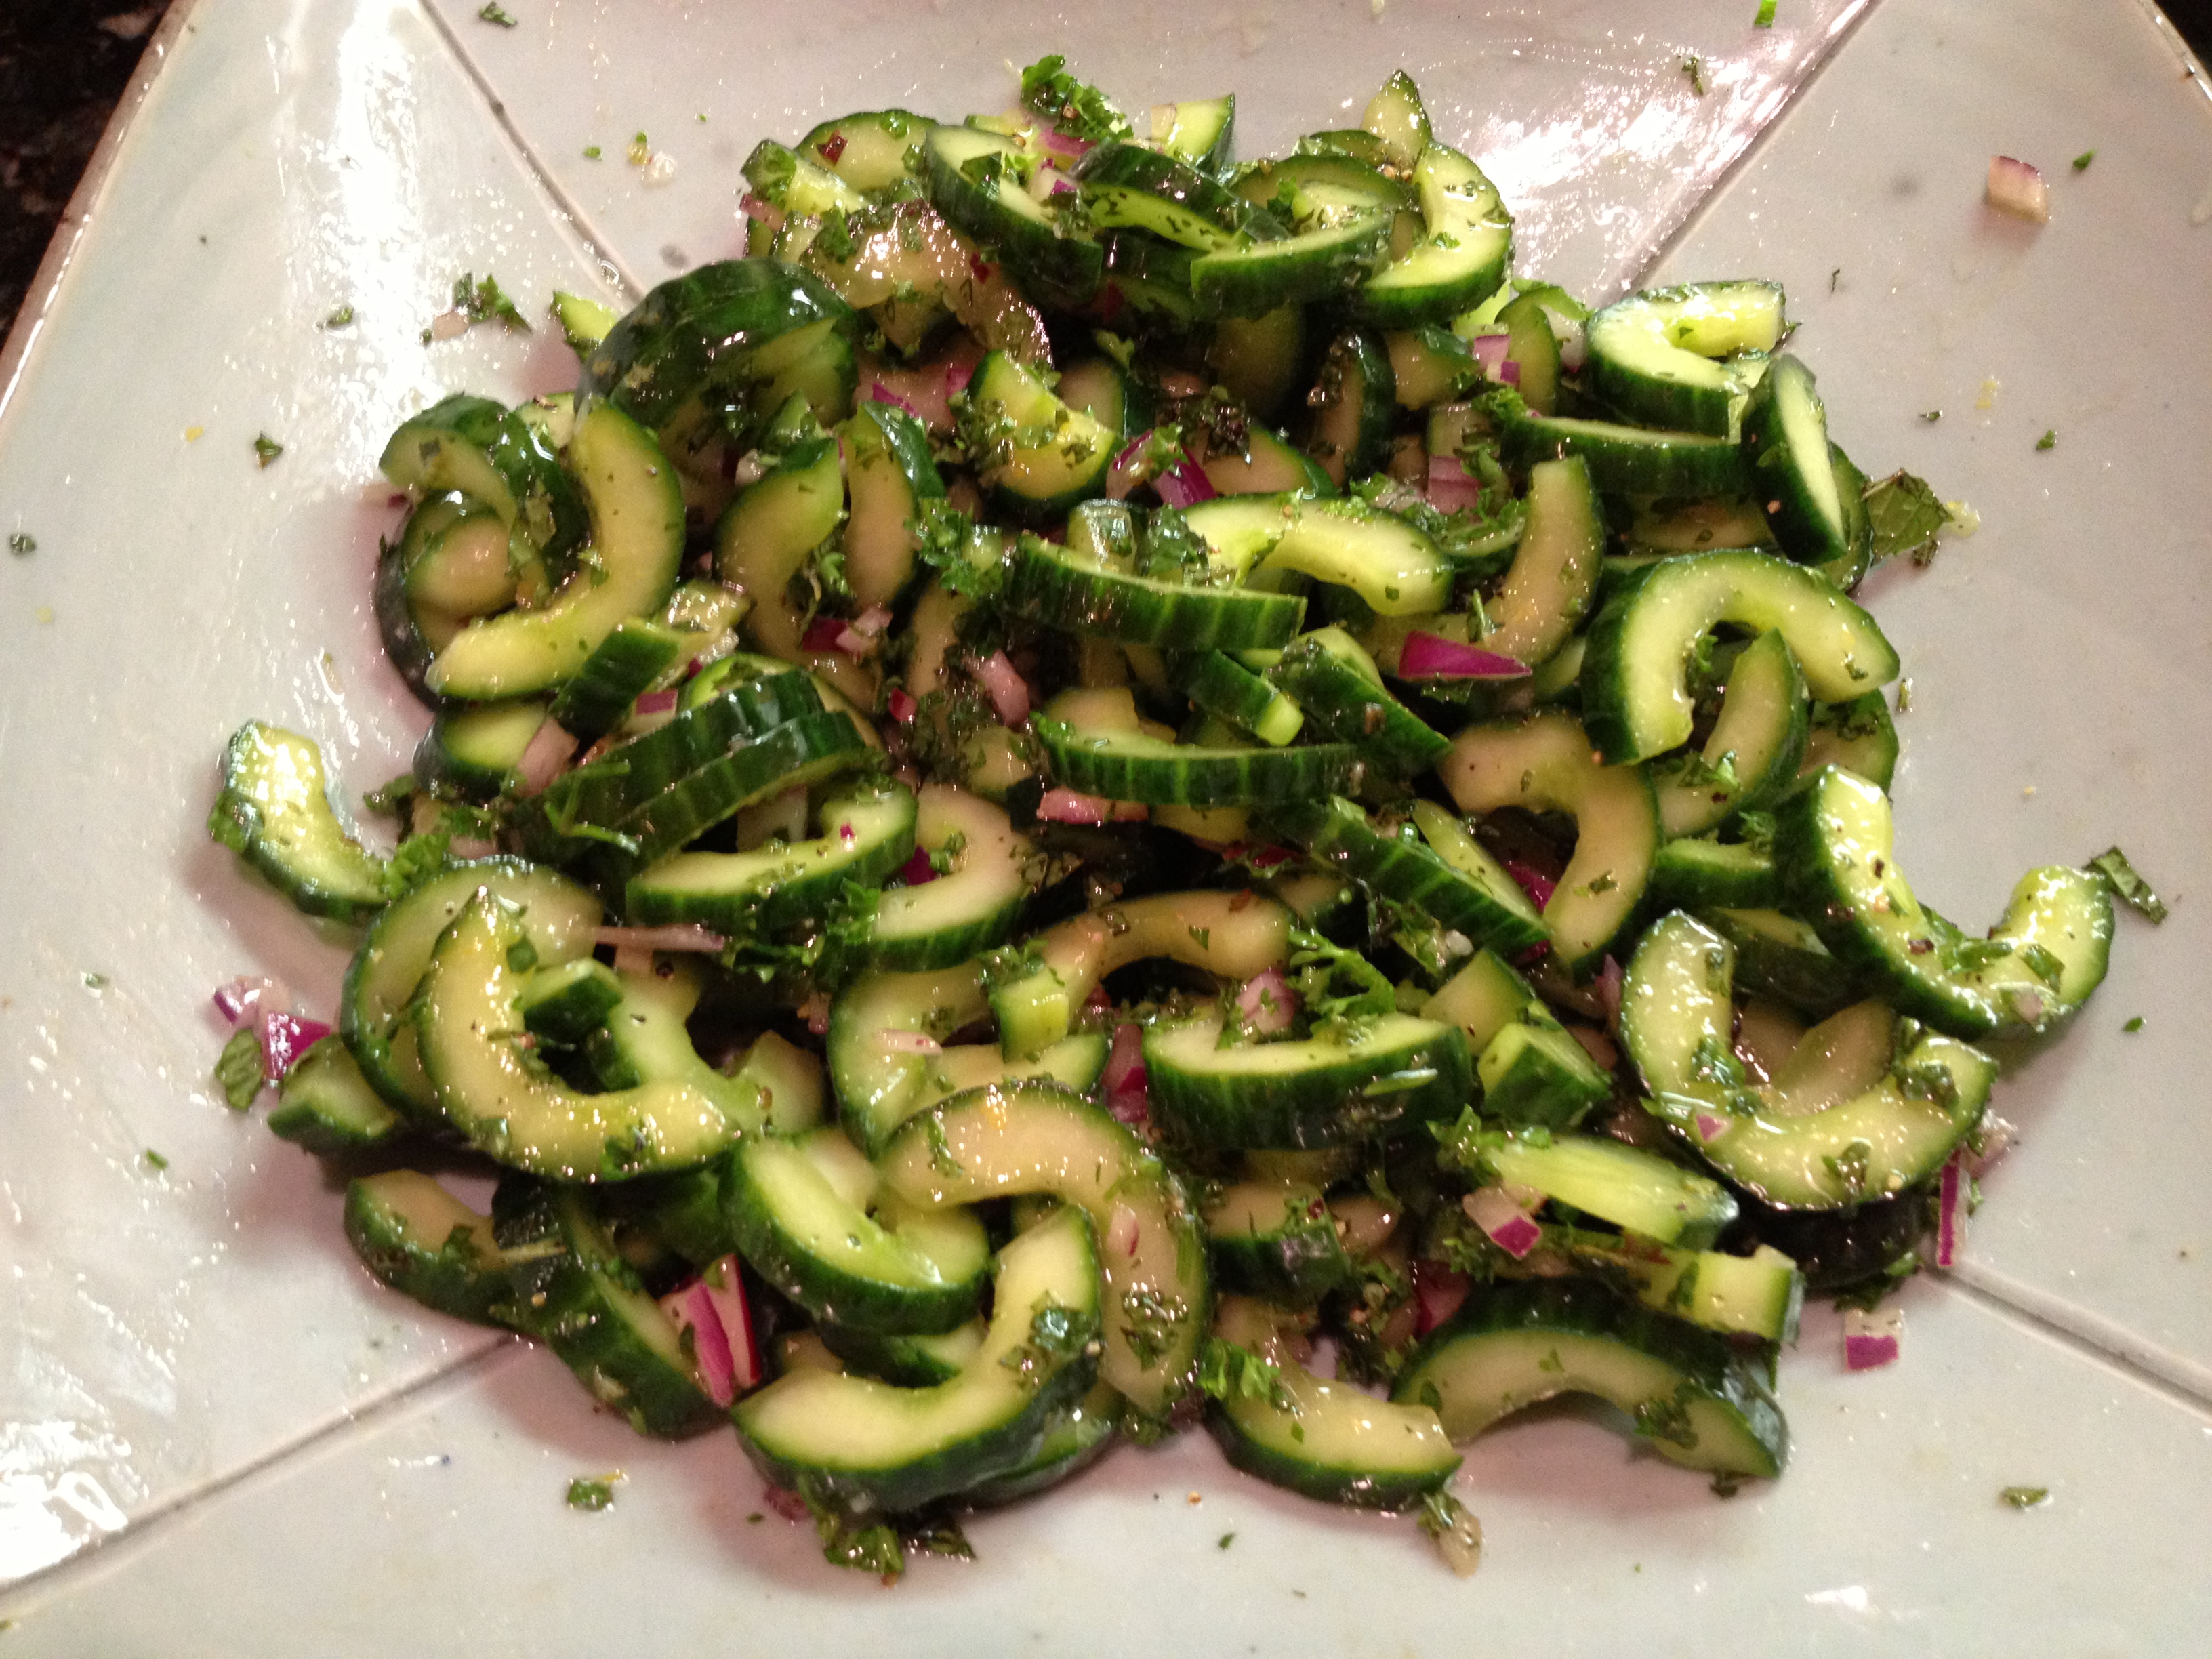
Crunchy Cucumber Salad
Serves 4 to 6
Free of: gluten and all top allergens
Cucumber salad is a perfect crisp and refreshing picnic side, but it can often get soggy fast. The following recipe employs several chef secrets to keep your cucumbers crunchy and delish.
2 English cucumbers, peel on
¾ tsp salt
2 tbsp sherry vinegar
1 tsp sugar
½ tsp Dijon mustard
¼ tsp lemon zest
3 tbsp olive oil
¼ cup finely minced red onion
2 tbsp chopped fresh parsley
2 tbsp chopped fresh mint
Freshly ground pepper
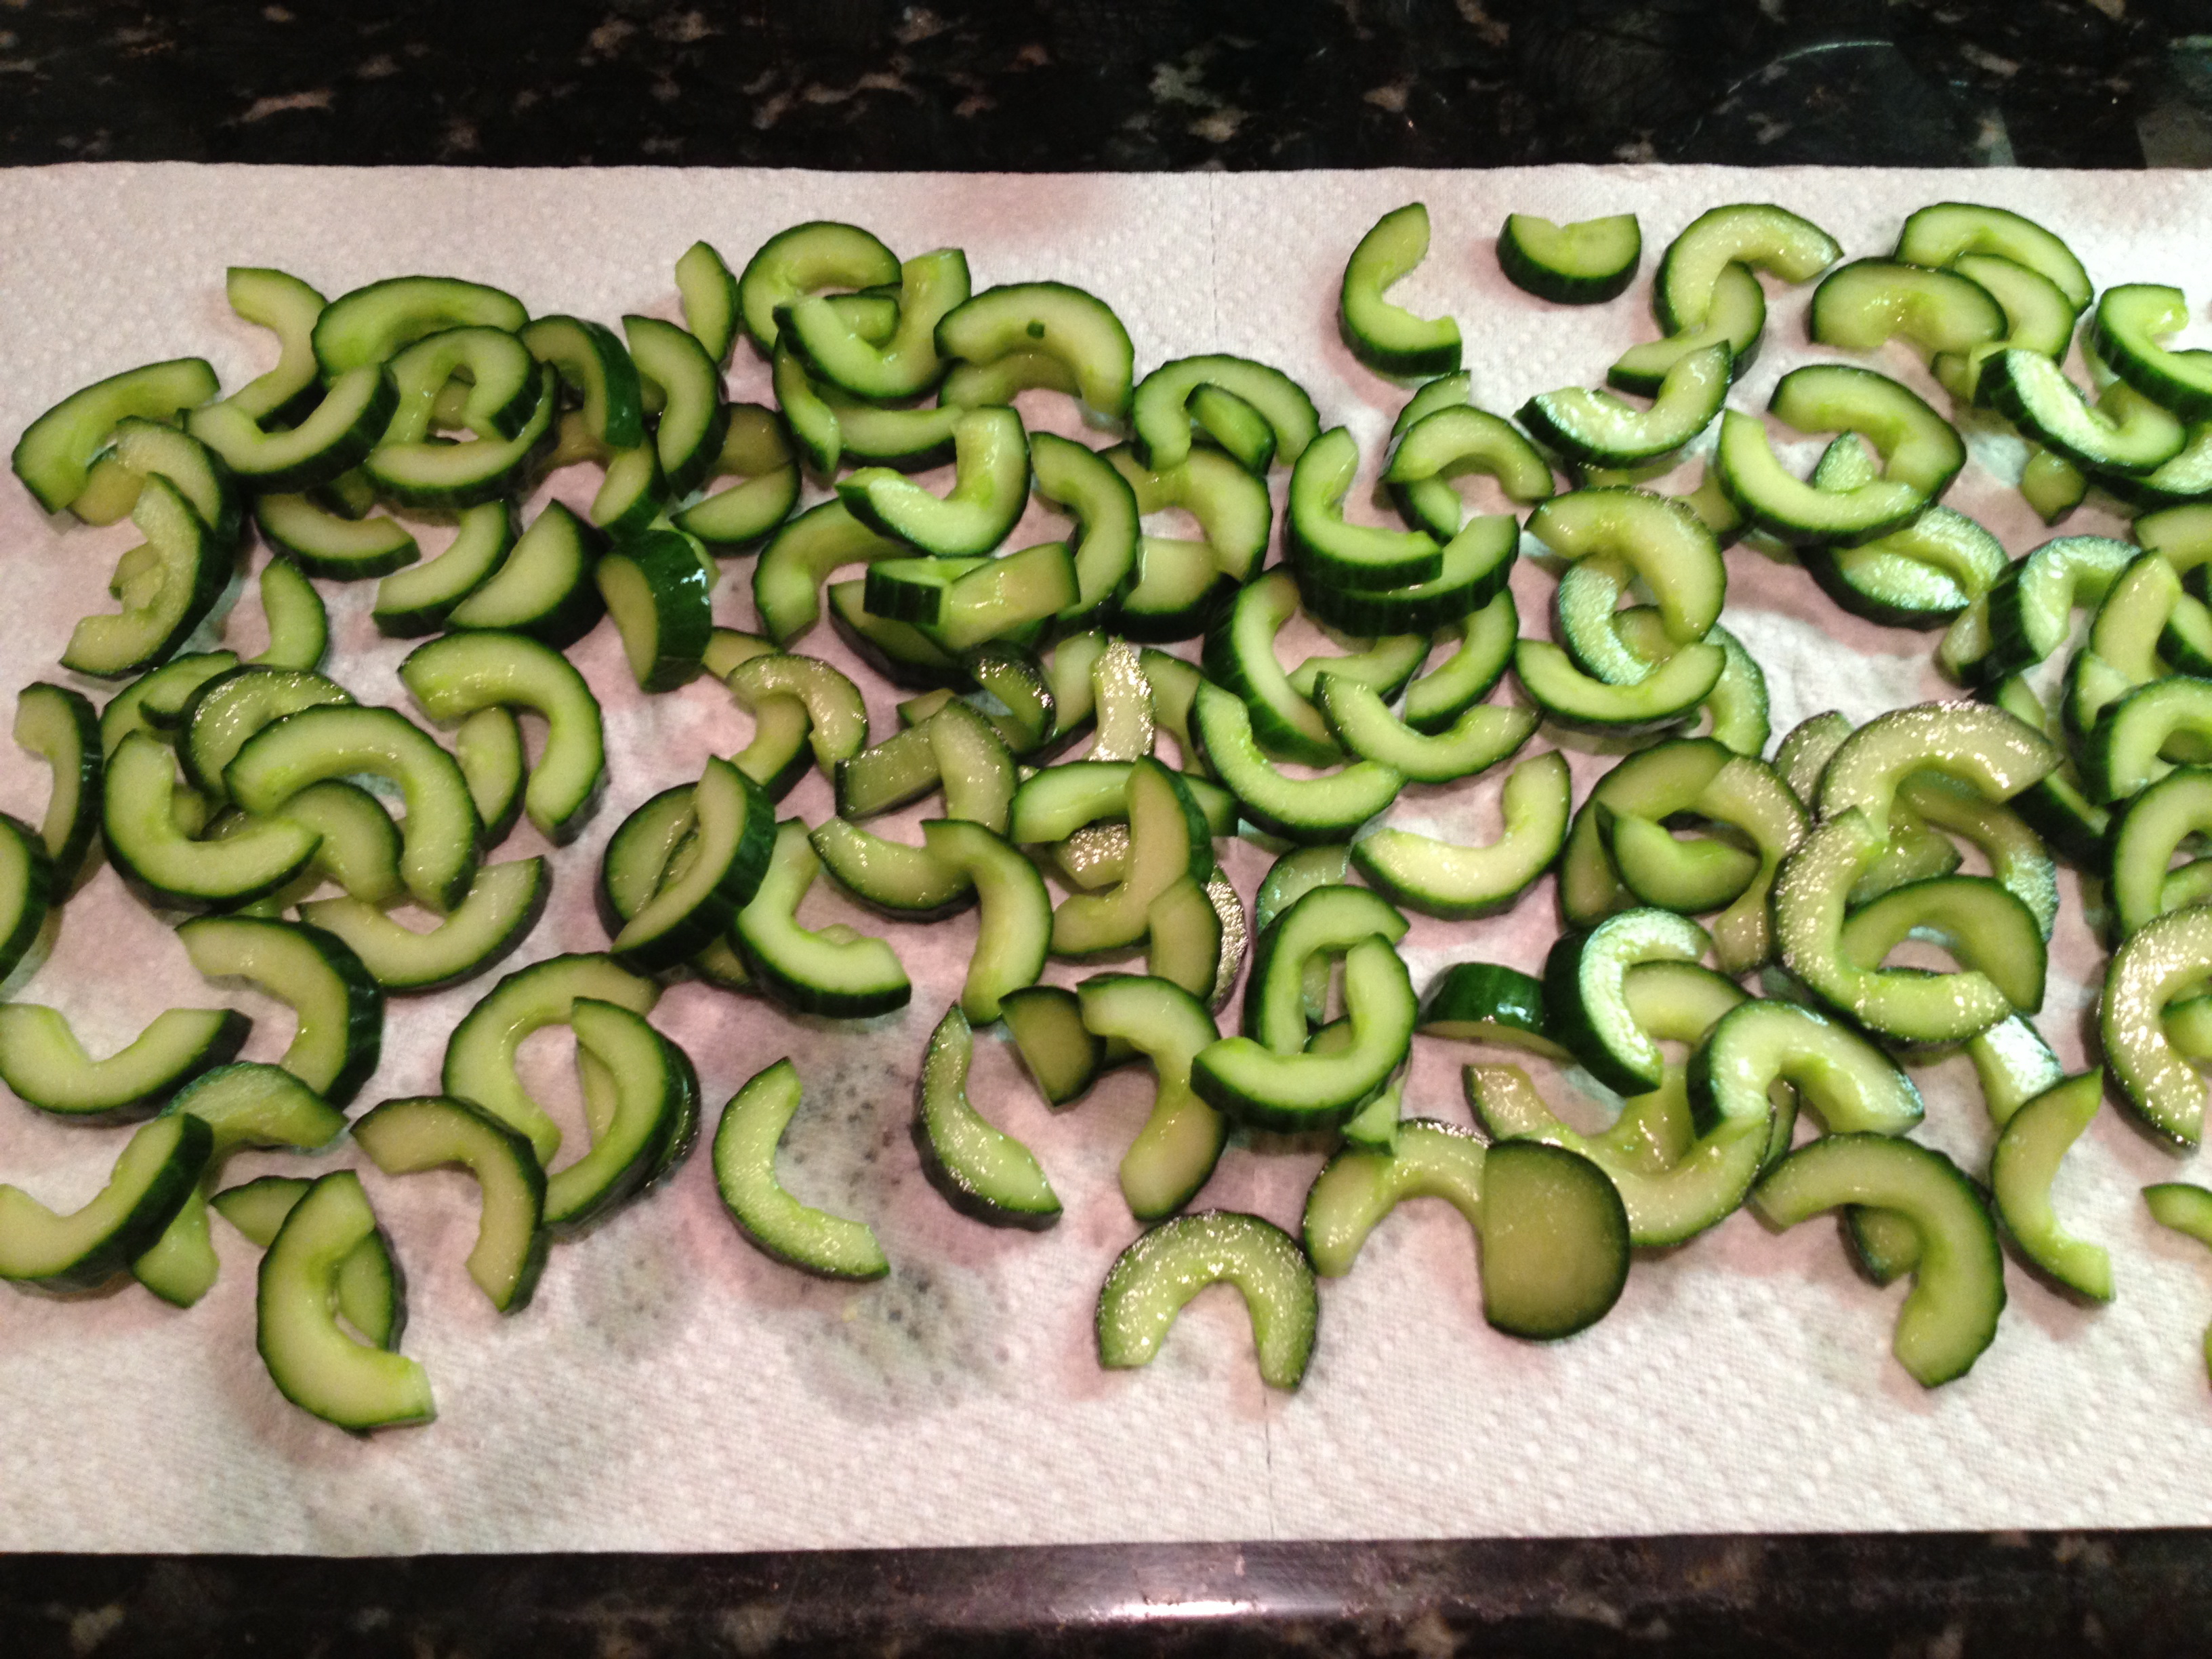
1. Cut cucumbers into halves lengthwise and scoop out seeds. Cut into ¼-inch thick slices. Put into a colander, sprinkle with salt and toss well. Place colander over a large bowl and let the cucumbers drain for 30 minutes, tossing a few times. Transfer cucumbers to paper towels and thoroughly blot dry.
2. Meanwhile, combine vinegar, sugar, mustard, zest and a few turns of freshly ground pepper. Drizzle in oil a little at a time while whisking, to emulsify.
3. Place drained cucumbers in a large salad bowl and toss with onions and fresh herbs. Add dressing and toss to combine. Cover and refrigerate for at least 30 minutes.
Crunchy Cucumber Salad © 2013 by Cybele Pascal
This recipe first appeared in the Summer 2013 issue of Allergic Living Magazine
June 23, 2014
Allergy Friendly Creamy Macaroni Salad
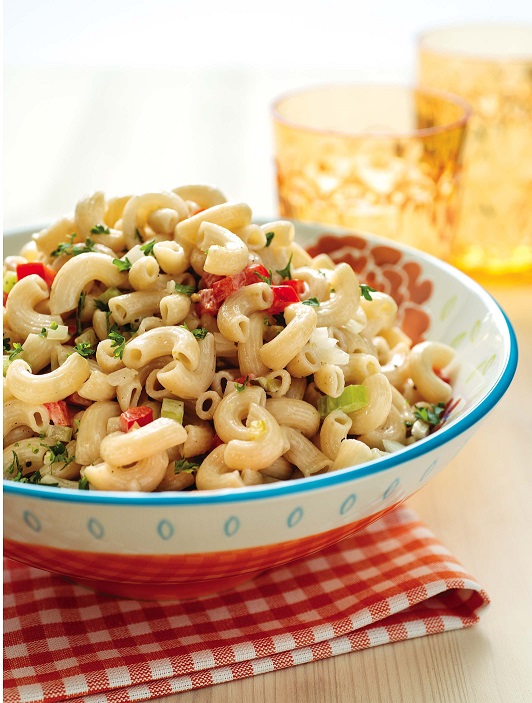
Classic Creamy Macaroni Salad
Serves 4 to 6
Free of: gluten and all top allergens
Pasta salad may seem like a no-brainer, but gluten-free pasta can get tough after a few hours, and allergy-friendly mayo isn’t always easy to locate. Luckily, I’ve got a few recipe tricks up my sleeve to tackle both issues.
8 oz gluten-free elbow macaroni pasta (I use Tinkyada brown rice with rice bran)
½ cup + 2 tbsp soy-free vegan mayonnaise (store-bought or my Rice Milk Mayonnaise)
1 large garlic clove, minced or crushed
1 tsp sugar
1 tbsp apple cider vinegar
1 tsp Dijon mustard
2 tbsp gluten-free sweet relish
2 tbsp plain rice milk
½ cup minced celery
½ cup minced red bell pepper
2 tbsp minced yellow onion
Salt and freshly ground pepper, to taste
Curly parsley, for garnish
1. Cook pasta in salted water until tender (do not stop at al dente). Drain but don’t rinse. Spread in a single layer on a baking tray to let cool and dry.
2. Combine mayonnaise, garlic, sugar, vinegar, mustard and relish in a medium bowl. Whisk in rice milk until smooth.
3. Toss pasta in a large bowl with celery, bell pepper and onion. Sprinkle with salt and a few turns of freshly ground pepper. Add dressing, and stir gently to coat.
4. To let flavors meld, cover pasta tightly and chill in refrigerator 1 hour.
5. Adjust salt and pepper, to taste. Serve garnished with fresh parsley.
Classic Creamy Macaroni Salad © 2013 by Cybele Pascal
This recipe first appeared in the Summer 2013 issue of Allergic Living Magazine
June 13, 2014
Allergy Friendly Oven Fried Chicken

“Buttermilk” Oven-Fried Chicken
Serves 4 to 6
Free of: Gluten and all top allergens.
Oven-baked chicken is much lower in fat, but the skin never fully crisps like deep-fried chicken. The solution: remove the skin – cutting fat even further. This allows the chicken to better absorb the marinade, for the breading to adhere to the surface, and it creates a much better texture when served at room temperature or cold.
1 cup (250 mL) plain rice milk
1 1/2 tbsp lemon juice
2 garlic cloves, minced or crushed
1/2 tsp + big pinch salt, divided
freshly ground pepper
3 tbsp olive oil
3 pounds (1.5 kg) chicken parts – drumsticks, thighs and bone-in split breasts (cut in half crosswise), skin removed.
3 cups (710 mL) gluten-free corn flakes (such as Erewhon brand) or 1 cup gluten-free bread crumbs (I use Ener-G)
1/2 cup (120 mL) dairy-free, soy-free mozzarella cheese alternative (I use Daiya)
1/4 tsp cayenne pepper
1/4 cup (60 mL) dairy-free, soy-free buttery spread (I use Earth Balance), melted
1. In a large shallow dish whisk together rice milk, lemon juice, garlic, 1/2 tsp salt and a few turns of freshly ground pepper. Drizzle in oil, a little at a time, while whisking to combine.
2. Add chicken to rice milk mixture. Turn to coat. Cover tightly and refrigerate at least 4 hours or overnight.
3. Grind cornflakes into a fine crumb in a blender or food processor. Transfer crumbs to a wide shallow bowl.
4. Pulse cheese alternative in a blender or food processor until it’s the texture of grated Parmesan. Add the grated cheese alternative to the crumbs, as well as cayenne, big pinch of salt and a few turns of ground pepper. Toss to combine.
5. Arrange a rack on top of a large baking pan. Remove chicken from marinade, allowing excess to drip off, turn in crumb mixture to coat and place on rack. Repeat with all chicken pieces. Let chicken dry on rack for 15 minutes.
6. Preheat oven to 425° F. Arrange the chicken on a lightly greased baking pan. Drizzle with buttery spread. Bake 40-45 minutes or until golden and crispy. Serve hot or at room temperature.
“Buttermilk” Oven-Fried Chicken © 2013 by Cybele Pascal
This recipe first appeared in the Summer 2013 issue of Allergic Living Magazine
May 10, 2014
Fruit Kebabs with Allergy Friendly Creamy Strawberry Dip

Fruit Kebobs with Creamy Strawberry Dip
Serves 4 to 6
Free of: gluten and all top allergens
No picnic is complete without watermelon. But why not jazz it up with some additional fruit on highly portable skewers? Add a little allergy-friendly strawberry vegan dip, and bingo – kid-friendly picnic food! As an added bonus, my boys like to help me make this treat. Or better yet, to make it for me! It’s Mother’s Day tomorrow, and I’m putting in a request. Happy Mother’s Day, everyone!
½ cup sliced strawberries
8 oz (¾ cup) plain vegan cream cheese (use Daiya for soy-free)
6 oz plain vegan yogurt (I like So Delicious coconut milk yogurt)
2 tbsp honey, agave nectar or maple syrup
1 tsp vanilla extract
6 cups fruit, such as cubed watermelon, honeydew, cantaloupe, strawberries and grapes
Wooden or bamboo skewers
1. Puree sliced strawberries in a blender.
2. Place the cream cheese in a mixing bowl and whip with an electric hand mixer on medium speed until fluffy, about 2 minutes. Add yogurt, honey and vanilla, and mix until smooth and creamy. Add strawberry puree and mix until smooth. Cover and refrigerate for 1 hour.
3. Meanwhile, thread fruit onto skewers, alternating, as you go. Serve skewers alongside dip.
Fruit Kebabs with Creamy Strawberry Dip © 2013 by Cybele Pascal
This recipe first appeared in the Summer 2013 issue of Allergic Living Magazine
Cybele Pascal's Blog

- Cybele Pascal's profile
- 8 followers

