
Cybele Pascal's Blog, page 2
July 27, 2015
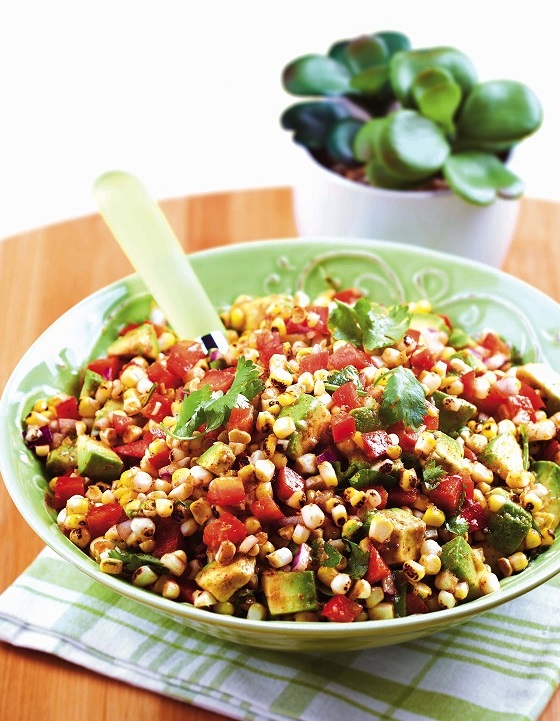
Grilled Corn and Avocado Salad
Grilled Corn and Avocado Salad
Makes 6 servings
Free From gluten and all top 8 allergens
With sweet crunchy corn in peak-season, it’s readily available and at the height of its deliciousness. While fantastic simply steamed or boiled on the cob, corn is also wonderful grilled, and can take center stage as a featured ingredient in salads, salsas, and many other sides. When shopping for fresh corn, look for green moist husks that cling tightly to the corn. To determine if it’s ripe, look for deep brown silk tips or ends — however, the whole silk should not be dried up — if it is, your corn is probably past its prime. A sure-fire way to make sure your corn is fresh and ripe is to peel back the husk slightly, and check the top row of kernels for plumpness. Dried or shriveled corn is a no-go. The ultimate test is to pierce a kernel with your fingernail. If it’s milky, your corn is just right.
This flavorful fresh Grilled Corn and Avocado Salad is a perfect accompaniment to any summer meal. Try it with my Carne Asada, for a flavor-full fiesta!
1 garlic clove, crushed
2 tsp ground cumin
1 tsp chili powder
¼ cup + 2 tbsp fresh-squeezed lime juice (3 limes)
¼ cup + 2 tbsp extra-virgin olive oil, plus additional for brushing
salt and black pepper, to taste
6 ears corn, husks and silks removed and halved
½ cup finely diced red onion
1 red bell pepper, diced
⅓ cup chopped, loosely-packed cilantro leaves
2 ripe, firm avocados, diced
1. In a small bowl, combine garlic, cumin and chili powder. Whisk in lime juice. Slowly drizzle in olive oil while whisking to emulsify. Add pinch of salt and dash of pepper.
2. Heat grill to high. Liberally brush corn with olive oil and lightly season all sides with salt and pepper. Grill with lid closed 10-12 minutes, turning every few minutes, until slightly charred on all sides.
3. Transfer corn to cutting board. Use a sharp serrated knife to cut off kernels. Place kernels in a large bowl and stir in onion, bell pepper and dressing. Adjust salt and pepper to taste. Add cilantro and avocado and toss gently to combine.
4. Serve immediately or cover tightly with plastic wrap and chill in refrigerator until ready to serve.
Grilled Corn and Avocado Salad © 2014 by Cybele Pascal
This recipe first appeared in the Summer 2014 issue of Allergic Living Magazine


July 1, 2015
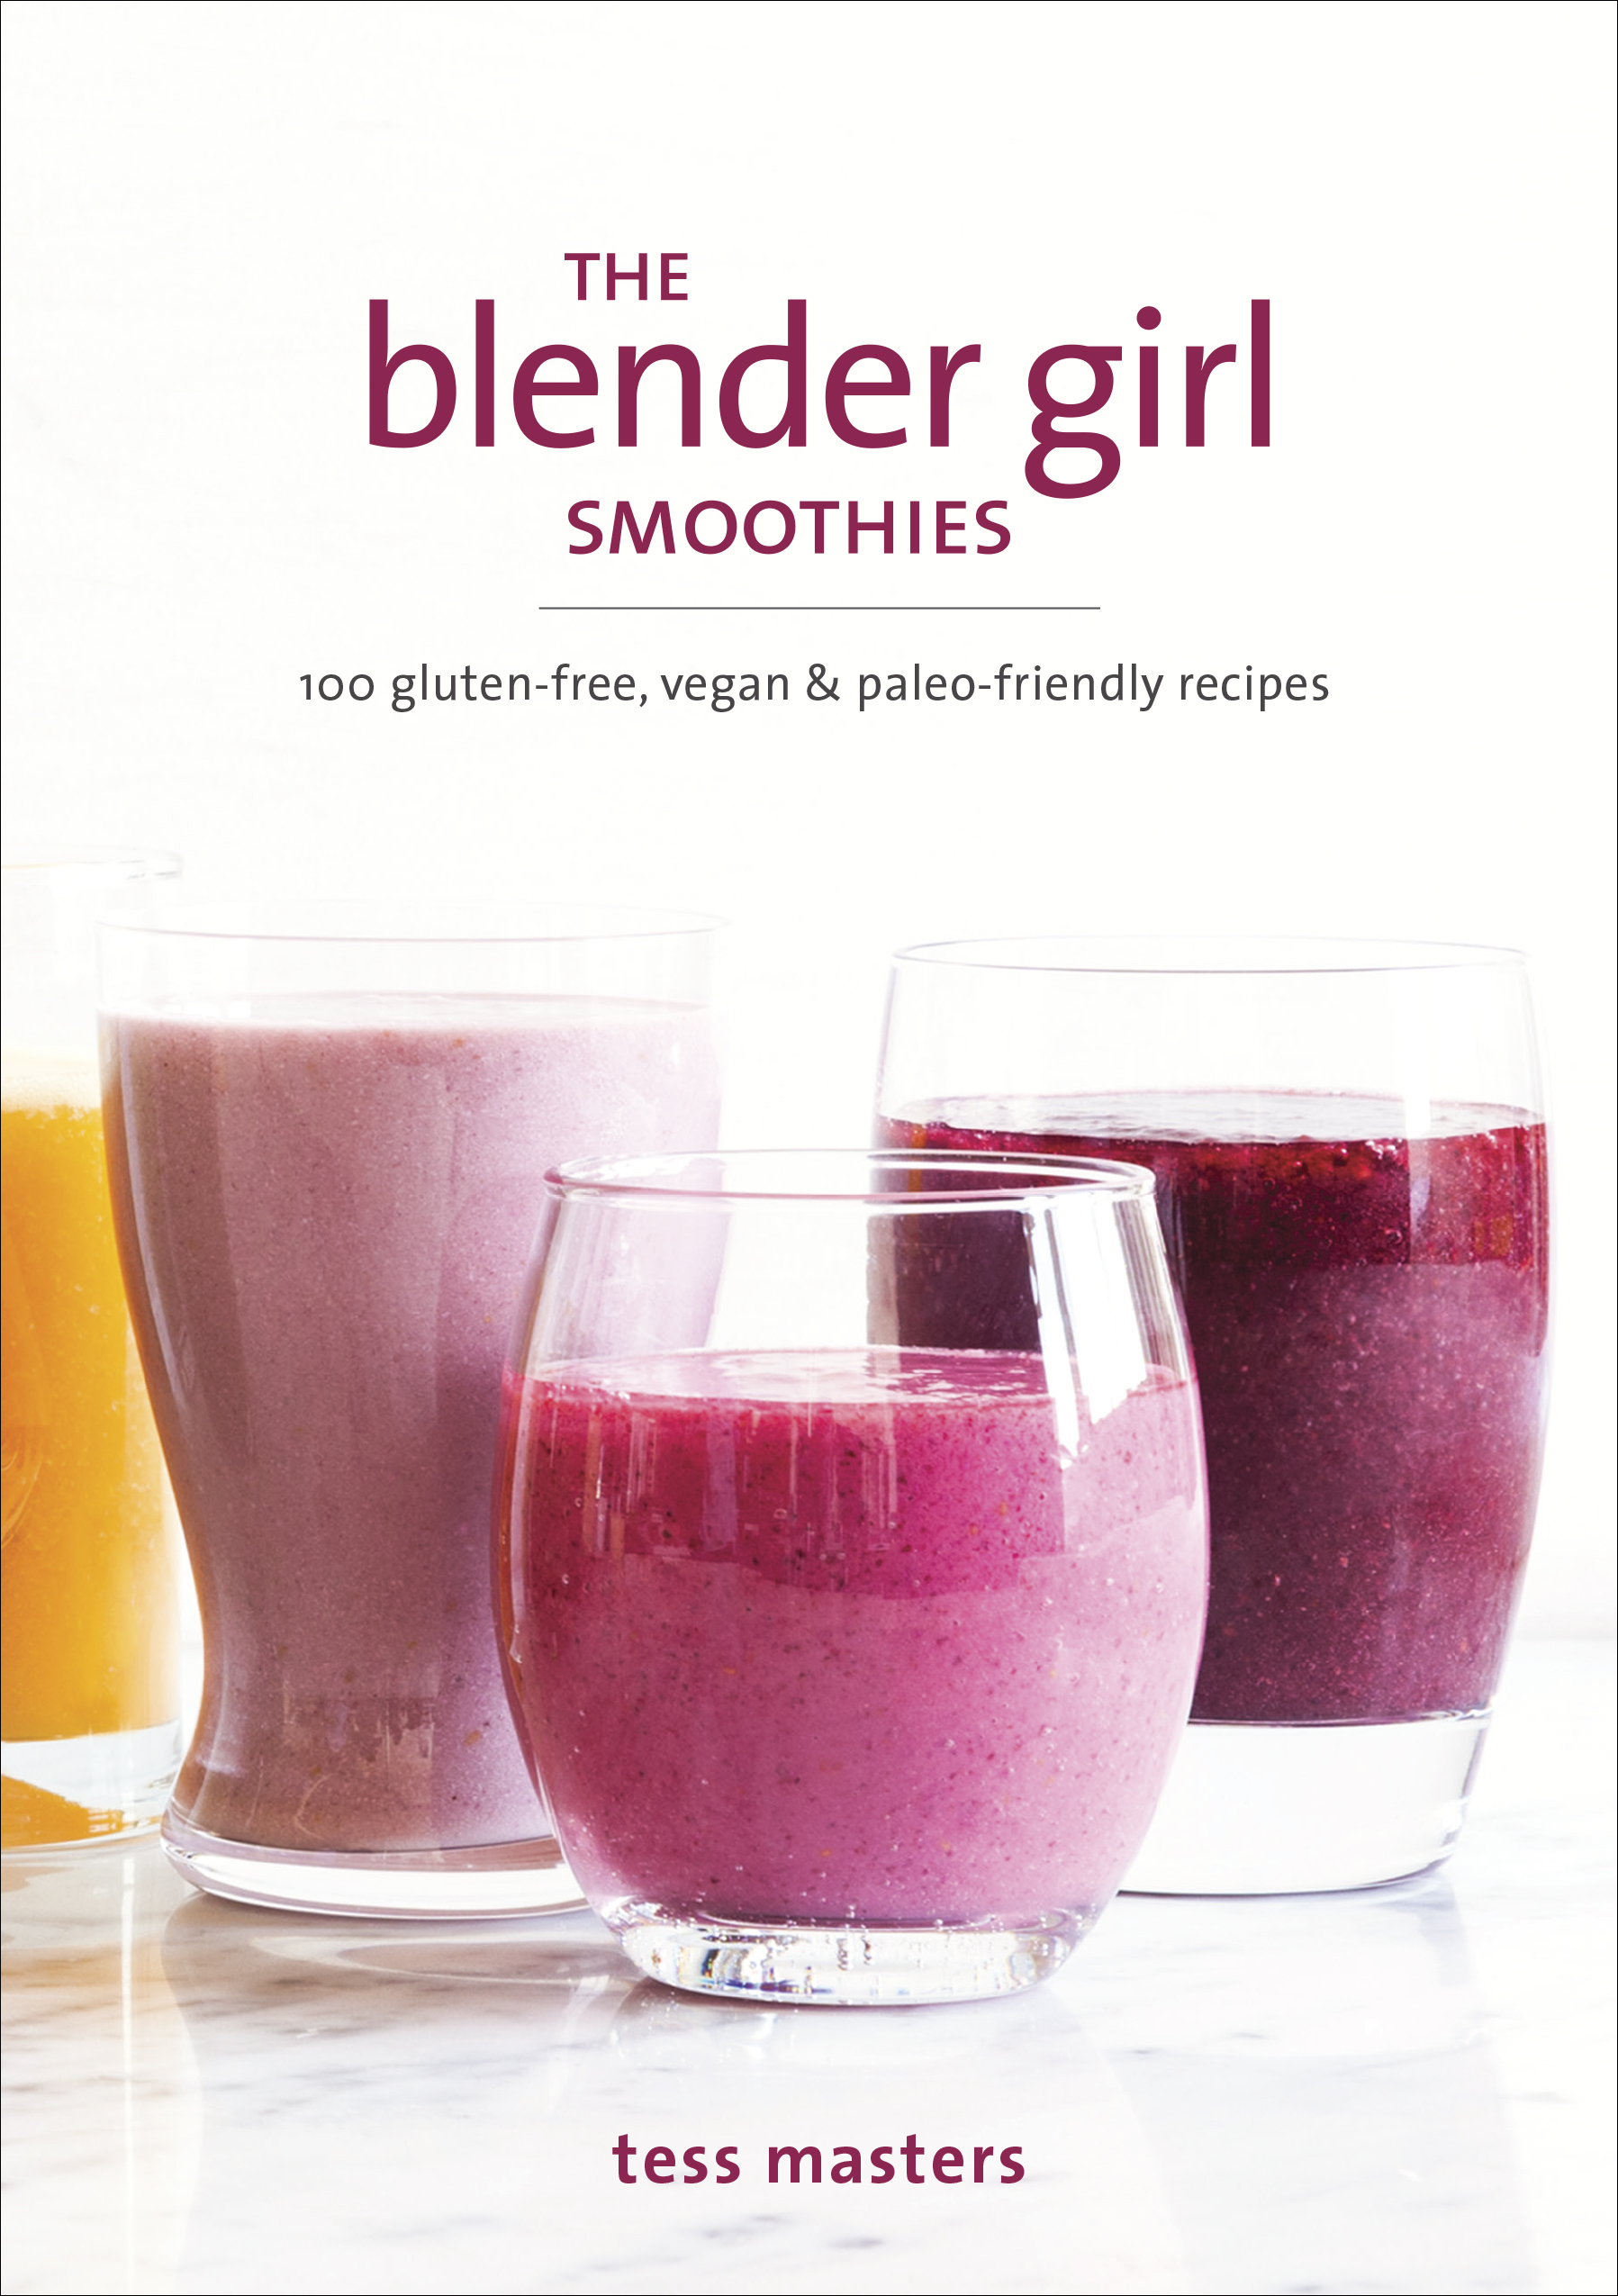
Tess Masters launches new cookbook The Blender Girl Smoothies plus Kitchen Aid Giveaway
Dear Readers:
Today is July 1st, to me the true beginning of summer and the perfect day to share the news that Tess Masters has published a new cookbook: The Blender Girl Smoothies. 100 gluten-free, vegan, & paleo-friendly recipes, to help you “blast your way to good health and blended bliss”, all summer long. Hurray!
To those who read my blog, you probably already know, I’m huge fan of Tess Masters’ work. I was wowed by her first cookbook, the Blender Girl, and wrote about it here. Tess has taken something seemingly mundane and turned it into a high art form. She’s created levels of flavor and texture that one never could have imagined possible in a glass. Her blender sensations are truly a sensorial delight, and chock-full of nutrients for optimal health to boot.
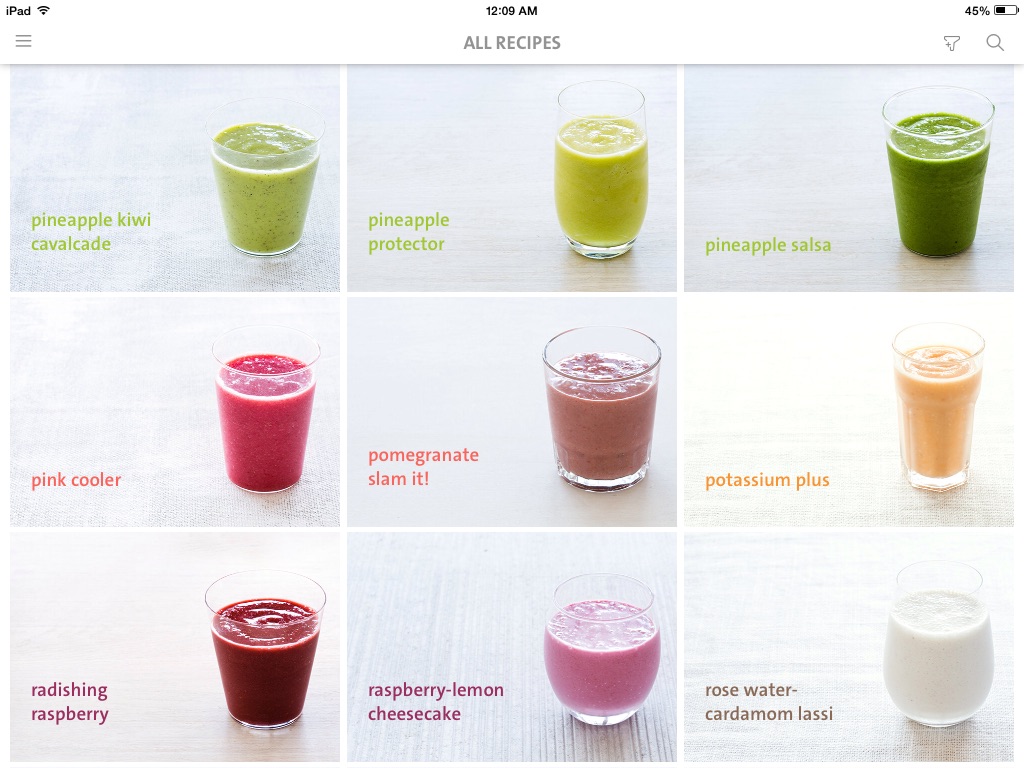
I’m somebody who works smoothies and juicing into my diet, sometimes for a meal, sometimes for a day, and at the start of every season, for 3 days. I have gone as long as 10 days on a liquid diet, but that was before I’d discovered Tess’s recipes and at the time, it was too darn long. I was bored, and felt deprived. Well, good bye deprivation! With this book, I’d happily take a month to revel in the endlessly delicious possibilities of drinking smoothies all day! Just look at a brief snapshot of the beauties you get to choose from!
The Blender Girl Smoothies book is based on The Blender Girl Smoothies app that launched in October 2014. To celebrate the launch of the book, the app is being offered at the special rate of 99c until July 6th. Get it while it’s cool!
In addition to this, in honor of the book’s launch, Tess is hosting a huge giveaway with KitchenAid. One LUCKY winner in the U.S has a chance to win a KA Gift Pack (Torrent Blender, Pro-Line Stand Mixer, and Pro-Line food processor) valued at $2,000! The giveaway runs for the whole month of July and is open to residents of the US. To enter, here’s the link.
And for a sneak peak, read on….

pomegranate slam it!
With a complex, mind-blowing flavor that explodes like a firecracker (don’t omit the cayenne), this is a heart-healthy delight. Pomegranate lowers blood pressure, keeps arteries supple, decreases inflammation in blood vessels, and helps manage cholesterol. Its phenolic antioxidants (also in strawberries) combat oxidative stress, making this an antiaging tonic.
serves 2
1 1⁄2 cups (360ml) unsweetened pomegranate juice
1 orange, peeled, seeded, and quartered
1⁄4 cup (35g) chopped red bell pepper
1⁄8 cup (3g) loosely packed arugula
1⁄2 small avocado, pitted and peeled
1 cup (160g) frozen strawberries
1 cup (125g) ice cubes
optional boosters
1 tablespoon pomegranate powder
1⁄2 cup (15g) loosely packed chard leaves
Pinch of cayenne pepper
Throw all of the ingredients into your blender and blast on high for about 1 minute, until smooth and creamy.
nutritional facts (per serving)
Calories 232 kcal | Fat 6 g | Saturated fat 0 g | Sodium 23 mg | Carbs 45 g | Fiber 6 g | Sugars 37 g Protein 2 g | Calcium 79 mg | Iron 0 mg
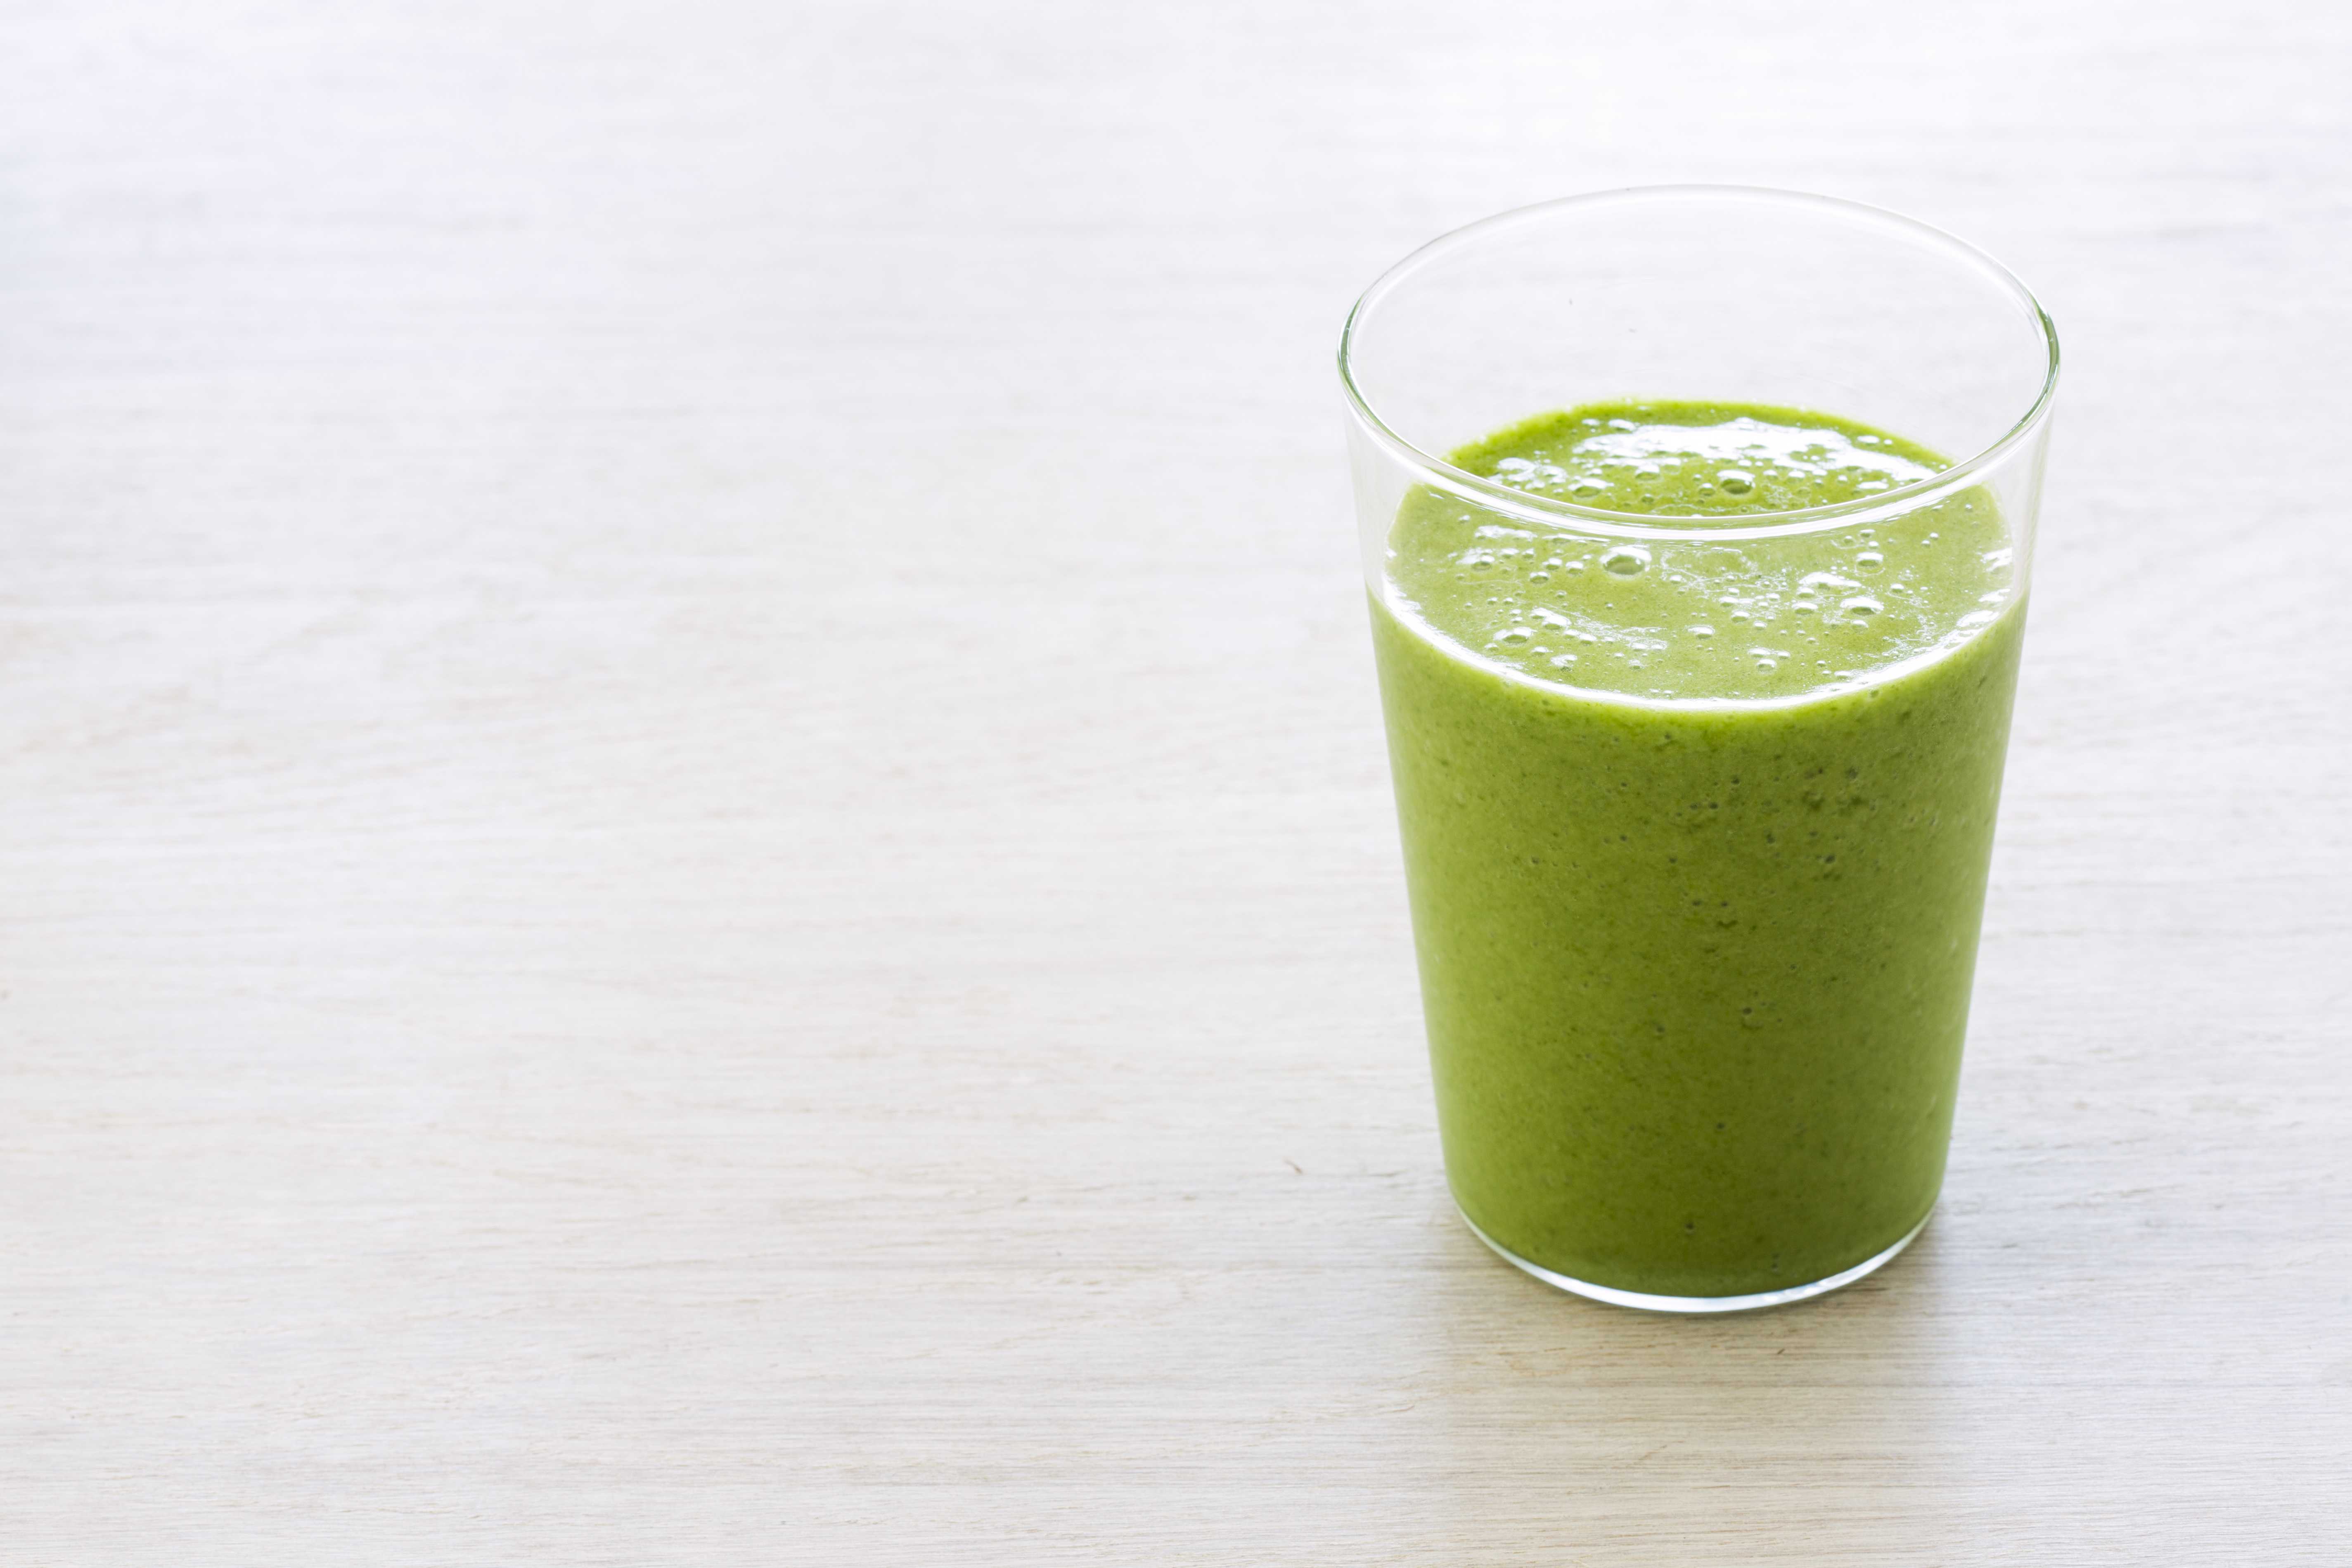
green mojito
This is a cold-and-flu buster and potent detoxifier, all in one zesty cocktail! The bromelain in pineapple suppresses coughs and loosens mucus, while mint clears respiratory congestion, soothes sore throats, and alleviates nausea. The vitamin C in limes has antibiotic power, anti-inflammatories in kale and pineapple combat arthritis, and ginger boosts immunity, aids digestion, and adds a powerful zing.
Serves 2
1 cup (240ml) coconut water or water
1 teaspoon finely grated lime zest
3 limes, peeled and quartered
1 cup (25g) torn-up curly green kale leaves (1 or 2 large leaves with stalk removed)
1/2 cup (18g) firmly packed mint
2 cups (320g) frozen pineapple
5 drops alcohol-free liquid stevia, plus more to taste
Throw all of the ingredients into your blender and blast on high for 30 to 60 seconds, until smooth and creamy.
Boosters
1 teaspoon wheatgrass powder
1 teaspoon minced ginger
1 teaspoon coconut oil
Reprinted from THE BLENDER GIRL SMOOTHIES Copyright © 2014, 2015 by Tess Masters. Photographs copyright © 2014 by Erin Kunkel. Published by Ten Speed Press, an imprint of Penguin Random House LLC.
Copyright © 2014 Anson Smart
TESS MASTERS BIO
Australian-born Tess Masters is an actor, cook, and author of The Blender Girl cookbook, The Blender Girl Smoothies, and creator of The Blender Girl Smoothies app. She shares her enthusiasm for healthy living on theblendergirl.com.
As a presenter and recipe developer, Tess collaborates with leading food, culinary, and lifestyle brands. She has been featured in the L.A Times, Washington Post, InStyle, Real Simple, Prevention, Family Circle, Clean Eating, Vegetarian Times, Living Without, Allergic Living, Thrive, New Idea, The Age, Today.Com, Yahoo.com, Shape.Com, Glamour.Com, FootNetwork.Com, Parents.Com, Chow.Com, among other websites, blogs, and publications around the world.
Away from the blender, Tess enjoys a diverse performance career. She has toured internationally with stage productions, worked in film and television, and lent her voice to commercial campaigns, audiobooks, and popular videogame characters.
Follow Tess on Facebook, Twitter, Pinterest, Instagram, You Tube, and Google +
June 14, 2015
Old Fashioned Strawberry Tart
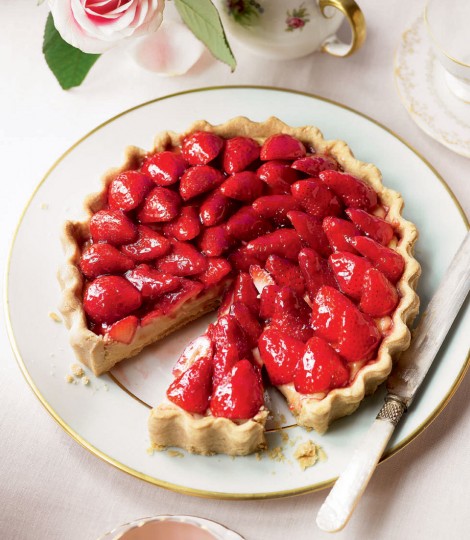
Old-Fashioned Strawberry Tart
Makes 9½-inch tart
Free From gluten and all top 8 allergens
This beautiful tart disappears in only a few hours at my house; it’s that good. Nobody would ever guess it’s gluten-free and allergy-friendly. Look for small sweet fresh strawberries at your local farmers’ market and use fresh squeezed orange juice for the biggest burst of flavor. To make sure every last bit of the juicy filling makes it into your tart, I highly recommend using a rubber spatula when transferring the sauce and jam.
Shortbread Tart Crust
1 1/2 cups my Basic Gluten-Free Flour Mix, or Authentic Foods GF Classical Blend
¼ cup + 2 tbsp confectioners’ sugar
¾ tsp xanthan gum
⅛ tsp salt
10 tbsp dairy-free soy-free vegetable shortening
1-2 tbsp orange juice (see instructions)
Strawberry Filling
5 cups hulled/de-stemmed strawberries, 1 cup sliced, 4 cups halved
½ cup granulated sugar
1½ tbsp cornstarch
1 tbsp orange juice
¾ tsp unflavored gelatin or vegan gel
Pinch salt
1 tsp pure vanilla extract
¼ cup plus 1 tbsp strawberry jam, divided
1 Preheat the oven to 350°F. Lightly grease a 9½-inch tart pan with removable bottom.
2. In bowl of a stand mixer with paddle attachment, sift together flour mix, confectioners’ sugar, xanthan gum, and salt. Add shortening (be very exact about this measurement) in tablespoon-sized pieces. Mix on medium speed to create a coarse meal, about 1 minute.
3. Add orange juice (1 tablespoon if using classic vegetable shortening, 2 tablespoons with palm shortening) and mix until dough begins to ball in the center, about 20 seconds. It should be the texture of soft new play dough.
4. Turn out dough onto a sheet of parchment or waxed paper and form into a ball. Top with another sheet of parchment or waxed paper, flatten into a disk and roll out to make a ¼-inch thick circle, 1 inch wider than your tart pan.
5. Remove top sheet of paper, flip crust into prepared tart pan and press down with the palm of your hand. Gently peel off remaining sheet of paper and finish pressing in dough, patching the sides or any breakages as necessary. Trim by running a rolling pin over top of the tart pan. Prick dough with a fork 8 times.
6. Bake crust for 20 minutes, or until set and very lightly golden. If it puffs up while baking, prick crust a couple more times. Let cool on a wire rack.
7. While crust is cooling, make strawberry sauce for filling. Puree 1 cup sliced strawberries in a blender until liquefied. Add granulated sugar, cornstarch, 1 tablespoon orange juice, gelatin and salt, and puree until smooth.
8. Transfer strawberry sauce to a small saucepan and stir in vanilla. Bring to a boil over medium heat while stirring continuously with a wooden spoon. Reduce heat to low, cook and stir for 1 minute, or until thickened like pudding. Transfer to a bowl and let cool to lukewarm (not cold), stirring a few times to help the process.
9. Warm jam over low heat in a small saucepan or in the microwave, stirring vigorously to thin. Using a pastry brush spread a thin layer of the jam on crust bottom. Chill crust in refrigerator for 10 minutes.
10. Gently combine 4 cups halved strawberries with remaining strawberry jam in a large bowl. Add lukewarm strawberry sauce and lightly toss until the strawberries are well-coated. Transfer filling to the cooled tart crust, evenly distributing strawberries.
11. Chill in refrigerator for 2 hours before serving. This pie is best served the day of, but it is also excellent the next day. Optionally, top each slice with your whipped topping of choice.
Old-Fashioned Strawberry Tart © 2014 by Cybele Pascal
This recipe first appeared in the Spring 2014 issue of Allergic Living Magazine
May 31, 2015
Split Roast Chicken with French Herbs, Fennel and Baby Potatoes
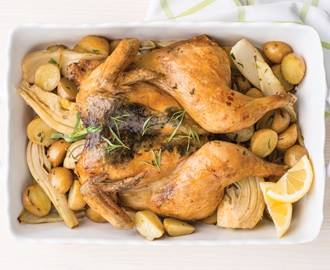
Split Roast Chicken with French Herbs, Fennel and Baby Potatoes
Makes 4 servings
Gluten Free and From From the Top 8 Allergens
Splitting a chicken encourages even roasting and beautiful presentation. This French bistro classic makes the most of spring herbs, delectable fennel, tiny potatoes, and shallots. Bon Appetit!
2 medium bulbs fennel, ends removed, rinsed and cut into 8 wedges each
1 pound baby potatoes, new potatoes (halved) or fingerling potatoes (halved lengthwise)
3 shallots, peeled and quartered lengthwise
4 tbsp olive oil, divided
½ tsp salt, plus additional for chicken
¼ tsp freshly ground black pepper, plus additional for chicken
3 tbsp chopped fresh tarragon, divided
1 3½ – 4 pound chicken
Juice and zest of 1 lemon
2 tbsp chopped fresh basil
1 tbsp chopped fresh thyme
½ cup dry white wine
1. Preheat oven to 400°F.
2. Combine fennel, potatoes, shallots, 3 tablespoons olive oil, ½ teaspoon salt, ¼ teaspoon pepper and 1 tablespoon tarragon in a large bowl. Transfer vegetables with seasoning to a roasting pan. Top with a roasting rack.
3. Rinse and pat chicken dry. Split chicken down the backbone with a sharp knife or kitchen shears. Flip and use the palm of your hand to press down firmly on the breastbone, to flatten. Beginning at the tail end, separate, but do not remove, the skin from the breast.
4. In a small bowl, combine lemon zest, 2 tablespoons tarragon, basil and thyme. Use fingers to spread and massage zest-herb mixture under chicken skin. Use toothpicks to secure the skin at the tail end, if needed.
5. Place chicken cavity side up on rack over vegetables. Season liberally with salt and pepper (about ¼ teaspoon each). Combine lemon juice with wine and pour over chicken.
6. Roast chicken and vegetables for 15 minutes. Remove from oven and flip chicken using tongs. Baste chicken with pan juices then brush with 1 tablespoon olive oil and season with more salt and pepper (about ⅛ teaspoon each). Return to oven and roast 15 minutes more.
7. Reduce oven temperature to 325°F. Bake chicken and vegetables for 1 hour, undisturbed, until skin is crispy, juices run clear when pricked with a skewer and an instant thermometer reads 185°F when inserted into the thickest part of the chicken.
8. Remove chicken from oven and let rest 10 minutes before carving. Serve with roasted vegetables and top with pan juices.
Split Roast Chicken with French Herbs, Fennel and Baby Potatoes © 2014 by Cybele Pascal
This recipe first appeared in the Spring 2014 issue of Allergic Living Magazine
May 23, 2015
Carne Asada
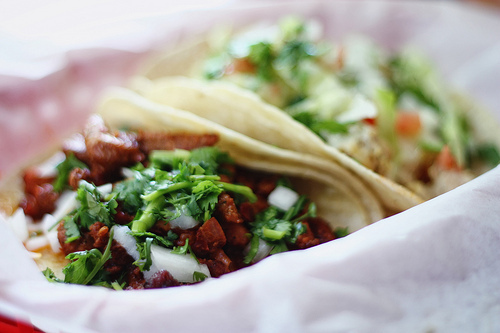
Carne Asada
Serves 6
Gluten-Free and Free From the Top 8 Allergens
This versatile and flavorful Latin American dish literally translates to “grilled meat”. We like it cooked medium-rare and served with my Grilled Corn and Avocado Salad (recipe coming) or cooked medium for soft tacos (see note below).
For tender results, look for flap steak in Latino markets or request it from your butcher. As an alternate, skirt steak is an excellent thin cut that comes in strips, which marinate easily and are perfect for searing over the barbecue.
4 garlic cloves
1 jalapeno or serrano chili pepper, roughly chopped
½ cup firmly-packed fresh cilantro leaves
1 tsp ground cumin
1 tsp dried oregano
1 tsp chili powder
½ tsp salt, plus additional as needed
freshly ground black pepper
¼ cup fresh-squeezed lime juice (2 limes)
¼ cup fresh-squeezed orange juice (1 orange)
2 tbsp apple cider vinegar
1 tsp honey
½ cup olive oil
2 lbs flap steak or skirt steak
1. For the marinade, turn food processor on and drop in garlic then chili pepper to finely chop. Turn processor off, add cilantro and pulse a few times until chopped. Add cumin, oregano, chili powder, ½ teaspoon salt and a few turns of pepper and turn processor on. With machine running pour in juices, vinegar and honey. Slowly add oil in a steady stream until pureed.
2. Put steak in a shallow ceramic or glass baking dish. Add marinade and turn steak to evenly coat on all sides. Cover and refrigerate 1-8 hours.
3. Heat grill to high and brush grates with oil.
4. Remove meat from marinade letting excess drip off. Lightly season both sides of meat with salt and pepper. Grill 3-4 minutes per side, lid closed, for medium rare. A thermometer inserted horizontally into the steak should read 140ºF and it will have a deep pink center. For medium, cook 1-2 minutes more, lid closed, to obtain a light pink center.
5. Remove meat to a cutting board and let rest 5 minutes. Thinly slice against the grain.
Soft Tacos: Heat 12 gluten-free soft corn tortillas on grill, 30 seconds per side. Double up tortillas on 6 plates and top with cooked Carne Asada strips. Garnish with condiments of choice, such as minced white onion, dairy-free cheese alternative shreds, pico de gallo or salsa, shredded lettuce, guacamole or diced avocado and coarsely chopped cilantro. Serve with lime wedges.
Carne Asada © 2014 by Cybele Pascal
This recipe first appeared in the Summer 2014 issue of Allergic Living Magazine
April 3, 2015
Allergy Friendly Matzo Ball Soup

Allergy-Friendly Matzo Ball Soup
Makes 4 servings
Gluten-Free and Free From the Top 8 Allergens
I am posting this recipe by special request of a reader, tonight, who could no longer find it up on Martha Stewart’s Whole Living site — and that is because the magazine no longer exists 
These matzo balls look just like traditional matzo balls, and mimic the texture very nicely. Be prepared to serve and eat them right away.
Happy Passover, Sara  And to all!
4 cups low-salt chicken broth or stock (for cooking the matzo balls in — allergy-friendly)
1/3 cup corn flour
¼ cup potato starch
¼ cup quinoa flakes
1 teaspoon baking powder
1/2 teaspoon xanthan gum
1/2 teaspoon salt
freshly ground pepper
1 1/2 teaspoons Ener-G Egg Replacer mixed with 2 Tablespoons chicken broth
1 Tablespoon applesauce
2 Tablespoons canola oil
¼ cup chicken broth
¼ cup very finely minced yellow onion
1 ½ teaspoons finely minced parsley
extra finely minced parsley or dill for garnish
1. Measure out corn flour and potato starch by spooning into dry measuring cups, then leveling off with a straightedge or butter knife. Combine flours with quinoa flakes, baking powder, xanthan gum, salt, and a few turns of freshly ground pepper. Whisk well, and set aside.
2. Whisk together egg replacer (prepared as instructed above), and applesauce. Add canola oil, and then remaining ¼ cup of chicken broth. Whisk well.
3. Make a well in the center of the dry ingredients. Add liquid ingredients, and stir with a wooden spoon. Add minced onion and minced parsley, stirring to combine.
4. Heat 4 cups chicken broth over medium-high heat.
5. Meanwhile, wet hands slightly with cool water, and roll dough into balls, about 1 ½-inches in diameter, wetting hands again as necessary.
6. Once chicken broth has come to a boil, reduce to a simmer, and gently add matzo balls to pot. Reduce heat to low, cover pot and cook 10 minutes. You don’t want to overcook them or they’ll get soggy, but cook them long enough to cook the onions. 15 minutes max. Remove from heat.
7. Adjust salt and pepper to taste. Sprinkle in some parsley or dill. Serve immediately.
Tip: If you have had to let the matzo balls sit before serving, by some misfortune, reheat the broth to a simmer and heat until matzo balls are bobbing again.
Allergy-Friendly Matzo Balls (and Matzo Ball Soup)
© 2010 by Cybele Pascal
March 30, 2015
Allergy Friendly Spring Vegetable Risotto

Spring Vegetable Risotto
Serves 4
Free From: gluten and all top allergens
Brimming with the bounty of spring, this risotto is so flavorful that you won’t even miss the customary Parmesan. Tender asparagus, baby zucchini, and young peas are rounded out by the delicate notes of sweet onions, fresh herbs, and early season tomatoes. Luckily, you can find these ingredients year round, so bring a little spring to your table, all year long!
Prep all ingredients, read the recipe through, and be ready to go. Risotto is easy, but requires continuous attention.
4½ cups vegetable or chicken broth (or stock)
¼ cup olive oil
1 tablespoon dairy-free, soy-free margarine or buttery spread
1 cup finely chopped sweet onion (e.g. Vidalia or Walla Walla)
2 garlic cloves, finely minced
1½ cups uncooked Arborio rice
½ cup dry white wine
1 small zucchini, finely chopped
12 ounces small asparagus, chopped into ¼-inch pieces
1 cup fresh shelled peas, the smaller the better
3 plum tomatoes, seeded and finely chopped
¼ teaspoon salt, plus a pinch for finishing
¼ cup chopped fresh flat leaf parsley, divided
¼ cup chopped fresh basil, divided
Freshly ground black pepper, to taste
Extra-virgin olive oil, to serve
Black truffle salt, to serve (optional)
1. In a medium saucepan, bring broth to a slow boil. Reduce heat and simmer over lowest possible heat.
2. In a large pot or Dutch oven, heat olive oil and margarine over medium heat. Add onion and cook, stirring often, for 2 minutes or until aromatic. Add garlic and sauté 1 minute. Add rice and sauté until glistening, about 1 minute. Add wine and cook while stirring until absorbed, about 2 minutes.
3. Add ½ cup heated broth to rice. Simmer while stirring continuously over medium heat until all broth is absorbed. Repeat, continuing to add 3 more cups heated broth, a half cup at a time, stirring continuously after each addition, until completely absorbed. After 10 minutes, stir in zucchini, asparagus, peas, tomatoes and ¼ teaspoon salt. Add another ½ cup broth and continue cooking as before, for 8 to 10 minutes, (reduce heat if simmering too hard) or until rice and vegetables are just tender, and ½ cup broth remains. Turn off heat.
4. Add final ½ cup broth, half of herbs, pinch salt and a few turns of black pepper. Cover and let rest 2 minutes.
5. Serve immediately, topped with remaining fresh herbs, drizzle with extra-virgin olive oil and sprinkle with a little black truffle salt, if using.
Allergy-Friendly Spring Vegetable Risotto © 2014 by Cybele Pascal
This recipe first appeared in the Spring 2014 issue of Allergic Living Magazine
March 15, 2015
Allergy Friendly Chocolate Cherry Cheesecake Squares

Chocolate Cherry Cheesecake Squares
Rich, decadent and flavorful, this hybrid dessert takes dairy-free indulgence to a whole new level. Thank you, Daiya, you’ve made the world a better place with your vegan dairy-free cheeses!
Makes 16 squares
Free From: gluten and all top allergens
Chocolate Layer Ingredients
½ cup + 4 tbsp dairy-free milk alternative (such as rice milk), divided
1½ tsp powdered egg replacer (such as Ener-G)
1¼ cups my Basic Gluten-Free Flour Mix or Authentic Foods GF Classical Blend
1¼ cups sugar
½ cup + 2 tbsp cocoa powder
1¼ tsp baking soda
⅝ tsp double-acting baking powder
⅝ tsp salt
½ tsp xanthan gum
½ cup + 2 tbsp warm water
¼ cup + 1 tbsp canola oil
¾ tsp vanilla extract
Cherry Cheesecake Layer Ingredients
2 tbsp dairy-free milk alternative (such as rice milk)
1½ tsp powdered egg replacer (such as Ener-G)
4 oz dairy-free, soy-free plain cream cheese alternative (such as Daiya)
2 tbsp dairy-free soy-free vegetable shortening
2 tbsp + 2 tsp sugar
1 tbsp my Basic Gluten-Free Flour Mix or Authentic Foods GF Classical Blend
⅜ tsp vanilla extract
1¼ cups cherry pie filling
Chocolate Drizzle
¼ cup allergen-free semi-sweet chocolate chips
1 tsp dairy-free soy-free vegetable shortening
1. Preheat oven to 350° F. Line a 9-inch baking pan with foil, extending ends over sides of pan and lightly grease.
2. For chocolate layer, whisk together 2 tablespoons milk alternative and egg replacer in a small bowl, until frothy.
3. In bowl of a stand mixer fitted with paddle attachment, whisk together flour blend, sugar, cocoa powder, baking soda, baking powder, salt and xanthan gum.
4. Add remaining ½ cup + 2 tablespoons milk alternative, warm water, oil, vanilla and egg replacer and beat on medium-low speed until smooth, about 2 minutes, scraping down sides of bowl as needed.
5. Transfer batter to foil-lined pan. Bake 25 minutes.
6. For cherry cheesecake layer, whisk together milk alternative and egg replacer in a small bowl, until frothy.
7. In bowl of a stand mixer fitted with paddle attachment, beat cream cheese alternative and shortening on medium speed until smooth. Mix in sugar and flour. Add egg replacer and vanilla and beat on medium speed until creamy and slightly fluffy.
8. When chocolate layer has baked 25 minutes, remove from oven and immediately spoon cheesecake mixture and cherry pie filling over top, alternating heaping tablespoons of each in a checkerboard pattern. Use a spoon to swirl together until marbled, leaving a little chocolate visible around edge of cake.
8. Bake 35 minutes, until chocolate layer starts to pull away from pan sides and filling edges are puffed and set. The center will still jiggle slightly.
9. Let cool completely on a wire rack. Transfer to refrigerator and chill at least 4 hours.
10. Grab edges of foil on both sides and lift cake out of pan. Cut into squares, wiping the knife blade clean after each cut. Transfer squares to individual cupcake liners.
11. For chocolate drizzle, place chocolate chips and shortening in a small microwave safe bowl and microwave on high 30 seconds. Vigorously stir. If not melted, microwave on high 30 seconds. Vigorously stir until smooth. Drizzle over squares and let stand 5 minutes. Serve immediately or store tightly covered in refrigerator up to 3 days or freeze up to 3 months.
Allergy-Friendly Chocolate Cherry Cheesecake Squares © 2014 by Cybele Pascal
This recipe first appeared in the Winter 2014 issue of Allergic Living Magazine
February 11, 2015
Hungarian Goulash with Buttery No Egg Noodles
Hungarian Goulash with Buttery No Egg Noodles
Serves 4
Free of: gluten and all top allergens
Hungarian Goulash is a cool weather favorite, hailing from Eastern Europe. The key ingredient is sweet Hungarian paprika, which has a warm exotic flavor. This dish usually contains gluten, dairy and eggs, but there’s no need for any of that here.
2 pounds boneless beef chuck roast, cut into 2-inch chunks, generously seasoned with salt and pepper
6 tbsp superfine brown rice flour
3 tbsp canola oil, divided
2 cups thinly sliced yellow onion
2 tbsp Hungarian sweet paprika
2 tbsp finely minced garlic
2 cups low-sodium beef broth (look for allergen-free brands)
3 tbsp tomato paste
Big pinch salt
½ cup vegan plain yogurt (preferably “Greek” style So Delicious coconut milk yogurt)
1 tbsp red wine vinegar
1 tsp lemon juice
Salt and pepper, to taste
Buttery No Egg Noodles (recipe follows)
Chopped dill, for garnish
Dredge seasoned beef in flour, shaking off extra.
Heat 2 tbsp oil over medium-high heat in a large Dutch oven. Add half of the beef to the pan, and brown on all sides, about 4 to 6 minutes total. Transfer cooked beef to a plate. Add remaining 1 tbsp oil and repeat the process with remaining half of beef.
Add onion, paprika and garlic to the pan, and cook while stirring for 30 seconds. Add broth, and deglaze, scraping up browned bits from bottom of pan.
Add tomato paste, stir well, and add back beef and big pinch of salt. Bring to a boil, reduce heat to low, and cover. Cook at a low simmer until meat is fork tender, about 2 to 2½ hours, stirring occasionally.
Remove from heat, stir in yogurt, vinegar and lemon juice, and season with salt and pepper to taste.
Serve over Buttery No Egg Noodles and garnish with dill.
Buttery No Egg Noodles
8 ounces gluten-free fusilli or spiral pasta
½ cup frozen peas
2 tbsp dairy-free, soy-free margarine (such as Earth Balance Soy-Free Buttery Spread)
1 tbsp chopped dill
Salt and freshly ground pepper
Cook noodles according to instruction on package. In last minute of cooking, add peas. Drain.
Toss cooked pasta and peas with margarine and dill, and season to taste with salt and pepper.
Hungarian Goulash with Buttery No Egg Noodles © 2013 by Cybele Pascal
This recipe first appeared in the Fall 2013 issue of Allergic Living Magazine
December 22, 2014
Allergy Friendly Sugar n Spice Cookies

Sugar ‘n Spice Cookies
The warmth of cardamom and nutmeg escalates these classic delights from ordinary to extraordinary. Carry them through the seasons with a diverse set of cookie cutters, from gingerbread men to Valentine hearts.
Makes 36 3-inch cookies
Free From: gluten and all top allergens
2½ cups + 2 tbsp my Basic Gluten-Free Flour Mix or Authentic Foods GF Classical Blend, plus additional for rolling
¾ tsp baking soda
¾ tsp ground cardamom
⅝ tsp xanthan gum
¼ tsp ground nutmeg
¼ tsp salt
1 cup granulated sugar
¾ cup dairy-free soy-free vegetable shortening
1½ tsp Ener-egg replacer mixed with 2 tbsp plain rice milk
1½ tsp vanilla extract
2 tbsp plain rice milk
Glaze (optional)
1 cup confectioners’ sugar, sifted
3 tbsp plain rice milk alternative
1. In a medium bowl, whisk together flour blend, baking soda, cardamom, xanthan gum, nutmeg and salt.
2. In bowl of a stand mixer fitted with paddle attachment, beat sugar and shortening on medium speed for 1 minute. Add egg replacer and vanilla extract and beat for 20 seconds. With mixer on low speed, add flour mixture in three batches, alternating with milk alternative (1 tablespoon at a time), beginning and ending with flour mix, until all cookie ingredients are fully combined and begin to form a ball in center of bowl.
3. Lay out two sheets of wax paper. Divide the dough evenly between the two sheets and shape into two disks. Wrap each disk in wax paper and chill 2 hours in refrigerator; if chilled much longer the dough will become brittle.
4. Preheat oven to 350° F. Line 2 baking sheets with parchment paper.
5. Dust your work surface and rolling pin with flour blend. Place one dough disk on work surface (leave other disk in the refrigerator) and dust with flour blend. Roll out dough to ¼-inch thickness, sprinkling on more flour blend as needed to avoid sticking. Cut dough into desired shapes with 3-inch cookie cutters. Transfer cut dough to baking sheets. Gather up remaining scraps, roll out and cut until all dough is used up. Repeat process with second disk of dough.
6. Bake cookies in center of oven for 10 minutes, or until lightly golden. Let cool on baking sheet for 10 minutes before transferring to a wire rack to cool completely.
7. For glaze, whisk together confectioners’ sugar and milk alternative in a small bowl until smooth. Use a pastry brush to paint cookies with glaze and dry, glaze side up, on wire rack for 1 hour.
Allergy-Friendly Sugar ‘n Spice Cookies © 2013 by Cybele Pascal
This recipe first appeared in the Winter 2013 issue of Allergic Living Magazine
Cybele Pascal's Blog

- Cybele Pascal's profile
- 8 followers

