
Cybele Pascal's Blog, page 4
May 1, 2014
Allergy Friendly Lemonade Cake

Allergy-Friendly Lemonade Cake
Makes 12 ample servings
Free of: gluten and all top allergens
Tart, sweet and the perfect finish to a summer meal, get ready to fall in love with this old-fashioned cake. It can be made a day in advance and lasts for several days, covered at room temperature, but good luck keeping it around that long!
Ingredients
¼ cup frozen lemonade concentrate, thawed
½ cup plain rice milk
¼ cup + 2 tbsp vanilla vegan yogurt (I like So Delicious coconut milk yogurt)
1½ tsp apple cider vinegar
1 tsp lemon zest
2¼ cups Authentic Foods GF Classical Blend or my Basic Gluten-Free Mix
¾ tsp xanthan gum
1⅛ tsp double-acting baking powder
1⅛ tsp baking soda
1⅛ tsp salt
1 cup + 2 tbsp sugar
½ cup + 1 tbsp dairy-free soy-free shortening
2¼ tsp vanilla extract
3½ tsp Ener-G Egg Replacer mixed with 4½ tbsp plain rice milk
1 recipe Lemonade Buttercream Frosting (recipe follows)
Method
1. Preheat oven to 350°F. Generously grease a 9×13-inch pan with shortening.
2. Combine lemonade concentrate, rice milk, yogurt and vinegar in a small bowl. Add zest, and set aside.
3. Measure flour mix by spooning flour into a dry measuring cup, then leveling it off with a straightedge. Whisk flour mix with xanthan gum, baking powder, baking soda and salt in a medium bowl. Set aside.
4. Add sugar and shortening to the bowl of a stand mixer fitted with the paddle attachment. Mix on medium speed for 2 minutes. Add vanilla and egg replacer mixture. Mix on medium speed 1 minute more.
5. Sift the flour mixture into the bowl of the stand mixer in three batches, alternating with the lemonade mixture, mixing after each addition to combine. Transfer batter to the prepared pan, and use an offset spatula to even out.
7. Bake in center of oven 20 minutes until the cake is starting to pull away from sides of pan, top is a lovely golden color, and a skewer or toothpick inserted into the cake comes out clean.
8. Let cool completely in pan on a cooling rack. Spread with frosting using an offset spatula.
Lemonade Buttercream Frosting
Makes enough to frost one 9×13-inch cake
Free of: gluten and all top allergens
¾ cup dairy-free soy-free shortening
Pinch of salt
¾ pound confectioners’ sugar (2¼ cup + 3 tbsp)
¼ cup frozen lemonade concentrate, thawed
¾ tsp vanilla extract
¾ tsp lemon zest
1. In the bowl of a stand mixer fitted with the paddle attachment, cream shortening and salt on medium speed for 2 minutes.
2. Add sugar in three batches, beating after each addition. It will be crumbly. Add lemonade concentrate, vanilla and zest. Beat on medium speed until smooth and fluffy, about 3 minutes.
Allergy-Friendly Lemonade Cake © 2013 by Cybele Pascal
This recipe first appeared in the Summer 2013 issue of Allergic Living Magazine


April 14, 2014
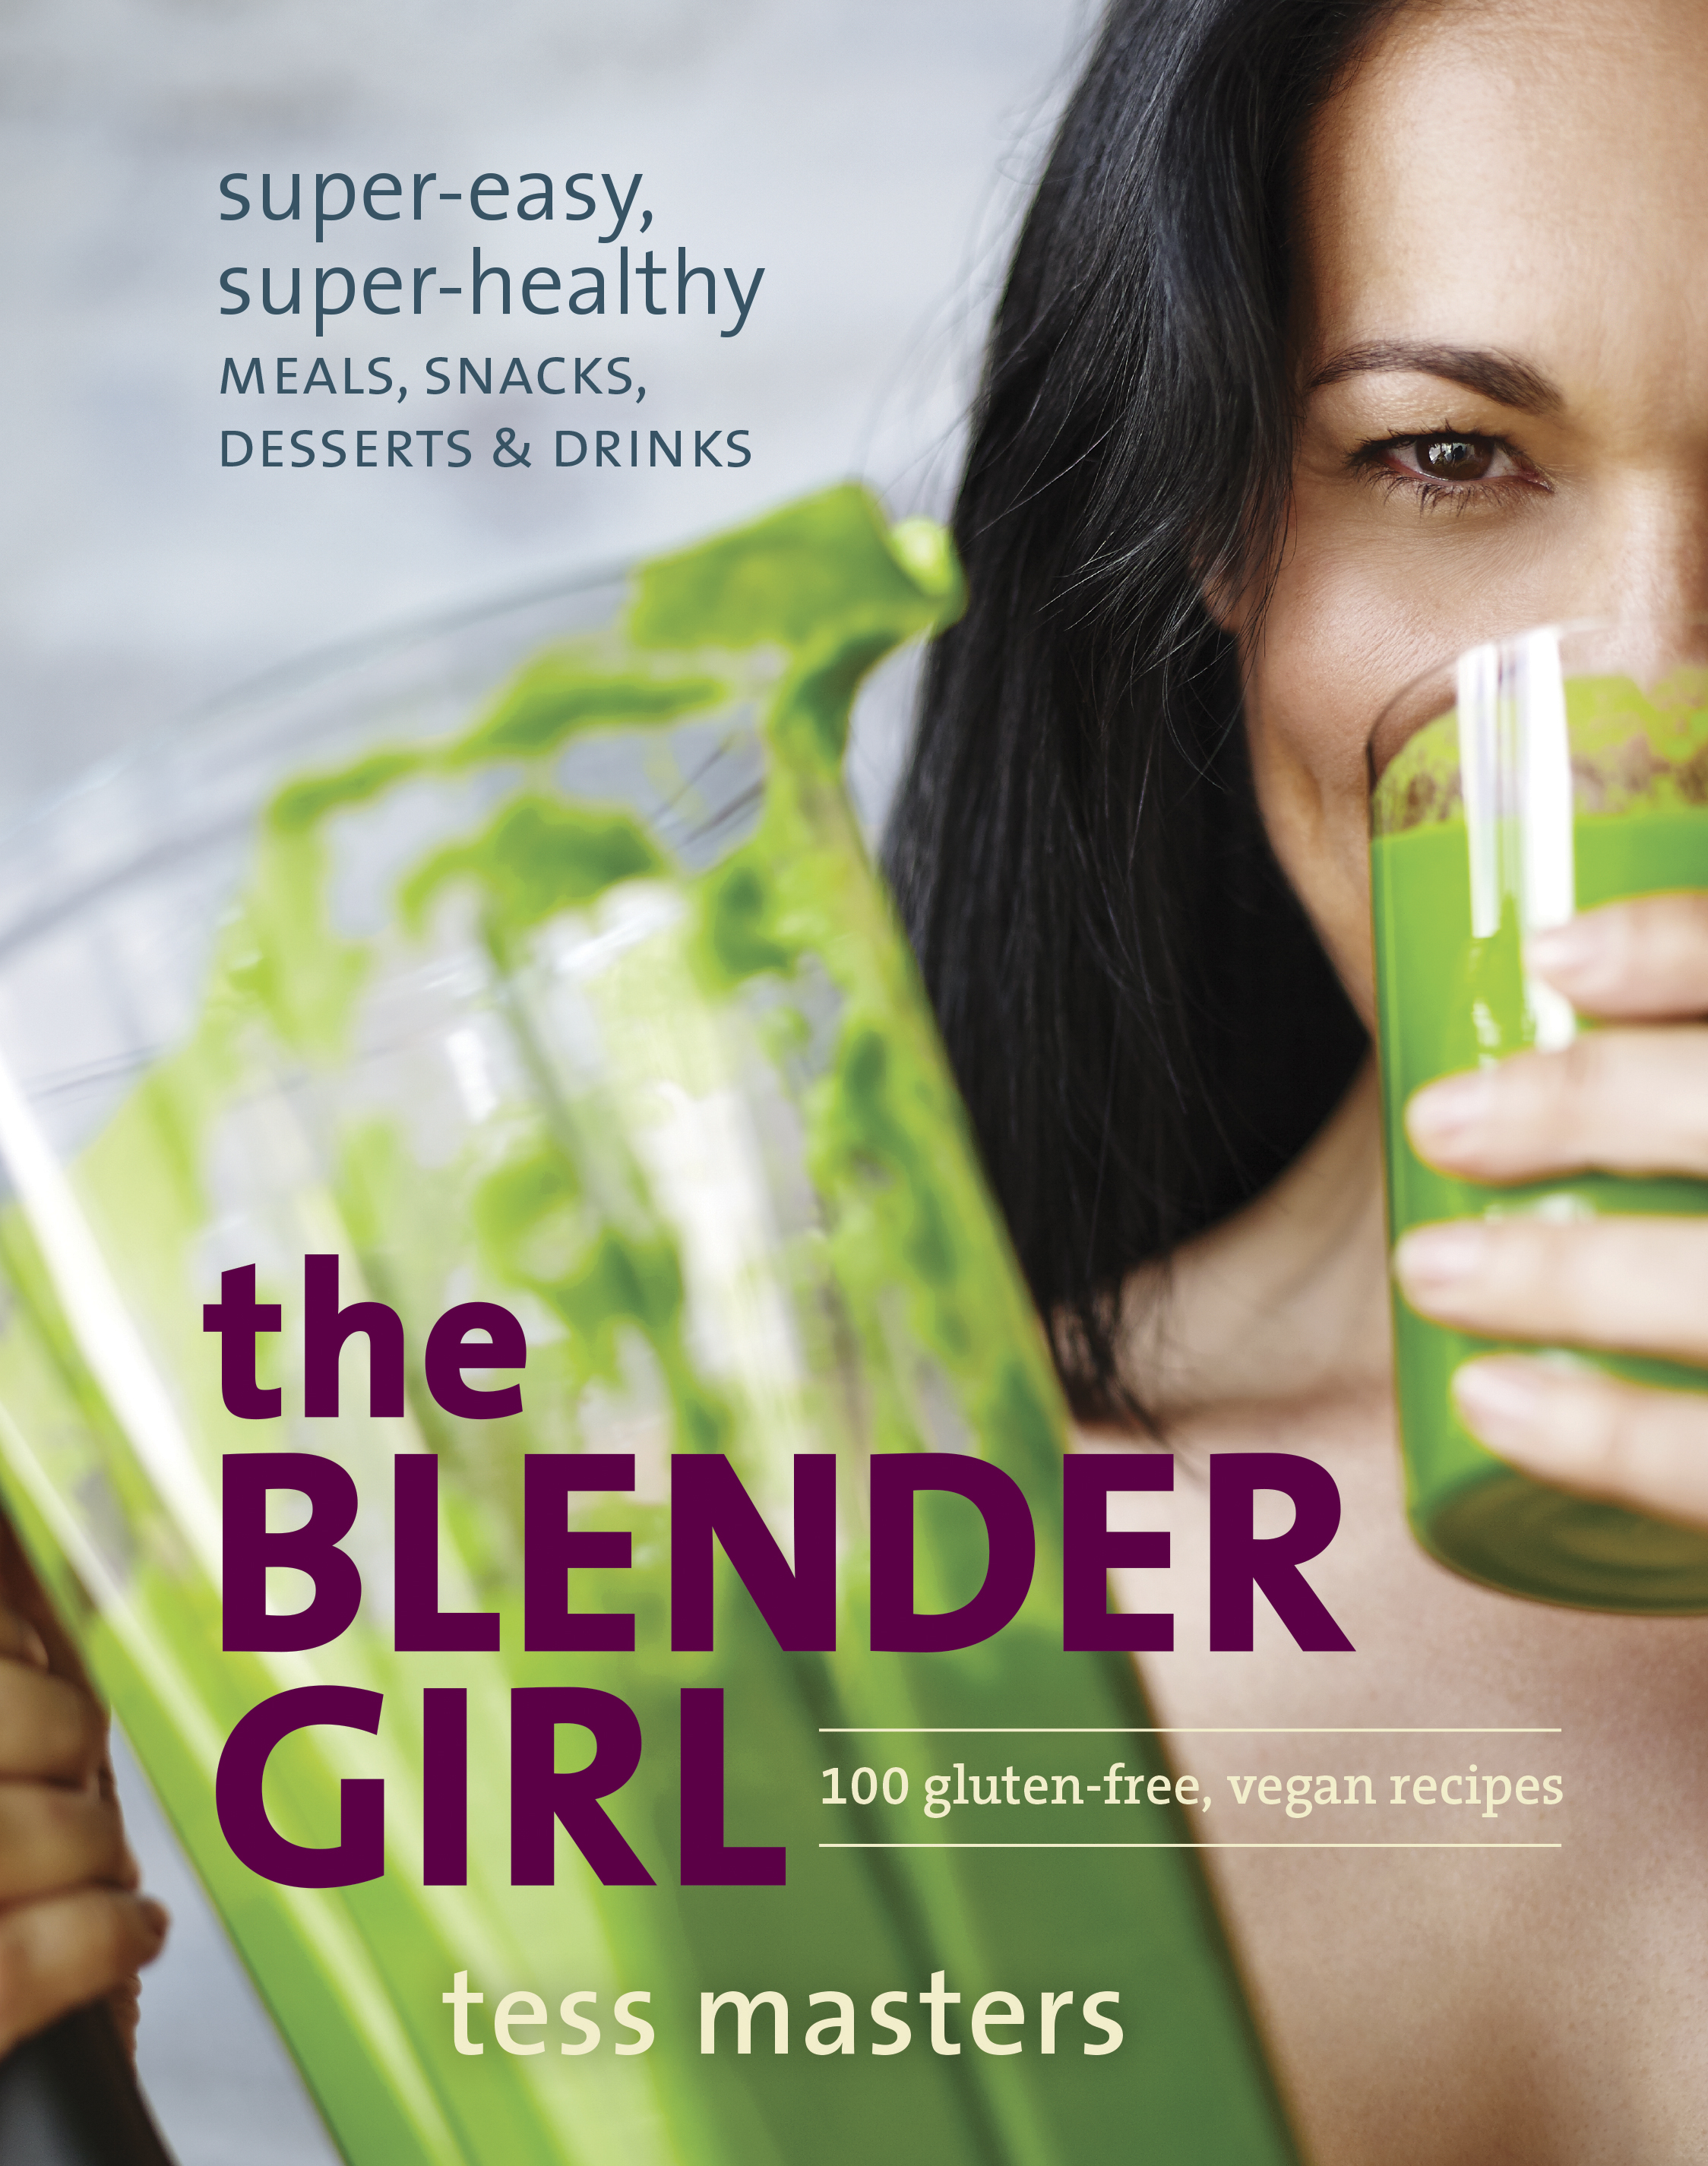
The Blender Girl by Tess Masters
antioxidant avenger
Tess Masters (aka, The Blender Girl) has just published her much anticipated debut cookbook, The Blender Girl: Super-Easy, Super-Healthy Meals, Snacks, Desserts & Drinks, and it’s a beauty. This is one colorful collection of 100 gluten-free, vegan recipes that all incorporate the use of a blender. And so, it should come as no surprise, that Tess’s philosophy of life is all about blending. “Blended” is a metaphor.
For those of you who have followed Tess’s blog, Healthy Blender Recipes, you already know how dynamic Tess is both in her persona and also her food writing. What I learned from reading her book is how flexible she is on both fronts as well. While she is a self-professed zealot, she is no preacher. For Tess, “the way” is a winding path, and it winds in a different direction for each and every one of us. So, this is not a “Gluten-Free” cookbook, or a “Vegan” cookbook, just a celebration of whole foods and a really great way to coax more fruits and vegetables into your daily diet.
Living in a world of fads and trends, it’s refreshing to have a cookbook author admit that there is no one diet that suits all, or even one diet that suits all of us, all the time. For example, Tess eats a lot of raw foods during the warmer months, but eats more cooked foods during the colder ones.
She puts forward the concept of bio-individuality. And while she makes no secret of the fact that she could “easily live without teeth”, this is not a prescription for others. It would be easy to assume that there would be rigidity to a vegan, gluten-free, (raw foods) cookbook full of recipes all made in a blender, but the opposite is actually true. This book will open your mind to endless new possibilities. I was delighted by the creativity and ingenuity of these recipes. “Optional” is a key word in this book, because whether you add an ingredient or not is up to you. But why wouldn’t you want to add the suggested ingredients, when what Tess has created is so perfect? I’m pretty sure that while Tess herself is not dogmatic or didactic, others will be tempted to make her their guru and follow her teachings to the “T” for Tess.
And speaking of “T” for Tess, one of my greatest takeaways from this book was the revelation that a blender-based diet is defined by the four Fs. It’s fun, fast, flexible, and forgiving.
While it might seem odd to focus so much attention on the prevailing philosophy of this cookbook, I think it’s important to recognize that it’s carving out a new genre. The blender isn’t just for smoothies anymore. It’s become a central kitchen tool in our busy, hectic, and often toxic lives, helping us create nutritionally dense, and delicious meals in a very short amount of time.
The Blender Girl: Super-Easy, Super-Healthy Meals, Snacks, Desserts & Drinks is packed with one healthy mouth-watering recipe after another. All made with natural flavors and sweeteners, all vegan, gluten-free and many raw. Many are also nut-free, soy-free, corn-free and sugar-free.
So what’s in the blender if you’ve excluded all that? A myriad of fantastic flavors melded into all kinds of exotic concoctions.
Highlights of the book are the “Love your Blender” chapter in which I learned more about blenders than I ever knew possible, (I was delighted to realize I own 3 types of blenders!) And yes, I too am smitten with longing for a Vitamix.
I also give a nod to her instructions for dehydrating – and I learned a lot from the soaking and sprouting tips. I also just adored the “Milk it baby!” chapter in which Tess walks readers through making your own vegan milks, of which there are countless varieties.
And here are a few shout outs: hats off to the super gorgeous inventive salads. To the “butters” and jams, to the dips, the smoothies, the chips, the fruit leather, the drinks chapter (love), the condiments and sauces, and of course, the desserts. In particular, the “Key Lime” Pudding, made with the incredibly simple and inventive combo of agave nectar, lemon and lime juice, avocado, bananas, and citrus zest. I loved this recipe because it got me thinking about “dessert” in a totally new way.
Now I will share a couple recipes from the book, which are both free of the Top 8 Allergens. Please note that you do not need a Vitamix to make the recipes in this book. While it may be the dream machine, I don’t have one, and these worked just fine. 
antioxidant avenger
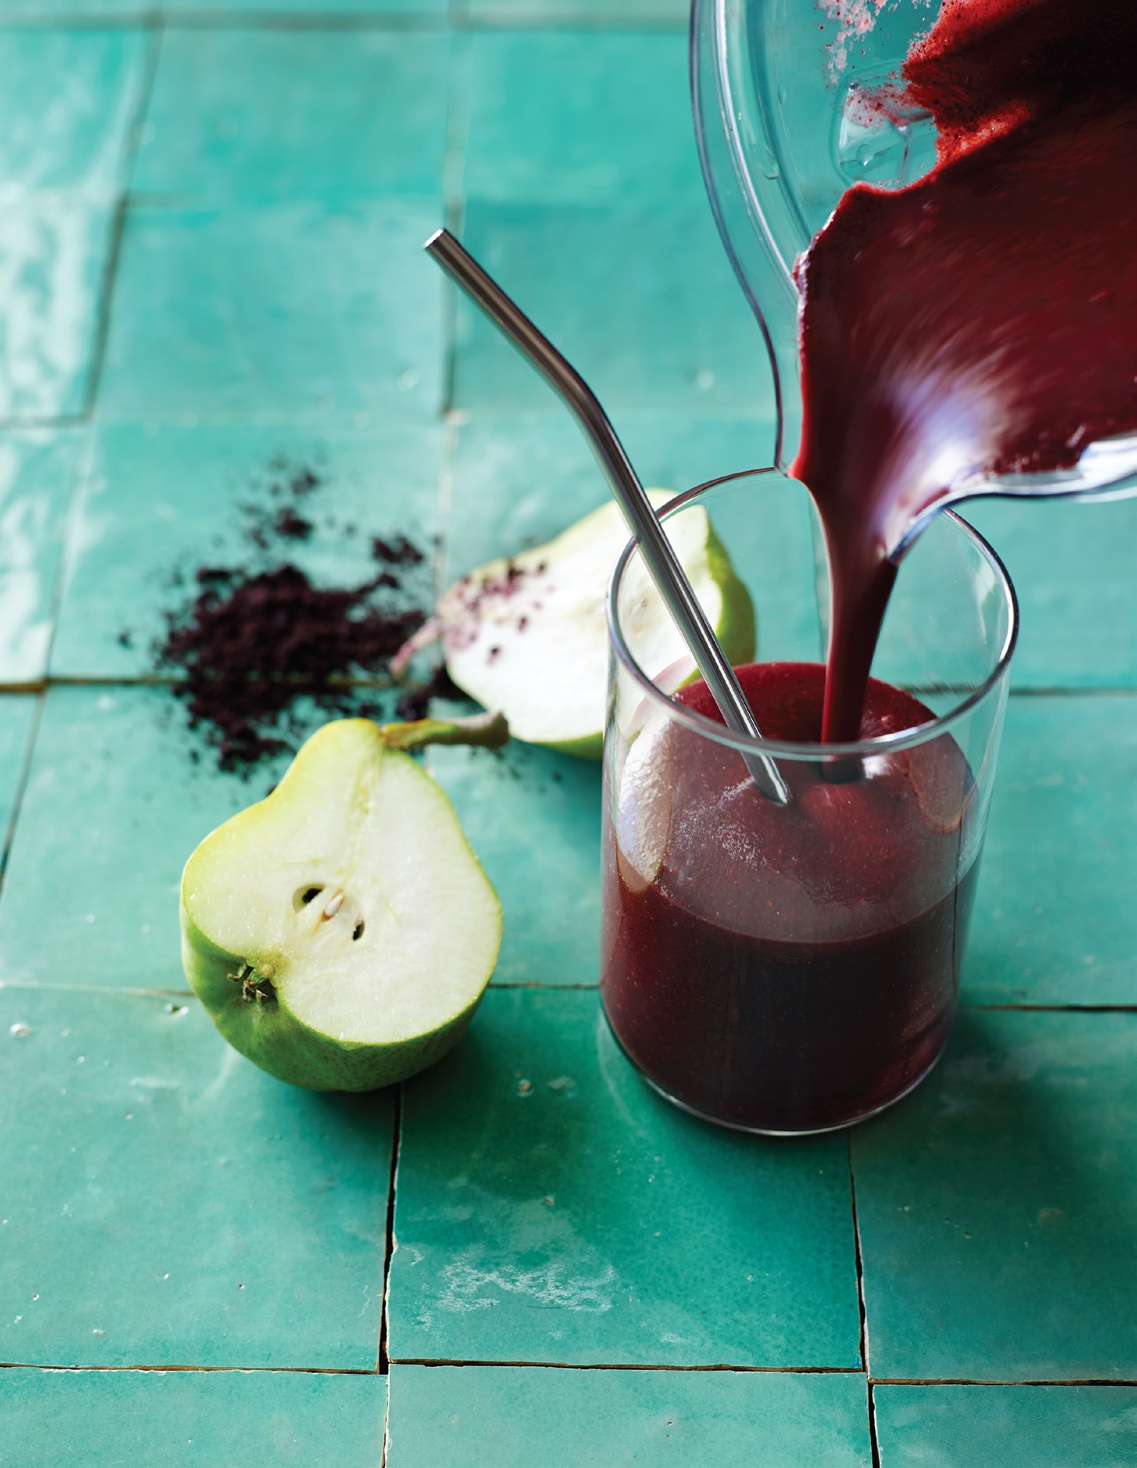
I think of this powerful blend as “field to shield.” With the antioxidant weight of these ingredients, nothin’s gettin’ the better of you! You can enjoy this booster in summer with a little sweetener and omit the trio of orange zest, cinnamon, and ginger. But, these warming spices taste absolutely incredible with the berries, really pull the other flavors together, and elevate this smoothie from good to great. The açaí and maqui are optional but provide an invaluable boost, and I always include them. If you don’t add these superfoods or the spices, you may not need the dates. However you make it, this one’s got your back.
serves 2
1/2 cup (120ml) coconut water
1/2 teaspoon probiotic powder (optional; see note, page 30)
1 packet (3.5 ounces/100g) frozen açaí pulp, or 2 tablespoons dried açaí powder
2 teaspoons maqui powder
2 cups (320g) mixed fresh or frozen berries (1/2 cup each of blueberries, blackberries, raspberries, and strawberries)
1/2 cup (85g) red seedless grapes
1 ripe pear, skin on, cored and diced
1/2 teaspoon minced ginger (optional)
1/4 teaspoon ground cinnamon (optional)
1/2 teaspoon finely grated
orange zest (optional)
1 cup (125g) ice cubes
1 chopped pitted date, soaked,
Throw everything into your blender and puree on high for 30 to 60 seconds, until smooth and creamy. Tweak the sweetness to taste.

watermelon gazpacho is the bomb!
The name says it all. Gazpacho rocks, and this concoction delivers a surprising taste explosion with every spoonful. A happy blend of sweet and spicy, the flavors in this chilled first course or main mellow nicely with time. In fact, the change in flavor is quite pronounced. This is particularly true of the onion. Like a fabulous sangria (see page 174), this soup is better the next day. But, it’s delicious a few hours after preparing, so don’t feel like you have to wait beyond the three-hour chill.
serves 8 as a starter, 6 as a main
4 cups (640g) roughly chopped seedless watermelon, plus 6 cups (960g) diced
2 cups (300g) diced tomato
1 cup (145g) peeled, seeded, and diced cucumber
1/2 cup (70g) diced red bell pepper
2 tablespoons diced red onion, plus more to taste
3 tablespoons finely chopped basil
3 tablespoons finely chopped mint
3 tablespoons freshly squeezed lime juice, plus more to taste
1 teaspoon finely grated lime zest
2 teaspoons minced ginger
1/2 teaspoon minced green serrano chile, plus more to taste
1/2 tablespoon natural salt, plus more to taste
Pinch of freshly ground black pepper
Put the 4 cups of chopped watermelon into your blender and puree on high for 30 to 60 seconds, until liquefied. Pour into a serving bowl. Add the 6 cups of diced watermelon and all the remaining ingredients. Stir to combine well. Tweak flavors to taste (you may want more onion, lime juice, chile, or salt).
Cover and chill in the fridge for at least 3 hours, but preferably 12 to 24 hours to allow the flavors to fuse and the vibrant red color to develop. Before serving, tweak flavors again (if it’s too spicy, add some lime juice). Pass additional lime juice and salt at the table.
Recipes reprinted with permission from The Blender Girl: Super-Easy, Super-Healthy Meals, Snacks, Desserts, and Drinks–100 Gluten-Free, Vegan Recipes! by Tess Masters, copyright © 2014. Published by Ten Speed Press, a division of Random House, Inc.
Photo Credit: Photo taken by Anson Smart © 2014
April 6, 2014
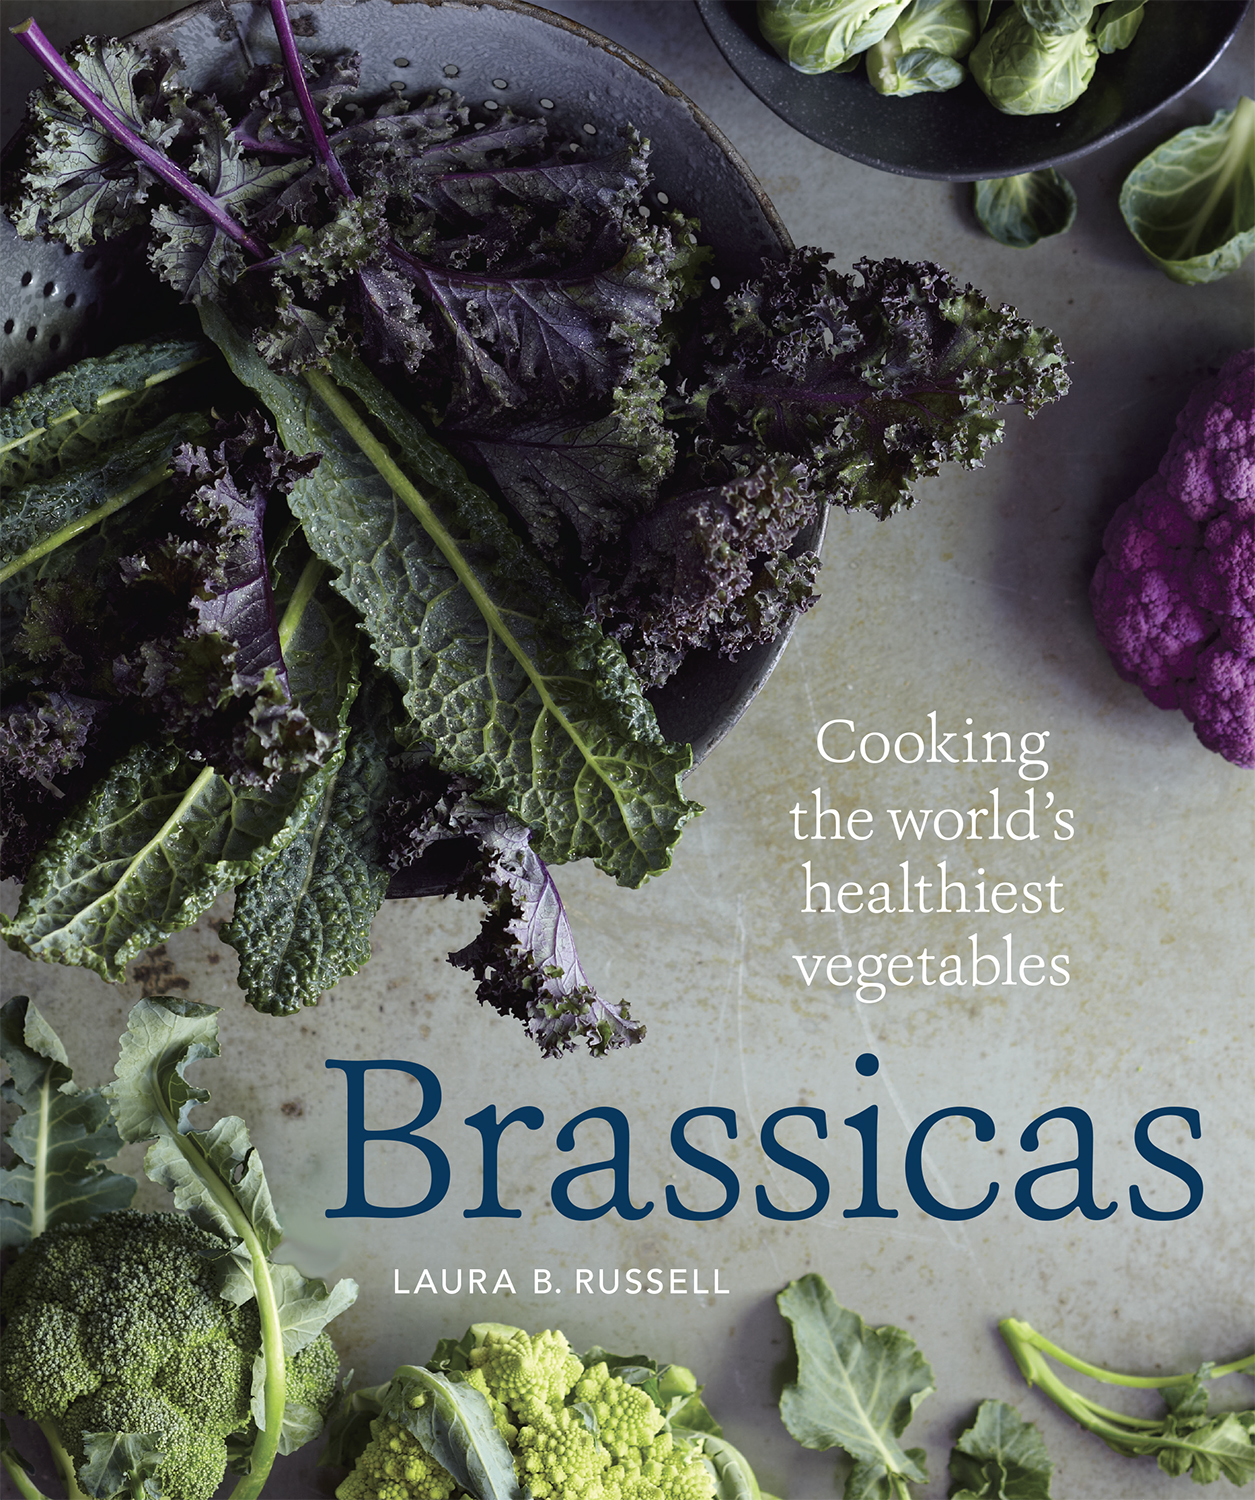
Brassicas: Cooking the world’s healthiest vegetables by Laura B. Russell
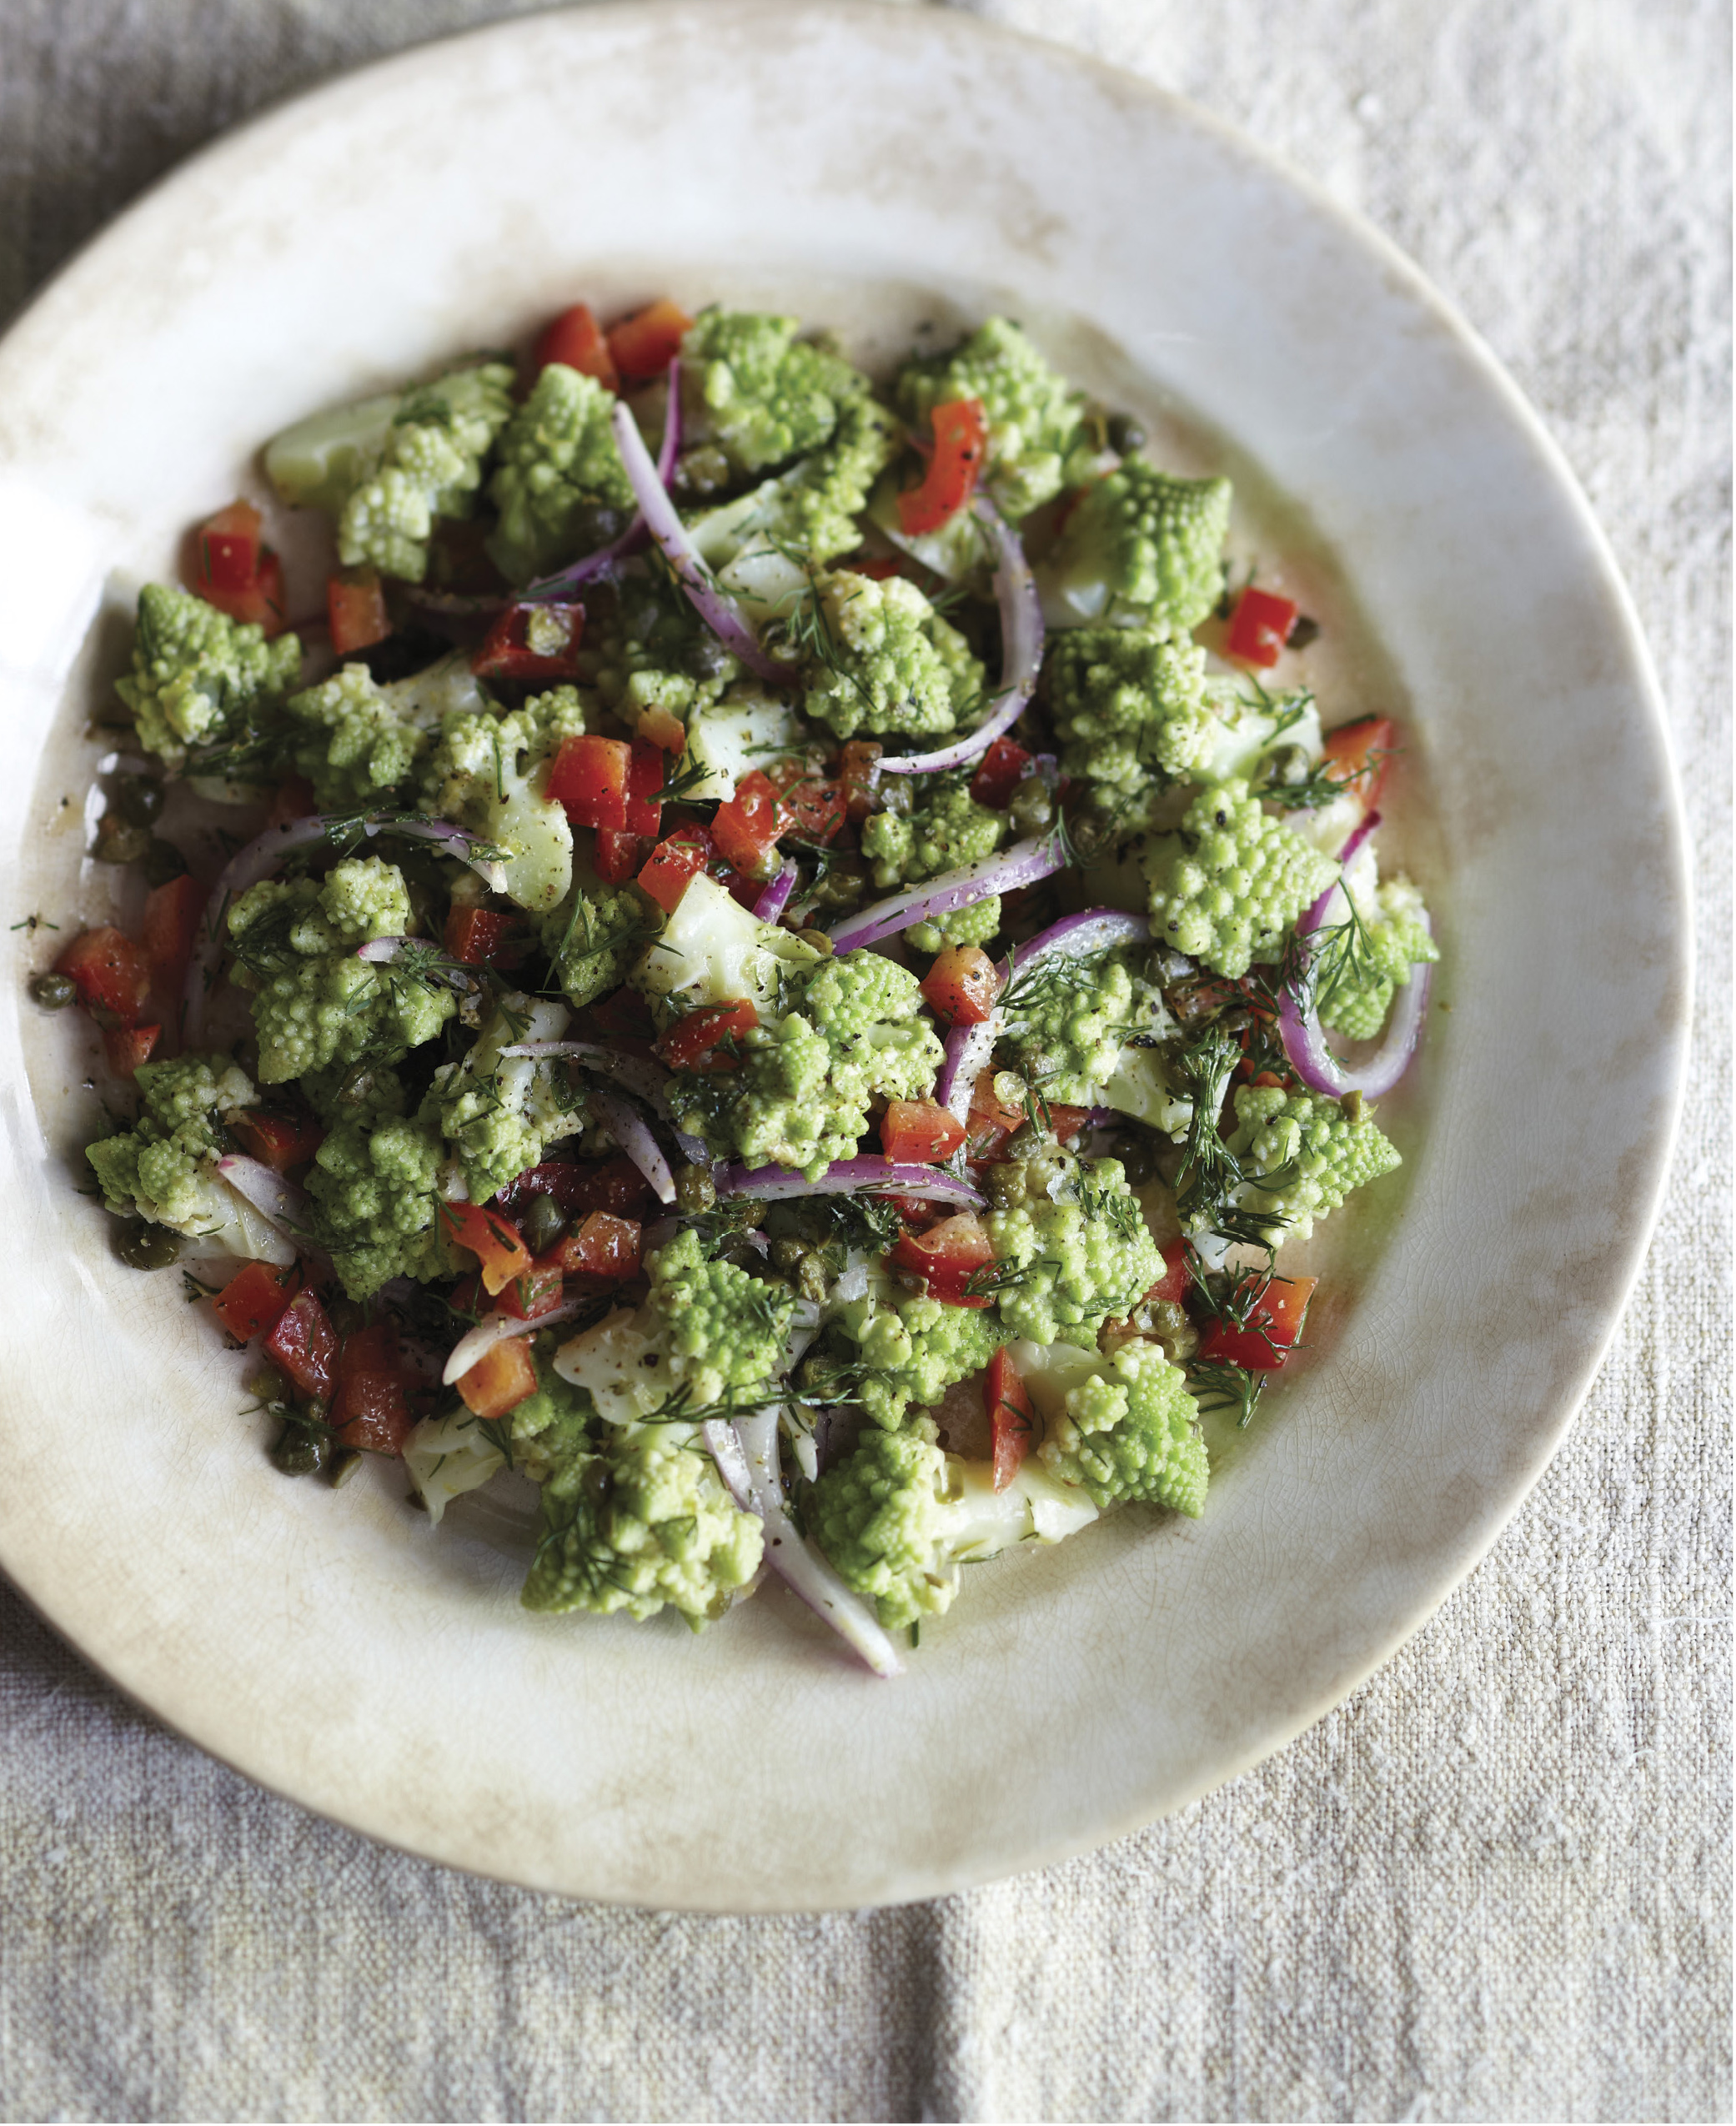
Romanesco Summer Salad
Laura B. Russell has done it again! Yup, that’s right, she’s made me drool. Her new book Brassicas is stunning, sumpteous, and best of all, user-friendly. I will, without a doubt, be cooking my way from cover to cover.
It’s been quite awhile since a cookbook’s jacket copy has inspired my heart to skip a beat. And so it did, when I flipped to read about what awaited me in the pages of Brassicas. I had known that Laura was working on an all-vegetable cookbook, and had filed that somewhere in the back of my mind as interesting (and something to look forward to). After all, I was a fan of her first cookbook The Gluten-Free Asian Kitchen. But I had no idea how excited I would be when this cookbook finally graced my table. If you are a fan of cruciferous and other brassicas veggies, you too will feel like this book was written especially for you. It’s a veritable candy shop for those who like their greens. It’s a celebration of the world’s healthiest vegetables, of their boundless potential and rich natural flavors. From the inherent sweetness coaxed out of brussels sprouts (see recipe for Charred Brussels Sprouts with Pancetta and Fig Glaze below) to the peppery zip of arugula and watercress salads, to the creaminess of Cauliflower Hummus, this book will take you on a journey through the wonders of brassicas, superfoods of the vegetable kingdom.
Featuring 80 recipes, Brassicas is chock-full of simple sides, salads, breakfast dishes, soups, snacks and even smoothies. Veggies aren’t j�ust for balancing out your plate at supper, they are to be featured, as highlights, all day long. In addition to one knock-out recipe after another, Brassicas is also structured in my favorite format for cookbooks: chapters are devoted to a single vegetable or class of brassicas.
The majority of the recipes are made with recognizable and easy-to-find brassicas like broccoli, cauliflower, cabbage, kale, and brussels sprouts, which is a plus for shoppers. But for those wanting a little exotic variety, there are gorgeous recipes for broccoli rabe, kohlrabi, mizuna, and collards, just to name a few. I, for one, am always looking for ways to introduce new foods to my family. And, I’ll venture to say, this is a book full of superfoods that will inspire even professed veggie-haters to gobble up what’s on their plates. Look at the glorious Romanesco Summer Salad picture, featured above. I’m sure I can convince my two boys to eat this simply based upon its other worldly resemblance to dinosaur tails. Fun food! And my husband? With its nod to Italian al fresco dining, that’s one romantic looking plate!
For those with dietary restrictions, please note that all of the recipes are gluten-free. Laura has also included a “Special Diets Table”, for identifying major food allergens. Many recipes are naturally allergy-friendly, and for those containing a major allergen, many can be made allergen-free with a substitution, as identified on this table. The two recipes I feature below are gluten-free and free of all Top 8 Allergens.
Brassicas is available for pre-order now and wherever books are sold on April 8, 2014.
Romanesco Summer Salad
Serves 4
Although vibrant lime green Romanesco (sometimes called broccoli Romanesco or Romanesco cauliflower) looks like the love child of cauliflower and broccoli, it is actually closer to cauliflower in terms of taste and how it is used. Its color is fantastic in this lively salad, though you can definitely use white cauliflower if that’s all you can find. Cook the Romanesco just long enough to take away the raw bite, 2 to 3 minutes tops. Normally I would suggest plunging the florets into ice water to halt the cooking immediately, but introducing extra water here will mute the flavor and dilute the dressing. Instead, cook them fast and then spread them on a baking sheet so they cool quickly.
1 cup water
1 medium Romanesco or regular cauliflower, cored and cut into bite-size florets (about 5 cups)
2 teaspoons whole-grain Dijon mustard
Grated zest of 1 lemon
2 tablespoons freshly squeezed lemon juice
3⁄4 teaspoon kosher salt (divided)
3 tablespoons olive oil
1 red bell pepper, chopped
1⁄2 cup thinly sliced red onion
1⁄3 cup chopped fresh dill
3 tablespoons drained capers, coarsely chopped
In a large pot, bring the water to a boil over high heat. (If you have a steamer insert, put it in the pot to hold the Romanesco. If you don’t have one, don’t worry about it.) Add the Romanesco, cover the pot, turn down the heat to medium, and steam for 2 to 3 minutes, until crisp-tender. Using a slotted spoon, transfer the Romanesco to a rimmed baking sheet or clean kitchen towel, spreading it in a single layer, to cool.
In a small bowl, to make the vinaigrette, whisk together the mustard, lemon zest, lemon juice, and 1/4 teaspoon of the salt. Slowly add the oil, whisking constantly with a fork to form an emulsified vinaigrette.
Put the Romanesco in a serving bowl. Add the bell pepper, onion, dill, capers, the remaining 1/2 teaspoon salt, and the vinaigrette and toss gently to combine. Cover and refrigerate until ready to serve. It will keep well for several hours. Just before serving, taste and add more salt if needed.
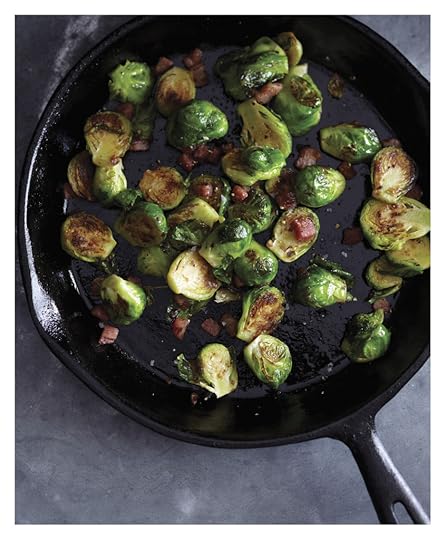
Charred Brussels Sprouts with Pancetta and Fig Glaze
Serves 4
Nothing tastes better with Brussels sprouts than cured pork, which is why I unapologetically offer you recipes that flavor sprouts with both pancetta and bacon (page 61). Here, the salty pancetta plays well with the sweetness from the fig jam, and you can finish the dish with a drizzle of balsamic vinegar to add a tangy note (see variations). I found fig jam near the grocery store’s cheese counter (not in the jams and jellies aisle), but you could also try apricot or peach jam instead. You may want to add a touch more jam than I suggest, but strive for a subtle sweetness rather than a cloying, sticky mess.
3 tablespoons olive oil (divided)
3 to 4 ounces pancetta, diced
11⁄2 pounds Brussels sprouts, trimmed and halved (or quartered if large) through the stem end (about 6 cups)
1⁄4 teaspoon kosher salt
2 tablespoons fig jam
1 tablespoon water
1⁄4 teaspoon freshly ground black pepper
In a large (12 inches or wider) frying pan, heat 1 tablespoon of the oil over medium heat. Add the pancetta and cook, stirring occasionally, for about 3 minutes, until crisp. Using a slotted spoon, transfer the pancetta to a small bowl. Return the pan to medium-high heat and add the remaining 2 tablespoons oil. Add the Brussels sprouts, keeping them in a single layer as much as possible. Having a few extra sprouts is fine, but if they are mounded in a pile, they will not brown or cook evenly. If necessary, use a larger pan, cook them in two batches, or pull out the extra for another use. Stir in the salt. Cook, stirring occasionally, for about 10 minutes, until the Brussels sprouts are tender and well browned—even charred in spots. If the sprouts are browning too quickly, lower the heat to medium.
Add the fig jam and the water and stir until the jam melts and coats the Brussels sprouts. Add the reserved pancetta and the pepper and stir to combine. Taste and add additional salt or pepper if needed. Serve warm.
Variations For a sweet, salty, tangy version, add a drizzle (a teaspoon or less) of balsamic vinegar at the end. Aged balsamic is an especially good choice. Although I prefer pancetta here (I like its unsmoked rich pork
flavor), you can use bacon in its place.
Recipes reprinted with permission from Brassicas by Laura B. Russell (Ten Speed Press, © 2014). Photo credit: Sang An.
March 23, 2014
Allergy Friendly Pad Thai
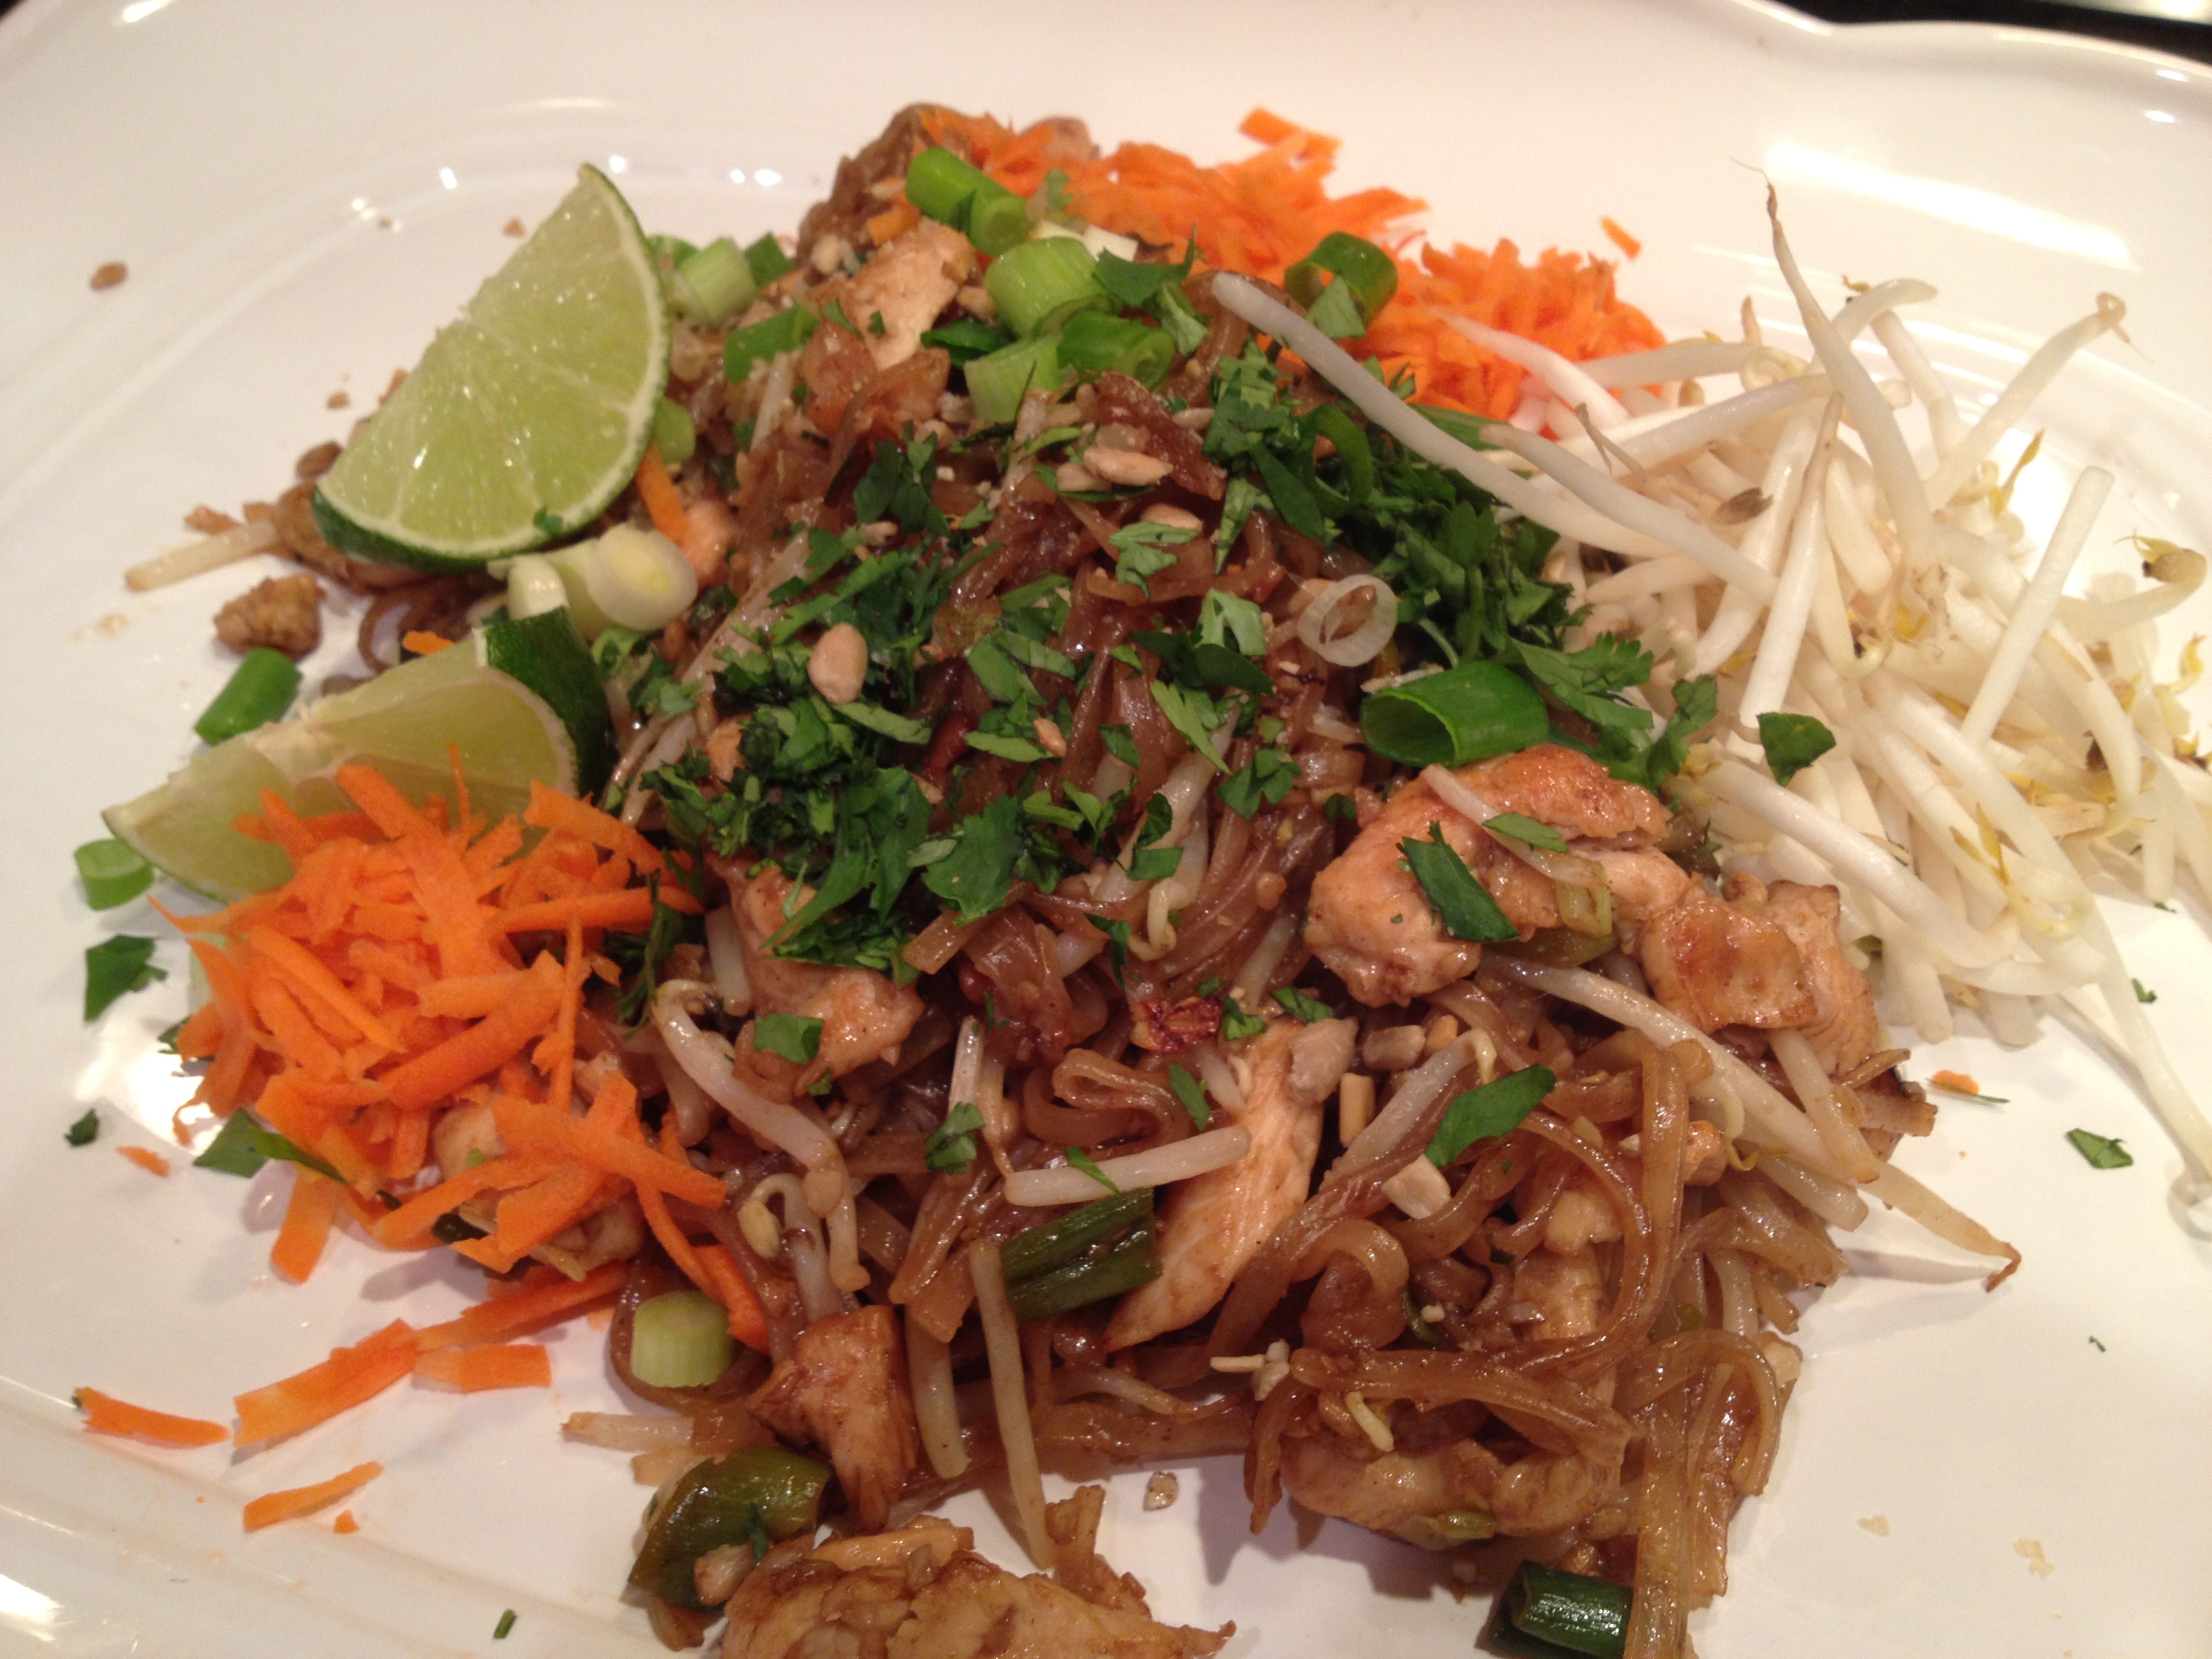
Allergy-Friendly Pad Thai
(Gluten-Free and Top 8 Allergen-Free)
Serves 2
Pad Thai used to be one of my favorite foods, until my allergies to fish, shellfish, and wheat blew up. In fact, in its traditional form, this is one of the world’s most allergenic foods since it contains wheat/gluten, soy, fish, shellfish, eggs, and peanuts.
Not one to be daunted, I decided it was time to conquer this amazing dish, and make it allergy-friendly for us Thai food lovers with food allergies.
This recipe serves two, which is the recommended way to make Pad Thai because cooking a larger batch will make for mushy, clumpy noodles. If you want to double the recipe, you will need to cook the sauce a bit longer than 20 minutes to reduce it, and you will need to cook the Pad Thai in two batches for best results.
Sauce Ingredients
½ cup beef broth [allergy-friendly brand such as KITCHEN BASICS]
½ cup low-sodium chicken broth [allergy-friendly brand such as KITCHEN BASICS]
1 clove garlic, thinly sliced
¼ tsp Chinese five-spice powder [try Spicely Organics, which are allergy-friendly]
¼ tsp salt
½ tsp freshly squeezed lemon juice
1 tsp freshly squeezed lime juice
1 tbsp tamarind paste
3 tbsp palm sugar or brown sugar
½ tsp Sriracha hot sauce (optional)
Main Ingredients
4 oz rice stick (pad Thai noodles)
2 tbsp canola oil
8 oz chicken breast, or pork, or beef, sliced into ¼-inch thick strips, seasoned with a little salt
1 cup chopped green onion, white and green parts divided
3 cloves finely minced garlic (1 tbsp)
1 1/3 cups bean sprouts, divided
½ cup roasted sunflower seeds, chopped, divided
¼ cup chopped cilantro
½ cup carrots, shredded or cut into match sticks
lime wedges
1. Combine beef broth, chicken broth, garlic, and Chinese five-spice powder in a small saucepan over medium heat. Bring to a boil. Now add salt, lemon juice and lime juice, reduce heat to medium-low and simmer uncovered 20 minutes until reduced to ¼ cup. Strain broth through a strainer or fine sieve, using the back of a spoon to push garlic juices through.
2. Return to the pot, add tamarind paste, palm sugar and Sriracha (if using). Stir over low heat, until the sugar is dissolved. Remove from heat and set aside.
3. Put noodles in a large bowl. Pour boiling water over noodles to cover completely. Use tongs to stir noodles a couple times. Let soak 4 minutes. Drain, and rinse with cool water. Set aside.

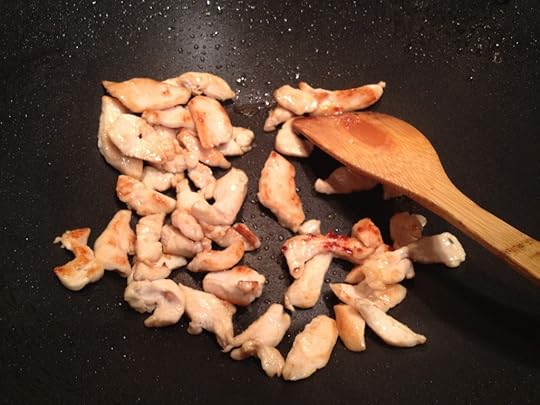
4. Heat a non-stick or well seasoned wok over high heat, add 1 tablespoon of the canola oil and heat until almost smoking, swirl around wok, then add the chicken. Cook, stirring often, about 3 minutes until golden brown. Transfer to a bowl and set aside.
5. Add the remaining tablespoon of canola oil to the wok. Add ½ cup of the green onions and the garlic to the wok, and cook stirring about 10-15 seconds. Do not burn the garlic.
6. Add remaining ingredients in the following order, and toss after each addition: noodles, 3 tablespoons of the sauce, chicken, 1 cup of the bean sprouts, and ¼ cup of the sunflower seeds. Season with a little salt. Toss everything until heated through but no longer than 1-2 minutes. Using two utensils will make tossing a lot easier!
7. Transfer to a serving platter and serve garnished with the remaining ½ cup of green onions, cilantro, the remaining 1/3 cup of bean sprouts, the carrots, the remaining ¼ cup of sunflower seeds, and a few lime wedges.
Pad Thai Tips
• While making your sauce, prep all your other ingredients except the noodles.
• “Chopping” sunflower seeds: Put the seeds in a ziplock bag and bang a few times with a rolling pin or a mallet. Attempting to chop these seeds with a knife is a losing battle.
• To mix evenly and cook through, use two large spatulas or spoons to toss the Pad Thai as you’re cooking it.
• Read the recipe through before making it, so you are ready to add ingredients to the wok quickly.
Allergy-Friendly Pad Thai © 2013 by Cybele Pascal
This recipe first appeared in the Spring 2013 issue of Allergic Living Magazine
February 16, 2014
Gluten Free Chicken Vegetable Yakitori

Gluten-Free Chicken Vegetable Yakitori
Free of: gluten and all top allergens
Serves 4 as a main, 6 as an appetizer
Yakitori is traditional Japanese street food. These tasty grilled skewers are usually dependent on soy and wheat/gluten for their flavorful marinade, but this allergy-friendly version is made with coconut amino acids instead for a gluten-free, soy-free savory, sweet, and tangy sauce.
The skewers are great for dinner, but also good party food, as they are easy to pass and require no utensils! I like making them with wooden or bamboo skewers, but they can also be made with metal skewers.
Marinade
6 tbsp coconut amino acids
2 cloves garlic, finely minced, or pressed
1 tsp grated fresh ginger
½ tsp salt
¼ tsp freshly ground pepper
1/8 tsp cayenne pepper (optional)
2 tbsp brown sugar
3 tbsp dry sherry
3 tbsp mirin
Ingredients
1½ lbs boneless chicken breast, cubed into 1-inch pieces
6 green onions, white and green parts, cut into 1 ½-inch pieces
1 red bell pepper cut into 1-inch pieces
8 ounces small white button mushrooms (halved, or even quartered if larger than 1 ½ inches) trimmed and wiped clean (don’t rinse)
2 Tablespoons olive oil
salt and freshly ground pepper
1. Combine the marinade ingredients in a medium bowl, stirring well to dissolve brown sugar. Transfer to a small saucepan, using a rubber spatula to scrape out all sauce from the bowl.
2. Bring to a simmer over medium heat, decrease heat to medium-low and keep at a slow simmer for 18 minutes until slightly thickened. Remove from heat and let cool to room temp. (Or place in refrigerator to cool).
3. Combine sauce with chicken in a large bowl, tossing well to coat the chicken. Cover and marinate in the refrigerator 2 hours.
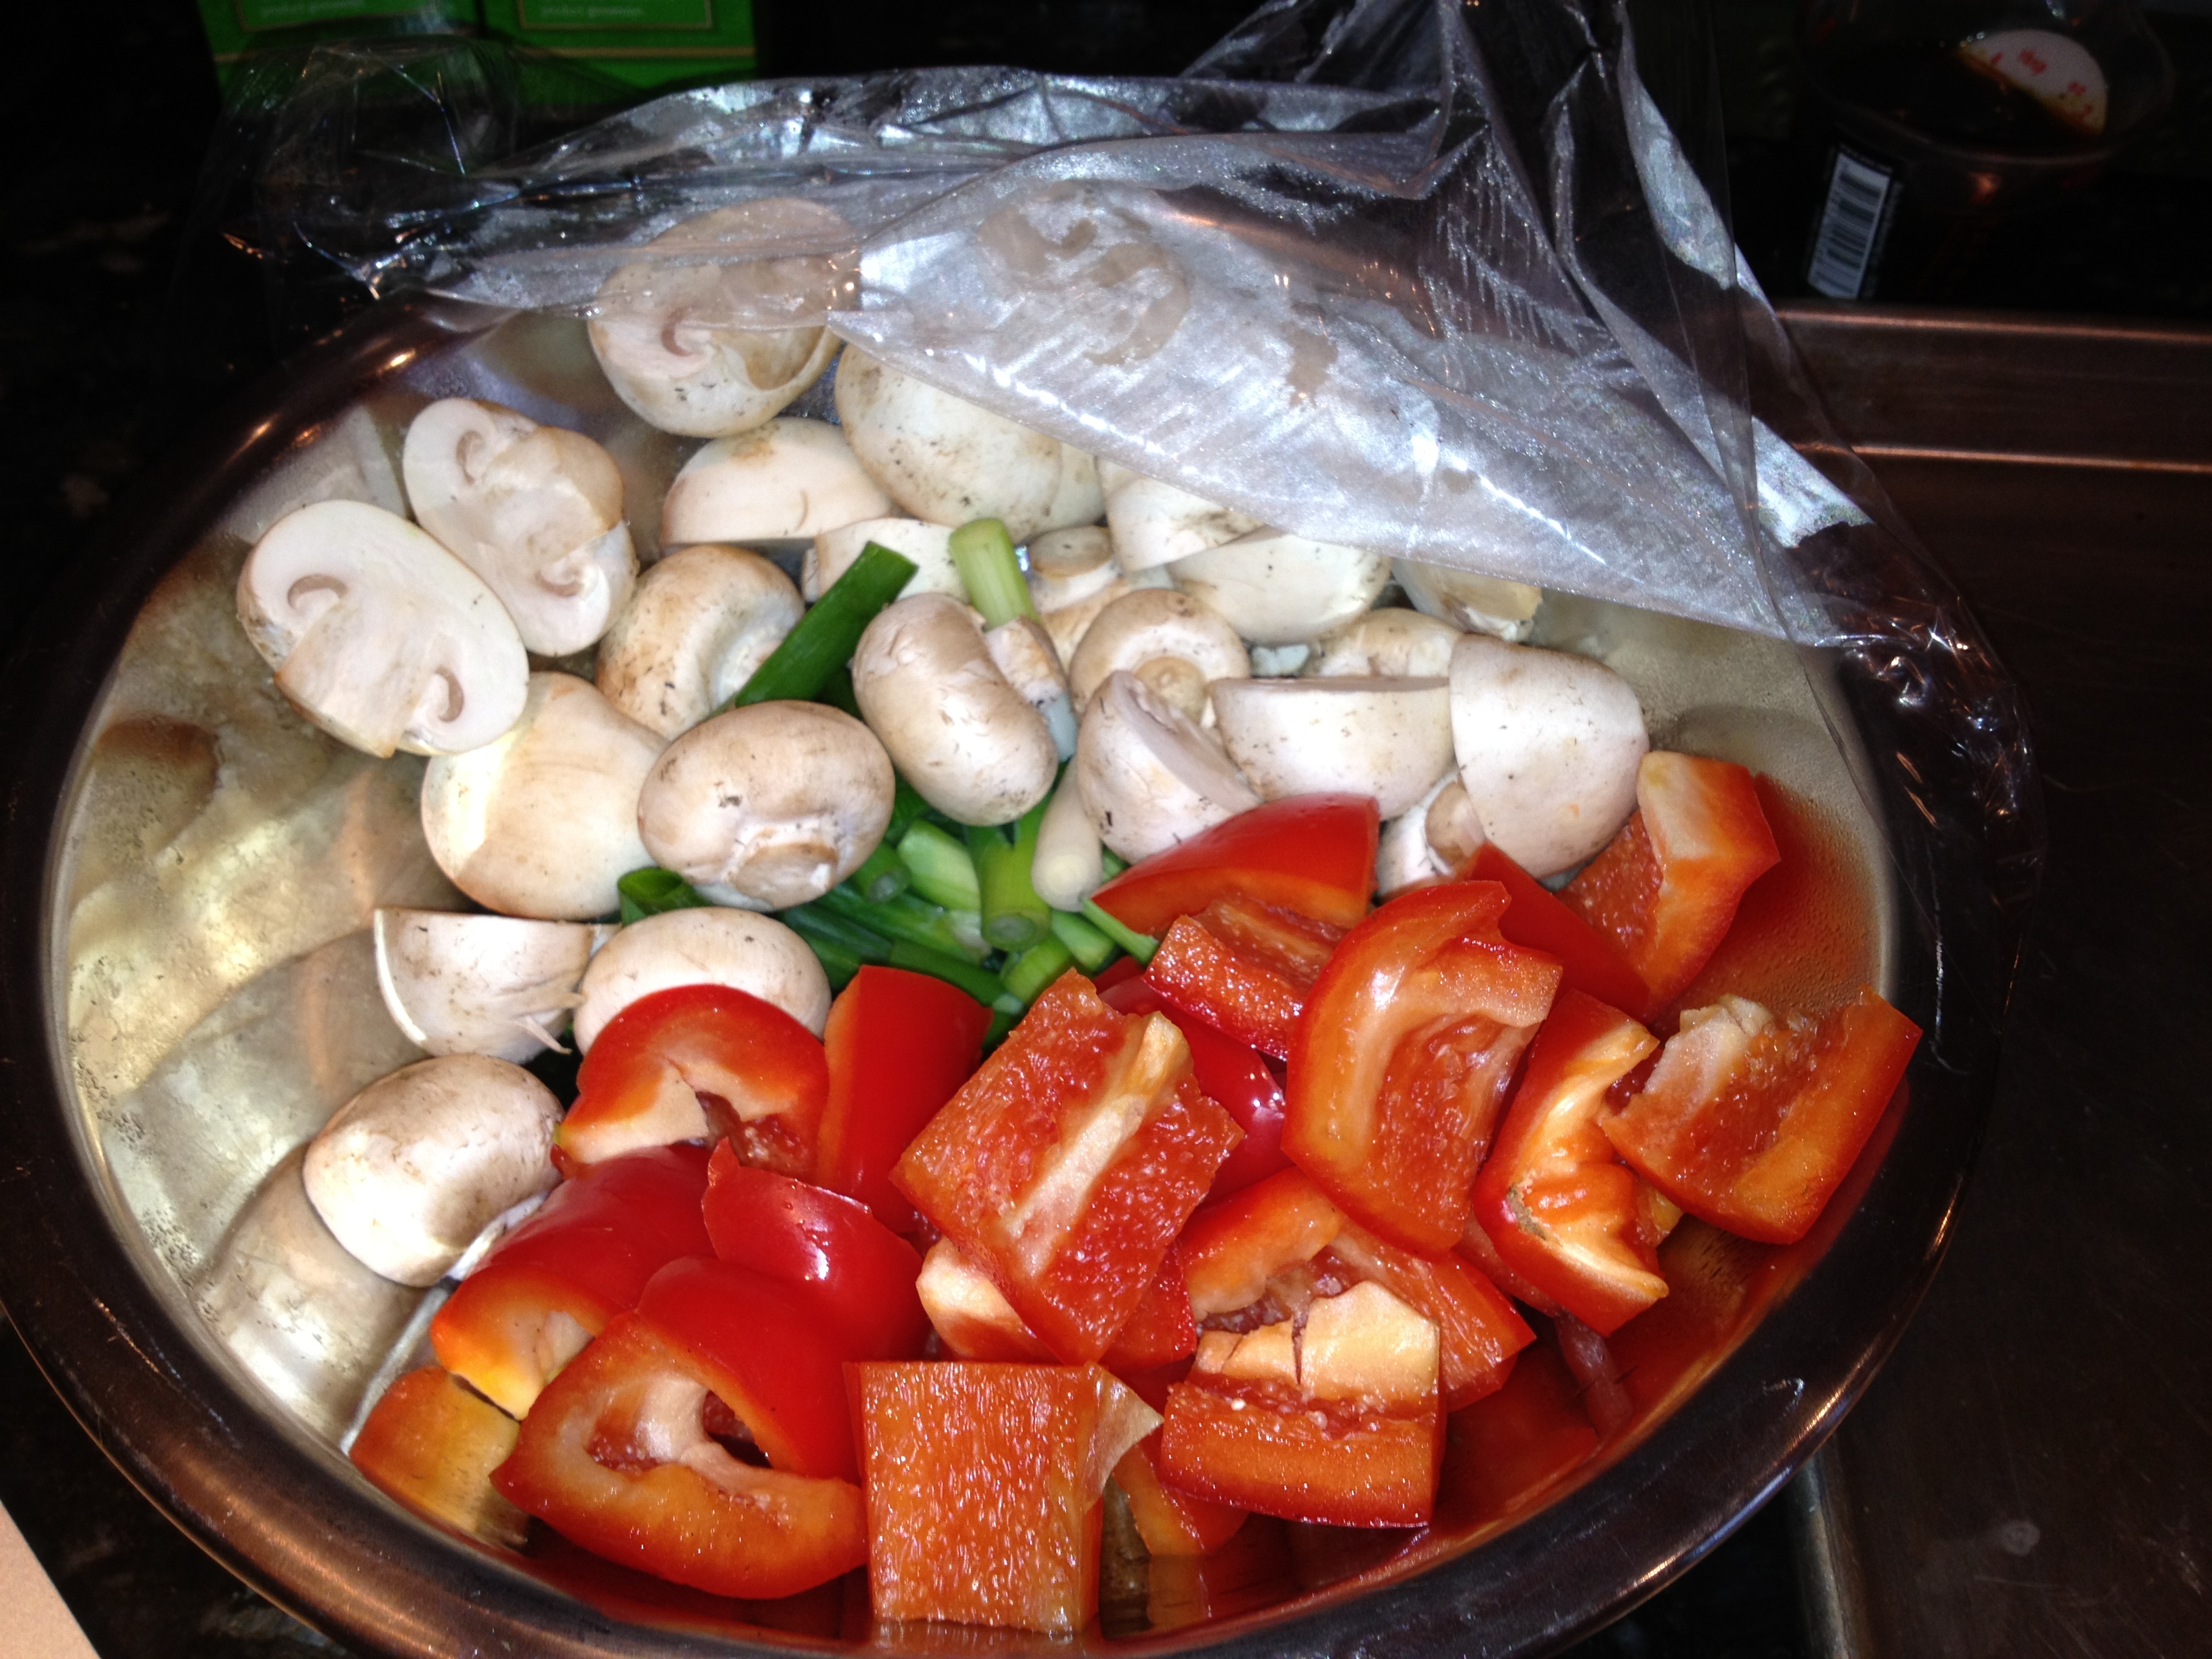
4. Meanwhile, this is a good time to prep your vegetables.
5. In the final hour of marinating the chicken, soak wooden or bamboo skewers in cool water. You will need about 10 skewers if you are using 10-inch skewers, and 16 if using 8-inch skewers.
6. Thread chicken and vegetables onto the skewers, starting with peppers, alternating chicken and vegetables. Don’t pack too tight. Reserve the remaining marinade to baste the skewers while grilling.
7. Brush skewers with olive oil, sprinkle with salt and freshly ground pepper, flip, sprinkle other side.
8. Preheat grill to medium. Oil the grill well.

9. Add skewers, baste with reserved marinade.

10. Cook for 4 minutes, flip skewers. baste again, and cook 4 minutes. Continue cooking, turning to brown on all sides and until chicken is cooked through, about 16 minutes total. Keep an eye on them, as they need to be turned often. Transfer to a platter and serve warm.

Gluten-Free Chicken Vegetable Yakitori © 2013 by Cybele Pascal
This recipe first appeared in the Winter 2013 issue of Allergic Living Magazine
January 25, 2014
Weights for my Basic Gluten Free Flour Mix

After being asked, many times, for years, for the weights of the flours and starches in my basic gluten-free flour mix, I am finally posted them! Not sure why it’s taken me so very long…. but here you go! Enjoy!
My Basic Gluten-Free Flour Mix
Makes 6 Cups
The key to the very best gluten-free baked goods is Authentic Foods superfine brown rice flour; it is the Cadillac, or cashmere, of brown rice flours and is worth its weight in gold. It is not grainy like other rice flours, and bakes the most fantastic cookies, cakes, pie crusts, and so on. If you can’t find it at your local natural foods market or Whole Foods, order it online. Both Ener-G and Bob’s Red Mill brown rice flours will also work in these recipes, but they won’t turn out quite as well. I do not recommend Arrowhead Mills brown rice flour, which I find too gritty. The brands of potato starch and tapioca flour or starch are not important; I find them all inter- changeable.
4 cups superfine brown rice flour (629.4 g)
1 1/3 cups potato starch (not potato flour) (261.2 g)
2/3 cup tapioca flour (also called tapioca starch) (93.00 g)
To measure flour, use a large spoon to scoop flour into the measuring cup, then level it off with the back of a knife or straightedge. Do not use the measuring cup itself to scoop your flour when measuring! It will compact the flour and you will wind up with too much for the recipe.
Combine all ingredients in a gallon-size zipper-top bag. Shake until well blended. Store in the refrigerator until ready to use.
January 5, 2014
Allergy Free Banana Chocolate Swirl Bread
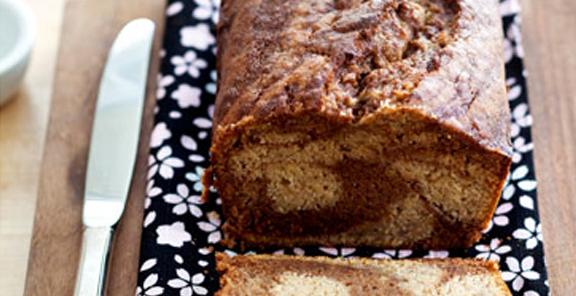
Allergy-Free Banana Chocolate Swirl Bread
(Vegan and Refined Sugar-free)
Not your momma’s fruitcake, this quick bread is chock-full of natural kid-pleasers like chocolate, bananas, and honey. It’s also gluten-free, vegan, and refined sugar-free. We eat it for breakfast toasted with Earth Balance buttery spread, with tea, and of course, for dessert.
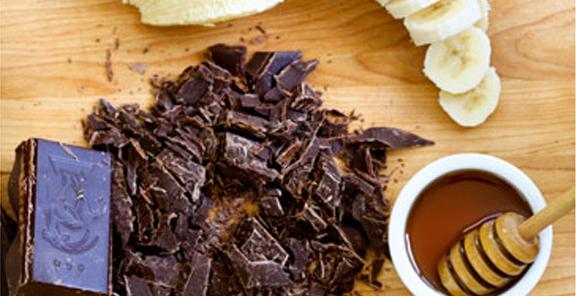
4 ounces semi-sweet chocolate or ½ cup semi-sweet chocolate chips (dairy and soy-free)
1/2 cup canola oil
3/4 cup honey (or agave nectar)
3 ripe medium-sized bananas (1 ¼ cups mashed)
2 Tablespoons flax seed meal mixed with 1/4 cup + 2 Tablespoons hot water (“flax eggs”)
1 Tablespoon freshly squeezed lemon juice
1 teaspoon lemon zest
1/2 teaspoon cinnamon
¼ teaspoon nutmeg
2 cups my Basic Gluten-Free Flour Mix or Authentic Foods GF Classical Blend
1/2 teaspoon xanthan gum
2 teaspoons double acting baking powder
1/4 teaspoon salt
1. Preheat oven to 350°F.
2. Chop chocolate into pieces the size of an almond or smaller, and set aside in a microwave safe bowl.
3. Use an electric mixer to combine canola oil and honey on medium speed. Mash the bananas, add to bowl, and blend thoroughly. Add “flax eggs”, lemon juice, lemon zest, cinnamon, and nutmeg.
4. In a separate bowl, combine flour mix (to measure flour, use a large spoon to scoop flour into the measuring cup, then level it off with the back of a knife or straightedge), xanthan gu�m, baking powder, and salt. Add dry ingredients to wet, and mix until combined.
5. Melt the chocolate in a microwave safe bowl, at 30-second increments, stirring between each with a wooden spoon. Do not overheat the chocolate as it burns very easily. Once melted, scoop out 1½ cups of batter and mix thoroughly into the melted chocolate.
6. Oil a 9×5-inch loaf pan and dust with a little flour. Spoon the batters into the loaf pan in two layers, alternating spoonfuls of banana and chocolate to simulate a checkerboard. To create swirls, run a knife or skewer through the batters in a swirling motion. Bake 60 to 70 minutes, rotating the pan halfway through. To test for doneness, insert a skewer into the center of the bread. It should come out clean (perhaps with a little melted chocolate). Let cool in pan on a rack for 30 minutes. Then invert onto rack, flip and let cool completely before slicing.
Allergy-Free Banana Chocolate Swirl Bread © 2014 by Cybele Pascal
November 26, 2013
Allergy Free Cornbread

As promised, here is my new and improved Allergy-Free Cornbread recipe. Serve on its own, or use it for my Allergy-Free Cornbread and Wild Mushroom Stuffing recipe. This Gluten-Free, Top 8 Allergen-Free, and Vegan recipe is a revision of my Cornbread Sticks recipe from The Allergen-Free Baker’s Handbook. I’ve altered it to be made with more readily available ingredients: Canola Oil in place of Spectrum Organic Palm Shortening, and King Arthur Gluten-Free Multi-Purpose Flour can be used instead of my Basic Gluten-Free Flour Mix or Authentic Foods GF Classical Blend. For this recipe, you can use either an 8-inch cast iron skillet (see below), or 2 cornstick pans, or an 8 x 8-inch square pan.
Allergy-Free Cornbread
1 cup rice milk
1 tablespoon freshly squeezed lemon juice
1 cup yellow cornmeal
1 cup King Arthur GF Multi-Purpose Flour, or my Basic Gluten-Free Flour Mix or Authentic Foods GF Classical Blend (this will make for BEST texture but any are fine!)
1/4 cup granulated sugar
1/2 teaspoon xanthan gum
1 tablespoon double-acting baking powder
1 teaspoon salt
1 1/2 teaspoons Ener-G egg replacer mixed with 2 tablespoons rice milk
1/3 cup canola oil
1. Preheat oven to 425°F. Preheat pan.
2. Combine rice milk with lemon juice. Set aside.
3. Whisk together cornmeal, flour mix, sugar, xanthan gum, baking powder, and salt in a large bowl.
4. Add the rice milk to the mixture and stir to combine. Add the egg replacer and the canola oil, and stir a few times until smooth. Remove the heated pan(s) from the oven, and grease liberally with baking spray or oil. Fill pan with batter, smooth surface, and bake about 25 minutes, until golden.
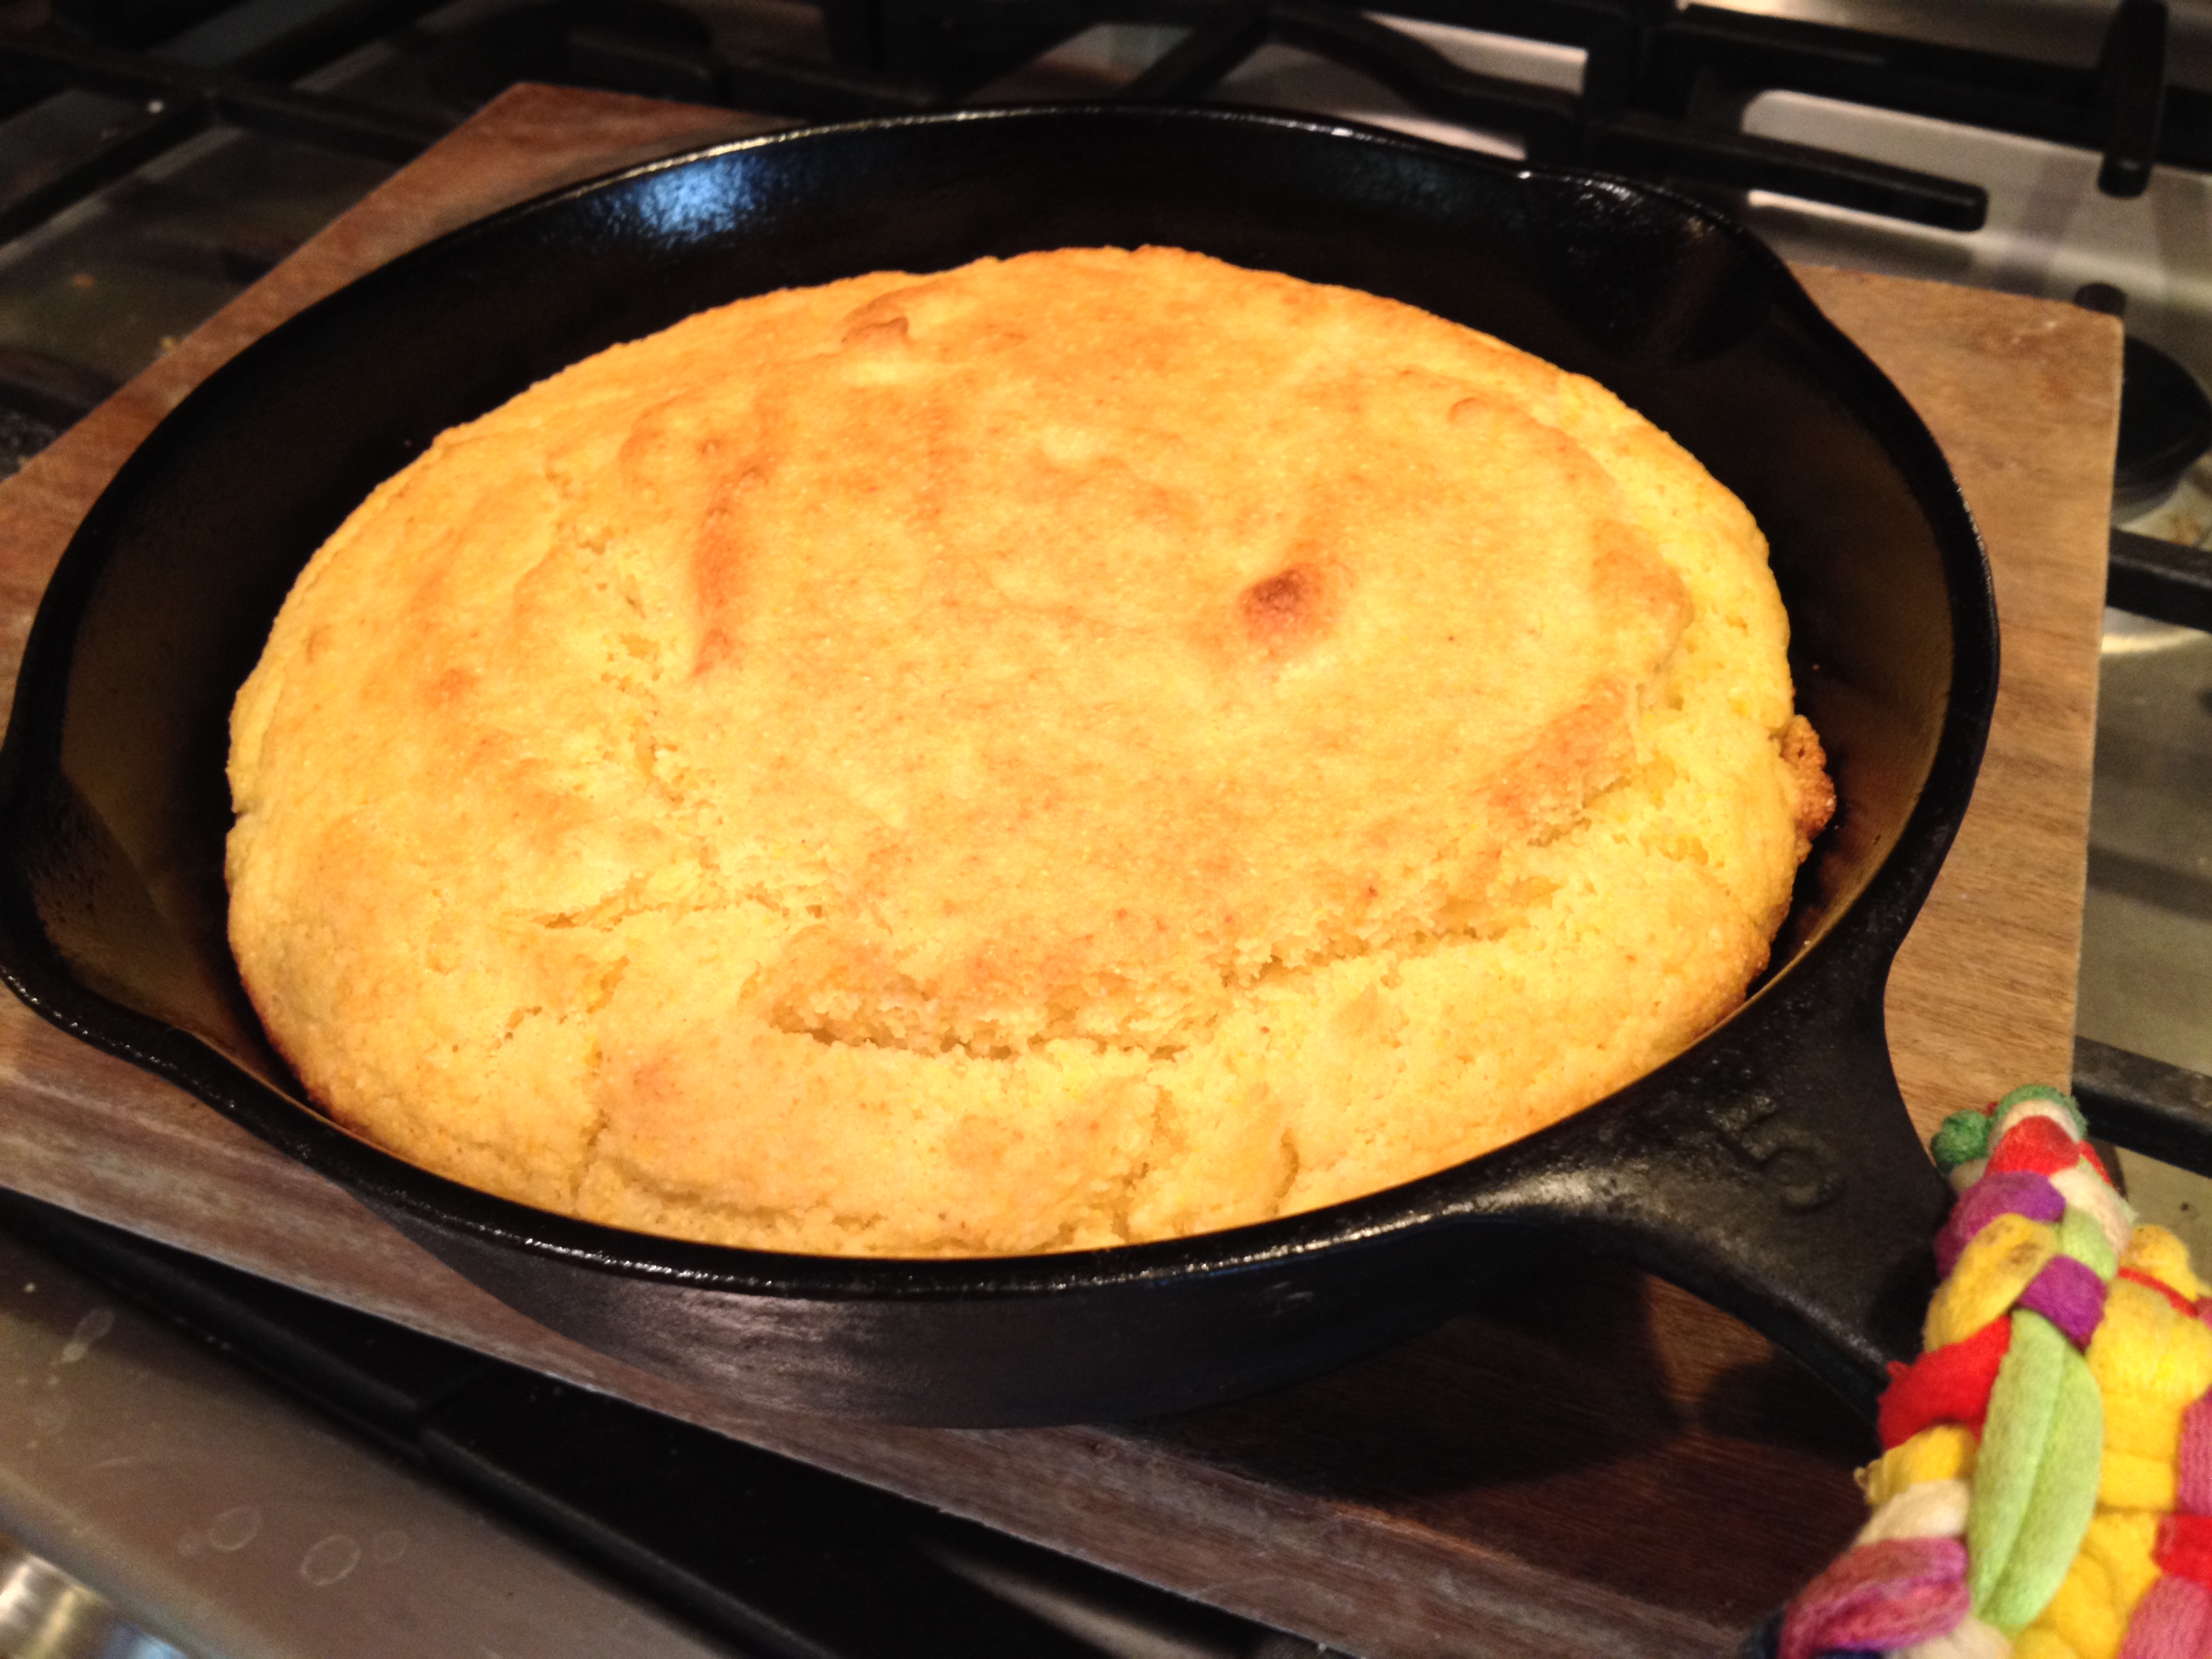
Allergy-Free Cornbread Copyright © 2013 by Cybele Pascal. Cornsticks photo credit: Chugrad McAndrews.
November 24, 2013
Allergy Friendly Thanksgiving Tips
 Delicious, Allergen-Free Turkey Day
On Thanksgiving, we gather and we eat for upwards of four hours, all the way from pre-dinner snacks to post-dessert dessert. But a traditional Thanksgiving dinner is literally one of the most allergen-laden meals possible.Whether this is your first allergen-free Thanksgiving or your twentieth, the following tips will help make it festive, mouthwateringly delicious, and safe.
Talking Turkey:
Did you know that many fresh and frozen turkeys contain hidden allergens? Most conventional, “self-basted” turkeys have been injected with butter, water and salt, and may also contain gluten. If you’re going to go the conventional turkey route, always verify ingredients with the manufacturer before purchasing. A safer option is a “Natural” turkey, which hasn’t been treated with any artificial colors or flavor enhancing ingredients. Look for “Organic” natural turkeys at websites like Local Harvest, or stores like Whole Foods.
Another good option: natural “Kosher” turkey. Guaranteed to have no dairy injected, the benefit of a Kosher turkey is that it has already been salted, and thus doesn’t need brining. I recommend Empire, the taste test winner selected by Cook’s Illustrated Magazine. Empire turkeys are also gluten-free. If you’re a die-hard foodie, take the adventurous (albeit, most expensive) route and look for a “Heritage” turkey, which is one of the pre-World War II breeds of turkey, like Narragansett and Bourbon Red. Slow Food has a great listing of independent farmers raising Heritage turkeys, state by state. Looking for something similar to what our forefathers might have eaten? Save yourself the hunt, check out D’Artagnan, to purchase a wild bird.
Last, to keep your turkey allergen-free, baste with olive oil. There is no need for butter, and in fact I prefer turkey with olive oil.
Savory Side Dishes:
Make baked sweet potato and potato dishes using canola oil instead of butter, and orange juice or rice milk instead of milk or cream. I prefer yams/sweet potatoes without marshmallows, but if like them, look for Allerenergy marshmallows, or try vegan brands like VeganSweets, made without eggs or gelatin, but be forewarned that they contain the allergen SOY. Instead of plain rice, mix and match with old world gluten-free grains like quinoa, millet, brown rice, wild rice, and buckwheat. All of these combine well with legumes like lentils or chickpeas, and are wonderful when enhanced with fresh herbs like thyme and sage. Dip into the plentiful array of winter squash available this time of year–not just butternut and acorn, but delicata, red kuri, and sweet dumplings. For an allergy-friendly stuffing, check out my Cornbread Wild Mushroom Stuffing Recipe.
Gravy can be made with olive oil instead of butter, and alternate flours, such as brown rice flour for thickening, instead of traditional wheat flour. See my recipe for Allergy-Friendly Gravy below.
Try making roast brussel sprouts this year instead of drenching them in butter or hollandaise sauce. To roast, cook at 450 degrees on a baking tray, tossed in olive oil and sprinkled with kosher salt and pepper, for 25 minutes, shaking once or twice until a crispy golden brown on the outside, and tender on the inside.
For cranberry sauce, omit walnuts (tree nuts), and use thinly sliced tangerines or mandarin oranges, keeping the rind on, to add texture and color.
For Pie, check out my cookbook, The Allergen-Free Baker’s Handbook for any number of wonderful allergen-free pie, crumble, and crisp recipes, from Pumpkin Pie, to Apple Cranberry Pie. Or see my Allergy-Friendly Sweet Potato Pie recipe, or Cranberry Apple Crisp.
Remember: if you’re only doing a few allergen-free dishes rather than a whole allergy-friendly meal, be aware of cross contamination and cross contact while cooking and serving. Consider labeling dishes with ingredient cards. If the meal is going to be served buffet-style, serve the food allergic person first to avoid cross contamination.
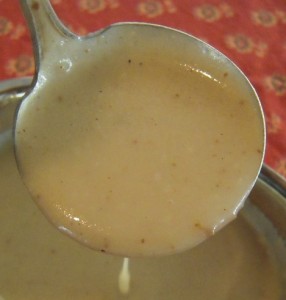 Allergy-Friendly (Gluten-Free) Creamy Gravy
Makes 1 1/4 cups
Gravy is one of those things that everybody loves. Even the thought of gravy can make you smile. In fact, the term gravy, in slang, means happiness, stable goodness, and a state of complacency.Gravy also means cool, okay, and all good, as in “It’s all gravy, baby”. If something is better than gravy, it’s gravy on eggos or gravy on rice. Who doesn’t want some of that coolness poured onto their plate?
But beloved gravy is also highly allergenic. Yup, it’s loaded with no-nos for those with food allergies. Butter (dairy), wheat (gluten), and cream/milk (dairy again). It’s also often chock-full of soy derivatives.So I took on the challenge to convert beloved gravy into something allergy-friendly. Just pour this yummy goodness over rice, potatoes, turkey breast, or do like me, and eat it with a spoon!
Ingredients:
1/4 cup canola oil
1/4 cup fine brown rice flour
1/8 teaspoon onion powder
pinch of dried thyme
pinch of cayenne pepper
salt and freshly ground pepper
1 cup warm beef (or chicken or turkey) broth or stock (Kitchen Basics is allergy-friendly)
1/2 cup warm rice milk
1. Heat canola oil in heavy pot over medium-high heat.
2. Add brown rice flour, 1 tablespoon at a time, and cook, stirring constantly with a wooden spoon, 2 minutes, until golden and aromatic.
3. Add onion powder, pinch of thyme, pinch of cayenne pepper, pinch of salt, and a couple turns of freshly ground pepper. Cook about 1 minute more, stirring.
4. Reduce heat to medium. Using a whisk, whisk in the warm beef broth, in three batches. Whisk vigorously, to smooth out any lumps. Add warm rice milk, whisking, and bring to a simmer. Cook stirring often, until thick and creamy. Adjust salt and pepper to taste. Serve warm.
Allergy-Friendly, Gluten-Free Creamy Gravy
© 2010 by Cybele Pascal
(Please note that all my recipes are completely free of all top allergens (wheat, dairy, soy, eggs, peanuts, tree nuts, sesame, fish, shellfish, and gluten), so as many people as possible can enjoy them. Additionally, all the ingredients are available at Whole Foods, and online at Amazon.com. If you have trouble finding something, let me know and I’ll help you find it.)
SAFETY NOTE: Because each person’s food sensitivity and reaction is unique, ranging from mild intolerance to life-threatening and severe food allergies, it is up to the consumer to monitor ingredients and manufacturing conditions. If manufacturing conditions, potential cross contact between foods, and ingredient derivatives pose a risk for you, please re-read all food labels and call the manufacturer to confirm potential allergen concerns beforeconsumption. Ingredients and manufacturing practices can change overnight and without warning.
November 17, 2013
Allergy Free Pumpkin Pie Popsicles
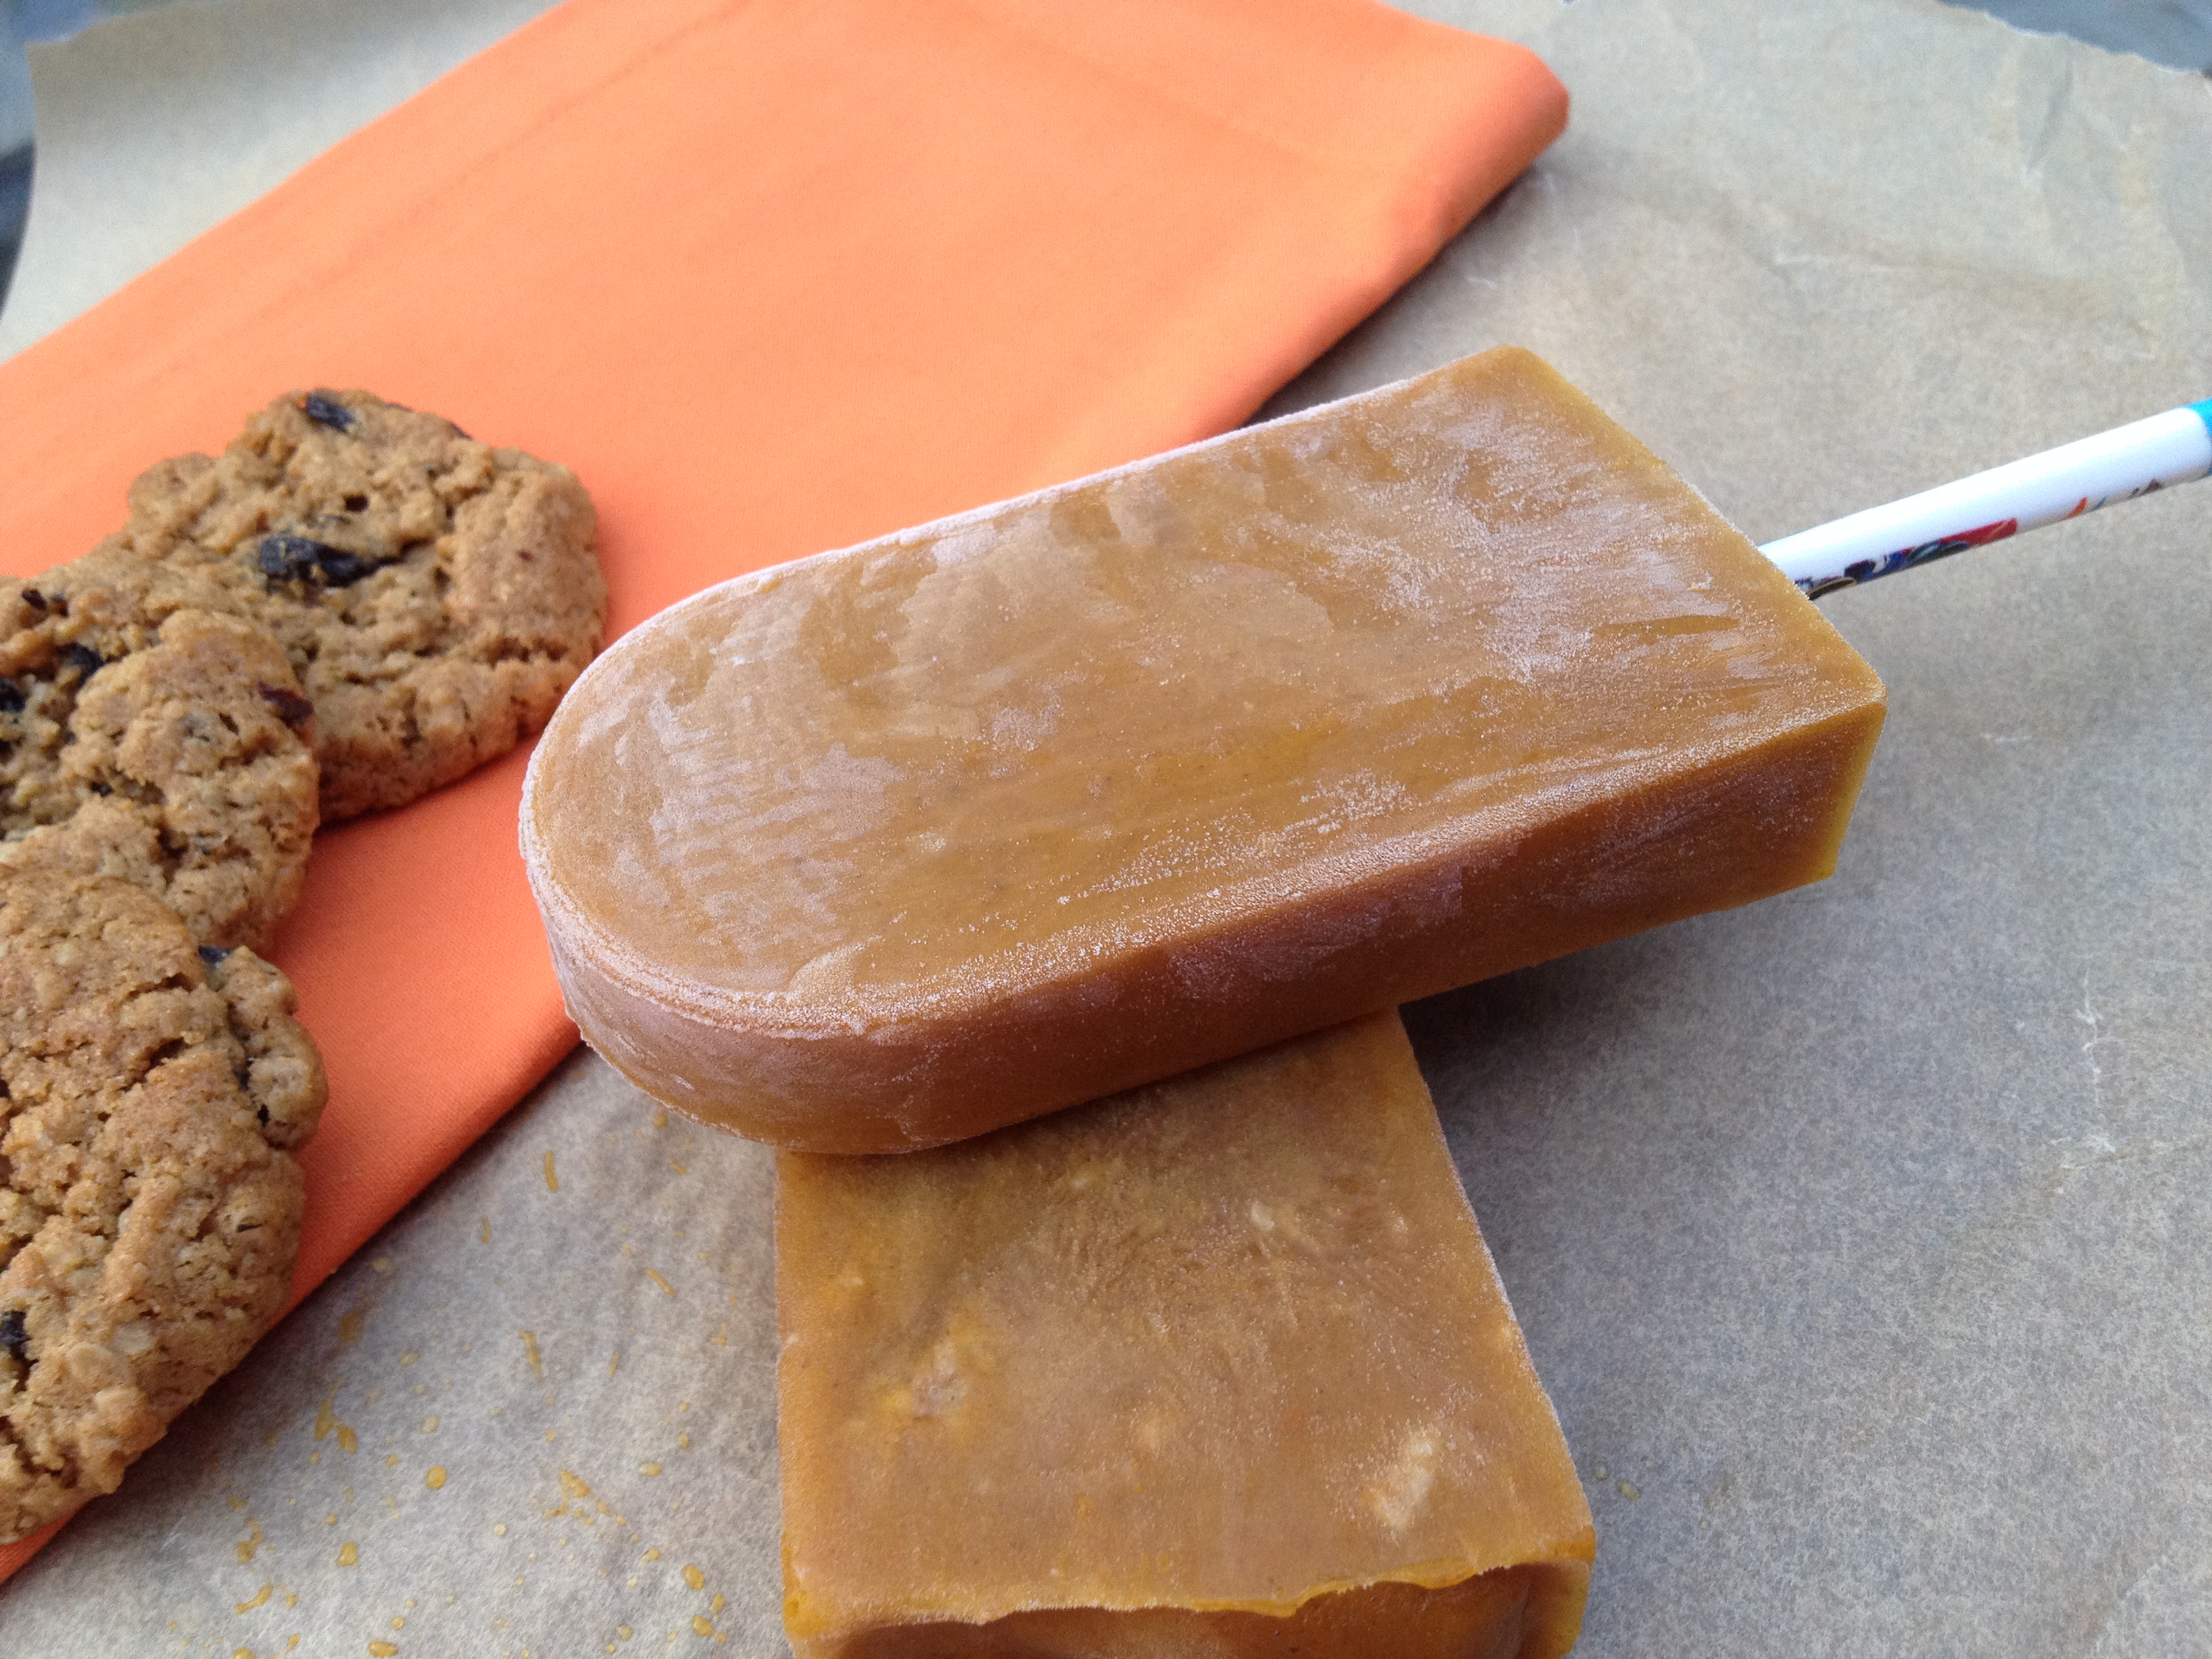
Allergy-Free Pumpkin Pie Popsicles
(Pumpkin Piesicles)
Makes 8
This recipe was inspired by one I saw on TAKEAMEGABITE.com, which was inspired by� one on OMFGSOGOOD.com. I was smitten by the concept of a no-bake Thanksgiving treat, with all the rich flavors of pie, but a lighter hit on the tummy, post feast. I tried the recipe as written and found it much too sweet for my taste. I’ve cut the sugar in half, and made them allergy-free, vegan, and gluten-free by using my allergy-friendly Cybele’s Free-to-Eat Oatmeal Raisin Cookies, and swapping light coconut milk for the cream (also bumping up the proportions by an extra half a cup so you get a truly creamy piesicle). The only problem? These pops won’t make it anywhere near Thanksgiving. I already ate 2 today!
1/2 cup light brown sugar
1/2 cup water
1/2 teaspoon cinnamon
1/4 teaspoon ground ginger
pinch of ground nutmeg
pinch of ground cloves
1 tablespoon maple syrup
1 (15 ounce) can pumpkin puree
3/4 cup canned light coconut milk
pinch of salt
6 Cybele’s Free-to-Eat Oatmeal Raisin Cookies, crumbled (1 scant cup), or 1 scant cup of allergy-free granola
1. Combine first 7 ingredients in a medium sauce pan over medium heat. Cook, stirring, about 3 minutes until the sugar is completely dissolved. Add the pumpkin puree and warm through, stirring u�ntil completely combined. Remove from heat, and stir in the coconut milk and pinch of salt. Once completely combined, stir in the cookie bits.
2. Use a ladle to spoon into popsicle molds.
3. Freeze overnight or at least 6 hours.
Allergy-Free Pumpkin Pie Popsicles
© 2013 by Cybele Pascal
Cybele Pascal's Blog

- Cybele Pascal's profile
- 8 followers

