
Paul Kelly's Blog
September 9, 2016
VBA Class Modules – The Ultimate Guide
“Classes struggle, some classes triumph, others are eliminated. Such is history” – Chairman Mao
A Quick Guide to the VBA Class Module
ItemExplanation
Class Module Allows the user to create their own objects.
MethodA public function or sub in the class module.
Member variableA variable declared in the class module.
PropertySpecial function/subs that behave like variables when used
Property typesGet, Set and Let.
Event - InitializeSub that automatically runs when the class module object is created.
Event - TerminateSub that automatically runs when the class module object is deleted.
Declaring and Creating
- StaticDim o As New Class1
Declaring and Creating - DynamicDim o As Class1
Set o = New Class1
Calling a class module subo.WriteValues Total
Calling a class module functionAmount = o.Calculate()
Using a class module propertyo.Amount = 1
Total = o.Amount
Introduction
Class Modules are used in VBA to create objects. If you are not familiar with objects then I would highly recommend that you first check out my previous post VBA Objects – The Ultimate Guide.
In languages such as C# and Java, Classes are used to create objects. Class Modules are the VBA equivalent of these Classes. The major different is that Class Modules do not allow Inheritance* whereas the other classes do.
In VBA we have built-in objects such as the Collection, Workbook, Worksheet and so on. The purpose of Class Modules is to allow us to custom build our own objects.
Let’s start this post by looking at why we use objects in the first place.
(*Inheritance is using an existing class to build a new class.)
Why Do We Use Objects
Using objects allows us to build our applications like we are using building blocks.
The idea is that the code of each object is self-contained. It is completely independent of any other code in our application.

© BigStockPhoto.com
This is similar to how things are built using Lego. There are many different types of building items used in Lego. For example, a block, steering wheel, and laser are different items. They behave completely independently each other. The wheel spins, the laser rotates etc. Yet we can connect them together to create a building, vehicle, space station and so on.
If you are still not clear about this then don’t worry. We’ll be breaking it all down into simple terms in the rest of this post.
Advantages of Using Objects
Treating parts of our code as blocks provide us with a lot of great advantages
It allows us to build an application one block at a time.
It is much easier to test individual parts of an application.
Updating code won’t cause problems in other parts of the application.
It is easy to add objects between applications.

Not a good look for your code © BigStockPhoto.com
Disadvantages of Using Objects
With most things in life there are pros and cons. Using class modules is no different. The following are the disadvantages of using class module to create objects
It takes more time initially* to build applications*.
It is not always easy to clearly define what an object is.
People new to classes and objects can find them difficult to understand at first.
*If you create an application using objects it will take longer to create it initially as you have to spend more time planning and designing it. However, in the long run it will save you a huge amount of time. Your code will be easier to manage, update and reuse.
Creating a Simple Class Module
Let’s look at a very simple example of creating a class module and using it in our code.
To create a class module we right click in the Project window and then select Insert and Class Module

Adding a Class Module
Our new class is called Class1. We can change the name in the Properties window as the following screenshot shows
Let’s change the name of the class module to clsCustomer. Then we will add a variable to the class module like this
Public Name As String

We can use now use this class module in any module(standard or class) in our workbook. For example
' Create the object from the class module
Dim oCustomer as New clsCustomer
' Set the customer name
oCustomer.Name = "John"
' Print the name to the Immediate Window(Ctrl + G)
Debug.Print oCustomer.Name
Class Module versus Objects
People who are new to using classes and class modules, often get confused between what is a class and what is an object.
Let’s look at a real world example. Think of a mass produced item like a coffee mug. A design of the mug is created first. Then, thousands of coffee mugs are created from this design.
This is similar to how class modules and objects work.
The class module can be thought of as the design.
The object can be thought of as the item that is created from the design.
The New keyword in VBA is what we use to create an object from a class module. For example
' Creating objects using new
Dim oItem As New Class1
Dim oCustomer1 As New clsCustomer
Dim coll As New Collection
Note: We don’t use New with items such as Workbooks and Worksheets. See When New is not required for more information.
Class Modules Versus Normal Modules
Writing code in a class module is almost the same as writing code in a normal module. We can use the same code we use in normal modules. It’s how this code is used which is very different.
Let’s look at the two main differences between the class and normal module. These often cause confusion among new users.
Difference 1 – How the modules are used
If you want to use a sub/function etc. from a class module you must create the object first.
For example, imagine we have two identical PrintCustomer subs. One is in a class module and one is in a normal module…
' CLASS MODULE CODE - clsCustomer
Print Sub PrintCustomer()
Debug.Print "Sample Output"
End Sub
' NORMAL MODULE CODE
Public Sub PrintCustomer()
Debug.Print "Sample Output"
End Sub
You will notice the code for both is exactly the same.
To use the PrintCustomer sub from the class module, you must first create an object of that type
' Other Module
Sub UseCustomer()
Dim oCust As New clsCustomer
oCust.PrintCustomer
End Sub
To use PrintCustomer from the normal module you can call it directly
' Other Module
Sub UseCustomer()
PrintCustomer
End Sub
Difference 2 – Number of copies
When you create a variable in a normal module there is only one copy of it. For a class module, there is one copy of the variable for each object you create.
For example, imagine we create a variable StudentName in both a class and normal module..
' NORMAL MODULE
Public StudentName As String
' CLASS MODULE
Public StudentName As String
For the normal module variable there will only be one copy of this variable in our application.
StudentName = "John"
For the class module a new copy of the variable StudentName is created each time a new object is created.
Dim student1 As New clsStudent
Dim student2 As New clsStudent
student1.StudentName = "Bill"
student2.StudentName = "Ted"
When you fully understand class modules, these differences will seem obvious.
The Parts of a Class Module
There are four different items in a class module. These are
Methods – functions/subs.
Member variables – variables.
Properties– types of functions/subs that behave like variables.
Events – subs that are triggered by an event.
You can see they are all either functions, subs or variables.
Let’s have a quick look at some examples before we deal with them in turn
' CLASS MODULE CODE
' Member variable
Private dBalance As Double
' Properties
Property Get Balance() As Double
Balance = dBalance
End Property
Property Let Balance(dValue As Double)
dBalance = dValue
End Property
' Event - triggered when class created
Private Sub Class_Initialize()
dBalance = 100
End Sub
' Methods
Public Sub Withdraw(dAmount As Double)
dBalance = dBalance - dAmount
End Sub
Public Sub Deposit(dAmount As Double)
dBalance = dBalance + dAmount
End Sub
Now that we have seen examples, let’s take a look at each of these in turn.
Class Module Methods
Methods refer to the procedures of the class. In VBA procedures are subs and functions. Like member variables they can be Public or Private.
Let’s look at an example
' CLASS MODULE CODE
' Class name: clsSimple
' Public procedures can be called from outside the object
Public Sub PrintText(sText As String)
Debug.Print sText
End Sub
Public Function Calculate(dAmount As Double) As Double
Calculate = dAmount - GetDeduction
End Function
' private procedures can only be called from within the Class Module
Private Function GetDeduction() As Double
GetDeduction = 2.78
End Function
We can use the clsSimple class module like this
Sub ClassMembers()
Dim oSimple As New clsSimple
oSimple.PrintText "Hello"
Dim dTotal As Double
dTotal = oSimple.Calculate(22.44)
Debug.Print dTotal
End Sub
Class Module Member Variables
The member variable is very similar to the normal variable we use in VBA. The difference is we use Public or Private instead of Dim.
' CLASS MODULE CODE
Private Balance As Double
Public AccountID As string
Note: Dim and Private do exactly the same thing but the convention is to use Dim in sub/functions and to use Private outside sub/functions.
The Public keyword means the variable can be accessed from outside the class module. For example
Dim oAccount As New clsAccount
' Valid - AccountID is public
oAccount.AccountID = "499789"
' Error - Balance is private
oAccount.Balance = 678.90
In the above example we cannot access Balance because it is declared as Private. We can only use a Private variable within the class module. We can use in a function/sub in the class module e.g.
' CLASS MODULE CODE
Private Balance As Double
Private Sub SetBalance()
Balance = 100
Debug.Print Balance
End Sub
It is considered poor practice to have public member variables. This is because you are allowing code outside the object to interfere with how the class works. The purpose of the using classes is so that we hide what is happening from the caller.
To avoid the user directly talking to our member variables we use Properties.
Class Module Properties
Get – returns an object or value from the class
Let – sets a value in the class
Set – sets an object in the class
Format of VBA Property
The normal format for the properties are as follows:
Public Property Get () As Type
End Property
Public Property Let (varname As Type )
End Property
Public Property Set (varname As Type )
End Property
We have seen already that the Property is simply a type of sub. The purpose of the Property is to allow the caller to get and set values.
Why we use Properties
Why can’t we just make the variables Public and use them directly?
Let’s explain with some examples. Imagine we have a class that maintains a list of Countries. We could store the list as an array
' CLASS MODULE CODE - clsCountryList
' Declare array
Public arrCountries() As String
When the user wants to get the number of countries in the list they could do this
' NORMAL MODULE CODE
Dim oCountry As New clsCountry
' Get the number of items
NumCountries = UBound(oCountry.arrCountries) + 1
There are two major problems with the above code
To get the number of countries you need to know how the list is stored e.g. Array.
If we change the Array to a Collection, we need to change all code that reference the array directly.
To solve these problems we can create a function to return the number of countries
' CLASS MODULE CODE - clsCountryList
' Array
Private arrCountries() As String
Public Function Count() As Long
Count = UBound(sCountries) + 1
End Function
We then use it like this
' MODULE CODE
Dim oCountries As New clsCountries
Debug.Print "Number of countries is " & oCountries.Count
This code solves the two problems we listed above. We can change our Array to a Collection and the caller code will still work e.g.
' CLASS MODULE CODE
' Collection
Private collCountries() As Collection
Public Function Count() As Long
Count = collCountries.Count
End Function
The caller is oblivious to how the countries are stored. All the caller needs to know is that the Count function will return the number of countries.
As we have just seen, a sub or function provides a solution to the above problems. However, using a Property can provide a more elegant solution.
Using a Property instead of a Function/Sub
Instead of the creating a Count Function we can create a Count Property. As you can see below they are very similar
' Replace this
Public Function Count() As Long
Count = UBound(sCountries) + 1
End Function
' With this
Property Get Count() As Long
Count = UBound(sCountries) + 1
End Function
In this scenario there is not a lot of difference between using the Property and using a function. However, there are differences. We normally create a Get and Let property like this
' CLASS MODULE CODE - clsAccount
Private dTotalCost As Double
Property Get TotalCost() As Long
TotalCost= dTotalCost
End Property
Property Let TotalCost(dValue As Long)
dTotalCost = dValue
End Property
Using Let allows us to treat the property like a variable. So we can do this
oAccount.TotalCost = 6
The second difference is that using Let and Get allows us to use the same name when referencing the Get or Let property. So we can use the property like a variable. This is the purpose of using Properties over a sub and function.
oAccount.TotalCost = 6
dValue = oAccount.TotalCost
If we used a function and a sub then we cannot get the behaviour of a variable. Instead we have to call two different procedures e.g.
oAccount.SetTotalCost 6
dValue = oAccount.GetTotalCost
You can also see that when we used Let we can assigned the value like a variable. When we use SetTotalCost , we had to pass it as a parameter.
The Property in a Nutshell
The Property hides the details of the implementation from the caller.
The Property allows us to provide the same behaviour as a variable.
Types of VBA Property
There are three types of Properties. We have seen Get and Let already. The one we haven’t looked at is Set.
Set is similar to Let but it is used for an object(see Assigning VBA Objects for more detail about this).
Originally in Visual Basic, the Let keyword was used to assign a variable. In fact, we can still use it if we like.
' These line are equivalent
Let a = 7
a = 7
So we use Let to assign a value to a variable and we use Set to assign an object variable to an object.
' Using Let
Dim a As Long
Let a = 7
' Using Set
Dim coll1 As Collection, coll2 As Collection
Set coll1 = New Collection
Set coll2 = coll1
Let is used to assign a value to a basic variable type.
Set is used to assign a variable to a an object.
In the following example, we use Get and Let properties for a string variable
' CLASS MODULE CODE
' SET/LET PROPERTIES for a variable
Private m_sName As String
' Get/Let Properties
Property Get Name(sName As String) As String
Name = m_sName
End Property
Property Let Name(sName As String)
m_sName = sName
End Property
We can then use the Name properties like this
Sub TestLetSet()
Dim sName As String
Dim coll As New Collection
Dim oCurrency As New clsCurrency
' Let Property
oCurrency.Name = "USD"
' Get Property
sName = oCurrency.Name
End Sub
In the next example, we use Get and Set properties for an object variable
' CLASS MODULE CODE
Private m_collPrices As Collection
' Get/Set Properties
Property Get Prices() collPrices As Collection
Set Price = m_collPrices
End Property
Property Set Prices(collPrices As Collection)
Set m_collPrices = collPrices
End Property
We can then use the properties like this
Sub TestLetSet()
Dim coll1 As New Collection
Dim oCurrency As New clsCurrency
' Set Property
Set oCurrency.Prices = coll1
' Get Property
Dim coll2 As Collection
Set Coll2 = oCurrency.Prices
End Sub
We use the Get property to return the values for both items. Notice that even though we use the Get Property to return the Collection, we still need to use the Set keyword to assign it.
Class Module Events
A class module has two events
Initialize – occurs when a new object of the class is created.
Terminate – occurrs when the class object is deleted.
In Object Oriented languages like C++, these events are referred to as the Constructor and the Destructor. In most languages, you can pass parameters to a constructor but in VBA you cannot. We can use a Class Factory to get around this issue as we will see below.
Initialize
Let’s create a very simple class module called clsSimple with Initialize and Terminate events
' CLASS MODULE CODE
Private Sub Class_Initialize()
MsgBox "Class is being initialized"
End Sub
Private Sub Class_Terminate()
MsgBox "Class is being terminated"
End Sub
Public Sub PrintHello()
Debug.Print "Hello"
End Sub
In the following example, we use Dim and New to create the object.
In this case, oSimple is not created until we reference it for the first time e.g.
Sub ClassEventsInit2()
Dim oSimple As New clsSimple
' Initialize occurs here
oSimple.PrintHello
End Sub
When we use Set and New together the behaviour is different. In this case the object is created when Set is used e.g.
Sub ClassEventsInit()
Dim oSimple As clsSimple
' Initialize occurs here
Set oSimple = New clsSimple
oSimple.PrintHello
End Sub
Note: For more information about the different between using New with Dim and using New with Set see Subtle Differences of Dim Versus Set
As I said earlier, you cannot pass a parameter to Initialize. If you need to do this you need a function to create the object first
' CLASS MODULE - clsSimple
Public Sub Init(Price As Double)
End Sub
' NORMAL MODULE
Public Sub Test()
' Use CreateSimpleObject function
Dim oSimple As clsSimple
Set oSimple = CreateSimpleObject(199.99)
End Sub
Public Function CreateSimpleObject(Price As Double) As clsSimple
Dim oSimple As New clsSimple
oSimple.Init Price
End Function
We will expand on this CreateSimpleObject in Example 2 to create a Class Factory.
Terminate
The Terminate event occurs when the class is deleted. This happens when we set it to Nothing
Sub ClassEventsTerm()
Dim oSimple As clsSimple
Set oSimple = New clsSimple
' Terminate occurs here
Set oSimple = Nothing
End Sub
If we don’t set the object to Nothing then VBA will automatically delete it when it goes out of scope.
What this means is that if we create an object in a procedure, when that procedure ends VBA will delete any objects that were created.
Sub ClassEventsTerm2()
Dim oSimple As New clsSimple
' Initialize occurs here
oSimple.PrintHello
' oSimple is deleted when we exit this Sub calling Terminate
End Sub
Class Module Example 1
In this example, we are going to look at a very common use of a Class module.
Imagine we have the following data

We want to read the Albums based on a range of years and then create various reports.
We could use a 2D Array for this or a Collection of collections e.g.
For i = 2 To rg.Rows.Count
Year = rg.Cells(i, 3)
If startYear = Year Then
' Create a new collection for each row
Set rowColl = New Collect
' Add artist
rowColl .Add rg.Cells(i, 1)
' Add Title
rowColl.Add rg.Cells(i, 2)
' and so on
' Add row collection to main collection
coll.Add rowColl
End If
Next i
As you can imagine this code would get messy very quickly.

© BigStockPhoto.com
Lucky for us we have class modules to make our life easier. We can create a class module to store the items.
' clsAlbum class module
Private m_sArtist As String
Private m_sTitle As String
Private m_sYear As String
Private m_sGenre As String
Private m_sSales As String
' Properties
Public Property Get Artist() As String
Artist = m_sArtist
End Property
Public Property Let Artist(ByVal sArtist As String)
m_sArtist = sArtist
End Property
' etc
Each time we want to add a record we can do it as follows
' Declare the Variable
Dim oAlbum = clsAlbum
' Create new album
Set oAlbum = New clsAlbum
' Add the details
oAlbum.Artist = rg.Cells(i, 1)
oAlbum.Title = rg.Cells(i, 2)
oAlbum.Year = rg.Cells(i, 3)
oAlbum.Genre = rg.Cells(i, 4)
oAlbum.Sales = rg.Cells(i, 5)
' Add the album object to the collection
coll.Add oAlbum
You can see that this makes our code much more readable. It is clear what Artist, Title etc. are being used for.
We can then easily use this data to create reports, write to files etc.
Sub PrintAlbum(coll As Collection)
Dim oAlbum As clsAlbum
For Each oAlbum In coll
' Print out the title and artist for each album
Debug.Print oAlbum.Title, oAlbum.Artist
Next
End Sub
Below is the full code for this example
Sub CreateReport()
Dim coll As Collection
' read the data
Set coll = ReadAlbums(1990, 2001)
' Print the album details
PrintAlbum coll
' Print the total sales
PrintTotalSales coll
End Sub
Function ReadAlbums(startYear As Long, endYear As Long) _
As Collection
Dim rg As Range
Set rg = Sheet1.Range("A1").CurrentRegion
' Create a collection to store the albums
Dim coll As New Collection
Dim oAlbum As clsAlbum
Dim i As Long, Year As Long
For i = 2 To rg.Rows.Count
Year = rg.Cells(i, 3)
If startYear = Year Then
' Create new album
Set oAlbum = New clsAlbum
' Add the details
oAlbum.Artist = rg.Cells(i, 1)
oAlbum.Title = rg.Cells(i, 2)
oAlbum.Year = Year
oAlbum.Genre = rg.Cells(i, 4)
oAlbum.sales = rg.Cells(i, 5)
' Add the album objecdt to the collection
coll.Add oAlbum
End If
Next i
Set ReadAlbums = coll
End Function
Sub PrintAlbum(coll As Collection)
Dim oAlbum As clsAlbum
For Each oAlbum In coll
Debug.Print oAlbum.Title, oAlbum.Artist
Next
End Sub
Sub PrintTotalSales(coll As Collection)
Dim oAlbum As clsAlbum, sales As Double
For Each oAlbum In coll
sales = sales + oAlbum.sales
Next
Debug.Print "Total number sales is " & sales
End Sub
Class Module Example 2
In this example, we’re going to take things a bit further. We’re going to look as some neat tricks when using objects.
Imagine you have a list of products like in the image below.

The products have different fields so we need to use a different class module for each product type. One type for a Book row, one type for a Film row.
We’ll create our class modules first. As you can imagine the are very similar for both product types
' CLASS MODULE - clsBook
' Member variables
Private m_Title As String
Private m_Year As Long
' Properties
Property Get ItemType() As String
ItemType = "Book"
End Property
Property Get Title() As String
Title = m_Title
End Property
Property Get Year() As Long
Year = m_Year
End Property
' Methods
Public Sub Init(rg As Range)
m_Title = rg.Cells(1, 2)
m_Year = CLng(rg.Cells(1, 4))
End Sub
Public Sub PrintToImmediate()
Debug.Print ItemType, m_Title, m_Year
End Sub
' CLASS MODULE - clsFilm
' Member variables
Private m_Title As String
Private m_Year As Long
' Properties
Property Get ItemType() As String
ItemType = "Film"
End Property
Property Get Title() As String
Title = m_Title
End Property
Property Get Year() As Long
Year = m_Year
End Property
' Methods
Sub Init(rg As Range)
m_Title = rg.Cells(1, 2)
m_Year = CLng(rg.Cells(1, 5))
End Sub
Public Sub PrintToImmediate()
Debug.Print ItemType, m_Title, m_Year
End Sub
As you can see, the only real difference is the Init sub.
Note: In Object Oriented languages such as C++, we would have a “Base” class which would contain all the common items of these classes. Then our Book and Film classes would both use the common parts of this class. This is known as (Inheritance and does not exist in VBA.
The following code shows an example of Inheritance in C++
// C++ language
// Base class
class Product {
protected:
int m_Year
}
// Classes below use Product as part of their class so
// they have an integer variable m_Year
class Book: public Product {
}
class Film: public Product {
}
When we read each record we need to determine if it is a Book or Film. Then we create the appropriate object. You would imagine we would have to create a variable for each type e.g.
' One variable required for each type
Dim oBook as clsBook
Dim oFilm as clsFilm
' If book do this
Set oBook = New clsBook
' Else If film do this
Set oFilm = New clsFilm
If we had lots of different types this would get very messy indeed. The good news is we only need to use one variable!
In VBA we can declare a variable as a Variant. When we use a Variant we are essentially saying “We will decide the type of variable when the code is running”.
This is very useful when dealing with objects and allows us to get away with using one variable e.g.
' Only one variable required
Dim oItem As Variant
' If book set type to clsBook
Set oItem = New clsBook
' Else If film set type to clsFilm
Set oItem = New clsFilm
This is really useful as we only need one variable no matter how many objects we have.
A second advantage of using a Variant is this. If each Class Module has a sub/function with the same name and parameters, we can use the same variable to call it
So imagine clsBook has a function called InitBook and clsFilm has a function called InitFilm. We would need to do this
' If clsBook
If type = "Book" Then
oItem.InitBook
ElseIf type = "Film" Then
oItem.InitFilm
However, if they have the same name, e.g. Init, we can replace the If\ElseIf lines of code with one line
' this will call the Init sub of whatever type oItem is set to
oItem.Init
We can now create a function to create the appropriate object. In Object Oriented Programming, we have what is called a Class Factory. This is simply a function that creates an object based on a given type.
We saw earlier that the Initialize event does not take parameters. We can call Init in the Class Factory to get around this issue.
The full code for the ClassFactory function is here
Function ClassFactory(rg As Range) As Variant
' Get product type
Dim sType As String
sType = rg.Cells(1, 1)
' Create an object based on the type
Dim oItem As Variant
Select Case sType
Case "Book":
Set oItem = New clsBook
Case "Film":
Set oItem = New clsFilm
Case Else
MsgBox "Invalid type"
End Select
' Parse the fields to the correct class variables
oItem.Init rg
' Return the product object
Set ClassFactory = oItem
End Function
This following is our starting sub. In this sub, we read through the worksheet and pass the range to ClassFactory.
It creates the object, passes the range to the object Parse method. Then it returns the object which we add to our Collection.
Sub ReadProducts()
' Create the collection
Dim coll As New Collection
Dim product As Variant
Dim rg As Range
Set rg = Sheet1.Range("A" & i & ":E" & i)
' Read products from the worksheet
Dim i As Long
For i = 1 To 2
Set product = ClassFactory(rg)
coll.Add product
Next
' Print the product details to the Immediate Window(Ctrl + G)
PrintCollection coll
End Sub
We can also use the variant object to print the items. As long as both objects have a sub with the same name and parameters(e.g PrintToImmediate) we can call it using a Variant type.
Public Sub PrintCollection(ByRef coll As Collection)
Dim v As Variant
For Each v In coll
' Print items
v.PrintToImmediate
Next
End Sub
Conclusion
That concludes my post on the Class Modules in VBA. In this post we have looked at the parts of the Class Module and two example cases where you would use them.
It’s important to understand that Classes and Objects is a vast topic. There are countless types of objects you can create and ways you can use them.
If you plan to use Class Modules then my advice is to start simple and get familiar with how to create a simple one. Once you have mastered the basics it will be much easier to move onto more challenging scenarios.
What’s Next?
If you want to read about more VBA topics you can view a complete list of my posts here. I also have a free eBook(see below) which you will find useful if you are new to VBA.
If you are serious about mastering VBA then you may want to check out Build 11 Full VBA Applications
Get the Free eBook

Please feel free to subscribe to my newsletter and get exclusive VBA content that you cannot find here on the blog, as well as free access to my eBook, How to Ace the 21 Most Common Questions in VBA which is full of examples you can use in your own code.

The post VBA Class Modules – The Ultimate Guide appeared first on Excel Macro Mastery.


June 29, 2016
VBA Objects – The Ultimate Guide
âHigh aims form high characters, and great objects bring out great mindsâ – Tryon Edwards
VBA Objects Cheat Sheat
TaskExamples
Declare and CreateDim coll As New Collection
Dim o As New Class1
Declare OnlyDim coll As Collection
Dim o As Class1
Create at run timeSet coll = New Collection
Set o = New Class1
Assign to Excel ObjectDim wk As Workbook
Set wk = Workbooks("book1.xlsx")
Assign using CreateObjectDim dict As Object
Set dict = CreateObject("Scripting.Dictionary")
Assign to existing objectDim coll1 As New Collection
Dim coll2 As Collection
Set coll2 = coll1
Return from FunctionFunction GetCollection() As Collection
Dim coll As New Collection
Set GetCollection = coll
End Function
Receive from FunctionDim coll As Collection
Set coll = GetCollection
Introduction
If you are serious about learning VBA then it is important to understand VBA Objects. Using objects is not that difficult. In fact, they make your life much easier.
In this post, you will see how VBA makes brilliant use of objects. How objects such as Collections, Workbooks and Worksheets save you much complexity, time and effort.
In my next post, I will cover creating objects using Class Modules. However, before you create your own it is vital that you understand exactly what they are and why you need them.
So grab your favourite beverage and take a journey into the fascinating world of VBA objects.

© BigStockPhoto.com
What is a VBA Object?
To understand what an object is, we must first look at simple variables. In VBA we have basic data types such as string, integers, double and date.
We use these data types when we are creating a variable e.g.
Dim Score As Long, Price As Double
Dim Firstname As String, Startdate As Date
Score = 45
Price = 24.55
Firsname = "John"
Startdate = #12/12/2016#
Basic VBA variables have only one purpose. To store a value while our application is running. We either put a value in the variable or read a value from the variable.
Dim Marks As Long
' Store value in Marks
Marks = 90
Marks = 34 + 44
Marks = Range("A1")
' Read value from Marks
Range("B2") = Marks
Debug.Print Marks
In VBA we have a Collection which we use to store groups of items. The following code shows an example of using a Collection in VBA
Sub UseCollection()
Dim collFruit As New Collection
' Add item to the collection
collFruit.Add "Apple"
collFruit.Add "Pear"
' Get the number of items in the collection
Dim lTotal As Long
lTotal = collFruit.Count
End Sub
The Collection is an example of an object. It is more than a variable. That is, it does more than storing a piece of data. We can add items, remove items and get the number of items.
Definition of a VBA Object: An object is a grouping of data and procedures(i.e. Functions and Subs). The procedures are used to perform some task related to the data.
In the Collection the data is the group of the items it stores. The procedures such as Add, Remove, Count then act on this data.
In the Worksheet object, the main data item is the worksheet and all the procedures perform actions related to the worksheet.

Why VBA Uses Objects
An object is used to represent real world or computer based items.
The major benefit of an object is that it hides the implementation details. Take the VBA Collection we looked at above. It is doing some complicated stuff. When an item is added it must allocate memory, add the item, update the item count and so on.
We don’t know how it is doing this and we don’t need to know. All that we need to know is when we use Add it will add the item, Remove will remove the item and Count will give the number of items.
Using objects allows us to build our applications are blocks. Building it this way means you can work on one part without affecting other parts of your application. It also makes it easier to add items to an application. For example, a Collection can be added to any VBA application. It is not affected in any way by the existing code and in turn it will not affect the existing code.
A Real World Analogy
Looking at a real-world example can often be a good way to understand concepts.
Take a car with a combustion engine. When you are driving your car, a lot of complex stuff is happening. For example, fuel gets injected, compressed and ignited leading to combustion. This then causes the wheels of your car to turn.

A nice looking combustion engine | © BigStockPhoto.com
The details of how this happens are hidden from you. All you expect is that turning the key will start the car, pressing the accelerator will speed it up and pressing the brake will slow it down and so on.
Think of how great your code would be if it was full of these type of objects. Self-contained and dedicated to performing one set of tasks really well. It would make building your applications so much easier.
Object Components
There are three main items that an object can have. These are
Properties – These are used to set or retrieve a value.
Methods – These are function or subs that perform some task on the objects data.
Events – These are function or subs that are triggered when a given event occurs
If you look in the Object Browser(F2) or use Intellisense you will notice different icons beside the members of an object. For example, the screenshot below shows the first three members of the Worksheet object
![]()
What these icons mean is as follows
![]()
Let’s take a look at the first three members of the worksheet.
It has an Activate method which we can use to make worksheet active.
It has an Activate event which is triggered when the worksheet is activated.
The Application property allows us to reference the application(i.e. Excel).
' Prints "Microsoft Excel"
Debug.Print Sheet1.Application.Name
' Prints the worksheet name
Debug.Print Sheet1.Name
In the next sections we will look at each of these components in more detail.
Object Properties
An object property allows us to read a value from the object or write a value to the object. We read and write to a property the same way we read and write to a variable.
' Set the name
sheet1.Name = "Accounts"
' Get the name
sName = sheet1.Name
A property can be read-only which means we can read the value but we cannot update the value.
In the VBA Range, Address is a read-only property
' The address property of range
Debug.Print Sheet1.Range("A1").Address
The workbook property Fullname is also a read-only property
' The Fullname property of the Workbook object
sFile = ThisWorkbook.Fullname
Properties can also Set and Get objects. For example, the Worksheet has a UsedRange property that return a Range object
Set rg = Sheet1.UsedRange
You will notice we used the Set keyword here. We will be looking at this in detail later in the post.
Object Methods
A method is a Sub or a Function. For example, Add is a method of the Collection
' Collection Add method
Coll.Add "Apple"
Methods are used to perform some action to do with the object data. With a Collection, the main data is the group of items we are storing. You can see that the Add, Remove and Count methods all perform some action relating to this data.
Another example of a method is the Workbook SaveAs method
Dim wk As Workbook
Set wk = Workbooks.Open "C:\Docs\Accounts.xlsx"
wk.SaveAs "C:\Docs\Accounts_Archived.xlsx"
and the Worksheets Protect and Copy methods
sheet1.Protect "MyPassword"
Sheet1.Copy Before:=Sheet2
Object Events
Visual Basic is an event-driven language. What this means is that the code runs when an event occurs. Common events are button clicks, workbook Open, worksheet Activate etc.
In the code below we display a message each time Sheet1 is activated by the user. This code must be placed in the worksheet module of Sheet1.
Private Sub Worksheet_Activate()
MsgBox "Sheet1 has been activated."
End Sub
Now that we know the parts of the VBA object let’s look at how we use an object in our code.
Creating a VBA Object
In VBA, our code must “Create” an object before we can use it. We create an object using the New keyword.
If we try to use an object before it is created we will get an error. For example, take a look at the code below
Dim coll As Collection
coll.Add "Apple"
When we reach the Add line no Collection has been created.

If we try to run this line we get the following error

There are three steps to creating a VBA object
Declare the variable.
Create a new object.
Assign the variable to the object.
We can perform these steps in one line using Dim and New together. Alternatively, we can declare the variable in one line and then create and assign the object in another line using Set.
Let’s take a look at both of these techniques.
Using Dim with New
When we use Dim and New together they declare, create and assign all in one line.
' Declare, Create and Assign
Dim coll As New Collection
Using code like does not provide much flexibility. It will always create exactly one Collection when we run our code.
In the next section we will look at Set. This allows us to create objects based on conditions and without having to declare a variable for each new object.
Using Set with New
We can declare an object variable in one line and then we can use Set to create and assign the object on another line. This provides us with a lot of flexibility.
In the code below we declare the object variable using Dim. We then create and assign it using the Set keyword.
' Declare
Dim coll As Collection
' Create and Assign
Set coll = New Collection
We use Set in this way when the number of objects can vary. Using Set allows us to create multiple objects. In other words, we can create objects as we need them. We can’t do this using Dim and New.
We can also use conditions to determine if we need to create an object e.g.
Dim coll As Collection
' Only create collection if cell has data
If Range("A1") <> "" Then
Set coll = New Collection
End If
Later in this post we will see some examples of using Set to create objects.
Subtle Differences of Dim Versus Set
There are some subtle differences between using New with Set and using New with Dim.
When we use New with Dim, VBA does not create the object until the first time we use it.
In the following code, the collection will not be created until we reach the line that adds “Pear”.
Dim coll As New Collection
' Collection is created on this line
coll.Add "Pear"
If you put a breakpoint on the Add line and check the variable value you will see the following message
Object variable or With block variable not set
When the Add line runs, the Collection will be created and the variable will now show a Collection with one item.
The reason for this is as follows. A Dim statement is different to other VBA lines of code. When VBA reaches a Sub/Function it looks at the Dim statements first. It allocates memory based on the items in the Dim statements. It is not in a position to run any code at this point.
Creating an object requires more than just allocating memory. It can involve code being executed. So VBA must wait until the code in the Sub is running before it can create the object.
Using Set with New is different in this regard to using Dim with New. The Set line is used by VBA when the code is running so VBA creates the object as soon as we use Set and New e.g.
Dim coll As Collection
' Collection is created on this line
Set coll = New Collection
coll.Add "Pear"
There is another subtlety to keep in mind using New. If we set the object variable to Nothing and then use it again, VBA will automatically create a new object e.g.
Sub EmptyColl2()
' Create collection and add items
Dim coll As New Collection
' add items here
coll.Add "Apple"
' Empty collection
Set coll = Nothing
' VBA automatically creates a new object
coll.Add "Pear"
End Sub
If we used Set in the above code to create the new Collection then the “Add Pear” line would cause an error.
When New Is Not Required
You may have noticed some objects don’t use the New keyword.
Dim sh As Worksheet
Set sh = ThisWorkbook.Worksheets("Sheet1")
Dim wk As Workbook
Set wk = Workbooks.Open("C:\Docs\Accounts.xlsx")
When a workbook is opened or created VBA automatically creates the VBA object for it. It also creates the worksheet object for each worksheet in the workbook.
Conversely, when we close the workbook VBA will automatically delete the VBA objects associated with it.
This is great news. VBA is doing all the work for us. So when we use Workbooks.Open, VBA opens the file and creates the workbook object for the workbook.
An important point to remember is that there is only one object for each workbook. If you use different variables to reference the workbook they are all referring to the same object e.g.
Dim wk1 As Workbook
Set wk1 = Workbooks.Open("C:\Docs\Accounts.xlsx")
Dim wk2 As Workbook
Set wk2 = Workbooks("Accounts.xlsx")
Dim wk3 As Workbook
Set wk3 = wk2
We will look at this in more detail in the VBA Objects in Memory section below.
Using CreateObject
There are some very useful libaries that are not part of Excel VBA. These include the Dictionary, Database objects, Outlook VBA objects, Word VBA objects and so on.
These are written using COM interfaces. The beauty of COM is that was can easily use these libraries in our projects.
If we add a reference to the library we create the object in the normal way.
' Select Tools->References and place a check
' beside "Microsoft Scripting Runtime"
Dim dict As New Scripting.Dictionary
If we don’t use a reference we can create the object at run time using CreateObject.
Dim dict As Object
Set dict = CreateObject("Scripting.Dictionary")
The first method is referred to as Early Binding and the second is referred to as Late Binding(see Early versus Late Binding) for more details.
Assigning VBA Objects
We can assign basic variables using the Let keyword.
Dim sText As String, lValue as Long
Let sText = "Hello World"
Let lValue = 7
The Let keyword is optional so nobody actually uses it. However, it is important to understand what it is used for.
sText = "Hello World"
lValue = 7
When we assign a value to a property we are using the Let Property
' Both lines do the same thing
sheet1.Name = "Data"
Let sheet1.Name = "Data"
When we assign an object variable we use the Set keyword instead of the Let keyword. When I use “object variable” I mean any variable that isn’t a basic variable such as a string, long or double etc..
' wk is the object variable
Dim wk As Worksheet
Set wk = ThisWorkbook.Worksheets(1)
' coll1 is the object variable
Dim coll1 As New Collection
coll1.Add "Apple"
' coll2 is the object variable
Dim coll2 As Collection
Set coll2 = coll1
Using the Set keyword is mandatory. If we forget to use Set we will get the error below
coll2 = coll1

It may look like Let and Set are doing the same thing. But they are actually doing different things:
Let stores a value
Set stores an address
To understand more about this we need to take a peek(pun intended:-)) into memory.
VBA Objects in Memory
âFools ignore complexity. Pragmatists suffer it. Some can avoid it. Geniuses remove itâ – Alan Perlis
To understand what New and Set are doing we need to understand how variables are represented in memory.
When we declare variables, VBA creates a slot for them in memory. You can think of the slot as an Excel cell in memory.
Dim X As long, Y As long

When we assign values to these variables, VBA places the new values in the appropriate slots.
X = 25
Y = 12

We saw the following line of code earlier in this post
Dim coll As New Collection
This line creates the object in memory. However, it doesn’t store this object in the variable. It stores the address of the object in the variable. In programming, this is known as a Pointer.

Because VBA handles this seamlessly it can seem as if the object variable and the object are the same thing. Once we understand they are different it is much easier to understand what Set is actually doing.
How Set Works
Take a look at the following code
Dim coll1 As New Collection
Dim coll2 As Collection
Set coll2 = coll1
Only one Collection has been created here. So coll1 and coll2 refer to the same Collection.
In this code, coll1 contains the address of the newly created Collection.
When we use Set we are copying the address from coll1 to coll2. So now they are both “pointing” to the same Collection in memory.

Earlier in the post we looked at Workbook variables. Let’s have a look at this code again
Dim wk1 As Workbook
Set wk1 = Workbooks.Open("C:\Docs\Accounts.xlsx")
Dim wk2 As Workbook
Set wk2 = Workbooks("Accounts.xlsx")
Dim wk3 As Workbook
Set wk3 = Workbooks(2)
When we open the workbook Accounts.xlsx, VBA creates an object for this workbook. When we assign the workbook variables in the code above, VBA places the address of the workbook object in the variable.
In this code example, the three variables are all referring to the same workbook object.

If we use code like the following
wk1.SaveAs "C:\Temp\NewName.xlsx"
VBA uses the address in wk1 to determine the workbook object to use. It does this seamlessly so when we use a workbook variable it looks like we are referring directly to the object.
To sum up what we have learned in this section:
Let writes a value to a basic variable
Set writes an address to an object variable
Objects and Procedures
In VBA we can refer to Functions and Subs as procedures. When we pass an object to a procedure only the address passed.
When we pass an object from a Function(Subs cannot return anything) only the address of the object is passed back.
In the code below we have one collection. It is the address that gets passed to and from the function.
Sub TestProc()
' Create collection
Dim coll1 As New Collection
coll1.Add "Apple"
coll1.Add "Orange"
Dim coll2 As Collection
' UseCollection passes address back to coll2
Set coll2 = UseCollection(coll1)
End Sub
' Address of collection passed to function
Function UseCollection(coll As Collection) _
As Collection
Set UseCollection = coll
End Function
Using ByRef and ByVal
When we pass a simple variable to a procedure we can pass using ByRef or ByVal.
ByRef means we are passing the address of the variable. If the variable changes in the procedure the original will also be changed.
ByVal means we are creating a copy of the variable. If the variable changes in the procedure the original will not be changed.
' Pass by value
Sub PassByVal(ByVal val As Long)
' Pass by reference
Sub PassByRef(ByRef val As Long)
Sub PassByRef(val As Long)
Most of the time it is a good idea to use ByVal because it prevents the variable being accidentally changed in a procedure.
When we pass a Collection to a procedure, we are always passing the address of the Collection.
ByRef and ByVal only affect the object variable. They do not affect the object!
What this means is that if we change the object in the procedure it will be changed outside it – this is regardless of whether you use ByVal or ByRef.
For example, in the code below we have two procedures that change the Collection. One uses ByRef and one uses ByVal. In both cases the Collection has changed when we return to the TestProcs Sub
Sub TestProcs()
Dim c As New Collection
c.Add "Apple"
PassByVal c
' Prints Pear
Debug.Print c(1)
PassByRef c
' Prints Plum
Debug.Print c(1)
End Sub
' Pass by value
Sub PassByVal(ByVal coll As Collection)
' Remove current fruit and add Pear
coll.Remove (1)
coll.Add "Pear"
End Sub
' Pass by reference
Sub PassByRef(ByRef coll As Collection)
' Remove current fruit and add Plum
coll.Remove (1)
coll.Add "Plum"
End Sub
Let’s look at a second example. Here we are setting the object variable to “point” to a new Collection. In this example we get different results from ByVal and ByRef.
In the PassByVal Sub a copy of the original object variable is created. So it this copy that points to the new Collection. So our original object variable is not affected.
In the PassByRef Sub we are using the same object variable so when we point to the New Collection, our original object variable is now pointing to the new collection.
Sub TestProcs()
Dim c As New Collection
c.Add "Apple"
PassByVal c
' Prints Apple as c pointing to same collection
Debug.Print c(1)
PassByRef c
' Prints Plum as c pointing to new Collecton
Debug.Print c(1)
End Sub
' Pass by value
Sub PassByVal(ByVal coll As Collection)
Set coll = New Collection
coll.Add "Orange"
End Sub
' Pass by reference
Sub PassByRef(ByRef coll As Collection)
Set coll = New Collection
coll.Add "Plum"
End Sub
Why VBA Uses Pointers
You may be wondering why VBA uses pointers. The reason is that it is much more efficient.
Imagine you had a Collection with 50000 entries. Think how inefficient it would be to create multiple copies of this Collection when your application was running.
Think of it like a library which is a real world collection of books. We can put the Library address in directories, newspapers etc. A person simply uses the address to go to the Library and add and remove books.
There is one Libary and the address is passed around to anyone who needs to use it.If we wanted a second library we would create a new library. It would have a different address which we could also pass around.

© BigStockPhoto.com
Running a Simple Memory Experiment
To demonstrate what we have been discussing, let’s look at a code example. The code below uses
VarPtr to give the memory address of the variable
ObjPtr to give the memory address of the object
The memory address is simply a long integer and it’s value is not important. But what is interesting is when we compare the addresses.
Sub Memory()
Dim coll1 As New Collection
Dim coll2 As Collection
Set coll2 = coll1
' Get address of the variables Coll1 and Coll2
Dim addrColl1 As Long, addrColl2 As Long
addrColl1 = VarPtr(coll1)
addrColl2 = VarPtr(coll2)
Debug.Print "Address of the variable coll1 is " & addrColl1
Debug.Print "Address of the variable coll2 is " & addrColl2
' Get address of the Collection they point to
Dim addrCollection1 As Long, addrCollection2 As Long
addrCollection1 = ObjPtr(coll1)
addrCollection2 = ObjPtr(coll2)
Debug.Print "Address coll1 collection is " & addrCollection1
Debug.Print "Address coll1 collection is " & addrCollection2
End Sub
When you run the code you will get a result like this:
Address of the variable coll1 is 29356848
Address of the variable coll2 is 29356844
Address coll1 collection is 663634280
Address coll2 collection is 663634280
you will notice
The memory addresses will be different each time you run.
The address of the Coll1 Collection and the Coll2 Collection will always be the same.
The address of the coll1 and coll2 variable will always be different.
This shows that we have two different variables which contain the address of the same Collection.
Cleaning Up Memory
So what happens if we set a variable to a New object multiple times? In the code below we use Set and New twice for the variable coll
Dim coll As Collection
Set coll = New Collection
coll.Add "Apple"
' Create a new collection and point coll to it
Set coll = New Collection
In this example, we created two new Collections in memory. When we created the second collection we set coll to refer to it. This means it no longer refers to the first collection. In fact, nothing is referring to the first Collection and we have no way of accessing it.
In some languages(looking at you C++) this would be a memory leak. In VBA however, this memory will be cleaned up automatically. This is known as Garbage Collection.
To clarify, once no variable is referring to an object VBA will delete the object in memory. In the above code, our Collection with “Apple” will be deleted when coll1 is set to “point” to a new Collection.
Clean Up Example
If you want to see this for yourself then try the following.
Create a class module, call it clsTest and add the following code.
Public Firstname As String
Private Sub Class_Terminate()
MsgBox "Customer " & Firstname & " is being deleted."
End Sub
Class_Terminate is called when an object is being deleted. By placing a message box in this event we can see exactly when it occurs.
Step through the following code using F8. When you pass the Set o = New clsCustomer line you will get a message saying the Jack was deleted.When you exit the function you will get the message saying Jill was deleted.
Sub TestCleanUp()
Dim oCust As New clsCustomer
oCust.Firstname = "Jack"
' Jack will be deleted after this line
Set o = New clsCustomer
o.Firstname "Jill"
End Sub
VBA automatically deletes objects when they go out of scope. This means if you declare them in a Sub/Function they will go out of scope when the Function ends.
Setting Objects to Nothing
In code examples you may see code like
Set coll = Nothing
A question that is often asked is “Do we need to Set variables to Nothing when we are finished with them?”. The answer is most of the time you don’t need to.
As we have seen VBA will automatically delete the object as soon as we go out of scope. So in most cases setting the object to Nothing is not doing anything.
The only time you would set a variable to Nothing is if you needed to empty memory straight away and couldn’t wait for the variable to go out of scope. An example would be emptying a Collection.
Imagine the following project. You open a workbook and for each worksheet you read all the customer data to a collection and process it in some way. In this scenario, you would set the Collection to Nothing every time you finish with a worksheet’s data.
Sub SetToNothing()
' Create collection
Dim coll As New Collection
Dim sh As Worksheet
' Go through all the worksheets
For Each sh In ThisWorkbook.Worksheets
' Add items to collection
' Do something with the collection data
' Empty collection
Set coll = Nothing
Next sh
End Sub
Memory Summary
To sum up what we have learned in this section:
A new object is created in memory when we use the New keyword.
The object variable contains only the memory address of the object.
Using Set changes the address in the object variable.
If an object is no longer referenced then VBA will automatically delete it.
Setting an object to Nothing is not necessary in most cases.
Why Set Is Useful
Let’s look at two examples that show how useful Set can be.
First, we create a very simple class module called clsCustomer and add the following code
Public Firstname As String
Public Surname As String
Set Example 1
In our first scenario, we are reading from a list of customers from a worksheet. The number of customers can vary between 10 and 1000.
Obviously, declaring 1000 objects isn’t an option. Not only is it a lot of wasteful code, it also means we can only deal with maximum 1000 customers.
' Don't do this!!!
Dim oCustomer1 As New clsCustomer
Dim oCustomer2 As New clsCustomer
' .
' .
' .
Dim oCustomer1000 As New clsCustomer
What we do first is to get the count of rows with data. Then we create a customer object for each row and fill it with data. We then add this customer object to the collection.
Sub ReadCustomerData()
' We will always have one collection
Dim coll As New Collection
' The number of customers can vary each time we read a sheet
Dim lLastRow As Long
lLastRow = Sheet1.Range("A" & Sheet1.Rows.Count).End(xlUp).Row
Dim oCustomer As clsCustomer
Dim i As Long
' Read through the list of customers
For i = 1 To lLastRow
' Create a new clsCustomer for each row
Set oCustomer = New clsCustomer
' Add data
oCustomer.Firstname = Sheet1.Range("A" & i)
oCustomer.Surname = Sheet1.Range("B" & i)
' Add the clsCustomer object to the collection
coll.Add oCustomer
Next i
End Sub
Each time we use Set we are assigning oCustomer to “point” to the newest object. We then add the customer to the Collection. What happens here is that VBA creates a copy of the object variable and places it in the collection.
Set Example 2
Let’s look at a second example where using Set is useful. Imagine we have a fixed number of customers but only want to read the ones whose name starts with the letter B. We only create a customer object when we find a valid one.
Sub ReadCustomerB()
' We will always have one collection
Dim coll As New Collection
Dim oCustomer As clsCustomer, sFirstname As String
Dim i As Long
' Read through the list of customers
For i = 1 To 100
sFirstname = Sheet1.Range("A" & i)
' Only create customer if name begins with B
If Left(sFirstname, 1) = "B" Then
' Create a new clsCustomer
Set oCustomer = New clsCustomer
' Add data
oCustomer.Firstname = sFirstname
oCustomer.Surname = Sheet1.Range("B" & i)
' Add to collection
coll.Add oCustomer
End If
Next i
End Sub
It doesn’t matter how many customer names start with B this code will create exactly one object for each one.
This concludes my post on VBA Objects. I hope you found in beneficial.In my next post I’ll be looking at how your can create your own objects in VBA using the Class Module.
If you have any questions or queries please feel free to add a comment or email me at Paul@ExcelMacroMastery.com.
What’s Next?
If you want to read about more VBA topics you can view a complete list of my posts here. I also have a free eBook(see below) which you will find useful if you are new to VBA.
If you are serious about mastering VBA then you may want to check out Build 11 Full VBA Applications
Get the Free eBook
Please feel free to subscribe to my newsletter and get exclusive VBA content that you cannot find here on the blog, as well as free access to my eBook, How to Ace the 21 Most Common Questions in VBA which is full of examples you can use in your own code.
The post VBA Objects – The Ultimate Guide appeared first on Excel Macro Mastery.
June 3, 2016
VBA VLookup – A Complete Guide
âConstant effort and frequent mistakes are the stepping stones to geniusâ – Elbert Hubbard
A Quick Guide to the VBA VLookup
ParametersType
Lookup valueThe value you are searching for
Table array
The range you are searching through
Column indexThe column number of the value to return.
Range look upOptional - set to False for exact match only.

© BigStockPhoto.com
Introduction
The VLookup function can be a useful Excel function. Even though it is straightforward to use can often be confusing when used in VBA. In this post, I am going to show how anyone can easily use the VLookup function. I’ll also cover the pitfalls and how to avoid them. Of course, not post would be complete without a ton of examples that you can try for yourself.
If you are not familiar with VLookup in Excel then this page provides a great introduction.
Notes: I use the Underscore character(_) in the code examples. In VBA this allows you to split a line over multiple lines e.g.
' One line
sResult = Application.VLookup("Apricot", Sheet1.Range("A10:B10000"), 1)
' Split up with underscore
sResult = Application.VLookup( _
"Apricot", Sheet1.Range("A10:B10000"), 1)
A Simple VBA VLookup example
Take a look at the following data

The code below will return the price for the Orange 1.45
Sub SimpleVLookup()
Dim sRes As String
sRes = Application.VLookup("Pear",shData.Range("A2:B7"),2)
' This will print 1.67 to the Immediate Window(Ctrl + G)
Debug.Print sRes
End Sub
The code looks for the text Pear in the range A2:B7. When it finds the text it returns a value from the same row as the text. The value in determined by the column number argument. We used 2 in this example.


Let’s look at some more examples and results
' Returns 1.45
sRes = Application.VLookup("Orange",shData.Range("A2:B7"),2)
' Returns 1.56
sRes = Application.VLookup("Apple",shData.Range("A2:B7"),2)
' Returns 1.22
sRes = Application.VLookup("Plum",shData.Range("A2:B7"),2)
' Returns Orange as column is 1
sRes = Application.VLookup("Orange",shData.Range("A2:B7"),1)
' Returns Apple as column is 1
sRes = Application.VLookup("Apple",shData.Range("A2:B7"),1)
' Returns Plum as column is 1
sRes = Application.VLookup("Plum",shData.Range("A2:B7"),1)
The Parameters
In this section we will look at the four parameters. These are
lookup_value – The value to look up. It must be in the first column of the range.
table_array – This is the range to search. This can also be a VBA array although it very slow using this.
col_index_num – This contains the column number of the return value. Starts at column number one.
range_lookup(optional) – Use True(default) to find closest match. Use False to find exact match. Using True assumes that the first columnis sorted alphabetically or numerically.
We will look at these parameters individually starting with the lookup_value parameter.
Parameter 1: lookup_value
This is the value that you are looking up. It must be in the first column of the Range. If you are using the range C4:X10 then the lookup value must be in column C. If you are using the range Z1:AB5 then the lookup value must be in column Z.
The type of value you search for will normally be a string as this example shows
Sub StringVLookup()
Dim sFruit As String
sFruit = "Plum"
Dim sRes As Variant
sRes = Application.VLookup( _
sFruit, shData.Range("A2:B7"), 2, False)
End Sub
We can also search for a number but you have to be careful here:
If the number is stored as text then the search value must be a string.
If the number is stored as a number then the search value must be a number.
For example in this data we have the lookup column stored as numbers

In this case, the lookup value must be a Long or you will get an error message.
Sub NumberVLookup()
Dim num As Long
num = 7
Dim sRes As Variant
sRes = Application.VLookup( _
num, shData.Range("F2:G7"), 2, True)
Debug.Print sRes
End Sub
You can also use the Double data type if you are looking up a decimal value. As in the case of an integer it must be stored as a number if you want to use Double.
Using VLookup on a Date Type
Using a Date type is a tricky business. VBA has a Date data type but the worksheet does not.
So the date type needs to be converted to a Long as the following examples show
theDate = CLng(#1/14/2017#)
theDate = CLng(CDate("1/14/2017"))
theDate = CLng(shData.Range("H10"))
You can then use it as normal in the VLookup function when the search column contains dates
Sub DateVLookup()
Dim theDate As Long
theDate = CLng(#1/14/2017#)
Dim sRes As Variant
sRes = Application.VLookup( _
theDate, shData.Range("I2:J7"), 2, False)
Debug.Print sRes
End Sub
Parameter 2: table_array
This parameter refers to the range of the data we are looking up. You will normally use a range for this as we have seen in the examples so far.
If you are using a worksheet table you can use the range of the table.
Sub SimpleVLookupTable()
Dim sRes As Variant
' Get the table
Dim table As ListObject
Set table = shData.ListObjects("Table1")
' Use the table for the table_array parameter
sRes = Application.VLookup( _
"Plum", table.Range, 2, False)
Debug.Print sRes
End Sub
You can also use a VBA array with VLookup but this tends to be very slow.
Parameter 3: col_index-num
This parameter refers to the column which contains the value you want to return. Column 1 is the leftmost column of the table_array.
If the column number is greater than the number of columns in the range you will get an error. See The VLookup Error Types section below.

© BigStockPhoto.com
Parameter 4: range_lookup
This is an optional parameter. If it is not used then it takes True as the default value.
False means that an exact match must be found.
True means that an approximate match will be returned. The first column must be ordered numerically or alphabetically for this to work correctly.
Let’s look at the sample data again
The following code shows some examples of how this parameter works
Sub SimpleVLookup()
Dim rg As Range
Set rg = shData.Range("A2:B7")
Dim sRes As Variant
' Stops at Orange - the last item before a P item
sRes = Application.VLookup("P", rg, 2, True)
' Stops at Orange - the last item before a Pea item
sRes = Application.VLookup("Pea", rg, 2, True)
' Stops at Peach - the last item before a Pead item
sRes = Application.VLookup("Pead", rg, 2, True)
' Error - no exact match found
sRes = Application.VLookup("Pea", rg, 2, False)
End Sub
Dealing with Errors

© BigStockPhoto.com
We can use VLookup in two ways in VBA. With Application or with WorksheetFunction
Application.WorksheetFunction.VLookup
Application.VLookup
The difference between them is how we handle errors. Let’s look at each of these in turn.
Using WorksheetFunction
Using WorksheetFunction.VLookup requires us to use On Error to trap the error. We can then check the error number Err.Number to see if the value is valid.
Sub UseWorksheetFunction()
Dim sRes As Variant
' Turn on error trapping
On Error Resume Next
Err.Clear
sRes = Application.WorksheetFunction.VLookup _
("Plum", shData.Range("A2:B7"), 2, False)
' Check if value found
If Err.Number = 0 Then
Debug.Print "Found item. The value is " & sRes
Else
Debug.Print "Could not find value: " & "Plum"
End If
End Sub
Using Application
Using Application.VLookup we can simply check the return value to see if there was an error
Sub UsingApplication()
Dim sRes As Variant
sRes = Application.VLookup _
("Plum", shData.Range("A2:B7"), 2, False)
' Check if value found
If IsError(sRes) = False Then
Debug.Print "Found item. The value is " & sRes
Else
Debug.Print "Could not find value: " & "Plum"
End If
End Sub
VLookup Error Types
The following table shows a list of the Excel cell error numbers and what they mean. These are the error numbers we get when we use Application.VLookup. This is taken from this MSDN Page
ConstantError numberCell error value
xlErrDiv02007#DIV/0
xlErrNA2042#N/A
xlErrName2029#NAME?
xlErrNull2000#NULL!
xlErrNum2036#NUM!
xlErrRef2023#REF!
xlErrValue2015#VALUE!
Errors and Causes
The following table shows some common errors you may encounter with VLookup. If you’re having trouble with a particular VLookup error then it is a good idea to try it in Excel first.
NumberCellPossible causes
2015#VALUE!The column number is less than one.
2015
#VALUE!You used a string instead of a range for the table_array parameter.
2023#REF!The column number is greater than the number of columns.
2042#N/AThe value is not found. See possible causes below.
If you cannot find the value then check the following:
Ensure the Table/Range is correct.
Ensure the Table/Range is using the correct worksheet.
If searching for a number use a long or double data type in the lookup_value parameter. See lookup_value section above
If searching for a number stored as text use a string data type in the lookup_value parameter.
If searching for a date convert it to a long(see Date Type above) in the lookup_value parameter.
If you are getting the wrong value then check the following:
If the range_lookup parameter is True or not used, then ensure the first column is sorted alphabetically or numerically (see range_lookup above)
VBA VLookup Speed
Sometimes you may need to perform a large number of lookups. In these cases, VLookup could be too slow. The VBA Dictionary is faster when dealing with a large number of lookups. The following code shows an example of using the Dictonary.
Sub UseDictionary()
' Get the range of values
Dim rg As Range
Set rg = shData.Range("M1:N20000")
' Create the dictionary
Dim dict As Object
Set dict = CreateObject("Scripting.Dictionary")
' Fill the dictionary
Dim cell As Range
For Each cell In rg
dict(cell.Value) = cell.Offset(0, 1).Value
Next
' Perform the Lookups
For Each cell In rg
Debug.Print dict(cell.Value)
Next
End Sub
What’s Next?
If you want to read about more VBA topics you can view a complete list of my posts here. I also have a free eBook(see below) which you will find useful if you are new to VBA.
If you are serious about mastering VBA then you may want to check out The Excel VBA Handbook
Get the Free eBook
Please feel free to subscribe to my newsletter and get exclusive VBA content that you cannot find here on the blog, as well as free access to my eBook, How to Ace the 21 Most Common Questions in VBA which is full of examples you can use in your own code.
The post VBA VLookup – A Complete Guide appeared first on Excel Macro Mastery.
April 30, 2016
VBA UserForms – A Guide for Everyone (Part 2)
“The system should treat all user input as sacred.” – Jef Raskin
A Quick Guide to the VBA UserForm
FunctionExamples
Declare and create Dim form As New userformCars
Declare and create Dim form As userformCars
Set form = New userformCars
Show as modalform.Show
OR
form.Show vbModal
Show as non modalform.Show vbModeless
UnloadPrivate Sub buttonCancel_Click()
Unload Me
End Sub
HidePrivate Sub buttonCancel_Click()
Hide
End Sub
Get\set the titleform.Caption = "Car Details"
CLICK HERE TO DOWNLOAD THE TEST DATA FOR THIS POST
Introduction
In the first post we looked at the general use of the UserForm. We saw how to
diplay it and how to retrieve data from it.
In this post we are going to look at the individual controls and how to use them.

Excel’s Format Cells User Form
User forms are made up of different types of controls such as buttons, list boxes, dropdown lists, checkboxes and textboxes.
In simple terms, we are asking the user to give us some information and then we are using this information when running the application.
The Controls
We add controls to the UserForms to allow the user to make selections, enter text or click a button. To add a control do the following
Go to the toolbox dialog – if not visible select View->Toolbox
Click on the control you want to add – the button for this control will appear flat
Put the cursor over the UserForm.
Hold down the left mouse button and drag until the size you want.
The following table shows a list of the common controls
ControlDescription
Label Displays text
TextboxAllows text entry
ComboBoxAllows selection from a list of items
ListBoxAllows selection from a list of items
CheckBoxTurn item on/off
CommandButtonClick to perform action
Properties of the Controls
Take a look at the following screenshot

UserForm Windows
If you click on any control or the UserForm itself you will see the properties of the item displayed in the properties window. You can change the name, caption etc. here.
To change the name of the UserForm do the following
Click on the UserForm in the Project window or click on the UserForm itself
Click in the name field of the properties window.
Type in the new name
Formatting the controls
Adding the Code
To view the code of the UserForm
Right click on the UserForm in the properties windows(or the UserForm itself) and select “View Code”.
You will see a Sub call UserForm_Click. You can delete this when you create your first sub.
If you double click on any control it will create the click event of that control if it doesn’t exist. It both cases will
go to the code which is very usefi;.
The controls
Let’s look at the controls and how we use them
Common control functions
The following table shows the most commonly used functions that are available to all controls.
FunctionOperationExample
EnabledEnable/Disable controlcombobox.Enabled = True
textbox.Enabled = False
SetFocusSets the focus to the control.
(cannot use with the Label).combobox.SetFocus
VisibleShow/Hide controlcombobox.Visible = True
textbox.Visible = False
The Enabled is often used when we want to prevent a user making a selecting for a particular control.
CheckBox
FunctionOperationExample
CaptionGet/Set the textcheckbox.Caption = "Apple"
ValueGet the checked stateIf checkbox.Value = True Then
ValueSet the checked statecheckbox.Value = False
The check box is a simple control that allows the user set something to on or off. You will often see them used on web pages where you are asked to accept terms and conditions.

We can turn the checkbox on or off by setting it to true or false
' Set the check on
CheckBoxTerms.Value = True
' Set the check off
CheckBoxTerms.Value = True
If we want to create an action when the user clicks on the checkbox then we create a checkbox event. This is simply a sub that runs when the checkbox is clicks.
To create this event simply click on the checkbox in design mode and you will get the following.
Private Sub CheckBoxTerms_Click()
End Sub
You can put any code you like here.
Label
FunctionOperationExample
TextGet\Set the texttextbox1.Text = "Apple"
The label is the simplest off controls and generally speaking we don’t use it in the code. It is used to identify the controls or explain something to the user.
You can the text of the Label in the code using the Caption property
LabelAddress.Caption = "Customer Address"
TextBox
FunctionOperationExample
TextSet the texttextbox1.Text = "Apple"
TextGet the textsFruit = textbox1.Text
ValueSet the texttextbox1.Value = "Apple"
ValueGet the textsFruit = textbox1.Value
The textbox is used to allows the user to enter text. We can read or write from a text box as follows
TextBoxNotes.Value = "It was the best of times."
sNotes = TextBoxNotes.Value
The textbox has properties Text and Values. These are the same thing.
From MSDN: For a TextBox, any value you assign to the Text property is also assigned to the Value property.
The problem with the text box is that the user can enter anything. If want the user to pick a country for example we would allow them to select the country from a list. This means they cannot accidentally spell the name of the country wrong.
If we want to put limits on what the user can enter in a textbox then we need to be creative.
ComboBox
FunctionOperationExample
AddItemAdd an itemlistbox.AddItem "Spain"
ClearRemove all Items combo.Clear
ListAdd a range of itemscombo.List = Range("A1").Value
ListCountGet the number of itemscnt = combo.ListCount
ListIndexGet/set selected itemIdx = combo.ListIndex
combo.ListIndex = 0
ListRowsGet/set number of items displayed NoItems = combo.ListRows
combo.ListRows = 12
RemoveItemRemove an item combo.RemoveItem 1
ValueGet the value of selected ItemDim sCountry As String
sCountry = combo.Value
The combobox is used to allow the user to select an item from a list. It is very similar to the listbox. The main difference is the listbox allows multiple selections.
The easiest way to show how this works is with an example. Imagine we have a list of countries and their capitals in cells A1:B196.
We want the user to select any country. When they do our userform will display the captital of that country. The screenshot below shows and example of this
The first thing we want to do is fill the countries combobox when the form loads. We do this using the UserForm_Initialize event which we looked at in the first post on VBA UserForms.
Private Sub ComboBoxCountry_Change()
End Sub
We can use the following code to update the textbox
Private Sub ComboBoxCountry_Change()
' Get the value from the combo box
Dim sCountry As String
sCountry = ComboBoxCountry.Value
' Use VLookup to find the capital of the country
TextBoxCapital.Value = _
WorksheetFunction.VLookup(sCountry, Sheet1.Range("A1:B196"), 2)
End Sub
When the user selects a country we want to display the capital city in the textbox. We use the Change event of the ComboBox. To create this we simply double click on the ComboBox and it will be automatically created.
Private Sub UserForm_Initialize()
' Add array to combobox
ComboBoxCountry.List = Sheet1.Range("A1:A196").Value
' Set the first item in combobox
ComboBoxCountry.ListIndex = 0
End Sub
ListBox
FunctionOperationExample
AddItemAdd an itemlistbox.AddItem "Spain"
ClearRemove all Itemslistbox.Clear
ColumnCountSet the number of visible columnsComboBox1.ColumnCount = 2
ColumnHeadsMake the column row visibleComboBox1.ColumnHeads = True
ListCountGet the number of itemscnt = listbox.ListCount
ListIndexGet/set selected itemIdx = listbox.ListIndex
combo.ListIndex = 0
RemoveItemRemove an itemlistbox.Remove 1
RowSourceAdd a range of values from a worksheet ComboBox1.RowSource = Sheet1.Range("A2:B3").Address
ValueGet the value of selected ItemDim sCountry As String
sCountry = listbox.Value
The listbox allows the user to select from a list of items
A complete example
What’s Next?
If you want to read about more VBA topics you can view a complete list of my posts here. I also have a free eBook(see below) which you will find useful if you are new to VBA.
If you are serious about mastering VBA then you may want to check out Build 11 VBA Modules Full VBA Applications
Get the Free eBook
Please feel free to subscribe to my newsletter and get exclusive VBA content that you cannot find here on the blog, as well as free access to my eBook, How to Ace the 21 Most Common Questions in VBA which is full of examples you can use in your own code.
The post VBA UserForms – A Guide for Everyone (Part 2) appeared first on Excel Macro Mastery.
April 22, 2016
VBA UserForms – A Guide for Everyone (Part 1)
“The system should treat all user input as sacred.” – Jef Raskin
A Quick Guide to the VBA UserForm
The following table provides a quick guide to the most common features of the UserForm
FunctionExamples
Declare and create Dim form As New userformCars
Declare and create Dim form As userformCars
Set form = New userformCars
Show as modalform.Show
OR
form.Show vbModal
Show as non modalform.Show vbModeless
UnloadPrivate Sub buttonCancel_Click()
Unload Me
End Sub
HidePrivate Sub buttonCancel_Click()
Hide
End Sub
Get\set the titleform.Caption = "Car Details"
Introduction
UserForms are a useful tool in VBA. They provide a practical way for your application to get information from the user,
If you are new to UserForms you may be overwhelmed by the amount of information about them. As with most topics in VBA, 90% of the time you will only need 10% of the functionality.
In these two blog posts(part 2 is coming soon!) I will show you how to quickly and easily add a UserForm to your application.
This first post covers creating Userforms and using them as modal or modeless. I will also show you how to easily pass the users selection back to the calling procedure.
In the second post I will cover the main controls such as the listbox, the combobox(dropdown), the textbox and the checkbox. This post will contain a ton of examples showing how to use each of these controls.
Useful Resources
If you are looking for more online information about UserForms you can go to
MSDN – Microsoft Developer Network – UserForms
Another great resource is John Walkenback’s VBA book. It has an entire section(150 pages) dedicated to UserForms and is well worth reading
Excel 2013 Power Programming with VBA by John Walkenback
What are VBA Userforms?
A UserForm is a dialog which allows your application to get input from the user. UserForms are used throughout all Windows applications. Excel itself has a large number of UserForms such as the Format Cells UserForm shown in the screenshot below.
Excel’s Format Cells User Form
UserForms are made up of different types of controls such as buttons, listboxes, comboboxes(dropdown lists), checkboxes and textboxes.
In the Format Cells screenshot above you can see examples of these controls:
Font, Font style and Size contain a textbox with a listbox below it
Underline and Color use a Combobox
Effects uses three checkboxes
Ok and Cancel are command buttons
There are other controls but these are the ones you will use most of the time.
Built in VBA Userforms
It is important to note that VBA has some useful built-in UserForms. These can be very useful and may save you having to create a custom one. Let’s start by having a look at the MsgBox.
VBA MsgBox
The VBA message box allows you to display a dialog to the user. You can choose from a collection of buttons such as Yes, No, Ok and Cancel.
You can easily find out which of these buttons the user clicked on and use the results in your code.
The following code shows two simple examples of using a message box
Sub BasicMessage()
' Basic message
MsgBox "There is no data on this worksheet "
' Basic message with "Error" as title
MsgBox "There is no data on this worksheet ", , "Error"
End Sub
In the next example we ask the user to click Yes or No and print a message displaying which button was clicked
Sub MessagesYesNoWithResponse()
' Display Yes/No buttons and get response
If MsgBox("Do you wish to continue? ", vbYesNo) = vbYes Then
Debug.Print "The user clicked Yes"
Else
Debug.Print "The user clicked No"
End If
End Sub
In the final example we ask the user to click Yes, No or Cancel
Sub MessagesYesNoCancel()
' Display Yes/No buttons and get response
Dim vbResult As VbMsgBoxResult
vbResult = MsgBox("Do you wish to continue? ", vbYesNoCancel)
If vbResult = vbYes Then
Debug.Print "The user clicked Yes"
ElseIf vbResult = vbNo Then
Debug.Print "The user clicked No"
Else
Debug.Print "The user clicked Cancel"
End If
End Sub
InputBox
If you want to get a single piece of text or value from the user you can use the InputBox. The following code asks the user for a name and writes it to the Immediate Window(Ctrl + G to view)
Sub GetValue()
Dim sValue As String
sValue = InputBox("Please enter your name", "Name Entry")
Debug.Print sValue
End Sub
GetOpenFilename
We can use the Windows file dialog to allow the user to select a file or multiple files.
The first example allows the user to select a file
' Print the name of the selected file
sfile = Application.GetOpenFilename("Excel Files (*.xlsx),*.xlsx")
Debug.Print sfile
This following example allows the user to select multiple files
Sub GetMultipleFiles()
Dim arr As Variant
arr = Application.GetOpenFilename("Text Files(*.txt),*.txt" _
, MultiSelect:=True)
' Print all the selected filenames to the Immediate window
Dim filename As Variant
For Each filename In arr
Debug.Print filename
Next
End Sub
How to Create a VBA UserForm
If the built-in UserForms do not cover your needs then you will need to create your own custom Userform. To use a UserForm in our code we must first create one. We then add the necessary controls to this userform.
We create a UserForm with the following steps
Open the Visual Basic Editor(Alt + F11 from Excel)
Go to the Project Window which is normally on the left(select View->Project Explorer if it’s not visible)
Right-click on the workbook you wish to use
Select Insert and then UserForm(see screenshot below)

VBA Userform Create
A newly created UserForm will appear. Anytime you want to access this Userform you can double click on the UserForm name in the Project window.
The Toolbox dialog should also be visible. If it’s not visible select View->Toolbox from the menu. We use the toolbox too add controls to our UserForm.

The UserForm Toolbox
Designing the UserForm
To view the design of the UserForm, double click on it in the Project window. There are three important windows we use when creating our UserForms.
The UserForm
The properties window – this is where we can change the setting of the Userform and its controls
The toolbox – we use this to add new controls to our UserForm
UserForm Windows
A Very Simple UserForm Example
Let’s have a look at a very simple user form example.
Create a new UserForm
Rename it to userformTest in the (Name) property in the properties window
Create a new module(Right click on properties window and select Insert->Module)
Copy the DislayUserForm sub below below to the module
Run the sub using Run->Run UserForm Sub from the menu
The UserForm will be displayed – you have created your first UserForm application!
Click on the X in the top right of the UserForm to close
Sub DisplayUserForm()
Dim form As New UserFormTest
form.Show
End Sub
Setting the Properties of the UserForm
We can change the attributes of the UserForm using the properties window. Select View->Properties Window if the window is not visible.
When we click on the UserForm or the control on a UserForm then the Properties window displays the attributes of that item.

VBA Properties Window
Generally speaking, you only use a few of these properties. The important ones for the UserForm are Name and Caption.
To change the name of the UserForm do the following
Click on the UserForm in the Project window or click on the UserForm itself
Click in the name field of the properties window
Type in the new name
The Controls
We add controls to the UserForms to allow the user to make selections, enter text or click a button. To add a control use the steps below
Go to the toolbox dialog – if not visible select View->Toolbox
Click on the control you want to add – the button for this control will appear flat
Put the cursor over the UserForm
Hold down the left mouse button and drag until the size you want
The following table shows a list of the common controls
ControlDescription
Label Displays text
TextboxAllows text entry
ComboBoxAllows selection from a list of items
ListBoxAllows selection from a list of items
CheckBoxTurn item on/off
CommandButtonClick to perform action
Adding the Code
To view the code of the UserForm
Right click on the UserForm in the properties windows(or the UserForm itself) and select “View Code”
You will see a sub called UserForm_Click. You can delete this when you create your first sub
Note: If you double click on a control it will bring you to the click event of that control. This can be a quicker way to get to the UserForm code.
Adding Events
When we use a UserForm we are dealing with events. What this means is that we want to perform actions when events occur. An event occurs when the users clicks a button, changes text, selects an item in a combobox etc. We add a Sub for a particular event and place our code in it. When the event occurs our code will run.
One common event is the Initialize event  which occurs when the UserForm is created at run time. We normally use this event to fill our controls with any necessary data. We will look at this event in the section below.

To add an event we use the comboboxes over the code window(see screenshot above). The left one is used to select the control and the right one is used to select the event. When we select the event it will automatically add this sub to our UserForm module.
Note: Clicking on any control on the UserForm will create the click event for that control.
The Initialize Event
The first thing we want to do with a UserForm is to fill the controls with values. For example, if we have a list of countries for the user to select from we could use this.
To do this we call the Initialize event. This is a sub that runs when the form is created in your application.
To create the Initialize event we do the following
Right click on the UserForm and select View Code from the menu
In the Dropdown list on the left above the main Window, select UserForm
This will create the UserForm_Click event. You can ignore this
In the Dropdown list on the right above the main Window, select Initialize
Optional: Delete the UserForm_Click sub created in step 2

Adding the Initialize Event
Once we have the Initialize event created we can use it to add the starting values to our controls. We will see more about this in the second part of this post.
Calling the UserForm
We can use the UserForm in two ways
Modal
Modeless
Modal Userform
Modal means the user cannot interact with the parent application while this is visible. The excel Format cells dialog we looked at earlier is a modal UserForm. So are the Excel Colors and Name Manager dialogs.
We use modal when we don’t want the user to interact with any other part of the application until they are finished with the UserForm.
Modeless Userform
Modeless means the user can interact with other parts of the application while they are visible. An example of modeless forms in Excel is the Find dialog(Ctrl + F).
You may notice that any Excel dialog that allows the user to select a range has a limited type of Modeless – the user can select a range of cells but cannot do much else.
Modal versus Modeless
The actual code to make a UserForm modal or modeless is very simple. We determine which type we are using when we show the UserForm as the code below demonstrates
Dim frm As New UserFormFruit
' Show as modal - code waits here until UserForm is closed
frm.Show vbModal
' Show as modeless - code does not wait
frm.Show vbModeless
' default is modal
frm.Show
As the comments in the above indicate the code behaves differently for Modal and Modeless. For the former it waits for the UserForm to close and for the latter it continues on.
Even though we can display any UserForm as modal or modeless we normally use it in one way only. This is because how we use them is different
Typical use of a Modal form
With a Modal UserForm we normally have an Ok and a Cancel button.
The Ok button normally closes the UserForm and performs the main action. This could be saving the user inputs or passing them back to the procedure.
The Cancel button normally closes the UserForm and cancels any action that may have taken place. Any changes the user made on the UserForm are ignored.
Typical use of a Modeless form
With a Modeless UserForm we normally have a close button and an action button e.g. the Find button on the Excel Find Dialog.
When the action button is clicked an action takes place but the dialog remains open.
The Close button is used to close the dialog. It normally doesn’t do anything else.
A Modal Example
We are going to create a modal UserForm example. It is very simple so you can see clearly how to use a UserForm.
The following UserForm allows the user to type in the name of a fruit

We use the following code to show this UserForm and retrieve the user input
' PROCEDURE CODE
Sub UseModal()
' Create and show form
Dim frm As New UserFormFruit
' Display Userform - The code in this procedure
' will wait here until the form is closed
frm.Show
' Display the returned value
MsgBox "The user has selected " & frm.Fruit
' Close the form
Unload frm
Set frm = Nothing
End Sub
' USERFORM CODE
' Returns the textbox value to the calling procedure
Public Property Get Fruit() As Variant
Fruit = textboxFruit.Value
End Property
' Hide the UserForm when the user click Ok
Private Sub buttonOk_Click()
Hide
End Sub
What you will notice is that we hide the UserForm when the user clicks Ok. We don’t set it to Nothing or unload it until after we are finished retrieve the user input. If we Unload the UserForm when the user clicks Ok then it no longers exists so we cannot access the values we want.
Cancelling the UserForm
We always want to give the user the option to cancel the UserForm. Once it is cancelled we want to ignore any changes they made to the userform.
Each form comes with an X in the top right-hand corner which allows the user to cancel it. This works automatically – no code is necessary.
When the user clicks X the UserForm is unloaded from memory. That is, it no longer exists so we will get an error if we try to access it. To avoid this error we need some way of telling if the UserForm is currently loaded. We can use the following function to do this
' Check if a given UserForm is currently loaded
Function IsUserFormLoaded(ByVal sUserFormName As String)
On Error Resume Next
Dim frm As Variant
' Go through all UserForms and check names
For Each frm In VBA.UserForms
If frm.Name = sUserFormName Then
' UserForm was found so return true
IsUserFormLoaded = True
Exit For
End If
Next
End Function
We can then update our procedure to check if the form is loaded
' PROCEDURE CODE
Sub UseModal()
' Create and show form
Dim frm As New UserFormFruit
frm.Show
' If not cancelled then retrieve the user entry
If IsUserFormLoaded("UserFormFruit") = True Then
MsgBox "The user has entered " & frm.Fruit
Unload frm
Else
MsgBox "Userform cancelled"
End If
Set frm = Nothing
End Sub
If we want to add a Cancel button it is simple to do. All we need to do is unload the UserForm in the click event for the Cancel button.
' PROCEDURE CODE
Private Sub buttonCancel_Click()
Unload Me
End Sub

Using the Escape key to cancel
If you want to allow the user to cancel using the Esc it is simple(but not obvious) to do. You set the Cancel property of your ‘Cancel’ button to True. When Esc is pressed the click event of your Cancel button will be used.

Putting All the Modal Code Together
The final code for a Modal form looks like this
' USERFORM CODE
' Returns the textbox value to the calling procedure
Public Property Get Fruit() As Variant
Fruit = textboxFruit.Value
End Property
' Hide the UserForm when the user click Ok
Private Sub buttonOk_Click()
Hide
End Sub
Private Sub buttonCancel_Click()
Unload Me
End Sub
' PROCEDURE CODE
Sub UseModal()
' Create and show form
Dim frm As New UserFormFruit
frm.Show
' If not cancelled then retrieve the user entry
If IsUserFormLoaded("UserFormFruit") = True Then
MsgBox "The user has entered " & frm.Fruit
Unload frm
Else
MsgBox "Userform cancelled"
End If
Set frm = Nothing
End Sub
' Check if a given UserForm is currently loaded
Function IsUserFormLoaded(ByVal sUserFormName As String)
On Error Resume Next
Dim frm As Variant
' Go through all UserForms and check names
For Each frm In VBA.UserForms
If frm.Name = sUserFormName Then
' UserForm was found so return true
IsUserFormLoaded = True
Exit For
End If
Next
End Function
You can use this code as a base for most of your Modal UserForms.
How to Use a Modeless form
We are now going to use a simple example to show how to use a Modeless form. In this example we will add a customer name to a worksheet each time the clicks on the the Add Customer button.

The following code displays the UserForm. The important thing to notice here is that after the frm.Show line, the code will continue on. This is different to Modal where the code waits at this line for the UserForm to be closed or hidden.
' PROCEDURE CODE
Sub UseModeless()
Dim frm As New UserFormCustomer
' Unlike the modal state the code will NOT
' wait here until the form is closed
frm.Show vbModeless
End Sub
When the Add button is clicked the action occurs immediately. We add the customer name to a new row in our worksheet. We can add as many names as we like. The UserForm will remain visible until we click close.
' USERFORM CODE
Private Sub buttonAdd_Click()
InsertRow
End Sub
Private Sub buttonClose_Click()
Unload Me
End Sub
Private Sub InsertRow()
With Sheet1
' Get the current row
Dim curRow As Long
If .Range("A1") = "" Then
curRow = 1
Else
curRow = .Range("A" & .Rows.Count).End(xlUp).Row + 1
End If
' Add item
.Cells(curRow, 1) = textboxFirstname.Value
.Cells(curRow, 2) = textboxSurname.Value
End With
End Sub
What’s Next?
This is the end of part one of a two-part post on UserForms. In the second part(coming soon!) we will look at using the UserForm Controls in detail. We will cover how to fill them with data, retrieve selection, setting default selections and much much more.
Get the Free eBook
Please feel free to subscribe to my newsletter and get exclusive VBA content that you cannot find here on the blog, as well as free access to my eBook, How to Ace the 21 Most Common Questions in VBA which is full of examples you can use in your own code.
The post VBA UserForms – A Guide for Everyone (Part 1) appeared first on Excel Macro Mastery.
January 6, 2016
Excel VBA Dictionary – A Complete Guide
“The greatest masterpiece in literature is only a dictionary out of order.” – Jean Cocteau
A Quick Guide to the VBA Dictionary
FunctionParams
Early binding referenceâMicrosoft Scripting Runtimeâ
(Add using Tools->References from the VB menu)
Declare (early binding)
Dim dict As Scripting.Dictionary
Create(early binding) Set dict = New Scripting.Dictionary
Declare (late binding) Dim dict As Object
Create(late binding) Set dict = CreateObject("Scripting.Dictionary")
Add item (key must not already exist) dict.Add Key, Value
e.g. dict.Add "Apples", 50
Change value at key. Automatically adds if the key does not exist. dict(Key) = Value
e.g. dict("Oranges") = 60
Get a value from the dictionary using the keyValue = dict(Key)
e.g. appleCount = dict("Apples")
Check if key existsdict.Exists(Key)
e.g. If dict.Exists("Apples") Then
Remove itemdict.Remove Key
e.g. dict.Remove "Apples"
Remove all itemsdict.RemoveAll
Go through all items (for each loop)Dim key As Variant
For Each key In dict.Keys
Debug.Print key, dict(key)
Next key
Go through all items (for loop)Dim i As Long
For i = 0 To dict.Count - 1
Debug.Print dict.Keys(i), dict.Items(i)
Next i
Get the number of itemsdict.Count
Make key case sensitive (the dictionary must be empty).dict.CompareMode = vbBinaryCompare
Make key non case sensitive (the dictionary must be empty).dict.CompareMode = vbTextCompare
CLICK HERE TO DOWNLOAD THE TEST DATA FOR THIS POST
What is the VBA Dictionary?
In VBA we used Arrays and Collections to store groups of values. For example, we could use them to store a list of customer names, student marks or a  list of values from a range of cells.
A Dictionary is similar to a Collection. Using both types, we can name an item when we add it. Imagine we are storing the count of different fruit types. We could use both a Collection and a Dictionary like this
' Add to Dictionary
dict.Add Key:="Apple", Item:=5
' Add to Collection
coll.Add Item:=5, Key:="Apple"

Example of Key, Value pairs
In both cases, we are storing the value 5 and giving it the name “Apple”. We can now get the value of Apple from both types like this
' Get value from Dictionary
Total = dict("Apple")
' Get value from Collection
Total = coll("Apple")
So far so good. The Collection however, has two major faults
We cannot check if the key already exists.
We cannot change the value of an existing item.
The VBA Dictionary does not have these issues. You can check if a Key exists and you can change the Item (Note: you cannot change the Key itself).
For example, we can use the following code to check if we have an item called Apple.
If dict.Exists("Apple") Then
dict("Apple") = 78
These may seem very simple differences. However, it means that the Dictionary is very useful for certain tasks. Particularly when we need to retrieve the value of an item.

Magical Words | © BigStockPhoto.com
A Dictionary in real world terms
If you are still not clear about a Dictionary then think of it this way. A real world dictionary has a list of keys and items. The Keys are the words and the Items are the definition.
When you want to find the definition of a word you go straight to that word. You don’t read through every item in the Dictionary.
A second real world example is a phone book(remember those?). The Key in a phone book is the name\address and the Item is the phone number. Again you use the name/address combination to quickly find a phone number.
In Excel the VLookup function works in a similar way to a Dictionary. You look up an item based on a unique value.
A Simple Example of using the VBA Dictionary
The code below give a simple but elegant example of using the Dictionary. It does the following
Adds three fruit types and a value for each to a Dictionary.
The user is asked to enter the name of a fruit.
The code checks if this fruit is in the Dictionary.
If yes then it displays the fruit name and the value.
If no then it informs the user the fruit does not exist.
Sub CheckFruit()
' Select Tools->References from the Visual Basic menu.
' Check box beside "Microsoft Scripting Runtime" in the list.
Dim dict As New Scripting.Dictionary
' Add to fruit to Dictionary
dict.Add key:="Apple", Item:=51
dict.Add key:="Peach", Item:=34
dict.Add key:="Plum,", Item:=43
Dim sFruit As String
' Ask user to enter fruit
sFruit = InputBox("Please enter the name of a fruit")
If dict.Exists(sFruit) Then
MsgBox sFruit & " exists and has value " & dict(sFruit)
Else
MsgBox sFruit & " does not exist."
End If
Set dict = Nothing
End Sub
This is a simple example but it shows how useful a Dictionary is. We will see a real world example later in the post. Let’s look at the basics of using a Dictionary.
Creating a Dictionary
To use the Dictionary you need to first add the reference.
Select Tools->References from the Visual Basic menu.
Find Microsoft Scripting Runtime in the list and place a check in the box beside it.
We declare a dictionary as follows
Dim dict As New Scripting.Dictionary
or
Dim dict As Scripting.Dictionary
Set dict = New Scripting.Dictionary
Creating a Dictionary this way is called “Early Binding”. There is also “Late Binding”. Let’s have a look at what this means.
Early versus Late Binding
To create a Dictionary using Late binding we use the following code. We don’t need to add a reference.
Dim dict As Object
Set dict = CreateObject("Scripting.Dictionary")
In technical terms Early binding means we decide exactly what we are using up front. With Late binding this decision is made when the application is running. In simple terms the difference is
Early binding requires a reference. Late binding doesn’t.
Early binding allows access to *Intellisense. Late binding doesn’t.
Early binding may require you to manually add the Reference to the “Microsoft Scripting Runtime” for some users.
(*Intellisense is the feature that shows you the available procedures and properties of an item as you are typing.) Â
Microsoft recommends that you use early binding in almost all cases.
Adding Items to the Dictionary
FunctionParamsExample
AddKey, Itemdict.Add "Apples", 50
We can add items to the dictionary using the Add function. Items can also be added by assigning a value which we will look at in the next section.
Let’s look at the Add function first. The Add function has two parameters: Key and Item. Both must be supplied
dict.Add Key:="Orange", Item:=45
dict.Add "Apple", 66
dict.Add "12/12/2015", "John"
dict.Add 1, 45.56
In the first add example above we use the parameter names. You don’t have to do this although it can be helpful when you are starting out.
The Key can be any data type. The Item can be any data type, an object, array, collection or even a dictionary. So you could have a Dictionary of Dictionaries, Array and Collections. But most of the time it will be a value(date, number or text).
If we add a Key that already exists in the dictionary then we will get the error

The following code will give this error
dict.Add Key:="Orange", Item:=45
' This line gives an error as key exists already
dict.Add Key:="Orange", Item:=75
Assigning a Value
OperationFormatExample
AssignDictionary(Key) = Item dict("Oranges") = 60
We can change the value of a key using the following code
dict("Orange") = 75
Assigning a value to Key this way has an extra feature. If the Key does not exist it automatically adds the Key and Item to the dictionary. This would be useful where you had a list of sorted items and only wanted the last entry for each one.
' Adds Orange to the dictionary
dict("Orange") = 45
' Changes the value of Orange to 100
dict("Orange") = 100
Checking if a Key Exists
FunctionParametersExample
ExistsKey If dict.Exists("Apples") Then
We can use the Exists function to check if a key exists in the dictionary
' Checks for the key 'Orange' in the dictionary
If dict.Exists("Orange") Then
MsgBox "The number of oranges is " & dict("Orange")
Else
MsgBox "There is no entry for Orange in the dictionary."
End If
Other useful functions
FunctionParametersExample
CountN/Adict.Count
RemoveKeydict.Remove "Apples"
RemoveAllN/Adict.RemoveAll
The three functions in the above table do the following:
Count – returns the number of items in the Dictionary.
Remove – removes a given key from the Dictionary.
RemoveAll – removes all items from the Dictionary
The following sub shows an example of how you would use these functions
Sub AddRemoveCount()
Dim dict As New Scripting.Dictionary
' Add some items
dict.Add "Orange", 55
dict.Add "Peach", 55
dict.Add "Plum", 55
Debug.Print "The number of items is " & dict.Count
' Remove one item
dict.Remove "Orange"
Debug.Print "The number of items is " & dict.Count
' Remove all items
dict.RemoveAll
Debug.Print "The number of items is " & dict.Count
End Sub
Reading through the Dictionary
We can read through all the items in the Dictionary. We can go through the keys using a For Each loop. We then use the current key to access an item.
Dim k As Variant
For Each k In dict.Keys
' Print key and value
Debug.Print k, dict(k)
Next
We can also use a normal for loop and the index
Dim i As Long
For i = 0 To dict.Count - 1
Debug.Print dict.Keys(i), dict.Items(i)
Next i
A Real World Dictionary Example
Let’s have a look at a real world example of using a dictionary. Our data for this example is the World Cup Final matches from 2014.

CLICK HERE TO DOWNLOAD THE TEST DATA FOR THIS POST
Our task here is to get the number of goals scored by each team.
The first thing we need to do is to read all the data. The following code reads through all the matches and prints the names of the two teams involved.
Sub GetTotals()
' Get worksheet
Dim wk As Worksheet
Set wk = ThisWorkbook.Worksheets("2014")
' Get range for all the matches
Dim rgMatches As Range
Set rgMatches = wk.Range("A1").CurrentRegion
Dim sTeam1 As String, sTeam2 As String
Dim lGoals1 As Long, lGoals2 As Long
Dim row As Range
For Each row In rgMatches.Rows
' read the data from each match
sTeam1 = row.Cells(1, 5)
sTeam2 = row.Cells(1, 9)
lGoals1 = row.Cells(1, 6)
lGoals2 = row.Cells(1, 7)
' Print each teams/goals to Immediate Window(Ctrl G)
Debug.Print sTeam1, sTeam2, lGoals1, lGoals2
Next row
End Sub
What we want to do now is to store each team and the goals they scored. When we meet a team for the first time we add the name as a Key and the number of goals as the Item.

Celebrating a Goal | © BigStockPhoto.com
If the team has already been added then we add the goals they scored in the current match to their total.
Using a Dictionary, we can easily check if the team already exists. We can also update the value for this team.
If dict.Exists(sTeam1) Then
' If exists add to total
dict(sTeam1) = dict(sTeam1) lGoals1
Else
' if doesn't exist then add
dict(sTeam1) = lGoals1
End If
We write out the values from the Dictionary to the worksheet as follows
Public Sub WriteDictionary(dict As Scripting.Dictionary _
, shReport As Worksheet)
shReport.Cells.Clear
Dim k As Variant, lRow As Long
lRow = 1
For Each k In dict.Keys
shReport.Cells(lRow, 1) = k
shReport.Cells(lRow, 2) = dict(k)
lRow = lRow 1
Next
End Sub
We obviously want the scores to be sorted. It is much easier to read this way. There is no easy way to sort a Dictionary. The way to do it is to copy all the items to an array. Sort the array and copy the items back to a Dictionary.
What we can do is sort the data once it has been written to the worksheet. We can use the following code to do this
Public Sub SortByScore(shReport As Worksheet)
Dim rg As Range
Set rg = shReport.Range("A1").CurrentRegion
rg.sort rg.Columns("B"), xlDescending
End Sub
Our final GetTotals Sub looks like this
Sub GetTotals()
' Create dictionary
Dim dict As New Scripting.Dictionary
' Get worksheet
Dim sh As Worksheet
Set sh = ThisWorkbook.Worksheets("2014")
' Get range
Dim rgMatches As Range
Set rgMatches = sh.Range("A1").CurrentRegion
Dim sTeam1 As String, sTeam2 As String
Dim lGoals1 As Long, lGoals2 As Long
Dim i As Long
For i = 2 To rgMatches.Rows.Count
sTeam1 = rgMatches.Cells(i, 5)
sTeam2 = rgMatches.Cells(i, 9)
lGoals1 = rgMatches.Cells(i, 6)
lGoals2 = rgMatches.Cells(i, 7)
If dict.Exists(sTeam1) Then
' If exists add to total
dict(sTeam1) = dict(sTeam1) lGoals1
Else
' if doesn't exist then add
dict(sTeam1) = lGoals1
End If
If dict.Exists(sTeam2) Then
' If exists add to total
dict(sTeam2) = dict(sTeam2) lGoals2
Else
' if doesn't exist then add
dict(sTeam2) = lGoals2
End If
Next i
' Get the report worksheet
Dim shReport As Worksheet
Set shReport = ThisWorkbook.Worksheets("Report")
' Write the teams and scores to the worksheet
WriteDictionary dict, shReport
' Sort the range
SortByScore shReport
' Clean up
Set dict = Nothing
End Sub
When you run this code you will get the following results

Teams ordered by number of goals scored
When To Use The Dictionary
So when should you use the VBA Dictionary? When you have a task where
You have a list of unique items e.g. countries, invoice numbers, customer name and addresses, project ids, product names etc.
You need to retrieve the value of a unique item.

Key/Values of Countries and Land area in Km2
What’s Next?
If you want to read about more VBA topics you can view a complete list of my posts here. I also have a free eBook(see below) which you will find useful if you are new to VBA.
If you are serious about mastering VBA then you may want to check out The Excel VBA Handbook
Get the Free eBook
Please feel free to subscribe to my newsletter and get exclusive VBA content that you cannot find here on the blog, as well as free access to my eBook, How to Ace the 21 Most Common Questions in VBA which is full of examples you can use in your own code.
The post Excel VBA Dictionary – A Complete Guide appeared first on Excel Macro Mastery.
November 6, 2015
VBA IF Statement – A Complete Guide
“Guess, if you can, and choose, if you dare.” – Pierre Corneille
This post provides a complete explanation of the VBA If statement.
If you want to see the format of the If Statement and a quick example then go here.
To find out more about the alternate If statement then check out the IIf function.
If you are new to VBA and programming then you may want to read the post from start to finish.

©Bigstock | Student thinking
Format of the VBA If Statement
The format of the If statement is as follows
If Then
ElseIf Then
Else
End If
The following code shows a simple example of using the If statement
If Range("A1").Value > 5 Then
Debug.Print "Value is greater than five."
ElseIf Range("A1").Value < 5 Then
Debug.Print "value is less than five."
Else
Debug.Print "value is equal to five."
End If
What is If and why do you need it?
If statements are used to allow your code to make choices when it is running .
You will often want to make choices based on the data your macros reads.
For example, you may want to read only the students who have marks greater than 70. As you read through each student you would use the If Statement to check the marks of each student.
The important word in the last sentence is check. The If statement is used to check a value and then to perform a task based on the results of that check.
The Test Data
We’re going to use the following test data for the code examples in this post.

A Simple If Example
The following code prints out the names of all students with marks greater than 50 in French.
Sub ReadMarks()
Dim i As Long
' Go through the marks columns
For i = 2 To 11
' Check if marks greater than 50
If Range("C" & i) > 50 Then
' Print student name to the Immediate Window(Ctrl + G)
Debug.Print Range("A" & i) & " " & Range("B" & i)
End If
Next
End Sub
Results
Bryan Snyder
Juanita Moody
Douglas Blair
Leah Frank
Monica Banks
Play around with this example and check the value or the > sign and see how the results change.
Conditions
The piece of code between the If and the Then keywords is called the condition. A condition is a statement that evaluates to true or false. They are mostly used with Loops and If statements. When you create a condition you use signs like >,<>,>=,
The following are examples of conditions

You may have noticed x=5 as a condition. This should not be confused with x=5 when used as an assignment. When equals is used in a condition it means “is the left equal to the right”. The following table demonstrates how equals is used in conditions and assignments

Using ElseIf
The ElseIf statement allows you to choose from more than one option. In the following example we print for marks that are in the Distinction or High Distinction range.
Sub UseElseIf()
If Marks >= 85 Then
Debug.Print "High Destinction"
ElseIf Marks >= 75 Then
Debug.Print "Destinction"
End If
End Sub
The important thing to understand is that order is important. The If condition is checked first.
If it is true then “High Distinction” is printed and the If statement ends.
If it is false then the code moves to the next ElseIf and checks it condition.
Let’s swap around the If and ElseIf from the last example. The code now look like this
Sub UseElseIfWrong()
' This code is incorrect as the ElseIf will never be true
If Marks >= 75 Then
Debug.Print "Destinction"
ElseIf Marks >= 85 Then
' code will never reach here
Debug.Print "High Destinction"
End If
End Sub
In this case we check for a value being over 75 first. We will never print “High Distinction” because if a value is over 85 is will trigger the first if statement.
To avoid these kind of problems we should use two conditions. The help state exactly what you are looking for a remove any confusion. The example below shows how to use these. We will look at more multiple conditions in the section below.
If marks >= 75 And marks < 85 Then
Debug.Print "Destinction"
ElseIf marks >= 85 And marks
Let’s expand the original code. You can use as many ElseIf statements as you like. We will add some more to take into account all our mark classifications.
Using Else with If
The Else statement is used as a catch all. It basically means “if no conditions were true” or “everything else”. If the previous code example we didn’t include a print statement for a fail mark. We can add this using Else.
Sub UseElse()
If Marks >= 85 Then
Debug.Print "High Destinction"
ElseIf Marks >= 75 Then
Debug.Print "Destinction"
ElseIf Marks >= 55 Then
Debug.Print "Credit"
ElseIf Marks >= 40 Then
Debug.Print "Pass"
Else
' For all other marks
Debug.Print "Fail"
End If
End Sub
So if it is not one of the other types then it is a fail.
Let’s write some code to through our sample data and print the student and their classification.
Sub AddClass()
' get the last row
Dim startRow As Long, lastRow As Long
startRow = 2
lastRow = Cells(Cells.Rows.Count, 1).End(xlUp).Row
Dim i As Long, Marks As Long
Dim sClass As String
' Go through the marks columns
For i = startRow To lastRow
Marks = Range("C" & i)
' Check marks and classify accordingly
If Marks >= 85 Then
sClass = "High Destinction"
ElseIf Marks >= 75 Then
sClass = "Destinction"
ElseIf Marks >= 55 Then
sClass = "Credit"
ElseIf Marks >= 40 Then
sClass = "Pass"
Else
' For all other marks
sClass = "Fail"
End If
' Write out the class to column E
Range("E" & i) = sClass
Next
End Sub
The results look like this with column E containing the classification of the marks

Results
Using More Complex Conditions
You can have more than one condition in an If Statement. The VBA keywords And and Or allow use of multiple conditions.
These words work in a similar way to how you would use them in English.
Let’s look at our sample data again. We now want to print all the students that got over between 50 and 80 marks.
We use And to add an extra condition. The code is saying: if the mark is greater than or equal 50 and less than 75 then print the student name.
Sub CheckMarkRange()
Dim i As Long, marks As Long
For i = 2 To 11
' Store marks for current student
marks = Range("C" & i)
' Check if marks greater than 50 and less than 75
If marks >= 50 And marks < 80 Then
' Print first and last name to Immediate window(Ctrl G)
Debug.Print Range("A" & i) & Range("B" & i)
End If
Next
End Sub
Results
Douglas Blair
Leah Frank
Monica Banks
In our next example we want the students who did History or French. So in this case we are saying if the student did History OR if the student did French.
Sub ReadMarksSubject()
Dim i As Long, marks As Long
' Go through the marks columns
For i = 2 To 11
marks = Range("D" & i)
' Check if marks greater than 50 and less than 80
If marks = "History" Or marks = "French" Then
' Print first and last name to Immediate window(Ctrl G)
Debug.Print Range("A" & i) & " " & Range("B" & i)
End If
Next
End Sub
Results
Bryan Snyder
Bradford Patrick
Douglas Blair
Ken Oliver
Leah Frank
Rosalie Norman
Jackie Morgan
Using Multiple conditions like this is often a source of errors. The rule of thumb to remember is to keep them as simple as possible.
And
The AND works as follows
Condition 1
Condition 2
Result
TRUE
TRUE
TRUE
TRUE
FALSE
FALSE
FALSE
TRUE
FALSE
FALSE
FALSE
FALSE
What you will notice is that AND is only true when all conditions are true
Or
The OR keyword works as follows
Condition 1
Condition 2
Result
TRUE
TRUE
TRUE
TRUE
FALSE
TRUE
FALSE
TRUE
TRUE
FALSE
FALSE
FALSE
What you will notice is that OR is only false when all the conditions are false.
Mixing AND and OR together can make the code difficult to read and lead to errors. Using parenthesis can make the conditions clearer.
Sub OrWithAnd()
Dim subject As String, marks As Long
subject = "History"
marks = 5
If (subject = "French" Or subject = "History") And marks >= 6 Then
Debug.Print "True"
Else
Debug.Print "False"
End If
End Sub
Not
There is also a NOT operator. This makes the condition give the opposite result
Condition
Result
TRUE
FALSE
FALSE
TRUE
The following two lines of code are equivalent.
If marks < 40 Then If Not marks >= 40 Then
Putting the condition in parenthesis makes the code easier to read
If Not (marks > 40) Then
A common usage of Not when checking if an object has been set. Take a worksheet for example. Here we declare the worksheet
Dim mySheet As Worksheet
' Some code here
We want to check mySheet is valid before we use it. We can check if it is nothing.
If mySheet Is Nothing Then
There is no way to check if it is something as there is many different ways it could be something. Therefore we use Not with Nothing
If Not mySheet Is Nothing Then
If you find this a bit confusing you can use parenthesis like this
If Not (mySheet Is Nothing) Then
The IIF function
VBA has an fuction similar to the Excel If function. In Excel you will often use the If function as follows:
=IF(F2=””,””,F1/F2)
The format is
=If(condition, action if true, action if false).
VBA has the IIf statement which works the same way. Let’s look at an example. In the following code we use IIf to check the value of the variable val. If the value is greater than 10 we print true otherwise we print false.
Sub CheckVal()
Dim result As Boolean
Dim val As Long
' Prints True
val = 11
result = IIf(val > 10, True, False)
Debug.Print result
' Prints false
val = 5
result = IIf(val > 10, True, False)
Debug.Print result
End Sub
In our next example we want to print out Pass or Fail beside each student depending on their marks. In the first piece of code we will use the normal VBA If statement to do this.
Sub CheckMarkRange()
Dim i As Long, marks As Long
For i = 2 To 11
' Store marks for current student
marks = Range("C" & i)
' Check if student passes or fails
If marks >= 40 Then
' Write out names to to Column F
Range("E" & i) = "Pass"
Else
Range("E" & i) = "Fail"
End If
Next
End Sub
In the next piece of code we will use the IIf function. You can see that the code is much neater here.
Sub CheckMarkRange()
Dim i As Long, marks As Long
For i = 2 To 11
' Store marks for current student
marks = Range("C" & i)
' Check if student passes or fails
Range("E" & i) = IIf(marks >= 40,"Pass","Fail")
Next
End Sub
You can see the IIf function is very useful for simple cases where you are dealing with two possible options.
Using Nested IIf
You can also nest IIf statements like in Excel. This means using the result of one IIf with another. Let’s add another result type to our previous examples. Now we want to print Distinction, Pass or Fail for each student.
Using the normal VBA we would do it like this
Sub CheckResultType2()
Dim i As Long, marks As Long
For i = 2 To 11
' Store marks for current student
marks = Range("C" & i)
If marks >= 75 Then
Range("E" & i) = "Distinction"
ElseIf marks >= 40 Then
' Write out names to to Column F
Range("E" & i) = "Pass"
Else
Range("E" & i) = "Fail"
End If
Next
End Sub
Using nested IIfs we could do it like this
Sub UsingNestedIIF()
Dim i As Long, marks As Long, result As String
For i = 2 To 11
marks = Range("C" & i)
result = IIf(marks >= 55,"Credit",IIf(marks >= 40,"Pass","Fail"))
Range("E" & i) = result
Next
End Sub
Using nested IIf is fine in simple cases like this. The code is simple to read and therefore not likely to have errors.
If Versus IIf
So which is better?
You can see for this case that IIf is shorter to write and neater. However if the conditions get complicated you are better off using the normal If statement. A disadvantage of IIf is that it is not well known so other users may not understand it as well as code written with a normal if statement.
My rule of thumb is to use IIf when it will be simple to read and for more complex cases use the normal If statement.
Using Select Case
The Select Case statement is an alternative way to write an If statment with lots of ElseIf’s. You will find this type of statement in most popular programming languages where it is called the Switch statement. For example Java, C#, C++ and Javascript all have a switch statement.
The format is
Select Case
Case
Case
Case
Case Else
End Select
Let’s take our AddClass example from above and rewrite it using a Select Case statement.
Sub AddClass()
' get the last row
Dim startRow As Long, lastRow As Long
startRow = 2
lastRow = Cells(Cells.Rows.Count, 1).End(xlUp).Row
Dim i As Long, Marks As Long
Dim sClass As String
' Go through the marks columns
For i = startRow To lastRow
Marks = Range("C" & i)
' Check marks and classify accordingly
If Marks >= 85 Then
sClass = "High Destinction"
ElseIf Marks >= 75 Then
sClass = "Destinction"
ElseIf Marks >= 55 Then
sClass = "Credit"
ElseIf Marks >= 40 Then
sClass = "Pass"
Else
' For all other marks
sClass = "Fail"
End If
' Write out the class to column E
Range("E" & i) = sClass
Next
End Sub
The following is the same code using a Select Case statement. The main thing you will notice is that we use “Case 85 to 100” rather than “marks >=85 And marks
Sub AddClassWithSelect()
' get the first and last row
Dim firstRow As Long, lastRow As Long
firstRow = 2
lastRow = Cells(Cells.Rows.Count, 1).End(xlUp).Row
Dim i As Long, marks As Long
Dim sClass As String
' Go through the marks columns
For i = firstRow To lastRow
marks = Range("C" & i)
' Check marks and classify accordingly
Select Case marks
Case 85 To 100
sClass = "High Destinction"
Case 75 To 84
sClass = "Destinction"
Case 55 To 74
sClass = "Credit"
Case 40 To 54
sClass = "Pass"
Case Else
' For all other marks
sClass = "Fail"
End Select
' Write out the class to column E
Range("E" & i) = sClass
Next
End Sub
Using Case Is
You could rewrite the select statement in the same format as the original ElseIf. You can use Is with Case.
Select Case marks
Case Is >= 85
sClass = "High Destinction"
Case Is >= 75
sClass = "Destinction"
Case Is >= 55
sClass = "Credit"
Case Is >= 40
sClass = "Pass"
Case Else
' For all other marks
sClass = "Fail"
End Select
You can use Is to check for multiple values. In the following code we are checking if marks equals 5, 7 or 9.
Sub TestMultiValues()
Dim marks As Long
marks = 7
Select Case marks
Case Is = 5, 7, 9
Debug.Print True
Case Else
Debug.Print False
End Select
End Sub
Try this Exercise
We covered a lot in this post about the If statement. A good way to help you understand it is by trying to write some code using the topics we covered. The following exercise uses the test data from this post. The answer to the exercise is below.
We are going to use cell G1 to write the name of a subject.
In the columns H to L write out all the students who have marks in this subject. We want to classify their result as pass or fail. Marks below 40 is a fail and marks 40 or above is a pass.
Column H: First name
Column I: Second name
Column J: Marks
Column H: Subject
Column I: Result type – Pass or Fail
If cell G1 contains “French” then your result should look like this

Result of exercise
Answer to Exercise
The following code shows how to complete the above exercise. Note: There are many ways to complete this so don’t be put off if your code is different.
Sub WriteSubjectResults()
' Get subject
Dim subject As String
subject = Range("G1")
If subject = "" Then
Exit Sub
End If
' Get first and last row
Dim firstRow As Long, lastRow As Long
firstRow = 2
lastRow = Cells(Cells.Rows.Count, 1).End(xlUp).Row
' Clear any existing output
Range("H:L").ClearContents
' Track output row
Dim outRow As Long
outRow = 1
Dim i As Long, marks As Long, rowSubject As String
' Read through data
For i = firstRow To lastRow
marks = Range("C" & i)
rowSubject = Range("D" & i)
If rowSubject = subject Then
' Write out student details if subject French
Range("A" & i & ":" & "D" & i).Copy
Range("H" & outRow).PasteSpecial xlPasteValues
' Write out pass or fail
If marks < 40 Then
Range("L" & outRow) = "Fail"
ElseIf marks >= 40 Then
Range("L" & outRow) = "Pass"
End If
' Move output to next row
outRow = outRow + 1
End If
Next i
End Sub
What’s Next?
If you want to read about more VBA topics you can view a complete list of my posts here. I also have a free eBook(see below) which you will find useful if you are new to VBA.
Get the Free eBook
Please feel free to subscribe to my newsletter and get exclusive VBA content that you cannot find here on the blog, as well as free access to my eBook, How to Ace the 21 Most Common Questions in VBA which is full of examples you can use in your own code.
The post VBA IF Statement – A Complete Guide appeared first on Excel Macro Mastery.
September 7, 2015
Excel VBA Find – A Complete Guide
“I know well what I am fleeing from but not what I am in search of” – Michel de Montaigne
This post covers everything you need to know about the VBA Find function. It explains how to use Find in simple terms. It also has tons of code examples of Find you can use right now.
If you want to go straight to an example of Find then check out How to do a Simple Find.
If you want to search for text within a string then you are looking for the InStr and InStrRev functions.
If you want to find the last row or column with data then go to Finding the Last Cell Containing Data
What is the VBA Find Function?
The Find function is very commonly used in VBA. The three most important things to know about Find are:
The Find function is a member of Range.
It searches a range of cells for a given value.
It is essentially the same as using the Find Dialog on an Excel worksheet.

© Luis Louro | Dreamstime.com |A real world fnd
Excel Find Dialog
To view the Excel Find dialog, go to the Home ribbon and click on Find & Select in the Editing section. In the menu that appears select Find(shortcut is Ctrl + F)

When you do this the following dialog will appear

The VBA Find function uses most of the options you can see on this Dialog.
How to Use Options With Find
To use the options you pass them as parameters to the Find function. This is similar to how you use worksheet functions. For example, the Sum function has a Range as a parameter. This means you give it a range when you use it.
The VBA Find uses parameters in the same way. You must give it the item you are searching for. This is the first parameter and it is required.
The rest of the parameters are optional. If you don’t use them then Find will use the existing settings. We’ll see more about this shortly.
The table in the next section shows these parameters. The sections that follow this, give examples and details of how to use these parameters.
VBA Find Parameters
The following tables shows all the Find parameters.
ParameterTypeDescriptionValues
WhatRequiredThe value you are searching forAny VBA data type e.g String, Long
AfterOptionalA single cell range that you start your search fromRange("A5")
LookInOptionalWhat to search in e.g. Formulas, Values or CommentsxlValues, xlFormulas, xlComments
LookAtOptionalLook at a part or the whole of the cell xlWhole, xlPart
SearchOrderOptionalThe order to searchxlByRows or xlByColumns.
SearchDirection OptionalThe direction to searchxlNext, xlPrevious
MatchCaseOptionalIf search is case sensitiveTrue or False
MatchByteOptionalUsed for double byte languagesTrue or False
SearchFormatOptionalAllow searching by format. The format is set using Application.FindFormatTrue or False
Important Note about Find Parameters
Keep the following in mind as it can cause a lot of frustration when using Find.
As you can see from the table most of the VBA Find parameters are optional. As we said earlier, if you don’t set a Find parameter it uses the existing setting.
For example, if you set the LookIn parameter to xlComments, it will search for a value in comments only. The next time you run Find(either from the Dialog or from VBA) the existing LookIn setting will be Comments.
The following code shows an example of this
' Search in comments only
Range("A1:A5").Find "John", LookIn:=xlComments
' Will search comments as this is the existing setting
Range("A1:A5").Find "John"
' Search in formulas only
Range("A1:A5").Find "John", LookIn:=xlFormulas
' Will search formulas as this is the existing setting
Range("A1:A5").Find "John"
This applies to the parameters LookIn, LookAt, SearchOrder, and MatchByte.
The Find Return Value
If the search item is found then Find returns the cell with the value. That is, it returns a Range type of one cell.
If the search item is not found then Find returns an object set to Nothing.
In the following examples, you will see how to deal with the return value.
How to do a Simple Find
Let’s start with a simple example of the VBA Find. You need three things when using the Find function
The Range to search
The value you are searching for
The Range to store the returned cell
Let’s take the following sample data
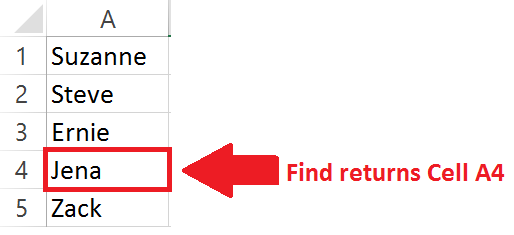
We are going to search for the text “Jena” in the cells A1 to A5.
The following code searches for “Jena”. When it finds “Jena”, it then places the cell in the rgFound variable.
' Find the name Jena in the range A1:A5
Dim rgFound As Range
Set rgFound = Range("A1:A5").Find("Jena")
' Print cell address to Immediate Window(Ctrl + G)
Debug.Print rgFound.Address
The above code shows the most basic search you can do. If this is your first time using the VBA Find function then I recommend you practice with a simple example like this.
When the Value is not Found
When you use the VBA Find function, there will be times when you do not find a match. You need to handle this in your code or you will get the following error when you try to use the returned range

The following code will give this error if the text “John” is not found in the range A1 to A5
Set rgFound = Range("A1:A5").Find("John")
' Shows Error if John was not found
Debug.Print rgFound.Address
What we need to do is check the return value like the following code shows
Set rgFound= Range("A1:A5").Find("John")
If rgFound Is Nothing Then
Debug.Print "Name was not found."
Else
Debug.Print "Name found in :" & rgFound.Address
End If
Using After with Find
The After parameter is used if you want to start the search from a particular cell. This is the same as when you do a search with Excel Find Dialog. With the dialog, the active cell is considered the After cell.
Example 1 Without After
Let’s look at the following code.
Set cell = Range("A1:A6").Find("Rachal")
Find will return the cell A2 as this is where the first “Rachal” is found.

Example 2 Using After
In the next example, we use after. We are telling VBA to start the search for “Rachal” after cell A2
Set cell = Range("A1:A6").Find("Rachal", After:=Range("A2"))
This will return the cell A6

Example 3 Wrapping Around
If a match is not found then the search will “wrap around”. This means it will go back to the start of the range.
In the following example, we are looking for Drucilla. We start our search After cell A2. Find will search from A3 to A6 and then will move to A1.
So the following code will return A1 as there is no text “Drucilla” from A3 to A6.
Set cell = Range("A1:A6").Find("Drucilla", After:=Range("A2"))

The search order for this example was A4, A5, A6, A1.
Using LookIn with Find
Using LookIn allows you to search in Values, Formulas or Comments.
Important Note: When a cell has text only, this text is considered a formula AND a value. See the table below for details
Cell ContainsResultLookIn value is
AppleAppleValue and Formula
="App" & "le"'AppleValue only
=LEFT("Apple",4)'ApplFormula only
We are going to use the following sample data.
A2 Contains “Apple” as a value only
A3 Contains “Apple” as a formula only
A4 Contains “Apple” in the comment only

The code below searches for “Apple” in the different types
Sub UseLookIn()
Dim cell As Range
' Finds A2
Set cell = Range("A1:A4").Find("Apple", LookIn:=xlValues)
Debug.Print cell.Address
' Finds A3
vSet cell = Range("A1:A4").Find("Apple", LookIn:=xlFormulas)
Debug.Print cell.Address
' Finds A4
Set cell = Range("A1:A4").Find("Apple", LookIn:=xlComments)
Debug.Print cell.Address
End Sub
Using LookAt with Find
Using the LookAt function is pretty straightforward.
xlWhole means the search value must match the entire cell contents.
xlPart means the search value only has to match part of the cell.
The following example has “Apple” as part of the cell contents in A2 and it is the full contents in cell A3.
The first Find in the following code finds “Apple” in A2. The second Find is looking for a full match so finds A3.
Sub UseLookAt()
Dim cell As Range
' Finds A2
Set cell = Range("A1:A3").Find("Apple", Lookat:=xlPart)
Debug.Print cell.Address
' Finds A3
Set cell = Range("A1:A3").Find("Apple", Lookat:=xlWhole)
Debug.Print cell.Address
End Sub
Using SearchOrder with Find
The SearchOrder parameter allows use to search by row or by column. In the following sample data we have two occurrences of the text “Elli”.

If we search by row we will find the “Elli” in B2 first. This is because we search in the order row 1, then row 2 etc.
If we search by column we will find the “Elli” in A5 first. This is because we search in the order column A, the Column B etc.
The following code shows an example of using the SearchOrder with this sample data
Sub UseSearchOrder()
Dim cell As Range
' Finds B2
Set cell = Range("A1:B6").Find("Elli", SearchOrder:=xlRows)
Debug.Print cell.Address
' Finds A5
Set cell = Range("A1:B6").Find("Elli", SearchOrder:=xlColumns)
Debug.Print cell.Address
End Sub
Using SearchDirection with Find
SearchDirection allows you to search forward or backward. So imagine you have the range A1:A7. Searching using xlNext will go in the order
A1, A2, A3, A4, A5, A6, A7
Searching using xlPrevious will go in the order
A7, A6, A5, A4, A3, A2, A1

Using xlNext with the sample data will return A2 as this where it finds the first match. Using xlPrevious will return A5.
' NOTE: Underscore allows breaking up a line
Sub UseSearchDirection()
Dim cell As Range
' Finds A2
Set cell = shData.Range("A1:A7") _
.Find("Elli", SearchDirection:=xlNext)
Debug.Print cell.Address
' Finds A5
Set cell = shData.Range("A1:A7") _
.Find("Elli", SearchDirection:=xlPrevious)
Debug.Print cell.Address
End Sub
Using xlPrevious with After
It you use the After parameter with xlPrevious then it will start before from the After cell. So if we set the After cell to be A6 then the search order will be
A5,A4,A3,A2,A1,A7,A6.
The following code shows an example of this
Sub UseSearchDirectionAfter()
Dim cell As Range
' Finds A2
Set cell = shData.Range("A1:A7").Find("Elli" _
, After:=Range("A6"), SearchDirection:=xlPrevious)
Debug.Print cell.Address
' Finds A6
Set cell = shData.Range("A1:A7").Find("Elli" _
, After:=Range("A7"), SearchDirection:=xlPrevious)
Debug.Print cell.Address
End Sub
Using MatchCase with Find
The MatchCase parameter is used to determine if the case of the letters matters in the search. It can be set to True or False.
True – the case of the letters must match
False – the case of the letters does not matter
The following sample list has two entries for “Elli”. The second has a small letter e

The following code examples shows the result of setting MatchCase to True and False
Sub UseMatchCase()
Dim cell As Range
' Finds A2
Set cell = Range("A1:B6").Find("elli", MatchCase:=False)
Debug.Print cell.Address
' Finds A6
Set cell = Range("A1:B6").Find("elli", MatchCase:=True)
Debug.Print cell.Address
End Sub
Using MatchByte with Find
The MatchByte parameter is used for languages with a double byte character set. These are languages such as Chinese/Japanese/Korean.
If you are not using them then this parameter is not relevant. They are used as follows
True means to match only double-byte characters with double-byte characters.
False means to double-byte characters can match with single or double-byte characters.
Using SearchFormat with Find
Search Format is a bit different than the other parameters. It allows you to search for a cell format such as font type or cell colour.
You need to set the format first by using the Application.FindFormat property. Then you set SearchFormat to True to search for this format.
In the following sample data, we have two cells formatted. Cell A5 is set to Bold and Cell A6 has the fill colour set to red.
The following code searches for the bold cell.
Sub UseSearchFormat()
Dim cell As Range
Application.FindFormat.Font.Bold = True
' Finds A2
Set cell = Range("A1:B6").Find("Elli", SearchFormat:=False)
Debug.Print cell.Address
' Finds A5
Set cell = Range("A1:B6").Find("Elli", SearchFormat:=True)
Debug.Print cell.Address
End Sub
Using Wild Card
You can search for a cell based on the format only. In other words, the value in the cell is ignored in the search. You do this by placing “*” in the search string.
The following code searches for a cell that is formatted to red. The contents of the cell do not matter.
Sub UseSearchFormatWild()
Dim cell As Range
' Clear previous formats
Application.FindFormat.Clear
' Set format
Application.FindFormat.Interior.Color = rgbRed
' Finds A2
Set cell = Range("A1:B6").Find("*", SearchFormat:=False)
Debug.Print cell.Address
' Finds A5
Set cell = Range("A1:B6").Find("*", SearchFormat:=True)
Debug.Print cell.Address
End Sub
Important – Clearing Format
When you set the FindFormat attributes they remain in place until you set them again. This is something to watch out for.
For example, imagine you set the format to bold and then use Find. Then you set the format to font size 12 and use Find again. The search will look for cells where the font is bold AND of size 12.
Therefore, it is a good idea to clear the format before you use it. You can clear the format by using the code
Application.FindFormat.Clear
You can see the we used this in the second SearchFormat example above.
Multiple Searches
In many cases you will want to search for multiple occurrences of the same value. To do this we use the Find function first. Then we use the .FindNext function to find the next item.

.FindNext searches based on the setting we used in the Find. The following code shows a simple example of finding the first and second occurrences of the text “Elli”.
Sub SearchNext()
Dim cell As Range
' Find first - A2
Set cell = Range("A1:A9").Find("Elli")
Debug.Print "Found: " & cell.Address
' Find second - A5
Set cell = Range("A1:A9").FindNext(cell)
Debug.Print "Found: " & cell.Address
End Sub
Sometimes you won’t know how many occurrences there is. In this case we use a loop to keep searching until we have found all the items.
We use Find to get the first item. If we find an item we then use a Do Loop with .FindNext to find the rest of the occurrences.
FindNext will wrap around. That is, after it finds A9 it will continue the search at A1. Therefore, we store the address of the first cell we find. When FindNext returns this cell again we know we have found all the items.
The following code will find all the occurrences of Elli
Sub MultipleSearch()
' Get name to search
Dim name As String: name = "Elli"
' Get search range
Dim rgSearch As Range
Set rgSearch = Range("A1:A9")
Dim cell As Range
Set cell = rgSearch.Find(name)
' If not found then exit
If cell Is Nothing Then
Debug.Print "Not found"
Exit Sub
End If
' Store first cell address
Dim firstCellAddress As String
firstCellAddress = cell.Address
' Find all cells containing Elli
Do
Debug.Print "Found: " & cell.Address
Set cell = rgSearch.FindNext(cell)
Loop While firstCellAddress <> cell.Address
End Sub
The output from this code is
Found: $A$2
Found: $A$5
Found: $A$8
Finding the Last Cell Containing Data
A very common task in VBA is finding the last cell that contains data in a row or colum. This does not use the VBA Find function. Instead, we use the following code to find the last row with data
' Find the last row with data in column A
LastRow = Cells(Rows.Count, 1).End(xlUp).Row
' Find the last row with data in column C
LastRow = Cells(Rows.Count, 3).End(xlUp).Row
To find the last column with data we use similar code
' Find the last column with data in row 1
lLastCol = Cells(1, Columns.Count).End(xlToLeft).Column
' Find the last column with data in row 3
lLastCol = Cells(3, Columns.Count).End(xlToLeft).Column
Finding Cells with Patterns
If you want to find cells with certain patterns then you have to use the Like operator rather than Find.
For example, to find the all the names starting with E you could use the following code
' Print all names starting with the letter E
Sub PatternMatch()
Dim cell As Range
' Go through each cell in range
For Each cell In Range("A1:A20")
' Check the pattern
If cell Like "[E]*" Then
Debug.Print cell
End If
Next
End Sub
If you want to know more about this then check out Comparing Strings using Pattern Matching.
To see a real-world example of using pattern matching check out .
An Alternative to using VBA Find
If you are expecting a large number of hits then using an array is a better option. You can read a range of cells to an array very quickly and efficiently.
The following code reads the cell values to an array and then reads through the array to count the items.
Sub UseArrayToCount()
Dim arr() As Variant
' read cell range to array
arr = Sheet2.Range("A1:B25")
Dim name As Variant, cnt As Long
' Go through the array
For Each name In arr
' Count in the name 'Ray' is found
If name = "Ray" Then
cnt = cnt + 1
End If
Next name
Debug.Print "The number of occurrences was: " & cnt
End Sub
If you want to find out more about arrays then check out the post The Complete Guide to Using Arrays in Excel VBA.
Find and Replace
To do a find and Replace you can use the Replace function. It is very similar to using the Find function.
The replace function is outside the scope of this post although a lot of what you read here can be used with it. You can see the details of it at Microsoft – VBA Replace Function
What’s Next?
If you want to read about more VBA topics you can view a complete list of my posts here. I also have a free eBook(see below) which you will find useful if you are new to VBA.
Get the Free eBook
Please feel free to subscribe to my newsletter and get exclusive VBA content that you cannot find here on the blog, as well as free access to my eBook, How to Ace the 21 Most Common Questions in VBA which is full of examples you can use in your own code.
The post Excel VBA Find – A Complete Guide appeared first on Excel Macro Mastery.
August 31, 2015
How to Deal With Real World VBA Code
“The battlefield is a scene of constant chaos. The winner will be the one who controls that chaos” – Napoleon Bonaparte
Ever feel like all the VBA examples are way simpler than the code you face in real life?
A post with simple code is good for explaining a topic clearly. It can make things much easier to understand.
But the real world is more complex. The code you meet can often look like it was fed through the Enigma machine first.
In this post, I’m going to do something different. I’m going to take code from a real world application and
explain it to you in simple English
convert it to code a professional would write
show you an alternative way of writing the same code
If you understand the ideas presented here it will dramatically improve you skills when you deal with real world VBA code.
Quick Notes
The underscore character “_” is used to break up long lines of code in VBA. The code behaves exactly the same as if it was on one line. It’s just easier to read.
To view the Immediate Window select View->Immediate Window from the menu or press Ctrl G.
If you are new to VBA you may want to get familiar with VBA Cells and Ranges first.
For more info on the Loops used here, go to For Loops and For Each Loops.
The Code
Imagine you have been given the following piece of code to change
Sub Update()
Dim collect As Long, inptr As Long
collect = 3
inptr = 11
Dim x As Long, j As Long
For x = 1 To 4
For j = 1 To 5
Cells(x collect, 4 j).Value = _
Cells(x collect, 4 j - 1).Value Cells(inptr, j).Value
Next j
Next x
End Sub
If you are familiar with VBA you will have seen code like this a lot. If you are new to VBA then this code can seem daunting.
What do the numbers mean? What are the calculations for? What does it all mean?
These are some of the questions you may have.
I’m going to answer these questions. Then I’m going to break the code down in the simplest terms possible. I’m going to explain each part in plain English.

© Suprijono Suharjoto | Coming face to face with real world code can be daunting
Breaking the Code into Simple Parts
The main line in our code is of course
Cells(x collect, 4 j).Value _
= Cells(x collect, 4 j - 1).Value Cells(inptr, j).Value
The code on the right of the equals is adding the value of two cells. The cell to the left of the equals receives this value.
This is what the code is doing in simple terms
Cell1 = Cell2 Cell3
Let’s look at Cell1 first and see which cell or cells the code is referring to
The Left of the Equals
This left side of the line uses the Cells property to place a value in a cell.
Cells(x collect, 4 j).Value =
The Cells property allows us to read from or write to a cell on a worksheet. Remember that Cells takes Row and Column as arguments. So for example
Cells(1,1) refers to the cell A1
Cells(5,2) refers to the cell B5
Cells(2,1) refers to the cell A2
This code writes a value to a cell. We can see the row and column of the cell is
Row: x collect
Column: 4 j
Cells(x collect, 4 j).Value =
We know that the value of collect is set to 3 at the start of the Sub
Dim collect As Long, inptr As Long
collect = 3
It never changes in the code. So we can update our calculation
Row: 3 x
Column: 4 j
The variables x and j are each used in with a for loop. So next we will look at how the x and j are used.
How the For Loop works
I am going to show you how the values change as the code runs through the For Loop. If you are not familiar with loops then you may want to read The Ultimate Guide to Loops in Excel VBA first.
If you would like to see a simple example of a loop in action then check out the section How a Loop Works.
Let’s look at the first For loop in the code
For x = 1 To 4
Next x
What a For loop does is to repeat a line of code a given number of times. In the above code it will repeat the lines between For and Next four times. That is the values from 1 to 4.
The first time the loop runs x will have the value 1. The second time, x will be 2, third time 3 and the fourth time 4. Let’s look at the code
For x = 1 To 4
Cells(x collect, 4 j).Value =
Next x
As the code runs through the loop the values change as follows
xcollectRow
134
235
336
437
Note: Row in the table is calculated as: x collect
The original code has two loops so let’s look at the second For loop.
The Second For Loop
The reason we have two for loops is because we are dealing with rows and columns. The outer loop (for x) reads through rows and the inner loop(for j) reads through the columns.
Dim x As Long, j As Long
For x = 1 To 4
For j = 1 To 5
Cells(x collect, 4 j).Value =
Next j
Next x
If you are new to programming a loop within a loop may seem tricky. The following will show the values as the code runs
Running the Code
The For x loop runs 4 times. Each time it runs the For j loop runs 5 times.
The first time it runs the For x loop sets x to 1.
Then the For j loop sets j to 1.
When we reach the cells line for the first time the values are as follows:
Cells(x collect, 4 j) will be Cells(1 3, 4 1) which gives Cells(4, 5) which is cell E4.
When this line runs we reach the Next j line. This sends us to the start of the loop. Here, j is now set to 2
Cells(x collect, 4 j) will be Cells(1 3, 4 2) which gives Cells(4, 6) which is cell F4.
The Cells code will be repeated 20 times. The For loop x runs 4 times. Each time it runs the For j loop runs 5 times.
A Quick Look at the Values
The table below shows the values for Cells, row and column for the first 8 times.
xcollectx collect4j4 j
134415
134426
134437
134448
235415
235426
235437
235448
3...
The following are all 20 cells we place a value in
(4,5), (4,6), (4,7), (4,8), (4,9)
(5,5), (5,6), (5,7), (5,8), (5,9)
(6,5), (6,6), (6,7), (6,8), (6,9)
(7,5), (7,6), (7,7), (7,8), (7,9)
or using the column as a letter
E4, F4, G4, H4, I4
E5, F5, G5, H5, I5
E6, F6, G6, H6, I6
E7, F7, G7, H7, I7
When the code runs, all these cells are assigned a new value. This value is got from the code to the right of the equals. Let’s look at this next.
Finding the second cell
Let’s have a look at the code to the right of the equals. The result of this calculation will appear in the cells we have shown.
Cells(x collect, 4 j - 1) Cells(inptr, j)
You can see that the first part of this assignment
Cells(x collect, 4 j - 1)
is similar to the cell we write the value
Cells(x collect, 4 j) =
The difference is that it refers to the cell one column to the left.
So the code
Cells(x collect, 4 j).Value = Cells(x collect, 4 j - 1)
is saying
E4 = D4
F4 = E4
G4 = F4 and so on
Finding the third cell
The second part of the assignment is
Cells(inptr, j).Value
The variable inptr is set to 11 at the start of the Sub. It never changes. So this cell is always in row 11.
The column we use here takes the value j.
So when x = 1 and j=1 our code
Cells(x collect, 4 j) = _
Cells(x collect, 4 j - 1) Cells(inptr, j)
gives
Cells(4, 5) = Cells(4, 4) Cells(11, 1)
which is doing:
E4 = D4 A11
So
x=1 and j=1 gives E4 = D4 A11
x=1 and j=2 gives F4 = E4 B11
x=1 and j=3 gives G4 = F4 C11
x=1 and j=4 gives H4 = G4 D11
x=1 and j=5 gives I4 = H4 E11
x=2 and j=1 gives E5 = D5 A11
x=2 and j=2 gives F5 = E5 B11
and so on.
The following screenshots shows the first two values being assigned

E4(Red)= D4(Blue) A11(Blue)

F4(Red)= E4(Blue) A11(Blue)
Oh No, My Brain is Bursting!
Well done on reaching this far. It shows you are serious about learning VBA. Your brain may be hurting but don’t worry. The worst is over. The rest of this post is much simpler.
So sit back and relax as I rewrite the code and make it easier to read.
Giving the Code a Makeover
Let’s take the original code again. We’re going to make to change it piece by piece until it is a thing of beauty!
Sub Update()
Dim collect As Long, inptr As Long
collect = 3
inptr = 11
Dim x As Long, j As Long
For x = 1 To 4
For j = 1 To 5
Cells(x collect, 4 j).Value = _
Cells(x collect, 4 j - 1).Value Cells(inptr, j).Value
Next j
Next x
End Sub
Step 1: Remove the Calcs
The first thing that springs to mind is this. Rather than adding a collect number of cells each time why not start at the correct cell. So instead of
For x = 1 To 4
Cells(x collect, 4 j).Value =
to something like
For x = collect To collect 4
Cells(x, 4 j).Value =
Then we don’t need to calculate the row each time. x is already the correct row.
Step 2: Create Useful Variables
Let’s create some variables to define our range. We’ll give them names that mean something.
Dim rowStart As Long, rowEnd As Long
Dim colStart As Long, colEnd As Long
colStart = 5
colEnd = 9
rowStart = 4
rowEnd = 7
Step 3: Rewrite the For Loops
Now we have all the cells positions. We can create the For loops to read through these cells. No calculations needed to find the cells.
Note: It is standard to use i and j as variables in For loops.
Dim i As Long, j As Long
For i = rowStart To rowEnd
For j = colStart To colEnd
Next j
Next i
Step 4: Rewrite the Cell Assignment Code
Let’s look at the main line next. It is now much simpler. See the original and new versions below.
' Original
Cells(x collect, 4 j) = Cells(x collect, 4 j - 1)
' New version
Cells(i, j) = Cells(i, j - 1)
So you can see the code is much more readable. We only have one calculation for a cell and that is subtracting 1 from j.
Step 5: Rewrite the Cell Values Code
The last part is a little bit tricky. We know the row with the values is always 11 so let’s rename the variable Inptr to rowValues.
Dim rowValues As Long
rowValues = 11
The value in A11 is added to E4, B11 is added to F4 and so on. So for the first value we add from column 1, the second value from column 2 etc.
Let’s create a counter for this column
Dim colCnt As Long
We place this counter before the second loop. This means it starts at one each time the For j loop runs. We then a line to the loop that adds one to it each time so it moves on one column.
' Reset value column to 1
colCnt = 1
For j = colStart To colEnd
Cells(i, j) = Cells(i, j - 1) Cells(rowValues, colCnt).Value
' Move value column on 1
colCnt = colCnt 1
Next j
Final Code
The final code including comments looks like this
Sub UpdateNew()
' Set the totals range
Dim rowStart As Long, rowEnd As Long
Dim colStart As Long, colEnd As Long
rowStart = 4
rowEnd = 7
colStart = 5
colEnd = 9
' Set the values row
Dim rowValues As Long
rowValues = 11
Dim colCnt As Long
Dim i As Long, j As Long
' Read through the rows
For i = rowStart To rowEnd
' Reset value column to 1
colCnt = 1
' Read through the columns for the current row
For j = colStart To colEnd
Cells(i, j) = Cells(i, j - 1) Cells(rowValues, colCnt)
' Move value column on 1
colCnt = colCnt 1
Next j
Next i
End Sub
You can see this code is much more readable. The variable names give a clear indication of what the values are.
There are no complicated calculations. This makes code easier to read or change. It is also less likely to have errors.
For completeness I’m going to show another way you could perform the same task.
Version 2 – Use the For Each Loop
Let’s write a version of this using the For Each loop. The major difference this time, is that we only need one loop.
' Range of totals
Dim sRange As String: sRange = "E4:I7"
' Go through each cell in the range
Dim rCell As Range
For Each rCell In Range(sRange)
Next rCell
Now we want to set the value of the cell to something.
rCell =
The first part of the calculation is the cell to the left. We can use the Offset property of range.
To get one cell to the left we use a minus value
rCell = rCell.Offset(0, -1)
If the rCell here was E4 then rCell.Offset(0, -1) would be D4.
This final item we need is the value from the additions row. We add the offset for the column
' A count to the column on the values row.
Dim colValuesOffset As Long: colValuesOffset = 4
Now we use the offset to get the value cell from the current one. The row is always 11 i.e. rowValues. The column is 4 less than the current cell column
' Read addition value
addValue = Cells(rowValues, rCell.Column - colValuesOffset)
So the final code looks like this
Sub UpdateForEach()
' Range of totals
Dim sRange As String: sRange = "E4:I7"
' Row that contains the addition values
Dim rowValues As Long: rowValues = 11
' A count to the column on the values row.
Dim colValuesOffset As Long: colValuesOffset = 4
Dim rCell As Range, addValue As Long
' Go through each cell in the range
For Each rCell In Range(sRange)
' Read addition value
addValue = Cells(rowValues, rCell.Column - colValuesOffset)
' new cell value is cell to left plus add value
rCell = rCell.Offset(0, -1) addValue
Next rCell
End Sub
You can see we have broken down the calculation into two lines. This makes the code easier to read and understand.
We also only have one For loop which means we have not complex calculations to figure out.
Conclusion
If you have read this far then congratulations! This was not a simple topic. If you can grasp the ideas then you are well on the way to becoming proficient at VBA.
So what we did here was as follows
We took a real word piece of code
Then we broke it down into simple parts
We looked at how the cells were calculated
We rewrote the code so it was much simpler to read
We wrote it a second way using a For Each loop which made the code much simpler
If you come face to face with complex code you can approach it like this. Break it down into simple parts. Try to understand what each part is doing.
What Next?
If you would like more information about the topics covered here you may want to check out Cells and Ranges, For Loops and For Each Loops.
You can get the complete list of all the posts here. I also have a free eBook(see below) which you will find useful if you are new to VBA
Get the Free eBook
Please feel free to subscribe to my newsletter and get exclusive VBA content that you cannot find here on the blog, as well as free access to my eBook, How to Ace the 21 Most Common Questions in VBA which is full of examples you can use in your own code.
The post How to Deal With Real World VBA Code appeared first on Excel Macro Mastery.
August 18, 2015
How to Easily Extract From Any String Without Using VBA InStr
The VBA InStr function is one of the most used functions in VBA. It is used to find a string within a string and indeed it does a very fine job.
However, it is often used to help extract part of a string and for this task it performs badly.
If you have found string extraction in VBA to be a painful process, then read on. This post will show you a simpler and better way use three real world examples!
A Quick Guide to this Post
The following table provides a quick reference guide to what is covered in this post.
String TypeTaskHow to
1234ABC334Fixed sizeget left 4 charsLeft(s,4)
1234ABC334Fixed sizeget right 3 charsRight(s,3)
1234ABC334Fixed sizeget chars 5,6,7Mid(s,5,3)
"John Henry Smith"Variable sizeget first nameSplit(s," ")(0)
"John Henry Smith"Variable sizeget second nameSplit(s," ")(1)
"John Henry Smith"Variable sizeget third nameSplit(s," ")(2)
"John Henry Smith"Variable sizeGet last nameDim v As Variant
v = Split(s, " ")
v(UBound(v))
Quick Reference Notes
To find out more about the items referenced in the post check out the following links
If you would like to know more about the InStr or InStrRev functions then please read Searching within a string.
If you would like to know more about Mid, Left or Right functions then check out Extracting Part of a String.
For more about the Split function check out String to Array using Split.
The Like operator is covered in Pattern Matching
I use Debug.Print in my examples. It prints values to the Immediate Window which you can view by pressing Ctrl and G(or select View->Immediate Window)
Introduction
In this post, I’m going to show you a better way to extract values from a string than using then VBA InStr function with Left, Right or Mid.
This post is broken down as follows
Section 1: How to extract from fixed sized strings.
Section 2: How to extract from variable sized strings.
Section 3: How to extract from variable sized string using the Split function.
Sections 4 to 6: Some real world examples.
When VBA InStr, Left, Right and Mid are useful
If you want to check if a string contains a value then InStr is fine for the job. If you want to do a simple extraction then Left, Right and Mid also fine to use.
Using InStr to check if string contains text
In the following example, we check if the name contains “Henry”. If the return value of InStr is greater than zero then the string contains the value we are checking for.
' Check if string contains Henry
If InStr("John Henry Smith", "Henry") > 0 Then
Debug.Print "Found"
End If
Extracting Part of a String with Left, Right and Mid
The Left function is used to get characters from the left of a string.
The Right function is used to get characters from the right of a string.
The Mid function is used for the middle of the string. It is the same as Left except that you give it a starting position.
Sub ExtractString()
Dim s As String: s = "ABCD-7789.WXYZ"
Debug.Print Left(s, 2) ' Prints AB
Debug.Print Left(s, 4) ' Prints ABCD
Debug.Print Right(s, 2) ' Prints YZ
Debug.Print Right(s, 4) ' Prints WXYZ
Debug.Print Mid(s, 1, 2) ' Prints AB
Debug.Print Mid(s, 6, 4) ' Prints 7789
End Sub

These three functions work fine if the text you require is always the same size and in the same place. For other scenarios, they require the use of InStr to find a particular position in the string. This makes using them complicated.
Use Left, Right or Mid when the characters will always be in the same position.
Dealing with Strings of Varying Lengths
Many of the strings you will deal with will be of different lengths. A simple example is when you are dealing with a list of names. The string length and part you require(e.g. the first name) may be of different each time. For example
Brooke Hilt
Pamela Jurado
Zack Kinzel
Eddy Wormley
Kaitlyn Rainer
Jacque Trickett
Kandra Stanbery
Margo Hoppes
Berenice Meier
Garrett Hyre
(If you need random list of test names then try this )
Using the VBA InStr Function with Left
In the following example, we are going to get the first name from a string. In this string the first name is the name before the first space.
We use the VBA InStr function to get the position of the first space. We want to get all the characters before the space. We subtract one from the position as this gives us the position of the last letter of the name.
Sub GetFirstname()
Dim s As String, lPosition As Long
s = "John Henry Smith"
' Prints John
lPosition = InStr(s, " ") - 1
Debug.Print Left(s, lPosition)
s = "Lorraine Huggard"
' Prints Lorraine
lPosition = InStr(s, " ") - 1
Debug.Print Left(s, lPosition)
End Sub
Let’s look at the first example in the above code. The first space is at position 5. We substract 1 so which gives us position 4. This is the position of the last letter of John i.e. n.

We then give 4 to the Left function and it returns the first four characters e.g. “John”
We can perform the same task in one line by passing the return value from InStr to the Left function.
Dim s As String
s = "John Henry Smith"
' Prints John
Debug.Print Left(s, InStr(s, " ") - 1)
Using the VBA InStr Function with Right
In this example, we will get the last word in the string i.e. Smith. We can use the InStrRev function to help us. This is the same as InStr except it searches from the end of the string.
It’s important to note that InStrRev gives us the position from the start of the string . Therefore, we need to use it slightly differently than we used InStr and Left.
Sub GetLastName()
Dim s As String: s = "John,Henry,Smith"
Dim Position As Long, Length As Long
Position = InStrRev(s, " ")
Length = Len(s)
' Prints Smith
Debug.Print Right(s, Length - Position)
' Alternative method. Prints Smith - do in one line
Debug.Print Right(s, Len(s) - InStrRev(s, " "))
End Sub
How this the above example works
We get the position of the last space using InStrRev: 11
We get the length of the string: 16.
We subtract the position from the length: 16-11=5
We give 5 to the Right function and get back Smith

Using the VBA InStr Function with Mid
In the next example, we will get “Henry” from the string. The word we are looking for is between the first and second space.
We will use the Mid function here.
Sub GetSecondName()
Dim s As String: s = "John Henry Smith"
Dim firstChar As Long, secondChar As Long
Dim count As Long
' Find space position plus 1. Result is 6
firstChar = InStr(s, " ") 1
' find 2nd space position. Result is 11
secondChar = InStr(firstChar, s, " ")
' Get numbers of characters. Result is 5
count = secondChar - firstChar
' Prints Henry
Debug.Print Mid(s, firstChar, count)
End Sub
You can see this is tricky to do and requires a bit of effort to figure out. We need to find the first space. Then we need to find the second space. Then we have to substract one from the other to give us the number of characters to take.

If have a string with a lot of words then this can get very tricky indeed. Luckily for us there is a much easier was to extract characters from a string. It’s called the Split function.
The Split Function

©Starblue | Magic Book
We can use the Split function to perform the above examples. The Split function splits a string into an array. Then we can easily access each individual item.
Let’s try the same three examples again and this time we will use Split.
Dim s As String: s = "John Henry Smith"
Debug.Print Split(s, " ")(0) ' John
Debug.Print Split(s, " ")(1) ' Henry
Debug.Print Split(s, " ")(2) ' Smith
Boom! What a difference using Split makes. The way it works is as follows
The Split function splits the string wherever there is a space.
Each item goes into an array location starting at location zero.
Using the number of a location we can access an array item.
The following table shows what the array might look like after Split has been used.
Note: the first position in the array is zero. Having zero based arrays is standard in programming languages.
012
JohnHenrySmith
In the above code we split the string each time we used it. We could also split the string once and store it in an array variable. Then we can access it when we want.
Sub SplitName()
Dim s As String: s = "John Henry Smith"
Dim arr() As String
arr = Split(s, " ")
Debug.Print arr(0) ' John
Debug.Print arr(1) ' Henry
Debug.Print arr(2) ' Smith
End Sub
If you would like to know more about arrays then I wrote an entire post about them called The Complete Guide to Using Arrays in Excel VBA.
In the next sections, we will look at some real world examples. You will see the benefit of using Split instead of the InStr function.
Please feel free to try these yourself first. It is a great way to learn and you may have fun trying to figure them out(or maybe that’s just me!)
Example 1: Getting part of a file name
Imagine we want to extract the numbers from the following filenames
“VB_23476_Val.xls”
“VV_987_Val.txt”
“VZZA_12223_Val.doc”
This is similar to the example about where we get the second item. To get the values here we use the underscore(i.e. “_”) to split the string. See the code example below
Sub GetNumber()
' Prints 23476
Debug.Print Split("VB_23476_Val.xls", "_")(1)
' Prints 987
Debug.Print Split("VV_987_Val.txt", "_")(1)
' Prints 12223
Debug.Print Split("ABBZA_12223_Val.doc", "_")(1)
End Sub
In the real world you would normally read strings like these from a range of cells. So let’s say these filenames are stored in cells A1 to A3. We will adjust the code above slightly to give us:
Sub ReadNumber()
Dim c As Range
For Each c In Range("A1:A3")
' Split each item as you read it
Debug.Print Split(c, "_")(1)
Next c
End Sub
Example 2: IP Address Range
The example here is taken from a question on the StackOverflow website.
The user has a string with an IP address in the format “BE-ABCDDD-DDS 172.16.23.3″.
He wants an IP of the range 172.16 to 172.31 to be valid. So for example
“BE-ABCDDD-DDS 172.16.23.3″ is valid
“BE-ABCDDD-DDS 172.25.23.3″ is valid
“BE-ABCDDED-DDS 172.14.23.3″ is not valid
“BE-ABCDDDZZ-DDS 172.32.23.3″ is not valid
This is how I would do this. First I split the string by the periods. The number we are looking for is between the first and second period. Therefore, it is the second item. When we split the string it is placed at position one in the array (remember that the array starts at position zero).
The resulting array will look like this
0123
BE-ABCDDD-DDS 17231233
The code below shows how to do this
Sub IPAdd()
' Check the number to test different ip addresses
Dim s1 As String: s1 = "BE-ABCDDD-DDS 172.31.23.3"
' Split the string using the period symbol
Dim num As Long
num = Split(s1, ".")(1)
' Check the number is valid
Debug.Print num >= 16 And num
Example 3: Check if a filename is valid
In this final example, we want to check that a file name is valid. There are three rules
It must end with .pdf
It must contain AA
It must contain 1234 after AA
The following tables shows some valid and invalid items
FilenameStatus
AA1234.pdfvalid
AA_ljgslf_1234.pdfvalid
AA1234.pdf1Not valid - doesn't end with .pdf
1234 AA.pdfNot valid - AA does not come before 1234
12_AA_1234_NM.pdfValid
First we will do this using the InStr and Right functions.
Sub UseInstr()
Dim f As String: f = "AA_1234_(5).pdf"
' Find AA first as the 1234 must come after this
Dim lPos As Long: lPos = InStr(f, "AA")
' Search for 1234 and ensure last four chars are .pdf
Debug.Print InStr(lPos, f, "1234") > 0 And Right(f, 4) = ".pdf"
End Sub
This code is very messy. Luckily for us, VBA has Pattern Matching. We can check the pattern of a string without having to search for items and positions etc. We use the Like operator in VBA for pattern matching. The example below shows how to do it.
Sub UsePattern()
Dim f As String: f = "AA_1234_(5).pdf"
' Define the pattern
Dim pattern As String: pattern = "*AA*1234*.pdf"
' Check each item against the pattern
Debug.Print f Like pattern ' False
End Sub
In the above example, the asterisk in the pattern refers to any number of characters.
Let’s break down this pattern *AA*1234*.pdf
* – any group of characters
AA – the exact characters AA
* – any group of characters
1234 – the exact characters 1234
* – any group of characters
.pdf – the exact characters .pdf
To show this works correctly, let’s try it on all the example names in the table
Sub UsePatternTest()
' Create a collection of file names
Dim coll As New Collection
coll.Add "AA1234.pdf"
coll.Add "AA_ljgslf_1234.pdf"
coll.Add "AA1234.pdf1"
coll.Add "1234 AA.pdf"
coll.Add "12_AA_1234_NM.pdf"
' Define the pattern
Dim pattern As String: pattern = "*AA*1234*.pdf"
' Check each item against the pattern
Dim f As Variant
For Each f In coll
Debug.Print f Like pattern
Next f
End Sub
The output is
True
True
False
False
True
To find out more about Pattern Matching and the Like keyword please check out this post.
Conclusion
InStr and InStrRev are really only useful for simple tasks like checking if text exists in a string.
Left, Right and Mid are useful when the position of the text is always the same.
The Split function is the best way to extract from a variable string.
When trying to check the format of a string that is not fixed in size, the Like keyword(i.e Pattern Matching) will generally provide an easier solution.
Please feel free to subscribe to my newsletter and get exclusive VBA content that you cannot find here on the blog, as well as free access to my eBook, How to Ace the 21 Most Common Questions in VBA which is full of examples you can use in your own code.
The post How to Easily Extract From Any String Without Using VBA InStr appeared first on Excel Macro Mastery.


![[image error]](http://excelmacromastery.com/Blog/wp-content/uploads/2016/04/Dropdown-example.png)