Nancy I. Sanders's Blog, page 68
November 5, 2013
Yes! You Can Celebration
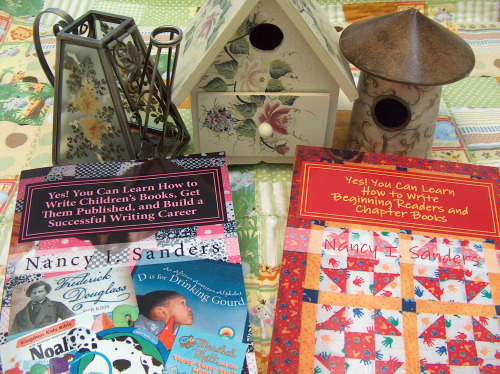
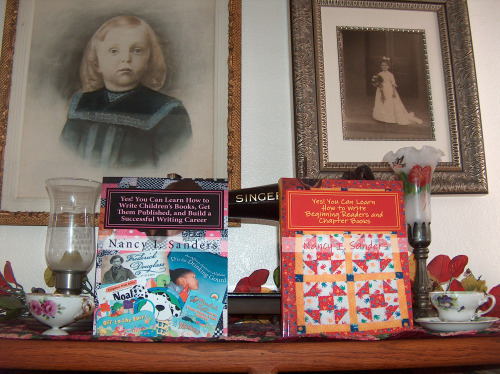
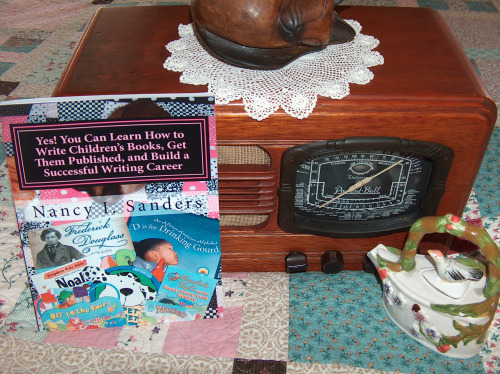
As most of you know, over the past couple of months, we’ve been celebrating the re-release of my first how-to book for writers, Yes! You Can Learn How to Write Children’s Books Get Them Published, and Build a Successful Writing Career.
But what you may not know is that when it comes to that age-old question, “Which came first, the chicken or the egg?” I’m a firm advocate of the egg.
And if you’d like to build a successful career as a writer, I encourage you to join the “egg” side of the discussion as well.
What am I talking about? I’m glad you asked!
To find out exactly what I mean, hop on over to the site, Writers On the Move, where you’ll find my guest post today for Karen Cioffi as part of the celebration about my how-to book. (Thanks, Karen, for hosting me today!)


November 4, 2013
Highlights: Submission Time!
I was so excited to reach this point…Submission time!!!! I hope you’re getting ready to submit your nonfiction article to Highlights, too.
It may not be perfect. It may get rejected. But I have grown so much as a writer through this process. And I hope you have too!
Here’s what I put in my Submission packet and in this order:
* SASE: A business-sized letter with a stamp and addressed to me. I don’t want my manuscript back. They can recycle it. I just want to get an acceptance letter from the editor.  ) A business-size envelope is all they need.
* My cover letter
* My one-page resume
* My manuscript: A nonfiction article
* My resume extension/query letter
* The expert’s review e-mail
* My image log
* The bibliography along with photocopies of each page I cited in the manuscript
* A DVD with potential images they can use that are free or in the public domain
* A nice piece of cardboard to protect my DVD
And now I’m heading off to the post office and get this puppy out the door!
Have you submitted something to Highlights yet? If so, let us know what’s in YOUR submission package.


November 1, 2013
Highlights: Your Resume
After I wrote my cover letter to send in with my nonfiction article I’ve written for Highlights magazine, I printed out a copy of my resume to include as well.
If you’ve never written a resume before to include with your manuscript submissions, you can find out how it’s done in Section 13.1 Manuscript Submissions of my how-to book for writers, Yes! You Can Learn How to Write Children’s Books, Get Them Published, and Build a Successful Writing Career.
No matter what I submit, I always like to include a resume. At various times over the years, editors have offered me contracts to write manuscripts for them based on what they see on my resume.
Don’t worry if you don’t yet have any published credits. Just start writing for the no-pay, low-pay market and you’ll build credits amazingly fast. You’ll find out more about how to do this in Section 5.3 Write to Get Published in my book, Yes! You Can Learn How to Write Children’s Books, Get Them Published, and Build a Successful Writing Career.
And then, guess what I did? I wrote a second letter to the editor at Highlights.
This letter, alone, could be the most important item in my submission to Highlights. This letter, alone, could be the most important item in YOUR submission to Highlights.
This letter, alone, has landed me more contracts to write more manuscripts and has earned me more money than any manuscript I’ve ever submitted anywhere. This letter, alone, could land you an actual contract and earn you actual money from Highlights.
Why?
Because, actually, I have no way of knowing if Highlights already has an article in the publishing queue on the exact same topic as my article. If they do, and they can’t use mine, they’ll send me a standard rejection letter. End of story.
But this letter gives them the opportunity to ask me for a new article on a topic they’re interested in if they like my writing but can’t use that particular article for whatever reason.
Sometimes I refer to this letter as a resume extension. Sometimes I refer to it as a pitch or a query. Whatever we call it, the principle is the same.
In this letter I tell the editor I’ve been studying their Submission Guidelines and their product and was wondering if they’d like a submission on any of the following ideas. And then I list 3-5 ideas for them to choose from.
I highly recommend that you take time to think of ideas to include in this letter and send it along with your submission. To help you write your letter, here is a sample you can download and print out. The blue text explains instructions and tips on writing different sections of the letter. Feel free to copy any part of it that you want to use.
To learn more about how to brainstorm ideas for this process and write these letters, you can read about it in these sections of my book, Yes! You Can Learn How to Write Children’s Books, Get Them Published, and Build a Successful Writing Career.:
8.3 Brainstorm Ideas
8.4 Contact the Publisher
8.5 Target Practice


October 31, 2013
Highlights: Writing the Cover Letter
Next on my to-do list is writing the cover letter to include in my submission to Highlights.
After all this work, I want to be sure I let the Highlights editor know I’ve taken this task very, very seriously. I haven’t just written any old article and started submitting it to every magazine I know of.
I have targeted Highlights. I have read Highlights’ Current Needs. I have read Highlights’ Contributor Guidelines. In my cover letter I’m going to let the editor know this. And so should you!
I won’t actually say that, but I’ll show her by the examples I include.
To show you what I mean and also let you see how I formatted my cover letter, I’m including it with fake text dropped in as a pdf file you can download and print out. Please feel free to copy anything from this letter that you want if you find it helpful.
As you can see, I addressed my cover letter to Carolyn Yoder. That’s because on Highlight’s page of Current Needs, the instructions say to do this if I’m writing an article for that list. My article is for “History and World Cultures” so she’s the editor I’m targeting. Be sure to double check you get your article submitted to the right editor if you’re also writing a topic to meet one of their current needs.
The first paragraph in my cover letter is the hook. I used blue text to tell you how to write that.
The second paragraph in my cover letter tells my credentials. I used blue text to tell you how to write that. And if you don’t have any published credits yet, just leave that last sentence blank.
The final paragraph gives the nuts and bolts about my article, including its title. You can copy that verbatim, tweaking it to fit your particular article if you want. That text is in black.


October 30, 2013
Highlights: Format Your Manuscript
I had finished the final version of my manuscript. Yay!
So now I went back and double-checked that it was formatted correctly. You can do that, too. If you don’t know how to format a nonfiction article for submission, here are some steps to follow:
Step 1: Set up your header and page number
In your document tool bar (usually under VIEW) click on the “Header and Footer.” Inside the header, on the left hand top of the page, type in your last name followed by one word of your title. If it’s a short title you can type in the whole thing. Like this:
Sanders-Watermelon
Then insert your page number. On most manuscripts I’ve ever seen, it’s at the top right, so choose the top right, but not on the first page.
Step 2: Type your personal information
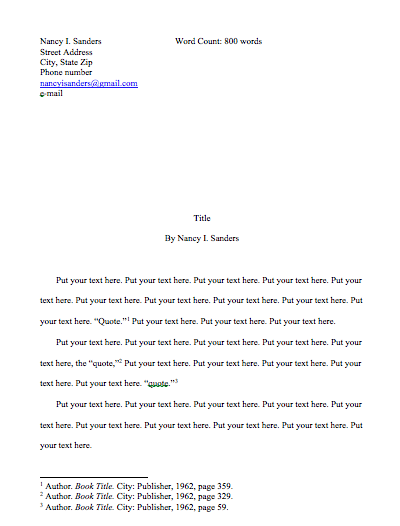
On the top left of manuscript submissions, I type my personal information. This is single-spaced. Like this:
Nancy I. Sanders
Street Address
City, State, Zip
Phone Number
E-mail
Website
Step 3: Type in the Word Count
On the top right, I type in the word count. Like this:
Word Count: 800 words
(On other manuscript submissions directly underneath the word count, I also type in what rights I’m selling such as Picture Book Rights or First Rights, but since Highlights always purchases all rights, I just left this blank.)
Step 4: Type in the title and the author’s name
Move your document down the page until the curser is about 1/3 of the way down. I like to center my curser and type in the title, then skip a double space and write my name.
Step 5: Skip a double space and start your manuscript.
From here on out, everything is double spaced. Use paragraph format, not business letter format, in an article such as this. Paragraph format means no breaks between lines and indent the first line of every paragraph.
Do you have any questions about any of this? Of course, some styles can vary about how you format your manuscript, but this is a standard style used in the publishing industry, so you can’t go wrong formatting your manuscript this way.
Just for a point of reference, here’s a picture of the first page of my manuscript with fake text dropped in so you can see what yours should look like.


October 29, 2013
Highlights: Key Resources
I’m getting close to the finish line and I hope you are, too. It’s a little bit scary, but it’s a good feeling, too. Even if my work isn’t good enough to get published in Highlights yet, I know I’m trying to do the best I can do at this point in my career. And that’s a good feeling. I’m growing as a writer.
I pulled out my file with the print outs of Highlight’s “Submission Guidelines” and “Current Needs.” I’m reading over them multiple times to make sure I’m getting everything gathered to include with my file marked “Submissions.”
One of the things Highlights requires to see with a nonfiction submission is a batch of “photocopies of key pages in references.”
There are various items you can photocopy, but I decided I wanted to photocopy the resource I used for each one of the quotes I cited in a footnote. I decided that this would give a nice overview of the key pages I used in my research.
Before I did that step, though, I had one issue to solve.
My opening paragraph. It was bugging me. And it was bugging Jeff, too. We had been talking about it for the last couple of days. Jeff insisted my middle sentence in my opening paragraph should be the first sentence of my paragraph. He teaches how to write paragraphs to his fourth grade students, so he should know. But, I argued, it was kind of a boring sentence and didn’t pack the punch I wanted the first sentence to have.
So we talked about it and talked about it and talked about it some more. He wrote suggestions on my manuscript and I wrote even more. And then finally, it happened. I suddenly knew exactly what I wanted to say in that opening sentence. I used the INFORMATION Jeff knew was important and I added the PIZZAZZ I knew was important and BINGO! The first sentence was a winner. I had to rearrange the other sentences in the paragraph to flow better, but now I was finally satisfied. My manuscript was done. Yay!
Then I got my reference books and photocopied every single page I cited in my article in a footnote for a quote. Next, I made a copy of all these pages for me to keep for my records, too.
Then I got out my pink highlighter and highlighted each quote on each photocopy and wrote at the top of the page which footnote it went with. I stapled each batch of photocopies together according to which book they went with, along with a photocopy of each book’s cover, too. I did the same with the copy I’m keeping, too.
My photocopies were done. I added this batch to my “Submission” folder.
I also started a second pile of duplicates I’m making. I like to make a duplicate of everything I actually submit. I’ll keep this in my “Submission” folder after I mail the actual one in. This keeps me organized.


October 28, 2013
Highlights: Bibliography
Now that my nonfiction article is a work-in-progress and is no longer a first draft, I’m spending a portion of time editing it nearly every day. This process usually takes some time…there’s just no way to cut it short. And if you add critique group feedback into the loop, you have to wait until your group meets.
So while I’m digesting and editing and thinking and revising and contemplating various parts of the manuscript, I’m working on other tasks as well.
Of course, I’m saving different versions of my file each time I sit down to revise. One of the versions I saved at this point was a version that has all my footnotes in it. I cited every quote I used in my article, of course. But I also put footnotes is bunches of places to keep track of where I found the different facts I stated. Plus in these footnotes I’ll often write little notes to myself such as “This book and that book stated this date, but the other book stated that date.”
When I felt I was NEARLY finished with my research (you’re never quite TOTALLY finished until the second you send it in) I saved a file that I labeled “Title with Footnotes.” Now I can always find it at a quick glance.
Then I went through and deleted all my research footnotes and personal footnotes and saved this as a new file version. I kept all the footnotes citing each quote in the article. This will now be the version I work on to finalize my article for submission.
Then I finalized my Bibliography. I listed my main references in the bibliography. Since I had the luxury of using several autobiographies (primary sources) I didn’t need a lot of books listed. I printed this out. Once again, it looks like the format I show on my website for my book, Frederick Douglass for Kids.
I put my Bibliography in my “Submissions” folder.


October 25, 2013
Yes! You Can Celebration
Thank you, thank you, thank you for helping me celebrate the re-release of my first how-to book for children’s writers this week!
And a great big thank you goes to Irene Roth for hosting me on her blog all week long. Be sure to stop by and say “hi” on my final visit to her blog today at Irene Roth’s Fearless Writer’s Blog.
And if you love connecting with other writers and learning more about their writing day, you’ll enjoy visiting the blog of Author Mary Cronk Farrell. Recently, she tagged me in a blog hop, so hop on over and say “hi” on her site as well!


October 24, 2013
Highlights: Photo Research
As I’ve been working to self-edit my manuscript and read over it multiple times looking for various weak spots, I sat down and did some photo research.
Highlights says that “slides, photos or art-reference materials are helpful and sometimes crucial in evaluating submissions.”
So I’m planning on doing some photo research to include with my submission.
If you’ve never researched your topic before, you’ll be starting from scratch. It will take you some time to dig around and learn what photographs are out there and who has them in their collections and how much it costs for a publisher to use them.
Don’t feel as if this is a waste of your time, however. Just plan on using all this research in a future writing project, too. Plan to write a picture book on your topic or a blog post about your topic or another magazine article about your topic or even a nonfiction book about your topic.
A good place to start digging around is to look in the back or front of published books on your topic and find the list of photograph credits. Look where those authors got their photographs. Library of Congress? Private organization such as Corbis? Historic society, famous library, or museum?
Then, one by one, explore each of those sites and click on links to find out how someone can acquire those photographs, too. You might have to actually e-mail someone for a price list or a price quote.
Now, if you’re writing about a topic for Highlights that you already wrote about before, you might already know what pictures are out there and how to acquire them and how much they cost. I chose to write about a topic I’ve already researched, so I was able to dig up most of the photo info I needed pretty quickly in several hours.
Highlights will probably be most interested in photos they can acquire for free for at low cost, so I’m including those kinds of images in my submission. Here’s what I did:
Step 1:
I found 3-8 images I want to include in my submission. I got the official name of each image, the contact info, and the pricing.
Step 2:
I created a word document to be an image log of potential images I want to recommend to Highlights. This would fall under the category of “art-reference materials.” I inserted a low-resolution image of each picture in my word document. After each image, I typed in the name of the image, the contact info where that image can be found, and a ballpark figure of the pricing. (Pricing might differ slightly according to what right Highlights acquires.) I printed out a copy of this word document and put it in a folder marked “Image Log.”
Step 3:
I downloaded a high-resolution image of any public domain pictures from the Library of Congress or other free public domain sources that I’ve found. Highlights requires 300 dpi so I double-checked that the resolution is high enough. I burned these images on a disc. If you can’t find any free images in public domain of your topic, don’t despair. You don’t need to include a disc if your topic doesn’t have these images available for you to burn. An image log is sufficient.
There! My photo research is done and ready to include with my submission. I printed out another copy of my image log and put it in a folder marked “Submission.” I put the disc in this folder, too.
I also printed out the e-mail I just got back from the “expert” who sent me a short review to include with my submission. I added this to my “Submission” folder, too.
I’m starting to feel really good at this point. I actually have a folder marked “Submission” now where I’m putting things I’m gathering in preparation for submitting this. I’m tweaking and polishing my first draft and guess what? I no longer have a first draft! I have an official work in progress. Hopefully you do, too. Wahoo!
So…….How’s your photo research coming along? Do you have any questions? I’m not super tech-savvy in this area, but I’ve worked on several books with photographs, so I know a little bit and am happy to share what I know. Plus, I’d love to know how you’re progressing along your journey, too.
And be sure to hop on over to Irene Roth’s Fearless Writer’s Blog where Irene is hosting Day 4 of a 5-day post about my books!


October 23, 2013
Yes! You Can Celebration
I am so encouraged by so many of you who have written to me to tell me how much my how-to book for writers, Yes! You Can Learn How to Write Children’s Books, Get Them Published, and Build a Successful Writing Career, has helped you take steps toward success and seeing your dreams come true.
Here’s an e-mail I just got last week:
Guess what? I have been following your advice and querying editors about different ideas, asking if they are interested in seeing a proposal and sample chapters. Well, I just had an editor say “yes, send me the proposal and chapters.” I’m thrilled! -Rebecca
It’s stories like this that motivate me to keep letting others know about my book.
Today, to help me celebrate the re-release of my first Yes! You Can book, you can visit TWO sites!
Latrisha’s Blog where Latrisha is featuring me in her Writer’s Spotlight Wednesday. And if you’re an author and want Latrisha to feature you in the spotlight, contact her and let her know. Just follow the directions on her blog.
Irene Roth’s Fearless Writer’s Blog where Irene is hosting Day 3 of a 5-day post about my books! Yay, Irene!


Nancy I. Sanders's Blog
- Nancy I. Sanders's profile
- 76 followers


