Nancy I. Sanders's Blog, page 70
October 9, 2013
Highlights: Make it Your Goal!
For the past month, I’ve been sharing in real time what I REALLY am doing to try to experience breakthrough in everybody’s favorite magazine, Highlights.
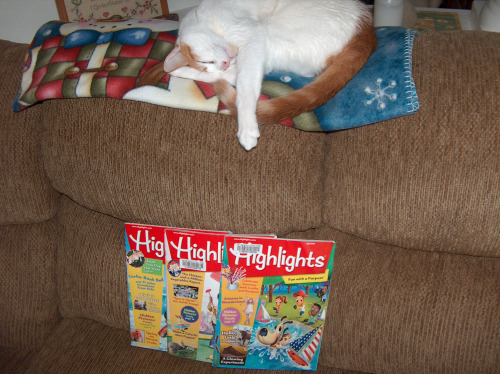
As you can see, even Sandman, my cat LOVES Highlights. He keeps them close to him even when he’s taking a catnap so he can read them when he wakes up again!
If you haven’t yet started on this journey, here’s an article that I hope convinces you to give this a try! I wrote it for the writing-for-children column that I contribute to at the Working Writers Club. (Hey! Why not join this club…it’s free!!!! And it has amazing opportunities for us as writers such as you get to write for any column of your choice and you get to network with other great writers and you get the solid advice and wisdom of awesome writing coach, Suzanne Lieruance!)
Here’s my article:
Strengthen Your Nonfiction Muscles
So come on. Join the adventure! Your writing will never be the same.


October 8, 2013
Highlights: Writing Session 2
I sat down to write my second paragraph in the beginning section of my nonfiction article for Highlights.
First, I read over the opening paragraph I had written the day before. I often start my writing day out like this and go back for a small editing session of the previous day’s work.
Before I started to edit it, I saved my file as the “B” version so that my first efforts will stay intact in case I want to go back to the original.
Right away, I spotted a glaring weakness in the opening paragraph. One of my quotes didn’t quite fit. It sounded like it would fit better at the end of the article rather than here in the beginning. So I cut this out of the first paragraph (footnote and all) and pasted it down at the end of the manuscript under a section I labeled, “Extra material.”
Then I spent about 15 minutes reading over my subject’s autobiography to find a better quote that fit. I found one and plugged it into my paragraph, rearranging the order of the previous sentences that I’d written until I felt better satisfied with it.
Then I pulled up my sample article in the Word document where I had typed it. This is where that exercise really comes in handy. I tested the word count in the first section of my sample target article and discovered that the first paragraph in my article had as many words in it as the entire first section of my target article!
So I cut my paragraph into two sections and tweaked it and trimmed it…now I just had one more paragraph to go.
I did some reading in my autobiography and tried out a few sentences and quotes, but nothing seemed to fit.
I realized I didn’t know the rest of my article well enough to flesh out this opening section.
So I set the opening section aside for awhile.
I picked up my plot chart and looked at section 2: the first half of the middle where my plan is to tell about my subject’s youth.
I felt much more confident dealing with this subtopic, so I started to work on my second section instead.
For an hour or two, I read through my subject’s autobiography, familiarizing myself with his childhood and looking for good quotes to use. I wrote one paragraph for each subtopic I had listed on my plot chart and found some nice quotes to weave into the narrative.
After I’d written 3 paragraphs, I pulled up my sample target article in Word again. This time I compared my section 2 with its section 2. Once again, I had way overshot the word length.
So I saved this as the “C” version of my file.
Then I went through and trimmed sentences and phrases to get the writing tighter and a closer match to my target article.
When I was finally finished with all this, I read over what I’d written so far.
Still stinks pretty much, I think, but that’s okay. Why? Because this is a first draft! Remember? First drafts usually stink.
But at least now I have almost half of the first draft of my article written. And that’s a very satisfying sense of accomplishment. Wahoo! I am building a solid foundation for this article and will be able to polish it and perfect it in the days ahead.
How about you? What kind of progress are you making on your manuscript? Go ahead and set aside an hour or two to read and research and write down sentences and even some paragraphs.
We’re moving forward on our journey! We’re practicing our skills at writing nonfiction. And that’s a good place to be.


October 7, 2013
Highlights: Writing Session 1
The first paragraph of any manuscript is a unique entity all its own and Highlights is no different. So I sat down to write the first paragraph of my article. Here’s how it went:
First I went over the plot chart I made for my article to get it fresh in my mind again.
Then I read and re-read and then read the first paragraph again of my target sample article. It really gave an exciting and very interesting introduction to the whole article and had solid quotes in it to boot!
So I gathered several primary sources (the subject’s autobiographies…he wrote more than one) and also a children’s book I have on my topic.
Why a children’s book? Because I often start digging around in children’s books when I start my research. Children’s books just highlight the golden nuggets. I don’t have to wade through 300+page monsters to try to find what I’m looking for. They are so helpful to use as part of the research process!
My children’s book showed exactly which part of my subject’s life he achieved the narrow focus I’m writing about. It also showed how this fit into the era he lived in.
Armed with this information, I then picked up one of his autobiographies. I skimmed through the table of contents and found the chapters where he talks about the narrow focus I’m writing about.
Then I skimmed and read through these pages about this part of his life. I looked for quotes. And fragments of quotes that could have potential.
I put sticky notes on pages that I want to come back to. I jotted down on a piece of paper several quotes that I thought had potential to use in my article.
Every once in a while a sentence would start to form in my mind for the first paragraph of my Highlights article. I’d just write these ideas down. Plus, I tried to weave in several quotes I’d discovered in his autobiography. I made a note for each reference I used.
When I make notes during a research session like this, I give each of my research books a code such as:
AA
AB
AC
AD
AE
AF
So when I’m writing notes by hand, I can just write in: AC201 or AD32 next to the part I wrote that needs a footnote. This tells me quickly that I found that fact on page 201 of a particular book and on page 32 of a different one.
After about an hour and a half of reading through the autobiography and jotting down notes by hand, I had a rough three sentences that could work as the first draft of the first paragraph in my Highlights article.
So I moved to my computer. I typed out these three sentences and streamlined them a bit to work better together. I added several footnotes with a full bibliographical record to each quote I used and every fact I drew from somewhere.
Whew! I was finished for the day.
I had the first draft of my first paragraph. It stinks. It’s rough around the edges. It doesn’t quite have the kid appeal it should have.
But hey…it’s a first draft! First drafts are supposed to stink! That’s why they’re called first drafts.
I feel great that I actually have something typed. My manuscript is started. I can rework it and polish it and hone it to perfection in the days ahead.
So can you! So sit down and get your first paragraph written. You can do this! It’s just three or four sentences. Make it your goal today.


October 4, 2013
Highlights: Develop the Plot and Structure
In a piece of fiction, the plot is the structure that moves the action from Point A to Point B. Action and tension and angst build up toward the climax or end of the story.
In nonfiction, there is still a bit of structure that is necessary to build a compelling article. And in today’s market where creative nonfiction is hot, you can add a certain amount of “plot” to your manuscript to help build emotion and tension and action even in a small way.
First of all, let’s define “creative nonfiction.” You’ll find all sorts of definitions floating around on the internet and in writing circles, so I’ll share from my own experience in working with various publishers as I write creative nonfiction.
Creative nonfiction is a manuscript that it 100% true, just like regular nonfiction. All the facts are true. However, fiction techniques are used to present the facts.
For example, dialogue is used in creative nonfiction. But you can’t make up dialogue. You use actual quotes from your subject’s autobiographies or speeches or interviews to incorporate dialogue. Remember. It has to be 100% true.
Sensory details can be added. This is another fiction technique. For example, when I wrote the book, Frederick Douglass for Kids, I knew he escaped to New York City in the fall on a train. So I created a scene where he steps out of the train, hears the train whistle and the screech of the breaks, and feels the chill in the fall air. I know all these things would have actually happened to him since he was there doing that at that time of year. It’s all 100% true.
So as I got ready to start writing my nonfiction article that I want to submit to Highlights, I pulled out my Basic Plot Worksheet A. I use this worksheet to plot magazine stories and magazine articles as well as some books.
You can download and print out this worksheet by visiting my site, Writing According to Humphrey and Friends. Scroll down the page to CHARTS AND WORKSHEETS TO GET ORGANIZED FOR SUCCESS and click on the “Basic Plot Worksheet A.”
Here’s how to fill this out:
* Fill in the stats in the left column. If you don’t yet have a title for your article, just write down a keyword. I wrote down the name of my subject since I’m writing a biography.
-Write your name as the Author.
-Write Highlights as the Publisher.
-Write 2013 Highlights as the Copyright since they purchase all rights.
-Write 4-7 as the Target Age unless you’re writing a shorter piece for younger readers.
-Write 700-800 as the word count.
-Add any notes you want to add.
*Now let’s look at the plot chart.
My target article was divided into four sections. That made it super easy since most stories are divided into four main sections:
Beginning
1st half of the Middle
2nd half of the Middle
End
If your target article is divided into four sections, just plug those in, too, like I did.
For example, the first section of my target article was all about my person’s claim to fame.
So on my chart in the “Beginning” column under “How does the story start?” I wrote down my main idea, which is a very narrow topic about my subject.
In my target article, the second section was about the subject’s youth, so mine will be too.
On the line for “Change 1:” I wrote: “Tell about Youth.”
Then under the “1st Half of the Middle” column, I wrote down one example. Then I had to stop and do some research to add 2-3 examples or anecdotes I want to write about here to tell how as a child he overcame obstacles that would have hindered his claim to fame.
The third section in my target article told several anecdotes about how he started to get famous, so on my line for “Change 2:” I wrote the important incident that he first took on his road to fame.
This “middle line of the Middle” of the story or article is the turning point of the plot. It’s the place something important happens in fiction that moves the character toward the finish line with no turning back.
To incorporate this fiction technique, I want to be sure this is the point I introduce the turning point in my subject’s life as well. I want this to be the turning point of my nonfiction article. So this is where I’ll tell how he did something that changed his life and moved him significantly on his way toward fame, no turning back. (Note that he’s not quite yet REALLY famous yet. He just made a significant step toward becoming famous.)
See if you can do the same with your article at this point.
Next, for the “2nd Half of the Middle,” I listed one example I could thing of and then I dug around in my reference books to find 2-3 examples or anecdotes that I want to include here that show my subject getting famous.
For Section 4 in my target article, it tells several anecdotes of what he did while he was famous. I want to do the same.
So on the line for “Change 3:” I wrote the single incident that launched him to be “superstar” in history. Then in the column for “How does the story end” I list 2-3 examples of things he did when he was famous.
My final paragraph in my target article ended very inspirational with an interesting list of this person’a famous accomplishments, so I plan to end the same.
This exercise will go quickly for you if you already have researched your topic and already have the basic facts in your head. If you haven’t yet researched your topic, don’t despair! Just take your time and enjoy the process of filling out this form. Take time to dig around and research your topic until you have the information you need to fill out each part of the chart.
When you’re done with the worksheet, make a file folder for it and label it “Plot Worksheet” so you can keep it in one handy place in your file pocket of folders.
This worksheet will really pay off at the end. Your writing will be tight and to the point. It will help you not get writer’s block because you will already have a roadmap to follow when you sit down to write. Plus, you’re incorporating some fiction techniques into your article simply by giving it a plot structure. This will help take it from just a list of facts to a compelling true story about your topic.
And that’s a good hook for editors as well as young readers, too!


October 3, 2013
Highlights: Dissect Your Target Article
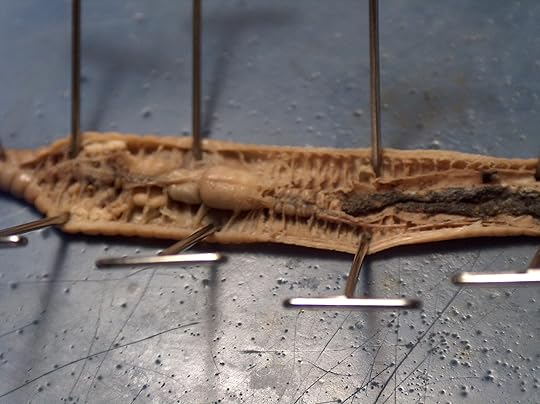
Pretty scary picture, isn’t it? And what is it?! It’s a photo of a gigantic earthworm my husband and I dissected!
I loved dissecting in high school, but haven’t done it since, and my husband never got to dissect, so just for kicks, we invited some family members over to have some fun dissecting worms, frogs, and fetal pigs. We’ve done the worms and frogs already and are getting ready to tackle the pigs. Pretty cool, huh?
Well, get ready to get out your scalpels and T-pins ’cause it’s time to dissect your target article!
I found out my target article has 4 sections.
I plan to write my article in 4 sections.
How many sections does your article have?
Plan to write your article in that many.
I found out there are 3 paragraphs in each section of my target article.
I plan to write 3 paragraphs in each section of my article.
How many paragraphs are in each section of your target article?
Plan to do the same.
My target article is a biography. Here’s what the four sections were all about:
Section 1: Started the article with a declarative sentence as the first sentence claiming an interesting fact about this person that was part of his claim to fame. The second sentence was a quote. Every paragraph in this section supported the main topic and told all about the title.
Section 2: Told several anecdotes about the subject’s childhood and tied them into the main topic/title. An anecdote is a little story. In this article, some of these stories were just one sentence long! Here’s an example of an anecdote:
When Abraham Lincoln was a young boy, one day he played a joke on his stepmother by standing on his hands and walking white footprints across the ceiling.
Section 3: Told several anecdotes about how the subject became famous, tying these into the main topic/title.
Section 4: Told a couple of anecdotes about when he was famous, tying these into the main topic/title.
Final paragraph: Ended very inspirational with an interesting list of this person’s famous accomplishments.
Further dissection reveals the following:
Each paragraph has an opening sentence that introduces a fact about the person. This fact is a subtopic of the main topic. This sentence is followed by 2 or 3 sentences in the paragraph that provides more details about that subtopic.
This is standard format for most nonfiction articles, so we want to be sure to follow this format when we write ours.


October 2, 2013
Highlights: Analyze Your Target Article
Now that you’ve typed out your sample article, let’s analyze it.
Let’s get some stats.
Do a word count.
(Don’t count the title)
I was surprised that my sample article came in at 700 words. This made me realize I don’t need to aim for 800 words. 700 can be just fine.
Run a spell-check and see what the Flesch-Kincaid Reading Level is. I was surprised that it came in at a 9.0 reading level. This means the vocabulary and sentence structure is at a ninth grade reading level. This shows that I don’t need to keep it at an elementary reading level, which makes it easier sometimes.
If you don’t know how to check for the Flesch-Kincaid Reading Level, post a comment and let me know and I’ll give some pointers.
Count the Sections and Paragraphs
I can clearly see that there are four sections in this article and each section has 3 paragraphs in it. I plan to do the same for my article.
Count the Quotes
Remember how the Contributors Guidelines say they want lots of quotes? No kidding! I went through and highlighted every quote in my target article. My target article has 1-3 quotes in every single paragraph except 3. Wow!
Count the Photos
My target article has 3 photographs in it. That will guide me as I dig around looking for potential photographs to include with my article. Three. That sounds very doable! One. Two. Three. It will take time, yes, but not too much time. And the skills we’ll acquire along the journey will help us become better writers. And more confident writers. And more experienced writers. Guaranteed!


October 1, 2013
Highlights: Type a Sample Article
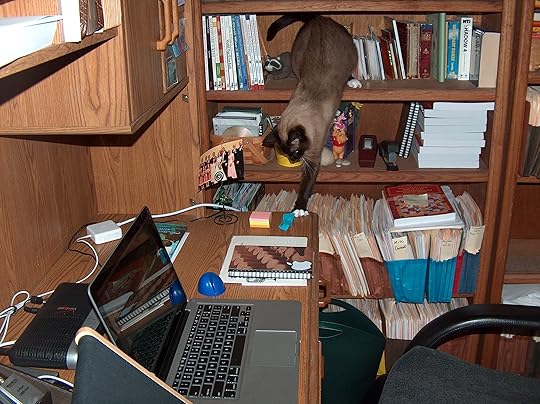
This is my cat Pitterpat wandering around my desk. She does this every day when I sit down to type on my computer. (I think she’s trying to steal ideas for her own stories!) Eventually, she settles down to take a nap on Jeff’s computer chair at HIS desk (which is next to mine). But first she has to take a little ramble over mine.
I wanted you to see this photo because for the next step I took on my journey to write and submit a nonfiction article to Highlights, I sat down at my computer and typed out one sample published nonfiction article from Highlights that I’m using as my target article.
I did this for 3 reasons:
1. To train my brain. Every time you type out a published article or section in a book, your brain gets trained to flow and move in a similar pattern to that the published piece. At multiple levels. I like to do this whenever I can to help train my brain to write in a particular genre.
2. I want to analyze this one article. I want to test it for the Flesch-Kincaid Reading Level. I want to know its exact word count…overall and in specific spots. It’s so much easier to do this in Microsoft Word.
3. I want to dissect it. I want to plot its structure and its pace and its format. Then after that this will help me plot out my own outline for my own story before I write it. Over the years, I’ve had to plot out my stories and articles for publishers before I write one single word so that they can approve or tweak or change it before I start to write it. At first, this was such a pain. But over the years I’ve learned how essential this process it to writing a successful story that pops and sizzles with pizzazz. So I’m planning to do this with this article as well.
So now it’s your turn. If you haven’t done this yet, take that article you tucked away in the file folder, “Sample Article to Target” that was published fairly recently in Highlights.
Type it out, word for word.
Then come back here ’cause in my next post we’re going to talk stats and analyze that article.


September 30, 2013
Highlights: Check-off List Part 4
The final item on my check-off list for the Contributors Guidelines for submitting nonfiction to Highlights magazine is here:
• We encourage authors to have their articles reviewed by an expert before submission. Please include the expert’s response.
o I have 3 main places I will contact for this:
o Two museums on my subject.
o One author who is an expert on my subject. (I will contact the author’s publisher to see how to contact him.)
Once again, this scares most writers. But hey…this is also a necessary skill we must acquire as writers of nonfiction.
So go ahead and gear up for this final step after your manuscript has been written and polished. You might actually discover how fun it is to connect with people who are experts on the topic you’re writing about!
Think of potential people now, at this stage of the journey, that you can contact when you reach that final stage.
Museums, historic sites, historic libraries, university libraries, authors of books…all these places and people are great contacts for getting an expert’s response to your article.
And hey…if you REALLY want to be efficient and speed up the process when you get there, you can even contact these people now! Just call them or e-mail them and tell them you’re writing a nonfiction article and will need an expert’s opinion on it after it’s done. Ask if they might be interested in helping you.
But don’t feel like you have to do this now. There will be plenty of time to do this in the days up ahead. Especially if you’re working on this project for the goal of Personal Fulfillment, like I am.


September 28, 2013
Yes! You Can Celebration
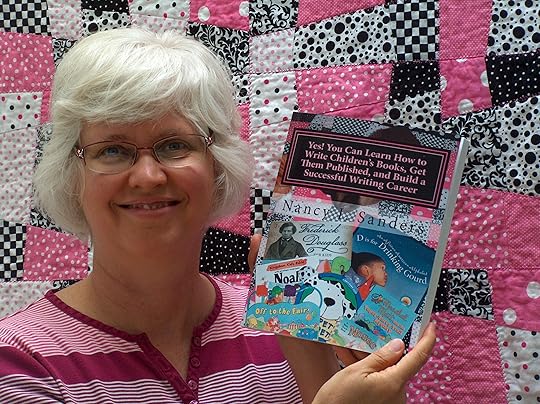
As many of you know, my first how-to book for children’s writers, Yes! You Can Learn How to Write Children’s Books, Get Them Published, and Build a Successful Writing Career has recently been re-released.
Over the upcoming weeks I’ll be posting here on my blog some fun ways to celebrate and get the news out about it. For starters, I thought it could be fun to have a 5-Star Review Swap. Here’s how it works:
5-Star Review Swap
If you’ve read my book and want to post a 5-star review on it on Amazon, that would be super! (Even if you posted a review on Amazon already, you’d need to post another one since those reviews don’t show up for this version of the book.)
If you post a 5-star review on my book and YOU have a book up on Amazon that you’d like me to post a 5-star review on, just let me know! I’d love to return the favor! You can post a comment here and let me know the title of your book, or e-mail me privately at jeffandnancys@gmail.com.
We can swap 5-star reviews and help each other’s books get in the hearts and hands of our readers.
Just a note on the types of books I like to review:
Picture books
Children’s books that are sweet with positive values
Christian books
How-to-write books
I don’t do violent or horror or romance or other types of religions or ghost stories
So what do you say? Let’s help market each other’s books by posting 5-star reviews on Amazon!


September 27, 2013
Highlights: Check-off List Part 3
This next part of the check-off list for the Contributor’s Guidelines for Highlights is a stumbling block for many writers. I know. Because it’s not on my top 10 list of things I want to do as a writer.
But it’s an actual skill I need to learn how to do as a writer, and I’ve learned some tips and techniques over the years as I’ve had to acquire photographs for some of my articles and books.
Here’s the note I wrote myself on this one:
• Color 35mm slides, photos or art-reference materials are helpful and sometimes crucial in evaluating submissions. Digital images should be no less than 300 dpi.
o I’m making a note to spend time researching photographs. My subject has free photos found in the Library of Congress. I also took photographs when I visited the historic sites and museums (I can contact them about obtaining permission to use them). Also, I know places that offer photos of my subject for a small fee.
Whoa! Does this sound like opening a can of worms or what?!
If this leaves you squirming in your writer’s chair, don’t despair. Schedule in some time for yourself in the days ahead to start digging in and looking around for potential photographs that you can recommend with the article you’ll be writing for Highlights.
For some real tips and a chuckle, check out what my writing buddies have to say about this at Writing According to Humphrey and Friends.
And one more note…you might already know this, but I didn’t until recently, so I want to share this with you.
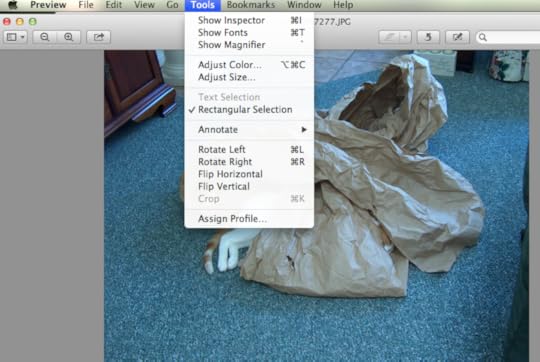
I have a Mac. See if this works for your Windows computer, too.
Put a photograph on your desktop as a jpg file.
Double click on the photo so it opens up as a big picture on your screen.
You’ll see “PREVIEW” across the top.
In that toolbar, click on “Tools.”
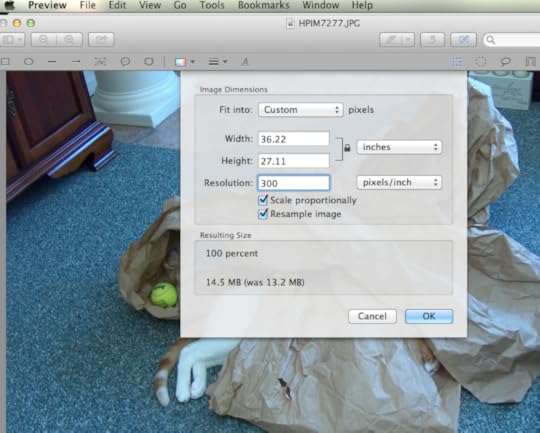
A dropdown menu appears. Click on “Adjust size.”
A window opens.
In the “Resolution” box type in 300.
Be sure it says next to that “pixels/inch.”
Click “OK” and click save.
That’s one way you can adjust the size of your photo to be 300 dpi as Highlights requires. Eventually, you’ll want to double-check with them or with your other publishers to see if this works.


Nancy I. Sanders's Blog
- Nancy I. Sanders's profile
- 76 followers


