
Kayla I. Shown-Dean's Blog, page 29
April 4, 2023
Why Twitter Isn’t Working With Your Blog (Right Now)
Update: We have regained access to the Twitter API, and Jetpack Social should be fully functional on all sites again!Please read our latest post here and reach out to support if you continue to have issues.
On April 3, Twitter suspended WordPress.com’s access to the Twitter API without warning. As a result, Jetpack Social — the built-in tool that we use to auto-share your posts to social media — is currently broken for Twitter. This means that auto-posting to Twitter via WordPress.com is not actively working.
Thankfully, this issue is isolated to Twitter, which means that Jetpack Social connections to other platforms are unaffected. Rest assured that you can continue sharing to Tumblr, Facebook, and LinkedIn without interruption.
You’re most likely to encounter this when publishing a new post. You’ll see this alert in the pre-publish sidebar:
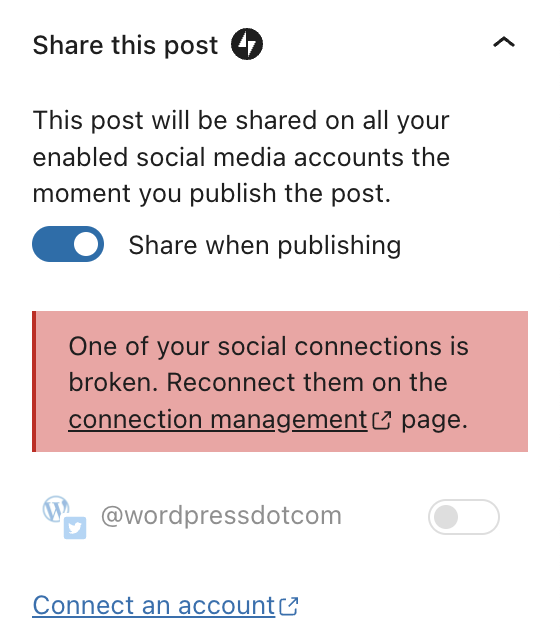
Reconnecting won’t work at this time, nor will trying to establish a new connection.
We want you to know that we’re on top of this and working hard to find a solution. We’ll keep this post updated as we get more information.
In the meantime, if you haven’t checked out Tumblr recently, now is a great time to do so! While some social media companies have made recent decisions that adversely affect users’ experience, we’re constantly adding great new features and amping up what’s possible on Tumblr.
We know that social sharing is vitally important for spreading the word about your work, and we’re sorry for any inconvenience this causes. Thank you for your patience as we work to get everything back up and running.


March 27, 2023
Special Webinar on March 28: WooCommerce 101 — How to Set Up a Store
Are you taking your first steps in selling a product or service online and don’t know where to start? Be sure to register for our upcoming WooCommerce 101 webinar, where our expert Happiness Engineers will walk you through everything you need to know about setting up an online store with WooCommerce and WordPress.com managed hosting.
Webinar details Date: Tuesday, March 28, 2023 Time: 16:00 UTC | 18:00 CEST | 12pm EDT | 9:00am PDT Cost: FreeWho’s invited: business owners, entrepreneurs, freelancers, service providers, store owners, and anyone else who wants to sell a product or service online.Register to attend!What you’ll learnWhether you’re an e-commerce veteran or this is your first business, join us for the inside scoop on launching a store that’s fully customizable, completely yours, and ready to grow from the start. In this live webinar, our Happiness Engineer will demonstrate how to:
Instal Woo on your existing WordPress siteUse the setup wizard to get up and running fastSet up simple products, basic shipping, and tax supportCollect payments through WooCommerce Payments and other gatewaysNo previous e-commerce experience is necessary, but we recommend a basic familiarity with WordPress.com to ensure you can make the most from the webinar. A Q&A session will follow the walkthrough, so be sure to bring any questions you might have!
Seats are limited, so register now to reserve your spot. See you then!
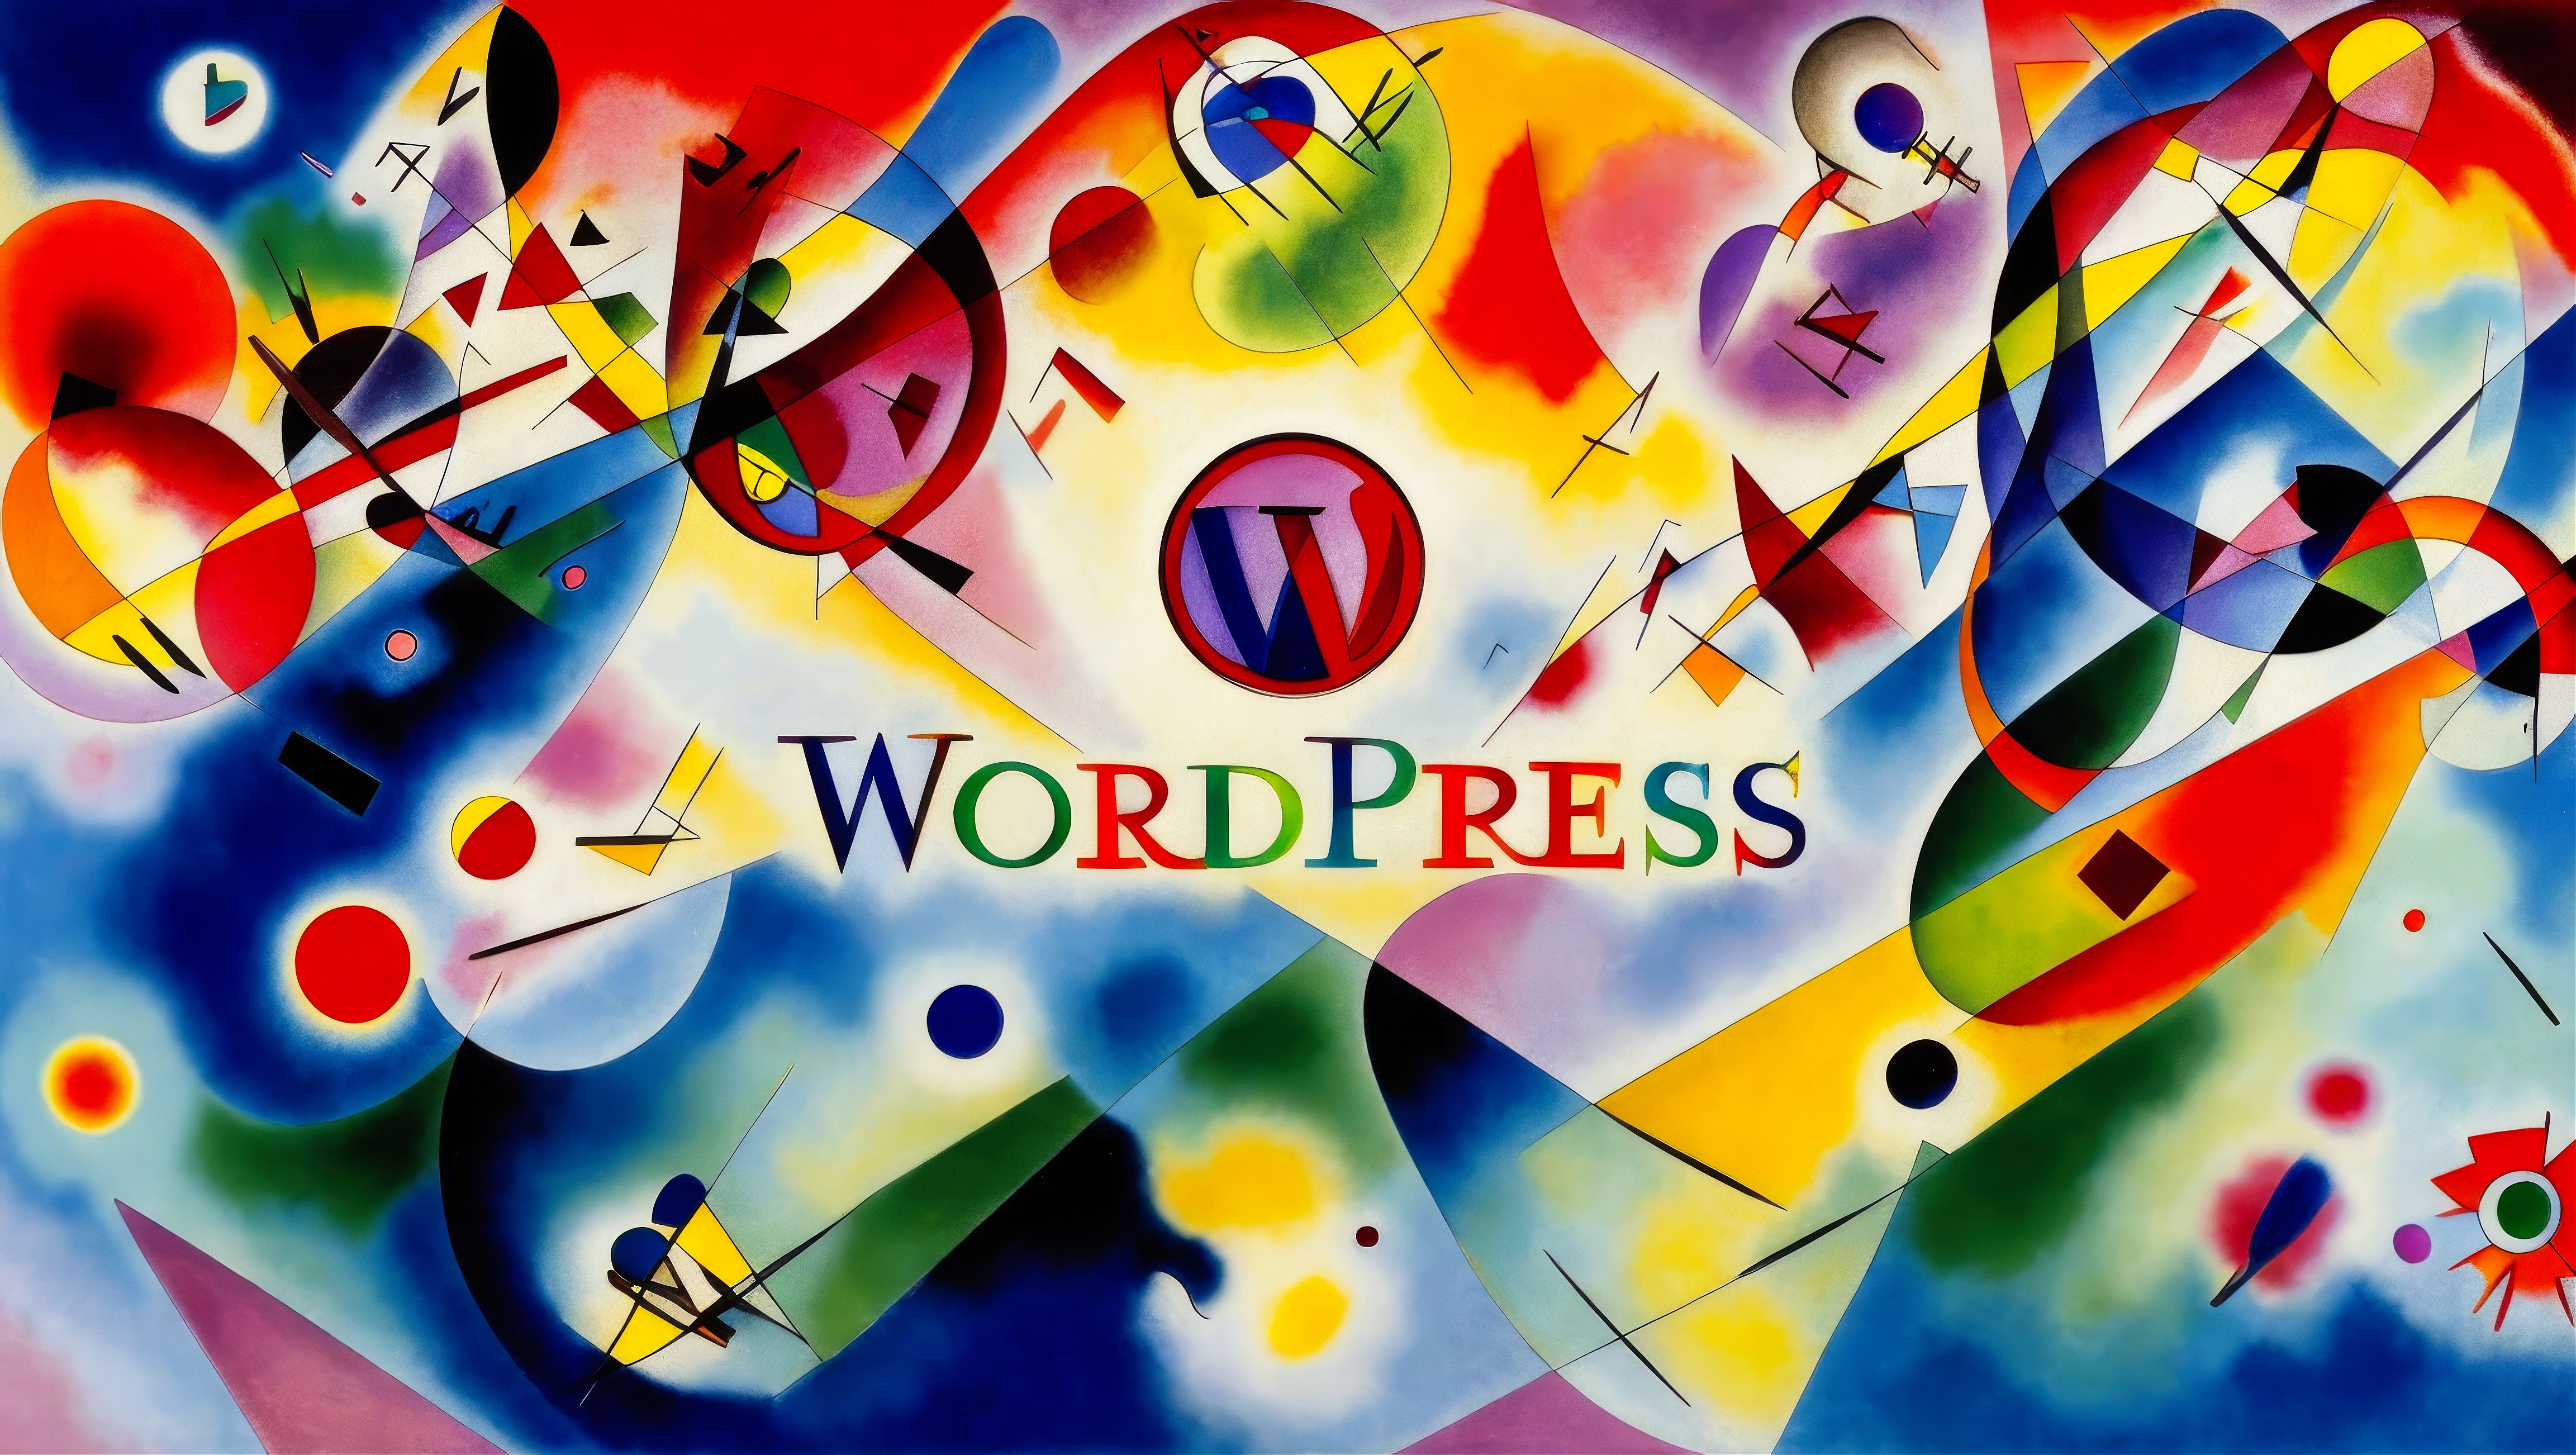
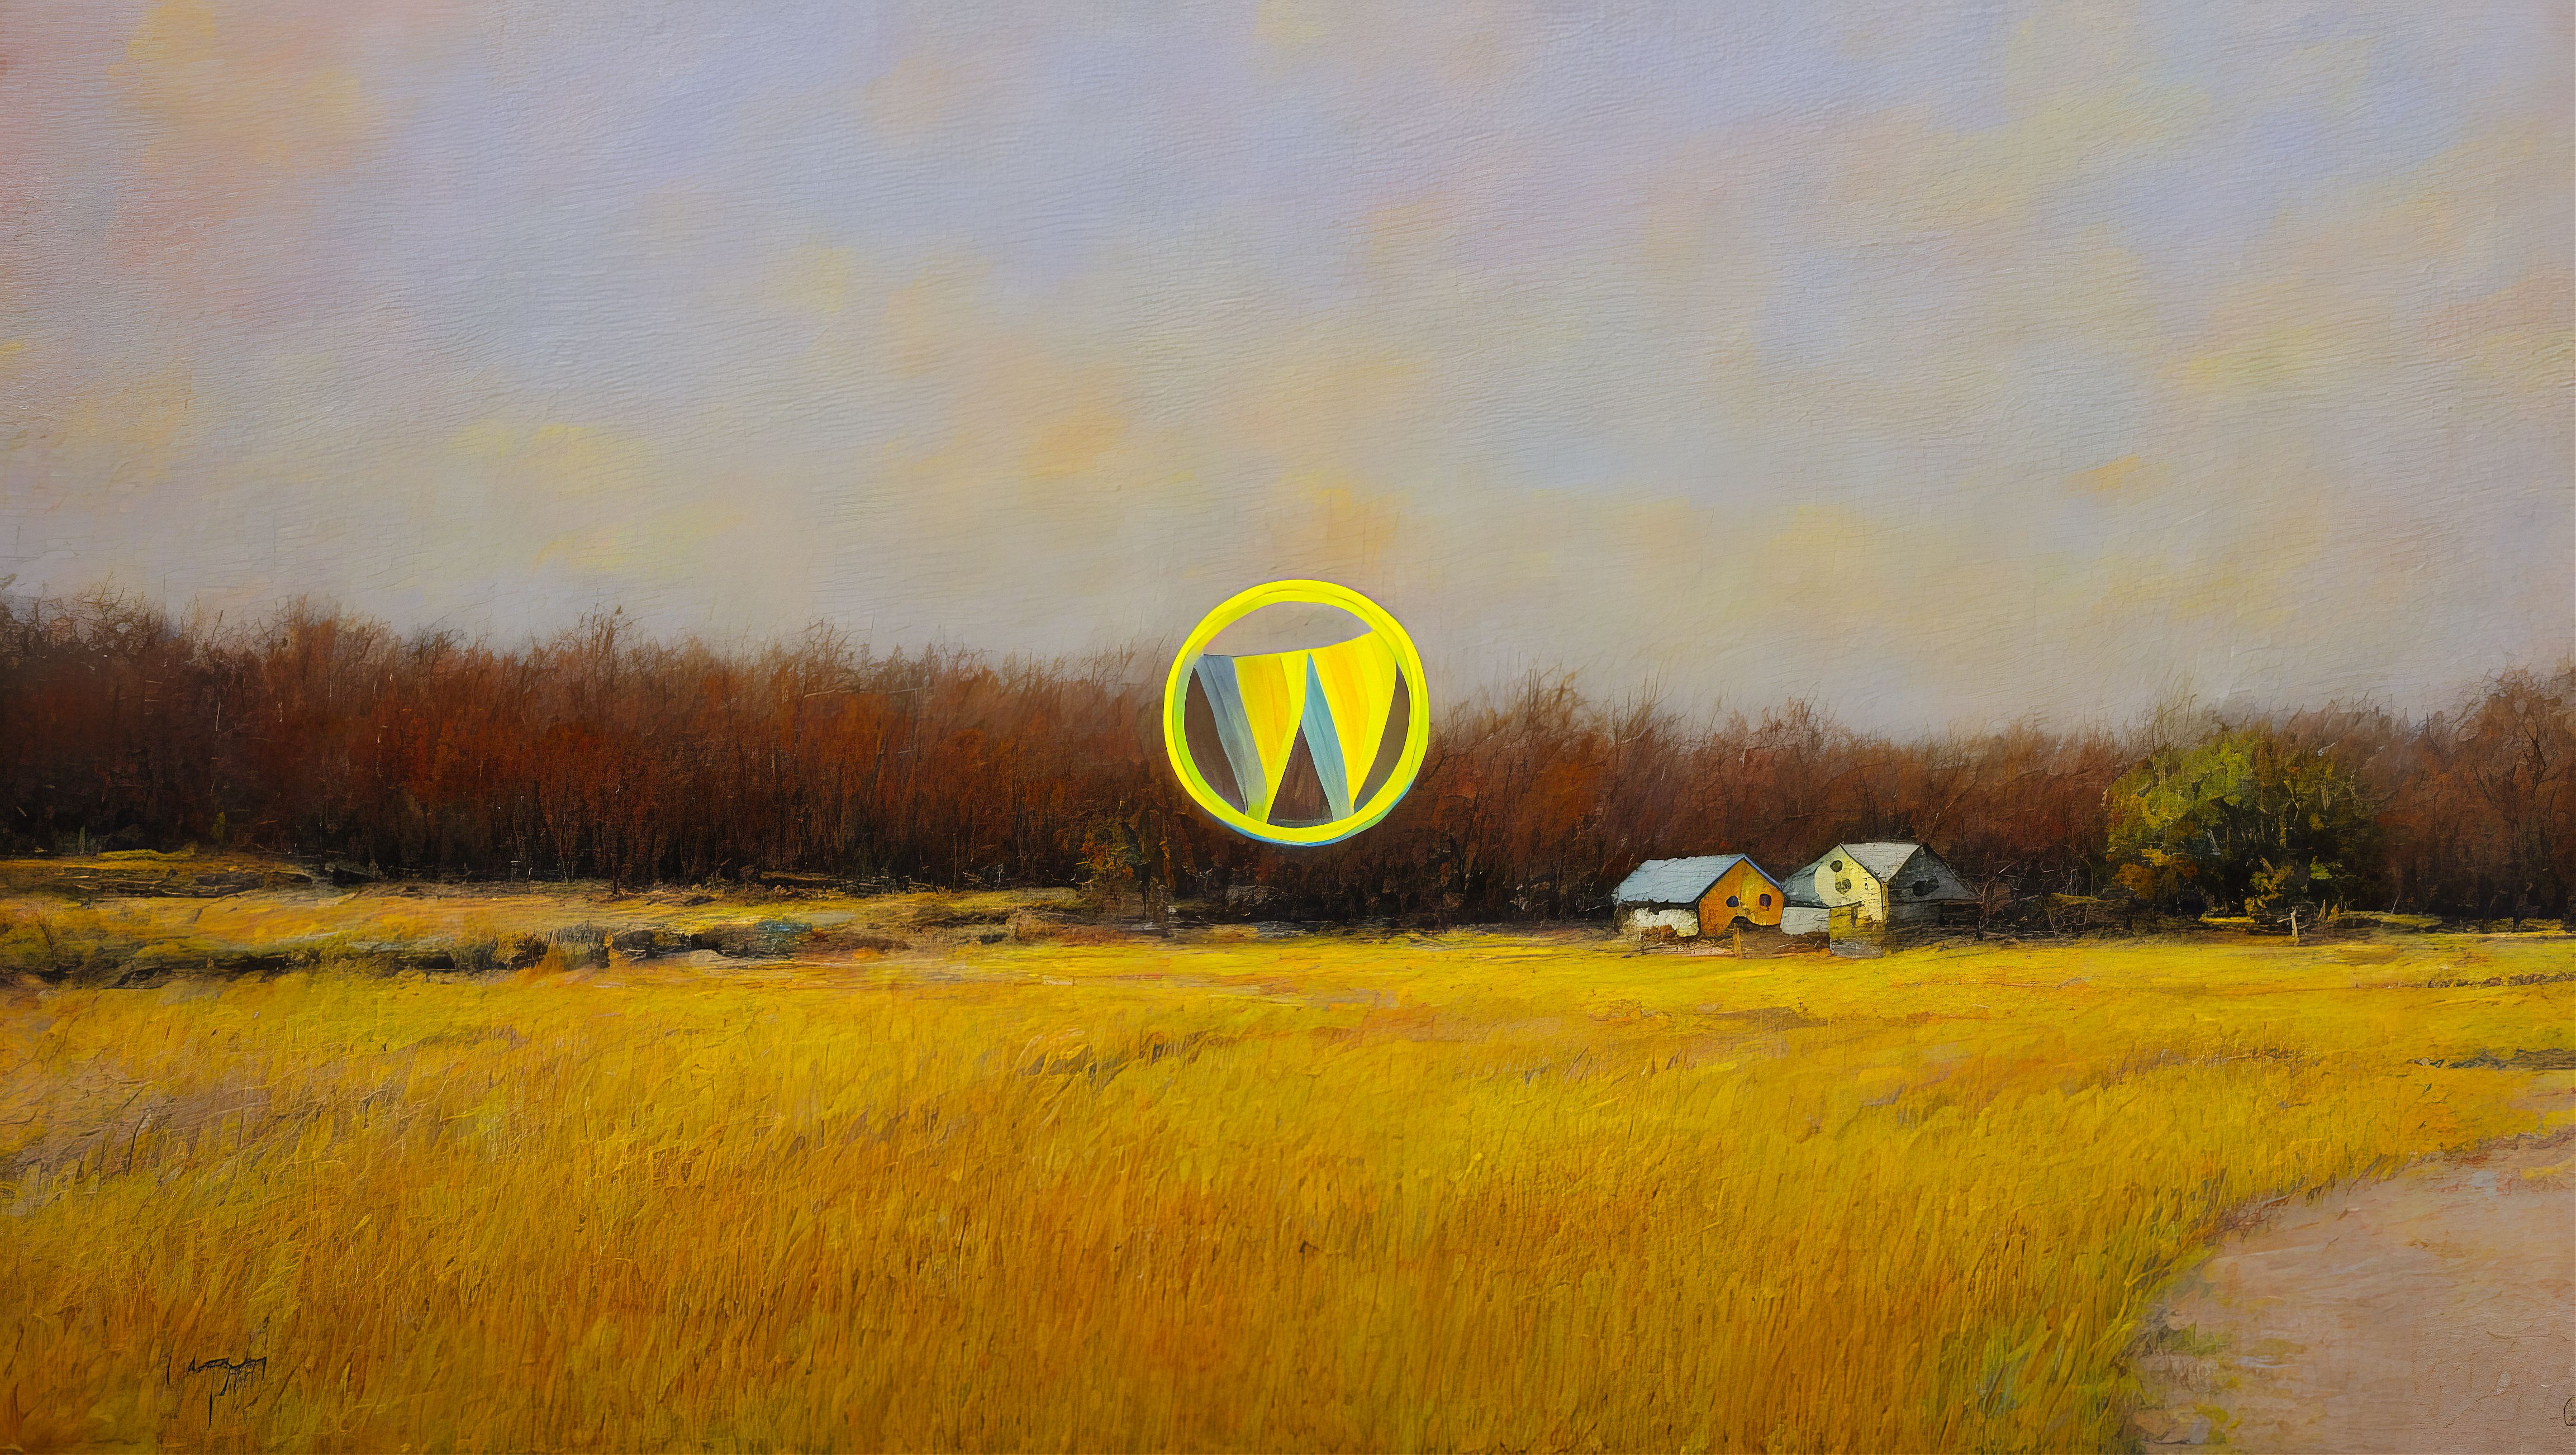
WordPress wallpapers
Has your desktop been looking a bit drab lately? If so – or if you’d just like to show a little WordPress love – we’ve got just the remedy: 30 one-of-a-kind WordPress desktop wallpapers to breathe new life into your backgrounds.
The wallpapers


 Download and install
To add a wallpaper to your desktop:
Click on any image to open a fullscreen carouselRight-click the image if you’re using Windows or Linux, or command-click on a MacSave the wallpaper to your favorite folderAnd set it as your desktop wallpaper (Windows / Ubuntu / MacOS)About the wallpapersThe wallpapers are a homage to some of our favorite artists, with a nod to the freedom, innovation, and creativity of open-source software.
We put these together with an entirely open-source AI tool called Stable Diffusion. Like WordPress, Stable Diffusion is all about helping more people to create, experiment, and share, while having the freedom to access and contribute to the code making it all happen.
Over to youWe’d love to hear what you think, and if you have any favorites. Of course, please feel free to remix, use these on your blog, or share your work in the comments!
March 20, 2023
Sell Courses and Create Interactive Content on WordPress.com
One of the biggest benefits of our Business and Commerce plans is that you can add additional WordPress plugins to enhance the functionality of your website.
Below, we’re highlighting two of the newest additions to our plugin marketplace, now available at a hefty exclusive discount for WordPress.com users.
Create courses with Sensei Pro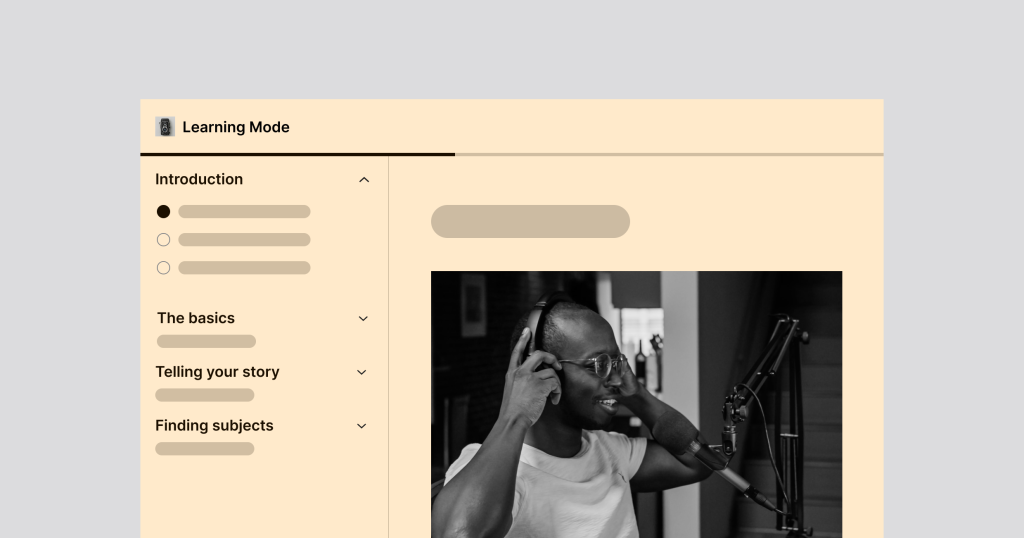
Automattic, the same company behind WordPress.com, creates Sensei LMS. We’ve collaborated to bring our Learning Management System and course creation tools to WordPress.com sites in one seamless experience.
With Sensei Pro, you can create online courses with quizzes, certificates, cohorts, and detailed student reports. Lessons are edited just like WordPress posts or pages, so you will already know how it works.
You can enable the distraction-free Learning Mode to provide students with an optimized mobile-friendly learning environment that keeps your course content front and center.
Sell courses with WooCommerce integration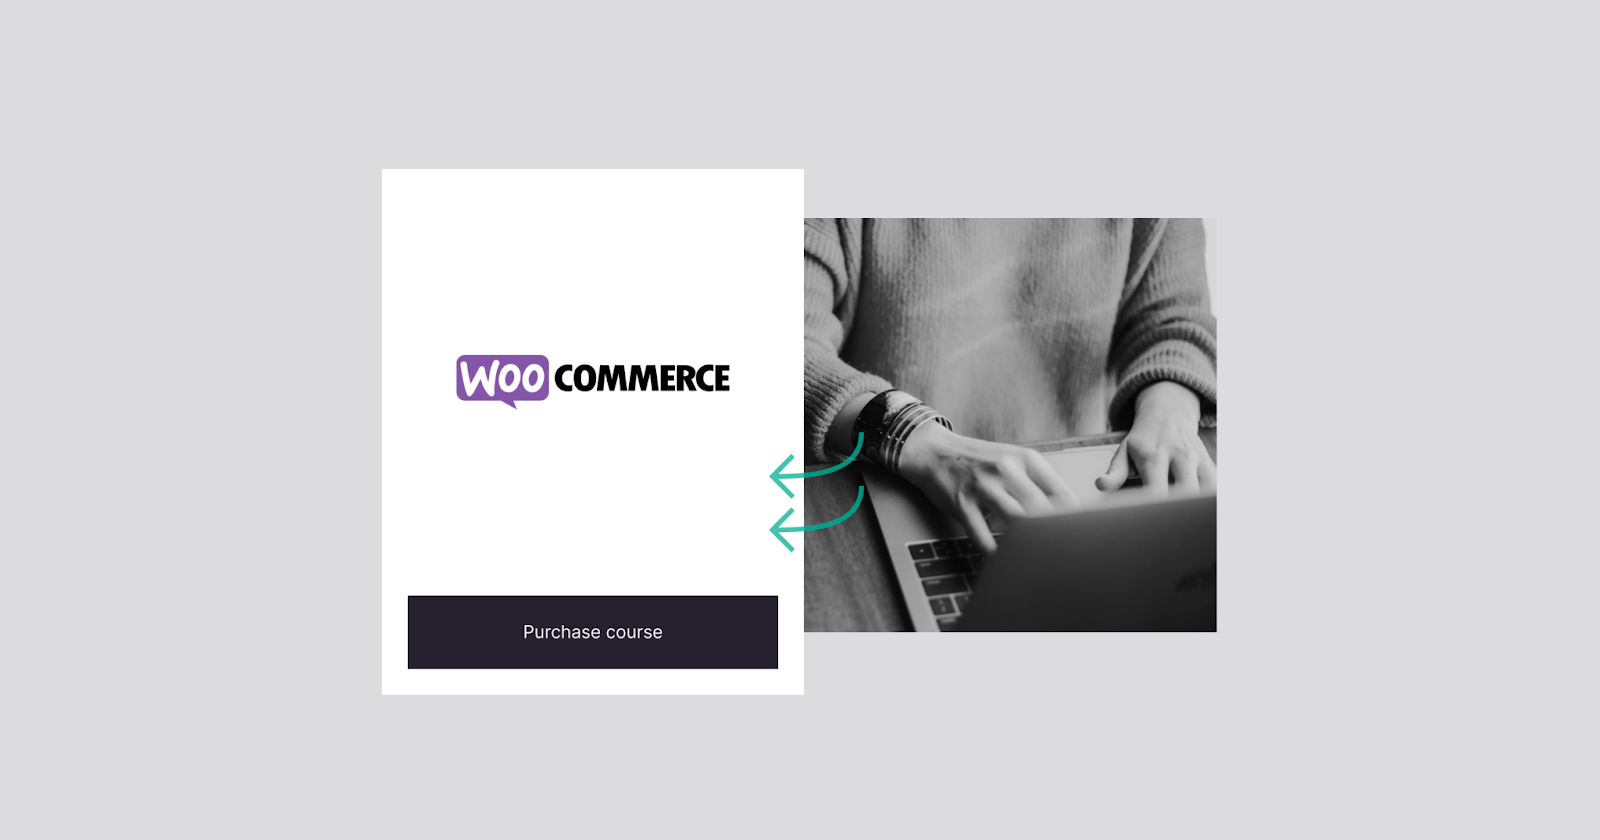
Selling courses can be a lucrative way to generate revenue for your blog or business. Sensei LMS integrates deeply with our WooCommerce suite of tools to make selling access to a course a breeze.
You can also take advantage of WooCommerce extensions to handle coupons, memberships, subscriptions, and more.
Learn more about WooCommerce and Sensei integration.
Publish interactive and private videosVideos are often a big part of online courses. WordPress.com sites also come with our VideoPress service, which lets you upload videos directly to your site without dealing with a third-party tool or embed codes. Especially important for video courses, you can mark a video as “private” to ensure it won’t be downloaded or linked to, and will only be available to course students.
Even better, with Sensei’s Interactive Videos block, you can create pause points with additional content to any video. For example:
Add a quiz question in the middle of a course video. Add a contact form to the end of a sales video.Show links to additional resources to a blog post video.Add Interactive Videos to any WordPress page or post. They are not limited to courses or lessons.
Learn more about Interactive Videos.
Engage with interactive blocks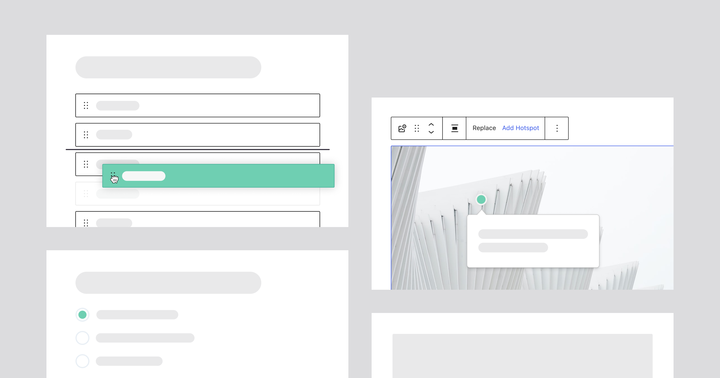
In addition to the Interactive Videos, Sensei also comes with interactive and educational content blocks, including:
Quiz questionsAccordionsImage hotspotsFlashcardsTask listsUsing these blocks, you can craft compelling content that captivates and keeps your readers engaged. Whether writing an educational blog post or creating a sales landing page, you can add these blocks to any WordPress page or post.
Learn more about Interactive Blocks.
Getting Sensei Pro and Sensei BlocksFor existing sites on WordPress.com, you’ll find Sensei’s plugins in the plugin marketplace. WordPress.com users receive a 30% discount on Sensei Pro automatically.
Sensei Pro — all course creation tools and interactive blocks included. Get Sensei Pro here.Sensei Interactive Blocks — interactive videos, accordions, image hotspots, flashcards, and task lists. Creating courses is not needed to be able to use these blocks. Get Sensei Interactive Blocks here.March 17, 2023
Making the Social Web a Better Place: ActivityPub for WordPress Joins the Automattic Family
We’re excited to announce that Automattic, the parent company of WordPress.com, has acquired the popular WordPress plugin ActivityPub.
This innovative plugin brings a whole new level of social networking to your website by integrating it with the wider federated social web. When installed, the plugin allows you to easily share your content and interact with users on Mastodon and other platforms that also support the ActivityPub protocol.
Just as Automattic aims to do with all of our products, this plugin helps to decentralize the web, break down silos, and foster a more connected online ecosystem.
Why you should use the ActivityPub pluginIf you’re a blogger or content creator who wants to reach a wider audience, the ActivityPub plugin is perfect for you. Just as Jetpack Social — another one of our great plugins! — automatically shares content to large social networks like Twitter, Facebook, and LinkedIn, ActivityPub automatically allows anyone on a federated network to follow your blog’s posts, which will show up in their Home feed. The federated networks include:
MastodonPleromaFriendicaHubZillaPixelfedSocialHomeMisskeyResponses on those platforms show up in your WordPress post’s comments, allowing you to interact directly with readers across the fediverse, streamlining engagement and creating a more cohesive online presence.
Moreover, in using ActivityPub for WordPress, you’re supporting the open source movement, promoting transparency and collaboration, and empowering users to take control of their online experience and contribute to a more diverse and inclusive internet landscape.
How to install ActivityPub for WordPress
Installing the ActivityPub plugin is a breeze, even if you’ve never added a plugin before.
1. From your dashboard’s left-side menu, navigate to the plugin marketplace and search “ActivityPub” (all one word). Alternatively, you can click here and go directly to the plugin page.
2. Click “Install and activate.”
3. Once activated, you can click “Manage plugin,” which allows you to choose the type of content that will show up in fediverse feeds — if you’re not quite ready for that, you can always access it later under “Settings” → “ActivityPub.”
At Automattic, our philosophy has always been to democratize publishing and make the web a better place. In our acquisition of ActivityPub for WordPress, we’re doing that for the social web.
March 14, 2023
A Social Experience Anchored by Your Domain
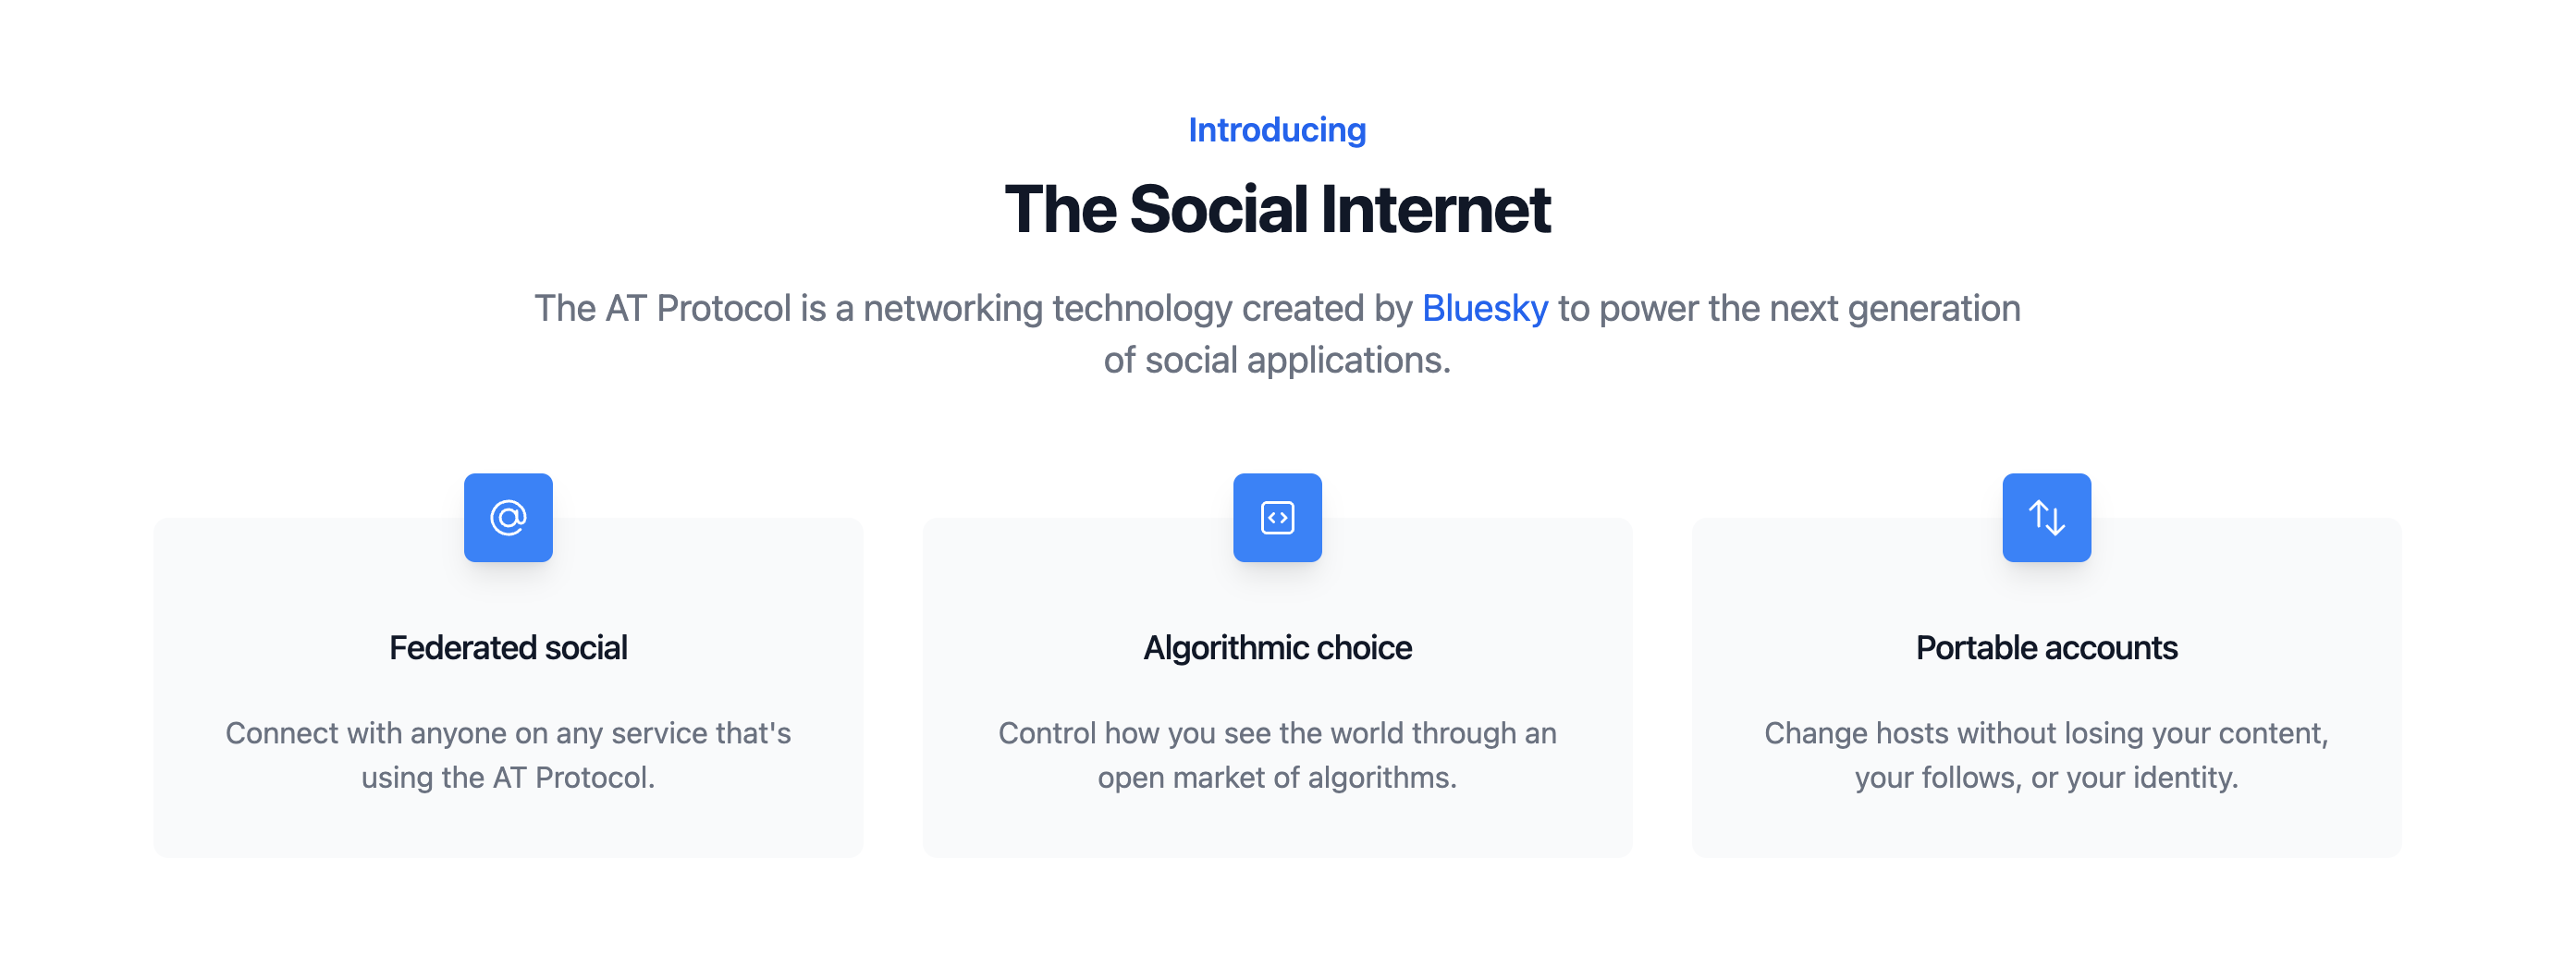
WordPress.com is an organization — like others within Automattic — that is heavily invested in Open Source and the democratization of the web. We genuinely believe that everyone should have control over their presence, their data, and even their social experiences. That’s why we’re really excited about some of the work Bluesky is doing.
What is Bluesky?
We’re building a new foundation for social networking which gives creators independence from platforms, developers the freedom to build, and users a choice in their experience.
blueskyweb.xyz
Think about all of the different pieces tied to any one of your social accounts:
Your username – how people identify you in that platform Your connections/networkThe content you’ve created The media you’ve uploaded The conversations you’ve had with othersYour connections to influencers, brands, and businessesPurchases within a specific platformNow, imagine being able to bring all of that with you when you get frustrated with changes on one social network and rediscover the magic of one you had *almost* forgotten about. 
This is exactly what Bluesky is trying to accomplish with its AT Protocol, and we can’t wait to see how it evolves.
That’s so cool! Why is that cool?So glad you asked!
We’re all probably familiar with the “blue checkmark of officialness” used across may social platforms. It’s essentially a way for users to identify the real accounts for famous and notable people/brands/things.
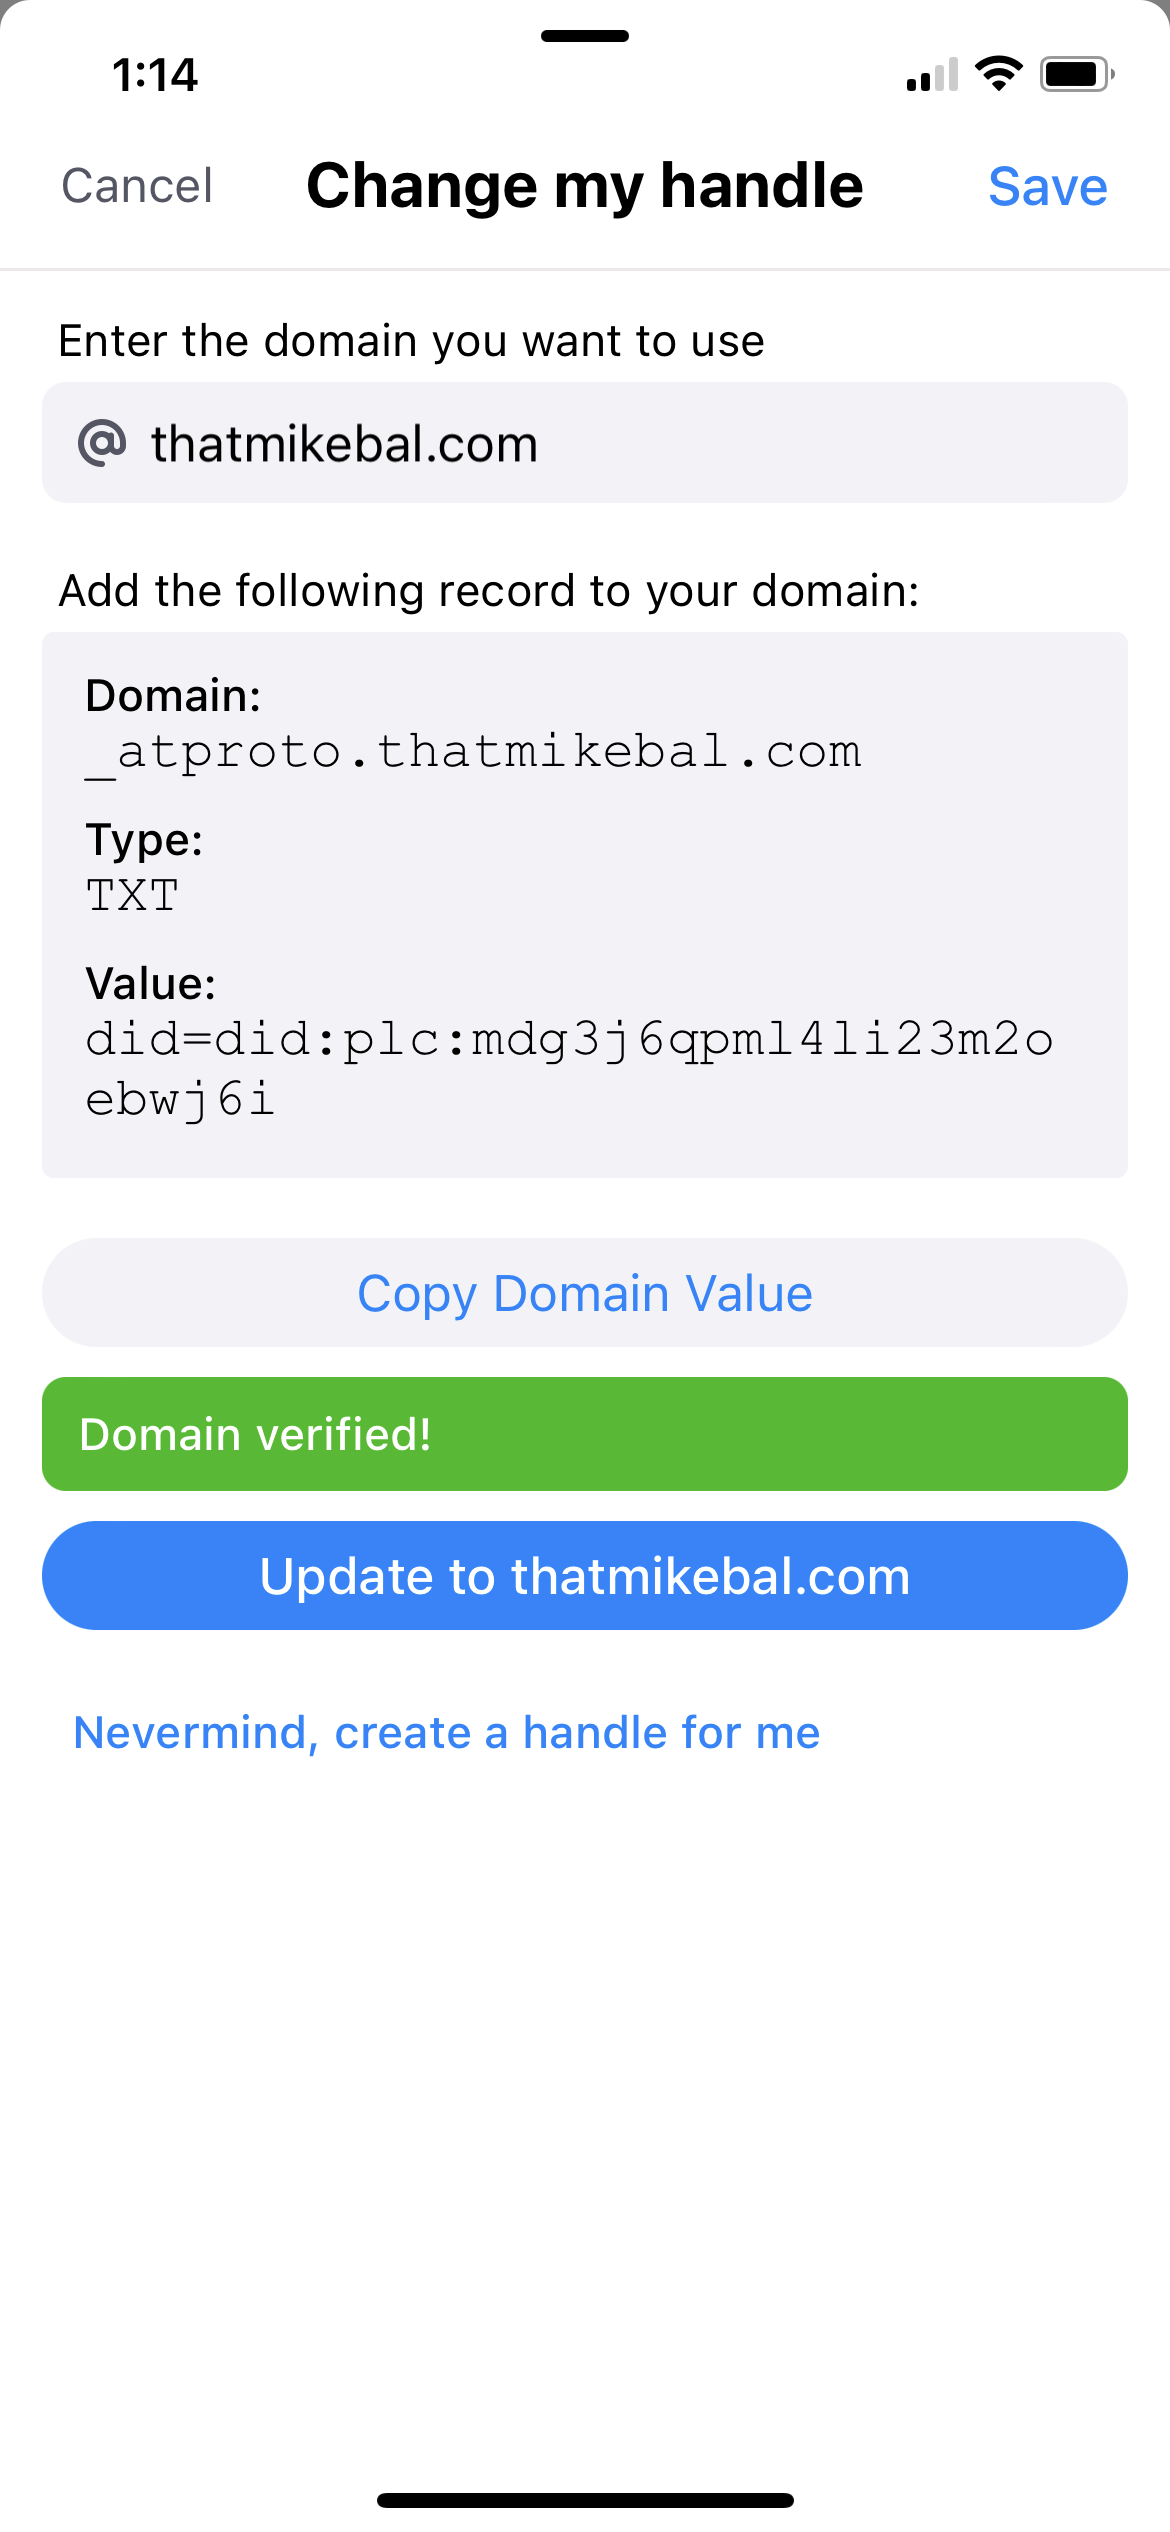
Bluesky lets you claim a domain that you own as your username/handle, and they automatically verify it by checking your domain for a simple text record. That may sound complicated, but it’s actually quite simple — especially on WordPress.com.
Think of it like any kind of certificate you might get, which often requires a signature from you as well as from some sort of official before it’s considered a verified document. It’s just like that, except that instead of collecting dust, this unlocks a digital superpower: a consistent way for anyone to find the real you (potentially) anywhere on the web.
How do I add a text record to my domain?I’ll cover some simple steps for those of you who manage your domains here on WordPress.com. If you have domains registered elsewhere on the web you will have to check that registrar’s documentation. If you’d rather just manage it here, you can check out the steps to transfer it over.
Note: You will need an invitation to join to the private beta of Bluesky before you can set up an account and use this feature.
6 easy stepsStep 1: Navigate to the site that your domain is associated with on WordPress.com — if you only have one site you can simply go to WordPress.com.
Step 2: Use the left hand menu to navigate to Upgrades/Domains.
Step 3: Identify the domain you want to use and click on the vertical elipses on the right. Click “view settings.”
Step 4: Click on the arrow to the right of “DNS Records” to expand the information. Click on “Manage.”
Step 5: Click the “+ Add Record” button at the top of the screen.
Step 6: Change the record type from “A” to “TXT.”
Step 7: Add the Bluesky information to your record.
Add _atproto in the “domain name (optional)” field.Add the Bluesky “Value” in the “Text” field.Step 8: Click the “Add DNS record” button.
I’m always pleasantly surprised by how fast our DNS is. In this case, I was able to verify the record in the Bluesky app less than 30 seconds after I saved it on WordPress.com. Here’s what the app looks like while you’re setting up, after it’s verified, and after you officially update your handle.

If you made it this far, you’re at least a little bit interested. Let us know what piqued your interest in the comments!
March 10, 2023
What’s New on WordPress.com: Fresh Buttons, Sticky Headers, and Time-Saving Shortcuts
At WordPress.com, we’re always pushing our platform to do even more so that you can create, design, and publish amazing things with ease. Our newest features go a little deeper into the settings, making them particularly suited to those who call themselves tinkerers. Even if you don’t think of yourself as a pro, get in there and play around anyway! You’re more capable than you think, and if you break something our team can always get it back — we’ve all been there.
And in this case, a little experimentation can reap big rewards. All it takes is a small change or two to make a huge difference in how people see (and interact with) your website.
Let’s jump in and take a look.
Make your site’s buttons popGiving your buttons a shadow effect is an easy and powerful way to give your pages some extra panache. Now, new preset options available in the Styles menu let you apply that across your site.
From the Styles sidebar, click “Blocks,” and then “Buttons.” From there, you’ll see four options for how to style your buttons. This feature is only available on block themes.

When to use this feature: You’re a master of the CTA (call to action) and you put a button at the end of every blog post asking readers to watch a YouTube video, listen to a podcast, or buy a book. You’ve been thinking that those buttons are looking a little stale and flat. Use the new shadow presets to invigorate your default buttons with a depth and freshness that wasn’t there before.
Reuse a beautiful designNot only can you copy and paste text from one block to another, you can now copy the entire styling of a block — colors, typography, and anything else — and paste it to another block of the same type.
From a block’s settings menu, select “Copy Styles.” Then once you add a new block, select “Paste Styles” from the settings menu to transfer all those design goodies.
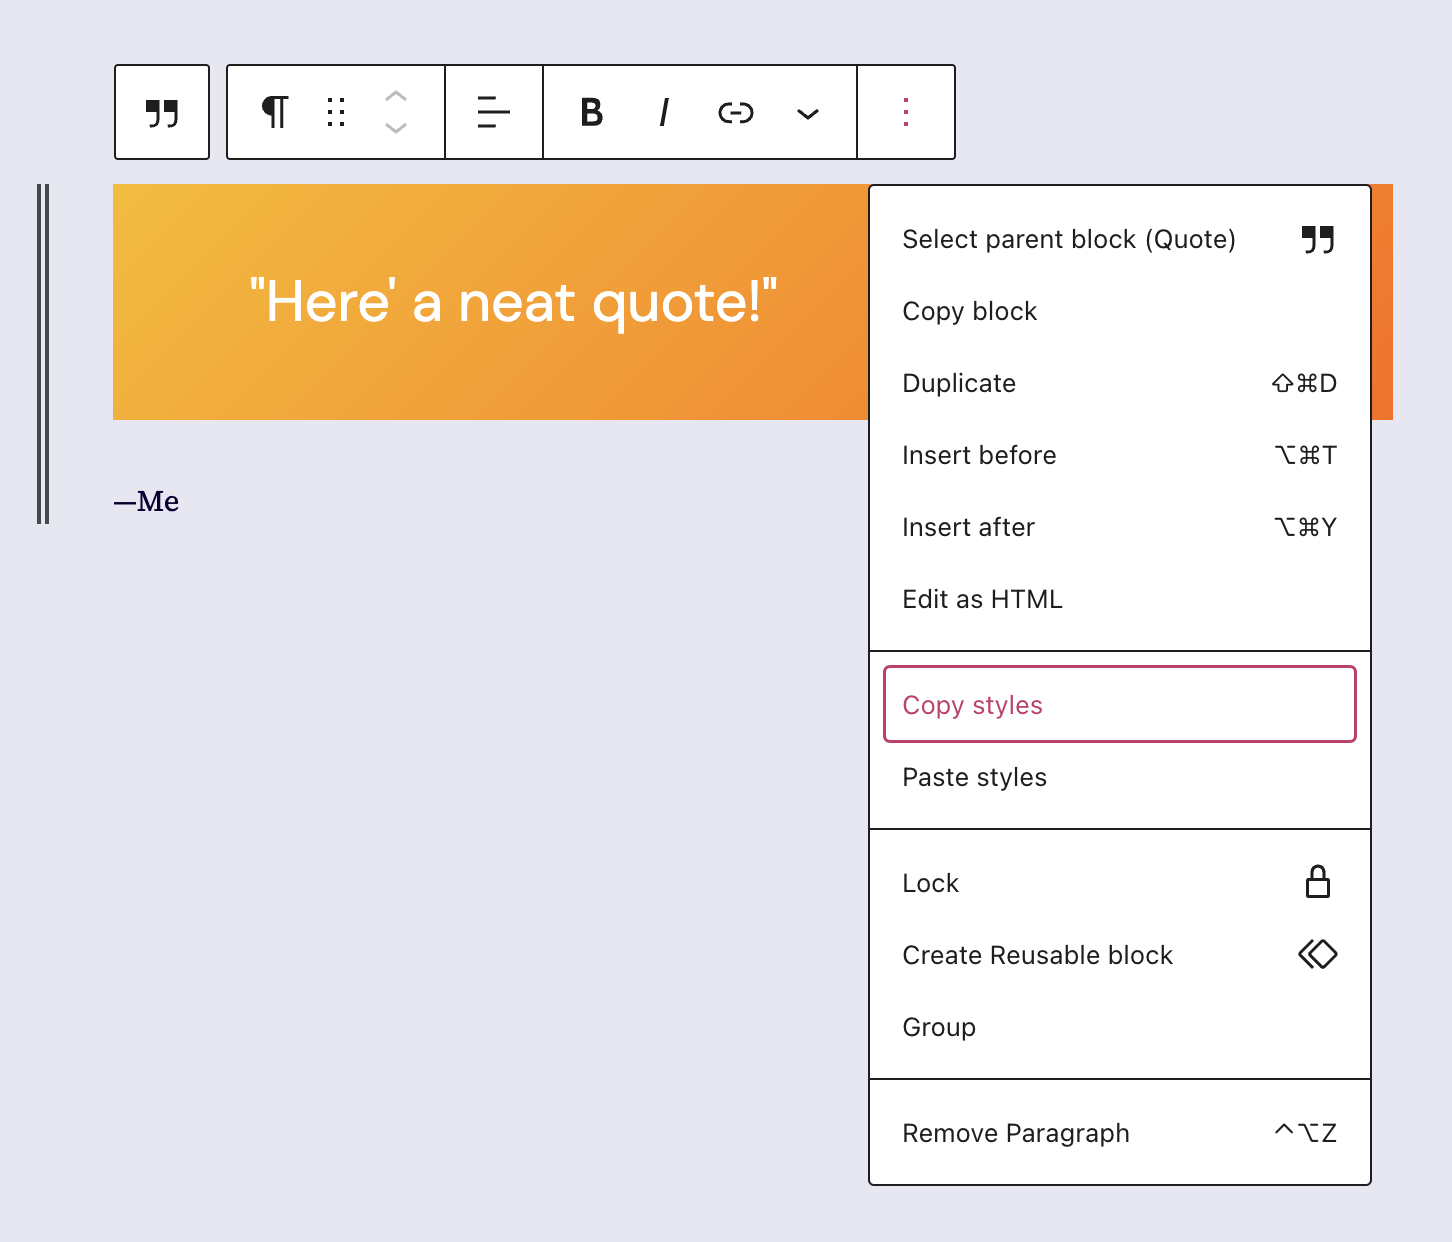
When to use this feature: You’ve spent some time playing with gradients and type settings to make a Quote Block look really nice, and it’s paid off — now you want to bring that primo styling over to a Quote Block on a different page. Rather than recreating the steps you took, simply use “Copy Styles”/”Paste Styles” and get a gold star for efficiency.
Give readers a sticking pointA “sticky” component on your website is a piece of content (often a header + menu, though not always) that stays stuck at the top no matter how far down you scroll through a page or post. It’s a handy feature for visitors to your site, especially on mobile, where scrolling back up to a menu can be annoying.
There are other uses as well, such as an important announcement or promotion that you want visible at all times.
However, only a group can be made sticky rather than any individual template part. So you’ll first wrap your desired sticky blocks in a group, select that group, then access the “Sticky” option from the settings sidebar.
When to use this feature: Your website features long pages or posts that require a lot of scrolling. Maybe you’re a baby name consultant and have numerous lengthy lists of names. Utilize a sticky header and menu so that visitors don’t have to scroll all the way back up in order to quickly access the next category of names to peruse.
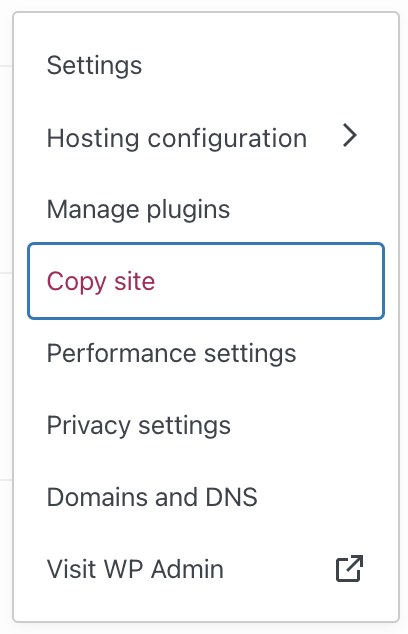
Twice as nice: copy your entire site!Are you a professional in the web-building space? We’ve launched a new feature that allows you to easily copy the entirety of a site. Once you create your base template site, you’ll be able to spin up new client sites without starting entirely from scratch.
An important note: copying a site creates a new plan as well. For instance, copying a business site creates a new business plan at the same time.
From the wordpress.com/sites dashboard, click the three-dot menu, hit “Copy site,” go through a couple confirmation steps, and you’ll be set. This feature is available on Business and Commerce plans with Hosting Features active.
When to use this feature: You’re a solopreneur website builder and you often use previously built sites as inspiration for current builds. If you’re working on a new site and thinking about using a framework or feel that you’ve already created, copy the site with a single click and start the project with some of the work already done.
In Case You Missed ItIf you missed our other recent updates, below is a quick snapshot.
A new mobile experience for WordPress.com
Our new and improved Jetpack mobile app offers everything you need to WordPress on the go.
Professional design, without a designer
This primer on Styles gives you the lowdown on making your website pop in just a few clicks.
A new home for WordPress.com courses
Our courses have a new home at WordPress.com/Learn. The best part? All the courses are totally free and there’s no registration needed.
A more diverse stock photo library
Cocoamattic ERG, an employee resource group at Automattic, partnered with Nappy.co to release a collection of 90+ beautiful photos of Black people interacting with technology.
March 8, 2023
A New Home for WordPress.com Courses
We’re excited to announce that our WordPress.com courses are now available at wordpress.com/learn, with no registration or purchase needed.
The world-class educational offerings available in the new learning hub include:
Get StartedCreate Your SiteIntro to SEOIntro to BloggingIntro to PodcastingAnd there are more courses to come!
This learning hub also provides quick access to our live webinars (and replays) where you can join us for demonstrations, instructions, and Q&As. Get registered today for our March sessions:
Site Editing: Custom HeadersSite Editor vs. Page Editor: Editing your entire site in WordPressCompelling Homepages: Custom layouts using the WordPress block editorBe sure to check the webinars page each month for new topics.
Finally, wordpress.com/learn allows for one-click access to our support documentation, forums, and YouTube channel.
It’s worth repeating: there’s no registration or login required to view any of our materials! It’s as easy as clicking the button below to get started today.
Start Learning!There’s never been a better time to learn the ins and outs of creating a new site, blogging like a boss, podcasting like a pro, and optimizing your content! Join us at wordpress.com/learn to get started on the path towards pursuing your dreams.
February 28, 2023
Changing the Narrative: New Black x Tech Stock Photo Collection
Ask and most small business owners or bloggers will tell you how difficult it can be to find high-quality, openly licensed stock photography for their websites. If a campaign or website calls for diverse and inclusive stock photography, you’ll more than likely come up short.
That’s why WordPress.com is excited to announce the release of the Black x Tech stock photography collection! The Cocoamattic ERG, an employee resource group at Automattic, partnered with Nappy.co to release a collection of 90+ beautiful photos of Black people interacting with technology. Nappy, a company on a mission to increase the representation of Black and Brown people in openly licensed stock photography, was a natural fit to collaborate on the initiative. Nappy co-founder Jacques Bastien is a long time WordPress user, and shares the same passion for open source.


Cocoamattic ERG co-lead Santana Inniss said of the collection, “Cocoamattic is a group that represents Black/African diaspora employees working at Automattic. Part of our mission is to increase representation of Black folks in tech. We know how impactful representation can be, and seeing yourself represented in media about technology can be the jumping off point for getting into a career in tech.”
Seeing that representation of Black folks creating or engaging with technology was sorely lacking in stock photography, Cocoamattic wanted to tackle the problem head on. Santana continues, “Getting a beautiful, authentic collection of stock photos representing Black folks onto WordPress.com was so important to us. We selected Nappy for the synergy of mission, but also because photos on Nappy.co are now indexed through Openverse.org.”
Openverse, an aggregator of openly licensed media, makes the Black x Tech photos accessible from your WordPress.com website via the Media Library, or the Image and Gallery blocks.
 Adding images via the Image Block
 Adding images from the Media Library
If you’re looking to add diverse and inclusive photos to your WordPress.com site, that just got a whole lot easier with the Black x Tech photo collection, brought to you by Cocoamattic x Nappy. You can also view the collection directly on Nappy.co.
February 24, 2023
Design Like a Pro in Just a Few Clicks
Our latest batch of design tools empower you to create a consistently compelling style across your entire website with just a few clicks. Today we’d like to zoom in on the “Styles” settings, which allow you to make sitewide changes and create new style defaults right from the Site Editor.
Professional design without a designerFrom basic options like colors and typography, to more advanced parameters like content dimensions, padding, and block-specific settings, you’re sure to find our style customizations useful no matter your level of design expertise (or lack thereof!).
Though a number of themes come with style variations that you can test out, using custom Styles gives you even more freedom and flexibility to experiment and play around with various design pieces.
Utilizing these settings creates new default styling for elements on your site, such as headings, paragraphs, and buttons. This means that any new pages or posts created will automatically inherit these styles, making the entire process much more efficient. Additionally, any changes you make will be reflected across the entire site, ensuring a consistent look and feel.
Our Site Editor design tools are perfect for those who want to save time and effort while maintaining a consistent look and feel across their website.
Learn more about StylesHow to DIY design, with easeFrom the Site Editor (on the left sidebar, navigate to Appearance → Editor), click the “Edit” button at the top left of the page, and then the Styles icon on the top right. A sidebar will come up with a number of options to explore. (Note: This option may not appear if the theme you’re using isn’t compatible with the Site Editor.)
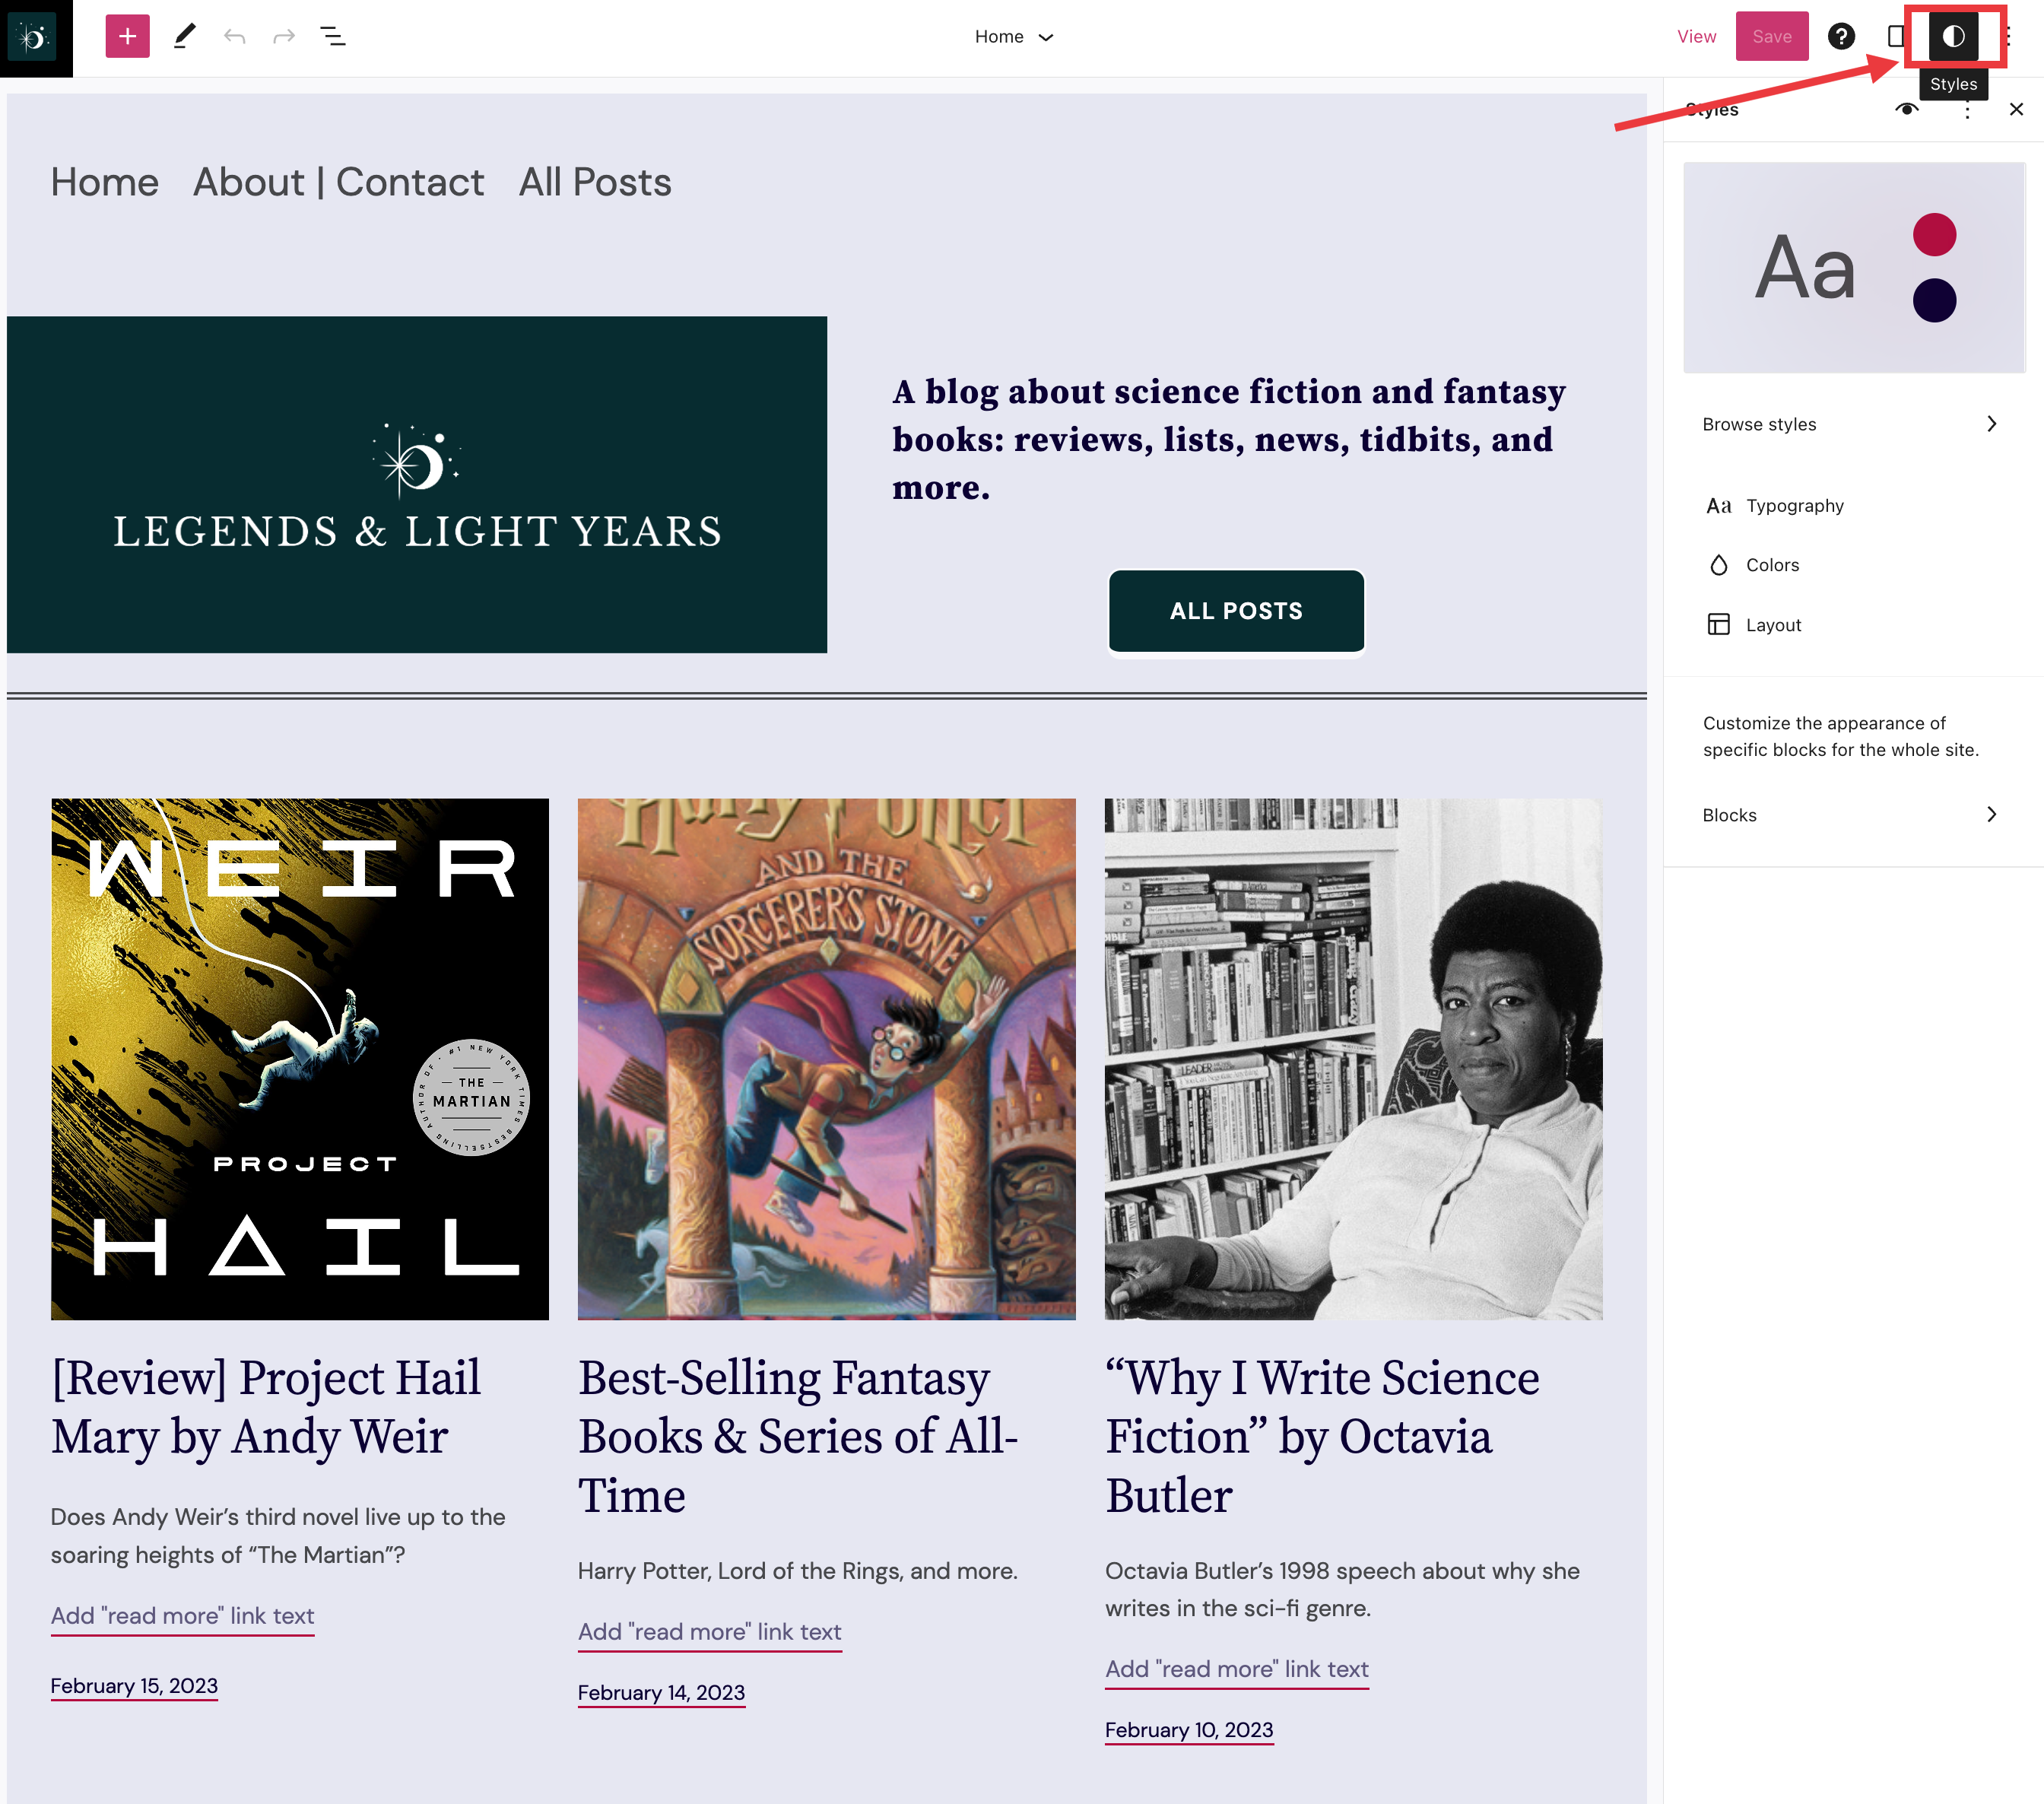
The best place to start is with the Style Book. Using Style Book, you can explore the various color and typography schemes and get a sense for what different blocks will look like before implementing them:
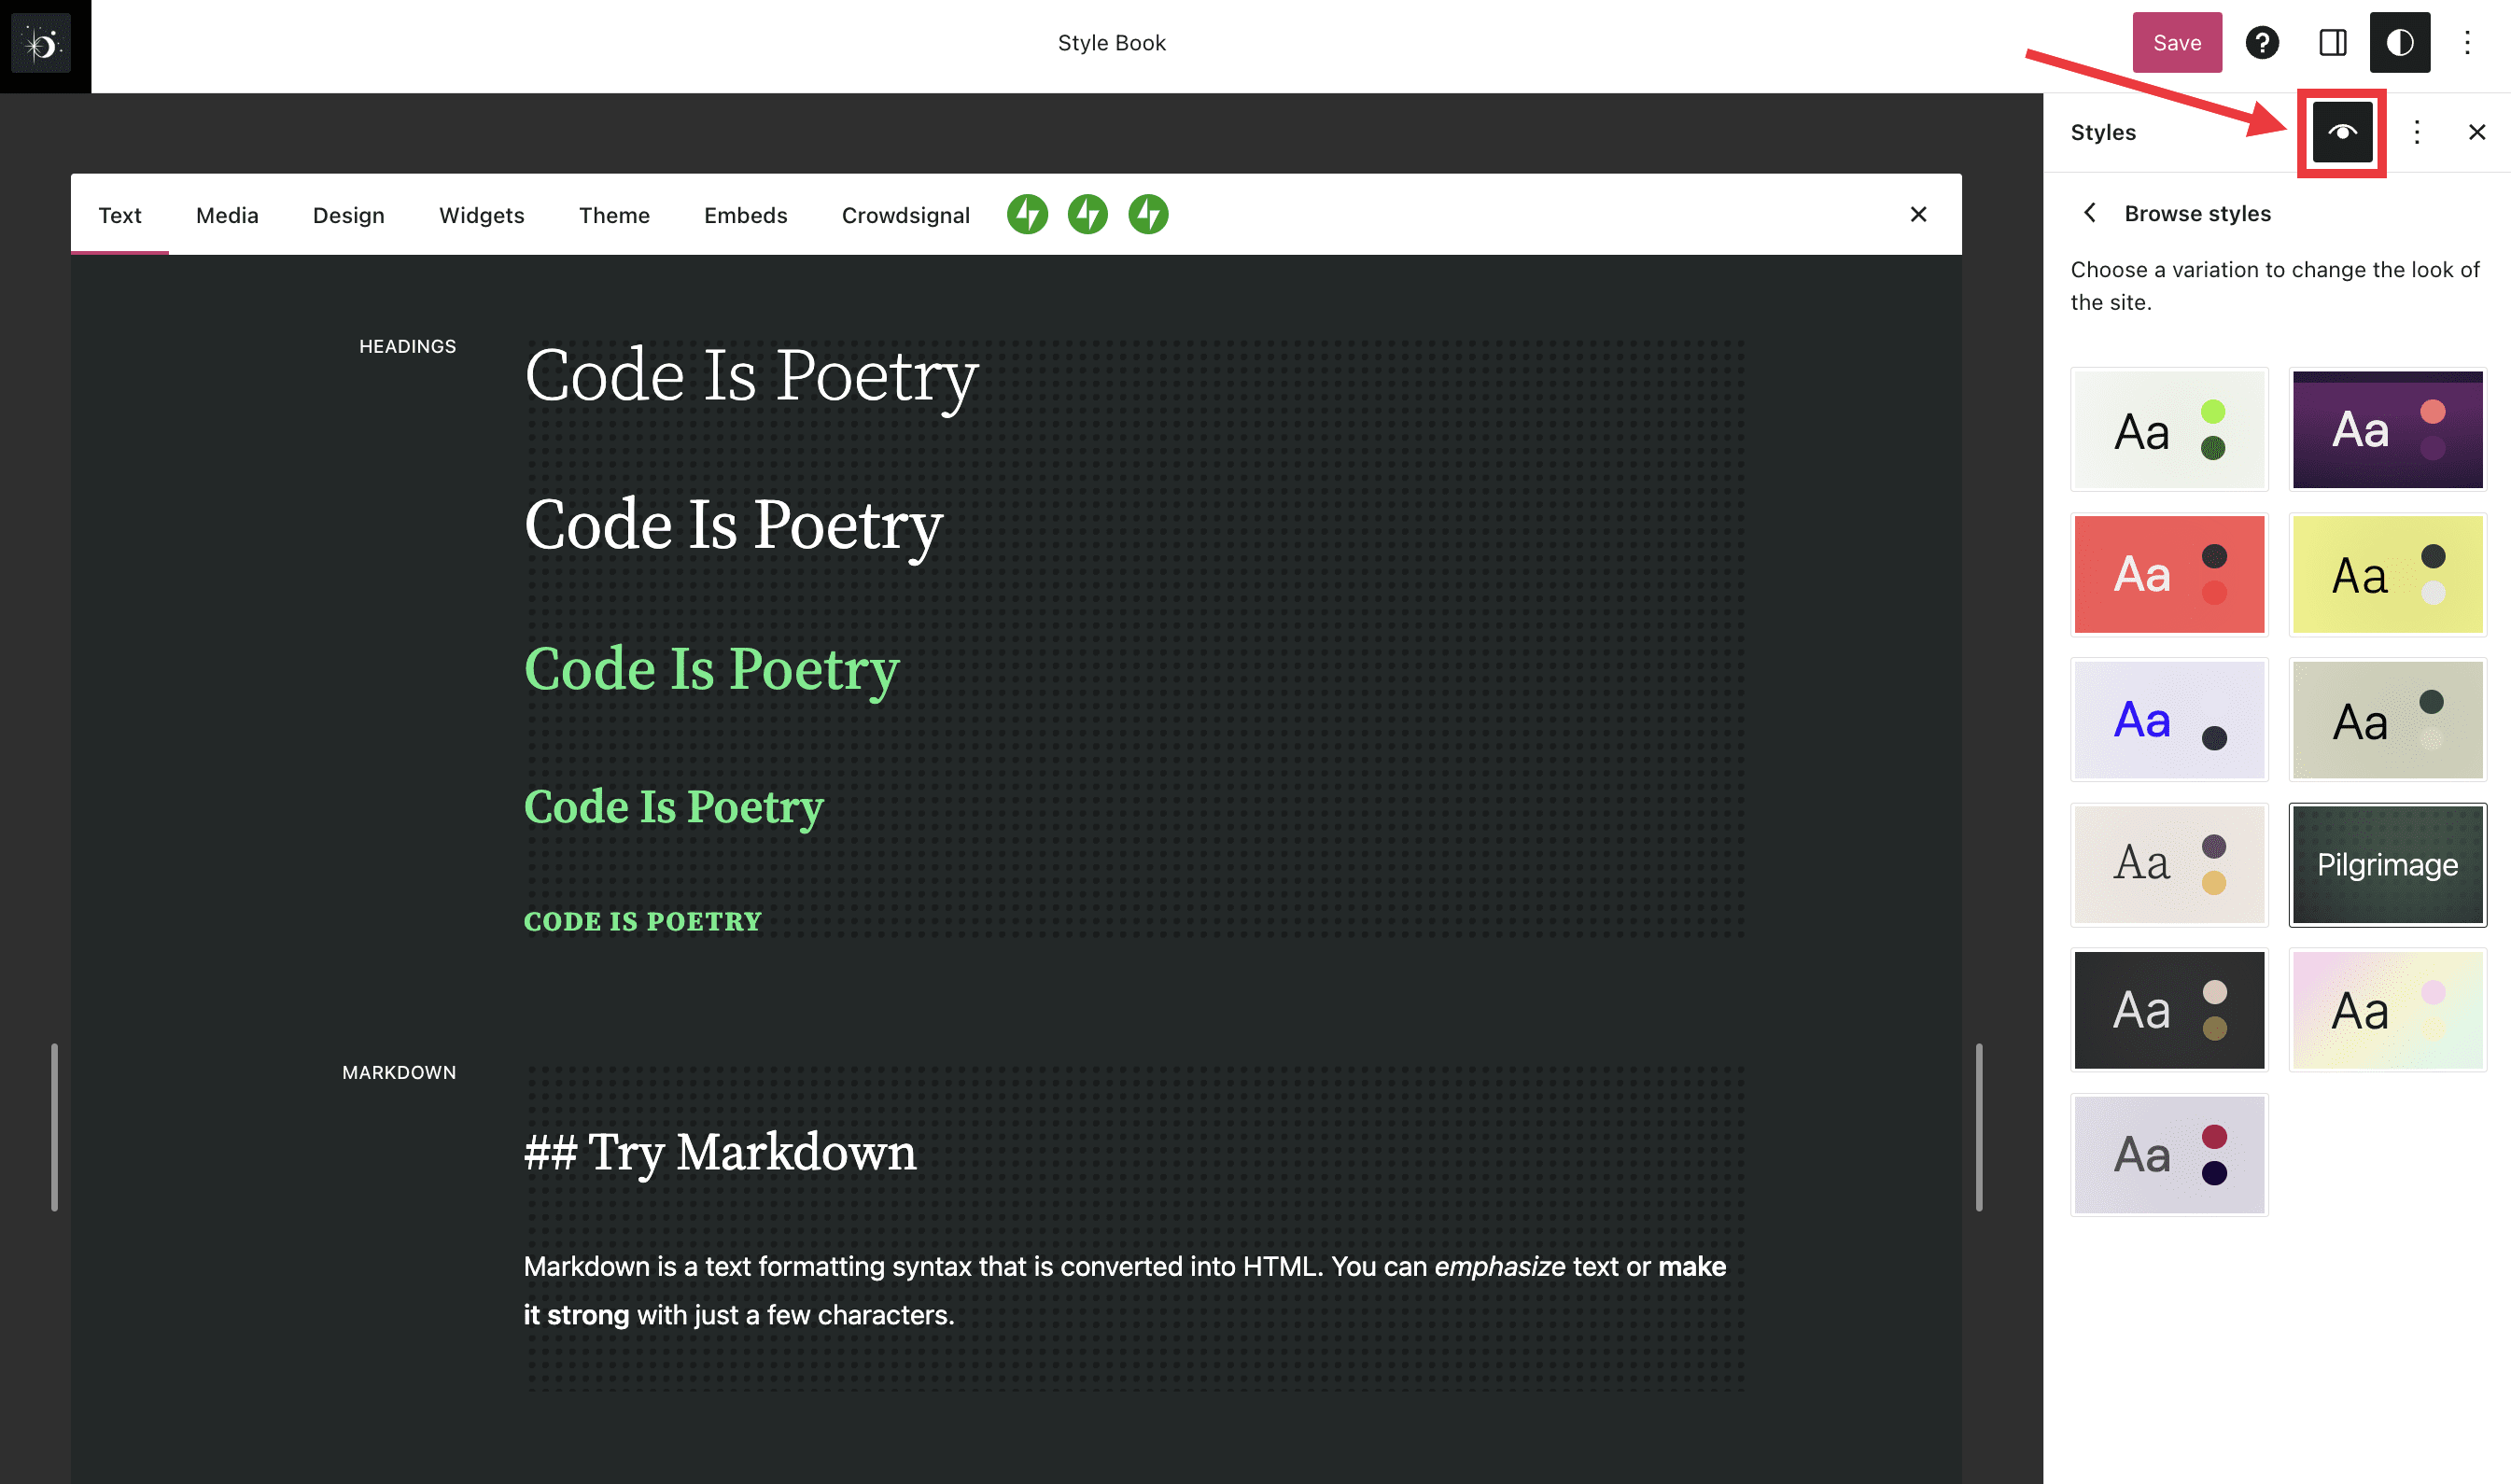
Once you’re out of the Style Book, you can click “Browse Styles,” which allows you to preview what those style elements look like on your actual site. Remember, nothing is set in stone until you hit the “Save” button.
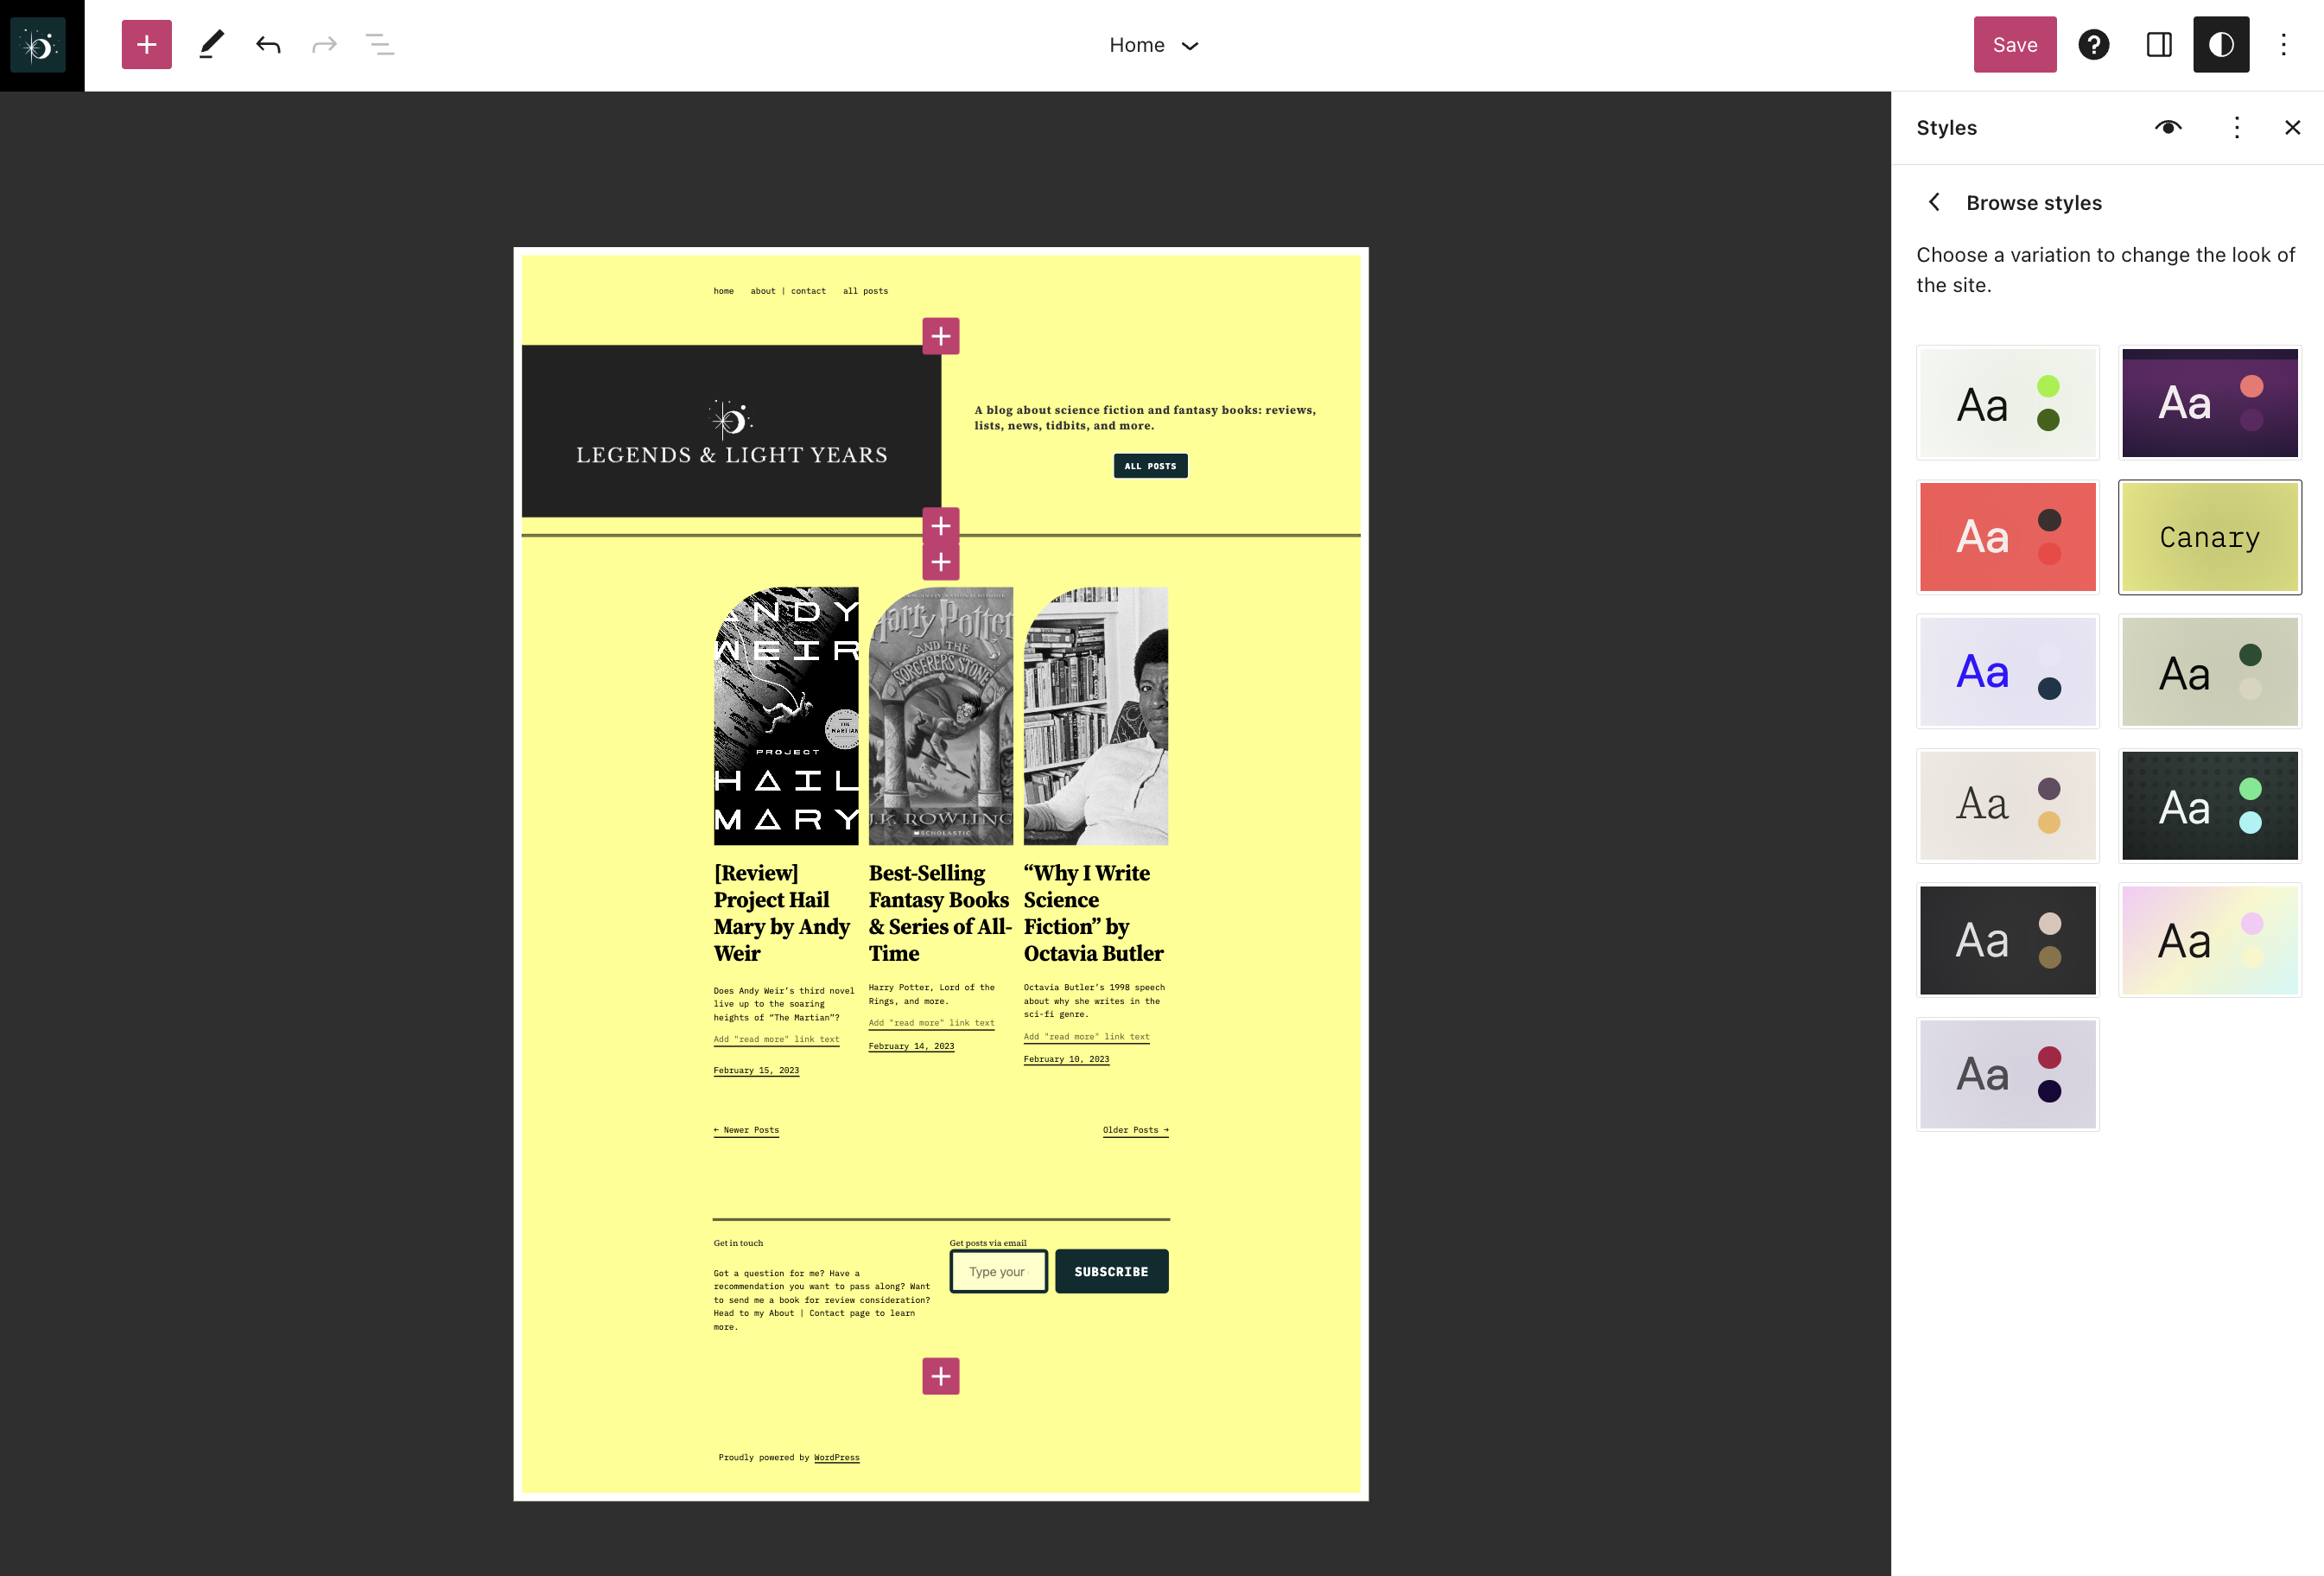
From there, you can experiment with specific settings for typography, colors, and layout. You can also fine-tune design aspects for specific blocks. For example, if you tweak the color or text size in the Heading Block, it’ll change every heading on your site as well as become the new default for any new headings.

When you set a block-specific style from the Site Editor, any changes you make on specific pages or posts will only apply to that placement – though you can hit the “Apply globally” button to incorporate them across the entire site.
 Learn more about Styles
Styles tools are available on Premium plans and above.


