
Marly Bird's Blog, page 191
October 15, 2015
Knitwear Designer and Teacher Sarah Peasley
Knitwear Designer and Teacher Sarah Peasley was the guest today on the Yarn Thing podcast with Marly Bird. 
Sarah Peasley says she’s been knitting for as long as she can remember but no one can remember who taught her. Her mom knits and that’s the only person around who would have taught her, Sarah remembers knitting for her dolls. She does know how to crochet but feels knitting is more intuitive for her. Sarah says it wasn’t an obsession until after she’d had her son….
She took a job through a typing service and was placed in auto parts plant in Michigan. Sarah took an aptitude test and was placed there as computer programmer. With Y2K her job went away, her youngest was three and in day-care, Sarah says she got the bug to create the perfect baby blanket. Through the local yarn shop and knitting guild who brought in big-name teachers that she learned a lot from. She began hanging out at yarn shop on the days her son was in day-care, and the owner asked if she would teach. Sarah declined thinking she was too introverted to stand up and talk in front of people. The next time she was in the shop, the owner said ‘And WHEN you teach for me, we’ll have you teach this’ again Sarah declined, and the NEXT time the owner said ‘When you teach, we’ll have you use these patterns’… eventually Sarah was teaching. With the popularity of knitting and the opening of new shops in her area, she began teaching at other shops. As her kids grew, and her mom’s health began to decline, so she held back from teaching but attended Meg Swansen’s Knitting Camp, which eventually became a teaching opportunity, and later began teaching with XRX Books’ Stitches.
XRX asked her help edit Gwen Bortner’s Entrelac book, and has been editing the book and magazines since then, as well as for other designers. During this visit, Sarah says attending Marly’s Designer Dinner at TNNA, she gets a lot of work tech editing. Sarah Peasley is a regular teacher at XRX’s Stitches Events and one of the first roommates she had was Edie Eckman who has become a lifelong friend and a great source of advice about what to say or not to say.
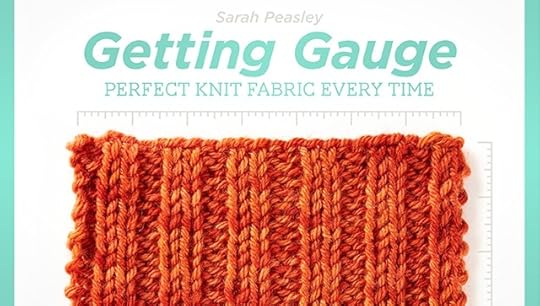 Another unexpected phone call led to her teaching a Craftsy Class (Marly’s affiliate link). She was led by an acquistions person from Craftsy to this first subject, a content editor help tweek a few things in the way she taught her class and the producer helped her make it look good. And to BREATHE. She’s really proud of it because it’s about SWATCHING which she has realized is kind of a dirty word in knitting, but there is so much to learn like how the fabric will be, and not just rows and stitches per inch. Part of her live class shares everyone’s stitch count which shows that using the same materials and tool, with the only variable is the knitter, how different the numbers can be. It was her passion about this that made this topic a great FIRST class for her to teach with Craftsy.
Sarah Peasley can be found in a few places online, if you’d like to follow her. She has a website sarahpeasley.com, and a designer page in Ravelry, and a GROUP! She is on Facebook, Twitter and Instagram.
Just for fun, I’m sharing the link to her classes at Stitches West. Many of the teachers are finding their class filled already, so you may want to check this link ASAP!
If you missed getting to hear this live you can find it as an archived episode where it aired originally: http://www.blogtalkradio.com/yarnthing/2015/10/15/knitwear-designer-and-teacher-sarah-peasley or in iTunes.

The post Knitwear Designer and Teacher Sarah Peasley appeared first on Marly Bird.


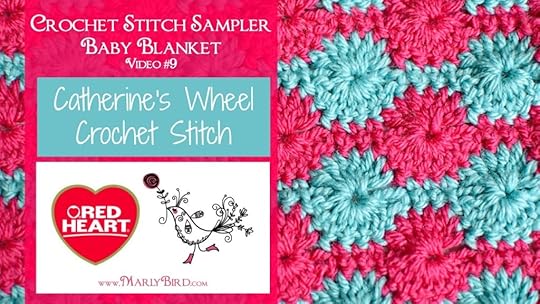
Catherine’s Wheel Crochet Stitch
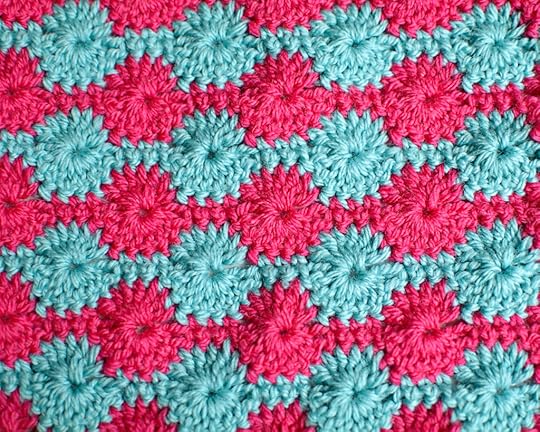
Let’s make the Catherine’s Wheel Crochet Stitch Square! You are nearing the finish line, way to go! This is your second two color stitch and it is a fun one! This is the eighth block in the Crochet Stitch Sampler Baby Blanket CAL Sponsored by Red Heart Yarns and hosted by Marly Bird.
You can click here for the first square, here for the second square, here for the third square, here for the fourth square, here for the fifth square, here for the sixth square, here for the seventh square.
Where is the Full Pattern?
During the Crochet-along (CAL) you will be able to get the written and chart instructions as well as the HD Video tutorial for the next step in the Crochet Stitch Sampler Blanket every Tuesday and Thursday. The full pattern will not be posted until the end of the CAL.
GET FULL CAL DETAILS HERE
Get a little help from your friends!
Follow along and complete each step with my help as well as the wonderful group of other Marly Bird CAL members in the Facebook Group. In the group you can post pictures, ask questions and get general crochet support.
I’m ready! Let’s get this party started!
I chose the Catherine’s Wheel Crochet Stitch square for this blanket because it looks AWESOME! Have you noticed that baby toys and such tend to be really bright colors? Me too. So I thought adding this really visually appealing stitch was just PERFECT for this baby blanket. This pattern stitch also teaches you more about building hills and filling in valleys. I talk about that in the video 
Click on the stitch below If you need a quick refresher on how to do it.
Slip Knot and Chain Stitch
Single Crochet
Double Crochet
CROCHET STITCH SAMPLER BABY BLANKET
Add this pattern to your Ravelry Queue and Favorites
Materials
Yarn: Red Heart, “With Love” (100% Acrylic; 315 yds/170g): 1 skein of 4 different complementary colors and 2 skeins of main color.
Designer NOTE: Original was made with a discontinued yarn– STITCH NATION by Debbie Stoller™ “Washable Ewe™”: [for sample size blanket] 2 balls each 3903 Strawberry, 3540 Currant, 3501 Robin Egg, 3652 Clover; 3 balls each 3365 Earth.
Hooks: you will need a variety of different sized hooks for this blanket. Use the hook size that will get you the desired square size. Some squares will require a smaller hook and others a larger hook depending on the stitch pattern. For the sample I used G/7 and H/8.
Notions: Stitch markers, tapestry needle
Gauge
Each Full Size Square: 11” x 11″ [27.94 X 27.94 cm]
Each stitch count given for the full square will result in approximately the same size square as long as you adjust hook size when necessary. YOU decide how large you want your squares to be. Once you choose the size for your blanket just make sure that each square will measure that.
Designer NOTE: To make sure each square I made was the same size, I washed and blocked each square as I made it. Doing so made it so I knew right away if my stitches were too tight or too loose.
Abbreviations
This is the full list of abbreviations used for all the patterns. I will be sure to add this to each pattern so you don’t have to go searching for it as your working on the square.
beg – begin(ning)
bpdc – back post double crochet
ch – chain
dc – double crochet
fpdc – front post double crochet
hdc – half double crochet
rep – repeat
rnd – round
RS – right side
sc – single crochet
sk – skip
sl st – slip stitch
sp – space
st – stitch
tch – turning chain
tr – treble crochet
WS – wrong side
yo – yarn over
Special Stitches
Dc4tog (Double crochet 4 together): (yo, pull up a loop in indicated st, yo and draw through 2 loops) 4 times, yo and draw through all 5 loops on hook
Dc5tog (Double crochet 5 together): (yo, pull up a loop in indicated st, yo and draw through 2 loops) 5 times, yo and draw through all 6 loops on hook
Dc7tog: (Double crochet 7 together): (yo, pull up a loop in indicated st, yo and draw through 2 loops) 7 times, yo and draw through all 8 loops on hook
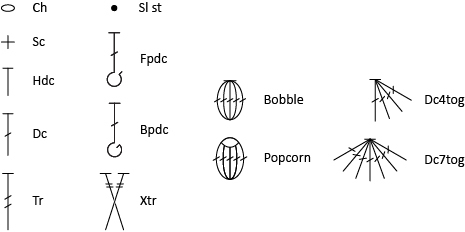
Symbol Key for Crochet Charts
This is the symbol key for all the charts used for all the patterns. I will be sure to add this to each pattern so you don’t have to go searching for it as your working on the square.
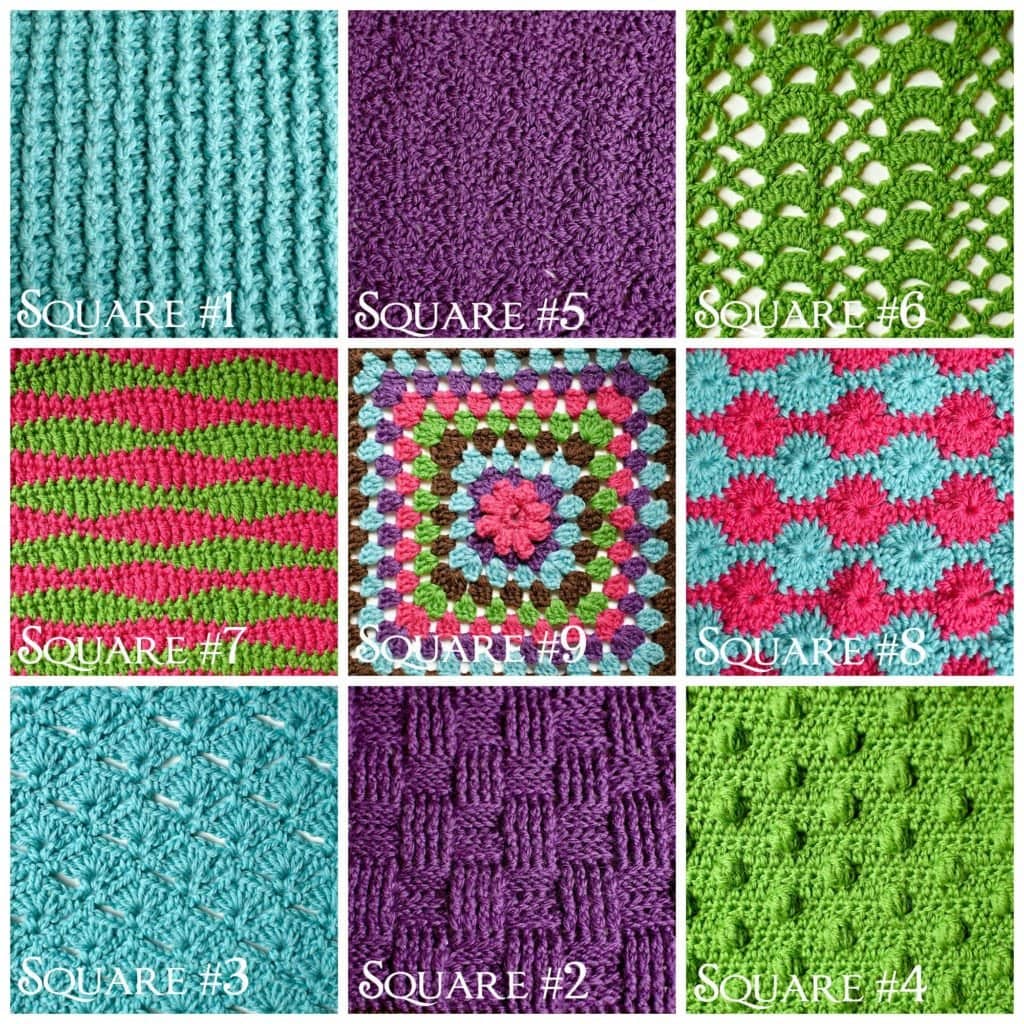
Layout
Here is the layout of the sample blanket incase you want to follow along with the same placement and color sequence. It should help you in choosing when to use a particular color for your blanket as well. But please remember, you can mix and match any way you wish; you _do not_ have to use my same layout!
Pattern
Catherine’s Wheel Crochet Stitch Square (Pink and Blue in sample):
Using two of the 4 complementary colors.
If you want to use this pattern stitch for another pattern you need to know how many chains are used for the foundation. For the Catherine’s Wheel–Foundation chain is a multiple of 10+2.
In class block: Ch 22, continue to row 1.
This is the foundation chain amount I do in the HD Video tutorial. This ‘in class block’ is a great way to get familiar with the stitch pattern before you commit to a larger square. It is also a good way to test out your gauge.
OR
Full size block: Ch 52, continue to row 1. (note that original post had this chain amount incorrect but it has since been fixed)
This is the foundation chain amount I did for the full square in the sample blanket. This number of stitches will give you the same size squares as long as you use the correct hook size to get the size you want. The stitch multiple on this one is large so there isn’t a lot of wiggle room for changing chain amounts so you will have to adjust hook size to get the correct size.
Designer Note: USE a stitch marker as I show you in the video! It will help you keep your place!
Row 1 (RS): Sk 1 ch, sc in each of the next 2 ch, sk 3 ch, 7 dc in next ch, * sk 3 ch, sc in each of the next 3 ch, sk 3 ch, 7 dc in next ch, rep from * to last 5 ch, sk 3 ch, sc in each of the last 2 ch.
Row 2: Change to B, ch 2, dc4tog over 1st 4 sts, ch 3, sc in each of the next 3 dc, * ch 3, dc7tog over next 7 sts, ch 3, sc in each of the next 3 dc; rep from * to last 4 sts, ch 3, dc4tog over last 4 sts.
Row 3:
Ch 2, 4 dc in 1st dc4tog, sk 3-ch sp, sc in each of the next 3 sc, * sk 3-ch sp, 7 dc in dc7tog, sk 3-ch sp, sc in each of the next 3 sc; rep from * to last 3-ch sp, sk last 3-ch sp, 4 dc in last dc4tog.
Row 4: Change to A, ch 1, sc in each of the 1st 2 sts, ch 3, dc7tog over next 7 sts, ch 3, * sc in each of the next 3 dc, ch 3, dc7tog over next 7 sts, ch 3; rep from * to last 2 sts, sc in each of the last 2 sts.
Row 5: Ch 1, sc in each of the 1st 2 sc, sk 3-ch sp, 7 dc in next dc7tog, sk 3-ch sp, * sc in each of the next 3 sc, sk 3-ch sp, 7 dc in next dc7tog, sk 3-ch sp; rep from * to last 2 sc, sc in each of the last 2 sc.
Rep rows 2-5 only, ending piece after a Row 2 or Row 4.
Designer NOTE: Are you have a little trouble? Check out the HD Video and let me help.
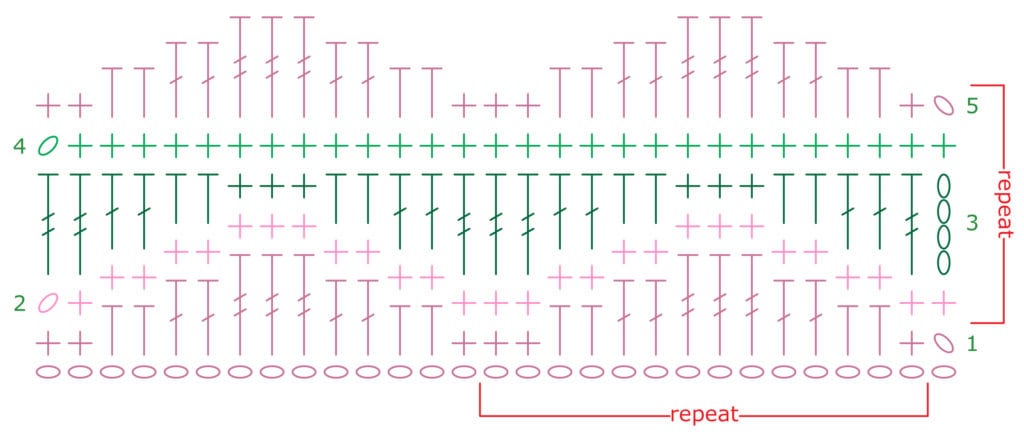
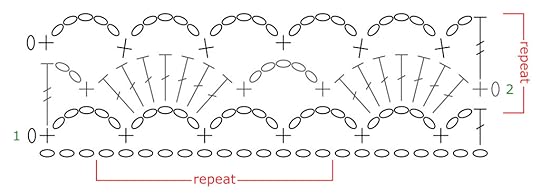
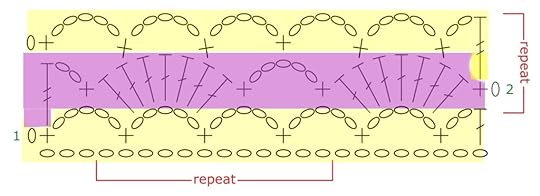
Chart
Catherine’s Wheel Crochet Stitch Chart

For this chart you will notice that the numbers on the sides count the rows. You can also use these numbers to let you know from which side you will begin reading that row of the chart. For example: Row 1 will be read from the left to right.
Each of the charts provided in this pattern are written with the same number of foundation chain stitches as the ‘in class block’. I did this so that you have a full chart that allows you to see exactly what stitches go where for the entire swatch.
To use the charts for the full size block you will simple repeat the stitches and rows as indicated in red on the chart.
HD Video Tutorial
Please SMASH THAT LIKE BUTTON on the video when you watch it 
October 14, 2015
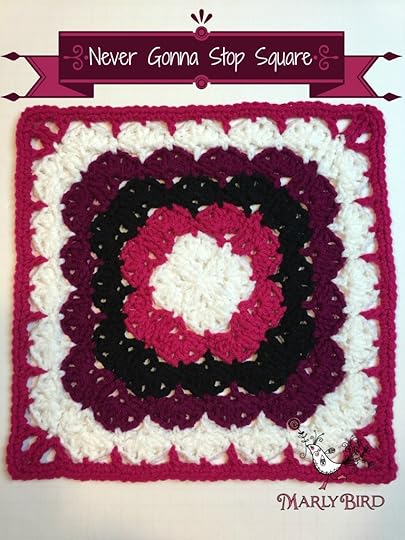
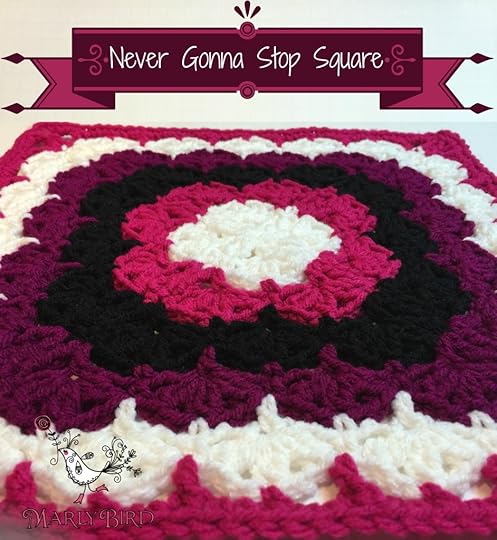
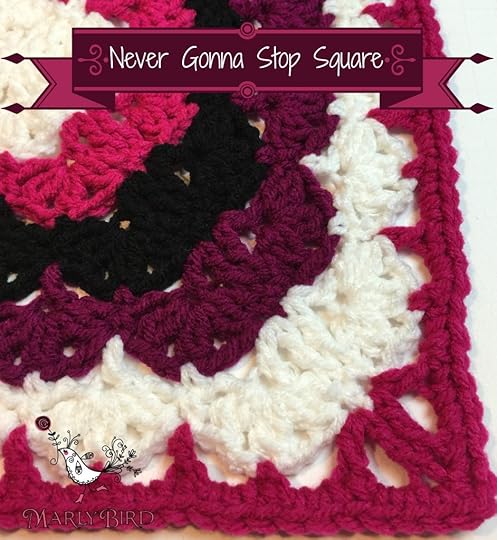
Never Gonna Stop Square
 Never Gonna Stop Square
Add this pattern to your Ravelry Queue and Favorites
So, why am I publishing a crochet granny square motif? Well, I was asked to be a part of the 2015 American Crochet Afghan Crochet-along. For the entire year of 2015 participating designers publish a square pattern that is free and measures 12″ (30.48 cm) using heavy worsted weight yarn (aran weight in UK).
You can learn more about this fun crochet-along please click here. 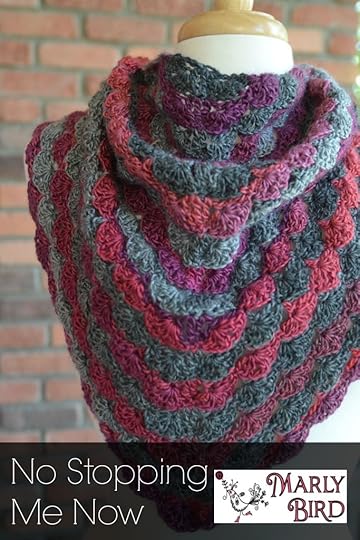
The name is Never Gonna Stop Square because this is the same stitch pattern I used in the No Stopping Me Now Shawl which is a free pattern by me! (see image to the right)
In the meantime, here is the information about the Never Gonna Stop Square!
FREE Crochet Square Information
Size
Finishes sample is approx. 12” (30.48cm) square.
Materials
Yarn Red Heart, “With Love” (100% acrylic, 370 yds / 338m, 198g / 7 oz):
White #1001 (A) – 1 skein
Hot Pink #1701 (B) – 1 skein
Black #1012 (C) – 1 skein
Boysenberry #1907 (D) — 1 skein
Or colors of your choice
Hook Size J-9 (6 mm) hook or size required for gauge
Notions Removable stitch markers, yarn needle
Notes
To change colors, work last st of row to final yo, yo with new color and complete last st.
Special Stitches
CL (cluster): * Yo, pull up a loop in indicated st, yo and draw through 2 loops on hook, rep from * once more, yo and draw through all 3 loops on hook.
Shell: CL, (ch 2, CL) twice all in same st or sp.
Abbreviations
beg – begin(ning)
ch – chain
dc – double crochet
rep – repeat
RS – right side
sc – single crochet
st – stitch
tr – triple (treble) crochet
WS – wrong side
Yo – yarn over
 Square Pattern
Using A, Use magic loop.
Row 1: Ch 7 (counts as 1 tr and 3 ch), (dc, ch 3, 2 tr, ch 3, dc, ch 3, tr) twice, all in magic loop, join with a sl st to 4th ch of original ch-7. Do Not Turn. Pull Magic Loop Closed.
Notice: At this point in the square it is hard to have any orientation so let me help a bit. The treble stitches are placed at the corner of the square now and throughout. As you work more rows you will see the shells build along the sides of the square and the center corner stitches will always be the treble crochet (for the row 5 repeat) and the single crochet (for the row 4 repeat).
Row 2: Ch 1, * sc in first tr, shell (see Special Stitches) in next dc, sc in each of 2 tr, shell in next dc, sc in tr; rep from * once more, join with a sl st to first sc, changing to B in last st.
Row 3: Ch 7 (counts as 1 tr and 3 ch), dc in first sc, * ch 3, sc in center CL of shell, ch 3, (dc, ch 3, tr) in next sc, (tr, ch 3, dc) in next sc, ch 3, sc in center CL of shell, ch 3, (dc, ch 3, tr) in next sc **, (tr, ch 3, dc) in next sc; rep from * once more ending at **, join with a sl st to the 4th ch of the beginning ch-7.
Row 4: Ch 1, sc in first tr, shell in next dc, * sc in next sc, shell in next dc; rep from * to corner 2 tr, sc in each of 2 corner tr, shell in next dc **, rep between * and ** twice more, then from * to * once, sc in last corner tr, join with a sl st to the first sc, changing to next color in last st.
Row 5: Ch 7 (counts as 1 tr and 3 ch), * dc in sc, ch 3, sc in center CL of shell, ch 3; rep from * to 2 corner sc, (dc, ch 3, tr) in next sc, (tr, ch 3, dc) in next sc, ch 3, sc in center CL of shell, ch 3 **, rep between * and ** twice more, then from * to * once, (dc, ch 3, tr) in last corner sc, join with a sl st to 4th ch of beginning ch-7.
Row 6: Repeat row 4
Row 7: Repeat row 5
Row 8: Repeat row 4
Row 9: Repeat row 5
Row 10: Repeat row 4
Row 11: Repeat row 5
Row 12: Ch 1, sc in tr, 2 sc in ch-3 sp, * sc in next st, 2 sc in ch-3 sp; rep from * to corner 2tr, 2 sc in tr, ch 1, 2 sc in tr, 2 sc in ch-3 sp **; rep from * to ** twice more, then from * to * once, 2 sc in last corner tr, ch 1, join with a sl st to first sc. Finish off.
Finishing
Weave in ends.
I hope you enjoy Never Gonna Stop Square free crochet granny motif pattern! It was super fun to crochet – and fast too!
If doing all the color changes is something you don’t want to do, consider using a long color changing yarn instead of the solids.

Written pattern copyright Marly Bird 2015, all rights reserved. Please do not reprint or repost this pattern, but please do link to this page to share this pattern with others. To print this pattern for personal use, please use Print Friendly button at the bottom of the pattern. Thank you to Red Heart Yarns for providing the yarn for this pattern!
The post Never Gonna Stop Square appeared first on Marly Bird.
October 13, 2015
NEW Craftsy Teacher Lindsey Stephens
New Craftsy Teacher Lindsey Stephens was the guest this morning on the Yarn Thing podcast with Marly Bird. We love having the Craftsy teachers share their new classes because Craftsy is one of the podcast’s sponsors!
Lindsey Stephens comes from a crafty family. Her grandmother started her with crochet, she conquered the chain stitch but lost her between there and making a flower. Later Lindsey decided to learn to knit but her first yarn choice was too fuzzy to see what she was doing. Her third attempt was a how to crochet book and a long relocation road-trip and that seems to have done the trick for her.
Lindsey progressed from learning through experimenting to teaching and designing rather quickly. Partially as a misunderstood statement of her husband’s that she could try but not to expect much, she really was determined to prove herself to her husband. Through her search of the internet (pre-Ravelry) she got a mentor through the CGOA (Crochet Guild of America) Bendy Carter. Both ladies value Bendy’s knowledge of stitch construction, for Lindsey having someone to talk to was valuable.
She began submitting patterns and with a good-sized rejection pile, began Poetry in Yarn in 2010. In a special session with Robin Chachula, Lindsey learned that just because a piece was rejected doesn’t mean that wasn’t a good one, it may have not been a good fit where the publisher needed it to go. (Robin actually compiled those rejected designs into a book, which is a great example to others.)
Another aspect that’s probably been major for Lindsey is Tech Editing. Investing in programs to help her assist other designers and publishing companies was a big step but worked well with her background as a certified math teacher. Her goal is to make sure the patterns are accurate, clear and consistent. This work now fills the bulk of her day. She enjoys being part of a long chain of people that helps the yarn industry to grow.
Lindsey was contacted by Craftsy to teach Seaming Crochet was a great investment of time and effort for her and her family, creating the samples and making lists of helpful tips, and the experience was enjoyable for her. The class includes Prepping for Seaming, Traditional, Raised, Decorative Seams and the almost invisible seams the mimic the crocheted fabric, working with variegated and specialty yarns … a VERY thorough and thoughtful course.
Here is Marly’s affiliate link to Lindsey’s Craftsy class. You can follow Lindsey Stephens at her website: ww.PoetryinYarn.com She can also be found in Facebook, Instagram and Twitter. Here is the link to her Designer page in Ravelry, also.
If you missed getting to hear this when it aired it’s still available as an archive where it aired originally http://www.blogtalkradio.com/yarnthing/2015/10/13/new-craftsy-teacher-lindsey-stephens or in iTunes.
The post NEW Craftsy Teacher Lindsey Stephens appeared first on Marly Bird.
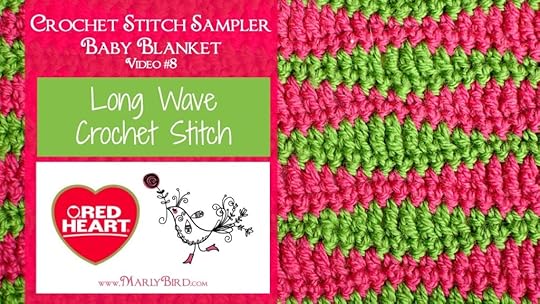
Long Wave Crochet Stitch
Let’s make the Long Wave Crochet Stitch Square! You are more than half way through the squares, way to go! Now we are getting into some fun stitches. This is the seventh block in the Crochet Stitch Sampler Baby Blanket CAL Sponsored by Red Heart Yarns and hosted by Marly Bird.
You can click here for the first square, here for the second square, here for the third square, here for the fourth square, here for the fifth square, here for the sixth square.
Where is the Full Pattern?
During the Crochet-along (CAL) you will be able to get the written and chart instructions as well as the HD Video tutorial for the next step in the Crochet Stitch Sampler Blanket every Tuesday and Thursday. The full pattern will not be posted until the end of the CAL.
GET FULL CAL DETAILS HERE
Get a little help from your friends!
Follow along and complete each step with my help as well as the wonderful group of other Marly Bird CAL members in the Facebook Group. In the group you can post pictures, ask questions and get general crochet support.
I’m ready! Let’s get this party started!
I chose the Fan Trellis Crochet Stitch square for this blanket because I liked the lace look for one of the squares. I can imagine little fingers and toes playing in those lace stitches. This pattern stitch also teaches you more about placing a stitch in a chain or in a chain space.
Click on the stitch below If you need a quick refresher on how to do it.
Slip Knot and Chain Stitch
Single Crochet
Half Double Crochet
Double Crochet
Treble Crochet
CROCHET STITCH SAMPLER BABY BLANKET
Add this pattern to your Ravelry Queue and Favorites
Materials
Yarn: Red Heart, “With Love” (100% Acrylic; 315 yds/170g): 1 skein of 4 different complementary colors and 2 skeins of main color.
Designer NOTE: Original was made with a discontinued yarn– STITCH NATION by Debbie Stoller™ “Washable Ewe™”: [for sample size blanket] 2 balls each 3903 Strawberry, 3540 Currant, 3501 Robin Egg, 3652 Clover; 3 balls each 3365 Earth.
Hooks: you will need a variety of different sized hooks for this blanket. Use the hook size that will get you the desired square size. Some squares will require a smaller hook and others a larger hook depending on the stitch pattern. For the sample I used G/7 and H/8.
Notions: Stitch markers, tapestry needle
Gauge
Each Full Size Square: 11” x 11″ [27.94 X 27.94 cm]
Each stitch count given for the full square will result in approximately the same size square as long as you adjust hook size when necessary. YOU decide how large you want your squares to be. Once you choose the size for your blanket just make sure that each square will measure that.
Designer NOTE: To make sure each square I made was the same size, I washed and blocked each square as I made it. Doing so made it so I knew right away if my stitches were too tight or too loose.
Abbreviations
This is the full list of abbreviations used for all the patterns. I will be sure to add this to each pattern so you don’t have to go searching for it as your working on the square.
beg – begin(ning)
bpdc – back post double crochet
ch – chain
dc – double crochet
fpdc – front post double crochet
hdc – half double crochet
rep – repeat
rnd – round
RS – right side
sc – single crochet
sk – skip
sl st – slip stitch
sp – space
st – stitch
tch – turning chain
tr – treble crochet
WS – wrong side
yo – yarn over
Symbol Key for Crochet Charts
This is the symbol key for all the charts used for all the patterns. I will be sure to add this to each pattern so you don’t have to go searching for it as your working on the square.
Layout
Here is the layout of the sample blanket incase you want to follow along with the same placement and color sequence. It should help you in choosing when to use a particular color for your blanket as well. But please remember, you can mix and match any way you wish; you _do not_ have to use my same layout!
Pattern
Long Wave Crochet Stitch Square (Green in sample):
Using one of the 4 complementary colors.
If you want to use this pattern stitch for another pattern you need to know how many chains are used for the foundation. For the Long Wave–Foundation chain is a multiple of 14+2.
In class block: Ch 30, continue to row 1.
This is the foundation chain amount I do in the HD Video tutorial. This ‘in class block’ is a great way to get familiar with the stitch pattern before you commit to a larger square. It is also a good way to test out your gauge.
OR
Full size block: Ch 44, continue to row 1.
This is the foundation chain amount I did for the full square in the sample blanket. This number of stitches will give you the same size squares as long as you use the correct hook size to get the size you want. The stitch multiple on this one is large so there isn’t a lot of wiggle room for changing chain amounts so you will have to adjust hook size to get the correct size.
Designer NOTE: The nature of this stitch is to be open so it could easily be made too big. If your squares are turning out much bigger than my 11″ by 11″ this might be one of the squares you use a smaller hook for and/or adjust the beginning chain amount.
Also, USE a stitch marker as I show you in the video! It will help you keep your place!
Row 1 (RS): Sk 2 ch (counts as 1 ch and 1 sc), * sc in next ch, hdc in each of the next 2 ch, dc in each of the next 2 ch, tr in each of the next 3 ch, dc in each of the next 2 ch, hdc in each of the next 2 ch, sc in each of the next 2 ch; rep from * to end.
Row 2: Ch 1 (counts as 1 sc), sk 1st st, sc in next st and each st to end, working last sc in tch.
Row 3: Change to B, ch 4 (counts as 1 tr), sk 1st sc, * tr in next sc, dc in each of the next 2 sc, hdc in each of the next 2 sc, sc in each of the next 3 sc, hdc in each of the next 2 sc, dc in each of the next 2 sc, tr in each of the next 2 sc; rep from * to end working last tr in tch.
Row 4: As row 2.
Row 5: Change to A, ch 1 (counts as 1 sc), sk 1st sc, * sc in next sc, hdc in each of the next 2 sc, dc in each of the next 2 sc, tr in each of the next 3 sc, dc in each of the next 2 sc, hdc in each of the next 2 sc, sc in each of the next 2 sc; rep from * to end working last sc in tch.
Rep rows 2-5 only, ending piece after a Row 4.
Designer NOTE: Are you have a little trouble? Check out the HD Video and let me help.

Chart
Long Wave Crochet Stitch Chart
For this chart you will notice that the numbers on the sides count the rows. You can also use these numbers to let you know from which side you will begin reading that row of the chart. For example: Row 1 will be read from the left to right.
Each of the charts provided in this pattern are written with the same number of foundation chain stitches as the ‘in class block’. I did this so that you have a full chart that allows you to see exactly what stitches go where for the entire swatch.
To use the charts for the full size block you will simple repeat the stitches and rows as indicated in red on the chart.
HD Video Tutorial
Please SMASH THAT LIKE BUTTON on the video when you watch it
October 8, 2015
Tot Toppers by Kate Oates
Tot Toppers by Kate Oates was the topic of the Yarn Thing podcast with Marly Bird today. Mostly just the ooo and aaah that comes with ‘cute’. Kate says she learned to knit in middle school. As the oldest of three, feeling competitive, her sister learned to knit from an aunt and Kate felt compelled to learn, too. She says her sister is an awesome knitter and sews. Her boyfriend (now husband) loved to watch football so she did an big afghan, which was not a stretch in techniques. When she was pregnant with her first son, she learned more techniques and it became a hobby which morphed to designing.
Kate says the aunt that taught her, gave her the basic stitches but the majority of what she’s learned in techniques is from books. She started publishing her first pattern in Ravelry, but it’s all kind of a blur with her each family addition! Her patterns focused on her own needs, creating patterns for boys that people would want to knit and the wearer would want to put on. In fact, her four handsome young men often are seen modeling the pieces in the patterns.
Knits for Boys was kind of a dream book for Kate, that she envisioned for a long time as ‘something that needed to be made’. She included a Grow With Me section, so that modifications can be made as the child grows, she mentions things that can be done if the child grows while the project is in progress. That book is published through Stackpole Press as of just last spring.
Since then, two booklets, available through her website, New Girl and New Guy, are layette collections for brand-new additions to your family. She also creates designs for adults, too, which are just as fun and cute without being childish.
You can follow Kate Oates at her website www.tottoppers.com where she has a blog, too, also a page in Facebook, Twitter, Pinterest, Instagram, and be sure to check out her designer page in Ravelry. There is also a Ravelry Group for Tot Toppers.
You can listen to Kate’s previous visit to Yarn Thing podcast in 2013.
If you missed getting to hear this live, it is available as an archive where it aired orignially http://www.blogtalkradio.com/yarnthing/2015/10/08/tot-toppers-by-kate-oates or in iTunes.
The post Tot Toppers by Kate Oates appeared first on Marly Bird.
October 7, 2015
Fan Trellis Crochet Stitch
Let’s make the Fan Trellis Crochet Stitch Square! You are more than half way through the squares, way to go! Now we are getting into some fun stitches. This is the sixth block in the Crochet Stitch Sampler Baby Blanket CAL Sponsored by Red Heart Yarns and hosted by Marly Bird.
You can click here for the first square, here for the second square, here for the third square, here for the fourth square, here for the fifth square.
Where is the Full Pattern?
During the Crochet-along (CAL) you will be able to get the written and chart instructions as well as the HD Video tutorial for the next step in the Crochet Stitch Sampler Blanket every Tuesday and Thursday. The full pattern will not be posted until the end of the CAL.
GET FULL CAL DETAILS HERE
Get a little help from your friends!
Follow along and complete each step with my help as well as the wonderful group of other Marly Bird CAL members in the Facebook Group. In the group you can post pictures, ask questions and get general crochet support.
I’m ready! Let’s get this party started!
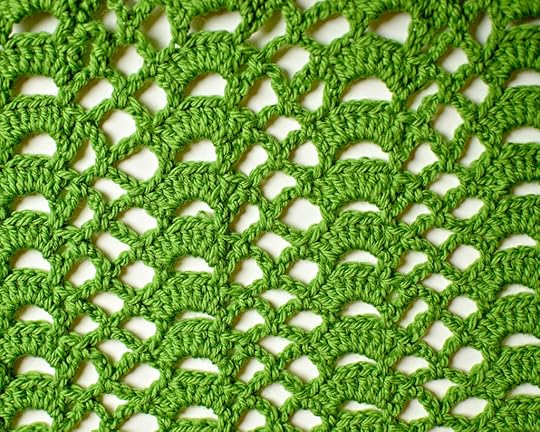
I chose the Fan Trellis Crochet Stitch square for this blanket because I liked the lace look for one of the squares. I can imagine little fingers and toes playing in those lace stitches. This pattern stitch also teaches you more about placing a stitch in a chain or in a chain space.
Click on the stitch below If you need a quick refresher on how to do it.
Slip Knot and Chain Stitch
Single Crochet
Treble Crochet
Double Crochet
CROCHET STITCH SAMPLER BABY BLANKET
Add this pattern to your Ravelry Queue and Favorites
Materials
Yarn: Red Heart, “With Love” (100% Acrylic; 315 yds/170g): 1 skein of 4 different complementary colors and 2 skeins of main color.
Designer NOTE: Original was made with a discontinued yarn– STITCH NATION by Debbie Stoller™ “Washable Ewe™”: [for sample size blanket] 2 balls each 3903 Strawberry, 3540 Currant, 3501 Robin Egg, 3652 Clover; 3 balls each 3365 Earth.
Hooks: you will need a variety of different sized hooks for this blanket. Use the hook size that will get you the desired square size. Some squares will require a smaller hook and others a larger hook depending on the stitch pattern. For the sample I used G/7 and H/8.
Notions: Stitch markers, tapestry needle
Gauge
Each Full Size Square: 11” x 11″ [27.94 X 27.94 cm]
Each stitch count given for the full square will result in approximately the same size square as long as you adjust hook size when necessary. YOU decide how large you want your squares to be. Once you choose the size for your blanket just make sure that each square will measure that.
Designer NOTE: To make sure each square I made was the same size, I washed and blocked each square as I made it. Doing so made it so I knew right away if my stitches were too tight or too loose.
Abbreviations
This is the full list of abbreviations used for all the patterns. I will be sure to add this to each pattern so you don’t have to go searching for it as your working on the square.
beg – begin(ning)
bpdc – back post double crochet
ch – chain
dc – double crochet
fpdc – front post double crochet
hdc – half double crochet
rep – repeat
rnd – round
RS – right side
sc – single crochet
sk – skip
sl st – slip stitch
sp – space
st – stitch
tch – turning chain
tr – treble crochet
WS – wrong side
yo – yarn over
Symbol Key for Crochet Charts
This is the symbol key for all the charts used for all the patterns. I will be sure to add this to each pattern so you don’t have to go searching for it as your working on the square.
Layout
Here is the layout of the sample blanket incase you want to follow along with the same placement and color sequence. It should help you in choosing when to use a particular color for your blanket as well. But please remember, you can mix and match any way you wish; you _do not_ have to use my same layout!
Pattern
Fan Trellis Crochet Stitch Square (Green in sample):
Using one of the 4 complementary colors.
If you want to use this pattern stitch for another pattern you need to know how many chains are used for the foundation. For the Cross Hatch–Foundation chain is a multiple of 12.
In class block: Ch 24, continue to row 1.
This is the foundation chain amount I do in the HD Video tutorial. This ‘in class block’ is a great way to get familiar with the stitch pattern before you commit to a larger square. It is also a good way to test out your gauge.
OR
Full size block: Ch 48, continue to row 1.
This is the foundation chain amount I did for the full square in the sample blanket. This number of stitches will give you the same size squares as long as you use the correct hook size to get the size you want.
Designer NOTE: The nature of this stitch is to be open so it could easily be made too big. If your squares are turning out much bigger than my 11″ by 11″ this might be one of the squares you use a smaller hook for and/or adjust the beginning chain amount.
Also, USE a stitch marker as I show you in the video! It will help you keep your place!
Row 1 (WS): Sc in 2nd ch from hook, * ch 5, sk 3 ch, sc in next ch; rep from * to last 2 ch, ch 2, sk 1 ch, dc in last ch.
Row 2: Ch 1, sc in 1st st, sk 2-ch sp, 7 dc in next 5-ch sp, sc in next 5-ch sp * ch 5, sc in next 5-ch sp, 7 dc in next 5-ch sp, sc in next 5-ch sp; rep from * to end, ch 2, tr in last sc.
Row 3: Ch 1, sc in 1st st, ch 5, sc in 2nd of next 7-dc group, ch 5, sc in 6th dc of same group, * ch 5, sc in next 5-ch sp, ch 5, sc in 2nd of next 7-dc group, ch 5, sc in 6th dc of same group; rep from * to end, ch 2, tr in last sc.
Rep rows 2 and 3 only.
Designer NOTE: As you work this square and begin to think about joining it to the others you might think that seaming this block to the others can be a bit tricky. I talk about this on the HD Video.
Chart
Fan Trellis Crochet Stitch Chart
For this chart you will notice that the numbers on the sides count the rows. You can also use these numbers to let you know from which side you will begin reading that row of the chart. For example: Row 1 will be read from the left to right.
Each of the charts provided in this pattern are written with the same number of foundation chain stitches as the ‘in class block’. I did this so that you have a full chart that allows you to see exactly what stitches go where for the entire swatch.
To use the charts for the full size block you will simple repeat the stitches and rows as indicated in red on the chart.
Designer NOTE: I find when working with a chart like this one that using colored pencils or a high-lighter to color in the stitches in a particular row helps keep me on track. I can better see what stitches go with what row which is vital. Please look at the chart below to see what I mean.
HD Video Tutorial
Please SMASH THAT LIKE BUTTON on the video when you watch it
October 6, 2015
Jennifer Raymond of Tinking Turtle
Jennifer Raymond of Tinking Turtle was the guest on Yarn Thing podcast with Marly Bird.

Jennifer says she learned to crochet when very young, taught by a helpful occasional caregiver. She says she immediately began to challenge the granny squares she started with ‘What if’s’. She did learn to knit, but was discouraged with dropped stitches and not realizing knitting was harder because it required practice time also. She says she continued to crochet and in College, she credits a yarn store across the street from the campus as helping her get through it. Wanting to knit socks after finding it very difficult to mend crocheted socks, she seems to have become more bi-crafty at that point.
Moving on from college and realizing that office work wasn’t a good fit for her, and not really comin g from an entrepreneurial background and thinking that crochet is was not something you could live on, when she and her husband moved to Washington, DC, where she discovered the Yarn Spot. Jennifer taught there and designing took off for her.
Tinking Turtle came about in a discussion with her husband. He is a train officiando and they live in a train town. With a bottle of wine, they were putting togther a model train layout which included their love of turtles, and he was naming the bar and ‘…. and there will be a yarn shop named ‘The Tinking Turtle’. Jennifer says he was so knew to her discussions of knitting that he could not have known how perfect that term is to knitters!
Marly met Jennifer at a TNNA while Marly was ‘claiming Laurinda Redding for her own’ at a booksigning. At this point Jennifer had been designing for about four years and really looked forward to finding her place in the industry. Jennifer finds her youthful appearance can make it hard to be taken seriously. Laurinda showing Jennifer around TNNA and being at Marly’s Designer Dinner, became an opportunity to make connections for her.
 Jennifer is still enjoying the thrill of seeing her designs in print. The Mercury Top (Ravelry link) appeared in Interweave Crochet Fall 2015 and another will be in the Winter edition. If you heard her discuss this, you can hear the squeal of excitement in her voice when she describes the pieces. Check out her list of designs in Ravelry.
You can follow Jennifer Raymond’s website, she is in Facebook, also on Tinking Turtle where ever you might look for her like Twitter.
If you missed hearing this live, it is still available as an archived episode where it aired originally: http://www.blogtalkradio.com/yarnthing/2015/10/06/jennifer-raymond-of-tinking-turtle or in iTunes.
The post Jennifer Raymond of Tinking Turtle appeared first on Marly Bird.
October 5, 2015
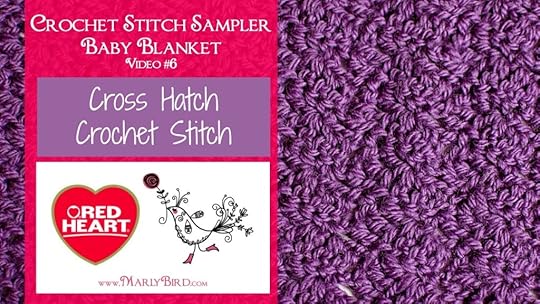
Cross Hatch Crochet Stitch
Let’s make the Cross Hatch Crochet Stitch Square! You are more than half way through the squares, way to go! Now we are getting into some fun stitches. This is the fifth block in the Crochet Stitch Sampler Baby Blanket CAL Sponsored by Red Heart Yarns and hosted by Marly Bird.
You can click here for the first square, here for the second square, here for the third square, here for the fourth square.
Where is the Full Pattern?
During the Crochet-along (CAL) you will be able to get the written and chart instructions as well as the HD Video tutorial for the next step in the Crochet Stitch Sampler Blanket every Tuesday and Thursday. The full pattern will not be posted until the end of the CAL.
GET FULL CAL DETAILS HERE
Get a little help from your friends!
Follow along and complete each step with my help as well as the wonderful group of other Marly Bird CAL members in the Facebook Group. In the group you can post pictures, ask questions and get general crochet support.
I’m ready! Let’s get this party started!
I chose the Cross Hatch Crochet Stitch square for this blanket because I liked the chance to learn about placing stitches in an unusual place. Plus, this stitch is solid without being dense. If you _over_ block the square it could actually be more open and lace like. Totally up to you and the look you are going for with your blanket.
The stitch pattern of this stitch is very similar to the the Corner to Corner (C2C) blankets that are so popular. The difference is that you are creating the fabric vertically instead of on the diagonal as you do when making the C2C. Having said that, if you are familiar with C2C construction and wish to make your square in that manner you totally can do that. This is YOUR blanket
October 1, 2015
Yarn Thing Sponsor, Erin.Lane Bags’ Lindsey Martin NEEDS YOU
Yarn Thing sponsor, Erin.Lane Bags’ Lindsey Martin NEEDS YOU and share with us why on the Yarn Thing podcast with Marly Bird.
 Marly and Lindsey at a LYS event! Marly was teaching at Crafty Hands in Tennesse (April) and Lindsey brought her Erin.Lane products for a Trunk Show. TOO much fun!
It’s been a crazy year for Erin.Lane Bags! They have been creating special bags for our favorite people and events and being that they are all handmade, are completely collectors items. These special bags have mostly SOLD-OUT including the recent Stitches Texas bags.
Those are the ups. There are downs too, like getting stuck on the road home from Stitches West (Erin.Lane bags is based out of Tennesse so there is a lot of road to get stuck in!) and Lindsey getting sick at Stitches Texas with food poisoning.
But Lindsey is determined to persevere. The biggest challenge she meets with a fierce determination, having enough fabric for all of her fans to get the bags they want. For example, (this can be found at her Crowd-Funding page) Lindsey found a fabric with a sweet knitting sheep design. She called as soon as she received notification of it’s availability to find that it was ALREADY sold out. When she finally did get it, she called to order again and it was again sold out. 
To meet the challenge of having the fabric her customers want when she can use it, Lindsey has given us the opportunity to help her by means of a Crowd-Funding plan. This has been really successful for lots of o take a giant leap in their success. It gives us, the general public, the opportunity to support a small business that we love. In this case, we can contribute any amount we can afford (or more if we wish to REALLY show we love them) from a dollar. There are also levels that reward contributors with product, anywhere from a sock bag, to a collection of bags that you could share with everyone at knit night. (Or for every one of your projects!)
There is so much more to look forward to with Erin.Lane Bags. She also mentioned her newest products, the Zippity Do Da and the Zippity TWO Da bags, which Lindsey totally credits Marly with naming. For 2016, Lindsey is organizing a club, called Indie Yarn Carnival that includes a bag with coordinating yarn from 6 independent dyers. They are also registering people for a club based on Lindsey’s favorite books, CS Lewis Narnia series, called A Year of Winter which will include yarn from indie-dye companies. The deadline for that is December 15th, so get signed up, there are 6 packages, payable in 12 installments, and you don’t want to miss any of them.
Just want to point out, Lindsey’s bag/yarn clubs really shows her support of other small businesses, because some indie-dyers are often found doing their work in the big pots in their kitchen.
You can find Erin.Lane Bags website at this link, BE SURE TO VISIT the Crowd-Funding page and share it with all your crafting friends. Erin.Lane Bags are also very active in Social Media, you can find them in Ravelry, Facebook, Twitter, so make sure you’re following them everywhere, too.
Just for fun, here are the links to Lindsey’s two earlier visits to the Yarn Thing podcast, in 2013 and just earlier this year, when Erin.Lane Bags became a NEW Yarn Thing Sponsor.
If you weren’t able to join us LIVE, this episode of Yarn Thing is still available as and archive at it’s original location: http://www.blogtalkradio.com/yarnthing/2015/10/01/yarn-thing-sponsor-erinlane-bags-lindsey-martin-needs-you or in iTunes.
The post Yarn Thing Sponsor, Erin.Lane Bags’ Lindsey Martin NEEDS YOU appeared first on Marly Bird.
Marly Bird's Blog

- Marly Bird's profile
- 19 followers

