
Ruth Soukup's Blog, page 83
April 13, 2015
How to Store & Organize Your Spices

Being able to whip up any number of dishes based the pantry staples you already have on hand is a great way to keep your grocery expenses down, and a well-stocked kitchen should include at least a basic selection of frequently used spices and herbs.
Like most things in life, spices and herbs are usually best when kept simple, and a budget-friendly spice rack means making sure you’ll actually be able to use the spices you keep on hand before they go bad. The truth is that most of us have way too many spices on hand, and we could probably all benefit from a nice big purge.
Believe it or not, most dried herbs and spices have a definite shelf-life and it’s actually not nearly as long as you think! Most jars come with a clear expiration date that usually falls within 1 to 3 years, if kept sealed. When opened, most spices last from 12-24 months, depending on storage location. Fresh herbs and spices can add a lot of oomph to your cooking, but old or expired spices may detract from or muddy an otherwise great dish.
Most herbs and spices should be added at the end of the cooking process. If you’re cooking up a freezer meal or making a crockpot dish, we find that the flavors turn out brighter and stronger when there’s a final round of seasoning added just before the dish is served, especially when using fresh ground pepper or herbs.

Spices & Herbs: Containers and Storage
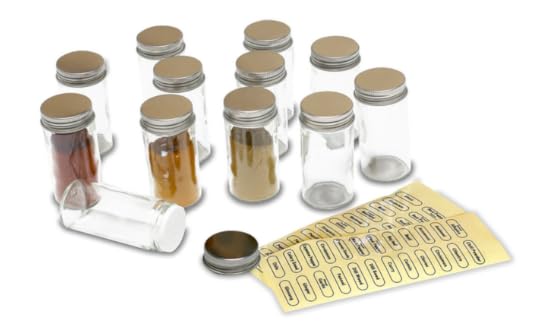
Small jars work very well for spices due to their tight-fitting lids. Glass works well because you won’t transfer flavors. Plus, the jars can be reused and there are a variety of sizes available. Small mason jars are one possibility, or you can order a set of 12 glass jars like these ones for less than $15. I’ve also seen individual jars sold at The Container Store or Bed, Bath, & Beyond.
As counterintuitive as it may seem, spices should never be stored near your stove. Heat damages spices and weakens their flavor. Spices should be kept in a cool, dry, dark area of your kitchen, like in the pantry. Red-colored spices (including red pepper, paprika and chili powder) should always be stored in the fridge, especially in hot and humid climates. Seeds like poppy and sesame should also be stored in the fridge to prevent the oils from going rancid.
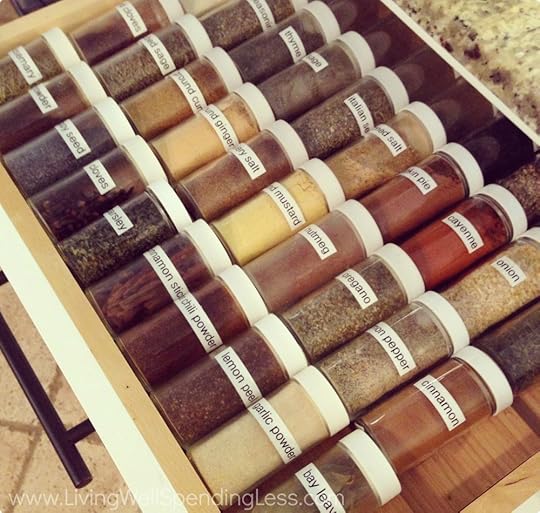
For easy access, store spices on a lazy Susan or on a staggered shelf so you can clearly see labels and quickly determine what spices you have on hand. A drawer works great as well, as long as you can clearly see everything and it all fits properly. In our kitchen, my husband used a few scrap pieces of wood to create simple drawer racks to hold the spice jars.
As you transfer your spices to jars, it is a good idea to include a sticker or mark the date on the bottom of each container. This ensures you don’t keep spices beyond their usefulness. As tempting as it can be to buy in bulk, only purchase what you can use within the allotted “freshness” time period—six months to a year once a jar is opened.
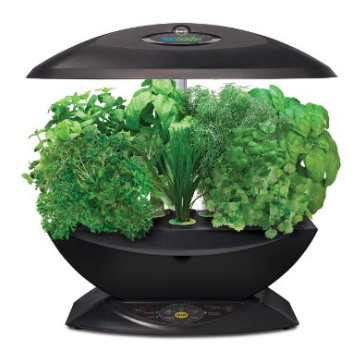 When it comes to herbs, nothing beats fresh. “Green” flavors just don’t dry well. A windowsill herb garden with a few basics like parsley and cilantro can really up your culinary game. Try a cool countertop pod like the Miracle-Gro AeroGarden to keep your herbs fresh and growing all winter long.
If you have a black thumb, freeze-dried herbs or herbs frozen in cubes (like these by Dorot) are great alternatives to fresh. You can also make your own by chopping herbs and storing them in broth or olive oil, then freezing them ice cube trays.
If you purchase fresh (sometimes pricey) herbs from the market, store in open bags with damp paper toweling to help them last longer. Prepara Herb Savor Pods help your herbs last three times as long in the fridge and they’re worth the investment seeing as fresh herbs often come in large quantities and are hard to use up in just a few days.
Building Your Spice Drawer
To keep it simple, you really only need to keep a few basic herbs and spices on hand. Storing them as whole as possible will help preserve their life and flavor.
Salt (I love these Maldon Sea Salt Flakes, but any sea salt or kosher salt will work)
Black Pepper (Peppercorns are even better!)
Chili Powder (store in the fridge)
Garlic Powder
Minced Onion
Ground Cinnamon
Freeze Dried Dill (Litehouse brand, found in the produce section at Target!)
Paprika (store in the fridge)
Dried Thyme
Seasoned Salt or Lemon Pepper
Add these extras if you…
Do a lot of baking:
Nutmeg (purchasing whole will ensure a longer life and fresher flavor)
Poppy seeds (store in the fridge)
Cloves
Pumpkin Pie Spice
Ground Ginger
Like Mexican flavors:
Cumin
Crushed Red Pepper (store in the fridge)
Cayenne Pepper (store in the fridge)
Like Italian cooking:
Dried Oregano
Freeze Dried Basil (Litehouse brand, found in the produce section at Target!)
Crushed Red Pepper (store in the fridge)
Like Asian & Middle Eastern dishes:
Yellow Curry Powder
Sesame Seeds
Turmeric
Mustard Seed
Freeze Dried Ginger (Litehouse brand, found in the produce section at Target!)
At this point, you might be scratching your head and wondering, “What about parsley? Cilantro? Basil?” Unfortunately, many green herbs simply aren’t worth storing because they lose so much flavor. The exceptions to this rule are Thyme and Dill which both remain fairly potent, even on a shelf. But for common herbs like parsley, cilantro, basil, chives, sage, and mint, it really is better to use fresh whenever possible.

Once in a while, your recipe will call for a unique herb or spice, like Gumbo File Powder or Cream of Tartar, and offten it is that unique flavor that really “makes” the dish. In those cases, we recommend buying the smallest quantity possible from a spice retailer or the bulk foods section of your market. Often you can transfer leftovers from a bag to the smallest jar possible or simply only buy enough to use all at once.
Keeping it Organized
While it might seem a little overwhelming at first, overhauling and assessing your spice and herb collection doesn’t have to take all day. Simply follow these five simple steps:
Check expiration dates and get rid of anything that:
You don’t use regularly
Looks discolored
Looks like it’s caking
Smells weak
You’ve had open for longer than a year
Find and assemble glass containers with lids that seal tightly, such as these or these .
Create labels and expiration labels. (Try these chalkboard labels –so cute!)
Assemble jars and fill with spices
Store in an accessible corner of your fridge or pantry, away from light, heat and moisture
It can feel a little painful to throw herbs and spices away, especially when you know how expensive they can be, and it can also be a little scary to add new flavors to your collection if you aren’t sure how to use them. Even so, a well-stocked kitchen strikes a balance between flavor and waste.

* * *
How do you store your spices?
Pin It
The post How to Store & Organize Your Spices appeared first on Living Well Spending Less®.


April 11, 2015
Weekend Wandering


Happy Weekend! I’m trying to muster up the motivation to tackle some spring cleaning projects, but the truth is that all I really want to do is curl up and read all weekend! I’m still not sure which side is going to win out……what are YOU planning to do this weekend?
In other news, voting for the Secret 13 essay contest will start on Tuesday April 14th–be sure to pop by to support your favorite essay! One lucky finalist will win a 7 day cruise for four on the Carnival Sunshine!
Here is what I loved this week:
* * *
First of all, this Classic Layered Salad with Avocado Cream from Nicer Than New is absolutely gorgeous! What a perfect dish to bring to a potluck or picnic!

These Crockpot Chicken Tacos from Kleinworth & Co. are a super easy no-fail recipe that the whole family will love!

These Herb Marinated Grilled Pork Chops from This Silly Girl’s Life look and sound amazing!

Moving onto the sweets…these Lemon Cheesecake Cookie Bites from Life With the Crust Cut Off would be perfect treat for a Mother’s Day brunch!

These Lemon Thyme Shortbread Cookies from Home Made Interest sound absolutely amazing!!

Mmm…this Lemon Meringue Cake from Annie’s Noms is so pretty! (Can you tell I LOVE lemon?!)

Of course if chocolate is more your thing, this Chocolate Dessert Pie from The Pretty Bee looks both simple and delicious!

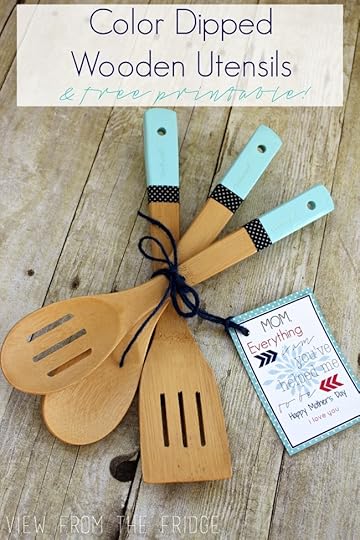
Onto some DIY crafts and projects….Just in time for Teacher Appreciation week and Mother’s Day, these Paint Dipped Wooded Utensils from A View From the Fridge are such a cute and practical gift!
This DIY Monogram Tote Bag from Sweet T Makes Three has step-by-step instructions and suggestions for fabric combinations.

This Lemon Coconut Homemade Sugar Scrub from Saving Cent by Cent uses just 3 ingredients and can also be made with your favorite essential oil!

These free printables of Oh! The Places You’ll Go Graduation Treat Bag Toppers from A Little Claireification are such a fun idea!

These tips from Ann’s Entitled Life on How to Grow a Salsa Garden are perfect for beginners!

If you don’t have the greenest of thumbs but still want to eat fresh then be sure to check out these Top 10 Farmer’s Market Tips from Blue Crab Martini.

A Cultivated Nest shares 8 Old Fashioned Money Saving Tips that are still applicable today!

This list of 3 Things You Should Never Ever Buy from My Love for Words is such a great resource!

Working at Homeschool shares her secrets on How She Fed Her Family of Six for a Week for Under $100 without coupons! There is also a downloadable menu, shopping list and cooking instructions!
Finally, these Top 10 Budget Travel Ideas for a Dream Vacation from Financially Wise on Heels can yield an awesome Summer vacation!

* * *
What did you love this week?
Pin It
The post Weekend Wandering appeared first on Living Well Spending Less®.
April 10, 2015
5 Smart Ways to Spend Your Tax Refund

This is a guest post from Kalyn Brooke of Creative Savings
Every year around tax time, I anxiously wait for a call from our CPA letting us know whether we owe or get a refund this year. It’s anxiety-inducing to say the least, but for the most part, we’ve been lucky enough to get a nice chunk of change deposited into our account — usually right before we have a major car repair — go figure!
As we’re paying for those perfectly timed {and usually unplanned} expenses, I have to admit I’m a little jealous of those who are able to spend their refund in a more exciting way. But while it might be more exciting at first glance, I know that it’s not always smart, especially if we have to make hard financial sacrifices in order to “keep up appearances”.
It’s frustrating to be responsible, yes? But I’m pretty sure you’ll find it’s more than worth it.
Here are the steps you need to tackle first, before using your tax refund toward a dream cruise, fancy car, or kitchen remodel. In fact, if you continue to use your resources wisely, you’ll be able to afford those fun things many times over — promise!

Start or Increase Your Emergency Fund
Emergency funds are essential to maintaining healthy finances — they help you prepare for the unexpected, and reduce the impact of a higher than normal bill. Without an emergency fund, both my husband and I would be in hot water, for sure!
If you don’t have an emergency fund set up yet, tax time is the perfect opportunity to start. A general rule of thumb is to set a goal of $1,000, which might seem like a lot, especially if you’re struggling just to meet the day-to-day expenses. But if you can just put a few hundred dollars from your return toward establishing one, you’ll be better off than most.
After you’ve made it to the $1,000 mark, you can work on increasing your fund to be approximately three months worth of expenses {an extra safe zone}, or move on to Step 2. You also might want to reference 10 Smart Ways to Build an Emergency Fund for even more ideas on how to save.
Pay Down High Interest Debt
The next step is to work on paying off, or at least putting a good portion towards, high interest debt. These are things like credit cards, school loans, or any other outstanding debt you might have with a super high interest rate. The sooner you can get rid of these payments, the more money you’ll have available for other, and more important things!
It seems everyone has a differing opinion on whether you should pay off debt first, or start an emergency fund. Supporters of the emergency fund claim that if something catastrophic happens, you won’t have any money to cover it. Supporters of paying off debt first, especially high interest ones, claim that you’ll save more money in the long run by doing it this way.
No matter which way you choose, I honestly believe you won’t be doing it “wrong”. As long as you are steadily working toward a better financial future, you’ll be okay.

Build Your Savings Account
Once you’ve paid down high interest debt AND have at least a $1,000 emergency fund, it’s time to start building your savings account. This is the fun part, because you can start dreaming about all the different things you want to eventually purchase!
Some people prefer to open a separate savings account specifically for each item they are saving for, or designate various columns in the same account to keep track. Do what works best and makes the most sense to you.
Here are some ideas of what you might start saving for:
A down payment for a home
Being able to pay for your next car in cash
A family vacation
A much-needed remodel or repair for your home
College tuition for your children
Your tax refund is an excellent resource to jumpstart any of the above goals, but if you want an even healthier savings, be sure to read 3 Surefire Ways to Increase Your Savings Account to reach those goals even faster.
Pay Down Longterm Debt
Interest rates for mortgages and car loans are generally lower than credit card rates, so the next step is to work on paying down those longer term debts that you’ve accumulated. It can seem really overwhelming to look at your mortgage and wonder how you’ll ever decrease it to a more manageable level, but even just one extra payment a year can have a big impact, and save a lot of interest!
Something I find really helpful and motivating is to print out an amortization schedule in which I highlight the month any time a new payment is made. This shows me at a quick glance how many months I have left to pay, and encourages me to keep going until the loan is completely gone.

Invest in the Future
When you have all the previous steps completed {or at least a good start!}, it’s time to use that tax refund towards investments. In all honesty, I’m not an expert in this area, but I do know that it’s important to stash away some money for retirement whenever you can.
If you have a 401K through your employer, seriously consider adding a little bit more toward it this year, and if you don’t yet have a Traditional or Roth IRA, now might be the perfect time to open one. {Here’s a better explanation of both IRA’s, and the difference between them.} Certificates of Deposit are less popular, but may be worth looking into if you don’t need to access your tax money right away, and are still deciding the best course of action.
Any amount you contribute towards retirement is deductible on next year’s taxes, so it’s has an even bigger and better benefit beyond helping you prepare for the future.
It’s not often that we have extra cash at our disposal, so it’s even more important that we spend our tax refund without regret. These steps will give your money the best chance of success, and start you on the path toward true financial independence!

Kalyn Brooke is a full-time writer and blogger at CreativeSavingsBlog.com, where she gives a fresh perspective on frugal
living, and the kick-in-the-pants you need to create a budget from scratch. She lives in beautiful Southwest Florida with her news-photographer husband. She loves making to-do-lists, reading good books, eating chocolate peanut butter ice cream, and pursuing big big dreams… all carefully planned out, of course.
* * *
How are you spending your tax refund this year?
Pin It
The post 5 Smart Ways to Spend Your Tax Refund appeared first on Living Well Spending Less®.
April 9, 2015
Thrifty Thursday {Week 104}

Happy Thursday! Here at LWSL headquarters my team and I have been busy getting ready for our 2015 session of Elite Blog Academy! The doors will be opening for one week on April 14th, and then they won’t open again until 2016! If you’ve been thinking about taking the course, will not want to miss this window! (For more information about whether EBA is right for you, check out this post.) Also, to kick off the launch we will be offering a 24 hour promo code–FIRSTDAY–that you can use to save $75 on the tuition fee. However, this code will expire at 11:49pm on Tuesday, 4/14, so don’t wait to use it!
In other news, our very last Secret 13 Essay Contest finalist this week was Courtney. You can read her journey here. Voting for Secret 13 will start on Tuesday April 14th as well–be sure to pop by to support your favorite essay. One lucky finalist will win a 7 day cruise for four on the Carnival Sunshine!
Here are the most clicked links from last week:
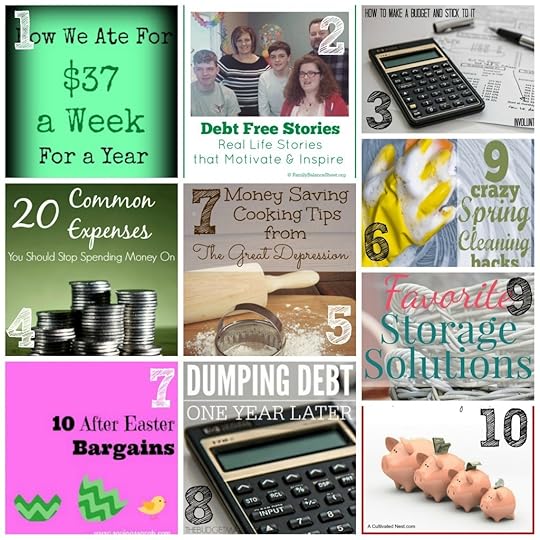
1. Not Getting Off This Train { How We Ate for $37 a Week for a Year }
2. Family Balance Sheet { Find Out How Brian and His Wife Paid Off $109,000 Debt }
3. Involuntary Adulthood { How to Make a Budget }
4. Adventures in Couponing {20 Common Expenses You Should Stop Spending Money On}
5. Graceful Little Honey Bee {7 Money Saving Cooking Tips}
6. A Debt Free Stress Free Life {9 Crazy Spring Cleaning Hacks}
7. Earning & Saving with Sarah Fuller {10 After Easter Bargains}
8. The Budget Mama {Dumping Debt- One Year Later}
9. Laura Sue Shaw {Storage Solutions for a Beautiful, Organized Home}
10. A Cultivated Nest {Sinking Funds: How Planning Ahead Saves You Money}
Never linked up before? Here’s how:
Scroll down, find the little blue “Add your Link” Button and click on that.
Follow the instructions on the next page – add a great image of your project and an interesting title. Make sure you link to the direct page of your budget friendly post – not the main page of your blog!
Try to visit at least a few other blogs at the party. Be sure to leave a comment to let them know you stopped by!
Please link back to this post somehow. There are badges available here; a simple text link is just fine too.
 Feel free to tweet about Thrifty Thursday so others can join the fun, and don’t forget to check back here Sunday morning to see which posts have been featured this week at Weekend Wandering!
If this is your first time here I also invite you to check out my blogging guide, How to Blog for Profit (Without Selling Your Soul). It is a fantastic resource if you are interested in building your blog, getting more traffic, or learning how to monetize! Or, if you have read the book and are still looking to take your blog to the next level, I encourage you to check out Elite Blog Academy.
An InLinkz Link-up
Pin It
The post Thrifty Thursday {Week 104} appeared first on Living Well Spending Less®.
April 8, 2015
Creamed Kale & Spinach Casserole


After four years of trying, I feel like I’m only just beginning to figure out this whole gardening thing. If you’ve been following my progress on Instagram, (hashtag #SoukupGarden), you’ve already seen that this year’s vegetable garden was by far our most successful! The kale did especially well, which gave me fresh incentive to try a brand new recipe!
I’ve always loved creamed spinach and I always order anytime we go out to a nice steak house for dinner, but I’ve never tried making it at home. Who knew it was so easy? And while spinach on its own can be a little mushy when it’s cooked, the kale adds the perfect amount of texture to the mix! It is so good! Even my kids couldn’t get enough of this delicious casserole!
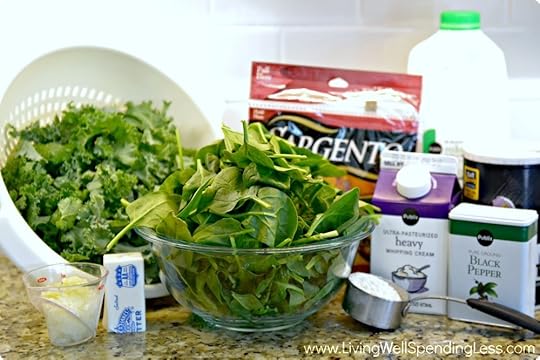
Here is what you need:
6 tablespoons butter
4 tablespoons all-purpose flour
1 cup whole milk
1/4 cup heavy whipping cream
2 tablespoons minced onion
2 cloves garlic, minced
1/8 teaspoon ground nutmeg
1 large bunch kale, rinsed & leaves torn from stems
8 ounces baby spinach
salt & pepper
1/2-1 cup shredded Parmesan cheese

Step 1: Melt 4 TBSP of butter in a medium saucepan over medium heat. Whisk in flour until smooth. Cook for one minute stirring constantly.

Step 2: Slowly whisk in milk, nutmeg, and heavy cream. Add onion and bring to a simmer, stirring quite often to prevent clumping and scorching. Simmer on low heat while you prepare the kale.

Step 3: Chop kale into small pieces.

Step 4: Melt remaining butter in large saute pan over medium heat. Add Kale a little at a time, stirring occasionally until it begins to wilt, cover, turn to medium-low heat and let kale cook for 2-3 minutes. Add spinach and let it wilt.

Step 5: Once kale & spinach is soft, pour in cream sauce, folding with spatula to combine. Season to taste with salt and pepper.

Step 6: Mix in Parmesan cheese. Pour into an oven safe dish, and sprinkle with additional Parmesan if desired.

Step 7: Bake at 400 degrees for 10 minutes; then broil for 5 minutes until cheese is browned.
Print This!
Recipe: Creamed Spinach & Kale Casserole
Summary: These leafy greens come together nicely in this super cheesy casserole!
Ingredients
6 tablespoons butter
4 tablespoons all-purpose flour
1 cup whole milk
1/4 cup heavy whipping cream
2 tablespoons minced onion
2 cloves garlic, minced
1/8 teaspoon ground nutmeg
1 large bunch of kale, rinsed & leaves torn from stems
8 ounces baby spinach
salt & pepper
1/2 – 1 cup Parmesan cheese shredded
Instructions
Melt 4 TBSP of butter in medium saucepan over medium heat. Whisk in flour until smooth. Cook for one minute stirring constantly.
Slowly whisk in milk, nutmeg, and heavy cream. Add onion and bring to a simmer, stirring quite often to prevent clumping and scorching. Simmer on low heat while you prepare the kale.
Chop kale into small pieces.
Melt remaining butter in large saute pan over medium heat. Add kale a little at a time, stirring occasionally until it begins to wilt, cover, turn to medium-low heat and let kale cook for 2-3 minutes. Add spinach and let it wilt.
Once kale & spinach is soft, pour in cream sauce, folding with spatula to combine. Season to taste with salt & pepper.
Mix in Parmesan cheese. Pour into an oven safe dish, and sprinkle with additional Parmesan if desired.
Bake at 400 degrees for 10 minutes; then broil for 5 minutes until cheese is browned.
Preparation time: 5-10 minutes
Cooking time: 20-25 minute(s)
Number of servings (yield): 12

Pin It
The post Creamed Kale & Spinach Casserole appeared first on Living Well Spending Less®.
April 7, 2015
Always & Never are Seldom True (Secret 13 Finalist)


Living Well Spending Less: 12 Secrets of the Good Life shares 12 secrets for seeking—and finding—the Good Life in our day to day lives. From time management and goal-setting to managing our homes and finances, these practical and concrete strategies can help each of us discover a life rich with purpose. Even so, a life well lived is not so much about what we have as who we are, and ultimately each one of us holds the key to our own secrets. Secret 13 is the truth that YOU have uncovered as you discover your own Good Life.
Each week for 12 weeks we will select one finalist’s essay to feature here at Living Well Spending Less. At the end of the 12 weeks, Living Well Spending Less readers will vote on their favorite #Secret13 story, and the essay with the most votes will win a 7 day cruise for 4 on the Carnival Sunshine! Today’s post is our final finalist in the Secret 13 Essay Contest. For information about voting, which begins NEXT WEEK, scroll to the bottom of the post!
You know that “I own the domain name but am too terrified to hit publish” phase of blogging? I’m still there, although after reading Living Well, Spending Less: 12 Secrets of the Good Life, I’ve realized that perhaps it’s time for me, Courtney Black, a wife, mother, daughter, life-long learner, decent cook, horrific gardener, amateur explorer, avid reader, loyal friend, life lover and Christ follower, to add writer to that lengthy list of identifiers. I’ve decided to enter this contest as a step towards being brave, as too much time has been wasted in fear of what others will think of my writing. The prospect of a week-long cruise appears to be enough incentive for me to finally take that risk. Along with my husband and two children, we call Fort Myers, Florida home. My job teaching middle school students may cause some to label me as somewhat zany, but rest assured I’m fairly normal. What little wisdom I have is gathered here on this page and here is my Secret #13: Always and Never are seldom true.
* * *
Perhaps it was the caffeine induced buzz, or the euphoria a Florida winter’s day inevitably brings; the crisp, cool, clear morning sliding through the sunroof…nope, my kids were at Mother’s Morning Out, so that was most definitely it. It was that very morning that I experienced with more clarity than ever before, God’s purpose for my life. While driving down the road watching the vapor trails from airplanes form a checked pattern across the cloudless cerulean sky, I was so overwhelmed by the simple beauty of the moment. I could feel God pouring into me and whispering, “I’m here.” I just wanted to savor that moment and keep it as a reminder. I wanted to save it for those days. Yes, those days….you know the ones.

You see, many of my days are not so glittered with simple perfection. Often I feel rather lost and alone. I did not slide into my role as a stay at home mom as seamlessly as I had hoped or expected. Sometimes the minutiae of the laundry, doctor’s visits, sweeping, crying, scrubbing, wiping, screaming, rinse, dry, repeat of my life really gets me down. My children are demanding, frequently pooping, mess-makers and they drive me to the edge of insanity before reverting back to the most precious and delightful children God ever created. Even with the pandemonium and relentless renditions Peppa Pig, one thing I have learned is that this is the good life, because this life is the only one we’ve got. And even in the dark crevices of those days, God is with us. And although I have far more of those days than I would care to admit, I understand that a proper perspective is essential and that always and never are seldom true.
There are times it feels that there is always laundry to fold or someone is always sick and there are always more Legos hiding beneath the sofa. But someday, there will be no tiny “Frozen” panties or “Hot Wheels” socks to fold. I will not always be in the car, driving to doctor’s appointments or forever wiping a dirty face, hands, or bottom. And in a strange and paradoxical twist, your kids might someday be changing you and wiping your behind, driving you to your doctor’s appointments. Their always won’t last either. Whether or not they realize it, you won’t always be around and neither will they, and neither will their children.
A few years before my grandfather died, he looked at me with a sense of astonishment and said “I’m 77 years old. Where did it all go?”
I had no answer for him and I realized that I was on the same path of wasting and wishing away the days because the details of my life were all at once overwhelming and underwhelming. You see, when I neglected to recognize God in all of those small, seemingly unending moments and tasks, I was in serious danger of staying trapped in the snare of self-pity. Always does that to us. Always makes us take for granted the blessings of service to our family and resent the opportunities to shape and influence the future through them. We will not always have these chances.
Okay, I get it. I can hear the collective “but” coming from your mind. I’m SHOUTING it too, because there is no denying, there are those days. Many of us know them well. Often times we are certain that many of those days will never end. In those days always invites ingratitude, but never ushers in despondency. With the privilege of age, comes experience. Many experiences I call my own, others belong to those who hold a piece of my heart. Far too many friends have endured the loss of a home, their health, a husband, a child. Many times, I have felt that I could do nothing more than pray and weep with them. These are days where God edits our story and everything changes. Forever. What is left makes little sense and it’s difficult to know what is true. However, I have learned from walking with them during these events, I can hold fast to the truth of God’s word that “weeping may endure for a night, but joy cometh in the morning.” (Psalm 30:5) Yes, my friends’ joy cometh indeed.

The birth of our daughter was a joyous occasion. I wish I could say the same for the 20 weeks that followed. At some point during the first few weeks of our daughter’s life, she developed the habit of screaming. All. Night. Long. My husband was back to work and I was not equipped to deal with a cranky toddler and a newborn that rarely slept, so our only option was to drive around at night until she had stopped crying. This took hours. Lack of sleep does strange things to person-full blown hallucinations, incoherent speech, pouring coffee in your cereal. One night at about 3 am, exhaustion and delirium were about to win the war. Unsure if I could drive, or speak or function, I sat on my dirty bathroom floor, with my screaming infant and I sobbed. I cried out to God for help. I was holding my daughter tight to my chest because I didn’t know what else to do. God sent help in the form of my handsome husband. With disheveled hair, glasses and pajamas, he walked in and said, “Go get in bed, I can take her.” Despite being exhausted himself and having to work the next day, he gently took her, placed her in her car seat and said, “Come on kid, let’s go for a drive.” I’d never loved him more.

Today is my last day as a stay at home mom. Monday, I return to the work force as a middle school teacher. Gone are the week days of staying in our PJ’s until noon or being there for every first. The transition promises to hold challenges and triumphs for my children and for myself. Never did I think these days would come to an end. And although, there will be things I will not miss, I will miss watching my children play in our backyard each morning, and spending hours on the floor playing Play Dough. God was there with us in those seemingly small unending moments. But He will remain with us, even during our hours apart. I hope I’ve taught my children to look for Him. And I hope I’ve taught them that this is the good life, because God is with us and always will be.
* * *
For the past few months, we’ve read Secret 13 stories from 12 inspiring finalists, as they’ve shared how the lessons found in Living Well Spending Less: 12 Secrets of the Good Life personally affected or changed them. Now it’s almost time for one of them to win an all-expenses paid cruise for four on the Carnival Sunshine, and we need YOUR help to pick a winner!
Beginning next Tuesday, April 14th at 9am EST, you will be able to VOTE for your favorite Secret 13 Essay! Voting will remain open until Sunday, April 19th at 11:59pm, and we will announce the winner on Tuesday, April 21st.

Pin It
The post Always & Never are Seldom True (Secret 13 Finalist) appeared first on Living Well Spending Less®.
April 6, 2015
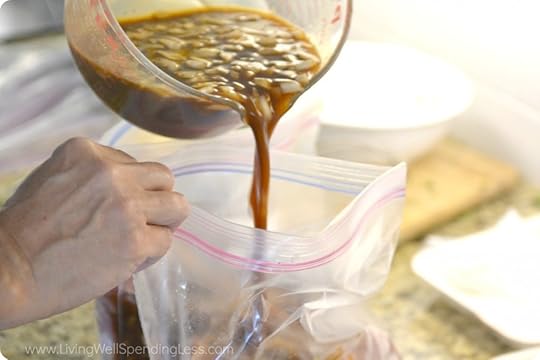
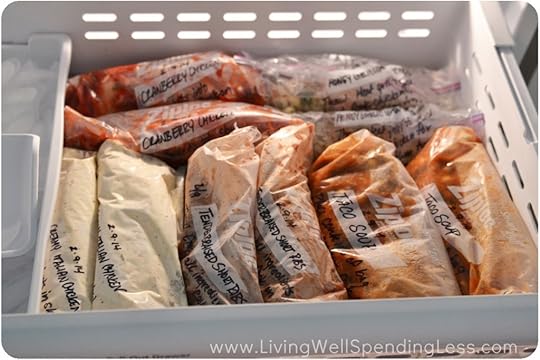
10 Freezer Meals in One Hour: Part 5


As you’ve hopefully discovered by now, here at Living Well Spending Less my team and I are 100% committed to bring you easy recipes that taste great and don’t take a lot of time, effort, or expensive ingredients to throw together. As a busy mom, I also want meals that can be made and frozen ahead of time to save time on hectic weeknights, especially as part of a Sunday Prep plan. My goal is to spend less time in the kitchen, not more, but I still want to be able to provide tasty meals that my family loves (and avoid eating out when we can!)
Over the past year we have shared four different 10 Meals in One Hour plans, which have each included 5 great freezer recipes that can be prepared together in about sixty minutes. (You can find the previous plans here: Part 1 , Part 2, Part 3 and Part 4) They have been a huge hit, not only with our own families, but with many of your families as well, and we’ve absolutely loved hearing how much you all are enjoying these tasty recipes!
Today I amsuper excited to share with you a new series of flavorful favorites.
As usual, in order to make the cut, each recipe must meet ALL of the following criteria:
Deemed delicious by both my kids and husband (plus additional testers!)
No pre-cooking required (aside from browning ground beef)
Freezer friendly
Easy to cook
Uses budget-friendly ingredients and pantry staples
In this one post you will find everything you need to prep 10 awesome freezer meals in about an hour of hands-on time (not including grocery shopping.) Just think, in just one quick weekend session you could have almost two weeks worth of absolutely delicious, family-friendly meals all ready to go!
Before you begin, you will need to gather your tools & supplies and also make sure that you have all your groceries on hand. I find it is easiest to go grocery shopping the day before I do my cooking. To save time unloading, only put away the items that need to be refrigerated. Finally, make sure your kitchen counters are cleared of clutter and sanitized and empty your dishwasher and sink of any dishes. (Check out this post for more tips on freezer cooking like a pro!)
Here are the five recipes we will be making:
Freezer-to-Crockpot Chicken Fajitas
Crockpot Beef Burritos
Kale & White Bean Soup with Sausage
Creamy Mushroom Pork Chops
Honey Sesame Chicken
Here are the supplies you will need:
10 gallon size zipper freezer bags
labels or permanent marker
large mixing bowl
cutting board
sharp knife
garlic press
can opener
dry measuring cups
liquid measuring cups
dry measuring spoons
liquid measuring spoons
12 inch frying pan
stand or hand mixer
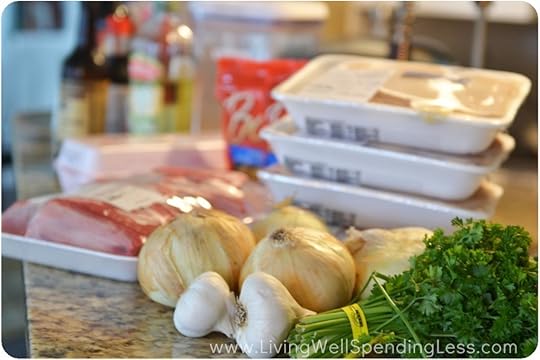
Here are the ingredients you will need:
Produce
6 sweet onions
2 bunches green onions
3 green bell peppers
2 packages shredded lettuce (optional; only needed for cooking day, not for prep)
2 avocado(optional; only needed for cooking day, not for prep)
1 bunch Italian parsley
5-6 large carrots
6-8 cups kale
12 cloves garlic
1 8oz package sliced mushrooms
1 lime
Pantry Staples
Olive oil
Soy sauce
Ketchup
Rice (optional; only needed for cooking day, not for prep)
Black pepper
Salt
Garlic powder
Honey
Cayenne pepper
Italian Seasoning
Paprika
Red Pepper Flakes (optional)
Sesame Seeds (optional; only needed for cooking day, not for prep)
Canned/Dry Goods
4 15oz cans white beans or 1 pound dry white beans
2 15oz cans diced tomatoes
12 cups chicken broth
2 cans condensed cream of mushroom soup
2 packets chicken fajita seasoning
1 4oz. can green chiles
1 16oz jar of Salsa Verde
1 16 oz jar of Salsa
2 packets of taco seasoning
3 10oz cans of Rotel tomatoes or diced tomatoes with chiles
Bread
burrito size flour tortillas (cooking day only)
fajita size flour tortillas (cooking day only)
Dairy
Sour Cream (cooking day only)
1 cup shredded Parmesan cheese (optional)
1 package shredded cheddar cheese (optional)
Meat
6-8 pounds boneless, skinless chicken thighs or breasts
1 pound smoked sausage (optional)
2-2-3 pound chuck roasts
8 pork loin chops (not thin cut)

Be sure to print the following pages before getting started:
Printable labels (designed to work with Avery 8163 shipping labels)
Printable Shopping List
Printable Prep & Prepare Instructions
Be sure to also print the following recipes:
Freezer-to-Crockpot Chicken Fajitas
Crockpot Beef Burritos
Kale & White Bean Soup with Sausage
Creamy Mushroom Pork Chops
Honey Sesame Chicken

PREP
(The night before) If using dried beans instead of cans, soak beans in water overnight, then drain and set aside.
Prep your bags—either print labels using these ready-made printable labels or use a permanent marker to label each bag with the name of the recipe, date prepared, and cooking instructions. DO NOT SKIP THIS STEP! While you might think that you’ll remember what is in every bag, I promise you will forget!
Chop smoked sausage and set aside
Chop onion and set aside
Chop green onion and set aside
Chop carrots and set aside
Slice green onions and set aside
Remove stems from kale; coarsely chop and set aside.
Chop parsley and set aside
Peel and mince garlic and set aside
Prep raw chicken if necessary
PREPARE
Prep Kale & White Bean Soup using instructions found here . Divide mixture into 2 freezer bags, press out excess air, and seal well. Place bags in refrigerator.
Prep Creamy Mushroom Pork Chops using instructions found here . Divide mixture into 2 freezer bags, press out excess air, and seal well. Place bags in refrigerator.
Prep Crockpot Beef Burritos using instructions found here . Place meat into 2 freezer bags and cover with marinade, then press out excess air and seal well. Place bags in refrigerator.
Prep Crockpot Chicken Fajitas using instructions found here . Place chicken into 2 freezer bags and cover with marinade, then press out excess air and seal well. Place bags in refrigerator.
Prep Honey Sesame Chicken using instructions found here . Place chicken into 2 freezer bags and cover with marinade, then press out excess air and seal well. Place bags in refrigerator.
Once all prep is complete, place all bags in freezer until needed. After you’ve made your meal plan for the coming week, consider setting an alert on your phone to remind you to take your bag out to thaw the day before you plan to make it!
* * *
Have you tried making 10 meals in an hour yet? What tricks or tips can you share?

Pin It
The post 10 Freezer Meals in One Hour: Part 5 appeared first on Living Well Spending Less®.
April 4, 2015
How to Make Money Blogging

I don’t usually write about the business side of blogging here at Living Well Spending Less. My main focus and passion is helping my readers discover simple ways to live better, spend less, and have more time for the things that matter most. That said, as someone who earns a full-time income through blogging, the topic of how to start a blog and how to make money blogging is something I get asked about all the time!
The truth is that I am incredibly passionate about helping other bloggers—or those who aspire to be—gain the knowledge to do the same. Don’t get me wrong, blogging is by no means “easy money”, but it is very possible to earn a full-time living writing about what you love and care about.
I know because I’ve done it.
When I first started blogging, I made a ton of mistakes and learned some very hard lessons along the way. I often wished that there had been someone with experience to hold my hand and share all their secrets. I swore that if I ever figured it out, I would help everyone I could.
Finally, two years ago, I wrote a book called How to Blog for Profit (Without Selling Your Soul) that shared in detail the essentials of creating amazing content, growing blog traffic, as well as a number of monetization strategies. That book has gone on to help tens of thousands of bloggers (or those who aspire to be) get started.
From there I began working individually with bloggers through private consulting. I loved helping and encouraging people one-on-one, and the results were pretty dramatic, but I also found that there simply wasn’t enough time in my already busy schedule to keep up with the demand.
But I hated having to say no!
Thus, Elite Blog Academy was born–an in-depth blogging course to help bloggers, step-by-step, exactly how to refine their message, grow their audience, monetize their platform, and build their business. In other words, it is everything I wish someone would have taught me when I first started blogging!

The results of EBA students from our 2014 class been pretty amazing so far–many have tripled or quadrupled their traffic and income in just a few months, and the testimonials keep pouring in:
Let me tell you about the best money I’ve spent this year….I started the course in mid-September and my traffic has tripled. For the first time ever since starting blogging in 2008, blogging as a real PT or FT job is a viable option for me and I’m just so excited.” -Lisa @ A Day in Our Shoes
In the almost-two months since I started Elite Blog Academy, I have more than doubled my monthly page views….I don’t do many reviews on my blog because there aren’t many products that I feel comfortable wholeheartedly endorsing…. But this course? The absolute best course I’ve ever taken. (Out of many, many courses!)” -Alexa @ Single Mom’s Income
Elite Blog Academy has been by far the best investment I’ve ever made in my blog. The course materials and handouts have taught me so much and the techniques really work. When I look at all the materials, bonus helpful handouts and extra personal help Ruth offers, I’m surprised but thankful she didn’t charge more.” -Carrie @ Carrie This Home
When EBA opened, I had no Facebook fans, no Pinterest followers, no anything. I was starting at the very bottom. I have been blown away by the results. I truly love how Ruth encourages newbies to build their content and brand rather than focusing on the numbers at the beginning….My little blog has grown by leaps and bounds this year as I’ve been slowly but surely working my way through this material. I love that I can take these units at my own pace and go back anytime to review and take more notes. Ruth also sends out a helpful weekly newsletter to share the latest and greatest things in blogworld and she has hosted several live chats where you can ask questions. Those have been so helpful and eye-opening….I’ve loved learning and growing from this course and can’t wait to see how this blog will have grown a year from now.” -Jennie @ Little Girl Designs
Elite Blog Academy starts with the basics, from getting your blog off the ground and creating KILLER content (for those of you that are beginners) to developing revenue streams and marketing on social media (for those of you in the mid-region of growth), and all the way to turning your blog into a business! This course taught me how to now only run my blog and my business correctly, but how to have the correct mindset and entrepreneurial spirit that will set my business up for long-term success. And that’s exactly what I want!” -Gretchen @ Retired by 40
The doors for Elite Blog Academy 2015 will be open on April 14th for ONE WEEK only, and then they will not open again until 2016. Right now you can join our waiting list and be instantly registered for our FREE EBA Mini Course, which starts April 7th.

If you already have a blog but want to take it to the next level, or if you have thought about starting a blog but don’t know where to start, Elite Blog Academy might be right for you. We have discovered that our most successful students fall into one of three categories:
Ambitious Beginners Wanting to Establish a Platform
Perhaps you don’t yet have a blog, or you’ve just started one, but you want to establish a platform so that you can write a book or launch a business. Elite Blog Academy can help make sure you are starting on the right foot with a firm foundation
Intermediate Level Bloggers Looking to Grow
You’ve been blogging for a while but don’t feel like you’ve quite figured out the formula just yet. Elite Blog Academy will show you, step by step, exactly what you need to do to step up your game.
Professional Bloggers Already Earning an Income Online
You’re past the intermediate stage, yet somehow you feel like you’re still missing something opportunities for traffic and revenue growth. Elite Blog Academy can help you take your business to the next level and transform your mindset from that of a blogger to that of an entrepreneur.

If you’re still not sure you are quite ready to begin, here are some simple steps that will help you prepare so that you can be ready in time for our 2015 session.
1. Set up a self-hosted blog on Wordpress
Elite Blog Academy is meant to be a hands-on course, which means in order to benefit you will need to have a real live blog to work with, not just an idea for one. If you haven’t already, you will need to set up your self-hosted blog on WordPress. This is pretty easy to do, especially when you use the detailed step-by-step tutorial found HERE.
Furthermore, if your blog is currently hosted on Blogger or WordPress.com, I would strongly recommend that you make the transition to being self-hosted on WordPress, and do it sooner rather than later.
2. Set up your social media accounts.
Once you have set up your blog, you will also want to set up some basic accounts on social media to correspond with your website, including a Facebook page, a Twitter profile, and a Pinterest Business Account. Depending on your niche, you may also want to set up accounts for Google+, Instagram, and LinkedIn.
3. Install a few basic plugins
The best feature of WordPress is that there are an almost infinite number of plugins available to install that can help you do almost anything on your blog, from fighting spam to building your email list to keeping track of your analytics and helping you easily add advertising or affiliate links.
Here are a few that I recommend:
Akismet or Antispam Bee – An anti-spam plugin is probably the very first plugin you will want to install, as spam comments will begin to show up almost immediately.
Bottom of Every Post – This plugin does one thing, and that thing is to add some content to the end of each of your posts.
Google Analytics Dashboard– Google Analytics Dashboard gives you the ability to view your Google Analytics data in your WordPress dashboard. You can also allow other users to see the same dashboard information when they are logged in or embed parts of the data into posts or as part of your theme.
MaxBlogPress Ninja Affiliate – Allows you to quickly and easily insert affiliate links that you use frequently. Using Ninja Affiliate, you can also automatically convert any keyword in your blog to an affiliate link instantly.
WP Supercache – A caching plugin that helps your site load faster.
Yoast SEO – Yoast WordPress SEO is the most complete SEO plugin available for WordPress. It offers everything you need to optimize your site.
4. Get comfortable with blogging
Once you’ve set up your blog, it is important to get comfortable with the process of blogging. Don’t worry about creating the perfect blog design just yet–we will work on that during the course–but instead work on writing blog posts and creating content for your site. Try to figure out what you feel comfortable writing about, how often you would like to write, as well as whether you think the topic you picked is a good one. Don’t worry about getting readers yet, simply work on learning the ropes.
Consider reading one or more of the following books:
How to Blog for Profit: Without Selling Your Soul
WordPress to Go
ProBlogger: Secrets for Blogging Your Way to a Six-Figure Income
5. Set aside time
Elite Blog Academy is the most comprehensive, in-depth blogging course available, and it will show you, step-by-step, exactly how to refine your message, grow your audience, monetize your platform, and build your business. That said, what you get out of the course will directly related to what you put into it. If you try to quickly skim through the course materials to get to the “good stuff,” or are expecting some secret formula that will transform your blog overnight, you will be disappointed.
Elite Blog Academy will work for you, but you will have to do the work, and it will take time! Be sure to plan on giving yourself at least 5-10 hours a week for at least 12 weeks to work on course assignments.
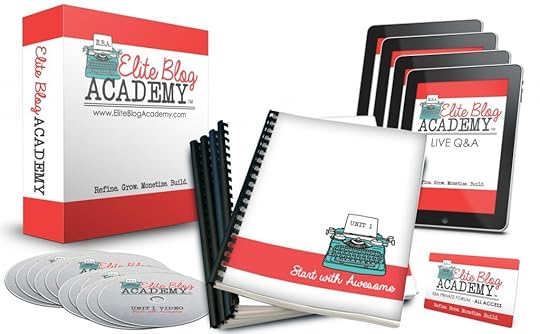
Here is what the course includes:
12 Comprehensive Unit Videos
12 Detailed Unit Outlines
16 Powerful Handouts
30 Purposeful Assignments
4 LIVE Instructional Q&A Webinars
Accountability & Community within a Private Forum
A Guided Course Syllabus with Weekly LIVE Office Hours
A Weekly Newsletter with Additional Tips, Encouragement, & Strategies
Additional Bonus Content, Handouts, & Videos
Elite Blog Academy is designed to be self-paced, but should not be completed in less than 12 weeks. Blogging is not for the faint of heart, and this course absolutely requires a willingness to buckle down and get to work. You should not even consider taking this course if you aren’t willing to put the time and energy into completing each assignment.
However, for those who are willing to put in the time and effort, I know for a fact the strategies I share in this course will work; they already have. In fact, I am so sure that this stuff works that I am backing it with a money-back guarantee. If you complete the course and have not seen measurable results in both traffic and income growth I will give you a full refund. That’s a pretty incredible promise, but it means that you’ve literally got nothing to lose.
Remember, enrollment for Elite Blog Academy 2015 is extremely limited, and will only be open from April 14th-21st. If you are ready to finally start a blog, or to take the blog you have to the next level, be sure to join our waiting list now to secure your spot.
Click here to join the Elite Blog Academy waiting list
Pin It
The post How to Make Money Blogging appeared first on Living Well Spending Less®.
Weekend Wandering
Happy Weekend! Don’t forget that today is the LAST DAY to grab our special offer from ePantry, which expires at 9pm EST tonight! It includes a Free Mrs. Meyer’s Hand Soap, $10 Product Credit, and free shipping for first-time orders, which means you can get more than $50 of your favorite all-natural cleaning products for around $20! We have had so much great feedback about this offer this week–it is seriously an amazing deal! You can get all the information HERE!
This week has been so busy that I have to admit I haven’t done a SINGLE thing to prepare for Easter yet! If you have procrastinated like me are are still needing Easter crafts and menu ideas then look no further–there were a ton of fun Easter recipes & DIY ideas linked up this week! I’m feeling inspired!
Here is what I loved this week:
* * *
First of all, My Mothermode shares her simple recipe for Resurrection Rolls. These are such a neat way to represent the true meaning of Easter!

These Carrot Pancakes from All She Cooks take only minutes to whip up and would be a unique and tasty way to start the day!

These Easy Hot Cross Buns from Carmel Moments might be the perfect compliment to your holiday meal!

Looking for a way to use up all those hardboiled eggs? Why not whip up this super simple Egg Salad from Meatloaf and Melodrama?

Moving on to the sweeter stuff….these Cadbury Ganache Buttercream Cupcakes from Raining Hot Coupons are so rich & decadent that your teeth might actually fall out while you are eating them! Worth it? Perhaps….

These homemade Chocolate Dipped Coconut Cream Eggs from Wheel n Deal Mama sound so much yummier than the store-bought variety!

These deceptively simple Candy Carrots from Crafty Journal look complicated to make, but are actually super easy!

Can you tell I’m all about simple and easy this year? This adorable Bunny Cake from Burlap & Sawdust is also a great way to cheat your way to an easter menu–it is made from two round cakes!

These Pretzel Bunnies & Chicks from One Little Project are so adorable! (And easy as well–I’m definitely feeling better about my lack of preparation!)

Onto some sweet & simple DIY ideas…. These Watercolor Easter Eggs from Three Loud Kids are a great alternative to messy dye!

Likewise, this Easy No Dye Easter Egg Idea from Gym Craft Laundry uses temporary tattoos and glitter glue! Genius!

These Origami Rabbit Baskets from Simple Joys are so cute!

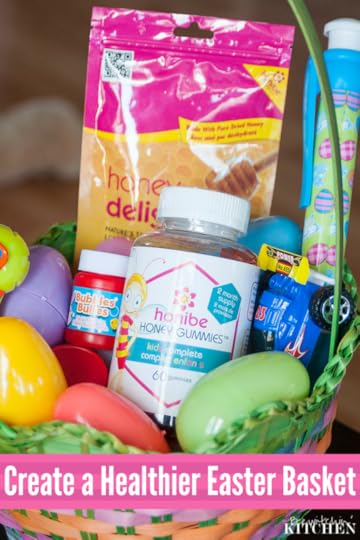
The Bewitchin’ Kitchen shared some great tips for Building a Healthier Easter Basket!
These Budget Friendly Non-Candy Easter Basket Ideas from Frugal Debt Free Life are perfect for last minute basket ideas!

These 10+ Easter Egg Hunt Ideas from Outside the Box Mom are really clever!

I loved these 9 Crazy Spring Cleaning Hacks from A Debt Free Stress Free Life.

How We Thrive on One Income from Snyder’s Tell All shares 5 tips for living on a teacher’s salary. Tip number four is so important!
![How We thrive on one income 5 tips_thumb[3]](https://i.gr-assets.com/images/S/compressed.photo.goodreads.com/hostedimages/1428217792i/14389692._SY540_.jpg)
Finally, Earning and Saving with Sarah Fuller has a list of 10 After Easter Bargains to take advantage of!

* * *
What did you love this week?
Pin It
The post Weekend Wandering appeared first on Living Well Spending Less®.
April 3, 2015
10 Painless Ways to Save


Let’s face it–being a responsible adult is not always easy.
In fact, the idea of saving money can feel painful sometimes! Few of us actually want to give up our creature comforts or drastically lower our standard of living in order to pinch pennies. It’s downright hard to have to tell a child or spouse that something is out of the budget this month, and it’s not always fun to make sacrifices with the big picture in mind.
And while meeting those big financial goals like building an emergency fund or paying off debt WILL probably take some serious effort on your part, the good news is that there are also ways to save money without having to make big sacrifices. Believe it or not, saving money can, in some cases, be painless, fun—and even addicting (in a good way)!
By making it a game and getting the whole family on board, you’ll find that a little savings here and there will really start to add up. Check out these great little ways to painlessly save!
1. Cut Your Cable
Most of us enjoy watching at least a few shows each week to relax and unwind, but what if you could access most of the shows you love for a whole lot less? Cable is FULL of hidden fees, plus it seems we’re always dealing with random price increases or channel packaging changes.
If your cable bill is running you over $20/month, you’re paying too much. Surprised? Netflix is just $7.99 per month after a free month (no hidden fees) and Hulu (which offers more current television shows) is also only $7.99 a month after a free week. We love our Roku box! It offers 2,000+ streaming channels, so you can mix and match the (much cheaper) services that best fit your family’s television habits and budget.
An added bonus of cutting out regular TV in favor of streaming? No commercials! Believe it or not, cutting out commercials is a great way to save, and an amazing way to keep your kids from becoming enamored with everything they see on TV!

2. Access Free Learning Resources
If school isn’t a walk in the park for your kids, there are plenty of online resources that are much cheaper than a tutor. ClassZone offers lots of educational resources that build onto their textbook curriculum, but also offers a ton of additional, standalone help your middle school and high school students can access for free.
There are also plenty of online learning resources for adults. Try MIT OpenCourseWare to learn about everything from aeronautics to media arts. You really can’t beat this top-notch completely free resource for lifelong learners.
For both kids and adults, learning to code can be a hugely advantageous skill in today’s job market. Codecademy courses are a super fun, interactive learning experience—and again, all completely free.
3. Read for Free
Another great resource for learners? Your local library. Your local library offers books, movies and music—and many now grant you access to Zinio for FREE! All you have to do is walk in, get a library card, and start exploring the world at your fingertips.
If you love books but have a hard time finding the time to read, you may also want to check out Audible. Your first 30 days (and your first book) are completely free, so there’s no risk. You may find you’re spending less money on books while enjoying them even more. The cool thing about Audible is that you can request to put your account on hold when you get behind on your reading, so you’re never wasting money. You can also check out Google Books for thousands and thousands of books online, available on nearly any device—all for free.
One other great way to save on books? Sign up to be a book reviewer through a program such as Book Look Bloggers, which sends free books to bloggers for review. Don’t have a blog? You can set one up in less than ten minutes HERE.

4. Switch to a Bank that Pays
There are some banks out there that REALLY want your business, and are willing to pay for it! Chase Bank is offering $200 when you open a Chase Total Checking Account. You have to request a coupon code, which is emailed immediately, and then you can print it out and bring it to the nearest branch. If you’d prefer to sign up online, consider PNC Bank, which has 3 different cash back options, ranging from $75-$300. Online banks can offer some unique savings, since a lower number of brick & mortar locations allows them to pass their own savings on to you in the form of better interest rates and cash bonuses. Capital One 360 also have several cash back options, including one for kids.
5. Save While You Spend
There are lots of really great ways to save while you spend, and most require very little extra effort. Just be careful that you don’t use this as an excuse to buy more! Buy only what you will use and stick to the items on your list. Some may still find it easier to shop with cash, but if you do shop online, you are doing yourself a disservice NOT to utilize easy to use program such as Ebates or Inbox Dollars, both of which give you cash back on the purchases you make. Both programs also have great incentives for joining–Ebates gives you a $10 gift card to the store of your choice, while Inbox Dollars gives you $5 cash. I recommend signing up for both, then deciding for yourself which one is more convenient to use, and which one works with the stores you shop at most regularly.

Another painless way to save while you spend? Round up and save your change. You can start as small as you like. Make a pact with yourself to throw your extra change in a jar whenever you return home with less than $2. If you bank at Bank of America, sign up for their Keep the Change program and your spare change will be automatically transferred to your savings account.
6. Take Advantage of Special Discounts
Are you a student, senior citizen, a teacher, or in the military? Always, always ask for the appropriate discount. Sometimes stores and entertainment facilities offer these discounts but do not post them or actively advertise them. Be brave. It doesn’t hurt to ask!
Discounts for teachers are more widely available than you may think. For example, Jo-Ann Fabrics offers a Teacher Rewards Discount Card, Michael’s offers teachers a 15% discount on all purchases, the Barnes & Noble Educator Program offers a number of teacher discounts and rewards, and even Sprint offers a ton of teacher discounts. Again, always ask!
Check with your employer to see if you’re qualified for savings on anything from your phone bill to your business attire. Target, Men’s Warehouse, Avis, J. Crew, Shoes.com, Restaurants.com and many, many more retailers offer discounts for employees of their hundreds to thousands of corporate partners.
7. Try Easy Freezer Cooking
My husband and I have always loved eating out, and it was often our go-to option anytime life got busy or we weren’t prepared for dinner. Over time, it became an expensive habit! The idea of freezer cooking was always overwhelming to me until I discovered “cheater” freezer cooking–simple recipes that don’t require pre-cooking, and take just minutes to throw together. Now I can whip up ten budget friendly meals in about an hour, which means that we always have easy, delicious meals ready to go.
It has been a lifesaver!
If you haven’t yet tried any of our simple freezer recipes, or followed one of our 10 Meals in an Hour Plans, you are seriously missing out! Start by reading these 7 tips for freezer cooking like a pro, then set aside a Saturday morning to give it a try. I promise you won’t regret it!
8. Hire a Bill Negotiating Service
Sometimes reducing your bills it is just a matter of thinking outside the box, and knowing what resources are available to help you save without even trying. One really great option is to look at a service such as BillCutterz. This innovative service helps negotiate better rates for all your bills, and then splits the difference with you. While you still have to pay them for the service, you will still be paying less over all. They only get paid if they are saving you money, which means that it is not only painless, but a no-brainer! You can find out more HERE.
9. Make Your Home a Sanctuary
There are lots of ways you can decorate on a budget, or even smart ways you can revamp your space for free. A fresh coat of paint can completely transform a room–and your attitude. In fact, just taking the time to clear the clutter or deep clean your house from top to bottom can make all the difference in the world.
When you love your living space, you want to stay home more. You are more likely to invite others over, and less likely to go out and spend mindlessly. My good friend Edie from Life in Grace has some great thoughts about staying at home that are definitely worth a read. The next time you are tempted to just get out of the house, ask yourself whether you are simply trying to avoid a mess or unwelcoming space.
10. Exercise at Home
And speaking of staying home, consider kicking your gym membership too. Pricey memberships can add up to thousands each year and sometimes they go unused or barely used. If the weather is great in your area—simply go outside! Or, consider workouts you can do at home or through your local community recreation center. If you need to get out of the house to work out, check if your local high school offers pool access off-hours or if your local mall is open to walkers in the mornings. Try workouts on YouTube or grab a DVD rental from the library to mix it up. A family walk or bike ride costs nothing and gets everyone’s heart pumping and healthy.
* * *
Meeting your financial goals does take effort, but not every attempt at saving money has to hit you where it hurts. Try these little ways to painlessly save. You might be surprised how easy making little tweaks in your daily routine can be—and how quickly the savings add up! Believe it or not, saving money really can be a fun family challenge. Viewing each experience as an opportunity to enrich your learning, increase family togetherness, and learn new skills can make it feel like more of an exciting journey and growth experience (instead of a sacrifice and a chore).
You may find that with a little effort in painless saving, your entire family will start on their path to becoming super-savers—and actually enjoy the process!

Pin It
The post 10 Painless Ways to Save appeared first on Living Well Spending Less®.


