
Angela Liddon's Blog, page 16
June 10, 2015
This and That – An Update on Life Lately
How about a life-y things type update? It’s been a while! I’ll start, and you can fill me in on what’s new with you, if you’d like. Don’t mind the occasional blurry iPhone photo below (they secretly kill me).
1. June Challenge
For the month of June I challenged myself to 1 smoothie a day and 1 salad a day. So far it’s going strong and I’m packing in more veggies and fruit (check out the slew of smoothies, smoothie bowls, and parfaits taking over my Instagram lately). And chocolate for good measure. Want to join me? This smoothie bowl below is going in the next cookbook. Adults and kiddos alike are going nuts over it. I’m having so much fun coming up with summer breakfasts lately…

2. May fun.
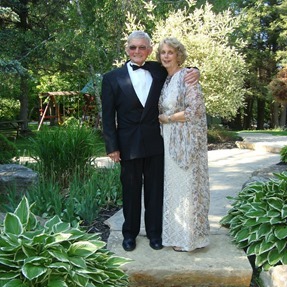
May was a fun and busy month! There was my first Mother’s Day and birthday celebration, a visit from my mom, another visit from my mom and stepdad, celebrating my Grandparents 50th anniversary (!), and a lot of baby milestones in between (we now have a crawler on our hands!).

3. Morning Sing Songs
As it turns out, Adriana loves to sing when she’s in a good mood. Check out this video I shared on Instagram last week (turn on the volume). I have no idea how she hits some of those notes! I certainly can’t (a reality she knows all too well). We’ve had some challenges with teething and other developments this month, so these sweet, happy moments are all the more appreciated! I may or may not watch this video before bed every night…girl kills me.
A video posted by Angela (@theglowspot) on Jun 5, 2015 at 4:47am PDT
4. Organic CSA
An easy way to get more veggies into your diet? Support a local CSA (community shared agriculture). We just had our first delivery yesterday. I had forgotten how exciting it is when the loot arrives! It takes all of my restraint not to tackle the delivery person. Since we don’t have a veggie garden in our current backyard, I figure this is the next best thing. It’s already helping me break out of cooking ruts. Random question – what would you make with this loot? The first thing I did was sauté the mushrooms and throw them over a salad. The second thing I did was make collard wraps (SO GOOD). A new obsession has formed…

5. Kitchen Adventures
The state of my kitchen lately (on a good day). Note: only one drawer is open Eric! I’m currently wrapping up the recipes for my next cookbook over the next month or so. The kitchen reno that we did last summer is definitely being put to good use! It’s easily the most used, loved, and enjoyed room of the house.

6. Current state of mind.

Image via heyokreal .
I feel like I could write an essay on this topic, but I’ll save that for another day.
7. A couple press things
I recently found out the University of Guelph (where I pursued my undergrad studies) included me in their alumni spotlight. See: University of Guelph Alumni feature
The Oh She Glows Cookbook was #1 on the Globe and Mail Bestseller list (Food and Cooking) again last month. Thank you all so much for your continued support! It’s making me all the more excited for cookbook #2 in 2016. There are so many awesome recipes I’m dying for you to try (I seriously think I’m going to have to host a big kick-off party with all my fav recipes or something).
8. Updated blog header + pictures

You might have noticed an updated blog look for the summer (or until I get bored of it again). Eric took a couple updated photos of me and I added those to the sidebar, About page, and Before and After page. It feels like just yesterday when our photographer Dave Biesse shot my last headshots for the cookbook, but as it turns out, that was 2 years ago already. Slow down time!
So there’s a random update. Much more to share, but this is a good start.
Ok, tell me about your plans for June and this summer. Any exciting work/personal projects or travels on the horizon? Also, what would you make with my CSA loot?
Comments (55) | Share on Facebook | Tweet | Pin It | Stumble© copyright 2015 Oh She Glows. All Rights Reserved.


June 5, 2015
Salted Almond Butter Freezer Fudge + Everyday Detox Cookbook


My friend and fellow blogger, Megan Gilmore, from the popular blog Detoxinista just launched her first cookbook this week, Everyday Detox: 100 Easy Recipes to Remove Toxins, Promote Gut Health, and Lose Weight Naturally. I was lucky to be able to review this cookbook before it went to print and I’ve been eagerly anticipating the hard copy on my doorstep. Just like on her blog, the recipes in her debut cookbook are unfussy, whole foods based, and feature short ingredient lists. I’ve been a fan of Megan’s for years and I’ve always admired her ability to take a handful of simple, whole foods ingredients and turn them into something practical for everyday life. While Megan doesn’t ascribe to any particular dietary label, she creates many vegan, paleo, vegetarian, and gluten-free recipes. About 75% of the recipes in Everyday Detox are vegan or can be made vegan by swapping out the sweetener or leaving out the cheese. All of the recipes are gluten-free. There are around 50 gorgeous photos shot by Nicole Franzen.
The book’s chapters include: 1) An easy approach to detoxing; 2) stocking your detox-friendly kitchen; 3) liquid nourishment; 4) morning favorites; 5) salads, dressings & sides; 6) soups, sandwiches & wraps; 7) casseroles & comfort foods; 8) sweet treats; and 9) back to basics.
Detox-based cookbooks tend to make me think of hard-core fad diets and cleanses, but thankfully Megan’s approach is much less drastic. She encourages you to practice daily healthy habits and believes in eating whole foods (ie., unprocessed, refined-sugar free, chemical additive free) on a day to day basis – making a lifestyle change – rather than teetering on the extremes and cyclic nature of dieting. Megan doesn’t believe in calorie counting because she says it “doesn’t take into account the quality of foods we’re consuming nor the body’s ability to digest natural foods versus processed ones.” Instead of looking at the calorie count on a label, she says to ask yourself a few questions: Where does the food come from? Is it in its natural state? How many ingredients does it contain and do you recognize those ingredients? Better yet, she says, select foods with no label at all. I love that last tip. The recipes in Everyday Detox are also based on the principles of food-combining and how food-combining can impact digestion (which is something I admit that I’m not overly motivated to follow), but whether you want to learn more about food-combining or not, the recipes can be enjoyed simply because they are healthful and delicious.
Today, I’m happy to share a recipe from her cookbook for all of the almond butter lovers out there! I couldn’t help myself and added a homemade chocolate topping and Maldon sea salt flakes. It was a hit with our friends!


Salted Almond Butter Freezer Fudge
Vegan, gluten-free, grain-free, no bake/raw, refined sugar-free, soy-free
This almond butter fudge is lightly adapted and shared with permission from Everyday Detox (2015) by Megan Gilmore. I also threw on a homemade chocolate coating for a snappy burst of chocolate in each piece, and a garnish of flaked sea salt. Be sure to keep this fudge in the freezer because it melts at room temperature.
Yield
21 pieces
Freeze time
1.5 hours
Prep Time
15 Minutes
Cook time
0 Minutes
Total Time
15 Minutes
Ingredients:
For the freezer fudge (lightly adapted from Everyday Detox):1 1/2 cups raw smooth almond butter1/4 cup + 2 tablespoons virgin coconut oil1/4 cup pure maple syrup1/4-1/2 teaspoon pink Himalayan sea salt or other fine sea salt, to tasteFor the chocolate topping:3 tablespoons virgin coconut oil1.5 tablespoons pure maple syrup3 tablespoons unsweetened cocoa powderPinch of pink Himalayan sea salt or other fine sea saltMaldon sea salt or other flaked sea salt, for garnish (optional)
Directions:
Lightly grease a standard size loaf pan (9"x5") and line with a piece of parchment paper cut to fit the length of the pan. For the fudge: Spoon the almond butter into a large mixing bowl. In a small pot, add the coconut oil, maple syrup, and salt (only the fudge ingredients here). Heat over low, until the oil is melted. Slowly pour the wet mixture into the bowl with the almond butter, stirring as you go. Stir until completely smooth and combined. It'll be quite runny at this stage. With a spatula, spoon the almond butter mixture into the prepared pan. Smooth out. Place the pan, uncovered, on a flat surface in the freezer. Freeze for around 1 hour, or until the fudge is solid. For the chocolate topping: In a small pot, add the oil and melt the oil over low heat. Remove from heat and whisk in the maple syrup, cocoa powder, and salt until smooth. I like to place the chocolate sauce in the fridge for several minutes until thickened slightly. Slice the frozen slab of fudge into about 21 (1-inch) squares and place on a large plate lined with parchment paper, about a half-inch between each piece. Spoon the chocolate sauce on top of each square (a scant 1 teaspoon per square). Place back in the freezer until the chocolate is solid. Sprinkle on some flaked sea salt, if desired. Break apart the squares of fudge (if the chocolate pooled at the bottom) and enjoy immediately. Return leftovers to the freezer.

I also tried out the Strawberry Basil Blast smoothie a few times. I change it up a bit using half the avocado and lemon juice. It’s also good without the fresh basil (I don’t always have it handy because I love to kill me a basil plant), but I do recommend trying the basil version first. I’ve made a cherry-basil combo in the past and it really is awesome in a smoothie! This smoothie will be on heavy rotation throughout the summer.

Some other recipes on my must-try list include: Raw Falafel Wraps, Enchilada Stuffed Cabbage Rolls, and “Beef” and Broccoli.
Thanks to Megan for letting me share this almond butter fudge recipe today. Be sure to check out Everyday Detox which is hot off the press this week!
Comments (7) | Share on Facebook | Tweet | Pin It | Stumble© copyright 2015 Oh She Glows. All Rights Reserved.
May 23, 2015
Gourmet Chia Seed Pudding (from scratch!)

Your comments on my Kitchen Quirks story were quite hilarious. They also led to even more funny stories here at home and among our friends and family.
I got a text from a friend shortly after posting.
“I’m reading your kitchen quirks post aloud to my husband (because he is absolutely nuts about the dishwasher just like Eric is). I finish reading it to him and he goes, “Ugh, I wonder what some of Eric’s tricks are? Did he write specifics?”
There are many inquiring minds as to what Eric’s dishwashing tricks are, it seems. Eric is in the process of penning an e-guide for dishwasher enthusiasts. Ok not really, but I told him he can’t keep his secrets all to himself for ever! Plus, I need others to know what I’m going through.
When we were talking about the blog post, Eric decided to mention another one of my kitchen quirks. You know, aside from general “chaos”. Apparently, I have this annoying little habit of leaving kitchen cupboards/cabinets and drawers open while I’m baking or cooking. I’ve been doing it for years. Basically, since I started cooking.
In my eyes, leaving the drawers and cupboards open is efficient. I do it because I know I’ll probably go back to that cupboard later on in the cooking process so I see no need to close it every single time. See it’s not lazy; it’s practical! I’m all about efficiency.
One morning about 4 years ago when we were living in our previous house, I headed downstairs to the kitchen for breakfast. Eric was still upstairs getting ready for work. As I approached the kitchen I immediately noticed something was wrong…very wrong.

Every single cupboard and drawer in the entire kitchen was wide open. Just picture your own kitchen with every cupboard door open and every drawer open. It’s freaky stuff, right?
I stopped dead in my tracks at the edge of the kitchen.
“OH… MY… GOD…”
I was absolutely horrified. Of course, I immediately assumed there was some kind of weird Poltergeist shit going on. Or some evil force taking over my kitchen. Or both.
I turned on my heels and BOOKED it upstairs. There’s no way I was going to wait around for the drawers to start spontaneously slamming or something!!
Eric started laughing uncontrollably. He then confessed that he opened every cupboard and drawer before bed to play a trick on me. What kind of sick person does that?
So it’s been 4 years since his prank and I’m long overdue for retaliation. I’m thinking it’s going to have something to do with his beloved dishwasher. I’m open to your suggestions, as always.


Gourmet Chia Seed Pudding (From Scratch!)
Vegan, gluten-free, no bake/raw, oil-free, refined sugar-free, soy-free
Creamy, rich, and thick chia seed pudding made from scratch! If you want to make the speedy version using store-bought almond milk and liquid sweetener, see the tip below. This is a large batch (3 cups or so), but I discovered that chia seed pudding freezes well and it thaws beautifully in the fridge. So there’s never fear of any going to waste. I like to freeze it in individual servings in freezer-safe zip bags or small glass containers, so I always have a healthy snack on hand. if you aren't down with the tapioca-like texture of chia seed pudding, feel free to blend this pudding in your blender until smooth.
Yield
3-3.5 cups (serves 4-6)
Soak time
overnight + 2-3 hours
Prep Time
10 Minutes
Cook time
0 Minutes
Total Time
10 Minutes
Ingredients:
1 cup raw almonds, soaked overnight3 cups filtered water1 vanilla bean, chopped into a few pieces (optional, but recommended)1/2 teaspoon pure vanilla extractSmall pinch Himalayan pink sea salt or fine grain sea salt3-4 tablespoons pure maple syrup or 1/3 cup packed pitted Medjool dates, or to taste1/2 cup chia seeds
Directions:
Place almonds in a bowl and cover with a couple inches of water. Soak overnight or for 8 hours. If you are in a rush, soaking for 1-2 hours works in a pinch. Drain and rinse almonds after soaking. Place almonds in a high speed blender along with the 3 cups filtered water, chopped vanilla bean (if using), vanilla extract, and salt. Blend on the highest speed, for about 1 minute until the almonds and vanilla bean are pulverized. Place a nut milk bag (this is the new one that I use and love) over top of a large bowl and pour the almond milk into the bag. (You can also use cheesecloth placed over a fine mesh sieve, however a nut milk bag yields the smoothest result and is faster.) Squeeze the bag and press out all the milk. The pulp will remain in the bag/cloth (you should have about 1 cup of pulp). If using dates as your sweetener: Note: I only recommend using dates if your blender can pulverize them super smooth, otherwise use liquid sweetener. Rinse out the blender. Carefully pour the almond milk back into the blender and add the pitted dates. Blend on the highest speed until the dates are pulverized and the milk is super smooth. Add milk back into the bowl. Whisk in the chia seeds (and the maple syrup, only if not using the dates). Place in the fridge for 2-3 hours, until thickened and cold. Give the mixture a good stir every once in a while to redistribute the chia seeds. I served this with granola (here is a recipe) and Banana-Mango-Lime soft serve (1 large frozen banana, 3/4 cup frozen mango chunks, squeeze lime processed in food processor until soft serve consistency). Chia seed pudding will keep in the fridge for up to 3-4 days. It freezes well too, just thaw in the fridge before ready to enjoy.
Tips: 1) For a quicker version, simply use 3 cups of store-bought unsweetened almond milk, 1/2 cup chia seeds, and 2-3 tablespoons of pure maple syrup. Whisk everything in a mason jar and chill in the fridge for 2 1/2-3 hours. 2) Ideas for using leftover pulp: Spread it onto a baking sheet and dry it out by baking it at 300F for 25-30 minutes until lightly golden in some spots. Cool completely. Grind it in a food processor until a coarse flour forms. You can use the toasted pulp in granola recipes or any other baked goods you see fit.

Comments (7) | Share on Facebook | Tweet | Pin It | Stumble© copyright 2015 Oh She Glows. All Rights Reserved.
May 20, 2015
Super Thick Coconut Yogurt (the shortcut method!)

Hi, my name is Angela and I’m in love with coconut meat. I also like shortcuts, so discovering frozen bags of coconut meat made me a bit giddy…

When I first tried coconut meat I wasn’t sure if I liked it, but it totally grew on me. It’s lightly sweet, super filling (it packs 8g fibre per 1/2 cup!), and has this irresistible silky, smooth texture. I love just eating it on its own as well as making it into this shortcut “yogurt”. Adriana on the other hand…well let’s just say when I let her try some of the yogurt (a version with just coconut and water), she made a dramatic gagging face while sticking her tongue out. I guess it’s not for everyone. haha! Maybe she’ll come around.
These bags of frozen coconut meat are more expensive than buying the young Thai coconuts and retrieving the meat yourself, so it’s something I splurge on once in a blue moon when I’m craving a fuss-free homemade coconut yogurt. But it can be whirled up in seconds! And no risk of hacking my hand off with a cleaver (I’m working on my cleaver skills…still not quite there yet). This shortcut recipe isn’t a true yogurt because it’s not fermented, but that’s partly why I love it so much. No wait time, no fuss. I empty a couple probiotic capsules in the yogurt, but you can totally leave the probiotics out if you wish. We’ll call this a “cheater’s” yogurt. A gotta-have-it-now yogurt. For those of you in the GTA, I find these frozen bags of coconut meat at Organic Garage..I think Whole Foods carries it too. If you want to do it the old-fashioned way, you can do that too of course! I link to a Youtube tutorial in the recipe below.

Hello dreamboat! As I mentioned, this version is super thick! It has a similar consistency to Greek yogurt. You can make it however thick or thin you wish just by adjusting the liquid amount. I find 1/2 cup of coconut water and 2 cups of coconut meat = a lovely thick yogurt…no straining required. Likewise, you can make it as sweet or tart as you want by adjusting the sweetener. I don’t like super sweet yogurt so I only add a tablespoon of sweetener into the blender. If I don’t want the yogurt to change colour, I use cane sugar (such as in these photos), but I also like to use maple syrup or raw coconut nectar too (which will dim the bright white yogurt a bit). You can also get creative and try making different flavours by adding fruit, chia jam, etc. I think I might try a coconut-mango-lime version next!

I made parfaits with strawberry-raspberry chia seed jam paired with a granola that I’m testing for my next cookbook (in the meantime, check out my Lightened Up Summer granola and the granola clusters in the Oh She Glows Cookbook). This yogurt is also awesome in vegan overnight oats, smoothies, and I hear you can make raw ice cream with it too.
Here is my batch of strawberry-raspberry-vanilla chia seed jam below. As a general rule of thumb for making chia seed jam, I use about 300-450 grams of fruit, 3 tablespoons of pure maple syrup (adjust depending on tartness of fruit), 2 tablespoons of chia seeds, and a pinch of pink salt. You can flavour it with vanilla, lemon, orange, etc. For how to make it, see this post.


Super Thick Coconut "Yogurt"
Vegan, gluten-free, grain-free, no bake/raw, nut-free, oil-free, soy-free
This “shortcut” coconut yogurt is as simple and fresh as it gets! I occasionally buy coconut yogurt from the grocery store, but when I want something that is super fresh and without any added ingredients I will make this version for a fun treat. Granted, it's not a true yogurt since there's no fermentation, but I love how quick this version is. I often take the shortcut by purchasing frozen coconut meat (found in the freezer section of some health food grocers, like Organic Garage or Whole Foods) rather than buying young coconuts. Once the meat is thawed it just takes a minute of blending to create a yogurt with a texture similar to Greek yogurt. If you are well-versed with young coconuts and a cleaver, feel free to scoop out the flesh the old-fashioned way too! See this video for a tutorial. I recommend making this recipe in advance so it has time to chill in the fridge. Thanks to Gena from Choosing Raw for the recipe inspiration!
Yield
2 cups
Prep Time
5 Minutes
Cook time
0 Minutes
Total Time
5 Minutes
Ingredients:
2 cups fresh young Thai coconut meat (or thawed Young Thai Coconut Meat, see headnote)1/2 cup coconut water (or use filtered water in a pinch)1 tablespoon fresh lemon juice (reduce for a less tart flavour)1/4-1/2 teaspoon probiotic powder, optional (you can empty probiotic capsules, if desired)pinch of pink salt or fine grain sea saltliquid sweetener to taste (I use 1 tablespoon natural cane sugar)
Directions:
Add all ingredients into a high speed blender and blend on low, gradually increasing the speed to high, until super smooth. Keep blending until it’s not grainy anymore. Adjust sweetness to taste by adding sweetener if desired and blending again. I add a tablespoon of cane sugar and blend on high to pulverize it in my Vitamix. Spoon the yogurt into an air-tight container and chill in the fridge for at least a couple hours. Serve with granola and chia seed jam, parfait-style, if desired. Or simply enjoy alone. This yogurt is also great mixed into vegan overnight oats or added to smoothies! I’m not positive on the shelf life because we usually enjoy it within a couple days, but I imagine it lasts at least a few days in the fridge in an air-tight container.
Tip: In the photo, I made parfaits with strawberry-raspberry chia seed jam paired with a granola that I’m testing for my next cookbook (in the meantime, check out my Lightened Up Summer granola and the granola clusters in the Oh She Glows Cookbook)

Comments (43) | Share on Facebook | Tweet | Pin It | Stumble© copyright 2015 Oh She Glows. All Rights Reserved.
May 12, 2015
Cookbook #2 News To Share + Updates!

photo credit: Ashley McLaughlin (left), Laura Ramos (right)
Good morning! I’m excited for today’s post. There’s been a lot going on behind the scenes over here so I want to share some recent news with you.
Shortly after my first cookbook launched last March, I was offered to write second and third cookbooks. To say that I felt grateful is an understatement. However, my energy levels were pretty shot after a recent move, house renovation, the first trimester of pregnancy, and book launch. I knew I wanted to create another book someday, but I also knew the timing had to be right. Would I ever have the chance to create another book with a baby on the way? When would the timing be right? How would I continue to do chase career dreams while being a mother? I struggled, and still do, with these questions. I don’t have it all together, or even many answers on how to achieve a great balance, but I just try to put my heart into everything I do. I honestly didn’t know if I would want to write another cookbook for a long time. Not because I didn’t enjoy the first book, but the cookbook process is long, intense, and taxing. I’ve never been one to rush into big decisions so I decided to wait. My editors were super supportive and understanding, thankfully. I needed the passion and drive to return.
Sure enough though, that drive and creative spark did come back – and much sooner than I anticipated. During fall of last year, I started to feel a passion for creating a collection of recipes again. After a pregnancy that left me feeling lackluster about food, I now had an insatiable appetite thanks to round the clock nursing sessions. Food was exciting again!!! Recipes started flooding my mind and I worked on a recipe list during middle of the night feedings. Weird, I know, but there I was at 3am typing ideas into my iPhone. Before I knew it, I had over 200 recipe ideas and the rough outline for book #2 drafted. I was in the kitchen testing every chance I had – during naps and after Adriana’s bedtime mostly. No one was more shocked than I was with this sudden burst of creativity. My editors were thrilled to hear the news that I had been secretly working away on book #2 for months. But I was still unsure if I could make it all come to life. I’ve always been an independent worker, but it struck me then that I didn’t have to do it all on my own. In fact, I couldn’t anymore. Even though I enjoy food photography (and shooting the first book was one of my pride and joys), I knew with a baby in the house shooting over 100 photos for the book in addition to everything else just wasn’t going to happen!
The first person I thought of is my friend, Ashley. Our blogs and granola bar businesses brought us together way back in 2008 and we have stayed close ever since. She needs no introduction for many of you; she’s an incredibly talented blogger, recipe developer, and photographer (you can check out her gorgeous portfolio here). I sent her an email one day asking her if she’d be interested in shooting an entire cookbook (she recently shot the photography for her own cookbook – Baked Doughnuts for Everyone), and she got back to me almost instantly with…Am I interested? Umm let me think….YES!!!!!

Here we are back in 2010!
Obviously, I had to iron out the project proposal and all the details, but seeing her enthusiasm for this project made me certain she had to be a part of it. Her passion for food photography is exactly what I want for this next book, not to mention I admire her all-natural, unaltered approach with food styling. (You want to bet that she eats every recipe after she shoots it!) I knew she could capture the essence of my healthy, approachable, and fuss-free recipes while show-casing the food’s natural beauty.
Here are a few beautiful trial photos that she shot:

photo credits: Ashley McLaughlin
I’m so excited to have Ashley on board to shoot 100+ photos for my next cookbook. This allows me to focus on my biggest passion – developing and testing recipes for you. Not having to do the photography has allowed me to focus exclusively on developing and testing recipes, writing, and running my recipe tester website. It’s working out well (most of my recipes are completed and just need re-testing) and I couldn’t be happier with how it’s coming along. Ashley will be shooting the photography this summer, so this spring has been a really busy one for me. I know things have been quieter around here on the blog lately, and I appreciate your patience as I put my heart and soul into this next book. I hope to get back into a regular blog posting schedule soon. I miss this space so much!
Many of you have asked when the next cookbook will be published and I can now tell you that it’s due out early fall 2016. It’ll be out in time for the start of the holiday season which I think is the perfect time for this collection of recipes.
Here are a few more details about the next book:
- It will feature a mix of my favourite “every day” go-to recipes perfect for busy and active lifestyles, as well as more elaborate or special occasion recipes! I’m sharing the recipes that work for my actual life, the things I make on a regular basis, my go-to potluck/holiday recipes, etc. I think it’ll be a great mix.
- All recipes are plant-based/vegan. Almost all of the recipes are gluten-free (with the exception of a few recipes with spelt flour), and soy-free.
- I offer a lot of nut-free recipes as well as many nut-free substitutions in this book. There are plenty of nut-free snacks for kids!!
- Think “healthy comfort food” recipes that won’t weigh you down! Examples: nut-free chili and cheese nachos, creamy roasted detox salad, cheesy lentil pasta casserole, and the ultimate flourless sea salt brownies (totally bean-free, grain-free!), as well as a mix of lighter recipes like healthy parfaits, salads, soups, dips, smoothies, and more. No strange ingredients, just real food.
I’ve been sharing behind the scenes action for months now on Instagram. You can follow all the behind the scenes action with the #osgcookbook2 hashtag! Ash will be sharing behind the scenes sneak peaks this summer too (I’m a sucker for those glimpses into someone’s work!). You can follow us on Instagram: @ohsheglows and @edibleash (you can read her announcement post here, by the way).
Well, I can’t wait for this next book to come to life. I’m incredibly grateful to continue this journey and for your amazing support. More updates to come!
P.S. I’d like to pass along some recent interviews!
1) A review of The Oh She Glows Cookbook by Katie Hay of T.O.F.U. Magazine
“This cookbook is full of simple, approachable recipes that the whole family will enjoy. Most can be made with ease on a weeknight (
2) An interview with Barre3 – We chatted about cookbook creation, favourite recipes, balance, and more.
“Running a business and being a new mom has reinforced something I’ve known for a while—it’s impossible for every aspect of my life to feel balanced at the same time. It reminds me of the saying, “you can have it all, but just not all at once.” I’ve made peace with the unbalance in my life right now. Yes, I’m sleep deprived, my laundry is piled up, and my pre-baby jeans are still a bit tight, but there is so much in my life to be grateful for.”
3) An interview and Oh She Glows Cookbook recipe feature in The Telegraph (UK)
Comments (84) | Share on Facebook | Tweet | Pin It | Stumble© copyright 2015 Oh She Glows. All Rights Reserved.
May 3, 2015
Healthy Happy Vegan Kitchen: An Interview with Kathy Patalsky
Hello beautiful month of May!
Are you as pumped for a new month as I am? I’m looking forward to this month a lot. For starters, I get to celebrate my first Mother’s Day with Adriana, Eric, and my mom who is flying out this week for a visit. I’m so darn excited. Adriana has changed so much since we were there visiting over Christmas. Eric and I are also going on our first date night since becoming parents (!), thanks to my mom babysitting while she’s here. The following week is my birthday which brings visits with friends and family, including meeting our new cousin. Then we’re ending the month celebrating my Grandpa and Diane’s 50th wedding anniversary and another quick visit with my mom and stepdad. It’s going to be quite the festive month! The first 4 months of 2015 have been intense between cookbook creating, parenthood, and trying to find time for writing and sharing on this blog, but I know I can’t keep burning the candle at both ends like I have been. I need this month to replenish, recharge, and reboot. So I figure what better than a birthday month to do so.
It’s hard to believe that it’s been almost 7 years that I’ve been writing this blog. When I started I was fresh out of grad school and newly married. I truly had no idea what I wanted to do in life, or rather, what would make me the happiest. Even though I haven’t been able to post as much as I’d like to lately due to my second cookbook creation and parenthood, I’m always thinking about those of you reading, ideas for this blog + recipes, and how I can improve this space. I have so many goals for the future of this blog…I just need to find a way to make it happen! It’s also funny to think that there was once a time in my life when I didn’t read blogs (or even know they existed) because now a day doesn’t go by when I don’t check in on my favourites. It’s been super inspiring to follow my favourite bloggers over the years and see them turn passions and hobbies into successful careers. There is nothing better than seeing someone do what they love.

Someone who has always inspired me is Kathy Patalsky from Healthy Happy Life. I’ve been reading her blog for years and I’ve always admired her positive energy and passion for creating colourful and inspiring vegan recipes. Not to mention, she is such a genuine person inside and out. I remember the first time I stumbled upon her site my jaw dropped. Kathy has a talent of creating vivid imagery that hooks you in and makes you excited about a plant-based diet.

photo credit: Kathy Patalsky
Aside from being an inspiring force in the blog world, Kathy just launched her second cookbook this past week, Healthy Happy Vegan Kitchen! She recently took the time to answer some of my questions about the book and her life in general. Read on for the interview!

photo credit: Kathy Patalsky
Congrats on the launch of Healthy Happy Vegan Kitchen! Can you tell us a bit about your new cookbook?
The book is a mix of fan favorites already developed and posted on my blog and also new-to-you recipes. But most of the new recipes are “old favorites” for me, so developing the recipes was not a huge challenge. I really wanted to take recipes that are timeless in MY kitchen and present them to my readers in a book that they can hold, instead of just appearing on my blog.
As a recipe developer, I’ve found that certain chapters come much easier than others. I’m curious which chapter was the most challenging to develop recipes for?
The most challenging part of the book for me was the desserts section. There are always SO many ways you can change up substitutions in a baking recipe, so trying to decide on ONE way to present the recipe was very tough for me. I still read through and think, shoot I should have said you can substitute the silken tofu with mashed ripe bananas in this muffin recipe! Etc. But placing all those subs in a cookbook can get challenging.
I can relate as I often drive myself crazy wanting to test a million and one substitutions! So what’s your favourite dessert recipe in the book then?
I would have to say my Trail Trekker Cookies (I love a nutty, rustic chocolate chip cookie!) or something super indulgent like my Peanut Butter Chocolate Silk Pie with Peanut Cookie Crust or even my Caramel Apple Pie.
You had me at trail…is that weird? Let’s say you’re having someone over for dinner who is very skeptical about vegan recipes. Which appetizer, entrée, and dessert would you serve to win her/him over?
Great question! I love serving vegan newbies comfort food. So I would go with oven-roasted crispy taters with dipping sauces, my 5-step kale salad, sweet potato veggie burgers with avocado (maybe add some tempeh bacon!) and maybe some classic chocolate chip cookies for dessert.
Vegan mac and cheese, vegan mashed potatoes or a vegan Philly cheese sandwich – also big faves for skeptics I have encountered!
I don’t think you can ever go wrong with comfort food! Good call. Which recipe do you feel is the most creative/unique in the book?
I have to be honest, I wasn’t going for super unique for this book! I really wanted to fill the pages with go-to classic vegan and (veganized!) favorite recipes. But if I think hard, I would say my white velvet roasted soup. It might sound ordinary, but using a sticky sweet oven-baked white sweet potato for this thick and velvety soup is soooo good and unique. If you are a sweet potato fanatic like me, give it a try.
Another creative recipe is my Pesto Chickpea Bowl which includes pesto smothered skillet chickpeas with fresh tomato garnish. Served with rice. Super yummy for pesto lovers.
Both of those recipes sound amazing but I have to disagree with you – I think your recipes are super creative! This is your second cookbook (your first being 365 Vegan Smoothies), what has been the most surprising thing about writing cookbooks? The most difficult thing?
Surprising: how many rounds of edits need to occur!
Difficult: staying organized. I have a creative spirit and when it comes to creating content I love freedom, but when you are writing a cookbook you really have to break out your virtual or real chalkboard and set a game plan and stick to it!
Oh yes, the multiple rounds of edits. It’s not for the faint of heart. Any words of advice for others looking to some day write their own cookbook?
I actually wrote an awesome blogpost for my friend Heidi of blogger babes! You can read my answers here.

photo credit: Kathy Patalsky
Great post. Let’s get to know you a bit better. What are three things about you and your life that your fans might not know?
I feel like lately I try to be an open book on my blog, but I like this challenge! Let’s see..
1. I was in high school when Britney Spears came on the scene, so I have a serious love affair with dancing around my living room to Britney and any other 90′s pop I can sneak onto my iTunes. And yes, I know all the moves to “oops I did it again.” Also of that era, my fave movie is Titanic and if I ever meet Leonardo DiCaprio I will probably faint. KiddingNotKidding.
2. My healthy lifestyle hasn’t always been perfect. As I have recently spoken out about on my own blog and Gena’s blog (choosing raw) I struggled with a pretty severe eating disorder and self esteem issues all through high school and even college. It is something that I think needs to be shared because I never thought I would “get better” but the place I am now is beyond any happiness I could have envisioned for myself way back then.
3. I was painfully shy growing up. I was that girl in class that was always friendly and had loads of friends but was mostly quiet and shy in class. But then I would join drama and sing in choir and become a completely different person. Totally open and free. I like to think my shyness is mostly gone and now I am just free. I used to care way too much about what others thought of me. Over that! And much happier for it. My best advice to young people ever is to stop comparing yourself to others and start focusing on getting to know YOU and develop your own personality and unique shiny spirit.
Love your honesty Kathy. (And now I’m feeling super nostalgic for the 90’s too). Where do you see yourself in 5 years time? Any plans for the future you’d like to tease us with?
I see myself happy. No matter what path I take, I will always put my happiness first. I have to. I love writing books but I do not have one planned for a while. I want to give myself a little break on that front. I hope my other website FindingVegan has grown even more! I love that site so much and I love working on it. I will still be blogging in five years, for sure. I also still see myself in California. I would love to start a family but who knows if that will happen. Life is so full of surprises so I am just happy to see what adventures await me around the next turn in my path. And of course sharing those journeys on my blog and social media is something I will continue to love doing.
I think that’s a great note to end on – making happiness a priority. Thanks for taking the time to answer my questions and also for sharing this inspiring collection of vegan recipes with the world! Congrats again on all of your success with Healthy Happy Life, FindingVegan, 365 Vegan Smoothies, and now Healthy Happy Vegan Kitchen!
Comments (18) | Share on Facebook | Tweet | Pin It | Stumble© copyright 2015 Oh She Glows. All Rights Reserved.
April 4, 2015
Banoffee Pie from My New Roots

I’m preparing to host my very first Easter dinner tomorrow – a totally plant-based menu with all the fixins! Go big or go home, I say. Usually we go to my in-laws for Easter, but this year my sister-in-law had to stay close to home for an event so we offered to host. I’m making a ridiculous amount of food including many recipes from my next cookbook. So pumped. I just need to scrounge together enough chairs and pray that we all fit at our table! Ok, that is definitely not happening…but what would a big family get together be without a kids table?!
Cooking has been more fun than usual these days because I have an audience now – a 6 1/2 month old baby who loves to watch her mama in the kitchen! Adriana is very curious as to what I’m doing in there all the time and she smiles at me from the table and even laughs at all the right moments, such as when I bust out Twinkle Twinkle Little Star complete with a made up dance routine. I’m now a cook/entertainer all at once. What an ego boost, let me tell you. Did I mention I burned two desserts last weekend? I can’t imagine why…

This pie, however, came together without a hitch. Sa-weet. If you’re like me, you might even find you have all the ingredients on hand which makes me want to cry happy tears because I didn’t need one more grocery trip on a holiday weekend. Or should I say Eric doesn’t need one more grocery trip on a holiday weekend…bahaha. I don’t know about you, but when I realize that I have all the ingredients for a recipe I’m like that Ikea commercial, only instead of running to the car I’m running to my kitchen… START THE OVEN, START THE OVEN!
I’m not weird, not weird at all.

Last year I had the opportunity to preview Sarah Britton’s debut cookbook, My New Roots: Inspired Plant-Based Recipes for Every Season, based on her beautiful whole foods recipe blog. I’ve long admired Sarah’s unbridled enthusiasm for plant-based food; in fact, I don’t know if I’ve ever come across someone who is so passionate about vegetables, not to mention, knowledgeable about how they impact our health.
This cookbook is gorgeous with beautiful food photography and interior design (I’m a bit of a cookbook nerd these days, often gushing over paper stock of all things). There are 100 creative vegetarian recipes with many vegan options. Some of the ingredients are a bit uncommon or difficult to find, but I expect if you have a solid farmer’s market and health food store handy you’ll be able to find many of the ingredients in the right season. Just in case you aren’t sure which ingredients are in season, the cookbook is conveniently divided into 5 sections by season (spring, early summer, late summer, autumn, and winter). I love that summer is divided into two seasons; it totally makes sense because there’s so much coming into season over the summer months. One thing’s for sure, Sarah’s recipes will help you bust out of a cooking rut and get adventurous in the kitchen.
Here is a sample of recipes from My New Roots:
Buckwheat Crepes with Creamy Purple String Bean Slaw
Roasted Red Pepper Walnut Dip
Shaved Turnip and Radish Salad with Poppyseed Dressing
Oyster Mushroom Bisque
Apricot Rhubarb Clafoutis
Caramelized Fennel on Herbed Polenta
Roasted Cauliflower with Lebanese Lentils and Kaniwa
Trippy Tie-Dye Soup
Butternut Stacks with Kale Pesto, Kasha, and Butter Beans
Today, I’m excited to share this dreamy Banoffee Pie recipe from her new cookbook. I’ll be serving it tomorrow along with a few other desserts. I hope you enjoy it as much as I did (yes, I had to eat a slice before serving it tomorrow…don’t judge). I’m predicting it won’t last long because who on earth can resist the combo of coconut whipped cream, banana, oats, and date caramel? Anyone?

Banoffee Pie
Vegan, gluten-free, refined sugar-free, soy-free
Sarah writes that this version of Banoffee Pie isn’t as “jaw-achingly sweet” as traditional versions - which admittedly I’ve never had - but I can tell you I find this version to be perfectly sweet while still feeling super light and healthy. That’s a win-win in my books! I made several improvisations to the original recipe because I can’t seem to ever leave a recipe alone. I’ll share my adaptations here. In the crust I swapped sunflower seeds for almonds because I prefer the flavour of almonds. I also skipped toasting the almonds beforehand because I figured they would toast up while baking the crust and I wanted to save some time. I also skipped chilling the coconut oil and opted to use softened coconut oil and then I added cinnamon to the crust because cinnamon and oats is always a good idea in my books. My crust baked up in 12 minutes as opposed to the 20-30 minute suggested bake time so my advice is to keep an eye on it. When my crust got a tiny bit golden I took it out. Keep in mind the crust firms up as it cools. For the raw caramel toffee, I kept the almond theme going using almond butter and I also cut down the lemon juice. Lastly I ended up using 3 bananas instead of 2 because I don’t think you can ever have too many banana slices. As you can tell, this recipe is quite versatile so have fun with it!
This recipe is adapted from My New Roots: Inspired Plant-Based Recipes for Every Season. Copyright © 2015 by Sarah Britton. Published by Clarkson Potter, an imprint of Penguin Random House, LLC.
Yield
8-10 slices
Prep Time
40 Minutes
Cook time
12 Minutes
Total Time
52 Minutes
Ingredients:
For the crust:1/2 cup raw almonds2 cups gluten-free rolled oats1/2 teaspoon cinnamon1/4 teaspoon fine sea salt1/4 cup virgin coconut oil, softened2 tablespoons pure maple syrup1 1/2 tablespoons water, or as needed to moisten doughFor the Raw Caramel Toffee:1 1/2 cups pitted Medjool dates3 tablespoons smooth almond butter1 teaspoon fresh lemon juice1/4 teaspoon fine sea salt1 vanilla bean, seeded or 1/2 teaspoon pure ground vanilla bean powderFor the filling:2 (14-ounce) cans full-fat coconut milk, chilled overnightRaw Caramel Toffee (from above)3 large ripe bananas, sliced into “coins”a few squares of non-dairy dark chocolate, shaved
Directions:
Place 2 cans of full-fat coconut milk in the fridge overnight, the longer they chill the better. For the crust: Preheat the oven to 375F. Grab an 8-10 inch tart pan (I used 10-inch) and lightly grease the base and sides with coconut oil. Cut a circle of parchment paper to fit along the bottom and place it inside the tart pan. This will prevent the crust from sticking. Add almonds into a food processor and process until a coarse crumb. Now add in the oats, cinnamon, and salt and process again until the mixture looks like coarse sand. Add the oil, maple syrup, and water and process until the mixture comes together. The dough should stick together when pressed between your fingers, but it shouldn't be super sticky. If it's still too dry, try adding another teaspoon of water and processing again. Crumble the dough all over the base of the tart pan in an even layer. Starting at the centre of the tart, press the dough into the pan with your fingers and work your way outward and up the sides. If the dough starts to stick to your hands, feel free to lightly wet your hands every now and then. With a fork, poke the base of the tart about 20 times to allow the air to escape while baking. Bake the tart at 375F for around 12-14 minutes (I baked for 12 minutes) until lightly golden. Place tart pan on a cooling rack for about 15 minutes or so. If the crust puffed up during baking you can poke it a few more times with a fork to let the air escape. The crust will firm up as it cools. For the raw caramel toffee: Add pitted dates into a bowl and pour boiling water over top. Let sit for 5-10 minutes, or longer if your dates are firm. Drain the dates well and add to food processor along with the almond butter, lemon juice, salt, and vanilla bean seeds. Process until smooth. When the crust has cooled, carefully spread all of the caramel toffee onto the base of the crust. Slice all the bananas and place half of the banana slices on top of the caramel, pressing down lightly to adhere. Grab the cans of coconut milk from the fridge. Open the cans and carefully scoop off the white cream from the top of the can, discarding the water. Add the coconut cream into a medium bowl. With a whisk or electric beaters beat the cream until smooth and fluffy. Spread all of the coconut cream on top of the banana slices in an even layer. Now add the remaining banana slices on top in a circular pattern. Garnish with shaved chocolate. Serve pie immediately. Store leftovers in the fridge.
Tips: 1) Be sure to chill the cans of coconut the night before you begin this recipe. 2) The raw caramel works best with very soft dates.

Congrats again, Sarah!
To those of you celebrating this weekend, I wish you a lovely Easter! Spring is officially in the air. ahhhh.
Comments (31) | Share on Facebook | Tweet | Pin It | Stumble© copyright 2015 Oh She Glows. All Rights Reserved.
March 30, 2015
Food For Thought

Since I announced my pregnancy last year, I’ve been asked quite often whether we would raise our baby vegan. If I saw the question on my blog or social media, I would respond by saying that we decided not to label her diet or lifestyle and I explained why if I had the time. Since I was asked this question so frequently I recently decided to write a blog post on the topic to be transparent about our decision (see: Will you raise your daughter a vegan?). I’ve always been an open book on the blog and figured I could share our thoughts and also ask you to share your own experiences. I enjoy hearing other perspectives because I’ve never been someone who thinks that there is one correct way to do anything. What works for one family might not work for others.
As I expected, there was a wide range of opinions on the topic. Many of you left thought-provoking and respectful comments (whether you agreed or not), and I greatly enjoyed reading them. They led to some wonderful discussions with friends and family this week. However, there were some hateful and threatening comments attacking me, my family, and our decision. According to some, I’m no longer welcome to call myself vegan. This wasn’t entirely surprising; over the past 6 years I’ve often been accused of not being “vegan enough”, being “too mainstream”, or not “doing enough for the vegan movement”, yet here I was receiving hundreds of comments and emails each month from readers telling me my recipes changed their lives, that they were happy to be helping animals, reducing their carbon footprint, and getting healthy even if they weren’t “perfect”. Apparently, my welcoming and non-judgmental approach was indeed the catalyst for major change.
I realize that the scrutiny I’ve faced over the years is from a small percentage of vegans. Tearing each other down is never conducive to furthering the movement though. The majority of vegans I know are incredibly kind and compassionate both to animals and humans alike. However, the personal attacks have made me reflect greatly about whether this label continues to be right for me. Do I want to live my life striving for an elusive perfection that I know I’m too flawed to ever achieve? Or can I do it my way? While some of you will say "don’t let it bother you" and “don’t let them win” I’ll be honest in telling you that experiencing hate on a public forum from your own community wears you down over time. It’s a distraction from my overall purpose and you know what, it sure as hell takes the fun out of the journey.
In the end, I will keep on doing my thing, but without a personal label on my diet or lifestyle. Going forward you can expect to see the same types of crowd-pleasing plant-based recipes on this blog and in my next cookbook; this is how I love to eat and what makes me happy. My goal has always been to encourage others to reduce their animal consumption and embrace more plants in their diet. This is my passion in life not only because of how it has greatly improved my own and those close to me, but for countless other reasons. I still believe that the greatest change happens when we elevate one another, celebrate progress, and of course, share delicious food that challenges the norms of the standard diet. So that’s exactly what I intend to keep doing. There are many ways in which compassionate individuals can spread their message and this is what speaks to my heart. I have no doubt there is something out there for everyone.
Thank you to everyone who has supported me over the years, and also, for reminding me why it’s important to remain authentic even in spite of criticism.
Angela

Comments (701) | Share on Facebook | Tweet | Pin It | Stumble© copyright 2015 Oh She Glows. All Rights Reserved.
March 18, 2015
Crazy Good Coconut Oil "Chocolate" Bark
[image error]
Do you have any kitchen quirks? What about your partner or roommates?
Maybe you are wondering what I mean by a kitchen quirk. Basically it’s anything that drives your significant other batshit crazy.
I’ll offer some examples:
- Always sticking produce stickers on the counter despite your husband’s pleas not to (my long-time readers will get this, if you don’t, see Part 1 and Part 2)
- Loading the dishwasher in a very specific way (spoiler alert)
- Only wanting the cutlery drawer to be perfectly stacked with everything facing the same direction
- Organizing the fridge or pantry in a certain way and insisting that it’s kept in this precise order
- Debating with your partner/roommate about whether certain foods should be refrigerated or not
- Turning cans so that the label always faces the same way, are arranged by alphabet/colour/etc
I like to think of myself as a recipe creating tornado and I frequently drive Eric nuts because he is so much more organized than I am. When you are with someone for almost 15 years you learn every one of their little (and big) quirks. Day by day….by day.
Want to know what Eric’s biggest kitchen quirk is?
Aside from me, it’s the dishwasher.
The guy has a thing for dishwasher organization. It’s his pride and joy. And it’s actually impressive, the dedication that he puts into carefully loading and stacking the dishwasher every day. He has refined his technique over the years too, always improving. Impressive. At first glance, you might think that he’s just a normal guy unloading or loading the dishwasher, but you’d be wrong, very wrong. He is not normal. Eric has been trying to enlighten me with his genius dishwasher short-cuts ever since we got together. I stubbornly refused for years until I recently discovered how amusing it is to see him so proud when I use his “tricks”. He beams with pride.
My sister was over yesterday and after dinner we got talking about how her husband/my brother-in-law insists that the dishwasher is loaded in a certain way. Hmm sounds familiar. So began a hilarious conversation with us and the guys talking about how a dishwasher should be loaded. She said, “Steve will actually UNLOAD the dishes that I have loaded and then reload the machine!” Well, that rings a bell. I hear Eric tinkering away with unloading and reloading my dishes every night. He also has a system of loading my measuring spoons (because I typically use about 20+ on any given day of recipe testing). We have a dishwasher with a narrow top tray for cutlery and he has created this whole system of how to load the measuring spoons and other utensils so that they don’t collect/pool any water…right down to which direction they face for optimum drying. Like I said, not normal…but impressive.
I should also mention that we had a 10+ year ongoing debate about whether ketchup should be refrigerated or not. I said that, yes, ketchup should be refrigerated and he always said it shouldn’t (just a personal preference on his part). One day I pointed out the label which reads “Keep refrigerated” and it’s been in the fridge ever since! Case closed. Mystery solved. He finally gave in (even if it’s perfectly fine at room temperature).
Of course, this story wouldn’t be complete without Eric weighing in on my biggest kitchen quirk.
Without even blinking an eye he said, “chaos.”
Nailed it. Martha would so not approve of my kitchen ways.
Ok, it’s your turn to spill the beans. What are your kitchen quirks? What about your partner or roommates’ quirks?
[image error]
[image error]
[image error]
[image error]
[image error]
Crazy Good Coconut Oil "Chocolate" Bark
Vegan, gluten-free, grain-free, no bake/raw, refined sugar-free, soy-free
This homemade chocolate is made with just a few essential ingredients - virgin coconut oil, cocoa or cacao powder, and pure maple syrup. (Feel free to use whichever liquid sweetener you prefer). The virgin coconut oil replaces the cocoa butter found in traditional chocolate so while it needs to be kept in the freezer, it’s a great way to sneak some coconut oil into your day. You can also use any toppings you'd like - dried fruit, nuts, + seeds all work lovely. It melts much faster than regular chocolate, so be sure to keep it chilled until ready to enjoy. I prefer it straight from the freezer.
Yield
20 pieces
Freeze time
15 minutes
Prep Time
15 Minutes
Cook time
0 Minutes
Total Time
15 Minutes
Ingredients:
1/4 cup raw hazelnuts1/4 cup raw almonds1/3 cup large flake dried coconut1/2 cup virgin coconut oil1/2 cup cocoa or cacao powder, sifted if necessary1/4 cup pure maple syrup1 tablespoon smooth almond butter, optionalpinch fine sea salt
Directions:
Preheat oven to 300F. Line a 9" square pan or a small baking sheet with two pieces of parchment paper, one going each way. Set aside. Add hazelnuts and almonds on a baking sheet and roast in the oven for 10 minutes. Remove baking sheet and add the coconut flakes and spread out. Continue roasting the nuts and coconut flakes for another 3-4 minutes, or until the coconut is lightly golden. Watch closely to avoid burning - coconut burns fast! Place hazelnuts on several sheets of damp paper towel. Wrap the hazelnuts and rub them vigorously with the paper towel until the skins fall off. It’s ok if some skins don’t come off. Discard the skins and roughly chop the hazelnuts and almonds. In a medium saucepan, melt the coconut oil over low heat. Remove from heat and whisk in the cocoa (or cacao) powder, maple syrup, and almond butter (if using) until smooth. Add a pinch of sea salt to taste. Stir in half of the almonds and hazelnuts. With a spatula, spoon the chocolate mixture onto the prepared parchment-lined pan or sheet and smooth out until it's about 1/4-1/2 inch thick. Sprinkle on the remaining nuts and all of the coconut flakes. Place into freezer on a flat surface for about 15 minutes, until frozen solid. Once frozen, break apart into bark. Store in the freezer until ready to eat. I don't recommend keeping it out on the counter long because it melts fast.
Tip: To make this nut-free, simply omit the almond butter, hazelnuts, and almonds. It will still turn out just fine! You can try adding toasted sunflower seeds on top for a little crunch.
[image error]
Enjoy!
Comments (15) | Share on Facebook | Tweet | Pin It | Stumble© copyright 2015 Oh She Glows. All Rights Reserved.
March 10, 2015
Green Tea Lime Pie Smoothie Bowl

St. Patrick’s Day is coming up! Are you doing anything fun? I’m hosting a get together on Tuesday, so I’ve been planning a green themed menu to serve on the big day.
Smoothie bowls have been quite the sensation for a long time now, but I think this might be only the second smoothie bowl I’ve made. The truth is, I just love the efficiency of throwing things into a blender and guzzling it down in a glass – a few minutes seems to be all the time I have in the morning. I don’t want to fuss with smoothie bowls. But I figured it would be nice for a special themed breakfast! Plus, sometimes I need to remind myself not to inhale my food and sitting down to a bowl helps me slooooow down a bit. So instead of taking me 20 seconds to inhale it now takes me 60 (breastfeeding hunger is no joke). Anyway, this bowl is a nutritious way to kick off the day, especially if you plan on indulging later on!

The flavour is inspired by the popular Key Lime Pie, but with a green tea twist. Get it – TEA lime pie instead of KEY? I truly outdid myself with this title, I know. Imagine what I could do on a full night’s sleep?!
Ok joking aside, Matcha Green Tea Powder happens to pair lovely with banana and avocado, but it’s an optional booster ingredient so not to worry if you don’t have any on hand. The smoothie is still amazing without it. However, if you do stock Matcha it adds a wonderful energizing element to smoothies and a nice antioxidant boost. Since it’s fairly bitter, a little bit goes a long way; I only used 1/4 teaspoon in this smoothie. If you don’t think you will consume a whole tin, you might want to try out the single serving packs that are available in many grocery stores now. I store my opened tin in the fridge for maximum freshness.

The hydrating base is made up with coconut water which might be a great way to start the day if you plan on indulging in drinks later on. A frozen banana and avocado make it ultra creamy and lightly sweet, while lime juice and lots of zest give it a tangy, aromatic kick. It’s basically all of my favourite flavours wrapped into one kick butt smoothie bowl! We all know that smoothie bowls are so fun because of all the toppings you get to add, so I topped my bowl with melted coconut butter (which solidifies upon hitting the cold smoothie), granola, hemp hearts, and large flake coconut. I purposely made the smoothie on the thicker side so the toppings would sit nicely on the top and not sink through – that’s key!


Green Tea Lime Pie Smoothie Bowl
Vegan, gluten-free, no bake/raw, nut-free, oil-free, refined sugar-free, soy-free
Enjoy the tropical flavours of lime, coconut, banana, and avocado with some baby spinach and Matcha green tea powder thrown in for an extra boost. The flavour reminds me of the creamy, tart and sweet, Key Lime Pie.
Yield
2 cups/1 bowl
Prep Time
10 Minutes
Cook time
0 Minutes
Total Time
10 Minutes
Ingredients:
For the smoothie:3/4 cup coconut water1 cup fresh baby spinach1 large frozen bananapacked 1/4 cup avocado2 teaspoons lime zest1 tablespoon + 1 teaspoon fresh lime juice2 ice cubes1-2 teaspoons pure maple syrup, to taste1/4 teaspoon Matcha green tea powder, optionalTopping ideas:granolamelted coconut butterlarge flake dried coconutMatcha green tea powderlime zesthemp hearts
Directions:
Add all the smoothie ingredients into a high speed blender and blend on high until smooth. Adjust sweetness if desired. Pour into a bowl and sprinkle on the toppings of your choice. Enjoy with a spoon!
Tips: 1) It's easiest to zest the lime before juicing. 2) For a homemade granola recipe, try the Ultimate Nutty Granola Clusters in The Oh She Glows Cookbook (p. 31) or my Lightened Up Summer Granola.

Comments (26) | Share on Facebook | Tweet | Pin It | Stumble© copyright 2015 Oh She Glows. All Rights Reserved.
Angela Liddon's Blog

- Angela Liddon's profile
- 134 followers

