
R.L. Syme's Blog, page 18
December 13, 2013
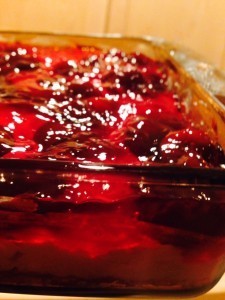
NWTK: Pretzel Cheesecake Jello Dessert
Well, it’s been awhile since the last New West Test Kitchen post. I ended up going to an editing retreat and then on vacation to Vegas, and then November just got away from me. Plus, my counterpart was moving into her brand new house, so we decided to take a small hiatus.
But now I’m back. We’ll resume the regularly scheduled programming, but I wanted to do a special Christmas Jello Pretzel dessert edition because I did some experimenting this week, and I think I’ve come up with a winner. Big winner.
You all remember that strawberry Jello dessert, right? That salty-sweet, creamy, decadent dessert was always a staple on our holiday table. Well, I decided I wanted to make that for the holidays this year, only I wanted to make it my way. So here’s the recipe
 CRUST
CRUST
2 cups chopped pretzel sticks (should be chunky, not crumb-y)
8 T. butter
1/4 c. sugar
Melt the butter and stir into sugar/pretzel combo. Bake at 350 for about 15 minutes. (You can use a 9×13 cake pan, but I like to make individual versions, so I put them in ramekins and then put all the ramekins on a cookie sheet and bake them individually. Really makes this dessert special.) Watch your oven temp, because a hot-running oven will burn this. But anytime after 10 minutes, you can take it out. Longer baking makes for a crispier crust. Cool completely.
LAYER 2 16 oz. cream cheese (room temperature)
2/3 c. sugar
2 T. cream
1 t. vanilla extract
1/2 t. anise extract (trust me on this one)
1/4 t. salt
1 c. heavy whipping cream
1/2 t. vanilla
2 T. powdered sugar
First step is to whip the cream. You can use a mixer, but whip the cream fresh. A lot of these recipes tell you to use thawed whipped topping. Not worth it. You can taste the difference when the cream is whipped fresh and you get to make it to taste. I don’t like super-sweet whipped cream, so I only use 2 T. of powdered sugar. But you can use more if you want.
Once you whip the cream, then in another bowl, mix together the cream cheese, sugar, cream, vanilla and anise extract, and salt. Whip those together until they’ll easily incorporate the whipped cream, then fold the whipped cream into the cream cheese mixture. Spread this mixture over the crust layer, making sure that you seal this layer all the way to the edge of the pan. (This will prevent the Jello layer from seeping into the crust layer and/or getting soggy.) Cool completely.
LAYER 3 2 small packets of cherry jello
2 cups hot water
2 cups cold water
1 package of frozen cherries
2 T. powdered sugar
First, drain the cherries and sprinkle the sugar on top. Mix them together and let them sit in the sugar, being drained. You want them to be mostly dry, but they’ll be too tart on their own for the jello if you don’t sweeten them just a touch. Then, boil 2 cups of water and stir in the cherry jello mixture. Stir in the 2 cups cold water and let that mixture sit in the fridge for about an hour. Once it’s thickened a bit, remove the bowl, stir in the drained cherries, and pour the jello over the top of the 2nd layer.
Refrigerate the individual ramekins (or the cake pan) for at least two hours before serving to allow the jello time to become firm. Enjoy one of my favorite holiday desserts!
What about you? Do you make this version with strawberries? Another kind of fruit? Do you have this at the holidays? Or another time?
Don’t forget, you can sign up for a giveaway copy of The Outcast Highlander on Goodreads HERE. Coming 12/26/13!


December 11, 2013
Cover Reveal: The Outcast Highlander
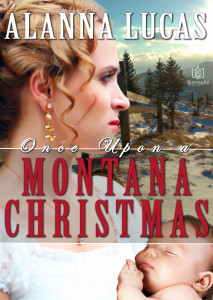
Well, without further ado, I want to reveal the cover for my newest release, The Outcast Highlander. Once again, Kim Killion at The Killion Group has outdone herself with amazing designs. Coming on December 26th, for your holiday reading pleasure, a sweet historical romance about a man who lost everything and the woman he will fight to keep.
The Outcast Highlander, Book One of The Highland Renegades Series
December 8, 2013
A Montana Christmas Romance
Hi, friends and fans of Montana romance. A friend and fellow author has a special novella out for the holidays and I wanted to give her a minute to introduce her book in case you’re looking for something to read this holiday season. Please welcome, Alanna Lucas.
My first trip to Montana was in 1999 to visit a friend who lived in Deer Lodge. She proudly showed off her state,
taking my husband and I to the Old Montana Prison (she was working there during the 1959 riot), the Lewis and
Clark Caverns, and the state capital, just to name a few sites.
However, it was our visit to the Grant-‐Kohrs Ranch that I remember with great fondness.
It had been raining most of the day, but as we arrived at the ranch, the clouds cleared to reveal a brilliant blue sky
and a lush green landscape. I fell in love. No postcard could do the scenery justice. We had an excellent guide who
brought the workings of the ranch to life. We spent an enjoyable afternoon wandering the property, visiting the
new spring additions, and touring the house. My absolute favorite item-‐ I still want one-‐ at the ranch was Kohrs’ cabinet desk. When closed up, it looked like a large portmanteau. But…when opened an entire office was revealed. There were dozens of pull out drawers, filing shelves, and a drop‐down work surface. It is a work of art unto itself.
When I decided to write Once Upon A Montana Christmas, I could think of no better inspiration for my ranch
than the Grant-‐Kohrs Ranch.
BLURB: Miss Eva Kenward does not want to spend another Christmas alone. Leaving Queen Victoria’s England, she journeys to America in search of an uncle but finds herself on the rugged frontier of Montana. And with no money and no acquaintances, the rudest man she has ever met is the one she must engage. Especially considering the precious bundle in her arms.
“Hunt” Strauss has been fooled before by beauty. So when the ravishing young woman arrives on his doorstep, he suspects her of ulterior motives. But perhaps the baby she holds truly is his kin…and when Miss Kenward finds herself stranded after a hotel fire, he reluctantly agrees to help. Bringing her to his sprawling ranch, Hunt tries to keep his distance. But the enticing woman and her enthusiasm for the season soon prove that fairy tale love stories—and holiday wishes—really can come true.
Alanna’s Christmas novella, Once Upon a Montana Christmas, is now available from all online retailers, including Amazon and Boroughs Publishing. You can also find Alanna at her website and on her Facebook author page.
November 25, 2013
A New View From Here

It’s Monday, so it’s “View From Here” time at rlsyme.com. That means I try to dig in to what’s going on in my writing life, at my writing desk, etc.
Well, a couple Mondays ago, a friend of mine posted this on his web page. Five Things Super Successful People Do Before 8am. It’s a Forbes article on the habits of highly successful people. (Not those five, though.) Since it’s been consistently proven that the extremely successful tend to have behaviors in common, it’s always worth looking at research about habits of successful people.
This one really caught me, though. As I was thinking of my days, and how I structure them, I started wondering if there was a better way to get myself motivated when I need to get up and out. Also, I read a book about habits last year, and I learned that the tiniest tweaks can sometimes make the absolute biggest difference.
So I decided to start an experiment of sorts. I’ve been doing the sprint challenge (which has been really awesome–I’ll report on that next week), to get to 2K a day by Christmas. So I thought maybe I would have some more success getting 500 words a day for seven days in a row if I could get some of my extraneous habits under control. Like when I go to sleep. When I exercise. How I organize my day.
I’m going to try taking just a couple of these things to heart and really pushing them in my professional workings.
1) I want to order my day.
2) I want to exercise at least a little every day.
3) I want to be up before 8am every day.
Supposedly, movement helps with cognitive functioning. Additionally, being organized helps to be more productive. And the most successful people in the world get up before 8am every day. So here we go. This is what I’m going to tackle.
Next Monday, I’ll talk about what I listen to in the car that helps me be more effective. What about you? What do you do to make yourself more effective in any part of your life?
October 25, 2013
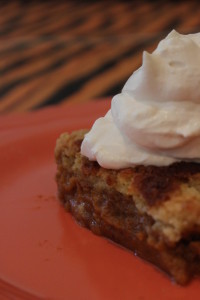
NWTK: Pumpkin Dump Cake
I’d never heard of dump cake until I started seeing it in every single community cookbook out there. Come to find out, dump cake is a thing. The essential concept is, you want to open packages, dump them, and bake, and make a cake. Skeptical? I was, too. Turns out, it kinda works. And in some cases, it works really well. Here was our NWTK experience with Dump Cakes.
Pumpkin Dump Cake (Beckatron)
1 box white cake
1/2 stick butter
2 cans pumpkin
1 can evaporated milk
1/2 c. sugar
3 eggs
1/3 c. heavy cream
5 T. pumpkin pie spice mix
 This dump cake wasn’t super dump-y. I ended up having to do a bunch of mixing, because the pumpkin wasn’t really “dump-able.” But it ended up actually tasting excellent, and was a great fall treat.
Basically, mix everything from the pumpkin to the spice mix in a bowl, dump it in the bottom of a greased pan, pour the white cake mix on top, melt the butter, and pour the butter over the top. Bake for about 40 minutes at 350.
So, I did some experimenting with this recipe. As always. I started off with an actual recipe. And I found a couple of things. The “bottom” part is essentially pumpkin pie. So if you have a favorite pumpkin pie recipe, make that filling and use it (I ended up making several substitutions from the original recipe–pictured–trying to make it just right). Second, the experience was much better when I made the actual cake mix and drizzled it over the top instead of dumping. But then it really wouldn’t be a dump cake.
 I brought this cake to a party and it was super popular. People liked the pumpkin pie filling with the cake on top. It was a really excellent tasting dessert. And again, while the “dump” part worked just fine, I highly suggest trying it with the prepared cake batter on top. Just remember, if you make the cake batter, it will get big. So perhaps cut the pumpkin pie filling part in half and then make the prepared cake and pour that over and bake it. Also, because I’m in such a high elevation, it changed my baking times, so make sure you’re checking the center of the cake for doneness before taking it out for sure. The last time I made it, I ended up having to bake it for 60 minutes (with more eggs in the filling and cake on top) just to keep the center cooked. So keep an eye on it.
Enjoy! And report back if you make it!
Fruity Dump Cake (Tistylee)
 1 pkg. yellow cake mix
1 (20 oz.) can crushed pineapple
1 can cherry pie filling
½ c. chopped nuts
½ to 1 c. butter or margarine
Grease a 9×13 inch pan. Dump in undrained pineapple, swirling it around to fill the corners. Dump in the pie filling and push it around until layers of fruit are quite even. Sprinkle the dry cake mix over the fruit to cover it all. Melt butter and drizzle over the top (or put on in little chunks of butter). Sprinkle with nuts. Bake at 350 F for 1 hour. Serve with whipped topping, cream or ice cream. Contributor’s Note: one cup coconut may be added, if desired. I usually don’t put in any nuts. This is good with just the cherry pie filling, omitting the pineapple and nuts.

I made this for my husband’s birthday this year. We had never tried a cake like this before, although I have seen similar ones on Pinterest. Unlike other recipes in my cookbook, this one is quite direct and easy to follow. So I did the obvious and followed the directions. My main departure of the recipe was to buy raspberry pie filling instead of cherry (because my husband prefers the raz!). And to follow her suggestion to use coconut in place of the nuts, so my nut allergy son could partake. The instructions for this recipe were so simple that my 3 year old was able to do most of it. She only needed help opening the packaging! Well that and melting the butter!
 The cake itself turned out beautiful. It is a VERY SWEET cake. The texture more closely resembled a pie or crumble than a cake. The cake mix on the edges didn’t get completely baked in, so next time I would use one whole cup of butter, instead of just the half. However, the flavors of the raspberry with the pineapple mingled were fabulous! Adding in the coconut turned a small birthday party into a tropical vacation! I strongly recommend serving it with whip cream or, even better, vanilla ice cream. The cream helps cut the sweetness a bit, and enables a more thorough taste of the different flavors. I also recommend refrigerating the cake after cooling/first serving. My husband didn’t like the increasingly soggy texture as it aged on our countertop. My kids did not share his complaint. They were happy to keep right on eating it!

What about you? Have you made Dump Cake before? Did you enjoy it? What is your favorite fruit/filling to use with dump cake? Click here to find out what the New West Test Kitchen is, and how it got started.
October 21, 2013
Have a Life Already

Since June, I’ve been trying every day to make the full-time writer thing work. Some of it has been uphill (manuscripts to finish, manuscripts to edit, classes to teach, authors to coach) and some of it has been downhill (social media, chapter leadership, conferences). But regardless of how easy or difficult it’s been, it’s been a great journey.
I’ve done my first booksigning, my first RWA conference as a published author, my first full request from my dream agent, my first editor cold-contact. My first sequel.
What scares me about where I am today is the same thing that often scares me.

There is just so much to do, and I can’t always do everything I want to do, and get all of my writing things done. And of course, when it rains, it pours.
Other writers may understand this (or other creative types). You spend a whole bunch of time locked in your room or house or office or studio trying to get a project done before life gets in the way, then life does get in the way. You start doing other things, and all of a sudden, you’re inundated with creativity.
I’ve spent the last four weeks knee-deep in a musical theater production. It’s been awesome. The kids were fantastic, the music was fun, the staging and costumes were amazing, and the people were just plain fun. I had an incredible time. But I found myself, even as I was sitting at the piano between songs, writing new books in my head. Or working on a new musical on my notebook between studio times. Our last performance was yesterday, and of course, I spent part of today catching up with emails and social media, and when I finally sat down, this afternoon, to start writing again, I was almost paralyzed by how much there was I could be working on.
I know I have contracts to fulfill, so those decisions are easy.
But beyond that, I’m having a hard time because there’s just so much. As always, when life proliferates, I get more ideas and more input produces more output. The curse of that particular Strength.
 Where I will go from here, I’m still not sure. I know I need to finish the books I still owe out. But from there, I’m still trying to decide. I have some writing friends who are helping me figure it out. I really do wish, at times like this, that I would have spent more time trying to find the right agent instead of doing everything myself. The do-it-yourself option may sound well and good, but I really just want some more perspective. Maybe that’s an answer in and of itself.
What do you think? How do you prioritize? How do you keep from getting paralyzed by too much life? Or not enough time?
October 20, 2013
New West Test Kitchen: Campfire Bundles
Montana in the late summer and early fall is all about being outside. And let’s face it, it’s the most beautiful weather we have, so we have to savor it. But I figured, since we’re all doing all this camping, it might be fun to try something you could theoretically make outside on a campfire. Kristy tried one recipe, and I tried another. Both are from the community cookbooks.
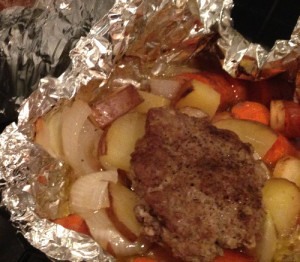
Hobo Dinners (Beckatron)
Of course, the really interesting part about this recipe, for me, was that there really wasn’t much of a recipe. The extent of it was: potatoes, carrots, meat – put in foil with pat of butter and cook 30 minutes on a grill.
Well, you know me. I can’t help but experiment. After hearing Kristy’s results, I wondered if it would help to have any different kinds of vegetables. So I tried all kinds of different things. I did one batch as it says (just potatoes, carrots, and meat, with salt and pepper and a pat of butter). Each additional batch, I’d add another vegetable, until the last of the bundles had all six of them. Those, of course, took the longest to cook, but minus the parsnips, they were also the best.
 The carrot/potato/meat was, of course, the least flavorful. Although I made the bundles again a second time and instead of regular butter, I used one of those compound butters that Kraft sells now, as a recipe starter. That ended up being the best tasting of them all. Must have been the extra herbs.
The most flavorful of the first batch was the one with potato, carrot, celery, onion, and meat (which, from a culinary perspective, makes complete sense). For some reason, the addition of the parsnip and turnip just didn’t do anything for me. But generally speaking, the hobo dinners were not an immediate success. They were much better the next day.
Here’s the best of what I did:
2 carrots
1 medium onion
2 red potatoes
2 stalks celery
1 lb. hamburger
3 T. butter
Chop vegetables into similar size pieces (just a bit smaller than bite-size is the best). Layer them in a piece of heavy foil, then top with 1/3 lb. of meat. Top with 1T. butter. Close foil and put on campfire (above direct heat) or on a grill. Check at 30 minutes if on grill.
Campfire Bundles (Tistylee)
I was interested in this recipe for camping purposes. To date, we have never made it past one night out with the kids. But someday we do hope to last longer, so we’ll need stuff to eat other than pork and beans!
[image error]
Here’s the original recipe:
1 lg. sweet onion, sliced
1 each, lg. green, sweet red & yellow pepper, sliced
4 med. Potatoes, sliced ½” thick
6 med. Carrots, sliced ½” thick
1 sm. Cabbage, sliced
2 med. Tomatoes, chopped
1 lb. fully-cooked Polish sausage, cut into ½” pieces
½ c. butter
1 tsp. salt
½ tsp. pepper
Place vegetables in order listed on 3 pieces of double-layered heavy duty foil, about 18×18 inches. Add sausage, dot with butter. Sprinkle with salt and pepper. Fold foil around the mixture and seal tightly. Grill, covered, over medium heat for 30 minutes. Turn and grill for 30 minutes longer, or until vegetables are tender. Yield: 6 servings.
First I got carried away and cut ALL the vegetables and put them together in a big bowl. My husband doesn’t like a lot of peppers, so I subbed in some mushrooms for the green pepper. I also increased the percentage of potatoes and carrots, and reduced the cabbage and onions to my family’s tastes. I mixed them all together thoroughly in the bowl, and then realized I was supposed to put them in the foil in the order listed. Oops! Next, I cut the sausage and tomatoes, keeping them separated (like I was told!). Once everything was cut, I put the veggie mix onto my (not heavy duty) foil, with the sausage and tomatoes, pat with butter and finally salt & peppered. Due to the large amounts of veggies, I ended up with 6 huge foil wrappings.
[image error]For fun, I cooked half of the packets on the grill and half in the oven. The grilled packets took about an hour over medium heat. When they were finished, the sausage was deliciously done. The veggies took on a bit of its flavor and everything had a nice roasty char on it. By comparison, the packets from the oven were not as good. I baked them at 350 F for an hour and 20 minutes. Everything inside was cooked, but the butter hadn’t cooked off at all. As a result, the veggies were soggy and bland.
In the end, both packets were met with dissatisfaction from my test subjects. They did not like the veggies very much, nor the sausage itself. If I ever made this again, I would purposely repopulate the veggies with family favorites. I would try to find a spice mix I liked in order to increase the flavor. And I would grill them exclusively. At this point, I’m doubtful that this will ever make it onto my camping menu. But perhaps some inspired version of this could appear down the road a few years.
So, what about you? Have you ever made a campfire food like this. What did you think? How would you re-make these campfire bundles?
October 14, 2013
Couch to 2K and Challenging Challenges

When I was in my 20s, I did something called a Couch to 5K. I was in a health kick and decided I wanted to run a 5K. There’s a program my friend Allison turned me on to called the Couch to 5K program. They set up non-runners to start running. You’re supposed to be able to go from couch potato to 5K runner in six weeks.
It was such a positive experience for me, I tend to get excited whenever someone talks about the program. (Not the least reason of which is because I’d love to do a program like that again and get back into the shape I was in in my mid-20s. Ha!) So the other day, I was browsing blog posts and came across one by Tina Radcliffe at Seekerville called the “Couch to 2K”. I clicked immediately.
Turns out, Tina is also a runner (or former runner) and was thinking about getting back into it. But like anything (running, dieting, writing, basically anything with an -ing on the end), the process of setting unrealistic goals can derail all intentions. I may have the best intentions of running a 5K, but if I try to get up tomorrow morning and do it, I will fail. That’s an unrealistic goal. Setting unrealistic goals is a sure way to fail.
That’s why the Couch to 5K program is so successful. It meets you where you are. Assumes you have a desire to be a runner, or you wouldn’t have found the program. But it also recognizes that you’re not at the 5K level yet. What level might you be at? That’s where you start.
This is what I love about Tina’s idea of the Couch to 2K. Now, I’m not quite at the couch level, but I’m definitely a streaky writer. Some weeks, I write 10K a week. Some weeks, I write 40K. Some, I write zero. It’s difficult to be consistent that way. However, consistency would be helpful. So I’d like to see if I can do a Couch to 2K program to get myself in the habit of writing every day. Here it is (from the Seekerville post, but amended for me, just a bit):
Week One: Write 500 words a day for seven consecutive days
Week Two: Write 750 words a day for seven consecutive days
Week Three: Write 750 words a day for seven consecutive days
Week Four: Write 1000 words a day for seven consecutive days
This is the beginning stage. There’s an intermediate stage that gets me to 2K, and then there’s an advanced stage to take me beyond that. But for now, I just want to focus on 30 days. Let’s get the 30 days of consecutive writing under our belts. Or, rather, my belt.
So, I started today. I wrote when I woke up. First thing. I wrote my 500 words. I’ve written more, but that’s my main goal. Write 500 words, every day, until I level up. As the SuperBetter game would have it, I’ve done my first three steps now. I hope to keep collecting the little benefits and doing the challenges. I’m hopeful that will help me. So let’s say, this is writing day #1. Let’s see how we do.
As per the rules, if I miss a day, I start all over again. So let’s just see how it goes.
Happy running!
October 13, 2013
New West Test Kitchen: Potato Salad

What would the summer or fall be like without potato salad? Everyone has their individual preferences, as far as how to make said picnic fare, so we really went to work this time. We tried mayonnaise, salad dressing, vegannaise, sour cream, and greek yogurt. Without further ado, let’s jump in to the testing.
Potato Salad (Tistylee)
I have a soft spot for my grandmother’s potato salad. Growing up, I spent a lot of summers at her house, and this was a staple. Always on the table for lunch, I rarely got enough of it. The gloppy sauce, the creamy potatoes, the crisp onion and bouncy eggs… it was one of my favorites! I’ve watched her make it time and again, from scratch, without a recipe… and I’ve tried (repeatedly) to copy it. Without success.
Now with kids of my own, I decided to give it a go. However, as my son is allergic to eggs, I thought I might look for a recipe that had similar ingredients to Hers. Obviously I could leave out the hard boiled eggs if I chose, so I was foremost searching for one that didn’t need mayo.
In our family cookbook, here’s the recipe I found:
2 tsp. mustard
1 T. vinegar
½ c. evaporated milk (or more)
¼ c. powdered sugar
Salt & pepper, to taste
Mix together; add to diced potatoes and lots of onion and boiled eggs. Make plenty of sharp tasting dressing because potatoes will weaken it.
 So this recipe makes, I don’t know how many, assumptions. First it assumes that you know that potatoes have to be cooked before making the salad. It assumes you know how to cook the potatoes yourself and that they have to be mostly cool to use. It also assumes you know how to HARD boil eggs.
I realize that country women in the old days would likely have known that you must and how to cook the eggs and potatoes. My grandmother did, as did her mother, and mine. However, this is a “hand me down” cookbook. Wouldn’t it be better to assume that the persons using this in the future might have NO IDEA?! That their grandchildren might like some more guidance on how to make these heirloom recipes?
Okay. Enough of my soapbox! Deep breath.
Obviously, I do know how to cook potatoes and eggs. Or at least, I think I do. But for the sake of fun, I checked online to see if the way I was taught is standard practice. It wasn’t. Or rather, there are a LOT of ways to cook potatoes and eggs for potato salad. Really? I’m not kidding. Most people do boil the potatoes (in slightly different ways) but some others bake them. Additionally, after they are baked/boiled you could grill them too for a different flavor.
And then the ways of hard boiling eggs were all over the place too. Some suggested boiling them for just a minute or two and then turning the burner off, but covering the pot. I was taught to get it boiling and let it roil for 15 minutes… hmmm… interesting.
Anyways. Eggs, potatoes, onions… easy, right? Here is what I did:
 Because I have NO IDEA how much sauce the recipe will make, I decide to make a “small batch” of potato salad. The potatoes and the eggs ultimately need to be cooked and cooled, so I started with them.
First, I boiled 6 eggs. To center the yolks in the middle of the eggs, I spun each one in my hand a few times. In a single layer, I placed them in the bottom of the pan and ran enough cold water in to cover them by about an inch. [8889] I salted the water and I set the pot to boil. However, once the water was boiling, I let it for one minute, then covered it and turned off the heat. I set the timer for 12 minutes and let it set on the burner. Not what I was taught, I was trying this method I found: http://www.wikihow.com/Hard-Boil-an-Egg. I only had one casualty and the rest turned out fine. After the time was up, I took them out of the hot water and set them in some cold water. (Usually I add ice to that water, but we are so low on ice around here without an automatic ice maker… so I made do without it.) When they were cool enough to handle, I put them back in the fridge to chill.
Second, I boiled the 2 ½ pounds of red potatoes. (I had read that they were the best kind for making potato salad.) Before placing them in water, I rinsed them off and cut them to the size I wanted. Then, filled the pot with enough cold water to cover them completely, with an inch or so extra. Similar to the eggs really, except this time once I got it boiling, I kept the heat on until the potatoes were done by the fork test. (By which, I mean, that my fork slid easily into the flesh of the potato and did not stick.) I drained the water and placed the potatoes into the fridge to cool off.
I divided the potatoes in half, with one to be bereft of hard boiled eggs. I largely diced 4 eggs and put into one of the potato bowls. I diced half an onion,[8911] and split between the two bowls. [8916]
Next I made the sauce. In no particular order, I put all the ingredients into a bowl and whisked them together.
Finally, I poured the sauce over the potato/egg/onion mixture.
 Result:
Upon first inspection, this was NOT my grandmothers’ potato salad. The sauce was super runny and did not really stick to the potatoes at all. In fact, there was no real substance to the dressing at all, which meant that there was no cohesiveness to the salad either. Pieces of potato, egg and onion were all still separate entities covered in the same yellow liquid. Taste-wise, it was sort of like Hers. It had a mustardy flavor with some sweetness that was reminiscent of her dressing. I remember that She used Miracle Whip instead of mayo (which is sweet) and added some sugar, in addition to the vinegar and mustard. However, Hers had texture that held the salad together, as well as adding flavor.
During my research, I discovered that if you put the sauce directly onto warm potatoes, they would soak it up some. Perhaps if I had done this trick, the potatoes themselves would have had more flavor. It would have done nothing to combine the pieces together more.
After resting in the fridge a bit, the potato salad did still not congeal into a wonderful mass. The dressing had disappeared more into the potatoes, but that left the salad dry. It was difficult to eat.
I didn’t like the sauce enough to cover my “just potatoes and onions” salad. Neither did my son, for whom this eggless cold salad would be intended. For my part, I don’t think it’s “potato salad” without the eggs. At least, it’s not my grandmother’s salad. If I get a chance, I will buy some Vegannaise to try a different dressing for his salad.
UPDATE: I got some grape seed Vegannaise and made a dressing for the potatoes. I added equal parts fake mayo, yellow mustard and brown mustard. I thought the sauce was okay, a bit vinegary perhaps, but my son would not even taste it. Later, I tried giving him some plain boiled potatoes and he wasn’t a fan of that either. Will have to try this cold salad again when he’s much older. At that point, I might try Becca’s version with the Greek yogurt!
What do you think? Can potato salad BE without hard boiled eggs? Do you have any dressing recipes for this salad to share?
Potato Salad Three Ways (Beckatron)
I had the benefit of starting with my grandma’s recipe (which she doesn’t write down and which she doesn’t even really measure, so getting her to write it down was a bit of a task). She kept saying things like, “enough cream to make it pourable” and “just a little mustard”.
I know she typically uses Miracle Whip, but I wanted to try other ways, as well, so here is what I generally tried and what the results were. Her basic recipe is:
5 lbs. red potatoes
5 eggs, boiled & peeled
1 medium onion
Dressing:
3 c. miracle whip (I also tried regular mayo and Greek yoghurt)
1-2 T. vinegar (I tried apple cider and malt)
Enough cream to make it pourable
Just a little yellow mustard
For potatoes, onions, and eggs, I did the same each time.

For eggs, I boiled about nine eggs (assuming I would mutilate at least one) by a trick I was taught that always seems to work well. I put the eggs in cold water, brought it to a boil, and then turned off the heat and left the eggs there for 15 minutes before running cold water over them. They turn out very well.
 For potatoes, I heavily salted and peppered some cold water, then chopped a bunch of red potatoes with the skin still on and boiled them until, like Kristy said, they passed the fork test. Then, I put them in three big bowls to try the three different kinds. Well, one of those bowls, I also took in half. As Kristy mentioned, our grandma liked to have the potatoes be cold. But I also wanted to try a version with hot potatoes. So, just with one version (the Mayo version), I did half with sauce on cold potatoes, and half with sauce on hot potatoes.
It turned out that with the kind of sauce we made, it actually worked out better if you put it on cold potatoes first. The heat either changed the consistency of the sauce or did something to the eggs, but it just didn’t taste as good with the sauce on warm potatoes. Better to cook them first, then cool them.

With the onions, because I really wanted very small pieces of onion, I decided to use a mandolin to do the slices, and then chopped the onion pieces very small. In the version with greek yogurt, I added celery (also cut on the mandolin), which added a really nice crunch, in addition to the onions. Also, chopped green onions could be subbed in for the chopped onion for a less sharp taste.

Now for the sauce. The first version, I did what the recipe called for. Miracle whip, vinegar (I did half with apple cider and half with malt), cream, yellow mustard. The second version, I tried Mayonnaise, vinegar, cream, and yellow mustard. (This time, however, I tried half a version with very little mustard and half a version with a whole T. of mustard.) And then, in the third version, I tried halving again – one half with Greek Yogurt, cream, vinegar, and yellow mustard; one half with Greek Yogurt, cream, vinegar, and brown mustard.
 And the results.
Which version was the best in the end? Isn’t that what we all want to know?
Well, I think the MW-apple cider v-cream-yellow mustard on cold potatoes tasted the most like grandma’s. That was a good thing. But I think the malt vinegar actually tasted better with the Miracle Whip. Offset the sweetness a bit.
Of the three different kinds of binders, the Miracle Whip got the best texture on the potatoes, the Greek Yogurt was the healthiest (calculating the health benefits, etc., can be very important), but I think the Mayonnaise had the best taste. In fact, the best tasting version in my opinion was the fourth version: Mayo, apple cider vinegar, cream, salt-pepper, onion, egg, potato. With mustard on the heavy side. I think the bitterness of the vinegar and the tang of the mustard makes the sweet onion and creamy egg and potato really a wonderful balance. I am quite pleased with the results of this.
What about you? What’s your favorite potato salad recipe?
October 4, 2013
New West Test Kitchen: Chocolate Cake
First of all, welcome to the new, updated website. We’re still working out a few things, but we’re getting our feet under us, and hope to be done by next week. For now, we’ve got a New West Test Kitchen post coming up because it is FRIDAY! Today, I wanted to do something that we all know and love. Chocolate Cake.
This week, we’re working from Chocolate Cake recipes that were just a list of ingredients. Now, if you know anything about baking, you know that the way you incorporate ingredients makes all the difference. Sometimes, even, the order in which you incorporate them. So tackling these recipes was difficult. But ultimately, productive.
Chocolate Sheet Cake (Beckatron)
 This is my favorite chocolate cake recipe. It’s got a very unique taste and is possibly the most moist cake I’ve ever had before. I highly suggest trying this one out.
Blend 2 c. flour & 2 c. sugar and set aside. Mix together 1 c. margarine, 1 c. cold water, and 4 T cocoa. Bring these three ingredients to a boil and pour over flour and sugar mixture, blending well.
Add 1/2 cup buttermilk, 1 teaspoon vanilla, 1/2 teaspoon cinnamon, 1/4 teaspoon salt, 1 teaspoon soda, and 2 eggs. Mix well and pour into a cookie sheet (15 1/2 x 10 1/2)Bake at 325 for 30 minutes. Make sure to let the cake cool before frosting.
Bring to a boil: 1/4 cup butter or margarine, 1 cup sugar, and 1/4 cup milk. Once on a low boil, remove from heat and add 1/2 c. chocolate chips. Don’t cool. Continue beating until it thickens. Once relatively thickened (but still pourable), pour it over the cake and spread to the corners.
You only really need a light coating of the frosting, but make sure to spread it when it’s hot because it will start to harden if you leave it to cool. The moist, spicy chocolate cake is a perfect counterpoint to the sweet frosting (which is why you can get by with only a light coating of frosting). This is by far the best cake I’ve ever eaten.
 In addition to making this in sheet-cake form, I tried it in mini rounds, as well. They still worked out to be the amazing, moist, chocolatey goodness that I’ve come to know and love in the sheet cake, but I was able to make them as individual cakes, which I really appreciated. Good to know that it works in multiple formats.
If you try this recipe, please come and find me here and tell me about it. I so adore this cake, I just want to share it with everyone. So I hope it makes you as happy as it’s always made me.
Chocolate Cake – First try (Tistylee)
Once upon a time I would have shied away from recipes like this… a list of ingredients with no directions! When I was a much younger me, I would sift through my grandmother’s cookbooks, looking at the recipes with wonder: How do you know what to do with them? It was like a codebook… sometimes there were just lists of different foods, with no amounts or order to them. The baking ones are more specific in terms of quantity, but still no advice on what to do with them.
 Like this one:
2 c. sugar
½ c. butter
2 sq. melted chocolate
2 eggs, well beaten
1 c. thick sour cream
2 ½ c flour, with 1 tsp baking soda (mix well)
1 c. boiling water (last)
1 tsp vanilla
This recipe was my Great Grandmother’s and years ago I would have just passed it by. Now I am intrigued… sour cream? In a cake? What kind of chocolate: unsweetened, semi-sweet, German? How would it turn out if I subbed out the eggs? Which egg substitution should I use? How long do I bake it? At what temperature? Should I make an actual cake, if so what size pan? Or just cupcakes?
Due to the lack of instructions, I pondered the order in which I would use the ingredients for nearly a week. Tried to consider all the options. I felt a bit like a detective, combing through the culinary clues for how to create this cake. Here’s my first try…
 First, I decided on using unsweetened chocolate, and melted 2 – 1 oz squares with butter over low heat. Didn’t want to scorch it! Nothing worse than burnt chocolate… what a waste!
While that melted together, I made up my “eggs”: for each egg needed, I mixed 1 T milled flax seed with 3 T of water. If you let that set for a few minutes, that mixture thickens up to a texture a bit like eggs.
Third, I measured out 2 cups of sugar into a big bowl and poured the melty chocolate over it and mixed together. I wanted to make sure that all the sugar and chocolate were incorporated together well before adding anything else.
Fourth, I added my “eggs” combining completely, then added the vanilla, doing the same. Fifth, I mixed in the sour cream completely.
 Sixth, I measured out the flour and baking soda into a small bowl, stirred together “well” as the recipe suggested. (One of my only directions, so I’d better follow it!) Then added the flour/baking soda to the rest of the cake batter. Before adding the flour, the batter was definitely too runny, but with all the dry stuff, it got much too thick. Thank goodness for the “last” addition of cup of boiling water.
Remembering my grandmother’s trick in making bread lighter, I decided to try it out on the cake batter. With a whisk, I stirred and stirred the batter until it was quite bubbly before pouring it into the cake pan.
Unable to decide just what type of cake I wanted, I made both a 9” round pan AND a small batch of cupcakes. Cheating a bit, I looked into my Betty Crocker cookbook to determine what temp they recommend baking cakes at… 350 F… so I went with that. The 9” pan took 40 minutes until the knife came out clean while the cupcakes only took 20. And yes, I baked them separately. This time. When they were out, I put them on a baking rack to cool.
With this obscure cake recipe, came one for frosting.
 1 c. sugar
1 c. sour cream
Boil until forms soft ball in cold water.
Add
1 tsp vanilla
Chopped walnuts
Luckily, I have a wee bit of experience making candy or else this would have seemed complete gibberish to me!
In a quart pot I mixed the sugar and sour cream together over medium low heat. As it liquefied, I got out my candy thermometer and attached it to the side of the pot, so I could wait for “soft ball” stage. Admittedly, I forgot at the beginning and stirred it too much, so the frosting took a bit longer to reach temp than it should have. But after realizing my error, and leaving it alone, it didn’t take too long to get there.
I added red food coloring while it boiled, my son’s favorite color, and waited. Once at the right stage, I stirred the vanilla in quickly. I omitted the walnuts. Then, while still hot, I poured the frosting over the cooled cake and cupcakes.
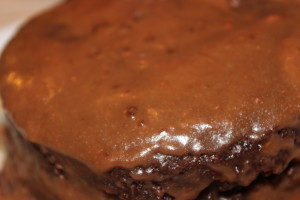
The cake itself turned out chocolaty, but not too sweet. Due to the egg substitute, it was a bit dense, like a cakey brownie. I wondered if it would dry out quickly, as my past eggless cakes had. It certainly looked that way a few hours later, as it sat on the counter waiting to be eaten. Yet, once covered with frosting and plastic, the moisture in the cake was secured. The frosting was very sticky at first and a bit difficult to eat. The caramel goodness clung to the top of our mouths and we found ourselves covered with sticky red frosting everywhere! But it also got better with covering. Perhaps the frosting provided the wetness the cake lacked, and the retreating moisture took the stickiness.
I really liked this cake. I imagine my grandfather and his brothers coming in from farming and finding this cooling on the counter. With dust in their hair and still in their muddy shoes, they clambered around to sneak a piece. I’m sure my great grandmother shooed them away to wash their hands for supper, only to notice the cake half eaten as they ran off to do her will. They would devour it completely, relishing the remains after their supper proper. My children have certainly made an effort to do the same.
 UPDATE:
So I decided to make the cake again with a few variations.
First, I used semi-sweet chocolate instead of the unsweetened.
Second, I used buttermilk (1/4 cup for each) as egg substitute.
Third, I sifted the flour before measuring.
Finally, I added 1 cup coconut to the original frosting recipe.
Everything else, I did the same as the first time.
YUM!
Due to the buttermilk substitute and the reduced flour (from sifting), the cake batter ended up runny. Thus, it needed more baking time. It actually took an extra 10 minutes.
The resulting cake was more moist that the original and more chocolatey. It also fell, like the first, and was very dense. But decadently dense. Delicious!


![[image error]](http://rlsyme.com/wp-content/uploads/2013/10/IMGP8952.jpg)