Carol Fenster's Blog, page 19
February 2, 2014
Announcing Gluten-Free 101: The Essential Beginner’s Guide to Easy Gluten-Free Cooking
I take great delight in making it easy for beginners to prepare their favorite gluten-free meals.

Gluten-Free 101: The Essential Beginner's Guide to Easy Gluten-Free Cooking
That’s why I am especially happy to tell you that my new cookbook for beginners, Gluten-Free 101: The Essential Beginner’s Guide to Easy Gluten-Free Cooking, is now in bookstores and natural food stores (and of course, on Amazon.com)
Watch for My Blog Tour
Visit my colleague Amy Green’s marvelous blog for a Lemon Bar recipe and her view of my new book.
Many of my other colleagues are blogging about my book in February, so stay tuned to find out where you can win a copy.
My Philosophy About the Book
I believe that living a gluten-free lifestyle can be fun, delicious, and easy. But it wasn’t always that way for me. Like other beginners, I was baffled by unfamiliar ingredients and new cooking techniques when I first adopted a gluten-free diet in 1988. My advantage, however, was that I already had some cooking skills, so the kitchen was not foreign territory to me—as it is for some of you.
Given my own experience and hearing from you, I recognized the need for a cookbook that makes it easy for beginners to make a simple and positive transition to cooking. So, my book explains how to select and work with gluten-free ingredients, how to continue eating healthfully, and how to master basic gluten-free cooking techniques, such as baking delicious breads or rolling gluten-free pizza dough—all with easy-to-follow instructions.
Gluten-Free 101 Has Recipes You Miss the Most
One of the first things newly-diagnosed patients tell me is how much they miss their favorite foods such as pizza, bread, and pasta— and all-American desserts such as brownies, cakes, and cookies. And they miss childhood favorites such as meat loaf, macaroni-and-cheese, spaghetti and meatballs, and comfort-food casseroles. So the book focuses on familiar dishes, but introduces time-saving, simple shortcuts and tips that are especially helpful to beginners.
Examples of Tips, Shortcuts in Gluten-Free 101
For example, using my “cold-oven start,” French baguettes bake in only 30 minutes. Pizza crusts can be baked ahead and frozen, ready for topping at a moment’s notice. I show how to use time-saving appliances such as a slow cooker for beef stew and a food processor to blend cookie dough in seconds. I give tips for handling sticky gluten-free bread dough and shaping gluten-free piecrust so breads and pies look perfect and taste delicious.
Get Your Copy Now
The book contains 175 recipes for everyday favorites with more than 25 beautiful photos to show how the finished dish looks, which is especially important to beginners and each recipe also offers nutrient content. This book joins my award-winning cookbooks— 1,000 Gluten-Free Recipes and 100 Best Gluten-Free Recipes, all from Houghton Mifflin Harcourt publishers. You can buy your copy at bookstores and natural food stores or at order at Amazon.com. Send me your postal mailing address and I will send you a signed bookplate that you can paste in the book so you have a signed copy.


January 28, 2014
Gluten-Free Super Bowl Party

Southwestern Chili
NEWS FLASH: Carol’s latest book, Gluten-Free 101: The Essential Beginner’s Guide to Easy Gluten-Free Cooking is now available in bookstores, natural food stores, and Amazon.com.
Get your copy today.
Super-Bowl Entertaining with Ease
Whether you are hosting a Super Bowl party next week, or just want a super-easy menu for a cold winter night, this flavorful, gluten-free menu is sure to be a hit. It has simple ingredients and is easy on the budget.
My motto, especially for beginners, is: “Stick to simple gluten-free recipes with gluten-free dishes that everyone recognizes and serve them in a simple way.” Try this easy menu.
Gluten-Free Super Bowl Menu
~Southwestern Chili~
~Plate of fresh vegetables and basket of corn chips~
~Guacamole and Mexican Salsa Dips~
~Cornbread~
~Chocolate Brownies~
~Your favorite beverages~
Southwestern Chili©
by Carol Fenster
You can control the heat in this flavorful chili by how much chili powder you use. It also freezes well, so make a batch and freeze in individual-serving containers for a quick, easy lunch.
1 pound lean ground beef or turkey
1/2 cup finely chopped onions
2 cans (15 ounces) pinto or kidney beans (or both), rinsed and drained
2 cans (15 ounces) canned tomatoes
1 large garlic clove, minced
2 teaspoons chili powder (or to taste)
1/2 teaspoon ground cumin
1/2 teaspoon ground coriander
1/2 teaspoon dried oregano
1/2 teaspoon salt (or to taste)
1/4 teaspoon sugar
1 cup water (or more)
In large Dutch oven or skillet, combine ground beef and onion. Cook over medium heat until meat and onion are gently browned. Add remaining ingredients and bring to boil. Add enough water to reach desired consistency. Cover and simmer on low heat for 2 hours. Refrigerate overnight. Or, prepare morning of party and cook in slow cooker 4 to 6 hours. Serve with shakers of additional spices near slow-cooker for those who want to spice it up. Serves 6 (can double or triple)
Carol’s Tips for Hosting a Super Bowl Party
[1] Choose a simple menu that is also dairy-free, since lactose-intolerance often occurs in people who react to gluten. Stick with high-flavor, straightforward dishes that you know how to prepare and that your guests are familiar with. It’s better to serve a simple, flavorful dish that you have mastered than to attempt a new, complicated dish that might not meet your expectations.
[2] Plan a menu that can be cooked-ahead―preferably the day before the party (or that morning)―and then reheated before the party. I like to cook this chili the day before and refrigerate it overnight to let the flavors meld. It doesn’t need thickening, so there is no conundrum about which gluten-free thickener to use. Reheated on party day and served in a slow-cooker (or cooked in the slow-cooker all day), it stays hot throughout the party.
[3] Serve a simple gluten-free bread that appeals to everyone. One of my favorites is a moist, homey Cornbread which pairs well with chili. Bake it on the morning of the party, cut into serving pieces earlier in the day, and pile high on a platter. Wrap in plastic wrap until party time to avoid drying out.
[4] Choose easily-served desserts. Luscious layer cakes are pretty, but require your full attention when cutting and plating―which takes you away from your guests and the TV. Instead, serve “grab and go” desserts such as gluten-free cookies (store-bought if you’re not a baker) or Brownies served on big platters. That way, guests serve themselves whenever they please, freeing you to focus on your favorite team.
[5] Make it easy for you and your guests. Serve the Southwestern Chili in a slow-cooker which allows guests to help themselves whenever they please. Place hot pepper sauce nearby for those who want to jazz it up a bit. Instead of bowls, use coffee cups so guests can balance food on their laps while watching TV―the cup’s narrow tops reduce spills and the cup’s handles make hot soup easier to hold. Arrange gluten-free cookies or pre-cut brownies on a platter so guests can help themselves―and you won’t have to do any last-minute serving of dessert and possibly miss that game-changing touchdown.
Enjoy the game and may your favorite team win! Personally, I’m rooting for the Denver Broncos!
January 25, 2014
Gluten-Free French Baguettes: Quick, Easy Bread
Despite all the wonderful gluten-free breads on the market, there’s nothing like homemade bread, piping hot from your own oven.

French Baguette
It tastes deliciously fresh, your kitchen smells heavenly like a bakery, and you’re in control of what goes into the bread.
“But baking bread takes so much time” you say. I have devised several shortcuts so everyone can have bread quickly. With a little advance planning, careful choice of pans, and some ingenuity, you can bake homemade bread ….to rave reviews from your family and guests.
The secret? Mix up the dry ingredients (potato starch through salt) ahead of time. Use a three-loaf French Baguette pan, and here’s the ingenuity…start bread to bake in a cold oven. Follow this easy recipe and enjoy homemade bread.
Gluten-Free French Baguettes
By Carol Fenster, author of Gluten-Free 101: The Essential Beginner’s Guide to Easy Gluten-Free Cooking (Houghton Mifflin Harcourt, 2014)
These easy French Baguettes bake quickly in a three-loaf French baguette pan that starts out in a cold oven—an unusual but effective method that makes perfect baguettes and is easy for beginners.
1 tablespoon active dry yeast
2 tablespoons sugar
1 cup plus 2 tablespoons warm (110°F) water
2 cups potato starch
1 cup Carol’s Sorghum Blend (see below)
1 teaspoon xanthan gum
1 teaspoon guar gum
1 teaspoon salt
3 large egg whites ([1/2] cup), at room temperature (reserve 1 tablespoon for egg wash)
[1/4] cup (1/2 stick) butter or buttery spread, (at room temperature) or canola oil
2 teaspoons cider vinegar
1 teaspoon sesame seeds
[1] In a small bowl, dissolve the yeast and 1 teaspoon of the sugar in the warm water. Set aside to foam for 5 minutes.
[2] Grease a French baguette (three trenches) pan or line with parchment paper (for perforated pans).
[3] In the bowl of a heavy-duty stand mixer, whisk together the remaining sugar and the potato starch, sorghum blend, xanthan gum, guar gum, and salt until well blended. With the electric mixer on low speed, beat in the egg whites, butter, vinegar and the yeast-water mixture just until blended. Increase the speed to medium and beat for 30 seconds, stirring down the side of the bowl with a spatula. The dough will be soft.
[4] Divide the dough among the three trenches of the baguette pan by dropping 4 or 5 balls of dough in each trench using a #24 or #30 metal spring-action ice cream scoop to make loaves of the same size. Smooth each third into an 11-inch log with a wet spatula, taking care to make each log the same length and thickness, with blunt rather than tapered ends (they brown too quickly). Whisk the reserved tablespoon of egg white with a tablespoon of water until smooth and then brush each loaf with the egg wash. With a sharp knife, make three diagonal slashes [1/8] inch deep in each loaf so steam can escape during baking. Sprinkle with the sesame seeds.
[5] Place immediately on the lower-middle rack of a cold oven. Set the oven temperature to 425°F and bake for 30 to 35 minutes, or until nicely browned. Cover the loaves with aluminum foil after 15 minutes of baking to prevent overbrowning, if necessary.
[6] Remove the bread from the pan and cool completely on a wire rack before slicing with a serrated knife or an electric knife. Makes 3 baguettes (twenty-one 1-inch servings)
Carol’s Sorghum Blend
1 ½ cups sorghum flour (or brown rice flour for lighter color and texture)
1 ½ cups potato starch
1 cup tapioca flour/starch
Whisk together until well blended. Store, tightly covered, in a dark, dry place.
Per slice: 96 calories; 1g protein; 1g total fat; 2g fiber; 19g carbohydrates; 6mg cholesterol; 110mg sodium
Starting Bread to Bake in a Cold Oven?
It may seem unusual to start bread-baking in a cold oven, especially when we have been taught to preheat the oven before baking anything. In reality, though, the cold-oven method works quite nicely with narrow or thin loaves like French baguettes. It does not work well with standard loaves (e.g., 4×8 or 5×9-inch) because they are too thick for the oven heat to penetrate quickly enough to bake them properly.
Gluten-free bread dough is heavy and wet. As the oven preheats, it warms the wet dough and activates the yeast, causing the bread to rise quickly, but that’s OK because the loaf is narrow, it doesn’t have to rise as much as a standard 5×9-inch loaf, and the heat from the oven dries out the crust to make it crisp. It also means that a French baguette spends only 30 to 35 minutes in the oven compared to a regular loaf that requires rising time and nearly an hour of baking time.
The bottom line? You will have bread much faster with the cold-oven method than with the preheated oven method. This cold-oven method works perfect in my KitchenAid wall oven, but it doesn’t work in all ovens—especially those with quick preheat cycles. Try it once in your oven; if it doesn’t work, then use the traditional method of first rising the dough and then baking it in a pre-heated 425⁰F oven for 25 to 30 minutes.
Want to Make the Dough Ahead of Time?

Dough for French Baguettes
To make this dough ahead and save even more time, use cold water and eggs straight from the refrigerator so you don’t activate the yeast. Assemble the dough, refrigerate tightly covered for up to 3 days before baking. Shape the dough, let it rest for 10 minutes to warm up a bit, and start baking in a cold oven as directed above.
NOTE: For an airier crumb, slightly higher rise, and longer shelf life replace ¼ to ½ cup of the potato starch with Expandex (modified tapioca starch). To see where to buy Expandex, go to www.expandexglutenfree.com.
January 19, 2014
Announcing My Gluten-Free 101 Blog Tour
I am happy to announce the publication of my latest cookbook,
Gluten-Free 101: The Essential Beginner's Guide to Easy Gluten-Free Cooking
Gluten-Free 101: The Essential Beginner’s Guide to Easy Gluten-Free Cooking (Houghton Mifflin Harcourt, January 2014).
And, this week we launch the blog tour for the book. What’s a blog tour? It is a planned series of blog posts by gluten-free experts who discuss my book, perhaps provide a recipe, and maybe even send you a free copy!
So, please visit these marvelous blogs from my supportive colleagues and please share the information with others:
Jan. 22: Amy Green at http://simplysugarandglutenfree.com/
Jan. 28: Elisa Bosley at http://deliciousliving.com/blogger/elisa-bosley
Jan. 30: Ellen Allard at http://www.glutenfreediva.com/blog/
Feb. 4: Sueson Vess at http://www.specialeats.com/
March 3: Rachel Begun, RD, at http://rachelbegun.com/blog
And, starting January 26, listen to me being interviewed by Jeanne Murdock on Celiac Radio.
Beginners Need a Book for Beginners
Now, little about the book. I believe that living a gluten-free lifestyle can be fun, delicious, and easy. But it wasn’t always that way for me. Like other beginners, I was baffled by unfamiliar ingredients and new cooking techniques when I first adopted a gluten-free diet many years ago. It can be confusing, I know.
From my own experience, I recognized the need for a cookbook that makes it easy for beginners to make a simple and positive transition to cooking gluten-free meals. So I wrote Gluten-Free 101, explaining how to select and work with the best gluten-free foods from an extensive and sometimes confusing product shelf, how to continue eating healthfully, and how to master basic gluten-free cooking techniques—such as baking delicious breads or rolling gluten-free pizza dough or piecrust, all with easy-to-follow instructions.
Enjoy Your Favorite Foods
One thing I hear frequently is how much you miss your favorite foods such as pizza, bread, and pasta— and all-American desserts such as brownies, cakes, and cookies.” And you miss childhood favorites such as meat loaf, macaroni-and-cheese, spaghetti and meatballs, and comfort-food casseroles. So the book focuses on familiar dishes, but introduces time-saving, simplifying shortcuts and tips that are especially helpful to beginners.
Get Your Copy and Buy One for a Friend
Gluten-Free 101 is a perfect gift for someone who has just been diagnosed with gluten intolerance or non-celiac gluten sensitivity—maybe it’s a gift to yourself or a beloved friend or relative. If you want a signed bookplate that you can paste in the front of the book (making it a signed copy) email me at carol@carolfenster.com. Enjoy!
January 13, 2014
January is National Get-Organized Month
It’s January and 2013 has quickly gone by. I want to thank you for being a loyal reader. Your support is greatly appreciated!
January is National Get Organized Month
Did you know that January is National Get Organized Month? The place where I need continual re-organization is my kitchen. How about you?

Ingredients for Sorghum Flour Blend
The term “spring cleaning” usually refers to cleaning closets. But the kitchen deserves that same level of attention. I know it’s not spring yet, but I am always motivated to do the “spring cleaning” at the beginning of a new year, because that seems like a real beginning to me (rather than springtime). Once those Christmas decorations are put away, my attention turns to getting my world in order after the chaos of the holidays!
Regardless of when you clean, the same principles apply―what to toss, keep, or donate―so here are my thoughts on getting organized.
Protect Your Investment in Gluten-Free Ingredients
Keep gluten-free flours, whole grains, rice, and legumes in food-quality storage containers with tight-sealing lids to avoid spills and deter pests. Label the containers so out-dated items can be purged. It always amazes me to find how many items are past their expiration dates.
Clean Storage Containers Between Fillings
Before refilling a container of flour or grains, first empty it, then wash and dry thoroughly. Why? Food at the bottom of a container can turn rancid or stale, even when topped by fresh layers, and can produce an off-taste in gluten-free baking.
The same holds true for gluten-free whole grains. In fact, whole grains (and the flours ground from them) contain all three parts of the grain (the germ, endosperm, and bran) which means higher oil content which in turn hastens deterioration.
Choose the Proper Storage Location
Be sure to store containers in dark, dry places away from heat or direct sunlight. Otherwise, a warm location or the hot sun shining on the containers causes moisture to build up inside, hastening spoilage. Many people store flours and grains in the refrigerator or freezer to preserve freshness. Be sure to bring chilled ingredients to room temperature before baking so the chill won’t hamper the leavening’s rising ability.
Clean and Organize the Storage Areas
Shelves, cupboards, and countertops should be cleared and then wiped down thoroughly with an appropriate cleaning solution to remove dirt, but also any spills that can attract pests. Take the time to organize what goes back on the shelf by placing similar foods together. For example, all flours together and all whole grains together in a systematic order for easier access and better inventory management. Knowing what’s on the shelf prevents inadvertently buying duplicates. If the refrigerator or freezer is the prime storage area, clean and organize them as well.
It should go without saying, but if you have an “integrated” kitchen, be sure to clearly label the gluten-free items and, if possible, store them in a clearly-marked area to avoid mishaps.
Purge Unused Utensils, Appliances, and Gadgets; Organize What’s Left
This is the part I have the greatest trouble with. It seems that every year I accumulate more stuff! Appliances take up precious space, so if they’re important―but not used frequently―relegate them to easily-accessible storage to avoid cluttered workspaces. My counter-top appliances include a heavy-duty stand mixer for mixing bread dough and cookie dough and a powerful blender for gluten-free batters and smoothies. All other appliances must earn the right to occupy precious counter space, such as my toaster oven and coffeemaker.
Items in good working order but no longer needed―including utensils and gadgets that haven’t been used during the past year―can be donated to charity or to a friend who can use them. Also, clean out drawers, including the silverware drawer. Arrange those spatulas so they’re easy to reach. Are your knives sharpened?
Need Motivation?
Even though it’s not my favorite task, I’ve learned that keeping a clean, well-organized kitchen makes day-to-day cooking and baking so much easier and saves money, so take my advice and invest the time now to make life easier throughout the year.
Happy New Year!
January 6, 2014
Happy New Year with Glühwein from Germany
The presents are all unwrapped and the Christmas decorations stowed away for next year, but there’s one tradition that I want to continue all winter long.

Gluhwein (mulled wine) from Nuremberg's Christmas Market
It’s called Glühwein—pronounced glooh-vine—and it is the German version of what we call mulled wine—red wine with spices and citrus fruits added to it. Sometimes it has other spirits added, such as brandy or bourbon.
It seems like the perfect drink for winter: hot, comforting, lightly spiced, and lovely to look at. And, it seems doubly perfect now when Colorado is getting the first of several mini-storms and bitter cold temperatures.
Hand your dinner guests a cup as they enter your home and they know they’re in for a good evening. That’s what the Viking River Cruise chef did each night when we returned from touring a different Christmas market each day. Granted, it was a small cup but what a “welcome home” touch!
In Germany, glühwein was served at all of the outdoor Christmas markets. People walked around with a cup in their mittened hands as they shopped, both warming their hands and their hearts. The other interesting thing was that each booth served this drink in different-shaped cups and the idea (at least for tourists like us) was to buy both the cup (as a souvenir to take home) and the drink. See the cup I bought in Nuremberg in the photo.
There are many ways to make glühwein and you probably have recipes for mulled wine in your cookbooks. The version served on the Viking ship had different spirits (e.g., bourbon) added to it on different nights.
See this easy recipe (without additional spirits) from Sunset magazine that comes from an alpine bistro in Aspen, Colorado. The only unusual ingredient in this recipe is the juniper berries, which can be found at kitchen stores or natural food stores (or omit, if you like).
I like to serve the wine in glass cups so you can enjoy the lovely color, but use whatever cups you have. If you’re serving it a party, keep it in your slow cooker so it stays warm throughout the party. Or, keep it in the fridge and reheat just as much as you need, when you need it. It’s naturally gluten-free and a wonderful way to warm up those cold winter nights.
Enjoy!
December 30, 2013
Viking River Cruise to Germany’s Christmas Markets
I’ve always wanted to go to Europe in wintertime to experience the Christmas decorations and rituals of the Old World.

Frankfurt's Christmas Market
So when a friend invited me to join her for a 6-day Viking River Cruise in December from Frankfurt to Nuremberg, Germany I said “why not, sounds like fun!” Germany is known for its Christmas Markets and the tour covered cities that I had never seen before, such as Heidelberg, Rothenburg, Bamberg, and Nuremburg.
Gluten-Free on a Cruise
Like all good gluten-free travelers, I asked Viking to provide gluten-free options for me. Gluten-free dining on cruise ships can be wonderful, not-so-wonderful, or somewhere in between (see my Alaskan Cruise experience earlier this year for a so-so experience).
To address these issues, Mark Roseman wrote a helpful ebook called Cruising with Special Diets, so check it out. You can also follow Mark on Twitter at @cruisediet. My experience was on the Viking ship named “Freya” so all of my remarks pertain specifically to that ship.
Gluten-Free on the Viking Freya
In a nutshell, the food on the Freya was fabulous! Not only was it high-quality and beautifully plated, my gluten-free options were delicious. Breakfast was served buffet-style, with many gluten-free options to choose from including eggs, bacon, roasted vegetables, gluten-free bread (see photo),

Gluten-Free Bread on Viking Freya
fruits, cereal, yogurt, etc. The servers were knowledgeable about what was gluten-free, but quick to query Chef George

Chef George with Carol
if they weren’t sure.
Lunch always started with a salad buffet, but then we ordered entrees from the menu and I had plenty of gluten-free options such as a Reuben sandwich.
Dinner was more elaborate; a sit-down affair. Each evening, the maitre ‘d, Jochen (a strapping 6 foot, 7-inch German fellow) greeted me at the door of the restaurant and discussed the menu, pointing out my options and how they could modify most dishes to be gluten-free. That way, I was confident about what I could eat even before I sat down at the table. (By the way, there were also vegetarian options as well.) Though most of our waitstaff was from Eastern Europe, all of them spoke excellent English so communication was never a problem.
Each dinner began with an “amuse-bouche” or surprise chef’s treat. Mine was usually different from my colleagues, such as a beautiful mini-collection of fresh fruit or cheese.Then we chose an appetizer, which might be soup, salad, etc. The main course offered at least 3 choices, usually fish/seafood, beef, or poultry and was beautifully plated. One of my favorites was the Salmon on Celery Root Puree with Brussels Sprouts.

Salmon on Celery Root Puree with Brussels Sprouts
Then there was dessert. One night, Pastry Chef Melanie prepared a fabulous gluten-free Tiramisu just for me. Some nights I had sorbet, but each was handmade on board and quite nice. One night I had a gluten-free bread pudding, which was very homey. The wine flowed freely throughout the meal and the coffee was top-quality.
Each meal took about two hours, so if you’re not inclined to long meals there was a “quick” bar menu in another part of the ship but we never got there so I can’t say how that went. We had a very collegial group of 6, so we looked forward to each night’s debriefing around the dinner table about what we had experienced during the day.
Throughout the cruise, I was impressed by the dedication to “hospitality” that every single staff member conveyed to us. Always smiling, they simply wanted us to have a wonderful time and bent over backwards to make sure that happened.
Accommodations on the Viking Freya
Our rooms were small, but very tastefully designed and appointed…complete with heated bathroom floors! The Freya is only about a year old, so quite new-looking. The ship holds under 200 guests so it is a small, intimate experience. The ship is 3 stories high, but looks like a very long white barge, with lots of windows. We opted for a French balcony, which includes sliding glass doors that give you a good view, but there is no balcony to stand on (despite the name). Each room had two electrical outlets that were compatible with our American appliances, but we needed adapters for the other outlets. Each room had TV, music, and air conditioning (although that certainly wasn’t necessary in December).
Christmas Markets
The whole point of this cruise, as far as I was concerned, was to experience the Christmas markets (ChristKindlMarkt in German) because they are magical. They are decorated with evergreen boughs and homemade Christmas crafts are everywhere. The air is perfumed with gingerbread, glühwein (mulled wine), and smoke swirling from bratwurst grills. Of course, I had to be careful about what I sampled, but the atmosphere is absolutely wonderful. Of course, it’s cold but we’re bundled up. I wear my heaviest, longest winter coat with layers underneath…plus a hat, gloves, and scarf. My tour group looks like a bunch of penguins as we waddled down cobblestone streets, so tightly swathed in warm clothing that we can hardly move. But we’re lucky that the temperature hovers in the high 30’s, with only one day of rain. We even had sunshine in Frankfurt, a rarity in wintertime Europe.
I think my favorite city was Rothenberg (pronounced “Rotenberg”) because it is a walled city and each store was decorated to the hilt with Christmas decorations. I also liked Bamberg, though it was a bigger city. But the largest Christmas market was in Nuremberg, with blocks and blocks of Christmas Market booths.
Gluten-Free on Lufthansa Airlines
My gluten-free meals on Lufthansa were good—maybe not as good as on the Freya—but I was always served first before any of the other passengers and even had German bread on the flight home. Dessert was always fresh fruit (rather than a sweet, yummy from the oven) but maybe that’s a good thing…!
December 23, 2013
Black-Eyed Pea Chili for New Year’s Good Luck
Black-eyed peas are eaten year-round, but it is believed that they bring prosperity when consumed on New Year’s Day…which is next week!
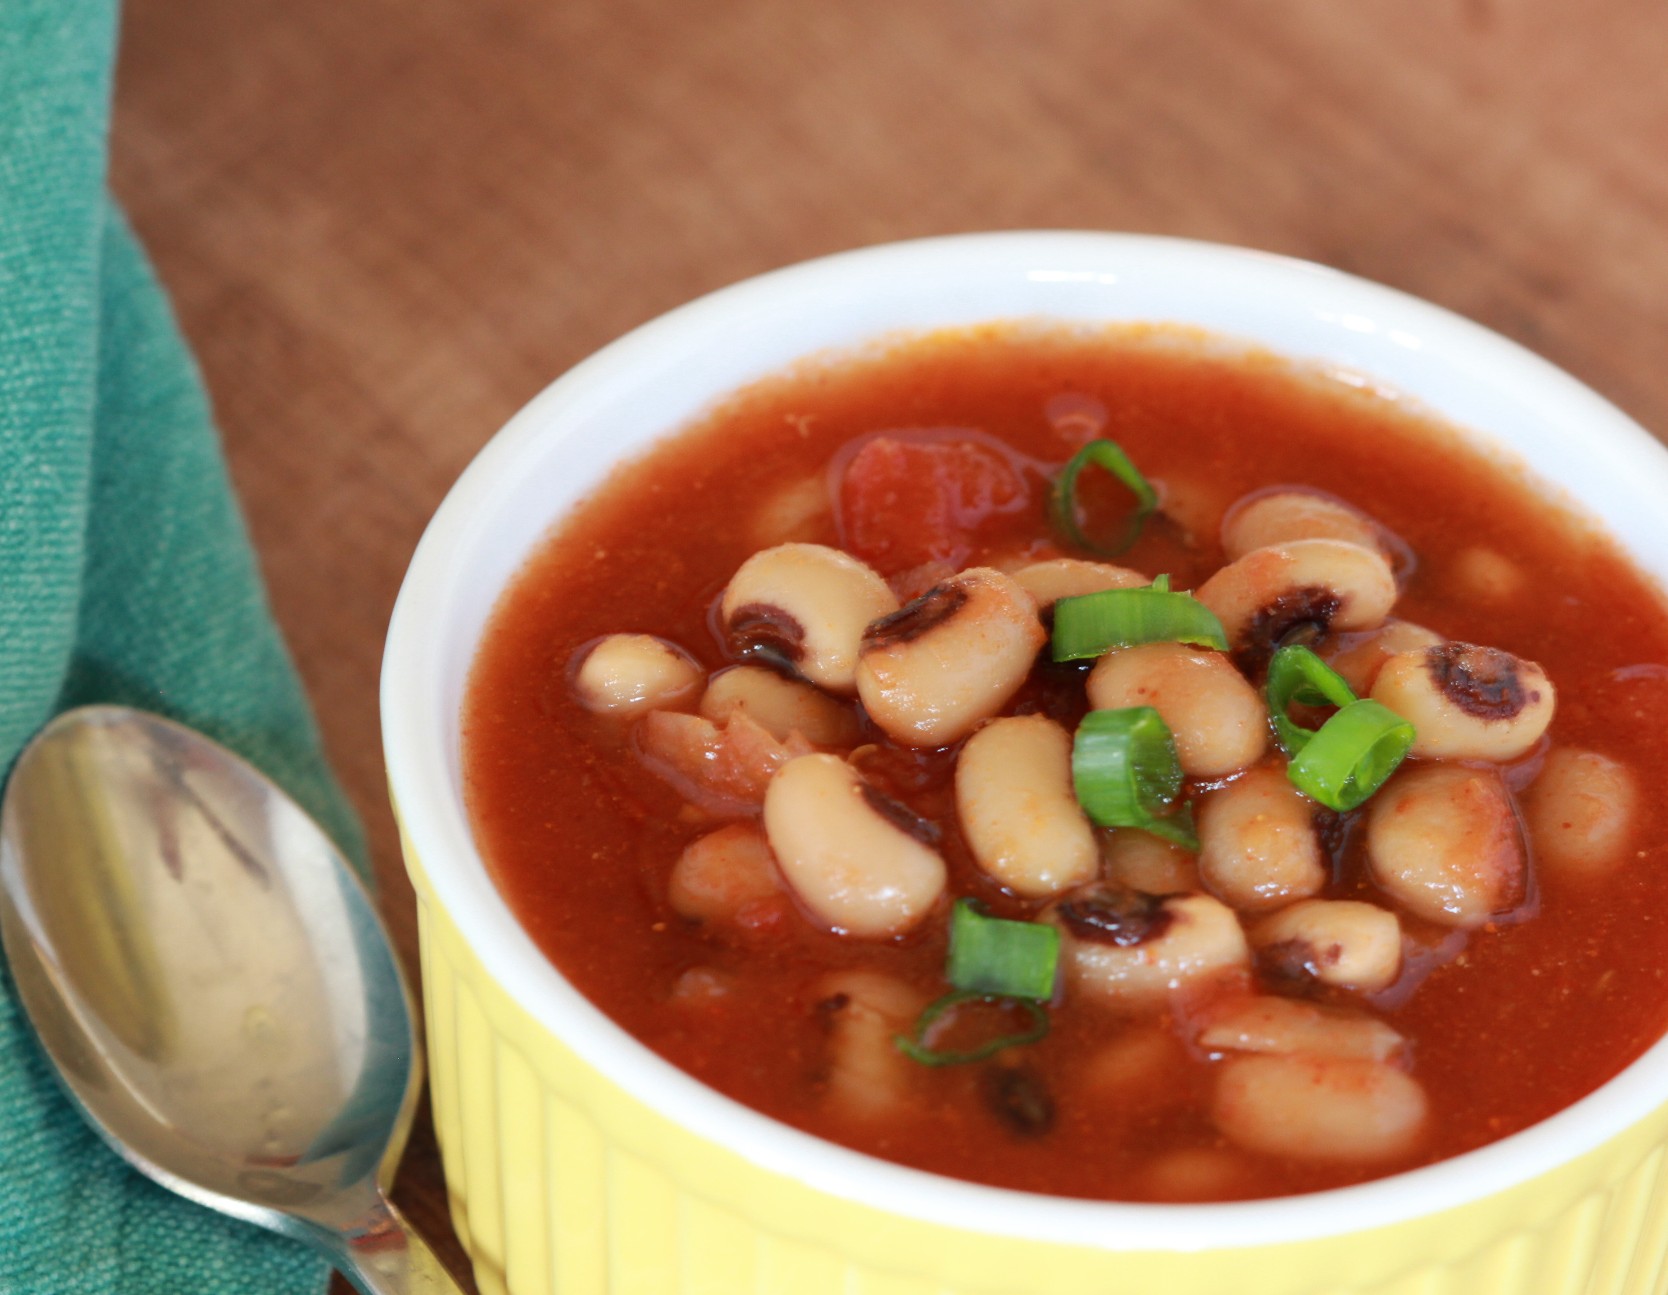
Black-Eyed Pea Chili for Good Luck on New Year's
So make up a batch of this boldly-flavored Chili, using black-eyed peas rather than kidney or pinto beans…and may good luck rain down on you!!
What are Black-Eyed Peas?
Black-eyed peas (also known as cowpeas) are actually beans so you can use them anywhere you might use beans. They get their name from the characteristic “black eye” or black spot on each bean. You can cook up a batch from scratch, starting with dry beans which will require soaking. Or, buy them canned and be sure to rinse with water in a sieve until the water runs clear to remove excess sodium. You remove nearly 40% of the sodium that way.
Around the holidays, I have found them in stores in pre-cooked form in plastic tubs that only require a 10 minute boil. They’re especially fresh this way, but if all you can find is canned go with that. Again, just be sure to rinse canned beans very well.
Black-eyed peas are full of good things for your body: protein, fiber, folate… and they are low in fat.
Black-Eyed Pea Chili
Adapted with permission from 1,000 Gluten-Free Recipes by Carol Fenster (Houghton Mifflin Harcourt, 2008)
Whip up a batch of this flavorful chili and serve it on New Year’s Day to bring good luck throughout the coming year. Plus, you’re doing your body a healthy favor, too. If you want to be authentic, serve this chili with collard greens (whose green color represents money) and cornbread (which represents gold).
2 teaspoons canola oil
1 pound ground turkey
2 teaspoons canola oil
2 cans (14.5 ounces each) black-eyed peas, rinsed and drained
2 cans (14.5 ounces each) petite diced tomatoes with green chiles, including juice
1 can (4 ounces) diced green chiles, drained
1 small onion, peeled and sliced
2 teaspoons chopped fresh oregano or 1 teaspoon dried oregano
1 teaspoon ground cumin
[1/2] teaspoon table salt
[1/4] teaspoon cayenne pepper
4 cups gluten-free, low-sodium chicken broth
2 garlic cloves, minced
[1/2] cup chopped fresh cilantro, divided
1 cup grated Monterey Jack cheese, for garnish
Per serving: 535 Calories ; 13g Fat; 5g Saturated Fat; 43g Protein; 12g Fiber; 68g Carbohydrates; 352mg Sodium ; 60mg Cholesterol
[1] In a Dutch oven or other deep, heavy pot with a tight-fitting lid, heat the oil over medium heat. Add the turkey and cook until browned, about 7 to 10 minutes. Add the beans, tomatoes, chiles, onion, oregano, cumin, salt, cayenne, broth, garlic and [1/4] cup cilantro.
[2] Cover and cook on medium-low heat for 30 to 40 minutes. Ladle into the soup bowls and serve immediately, garnished with a sprinkle of cheese and the remaining [1/4] cup chopped cilantro.
Makes 8 servings.
December 16, 2013
My New Book: Gluten-Free 101— The Essential Beginner’s Guide to Easy, Gluten-Free Cooking
I am delighted to announce the publication of my new book, Gluten-Free 101: The Essential Beginner’s Guide to Easy, Gluten-Free Cooking.

Gluten-Free 101: The Essential Beginner's Guide to Easy Gluten-Free Cooking
Those of you who know my books may recognize this title: it is revised and expanded from an earlier version, now with gorgeous full-color photos and is available for pre-order at Amazon.com
Gluten-Free Living Made Easier
I believe that living a gluten-free lifestyle can be fun, delicious, and easy. But it wasn’t always that way for me. Like other beginners, I was baffled by unfamiliar ingredients and new cooking techniques when I first adopted a gluten-free diet many years ago.
From my own experience, I recognized the need for a cookbook that makes it easy for beginners to make a simple and positive transition to cooking gluten-free meals. So my cookbook explains how to select and work with the best gluten-free foods from a now extensive (and sometimes confusing) product shelf, how to continue eating healthfully, and how to master basic gluten-free cooking techniques— such as baking delicious breads or rolling gluten-free pizza dough, all with easy-to-follow instructions.
Enjoy Your Favorite Foods
One of the first things newly-diagnosed patients tell me is how much they miss their favorite foods such as pizza, bread, and pasta— and all-American desserts such as brownies, cakes, and cookies. And they miss childhood favorites such as meat loaf, macaroni-and-cheese, spaghetti &meatballs, and comfort-food casseroles. So the book focuses on familiar dishes, but introduces time-saving, simplifying shortcuts and tips that are especially helpful to beginners.
French Baguettes in 30 Minutes!
For example, using my “cold-oven start” method, French baguettes bake in only 30 minutes. Pizza crusts can be baked ahead and frozen, ready for topping at a moment’s notice. I show you how to use time-saving appliances such as a slow cooker for beef stew and a food processor to blend cookie dough in seconds. I also offer tips for handling sticky gluten-free bread dough and shaping gluten-free piecrust so breads and pies look perfect and taste delicious. I know how much you like those breads , pizza, and pies!! Me, too!!!
Red Velvet Cupcakes, Anyone?
For baking, the book features a versatile sorghum-based flour blend as the base for my easy, streamlined recipes. Sorghum has actually been around for centuries and is a staple in Africa and India and sorghum flour is more nutritious than white rice flour and is now easily available to consumers after being used in commercial foods such as breakfast cereals, energy bars, and cookies for several years. It tastes somewhat like wheat, and has a pleasing texture that isn’t gritty like white rice flour, plus it makes fabulous Red Velvet Cupcakes. If you’re not inclined to use sorghum flour, you can replace it with brown rice flour in my flour blend.
Pre-Order Your Copy at Amazon.com
The book contains 175 recipes for everyday favorites with more than 25 beautiful photos to show how the finished dish looks, which is especially important to beginners and each recipe also offers nutrient content. Gluten-Free 101: The Essential Beginner’s Guide to Easy Gluten-Free Cooking is my 11th cookbook and available for pre-order at Amazon.com. So reserve your copy now and you’ll have it in January.
December 9, 2013
Gluten-Free Holiday Gift: Mix for Festive Layer-Bars
Need a last-minute gift? This festive layer-bar is perfect with its chocolate crust and decadent layers.

Layer Bar Mix for Holiday Gift-Giving
Assemble this easy mix in 3-cup glass jars and store in a dark, dry place until gift-giving time. You can also include a can of sweetened condensed milk, but for your dairy-intolerant recipients you might include a jar of your homemade sweetened condensed milk (see recipe below).
And be sure to include the instructions—printed on a festive recipe card and tied to the jar—so the lucky recipient knows how to prepare this decadent treat. In fact, why not make one for yourself while you’re at it! My version is for Christmas (e.g., candy canes) but you can tailor this to suit the occasion. For a non-Christmas version, I would try butterscotch or peanut butter chips in place of the candy canes.
Layer Bar Mix IN A JAR
1/4 cup chopped candy canes
1/2 cup semisweet chocolate chips
1/2 cup shredded coconut
1/4 cup chopped pecans
1/2 cup white chocolate chips
3/4 cup crushed GF cookies (such as Pamela’s Dark Chocolate, Chocolate Chunk Cookies)
Ingredients To Be Added by gift-recipient
1/4 cup (1/2 stick) butter or buttery spread, melted
7 ounces (half of 14-ounce can) sweetened condensed milk (see homemade recipe below)
ASSEMBLY INSTRUCTIONS FOR THE GIFT-GIVER
In 3-cup glass jar with screw-top lid (a 24-ounce Classico pasta sauce jar works perfectly), layer ingredients, starting with candy canes and then chocolate chips, coconut, pecans, and white chocolate chips. Spoon crushed cracker crumbs into small plastic bag and place on top of layers. Screw on lid, cover the lid with 6-inch circle of colorful wrapping paper or cloth, tie a festive bow over the paper-covered lid, and affix the recipe card to bow with more ribbon. Store in dark, dry place away from sunlight (so chips don’t melt).
BAKING INSTRUCTIONS FOR THE GIFT-RECIPIENT
Preheat oven to 350⁰F and coat 8-inch square baking dish with cooking spray. Remove cookie crumbs from jar and combine with melted butter. Press evenly into bottom of baking dish. Sprinkle remaining mix ingredients over crumb mixture. Pour sweetened condensed milk evenly on top. Bake until chips are melted, about 20 to 25 minutes. Allow to cool completely before cutting into 16 small bars.
Dairy-Free Sweetened Condensed Milk
Reprinted with permission from 125 Gluten-Free Vegetarian Recipes by Carol Fenster (Avery/Penguin Group, 2011)
Quite often, gluten-free folks are also dairy-sensitive and there is no store-bought version of sweetened condensed milk that is dairy-free. So, make this easy version at home. This recipe makes the equivalent of a 14-ounce can of sweetened condensed milk, about 1 ¼ cups.
1/2 cup sugar
3 tablespoons sweet rice flour
1/8 teaspoon salt
1 cup milk of choice (I like So Delicious coconut milk or Living Harvest hemp milk)
2 tablespoons unsalted butter or buttery spread
1 teaspoon pure vanilla extract
[1] In a small, heavy saucepan whisk together the sugar, sweet rice flour, and salt until thoroughly blended. Whisk in the milk until smooth, then add the butter and heat the mixture on medium heat, whisking constantly, until it thickens slightly, about 3 to 4 minutes.
[2] Remove from the heat and stir in the vanilla and butter. Cool to room temperature to thicken a bit more. It is best used at room temperature; can be refrigerated for up to 2 weeks but bring to room temperature again before using. Be sure to keep refrigerated until gift-giving time and tell the lucky recipient that it must be refrigerated.