Carol Fenster's Blog, page 17
July 7, 2014
Overnight Muesli
There are some summer mornings when the last thing I want is a hot breakfast. Knowing that the day will heat up, I want something cool and refreshing to get me started… yet something nutritious and tasty.
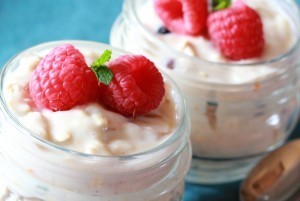
Muesli made with gluten-free oats.
Overnight Muesli is just the ticket.
I first learned of muesli back in my corporate traveling days when I ate breakfast at my hotel in Seattle. Now I make it for myself, at a fraction of the cost, and vary it as I like.
This version of muesli is made from gluten-free rolled oats (the whole grain part) and milk and yogurt (for dairy nutrients) plus a little honey and grated apples for sweetness.
It’s also perfect for busy summer days when your family—or guests—want breakfast at different times of the morning. All they have to do is reach into the refrigerator and grab one of these little gems.
I like using these cute little Mason jars, but use any vessel you like…as long as it’s got a lid to seal in moisture while the oats soak in the liquid overnight.
Enjoy!
Overnight Muesli
Reprinted with permission from www.GfreeCuisine.com* by Carol Fenster
Museli , an oat-based cereal dish commonly served in European countries, is very creamy, hearty, and filling. It is especially cute when served in mini Mason canning jars, but you can use regular cereal or soup bowls. If you use non-dairy yogurt and milk, this is a vegan breakfast.
Makes 4 servings
Preparation time: 5 minutes
Chilling time: overnight
3 [1/2] cups gluten-free granola**
2 apples (Gala or Fuji, or your choice), cored and grated (I don’t peel the apple, but you can)
8 ounces plain low-fat yogurt or soy yogurt
1 cup milk of choice
1 tablespoon honey or agave nectar, or to taste
1 teaspoon pure vanilla extract
Fresh fruit for garnish
In a large bowl, toss all of the ingredients until well blended. Cover and refrigerate overnight. Serve cold, garnished with fresh fruit.
Per serving: 230 calories; 8g protein; 7g total fat; 4g fiber; 35g carbohydrates; 3mg cholesterol; 77mg sodium
*Check with your physician to make sure gluten-free oats are right for you.
** Www.GfreeCuisine.com is a weekly e-booklet menu planning service that provides you with a personalized grocery shopping list.
June 30, 2014
Blackberry Coolers for Hot Summer Days
Hot summer days call for cool, refreshing beverages and I’ve got a great one for you today. First, as you can see from the photo, it is gorgeous to look at. Your guests will be impressed! But, it is also light and refreshing. Plus, it is versatile—you can also make it with raspberries instead of blackberries if you prefer. Personally, we like blackberries at our house so that’s how I usually make it.
In addition, you can use non-dairy ice cream and it is still delicious. In fact, I’m fond of coconut-based “ice cream” because I like the flavor but use what works in your household. Enjoy!!!!
Blackberry Coolers
Reprinted with permission from www.GfreeCuisine.com, Carol’s weekly online subscription e-cookbook that generates a personalized grocery shopping list just for you!
Cool, refreshing Blackberry Coolers from www.GfreeCuisine.com
2 cups fresh blackberries
3 tablespoons water
3 tablespoons sugar, or to taste
1/4 gallon vanilla ice cream of choice (can use non-dairy coconut or rice versions)
20 ounces seltzer water
Fresh mint, for garnish
[1] In a small saucepan, combine all but 12 of the blackberries with the water and sugar and bring to a boil over medium heat. Reduce the heat to low and simmer, uncovered, until the berries are very soft—roughly 7 to 10 minutes. Remove from the heat and cool.
[2] Press the blackberries through a sieve set over a bowl and discard the solids. Refrigerate the blackberry mixture until cold.
[3] To serve, divide the ice cream among 4 tall (at least 16 ounce, to contain the fizzing!!) glasses. Pour the seltzer on top, then divide the blackberry mixture evenly in each glass. Garnish with the remaining whole blackberries and a sprig of mint. Serve immediately with straws and spoons. Makes 4 coolers (16 ounce glasses). For 8 small servings, use 8 ounce glasses.
per 16 ounce glass serving: 357 calories; 6 grams protein; 16 grams total fat; 5 grams fiber; 10 grams saturated fat; 50 grams carbohydrates; 63 mgs cholesterol; 146 mgs sodium
June 23, 2014
Make Your Own Tulip Cupcake and Muffin Liners
Those cute little cupcake liners you see in bakeries and in Grain-Free Almond, Flax, and Chia Muffins from an earlier blog post are called “tulip” liners because their shape bears some resemblance to tulips.
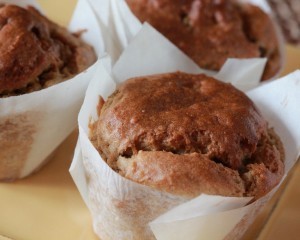
Grain-free Muffins in paper tulip liners.
Yes, you can buy them but it’s much cheaper to make your own. Even the kids can make it a project. You can make as many as you want—enough for one batch of muffins or several dozen to store and use as you need.
You can also give them away as gifts. After all, who doesn’t want their muffins and cupcakes looking like they came right out of a cute little (gluten-free) French bakery?
Supplies You Need
Parchment – white or natural (unbleached)
Ruler
Scissors
6-ounce tomato paste can
Your hands and fingers
Directions
* Using scissors, cut 5 ½-inch squares of parchment paper. I use a ruler to mark squares on the parchment paper so I know exactly where to cut. (Note: some commercial tulips are 5 inches; others are 6 inches. I like 5 ½ because this size is large enough to hold the batter, but not so tall that the muffins are obscured.)
* To find the center of the square, fold it in half and in half again. Then unfold and the point where the lines intersect is the center. Make a dot on this intersection with a pencil or ballpoint pen.
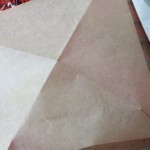
Parchment paper ready to be shaped into tulip liner
*Center the dot on the parchment square on the bottom of the tomato paste can, which measures two inches—the same size as the bottom of a standard muffin pan.
* Press the parchment square down around the mold, using your fingers to press creases so it conforms to the shape of the can. I typically make about 4 to 5 creases, by trying to bring the 4 points of the parchment square as close to each other as possible. Remember, the sharper the crease, the better the liner will hold its shape. The more tulips you make, the more adept you will become.
How to Use
Place the liners in the cups of your muffin pan. There is no need to grease or coat them with cooking spray because parchment paper is already lined with silicone to prevent sticking. Now, step back and admire your creativity and ingenuity! Enjoy!
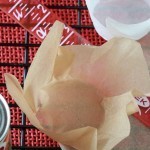
Tulip cupcake and muffin liners made from white and natural parchment paper.

Shape parchment squares around tomato paste can
June 16, 2014
Grain-Free Banana-Maple Muffins
When we think of sweeteners for baking, plain old white sugar is usually the first to come to mind. But many of us want other ways of sweetening our food.
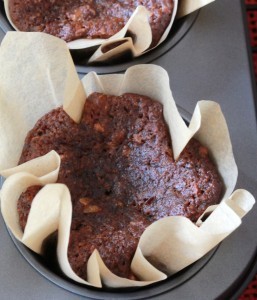
Grain Free Muffins Sweetened with Maple Syrup, Banana, & Coconut
One of my favorite alternative sweeteners is either maple sugar (which behaves a lot like white sugar in baking) and maple syrup, which is a liquid and therefore a little harder to bake with since most recipes are formulated for white or brown sugar. So, today’s blog contains a muffin recipe that relies on many sources for sweetness, including maple syrup.
The Skinny on Maple Syrup
According to Dr. Andrew Weil, maple syrup has about three times the sweetening power of cane sugar and has just 40 calories per tablespoon. Make sure to buy pure maple syrup, not the blended stuff. It will be a little more expensive, but worth it. Maple syrup is nutrient rich—it’s a great source of manganese and a good source of zinc.
In baking, start with a recipe that is formulated for liquid sweeteners (as I do here) or make adjustments to an existing recipe by decreasing the liquids to compensate for the liquid nature of maple syrup (easier said than done, so stick with maple syrup-formulated recipes for best results.)
Grain-Free Banana-Maple Muffins
By Carol Fenster
This grain-free muffin is a 6-muffin recipe, designed for small families or families where only a few of you adhere to a gluten-free diet. Plus, these muffins are appropriate for a Paleo or vegetarian diet. The sweetness comes from multiple sources—maple syrup plus the natural sugars in bananas, coconut, and raisins. Because it is heavily laden with these add-ins, it will be a dense muffin and won’t rise very high.
1 cup almond flour/meal
1 teaspoon ground cinnamon
½ teaspoon baking soda
½ teaspoon xanthan gum
¼ teaspoon salt
1 large egg
½ cup mashed ripe banana
¼ cup pure maple syrup
2 tablespoons canola oil or grapeseed oil or coconut oil (melted, slightly cooled)
½ teaspoon vinegar
½ cup raisins or chopped dried plums (or pitted and finely chopped dates)
¼ cup shredded coconut
[1] Place a rack in the middle of the oven. Preheat the oven to 325⁰F. Generously grease a 6-cup standard muffin pan or line with paper liners. (Or, use a 12-cup muffin pan, but place 2 tablespoons of water in each unused cup.)
[2] In a medium bowl, whisk together the almond flour/meal, cinnamon, baking soda, xanthan gum, and salt until well blended. In a small bowl, beat the banana, oil, maple syrup, and vinegar together with a fork or whisk until smooth. Stir the banana mixture into the almond flour mixture until well blended and then stir in the raisins and coconut. Divide the batter among the muffin cups, about a scant ¼ cup of batter per muffin cup.
[3] Bake 35 to 45 minutes or until a toothpick inserted into the center of a muffin comes out clean, Cool the muffins in the pan on a wire rack for 15 minutes and then remove from the pan and cool completely. Makes 6 muffins.
Per muffin: 245 calories, 11g protein; 11g total fat; 1g fiber; 31g carbohydrates; 30mg cholesterol; 208mgs sodium
June 9, 2014
Chimichurri for Big Flavor
Years ago, my son found a recipe for a “green sauce” that he loved. So, I made it for him frequently as he was growing up. I didn’t know it then and the recipe never referred to this name, but it was a variation of Chimichurri—a piquant sauce from South America made of herbs, garlic, vinegar, olive oil, and a little chili pepper— traditionally used on grilled meat, such as steak.
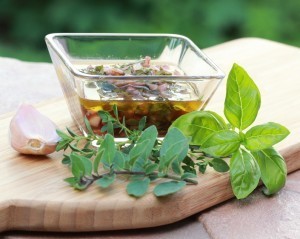
Chimichurri made from fresh herbs.
I have since lost that recipe. But as summer gets underway and my herb pots start flourishing—and with my love for bold flavors—I want this flavorful food in my diet. I use parsley in my version, but I have seen Chimichurri made with a wide variety of herbs so feel free to vary yours to suit what’s growing in your herb pots or garden. The chlorophyll in the parsley keeps the Chimichurri looking green, so keep a little parsley in your recipe for that reason. But try also using some fresh oregano or basil or chives, depending on what’s available.
One clever way to use Chimichurri is to reserve three-fourths of it to use as a sauce at serving time, but marinate your meat overnight in the remaining one-fourth (discard the marinade after you remove the meat). That way, your meat absorbs some of the flavors before grilling. As summer grilling season gets underway, you will use this sauce again and again. Enjoy!
Chimichurri
Adapted with permission from http://tinyurl.com/mszavqy 1,000 Gluten-Free Recipes by Carol Fenster (Houghton Mifflin Harcourt/Wiley, 2008)
This is an excellent way to use herbs year-round, but especially in the summer when you may have them growing in your backyard. Chimichurri transforms a plain old steak into something special. But, if you’re vegetarian, I’ve even used it with tofu, so give it a try.
1 cup minced flat-leaf parsley
½ cup extra-virgin olive oil
½ cup red wine vinegar
1 tablespoon chopped onion
2 garlic cloves, whole
2 teaspoons ground cumin
½ teaspoon salt
½ teaspoon freshly ground black pepper
¼ teaspoon crushed red pepper
[1] Place the parsley, oil, vinegar, garlic, paprika, cumin, crushed red pepper, salt, and pepper and in a food processor and pulse until combined but leave a few chunks for texture. Refrigerate until serving time, but let stand at room temperature about 20 minutes before serving. Makes about 1 cup.
June 2, 2014
Chia Pudding
From Chia Pets to our Kitchens
By now, we’re all familiar with Chia, that South American seed that migrated from those cute little green pets at Christmas time to a nutritional powerhouse in natural food stores. We see it everywhere now: cereals, bars, cookies… just to name a few.
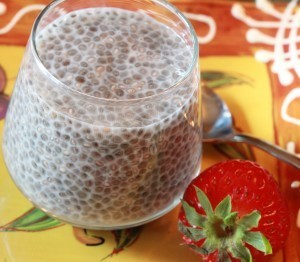
Chia Pudding is healthy and delicious for breakfast.
Even though chia was eaten by South Americans for centuries, we Americans were slow to catch on. I was the keynote speaker on gluten-free grains at a Gluten Intolerance Group conference in 2008—when Chia was just beginning to get attention in the U.S.—when an audience member asked me how to use it in gluten-free cooking. I didn’t have a lot of advice for her since I had barely begun to use it myself.
Since then, it has become a staple in my kitchen. I use in my morning smoothies for extra protein, add it to muffins or replace poppy seeds in salad dressings, and I’m especially fond of Chia Pudding, which is so simple and easy to make.
Nutritionally, chia is a powerhouse and that’s the main reason I use it since it doesn’t have much of a distinct flavor of its own. Chia seeds contain healthy omega-3 fatty acids, carbohydrates, protein, fiber, antioxidants, and calcium. And, another advantage is that chia seeds don’t have to be ground (as do flaxseeds) for our bodies to absorb those nutrients. So, try this easy pudding; you’ll love it.
Chia Pudding
Reprinted with permission from www.GfreeCuisine.com
Chia is a South American seed, known for its extraordinary nutrition qualities. The word “chia” means stamina or strength in the Mayan language and Aztec warriors used it for endurance. I often eat this cool pudding for breakfast during the hot summer months when hot cereal just seems, well… too hot. But it makes a great dessert anytime, but especially in summer, topped with fresh fruit for garnish.
Makes 4 servings
Preparation time: 2 minutes
Chilling time: overnight
4 to 5 tablespoons Bob’s Red Mill chia seeds (less for thinner pudding; more for thicker pudding)
2 cups milk of choice (you can use cow’s milk; I like soy milk or coconut milk)
1/3 cup sweetener of choice (maple syrup, agave nectar, honey, sugar)
1 teaspoon vanilla extract
Shake all of the ingredients together in a screw-top glass jar and refrigerate overnight. Be sure to shake or whisk a few times during the first two hours to redistribute the seeds or else they stick to themselves and you will have a gummy layer of seeds at the bottom. The consistency is similar to tapioca pudding. If you prefer a smoother texture, grind the chia seeds in a blender before blending with the other ingredients.
Per serving: 200 Calories; 6g protein; 6g total fat; 3g fiber; 2 g saturated fat; 31 g carbohydrates; 70mgs sodium; 5 mgs cholesterol
NOTE: for Chocolate Chia Pudding, stir in ¼ cup Hershey’s chocolate syrup or your favorite chocolate syrup before chilling
May 26, 2014
Start Your Herb Garden Now
Fresh Herbs are a Good Thing
Every year about this time, I ponder when to plant my herbs. My concern is frost. Depending on where you live, the last frost was long ago or still about to happen. Here in Denver, we’re advised to wait until after Mother’s Day to plant anything and every year that I don’t follow those instructions, I regret it. So this year, I waited until late May.
Discussing Herbs with Sheryl Borden, host of Creative Living, PBS-TV
You all know that I love my herb garden. And for good reason. Herbs add flavor to our food—no matter what diet you follow, gluten-free, Paleo, vegetarian, low-fat or whatever. They can be used decoratively in floral arrangements as well as food garnishes and they also have medicinal qualities (e.g., sage tea for sore throats or thyme tea for respiratory congestion).
Growing your herbs saves money. A package of fresh herbs costs about $3 (or more if organic). So, growing your own makes sense economically. If you grow too much, share your bounty with friends and neighbors.
And, then there is the purely sensory enjoyment of fresh herbs. One of my favorite summer experiences is stepping outside my kitchen door to the herb pots on my patio and clipping fresh herbs to use in preparing our gluten-free dinner that night. I use basil, oregano, and rosemary in Italian dishes, savory and thyme in stews, and of course, I use parsley and cilantro in almost everything but especially as garnishes. I even use fresh-cut herbs as fillers in flower arrangements, or sometimes I just put a bunch of herbs in a small vase and that serves as the centerpiece when I’m entertaining.
Growing Herbs for Maximum Yield
Follow directions for your zone and fertilize accordingly. Location (in relation to the sun) is critical. Some herbs, such as rosemary, need sun while others, such as basil, can’t tolerate too much. Where I put my plants in relation to the shade and time of day is critical to how well they fare throughout the summer. I have found that my northeast-facing patio is an excellent location because it gets the morning sun, but is then shielded from the harsh afternoon sun by the shade of my house. You will need to experiment to find the best place for herbs at your house.
Pinch new growth regularly— just above a node or joint in the stem—to maintain a healthy, bushy plant. I found that this is especially important with basil, one of my favorite herbs. Don’t let it produce seeds (called bolting) so pinch those off right away. Remove any withered or yellowed growth.
Water according to what the plant needs; some can tolerate drier soil while others like it wetter. Read the directions that came with the herb plant or look it up in a gardening book or the Internet.
Storing Fresh Herbs
When you pick a whole bunch of herbs from your garden or buy a lot at the Farmer’s Market, store them properly to prolong their freshness. Store fresh herbs with cut ends in a glass of water in fridge OR wrapped loosely in a damp paper towel in a plastic bag. Leave the end of the plastic bag unsealed to allow for some air circulation.
Plant Your Own Herbs
I hope you’re encouraged to plant your own herbs this summer. Whether it’s herbs in a huge garden or herbs in small pots, you’re bound to enjoy huge rewards.
May 19, 2014
Gluten-Free for Beginners at GIG: May is Celiac Awareness Month
As the nation celebrates May as Celiac Awareness Month, I was honored to be a guest speaker at the 40th Anniversary Conference of the Gluten Intolerance Group this past weekend in Atlanta, GA. One of my presentations was for beginners, those who are just starting the gluten-free diet.
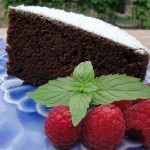
As a beginner, one of the first recipes i converted to gluten-free was my mother's chocolate cake.
We were all beginners in this gluten-free journey and I talk to beginners every day about their concerns. They are overwhelmed and confused yet eager to eat their favorite foods again such as pizza, bread, cakes, and cookies—all of which require baking. And, like, me they want to continue eating their favorite baked items (for me, it was my mother’s chocolate cake which is shown in the photo). So, drawing from the information in my new book, Gluten-Free 101: The Essential Beginner’s Guide to Easy Gluten-Free Cooking, here are some tips on baking that I shared with these beginners:
Use a Gluten-Free Cookbook.
Beginners should start out with cookbooks that contain gluten-free recipes to assure early success and build confidence as you learn new techniques and working with unfamiliar ingredients. Then, apply this new-found expertise to transform family heirloom recipes or favorite recipes from non-gluten-free cookbooks to a gluten-free version.
Follow the Recipe.
Follow the recipe precisely as written—especially the first time. Gluten-free batters and doughs are much softer and wetter than wheat-flour versions, so resist the temptation to add more flour which makes baked goods dry and crumbly. (I know this from personal experience! The first gluten-free bread I ever made was a resounding failure because I thought the dough was too soft and added more flour.)
Use a Blend of Flours in Baking.
Replace wheat flour with a blend of gluten-free flours instead of a single flour. Use the flour blend recommended in the recipe for best results. Find a blend you like (either store-bought or homemade) and keep this gluten-free flour blend in your pantry so you’re always ready to bake.
Use the Right Tools.
Use dry measuring cups to measure dry ingredients; liquid measuring cups for liquid ingredients. Many beginners don’t understand the difference between the two. Liquid measuring cups are usually see-through plastic or glass and have spouts. Dry measuring cups are usually opaque—such as plastic or metal—and the cups nest together. Dry and liquid measuring cups are not interchangeable in baking since it is very difficult to measure flour accurately in a liquid measuring cup.
Measure Flour Correctly.
Before measuring, run a whisk or spatula through the flour to aerate it a bit. Measure the flour by loosely spooning it into a measuring cup. Level the mound of flour with the flat side of a knife and never pack the flour down into the cup. Incorrect measuring can yield 20% more flour than needed, leading to dry baked goods. See my video on “How to Measure Flour” under Videos button at www.CarolFenster.com or www.CarolFensterCooks.com.
Incorporate Whole Grains for Better Nutrition.
Some gluten-free flours and grains are vitamin-deficient so search out recipes that use whole grains or whole grain flours such as amaranth, buckwheat, quinoa, millet, sorghum, and teff for wider diversity and better nutrition.
Consider an Increase in Flavorings, Herbs, and Spices.
Beginners may want to increase spices, herbs, and flavorings (such as vanilla extract) by ¼ to 1/3 to compensate for the loss of wheat flavor that many notice as their palates adjust to the new flavors and textures of gluten-free foods.
Don’t Forget the Gum.
Use xanthan gum or guar gum as directed in the recipe. It compensates for the missing gluten and improves texture and rise in baked goods. Without gums, baked goods crumble and fall apart. If you absolutely, positively don’t want to use gums in your baking, you’ll have better luck with smaller items such as bars, muffins, and cupcakes that don’t have to rise too much.
Use Smaller Pans for Baking.
Breads may be more successful in several small loaf pans (e.g., 4×6-inch) instead of one large (5×9-inch or 4×8-inch) loaf pan. A Bundt pan (instead of a 9×13-inch pan) produces a more successful cake because its circular shape (with the hole in the middle) promotes even heat distribution and reduces falling.
Use Nonstick Pans for Certain Foods.
Use nonstick pans (gray, not black) for pizza, breads, cakes, bars, and muffins to promote proper browning and encourage rising. For cookies, use shiny (not nonstick) baking sheets. Generously grease baking pans and use parchment paper on baking sheets to avoid sticking.
In Conclusion.
So those are my tips for beginners. Hopefully, you—and all of the people in the audience last weekend—will get in the kitchen and start baking.
May 12, 2014
The Importance of Cooking Your Own Food
I’ve always felt that preparing your own food is a good idea, but recently I was reminded of that by two well-known writers.
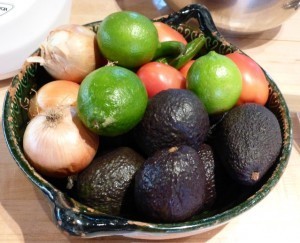
Making simple foods at home, like guacamole, is easy with just a few ingredients.
The first is Michael Pollan, author of Cooked and noted in Oprah magazine as “the man who changed the way we think about food.” The second person is Mark Hyman, MD, author of many books, including the Blood Sugar Solution Cookbook, but he is also an advocate for healthy eating.
A few weeks ago, I heard Michael Pollan as he was interviewed on one of my favorite radio shows, The Splendid Table, hosted by Lynn Rosetto Kaspar. I often listen to this cooking show on my iPad when I’m working in the kitchen and always come away learning a new thing or two. But hearing Pollan was the catalyst for this blog post.
I Was Raised on Home-Cooked Meals
Obviously, I think cooking your own food is terribly important and that’s why I have devoted the past 20 years to writing cookbooks so gluten-free people can prepare their own (safe) food at home. I was raised on a farm where my mother prepared every single meal; there was no fast food (unless you count the hotdog sandwiches we carried in our lunchboxes to our one-room country schoolhouse because there was no school lunch program back then). We raised our own cattle and pigs so fresh meat was standard fare, although I still have a hard time eating lamb because we had a pet lamb named “Baa-Baa.” And, I raised my son with home-cooked meals—even after working 12 hour days—because that’s how I was raised.
So, you see where I’m coming from and why cooking at home is important to me. I am afraid that cooking has become a spectator sport. We’re willing to watch hours of Food Network/Cooking Channel shows, but we’re loathe to spend time in our own kitchens. I think that is sad.
Now, what do these two thought-leaders have to say about cooking at home? Read on …..
Michael Pollan: Cooking is Calming, Grounding, and Meditative
According to Michael Pollan, research shows that Americans spend today, on average, about half the time preparing food that they did in the 1960’s. But part of it is how we’ve come to think about leisure. For some reason, he says, we’ve defined it as passive consumption, and we’ve learned to think of cooking as hard work.
But, it’s not hard. Pollan says that even a novice can make food that’s better than a frozen dinner. And cooking is the best thing you can do for the health and well-being of your family and friends. He has now come to view the aspects of food preparation that used to seem like a chore as “calming, grounding, and sometimes even meditative,” and he says, “Cooking is how we transform nature into culture.” He describes it as a “really profound thing—a spiritual thing” that transcends the notion that food preparation is drudgery.
When he was interviewed on Splendid Table, Pollan said the agro-industrial food system has deliberately denigrated cooking because corporations very much want to take over this work…and make you pay them to prepare food for you. Manufacturers have portrayed cooking as drudgery rather than a creative outlet and brainwashed us into thinking that fast food, TV dinners, and food that just needs microwaving is the solution.
Mark Hyman: Take Back Your Kitchen and Cook Real Food
Mark Hyman says we’ve now raised the second generation of Americans who don’t know how to cook. The average child in America doesn’t know where food comes from and thinks cooking means microwaving. They perceive food as “growing” in boxes, plastic bags, and cans. He agrees with Pollan by saying that we’ve been brainwashed into thinking that cooking real food is too hard or takes too long and that we should rely on convenience food.
Hyman fears that our reliance on convenience food—with all of its fat, sugar, and sodium—is not healthy and we are paying for this convenience with our health. In fact, he says real food is the best investment in your health.
Speaking of dollars, did you know that Americans spend only about 9 percent of each dollar on food, compared to 20 percent in Europe. (I know that figure is even higher in other countries, such as Japan.) So, we are fortunate to have access to food that is relatively less expensive than elsewhere.
In Conclusion: Get in the Kitchen
So, that’s my view on cooking at home. If you want to know more about how Michael Pollan and Mark Hyman feel about it, get their books—they have each authored several. In the meantime, get out your gluten-free cookbook (mine or someone else’s) and start cooking your own food. Your body will thank you with better health and you just might learn to like cooking.
May 6, 2014
Grain-Free Almond Flour, Flax, and Chia Muffins
Mother’s Day is just around the corner. For those of us without mothers, Mother’s Day is bittersweet. My own mother died quite young (age 54) and I wish she was here so I could shower her with love and attention. Instead, I treasure two dear elderly aunts who mean a great deal to me and are my connection to my mother.

Grain-free Muffins for Mother's Day
If you are lucky enough to have your mother in your life, why not bake these healthy muffins for her that say “I love you and I care about your health.” Or, bake them for yourself as a self-embracing hug or salute to your own health.
These muffins feature several healthy ingredients such as almond flour and flax. And many of you ask for grain-free recipes because you have adopted a Paleo diet or simply can’t tolerate grains anymore so this muffin meets those needs. Choose versions of ingredients that suit your needs (such as grain-free baking powder) and make it your own.
Chia
One ingredient you may not be familiar with is chia, a nutrient-dense seed that comes from the desert plant Salvia hispanica. “Chia” means strength in the Mayan and Aztec cultures —probably because these seeds contain healthy omega-3 fatty acids, carbohydrates, protein , fiber, antioxidants, and calcium. You may find them in light or dark colors but either color works just fine. Plus, you don’t have to grind them first to get their nutritional benefits.
These muffins are dense and filling, rather than light and airy so don’t expect them to rise super- high. Because of their density, they also travel well so stick a few in the freezer.
Grain-Free Almond Flour, Flax, and Chia Muffins
By Carol Fenster, author of Gluten-Free 101: The Essential Beginner’s Guide to Easy Gluten-Free Cooking (Houghton Mifflin Harcourt, 2014)
Serve these hearty muffins when you want a healthy treat that fills your kitchen with a heavenly cinnamon aroma. And, you don’t have to save them for Mother’s Day; anytime is just fine. Any type of apple works well, and I prefer to leave the peel on but you can peel if you wish. These are best eaten the second day, so make them the day before and store at room temperature overnight, then refrigerate or freeze any leftovers.
1 cup apple juice
1/4 cup chia seeds
1 cup almond flour/meal
3/4 cup ground flax seeds or flaxmeal
1/2 cup brown sugar
2 teaspoons baking powder
2 teaspoons pumpkin pie spice or apple pie spice
1 teaspoon guar gum
3/4 teaspoon salt
1/4 teaspoon baking soda
2 large eggs, at room temperature
1 teaspoon pure vanilla extract
1 medium cored, grated apple
2 tablespoons raisins
[1] Place a rack in the lower third of the oven. Preheat the oven to 375⁰F. Generously grease a standard 12-cup non-stick (gray, not black) muffin pan or use paper liners.
[2] In a small bowl, soak the chia seeds in the apple juice for 15 minutes, stirring occasionally.
[3] In a large mixing bowl, whisk together the almond meal, flax, sugar, baking powder, pumpkin pie spice, xanthan gum, salt, and baking soda until well blended. With an electric mixer on low speed, beat in the apple juice-chia mixture, eggs, and vanilla until thoroughly blended. Increase the speed to medium-low and beat until the batter is slightly thickened, about 30 seconds. Gently beat in the apples and raisins. Divide the batter evenly in the muffin cups. (A 1 [½]-inch metal spring-action metal ice cream scoop helps ensure uniformly -sized muffins.)
[4] Bake until the muffin tops are firm and a toothpick inserted into the center of a muffin comes out almost clean, about 30 to 35 minutes. If the muffins start to brown too much, lay a sheet of foil over the top. Cool the muffins in the pan on a wire rack for 10 minutes and then remove the muffins from the pan and cool completely on the wire rack. These are best served the next day.
Per muffin: 175 calories; 8g protein; 8g total fat; 3g fiber; 20g carbohydrates; 31mg cholesterol; 274mg sodium

