Marina Delio's Blog, page 18
July 17, 2016
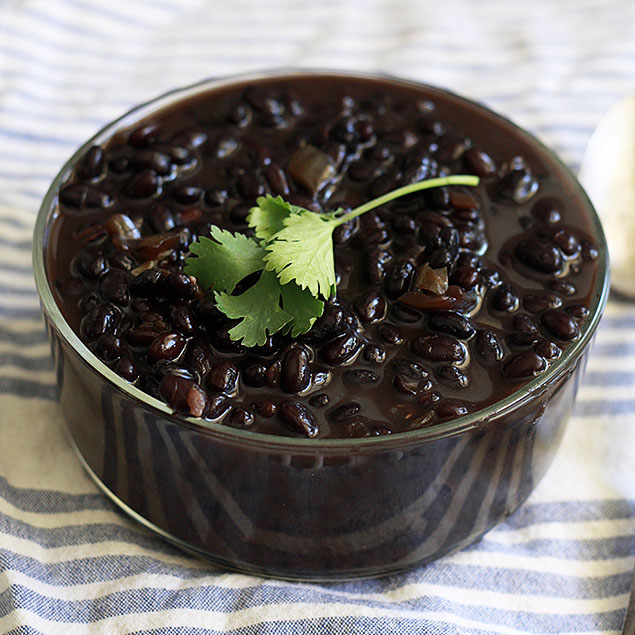
Slow Cooker Black Beans
Cooking dried black beans makes for easy, nourishing, and inexpensive meals. Here's an easy black beans recipe made in the slow cooker.
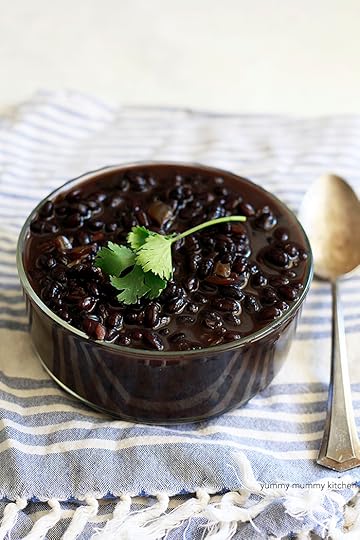 Cooking dried beans is so easy! Ditch the cans and try homemade beans instead. You'll save money and gain flavor. With the help of a slow cooker, dried beans practically cook themselves. Instead of mushy, high-sodium, beans from a can, cooking dried beans results in perfectly tender beans. This week I cooked a batch of dried black beans to use throughout the week in tacos, salads, and soups. I'm so glad I've finally made the switch from canned to dried beans. My pantry is now stocked with glass jars filled with beautiful dried legumes.
I've always used canned beans for their convenience. I've been meaning to switch to dried beans for ages, but just haven't until now. During the week I'm often a last-minute cook, deciding the dinner menu based on what we have in the fridge. And that leaves no time for soaking and boiling beans. Finally it clicked that we use beans in multiple meals every week, so why not cook up a batch and store in the refrigerator. Cooked beans even freeze well, so my concern that they could go to waste didn't even make sense.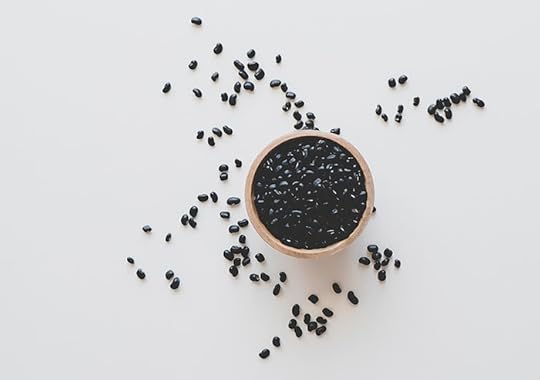 Bean based meals have a few fantastic perks. I've heard some people say that eating a healthy, meatless diet must be expensive. In reality, plants can be much less expensive than animal products. For example, I can make a big pot of veggie chili for much less than it would cost to get my family fast food burgers. Second, beans are a great replacement for meat. Black Bean Burgers are always my preference over meat burgers. Try the Black Bean Burgers with Mango Avocado Salsa in my cookbook! If I haven't convinced you, check out 7 Reasons Vegetarians Live Longer and you may just make the swap a few nights a week.
Black beans have many health benefits!
Plant based protein. Cooked black beans have 15.2 grams of protein per cup. High in fiber. Cooked black beans have 15 grams of fiber per cup - that's half the recommended daily value for an adult. Heart health supportDigestive tract support High in antioxidant and inflammatory phytonutrients There are just two steps and 1 ingredient needed to make black beans in the slow cooker. Step 1: soak the beans in water overnight. Step 2: Cook. So dang easy, right?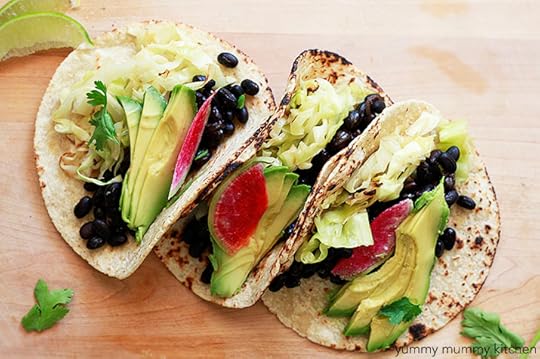 Black beans are so versatile. Most kids I know (granted, we live in California) love burritos and tacos with beans. Cooked black beans were a staple when my kids were toddlers, as they are the perfect little finger food. Some friends even use black beans to make healthier brownies, though I've never really been a fan.

Slow Cooker Black BeansBy Yummy Mummy Kitchen
Published 07/17/2016
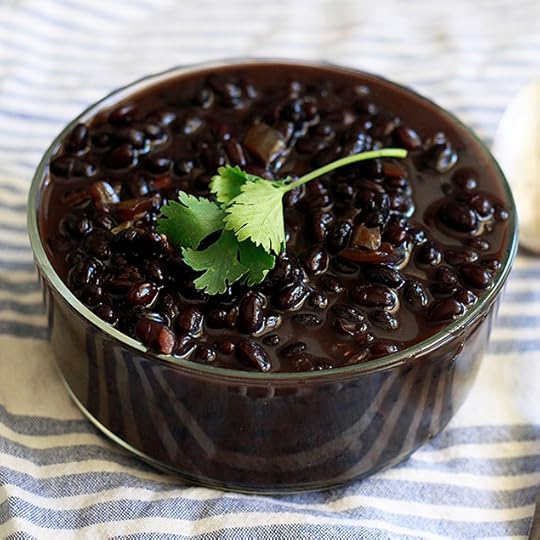
Black beans recipe made simple in the slow cooker. Feel free to change up the spices any way you like. Sometimes I add a teaspoon of taco seasoning. Ingredients2 cups dried black beans1 yellow onion, diced 2 cloves garlic, minced 1 teaspoon turmeric 1 teaspoon cumin 1 teaspoon sea salt InstructionsPick over the beans, looking for any little stones or blemished beans. Place beans in a bowl and cover with water. Soak overnight. Drain water and transfer beans to a slow cooker. Cover beans with about 2 inches of water. Stir in onion, garlic, spices, and salt. Cook on low for 6 to 8 hours. Different slow cookers will cook the beans at different rates. Check your beans after about 5 hours and then every half hour until they are tender. Yield: about 6 cups
Prep Time: 5 mins. Cook time: 8 hrs. 00 mins.
Total time: 8 hrs. 5 mins.
Tags: slow cooker, health, beans, Mexican, Vegetarian, Vegan


 Cooking dried beans is so easy! Ditch the cans and try homemade beans instead. You'll save money and gain flavor. With the help of a slow cooker, dried beans practically cook themselves. Instead of mushy, high-sodium, beans from a can, cooking dried beans results in perfectly tender beans. This week I cooked a batch of dried black beans to use throughout the week in tacos, salads, and soups. I'm so glad I've finally made the switch from canned to dried beans. My pantry is now stocked with glass jars filled with beautiful dried legumes.
 I've always used canned beans for their convenience. I've been meaning to switch to dried beans for ages, but just haven't until now. During the week I'm often a last-minute cook, deciding the dinner menu based on what we have in the fridge. And that leaves no time for soaking and boiling beans. Finally it clicked that we use beans in multiple meals every week, so why not cook up a batch and store in the refrigerator. Cooked beans even freeze well, so my concern that they could go to waste didn't even make sense.
 Bean based meals have a few fantastic perks. I've heard some people say that eating a healthy, meatless diet must be expensive. In reality, plants can be much less expensive than animal products. For example, I can make a big pot of veggie chili for much less than it would cost to get my family fast food burgers. Second, beans are a great replacement for meat. Black Bean Burgers are always my preference over meat burgers. Try the Black Bean Burgers with Mango Avocado Salsa in my cookbook! If I haven't convinced you, check out 7 Reasons Vegetarians Live Longer and you may just make the swap a few nights a week.
 Black beans have many health benefits!
Plant based protein. Cooked black beans have 15.2 grams of protein per cup. High in fiber. Cooked black beans have 15 grams of fiber per cup - that's half the recommended daily value for an adult. Heart health supportDigestive tract support High in antioxidant and inflammatory phytonutrients There are just two steps and 1 ingredient needed to make black beans in the slow cooker. Step 1: soak the beans in water overnight. Step 2: Cook. So dang easy, right?
 Black beans are so versatile. Most kids I know (granted, we live in California) love burritos and tacos with beans. Cooked black beans were a staple when my kids were toddlers, as they are the perfect little finger food. Some friends even use black beans to make healthier brownies, though I've never really been a fan.
Slow Cooker Black BeansBy Yummy Mummy Kitchen
Published 07/17/2016
Black beans recipe made simple in the slow cooker. Feel free to change up the spices any way you like. Sometimes I add a teaspoon of taco seasoning. Ingredients2 cups dried black beans1 yellow onion, diced 2 cloves garlic, minced 1 teaspoon turmeric 1 teaspoon cumin 1 teaspoon sea salt InstructionsPick over the beans, looking for any little stones or blemished beans. Place beans in a bowl and cover with water. Soak overnight. Drain water and transfer beans to a slow cooker. Cover beans with about 2 inches of water. Stir in onion, garlic, spices, and salt. Cook on low for 6 to 8 hours. Different slow cookers will cook the beans at different rates. Check your beans after about 5 hours and then every half hour until they are tender. Yield: about 6 cups
Prep Time: 5 mins. Cook time: 8 hrs. 00 mins.
Total time: 8 hrs. 5 mins.
Tags: slow cooker, health, beans, Mexican, Vegetarian, Vegan


Black Beans
Cooking dried black beans makes for easy, nourishing, and inexpensive meals. Here's an easy black beans recipe made in the slow cooker.
Cooking dried beans is so easy! Ditch the cans and try homemade beans instead. You'll save money and gain flavor. With the help of a slow cooker, dried beans practically cook themselves. Instead of mushy, high-sodium, beans from a can, cooking dried beans results in perfectly tender beans. This week I cooked a batch of dried black beans to use throughout the week in tacos, salads, and soups. I'm so glad I've finally made the switch from canned to dried beans. My pantry is now stocked with glass jars filled with beautiful dried legumes.
I've always used canned beans for their convenience. I've been meaning to switch to dried beans for ages, but just haven't until now. During the week I'm often a last-minute cook, deciding the dinner menu based on what we have in the fridge. And that leaves no time for soaking and boiling beans. Finally it clicked that we use beans in multiple meals every week, so why not cook up a batch and store in the refrigerator. Cooked beans even freeze well, so my concern that they could go to waste didn't even make sense.
Bean based meals have a few fantastic perks. I've heard some people say that eating a healthy, meatless diet must be expensive. In reality, plants can be much less expensive than animal products. For example, I can make a big pot of veggie chili for much less than it would cost to get my family fast food burgers. Second, beans are a great replacement for meat. Black Bean Burgers are always my preference over meat burgers. Try the Black Bean Burgers with Mango Avocado Salsa in my cookbook! If I haven't convinced you, check out 7 Reasons Vegetarians Live Longer and you may just make the swap a few nights a week.
Black beans have many health benefits!
Plant based protein. Cooked black beans have 15.2 grams of protein per cup. High in fiber. Cooked black beans have 15 grams of fiber per cup - that's half the recommended daily value for an adult. Heart health supportDigestive tract support High in antioxidant and inflammatory phytonutrients There are just two steps and 1 ingredient needed to make black beans in the slow cooker. Step 1: soak the beans in water overnight. Step 2: Cook. So dang easy, right?
Black beans are so versatile. Most kids I know (granted, we live in California) love burritos and tacos with beans. Cooked black beans were a staple when my kids were toddlers, as they are the perfect little finger food. Some friends even use black beans to make healthier brownies, though I've never really been a fan.
Slow Cooker Black BeansBy Yummy Mummy Kitchen
Published 07/17/2016
Black beans recipe made simple in the slow cooker. Feel free to change up the spices any way you like. Sometimes I add a teaspoon of taco seasoning. Ingredients2 cups dried black beans1 yellow onion, diced 2 cloves garlic, minced 1 teaspoon turmeric 1 teaspoon cumin 1 teaspoon sea salt InstructionsPick over the beans, looking for any little stones or blemished beans. Place beans in a bowl and cover with water. Soak overnight. Drain water and transfer beans to a slow cooker. Cover beans with about 2 inches of water. Stir in onion, garlic, spices, and salt. Cook on low for 6 to 8 hours. Different slow cookers will cook the beans at different rates. Check your beans after about 5 hours and then every half hour until they are tender. Yield: about 6 cups
Prep Time: 5 mins. Cook time: 8 hrs. 00 mins.
Total time: 8 hrs. 5 mins.
Tags: slow cooker, health, beans, Mexican, Vegetarian, Vegan
Cooking dried beans is so easy! Ditch the cans and try homemade beans instead. You'll save money and gain flavor. With the help of a slow cooker, dried beans practically cook themselves. Instead of mushy, high-sodium, beans from a can, cooking dried beans results in perfectly tender beans. This week I cooked a batch of dried black beans to use throughout the week in tacos, salads, and soups. I'm so glad I've finally made the switch from canned to dried beans. My pantry is now stocked with glass jars filled with beautiful dried legumes. I've always used canned beans for their convenience. I've been meaning to switch to dried beans for ages, but just haven't until now. During the week I'm often a last-minute cook, deciding the dinner menu based on what we have in the fridge. And that leaves no time for soaking and boiling beans. Finally it clicked that we use beans in multiple meals every week, so why not cook up a batch and store in the refrigerator. Cooked beans even freeze well, so my concern that they could go to waste didn't even make sense.
Bean based meals have a few fantastic perks. I've heard some people say that eating a healthy, meatless diet must be expensive. In reality, plants can be much less expensive than animal products. For example, I can make a big pot of veggie chili for much less than it would cost to get my family fast food burgers. Second, beans are a great replacement for meat. Black Bean Burgers are always my preference over meat burgers. Try the Black Bean Burgers with Mango Avocado Salsa in my cookbook! If I haven't convinced you, check out 7 Reasons Vegetarians Live Longer and you may just make the swap a few nights a week. Black beans have many health benefits!
Plant based protein. Cooked black beans have 15.2 grams of protein per cup. High in fiber. Cooked black beans have 15 grams of fiber per cup - that's half the recommended daily value for an adult. Heart health supportDigestive tract support High in antioxidant and inflammatory phytonutrients There are just two steps and 1 ingredient needed to make black beans in the slow cooker. Step 1: soak the beans in water overnight. Step 2: Cook. So dang easy, right?
Black beans are so versatile. Most kids I know (granted, we live in California) love burritos and tacos with beans. Cooked black beans were a staple when my kids were toddlers, as they are the perfect little finger food. Some friends even use black beans to make healthier brownies, though I've never really been a fan.
Slow Cooker Black BeansBy Yummy Mummy Kitchen
Published 07/17/2016
Black beans recipe made simple in the slow cooker. Feel free to change up the spices any way you like. Sometimes I add a teaspoon of taco seasoning. Ingredients2 cups dried black beans1 yellow onion, diced 2 cloves garlic, minced 1 teaspoon turmeric 1 teaspoon cumin 1 teaspoon sea salt InstructionsPick over the beans, looking for any little stones or blemished beans. Place beans in a bowl and cover with water. Soak overnight. Drain water and transfer beans to a slow cooker. Cover beans with about 2 inches of water. Stir in onion, garlic, spices, and salt. Cook on low for 6 to 8 hours. Different slow cookers will cook the beans at different rates. Check your beans after about 5 hours and then every half hour until they are tender. Yield: about 6 cups
Prep Time: 5 mins. Cook time: 8 hrs. 00 mins.
Total time: 8 hrs. 5 mins.
Tags: slow cooker, health, beans, Mexican, Vegetarian, Vegan
July 12, 2016
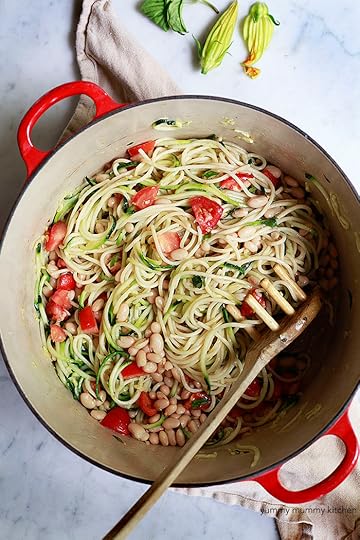
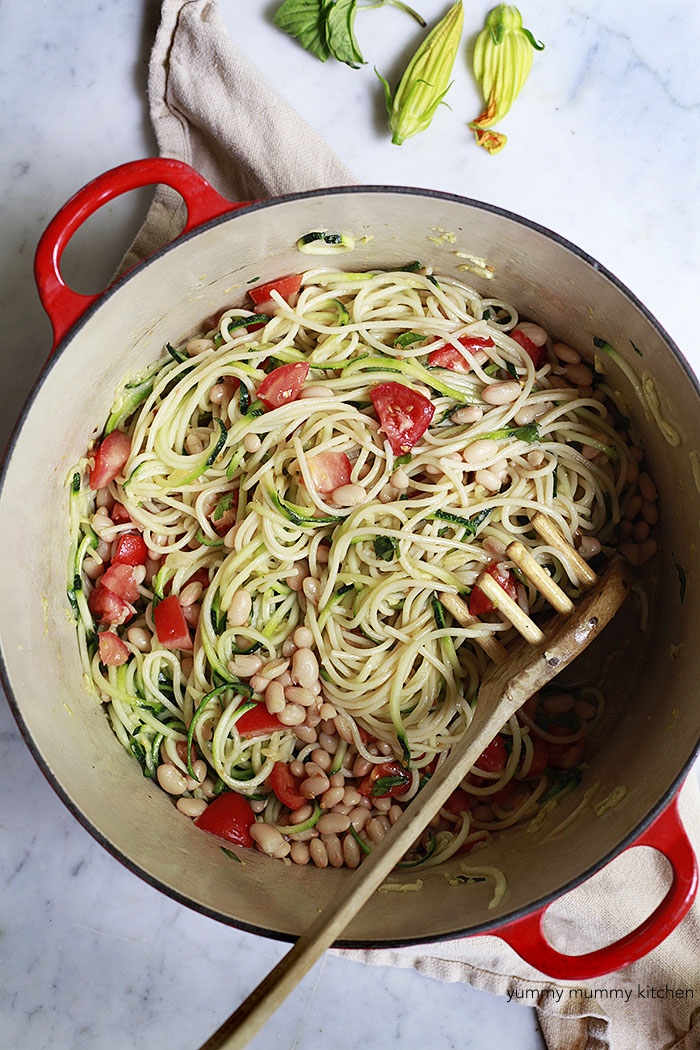
Zoodles (Zucchini Noodles) with White Beans and Tomatoes
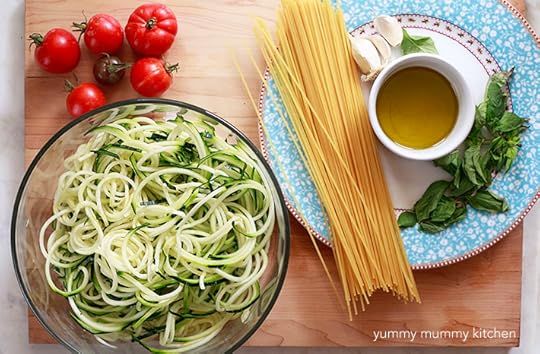
Zoodles, or zucchini noodles agilo e olio with white beans and tomatoes make an easy weeknight meal. Even picky eaters love this zucchini spaghetti!
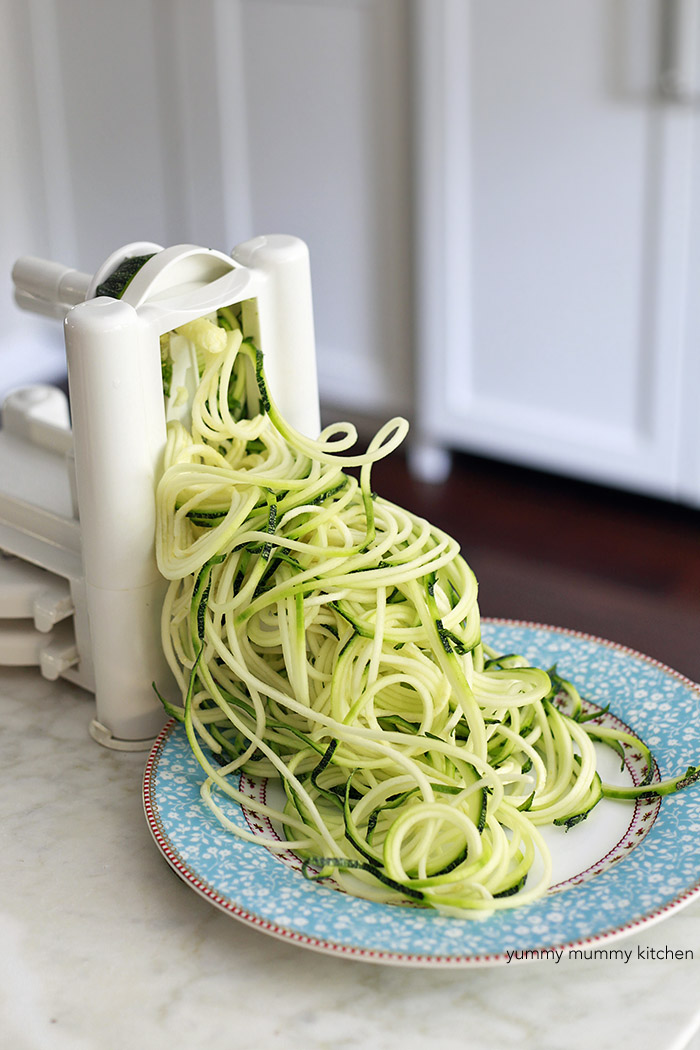
If there's one thing I know for certain, it's that kids love noodles. Buttered or olive oil pasta is a regular on kids' menus. In Italy it's called Pasta Bianco. Spaghetti aglio e olio (with garlic and olive oil) is such comfort food and how I usually make our pasta bianco at home. For the past few years zoodles, also know as zucchini noodles, have been gaining popularity. My girls and I have so much fun zoodling with our spiralizer. And I've found that zoodles are the easiest way to get my kids to eat zucchini without any complaints. As I've learned from a few zoodle fails, there are a few tricks to making delicious zucchini noodles. This week we made a zoodle spaghetti with that flavorful aglio e olio flavor, and added some white beans and tomatoes for added protein, texture, and heartiness.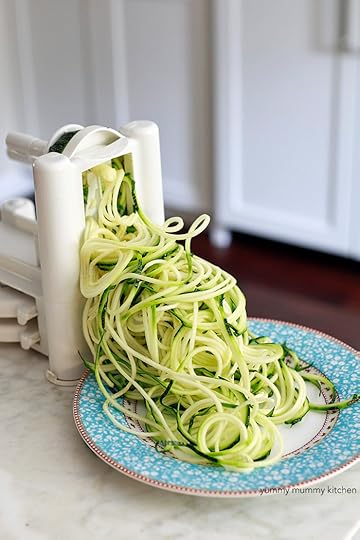 The first few times I made zucchini noodles, I used a julienne grater. It worked just fine, but took forever. Finally I invested in a proper spiralizer, and it has made spiralizing vegetables so much easier. This bunch of zucchini spaghetti came from one zucchini and took about 30 seconds to spiralize. To make your life even easier, you could incorporate spiralizing into your food prep day (I have ambitions of a regular food prep day, but it usually doesn't happen). My kids love carrot and cucumber ribbons in their lunch boxes.
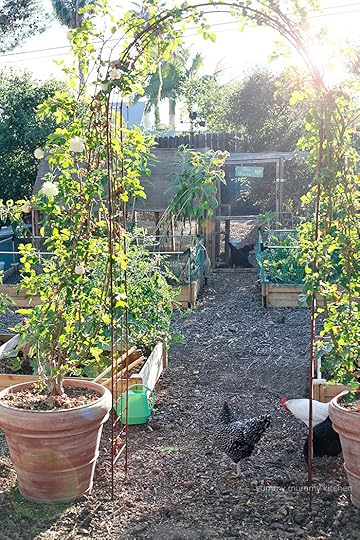 I adore my summer garden right now. The sunflowers are blooming and the zucchini plants are doing what they do best: growing crazy fast. Zoodles to the rescue!
 Here's the trick to getting kids to enjoy zoodles. I love zoodles, but on their own as a replacement for pasta, they just aren't as satisfying. I think it's a texture thing - zoodles don't have the same bite as real pasta. But when you add a big bunch of zoodles to freshly cooked spaghetti and eat both real pasta and zucchini pasta together, it's hard to distinguish which is which.
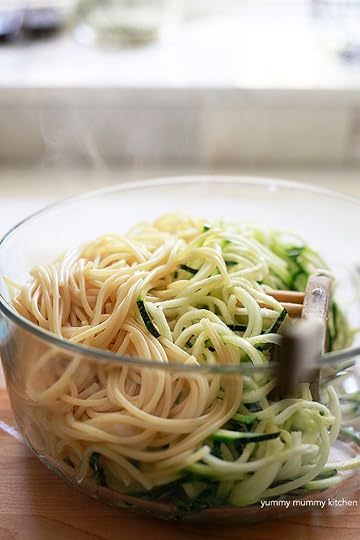 Twirled together on a fork, you still get that comforting chewy spaghetti bite even if most of the noodles are made out of zucchini. The second trick to zoodles is to cook them perfectly. Too raw and they are stiff, but overcook the zoodles and they end up mushy.
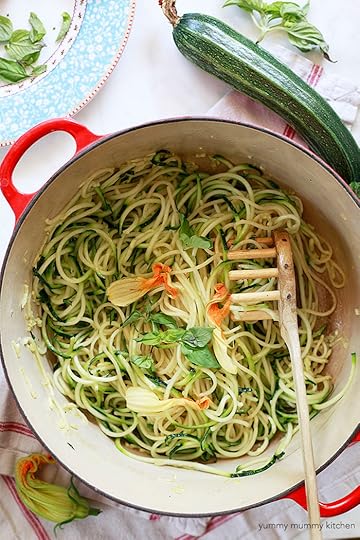 Zoodles taste best when they are cooked in a little olive oil and garlic for just a couple of minutes so that they just begin to soften. Zoodles are also tasty with red sauce. For this recipe I cooked and drained the spaghetti, cooked some (lots!) garlic in evoo, then tossed the zucchini noodles back into the pot with the spaghetti and tossed until the zoodles were al dente.
 Done! So simple and easy, and a great way to get kids to eat veggies. Plus this is a one-pot dinner. My favorite kind.
Need a spiralizer?
Here's the one I use. (Amazon Affiliate link)
Zucchini Noodle Spaghetti with White Beans and Tomatoes Printer Friendly Recipe
By Yummy Mummy Kitchen
Published 07/12/2016
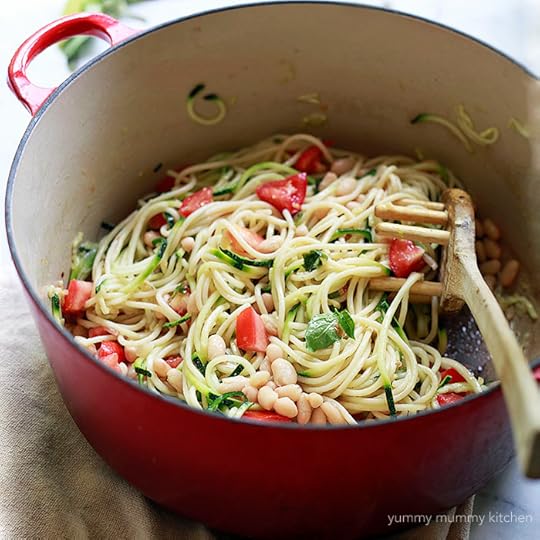
Easy zucchini noodle spaghetti with white beans and tomatoes. Even picky eaters love this version of zoodles! Ingredients4 oz. favorite dried spaghetti 2 medium zucchini, spiralized1/4 cup extra virgin olive oil6 cloves garlic, peeled and sliced pinch of red pepper flakes 1 (15 oz.) can cannellini beans, drained and rinsed 1 cup halved cherry tomatoes, or chopped Roma tomatoes 1/4 cup fresh basil or Italian parsley Parmesan cheese (optional) InstructionsBring a pot of salted water to a boil. Add spaghetti and cook until al dente, according to package directions. Drain and add to a large serving bowl with the zucchini noodles. The heat from the cooked pasta will begin to cook the zoodles. In the same pot over low heat, saute sliced garlic with the pepper flakes in olive oil. Cook 5 minutes or until garlic is tender and golden brown, taking care not to burn the garlic or it will become bitter. Add the beans, tomatoes, and both kinds of noodles back into the pot and toss to coat with garlic olive oil. Heat until zucchini noodles have softened and beans are heated. Stir in basil or parsley. Season with sea salt if needed. Serve with Parmesan, if desired. Yield: Serves 4
Prep Time: 10 mins. Cook time: 20 mins.
Total time: 30 mins.
Tags: dinner, summer recipes, vegetarian, vegan, zoodles, zucchini noodles
*Vegan Option: Omit the Parmesan
*Gluten Free Option: Use GF spaghetti


If there's one thing I know for certain, it's that kids love noodles. Buttered or olive oil pasta is a regular on kids' menus. In Italy it's called Pasta Bianco. Spaghetti aglio e olio (with garlic and olive oil) is such comfort food and how I usually make our pasta bianco at home. For the past few years zoodles, also know as zucchini noodles, have been gaining popularity. My girls and I have so much fun zoodling with our spiralizer. And I've found that zoodles are the easiest way to get my kids to eat zucchini without any complaints. As I've learned from a few zoodle fails, there are a few tricks to making delicious zucchini noodles. This week we made a zoodle spaghetti with that flavorful aglio e olio flavor, and added some white beans and tomatoes for added protein, texture, and heartiness.
 The first few times I made zucchini noodles, I used a julienne grater. It worked just fine, but took forever. Finally I invested in a proper spiralizer, and it has made spiralizing vegetables so much easier. This bunch of zucchini spaghetti came from one zucchini and took about 30 seconds to spiralize. To make your life even easier, you could incorporate spiralizing into your food prep day (I have ambitions of a regular food prep day, but it usually doesn't happen). My kids love carrot and cucumber ribbons in their lunch boxes.
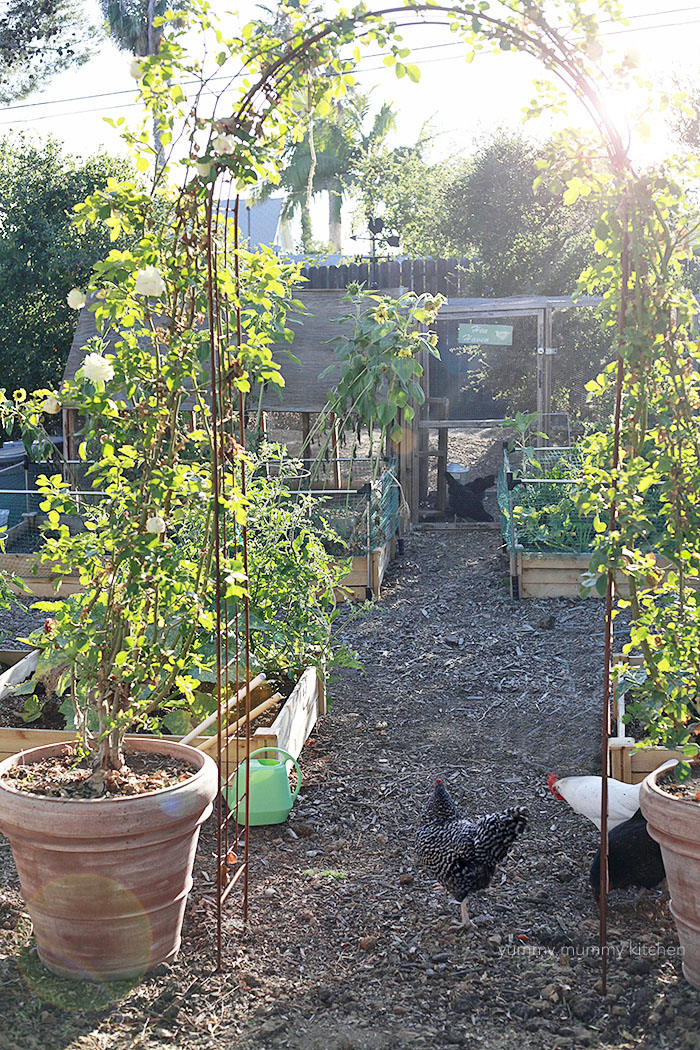 I adore my summer garden right now. The sunflowers are blooming and the zucchini plants are doing what they do best: growing crazy fast. Zoodles to the rescue!
 Here's the trick to getting kids to enjoy zoodles. I love zoodles, but on their own as a replacement for pasta, they just aren't as satisfying. I think it's a texture thing - zoodles don't have the same bite as real pasta. But when you add a big bunch of zoodles to freshly cooked spaghetti and eat both real pasta and zucchini pasta together, it's hard to distinguish which is which.
 Twirled together on a fork, you still get that comforting chewy spaghetti bite even if most of the noodles are made out of zucchini. The second trick to zoodles is to cook them perfectly. Too raw and they are stiff, but overcook the zoodles and they end up mushy.
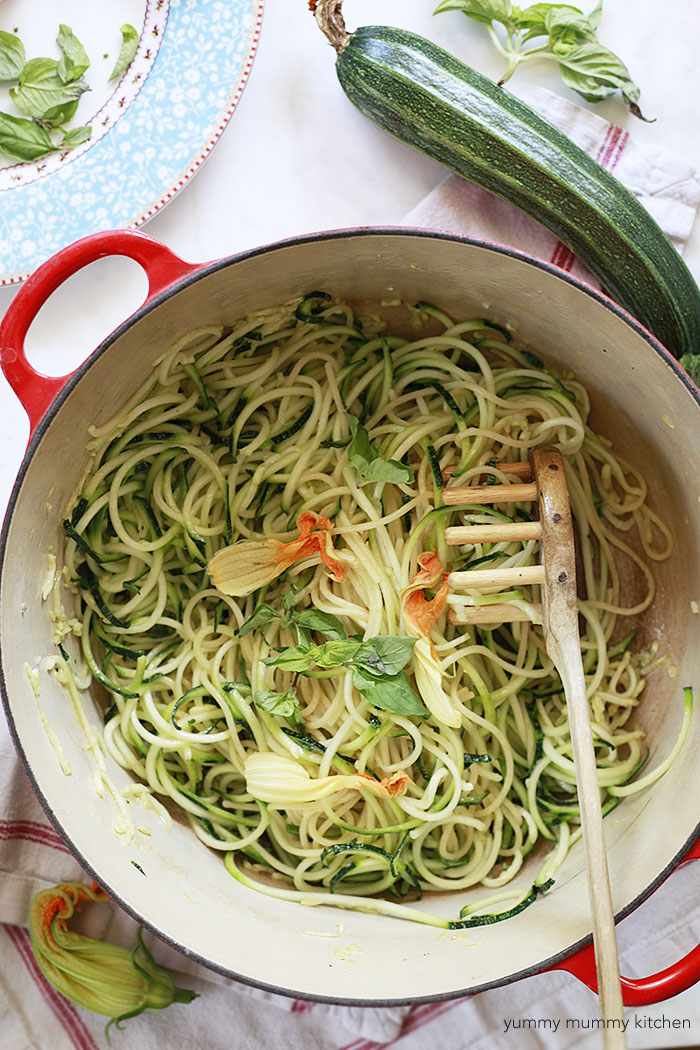 Zoodles taste best when they are cooked in a little olive oil and garlic for just a couple of minutes so that they just begin to soften. Zoodles are also tasty with red sauce. For this recipe I cooked and drained the spaghetti, cooked some (lots!) garlic in evoo, then tossed the zucchini noodles back into the pot with the spaghetti and tossed until the zoodles were al dente.
 Done! So simple and easy, and a great way to get kids to eat veggies. Plus this is a one-pot dinner. My favorite kind.
Need a spiralizer?
Here's the one I use. (Amazon Affiliate link)
Zucchini Noodle Spaghetti with White Beans and Tomatoes Printer Friendly Recipe
By Yummy Mummy Kitchen
Published 07/12/2016
Easy zucchini noodle spaghetti with white beans and tomatoes. Even picky eaters love this version of zoodles! Ingredients4 oz. favorite dried spaghetti 2 medium zucchini, spiralized1/4 cup extra virgin olive oil6 cloves garlic, peeled and sliced pinch of red pepper flakes 1 (15 oz.) can cannellini beans, drained and rinsed 1 cup halved cherry tomatoes, or chopped Roma tomatoes 1/4 cup fresh basil or Italian parsley Parmesan cheese (optional) InstructionsBring a pot of salted water to a boil. Add spaghetti and cook until al dente, according to package directions. Drain and add to a large serving bowl with the zucchini noodles. The heat from the cooked pasta will begin to cook the zoodles. In the same pot over low heat, saute sliced garlic with the pepper flakes in olive oil. Cook 5 minutes or until garlic is tender and golden brown, taking care not to burn the garlic or it will become bitter. Add the beans, tomatoes, and both kinds of noodles back into the pot and toss to coat with garlic olive oil. Heat until zucchini noodles have softened and beans are heated. Stir in basil or parsley. Season with sea salt if needed. Serve with Parmesan, if desired. Yield: Serves 4
Prep Time: 10 mins. Cook time: 20 mins.
Total time: 30 mins.
Tags: dinner, summer recipes, vegetarian, vegan, zoodles, zucchini noodles
*Vegan Option: Omit the Parmesan
*Gluten Free Option: Use GF spaghetti
July 6, 2016
Grand Hyatt Kauai
Aloha and welcome to paradise...

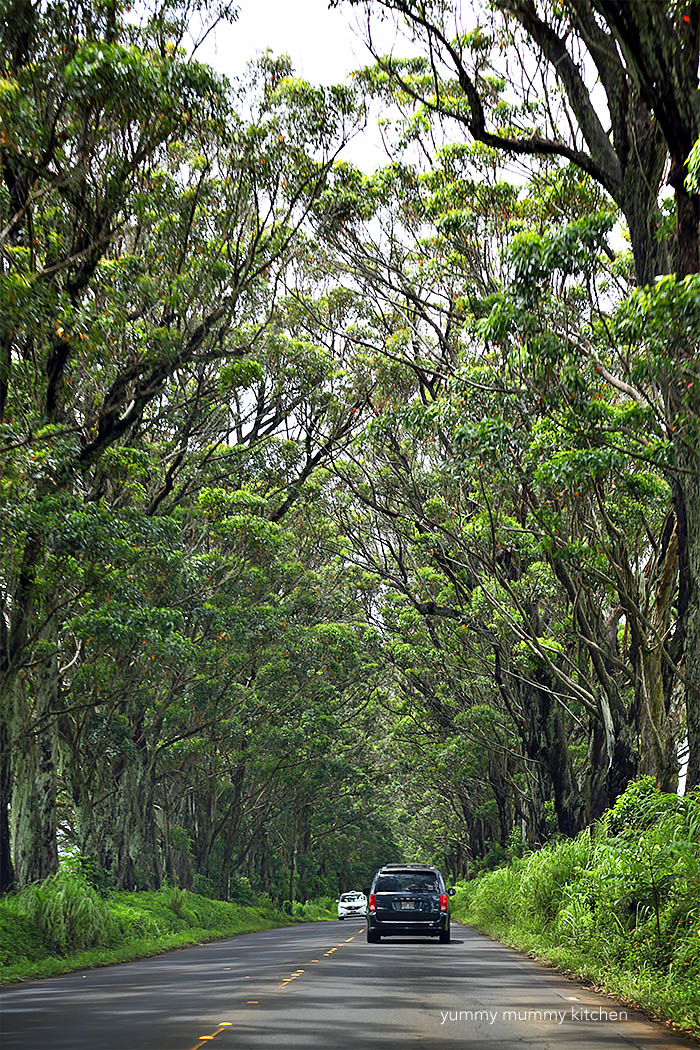
As I mentioned, and you probably know from my Instagram spamming, we just spent a week on the gorgeous island of Kauai. I have been to the North Shore of Kauai many times, and am always longing to go back. It must be one of the most beautiful, peaceful, unspoiled places on Earth. The last time we visited Hawaii, we spent a few days in Princeville, Kauai, and then spent the rest of our trip in Wailea, Maui. This time we didn't want to waste any time traveling between islands and decided to stick to Kauai, which was our favorite. It's known as the Garden Island for a reason. Kauai is just so tropical and lush. While Yummy Hubby and I prefer the privacy and serenity of a vacation rental, the kids love resort pools. Give those girls a waterslide and they are happy as can be. When deciding on a Kauai beach resort, the Grand Hyatt Kauai in Poipu was a no-brainer. Waterslide - check. Lazy river - check. Breakfast buffet - check. The Grand Hyatt was the perfect stop for a couple of days before heading to the North Shore. There have been so many travel warnings recently about long TSA security wait times, but we were lucky and had easy flights from LAX to Kauai's airport in Lihue. The drive from the Lihue airport to the Grand Hyatt Kauai was short and beautiful. Kauai is so lush and green - quite the contrast to our parched California landscape. We passed grazing cows and drove through the famed Tunnel of Trees. Long vines hang from trees and we imagined monkeys leaping from one vine to the next.

One thing I love about staying in a resort as opposed to a condo/rental is that upon arrival, guests are greeted with that warm aloha hospitality. The entrance to the Grand Hyatt Kauai is breathtaking. We were greeted with cold watermelon infused water, fresh orchid leis, and a stunning view of the ocean that looked like it could be a painting. Suddenly all the stress of travel melts away and vacation truly begins. The air in Hawaii is different. It's wet and warm and perfumed with plumeria flowers. I was happy to find my favorite flowers all over the Grand Hyatt Kauai's beautiful grounds. It isn't a Hawaiian vacation without a plumeria flower tucked behind my ear.
The Grand Hyatt Kauai truly has everything you could want or need, which means you never have to even leave the resort if you don't want to.
 There are several beautiful restaurants to choose from. We didn't make it to Tidepools, pictured above, but doesn't it look romantic?! I've heard from friends that the food is fantastic, but being surrounded by Koi fish, swans, and warm ocean breezes is reason enough for a visit. Instead, we picked up pizza and salad from Seaview Terrace while we watched the most darling tiny hula dancers perform to live music.
 The highlight of Poipu was definitely the waterslide and pools. This waterslide wasn't too fast or scary. The beach in front of the Grand Hyatt Kauai is nothing spectacular unless you're lucky enough to see the seals or sea turtles resting on the beach. When we were there the ocean was too rough for our girls to swim and the beach was very rocky. It didn't matter though - this Kauai beach resort is all about the pools pools pools. There's a saltwater lagoon with an ocean view that is so perfect for kids who aren't strong swimmers and adults who just want to relax.
 The Grand Hyatt Kauai lazy river was fun too, although the water doesn't seem to actually move much. If you're heading to the Grand Hyatt Kauai, pick up some inner tubes at the drug store on the way to the resort. Otherwise they are $11 each and very small. Pool tip: get to the pool early to claim your chairs. By the afternoon the pool area was full. Bringing some snacks like hummus and veggies is also a good idea. We found the poolside dining service to be just so-so and like many big resorts, overpriced.
 Splurging for the breakfast buffet? Totally worth it! We all loved the tropical offerings at the breakfast overlooking the turquoise ocean. I couldn't decide (and didn't have to!) between the pancakes with macadamia nuts, granola with the sweetest papaya and pineapple, and all the other delectable foods. Everything was perfectly fresh and delicious.
 I was happiest, however, venturing out of the resort and into the town. Hitting the Monday Koloa farmers market was on my bucket list. All the tropical fruits were just dreamy and I was in my happy place picking up papaya, pineapple, mango, and passion fruit for our condo in Princeville.
 About 5 minutes from the resort we found the sweetest little natural foods cafe, juice bar, and grocery. We stopped into Living Foods for the best pitaya bowl ever, green juice, and a tropical smoothie. They also have made to order pizza, burgers, and wraps. Living Foods is located in a cute shopping center, The Shops at Kukui'ula.

We stayed at the Grand Hyatt Kauai for just two nights before heading to our Princeville condo. For us, two nights was the perfect amount of time to enjoy the resort. Up next, Princeville...


As I mentioned, and you probably know from my Instagram spamming, we just spent a week on the gorgeous island of Kauai. I have been to the North Shore of Kauai many times, and am always longing to go back. It must be one of the most beautiful, peaceful, unspoiled places on Earth. The last time we visited Hawaii, we spent a few days in Princeville, Kauai, and then spent the rest of our trip in Wailea, Maui. This time we didn't want to waste any time traveling between islands and decided to stick to Kauai, which was our favorite. It's known as the Garden Island for a reason. Kauai is just so tropical and lush. While Yummy Hubby and I prefer the privacy and serenity of a vacation rental, the kids love resort pools. Give those girls a waterslide and they are happy as can be. When deciding on a Kauai beach resort, the Grand Hyatt Kauai in Poipu was a no-brainer. Waterslide - check. Lazy river - check. Breakfast buffet - check. The Grand Hyatt was the perfect stop for a couple of days before heading to the North Shore.
 There have been so many travel warnings recently about long TSA security wait times, but we were lucky and had easy flights from LAX to Kauai's airport in Lihue. The drive from the Lihue airport to the Grand Hyatt Kauai was short and beautiful. Kauai is so lush and green - quite the contrast to our parched California landscape. We passed grazing cows and drove through the famed Tunnel of Trees. Long vines hang from trees and we imagined monkeys leaping from one vine to the next.

One thing I love about staying in a resort as opposed to a condo/rental is that upon arrival, guests are greeted with that warm aloha hospitality. The entrance to the Grand Hyatt Kauai is breathtaking. We were greeted with cold watermelon infused water, fresh orchid leis, and a stunning view of the ocean that looked like it could be a painting. Suddenly all the stress of travel melts away and vacation truly begins.
 The air in Hawaii is different. It's wet and warm and perfumed with plumeria flowers. I was happy to find my favorite flowers all over the Grand Hyatt Kauai's beautiful grounds. It isn't a Hawaiian vacation without a plumeria flower tucked behind my ear.
 The Grand Hyatt Kauai truly has everything you could want or need, which means you never have to even leave the resort if you don't want to.
 There are several beautiful restaurants to choose from. We didn't make it to Tidepools, pictured above, but doesn't it look romantic?! I've heard from friends that the food is fantastic, but being surrounded by Koi fish, swans, and warm ocean breezes is reason enough for a visit. Instead, we picked up pizza and salad from Seaview Terrace while we watched the most darling tiny hula dancers perform to live music.
 The highlight of Poipu was definitely the waterslide and pools. This waterslide wasn't too fast or scary. The beach in front of the Grand Hyatt Kauai is nothing spectacular unless you're lucky enough to see the seals or sea turtles resting on the beach. When we were there the ocean was too rough for our girls to swim and the beach was very rocky. It didn't matter though - this Kauai beach resort is all about the pools pools pools. There's a saltwater lagoon with an ocean view that is so perfect for kids who aren't strong swimmers and adults who just want to relax. The Grand Hyatt Kauai lazy river was fun too, although the water doesn't seem to actually move much. If you're heading to the Grand Hyatt Kauai, pick up some inner tubes at the drug store on the way to the resort. Otherwise they are $11 each and very small. Pool tip: get to the pool early to claim your chairs. By the afternoon the pool area was full. Bringing some snacks like hummus and veggies is also a good idea. We found the poolside dining service to be just so-so and like many big resorts, overpriced.
 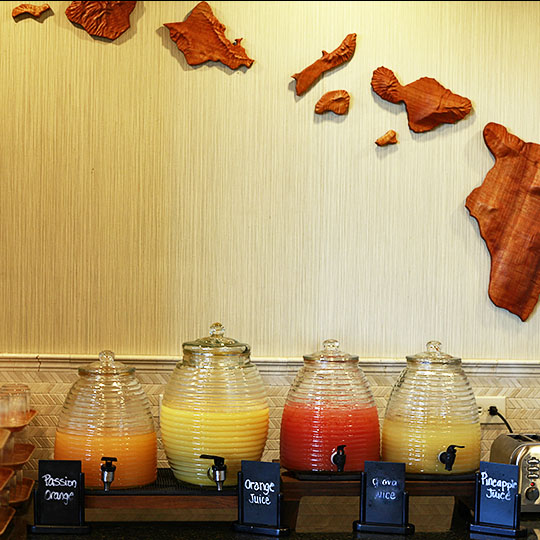 Splurging for the breakfast buffet? Totally worth it! We all loved the tropical offerings at the breakfast overlooking the turquoise ocean. I couldn't decide (and didn't have to!) between the pancakes with macadamia nuts, granola with the sweetest papaya and pineapple, and all the other delectable foods. Everything was perfectly fresh and delicious.
  I was happiest, however, venturing out of the resort and into the town. Hitting the Monday Koloa farmers market was on my bucket list. All the tropical fruits were just dreamy and I was in my happy place picking up papaya, pineapple, mango, and passion fruit for our condo in Princeville.
  About 5 minutes from the resort we found the sweetest little natural foods cafe, juice bar, and grocery. We stopped into Living Foods for the best pitaya bowl ever, green juice, and a tropical smoothie. They also have made to order pizza, burgers, and wraps. Living Foods is located in a cute shopping center, The Shops at Kukui'ula.

We stayed at the Grand Hyatt Kauai for just two nights before heading to our Princeville condo. For us, two nights was the perfect amount of time to enjoy the resort. Up next, Princeville...
July 1, 2016
Travel Carry-On Bag Essentials
This is a sponsored conversation written by me on behalf of Wet Ones® Hand Wipes. The opinions and text are all mine.
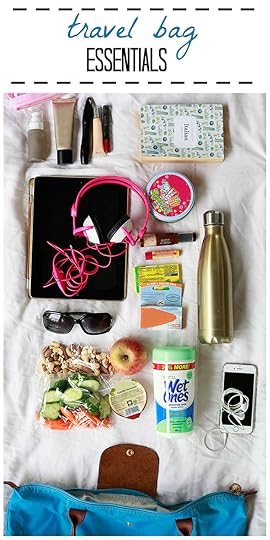
Summer is here and that means travel. We are getting ready for a trip that includes a flight, so I though I would put together a list of my top carry-on bag essentials for moms, or anyone really. We love to travel and have been taking our kids with us on trips since they were babies. Now that they are school age, long trips have gotten so much easier. I remember taking my daughter to Hawaii when she was 6 months old and waking up every two hours to nurse. While traveling with kids isn't exactly relaxing, it is an incredible adventure.Here are the essentials I always pack in my mom carry on bag for flights with the kids. Wet Ones® Hand Wipes. Airports and airplanes are notoriously germ infested and catching a cold at the start of a trip is no fun. The moment I sit down on the airplane I give the trays a good wipe down with Wet Ones® Citrus scented wipes. I use the antibacterial variety to wipe down all the doorknobs, bathrooms, and other high traffic surfaces whenever one of us is sick at home since they kill 99% of germs.Before and after eating, and there is a lot of snacking that happens on board, the kids' hands get cleaned with the Wet Ones® Sensitive Skin Extra Gentle Hand Wipes pictured above. I like the gentle wipes for sensitive baby and kid hands, and for myself since they don't dry out my hands. When we get to the rental car the container will promptly get placed in the cup holder to wipe hands after the beach. You can find these Wet Ones® Hand Wipes at Walmart.Snacks. When we travel food serves as both fuel and entertainment. One can keep a toddler occupied for some time by feeding her half a blueberry at a time. Some healthy snack ideas: individual serving of hummus with veggies, apples, applesauce squeezers for kids, granola bars, and nuts.Gum. Takeoff and landing can be especially painful for little ears.Lip balm. The air inside the plane cabin can feel really dry.Sunscreen. I like brush on mineral sunscreen powder for faces.Sunglasses. Tablet. loaded with movies, books, and gamesKid safe headphones. These child sized headphones have a safe volume limit.Small Game. A deck of cards or other small game to play with your travel buddies.Small pack of crayons or markers and paper. Book. Any parent with littles knows it's hard to get any reading done, but pack a book for your kids and for yourself.Smart phone and earbuds. Reusable water bottle. Although you won't be able to bring liquids with you onto the plane, you can fill it up onboard and have your bottle with you on your vacation. Staying hydrated is so important.Cosmetics separated into a separate bag. Don't forget the liquid limit of 3.4 ounces.Cozy sweater or wrap and socks. Airplanes can get chilly! Although I live in flip flops in my daily life, I always wear comfy flats or athletic shoes when traveling.
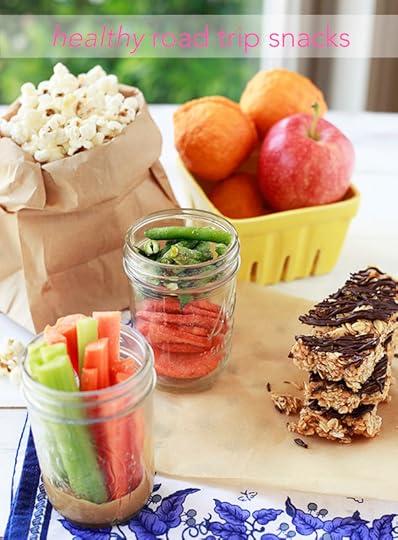 I have a post of more healthy snacks here if you're going on a road trip!
 And my favorite travel bag?A good cross-body bag with compartments.
You may also want to check out my post here: 10 Tips for Easy Travel with KidsAre you doing any traveling this summer? Did I miss any of your favorite travel essentials?


Summer is here and that means travel. We are getting ready for a trip that includes a flight, so I though I would put together a list of my top carry-on bag essentials for moms, or anyone really. We love to travel and have been taking our kids with us on trips since they were babies. Now that they are school age, long trips have gotten so much easier. I remember taking my daughter to Hawaii when she was 6 months old and waking up every two hours to nurse. While traveling with kids isn't exactly relaxing, it is an incredible adventure.Here are the essentials I always pack in my mom carry on bag for flights with the kids.
Wet Ones® Hand Wipes. Airports and airplanes are notoriously germ infested and catching a cold at the start of a trip is no fun. The moment I sit down on the airplane I give the trays a good wipe down with Wet Ones® Citrus scented wipes. I use the antibacterial variety to wipe down all the doorknobs, bathrooms, and other high traffic surfaces whenever one of us is sick at home since they kill 99% of germs.Before and after eating, and there is a lot of snacking that happens on board, the kids' hands get cleaned with the Wet Ones® Sensitive Skin Extra Gentle Hand Wipes pictured above. I like the gentle wipes for sensitive baby and kid hands, and for myself since they don't dry out my hands. When we get to the rental car the container will promptly get placed in the cup holder to wipe hands after the beach. You can find these Wet Ones® Hand Wipes at Walmart.Snacks. When we travel food serves as both fuel and entertainment. One can keep a toddler occupied for some time by feeding her half a blueberry at a time. Some healthy snack ideas: individual serving of hummus with veggies, apples, applesauce squeezers for kids, granola bars, and nuts.Gum. Takeoff and landing can be especially painful for little ears.Lip balm. The air inside the plane cabin can feel really dry.Sunscreen. I like brush on mineral sunscreen powder for faces.Sunglasses. Tablet. loaded with movies, books, and gamesKid safe headphones. These child sized headphones have a safe volume limit.Small Game. A deck of cards or other small game to play with your travel buddies.Small pack of crayons or markers and paper. Book. Any parent with littles knows it's hard to get any reading done, but pack a book for your kids and for yourself.Smart phone and earbuds. Reusable water bottle. Although you won't be able to bring liquids with you onto the plane, you can fill it up onboard and have your bottle with you on your vacation. Staying hydrated is so important.Cosmetics separated into a separate bag. Don't forget the liquid limit of 3.4 ounces.Cozy sweater or wrap and socks. Airplanes can get chilly! Although I live in flip flops in my daily life, I always wear comfy flats or athletic shoes when traveling.
I have a post of more healthy snacks here if you're going on a road trip!
And my favorite travel bag?A good cross-body bag with compartments.You may also want to check out my post here: 10 Tips for Easy Travel with KidsAre you doing any traveling this summer? Did I miss any of your favorite travel essentials?
June 30, 2016
Tropical Fruit
Inspiration for creating a healthy, beautiful tropical fruit platter to enjoy alone or with chia seed pudding, yogurt, or granola.
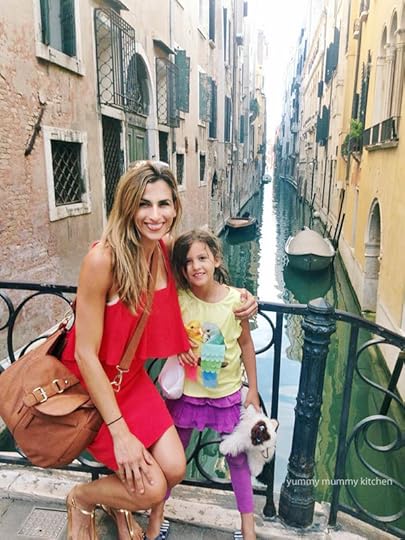
 Aloha! We spent last week on the magical island of Kauai. While there were so many things I loved about the island, and I'll share the details of our trip later, one of my favorite things was waking up early and enjoying a papaya with lime out on the lush green grass in front of our condo. The air was always warm and thick, even at 5:30 am. I could hear the waves crashing and birds chirping, but everything else was quiet while the kids were still sleeping. It was completely delicious peace.
Some of the world's best tropical fruit grows in Hawaii, and I couldn't wait to pick some up at the Poipu farmers market. I was familiar with most of the fruit, but there were a few new to me fruits as well. I just had to share this gorgeous tropical fruit with you and share some tips for putting together your own tropical fruit salad platter and other ways to enjoy it! I don't expect you will be able to find all of this unless you live in a tropical area, but I hope you enjoy the eye candy and get a little aloha fruit inspiration.
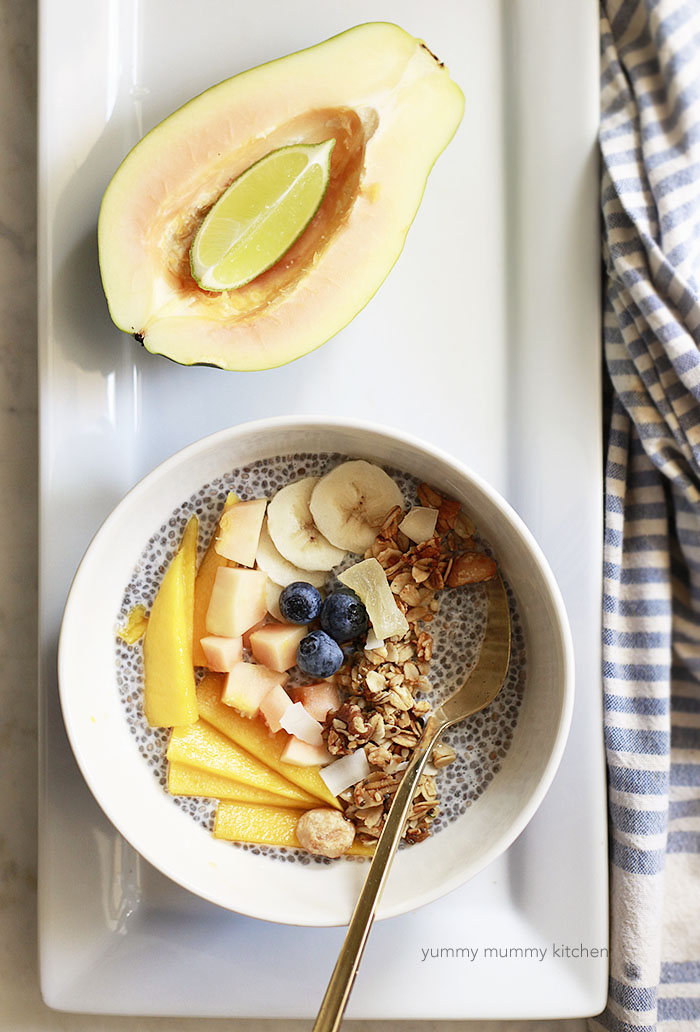
One of the reasons I prefer staying in a rental home rather than a hotel is being able to cook my own fresh, nourishing food. It's usually healthier and much less expensive. The first morning at the condo I put together this simple tropical fruit platter to go with breakfast. Nature is so beautiful. I couldn't resist taking pictures of this colorful plate. I would love to recreate this tropical fruit bowl for a fruit and granola parfait bar at a summer brunch.
Here's what we found at the Poipu farmers market and local grocery store in Princeville: Papaya. Papaya is wonderful for your health. They are high in vitamin C and contain enzymes that help with digestion and reducing bloating. There are different varieties, shapes, and colors. Most are grown in Hawaii, and unfortunately around 75% of those are GMO papayas. Some of the papayas I've seen in my local grocery store have little non-GMO stickers. GMO papayas are not legal in the EU, but are in the US and Canada. source Papaya are sweet and soft inside and taste best with a squeeze of lime.MangoLycheePassion Fruit Pineapple Coconut Soursop What's a soursop? This is a soursop! At first I thought it might be jackfruit, but it's not. The farmer told me that soursop has great health benefits including cancer fighting properties. The flesh is white and firm, and tastes sweet and mild, and a bit like passion fruit. Have you ever seen soursop? I am going to be on the lookout for it here!
 Let's talk dressing. Some people are big on "dressing" fruit and fruit salads. In the south, creamy poppy seed dressings are popular. Personally, I am team naked when it comes to fruit. Fruit is perfect on it's own, and should get to shine. Unless the fruit is not at it's sweetest, in which case a little drizzle of honey mixed with citrus juice is enough. At the suggestion of the kind farmer at the market on Kauai, we ate the papaya with a little passion fruit on top. Papaya is so creamy sweet that a little tartness is just what it needs. For very sweet fruits go with a squeeze of lime, for sour fruit, try a squeeze of orange. A little mint infused simple syrup can also be great on fruit that needs it, but these tropical fruits certainly don't.
 I love making a big beautiful platter of tropical fruit. It's wonderful alone, or on top of yogurt or chia pudding, sprinkled with tropical granola. Try a batch of my favorite Tropical Granola in my cookbook. It's amaaaaazing!
Tropical Fruit PlatterBy Yummy Mummy Kitchen
Published 06/30/2016
How to make a beautiful tropical fruit platter. The fruits listed below are suggestions, don't worry if you can't find them all. Ingredients1 papaya2 mangoes 1 small pineapple2 passion fruit, halved (the wrinklier the better!)5 lychee1 lime, cut into wedges fresh or toasted coconut meattropical granola for serving (optional) chia seed pudding or yogurt for serving (optional) InstructionsCut papaya in half lengthwise. Scoop out seeds with a spoon. Cut papaya halves again lengthwise so you have four pieces. Cut mango lengthwise around each side of the seed in the middle so you have two large pieces. Cut mango flesh to the skin without piercing skin, in 1/2" lines vertically, then horizontally to make cubes. Press the skin side of the mango forward to pop out. Cut peel and cut pineapple. Arrange fruit on a plate or platter. Spoon some passion fruit seeds over the papaya or squeeze some lime juice over.Serve fruit with granola, chia pudding, and/or yogurt. Yield: Serves 4-6
Prep Time: 10 mins. Total time: 10 mins.
Tags: breakfast, brunch, fruit, tropical, hawaii, chia pudding, granola


 Aloha! We spent last week on the magical island of Kauai. While there were so many things I loved about the island, and I'll share the details of our trip later, one of my favorite things was waking up early and enjoying a papaya with lime out on the lush green grass in front of our condo. The air was always warm and thick, even at 5:30 am. I could hear the waves crashing and birds chirping, but everything else was quiet while the kids were still sleeping. It was completely delicious peace.
 Some of the world's best tropical fruit grows in Hawaii, and I couldn't wait to pick some up at the Poipu farmers market. I was familiar with most of the fruit, but there were a few new to me fruits as well. I just had to share this gorgeous tropical fruit with you and share some tips for putting together your own tropical fruit salad platter and other ways to enjoy it! I don't expect you will be able to find all of this unless you live in a tropical area, but I hope you enjoy the eye candy and get a little aloha fruit inspiration.

One of the reasons I prefer staying in a rental home rather than a hotel is being able to cook my own fresh, nourishing food. It's usually healthier and much less expensive. The first morning at the condo I put together this simple tropical fruit platter to go with breakfast. Nature is so beautiful. I couldn't resist taking pictures of this colorful plate. I would love to recreate this tropical fruit bowl for a fruit and granola parfait bar at a summer brunch.
Here's what we found at the Poipu farmers market and local grocery store in Princeville: Papaya. Papaya is wonderful for your health. They are high in vitamin C and contain enzymes that help with digestion and reducing bloating. There are different varieties, shapes, and colors. Most are grown in Hawaii, and unfortunately around 75% of those are GMO papayas. Some of the papayas I've seen in my local grocery store have little non-GMO stickers. GMO papayas are not legal in the EU, but are in the US and Canada. source Papaya are sweet and soft inside and taste best with a squeeze of lime.MangoLycheePassion Fruit Pineapple Coconut Soursop
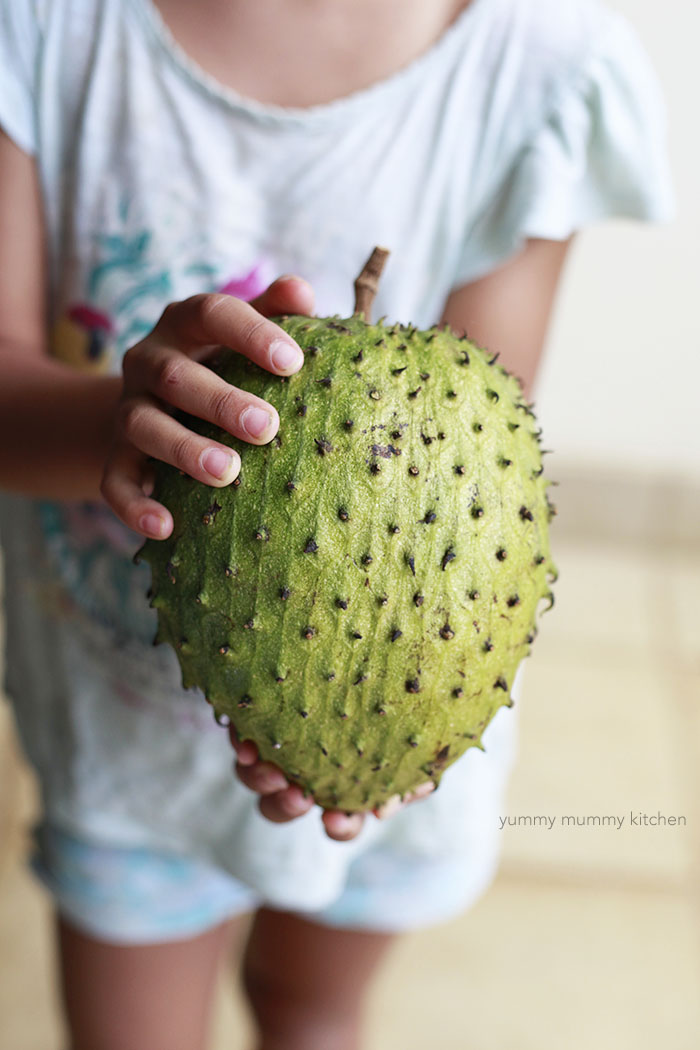 What's a soursop? This is a soursop! At first I thought it might be jackfruit, but it's not. The farmer told me that soursop has great health benefits including cancer fighting properties. The flesh is white and firm, and tastes sweet and mild, and a bit like passion fruit. Have you ever seen soursop? I am going to be on the lookout for it here!
  Let's talk dressing. Some people are big on "dressing" fruit and fruit salads. In the south, creamy poppy seed dressings are popular. Personally, I am team naked when it comes to fruit. Fruit is perfect on it's own, and should get to shine. Unless the fruit is not at it's sweetest, in which case a little drizzle of honey mixed with citrus juice is enough. At the suggestion of the kind farmer at the market on Kauai, we ate the papaya with a little passion fruit on top. Papaya is so creamy sweet that a little tartness is just what it needs. For very sweet fruits go with a squeeze of lime, for sour fruit, try a squeeze of orange. A little mint infused simple syrup can also be great on fruit that needs it, but these tropical fruits certainly don't.
 I love making a big beautiful platter of tropical fruit. It's wonderful alone, or on top of yogurt or chia pudding, sprinkled with tropical granola. Try a batch of my favorite Tropical Granola in my cookbook. It's amaaaaazing!
Tropical Fruit PlatterBy Yummy Mummy Kitchen
Published 06/30/2016
How to make a beautiful tropical fruit platter. The fruits listed below are suggestions, don't worry if you can't find them all. Ingredients1 papaya2 mangoes 1 small pineapple2 passion fruit, halved (the wrinklier the better!)5 lychee1 lime, cut into wedges fresh or toasted coconut meattropical granola for serving (optional) chia seed pudding or yogurt for serving (optional) InstructionsCut papaya in half lengthwise. Scoop out seeds with a spoon. Cut papaya halves again lengthwise so you have four pieces. Cut mango lengthwise around each side of the seed in the middle so you have two large pieces. Cut mango flesh to the skin without piercing skin, in 1/2" lines vertically, then horizontally to make cubes. Press the skin side of the mango forward to pop out. Cut peel and cut pineapple. Arrange fruit on a plate or platter. Spoon some passion fruit seeds over the papaya or squeeze some lime juice over.Serve fruit with granola, chia pudding, and/or yogurt. Yield: Serves 4-6
Prep Time: 10 mins. Total time: 10 mins.
Tags: breakfast, brunch, fruit, tropical, hawaii, chia pudding, granola
June 29, 2016
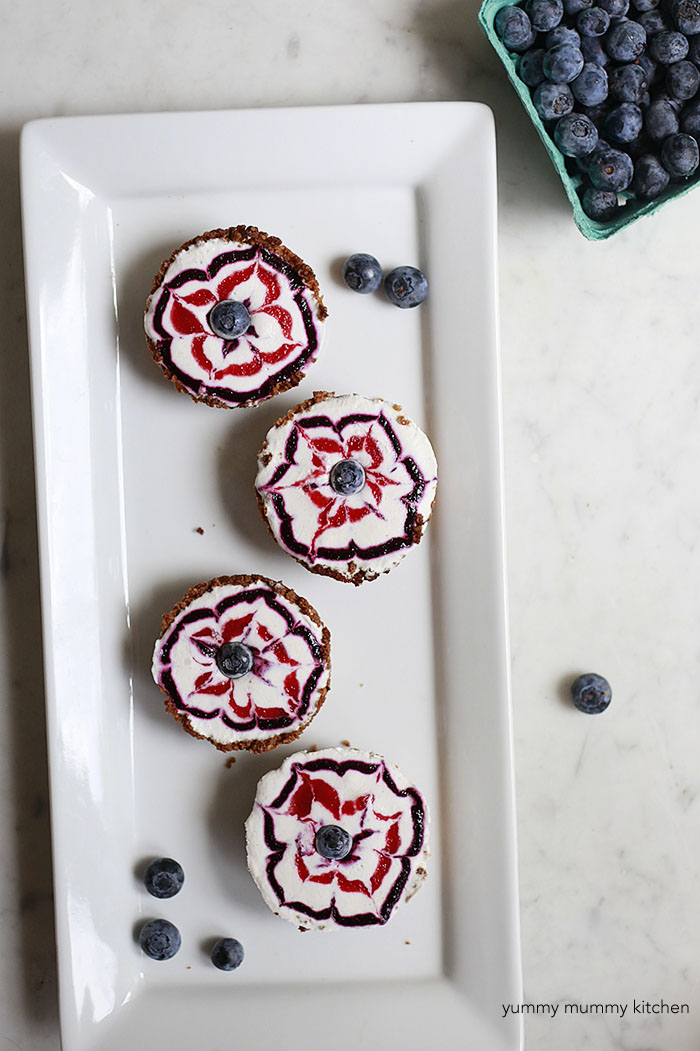
Mini Red, White, and Blue Ice Cream Pies
Adorable little mini ice cream pies all dressed up with red and blue berry sauces for 4th of July or Memorial Day.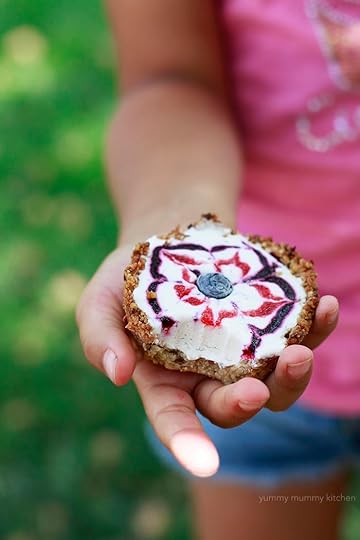 This Red, White, and Blue Ice Cream Pie with Granola Crust is always one of my most popular recipes around Memorial Day and 4th of July. One of my readers recently asked if this beautiful patriotic dessert could be made mini. I thought it was a great idea so I went ahead and tested the recipe for her and the rest of us! What I concluded was that making one, regular sized pie is the easiest route. However, minis are totally doable and my kids preferred them. In mini form, the pies can be hand held - no forks or plates necessary. The mini ice cream pies are the perfect size for kids. I absolutely love these red, white, and blue mini ice cream pies for 4th of July parties. They are naturally colored with berries and have a crunchy crust to hold the ice cream. It's so convenient that red strawberries and blue blueberries are in season just in time for red, white, and blue patriotic celebrations! Thank you, Mother Nature! No need for artificial colors. You can make these mini pies a day or two in advance so you can relax the day you need them, or just keep them in the freezer and grab one for dessert. These mini Red, White, and Blue ice cream pies are perfect if you have any gluten-free or vegan friends in your group. Just use gf granola for the crust and/or non-dairy ice cream. I used Luna and Larry's Organic Coconut Bliss, which is vegan, gluten free, and made with real food ingredients. Although my all-time favorite ice cream to use here is McConnell's coconut, you can use your favorite vanilla ice cream or frozen yogurt.

When I originally created this recipe a few years ago for the one pie, I used a granola crust. I love how crunchy and hearty it is. You can toss in some hemp or flax seeds to add more nutrition. Maybe it was just a chocolate craving, but this time, I wished I had made an Oreo crust. To me an Oreo crust would be more of a special occasion dessert, while the granola crust is more of an everyday rustic crust. An Oreo crust would be a little more decadent. You can be creative and choose the crust you like. If you want to try the Oreo crust, follow the crust recipe here. For the berry topping you have a couple of options as well. to make the pretty fireworks type shapes I did, use your berry sauces to make rings, like a bullseye, alternating colors. Then gently drag the tip of a toothpick from the center dot to the crust. Leave about 1/4" and then drag the toothpick back the other direction, from crust to center.
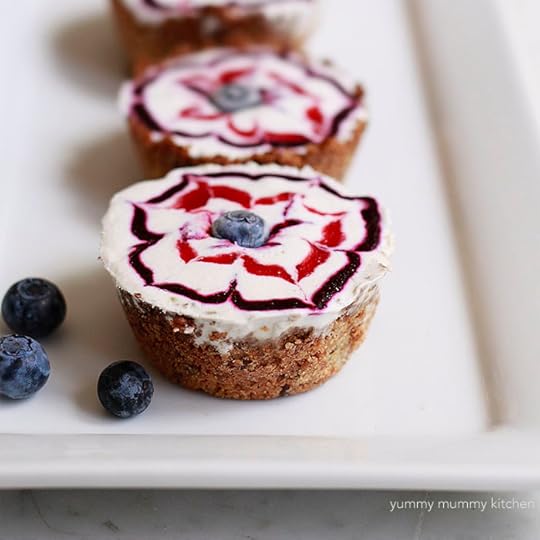
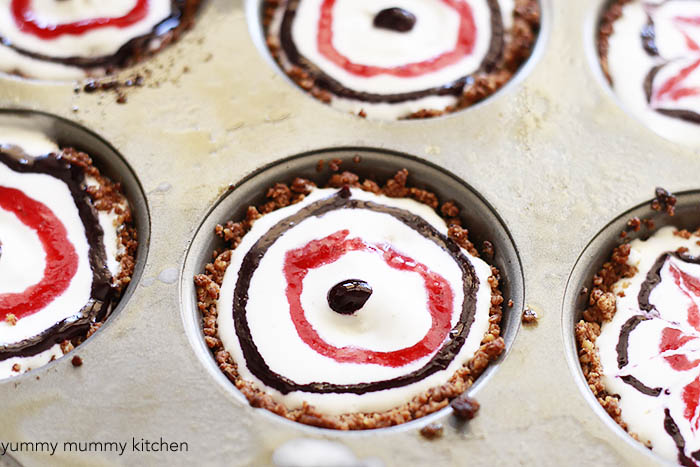
If you're not confidant in this technique, you could also do a criss cross pattern or random dots and swirls.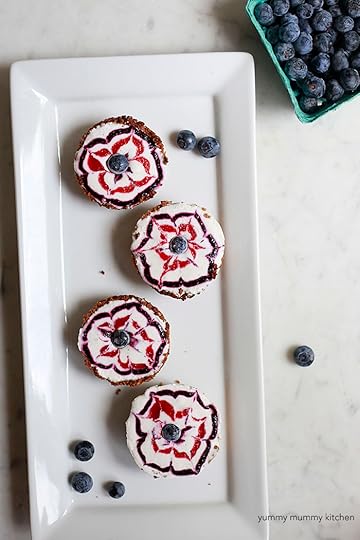 My fireworks aren't perfect, and they don't have to be, so don't stress too much. Any swirls will look beautiful.
Ta da! Party ready individual ice cream pies. Naturally beautiful, festive, and delicious. These are always a crowd pleaser and I hope you enjoy them!
Mini Red, White, and Blue Ice Cream PiesPrinter Friendly Recipe
By Yummy Mummy Kitchen
Published 06/29/2016
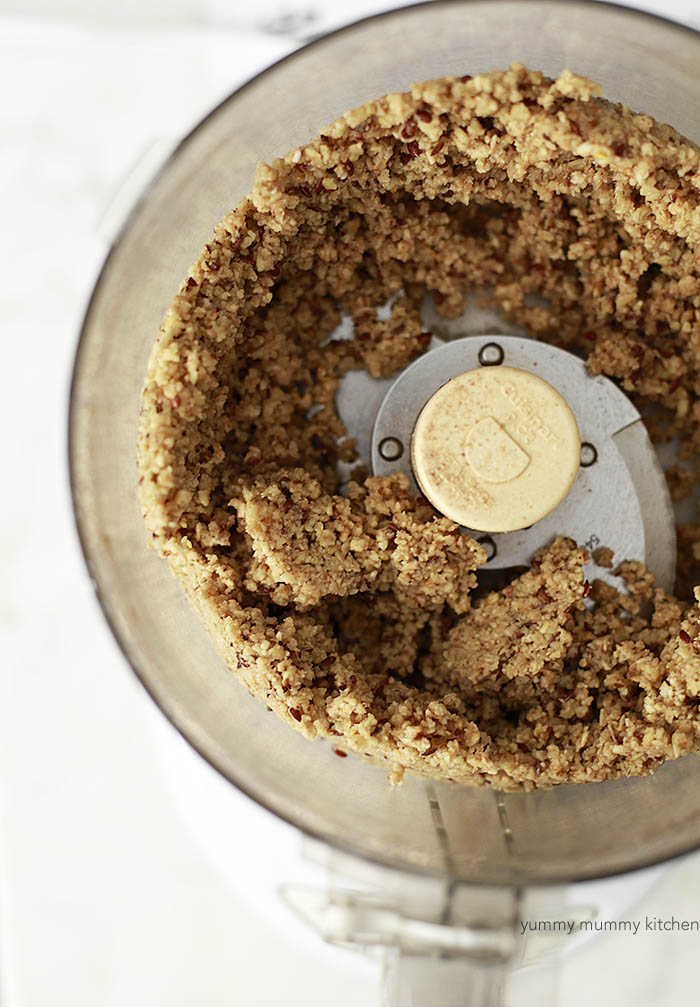
Adorable little mini ice cream pies all dressed up with red and blue berry sauces for 4th of July or Memorial Day. Ingredients2 cups natural homemade or store bought granola (gf and/or vegan if needed) 1/2 cup walnuts 4 tablespoons melted coconut oil or Earth Balance1 tablespoon maple or coconut syrup6 oz. strawberries, roughly chopped6 oz. blueberries2 tablespoons maple syrup2 tablespoons waterjuice of 1 lemon1 teaspoon organic cornstarch 1 pint favorite ice cream or frozen yogurt, softened (vanilla or coconut) InstructionsPreheat the oven to 350 degrees F. Coat a muffin tin with cooking spray. In a food processor, blend the granola, walnuts, coconut oil, and syrup until crumbly but holds together when pressed between fingers. You can add a little water, a teaspoon at a time if it's too dry. Divide the crust mixture evenly between 11 muffin tins, about 1 heaping tablespoon in each cup. Press the crust firmly into the bottom and up the sides of the cups. The crust won't come all the way up the cups. Bake for 7 minutes. Cool completely in the tin. Meanwhile, make the sauces. Place strawberries in one small saucepan and the blueberries in another small saucepan over medium heat. Add 1 tablespoon syrup, 1 tablespoon water, 1/2 lemon juice, and 1/2 teaspoon cornstarch to each pan and whisk to combine. Simmer until berries have completely broken down, about 15 minutes, whisking occasionally. Let sauces cool. Puree sauces individually in a blender, or press through a fine mesh sieve to ensure the sauces are very smooth. Transfer each sauce to a zip top sandwich bag and snip a tiny corner off for piping. With granola crusts still in the muffin tin, spoon softened ice cream into the cups. Smooth the top of ice cream. Pipe designs onto the top of the ice cream. You can make polka dots, swirls, criss-cross patterns, or drag a toothpick through circles to create "fireworks" as seen in the images. Have fun! Place the muffin tin in the freezer until ice cream is completely frozen. To remove pies, heat a sharp knife under hot water. Run the knife around the edge of each muffin tin to release. Yield: Makes 11 cupcake sized pies
Prep Time: 10 mins. Cook time: 35 mins.
Total time: 45 mins.
Tags: forth of july, memorial day, patriotic, desserts, pie, ice cream, summer
*Vegan Option* Use a coconut based ice cream
*Gluten Free Option* Make sure to use GF granola


This Red, White, and Blue Ice Cream Pie with Granola Crust is always one of my most popular recipes around Memorial Day and 4th of July. One of my readers recently asked if this beautiful patriotic dessert could be made mini. I thought it was a great idea so I went ahead and tested the recipe for her and the rest of us! What I concluded was that making one, regular sized pie is the easiest route. However, minis are totally doable and my kids preferred them. In mini form, the pies can be hand held - no forks or plates necessary. The mini ice cream pies are the perfect size for kids. I absolutely love these red, white, and blue mini ice cream pies for 4th of July parties. They are naturally colored with berries and have a crunchy crust to hold the ice cream. It's so convenient that red strawberries and blue blueberries are in season just in time for red, white, and blue patriotic celebrations! Thank you, Mother Nature! No need for artificial colors. You can make these mini pies a day or two in advance so you can relax the day you need them, or just keep them in the freezer and grab one for dessert. These mini Red, White, and Blue ice cream pies are perfect if you have any gluten-free or vegan friends in your group. Just use gf granola for the crust and/or non-dairy ice cream. I used Luna and Larry's Organic Coconut Bliss, which is vegan, gluten free, and made with real food ingredients. Although my all-time favorite ice cream to use here is McConnell's coconut, you can use your favorite vanilla ice cream or frozen yogurt.
When I originally created this recipe a few years ago for the one pie, I used a granola crust. I love how crunchy and hearty it is. You can toss in some hemp or flax seeds to add more nutrition. Maybe it was just a chocolate craving, but this time, I wished I had made an Oreo crust. To me an Oreo crust would be more of a special occasion dessert, while the granola crust is more of an everyday rustic crust. An Oreo crust would be a little more decadent. You can be creative and choose the crust you like. If you want to try the Oreo crust, follow the crust recipe here.
 For the berry topping you have a couple of options as well. to make the pretty fireworks type shapes I did, use your berry sauces to make rings, like a bullseye, alternating colors. Then gently drag the tip of a toothpick from the center dot to the crust. Leave about 1/4" and then drag the toothpick back the other direction, from crust to center.
 If you're not confidant in this technique, you could also do a criss cross pattern or random dots and swirls.
 My fireworks aren't perfect, and they don't have to be, so don't stress too much. Any swirls will look beautiful.

Ta da! Party ready individual ice cream pies. Naturally beautiful, festive, and delicious. These are always a crowd pleaser and I hope you enjoy them!
Mini Red, White, and Blue Ice Cream PiesPrinter Friendly Recipe
By Yummy Mummy Kitchen
Published 06/29/2016
Adorable little mini ice cream pies all dressed up with red and blue berry sauces for 4th of July or Memorial Day. Ingredients2 cups natural homemade or store bought granola (gf and/or vegan if needed) 1/2 cup walnuts 4 tablespoons melted coconut oil or Earth Balance1 tablespoon maple or coconut syrup6 oz. strawberries, roughly chopped6 oz. blueberries2 tablespoons maple syrup2 tablespoons waterjuice of 1 lemon1 teaspoon organic cornstarch 1 pint favorite ice cream or frozen yogurt, softened (vanilla or coconut) InstructionsPreheat the oven to 350 degrees F. Coat a muffin tin with cooking spray. In a food processor, blend the granola, walnuts, coconut oil, and syrup until crumbly but holds together when pressed between fingers. You can add a little water, a teaspoon at a time if it's too dry. Divide the crust mixture evenly between 11 muffin tins, about 1 heaping tablespoon in each cup. Press the crust firmly into the bottom and up the sides of the cups. The crust won't come all the way up the cups. Bake for 7 minutes. Cool completely in the tin. Meanwhile, make the sauces. Place strawberries in one small saucepan and the blueberries in another small saucepan over medium heat. Add 1 tablespoon syrup, 1 tablespoon water, 1/2 lemon juice, and 1/2 teaspoon cornstarch to each pan and whisk to combine. Simmer until berries have completely broken down, about 15 minutes, whisking occasionally. Let sauces cool. Puree sauces individually in a blender, or press through a fine mesh sieve to ensure the sauces are very smooth. Transfer each sauce to a zip top sandwich bag and snip a tiny corner off for piping. With granola crusts still in the muffin tin, spoon softened ice cream into the cups. Smooth the top of ice cream. Pipe designs onto the top of the ice cream. You can make polka dots, swirls, criss-cross patterns, or drag a toothpick through circles to create "fireworks" as seen in the images. Have fun! Place the muffin tin in the freezer until ice cream is completely frozen. To remove pies, heat a sharp knife under hot water. Run the knife around the edge of each muffin tin to release. Yield: Makes 11 cupcake sized pies
Prep Time: 10 mins. Cook time: 35 mins.
Total time: 45 mins.
Tags: forth of july, memorial day, patriotic, desserts, pie, ice cream, summer
*Vegan Option* Use a coconut based ice cream
*Gluten Free Option* Make sure to use GF granola
June 20, 2016
Pina Colada Red, White, and Blue Popsicles
This post contains an affiliate link, which means I make a small commission on purchases.
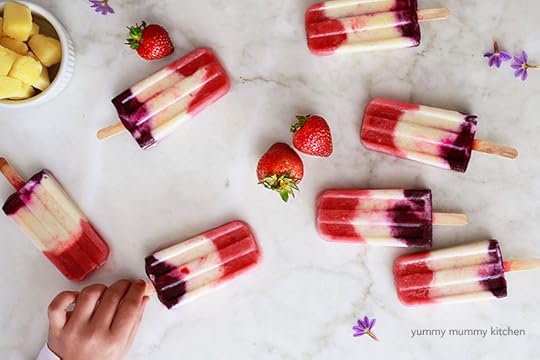 Aloha! If you follow me on Instagram, you know we have just finished our stay at the Grand Hyatt in Kauai and are in full relaxation mode. So I'm sending you some tropical red, white, and blue popsicles to get you in the aloha spirit too.
For us, summer means sun soaked pool days. And if we are really lucky, we may even splurge and indulge in one of our favorite drinks - pina coladas. Humming "If you like pina coladas... getting caught in the rain... do do do do..." is a small price to pay for such a creamy, refreshing, tropical treat. That song always gets stuck in my head. Since they are usually made with sugar syrup and very little nutrition, it's definitely a once or twice a summer type of treat for us. My girls call them "piggy ladas" and love them as much as I do (virgin of course!). I often make pina colada/piggy lada smoothies at home in the summer. They are easy to make without any added sugar or fillers.
With the 4th of July coming up, we turned our favorite pina colada smoothie into homemade popsicles naturally tinted red, white, and blue. Berries provide the best food coloring straight from nature - no chemicals. Though we used our favorite popsicle mold, you could easily make mini popsicles to feed a crowd at any summer gathering. Mini paper cups or even ice cube trays with halved paper straws for sticks work well.
 Making these healthy popsicles is as simple as making a smoothie in the blender. Using frozen fruit means each layer is already semi-frozen, so the layers won't blend together too much and freezing individual layers is not necessary. The layers here are: pineapple-strawberry, pineapple-coconut, and pineapple blueberry. I love the tropical flair! If you can't get to Hawaii for a real pina colada, these beautiful ice pops are the next best thing. And much healthier.
 Aren't these beautiful?!
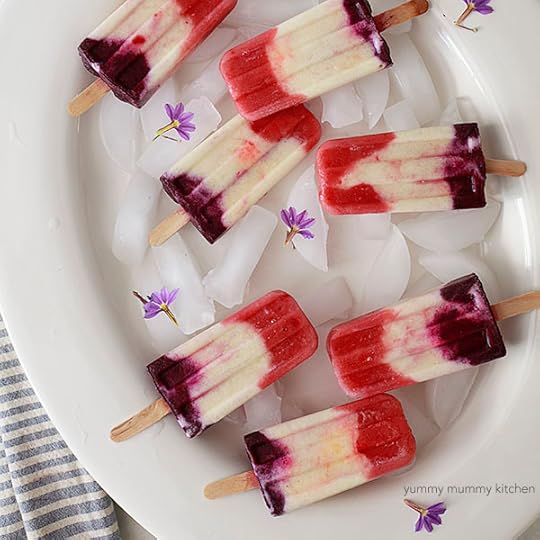
Aloha!
You may need:
Ice Pop Mold and Sticks (affiliate)
Red, White, and Blue Berry Colada PopsiclesBy Yummy Mummy Kitchen
PRINTER FRIENDLY RECIPE
Published 06/22/2016
Tropical red, white, and blue ice pops made with berries and coconut milk. Ingredients1 1/4 cups pineapple juice, divided1 cup frozen strawberries1 cup canned coconut milk 1 cup frozen pineapple1 banana1 cup frozen blueberriesInstructionsIn a blender, blend 1/2 cup pineapple juice and frozen strawberries. You can puree completely or leave chunky. Fill popsicle molds about 1/3 the way up with strawberry pineapple mixture. Rinse the blender. Blend coconut milk, frozen pineapple, banana, and 1/4 cup pineapple juice. Fill the popsicle molds another 1/3 way up with the pina colada mixture. Rinse the blender. Blend 1/2 cup pineapple juice with frozen blueberries. Pour over the pineapple coconut mixture to fill molds to the top. Insert popsicle sticks and freeze completely. To remove ice pops from the molds, run warm water over the bottom of molds.


 Aloha! If you follow me on Instagram, you know we have just finished our stay at the Grand Hyatt in Kauai and are in full relaxation mode. So I'm sending you some tropical red, white, and blue popsicles to get you in the aloha spirit too.
 For us, summer means sun soaked pool days. And if we are really lucky, we may even splurge and indulge in one of our favorite drinks - pina coladas. Humming "If you like pina coladas... getting caught in the rain... do do do do..." is a small price to pay for such a creamy, refreshing, tropical treat. That song always gets stuck in my head. Since they are usually made with sugar syrup and very little nutrition, it's definitely a once or twice a summer type of treat for us. My girls call them "piggy ladas" and love them as much as I do (virgin of course!). I often make pina colada/piggy lada smoothies at home in the summer. They are easy to make without any added sugar or fillers.
With the 4th of July coming up, we turned our favorite pina colada smoothie into homemade popsicles naturally tinted red, white, and blue. Berries provide the best food coloring straight from nature - no chemicals. Though we used our favorite popsicle mold, you could easily make mini popsicles to feed a crowd at any summer gathering. Mini paper cups or even ice cube trays with halved paper straws for sticks work well.
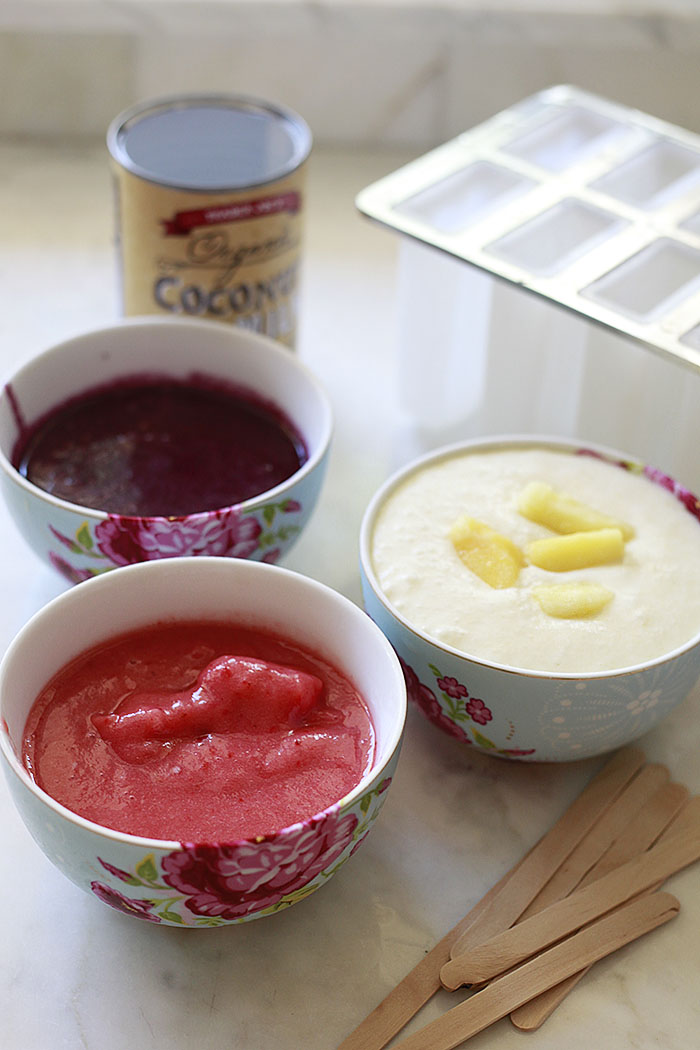 Making these healthy popsicles is as simple as making a smoothie in the blender. Using frozen fruit means each layer is already semi-frozen, so the layers won't blend together too much and freezing individual layers is not necessary. The layers here are: pineapple-strawberry, pineapple-coconut, and pineapple blueberry. I love the tropical flair! If you can't get to Hawaii for a real pina colada, these beautiful ice pops are the next best thing. And much healthier.
 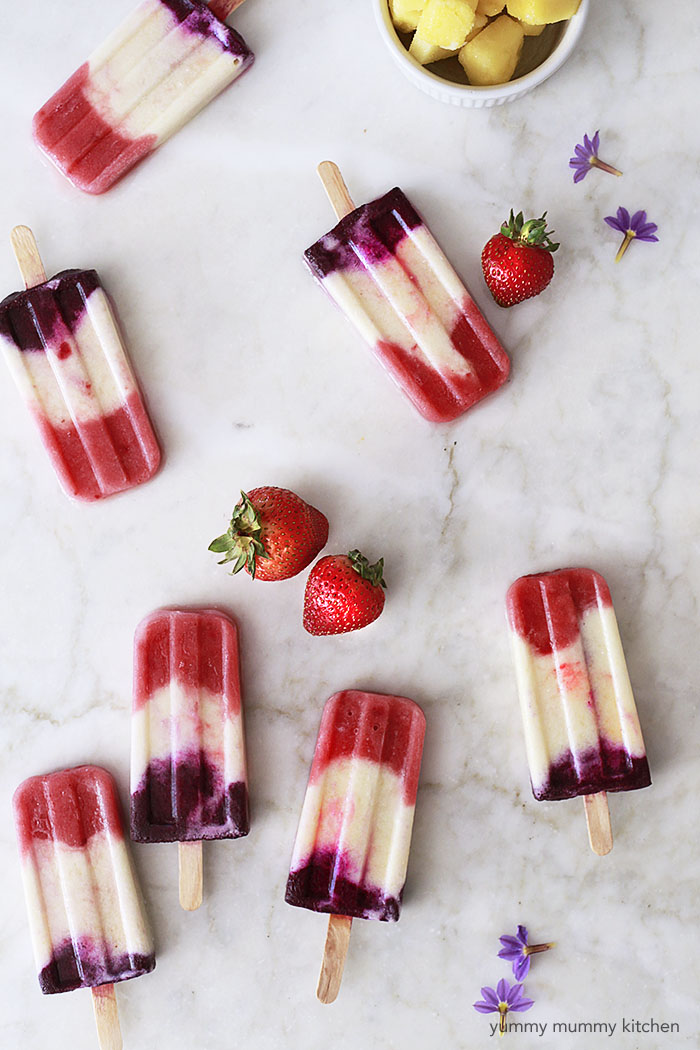 Aren't these beautiful?!

Aloha!
You may need:
Ice Pop Mold and Sticks (affiliate)
Red, White, and Blue Berry Colada PopsiclesBy Yummy Mummy Kitchen
PRINTER FRIENDLY RECIPE
Published 06/22/2016
Tropical red, white, and blue ice pops made with berries and coconut milk. Ingredients1 1/4 cups pineapple juice, divided1 cup frozen strawberries1 cup canned coconut milk 1 cup frozen pineapple1 banana1 cup frozen blueberriesInstructionsIn a blender, blend 1/2 cup pineapple juice and frozen strawberries. You can puree completely or leave chunky. Fill popsicle molds about 1/3 the way up with strawberry pineapple mixture. Rinse the blender. Blend coconut milk, frozen pineapple, banana, and 1/4 cup pineapple juice. Fill the popsicle molds another 1/3 way up with the pina colada mixture. Rinse the blender. Blend 1/2 cup pineapple juice with frozen blueberries. Pour over the pineapple coconut mixture to fill molds to the top. Insert popsicle sticks and freeze completely. To remove ice pops from the molds, run warm water over the bottom of molds.
June 13, 2016
Greek Inspired Buddha Bowls
Beautiful bowls of Greek inspired whole food ingredients come together to make Buddha bowl salads hearty enough for dinner.
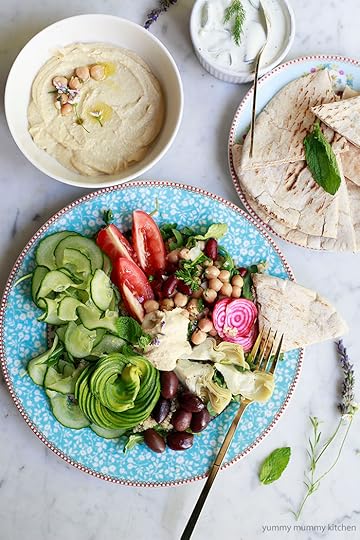 Summertiiiiiiiiime! It's official. The kids are out of school for the summer. We get to sleep in a little longer and enjoy a little less rush. After a long afternoon of playing in the sun, I often crave Buddha bowls. Well, when I'm not craving a veggie burger and fries. A Buddha bowl is a beautiful, nourishing meal that's easy to make with whatever veggies and grains you have at home. If you missed my 30 Best Buddha Bowls post, be sure to check that out for more inspiration. Not only are these big salad bowls beautiful and flavorful, they make me feel light and nourished. One of my favorite versions is this Greek inspired salad bowl. There are no rules here, so take what you like, and leave what you don't. This Greek bowl can be made vegan, vegetarian, or you can add whatever protein you like on top. I know my kids would love a grilled shrimp kabob on top of this.
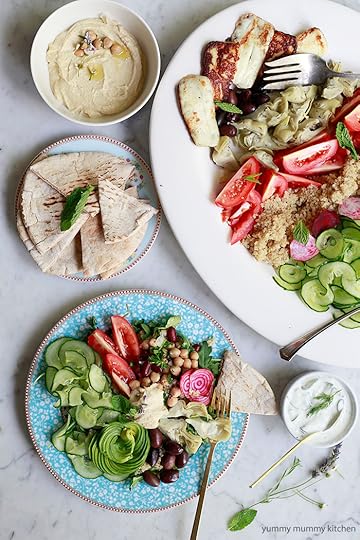 I had some halloumi cheese in the refrigerator that goes perfectly with Greek dishes like this one. Feta would also be fantastic. Have you tried halloumi? It's a firm, salty, white cheese traditionally made with goat and sheep milk. It's usually grilled or pan fried, creating a golden crust around the soft warm cheese. It's incredibly tasty in sandwiches, wraps, and salads. If you don't do dairy, and I usually don't, you're still getting plenty of protein with beans, hummus, quinoa, and veggies in this hearty salad.

I love eating this flavorful bowl with pita bread and extra hummus. Sometimes I even stuff the fillings into half a pita pocket and eat it as a sandwich instead of a salad.
While the ingredients listed below are a guideline, feel free to mix it up with the ingredients you have on hand and love. That's the whole point of Buddha bowls, anyway! I would love this one with watermelon or eggplant in the summer and roasted sweet potatoes in the winter. Greek salad traditionally has cucumber, tomato, red onion, and kalamata olives, so those ingredients were a must for me. My kids love cucumber ribbons, so we passed our cucumber through the spiralizer. I use and recommend this spiralizer. (Amazon affiliate link)
Opa!
Greek Buddha Bowls By Yummy Mummy Kitchen
Printer Friendly Recipe
Published 06/13/2016
Hearty and flavorful Greek inspired Buddha bowls. Ingredients3 oz. favorite salad greens (I used arugula) extra virgin olive oil sea salt and freshly cracked pepper2 cups cooked quinoa 1 English hothouse cucumber, sliced or spiralized1 cup pitted kalamata olives, drained2 medium tomatoes, cut into wedges, or 1 cup cherry tomatoes (whatever kind looks good!) 1/2 red onion, thinly sliced 2 avocados, pitted, peeled and sliced1 cup marinated artichoke hearts, drained1 (15 oz.) can garbanzo beans/chickpeas, drained and rinsed2 tablespoons fresh chopped parsley1 small shallot, diced 1 clove garlic1 tablespoon lemon juice fresh mint leavesHalloumi cheesepita bread for servinghummus tzatziki or favorite dressing (optional) InstructionsFill bowls or plates with greens. Dress lightly with a drizzle of olive oil and a pinch of sea salt and pepper. Top with quinoa, cucumber, olives, tomatoes, onion, avocado, artichoke hearts, bean salad (below), and mint leaves. To make the bean salad, in a small-medium bowl, toss together the beans, 1 tablespoon olive oil, parsley, shallot, garlic, and lemon juice. If using halloumi, grill or pan fry in 1 tablespoon of olive oil until browned on both sides, about 3 minutes total. Serve halloumi warm on your salad bowl. Serve the Greek bowls with hummus and pita bread. Use the hummus on top of the salads or as a dip for the bread. Dress with a drizzle of your favorite dressing, if desired, salt and pepper, or a dollop of more hummus or tzatziki. Yield: Serves 4-6
Prep Time: 20 mins. Cook time: 5 mins.
Total time: 25 mins.
Tags: Buddha bowls, salad, Greek, vegetarian
Gluten Free Option: Be sure to use GF pita bread and dressing.
Vegan Option: Omit any cheese and tzatziki.


 Summertiiiiiiiiime! It's official. The kids are out of school for the summer. We get to sleep in a little longer and enjoy a little less rush. After a long afternoon of playing in the sun, I often crave Buddha bowls. Well, when I'm not craving a veggie burger and fries. A Buddha bowl is a beautiful, nourishing meal that's easy to make with whatever veggies and grains you have at home. If you missed my 30 Best Buddha Bowls post, be sure to check that out for more inspiration. Not only are these big salad bowls beautiful and flavorful, they make me feel light and nourished. One of my favorite versions is this Greek inspired salad bowl. There are no rules here, so take what you like, and leave what you don't. This Greek bowl can be made vegan, vegetarian, or you can add whatever protein you like on top. I know my kids would love a grilled shrimp kabob on top of this.
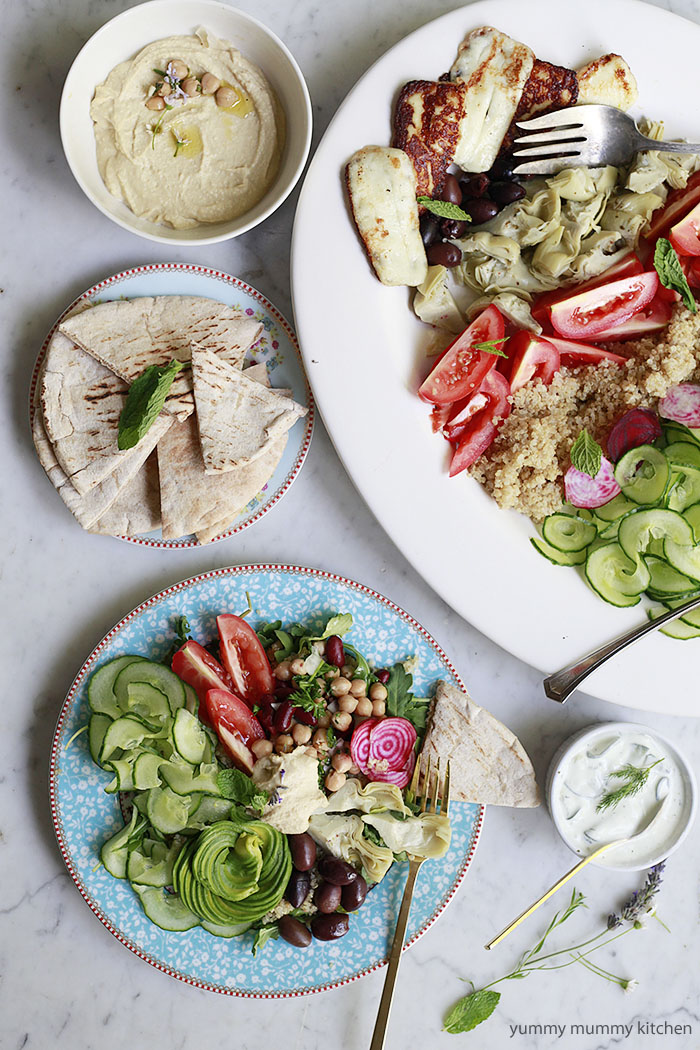 I had some halloumi cheese in the refrigerator that goes perfectly with Greek dishes like this one. Feta would also be fantastic. Have you tried halloumi? It's a firm, salty, white cheese traditionally made with goat and sheep milk. It's usually grilled or pan fried, creating a golden crust around the soft warm cheese. It's incredibly tasty in sandwiches, wraps, and salads. If you don't do dairy, and I usually don't, you're still getting plenty of protein with beans, hummus, quinoa, and veggies in this hearty salad.
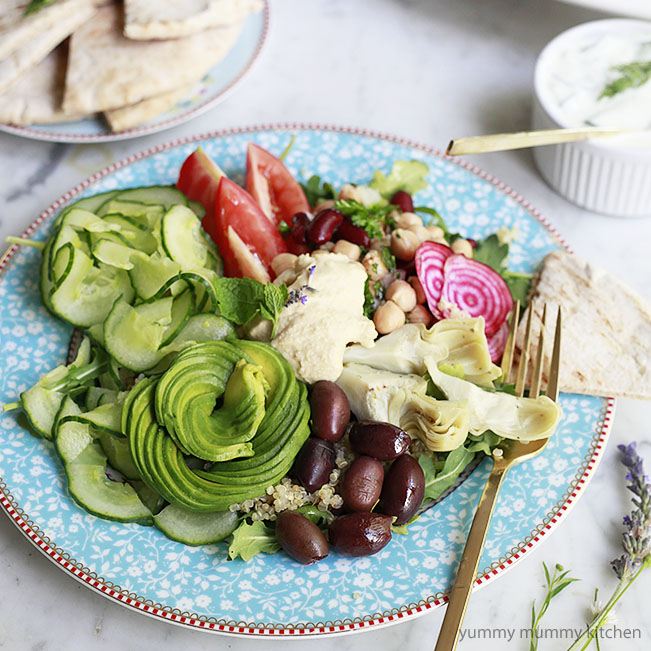
I love eating this flavorful bowl with pita bread and extra hummus. Sometimes I even stuff the fillings into half a pita pocket and eat it as a sandwich instead of a salad.
While the ingredients listed below are a guideline, feel free to mix it up with the ingredients you have on hand and love. That's the whole point of Buddha bowls, anyway! I would love this one with watermelon or eggplant in the summer and roasted sweet potatoes in the winter. Greek salad traditionally has cucumber, tomato, red onion, and kalamata olives, so those ingredients were a must for me. My kids love cucumber ribbons, so we passed our cucumber through the spiralizer. I use and recommend this spiralizer. (Amazon affiliate link)
Opa!
Greek Buddha Bowls By Yummy Mummy Kitchen
Printer Friendly Recipe
Published 06/13/2016
Hearty and flavorful Greek inspired Buddha bowls. Ingredients3 oz. favorite salad greens (I used arugula) extra virgin olive oil sea salt and freshly cracked pepper2 cups cooked quinoa 1 English hothouse cucumber, sliced or spiralized1 cup pitted kalamata olives, drained2 medium tomatoes, cut into wedges, or 1 cup cherry tomatoes (whatever kind looks good!) 1/2 red onion, thinly sliced 2 avocados, pitted, peeled and sliced1 cup marinated artichoke hearts, drained1 (15 oz.) can garbanzo beans/chickpeas, drained and rinsed2 tablespoons fresh chopped parsley1 small shallot, diced 1 clove garlic1 tablespoon lemon juice fresh mint leavesHalloumi cheesepita bread for servinghummus tzatziki or favorite dressing (optional) InstructionsFill bowls or plates with greens. Dress lightly with a drizzle of olive oil and a pinch of sea salt and pepper. Top with quinoa, cucumber, olives, tomatoes, onion, avocado, artichoke hearts, bean salad (below), and mint leaves. To make the bean salad, in a small-medium bowl, toss together the beans, 1 tablespoon olive oil, parsley, shallot, garlic, and lemon juice. If using halloumi, grill or pan fry in 1 tablespoon of olive oil until browned on both sides, about 3 minutes total. Serve halloumi warm on your salad bowl. Serve the Greek bowls with hummus and pita bread. Use the hummus on top of the salads or as a dip for the bread. Dress with a drizzle of your favorite dressing, if desired, salt and pepper, or a dollop of more hummus or tzatziki. Yield: Serves 4-6
Prep Time: 20 mins. Cook time: 5 mins.
Total time: 25 mins.
Tags: Buddha bowls, salad, Greek, vegetarian
Gluten Free Option: Be sure to use GF pita bread and dressing.
Vegan Option: Omit any cheese and tzatziki.
June 11, 2016
Vegan Almond Flour Brownies
Decadent almond flour brownies with an irresistible peanut butter glaze. These grain-free, gluten-free brownies are easy to make paleo and vegan.
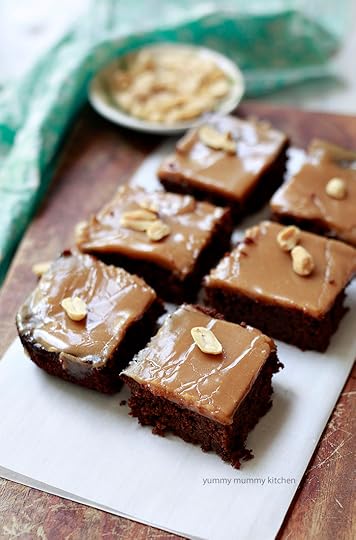 Brownies. Rich, fudgy, and decadent. I have always loved brownies... and have always gotten a stomach ache after eating them. It's no surprise really. Brownies are traditionally made with white flour, chocolate, and heaps of sugar. Many boxes of brownie mix are even worse, with ingredients like GMO corn syrup and hydrogenated soybean oil. But sometimes a gal just needs some brownies, am I right? Especially if they are these almond flour vegan brownies that taste like peanut butter cups. These easy homemade brownies are more nutritious and just as satisfying. In the past I've made Raw Brownies, but this time I wanted the real deal baked variety. I've also tried the very Pinterest popular black bean brownies, but for me, bean based brownies just fall short. These brownies are gluten-free, grain-free, all natural, and utterly delicious. In fact, these may just be too delicious, because I can't help but grab a bite every time I open the refrigerator. Oops.
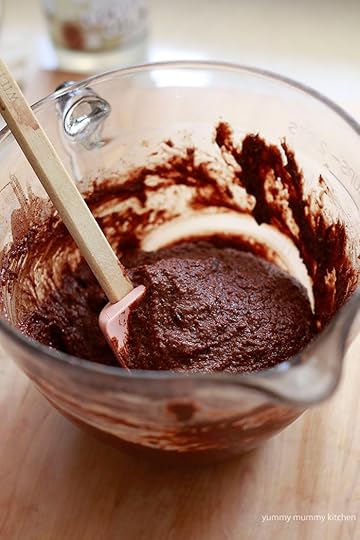 My Paleo Almond Flour Chocolate Muffins have been so popular here on the blog, that I wanted to make you some almond flour brownies. And my vegan treats have been equally popular. I really enjoy making treats that don't involve animals in only way - just plants. These vegan almond flour brownies are easy to make. So easy that I was left wondering why I ever used boxed brownie mixes. One bowl and real food ingredients always make me happy. Almond flour adds healthy fat, protein, and fiber. Treats can be nourishing too, so there's no need for empty calories. Yes these brownies are still sweet thanks to maple syrup, but at least when I give one to my kids I know they are also getting some important nutrients.
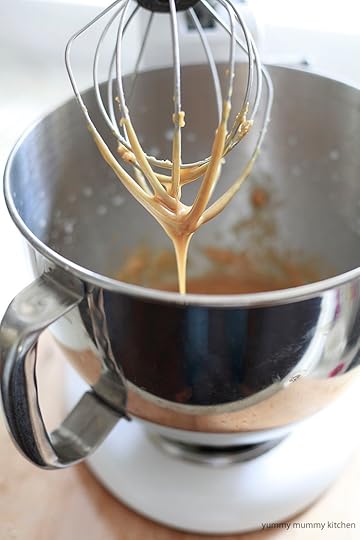 And because we are being a bit decadent with this one, a peanut butter glaze goes on top. Who can resist peanut butter and chocolate? These brownies have that irresistible peanut butter cup flavor. I don't eat candy. Unless it's a peanut butter cup.
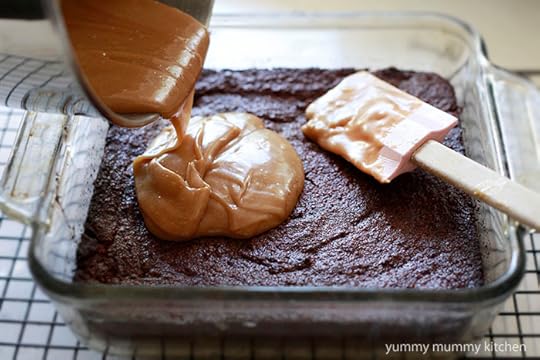
If you'd like to skip the glaze, these brownies are still incredible. In that case, however, I would suggest adding some chocolate chips and enjoying the brownies warm. If you're on a paleo diet, use almond butter instead of peanut butter.
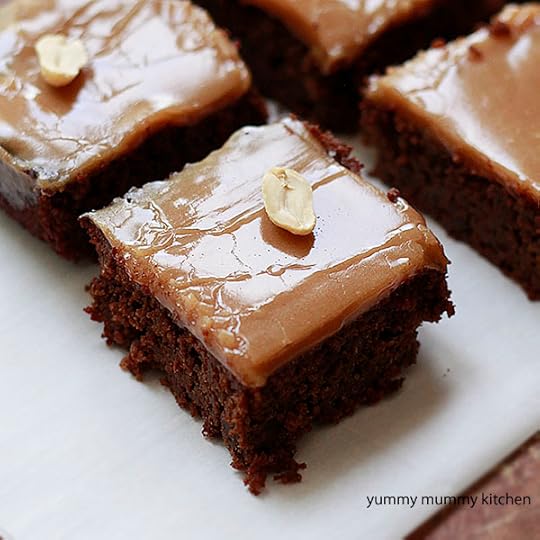 A little pinch of sea or Himalayan salt is the perfect finishing touch that ties these peanut butter and chocolate brownies together. Vegan Almond Flour Brownies By Yummy Mummy Kitchen
Printer Friendly Recipe
Published 06/11/2016
Rich and fudgy almond flour brownies with peanut butter glaze. Ingredients¼ cup melted coconut oil 2/3 cup maple syrup at room temperature 2 flax eggs (or large free range eggs or favorite vegan replacement such as Follow Your Heart)1 teaspoon vanilla extract1/2 cup unsweetened cacao or cocoa powder1/4 teaspoon sea salt, plus more to taste1 cup blanched almond flour1 teaspoon baking powder1/2 cup creamy peanut butter1 cup organic powdered sugar (*or 2 1/2 tablespoons maple syrup)5 tablespoons almond or coconut milk InstructionsPreheat the oven to 350 degrees F. Line an 8-inch baking dish with parchment paper or coat with cooking spray. In a medium bowl, whisk together the coconut oil, syrup, "eggs", and vanilla. In another bowl whisk together the cacao, salt, almond flour, and baking powder. Using a rubber spatula, mix the dry ingredients into the wet until combined. Pour into the prepared baking dish and smooth the top. Bake for 30 minutes. To make the peanut butter glaze, with an electric mixer, beat the peanut butter, sugar, and milk together. *Note: the powdered sugar will result in a shiny glaze like pictured. If you would like a healthier option, try maple syrup instead of the sugar and thin with milk to desired consistency. Spread peanut butter glaze over brownies after they have cooled slightly or completely. Sprinkle with a tiny pinch of sea salt. You can always add more, but it's hard to take salt off once it's on! I store these in the refrigerator so the glaze stays firm. Yield: makes one 8-inch pan
Prep Time: 10 mins. Total time: 40 mins.
Tags: brownies, paleo, vegan, dessert, chocolate, peanut butter
*Paleo Option: For the glaze/icing, use almond butter instead of peanut butter. Use the maple syrup method instead of powdered sugar.


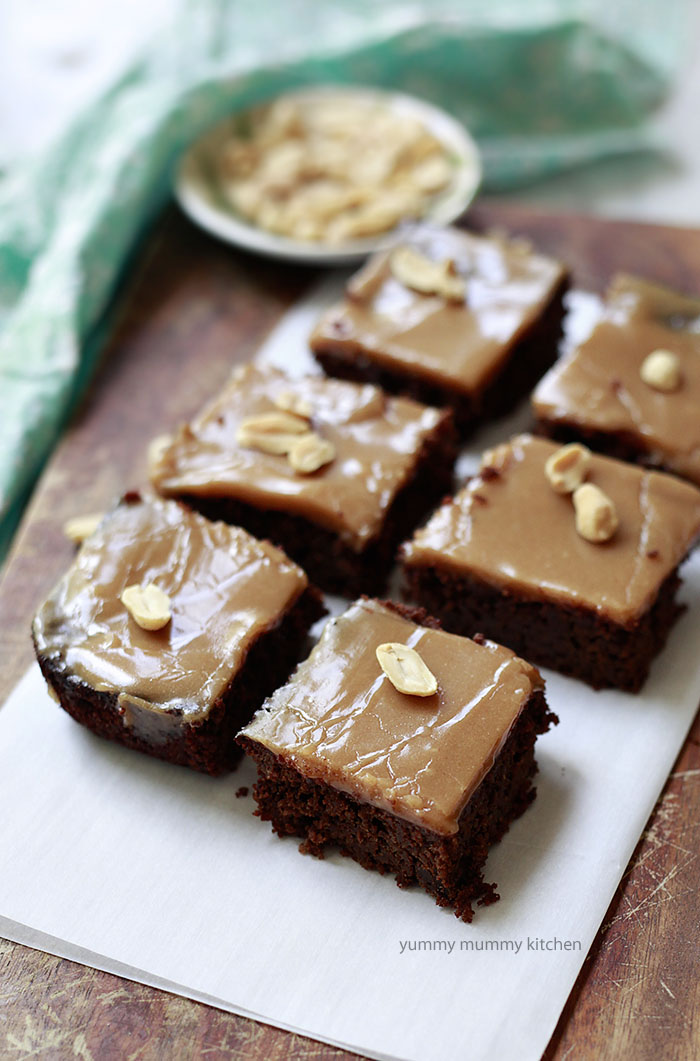 Brownies. Rich, fudgy, and decadent. I have always loved brownies... and have always gotten a stomach ache after eating them. It's no surprise really. Brownies are traditionally made with white flour, chocolate, and heaps of sugar. Many boxes of brownie mix are even worse, with ingredients like GMO corn syrup and hydrogenated soybean oil. But sometimes a gal just needs some brownies, am I right? Especially if they are these almond flour vegan brownies that taste like peanut butter cups. These easy homemade brownies are more nutritious and just as satisfying. In the past I've made Raw Brownies, but this time I wanted the real deal baked variety. I've also tried the very Pinterest popular black bean brownies, but for me, bean based brownies just fall short. These brownies are gluten-free, grain-free, all natural, and utterly delicious. In fact, these may just be too delicious, because I can't help but grab a bite every time I open the refrigerator. Oops.
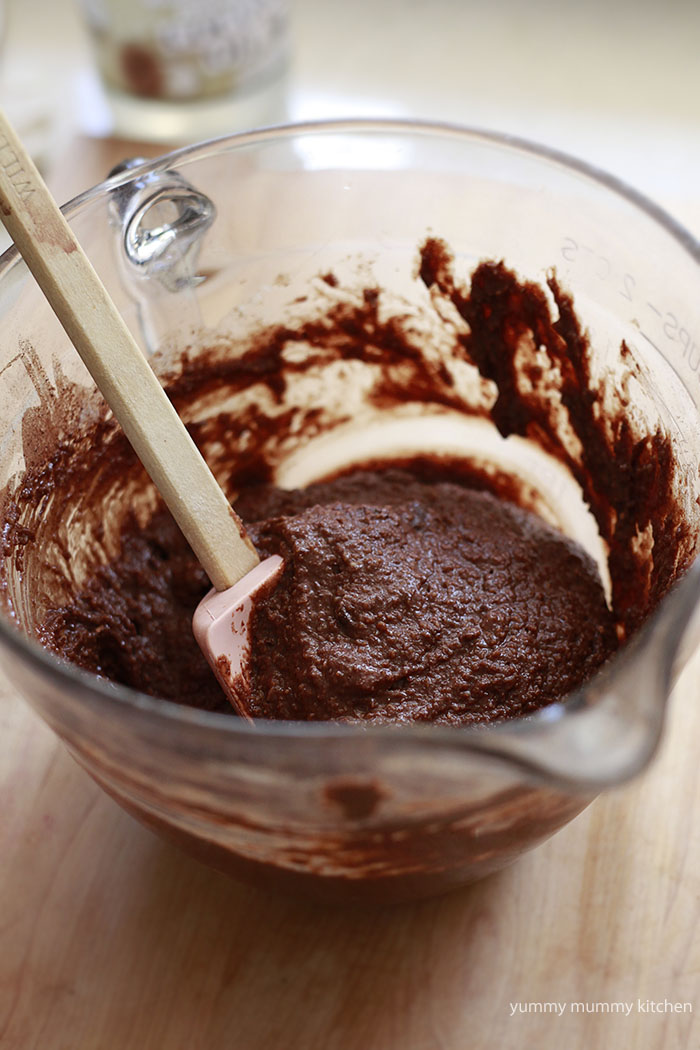 My Paleo Almond Flour Chocolate Muffins have been so popular here on the blog, that I wanted to make you some almond flour brownies. And my vegan treats have been equally popular. I really enjoy making treats that don't involve animals in only way - just plants. These vegan almond flour brownies are easy to make. So easy that I was left wondering why I ever used boxed brownie mixes. One bowl and real food ingredients always make me happy. Almond flour adds healthy fat, protein, and fiber. Treats can be nourishing too, so there's no need for empty calories. Yes these brownies are still sweet thanks to maple syrup, but at least when I give one to my kids I know they are also getting some important nutrients.
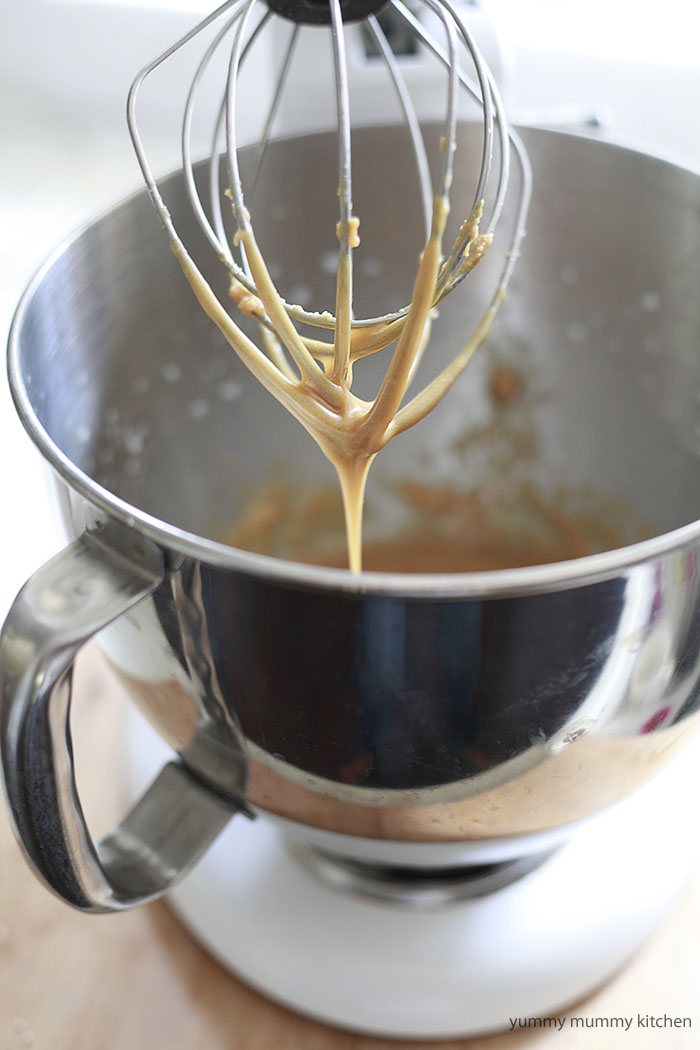 And because we are being a bit decadent with this one, a peanut butter glaze goes on top. Who can resist peanut butter and chocolate? These brownies have that irresistible peanut butter cup flavor. I don't eat candy. Unless it's a peanut butter cup.

If you'd like to skip the glaze, these brownies are still incredible. In that case, however, I would suggest adding some chocolate chips and enjoying the brownies warm. If you're on a paleo diet, use almond butter instead of peanut butter.
 A little pinch of sea or Himalayan salt is the perfect finishing touch that ties these peanut butter and chocolate brownies together. Vegan Almond Flour Brownies By Yummy Mummy Kitchen
 Printer Friendly Recipe
Published 06/11/2016
Rich and fudgy almond flour brownies with peanut butter glaze. Ingredients¼ cup melted coconut oil 2/3 cup maple syrup at room temperature 2 flax eggs (or large free range eggs or favorite vegan replacement such as Follow Your Heart)1 teaspoon vanilla extract1/2 cup unsweetened cacao or cocoa powder1/4 teaspoon sea salt, plus more to taste1 cup blanched almond flour1 teaspoon baking powder1/2 cup creamy peanut butter1 cup organic powdered sugar (*or 2 1/2 tablespoons maple syrup)5 tablespoons almond or coconut milk InstructionsPreheat the oven to 350 degrees F. Line an 8-inch baking dish with parchment paper or coat with cooking spray. In a medium bowl, whisk together the coconut oil, syrup, "eggs", and vanilla. In another bowl whisk together the cacao, salt, almond flour, and baking powder. Using a rubber spatula, mix the dry ingredients into the wet until combined. Pour into the prepared baking dish and smooth the top. Bake for 30 minutes. To make the peanut butter glaze, with an electric mixer, beat the peanut butter, sugar, and milk together. *Note: the powdered sugar will result in a shiny glaze like pictured. If you would like a healthier option, try maple syrup instead of the sugar and thin with milk to desired consistency. Spread peanut butter glaze over brownies after they have cooled slightly or completely. Sprinkle with a tiny pinch of sea salt. You can always add more, but it's hard to take salt off once it's on! I store these in the refrigerator so the glaze stays firm. Yield: makes one 8-inch pan
Prep Time: 10 mins. Total time: 40 mins.
Tags: brownies, paleo, vegan, dessert, chocolate, peanut butter
*Paleo Option: For the glaze/icing, use almond butter instead of peanut butter. Use the maple syrup method instead of powdered sugar.