Marina Delio's Blog, page 17
August 27, 2016
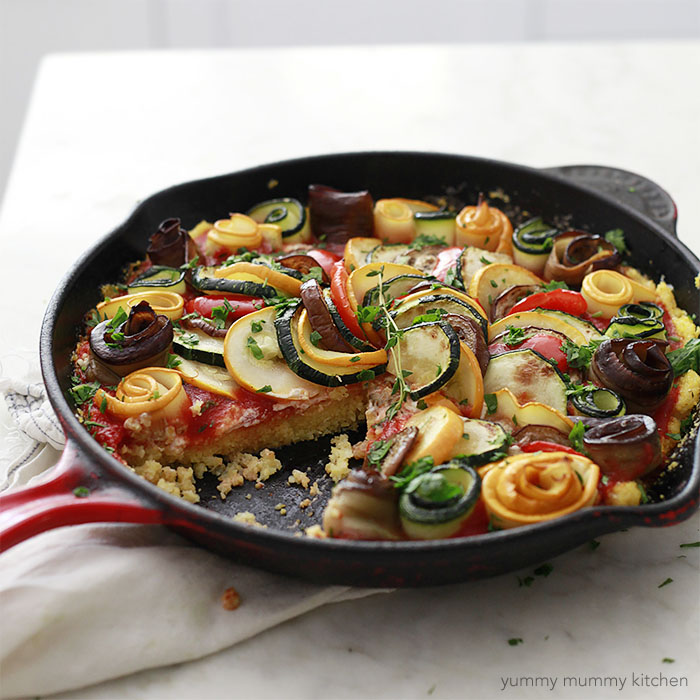
Ratatouille Recipe
Layered ratatouille vegetables on a bed of skillet polenta and tomato sauce. This ratatouille recipe is a delicious way to use summer garden vegetables like zucchini, yellow squash, eggplant, and bell peppers in a comforting vegetarian meal.

Summer is winding down and our kids have gone back to school. It was a bittersweet week for us. Aside from a few tears at drop-off, the kids did great with going back to school. Transitioning from kindergarten to the "big kid" part of school is a big change and the school day is longer. But for the first time ever, I have only one pick-up time, which has been amazing. We rise early, but thrive with more routine.
I neglected my garden a bit toward the end of summer break, as I was out and about with the kids. Yesterday I went out to check on it and couldn't believe how enormous the squash had gotten - oops! Summer squash should be picked before getting too large or the centers become too mealy and filled with seeds. As anyone who has grown zucchini knows, there's no shortage of squash with one plant in the backyard. I love the challenge of coming up with ways to use my homegrown produce. There's zoodles, zucchini fries, and zucchini bread, of course. Perhaps the most comforting zucchini recipe of all though, is ratatouille. I've loved ratatouille ever since I saw the Disney movie Ratatouille for the first time. The little mouse Remy wins over the cold restaurant critic, Ego, with his version of ratatouille. The dish takes Ego back to his childhood in France, where his mother would make the simple vegetable dish. Ratatouille is a traditional French recipe using some of summer's most abundant veggies: zucchini, yellow squash, bell pepper, and eggplant. It's served as a side dish, or as a meal when served with pasta or bread. Ratatouille in the movie is pure, beautiful comfort food. And though I don't usually think of zucchini as comfort food, this polenta ratatouille felt warm and cozy. I fancied this ratatouille up a bit by making rosettes and layering the veggies, but feel free to go with the chop and dump method if you're in a hurry. If you've never cooked fresh polenta (known as grits in the south U.S.) before it is ridiculously easy. Polenta is a staple in simple Italian home cooking. Although ratatouille with polenta is not particularly traditional, the two go together very nicely and I love the idea of marrying these French and Italian staples together in one dish.
This ratatouille is such a fun dish to serve right out of the skillet.
Here's what I did: Step 1: Cook the polenta in the skillet until just thickened Step 2: Cover with tomato sauce, herbs, and either goat cheese or a non-dairy cheese like Kite Hill (my favorite!) Step 3: Saute the sliced veggies until just tender
*Time to get real. I started out making these lovely rosettes with the veggies because I'm still having a moment with flower shaped food. Hello avocado roses. But honestly, all that rolling was too time consuming for a simple family dinner. So I switched to a simple layering technique.
 Just as pretty, right? I've written the recipe up using the rounds, but if you would like to try the rosettes, just slice thinly lengthwise rather than into rounds and roll up. These summer veggies go so wonderfully together, I can't think of a more delicious way to use them.
 Kids always keep us on our toes. I thought for sure the kids would love the polenta and push the veggies aside. I was wrong. Although my kids normally don't love summer squash, they really liked it here coated with tomato sauce. Yummy Hubby and I loved this dinner. The only thing I would have done differently was to pack in more veggies. Next time I will arrange them in on top of the polenta in a more vertical fashion than pictured here.
 Oh summer, don't go yet - I need to make ratatouille once or five times more.

If you would like to serve this ratatouille in a fancier casserole dish, simply transfer the polenta to the dish once it begins to thicken and proceed with the recipe. This ratatouille with polenta would be a great dish to bring to a friend too - just skip the final baking until it's dinnertime.
Ratatouille with PolentaPrinter Friendly Recipe
By yummy mummy kitchen
Published 08/27/2016
Ratatouille with polenta is a delicious way to use summer squash, eggplant, and peppers. Ingredients3 cups water½ teaspoon salt 1 cup polenta corn grits 2 tablespoons extra virgin olive oil, plus more as needed2 zucchini, sliced into ¼” thick rounds2 yellow squash, sliced into ¼” thick rounds2 Chinese eggplant, sliced into ¼” thick rounds 8 oz. canned tomato sauce 2 sprigs fresh thyme ½ teaspoon dried oreganopinch red pepper flakes (optional) 2 oz. crumbled goat cheese or kite hill vegan ricotta (optional) 3 tablespoons fresh chopped Italian parsley InstructionsPreheat the oven to 400 degrees F. In a cast iron skillet, bring water to a simmer. Slowly stir in salt and polenta. Reduce heat to low and continue to stir until polenta has thickened, about 10 minutes. Remove from heat. In another skillet, heat olive oil over medium heat. Season zucchini, yellow squash, and eggplant with a pinch of salt and pepper and sauté until just tender, about 3 minutes. Remove from heat. Pour tomato sauce over the polenta in the skillet and smooth into an even layer. Sprinkle with the leaves from the thyme, oregano, and pepper flakes. Top with crumbled cheese. Arrange the vegetables in a layered, overlapping fashion. Start at the outer edge of the skillet and work your way in to the middle. Place the skillet in the oven and bake until the sauce is bubbly, about 15 minutes. Sprinkle parsley over the top and serve warm. Yield: Serves 4
Prep Time: 15 mins. Cook time: 25 mins.
Total time: 40 mins.
Tags: ratatouille, polenta, vegetarian


Summer is winding down and our kids have gone back to school. It was a bittersweet week for us. Aside from a few tears at drop-off, the kids did great with going back to school. Transitioning from kindergarten to the "big kid" part of school is a big change and the school day is longer. But for the first time ever, I have only one pick-up time, which has been amazing. We rise early, but thrive with more routine.
I neglected my garden a bit toward the end of summer break, as I was out and about with the kids. Yesterday I went out to check on it and couldn't believe how enormous the squash had gotten - oops! Summer squash should be picked before getting too large or the centers become too mealy and filled with seeds. As anyone who has grown zucchini knows, there's no shortage of squash with one plant in the backyard. I love the challenge of coming up with ways to use my homegrown produce. There's zoodles, zucchini fries, and zucchini bread, of course. Perhaps the most comforting zucchini recipe of all though, is ratatouille. I've loved ratatouille ever since I saw the Disney movie Ratatouille for the first time. The little mouse Remy wins over the cold restaurant critic, Ego, with his version of ratatouille. The dish takes Ego back to his childhood in France, where his mother would make the simple vegetable dish. Ratatouille is a traditional French recipe using some of summer's most abundant veggies: zucchini, yellow squash, bell pepper, and eggplant. It's served as a side dish, or as a meal when served with pasta or bread. Ratatouille in the movie is pure, beautiful comfort food. And though I don't usually think of zucchini as comfort food, this polenta ratatouille felt warm and cozy. I fancied this ratatouille up a bit by making rosettes and layering the veggies, but feel free to go with the chop and dump method if you're in a hurry.
If you've never cooked fresh polenta (known as grits in the south U.S.) before it is ridiculously easy. Polenta is a staple in simple Italian home cooking. Although ratatouille with polenta is not particularly traditional, the two go together very nicely and I love the idea of marrying these French and Italian staples together in one dish. This ratatouille is such a fun dish to serve right out of the skillet.
Here's what I did: Step 1: Cook the polenta in the skillet until just thickened Step 2: Cover with tomato sauce, herbs, and either goat cheese or a non-dairy cheese like Kite Hill (my favorite!) Step 3: Saute the sliced veggies until just tender
*Time to get real. I started out making these lovely rosettes with the veggies because I'm still having a moment with flower shaped food. Hello avocado roses. But honestly, all that rolling was too time consuming for a simple family dinner. So I switched to a simple layering technique.
Just as pretty, right? I've written the recipe up using the rounds, but if you would like to try the rosettes, just slice thinly lengthwise rather than into rounds and roll up. These summer veggies go so wonderfully together, I can't think of a more delicious way to use them.
 Kids always keep us on our toes. I thought for sure the kids would love the polenta and push the veggies aside. I was wrong. Although my kids normally don't love summer squash, they really liked it here coated with tomato sauce. Yummy Hubby and I loved this dinner. The only thing I would have done differently was to pack in more veggies. Next time I will arrange them in on top of the polenta in a more vertical fashion than pictured here.
 Oh summer, don't go yet - I need to make ratatouille once or five times more.
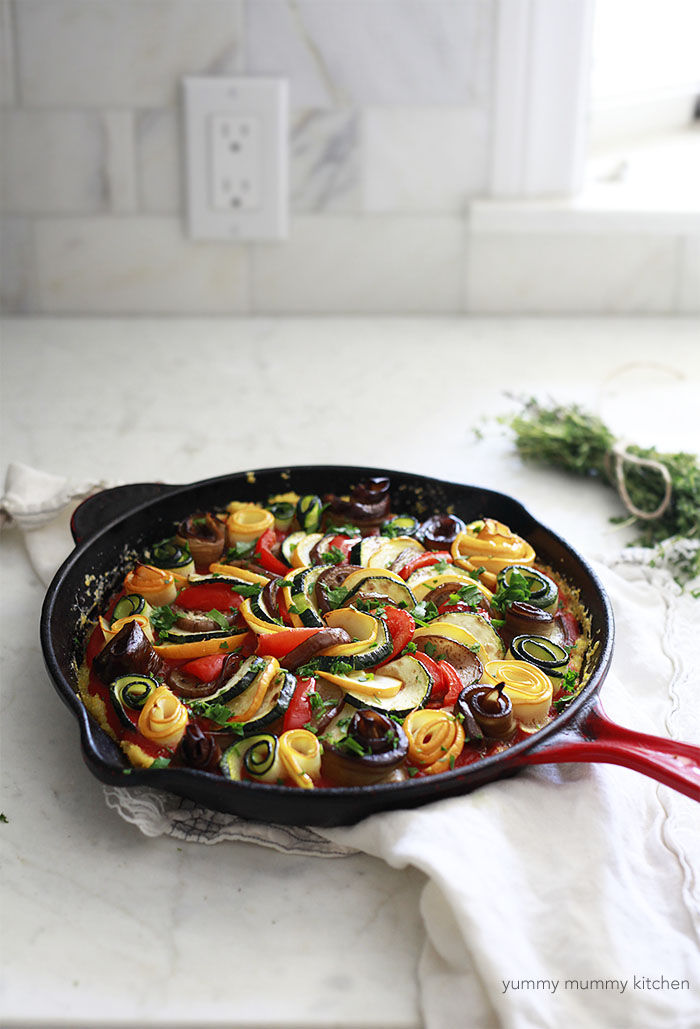
If you would like to serve this ratatouille in a fancier casserole dish, simply transfer the polenta to the dish once it begins to thicken and proceed with the recipe. This ratatouille with polenta would be a great dish to bring to a friend too - just skip the final baking until it's dinnertime.
Ratatouille with PolentaPrinter Friendly Recipe
By yummy mummy kitchen
Published 08/27/2016
Ratatouille with polenta is a delicious way to use summer squash, eggplant, and peppers. Ingredients3 cups water½ teaspoon salt 1 cup polenta corn grits 2 tablespoons extra virgin olive oil, plus more as needed2 zucchini, sliced into ¼” thick rounds2 yellow squash, sliced into ¼” thick rounds2 Chinese eggplant, sliced into ¼” thick rounds 8 oz. canned tomato sauce 2 sprigs fresh thyme ½ teaspoon dried oreganopinch red pepper flakes (optional) 2 oz. crumbled goat cheese or kite hill vegan ricotta (optional) 3 tablespoons fresh chopped Italian parsley InstructionsPreheat the oven to 400 degrees F. In a cast iron skillet, bring water to a simmer. Slowly stir in salt and polenta. Reduce heat to low and continue to stir until polenta has thickened, about 10 minutes. Remove from heat. In another skillet, heat olive oil over medium heat. Season zucchini, yellow squash, and eggplant with a pinch of salt and pepper and sauté until just tender, about 3 minutes. Remove from heat. Pour tomato sauce over the polenta in the skillet and smooth into an even layer. Sprinkle with the leaves from the thyme, oregano, and pepper flakes. Top with crumbled cheese. Arrange the vegetables in a layered, overlapping fashion. Start at the outer edge of the skillet and work your way in to the middle. Place the skillet in the oven and bake until the sauce is bubbly, about 15 minutes. Sprinkle parsley over the top and serve warm. Yield: Serves 4
Prep Time: 15 mins. Cook time: 25 mins.
Total time: 40 mins.
Tags: ratatouille, polenta, vegetarian


August 16, 2016
Natural Snow Cones + #DrinkGoodDoGood
Find out why I'm posing with a pineapple. There's a good reason, really! Plus, one of my kids' favorite healthy treats for hot days. This post is sponsored by Naked Juice, though opinions are my own.

If you follow me here, on Instagram, or know me in real life, you probably have noticed I have a real passion for healthy holistic living and beautiful, fresh food. As Hippocrates said, "Let food be thy medicine and medicine be thy food." I know how much better I feel, mind and body, when I eat well, which is why I love inspiring others to eat well too. I always knew how lucky I was to have access to an abundance of local, organic fruits and veggies. Not only are our farmers markets bursting with colorful seasonal produce, I'm lucky enough to have my own little garden with tomatoes and squash. I know though, that not everyone is so lucky. So I have teamed up with Naked Juice to take action on helping make fresh fruits and vegetables accessible to everyone. I'm embarrassed to say I didn't know much about food deserts until recently, but I'm happy I have this platform to help and show you how you can help too. And it couldn't be easier. Just snap a selfie with a fruit or vegetable and post it with the hashtag #DrinkGoodDoGood and Naked Juice will donate an additional 10 pounds† of produce to communities in need. Naked Juice is partnering with Wholesome Wave to provide fresh produce where there is none – through the #DrinkGoodDoGood campaign. Naked Juice is kicking off the campaign with a 250,000-pound contribution and asking consumers to get involved as well.
Here are some facts about food deserts that really surprised me: Nearly 30 million Americans live in food deserts* without access to affordable, quality, fresh fruits and vegetables.It’s a crisis affecting nearly one out of every 10 people in neighborhoods across the country.What is even more alarming is that 60% of Americans** don’t actually believe food deserts exist in their own community. I'm excited to be a part of helping provide produce to communities in need with my pineapple selfie and I hope you'll help too. Check out DrinkGoodDoGood.com for more information. I also had fun scrolling through the #DrinkGoodDoGood hashtag on Instagram and seeing everyone from Andy Cohen on Bravo, to Adrian Grenier, to Bobby Flay posting fruit and veggie selfies. Even Ellen is doing the #DrinkGoodDoGood thing!
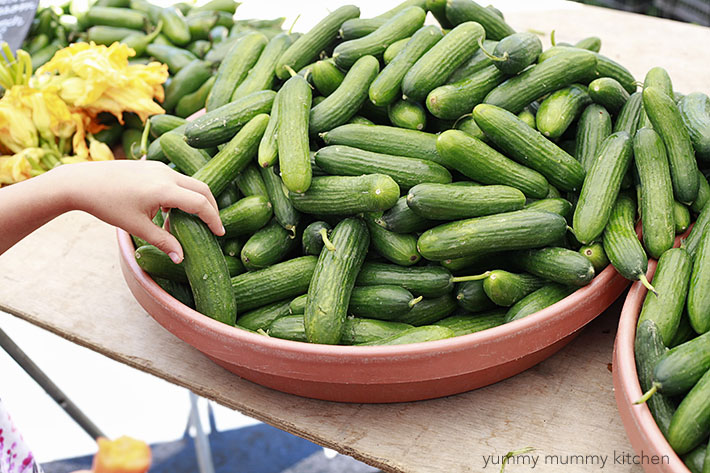
 Just like most kids, mine aren't always thrilled with all of the veggies that land on their plates. But I am so thankful that they excitedly grab whole cucumbers and carrots are the farmers markets to snack on as we walk around. And I'm reminded that kids are happy with simple, real food. No processed junk necessary.
 One of my girls' favorite hot day treats is a homemade snow cone or slushy. It's one of the things I get asked to make almost daily. Kids absolutely love snow cones and shave ice, but they are usually made with artificially colored sugar syrups. The secret is that they are even tastier when made with real ingredients. A handful of ice and some juice or coconut water is all you need.
 Place about 1 cup of ice cubes in a high powered blender without any liquid. Blend away until the ice turns to snow.
 Spoon into cups with a wooden spoon. Aren't you glad you don't even have to wash the blender?
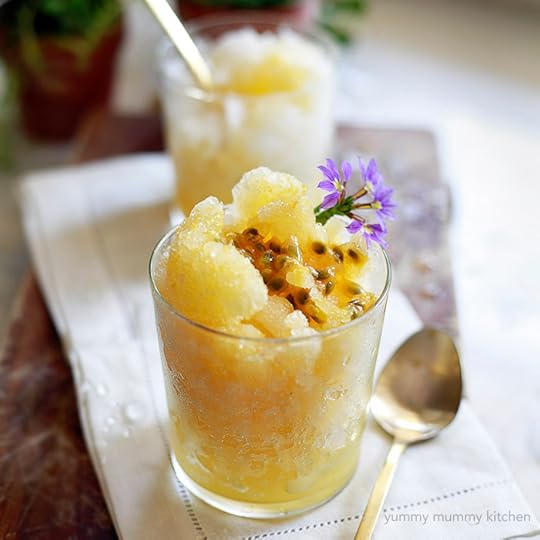
Now you can get creative. I like a little coconut water and a splash of pineapple juice with passion fruit scooped on top. Or make it creamy with coconut milk and maple syrup. My girls like it best with kombucha or orange juice. Whatever you add, homemade snow cones, shave ice, slushies... whatever you want to call them, are a more nutritious way to cool off when the sweet tooth strikes.
*Source: http://www.ers.usda.gov/media/956784/err143.pdf
**According to a survey by Wakefield Research
† The monetary equivalent of fruits and vegetables to be donated. Maximum donation of $500,000.Natural Snow ConesBy yummy mummy kitchen
Published 08/17/2016
How to make a natural slushie or snow cone.Ingredients1 cup ice1/2 cup juice or choicediced fresh fruit for topping (optional) InstructionsPlace ice in a high powered blender and blend until ice is finely ground into "snow." Transfer into a glass or glasses with a rubber spatula or wooden spoon. Pour just enough juice over the snow to soak it. Top with fruit or shredded coconut, if desired. Yield: Makes 1-2 servings
Prep Time: 3 mins. Cook time: 0 mins.
Total time: 3 mins.
Tags: healthy, kids, food for kids, summer, dessert, juice, slushie


If you follow me here, on Instagram, or know me in real life, you probably have noticed I have a real passion for healthy holistic living and beautiful, fresh food. As Hippocrates said, "Let food be thy medicine and medicine be thy food." I know how much better I feel, mind and body, when I eat well, which is why I love inspiring others to eat well too. I always knew how lucky I was to have access to an abundance of local, organic fruits and veggies. Not only are our farmers markets bursting with colorful seasonal produce, I'm lucky enough to have my own little garden with tomatoes and squash. I know though, that not everyone is so lucky. So I have teamed up with Naked Juice to take action on helping make fresh fruits and vegetables accessible to everyone. I'm embarrassed to say I didn't know much about food deserts until recently, but I'm happy I have this platform to help and show you how you can help too. And it couldn't be easier. Just snap a selfie with a fruit or vegetable and post it with the hashtag #DrinkGoodDoGood and Naked Juice will donate an additional 10 pounds† of produce to communities in need. Naked Juice is partnering with Wholesome Wave to provide fresh produce where there is none – through the #DrinkGoodDoGood campaign. Naked Juice is kicking off the campaign with a 250,000-pound contribution and asking consumers to get involved as well.
Here are some facts about food deserts that really surprised me: Nearly 30 million Americans live in food deserts* without access to affordable, quality, fresh fruits and vegetables.It’s a crisis affecting nearly one out of every 10 people in neighborhoods across the country.What is even more alarming is that 60% of Americans** don’t actually believe food deserts exist in their own community. I'm excited to be a part of helping provide produce to communities in need with my pineapple selfie and I hope you'll help too. Check out DrinkGoodDoGood.com for more information. I also had fun scrolling through the #DrinkGoodDoGood hashtag on Instagram and seeing everyone from Andy Cohen on Bravo, to Adrian Grenier, to Bobby Flay posting fruit and veggie selfies. Even Ellen is doing the #DrinkGoodDoGood thing!
 Just like most kids, mine aren't always thrilled with all of the veggies that land on their plates. But I am so thankful that they excitedly grab whole cucumbers and carrots are the farmers markets to snack on as we walk around. And I'm reminded that kids are happy with simple, real food. No processed junk necessary.
 One of my girls' favorite hot day treats is a homemade snow cone or slushy. It's one of the things I get asked to make almost daily. Kids absolutely love snow cones and shave ice, but they are usually made with artificially colored sugar syrups. The secret is that they are even tastier when made with real ingredients. A handful of ice and some juice or coconut water is all you need.
 Place about 1 cup of ice cubes in a high powered blender without any liquid. Blend away until the ice turns to snow.
 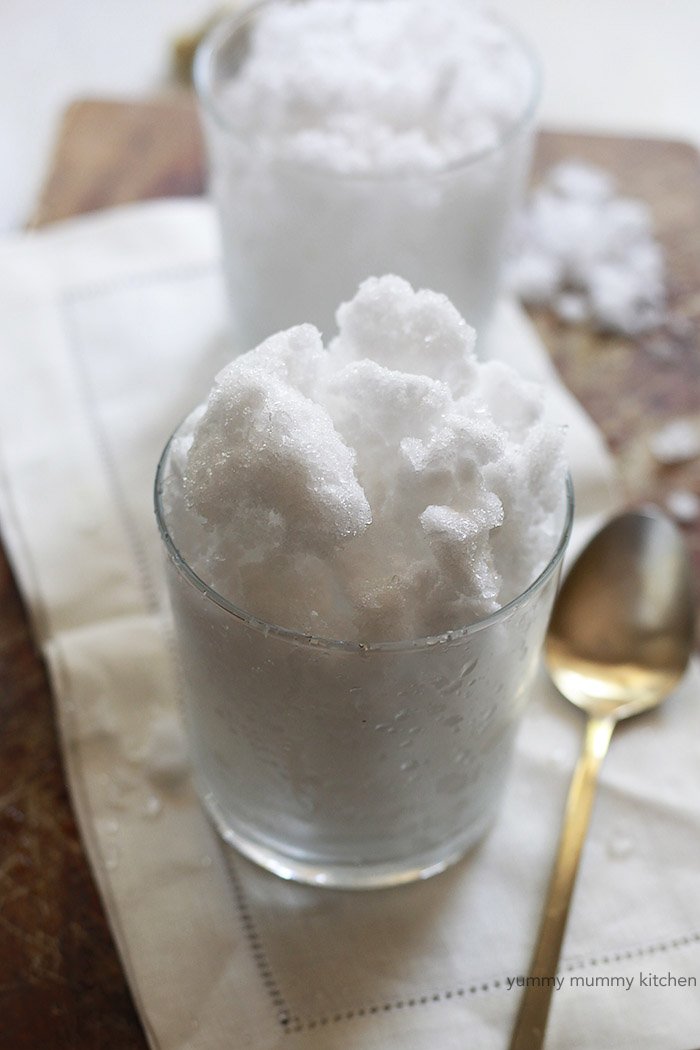 Spoon into cups with a wooden spoon. Aren't you glad you don't even have to wash the blender?

Now you can get creative. I like a little coconut water and a splash of pineapple juice with passion fruit scooped on top. Or make it creamy with coconut milk and maple syrup. My girls like it best with kombucha or orange juice. Whatever you add, homemade snow cones, shave ice, slushies... whatever you want to call them, are a more nutritious way to cool off when the sweet tooth strikes.
*Source: http://www.ers.usda.gov/media/956784/err143.pdf
**According to a survey by Wakefield Research
† The monetary equivalent of fruits and vegetables to be donated. Maximum donation of $500,000.Natural Snow ConesBy yummy mummy kitchen
Published 08/17/2016
How to make a natural slushie or snow cone.Ingredients1 cup ice1/2 cup juice or choicediced fresh fruit for topping (optional) InstructionsPlace ice in a high powered blender and blend until ice is finely ground into "snow." Transfer into a glass or glasses with a rubber spatula or wooden spoon. Pour just enough juice over the snow to soak it. Top with fruit or shredded coconut, if desired. Yield: Makes 1-2 servings
Prep Time: 3 mins. Cook time: 0 mins.
Total time: 3 mins.
Tags: healthy, kids, food for kids, summer, dessert, juice, slushie
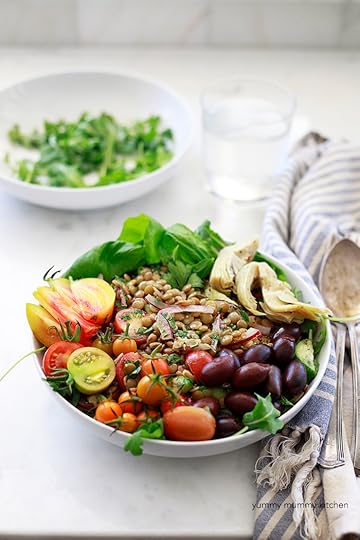
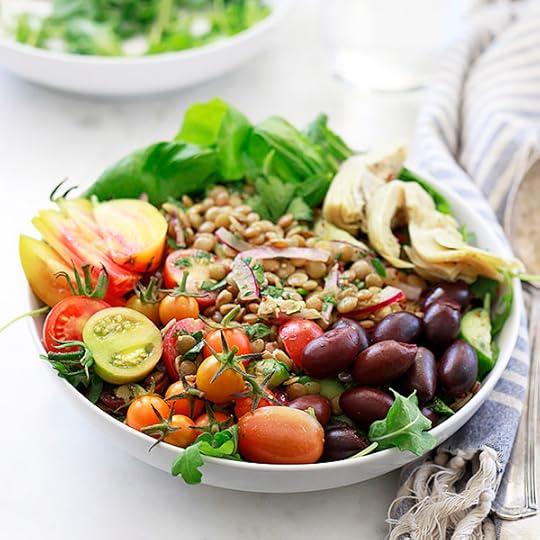
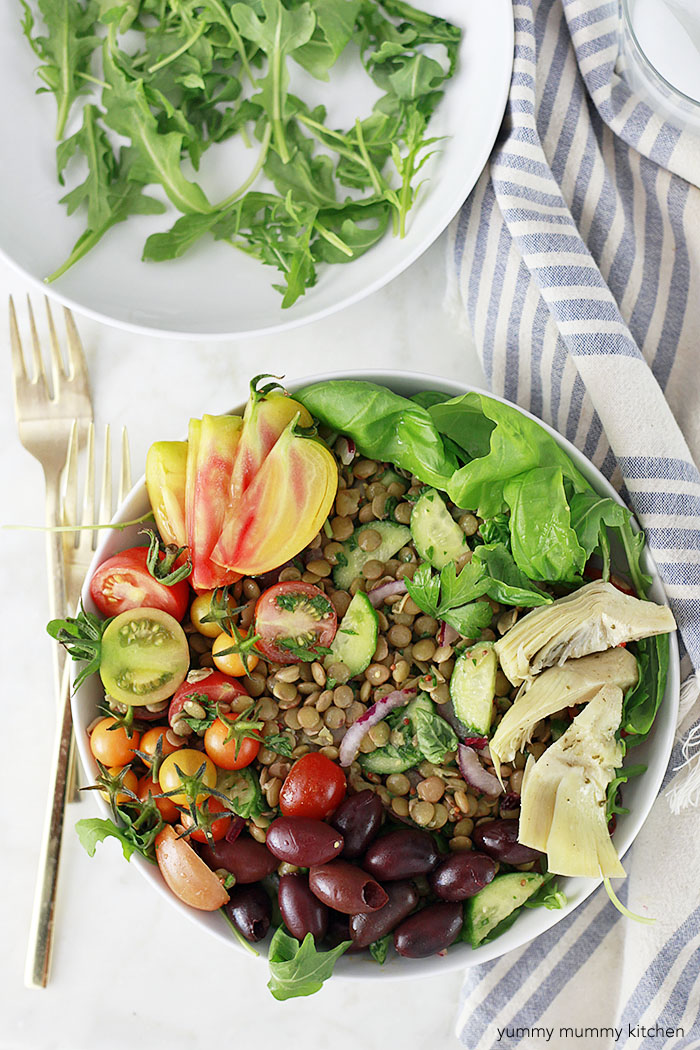
Lentil Salad with Tomatoes and Cucumbers
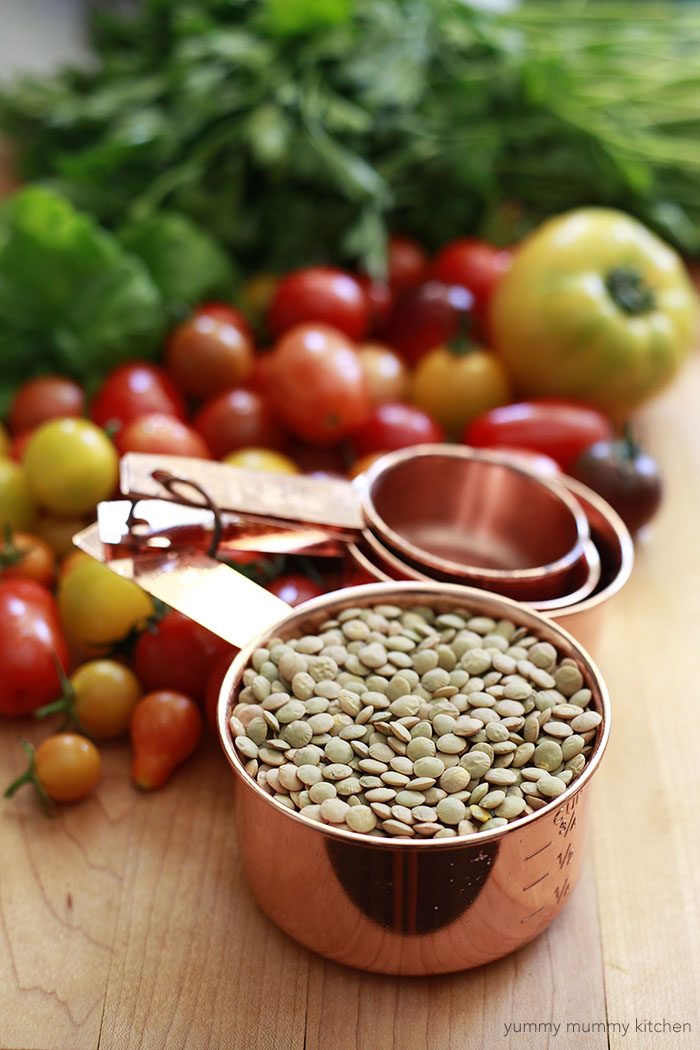
The recipe that made me fall in love with lentils. This hearty and flavorful lentil salad with green lentils, tomatoes, cucumber, and olives is dressed with a mustard vinaigrette. It's packed with protein and fiber to keep you feeling great all day.
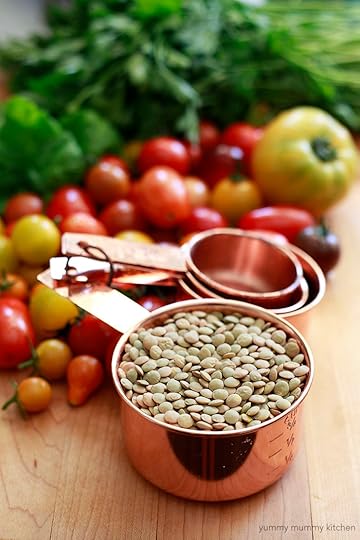
I consider lentils one of my secret weapons to health and feeling amazing. When I stopped eating meat a few years ago I quickly learned that lentils are an amazing source of plant-based protein and iron, at 18 grams per cup. And unlike meat, they are packed with fiber too. The problem at first though, was that I didn't care for these little legumes all that much, and I really didn't know what to do with them. After a few years of playing around with lentil recipes, however, I just love them. Lentils are versatile - they aren't too flavorful which means they can go from Mediterranean inspired dishes like this one to Indian curries. Lentils are hearty and filling, and my choice for lunch after an intense workout or in warm autumn and winter soups.
There's one recipe that turned me from lentil skeptic to lentil lover. The Goopster herself, Gwyneth Paltrow gets the credit for that. From the first time I tried her Lentil Salad with Mustard and Tomatoes via Self Magazine, I was hooked. Since then I've added and adapted the recipe to what you see here. If you're trying to eat better at work, this is a fabulous recipe to make on Sunday and enjoy throughout the week. It's one I eat often as I sit down to my computer work after a good morning workout. I also love adding this lentil salad to Buddha Bowls piled high with any veggies we happen to have, hummus, and pita bread.
Lentils are in the same legume and pulse family as beans. I keep dried beans and lentils of many varieties in my pantry, but lentils are a bit more convenient as they don't need to be soaked before cooking. Rather than the hours it takes to soak and cook dried beans, lentils go from pantry to table in under 45 minutes.

The trick to cooking delicious lentils is to cook them just the right amount. In soups they can be cooked until they are falling apart, but in cold salads like this one, they should remain slightly chewy. No one likes a mushy salad.
Have you tried lentil salads yet? This one is my all-time favorite, so I hope you'll try it!
Lentil Salad with TomatoesPrinter Friendly Recipe
Published 08/15/2016
A hearty and flavorful lentil salad with tomatoes, cucumber, and olives, with a mustard vinaigrette. Ingredients1 cup green lentils1/4 cup extra virgin olive oiljuice of 1/2 lemon2 tablespoons white or red wine vinegar1 tablespoon Dijon mustard1 tablespoon coarse seeded mustard1/2 teaspoon sea salt1/2 red onion, thinly sliced into 1-inch long slices1 pint cherry tomatoes, halved (I like multicolored heirlooms) 1 Persian cucumber, sliced into half-rounds1/2 cup Italian parsley, chopped 1/2 cup pitted kalamata olives (optional) InstructionsSort and rinse lentils well to remove any little stones or debris. Bring lentils and 4 cups of water to a simmer in a medium saucepan with lid tilted. Simmer about 20-25 minutes until lentils are just tender. Drain and cool. Meanwhile, in a small-medium bowl, whisk together the olive oil, lemon juice, vinegar, mustards, and salt. Gently combine the lentils with the mustard vinaigrette, tomatoes, cucumber, parsley, and olives if using. Serve alone or over a bed of your favorite greens. Sometimes I add artichoke hearts to this salad or serve it as a "Buddha Bowl" with hummus, pita bread, and any other veggies I have on hand. *Adapted from Gwyneth Paltrow's recipe on Self.com
Yield: Makes about 4 servings
Prep Time: 10 mins. Cook time: 25 mins.
Total time: 35 mins.
Tags: lentils, lentil salad, vegan, vegetarian, mustard, tomatoes, summer


I consider lentils one of my secret weapons to health and feeling amazing. When I stopped eating meat a few years ago I quickly learned that lentils are an amazing source of plant-based protein and iron, at 18 grams per cup. And unlike meat, they are packed with fiber too. The problem at first though, was that I didn't care for these little legumes all that much, and I really didn't know what to do with them. After a few years of playing around with lentil recipes, however, I just love them. Lentils are versatile - they aren't too flavorful which means they can go from Mediterranean inspired dishes like this one to Indian curries. Lentils are hearty and filling, and my choice for lunch after an intense workout or in warm autumn and winter soups.
There's one recipe that turned me from lentil skeptic to lentil lover. The Goopster herself, Gwyneth Paltrow gets the credit for that. From the first time I tried her Lentil Salad with Mustard and Tomatoes via Self Magazine, I was hooked. Since then I've added and adapted the recipe to what you see here. If you're trying to eat better at work, this is a fabulous recipe to make on Sunday and enjoy throughout the week. It's one I eat often as I sit down to my computer work after a good morning workout. I also love adding this lentil salad to Buddha Bowls piled high with any veggies we happen to have, hummus, and pita bread.
Lentils are in the same legume and pulse family as beans. I keep dried beans and lentils of many varieties in my pantry, but lentils are a bit more convenient as they don't need to be soaked before cooking. Rather than the hours it takes to soak and cook dried beans, lentils go from pantry to table in under 45 minutes.
The trick to cooking delicious lentils is to cook them just the right amount. In soups they can be cooked until they are falling apart, but in cold salads like this one, they should remain slightly chewy. No one likes a mushy salad.

Have you tried lentil salads yet? This one is my all-time favorite, so I hope you'll try it!
Lentil Salad with TomatoesPrinter Friendly Recipe
Published 08/15/2016
A hearty and flavorful lentil salad with tomatoes, cucumber, and olives, with a mustard vinaigrette. Ingredients1 cup green lentils1/4 cup extra virgin olive oiljuice of 1/2 lemon2 tablespoons white or red wine vinegar1 tablespoon Dijon mustard1 tablespoon coarse seeded mustard1/2 teaspoon sea salt1/2 red onion, thinly sliced into 1-inch long slices1 pint cherry tomatoes, halved (I like multicolored heirlooms) 1 Persian cucumber, sliced into half-rounds1/2 cup Italian parsley, chopped 1/2 cup pitted kalamata olives (optional) InstructionsSort and rinse lentils well to remove any little stones or debris. Bring lentils and 4 cups of water to a simmer in a medium saucepan with lid tilted. Simmer about 20-25 minutes until lentils are just tender. Drain and cool. Meanwhile, in a small-medium bowl, whisk together the olive oil, lemon juice, vinegar, mustards, and salt. Gently combine the lentils with the mustard vinaigrette, tomatoes, cucumber, parsley, and olives if using. Serve alone or over a bed of your favorite greens. Sometimes I add artichoke hearts to this salad or serve it as a "Buddha Bowl" with hummus, pita bread, and any other veggies I have on hand. *Adapted from Gwyneth Paltrow's recipe on Self.com
Yield: Makes about 4 servings
Prep Time: 10 mins. Cook time: 25 mins.
Total time: 35 mins.
Tags: lentils, lentil salad, vegan, vegetarian, mustard, tomatoes, summer
August 15, 2016
Laguna Beach {Family Vacation}
This post is sponsored by The Ranch at Laguna Beach. All opinions, stories, and images are my own.
 We just got back from a little mid-week road trip down south to Laguna Beach in Orange County, CA. The Ranch at Laguna Beach is a fun new Laguna Beach resort that's just opening after a major renovation. They invited me to come visit, so my mom, little girls, and I made it a 3-generation girls' trip! California is so diverse, and though I have lived here my whole life, I always enjoy exploring its different towns and landscapes.
Laguna Beach was so beautiful that I took lots of pictures. So grab a cup of tea and join me on our adventure. Let's look at where to stay, play, and eat in Laguna Beach.
STAYWhere we stayed in Laguna Beach
 The Ranch at Laguna beach was perfect for our group of 4 between the ages of 6 and 65. Our two bedroom cottage suite was spacious and gave us plenty or room to relax. Two beautiful bedrooms, a living space with sofa bed, two bathrooms, and a dining room area. My mom said the beds were the most comfortable hotel beds she's ever slept in, and she has done a lot of traveling.
I love the design and decor at the ranch. It has that California beachy rustic vibe I love, and everything is fresh and clean. I really would love all of the fixtures in my own home. The walls are covered with art from local Laguna Beach artists.
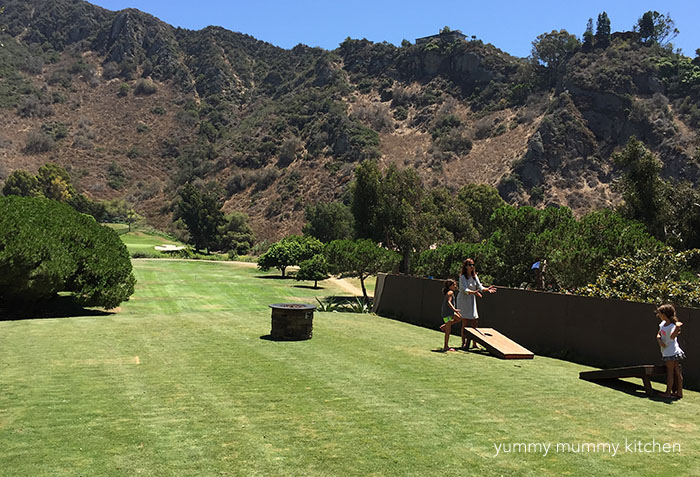
 The Ranch is conveniently located next to the best beaches, restaurants, and shopping, but tucked away into the canyon away from the hustle and bustle. The pool and golf course are perfect respites from the crowds of downtown Laguna Beach. I saw some very yummy looking cocktails go by at the pool too.
 My favorite thing about the Ranch at Laguna Beach is the kids' programs. From Peter Rabbit restaurant dishes to the Junior Rangers kids camp, they have made sure the littlest guests are happy. We saw groups of junior golf campers excitedly saying they had seen deer on the golf course. I kept thinking the Ranch at Laguna Beach would be so perfect for golf loving families, as parents could golf in the mornings while kids learn and play at the kids camp.
 Junior Rangers Kids Camp runs through September 5, and has a different theme ever day, Monday through Saturday. As we were at the Ranch on Friday we got to experience the Birds of Prey. This little rescue owl was the cutest thing ever and his handler was wonderful with the kids. We learned so much about these birds just from a few minutes of listening.
 When we visited, the main restaurant was still under construction, but I can tell it will be beautiful. The view from the main and temporary restaurant is of the lovely Ben Brown's golf course.
 PLAY What to do in Laguna Beach
 To me, Laguna Beach is all about art, beaches, and classic California living. We were treated to perfect 80 degree weather that stayed warm into the evenings. They sky was blue and from almost anywhere in Laguna Beach we were able to get a peek of the ocean.
  BEACHESNo visit to Laguna Beach would be complete without a beach day. Many beaches have great tide pools when kids can search for sea critters. We spent one day at Woods Cove Beach, pictured above. I was surprised by how clear the water was. My girls loved finding little crabs in between rocks. Surfing, SUP, and kayaking are all available in Laguna Beach too. I would have loved to take a paddle board yoga class if I had more time. There are beautiful walking paths all along the water, perfect for a sunset stroll or morning run.
ARTLaguna Beach started out as a small artist's colony around 1900 and the town celebrates art to this day. Practically every block has a charming art gallery or garden shop to peruse. During the summer there are several big art festivals. We spent a few hours perusing the different vendor's shops and listening to live music at the Sawdust Festival. The Sawdust Festival has been running for 50 years and my mom has fond memories of hanging out there as a teenager. We loved watching the creation of a beautiful vase during a glass-blowing demonstration. Not only are there artists selling their creations, kids can create their own art, including pottery thrown on a wheel.

SHOPPINGOne of my favorite things to do on vacations is just wander. We loved looking around the shops in Laguna Beach. We stumbled upon a home decor shop I just loved called Tuvalu. My mom and I swooned over all the beachy rustic throw blankets, candles, homewares, and especially the carved wooden mermaids. Coincidentally, I found out that this store did the interior design for The Ranch at Laguna Beach!
EATWhere to eat in Laguna Beach
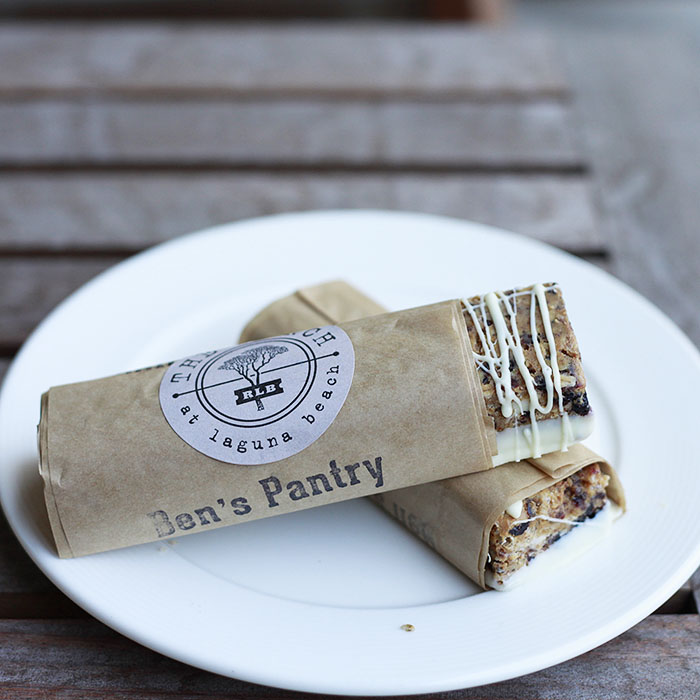 Homemade energy bars were waiting for us in our suite at the Ranch, which was so appreciated after a long drive. These bars were peanut buttery, flaky, and delicious. I'll have to try to recreate them here at home!
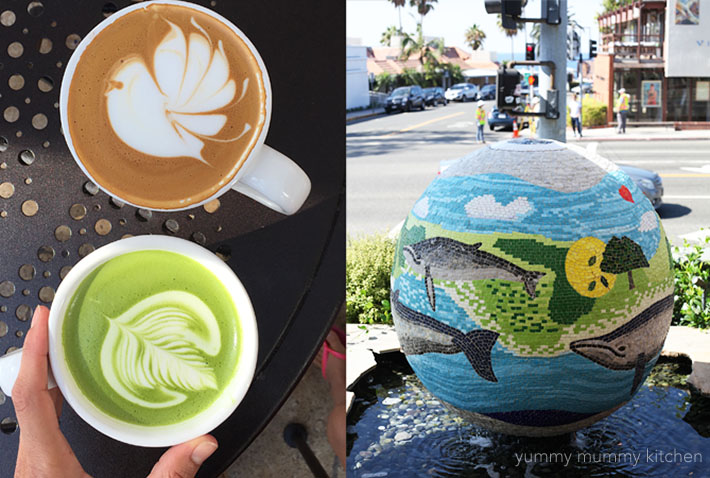 Urth Caffe has been on my list of must-try restaurants for a long time. As it's name implies, this earthy restaurant focuses on beautiful, sustainable, organic ingredients. And their lattes are simply gorgeous!
Have you ever been to Laguna Beach? Let me know if you have any recommendations to add in the comments!
Big thanks to the Ranch at Laguna Beach for hosting us.


August 6, 2016
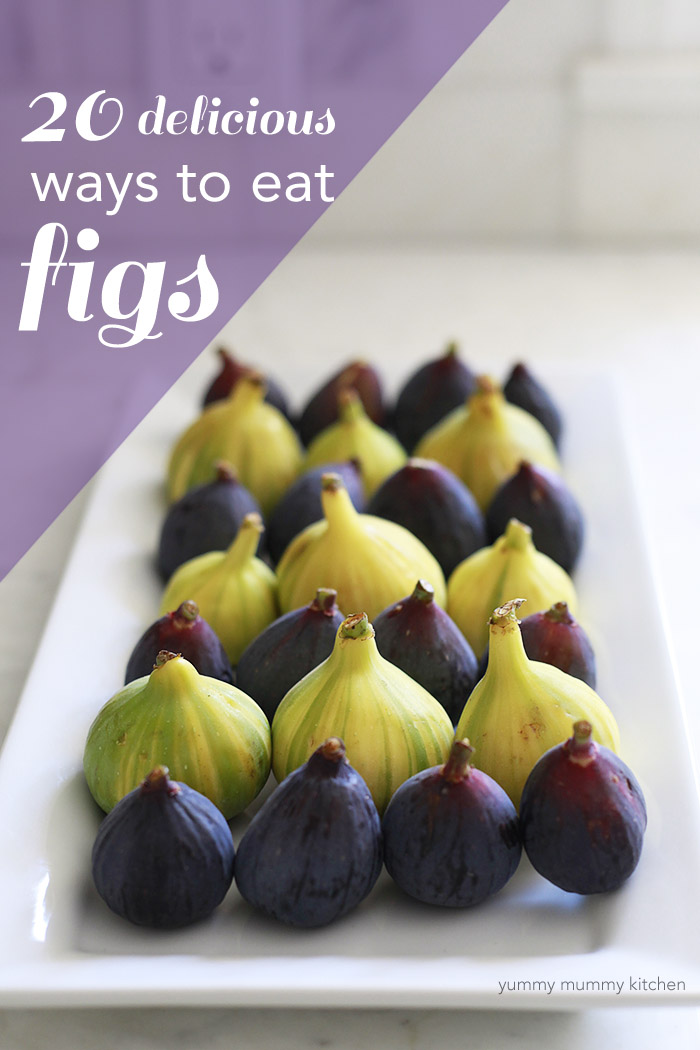
20 Amazing Fig Recipes
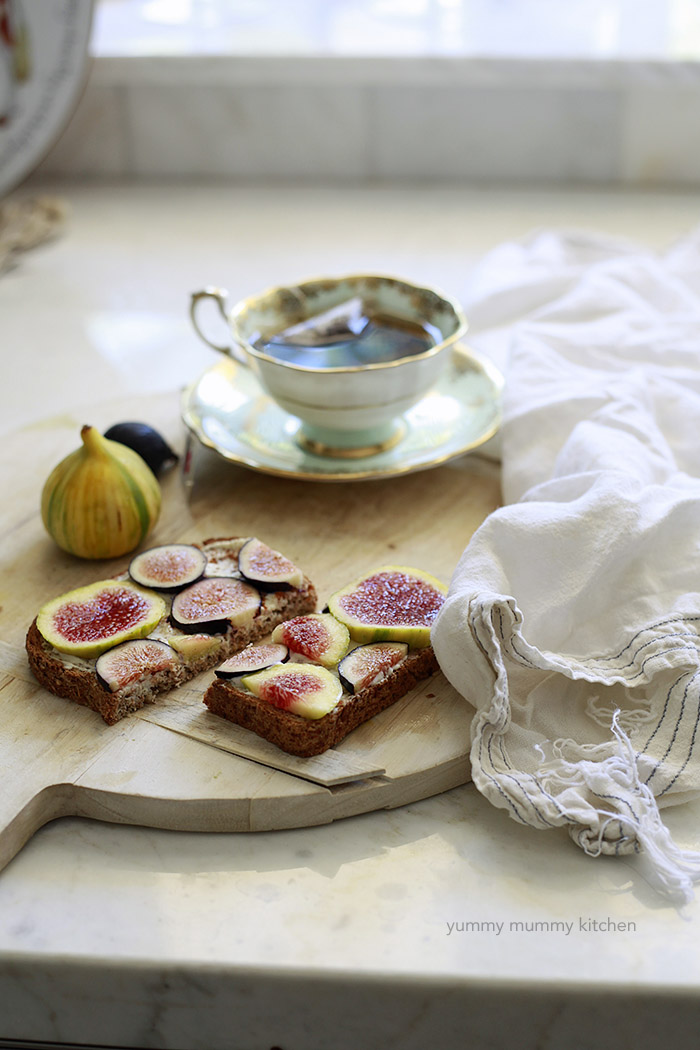 It's early August and fresh figs are popping up in farmer's markets, grocery stores, and many of my friends' backyards. A few of my friends have asked me for ideas for using up their bundles of figs, so I've put together a round-up of 20 fig recipes to help us all out. While some people love eating figs all on their own, others prefer fresh figs in recipes. I picked up a bunch of fresh green figs and black/purple figs at the farmers market last week and have been playing with them since. Fresh figs really add such a nice sweet richness to so many recipes. I've enjoyed them for breakfast atop toast spread with almond butter or cream cheese and a pinch of pumpkin pie spice (above), in salads, on ice cream and in sandwiches. What's your favorite way to use late summer figs? Let's take a look at some delicious ways to use up fresh figs, from my kitchen and around the web...
 Fresh figs are so beautiful. And their skins don't let on to the pretty pink interior.
 One of my girlfriends (hi La!) and her 9 year old son were telling me that they had the most incredible dessert at lunch at Metropolis here in Santa Barbara. They both raved about the chocolate covered figs, so I knew I had to make so me at home with my farmer's market fresh figs. These are so easy to make. Just melt some chocolate in a double boiler or microwave and dip away. I added a sprinkle of hemp to some, hazelnuts and pumpkin seeds to others.
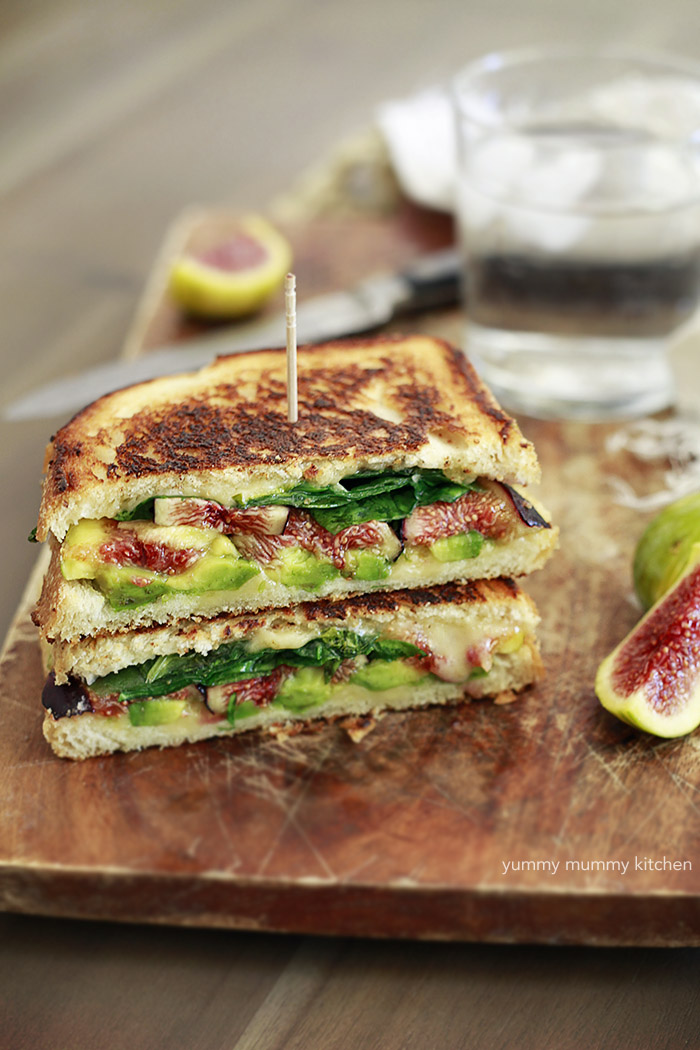 My favorite way to eat fresh figs, however, is probably in this fancy grilled cheese. Can grilled cheese even be fancy? I don't know, but this is totally delicious. Recipe at the end!
 Oh, oh! No, on a cheese board is definitely my favorite way to enjoy fresh figs when there are friends around. I pulled this one from my Instagram from last year. I loved the freshness and color that the figs added, but the flavor is perfect with cheese. VEGAN/DAIRY-FREE FRIENDS: you can totally do this! Check out these 14 Vegan Cheeses That Will Make You Forget About The Real Thing.
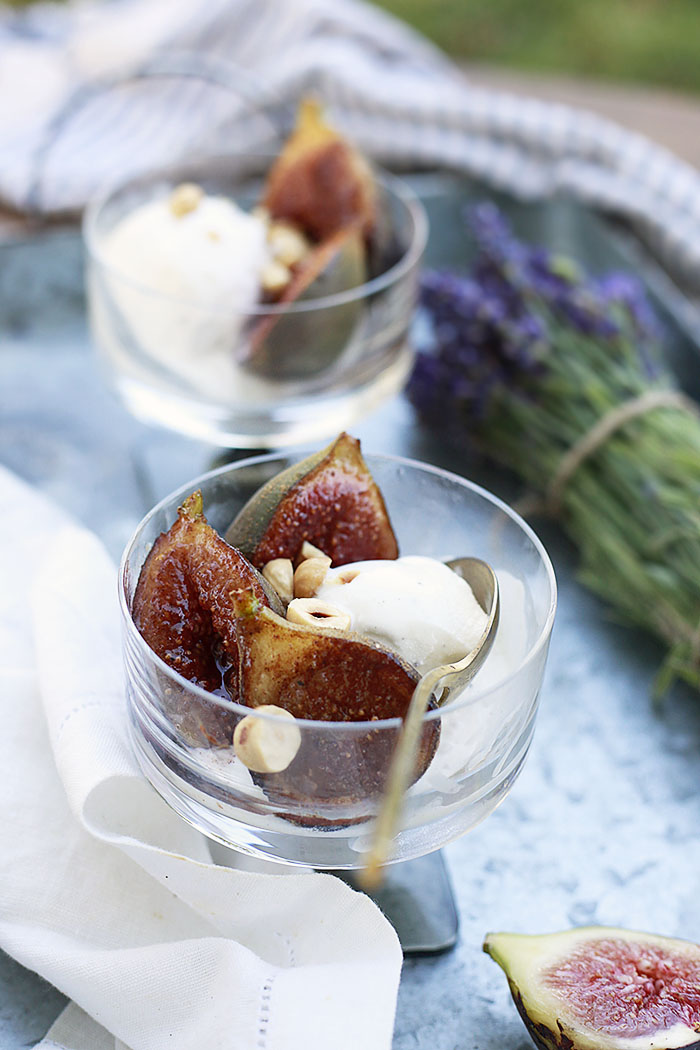
 Spice Roasted Figs
Fig Recipes
1. Fig Jam from Food and Wine2. Vegan Dark Chocolate Coconut Fig Ice Cream from Heather Christo3. Eggplant with California Figs & Leek from G-Free Foodie4. Fresh Fig Newton Cookies from Knead to Cook5. Fresh Fig Gelato from Doughmestic6. Fresh Fig Salad with Blackberries from Flavour & Savour7. Raw Vanilla Coconut Fig Slice from Secret Squirrel Food8. Raw Fig, Cherry, Lavender, and Honey Cake from Ascension Kitchen9. Vegan Coconut, Fig & Pistachio Cheesecake from Mind Body Green10. Fig and Caramelized Onion Flatbread from Little Broken11. How to Dehydrate Fresh Figs from Nourishing Joy12. Fig and Melon Salad with Creamy Lemon Vinaigrette from Not Without Salt13. Autumn Acai Bowl from How Sweet Eats14. Fig and Almond Tart from Giada De Laurentiis15. Goat Cheese Stuffed Figs from How Sweet Eats
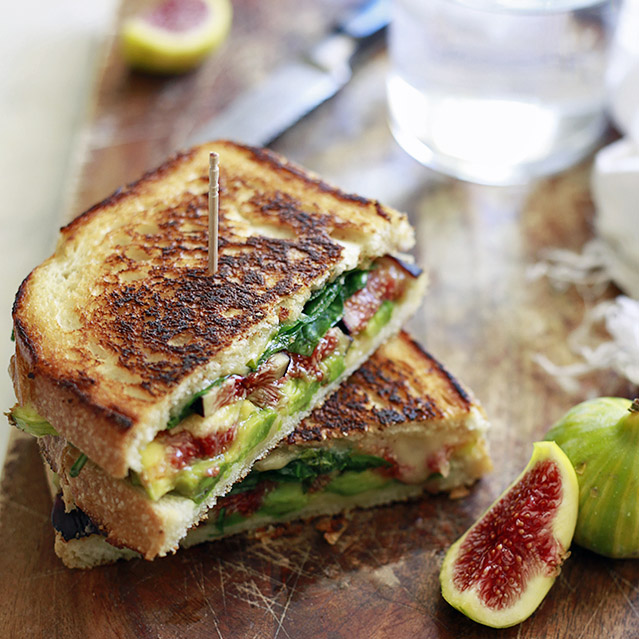
Fresh Fig and Avocado Grilled CheeseBy yummy mummy kitchen
Published 08/01/2016

This grilled cheese sandwich filled with avocado, spinach, and a touch of sweetness from fresh figs is pure deliciousness. Ingredients2 slices sourdough bread 1-2 fresh figs, sliced 1/2 large avocado, peeled, pitted, and sliced1/4 cup fresh baby spinach leavesfavorite cheese (white cheddar works well or dairy-free) 1 Tablespoon Butter or Earth Balance InstructionsAssemble the sandwich with avocado slices, figs, and spinach on the bottom piece of bread. Cover with cheese and then the top piece of bread. Meanwhile, melt the butter over medium heat in a skillet. Place the sandwich into the butter and cover the pan. Cook until bottom piece of bread is toasted and then flip. Cook until cheese has melted and other piece of bread is toasty. Cut in half and enjoy! Yield: Makes 1 Sandwich
Prep Time: 3 mins. Cook time: 7 mins.
Total time: 10 mins.
Tags: fresh figs, sandwiches, summer, lunch, grilled cheese


August 3, 2016
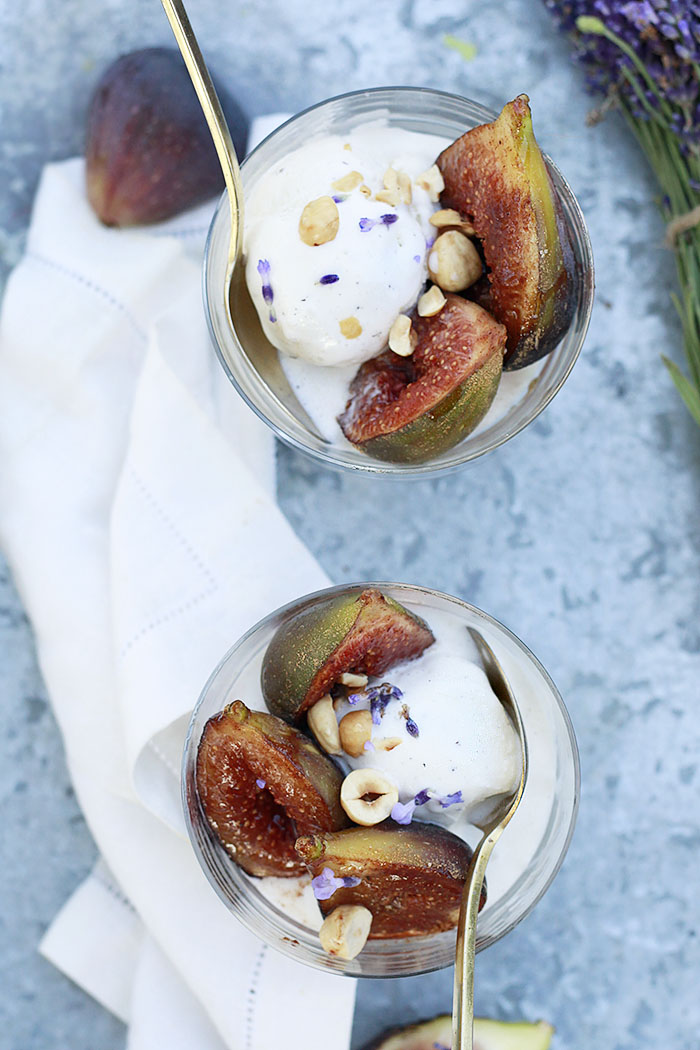
Spice Roasted Figs with Hazelnuts and Vanilla Ice Cream
This post brought to you by Breyers. The content and opinions expressed below are that of Yummy Mummy Kitchen.
Figs caramelized with warm spices and served with vanilla ice cream is the perfect August dessert. CONTINUE READING THIS POST »


Figs caramelized with warm spices and served with vanilla ice cream is the perfect August dessert.
 CONTINUE READING THIS POST »
August 1, 2016
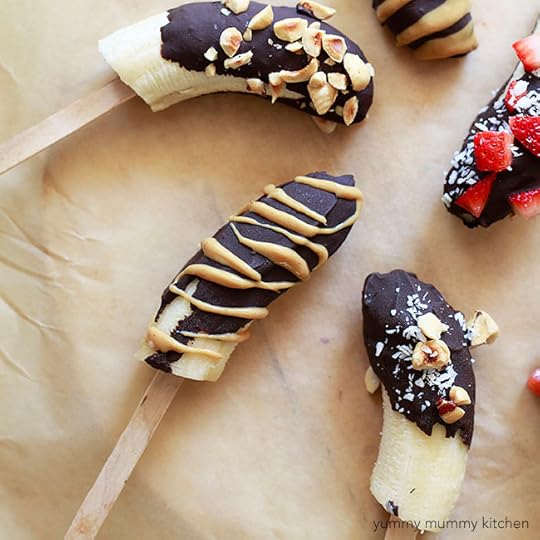
Chocolate Covered Frozen Bananas
Homemade frozen bananas are my new favorite dessert. I am completely smitten with these creamy, cold, simple treats. You're going to love them!
 I've never been a big fan of bananas. Sure, I'll toss one in a smoothie, but that's about all. Until this week, that is. I had no idea just how amazing homemade chocolate dipped frozen bananas are, and I'm completely obsessed. Thankfully this version of chocolate covered frozen bananas is on the healthier side, because I've been enjoying them all day long. I even sprinkled some with hemp and chia seeds and called it breakfast.
The kids love the frozen banana bites from Trader Joe's, but I've always thought they were just so-so. So I was delightfully surprised to find that I absolutely love these homemade frozen bananas. Like most homemade foods, these frozen bananas are so much tastier. Freshly frozen bananas are creamy dreamy and so much like ice cream - only plant based and completely natural. Also, as with most home cooking, when you make these frozen bananas at home, you get to control the quality of ingredients. You can use your favorite chocolate, whether it's stevia sweetened Lily's Sweets chips or dairy-free allergy friendly Enjoy Life chips, or your own personal favorite.

The girls wanted to do a cooking project and video last week. This frozen banana recipe ended up being the perfect little kids cooking project. They had so much fun dipping the frozen bananas in chocolate and sprinkling with toppings. This recipe is so simple and such a fun way to get kids in the kitchen. The topping options are endless! From sprinkles, to coconut shavings, nuts, seeds, berries, and nut butters, there are so many delicious flavors for your chocolate bananas!
My personal favorite is the peanut butter drizzle. It just doesn't get better than chocolate and peanut butter. I also made a few dipped completely in peanut butter thinned with coconut oil - Heaven! Sadly my camera chip was on the fritz and didn't save any of those images, so you'll have to use your imagination until the next time I make these babies. I have really loved having these beautiful and delicious frozen bananas in the freezer the past few days (maybe a little too much!) and am sad they are gone. I'll definitely be making more soon and I hope you try them too. These frozen bananas are the most luscious way to cool off, and we have been in serious need of cooling off lately.
Watch my silly girls and I make these frosty nanas! And please subscribe to my YouTube Channel so you get updates when new videos are live.
 These chocolate covered frozen bananas are creamy, crunchy, cold, sweet but not too sweet, and just the most perfect summer dessert. They are simple to make and would be an incredibly fun dessert to serve at a backyard BBQ. Time to go make more! Chocolate Covered Frozen BananasPrinter Friendly Recipe
By yummy mummy kitchen
Published 08/01/2016
Delicious homemade chocolate covered frozen bananas. Ingredients4 bananas, peeled and halved crosswise8 oz. favorite chocolate chips (I used Enjoy Life) chopped nuts (optional for topping)shaved coconut (optional for topping)peanut butter (optional for topping)berries, diced (optional for topping)seeds (optional for topping)InstructionsInsert a popsicle stick or cake pop stick into the cut sides of bananas. Place on cookie sheet lined with parchment or wax paper and freeze for at least 2 hours. Melt chocolate in the bowl of a double boiler until smooth. Carefully transfer the melted chocolate into a drinking glass. Holding the stick, dip a banana into the melted chocolate to coat. Chocolate doesn't not need to go all the way to the end of the banana. While chocolate is still melty, sprinkle any toppings on top. If doing a peanut butter drizzle, dip a fork in the peanut butter and drizzle over the chocolate. Lay chocolate covered banana back onto the lined cookie sheet and continue with the other bananas. Enjoy right away or freeze for later. *Vegan Option: Use Enjoy Life chocolate chips*Gluten Free Option: Use Enjoy Life chocolate chips
Yield: Makes 8 frozen bananas
Prep Time: 3 hrs. 00 mins. Cook time: 7 mins.
Total time: 3 hrs. 7 mins.
Tags: chocolate, bananas, snacks for kids, kids cooking, vegetarian, vegan, gluten-free, easy recipe, food for kids, summer, dessert


 I've never been a big fan of bananas. Sure, I'll toss one in a smoothie, but that's about all. Until this week, that is. I had no idea just how amazing homemade chocolate dipped frozen bananas are, and I'm completely obsessed. Thankfully this version of chocolate covered frozen bananas is on the healthier side, because I've been enjoying them all day long. I even sprinkled some with hemp and chia seeds and called it breakfast.
 The kids love the frozen banana bites from Trader Joe's, but I've always thought they were just so-so. So I was delightfully surprised to find that I absolutely love these homemade frozen bananas. Like most homemade foods, these frozen bananas are so much tastier. Freshly frozen bananas are creamy dreamy and so much like ice cream - only plant based and completely natural. Also, as with most home cooking, when you make these frozen bananas at home, you get to control the quality of ingredients. You can use your favorite chocolate, whether it's stevia sweetened Lily's Sweets chips or dairy-free allergy friendly Enjoy Life chips, or your own personal favorite.


The girls wanted to do a cooking project and video last week. This frozen banana recipe ended up being the perfect little kids cooking project. They had so much fun dipping the frozen bananas in chocolate and sprinkling with toppings. This recipe is so simple and such a fun way to get kids in the kitchen. The topping options are endless! From sprinkles, to coconut shavings, nuts, seeds, berries, and nut butters, there are so many delicious flavors for your chocolate bananas!
My personal favorite is the peanut butter drizzle. It just doesn't get better than chocolate and peanut butter. I also made a few dipped completely in peanut butter thinned with coconut oil - Heaven! Sadly my camera chip was on the fritz and didn't save any of those images, so you'll have to use your imagination until the next time I make these babies. I have really loved having these beautiful and delicious frozen bananas in the freezer the past few days (maybe a little too much!) and am sad they are gone. I'll definitely be making more soon and I hope you try them too. These frozen bananas are the most luscious way to cool off, and we have been in serious need of cooling off lately.
Watch my silly girls and I make these frosty nanas! And please subscribe to my YouTube Channel so you get updates when new videos are live.
 These chocolate covered frozen bananas are creamy, crunchy, cold, sweet but not too sweet, and just the most perfect summer dessert. They are simple to make and would be an incredibly fun dessert to serve at a backyard BBQ. Time to go make more! Chocolate Covered Frozen BananasPrinter Friendly Recipe
By yummy mummy kitchen
Published 08/01/2016
Delicious homemade chocolate covered frozen bananas. Ingredients4 bananas, peeled and halved crosswise8 oz. favorite chocolate chips (I used Enjoy Life) chopped nuts (optional for topping)shaved coconut (optional for topping)peanut butter (optional for topping)berries, diced (optional for topping)seeds (optional for topping)InstructionsInsert a popsicle stick or cake pop stick into the cut sides of bananas. Place on cookie sheet lined with parchment or wax paper and freeze for at least 2 hours. Melt chocolate in the bowl of a double boiler until smooth. Carefully transfer the melted chocolate into a drinking glass. Holding the stick, dip a banana into the melted chocolate to coat. Chocolate doesn't not need to go all the way to the end of the banana. While chocolate is still melty, sprinkle any toppings on top. If doing a peanut butter drizzle, dip a fork in the peanut butter and drizzle over the chocolate. Lay chocolate covered banana back onto the lined cookie sheet and continue with the other bananas. Enjoy right away or freeze for later. *Vegan Option: Use Enjoy Life chocolate chips*Gluten Free Option: Use Enjoy Life chocolate chips
Yield: Makes 8 frozen bananas
Prep Time: 3 hrs. 00 mins. Cook time: 7 mins.
Total time: 3 hrs. 7 mins.
Tags: chocolate, bananas, snacks for kids, kids cooking, vegetarian, vegan, gluten-free, easy recipe, food for kids, summer, dessert
July 29, 2016
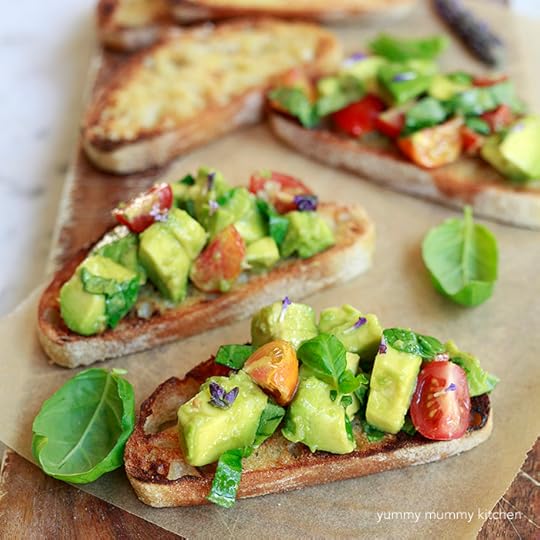
Avocado Bruschetta
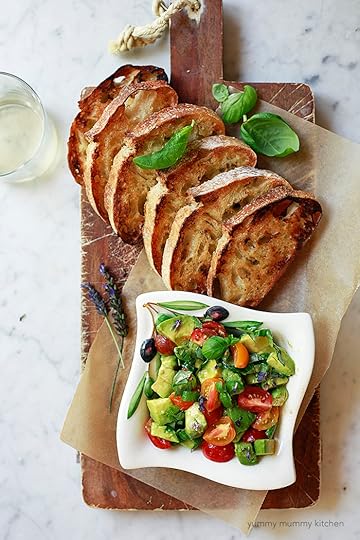
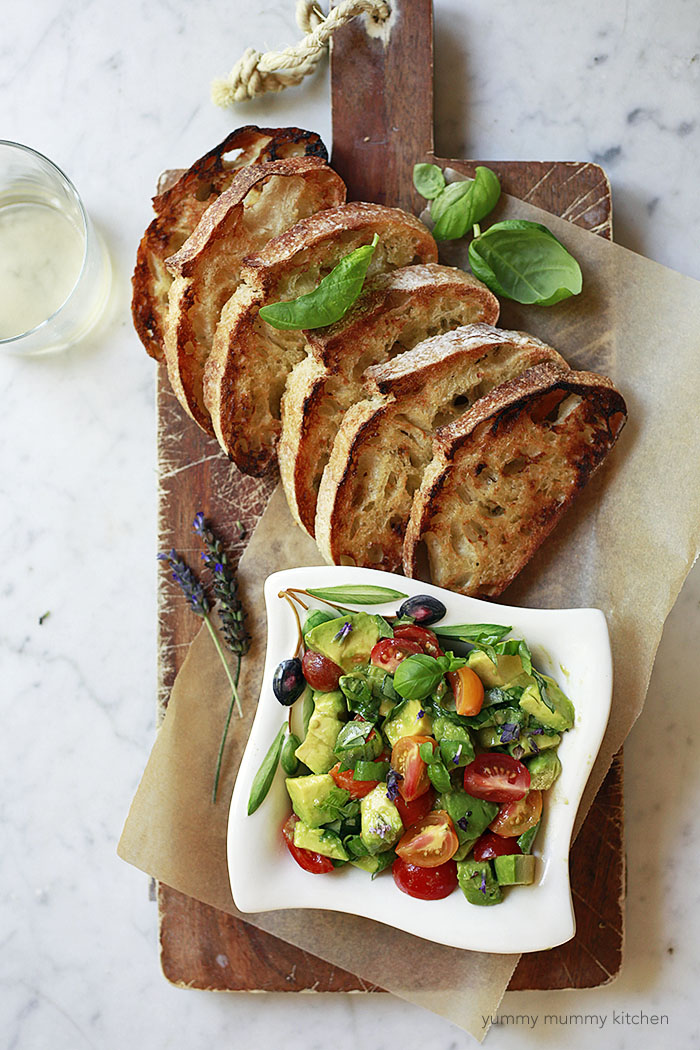
Satisfying avocado bruschetta perfect for snacking or bringing to get-togethers. This avocado bruschetta can be made up to 24 hours in advance without turning brown. What a delicious Italian twist on avocado toast!
 Like many native Californians, avocados are a staple in my diet. We have been eating "avocado toast" long before it was a thing. These creamy fruits are one of my favorite things to eat - breakfast, lunch or dinner. My kids often ask for "avocado with salt" for snack and simply scoop the avocado out of their own natural skin bowls. Foods that come with their own natural packaging are the best. There's no need for plastic with foods like bananas, avocados, and passion fruit. As much as I love avocado on its own, sometimes it's fun to spice things up a bit with a fun avocado toast variation. This Italian inspired twist on avocado toast is perfect for summer and a nice break from guacamole. Since it's been so warm lately, I've kept a bowl of avocado bruschetta in the fridge for a cool snack. One of the biggest complaints about avocados is that they turn brown so quickly once cut. Well, not with this avocado bruschetta recipe! The vinegar here keeps the avocado bruschetta perfectly green for over 24 hours in the refrigerator! So you can toss a bowl of bruschetta together and bring it out to enjoy with friends later.
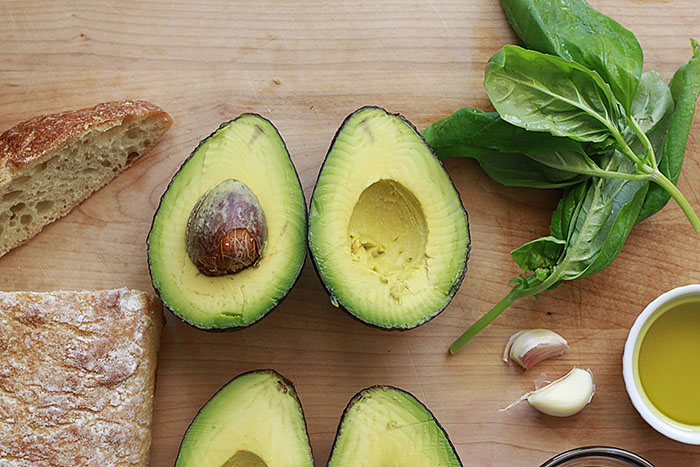
 One of the first things I learned to make when I was living in Florence was authentic Italian bruschetta. And bruschetta has been a favorite of mine ever since our lovely cooking teacher, Maria, taught me how to make it over a bottle of sangiovese. Avocado bruschetta certainly is not an authentic Italian recipe, but the method here is.
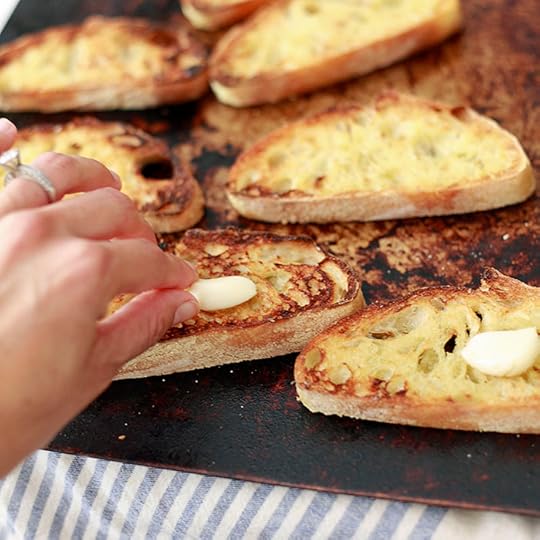 Many Americans think of bruschetta, which is pronounced bru-ske-ta, as the tomato topping most often served here in the U.S. In Italy, bruschetta is simply rustic bread toasted with olive oil, rubbed with garlic and sprinkled with a pinch of salt. And it is oh so tasty just like that. Bruschetta is more than just the topping, the bread is flavorful too.
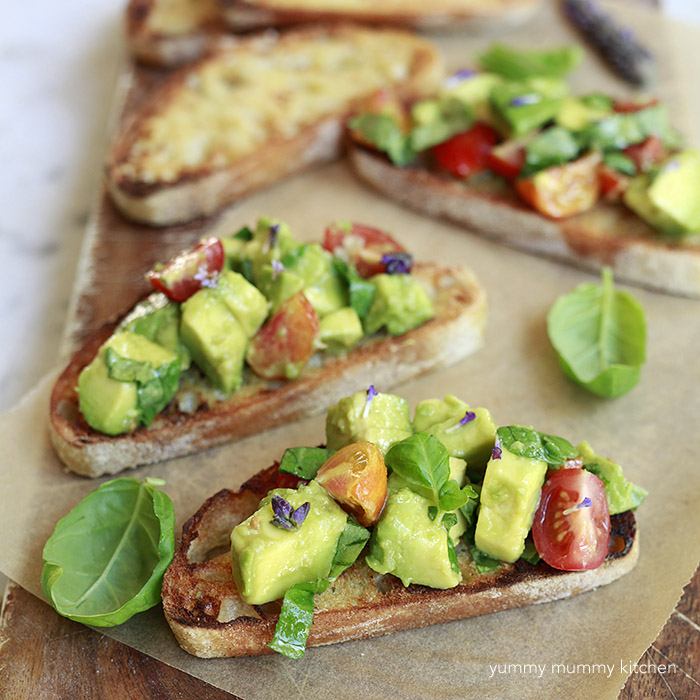
 Heirloom cherry tomatoes make this bruschetta refreshing and colorful. And since our lavender is blooming, I've been adding the flowers to just about everything. When I made this avocado bruschetta recipe this week (after photographing the recipe) I added a diced Persian cucumber and loved the added crunch. The only ingredient that may be new to you is white balsamic vinegar. I found a bottle at Trader Joe's and am loving it for light salad dressings. It has that wonderful tangy flavor of traditional balsamic, but is clear, so it won't turn this avocado bruschetta brown.

What's your favorite way to eat avocados? Buon appetito and have a beautiful weekend.
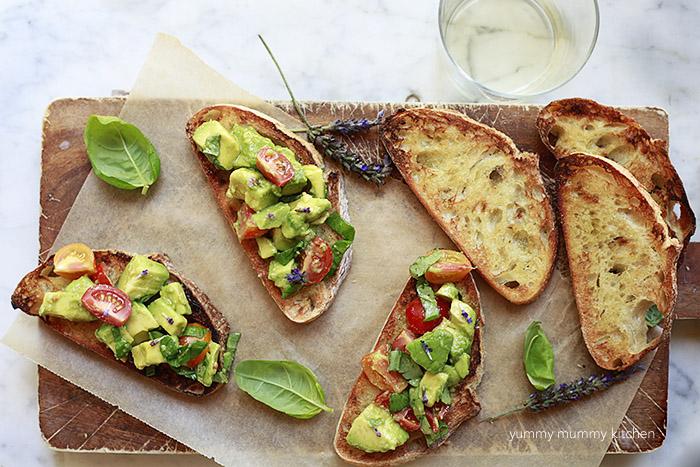
Avocado Toast Bruschetta
Bruschetta with avocado, tomato, and fresh basil make a tasty snack. Ingredients1 loaf rustic bread or baguette, sliced 1/2 inch thick1/4 cup extra virgin olive oil, divided1 clove garlic, peeled 1 clove garlic, finely minced or crushed 1 Roma tomato, diced or 1/2 cup quartered cherry tomatoes 1 large avocado, peeled, seeded and diced1 tablespoon white balsamic vinegar1/4 teaspoon sea salt1/4 cup sliced basil 1 Persian cucumber, diced (optional) InstructionsPreheat the broiler. Place the bread slices on a cookie sheet and brush with a little olive oil. Toast until golden brown. Slice one garlic clove in half and rub over the warm toast. In a small-medium bowl, gently combine 1 tablespoon olive oil, the minced garlic, tomato, avocado, white balsamic, salt, basil, and cucumber. Season to taste with more salt and/or vinegar if desired. Serve the avocado topping with the toasted bread. Topping will keep refrigerated in an airtight container for up to 24 hours. Yield: Serves 4
Prep Time: 5 mins. Cook time: 3 mins.
Total time: 8 mins.


 Like many native Californians, avocados are a staple in my diet. We have been eating "avocado toast" long before it was a thing. These creamy fruits are one of my favorite things to eat - breakfast, lunch or dinner. My kids often ask for "avocado with salt" for snack and simply scoop the avocado out of their own natural skin bowls. Foods that come with their own natural packaging are the best. There's no need for plastic with foods like bananas, avocados, and passion fruit. As much as I love avocado on its own, sometimes it's fun to spice things up a bit with a fun avocado toast variation. This Italian inspired twist on avocado toast is perfect for summer and a nice break from guacamole. Since it's been so warm lately, I've kept a bowl of avocado bruschetta in the fridge for a cool snack. One of the biggest complaints about avocados is that they turn brown so quickly once cut. Well, not with this avocado bruschetta recipe! The vinegar here keeps the avocado bruschetta perfectly green for over 24 hours in the refrigerator! So you can toss a bowl of bruschetta together and bring it out to enjoy with friends later.
 One of the first things I learned to make when I was living in Florence was authentic Italian bruschetta. And bruschetta has been a favorite of mine ever since our lovely cooking teacher, Maria, taught me how to make it over a bottle of sangiovese. Avocado bruschetta certainly is not an authentic Italian recipe, but the method here is.
 Many Americans think of bruschetta, which is pronounced bru-ske-ta, as the tomato topping most often served here in the U.S. In Italy, bruschetta is simply rustic bread toasted with olive oil, rubbed with garlic and sprinkled with a pinch of salt. And it is oh so tasty just like that. Bruschetta is more than just the topping, the bread is flavorful too.
 Heirloom cherry tomatoes make this bruschetta refreshing and colorful. And since our lavender is blooming, I've been adding the flowers to just about everything. When I made this avocado bruschetta recipe this week (after photographing the recipe) I added a diced Persian cucumber and loved the added crunch. The only ingredient that may be new to you is white balsamic vinegar. I found a bottle at Trader Joe's and am loving it for light salad dressings. It has that wonderful tangy flavor of traditional balsamic, but is clear, so it won't turn this avocado bruschetta brown.
What's your favorite way to eat avocados? Buon appetito and have a beautiful weekend.
Avocado Toast Bruschetta
Bruschetta with avocado, tomato, and fresh basil make a tasty snack. Ingredients1 loaf rustic bread or baguette, sliced 1/2 inch thick1/4 cup extra virgin olive oil, divided1 clove garlic, peeled 1 clove garlic, finely minced or crushed 1 Roma tomato, diced or 1/2 cup quartered cherry tomatoes 1 large avocado, peeled, seeded and diced1 tablespoon white balsamic vinegar1/4 teaspoon sea salt1/4 cup sliced basil 1 Persian cucumber, diced (optional) InstructionsPreheat the broiler. Place the bread slices on a cookie sheet and brush with a little olive oil. Toast until golden brown. Slice one garlic clove in half and rub over the warm toast. In a small-medium bowl, gently combine 1 tablespoon olive oil, the minced garlic, tomato, avocado, white balsamic, salt, basil, and cucumber. Season to taste with more salt and/or vinegar if desired. Serve the avocado topping with the toasted bread. Topping will keep refrigerated in an airtight container for up to 24 hours. Yield: Serves 4
Prep Time: 5 mins. Cook time: 3 mins.
Total time: 8 mins.
July 20, 2016
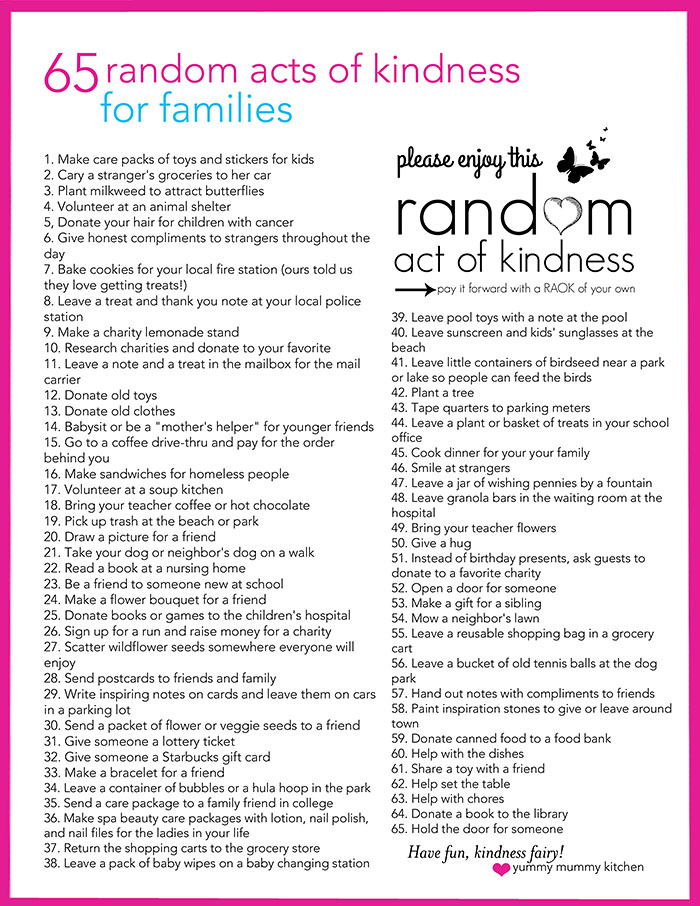
65 Random Acts of Kindness {Ideas for Kids}

One year ago one of my best friends lost their daughter to SMA (Spinal Muscular Atrophy). Gwendolyn was one of my girls' best buddies from the time they were just a few months old. For weeks I've been thinking about what I can do to honor Gwendolyn on her first angelversary and support our friends. Nothing seemed right for this little girl who changed the world in a gentle way.
Then a few days ago Victoria posted about this on the Gwendolyn Strong Foundation blog. She asked that to honor her girl who brought, and still brings, so much good and light into the world, we do something good. "Honor Gwendolyn's legacy on July 25th by being the good in the world. Donate in her memory. Perform an act of service for someone in need. Gather as a family to find a way to give back together. Brighten someone's day. Remember Gwendolyn and why she moved you and pass that goodness onto someone else.You can share your kind action with us with #GoodforGwendolyn and help her legacy continue to flow through the world."

I suddenly knew just what to do. It felt right. It's something I've actually been meaning to do for a long time. As she has always done, Gwendolyn is inspiring us to be the good and Never Give Up. So this week, leading up to Gwendolyn's angelversary on July 25th, my girls and I will be sharing random acts of kindness all over our town. We hope you will join us, so we've put together a list of ideas and a printable note you are welcome to use.
Here's what we've been up to. The kindness fairies have been busy the past couple of days...
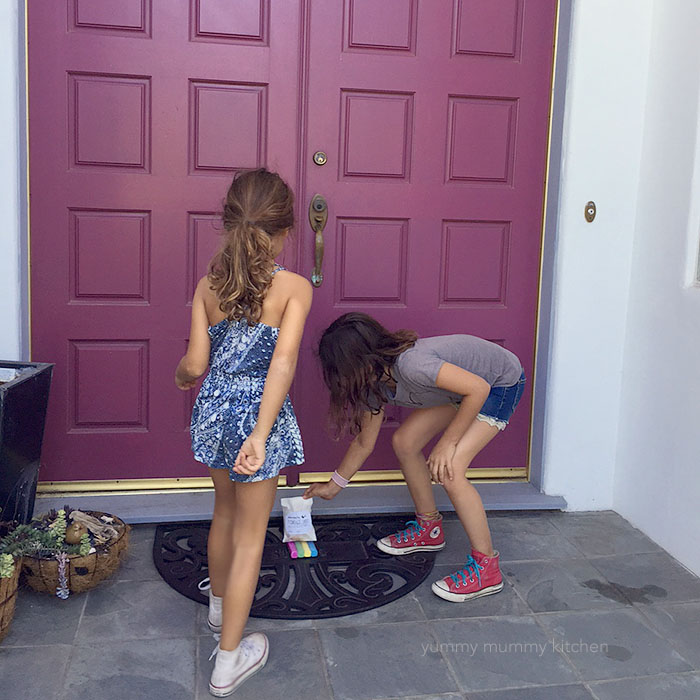 Delivering goodies to friends...
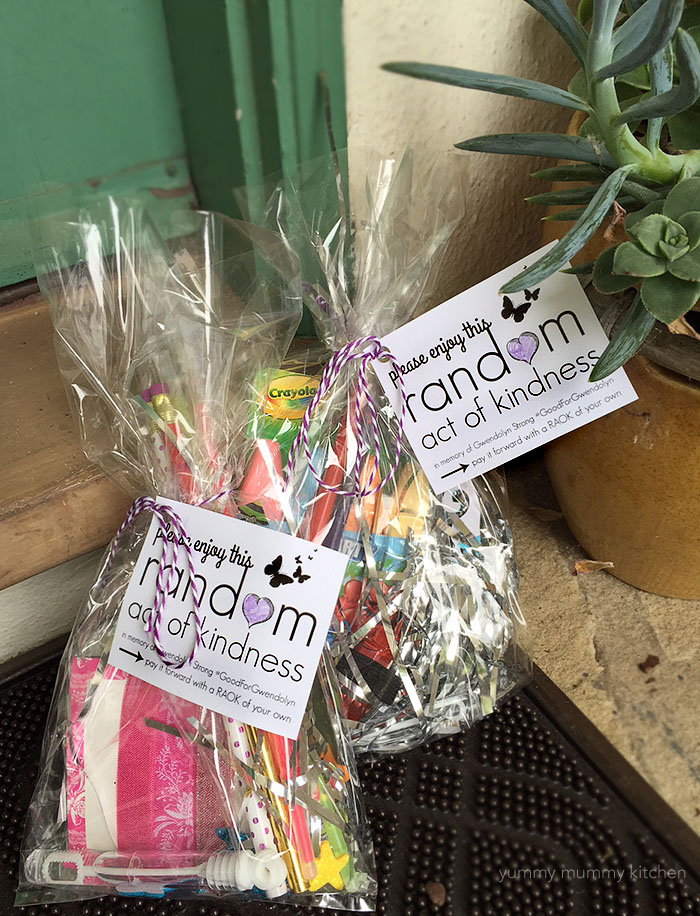 And dashing away before getting caught!
 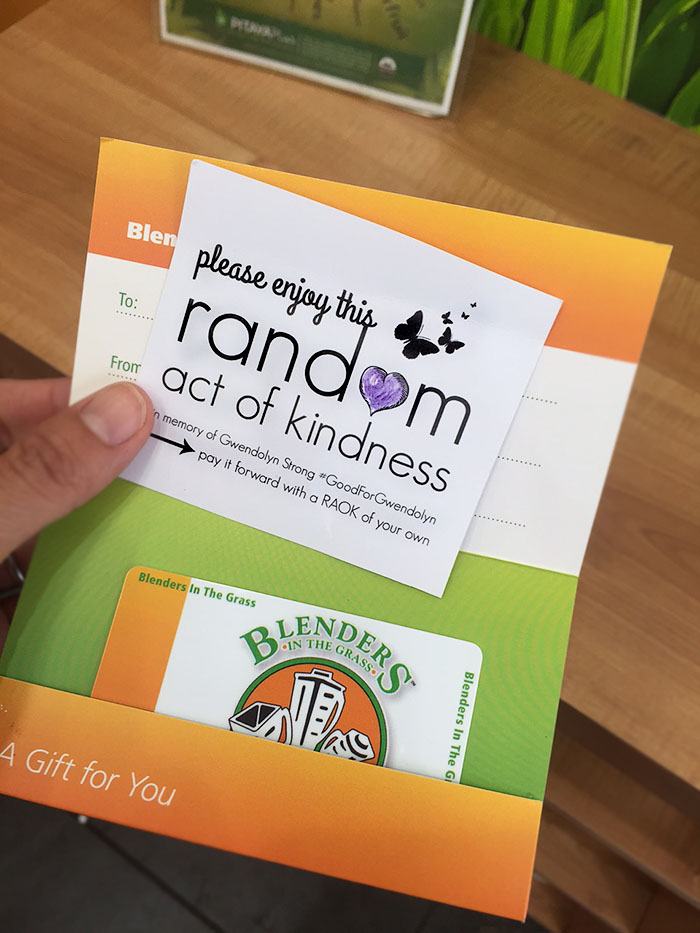 We even RAOK'd strangers. Strangers are really, REALLY surprised when you do something nice for them. While getting smoothies at our local juice place, we got a $5 gift card and handed it to the woman behind us in line. The girls loved seeing her shocked and then grateful reaction. It made me a little teeny bit sad that people were in such disbelief at the thought of a stranger doing something kind. We get so used to strangers being in a hurry, honking, rushing to get to the front of the line, that when someone says, "why don't you go ahead of me," we are surprised.
We left a reusable shopping bag in a cart a Trader Joe's.
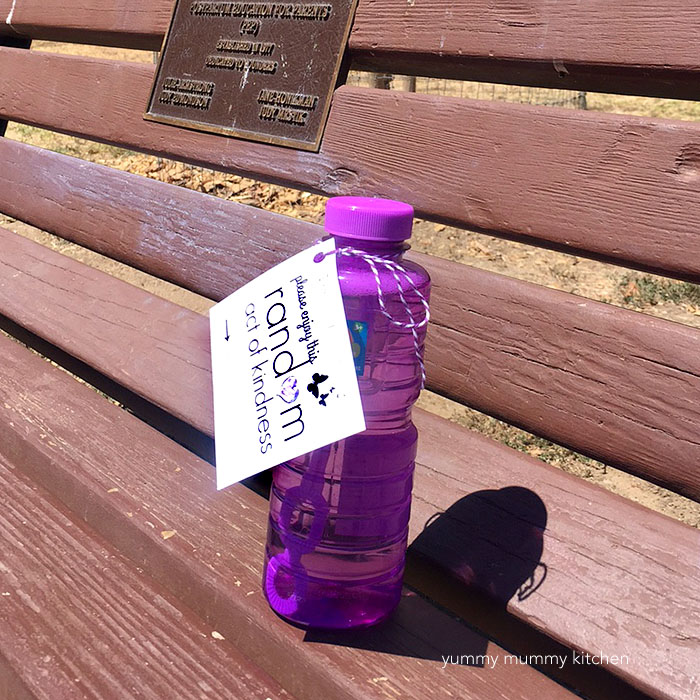 And bubbles on park benches.
 Although we wanted our random acts of kindness to remain anonymous, I'm sharing here to inspire you to make your own random acts of kindness. Lately the world I love so much has seemed so sad. So filled with hate and violence. Sometimes it feels there's nothing I can do. From the moment we started doing our acts of kindness, however, I realized there is something we can all do. Fill the world with kindness. Be the good and drown out the hate. If you feel sad, just do something good. You'll feel better - promise.
Random acts of kindness are a meaningful experience for kids who are on summer break right now. I know many families do this over winter break as well, so if you can't do it now, save this idea for later. The most important part of education to me is teaching our children to be kind, compassionate individuals. Learning the joy of giving is a great way to do that. Share your good with the hashtag #GoodforGwendolyn.
Many of these Random Acts of Kindness require a note attached so that the lucky finder knows it's for them. Also, I know it hopefully goes without saying, but these acts of kindness are not for children to do alone. As always, keep an eye on your children.
Click here to download the printable files for the notes and the Random Acts of Kindness list.
Will you join us in being the #GoodForGwendolyn? Please share your kindness on social media.


July 19, 2016
Veggie Tacos with Black Beans and Cabbage
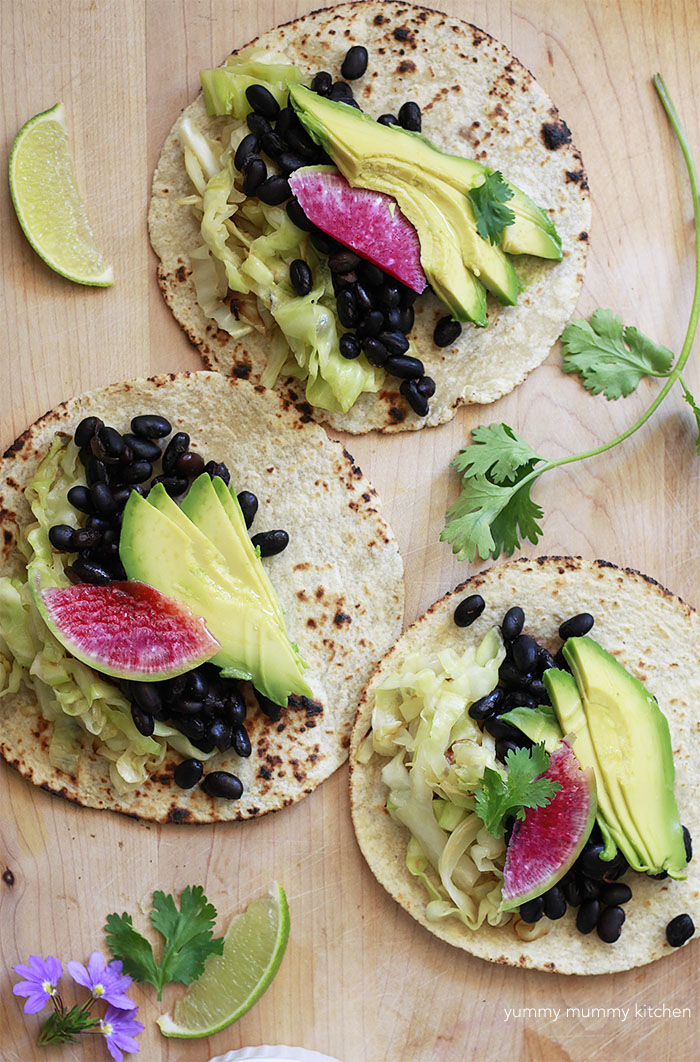 Happy Taco Tuesday! Black beans and hearty sautéed cabbage... talk about an easy wholesome dinner on the cheap! We love tacos at our house and I love to mix up the fillings. I usually let everyone assemble their own veggie tacos so that everyone is happy. Since I cooked that big batch of slow cooker black beans a few days ago, these tacos were crazy easy, cheap, healthy, and tasty. They didn't need any cheese, in my option, making these tacos completely vegan. If you must, you could of course add some grilled shrimp or chicken, but we thought these veggie tacos were plenty hearty.
 I learned to love sautéed cabbage in tacos when we were in Hawaii last month. While the tacos at Island Taco weren't as authentically Mexican as we are used to in So-Cal, they were surprisingly delicious! Almost all were stuffed with a generous pile of sautéed cabbage. Cabbage is in the cruciferous vegetable family, like broccoli, and very good for you. But when sautéed until tender with salt and pepper it turns into a hearty, warm, comfort food. Sautéed cabbage is perfect for bulking up tacos.
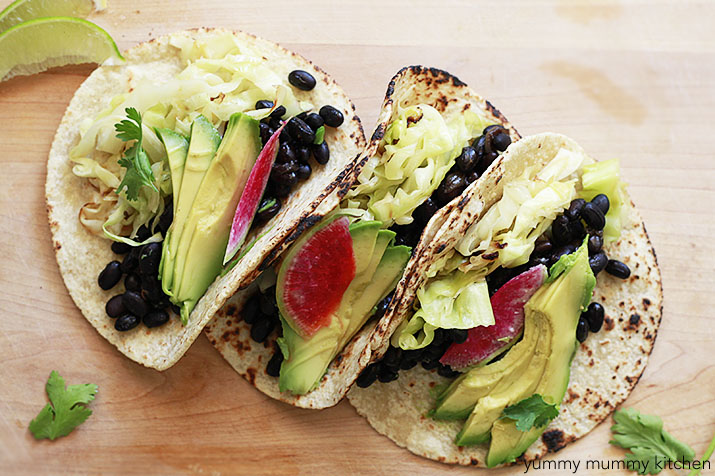 Unlike some taco places that sell tacos filled with lard, these nourishing tacos won't leave you with a stomach ache. The key to perfect tacos is to heat up those tortillas. I like to pop them under the broiler so that the edges get browned and the tortillas return to that just-made taste. Filled with cabbage and black beans, all these tacos need now is some avocado, a squeeze of lime, and possibly some salsa. I couldn't resist adding a few pieces of thinly sliced watermelon radish for a pop of color and crunch. The pink and green really is gorgeous, isn't it?
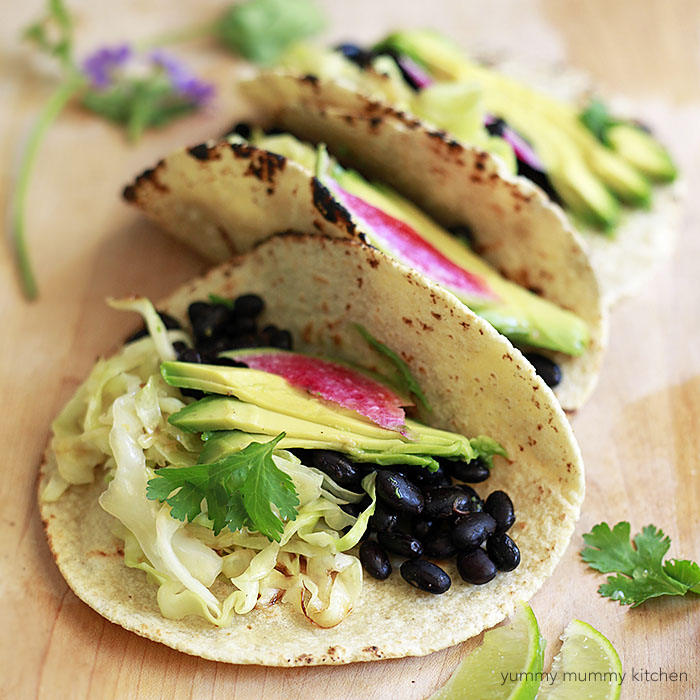
These veggie tacos really are so easy and a delicious way to get more cruciferous veggie into your diet. Make a batch of slow cooker black beans and you'll be ready to make these anytime.
Black Bean and Cabbage Veggie TacosBy Yummy Mummy Kitchen
Printer Friendly Recipe
Published 07/19/2016
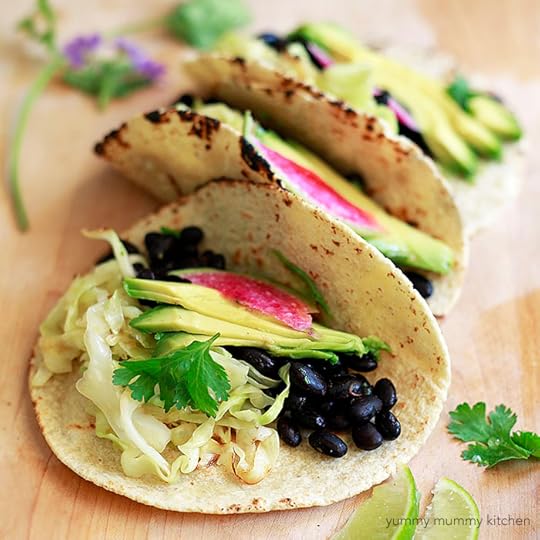
Black bean and cabbage tacos. Ingredients2 cups cooked black beans1 small white cabbage2 tablespoons extra virgin olive oil, or coconut oil 1 teaspoon sea saltpinch freshly ground pepper1 package tortillas2 avocados, peeled and sliced1 lime, cut into wedgesfresh salsa, for serving cilantro, for garnish, optional1 small watermelon radish, thinly sliced, optionalInstructionsWarm the beans in a saucepan. Cut the cabbage into thin strips. Saute the cabbage in oil, in a large skillet over medium heat. Season with salt and pepper. Cook until tender, about 8-10 minutes, stirring occasionally. Place tortillas on a cookie sheet and heat under the broiler for just a minute or two, taking care not to burn them. Fill warm tortillas with beans and cabbage. Top with avocado and squeeze lime over the fillings. Serve with salsa, cilantro, and radish. Yield: Serves 4
Prep Time: 10 mins. Cook time: 15 mins.
Total time: 25 mins.
Tags: tacos, vegetarian, vegan, black beans
*Gluten Free Option: Use GF tortillas.