Marina Delio's Blog, page 2
February 16, 2018
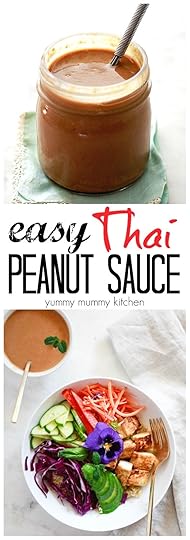
Simple Thai Peanut Sauce Recipe
An easy Thai inspired peanut sauce perfect for dipping or drizzling! This delicious sauce comes together in one bowl in 5 minutes and is so much tastier than store bought peanut sauces. 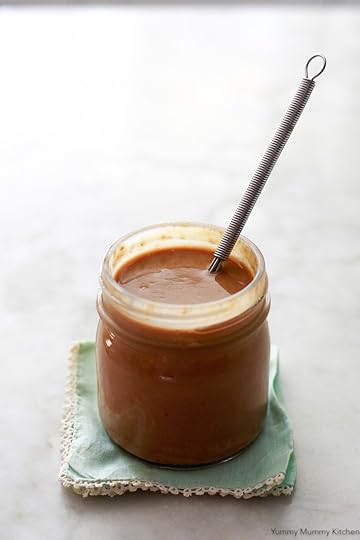
I have been completely addicted to fresh spring rolls lately. When I'm out and about with no time to make lunch, I'll grab a couple from Trader Joe's or Whole Foods. When we get Thai take-out I always order fresh spring rolls with peanut dipping sauce. More recently I've started making spring rolls and peanut sauce at home. I'm going to be sharing the spring roll recipe very soon, but I wanted to give you the recipe for this amazing peanut sauce first, and separately, because you can use it for other recipes too. If peanut sauce is one of those things you only buy at the store, it's time to try making it at home. This simple peanut sauce recipe tastes so much better than the bottled version and is done in under 5 minutes. After testing and tweaking, this creamy peanut sauce has the perfect balance of sweet and salty flavors. Let's take a look at the ingredients for Thai peanut sauce.
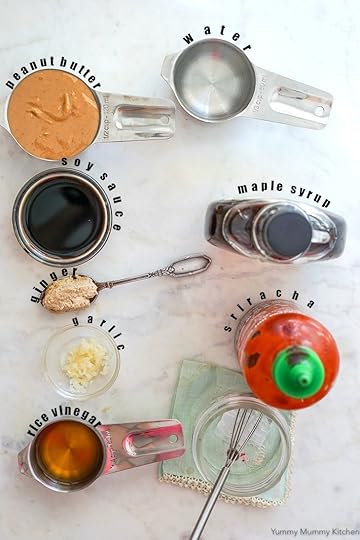
I almost always have all of these simple ingredients on hand. Peanut butter gets thinned out and loaded with flavor with a little help from soy sauce, garlic, ginger, rice vinegar and just a tiny splash of maple syrup and sriracha chili sauce. While some people make their peanut sauce with coconut milk, I find that this recipe is creamy enough without it. I adapted this recipe from one on the back of a package of rice paper wraps from Star Anise Foods. This Thai peanut sauce isn't spicy because I just use a tiny bit of sriracha. If you love spicy foods though, go ahead and add more sriracha. If you don't do soy or gluten, scrap the soy sauce and use coconut aminos instead.
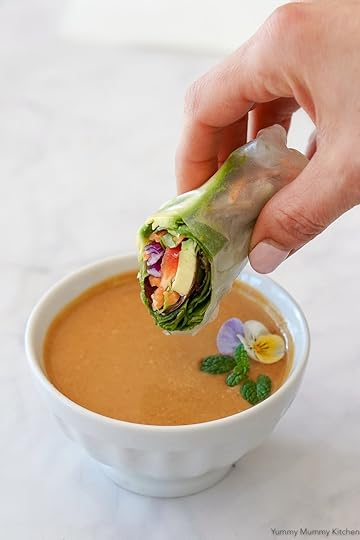
What to Make with Peanut Sauce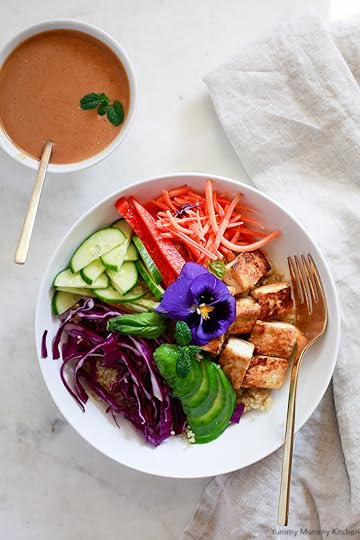 The first thing that comes to mind for using up peanut sauce is spring rolls, but there are many other ways to use it. Drizzle your homemade peanut sauce over Thai inspired Buddha bowls like this quinoa bowl, toss with noodles, add flavor to stir fry, or make a tofu satay to dip in your sauce.
 This simple Thai peanut sauce will make your Thai inspired recipes so much more delicious. Watch the video to see how it's done.
Yield: about 1 cupAuthor: Yummy Mummy KitchenPrint Recipe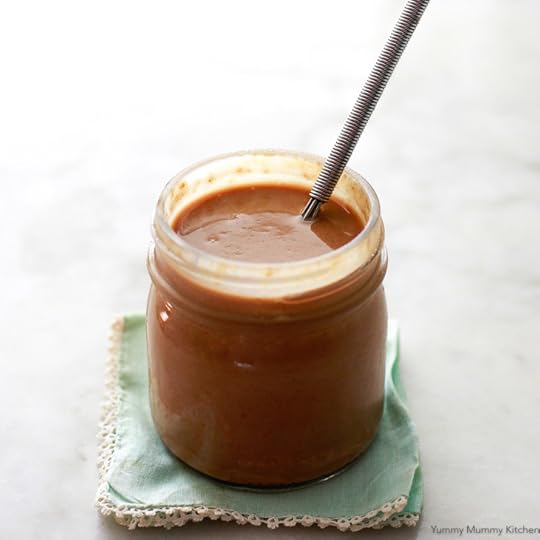 Simple Thai Peanut SauceA delicious Thai style peanut dipping sauce perfect for spring rolls, satay, or Buddha bowls. This easy recipe comes together in five minutes.prep time: 5 MINScook time: total time: 5 minsingredients
1/2 cup peanut butter (unsalted, unsweetened) 2 tablespoons soy sauce (coconut aminos for gluten-free)1/2 tablespoon minced ginger1 clove garlic, minced2 tablespoons rice vinegar1/2 teaspoon sriracha sauce1/2 teaspoon maple syrup 1/3 cup waterinstructions
Add the peanut butter, soy sauce, ginger, garlic, vinegar, sriracha, and maple syrup to a small bowl or jar. Whisk together, then whisk in the water slowly until the desired consistency has been reached. This peanut sauce tends to thicken up over time, so add more water as needed to thin. Taste and adjust as you'd like. notesNutrition information has been calculated for 1/10 of this recipe. Nutrition information is approximate and I can't guarantee accuracy, as I do my best using a third party calculator.calories
82fat (grams)
6.5sat. fat (grams)
1carbs (grams)
3protein (grams)
3.5sugar (grams)
1.5http://www.yummymummykitchen.com/2018/02/simple-thai-peanut-sauce-recipe.htmlCreated using The Recipes Generator.recipe-inner{text-align:left;max-width:620px;border:6px double #009BFF;padding:20px;background:#f2f2f2;margin: 40px auto;font-family:Lato, sans-serif;}.recipe-inner a{color: #4193f0;}#recipe .recipe-name{font-size: 21px;}#recipe .info{font-size:13px;text-transform:capitalize;border-bottom:2px solid #000;padding-bottom:7px;margin-bottom:20px}.info:after{content:'';display:table;clear:both}#recipe .info span:first-child{margin-right:30px}#printbutton{border:0;margin:0;color:#fff;float:right;background:#555; padding:5px;border-radius:3px;cursor:pointer}#recipe .time{text-transform:uppercase;font-size:12px;text-align:center;background:#fff;padding:15px 0;margin-bottom:20px}#recipe .time span:not(:last-child){margin-right:12px}#recipe .time span:not(:last-child):after{content:'';display:inline-block;height:10px;width:1px;background:#000;vertical-align:middle;margin-left:12px}#recipe .summary{line-height:1.7;font-style:italic}.ingredients{line-height:1.7;clear:both}.ingredients h3,.instructions h3,.notes h3{font-size:20px !important;font-weight:400 !important;margin-bottom:0;color:#000;text-transform: uppercase;}.ingredients ul{margin:0!important;margin-top:5px !important;}.instructions li{margin-bottom:15px !important;line-height:1.6;text-align:left;}.ingredients li{text-align:left}#recipe .instructions{margin-top: 30px;}#recipe .instructions ol,#recipe .instructions ol li {list-style:decimal !important;}#recipe .instructions ol{padding-left:39px;margin:0!important;margin-top:6px !important;}.posturl{border-top:1px solid #ccc;padding-top:10px;}.ing-section{padding-left:20px;margin: 10px 0;}.ing-section > span{font-weight:700}.recipe-credit{font-size:13px;border-top: 1px solid #ccc;padding:10px;text-align:center;background:#ffffff;margin:-20px;margin-top:15px;}.recipe-credit a{color:blue;text-decoration:none;}.copyright-statement{font-size: 13px;font-style:italic;border-top: 1px solid #ccc;margin-top:15px;padding-top:15px;line-height:1.6;}.notes pre{font-size: 15px;margin: 10px 0;padding-left: 20px;font-family: inherit;line-height: 1.7;white-space: pre-line;}.notes h3{margin: 0}.nutrition-info{font-size: 0;margin: 20px 0;padding: 10px;background: #fff;}.nutrition-info>div {display: inline-block;font-size: 14px;width: 20%;text-align: center;}.nutrition-info>div:nth-child(5) ~ div{margin-top: 20px;}.nutrition-info>div p{margin-top: 0;margin-bottom: 7px;}#recipe .info{position:relative}#recipe .image{text-align:center;margin:25px 0}#recipe .image img{max-width:100%;width:150px;height:150px;-o-object-fit:cover;object-fit:cover;border-radius:150px}#recipe .recipe-name{margin-top: 20px;text-align:center}#recipe .summary{margin:20px 0;clear:both;line-height:1.7;font-style:italic}#recipe .time{clear:both;border-top:1px dotted #000;border-bottom:1px dotted #000;border-right:0;border-left:0}


I have been completely addicted to fresh spring rolls lately. When I'm out and about with no time to make lunch, I'll grab a couple from Trader Joe's or Whole Foods. When we get Thai take-out I always order fresh spring rolls with peanut dipping sauce. More recently I've started making spring rolls and peanut sauce at home. I'm going to be sharing the spring roll recipe very soon, but I wanted to give you the recipe for this amazing peanut sauce first, and separately, because you can use it for other recipes too. If peanut sauce is one of those things you only buy at the store, it's time to try making it at home. This simple peanut sauce recipe tastes so much better than the bottled version and is done in under 5 minutes. After testing and tweaking, this creamy peanut sauce has the perfect balance of sweet and salty flavors. Let's take a look at the ingredients for Thai peanut sauce.
I almost always have all of these simple ingredients on hand. Peanut butter gets thinned out and loaded with flavor with a little help from soy sauce, garlic, ginger, rice vinegar and just a tiny splash of maple syrup and sriracha chili sauce. While some people make their peanut sauce with coconut milk, I find that this recipe is creamy enough without it. I adapted this recipe from one on the back of a package of rice paper wraps from Star Anise Foods. This Thai peanut sauce isn't spicy because I just use a tiny bit of sriracha. If you love spicy foods though, go ahead and add more sriracha. If you don't do soy or gluten, scrap the soy sauce and use coconut aminos instead.
What to Make with Peanut Sauce
The first thing that comes to mind for using up peanut sauce is spring rolls, but there are many other ways to use it. Drizzle your homemade peanut sauce over Thai inspired Buddha bowls like this quinoa bowl, toss with noodles, add flavor to stir fry, or make a tofu satay to dip in your sauce. This simple Thai peanut sauce will make your Thai inspired recipes so much more delicious. Watch the video to see how it's done. Yield: about 1 cupAuthor: Yummy Mummy KitchenPrint Recipe
Simple Thai Peanut SauceA delicious Thai style peanut dipping sauce perfect for spring rolls, satay, or Buddha bowls. This easy recipe comes together in five minutes.prep time: 5 MINScook time: total time: 5 minsingredients1/2 cup peanut butter (unsalted, unsweetened) 2 tablespoons soy sauce (coconut aminos for gluten-free)1/2 tablespoon minced ginger1 clove garlic, minced2 tablespoons rice vinegar1/2 teaspoon sriracha sauce1/2 teaspoon maple syrup 1/3 cup waterinstructions
Add the peanut butter, soy sauce, ginger, garlic, vinegar, sriracha, and maple syrup to a small bowl or jar. Whisk together, then whisk in the water slowly until the desired consistency has been reached. This peanut sauce tends to thicken up over time, so add more water as needed to thin. Taste and adjust as you'd like. notesNutrition information has been calculated for 1/10 of this recipe. Nutrition information is approximate and I can't guarantee accuracy, as I do my best using a third party calculator.calories
82fat (grams)
6.5sat. fat (grams)
1carbs (grams)
3protein (grams)
3.5sugar (grams)
1.5http://www.yummymummykitchen.com/2018/02/simple-thai-peanut-sauce-recipe.htmlCreated using The Recipes Generator.recipe-inner{text-align:left;max-width:620px;border:6px double #009BFF;padding:20px;background:#f2f2f2;margin: 40px auto;font-family:Lato, sans-serif;}.recipe-inner a{color: #4193f0;}#recipe .recipe-name{font-size: 21px;}#recipe .info{font-size:13px;text-transform:capitalize;border-bottom:2px solid #000;padding-bottom:7px;margin-bottom:20px}.info:after{content:'';display:table;clear:both}#recipe .info span:first-child{margin-right:30px}#printbutton{border:0;margin:0;color:#fff;float:right;background:#555; padding:5px;border-radius:3px;cursor:pointer}#recipe .time{text-transform:uppercase;font-size:12px;text-align:center;background:#fff;padding:15px 0;margin-bottom:20px}#recipe .time span:not(:last-child){margin-right:12px}#recipe .time span:not(:last-child):after{content:'';display:inline-block;height:10px;width:1px;background:#000;vertical-align:middle;margin-left:12px}#recipe .summary{line-height:1.7;font-style:italic}.ingredients{line-height:1.7;clear:both}.ingredients h3,.instructions h3,.notes h3{font-size:20px !important;font-weight:400 !important;margin-bottom:0;color:#000;text-transform: uppercase;}.ingredients ul{margin:0!important;margin-top:5px !important;}.instructions li{margin-bottom:15px !important;line-height:1.6;text-align:left;}.ingredients li{text-align:left}#recipe .instructions{margin-top: 30px;}#recipe .instructions ol,#recipe .instructions ol li {list-style:decimal !important;}#recipe .instructions ol{padding-left:39px;margin:0!important;margin-top:6px !important;}.posturl{border-top:1px solid #ccc;padding-top:10px;}.ing-section{padding-left:20px;margin: 10px 0;}.ing-section > span{font-weight:700}.recipe-credit{font-size:13px;border-top: 1px solid #ccc;padding:10px;text-align:center;background:#ffffff;margin:-20px;margin-top:15px;}.recipe-credit a{color:blue;text-decoration:none;}.copyright-statement{font-size: 13px;font-style:italic;border-top: 1px solid #ccc;margin-top:15px;padding-top:15px;line-height:1.6;}.notes pre{font-size: 15px;margin: 10px 0;padding-left: 20px;font-family: inherit;line-height: 1.7;white-space: pre-line;}.notes h3{margin: 0}.nutrition-info{font-size: 0;margin: 20px 0;padding: 10px;background: #fff;}.nutrition-info>div {display: inline-block;font-size: 14px;width: 20%;text-align: center;}.nutrition-info>div:nth-child(5) ~ div{margin-top: 20px;}.nutrition-info>div p{margin-top: 0;margin-bottom: 7px;}#recipe .info{position:relative}#recipe .image{text-align:center;margin:25px 0}#recipe .image img{max-width:100%;width:150px;height:150px;-o-object-fit:cover;object-fit:cover;border-radius:150px}#recipe .recipe-name{margin-top: 20px;text-align:center}#recipe .summary{margin:20px 0;clear:both;line-height:1.7;font-style:italic}#recipe .time{clear:both;border-top:1px dotted #000;border-bottom:1px dotted #000;border-right:0;border-left:0}


February 13, 2018
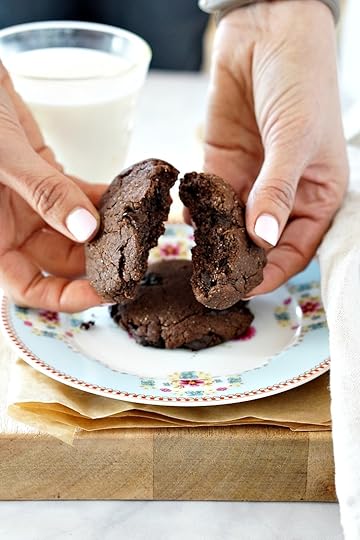
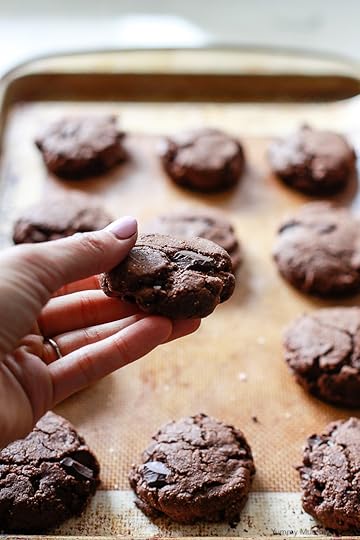
Double Chocolate Chip Almond Flour Cookies
These are the best double chocolate chunk cookies! Made with almond flour and almond butter, these delicious chocolate cookies are vegan, gluten-free, and paleo friendly!
I have been on an absolute cookie baking spree the past couple of days. The kitchen is now covered in chocolate powder and the sink filled with bowls, but chocolate cookies are totally worth the mess. I wanted these chocolate cookies to be just right for you, so I made three batches while perfecting the recipe. I tried them with just almond flour, with one tablespoon of coconut flour, with two tablespoons of coconut flour, with a flax egg, with a real egg... You get the idea. Now I've just got to give them away before I devour them all while the kids are at school. Give me a warm chocolatey cookie and a cup of tea and I am one happy mama. These rich chocolate chocolate chip or chunk cookies are a lot like the Paleo Chocolate Banana Muffins I shared a few years ago, which still get great reviews.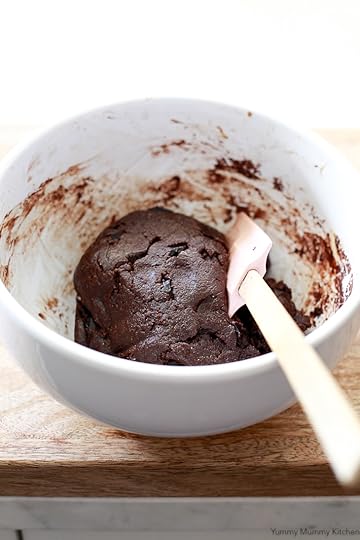
These rich, decadent, fudgy chocolate cookies are such an amazing way to satisfy any chocolate craving. They are so easy to whip up in one bowl and are done in under 30 minutes. You could also blend these together in a food processor or stand mixer if you like. When you first start mixing the dough together it may seem too dry, but once you keep stirring, it comes together in a very thick dough. Coconut flour is incredibly absorbent, so we usually use a very small amount when baking with it. However, it really helps bind the ingredients together and keep the almond flour from crumbling. When I tested these paleo double chocolate chip cookies using only almond flour, they were delicious, but a bit crumbly and dry, so I do recommend using the coconut flour. If you would like to make these cookies vegan, use a flax egg - it works very well here. When I tested this chocolate cookie recipe using one our backyard chicken eggs they were just a bit fluffier.
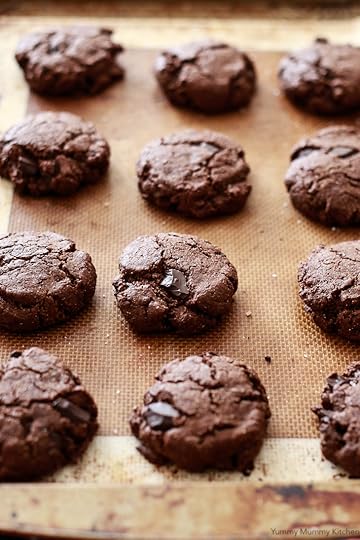
Chocolate cookies with melty chocolate chunks inside are just amazing. These are even better with a tiny pinch of pink or flaked sea salt on top to enhance the flavors. While I usually go for raw cacao powder in my chocolate recipes, I find a good quality unsweetened baking cocoa creates the best rich chocolate flavor in these cookies.
Shop this recipe! Here are a few ingredients you may need. These are Amazon affiliate links, which means I make a small commission when you make purchases through them. Thanks so much for your support!
Yield: about 15 cookiesAuthor: Yummy Mummy KitchenPrint Recipe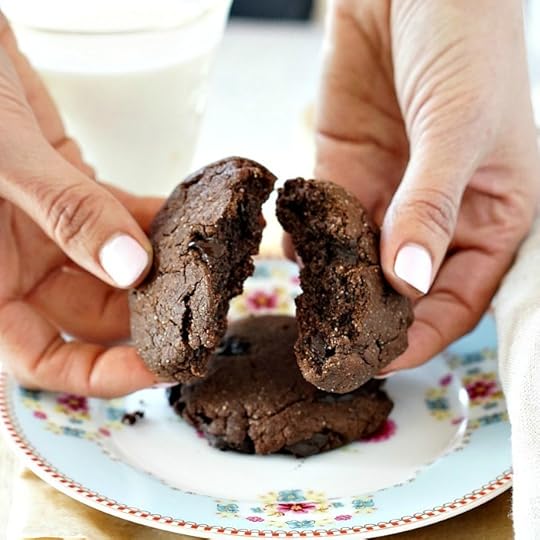 Paleo Double Chocolate CookiesEasy one-bowl rich and fudgy double chocolate cookies made with wholesome ingredients like almond flour and almond butter. These decadent cookies are vegan, gluten-free, and paleo.prep time: 5 MINScook time: 12 MINStotal time: 17 minsingredients
1 tablespoon flax meal (or 1 egg)1/2 cup almond butter (unsweetened, unsalted) 1/2 cup coconut sugar 1 teaspoon vanilla extract2 tablespoons melted coconut oil 1 cup almond flour2 tablespoons coconut flour1/2 teaspoon baking soda 1/4 teaspoon sea salt 1/3 cup unsweetened cocoa powder (I used Ghiradelli) 1/3 cup dairy-free chocolate chips or chunks (such as Enjoy Life or Lily's Sweets) instructions
Preheat the oven to 350 degrees F. Line a cookie sheet with parchment paper. In a small bowl, stir the flax meal with 3 tablespoons of warm water to make a flax egg, if using. Set aside. In a medium bowl stir together almond butter, coconut sugar, vanilla, egg/flax egg, and coconut oil. Add the almond flour, coconut flour, baking soda, salt, and cocoa powder and chocolate chunks and stir with a spatula until smooth. The dough will be very thick. Scoop heaping tablespoon sized mounds of dough onto the prepared cookie sheet. These cookies don't spread or flatten much, so press down with your fingers or the back of a cup coated with cooking spray. Bake for 12 minutes. Let cool on the cookie sheet for a few minutes before transferring to a cooling rack. notes*For vegan cookies use the flax egg rather than chicken's eggs.
*Nutrition information is approximate and my best calculation using a recipe calculator. I am not a nutritionist and cannot guarantee accuracy. If your health depends on nutrition information, be sure to calculate it using your favorite calculator.calories
134fat (grams)
9.5sat. fat (grams)
3carbs (grams)
12protein (grams)
2.7sugar (grams)
7http://www.yummymummykitchen.com/2018/02/double-chocolate-chip-cookies-paleo-vegan.htmlCreated using The Recipes Generator.recipe-inner{text-align:left;max-width:620px;border:6px double #009BFF;padding:20px;background:#f2f2f2;margin: 40px auto;font-family:Lato, sans-serif;}.recipe-inner a{color: #4193f0;}#recipe .recipe-name{font-size: 21px;}#recipe .info{font-size:13px;text-transform:capitalize;border-bottom:2px solid #000;padding-bottom:7px;margin-bottom:20px}.info:after{content:'';display:table;clear:both}#recipe .info span:first-child{margin-right:30px}#printbutton{border:0;margin:0;color:#fff;float:right;background:#555; padding:5px;border-radius:3px;cursor:pointer}#recipe .time{text-transform:uppercase;font-size:12px;text-align:center;background:#fff;padding:15px 0;margin-bottom:20px}#recipe .time span:not(:last-child){margin-right:12px}#recipe .time span:not(:last-child):after{content:'';display:inline-block;height:10px;width:1px;background:#000;vertical-align:middle;margin-left:12px}#recipe .summary{line-height:1.7;font-style:italic}.ingredients{line-height:1.7;clear:both}.ingredients h3,.instructions h3,.notes h3{font-size:20px !important;font-weight:400 !important;margin-bottom:0;color:#000;text-transform: uppercase;}.ingredients ul{margin:0!important;margin-top:5px !important;}.instructions li{margin-bottom:15px !important;line-height:1.6;text-align:left;}.ingredients li{text-align:left}#recipe .instructions{margin-top: 30px;}#recipe .instructions ol,#recipe .instructions ol li {list-style:decimal !important;}#recipe .instructions ol{padding-left:39px;margin:0!important;margin-top:6px !important;}.posturl{border-top:1px solid #ccc;padding-top:10px;}.ing-section{padding-left:20px;margin: 10px 0;}.ing-section > span{font-weight:700}.recipe-credit{font-size:13px;border-top: 1px solid #ccc;padding:10px;text-align:center;background:#ffffff;margin:-20px;margin-top:15px;}.recipe-credit a{color:blue;text-decoration:none;}.copyright-statement{font-size: 13px;font-style:italic;border-top: 1px solid #ccc;margin-top:15px;padding-top:15px;line-height:1.6;}.notes pre{font-size: 15px;margin: 10px 0;padding-left: 20px;font-family: inherit;line-height: 1.7;white-space: pre-line;}.notes h3{margin: 0}.nutrition-info{font-size: 0;margin: 20px 0;padding: 10px;background: #fff;}.nutrition-info>div {display: inline-block;font-size: 14px;width: 20%;text-align: center;}.nutrition-info>div:nth-child(5) ~ div{margin-top: 20px;}.nutrition-info>div p{margin-top: 0;margin-bottom: 7px;}#recipe .info{position:relative}#recipe .image{text-align:center;margin:25px 0}#recipe .image img{max-width:100%;width:150px;height:150px;-o-object-fit:cover;object-fit:cover;border-radius:150px}#recipe .recipe-name{margin-top: 20px;text-align:center}#recipe .summary{margin:20px 0;clear:both;line-height:1.7;font-style:italic}#recipe .time{clear:both;border-top:1px dotted #000;border-bottom:1px dotted #000;border-right:0;border-left:0}
Join me in pinning all the best recipes over on Pinterest! Here's a Pinterest friendly image of this recipe to get you started.


I have been on an absolute cookie baking spree the past couple of days. The kitchen is now covered in chocolate powder and the sink filled with bowls, but chocolate cookies are totally worth the mess. I wanted these chocolate cookies to be just right for you, so I made three batches while perfecting the recipe. I tried them with just almond flour, with one tablespoon of coconut flour, with two tablespoons of coconut flour, with a flax egg, with a real egg... You get the idea. Now I've just got to give them away before I devour them all while the kids are at school. Give me a warm chocolatey cookie and a cup of tea and I am one happy mama. These rich chocolate chocolate chip or chunk cookies are a lot like the Paleo Chocolate Banana Muffins I shared a few years ago, which still get great reviews.
These rich, decadent, fudgy chocolate cookies are such an amazing way to satisfy any chocolate craving. They are so easy to whip up in one bowl and are done in under 30 minutes. You could also blend these together in a food processor or stand mixer if you like. When you first start mixing the dough together it may seem too dry, but once you keep stirring, it comes together in a very thick dough. Coconut flour is incredibly absorbent, so we usually use a very small amount when baking with it. However, it really helps bind the ingredients together and keep the almond flour from crumbling. When I tested these paleo double chocolate chip cookies using only almond flour, they were delicious, but a bit crumbly and dry, so I do recommend using the coconut flour. If you would like to make these cookies vegan, use a flax egg - it works very well here. When I tested this chocolate cookie recipe using one our backyard chicken eggs they were just a bit fluffier.
Chocolate cookies with melty chocolate chunks inside are just amazing. These are even better with a tiny pinch of pink or flaked sea salt on top to enhance the flavors. While I usually go for raw cacao powder in my chocolate recipes, I find a good quality unsweetened baking cocoa creates the best rich chocolate flavor in these cookies.
Shop this recipe! Here are a few ingredients you may need. These are Amazon affiliate links, which means I make a small commission when you make purchases through them. Thanks so much for your support!
Yield: about 15 cookiesAuthor: Yummy Mummy KitchenPrint Recipe
Paleo Double Chocolate CookiesEasy one-bowl rich and fudgy double chocolate cookies made with wholesome ingredients like almond flour and almond butter. These decadent cookies are vegan, gluten-free, and paleo.prep time: 5 MINScook time: 12 MINStotal time: 17 minsingredients1 tablespoon flax meal (or 1 egg)1/2 cup almond butter (unsweetened, unsalted) 1/2 cup coconut sugar 1 teaspoon vanilla extract2 tablespoons melted coconut oil 1 cup almond flour2 tablespoons coconut flour1/2 teaspoon baking soda 1/4 teaspoon sea salt 1/3 cup unsweetened cocoa powder (I used Ghiradelli) 1/3 cup dairy-free chocolate chips or chunks (such as Enjoy Life or Lily's Sweets) instructions
Preheat the oven to 350 degrees F. Line a cookie sheet with parchment paper. In a small bowl, stir the flax meal with 3 tablespoons of warm water to make a flax egg, if using. Set aside. In a medium bowl stir together almond butter, coconut sugar, vanilla, egg/flax egg, and coconut oil. Add the almond flour, coconut flour, baking soda, salt, and cocoa powder and chocolate chunks and stir with a spatula until smooth. The dough will be very thick. Scoop heaping tablespoon sized mounds of dough onto the prepared cookie sheet. These cookies don't spread or flatten much, so press down with your fingers or the back of a cup coated with cooking spray. Bake for 12 minutes. Let cool on the cookie sheet for a few minutes before transferring to a cooling rack. notes*For vegan cookies use the flax egg rather than chicken's eggs.
*Nutrition information is approximate and my best calculation using a recipe calculator. I am not a nutritionist and cannot guarantee accuracy. If your health depends on nutrition information, be sure to calculate it using your favorite calculator.calories
134fat (grams)
9.5sat. fat (grams)
3carbs (grams)
12protein (grams)
2.7sugar (grams)
7http://www.yummymummykitchen.com/2018/02/double-chocolate-chip-cookies-paleo-vegan.htmlCreated using The Recipes Generator.recipe-inner{text-align:left;max-width:620px;border:6px double #009BFF;padding:20px;background:#f2f2f2;margin: 40px auto;font-family:Lato, sans-serif;}.recipe-inner a{color: #4193f0;}#recipe .recipe-name{font-size: 21px;}#recipe .info{font-size:13px;text-transform:capitalize;border-bottom:2px solid #000;padding-bottom:7px;margin-bottom:20px}.info:after{content:'';display:table;clear:both}#recipe .info span:first-child{margin-right:30px}#printbutton{border:0;margin:0;color:#fff;float:right;background:#555; padding:5px;border-radius:3px;cursor:pointer}#recipe .time{text-transform:uppercase;font-size:12px;text-align:center;background:#fff;padding:15px 0;margin-bottom:20px}#recipe .time span:not(:last-child){margin-right:12px}#recipe .time span:not(:last-child):after{content:'';display:inline-block;height:10px;width:1px;background:#000;vertical-align:middle;margin-left:12px}#recipe .summary{line-height:1.7;font-style:italic}.ingredients{line-height:1.7;clear:both}.ingredients h3,.instructions h3,.notes h3{font-size:20px !important;font-weight:400 !important;margin-bottom:0;color:#000;text-transform: uppercase;}.ingredients ul{margin:0!important;margin-top:5px !important;}.instructions li{margin-bottom:15px !important;line-height:1.6;text-align:left;}.ingredients li{text-align:left}#recipe .instructions{margin-top: 30px;}#recipe .instructions ol,#recipe .instructions ol li {list-style:decimal !important;}#recipe .instructions ol{padding-left:39px;margin:0!important;margin-top:6px !important;}.posturl{border-top:1px solid #ccc;padding-top:10px;}.ing-section{padding-left:20px;margin: 10px 0;}.ing-section > span{font-weight:700}.recipe-credit{font-size:13px;border-top: 1px solid #ccc;padding:10px;text-align:center;background:#ffffff;margin:-20px;margin-top:15px;}.recipe-credit a{color:blue;text-decoration:none;}.copyright-statement{font-size: 13px;font-style:italic;border-top: 1px solid #ccc;margin-top:15px;padding-top:15px;line-height:1.6;}.notes pre{font-size: 15px;margin: 10px 0;padding-left: 20px;font-family: inherit;line-height: 1.7;white-space: pre-line;}.notes h3{margin: 0}.nutrition-info{font-size: 0;margin: 20px 0;padding: 10px;background: #fff;}.nutrition-info>div {display: inline-block;font-size: 14px;width: 20%;text-align: center;}.nutrition-info>div:nth-child(5) ~ div{margin-top: 20px;}.nutrition-info>div p{margin-top: 0;margin-bottom: 7px;}#recipe .info{position:relative}#recipe .image{text-align:center;margin:25px 0}#recipe .image img{max-width:100%;width:150px;height:150px;-o-object-fit:cover;object-fit:cover;border-radius:150px}#recipe .recipe-name{margin-top: 20px;text-align:center}#recipe .summary{margin:20px 0;clear:both;line-height:1.7;font-style:italic}#recipe .time{clear:both;border-top:1px dotted #000;border-bottom:1px dotted #000;border-right:0;border-left:0}
Join me in pinning all the best recipes over on Pinterest! Here's a Pinterest friendly image of this recipe to get you started.
February 10, 2018
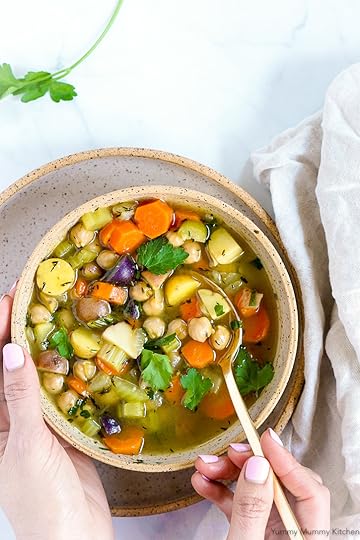
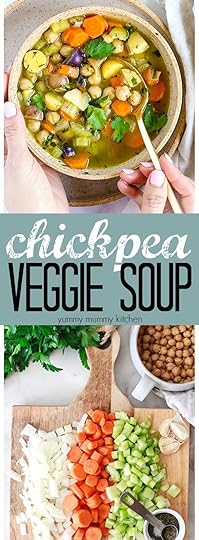
Chickpea Vegetable Soup
It's not chicken noodle soup, it's better - chickpea vegetable soup! This vegetarian version of the feel-good chicken soup has all the same warm and comforting flavors, and is loaded with vitamins and minerals.
My kids have been loving the warm and cozy flavors of chicken noodle soup lately. They've asked for the cans of it at the grocery store, but since I don't eat chicken, or really do canned soups for that matter, I decided to make a vegetarian "chicken noodle soup" for dinner. As Dr. Michael Greger reminded me on a recent Live with Kelly and Ryan show, "Beans are our healthiest source of protein..." You can watch the rest of the segment here. Our whole family loved this soup. Veggie heavy soups have long been one of my favorite family dinners. The small soft veggies make soups like this one great for little kids. Though I didn't add chicken or noodles to this chickpea veggie soup, it had the same qualities we all love. If you wanted to add some cooked pasta at the end, your definitely could.
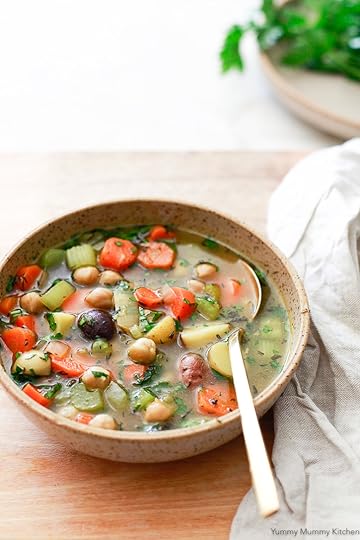
This soup has become one of my staple recipes for those nights when I haven't been grocery shopping in days and totally forgot about dinner until the last minute. I can't be the only one this happens to? This recipe is so easy because I almost always have all the ingredients on hand. Everyday ingredients like onions, carrots, celery and a couple of cans of chickpeas. To make it even easier, I've tested this soup recipe in the Instant Pot so I can give you those instructions too. The wonderful thing about the Instant Pot is that you can toss everything in and forget about it while you help your kids with homework or whatever else you need to get done. Be sure to read all the manual and safety information before using your pressure cooker.
 Chickpea vegetable soup starts out just the way many soups do - with onion, garlic, carrot, and celery sauteed just a bit before adding broth. I also added potatoes, which I completely forgot about during this photo.
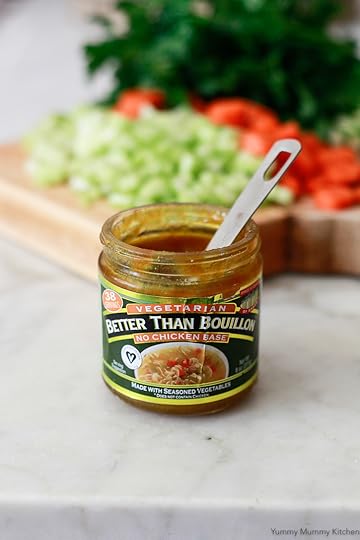
If you're looking for a deep vegetarian chicken soup flavor, this Better Than Bouillon no chicken base is the way to go. It's made with seasoned vegetables but has a ton of flavor. I use vegetable broth all the time, but when I want a really deliciously flavorful broth soup, I use a tablespoon or two of this base mixed with water. The caveat is that it is not low sodium, so if sodium is an issue for you, be sure to check the back so you know how much you're getting. Though it does contain corn products, the website says they are all Non-GMO. It's unclear if this product is gluten-free because the company does share a manufacturing facility with flour products. I did notice similar products at Whole Foods. If you have homemade vegetable broth, well, that's even better.
This is such a simple and tasty soup. I'm sure my kids would like it even better with some noodles, like a vegetarian chicken noodle soup, but I prefer it the way it is. We have even made this with tortellini added at the end.
Yield: Serves 4-6Author: Yummy Mummy KitchenPrint Recipe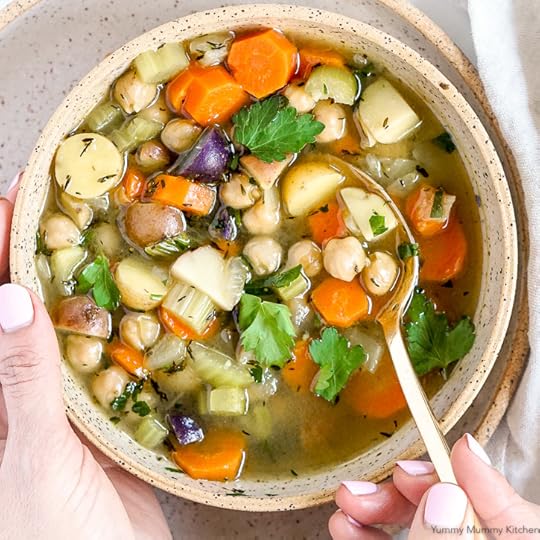 Chickpea Vegetable SoupIt's not chicken noodle soup, it's better - chickpea vegetable soup! This vegetarian version of the feel-good chicken soup has all the same warm and comforting flavors, and is loaded with vitamins and minerals.prep time: 5 MINScook time: 30 MINStotal time: 35 minsingredients
1 yellow onion, peeled and chopped4 carrots, diced or sliced 3 celery stalks, diced1 1/5 cups diced potatoes (I used baby yellow, red, and purple potatoes)4 cloves garlic, minced1 teaspoon dried thyme4 cups water (or your favorite broth) 1-2 tablespoons No Chicken Base (if using water) 2 (15 oz.) cans chickpeas, drained and rinsed1/3 cup chopped fresh parsley instructions
In a large soup pot over medium low heat, saute onion in a tablespoon of olive oil or water until softened, about 5 minutes. Add the carrots and celery, and saute until veggies just begin to soften, another 2 minutes. Add the potatoes, garlic, and thyme and saute another minute. Add the water and broth base (or your favorite broth) and bring to a low simmer. Simmer until all the vegetables are tender, about 20 minutes. Stir in the chickpeas to warm. Stir in the parsley and season to taste with salt and pepper, if desired. notes*Instant Pot instructions: Turn the electric pressure cooker to saute mode. Saute the onion until beginning to soften, about 3 minutes. Add the rest of the veggies, garlic, and thyme and saute another minute longer. Add the water and broth base. Lock the lid on the pot and set the valve to sealing. Set the pot to manual mode for 4 minutes. Let the pressure come down naturally for 10 minutes, then carefully release any remaining pressure. Remove the lid away from you. Stir in the chickpeas and parsley and place the lid back on to warm them.
*Optional add-ins: This soup would also be great with pasta, rice, quinoa, or barley. I've even made it with tortellini added in during the last three minutes of cooking.
*Nutrition information is approximate and based on 1/4 of this recipe. If your health depends on nutrition information, please calculate again using your favorite nutrition calculator. I am not a nutritionist and these numbers are my best estimate using an online calculator.calories
211fat (grams)
2sat. fat (grams)
0carbs (grams)
42protein (grams)
10http://www.yummymummykitchen.com/2018/02/chickpea-vegetable-soup.htmlCreated using The Recipes Generator.recipe-inner{text-align:left;max-width:620px;border:6px double #009BFF;padding:20px;background:#f2f2f2;margin: 40px auto;font-family:Lato, sans-serif;}.recipe-inner a{color: #4193f0;}#recipe .recipe-name{font-size: 21px;}#recipe .info{font-size:13px;text-transform:capitalize;border-bottom:2px solid #000;padding-bottom:7px;margin-bottom:20px}.info:after{content:'';display:table;clear:both}#recipe .info span:first-child{margin-right:30px}#printbutton{border:0;margin:0;color:#fff;float:right;background:#555; padding:5px;border-radius:3px;cursor:pointer}#recipe .time{text-transform:uppercase;font-size:12px;text-align:center;background:#fff;padding:15px 0;margin-bottom:20px}#recipe .time span:not(:last-child){margin-right:12px}#recipe .time span:not(:last-child):after{content:'';display:inline-block;height:10px;width:1px;background:#000;vertical-align:middle;margin-left:12px}#recipe .summary{line-height:1.7;font-style:italic}.ingredients{line-height:1.7;clear:both}.ingredients h3,.instructions h3,.notes h3{font-size:20px !important;font-weight:400 !important;margin-bottom:0;color:#000;text-transform: uppercase;}.ingredients ul{margin:0!important;margin-top:5px !important;}.instructions li{margin-bottom:15px !important;line-height:1.6;text-align:left;}.ingredients li{text-align:left}#recipe .instructions{margin-top: 30px;}#recipe .instructions ol,#recipe .instructions ol li {list-style:decimal !important;}#recipe .instructions ol{padding-left:39px;margin:0!important;margin-top:6px !important;}.posturl{border-top:1px solid #ccc;padding-top:10px;}.ing-section{padding-left:20px;margin: 10px 0;}.ing-section > span{font-weight:700}.recipe-credit{font-size:13px;border-top: 1px solid #ccc;padding:10px;text-align:center;background:#ffffff;margin:-20px;margin-top:15px;}.recipe-credit a{color:blue;text-decoration:none;}.copyright-statement{font-size: 13px;font-style:italic;border-top: 1px solid #ccc;margin-top:15px;padding-top:15px;line-height:1.6;}.notes pre{font-size: 15px;margin: 10px 0;padding-left: 20px;font-family: inherit;line-height: 1.7;white-space: pre-line;}.notes h3{margin: 0}.nutrition-info{font-size: 0;margin: 20px 0;padding: 10px;background: #fff;}.nutrition-info>div {display: inline-block;font-size: 14px;width: 20%;text-align: center;}.nutrition-info>div:nth-child(5) ~ div{margin-top: 20px;}.nutrition-info>div p{margin-top: 0;margin-bottom: 7px;}#recipe .info{position:relative}#recipe .image{text-align:center;margin:25px 0}#recipe .image img{max-width:100%;width:150px;height:150px;-o-object-fit:cover;object-fit:cover;border-radius:150px}#recipe .recipe-name{margin-top: 20px;text-align:center}#recipe .summary{margin:20px 0;clear:both;line-height:1.7;font-style:italic}#recipe .time{clear:both;border-top:1px dotted #000;border-bottom:1px dotted #000;border-right:0;border-left:0}


My kids have been loving the warm and cozy flavors of chicken noodle soup lately. They've asked for the cans of it at the grocery store, but since I don't eat chicken, or really do canned soups for that matter, I decided to make a vegetarian "chicken noodle soup" for dinner. As Dr. Michael Greger reminded me on a recent Live with Kelly and Ryan show, "Beans are our healthiest source of protein..." You can watch the rest of the segment here. Our whole family loved this soup. Veggie heavy soups have long been one of my favorite family dinners. The small soft veggies make soups like this one great for little kids. Though I didn't add chicken or noodles to this chickpea veggie soup, it had the same qualities we all love. If you wanted to add some cooked pasta at the end, your definitely could.
This soup has become one of my staple recipes for those nights when I haven't been grocery shopping in days and totally forgot about dinner until the last minute. I can't be the only one this happens to? This recipe is so easy because I almost always have all the ingredients on hand. Everyday ingredients like onions, carrots, celery and a couple of cans of chickpeas. To make it even easier, I've tested this soup recipe in the Instant Pot so I can give you those instructions too. The wonderful thing about the Instant Pot is that you can toss everything in and forget about it while you help your kids with homework or whatever else you need to get done. Be sure to read all the manual and safety information before using your pressure cooker.
Chickpea vegetable soup starts out just the way many soups do - with onion, garlic, carrot, and celery sauteed just a bit before adding broth. I also added potatoes, which I completely forgot about during this photo.If you're looking for a deep vegetarian chicken soup flavor, this Better Than Bouillon no chicken base is the way to go. It's made with seasoned vegetables but has a ton of flavor. I use vegetable broth all the time, but when I want a really deliciously flavorful broth soup, I use a tablespoon or two of this base mixed with water. The caveat is that it is not low sodium, so if sodium is an issue for you, be sure to check the back so you know how much you're getting. Though it does contain corn products, the website says they are all Non-GMO. It's unclear if this product is gluten-free because the company does share a manufacturing facility with flour products. I did notice similar products at Whole Foods. If you have homemade vegetable broth, well, that's even better.
This is such a simple and tasty soup. I'm sure my kids would like it even better with some noodles, like a vegetarian chicken noodle soup, but I prefer it the way it is. We have even made this with tortellini added at the end.
Yield: Serves 4-6Author: Yummy Mummy KitchenPrint Recipe
Chickpea Vegetable SoupIt's not chicken noodle soup, it's better - chickpea vegetable soup! This vegetarian version of the feel-good chicken soup has all the same warm and comforting flavors, and is loaded with vitamins and minerals.prep time: 5 MINScook time: 30 MINStotal time: 35 minsingredients1 yellow onion, peeled and chopped4 carrots, diced or sliced 3 celery stalks, diced1 1/5 cups diced potatoes (I used baby yellow, red, and purple potatoes)4 cloves garlic, minced1 teaspoon dried thyme4 cups water (or your favorite broth) 1-2 tablespoons No Chicken Base (if using water) 2 (15 oz.) cans chickpeas, drained and rinsed1/3 cup chopped fresh parsley instructions
In a large soup pot over medium low heat, saute onion in a tablespoon of olive oil or water until softened, about 5 minutes. Add the carrots and celery, and saute until veggies just begin to soften, another 2 minutes. Add the potatoes, garlic, and thyme and saute another minute. Add the water and broth base (or your favorite broth) and bring to a low simmer. Simmer until all the vegetables are tender, about 20 minutes. Stir in the chickpeas to warm. Stir in the parsley and season to taste with salt and pepper, if desired. notes*Instant Pot instructions: Turn the electric pressure cooker to saute mode. Saute the onion until beginning to soften, about 3 minutes. Add the rest of the veggies, garlic, and thyme and saute another minute longer. Add the water and broth base. Lock the lid on the pot and set the valve to sealing. Set the pot to manual mode for 4 minutes. Let the pressure come down naturally for 10 minutes, then carefully release any remaining pressure. Remove the lid away from you. Stir in the chickpeas and parsley and place the lid back on to warm them.
*Optional add-ins: This soup would also be great with pasta, rice, quinoa, or barley. I've even made it with tortellini added in during the last three minutes of cooking.
*Nutrition information is approximate and based on 1/4 of this recipe. If your health depends on nutrition information, please calculate again using your favorite nutrition calculator. I am not a nutritionist and these numbers are my best estimate using an online calculator.calories
211fat (grams)
2sat. fat (grams)
0carbs (grams)
42protein (grams)
10http://www.yummymummykitchen.com/2018/02/chickpea-vegetable-soup.htmlCreated using The Recipes Generator.recipe-inner{text-align:left;max-width:620px;border:6px double #009BFF;padding:20px;background:#f2f2f2;margin: 40px auto;font-family:Lato, sans-serif;}.recipe-inner a{color: #4193f0;}#recipe .recipe-name{font-size: 21px;}#recipe .info{font-size:13px;text-transform:capitalize;border-bottom:2px solid #000;padding-bottom:7px;margin-bottom:20px}.info:after{content:'';display:table;clear:both}#recipe .info span:first-child{margin-right:30px}#printbutton{border:0;margin:0;color:#fff;float:right;background:#555; padding:5px;border-radius:3px;cursor:pointer}#recipe .time{text-transform:uppercase;font-size:12px;text-align:center;background:#fff;padding:15px 0;margin-bottom:20px}#recipe .time span:not(:last-child){margin-right:12px}#recipe .time span:not(:last-child):after{content:'';display:inline-block;height:10px;width:1px;background:#000;vertical-align:middle;margin-left:12px}#recipe .summary{line-height:1.7;font-style:italic}.ingredients{line-height:1.7;clear:both}.ingredients h3,.instructions h3,.notes h3{font-size:20px !important;font-weight:400 !important;margin-bottom:0;color:#000;text-transform: uppercase;}.ingredients ul{margin:0!important;margin-top:5px !important;}.instructions li{margin-bottom:15px !important;line-height:1.6;text-align:left;}.ingredients li{text-align:left}#recipe .instructions{margin-top: 30px;}#recipe .instructions ol,#recipe .instructions ol li {list-style:decimal !important;}#recipe .instructions ol{padding-left:39px;margin:0!important;margin-top:6px !important;}.posturl{border-top:1px solid #ccc;padding-top:10px;}.ing-section{padding-left:20px;margin: 10px 0;}.ing-section > span{font-weight:700}.recipe-credit{font-size:13px;border-top: 1px solid #ccc;padding:10px;text-align:center;background:#ffffff;margin:-20px;margin-top:15px;}.recipe-credit a{color:blue;text-decoration:none;}.copyright-statement{font-size: 13px;font-style:italic;border-top: 1px solid #ccc;margin-top:15px;padding-top:15px;line-height:1.6;}.notes pre{font-size: 15px;margin: 10px 0;padding-left: 20px;font-family: inherit;line-height: 1.7;white-space: pre-line;}.notes h3{margin: 0}.nutrition-info{font-size: 0;margin: 20px 0;padding: 10px;background: #fff;}.nutrition-info>div {display: inline-block;font-size: 14px;width: 20%;text-align: center;}.nutrition-info>div:nth-child(5) ~ div{margin-top: 20px;}.nutrition-info>div p{margin-top: 0;margin-bottom: 7px;}#recipe .info{position:relative}#recipe .image{text-align:center;margin:25px 0}#recipe .image img{max-width:100%;width:150px;height:150px;-o-object-fit:cover;object-fit:cover;border-radius:150px}#recipe .recipe-name{margin-top: 20px;text-align:center}#recipe .summary{margin:20px 0;clear:both;line-height:1.7;font-style:italic}#recipe .time{clear:both;border-top:1px dotted #000;border-bottom:1px dotted #000;border-right:0;border-left:0}
February 6, 2018
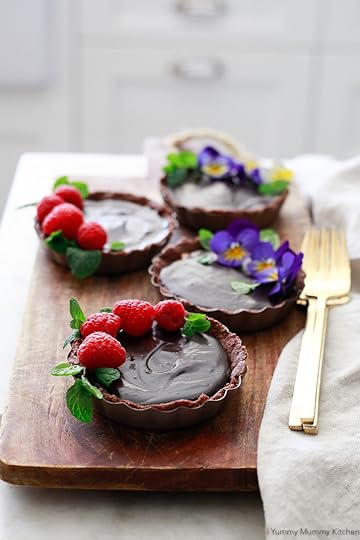
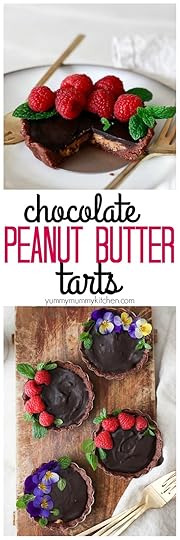
No Bake Chocolate Peanut Butter Tarts
Rich chocolate peanut butter cup tarts made with an almond flour crust, nut butter filling, and luscious ganache. These no-bake tarts are are as delicious as they are beautiful. This recipe is vegan, gluten-free, and paleo friendly! 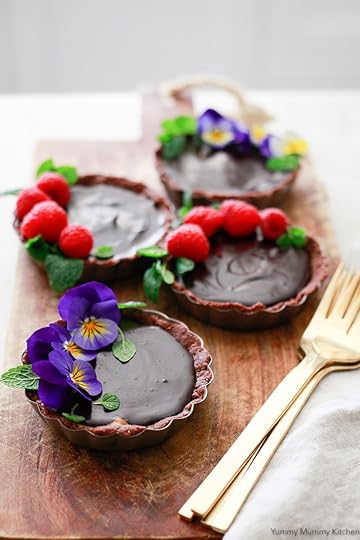
It's the month of love and Valentine's Day preparations are in full effect over here. The kids have their adorable classroom valentines all ready to go and I've got chocolate on my mind. One of my very favorite rich chocolate treats are the miracle tarts made by Hail Merry. Have you tried them yet? They're found in the refrigerated section of some natural food stores like Sprouts and Whole Foods. I've even seen mini versions at Costco. While my daughter loves their lemon tarts, I can't resist the chocolate almond butter tarts. I've been wanting to try making you some chocolate peanut butter cup tarts inspired by these for a long time, and what better time to share them than the month of love?! I'm so happy with how these no-bake chocolate peanut butter tarts turned out! They're so incredibly rich and dreamy. Have you ever seen a more romantic tart? Didn't think so. Let's check out the recipe.
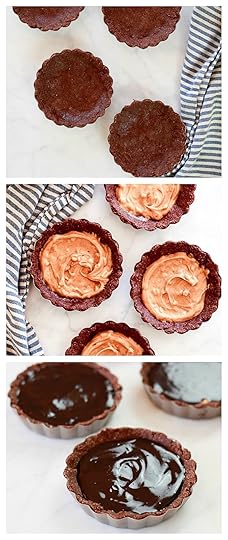 These no-bake chocolate peanut butter tarts require three steps. That may sound like a lot of work, but each step is super simple, promise. We press an almond flour base into the tart shells, top it with peanut or almond butter, and top that with the richest, creamiest, ganache. If you've never made ganache before that part might sound intimidating, like you have to be a pastry chef trained in Paris to create it. Watch the little video at the end and you'll see it's simply hot milk, in this case coconut milk, stirred into chopped chocolate.
I've tested this tart recipe with both almond butter and peanut butter. I really don't have a preference. love them both. With the peanut butter version I only had crunchy peanut butter on hand, and I loved the little bit of crunch it added. If you'd like this recipe to be paleo-friendly, go with almond butter, if you are a peanut butter and chocolate lover, go with peanut butter. Peanut butter and chocolate really is such an incredible combination of sweet and salty. These tarts would be amazing with a tiny pinch of sea salt on top too. Ready to take a peek inside?

OMG, swoon! Let me say it again, these tarts are rich and fudgy. Even these little 4-inch tarts are meant for sharing. They are the perfect dessert for two. Oh la la! Or just for treating yourself. That's a good plan too. Though I haven't tried it, I think these tarts should freeze well. They are best after setting overnight, so make them a day ahead.
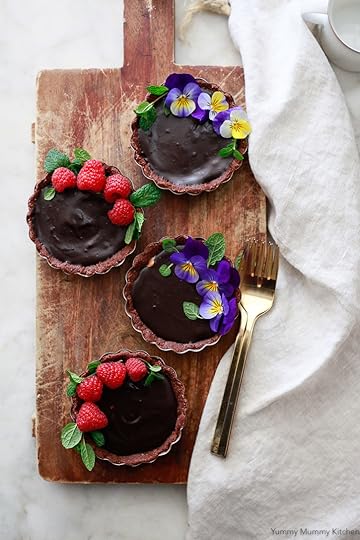
I'm really sorry about the excessive pictures... but these were just too beautiful and photogenic. Can you tell I had fun with this one? If you don't happen to have 4-inch tart shells, don't fret. You can make even smaller individual tarts in a muffin tin, or one larger tart in larger shell. If using a muffin tin, I would lay strips of parchment paper under the tart crusts for easy removal. I'll share the exact tart pans I used below. They would make really cute mini quiches too. This is an Amazon affiliate link, which means I make a small commission when you purchase through it.
Click play to watch the short video!
Yield: 4 (4-inch) tartsAuthor: Yummy Mummy KitchenPrint Recipe No Bake Chocolate Peanut Butter TartsRich no-bake chocolate peanut butter cup tarts made with an almond flour crust, nut butter filling, and luscious ganache.prep time: 15 MINScook time: 8 hourtotal time: 8 hours and 15 minsingredientsCrust
1 1/2 cups almond flour1/3 cup unsweetened cacao/cocoa powder3 tablespoons maple syrup2 tablespoons melted coconut oil Filling
2/3 cup unsweetened peanut or almond butter1 tablespoon maple syrup1/2 tablespoon melted coconut oilpinch of sea salt Ganache
3/4 cup chopped dark or semisweet dairy-free, GF, chocolate1/4 cup canned coconut milk1/2 teaspoon pure vanilla extract instructions
Coat the bottoms of tart shells lightly with cooking spray or rub with coconut oil. In a medium bowl, stir together the almond flour, cacao, maple syrup, and coconut oil until mixture holds together when pressed. If it's too dry, add just a little more coconut oil. Press firmly into the bottoms and up the sides of the tart shells, about 1/4 inch thick. In a small bowl, stir together the nut butter, coconut oil, and syrup. Gently spread a layer of this nut butter mixture about 1/4-inch thick over the crust. If using unsalted nut butter, sprinkle a pinch of sea salt over. Place the chocolate in a medium bowl. Heat the coconut milk in a small saucepan until it just begins to simmer. Carefully pour the hot coconut milk over the chocolate and whisk until the chocolate has melted and turned into a thick ganache. Whisk in the vanilla. Pour the ganache over the peanut butter filling and smooth with the back of a spoon. Place the tarts in the refrigerator to set up overnight. notesPaleo Option: Use almond rather than peanut butter. Be sure to use paleo-friendly chocolate such as Enjoy Life or Lily's Sweets.http://www.yummymummykitchen.com/2018/02/no-bake-chocolate-peanut-butter-tarts.htmlCreated using The Recipes Generator.recipe-inner{text-align:left;max-width:620px;border:6px double #009BFF;padding:20px;background:#f2f2f2;margin: 40px auto;font-family:Lato, sans-serif;}.recipe-inner a{color: #4193f0;}#recipe .recipe-name{font-size: 21px;}#recipe .info{font-size:13px;text-transform:capitalize;border-bottom:2px solid #000;padding-bottom:7px;margin-bottom:20px}.info:after{content:'';display:table;clear:both}#recipe .info span:first-child{margin-right:30px}#printbutton{border:0;margin:0;color:#fff;float:right;background:#555; padding:5px;border-radius:3px;cursor:pointer}#recipe .time{text-transform:uppercase;font-size:12px;text-align:center;background:#fff;padding:15px 0;margin-bottom:20px}#recipe .time span:not(:last-child){margin-right:12px}#recipe .time span:not(:last-child):after{content:'';display:inline-block;height:10px;width:1px;background:#000;vertical-align:middle;margin-left:12px}#recipe .summary{line-height:1.7;font-style:italic}.ingredients{line-height:1.7;clear:both}.ingredients h3,.instructions h3,.notes h3{font-size:20px !important;font-weight:400 !important;margin-bottom:0;color:#000;text-transform: uppercase;}.ingredients ul{margin:0!important;margin-top:5px !important;}.instructions li{margin-bottom:15px !important;line-height:1.6;text-align:left;}.ingredients li{text-align:left}#recipe .instructions{margin-top: 30px;}#recipe .instructions ol,#recipe .instructions ol li {list-style:decimal !important;}#recipe .instructions ol{padding-left:39px;margin:0!important;margin-top:6px !important;}.posturl{border-top:1px solid #ccc;padding-top:10px;}.ing-section{padding-left:20px;margin: 10px 0;}.ing-section > span{font-weight:700}.recipe-credit{font-size:13px;border-top: 1px solid #ccc;padding:10px;text-align:center;background:#ffffff;margin:-20px;margin-top:15px;}.recipe-credit a{color:blue;text-decoration:none;}.copyright-statement{font-size: 13px;font-style:italic;border-top: 1px solid #ccc;margin-top:15px;padding-top:15px;line-height:1.6;}.notes pre{font-size: 15px;margin: 10px 0;padding-left: 20px;font-family: inherit;line-height: 1.7;white-space: pre-line;}.notes h3{margin: 0}.nutrition-info{font-size: 0;margin: 20px 0;padding: 10px;background: #fff;}.nutrition-info>div {display: inline-block;font-size: 14px;width: 20%;text-align: center;}.nutrition-info>div:nth-child(5) ~ div{margin-top: 20px;}.nutrition-info>div p{margin-top: 0;margin-bottom: 7px;}#recipe .info{position:relative}#recipe .image{text-align:center;margin:25px 0}#recipe .image img{max-width:100%;width:150px;height:150px;-o-object-fit:cover;object-fit:cover;border-radius:150px}#recipe .recipe-name{margin-top: 20px;text-align:center}#recipe .summary{margin:20px 0;clear:both;line-height:1.7;font-style:italic}#recipe .time{clear:both;border-top:1px dotted #000;border-bottom:1px dotted #000;border-right:0;border-left:0}


It's the month of love and Valentine's Day preparations are in full effect over here. The kids have their adorable classroom valentines all ready to go and I've got chocolate on my mind. One of my very favorite rich chocolate treats are the miracle tarts made by Hail Merry. Have you tried them yet? They're found in the refrigerated section of some natural food stores like Sprouts and Whole Foods. I've even seen mini versions at Costco. While my daughter loves their lemon tarts, I can't resist the chocolate almond butter tarts. I've been wanting to try making you some chocolate peanut butter cup tarts inspired by these for a long time, and what better time to share them than the month of love?! I'm so happy with how these no-bake chocolate peanut butter tarts turned out! They're so incredibly rich and dreamy. Have you ever seen a more romantic tart? Didn't think so. Let's check out the recipe.
These no-bake chocolate peanut butter tarts require three steps. That may sound like a lot of work, but each step is super simple, promise. We press an almond flour base into the tart shells, top it with peanut or almond butter, and top that with the richest, creamiest, ganache. If you've never made ganache before that part might sound intimidating, like you have to be a pastry chef trained in Paris to create it. Watch the little video at the end and you'll see it's simply hot milk, in this case coconut milk, stirred into chopped chocolate.I've tested this tart recipe with both almond butter and peanut butter. I really don't have a preference. love them both. With the peanut butter version I only had crunchy peanut butter on hand, and I loved the little bit of crunch it added. If you'd like this recipe to be paleo-friendly, go with almond butter, if you are a peanut butter and chocolate lover, go with peanut butter. Peanut butter and chocolate really is such an incredible combination of sweet and salty. These tarts would be amazing with a tiny pinch of sea salt on top too. Ready to take a peek inside?
OMG, swoon! Let me say it again, these tarts are rich and fudgy. Even these little 4-inch tarts are meant for sharing. They are the perfect dessert for two. Oh la la! Or just for treating yourself. That's a good plan too. Though I haven't tried it, I think these tarts should freeze well. They are best after setting overnight, so make them a day ahead.
I'm really sorry about the excessive pictures... but these were just too beautiful and photogenic. Can you tell I had fun with this one? If you don't happen to have 4-inch tart shells, don't fret. You can make even smaller individual tarts in a muffin tin, or one larger tart in larger shell. If using a muffin tin, I would lay strips of parchment paper under the tart crusts for easy removal. I'll share the exact tart pans I used below. They would make really cute mini quiches too. This is an Amazon affiliate link, which means I make a small commission when you purchase through it.
Click play to watch the short video!
Yield: 4 (4-inch) tartsAuthor: Yummy Mummy KitchenPrint Recipe
No Bake Chocolate Peanut Butter TartsRich no-bake chocolate peanut butter cup tarts made with an almond flour crust, nut butter filling, and luscious ganache.prep time: 15 MINScook time: 8 hourtotal time: 8 hours and 15 minsingredientsCrust1 1/2 cups almond flour1/3 cup unsweetened cacao/cocoa powder3 tablespoons maple syrup2 tablespoons melted coconut oil Filling
2/3 cup unsweetened peanut or almond butter1 tablespoon maple syrup1/2 tablespoon melted coconut oilpinch of sea salt Ganache
3/4 cup chopped dark or semisweet dairy-free, GF, chocolate1/4 cup canned coconut milk1/2 teaspoon pure vanilla extract instructions
Coat the bottoms of tart shells lightly with cooking spray or rub with coconut oil. In a medium bowl, stir together the almond flour, cacao, maple syrup, and coconut oil until mixture holds together when pressed. If it's too dry, add just a little more coconut oil. Press firmly into the bottoms and up the sides of the tart shells, about 1/4 inch thick. In a small bowl, stir together the nut butter, coconut oil, and syrup. Gently spread a layer of this nut butter mixture about 1/4-inch thick over the crust. If using unsalted nut butter, sprinkle a pinch of sea salt over. Place the chocolate in a medium bowl. Heat the coconut milk in a small saucepan until it just begins to simmer. Carefully pour the hot coconut milk over the chocolate and whisk until the chocolate has melted and turned into a thick ganache. Whisk in the vanilla. Pour the ganache over the peanut butter filling and smooth with the back of a spoon. Place the tarts in the refrigerator to set up overnight. notesPaleo Option: Use almond rather than peanut butter. Be sure to use paleo-friendly chocolate such as Enjoy Life or Lily's Sweets.http://www.yummymummykitchen.com/2018/02/no-bake-chocolate-peanut-butter-tarts.htmlCreated using The Recipes Generator.recipe-inner{text-align:left;max-width:620px;border:6px double #009BFF;padding:20px;background:#f2f2f2;margin: 40px auto;font-family:Lato, sans-serif;}.recipe-inner a{color: #4193f0;}#recipe .recipe-name{font-size: 21px;}#recipe .info{font-size:13px;text-transform:capitalize;border-bottom:2px solid #000;padding-bottom:7px;margin-bottom:20px}.info:after{content:'';display:table;clear:both}#recipe .info span:first-child{margin-right:30px}#printbutton{border:0;margin:0;color:#fff;float:right;background:#555; padding:5px;border-radius:3px;cursor:pointer}#recipe .time{text-transform:uppercase;font-size:12px;text-align:center;background:#fff;padding:15px 0;margin-bottom:20px}#recipe .time span:not(:last-child){margin-right:12px}#recipe .time span:not(:last-child):after{content:'';display:inline-block;height:10px;width:1px;background:#000;vertical-align:middle;margin-left:12px}#recipe .summary{line-height:1.7;font-style:italic}.ingredients{line-height:1.7;clear:both}.ingredients h3,.instructions h3,.notes h3{font-size:20px !important;font-weight:400 !important;margin-bottom:0;color:#000;text-transform: uppercase;}.ingredients ul{margin:0!important;margin-top:5px !important;}.instructions li{margin-bottom:15px !important;line-height:1.6;text-align:left;}.ingredients li{text-align:left}#recipe .instructions{margin-top: 30px;}#recipe .instructions ol,#recipe .instructions ol li {list-style:decimal !important;}#recipe .instructions ol{padding-left:39px;margin:0!important;margin-top:6px !important;}.posturl{border-top:1px solid #ccc;padding-top:10px;}.ing-section{padding-left:20px;margin: 10px 0;}.ing-section > span{font-weight:700}.recipe-credit{font-size:13px;border-top: 1px solid #ccc;padding:10px;text-align:center;background:#ffffff;margin:-20px;margin-top:15px;}.recipe-credit a{color:blue;text-decoration:none;}.copyright-statement{font-size: 13px;font-style:italic;border-top: 1px solid #ccc;margin-top:15px;padding-top:15px;line-height:1.6;}.notes pre{font-size: 15px;margin: 10px 0;padding-left: 20px;font-family: inherit;line-height: 1.7;white-space: pre-line;}.notes h3{margin: 0}.nutrition-info{font-size: 0;margin: 20px 0;padding: 10px;background: #fff;}.nutrition-info>div {display: inline-block;font-size: 14px;width: 20%;text-align: center;}.nutrition-info>div:nth-child(5) ~ div{margin-top: 20px;}.nutrition-info>div p{margin-top: 0;margin-bottom: 7px;}#recipe .info{position:relative}#recipe .image{text-align:center;margin:25px 0}#recipe .image img{max-width:100%;width:150px;height:150px;-o-object-fit:cover;object-fit:cover;border-radius:150px}#recipe .recipe-name{margin-top: 20px;text-align:center}#recipe .summary{margin:20px 0;clear:both;line-height:1.7;font-style:italic}#recipe .time{clear:both;border-top:1px dotted #000;border-bottom:1px dotted #000;border-right:0;border-left:0}
February 3, 2018
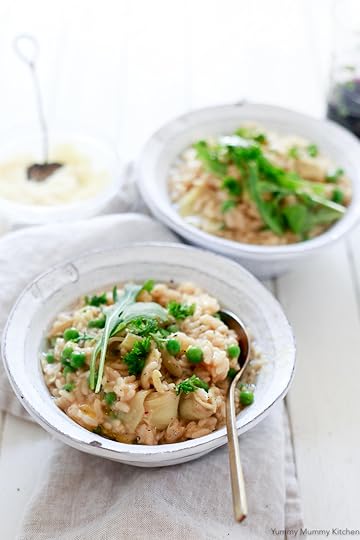
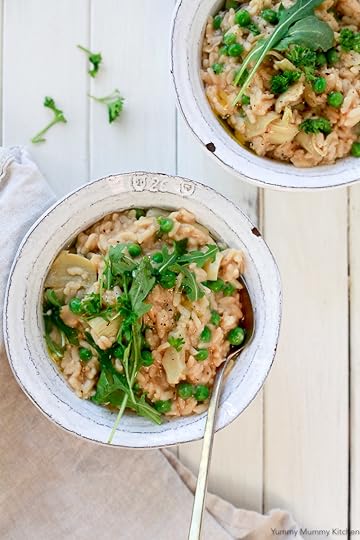
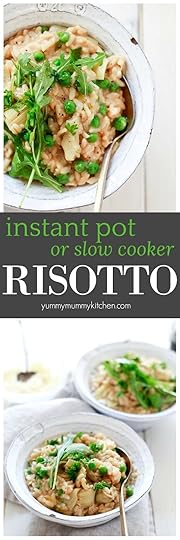
Instant Pot Risotto with Peas and Artichokes
Homemade risotto is easier than ever when made in the Instant Pot pressure cooker or the slow cooker! This Instant Pot risotto with peas and artichoke hearts is my kids' favorite version of the creamy classic Italian rice dish. 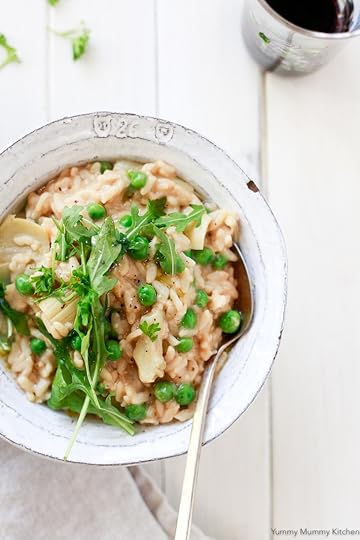
Risotto has been one of my eldest daughter's favorite foods since she was about one year old. 9 years later, she still asks for risotto every few weeks. In 2013 I posted this Risotto with Peas and Carrots recipe, made in the traditional method. There are a couple of other risotto recipes that live here on the blog too. When my daughter started loving risotto at a year old, I learned how to make it in the slow cooker. If you go way back in the blog archives to 2009 you might find this (rather embarrassing post with terrible photography) for Slow Cooker Artichoke Risotto. One day I would love to go through and update all my old posts. Since constantly stirring a pot of risotto for half an hour isn't always doable with a baby, the slow cooker method made things easy. Now that I have an Instant Pot electric pressure cooker, I've been using it to make risotto quickly rather than slowly. Have I mentioned how much I adore my Instant Pot. Are you getting tired of seeing Instant Pot recipes here? My Instant Pot Lentil Soup was such a hit with such rave reviews that I wanted to share more Instant Pot recipes with you.
Risotto is one of those warm comforting dishes that just makes you feel happy inside. Now that I have such a quick and easy way to cook risotto, I even pack it on hot containers for school lunches. It may not be the traditional Italian way, but the Instant Pot makes homemade risotto easy even on the busiest nights. If you don't yet own an electric pressure cooker, don't worry, I'll share the slow cooker method as well.
I personally love standing at the stove stirring hot broth into risotto for half an hour. The stirring is almost therapeutic and watching the rice go from hard and dry to soft and creamy is so satisfying. As a busy mama though, I don't always have that time or energy at the end of the day while helping with homework. One of the first things I learned to make in my Instant Pot pressure cooker was risotto. The Instant Pot makes risotto so quick and easy that it's even doable for weekend lunches. Instant Pot risotto is literally five minutes of prep and then you can set the cooker and forget about it.
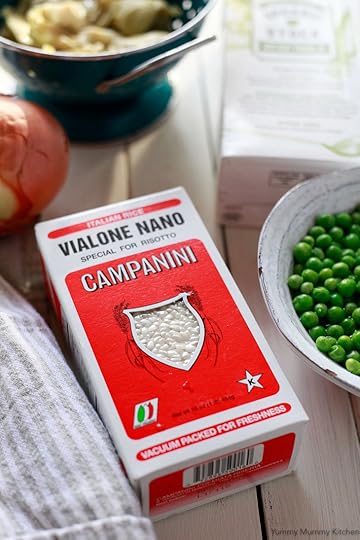
Risotto feels intimidating to a lot of people. I get it, because of the stirring bit. But making risotto is really incredibly simple and once you get the hang of it's one of those things you can make without a recipe, adding whatever flavors and ingredients you happen to have or want at the time. Risotto is mostly just rice and broth. The type of rice you use is crucial to making risotto as only specific varieties will work. Arborio rice is most commonly used here in the US, though other Italian short grain rice varieties like carnaroli and vialone are also traditionally used for risotto. It's important to use one of these varieties to achieve a creamy risotto. Should we rinse risotto rice the way we do other rice? No, don't do it! We don't want to rinse any of that starchiness away! I have, however, heard of people making farro risotto, or "farroto" which is something I would love to try in the future! Farro does contain gluten, but it's a higher protein ancient grain that's frequently used in Italian cooking. You can check out my Italian Farro Salad here if you like.
 I learned the correct time for cooking risotto in the pressure cooker from the cookbook, Vegan Under Pressure, so I'll link that book below. It's my go-to for cook times for grains and beans especially. I like to add a little more umami flavor to my risotto when serving and there are a few ways to do that. Sprinkle with Parmesan or truffle salt/oil, or stir in some nutritional yeast. I also love adding fresh herbs or arugula for an extra pop of freshness.
Shop this post! Here are a few things I used to make this dish. These are Amazon affiliate links, which means I make a small commission when you order through them.
I made a short video to show you how to make this Instant Pot risotto. Sometimes a video is worth a thousand words.
Yield: Serves 4Author: Yummy Mummy KitchenPrint Recipe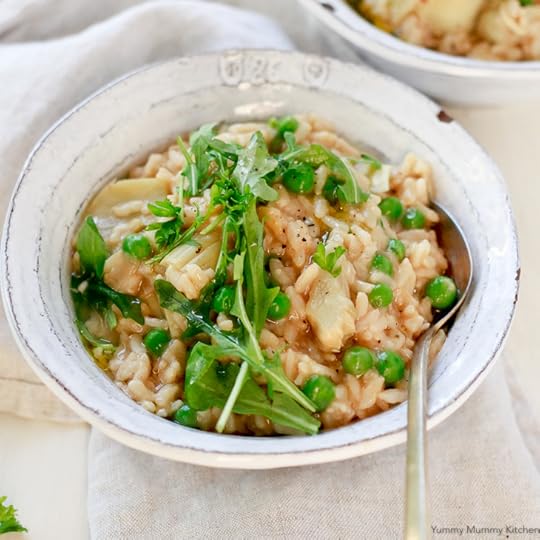 Instant Pot Risotto with Peas and ArtichokesThe Instant Pot pressure cooker makes risotto easier than ever. Try our favorite combination of peas and artichokes!prep time: 10 MINScook time: 25 MINStotal time: 35 minsingredients
2 tablespoons extra virgin olive oil1 small yellow onion, peeled and diced3 cloves garlic, minced 1 1/2 cups arborio, carnaroli, or vialone rice 4 cups vegetable stock, plus more if needed 1 1/2 cups frozen peas, thawed 1 (12 oz.) jar artichoke hearts, drained salt, to tastefreshly ground black pepper, to taste1/4 cup nutritional yeast or a pinch of truffle salt (optional)fresh Italian parsley or basil, for garnish (optional) instructions
Heat the olive oil in the Instant Pot with the saute mode. Add the onion and saute until tender and golden brown, about 5 minutes. Add the garlic and saute another minute longer. Add the rice and stir to toast for about one minute. Add the vegetable stock. Place the lid on the Instant Pot and make sure the valve is set to sealing. Cook on manual for 5 minutes. Quick release the pressure by carefully and slowly pulsing the valve to venting so that the juices don't spray out. Remove the lid away from you. Stir the risotto and add more broth if needed to loosen it up. Stir in the peas and artichokes. Season with salt and pepper. Lock the lid back on for a few minutes to heat up the peas and artichokes. Stir again and season to taste with salt and pepper, and nutritional yeast, if using. notes1. If using a slow cooker, follow the recipe but cook on high for 2 hours. Add the vegetables for the last 30 minutes or at the beginning. 2. Nutrition information is approximate and based on 1/4 of the total recipe. If your health depends on nutrition information, please calculate using your favorite nutrition calculator.calories
228fat (grams)
7sat. fat (grams)
1carbs (grams)
37protein (grams)
7sugar (grams)
5http://www.yummymummykitchen.com/2018/01/instant-pot-risotto-peas-risotto-vegan.htmlCreated using The Recipes Generator.recipe-inner{text-align:left;max-width:620px;border:6px double #009BFF;padding:20px;background:#f2f2f2;margin: 40px auto;font-family:Lato, sans-serif;}.recipe-inner a{color: #4193f0;}#recipe .recipe-name{font-size: 21px;}#recipe .info{font-size:13px;text-transform:capitalize;border-bottom:2px solid #000;padding-bottom:7px;margin-bottom:20px}.info:after{content:'';display:table;clear:both}#recipe .info span:first-child{margin-right:30px}#printbutton{border:0;margin:0;color:#fff;float:right;background:#555; padding:5px;border-radius:3px;cursor:pointer}#recipe .time{text-transform:uppercase;font-size:12px;text-align:center;background:#fff;padding:15px 0;margin-bottom:20px}#recipe .time span:not(:last-child){margin-right:12px}#recipe .time span:not(:last-child):after{content:'';display:inline-block;height:10px;width:1px;background:#000;vertical-align:middle;margin-left:12px}#recipe .summary{line-height:1.7;font-style:italic}.ingredients{line-height:1.7;clear:both}.ingredients h3,.instructions h3,.notes h3{font-size:20px !important;font-weight:400 !important;margin-bottom:0;color:#000;text-transform: uppercase;}.ingredients ul{margin:0!important;margin-top:5px !important;}.instructions li{margin-bottom:15px !important;line-height:1.6;text-align:left;}.ingredients li{text-align:left}#recipe .instructions{margin-top: 30px;}#recipe .instructions ol,#recipe .instructions ol li {list-style:decimal !important;}#recipe .instructions ol{padding-left:39px;margin:0!important;margin-top:6px !important;}.posturl{border-top:1px solid #ccc;padding-top:10px;}.ing-section{padding-left:20px;margin: 10px 0;}.ing-section > span{font-weight:700}.recipe-credit{font-size:13px;border-top: 1px solid #ccc;padding:10px;text-align:center;background:#ffffff;margin:-20px;margin-top:15px;}.recipe-credit a{color:blue;text-decoration:none;}.copyright-statement{font-size: 13px;font-style:italic;border-top: 1px solid #ccc;margin-top:15px;padding-top:15px;line-height:1.6;}.notes pre{font-size: 15px;margin: 10px 0;padding-left: 20px;font-family: inherit;line-height: 1.7;white-space: pre-line;}.notes h3{margin: 0}.nutrition-info{font-size: 0;margin: 20px 0;padding: 10px;background: #fff;}.nutrition-info>div {display: inline-block;font-size: 14px;width: 20%;text-align: center;}.nutrition-info>div:nth-child(5) ~ div{margin-top: 20px;}.nutrition-info>div p{margin-top: 0;margin-bottom: 7px;}#recipe .info{position:relative}#recipe .image{text-align:center;margin:25px 0}#recipe .image img{max-width:100%;width:150px;height:150px;-o-object-fit:cover;object-fit:cover;border-radius:150px}#recipe .recipe-name{margin-top: 20px;text-align:center}#recipe .summary{margin:20px 0;clear:both;line-height:1.7;font-style:italic}#recipe .time{clear:both;border-top:1px dotted #000;border-bottom:1px dotted #000;border-right:0;border-left:0}


Risotto has been one of my eldest daughter's favorite foods since she was about one year old. 9 years later, she still asks for risotto every few weeks. In 2013 I posted this Risotto with Peas and Carrots recipe, made in the traditional method. There are a couple of other risotto recipes that live here on the blog too. When my daughter started loving risotto at a year old, I learned how to make it in the slow cooker. If you go way back in the blog archives to 2009 you might find this (rather embarrassing post with terrible photography) for Slow Cooker Artichoke Risotto. One day I would love to go through and update all my old posts. Since constantly stirring a pot of risotto for half an hour isn't always doable with a baby, the slow cooker method made things easy. Now that I have an Instant Pot electric pressure cooker, I've been using it to make risotto quickly rather than slowly. Have I mentioned how much I adore my Instant Pot. Are you getting tired of seeing Instant Pot recipes here? My Instant Pot Lentil Soup was such a hit with such rave reviews that I wanted to share more Instant Pot recipes with you.
Risotto is one of those warm comforting dishes that just makes you feel happy inside. Now that I have such a quick and easy way to cook risotto, I even pack it on hot containers for school lunches. It may not be the traditional Italian way, but the Instant Pot makes homemade risotto easy even on the busiest nights. If you don't yet own an electric pressure cooker, don't worry, I'll share the slow cooker method as well.
I personally love standing at the stove stirring hot broth into risotto for half an hour. The stirring is almost therapeutic and watching the rice go from hard and dry to soft and creamy is so satisfying. As a busy mama though, I don't always have that time or energy at the end of the day while helping with homework. One of the first things I learned to make in my Instant Pot pressure cooker was risotto. The Instant Pot makes risotto so quick and easy that it's even doable for weekend lunches. Instant Pot risotto is literally five minutes of prep and then you can set the cooker and forget about it.
Risotto feels intimidating to a lot of people. I get it, because of the stirring bit. But making risotto is really incredibly simple and once you get the hang of it's one of those things you can make without a recipe, adding whatever flavors and ingredients you happen to have or want at the time. Risotto is mostly just rice and broth. The type of rice you use is crucial to making risotto as only specific varieties will work. Arborio rice is most commonly used here in the US, though other Italian short grain rice varieties like carnaroli and vialone are also traditionally used for risotto. It's important to use one of these varieties to achieve a creamy risotto. Should we rinse risotto rice the way we do other rice? No, don't do it! We don't want to rinse any of that starchiness away! I have, however, heard of people making farro risotto, or "farroto" which is something I would love to try in the future! Farro does contain gluten, but it's a higher protein ancient grain that's frequently used in Italian cooking. You can check out my Italian Farro Salad here if you like.
I learned the correct time for cooking risotto in the pressure cooker from the cookbook, Vegan Under Pressure, so I'll link that book below. It's my go-to for cook times for grains and beans especially. I like to add a little more umami flavor to my risotto when serving and there are a few ways to do that. Sprinkle with Parmesan or truffle salt/oil, or stir in some nutritional yeast. I also love adding fresh herbs or arugula for an extra pop of freshness.Shop this post! Here are a few things I used to make this dish. These are Amazon affiliate links, which means I make a small commission when you order through them.
I made a short video to show you how to make this Instant Pot risotto. Sometimes a video is worth a thousand words.
Yield: Serves 4Author: Yummy Mummy KitchenPrint Recipe
Instant Pot Risotto with Peas and ArtichokesThe Instant Pot pressure cooker makes risotto easier than ever. Try our favorite combination of peas and artichokes!prep time: 10 MINScook time: 25 MINStotal time: 35 minsingredients2 tablespoons extra virgin olive oil1 small yellow onion, peeled and diced3 cloves garlic, minced 1 1/2 cups arborio, carnaroli, or vialone rice 4 cups vegetable stock, plus more if needed 1 1/2 cups frozen peas, thawed 1 (12 oz.) jar artichoke hearts, drained salt, to tastefreshly ground black pepper, to taste1/4 cup nutritional yeast or a pinch of truffle salt (optional)fresh Italian parsley or basil, for garnish (optional) instructions
Heat the olive oil in the Instant Pot with the saute mode. Add the onion and saute until tender and golden brown, about 5 minutes. Add the garlic and saute another minute longer. Add the rice and stir to toast for about one minute. Add the vegetable stock. Place the lid on the Instant Pot and make sure the valve is set to sealing. Cook on manual for 5 minutes. Quick release the pressure by carefully and slowly pulsing the valve to venting so that the juices don't spray out. Remove the lid away from you. Stir the risotto and add more broth if needed to loosen it up. Stir in the peas and artichokes. Season with salt and pepper. Lock the lid back on for a few minutes to heat up the peas and artichokes. Stir again and season to taste with salt and pepper, and nutritional yeast, if using. notes1. If using a slow cooker, follow the recipe but cook on high for 2 hours. Add the vegetables for the last 30 minutes or at the beginning. 2. Nutrition information is approximate and based on 1/4 of the total recipe. If your health depends on nutrition information, please calculate using your favorite nutrition calculator.calories
228fat (grams)
7sat. fat (grams)
1carbs (grams)
37protein (grams)
7sugar (grams)
5http://www.yummymummykitchen.com/2018/01/instant-pot-risotto-peas-risotto-vegan.htmlCreated using The Recipes Generator.recipe-inner{text-align:left;max-width:620px;border:6px double #009BFF;padding:20px;background:#f2f2f2;margin: 40px auto;font-family:Lato, sans-serif;}.recipe-inner a{color: #4193f0;}#recipe .recipe-name{font-size: 21px;}#recipe .info{font-size:13px;text-transform:capitalize;border-bottom:2px solid #000;padding-bottom:7px;margin-bottom:20px}.info:after{content:'';display:table;clear:both}#recipe .info span:first-child{margin-right:30px}#printbutton{border:0;margin:0;color:#fff;float:right;background:#555; padding:5px;border-radius:3px;cursor:pointer}#recipe .time{text-transform:uppercase;font-size:12px;text-align:center;background:#fff;padding:15px 0;margin-bottom:20px}#recipe .time span:not(:last-child){margin-right:12px}#recipe .time span:not(:last-child):after{content:'';display:inline-block;height:10px;width:1px;background:#000;vertical-align:middle;margin-left:12px}#recipe .summary{line-height:1.7;font-style:italic}.ingredients{line-height:1.7;clear:both}.ingredients h3,.instructions h3,.notes h3{font-size:20px !important;font-weight:400 !important;margin-bottom:0;color:#000;text-transform: uppercase;}.ingredients ul{margin:0!important;margin-top:5px !important;}.instructions li{margin-bottom:15px !important;line-height:1.6;text-align:left;}.ingredients li{text-align:left}#recipe .instructions{margin-top: 30px;}#recipe .instructions ol,#recipe .instructions ol li {list-style:decimal !important;}#recipe .instructions ol{padding-left:39px;margin:0!important;margin-top:6px !important;}.posturl{border-top:1px solid #ccc;padding-top:10px;}.ing-section{padding-left:20px;margin: 10px 0;}.ing-section > span{font-weight:700}.recipe-credit{font-size:13px;border-top: 1px solid #ccc;padding:10px;text-align:center;background:#ffffff;margin:-20px;margin-top:15px;}.recipe-credit a{color:blue;text-decoration:none;}.copyright-statement{font-size: 13px;font-style:italic;border-top: 1px solid #ccc;margin-top:15px;padding-top:15px;line-height:1.6;}.notes pre{font-size: 15px;margin: 10px 0;padding-left: 20px;font-family: inherit;line-height: 1.7;white-space: pre-line;}.notes h3{margin: 0}.nutrition-info{font-size: 0;margin: 20px 0;padding: 10px;background: #fff;}.nutrition-info>div {display: inline-block;font-size: 14px;width: 20%;text-align: center;}.nutrition-info>div:nth-child(5) ~ div{margin-top: 20px;}.nutrition-info>div p{margin-top: 0;margin-bottom: 7px;}#recipe .info{position:relative}#recipe .image{text-align:center;margin:25px 0}#recipe .image img{max-width:100%;width:150px;height:150px;-o-object-fit:cover;object-fit:cover;border-radius:150px}#recipe .recipe-name{margin-top: 20px;text-align:center}#recipe .summary{margin:20px 0;clear:both;line-height:1.7;font-style:italic}#recipe .time{clear:both;border-top:1px dotted #000;border-bottom:1px dotted #000;border-right:0;border-left:0}
January 31, 2018
Creamy Peach Smoothie
This kid-approved thick and creamy peach smoothie recipe is a one of our favorites! Loaded with frozen peaches, orange, and Almondmilk yogurt, it provides immune boosting Vitamin C, antioxidants, and probiotics. 
Earlier this week my youngest daughter stayed home from school with a sore throat. She created this peach smoothie, I worked the blender and took the pictures, and we enjoyed our creamy peach smoothies together. We both agreed it was one of her best smoothie recipes. This thick and creamy peach smoothie recipe was absolutely delicious and tasted like ice cream, but I think it also helped her beat her sore throat and by the afternoon she was back to dancing around the house and laughing hysterically. This peach smoothie is loaded with Vitamin-C, antioxidants, and probiotics - a great immune-boosting combination. I'm just thinking of it now, but this would be a great smoothie to add fresh or ground turmeric to.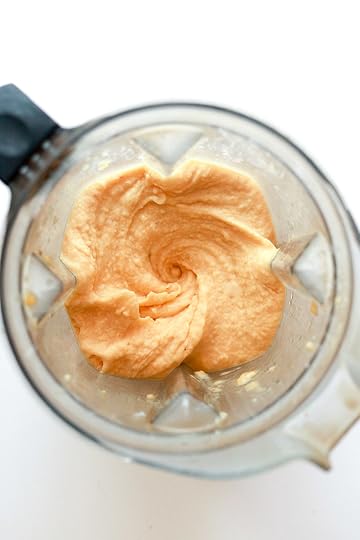
Look at that thick creamy swirl! If you've been following along here long, you know my family loves smoothies. I consider my Vitamix my best birthday present ever and it gets used at least once a day. While I love my green smoothies and chocolaty almond butter protein smoothies, my youngest daughter loves coming up with her own smoothie recipes. I keep a drawer of our freezer stocked with frozen fruit at all times so we can grab our favorite ingredients and whip up a smoothie quickly. Both Costco and Trader Joe's have pretty good deals on frozen fruit, but you can also freeze your own when it's in season. Fruit smoothies are a great way to enjoy organic, out-of-season fruit, all year long. Frozen fruit is just about as nutritious, so why not enjoy its benefits all year (source)? We always have a bag of frozen peaches. Frozen peaches make delicious peach crisps, but the kids even like eating the frozen slices straight from the bag for a cold treat.
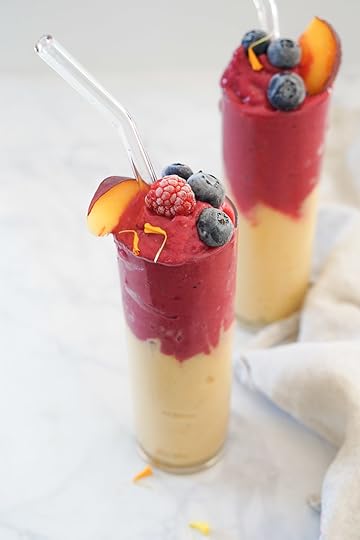
Do you want to know the secret to making thick and creamy ice cream-like smoothies? Use lots of frozen fruit, bananas and mangos are especially creamy, and as little liquid as possible. I find adding a whole orange usually provides enough liquid. You could keep this smoothie purely peach, or add a berry layer like we did this time. There's no right or wrong way. To make the layers, we simply start with our peach smoothie and add a handful of strawberries or raspberries after transferring half or more to our glasses. Then we continue blending and watch the peach color turn pink! I don't know why, but layered smoothies are just so satisfying!
Want more smoothies? Me too! Here are a few of my very favorites:
Green Glowing Smoothie Peanut Butter Banana Smoothie Chocolate Maca SmoothieTropical Turmeric SmoothieKids Smoothie Bar
Yield: 1-2 SmoothiesAuthor: Yummy Mummy KitchenPrint Recipe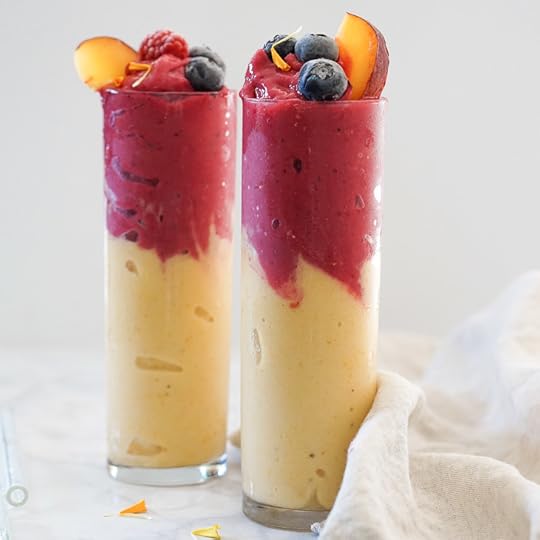 Creamy Peach SmoothieThis creamy peach smoothie is packed with healthy ingredients and is a delicious treat any time of day.prep time: 2 MINScook time: 2 MINStotal time: 4 minsingredients
1 whole orange, peeled 6 oz. yogurt (I used plain Almondmilk yogurt) 1 1/2 cups frozen sliced peaches 1 cup frozen sliced bananas 1 cup frozen strawberries or raspberries (optional) instructions
Place the orange, yogurt, peaches, and bananas in a blender. Blend until smooth and creamy. If the mixture is too thick to turn the blender, add a little liquid (water or more orange), if you'd like it thicker, add more frozen fruit. If adding a pink layer, transfer half to 3/4 of the peach smoothie to glasses and add the berries into the blender. Blend until smooth and then add this pink layer on top of the peach layer. Enjoy right away or freeze for later! notesNutrition information is approximate and is based on 1/2 this recipe. I am not a certified nutritionist and the information below is my best estimate based on online calculations. If nutrition facts are important for your health, please calculate using your favorite nutrition calculator. Further, I personally don't promote calorie counting unless directed by a doctor, but prefer to focus on feeding our bodies nourishing foods.calories
194fat (grams)
0sat. fat (grams)
0carbs (grams)
48protein (grams)
3http://www.yummymummykitchen.com/2018/01/peach-smoothie.htmlCreated using The Recipes Generator.recipe-inner{text-align:left;max-width:620px;border:6px double #009BFF;padding:20px;background:#f2f2f2;margin: 40px auto;font-family:Lato, sans-serif;}.recipe-inner a{color: #4193f0;}#recipe .recipe-name{font-size: 21px;}#recipe .info{font-size:13px;text-transform:capitalize;border-bottom:2px solid #000;padding-bottom:7px;margin-bottom:20px}.info:after{content:'';display:table;clear:both}#recipe .info span:first-child{margin-right:30px}#printbutton{border:0;margin:0;color:#fff;float:right;background:#555; padding:5px;border-radius:3px;cursor:pointer}#recipe .time{text-transform:uppercase;font-size:12px;text-align:center;background:#fff;padding:15px 0;margin-bottom:20px}#recipe .time span:not(:last-child){margin-right:12px}#recipe .time span:not(:last-child):after{content:'';display:inline-block;height:10px;width:1px;background:#000;vertical-align:middle;margin-left:12px}#recipe .summary{line-height:1.7;font-style:italic}.ingredients{line-height:1.7;clear:both}.ingredients h3,.instructions h3,.notes h3{font-size:20px !important;font-weight:400 !important;margin-bottom:0;color:#000;text-transform: uppercase;}.ingredients ul{margin:0!important;margin-top:5px !important;}.instructions li{margin-bottom:15px !important;line-height:1.6;text-align:left;}.ingredients li{text-align:left}#recipe .instructions{margin-top: 30px;}#recipe .instructions ol,#recipe .instructions ol li {list-style:decimal !important;}#recipe .instructions ol{padding-left:39px;margin:0!important;margin-top:6px !important;}.posturl{border-top:1px solid #ccc;padding-top:10px;}.ing-section{padding-left:20px;margin: 10px 0;}.ing-section > span{font-weight:700}.recipe-credit{font-size:13px;border-top: 1px solid #ccc;padding:10px;text-align:center;background:#ffffff;margin:-20px;margin-top:15px;}.recipe-credit a{color:blue;text-decoration:none;}.copyright-statement{font-size: 13px;font-style:italic;border-top: 1px solid #ccc;margin-top:15px;padding-top:15px;line-height:1.6;}.notes pre{font-size: 15px;margin: 10px 0;padding-left: 20px;font-family: inherit;line-height: 1.7;white-space: pre-line;}.notes h3{margin: 0}.nutrition-info{font-size: 0;margin: 20px 0;padding: 10px;background: #fff;}.nutrition-info>div {display: inline-block;font-size: 14px;width: 20%;text-align: center;}.nutrition-info>div:nth-child(5) ~ div{margin-top: 20px;}.nutrition-info>div p{margin-top: 0;margin-bottom: 7px;}#recipe .info{position:relative}#recipe .image{text-align:center;margin:25px 0}#recipe .image img{max-width:100%;width:150px;height:150px;-o-object-fit:cover;object-fit:cover;border-radius:150px}#recipe .recipe-name{margin-top: 20px;text-align:center}#recipe .summary{margin:20px 0;clear:both;line-height:1.7;font-style:italic}#recipe .time{clear:both;border-top:1px dotted #000;border-bottom:1px dotted #000;border-right:0;border-left:0}


Earlier this week my youngest daughter stayed home from school with a sore throat. She created this peach smoothie, I worked the blender and took the pictures, and we enjoyed our creamy peach smoothies together. We both agreed it was one of her best smoothie recipes. This thick and creamy peach smoothie recipe was absolutely delicious and tasted like ice cream, but I think it also helped her beat her sore throat and by the afternoon she was back to dancing around the house and laughing hysterically. This peach smoothie is loaded with Vitamin-C, antioxidants, and probiotics - a great immune-boosting combination. I'm just thinking of it now, but this would be a great smoothie to add fresh or ground turmeric to.
Look at that thick creamy swirl! If you've been following along here long, you know my family loves smoothies. I consider my Vitamix my best birthday present ever and it gets used at least once a day. While I love my green smoothies and chocolaty almond butter protein smoothies, my youngest daughter loves coming up with her own smoothie recipes. I keep a drawer of our freezer stocked with frozen fruit at all times so we can grab our favorite ingredients and whip up a smoothie quickly. Both Costco and Trader Joe's have pretty good deals on frozen fruit, but you can also freeze your own when it's in season. Fruit smoothies are a great way to enjoy organic, out-of-season fruit, all year long. Frozen fruit is just about as nutritious, so why not enjoy its benefits all year (source)? We always have a bag of frozen peaches. Frozen peaches make delicious peach crisps, but the kids even like eating the frozen slices straight from the bag for a cold treat.
Do you want to know the secret to making thick and creamy ice cream-like smoothies? Use lots of frozen fruit, bananas and mangos are especially creamy, and as little liquid as possible. I find adding a whole orange usually provides enough liquid. You could keep this smoothie purely peach, or add a berry layer like we did this time. There's no right or wrong way. To make the layers, we simply start with our peach smoothie and add a handful of strawberries or raspberries after transferring half or more to our glasses. Then we continue blending and watch the peach color turn pink! I don't know why, but layered smoothies are just so satisfying!
Want more smoothies? Me too! Here are a few of my very favorites:
Green Glowing Smoothie Peanut Butter Banana Smoothie Chocolate Maca SmoothieTropical Turmeric SmoothieKids Smoothie Bar
Yield: 1-2 SmoothiesAuthor: Yummy Mummy KitchenPrint Recipe
Creamy Peach SmoothieThis creamy peach smoothie is packed with healthy ingredients and is a delicious treat any time of day.prep time: 2 MINScook time: 2 MINStotal time: 4 minsingredients1 whole orange, peeled 6 oz. yogurt (I used plain Almondmilk yogurt) 1 1/2 cups frozen sliced peaches 1 cup frozen sliced bananas 1 cup frozen strawberries or raspberries (optional) instructions
Place the orange, yogurt, peaches, and bananas in a blender. Blend until smooth and creamy. If the mixture is too thick to turn the blender, add a little liquid (water or more orange), if you'd like it thicker, add more frozen fruit. If adding a pink layer, transfer half to 3/4 of the peach smoothie to glasses and add the berries into the blender. Blend until smooth and then add this pink layer on top of the peach layer. Enjoy right away or freeze for later! notesNutrition information is approximate and is based on 1/2 this recipe. I am not a certified nutritionist and the information below is my best estimate based on online calculations. If nutrition facts are important for your health, please calculate using your favorite nutrition calculator. Further, I personally don't promote calorie counting unless directed by a doctor, but prefer to focus on feeding our bodies nourishing foods.calories
194fat (grams)
0sat. fat (grams)
0carbs (grams)
48protein (grams)
3http://www.yummymummykitchen.com/2018/01/peach-smoothie.htmlCreated using The Recipes Generator.recipe-inner{text-align:left;max-width:620px;border:6px double #009BFF;padding:20px;background:#f2f2f2;margin: 40px auto;font-family:Lato, sans-serif;}.recipe-inner a{color: #4193f0;}#recipe .recipe-name{font-size: 21px;}#recipe .info{font-size:13px;text-transform:capitalize;border-bottom:2px solid #000;padding-bottom:7px;margin-bottom:20px}.info:after{content:'';display:table;clear:both}#recipe .info span:first-child{margin-right:30px}#printbutton{border:0;margin:0;color:#fff;float:right;background:#555; padding:5px;border-radius:3px;cursor:pointer}#recipe .time{text-transform:uppercase;font-size:12px;text-align:center;background:#fff;padding:15px 0;margin-bottom:20px}#recipe .time span:not(:last-child){margin-right:12px}#recipe .time span:not(:last-child):after{content:'';display:inline-block;height:10px;width:1px;background:#000;vertical-align:middle;margin-left:12px}#recipe .summary{line-height:1.7;font-style:italic}.ingredients{line-height:1.7;clear:both}.ingredients h3,.instructions h3,.notes h3{font-size:20px !important;font-weight:400 !important;margin-bottom:0;color:#000;text-transform: uppercase;}.ingredients ul{margin:0!important;margin-top:5px !important;}.instructions li{margin-bottom:15px !important;line-height:1.6;text-align:left;}.ingredients li{text-align:left}#recipe .instructions{margin-top: 30px;}#recipe .instructions ol,#recipe .instructions ol li {list-style:decimal !important;}#recipe .instructions ol{padding-left:39px;margin:0!important;margin-top:6px !important;}.posturl{border-top:1px solid #ccc;padding-top:10px;}.ing-section{padding-left:20px;margin: 10px 0;}.ing-section > span{font-weight:700}.recipe-credit{font-size:13px;border-top: 1px solid #ccc;padding:10px;text-align:center;background:#ffffff;margin:-20px;margin-top:15px;}.recipe-credit a{color:blue;text-decoration:none;}.copyright-statement{font-size: 13px;font-style:italic;border-top: 1px solid #ccc;margin-top:15px;padding-top:15px;line-height:1.6;}.notes pre{font-size: 15px;margin: 10px 0;padding-left: 20px;font-family: inherit;line-height: 1.7;white-space: pre-line;}.notes h3{margin: 0}.nutrition-info{font-size: 0;margin: 20px 0;padding: 10px;background: #fff;}.nutrition-info>div {display: inline-block;font-size: 14px;width: 20%;text-align: center;}.nutrition-info>div:nth-child(5) ~ div{margin-top: 20px;}.nutrition-info>div p{margin-top: 0;margin-bottom: 7px;}#recipe .info{position:relative}#recipe .image{text-align:center;margin:25px 0}#recipe .image img{max-width:100%;width:150px;height:150px;-o-object-fit:cover;object-fit:cover;border-radius:150px}#recipe .recipe-name{margin-top: 20px;text-align:center}#recipe .summary{margin:20px 0;clear:both;line-height:1.7;font-style:italic}#recipe .time{clear:both;border-top:1px dotted #000;border-bottom:1px dotted #000;border-right:0;border-left:0}
January 28, 2018
Black Bean Enchiladas
Black bean and corn enchiladas are hearty, filling, satisfying, and delicious. These enchiladas are my kids' favorite, but easy to spice up to your liking. They're easy to make naturally vegetarian, vegan, or gluten-free!
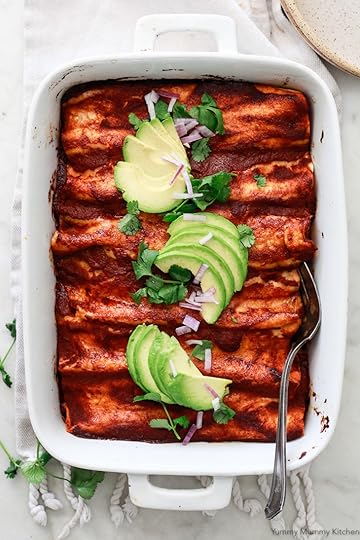
A few weeks ago Yummy Hubby decided to take on Sunday night dinner. You guys, it was so much fun. The girls loved the change of Daddy making dinner and a night off from cooking was just what I needed. I have a pretty great collection of cookbooks, but he headed straight to the one of the only cookbooks he had from before we were married, Dad's Own Cookbook. It was pretty cute. After perusing the pages he settled on the vegetarian tacos and went to the grocery store to do the shopping. Our whole family absolutely loved the tacos and the girls requested them again.
As I mentioned in the Homemade Enchilada Sauce recipe, my eldest daughter is currently in an enchilada phase. So I decided to recreate the taco filling from Daddy's cooking night, but use it as enchilada filling. It worked so well I had to share the recipe with you. These hearty black bean enchiladas are filled with saucy black beans, corn, and bell peppers. They are mild and kid-approved, but easy to spice up if you like heat. These tasty black bean enchiladas are easy to make vegetarian (if you use cheese), vegan (if you use no cheese or dairy-free cheese), and gluten-free if you use gluten free tortillas.
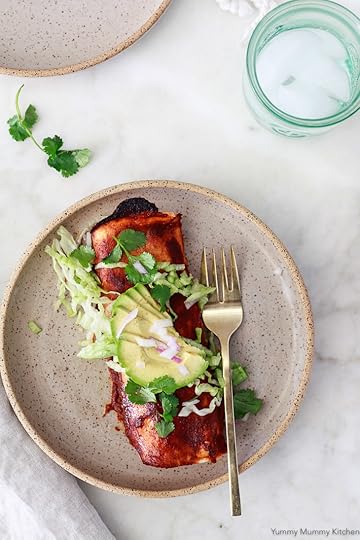
These black bean and corn enchiladas were the first ones I tried with my Homemade Enchilada Sauce. Though I made the enchilada sauce the day before, it felt so good to make most of this meal completely from scratch. The homemade sauce gave these enchiladas the perfect amount of heat and flavor. I love adding freshness with heaps of toppings on top of my enchiladas. Does this look like an salad? I'm cool with that.
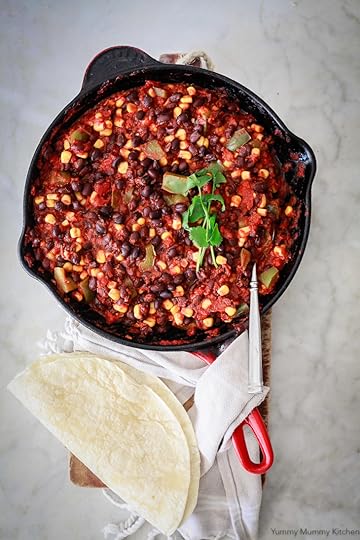
The filling for these black bean enchiladas is almost like a chili. If you have left over filling, just plop it in a bowl and eat it as-is. It's also delicious served as my hubby did, as a taco filling.
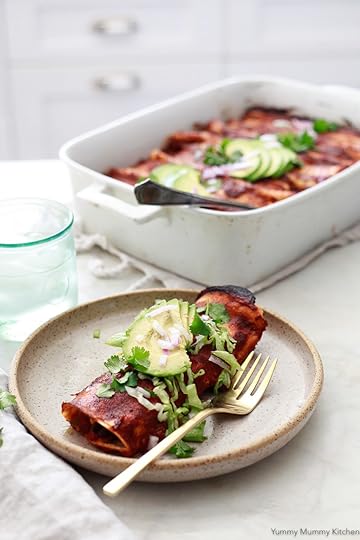 Enchilada night is always a success in my family and these black bean vegetarian enchiladas are the current favorite. Another favorite are my Roasted Butternut Squash and Black Bean Enchiladas from a few years ago.
I'll share the video for the enchilada sauce in case you'd like to see how to make it.
Yield: About 8 enchiladasAuthor: Yummy Mummy KitchenPrint Recipe Black Bean EnchiladasHearty and satisfying vegetarian enchiladas stuffed with a mixture of beans and corn. These are a favorite in my house!prep time: 10 MINScook time: 50 MINStotal time: 60 minsingredients
1 tablespoon olive oil1 green bell pepper, seeded and chopped15 oz. crushed tomatoes2 tablespoons taco seasoning 3 cups cooked drained black beans (2-15 oz. cans) 1 (15 oz.) can corn, drained 8 favorite tortillas (I used flour, use GF if needed) 1 cup shredded cheddar cheese, dairy-free (optional) 1 batch homemade Easy Enchilada Sauce (or store bought) For Garnish
1 large avocado, sliced for serving (or prepared guacamole) 1 head Romaine or iceberg lettuce, shredded for serving 1 small red onion, thinly sliced fresh cilantro leaves instructions
Heat olive oil in a large skillet over medium high heat. Add the bell pepper and saute until tender-crisp, about 5 minutes. Add the tomatoes, taco seasoning, and beans. Simmer over low heat, partially covered, for 20 minutes, stirring occasionally until the mixture is very thick. Stir in the corn to warm. Preheat the oven to 375 degrees F. Coat the bottom of a 9x13-inch casserole dish with cooking spray. Coat with a thin layer of enchilada sauce. Place about 1/4-1/2 cup of the bean filling in a line down each tortilla. The amount you use will depend on the size of your tortillas. You'll get the hang of it once you do it once or twice. Sprinkle with cheese, if desired. Roll each tortilla over the filling and place seam-side-down in the casserole dish. Cover the enchiladas with a layer of enchilada sauce. You can sprinkle the top with more cheese if you like, or leave it naked. Bake enchiladas for about 20 minutes. Serve with avocado, lettuce, red onion, and cilantro. notesNutrition information is approximate and doesn't include toppings in this recipe. I am not a certified nutritionist and the information below is my best estimate based on online calculations. If nutrition facts are important for your health, please calculate using your favorite nutrition calculator. Further, I personally don't promote calorie counting unless directed by a doctor, but prefer to focus on feeding our bodies nourishing foods.calories
312fat (grams)
7sat. fat (grams)
2carbs (grams)
53protein (grams)
10sugar (grams)
9http://www.yummymummykitchen.com/2018/01/black-bean-enchiladas-vegetarian-vegan.htmlCreated using The Recipes Generator.recipe-inner{text-align:left;max-width:620px;border:6px double #009BFF;padding:20px;background:#f2f2f2;margin: 40px auto;font-family:Lato, sans-serif;}.recipe-inner a{color: #4193f0;}#recipe .recipe-name{font-size: 21px;}#recipe .info{font-size:13px;text-transform:capitalize;border-bottom:2px solid #000;padding-bottom:7px;margin-bottom:20px}.info:after{content:'';display:table;clear:both}#recipe .info span:first-child{margin-right:30px}#printbutton{border:0;margin:0;color:#fff;float:right;background:#555; padding:5px;border-radius:3px;cursor:pointer}#recipe .time{text-transform:uppercase;font-size:12px;text-align:center;background:#fff;padding:15px 0;margin-bottom:20px}#recipe .time span:not(:last-child){margin-right:12px}#recipe .time span:not(:last-child):after{content:'';display:inline-block;height:10px;width:1px;background:#000;vertical-align:middle;margin-left:12px}#recipe .summary{line-height:1.7;font-style:italic}.ingredients{line-height:1.7;clear:both}.ingredients h3,.instructions h3,.notes h3{font-size:20px !important;font-weight:400 !important;margin-bottom:0;color:#000;text-transform: uppercase;}.ingredients ul{margin:0!important;margin-top:5px !important;}.instructions li{margin-bottom:15px !important;line-height:1.6;text-align:left;}.ingredients li{text-align:left}#recipe .instructions{margin-top: 30px;}#recipe .instructions ol,#recipe .instructions ol li {list-style:decimal !important;}#recipe .instructions ol{padding-left:39px;margin:0!important;margin-top:6px !important;}.posturl{border-top:1px solid #ccc;padding-top:10px;}.ing-section{padding-left:20px;margin: 10px 0;}.ing-section > span{font-weight:700}.recipe-credit{font-size:13px;border-top: 1px solid #ccc;padding:10px;text-align:center;background:#ffffff;margin:-20px;margin-top:15px;}.recipe-credit a{color:blue;text-decoration:none;}.copyright-statement{font-size: 13px;font-style:italic;border-top: 1px solid #ccc;margin-top:15px;padding-top:15px;line-height:1.6;}.notes pre{font-size: 15px;margin: 10px 0;padding-left: 20px;font-family: inherit;line-height: 1.7;white-space: pre-line;}.notes h3{margin: 0}.nutrition-info{font-size: 0;margin: 20px 0;padding: 10px;background: #fff;}.nutrition-info>div {display: inline-block;font-size: 14px;width: 20%;text-align: center;}.nutrition-info>div:nth-child(5) ~ div{margin-top: 20px;}.nutrition-info>div p{margin-top: 0;margin-bottom: 7px;}#recipe .info{position:relative}#recipe .image{text-align:center;margin:25px 0}#recipe .image img{max-width:100%;width:150px;height:150px;-o-object-fit:cover;object-fit:cover;border-radius:150px}#recipe .recipe-name{margin-top: 20px;text-align:center}#recipe .summary{margin:20px 0;clear:both;line-height:1.7;font-style:italic}#recipe .time{clear:both;border-top:1px dotted #000;border-bottom:1px dotted #000;border-right:0;border-left:0}
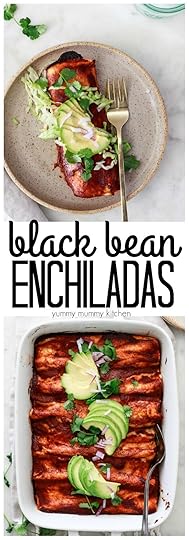


A few weeks ago Yummy Hubby decided to take on Sunday night dinner. You guys, it was so much fun. The girls loved the change of Daddy making dinner and a night off from cooking was just what I needed. I have a pretty great collection of cookbooks, but he headed straight to the one of the only cookbooks he had from before we were married, Dad's Own Cookbook. It was pretty cute. After perusing the pages he settled on the vegetarian tacos and went to the grocery store to do the shopping. Our whole family absolutely loved the tacos and the girls requested them again.
As I mentioned in the Homemade Enchilada Sauce recipe, my eldest daughter is currently in an enchilada phase. So I decided to recreate the taco filling from Daddy's cooking night, but use it as enchilada filling. It worked so well I had to share the recipe with you. These hearty black bean enchiladas are filled with saucy black beans, corn, and bell peppers. They are mild and kid-approved, but easy to spice up if you like heat. These tasty black bean enchiladas are easy to make vegetarian (if you use cheese), vegan (if you use no cheese or dairy-free cheese), and gluten-free if you use gluten free tortillas.
These black bean and corn enchiladas were the first ones I tried with my Homemade Enchilada Sauce. Though I made the enchilada sauce the day before, it felt so good to make most of this meal completely from scratch. The homemade sauce gave these enchiladas the perfect amount of heat and flavor. I love adding freshness with heaps of toppings on top of my enchiladas. Does this look like an salad? I'm cool with that.
The filling for these black bean enchiladas is almost like a chili. If you have left over filling, just plop it in a bowl and eat it as-is. It's also delicious served as my hubby did, as a taco filling.
Enchilada night is always a success in my family and these black bean vegetarian enchiladas are the current favorite. Another favorite are my Roasted Butternut Squash and Black Bean Enchiladas from a few years ago. I'll share the video for the enchilada sauce in case you'd like to see how to make it.
Yield: About 8 enchiladasAuthor: Yummy Mummy KitchenPrint Recipe
Black Bean EnchiladasHearty and satisfying vegetarian enchiladas stuffed with a mixture of beans and corn. These are a favorite in my house!prep time: 10 MINScook time: 50 MINStotal time: 60 minsingredients1 tablespoon olive oil1 green bell pepper, seeded and chopped15 oz. crushed tomatoes2 tablespoons taco seasoning 3 cups cooked drained black beans (2-15 oz. cans) 1 (15 oz.) can corn, drained 8 favorite tortillas (I used flour, use GF if needed) 1 cup shredded cheddar cheese, dairy-free (optional) 1 batch homemade Easy Enchilada Sauce (or store bought) For Garnish
1 large avocado, sliced for serving (or prepared guacamole) 1 head Romaine or iceberg lettuce, shredded for serving 1 small red onion, thinly sliced fresh cilantro leaves instructions
Heat olive oil in a large skillet over medium high heat. Add the bell pepper and saute until tender-crisp, about 5 minutes. Add the tomatoes, taco seasoning, and beans. Simmer over low heat, partially covered, for 20 minutes, stirring occasionally until the mixture is very thick. Stir in the corn to warm. Preheat the oven to 375 degrees F. Coat the bottom of a 9x13-inch casserole dish with cooking spray. Coat with a thin layer of enchilada sauce. Place about 1/4-1/2 cup of the bean filling in a line down each tortilla. The amount you use will depend on the size of your tortillas. You'll get the hang of it once you do it once or twice. Sprinkle with cheese, if desired. Roll each tortilla over the filling and place seam-side-down in the casserole dish. Cover the enchiladas with a layer of enchilada sauce. You can sprinkle the top with more cheese if you like, or leave it naked. Bake enchiladas for about 20 minutes. Serve with avocado, lettuce, red onion, and cilantro. notesNutrition information is approximate and doesn't include toppings in this recipe. I am not a certified nutritionist and the information below is my best estimate based on online calculations. If nutrition facts are important for your health, please calculate using your favorite nutrition calculator. Further, I personally don't promote calorie counting unless directed by a doctor, but prefer to focus on feeding our bodies nourishing foods.calories
312fat (grams)
7sat. fat (grams)
2carbs (grams)
53protein (grams)
10sugar (grams)
9http://www.yummymummykitchen.com/2018/01/black-bean-enchiladas-vegetarian-vegan.htmlCreated using The Recipes Generator.recipe-inner{text-align:left;max-width:620px;border:6px double #009BFF;padding:20px;background:#f2f2f2;margin: 40px auto;font-family:Lato, sans-serif;}.recipe-inner a{color: #4193f0;}#recipe .recipe-name{font-size: 21px;}#recipe .info{font-size:13px;text-transform:capitalize;border-bottom:2px solid #000;padding-bottom:7px;margin-bottom:20px}.info:after{content:'';display:table;clear:both}#recipe .info span:first-child{margin-right:30px}#printbutton{border:0;margin:0;color:#fff;float:right;background:#555; padding:5px;border-radius:3px;cursor:pointer}#recipe .time{text-transform:uppercase;font-size:12px;text-align:center;background:#fff;padding:15px 0;margin-bottom:20px}#recipe .time span:not(:last-child){margin-right:12px}#recipe .time span:not(:last-child):after{content:'';display:inline-block;height:10px;width:1px;background:#000;vertical-align:middle;margin-left:12px}#recipe .summary{line-height:1.7;font-style:italic}.ingredients{line-height:1.7;clear:both}.ingredients h3,.instructions h3,.notes h3{font-size:20px !important;font-weight:400 !important;margin-bottom:0;color:#000;text-transform: uppercase;}.ingredients ul{margin:0!important;margin-top:5px !important;}.instructions li{margin-bottom:15px !important;line-height:1.6;text-align:left;}.ingredients li{text-align:left}#recipe .instructions{margin-top: 30px;}#recipe .instructions ol,#recipe .instructions ol li {list-style:decimal !important;}#recipe .instructions ol{padding-left:39px;margin:0!important;margin-top:6px !important;}.posturl{border-top:1px solid #ccc;padding-top:10px;}.ing-section{padding-left:20px;margin: 10px 0;}.ing-section > span{font-weight:700}.recipe-credit{font-size:13px;border-top: 1px solid #ccc;padding:10px;text-align:center;background:#ffffff;margin:-20px;margin-top:15px;}.recipe-credit a{color:blue;text-decoration:none;}.copyright-statement{font-size: 13px;font-style:italic;border-top: 1px solid #ccc;margin-top:15px;padding-top:15px;line-height:1.6;}.notes pre{font-size: 15px;margin: 10px 0;padding-left: 20px;font-family: inherit;line-height: 1.7;white-space: pre-line;}.notes h3{margin: 0}.nutrition-info{font-size: 0;margin: 20px 0;padding: 10px;background: #fff;}.nutrition-info>div {display: inline-block;font-size: 14px;width: 20%;text-align: center;}.nutrition-info>div:nth-child(5) ~ div{margin-top: 20px;}.nutrition-info>div p{margin-top: 0;margin-bottom: 7px;}#recipe .info{position:relative}#recipe .image{text-align:center;margin:25px 0}#recipe .image img{max-width:100%;width:150px;height:150px;-o-object-fit:cover;object-fit:cover;border-radius:150px}#recipe .recipe-name{margin-top: 20px;text-align:center}#recipe .summary{margin:20px 0;clear:both;line-height:1.7;font-style:italic}#recipe .time{clear:both;border-top:1px dotted #000;border-bottom:1px dotted #000;border-right:0;border-left:0}
January 27, 2018
Easy Enchilada Sauce
The best easy enchilada sauce recipe! Find out how to make red enchilada sauce at home with this simple recipe and you'll never use store bought again. 
"I am really into enchiladas right now. Could you make them for dinner?" Those were the first words my eldest daughter said after school the other day. It's so funny how we, especially kids it seems, go through food phases. I always love when the kid request specific things for dinner because it gives me a break from always thinking up things to make, and I know they will eat and enjoy those dinners the most. I've made many, many pans of enchiladas over the years, but always took a shortcut. Can you guess what it was? Yep, store bought enchilada sauce. I finally took a look at the ingredients on that can of sauce and found that enchilada sauce is really just a few simple ingredients, but the store bought versions I was using had additives like soybean oil and processed corn products. So I set that can back down on the store shelf and went to work making my own homemade enchilada sauce.
If you like making homemade sauces, be sure to also check out my Fresh Tomato Marinara Sauce and How to Make Salsa with Fresh Tomatoes posts! While researching red enchilada sauce recipes I came across a range of recipes. Most English recipes started by making a roux, which is flour and oil or butter. I suspected this is not the traditional method, so I headed to recipes that were written in Spanish. I typed in "receta de salsa de enchilada" and watched several videos, in Spanish, of authentic enchilada sauce recipes. This recipe was adapted to this one I saw on YouTube. CONTINUE READING THIS POST »
January 24, 2018
Cacao Bliss Balls
Chocolatey bliss balls are the best little sweet treats! These amazing chocolate almond bliss balls are vegan and paleo, and made with healthy ingredients like dates and cacao. 
I love to prep healthier natural treats to keep us nourished on busy days. I was about to make my raw brownie energy bars and got out all the ingredients, when I decided to make bliss balls instead. I'm not sure who first coined the term "bliss ball" but I just adore it. We could all use a little bliss now and then, couldn't we? If it comes in the form of a naturally sweet little bite of goodness I'm all for it. What are bliss balls? Bliss balls are basically a sticky sweet concoction of nuts and dates blended together using about a 1 to 1 ratio. From there the bliss balls can be flavored any way you like. Cacao powder is my favorite bliss ball addition because it makes them chocolatey, but there are many other flavor combinations you could go with. Matcha, mint, pistachio, lemon, cinnamon, and coconut are just a few ingredient ideas that come to mind. Which bliss balls should I make next?

These cacao almond bliss balls are the favorite flavor in my family. They taste a bit like little brownie bites with some crunchy little bits of nuts. I added hemp hearts to this batch for even more protein and omegas. Pitted dates give these bliss balls their sweetness while also binding the mixture together. I've found that some packages of dates have more moisture than others. When using drier dates, you may need to add a little water to hold everything together. You can find dates in the nut section of most grocery stores, especially natural foods stores. You can buy dates already pitted, or pit them yourself. Interestingly, the pitted dates at my grocery store were less expensive than the whole dates. Be very careful you don't leave any date pits in, as they can create very sharp little pieces when blended.
A food processor is the best tool for this job. Pulse the ingredients until the mixture holds together when pressed. A few drops of water, coconut oil, and/or maple syrup can help if it's not holding. Don't over blend because the crunchy nut pieces add delicious texture.

Yummy Hubby and I like these bliss balls best coated in coconut shavings, while the girls like them best plain.
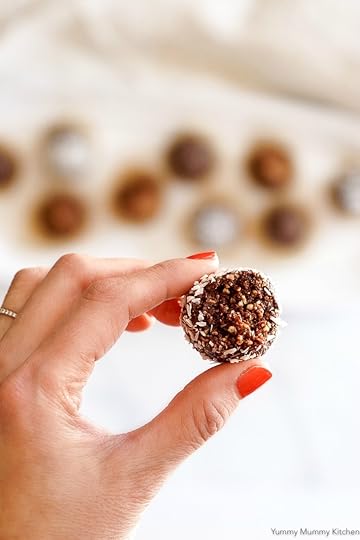 Aren't these bliss balls cute? It's so nice to have a batch in the fridge for times when we need a quick snack or to satisfy a chocolate craving. I hope you enjoy these! Don't miss the short video to see how it's done!
Here are a couple of ingredients you may need (Amazon affiliate links):
Yield: about 20 ballsAuthor: Yummy Mummy KitchenPrint Recipe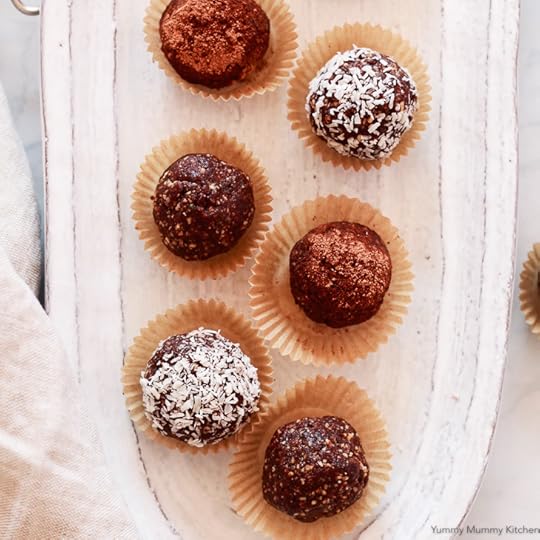 Cacao Almond Bliss BallsChocolatey almond bliss ball energy bites are a delicious healthier treat. Keep them in the fridge for whenever you need a sweet little snack.prep time: 10 MINScook time: total time: 10 minsingredients
1 1/2 cups roasted, unsalted almonds1 1/2 cups pitted dates1/3 cup unsweetened cacao/cocoa powder1/3 cup hemp hearts1/2 teaspoon Himalayan or sea salt 1 teaspoon pure vanilla extract instructions
Place all ingredients in the bowl of a food processor and pulse until nuts are ground and no chunks of dates remain. Squeeze the mixture between your fingers. If it holds together, roll into balls. If not, add a tablespoon of water and pulse again until it does hold together. The stickiness and moisture in dates can vary, so you may need more or less water. notes*You can make your bliss balls extra fancy and fun by rolling them in cacao powder or coconut shavings.
* Nutrition information is approximate and calculated by a third party app for 1/20 of the whole recipe.calories
104fat (grams)
5sat. fat (grams)
1carbs (grams)
13protein (grams)
3sugar (grams)
9http://www.yummymummykitchen.com/2018/01/bliss-balls.htmlCreated using The Recipes Generator.recipe-inner{text-align:left;max-width:620px;border:6px double #009BFF;padding:20px;background:#f2f2f2;margin: 40px auto;font-family:Lato, sans-serif;}.recipe-inner a{color: #4193f0;}#recipe .recipe-name{font-size: 21px;}#recipe .info{font-size:13px;text-transform:capitalize;border-bottom:2px solid #000;padding-bottom:7px;margin-bottom:20px}.info:after{content:'';display:table;clear:both}#recipe .info span:first-child{margin-right:30px}#printbutton{border:0;margin:0;color:#fff;float:right;background:#555; padding:5px;border-radius:3px;cursor:pointer}#recipe .time{text-transform:uppercase;font-size:12px;text-align:center;background:#fff;padding:15px 0;margin-bottom:20px}#recipe .time span:not(:last-child){margin-right:12px}#recipe .time span:not(:last-child):after{content:'';display:inline-block;height:10px;width:1px;background:#000;vertical-align:middle;margin-left:12px}#recipe .summary{line-height:1.7;font-style:italic}.ingredients{line-height:1.7;clear:both}.ingredients h3,.instructions h3,.notes h3{font-size:20px !important;font-weight:400 !important;margin-bottom:0;color:#000;text-transform: uppercase;}.ingredients ul{margin:0!important;margin-top:5px !important;}.instructions li{margin-bottom:15px !important;line-height:1.6;text-align:left;}.ingredients li{text-align:left}#recipe .instructions{margin-top: 30px;}#recipe .instructions ol,#recipe .instructions ol li {list-style:decimal !important;}#recipe .instructions ol{padding-left:39px;margin:0!important;margin-top:6px !important;}.posturl{border-top:1px solid #ccc;padding-top:10px;}.ing-section{padding-left:20px;margin: 10px 0;}.ing-section > span{font-weight:700}.recipe-credit{font-size:13px;border-top: 1px solid #ccc;padding:10px;text-align:center;background:#ffffff;margin:-20px;margin-top:15px;}.recipe-credit a{color:blue;text-decoration:none;}.copyright-statement{font-size: 13px;font-style:italic;border-top: 1px solid #ccc;margin-top:15px;padding-top:15px;line-height:1.6;}.notes pre{font-size: 15px;margin: 10px 0;padding-left: 20px;font-family: inherit;line-height: 1.7;white-space: pre-line;}.notes h3{margin: 0}.nutrition-info{font-size: 0;margin: 20px 0;padding: 10px;background: #fff;}.nutrition-info>div {display: inline-block;font-size: 14px;width: 20%;text-align: center;}.nutrition-info>div:nth-child(5) ~ div{margin-top: 20px;}.nutrition-info>div p{margin-top: 0;margin-bottom: 7px;}#recipe .info{position:relative}#recipe .image{text-align:center;margin:25px 0}#recipe .image img{max-width:100%;width:150px;height:150px;-o-object-fit:cover;object-fit:cover;border-radius:150px}#recipe .recipe-name{margin-top: 20px;text-align:center}#recipe .summary{margin:20px 0;clear:both;line-height:1.7;font-style:italic}#recipe .time{clear:both;border-top:1px dotted #000;border-bottom:1px dotted #000;border-right:0;border-left:0}
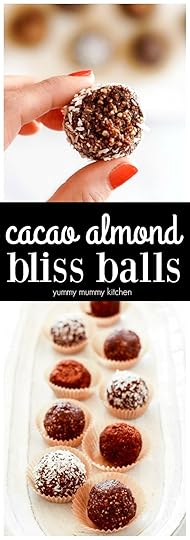


I love to prep healthier natural treats to keep us nourished on busy days. I was about to make my raw brownie energy bars and got out all the ingredients, when I decided to make bliss balls instead. I'm not sure who first coined the term "bliss ball" but I just adore it. We could all use a little bliss now and then, couldn't we? If it comes in the form of a naturally sweet little bite of goodness I'm all for it. What are bliss balls? Bliss balls are basically a sticky sweet concoction of nuts and dates blended together using about a 1 to 1 ratio. From there the bliss balls can be flavored any way you like. Cacao powder is my favorite bliss ball addition because it makes them chocolatey, but there are many other flavor combinations you could go with. Matcha, mint, pistachio, lemon, cinnamon, and coconut are just a few ingredient ideas that come to mind. Which bliss balls should I make next?
These cacao almond bliss balls are the favorite flavor in my family. They taste a bit like little brownie bites with some crunchy little bits of nuts. I added hemp hearts to this batch for even more protein and omegas. Pitted dates give these bliss balls their sweetness while also binding the mixture together. I've found that some packages of dates have more moisture than others. When using drier dates, you may need to add a little water to hold everything together. You can find dates in the nut section of most grocery stores, especially natural foods stores. You can buy dates already pitted, or pit them yourself. Interestingly, the pitted dates at my grocery store were less expensive than the whole dates. Be very careful you don't leave any date pits in, as they can create very sharp little pieces when blended.
A food processor is the best tool for this job. Pulse the ingredients until the mixture holds together when pressed. A few drops of water, coconut oil, and/or maple syrup can help if it's not holding. Don't over blend because the crunchy nut pieces add delicious texture.
Yummy Hubby and I like these bliss balls best coated in coconut shavings, while the girls like them best plain.
Aren't these bliss balls cute? It's so nice to have a batch in the fridge for times when we need a quick snack or to satisfy a chocolate craving. I hope you enjoy these! Don't miss the short video to see how it's done! Here are a couple of ingredients you may need (Amazon affiliate links):
Yield: about 20 ballsAuthor: Yummy Mummy KitchenPrint Recipe
Cacao Almond Bliss BallsChocolatey almond bliss ball energy bites are a delicious healthier treat. Keep them in the fridge for whenever you need a sweet little snack.prep time: 10 MINScook time: total time: 10 minsingredients1 1/2 cups roasted, unsalted almonds1 1/2 cups pitted dates1/3 cup unsweetened cacao/cocoa powder1/3 cup hemp hearts1/2 teaspoon Himalayan or sea salt 1 teaspoon pure vanilla extract instructions
Place all ingredients in the bowl of a food processor and pulse until nuts are ground and no chunks of dates remain. Squeeze the mixture between your fingers. If it holds together, roll into balls. If not, add a tablespoon of water and pulse again until it does hold together. The stickiness and moisture in dates can vary, so you may need more or less water. notes*You can make your bliss balls extra fancy and fun by rolling them in cacao powder or coconut shavings.
* Nutrition information is approximate and calculated by a third party app for 1/20 of the whole recipe.calories
104fat (grams)
5sat. fat (grams)
1carbs (grams)
13protein (grams)
3sugar (grams)
9http://www.yummymummykitchen.com/2018/01/bliss-balls.htmlCreated using The Recipes Generator.recipe-inner{text-align:left;max-width:620px;border:6px double #009BFF;padding:20px;background:#f2f2f2;margin: 40px auto;font-family:Lato, sans-serif;}.recipe-inner a{color: #4193f0;}#recipe .recipe-name{font-size: 21px;}#recipe .info{font-size:13px;text-transform:capitalize;border-bottom:2px solid #000;padding-bottom:7px;margin-bottom:20px}.info:after{content:'';display:table;clear:both}#recipe .info span:first-child{margin-right:30px}#printbutton{border:0;margin:0;color:#fff;float:right;background:#555; padding:5px;border-radius:3px;cursor:pointer}#recipe .time{text-transform:uppercase;font-size:12px;text-align:center;background:#fff;padding:15px 0;margin-bottom:20px}#recipe .time span:not(:last-child){margin-right:12px}#recipe .time span:not(:last-child):after{content:'';display:inline-block;height:10px;width:1px;background:#000;vertical-align:middle;margin-left:12px}#recipe .summary{line-height:1.7;font-style:italic}.ingredients{line-height:1.7;clear:both}.ingredients h3,.instructions h3,.notes h3{font-size:20px !important;font-weight:400 !important;margin-bottom:0;color:#000;text-transform: uppercase;}.ingredients ul{margin:0!important;margin-top:5px !important;}.instructions li{margin-bottom:15px !important;line-height:1.6;text-align:left;}.ingredients li{text-align:left}#recipe .instructions{margin-top: 30px;}#recipe .instructions ol,#recipe .instructions ol li {list-style:decimal !important;}#recipe .instructions ol{padding-left:39px;margin:0!important;margin-top:6px !important;}.posturl{border-top:1px solid #ccc;padding-top:10px;}.ing-section{padding-left:20px;margin: 10px 0;}.ing-section > span{font-weight:700}.recipe-credit{font-size:13px;border-top: 1px solid #ccc;padding:10px;text-align:center;background:#ffffff;margin:-20px;margin-top:15px;}.recipe-credit a{color:blue;text-decoration:none;}.copyright-statement{font-size: 13px;font-style:italic;border-top: 1px solid #ccc;margin-top:15px;padding-top:15px;line-height:1.6;}.notes pre{font-size: 15px;margin: 10px 0;padding-left: 20px;font-family: inherit;line-height: 1.7;white-space: pre-line;}.notes h3{margin: 0}.nutrition-info{font-size: 0;margin: 20px 0;padding: 10px;background: #fff;}.nutrition-info>div {display: inline-block;font-size: 14px;width: 20%;text-align: center;}.nutrition-info>div:nth-child(5) ~ div{margin-top: 20px;}.nutrition-info>div p{margin-top: 0;margin-bottom: 7px;}#recipe .info{position:relative}#recipe .image{text-align:center;margin:25px 0}#recipe .image img{max-width:100%;width:150px;height:150px;-o-object-fit:cover;object-fit:cover;border-radius:150px}#recipe .recipe-name{margin-top: 20px;text-align:center}#recipe .summary{margin:20px 0;clear:both;line-height:1.7;font-style:italic}#recipe .time{clear:both;border-top:1px dotted #000;border-bottom:1px dotted #000;border-right:0;border-left:0}
January 19, 2018
Avocado Salad
Simple avocado salad with tomatoes, cucumber, red onions, and a mustard vinaigrette dressing is delicious alone or served with greens, quinoa, or chickpeas! 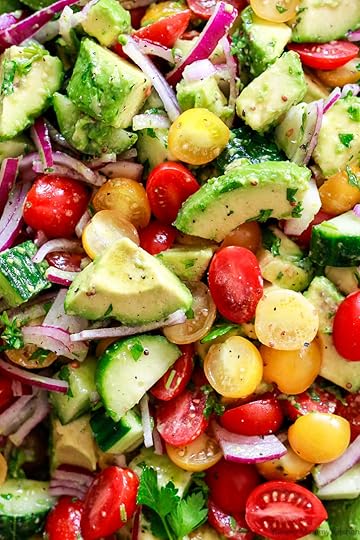
I've been seeing so much great feedback on my Avocado Bruschetta, that I wanted to a spin-off salad recipe with similar ingredients. I signed up for the "hearty vegetarian salad" slot for our school's staff appreciation lunch and thought it would be the perfect time to give this avocado salad a go. This avocado salad is simple. The bulk of it is made up of avocado, cherry tomatoes, red onion, and cucumber. I've dressed it with a mustard vinaigrette, but you could really use your favorite vinaigrette. A simple red wine or white balsamic vinegar and olive oil would be lovely. Or you could give this avocado salad some Mexican flair by dressing it with lime juice, olive oil, cumin, and garlic. While a simple avocado salad is a terrific side dish as-is, I love adding it to a bed of arugula and adding quinoa or chickpeas with a sprinkle of hemp seeds to make it a solid lunch salad.
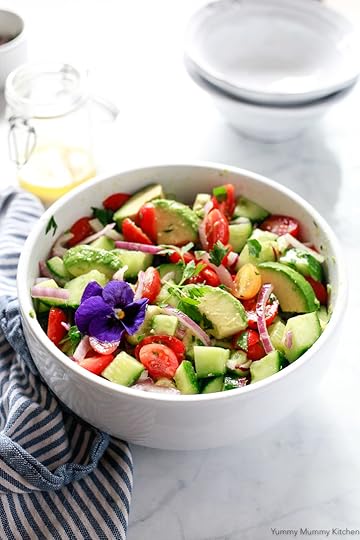
Avocado salad is such a nice option to bring to BBQs and potlucks, or just to serve as a side at home. Although avocados turn brown quickly, they stay green in this recipe thanks to the acid content of the vinegar and lemon juice. You can make this salad several hours in advance and store in the refrigerator.
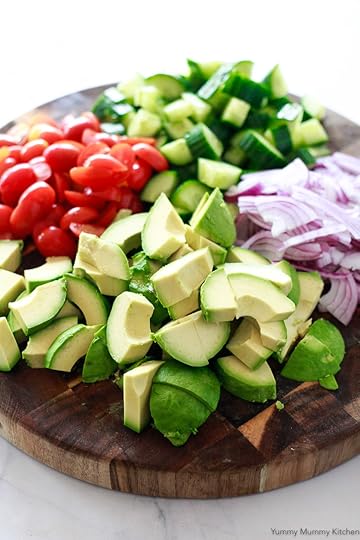
My best tip for making this avocado salad recipe is to choose the avocados wisely. Unlike when we are making guacamole and look for softer avocados to mash, we want firm avocados here so that they don't get smashed while tossing the salad together with the dressing. Use avocados that just barely give when pressed.
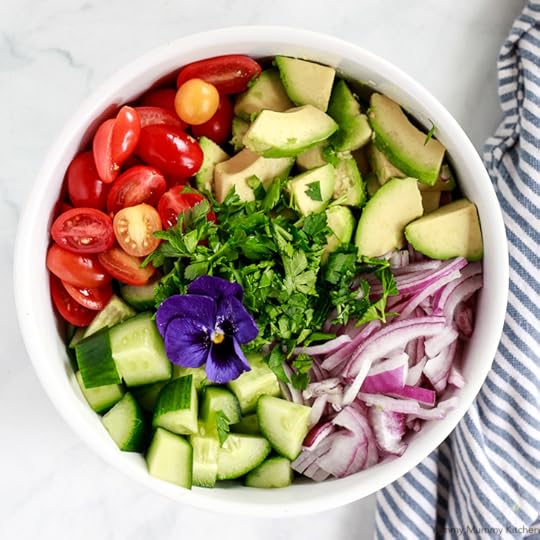
Yield: Serves 8Author: Yummy Mummy KitchenPrint RecipeAvocado SaladThis easy avocado salad with mustard vinaigrette is perfect for parties and potlucks, but is also a delicious side dish at home. I love adding arugula, quinoa, and/or chickpeas to this simple salad.prep time: 15 MINScook time: total time: 15 minsingredients
3 barely ripe avocados, peeled, seeded, and cut into bite-sized pieces1 English hothouse cucumber, cut into bite-sized pieces1 pint red cherry or grape tomatoes , halved lengthwise1 pint yellow cherry or grape tomatoes, halved lengthwise 1 small red onion, peeled and thinly sliced1/4 cup chopped Italian parsley 1/4 cup extra virgin olive oil juice of 1/2 lemon2 tablespoons white wine vinegar 1 tablespoon Dijon mustard 1/2 tablespoon coarse seeded mustard1/2 teaspoon coarse sea salt freshly ground pepper to taste instructions
Place the prepared avocado, cucumber, tomatoes, onions, and parsley in a salad serving bowl. In a small bowl or jar, whisk together the olive oil, lemon juice, vinegar, mustards, and salt. Dress the salad with the dressing right away to prevent the avocados from browning. Season with salt and pepper if desired. Store covered in the refrigerator until ready to eat, up to 4 hours. notesThis salad is a great side dish as-is, but there are a few additions I really love.
*Serve over a bed of arugula or gently mix the greens in.
*Add 1 1/2 cups of drained chickpeas or cooked and cooled quinoa for added protein to make it a meal.
Nutrition information is approximate and based on 1/8 of the total recipe including the dressing.calories
133fat (grams)
10sat. fat (grams)
1carbs (grams)
10protein (grams)
2sugar (grams)
3http://www.yummymummykitchen.com/2018/01/avocado-salad.htmlCreated using The Recipes Generator.recipe-inner{text-align:left;max-width:620px;border:6px double #009BFF;padding:20px;background:#f2f2f2;margin: 40px auto;font-family:Lato, sans-serif;}.recipe-inner a{color: #4193f0;}#recipe .recipe-name{font-size: 21px;}#recipe .info{font-size:13px;text-transform:capitalize;border-bottom:2px solid #000;padding-bottom:7px;margin-bottom:20px}.info:after{content:'';display:table;clear:both}#recipe .info span:first-child{margin-right:30px}#printbutton{border:0;margin:0;color:#fff;float:right;background:#555; padding:5px;border-radius:3px;cursor:pointer}#recipe .time{text-transform:uppercase;font-size:12px;text-align:center;background:#fff;padding:15px 0;margin-bottom:20px}#recipe .time span:not(:last-child){margin-right:12px}#recipe .time span:not(:last-child):after{content:'';display:inline-block;height:10px;width:1px;background:#000;vertical-align:middle;margin-left:12px}#recipe .summary{line-height:1.7;font-style:italic}.ingredients{line-height:1.7;clear:both}.ingredients h3,.instructions h3,.notes h3{font-size:20px !important;font-weight:400 !important;margin-bottom:0;color:#000;text-transform: uppercase;}.ingredients ul{margin:0!important;margin-top:5px !important;}.instructions li{margin-bottom:15px !important;line-height:1.6;text-align:left;}.ingredients li{text-align:left}#recipe .instructions{margin-top: 30px;}#recipe .instructions ol,#recipe .instructions ol li {list-style:decimal !important;}#recipe .instructions ol{padding-left:39px;margin:0!important;margin-top:6px !important;}.posturl{border-top:1px solid #ccc;padding-top:10px;}.ing-section{padding-left:20px;margin: 10px 0;}.ing-section > span{font-weight:700}.recipe-credit{font-size:13px;border-top: 1px solid #ccc;padding:10px;text-align:center;background:#ffffff;margin:-20px;margin-top:15px;}.recipe-credit a{color:blue;text-decoration:none;}.copyright-statement{font-size: 13px;font-style:italic;border-top: 1px solid #ccc;margin-top:15px;padding-top:15px;line-height:1.6;}.notes pre{font-size: 15px;margin: 10px 0;padding-left: 20px;font-family: inherit;line-height: 1.7;white-space: pre-line;}.notes h3{margin: 0}.nutrition-info{font-size: 0;margin: 20px 0;padding: 10px;background: #fff;}.nutrition-info>div {display: inline-block;font-size: 14px;width: 20%;text-align: center;}.nutrition-info>div:nth-child(5) ~ div{margin-top: 20px;}.nutrition-info>div p{margin-top: 0;margin-bottom: 7px;}#recipe .info{position:relative}#recipe .image{text-align:center;margin:25px 0}#recipe .image img{max-width:100%;width:150px;height:150px;-o-object-fit:cover;object-fit:cover;border-radius:150px}#recipe .recipe-name{margin-top: 20px;text-align:center}#recipe .summary{margin:20px 0;clear:both;line-height:1.7;font-style:italic}#recipe .time{clear:both;border-top:1px dotted #000;border-bottom:1px dotted #000;border-right:0;border-left:0}


I've been seeing so much great feedback on my Avocado Bruschetta, that I wanted to a spin-off salad recipe with similar ingredients. I signed up for the "hearty vegetarian salad" slot for our school's staff appreciation lunch and thought it would be the perfect time to give this avocado salad a go. This avocado salad is simple. The bulk of it is made up of avocado, cherry tomatoes, red onion, and cucumber. I've dressed it with a mustard vinaigrette, but you could really use your favorite vinaigrette. A simple red wine or white balsamic vinegar and olive oil would be lovely. Or you could give this avocado salad some Mexican flair by dressing it with lime juice, olive oil, cumin, and garlic. While a simple avocado salad is a terrific side dish as-is, I love adding it to a bed of arugula and adding quinoa or chickpeas with a sprinkle of hemp seeds to make it a solid lunch salad.
Avocado salad is such a nice option to bring to BBQs and potlucks, or just to serve as a side at home. Although avocados turn brown quickly, they stay green in this recipe thanks to the acid content of the vinegar and lemon juice. You can make this salad several hours in advance and store in the refrigerator.
My best tip for making this avocado salad recipe is to choose the avocados wisely. Unlike when we are making guacamole and look for softer avocados to mash, we want firm avocados here so that they don't get smashed while tossing the salad together with the dressing. Use avocados that just barely give when pressed.
Yield: Serves 8Author: Yummy Mummy KitchenPrint Recipe
Avocado SaladThis easy avocado salad with mustard vinaigrette is perfect for parties and potlucks, but is also a delicious side dish at home. I love adding arugula, quinoa, and/or chickpeas to this simple salad.prep time: 15 MINScook time: total time: 15 minsingredients3 barely ripe avocados, peeled, seeded, and cut into bite-sized pieces1 English hothouse cucumber, cut into bite-sized pieces1 pint red cherry or grape tomatoes , halved lengthwise1 pint yellow cherry or grape tomatoes, halved lengthwise 1 small red onion, peeled and thinly sliced1/4 cup chopped Italian parsley 1/4 cup extra virgin olive oil juice of 1/2 lemon2 tablespoons white wine vinegar 1 tablespoon Dijon mustard 1/2 tablespoon coarse seeded mustard1/2 teaspoon coarse sea salt freshly ground pepper to taste instructions
Place the prepared avocado, cucumber, tomatoes, onions, and parsley in a salad serving bowl. In a small bowl or jar, whisk together the olive oil, lemon juice, vinegar, mustards, and salt. Dress the salad with the dressing right away to prevent the avocados from browning. Season with salt and pepper if desired. Store covered in the refrigerator until ready to eat, up to 4 hours. notesThis salad is a great side dish as-is, but there are a few additions I really love.
*Serve over a bed of arugula or gently mix the greens in.
*Add 1 1/2 cups of drained chickpeas or cooked and cooled quinoa for added protein to make it a meal.
Nutrition information is approximate and based on 1/8 of the total recipe including the dressing.calories
133fat (grams)
10sat. fat (grams)
1carbs (grams)
10protein (grams)
2sugar (grams)
3http://www.yummymummykitchen.com/2018/01/avocado-salad.htmlCreated using The Recipes Generator.recipe-inner{text-align:left;max-width:620px;border:6px double #009BFF;padding:20px;background:#f2f2f2;margin: 40px auto;font-family:Lato, sans-serif;}.recipe-inner a{color: #4193f0;}#recipe .recipe-name{font-size: 21px;}#recipe .info{font-size:13px;text-transform:capitalize;border-bottom:2px solid #000;padding-bottom:7px;margin-bottom:20px}.info:after{content:'';display:table;clear:both}#recipe .info span:first-child{margin-right:30px}#printbutton{border:0;margin:0;color:#fff;float:right;background:#555; padding:5px;border-radius:3px;cursor:pointer}#recipe .time{text-transform:uppercase;font-size:12px;text-align:center;background:#fff;padding:15px 0;margin-bottom:20px}#recipe .time span:not(:last-child){margin-right:12px}#recipe .time span:not(:last-child):after{content:'';display:inline-block;height:10px;width:1px;background:#000;vertical-align:middle;margin-left:12px}#recipe .summary{line-height:1.7;font-style:italic}.ingredients{line-height:1.7;clear:both}.ingredients h3,.instructions h3,.notes h3{font-size:20px !important;font-weight:400 !important;margin-bottom:0;color:#000;text-transform: uppercase;}.ingredients ul{margin:0!important;margin-top:5px !important;}.instructions li{margin-bottom:15px !important;line-height:1.6;text-align:left;}.ingredients li{text-align:left}#recipe .instructions{margin-top: 30px;}#recipe .instructions ol,#recipe .instructions ol li {list-style:decimal !important;}#recipe .instructions ol{padding-left:39px;margin:0!important;margin-top:6px !important;}.posturl{border-top:1px solid #ccc;padding-top:10px;}.ing-section{padding-left:20px;margin: 10px 0;}.ing-section > span{font-weight:700}.recipe-credit{font-size:13px;border-top: 1px solid #ccc;padding:10px;text-align:center;background:#ffffff;margin:-20px;margin-top:15px;}.recipe-credit a{color:blue;text-decoration:none;}.copyright-statement{font-size: 13px;font-style:italic;border-top: 1px solid #ccc;margin-top:15px;padding-top:15px;line-height:1.6;}.notes pre{font-size: 15px;margin: 10px 0;padding-left: 20px;font-family: inherit;line-height: 1.7;white-space: pre-line;}.notes h3{margin: 0}.nutrition-info{font-size: 0;margin: 20px 0;padding: 10px;background: #fff;}.nutrition-info>div {display: inline-block;font-size: 14px;width: 20%;text-align: center;}.nutrition-info>div:nth-child(5) ~ div{margin-top: 20px;}.nutrition-info>div p{margin-top: 0;margin-bottom: 7px;}#recipe .info{position:relative}#recipe .image{text-align:center;margin:25px 0}#recipe .image img{max-width:100%;width:150px;height:150px;-o-object-fit:cover;object-fit:cover;border-radius:150px}#recipe .recipe-name{margin-top: 20px;text-align:center}#recipe .summary{margin:20px 0;clear:both;line-height:1.7;font-style:italic}#recipe .time{clear:both;border-top:1px dotted #000;border-bottom:1px dotted #000;border-right:0;border-left:0}