Matthew Houde's Blog, page 29
April 2, 2016
A Gold Mining Tour: Hunting for Treasure on the Osa
Two Weeks in Costa Rica |
In a recent post, we let you know about a fantastic rural tourism project in the town of Dos Brazos de Rio Tigre on Costa Rica’s Osa Peninsula. While the highlighted tour of the Association is their newest trail into Corcovado National Park, there are several others that are just as fun. One that we took focuses on the history and current practices of gold mining in the region. In this post, we’ll share our experience panning for gold in the rivers of the Osa Peninsula and let you know how you can try it too.

History of Gold in Costa Rica
When Christopher Columbus first reached Costa Rica in 1502, he named the land the Rich Coast (Costa Rica) after meeting indigenous groups who were wearing elaborate gold medallions and jewelry. The great explorer thought that the rugged landscape must be full of the precious mineral. That wasn’t the case as later adventurers would find out. Instead of originating in Costa Rican soil, much of the gold had been traded in from as far as South America. But there were some areas of the country that did hold impressive gold deposits. One such place was the Osa Peninsula on the southern Pacific Coast.

These gold nuggets, found in the Osa, are some of the largest ever discovered in Costa Rica. They are on display at the National Gold Museum in San Jose.
Dos Brazos de Rio Tigre: A Former Gold Rush Town
Our gold mining tour started at a modest wood-framed building off the side of a dusty dirt road. There, we were welcomed by Ermer Azofeifa, president of the small community association of Dos Brazos de Rio Tigre. From Ermer, we learned a bit more about gold mining in the region. Mining, he told us, began as early as the 1930s and peaked about 40 years later. Communities dedicated to gold mining popped up, as big companies with heavy machinery worked to strip away gold deposits. Over time, the extensive mining activity removed the most easy-to-access gold, outside of protected land like Corcovado National Park. With little left to mine, towns like Dos Brazos eventually shrunk from a population of several thousand to just a few hundred. Many of the families who stayed entered the national park illegally, both to mine for gold and to supplement their shrinking income by hunting and trapping.

The land near Dos Brazos contains lush rainforest, much of which is protected by Corcovado National Park.
The Conservation Association of Dos Brazos de Rio Tigre (Asociación Conervacionista Dos Brazos de Rio Tigre) was created to provide these former gold miners with new skills and jobs so that they would be able to remain, and thrive, in Dos Brazos. The Association’s efforts have been successful. Over the last year alone, they have converted 25 former gold miners and hunters into tour guides.
On the Treasure Trail: Our Experience on the Gold Mining Tour
With a rusty shovel in hand, our guide, José, a young guy in his 20s, led us to the river. Alan, his younger sidekick, tagged along too, binoculars strung around his neck and a large metal pan by his side. These guys were the next generation of Dos Brazos and it wasn’t long before we got to see the older generation too. Just up the riverbank, knee deep in the water, a man was working away. He kept his head down, shoveling and tossing away rocks, looking for that dull shine of gold below. José explained that men like this will work all day in the hot sun for what might amount to $30 worth of gold. Hard labor for sure, but you never know when you might get lucky.
Tip: Be prepared to get your feet wet on the tour. Wear sturdy hiking sandals like Keens that can get wet or high rubber boots if you want to stay dry. By the end of our tour, our low-cut hiking boots were drenched, making the walk back pretty uncomfortable.
After a half-hour walk through the thick jungle, crossing the shallow river several times, we came to a spot that José thought would turn up some gold. He and Alan laid down their tools and explained that the loose gravel embankment next to us was the perfect place to look. When heavy rains wash sediment down river, sometimes it brings new gold into the river from the surrounding hills.
At the edge of the water, Alan scooped a heavy shovelful of gravel onto José’s round pan. Dipping it below the surface, a muddy cloud of sediment washed away. José picked through the remaining gravel, tossing the larger stones into the water, and then dipped the pan again. This time he used a swirling motion, and another cloud of fine sediment was swept downstream. Repeating the process, the stones became smaller and smaller and the sediment dissipated. After about 10 minutes, tiny grains of sand were all that was left. A few more careful swirls and we saw it—gold.

José washes the sediment from the gravel.
A tiny fleck of gold.
José made the whole process look easy, finishing it off by sucking the tiny fleck into a modified ketchup bottle. Now it was our turn to try, and the true skill involved became apparent. Matt clumsily dipped the next heap of gravel underwater, letting a little too much sediment go downstream. Swirling the pan was even harder, requiring a certain rhythm. You have to let just the right amount of sediment out while keeping the heavier grains of sand in the pan. After a few tries, he started to get the hang of it, and with a little help from Alan, another speck of gold appeared at the bottom of the pan.

Matt giving it a try.
After our gold-mining demonstration, we hiked a bit farther to a local swimming hole to cool off. On the way, we enjoyed spotting about 30 different bird species. Alan, a bird enthusiast, knew all the English names and even identified some by their call. On the walk back to town, José told us that this route was the same one that he took to school every day as a kid. Things had changed for him a lot since those days. Now, he looked at the forest in a different way, identifying various plants and sharing his knowledge of the jungle. He was constantly learning new things about the forest he had walked through a thousand times.

We ended our tour back in the small village of Dos Brazos de Rio Tigre at a little riverside restaurant. As we ate a hearty meal of chicken and rice, Scarlet Macaw Parrots ate almonds from a tree overhead. It was the perfect ending to a fantastic tour.
Gold Mining Tour Info
Cost: $30 per person
Duration: 3-4 hours
Arranging a Tour: It’s best to contact the Association through their website in advance so that they can plan for your arrival. Walk-ins are also possible, but there is a risk that a guide might not be available.
Directions and Other Tours Offered
For directions to Dos Brazos de Rio Tigre as well as information about the other tours available, be sure to read our post Corcovado’s El Tigre Entrance: Hiking and Activities from Puerto Jimenez.
Have you ever panned for gold? Let us know your experience in the comments below (Email subscribers click here to post your comment online.).
Looking for more information to help plan your trip? Check out these posts:
Puerto Jimenez: An Outpost to the Osa – The closest destination to Dos Brazos de Rio Tigre. Read this post for hotel and activity recommendations in Puerto Jimenez, just south of Dos Brazos.
Costa Rica Wildlife Guides: Our Picks – The Osa Peninsula arguably has the best wildlife in the entire country. Check out these books to learn more about what you can see.
Simple Spanish for Visiting Costa Rica – Brush up on your Spanish or learn the basics with help from this post. Includes words for different scenarios like eating out or asking questions.
The post A Gold Mining Tour: Hunting for Treasure on the Osa appeared first on Two Weeks in Costa Rica.


March 23, 2016
Having a Baby in Costa Rica: Part 3, the Paperwork
Two Weeks in Costa Rica |
In our first two posts on having a baby in Costa Rica, we discussed prenatal care (Part 1) and delivery (Part 2). In this post, we’ll go through the much less exciting, though important, topic of paperwork. It took us a while to figure out exactly how (and where) to get the documents we needed, so we thought we’d share our experience. Below you’ll find information on getting our son Sam’s US citizenship documents and various Costa Rican documents.

US Passport and Certificate of Birth Abroad
A baby born in Costa Rica to at least one US citizen parent is a dual citizen, with citizenship rights to both Costa Rica and the United States. The baby is Costa Rican just by being born on Costa Rican soil. While the baby is also automatically a US citizen, you have to do some paperwork to have this formalized.
It is very important to get a Certificate of Birth Abroad from the US Embassy as proof that your baby is a US citizen. You can get this document, as well as your baby’s first US passport and social security card, from the US Embassy in San Jose. These documents can be obtained at the same time, and we found the process to be very efficient. Be sure to make an appointment in advance on the US Embassy website for Costa Rica. Keep in mind that both parents and the child need to attend the appointment.
The US Embassy website has all the forms you need to fill out, which we recommend doing in advance because they are very detailed. The website also has specific information on the documentation you’ll need to bring to the appointment. It is a lot of documents so be sure to go through the list carefully to avoid multiple trips to the Embassy. In general, you have to have:
An original copy of the baby’s birth certificate issued by the Civil Registry (more info on how to get this below)
A statement from the doctor who attended the birth
Parents’ marriage certificate, and if either has been married previously, certified copies of documents showing that the prior marriage was terminated. These do not have to be apostilled.
Proof of parents’ US citizenship (you can use your passport)
Proof of parents’ physical presence in the US (they liked our school transcripts for this requirement)
1 passport-size photo of the baby (can be taken at the US Embassy on the day of your appointment for a small fee).
You’ll bring all of these documents to the appointment and Embassy staff will ask for them, along with your forms, in a certain order. They made copies of all of our documents and gave us back the originals.
Once your application is accepted, you’ll pay the required fees. In about two weeks, you’ll get an email saying that the Certificate of Birth Abroad and passport are ready. You have to pick them up in person at the Embassy, but luckily only one parent has to go and you don’t have to bring the baby. They will mail the social security card separately.
Cost: Passport- $105; Certificate of Birth Abroad- $100
Costa Rican Birth Certificate
Getting your baby’s Costa Rican birth certificate is a very straightforward process. You have to file a request online with the Tribunal Supremo de Elecciones. It doesn’t take long once you make the request, and you can even get it same day if you do it early enough! Here is the link to the website. Just go through the prompts, putting in your child’s name and selecting which Registro de Civil office you want to pick up at. We recommend getting at least a few copies since it is inexpensive and you will probably need them for other things, like if you’re applying for residency.
When you go to pick up the documents, you’ll have to buy inexpensive timbres (stamps), usually sold right outside the office. These are what make the documents official.
Cost: Just the cost of timbres, about 20 colones per document.

Registro de Civil Office in San Isidro de El General
Permiso de Salida
Before you can travel out of the country, you’ll need to obtain a permiso de salida (exit permission). This is required for all minor Costa Rican children, both citizens and legal residents. Basically, the point of this process is to prevent kids from being unlawfully taken out of Costa Rica. You will get to decide if only one parent can take the child out, if only both parents can together, or if either parent can alone. We decided on the either of us option for the most flexibility in case only one of us needs to travel with Sam.
The Migracion website has excellent information on the process and what you need for documents. Take a look at the PDFs (all in Spanish but easy to translate). There is a one-page form to fill out and various documents depending on your exact situation. We needed two passport photos of Sam; a photocopy of the first page of everyone’s passport, including Sam’s; Sam’s birth certificate issued by the Civil Registry; and all of our actual passports. If you are getting permissions for more than one child, you will need multiple copies of the parents’ passports so that they have a copy for each child’s file.
The form and documents need to be submitted in person (both parents in attendance but not the child) to Migracion. The PDF with the info on what documents you need also says which Migracion offices can process the permiso de salida. We went to our local office in San Isidro de El General. When you go to the office, the official will go through your paperwork and create a file. They’ll put the permission into the computer system so that when you leave the country, immigration can pull up the information. They will also give you a paper record in case the computer system is down (we recommend carrying this with you when you travel). Before you can check in for your flight, you’ll need to go to immigration at the airport. They will confirm that you have filed for the permiso de salida and give you a separate paper for the baby’s passport saying that he or she is free to travel out of the country. We have also heard that you can file for the permiso de salida right at the airport if you need to as long as you bring all the required documents and both parents are present.
Cost: Free

Migracion Office in San Isidro de El General
Carnet
If you’re planning to use the public healthcare system, you will also need to get your baby’s carnet. The carnet looks like a small, paper appointment book and the lines get filled in at each hospital/clinic visit as a sort of record of care. We had a hard time figuring out where to go for this because the process isn’t uniform and depends on where you live in Costa Rica. We talked to some other parents who said that they got theirs at the local EBAIS clinic, but our clinic told us they didn’t issue them. We ended up having to go to the public hospital. The Oficina de Afiliacion at the hospital in San Isidro de El General issued Sam’s. All we had to show was his birth certificate.
Cost: Free
Getting your baby’s initial paperwork isn’t the most fun of chores, but once you figure out how to do it, it really isn’t that bad. Each step was more efficient than we expected, and a lot easier than some other things you have to do when you live in Costa Rica.
Have a question or want to share your experience about getting your baby’s initial documents? Leave a comment below (Email subscribers, click here to post a comment).
The post Having a Baby in Costa Rica: Part 3, the Paperwork appeared first on Two Weeks in Costa Rica.
March 2, 2016
Where to Live in Costa Rica: Planning Your Research Trip
Two Weeks in Costa Rica |
So you’re narrowing down different countries to retire or move to. Or maybe you’re already sure that Costa Rica will be your new home. Beautiful beaches, wildlife, rolling mountains, and a more relaxed pace of life have captured your heart and your imagination. While some people move to Costa Rica without even a single visit, we recommend doing some homework before you come for good. A well planned research trip can give you a glimpse of what life will really be like here day to day. It might even save you from packing up and leaving in a year or two like many do. In this post, we’ll cover some things to consider when planning your research trip.

I’m moving to Costa Rica, I love it there!
People contact us all the time, saying that they had an amazing first vacation to Costa Rica. They went zip-lining, saw a sloth, wrote their name in the sand, and are already making plans to move here and buy property. Yikes! Like us, they caught Costa Rica’s most contagious disease, pura vida, and it’s serious. We always try to respond with encouragement but caution, especially if they are making huge financial decisions based on a single visit.
This is what everyone pictures life being like in Costa Rica
The thing about a vacation is that it is a moment in time. Everything might have been perfect during your trip, but vacationing somewhere and living there are two completely different things. Before you start lining up immigration lawyers and making real estate appointments, we suggest at least one more visit to ensure that you know what life will really be like in paradise. While this trip should be treated much differently than a vacation, it doesn’t mean that you can’t still have an awesome time.
Tip: Another useful way to learn more about what life is like in Costa Rica is to read accounts from other expats in blogs and books. For a list of our favorite Costa Rica expat books, check out our post Books to Inspire Your Move to Costa Rica.
Choosing Destinations
Unlike vacation where you choose destinations based on nearby attractions, a research trip will be more practical. You should be thinking about things like: Where are the nearest hospitals, private or public schools, shopping centers, and airports? Where will you fill prescriptions, go to the doctor, buy groceries, go to the hardware store? How are the roads? What is the Internet like? Do the towns have an adequate water supply year-round? What is the crime like in each area? What is the going rate for a rental that meets your needs? How much do groceries cost and electricity? Some of these things you might not learn about until you spend time in each town and talk to people who live there. And that’s a big reason a trip like this is so helpful.
You’ll also need to consider where you will be comfortable. Spending a week at the beach drinking cold beers in the 90 degree heat is a lot different than dealing with those kind of conditions on a daily basis. Unless of course you plan to drink cold beers at the beach every day—which some people do. The coastal areas of Costa Rica are generally a lot more hot and humid than the mountain towns and cities of the Central Valley. Guanacaste can be extremely hot and dry for several months of the year (think: air conditioning costs), while the Caribbean Coast can be really wet (think: needing a dry room). Some towns in the mountains experience high winds part of the year. Others, at higher altitudes, even get chilly at night or during the rainy season. Rainfall is another big factor. Some areas of Costa Rica get up to 12 feet of rain each year! For a general sense of rainfall in different areas of the country, read our weather post.
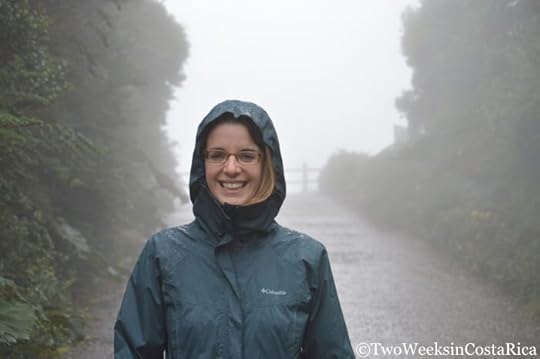
Jenn looking chilly in the cloud forest
Once you’ve narrowed down your destinations, be realistic about how many you can fit into your itinerary. Make sure you’ve done a lot of research so that you can cut your list down to two or three of your top choices. Then spend as much time in each place as possible. The longer you stay, the more you will learn about a town. A second trip might be necessary if the first one didn’t bring you to your ideal place or answer all your questions, but it’s worth it not to make a move to the wrong place.
Accommodations
Once you’ve narrowed down your destinations, it’s time to start booking places to stay. There are a couple of different ways to go about this. Instead of hotels, we recommend either a vacation rental home or a small expat-owned bed and breakfast.
Vacation Rentals: Costa Rica has a ton of these, partly because a lot of people only spend a portion of the year here and want to recoup some of the money they invested in their property. (Hint: Think about this before rushing to invest in your own Costa Rican property). These houses are great because they are set up to live in like a normal house, and you cook, clean, etc., like you would on a daily basis living here. If you’re “lucky,” you’ll even have to deal with some of the perils that come with living in the tropics. Weird bugs invading the house, strange plumbing problems, surges in electricity or maybe even outages, and Internet reliability, just to name a few. These lessons can really help you know what to look for in a future rental.
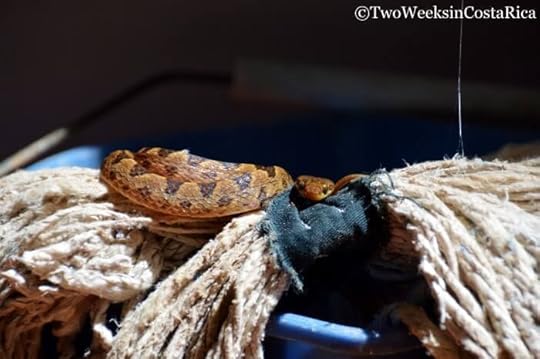
A little friend we found on our mop on the patio
Bed and Breakfasts: Another great option is a small expat-owned B&B. We’ve always found the owners of these places to be a wealth of knowledge. Some have recently gone through the process of moving to Costa Rica themselves, while others have lived here for decades. Either way, they have a lot of useful insight to offer and are usually more than willing to chat over breakfast or sit down with you to answer some questions. When we first moved to Costa Rica in 2013, we rented for a week at a small bed and breakfast in Manuel Antonio. We learned all sorts of useful knowledge about buying a car, how cell phone plans work, where to buy things, and we even lined up a short term rental through the owner’s friend.
Dig Deep Into the Community
Once you’re actually here on your Costa Rica research trip, it’s important to get a sense of the community that you will be potentially living in. Schedule time to go to local events like the feria (farmers market), fundraisers that might be going on, and church services if you are religious. Talk to people and ask questions about where they live, how long they have been around, and so on. Conversations like this can get you all kinds of useful info and even some community dirt.
Many towns also have known expat hangouts, which could be a particular bar on a certain night, a coffee shop, etc. Ask around to see when these get-togethers are and go to as many as you can. While some people don’t want to solely associate with other expats when they move to Costa Rica, these people know the most about what it’s like to transition into another culture and are a good resource to have on hand.
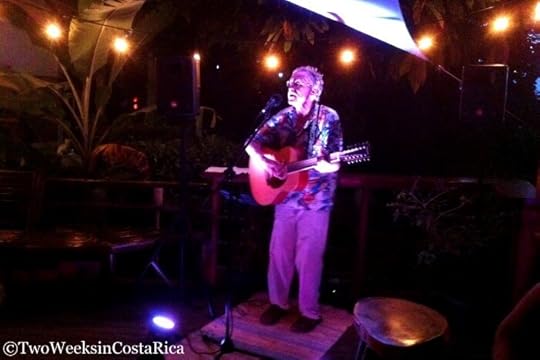
Live music at a restaurant in Dominical with expat musician David Bohn
Another way to scope out a community is using Facebook. Most of the popular expat towns have a corresponding Facebook group. These are a good way to find out about local events and see what kinds of issues are going on in the community. Things like crime, water shortages, proposed improvements, and other potential issues to know about. There are sometimes even Yard Sale or Classifieds groups for certain towns, which might give you a lead on a rental home, car, furniture, or other necessities when the time comes to move.
Since you’ll be potentially living in the town you’re visiting, you should also try to get a sense of what is available locally. Browse as many of the nearby shops to see what items are available and what you can expect for prices. Even if you don’t need anything, you can still look through the hardware store, appliance center, butcher shop, different grocery stores, veterinary office, etc.
Tip: Read our post Packing for Your Move to Costa Rica to get a sense of what items are hard to find or expensive here.
If you are concerned about medical care, private hospitals will often give short tours of their facility. You could also poke your head into the town’s local clinic or public hospital to see what it is like and visit some of the pharmacies to see what they offer and how much your medications will cost if you had to pay out of pocket.
We’ve also heard from a lot of people who are planning to move their entire family down. If you’ll be enrolling your kids in school, these research trips are an important time to tour the different schools and talk with other parents.
We hope that these tips will help you plan a thorough research trip to Costa Rica. While our personal research trip wasn’t as planned out as we explained above, we would have benefitted hugely from one that was. There is certainly a lot to think about before a big move, especially to a different country. But once you are here and settling in, the feeling is like no other.
Did you do a research trip before moving to Costa Rica? What other tips do you have? Leave us a comment below (email subscribers click here to post your comment online).
More Info to Help Plan Your Move:
FAQs About Moving to Costa Rica : Covers the basics on applying for residency, cost of living, working as a foreigner, and lots more.
Moving to Costa Rica Checklist : Get organized for your move with this simple checklist.
Buying a Car in Costa Rica : What to expect when buying your first car in Costa Rica.
Where We’ve Lived in Costa Rica : Breakdown of the advantages and disadvantages of the seven different towns we lived in during our first year in Costa Rica.
The post Where to Live in Costa Rica: Planning Your Research Trip appeared first on Two Weeks in Costa Rica.
February 25, 2016
Puerto Jimenez: An Outpost to the Osa
Two Weeks in Costa Rica |
Situated near the tip of Costa Rica’s remote Osa Peninsula, the town of Puerto Jimenez might not seem like a tourist destination if you were just passing through. On any given day, locals can be seen doing business in the small downtown or tending to their fishing boats bobbing in the bay. But when you see a Scarlet Macaw parrot flash red, blue, and yellow overhead or a dolphin surface in the bay, you’ll soon realize that there’s a lot more to this modest seaside town. In this post, we’ll give you an overview of Puerto Jimenez and explain why it is the perfect outpost for exploring the raw nature of the Osa Peninsula.
Location
Puerto Jimenez is located on the Osa Peninsula, a vast swath of land that juts out into the Pacific Ocean in Costa Rica’s Southern Zone. The town sits on the southeastern side of the peninsula, adjacent to a wide bay called the Golfo Dulce (Sweet Gulf). Aside from a few other small towns, the Osa Peninsula is literally covered with rainforest, much of which is protected as part of the famous Corcovado National Park. Puerto Jimenez is one of the two main jumping off points for visiting Corcovado, the other being Drake Bay on the Pacific side of the peninsula.
Getting to Puerto Jimenez
Part of the appeal of Puerto Jimenez is that it is an off-the-beaten path destination. The two primary ways to get there are by driving or taking a domestic flight/small plane. From the international airport in San Jose, it’s a long seven or so hour drive down the coastal highway and out onto the peninsula. While the roads are all paved, there’s not much around once you get past the small city of Palmar Norte. Many people who add Puerto Jimenez to their itinerary make it their last stop after visiting other destinations along the Pacific Coast, like Manuel Antonio or the Costa Ballena. They then fly back to San Jose on either Nature Air or Sansa to save time. Flights are much faster, taking only about an hour.
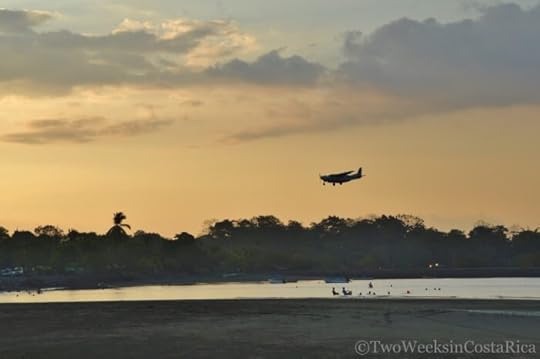
A small plane landing just before sunset
Note: There are only a few rental car agencies in Puerto Jimenez that allow you to return your car at the airstrip, and they all charge a fee to do so. If you’re looking to save some money, check out our discount through Adobe, not only to save on the rental but also the drop-off fees (only $20). Adobe recently started servicing this area from their new office in Uvita (you just need to mention when booking that you need pick-up/drop-off in Puerto Jimenez).
Puerto Jimenez Activities
With incredible rainforest at its doorstep and a glistening bay full of marine life, we were surprised to find that information about tours was somewhat confusing or even misleading. In fact, some of the activities offered through tour-company websites were on the complete other side of the peninsula, better accessed through Drake Bay. But don’t worry, there are plenty of amazing things to see and do. Below we cover the main activities available from town and hopefully clear up some misinformation.
Corcovado National Park
The main attraction in Puerto Jimenez is Corcovado National Park, an expansive 417 sq. km. (161 sq. mile) area of protected rainforest that holds an astonishing amount of biodiversity. Scientists often use this park as their laboratory, and new plant and animal species are being discovered all the time.
Puerto Jimenez is a popular starting point for multi-day hikes in Corcovado, but you can also visit the park just for the day. Below are the most common options.
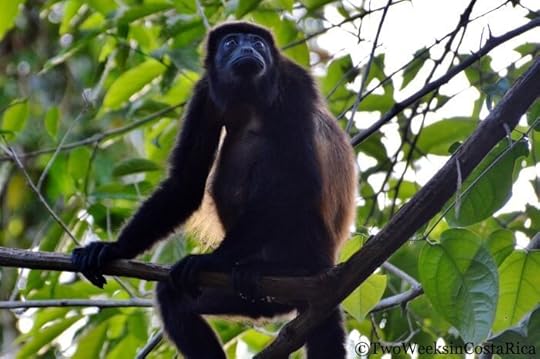
A howler monkey, one of four monkey species that can be seen inside Corcovado National Park.
Multi-Day Hikes – Prearranged through a local guide, these trips have you hike between Corcovado’s different ranger stations. Common routes are from Carate/La Leona to Sirena and back, or Los Patos to Sirena and then on to La Leona/Carate. Accommodations and meals at the ranger outposts are simple, but a dry place to sleep and eat is welcome after hard days of trekking. Book your trip at least 30 days in advance as tickets to the park are limited.
Via Carate/La Leona Ranger Station – This is how we first visited Corcovado many years back. It requires taking the public bus from downtown Puerto Jimenez (actually a truck with bench seats) to the remote village of Carate for about two hours. From the small store/restaurant in Carate, you then have to hike for about 45 minutes before reaching La Leona Ranger Station. Most of this hike is along the beach and is extremely hot. Like all entrances, a registered guide (booked in advance) is required to enter the park. Although this is a long day trip, it is a beautiful hike that will give you a sense of Corcovado’s magical diversity. The adventure of getting there is fun too!
Via Rio Tigre Ranger Station – The Rio Tigre entrance to Corcovado National Park recently opened in 2015. This is very exciting because, unlike La Leona, this entrance is just 25 minutes from downtown Puerto Jimenez, making it ideal for a day trip. The community organization of Dos Brazos de Rio Tigre is in charge of tours through this sector, and making reservations months in advance is not necessary. In addition to a long loop trail (about 7-8 hours) that goes into Corcovado, the community offers a plethora of other tours just outside park limits. These include birdwatching, gold-mining demonstrations, and night tours. For more information about the rural tourism project at Dos Brazos, read out post Corcovado’s El Tigre Entrance: Hiking and Activities from Puerto Jimenez.
Via Sirena Ranger Station (Day Trip) – This is one of the tours offered from Puerto Jimenez on some websites that would be much more logical from Drake Bay. This tour brings you directly to Sirena by charter plane and is quite costly.
Beaches
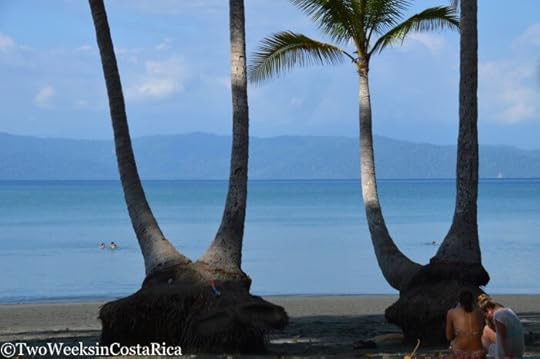
A great free activity is enjoying the calm cove right along the edge of town. The main beach stretches south all the way to the Rio Platanares Estuary, which makes for an awesome and easy walk. Unlike many beaches in Costa Rica, the water here is very calm and excellent for swimming.
For a more secluded beach, head to Playa Platanares south of town. This is a long stretch of fluffy sand with crashing waves and some shady palm trees. It is better to drive here (take the road south from the airstrip for 6 km/3.75 miles), but you can also bike or walk if you bring plenty of water and some snacks.

Playa Platanares
Chocolate Tours
There are two chocolate tours in the area. Rancho Raices is the closest, just 10 minutes outside town. German, the owner, brings you on a tour of his organic farm, letting you taste lots of exotic fruits and vegetables along the way. The real highlight, though, is learning about how to make chocolate from the pod step by step and then tasting it ($35). The other option is Finca Kobo, about 17 km (10 miles) north of Puerto Jimenez. This tour is also of an organic farm and explains the process of chocolate growing and small-scale production ($32).
Osa Wildlife Sanctuary
A favorite tour in the area, the Osa Wildlife Sanctuary located across the bay will get you up close and personal with amazing wildlife. The animals at the sanctuary have all been orphaned, injured, or displaced and are in the process of being rehabilitated. Entrance is $25/pp, but since you need to take a boat here and it is sort of far away, this tour is often combined with a mangrove, dolphin watching, snorkeling, or other tour. Otherwise it will be at least a couple hundred dollars for roundtrip boat transportation alone.
Water Activities
Kayaking
The calm waters of Puerto Jimenez are perfect for paddling. The town has at least three different kayak tour operators and some hotels also offer complimentary kayaks to their guests. One of the best times to take a tour is just before sunset, as you’ll not only see many types of birds and monkeys in the mangroves, but maybe also turtles and dolphins, depending on the tide. Prices for guided kayak tours are around $45 per person.

Kayaking into the mangroves
Dolphin and Whale Watching Tours
The sheltered Golfo Dulce is home to variety of different whales and dolphin species. Humpbacks are the most common (present December to April and July to November), but whale sharks, the world’s largest fish species, can also be seen in smaller numbers from April to May. Several species of dolphins can be seen any time of year, and it’s not uncommon to see huge pods of 100 or more.
Prices for these tours are usually charged by the boat instead of individually, making these tours more expensive (we were quoted $260 for a half-day tour for 3 people). Be sure to shop around because prices vary widely.
Sportfishing
Not surprisingly with all the marine life, the fishing is also amazing from Puerto Jimenez. Inshore fishing charters go after roosterfish, snook, jacks, grouper, sharks, and several types of snappers. Offshore trips go out to the mouth of the gulf for sailfish, tuna, mahi-mahi, and marlin. The peak season for trophy fish is December through April, but fishing is good all year-round. Fishing from shore or kayak is also possible, either guided or on your own. Fishing tackle for do-it-yourselfers can be rented near the town pier.
Hotels in Puerto Jimenez
Below are some recommendations for hotels in Puerto Jimenez. Because it isn’t a very big town, it doesn’t have a ton of options for lodging. Try not to wait too long to book so that you have the best choices.
Something to keep in mind when comparing hotels is whether or not they have air conditioning. Puerto Jimenez is one of the hottest, most humid areas in Costa Rica so even if you don’t normally need A/C, you might appreciate it here.
High-end Hotels
Iguana Lodge
Iguana Lodge offers a relaxing escape on the secluded Playa Platanares. The property, a few kilometers outside town, has a mix of nicely appointed casitas and rooms. Casitas are around $200 per person/night (includes meal package), rooms $145-180 per night (no meals included). None of the accommodations have A/C; opt for a casita for the best ocean breeze. Check rates and availability here.
Lapa Rios
For the ultimate in R&R, you’ll have to head south to the popular Lapa Rios. This luxury eco-lodge is set in a private nature reserve near Cabo Matapalo, about 45 minutes south of Puerto Jimenez. Because the property is set off on its own, visitors arrange their activities and meals through the lodge. $340-470 per person, per night (all meals included). Check rates and availability here.

Photo Credit: Lapa Rios
Mid-range Hotels
Agua Dulce
Agua Dulce is a mid-size resort right on the beautiful Playa Platanares. It’s best to have a rental car so that you can get to more restaurant options in town. Rooms range from suites with ocean views to more affordable standard rooms. $80-140. Check rates and availability here.
Corcovado Beach Lodge
This lodge made up of several freestanding bungalows has a prime location right on the bay. Mangroves and tall palms surround the property, drawing wildlife like Scarlet Macaws and howler monkeys. The beach is steps away for swimming and kayaking (use of the lodge’s kayaks is free). While this new hotel still has some fine details to work out, it is a nice place to stay for the location alone. $80-120. Check rates and availability here.

Corcovado Beach Lodge, right on the bay
Budget Hotels
Hotel Inn Jimenez
Hotel Inn Jimenez is a quaint B&B right in the downtown that still manages to feel somewhat secluded. Small gardens surround the property, and the rooms are tastefully decorated. The staff is very friendly and knowledgeable about area activities. $65, includes A/C. Check rates and availability here.

Photo Credit: Hotel Inn Jimenez
Las Islas Lodge
This small hotel with excellent service is a good option if you’re traveling with a car. It is located one mile from downtown Puerto Jimenez in a nice quiet location. Rooms are spacious, clean, and comfortable, and a good value for the area at around $65-95 (includes A/C and hot water). Check rates and availability here.
Cabinas Tropicales
You won’t find frills at Cabinas Tropicales, but the rooms are comfortable and have A/C. Nice gardens surround the property, drawing many species of birds. Guests love the owner who is very friendly and knowledgeable about local tours. $50. Check rates and availability here.
Lunas Hostel
If you’re on a budget, Lunas Hostel is a great option. This newer hostel close to the center of town has a few smaller rooms and one larger dorm room. $12. Check rates and availability here.
For a small patch of civilization in the middle of the rainforest, Puerto Jimenez surely has a lot to offer. The town has all the amenities you need, nature is knocking at your door, and the locals are friendly and laid back. If you’re looking for a destination to connect with nature, this outpost on the Osa is definitely worth a stop.
Have you visited Puerto Jimenez or stayed nearby? Let us know about your experience in the comments below (email subscribers click here to post a comment online).
Looking for more information to help you plan your trip? Check out these posts:
Driving in Costa Rica: What to Know Before You Go – Before you jump into the driver’s seat and head to Puerto Jimenez, read our tips on what driving is like and how to stay safe on the roads.
Best Hotels Near SJO Airport – If you need to stay near the airport in San Jose, don’t settle for a stale room with no character—you are on vacation, after all! Instead, check out our recommendations for charming places that will ease the transition to/from the real world.
Drake Bay: Costa Rica Unplugged – If you love wildlife and beaches, Drake Bay is another Osa Peninsula destination to consider. Arguably harder to get to than Puerto Jimenez, you can definitely unwind and unplug here.
The post Puerto Jimenez: An Outpost to the Osa appeared first on Two Weeks in Costa Rica.
February 16, 2016
Corcovado’s El Tigre Entrance: Hiking and Activities from Puerto Jimenez
Two Weeks in Costa Rica |
On our most recent trip to Puerto Jimenez on Costa Rica’s remote Osa Peninsula, we found ourselves with very few options for day trips, especially hiking. The Herrera Botanical Gardens mentioned in our brand new Lonely Planet guide had been closed for four years, and treks into Corcovado National Park were either full-day or multi-day excursions. Some even required an expensive charter plane. Luckily, we kept digging and learned about a community project at Corcovado National Park’s new El Tigre entrance. In this post, we’ll share information about this amazing rural tourism organization and let you know about the numerous options for activities.

Location and Access
The El Tigre entrance of Corcovado National Park is located on the eastern side of the Osa Peninsula, about 25 minutes from the town of Puerto Jimenez. You can access this entrance from the village of Dos Brazos de Rio Tigre (translating to Two Branches of the Tiger River). While Dos Brazos isn’t located inside Corcovado National Park, it abuts it. One trail from town leads into the park and others get very close to park limits. Instead of a ranger station, tours and hikes can be organized through the Conservation Association of Dos Brazos de Rio Tigre located right in town (more info below).
For driving directions to the El Tigre entrance, see the bottom of this post.

Walking through the small town of Dos Brazos
Dos Brazos de Rio Tigre: A Community in Transition
Knowing some history about the small town of Dos Brazos de Rio Tigre will help you appreciate what a unique community it is. In fact, you would never know by looking at the few modest buildings that during a dd-mining boom in the 1970s, the town had over 2,000 residents. Today, there are less than 300.
During its heyday, families in Dos Brazos relied on gold mining to make a living. While much gold was found, over the years, rivers were stripped and most people struggled to make a living on gold alone. Residents looked for other ways to supplement their income, many turning to hunting. Unfortunately these practices sometimes crossed over into the protected areas of Corcovado National Park, where there was more gold and more animals.
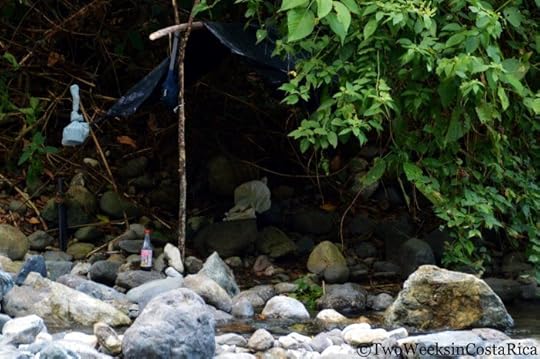
Today you can still see a few gold miners and their huts set up along the river.
Looking for ways to help people earn a living in a more sustainable way, the community banded together and recently formed the Conservation Association of Dos Brazos de Rio Tigre (Asociacion Conservacionista Dos Brazos de Rio Tigre). Like many other communities in Costa Rica, the residents of Dos Brazos wanted to bring eco-tourism dollars into town as an alternative way to earn money. Soon they successfully advocated for the opening of a new entrance to Corcovado National Park (the El Tigre entrance), and designed tours that would support the community while protecting the natural environment.

When we arrived in Dos Brazos, we were lucky enough to talk with Ermer Azofeifa, the president of the Association. We met him at the small building where they start tours and train community members. He proudly let us know about the efforts of the group and wanted to make sure to specifically mention one major accomplishment. In just one year since their opening, they have converted 25 community residents (many who were gold miners or hunters) into local guides. He went on to explain about the array of activities that were available through the Association.
Activities at Dos Brazos de Rio Tigre
We discovered when planning our visit to Puerto Jimenez that most tours near town were ocean-based and often very costly. There were few land-based activities or hikes. Fortunately, Dos Brazos offers a nice selection.
Note: We recommend contacting the Association through their website in advance to set up tours, but they were able to accommodate us even though we just showed up.
One Day Tour/Hike into Corcovado National Park
The main attraction in Dos Brazos is the Rio Tigre entrance to Corcovado National Park, which opened in February 2015. Corcovado National Park is one of Costa Rica’s most impressive parks because of its astounding biological diversity. There are over 375 species of birds, 124 mammals, and more than 8,000 different insects hidden among its thick jungle, not to mention the incredible diversity of plants. El Tigre Trail (Sendero El Tigre) starts at the edge of town and is a 5 mile (8 km) loop. This is a moderate-to-difficult hike, mostly because it is steep at the beginning, and takes about 7-8 hours.
Unlike other locations in Corcovado that require reservations months in advance, El Tigre does not require reservations through the SINAC (Sistema Nacional de Areas de Conservacion). Like we said, it’s a good idea to make reservations with the Association beforehand, but you can wait to do it when you arrive in Puerto Jimenez. As is the case with the rest of Corcovado, you do, however, need a registered guide to explore the trail. The price of the guide is included in the cost of the tour offered by the Association.
The El Tigre hiking tour is $150 for 2 people, $50 for each additional person.

El Tigre Trailhead
Gold Mining Tour
We love hiking, but with a two-month old, we weren’t about to try a 7-8 hour trek into Corcovado. Ermer suggested we try a shorter, flatter hike, which included a gold-mining demonstration. Even this was a little long for Sam, at about 3-4 hours, but he was a trooper in his baby carrier.
This tour goes along the Tigre River and close to the border of Corcovado National Park. Even though we weren’t inside the actual park, we got a sense of just how wild the area really is and saw tons of birds and different plant life. Our guides were José and Alan, and they did an excellent job introducing us to the town, explaining about its gold-mining operations (past and present), as well as teaching us about the local flora and fauna. We even got to try panning for gold ourselves and found some very small flecks in the riverbank.
The gold-mining tour is $30 per person.
Our guides: José shows us how to pan for gold while Alan digs new material from the riverbank.
Bird Watching Tour
During our gold-mining tour, we have to admit that we were somewhat distracted by the amazing variety of birds flying around. Luckily, our guides also happened to be birding experts and once they noticed our interest, helped us spot almost 30 different species. Some of the highlights were the White Hawk, Blue-throated Goldentail, Ringed Kingfisher, Orange-collared Manakin, Purple Gallinule, and of course, the several pairs of Scarlet Macaw Parrots we saw in town. To further entice you, we learned that during a Christmas count in 2014, the community identified over 100 species in just one day! Dos Brazos de Rio Tigre is a unique hotspot for birds because of its diversity of habitats. There are primary and secondary rainforests, fields, rivers, and lots of small ponds and swampy areas that were created by prior mining operations.
Birding tours are $30 per person and include an expert guide for about three hours. They suggest an early morning or afternoon tour to see the most.

A Long-billed Hermit (hummingbird) visiting a flower on the banks of the Rio Tigre.
Other Tours
The Association is constantly adding new tours, but some of the others that we learned about are:
El Salto Tour: Called the El Salto (the Jump) tour, this hike brings you through the forest, crossing the river several times, to a small waterfall and swimming hole. $20 per person.
Night Hike/Walk: A 2-hour walk through the forest, this tour will show you a lot of wildlife that remains hidden during the day. Night hikes are really fun because you never know what you’ll see. Common creatures are frogs, snakes, sleeping birds, and sometimes the glowing eyes of different mammals. $30 per person.
Horseback Riding: The horseback riding tour takes you through the rainforest and along the river in several spots. You’ll likely see locals panning for gold and get to see the jungle from a different vantage point, atop a horse. $75 per person.
Directions to Dos Brazos and El Tigre Entrance of Corcovado National Park
From Puerto Jimenez: Take the main road (Route 245) northwest for about 2.5 miles (4 km) and turn left after crossing the Rio Tigre Bridge. Look for signs for Dos Brazos and Parque Nacional Corcovado El Tigre. This road is not paved but is flat so you do not need a 4×4 vehicle. Continue to the town of Gallardo (about 2 miles/3 km) and look for a sign for Parque Nacional Corcovado. At the sign, take a right. Continue for a couple hundred meters and take the next road on the left. At this left there was no sign for Corcovado, but several signs for lodges (Los Mineros Guesthouse, Casa Aire Libre, Casa Los Suenos, etc.). After taking a left at those signs, follow the road straight (about 3 miles/5 km) until you reach Dos Brazos de Rio Tigre. You will see the rustic building for the tourism office on the right before you get to town. Parking is just after the building.
We were really happy to have discovered the community of Dos Brazos de Rio Tigre. All of the people we met in town and our guides were so friendly and helpful. After our tour, we ate a delicious and hearty meal at a small local restaurant, and it felt great to know that our tourism dollars were helping the community as a whole. If you are visiting Puerto Jimenez and looking for things to do a short distance from town, we highly recommend an activity through this dedicated community association.
Have a question about visiting Corcovado National Park’s new El Tigre entrance? Ask it in the comments below (email subscribers click here to post online).
Looking for more information to help you plan your trip? Check out these posts:
Packing for Costa Rica – Heading to a remote place like Puerto Jimenez? Check out our packing post for ideas on what to bring. Includes tips for rainy season travel.
Corcovado National Park – Read this post for a general overview of Corcovado National Park and the different ways to access it.
Bird Photography: How to Get That Perfect Shot – Capturing images of birds and other wildlife in the rainforest can be a challenge. Learn some techniques in this post from our friend Jeff—he’s a pro!
The post Corcovado’s El Tigre Entrance: Hiking and Activities from Puerto Jimenez appeared first on Two Weeks in Costa Rica.
February 10, 2016
Costa Rica and Mosquitoes: Tips to Prevent Zika, Dengue, and More
Two Weeks in Costa Rica |
Although Costa Rica has some amazing wildlife, not all creatures in its rainforests are postcard worthy. In fact, some, like the mosquito, are dreaded because of their ability to pass on diseases like Zika, Dengue, and Chikungunya to humans. While these illnesses are a real concern in Costa Rica, a little bit of knowledge goes a long way in prevention. In this post, we’ll discuss Costa Rica’s most common mosquito-borne illnesses and give you some tips on how to stay safe during your visit.

Mosquito-Borne Illnesses in Costa Rica
As a traveler, you should know that Costa Rica’s government takes mosquito-borne illnesses very seriously and has aggressive campaigns to prevent the spread of such diseases. These include public outreach to eliminate breeding sites as well as targeted chemical spraying in areas where diseases have been recorded. Our friend actually worked for Costa Rica’s Ministry of Health for a while, eradicating mosquitoes, and told us that each day they were given the addresses of people who had been diagnosed with a mosquito-borne illness. They would then go door to door in those neighborhoods, handing out educational pamphlets, emptying standing water containers, and spraying to kill mosquito larvae.
These impressive measures have helped to control the spread of mosquito-borne diseases in Costa Rica, but conditions are constantly changing. At times, there are reports of small outbreaks in certain areas, and at other times, things are very quiet. We don’t want to scare you off from your vacation, but we also want you to know what’s out there. Our goal is to give you as much information as possible so that you can stay safe.
Here are the most common mosquito-borne threats that you need to be aware of in Costa Rica (as of February 2016). Later in this post, we’ll cover our tips on how to prevent mosquito bites in the first place.
Zika Virus
The Zika virus is the latest scare in Costa Rica, and throughout Latin America, now that the first few confirmed cases were recently recorded here. The symptoms of the Zika virus can include a mild fever, skin rash, and conjunctivitis. These symptoms normally last for two days to a week, but many people who have the disease show no signs at all. While Zika has relatively mild symptoms, the biggest danger according to the CDC (U.S. Center for Disease Control) is to women who are pregnant or planning to become pregnant. Reports from other countries such as Brazil show an alarming rate of the birth defect microcephaly in children born to mothers who are infected with Zika. For this reason, the CDC recommends that those women consult their doctor or postpone their travel plans to countries that have the disease until more is known. Aside from being spread by mosquitoes, Zika also has recently been transmitted from person to person through sexual contact in the United States. The Zika virus is a developing story that everyone is watching closely.
Dengue Fever
Dengue Fever has been present in Costa Rica much longer than Zika. Its symptoms can vary from mild fever to incapacitating high fever, with severe headache, pain behind the eyes, joint and muscle pain, and rash. Although much less common, severe dengue (also known as dengue hemorrhagic fever) has symptoms of fever, persistent vomiting, abdominal pain, bleeding, difficulty breathing, and in rare cases, death. Since 2010, there have been five deaths in Costa Rica from severe Dengue, four of which were in 2010 and one in 2013. Cases of regular Dengue Fever vary each year, but average around 15,000/year. In 2013 (the year we moved to Costa Rica), cases spiked at 49,993. The last two years, numbers have been closer to the average, with about 11,000 cases in 2014 and 17,000 in 2015. Like we said above, the Costa Rican government’s aggressive campaigns to eradicate mosquitoes help to keep these numbers in check.
Chikungunya
Chikungunya is much less of a threat in Costa Rica but is also relatively new, occurring in only the last couple of years. In 2015, there were less than 5,000 cases reported. Symptoms of Chikungunya are an abrupt fever, which is usually accompanied by joint pain. Other signs include muscle pain, nausea, headache, fatigue, and rash. The joint pain associated with Chikungunya often can be very debilitating, but usually only lasts for a few days or weeks. Most patients recover fully, but in some cases joint pain can persist for months or even years.
How to Prevent Mosquito Bites
The three viruses we mentioned above, Zika, Dengue, and Chikungunya, are all transmitted by the bite of an Aedes mosquito. These types of mosquitoes are most active during the daytime and usually have white markings on their wings or body. In order to get you sick, the mosquito that bit you has to have previously bitten someone infected with one of the viruses.
Here are our tips on how to avoid bites from the start.

Aedes mosquito. Photo credit – CDC and James Gathany
Watch Out for These Spots
Mosquitoes in Costa Rica usually won’t bother you if you’re sunbathing on the hot sand or walking in the heat of the day. But watch out if you are resting under palm trees, hiking on shady trails, or passing by wetlands, ponds, or rivers. Also be extra careful in the morning and evening hours when it is a little cooler outside. We’ve been hit hard when eating at restaurants with outdoor seating. They love to hide out under the tables and bite your legs and ankles.
Mosquitoes are also much more prevalent during the rainy season months of May through November. With more water, they are simply able to reproduce faster so have higher numbers. Avoiding the rainiest areas of the country can help you avoid bites. Read our Weather post for more information about which areas of Costa Rica receive the most rain.
Insect Repellent
An obvious way to prevent bites is to use bug spray.
DEET Options
The CDC recommends an insect repellent that contains at least 20% DEET. You can buy insect repellent at most grocery and convenience stores in Costa Rica, but unfortunately we have only seen ones that have 15% DEET. This may work for a short amount of time but a higher concentration will last longer. Insect repellent is also very expensive here, at about $10 a can. For these reasons, we recommend bringing your own supply. For serious hiking through the rainforest, we have used Repel 100, which is 98% DEET, but try to apply only when we know we will be washing it off within a few hours since it is so strong. Ben’s 30% Wipes are milder and good to keep in a backpack or purse. Here are some other options that are good for travel.

Insect repellent for sale at a grocery store in Costa Rica
Natural Options
While DEET is proven to be effective against mosquitoes, a lot of people (us included) try to avoid it because of its potential harm to human health. Fortunately there are some more natural options that actually work quite well in Costa Rica. We regularly use Repel’s Lemon Eucalyptus spray and have found it to work just as well as our sprays containing DEET. Essential oil blends work well too. You can mix your own using lemongrass, citronella, clove, eucalyptus, etc. or you can buy something already made. One popular essential oil-based repellent is doTerra TerraShield Essential Oil Repellent Blend. Another option that we haven’t tried ourselves but have heard good things about is Burt’s Bees All-Natural Herbal Insect Repellent. Unfortunately natural repellents are hard to find in most areas of Costa Rica so we recommend bringing these from home too.
Cover Up
In addition to using repellent, it is also a good idea to protect your skin by covering up. Here are some tips:
When possible, cover all exposed skin by wearing light-colored, long-sleeved shirts, long pants, and hats. Loose-fitting, breathable pants like these are a good option for Costa Rica since it is so hot.
Sleep in air-conditioned or screened rooms. Keep in mind when looking at eco-lodges and hotels in Costa Rica that some accommodations are open air. This means that there is only a mosquito net covering the bed, and mosquitoes and other insects can slip through screenless windows or slats in the walls. It is best to avoid this style of lodging if you’re prone to bug bites.
If you are staying in open air accommodations like we describe above, at a minimum, make sure you have a bug net for sleeping.
Don’t be a Target
Many people don’t realize it, but mosquitoes can smell you from up to 50 yards away. To prevent them from honing in on your exact location, there are a few tactics you can use.
If you are staying in one place for a while, like a vacation rental or cabin, be careful not to leave sweaty clothing and footwear hanging out to dry near where you sit. A 1999 study in the Journal of Chemical Ecology found that after a couple of days, the bacteria growing on sweaty clothes attracted many more mosquitoes than “fresher” sweaty clothes.
You also can try to mask the chemical compounds that mosquitoes are attracted to by burning incense, citronella, or mosquito coils. Mosquito coils are available in grocery and convenience stores all around Costa Rica and cost only about $1 a package. When we sit outside, especially in the rainy season, we usually burn a couple of these coils on each end of our porch, setting up a sort of smoke screen. It doesn’t work perfectly but it definitely helps.
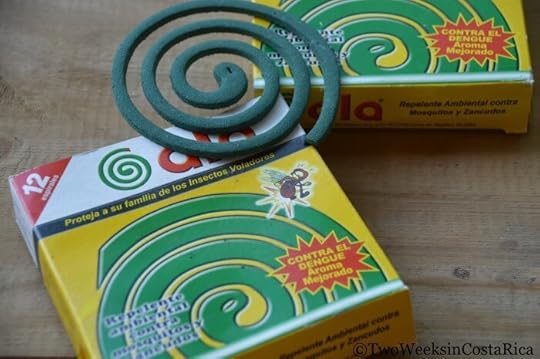
Mosquito coils can be found in grocery stores throughout Costa Rica
Mosquitoes in Costa Rica are not fun to talk about, but we know that they are on everyone’s mind now that the Zika virus is making headlines worldwide. Remember, though, that not every mosquito is infected, and your chances of contracting something during a short visit are relatively low. The preventative measures we’ve discussed in this post will go a long way towards prevention and hopefully will ease your worries so that you can enjoy all of the other, more beautiful creatures that this country has to offer.
These are our tips for protecting yourself against mosquito bites in Costa Rica based on our experience living in the country. We are not experts in disease prevention or doctors and are not intending to give medical or other professional advice. If you’re unsure if you should travel to Costa Rica, consult the CDC (Center for Disease Control) and WHO (World Health Organization) websites for more information or seek the advice of a medical professional.
Additional Resources
CDC : Info on travel advisories and ways to prevent mosquito bites.
WHO : Detailed info on different outbreaks throughout the world, including the Zika virus.
Costa Rica’s Ministry of Health: In Spanish, but they have an option to translate the site. Covers all the major health issues facing Costa Rica. The Noticias page has current articles that are relevant.
The Tico Times: Costa Rica’s leading English-language newspaper. Has several stories on Dengue and Zika in Costa Rica and are another good source for current information.
Some of the links in this post are connected to affiliate programs we have joined. If you make a purchase using one of the links, we get a small commission. This doesn’t cost you anything extra and helps us keep providing information on this website for free. Thanks for your support!
Have any tips to prevent mosquito bites? Leave a comment below (email subscribers click here to post your comment online).
Looking for more information to help you plan? Check out these posts:
Packing for Costa Rica: The Essentials – Detailed list of what to bring. Includes special considerations for travel during the rainy season and to remote destinations.
Driving in Costa Rica: What to Know Before You Go – An insider’s guide on what to expect on the road. Local customs, laws, and how to stay safe.
Money Matters: Currency, Exchanging Money, and Tipping in Costa Rica – Tips on how to handle money during your trip to Costa Rica.
The post Costa Rica and Mosquitoes: Tips to Prevent Zika, Dengue, and More appeared first on Two Weeks in Costa Rica.
February 1, 2016
A Taste of Costa Rica: 7 Traditional Foods to Try
Two Weeks in Costa Rica |
For many, traveling means not only visiting somewhere new, but also diving into the culture. And food is one of those defining parts of a place that people can’t wait to experience. Something new, something fresh, and something other than what they eat at home. Although Costa Rica may not be wildly famous for its cuisine, it does have some traditional tastes that can stay on your taste buds for years. In this post, we’ll tell you about a few of our favorite traditional Costa Rican foods.
Gallo pinto
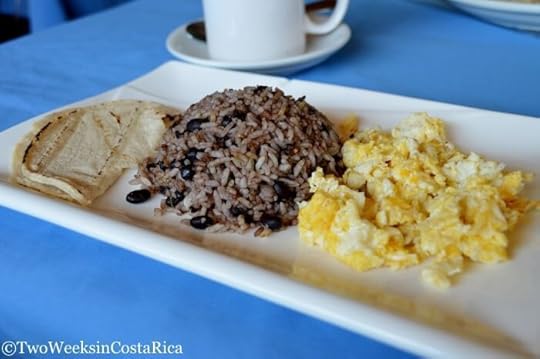
Gallo Pinto
Most Central American countries eat some form of rice and beans so it’s really about how they are prepared that makes the difference. In Costa Rica, rice and beans is traditionally served for breakfast and comes in the form of gallo pinto (pictured above). Translating to “painted rooster,” gallo pinto is a mixture of black beans, white rice, onions, sweet peppers, and cilantro. To give it the authentic Costa Rican taste, a tangy sauce called Salsa Lizano is added. Make sure to pick up some of this secret sauce at a local grocery store or online if you plan to replicate this dish at home. Gallo pinto is usually served alongside eggs and often has tortillas or toast, fried plantain, or fresh fruit.
Ceviche
One of our favorite treats for a hot day at the beach is ceviche. On a menu there are usually several types to choose from, like pescado (fish), camarones (shrimp) or mixto (mixed seafood), but they are all delicious. Ceviche is actually a raw dish, but the lime juice acts as an acid and sort of cooks and tenderizes the fish. Cilantro, finely chopped onions, and sweet peppers in the mixture bring it all together. With two coastlines, the Pacific and the Caribbean, you know that the seafood will be fresh no matter where you are in Costa Rica and nothing tastes fresher than ceviche.
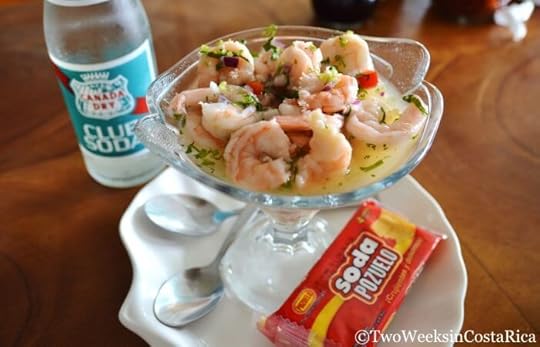
Shrimp Ceviche
Chifrijo
Chifrijo is a common bar food, especially near the capital of San Jose, where it was first created. It combines rice, beans, fresh pico de gallo, and fried chunks of meat (usually pork) in a bowl and is topped with some tortilla chips, jalapeno peppers, and sometimes sliced avocado. This is a perfect dish if you’re just a little hungry and don’t want to commit to something bigger.
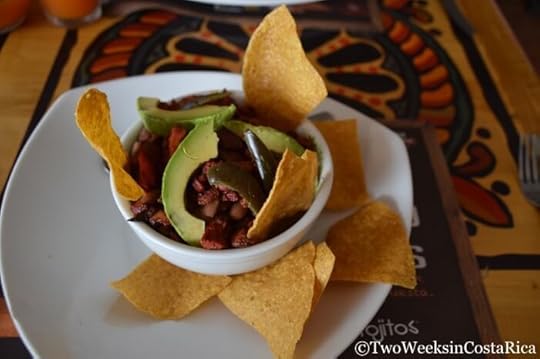
Chifrijo
Tamales
Tamales are found all over Central America, but they differ greatly from region to region and even household to household. In Costa Rica, tamales are made with a corn-based filling (masa) and contain small pieces of vegetables and meat. The filling is then folded in a banana leaf (other countries use corn husks) and cooked or steamed in boiling water. We have had some tamales as simple as just the corn filling with small chunks of pork and chicken, and others with an intricate mixture of masa, potatoes, carrots, olives, peas, capers, and smoked ham. Tamales are a seasonal treat offered around different holidays, especially Christmas, so you might not be able to find them all the time. But if you do see them, make sure to try a few different ones to compare.

Tamales
Casados
Casados are the lunch staple of Costa Rica. Found in every soda (small local restaurant) across the country, they are mixed plates of food that include a protein (fish, chicken, pork, or beef), some white rice, black or red beans, a couple of different side salads, and a piece of fried plantain. The side salads and flavor of the beans differ between restaurants, but you know you’ve found a good spot if the place is full of locals. Casados are typically around five or six dollars and sometimes include a fruit drink.
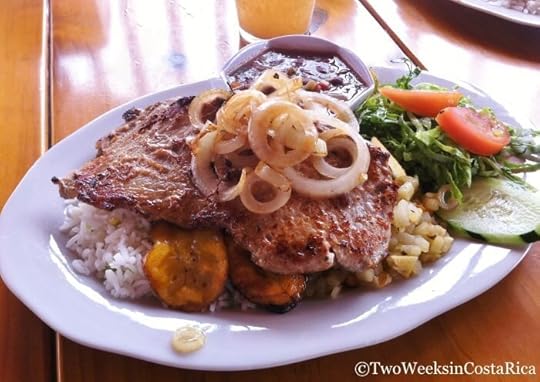
A typical casado with pork
Arroz con Pollo
Another popular dish in Costa Rica for lunch and sometimes dinner is arroz con pollo (rice with chicken). This pan-fried rice dish is loaded with different seasonings, vegetables, and shredded chicken. Think of it as a Chinese fried rice with Latin flavors. It usually comes with a small side salad and French fries (yes, this meal has a few carbs). Other variations of the dish include arroz con camarones (rice with shrimps), arroz con calamares (rice with squid), and our favorite, arroz con pulpo (rice with octopus).

Arroz con pollo
Pescado Entero
The first time we tried this dish, we had no idea what we had ordered. Luckily when it came we were hungry because pescado entero translates to whole fried fish. Usually that means a medium-sized red snapper (pargo), but it could be whatever is fresh that day. Although a little intimidating at first, the fish tastes so moist and flavorful when cooked this way. It is definitely a food memory that will last with us forever, and one that we revisit often.

Pescado Entero
These are just a sampling of Costa Rica’s culinary delights and we hope you get a chance to try some. If you’re into food, there’s a lot more to explore locally and regionally. You can find things like coconut-flavored rice on the Caribbean coast, savory red beans on the Nicoya Peninsula, or even a sweet Churchill ice-cream treat near Puntarenas, just to name a few.
What is your favorite Costa Rican food? Let us know in the comments below (email subscribers click here to post your comment online).
Looking for more practical info to help you plan? Check out these posts:
Money Matters: Currency, Exchanging Money, and Tipping in Costa Rica – Trying to figure out how many colones to bring or how to exchange them once you get here? This post will help.
Simple Spanish for Visiting Costa Rica – Learn a few basics for your trip. Costa Ricans really appreciate if you try to speak a little Spanish, even if it is just an hola or adios.
Driving in Costa Rica: What to Know Before You Go – Driving in Costa Rica can be intimidating at first, but knowing what to expect before you get behind the wheel can make all the difference.
The post A Taste of Costa Rica: 7 Traditional Foods to Try appeared first on Two Weeks in Costa Rica.
January 27, 2016
Best Beach Towns in Costa Rica to Visit Without a Car
Two Weeks in Costa Rica |
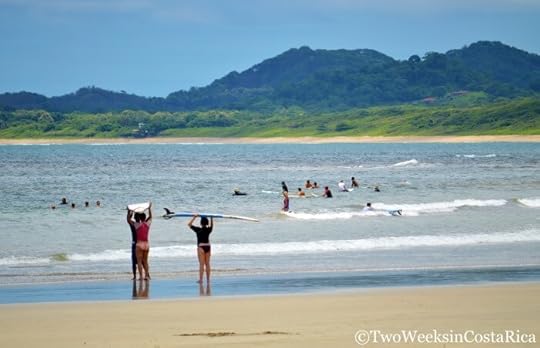
We always say that Costa Rica is best explored with your own rental car. That’s because a car gives you the flexibility to explore and move around at your own pace. But there are many reasons why you might not want to drive during your vacation. Maybe you are trying to save money, are nervous about driving in a foreign country, or drive all the time at home and just want to relax during your time off. Whatever the reason, don’t fret, there are plenty of places to visit in Costa Rica without a car. In fact, when we first visited the country as tourists, we didn’t rent a car until our fifth trip! In this post, we’ll give you some ideas for beach towns to visit in Costa Rica that are easily navigable without a car.

Tamarindo
Tamarindo is a beach town in the northwestern province of Guanacaste. This surfing hotspot is perfect for those without a car because there are lots of restaurants, shops, and tour operators just steps from the beach. Most hotels, hostels, and bed and breakfasts in Tamarindo are also only a short stroll or cab ride away from the main strip. And with plenty of activities to do locally, you can easily spend a week or more in this one spot. Read our post Tamarindo: Where Paradise Meets Convenience to learn more and get some ideas.
Playa Tamarindo
Getting There
From Liberia International Airport (LIR): Shuttle in 1-1.5 hours or bus in 2.5 hours. From San Jose International Airport (SJO): Shuttle in 5 hours or public bus in 5.5-6 hours. Small plane flights from San Jose arrive in about 1-1.5 hours.
Getting Around
Walking will get you to most places in town. There is also a local bus, plenty of taxis, or you can rent a bicycle or scooter.
Puerto Viejo de Talamanca
The most popular beach destination on Costa Rica’s Caribbean coast is Puerto Viejo de Talamanca. This small town gives off a distinct island vibe and is completely doable without a car. Caribbean-style cooking, surfing, plentiful wildlife, and some of the most gorgeous beaches in the country are just a few of the reasons to visit. Read our post Puerto Viejo: Caribbean Cool in Costa Rica to help you plan.

Playa Punta Uva
Getting There
From San Jose’s International Airport (SJO): Shuttle in 4-4.5 hours or public bus in 5-5.5 hours.
Getting Around
Many choose to flip-flop their way between their hotel, the beaches, and the bars, but the main road that leads south is also a popular bicycle route. You can rent beach cruisers by the day or week. A local bus also connects the downtown to the beach communities to the south (all the way to Manzanillo) and to the north (Cahuita).
Jaco
Some people avoid Jaco because of its party scene, but this busy beach town on the central Pacific coast really does have something for everyone. The scene at night can be easily avoided, and tons of tours and attractions are available to keep everyone busy, including kids. A few standouts are surfing beaches, every type of adventure tour that you can think of, and a main strip packed with shops and restaurants (some of our favorites in Costa Rica). The area also has a lot of wildlife nearby thanks to the rolling green mountains that back it. Read our post Jaco: Costa Rica’s Booming Beach Town to see some of our favorite things to do and places to stay.
Main strip in Jaco
Getting There
From San Jose’s International Airport (SJO): Shuttle in 2 hours or public bus in 3 hours.
Getting Around
The main street in Jaco has lots of lodging options, so if you stay there, you can walk to the beach and just about any place in town. You can also rent bicycles or scooters. Tip: The south end of the main way, Avenue Pastor Diaz, is a little more spread out and quieter, but still has great beach access and is an easy walk to town.
Tortuguero
Tortuguero is a special place for wildlife viewing on the northern Caribbean coast of Costa Rica. There is simply no need for a car here because there are no roads. The town is accessible only by boat or small plane, and the closest thing you will find to a road is a concrete walking path on land and a maze of canals in the water. Tortuguero has become famous for its sea-turtle nesting, which occurs along its long gray-sand beaches several times a year. The inland brackish waterways and mangroves are also filled with an array of wildlife like monkeys, caiman, and hundreds of bird species. Read our post Tortuguero Off the Resort for plenty of ideas for things to do right from town.
Boats are the most common way to get around in Tortuguero
Getting There
From San Jose’s International Airport (SJO): Shuttle and boat taxi in 5 hours or public bus and boat taxi in 5.5-6 hours. Small plane flights are less than 1 hour. Read our separate post Getting to Tortuguero for more information.
Getting Around
If staying near the main village, you can walk to everything. Resorts and more isolated lodges along the canals require a boat taxi to get to town but are often all-inclusive.
Manuel Antonio
Manuel Antonio was the first place we ever visited in Costa Rica and we loved it, even without a car. It was also the first town we moved to and we still visit often. This popular tourist destination on the central Pacific isn’t set up like your typical beach town. Although there are some lodging options near the beach, many are located up the hill, surrounded by jungle and featuring fantastic ocean views. With some careful planning, you can stay either down by the beach or on the hill near the main road and still get around very easily. Read our post Manuel Antonio Trip Planning for more information to plan your stay.

View from the top of the hill in Manuel Antonio
Getting There
From San Jose’s International Airport (SJO): Shuttle or public bus in 4 hours. Small plane flights to the neighboring town of Quepos take less than 1 hour from San Jose.
Getting Around
Since Manuel Antonio is built on one big hill, walking isn’t the best way to get around unless your hotel is right on the beach. Luckily the public bus runs frequently along the main road, carrying you to and from the beach, hotels, and restaurants. If you’re not up for taking the bus, local taxis, which are everywhere, can get you where you need to go for relatively little money.
We hope that this post has helped give you some ideas on where to go without a car in Costa Rica. When we first traveled the country, we did so by bus, shuttle van, and small plane and still had a blast. Having a rental car is definitely nice, but you can learn a lot about the country by riding the bus or talking with shuttle and taxi drivers about the local area.
What’s your favorite town in Costa Rica to visit without a car? Let us know in the comments below (Email subscribers click here to post a comment online).
Looking for more information to help you plan? Check out these posts:
Cost of Traveling in Costa Rica: This post will give you an idea on what costs to expect for things like hotels, restaurants, and tours when you travel to Costa Rica.
Simple Spanish for Visiting Costa Rica: Learn some Spanish basics before you come or print this post to help you order food at a local restaurant.
Best Airport Hotels Near SJO: Coming in late or leaving early? Check out these smaller hotels near the San Jose international airport.
The post Best Beach Towns in Costa Rica to Visit Without a Car appeared first on Two Weeks in Costa Rica.
January 19, 2016
Having a Baby in Costa Rica: Part 2, Delivery
Two Weeks in Costa Rica |
In our first post about having a baby in Costa Rica, we shared our experience with prenatal care. We covered public vs. private healthcare, and how we picked our doctor and decided where to deliver. Now that baby Sam has arrived, we’ll talk about the next phase in the adventure: the birth. We’ll explain what it was like to have a baby at a small private hospital in Costa Rica. We’ll also go through what we were worried about as foreigners having a baby in another country and how the actual delivery experience compared.
Getting Ready for the Birth
Before I delve into our story, you should know some background about the type of birth experience I wanted. It was our first child, so honestly I didn’t really know what I was in for. But after reading lots of websites and watching videos, I decided I wanted a natural birth to the extent possible. I didn’t want interventions like induction and wanted to try it without pain medications. I hadn’t originally planned on a water birth, but after talking to a woman in the waiting room at my doctor’s office who said it really helped with the pain, I changed my mind eight months into the pregnancy and decided I’d like to try it.
Some of the things I was most worried about were Matt not being allowed to be with me during the delivery, something that is common in public hospitals in Costa Rica, and being given medication like oxytocin to induce the labor to go faster. I had heard from someone who had given birth at Clinica Labrador, the private hospital in San Isidro del General where I was going, that there had been one especially pushy nurse who had insisted on giving her oxytocin when her labor wasn’t progressing fast enough. Having read about the importance of skin-to-skin contact and breastfeeding in the moments after delivery, I was also worried that the baby would get taken away soon after the birth.
There were several things about the hospital that I had concerns with too. I wasn’t sure what the facilities would be like and how difficult it would be to communicate with the nurses who probably only spoke Spanish. My Spanish is getting better but I don’t know medical terms and didn’t want to deal with being unable to communicate when making important medical decisions. Finally, I had heard about how some hospitals have policies about the number of hours you can be in labor before a C-section is required and wondered if the hospital would be able to override my doctor’s and my decision to wait for labor to progress on its own.
What I found extremely beneficial to putting my mind at ease was talking through these issues with my doctor in advance. During office visits in the months leading up to my due date, he assured me that he would be making all the decisions about my care (with my involvement, of course) and that the hospital wouldn’t be able to override him to force a C-section or other intervention. He told me that pain medication, including an epidural, would be available to me if I decided that I needed it and that he could perform a C-section if it became necessary. Something that really helped to put me at ease was when he told me that I wouldn’t go to the hospital right away when my labor began. Instead, he would check me out in his office and we wouldn’t go to the hospital until the labor progressed significantly—and we would go together. That made me feel a lot better. He also told me that at Clinica Labrador, men were able to be present during the delivery so Matt could stay with me the entire time.
My doctor also encouraged us to go to the hospital for a tour and talk to the head nurse. As I explained in our first post, I really wanted to keep my doctor for delivery because I was so comfortable with him and his medical ideology, which favored natural births. That meant that I needed to like Clinica Labrador, as he didn’t do deliveries at the other private hospitals in Costa Rica like Cima in San Jose. Luckily, our tour of Clinica Labrador went great. The head nurse was so kind and approachable, and actually reminded me of my grandmother. I felt very comfortable around her, and although she spoke only Spanish, she talked in such a way that she was very easy to understand.
After telling her how far along I was and a little about my pregnancy, she walked us through the different rooms we would be in for the different stages of delivery and showed us the room where we would sleep. We learned that we would all be able to sleep in the same room, Matt on the futon and the baby in a bassinet in between us.

Labor room at Clinica Labrador
After speaking to the nurse, we went over costs and other paperwork with the receptionist. He spoke English fluently, which was very helpful. We learned that a natural delivery would cost ₡615,000 (about $1,230), a delivery with an epidural would cost ₡740,000 (about $1,480), a water birth would cost ₡690,000 (about $1,380), and a C-section would cost ₡800,000 (about $1,600). This was the hospital fee only; our doctor’s fee of $1,600 was separate. Included in this price was care during the first 24 hours from the time we checked in. This was standard no matter what kind of birth you had, even a C-section, and seemed crazy to us. Matt and I decided that if I wasn’t ready to leave within that time frame, we would just stay longer given that the costs were so reasonable.
Birth Experience
I won’t go into all the details of our long birthing story, but here’s an overview. Sam decided to take his time to come into the world. Despite everyone’s theories that I would go into labor a few days after my due date, then when that didn’t happen, around the time of the full moon, I ended up being two weeks late. I had few signs of labor and was scheduled to be induced 12 days after my due date. Other than being tired, I felt great and was very excited to have the baby.
Sure enough, in the early morning on the scheduled day of my induction, I started to go into labor on my own. I had regular contractions and decided that we should go to San Isidro to be closer to the hospital since we lived 45 minutes away. I had heard lots of stories about how fast labor can progress and the last thing I wanted was to deliver a baby on the side of a curvy mountain road. Knowing what I know now, I had plenty of time. I ended up being in labor for a very long time.
During my two plus days of labor, Matt and I stayed at a hotel in downtown San Isidro and would check in with the doctor throughout the day. Despite having painful contractions that occurred regularly, my labor was still progressing rather slowly. The contractions continued day and night and the pain made it very difficult to eat and sleep. My doctor thought it wouldn’t be long until I had the baby and I still wanted a natural birthing experience so we continued on like this for a couple of days. Although I was in a lot of pain, I felt okay because I had great care. Whenever something came up, Matt would send the doctor a text message and he would get back to us, telling us whatever symptom I was experiencing was normal or to come to his office. In the middle of the night, he also came to check on me at the hotel, which was amazing. He brought a portable heart monitor to check on the baby and make sure everything was okay with me.
After two days of being in labor, I was feeling very weak from not eating much, tired from not sleeping, and very emotional about this baby not coming. We went into the doctor’s office that morning and things still hadn’t progressed much despite all the contractions. At that point, I decided I wanted to be induced. I knew that I would need energy for the delivery and couldn’t go on like that for days longer. So that afternoon, I went to the hospital for an induction and couldn’t have been happier. It was somewhat ironic that I was so happy to be induced. As I said, I had originally wanted a natural delivery with no interventions, but all that changed after enduring two days of labor. Now I understand why people always say to have a birthing plan but to be flexible because you never know what is going to happen.
The nurse hooked me up to the IV for the induction and helped me with breathing techniques to get through the contractions. She was wonderful, very calming, and present when I needed her, but not too involved at the same time. The induction progressed perfectly and they moved me into the tub to start pushing just a couple of hours later. I wasn’t sure what I would think about the water birth, but it ended up being a great experience. The warm water seemed to really help with the pain and made me more relaxed. I think I pushed for around an hour before finally meeting baby Sam.
After Sam was born, he was quickly checked out by the pediatrician. The doctor then put him on my chest, and let us spend almost a full hour with him, just the three of us. It was a magical experience that Matt and I will never forget. It was our doctor who pushed for this time together after the birth. It seemed that the hospital staff was antsy to take Sam for more care, but our doctor didn’t let that happen.
Overall, I had a great birthing experience at Clinica Labrador and highly recommend it. The facility wasn’t state of the art by any means, but was more than adequate. It was clean and comfortable, and I felt like I was in good hands with the head nurse, who was obviously very experienced.
There were some less-than-desirable parts of the experience, of course. I had some complications after the birth and lost a lot of blood, but my doctor was wonderful throughout the process and very reassuring. He even made a house call to check on me the day after we left the hospital.
A couple of things to note about the hospital in general for anyone thinking about delivering there: Although the staff was supportive of breastfeeding in general, they encouraged formula as well. Several times when Sam was crying in our room, a nurse would barge in, saying that the baby was hungry and trying to give him formula despite the fact that he was nursing fine. Something else to keep in mind is that most of the nurses at Clinica Labrador only spoke Spanish. Between the two of us, Matt and I were able to understand most of what they were saying, but if you don’t speak any Spanish, it would be difficult. The last thing that could have made the experience better was support for breastfeeding. This might have depended on who was working that day, but no one helped me with breastfeeding when I was first starting. Luckily, though, I had spent a lot of time learning about it in advance and Sam got it right away so it went smoothly.
So that’s our experience giving birth in Costa Rica. If you’re planning on having a baby in Costa Rica yourself and have a question, post it below and we’ll do our best to answer it.
Looking for more information about starting a family in Costa Rica? Check out these posts:
Having a Baby in Costa Rica: Part 1 – Our first post about our experience having a baby in Costa Rica. Focuses on prenatal care and why we chose to have a private doctor and deliver at a private hospital.
Buying Baby Stuff in Costa Rica – Info on cost of baby gear in Costa Rica and where to find it.
La Leche League: Costa Rica has a La Leche League, which provides support for breastfeeding mothers. There are local groups all around the country. Find more info here.
The post Having a Baby in Costa Rica: Part 2, Delivery appeared first on Two Weeks in Costa Rica.
Having a Baby in Costa Rica: Part 2
Two Weeks in Costa Rica |
In our first post about having a baby in Costa Rica, we shared our experience with prenatal care. We covered public vs. private healthcare, and how we picked our doctor and decided where to deliver. Now that baby Sam has arrived, we’ll talk about the next phase in the adventure: the birth. We’ll explain what it was like to have a baby at a small private hospital in Costa Rica. We’ll also go through what we were worried about as foreigners having a baby in another country and how the actual delivery experience compared.
Getting Ready for the Birth
Before I delve into our story, you should know some background about the type of birth experience I wanted. It was our first child, so honestly I didn’t really know what I was in for. But after reading lots of websites and watching videos, I decided I wanted a natural birth to the extent possible. I didn’t want interventions like induction and wanted to try it without pain medications. I hadn’t originally planned on a water birth, but after talking to a woman in the waiting room at my doctor’s office who said it really helped with the pain, I changed my mind eight months into the pregnancy and decided I’d like to try it.
Some of the things I was most worried about were Matt not being allowed to be with me during the delivery, something that is common in public hospitals in Costa Rica, and being given medication like oxytocin to induce the labor to go faster. I had heard from someone who had given birth at Clinica Labrador, the private hospital in San Isidro del General where I was going, that there had been one especially pushy nurse who had insisted on giving her oxytocin when her labor wasn’t progressing fast enough. Having read about the importance of skin-to-skin contact and breastfeeding in the moments after delivery, I was also worried that the baby would get taken away soon after the birth.
There were several things about the hospital that I had concerns with too. I wasn’t sure what the facilities would be like and how difficult it would be to communicate with the nurses who probably only spoke Spanish. My Spanish is getting better but I don’t know medical terms and didn’t want to deal with being unable to communicate when making important medical decisions. Finally, I had heard about how some hospitals have policies about the number of hours you can be in labor before a C-section is required and wondered if the hospital would be able to override my doctor’s and my decision to wait for labor to progress on its own.
What I found extremely beneficial to putting my mind at ease was talking through these issues with my doctor in advance. During office visits in the months leading up to my due date, he assured me that he would be making all the decisions about my care (with my involvement, of course) and that the hospital wouldn’t be able to override him to force a C-section or other intervention. He told me that pain medication, including an epidural, would be available to me if I decided that I needed it and that he could perform a C-section if it became necessary. Something that really helped to put me at ease was when he told me that I wouldn’t go to the hospital right away when my labor began. Instead, he would check me out in his office and we wouldn’t go to the hospital until the labor progressed significantly—and we would go together. That made me feel a lot better. He also told me that at Clinica Labrador, men were able to be present during the delivery so Matt could stay with me the entire time.
My doctor also encouraged us to go to the hospital for a tour and talk to the head nurse. As I explained in our first post, I really wanted to keep my doctor for delivery because I was so comfortable with him and his medical ideology, which favored natural births. That meant that I needed to like Clinica Labrador, as he didn’t do deliveries at the other private hospitals in Costa Rica like Cima in San Jose. Luckily, our tour of Clinica Labrador went great. The head nurse was so kind and approachable, and actually reminded me of my grandmother. I felt very comfortable around her, and although she spoke only Spanish, she talked in such a way that she was very easy to understand.
After telling her how far along I was and a little about my pregnancy, she walked us through the different rooms we would be in for the different stages of delivery and showed us the room where we would sleep. We learned that we would all be able to sleep in the same room, Matt on the futon and the baby in a bassinet in between us.
Labor room at Clinica Labrador
After speaking to the nurse, we went over costs and other paperwork with the receptionist. He spoke English fluently, which was very helpful. We learned that a natural delivery would cost ₡615,000 (about $1,230), a delivery with an epidural would cost ₡740,000 (about $1,480), a water birth would cost ₡690,000 (about $1,380), and a C-section would cost ₡800,000 (about $1,600). This was the hospital fee only; our doctor’s fee of $1,600 was separate. Included in this price was care during the first 24 hours from the time we checked in. This was standard no matter what kind of birth you had, even a C-section, and seemed crazy to us. Matt and I decided that if I wasn’t ready to leave within that time frame, we would just stay longer given that the costs were so reasonable.
Birth Experience
I won’t go into all the details of our long birthing story, but here’s an overview. Sam decided to take his time to come into the world. Despite everyone’s theories that I would go into labor a few days after my due date, then when that didn’t happen, around the time of the full moon, I ended up being two weeks late. I had few signs of labor and was scheduled to be induced 12 days after my due date. Other than being tired, I felt great and was very excited to have the baby.
Sure enough, in the early morning on the scheduled day of my induction, I started to go into labor on my own. I had regular contractions and decided that we should go to San Isidro to be closer to the hospital since we lived 45 minutes away. I had heard lots of stories about how fast labor can progress and the last thing I wanted was to deliver a baby on the side of a curvy mountain road. Knowing what I know now, I had plenty of time. I ended up being in labor for a very long time.
During my two plus days of labor, Matt and I stayed at a hotel in downtown San Isidro and would check in with the doctor throughout the day. Despite having painful contractions that occurred regularly, my labor was still progressing rather slowly. The contractions continued day and night and the pain made it very difficult to eat and sleep. My doctor thought it wouldn’t be long until I had the baby and I still wanted a natural birthing experience so we continued on like this for a couple of days. Although I was in a lot of pain, I felt okay because I had great care. Whenever something came up, Matt would send the doctor a text message and he would get back to us, telling us whatever symptom I was experiencing was normal or to come to his office. In the middle of the night, he also came to check on me at the hotel, which was amazing. He brought a portable heart monitor to check on the baby and make sure everything was okay with me.
After two days of being in labor, I was feeling very weak from not eating much, tired from not sleeping, and very emotional about this baby not coming. We went into the doctor’s office that morning and things still hadn’t progressed much despite all the contractions. At that point, I decided I wanted to be induced. I knew that I would need energy for the delivery and couldn’t go on like that for days longer. So that afternoon, I went to the hospital for an induction and couldn’t have been happier. It was somewhat ironic that I was so happy to be induced. As I said, I had originally wanted a natural delivery with no interventions, but all that changed after enduring two days of labor. Now I understand why people always say to have a birthing plan but to be flexible because you never know what is going to happen.
The nurse hooked me up to the IV for the induction and helped me with breathing techniques to get through the contractions. She was wonderful, very calming, and present when I needed her, but not too involved at the same time. The induction progressed perfectly and they moved me into the tub to start pushing just a couple of hours later. I wasn’t sure what I would think about the water birth, but it ended up being a great experience. The warm water seemed to really help with the pain and made me more relaxed. I think I pushed for around an hour before finally meeting baby Sam.
After Sam was born, he was quickly checked out by the pediatrician. The doctor then put him on my chest, and let us spend almost a full hour with him, just the three of us. It was a magical experience that Matt and I will never forget. It was our doctor who pushed for this time together after the birth. It seemed that the hospital staff was antsy to take Sam for more care, but our doctor didn’t let that happen.
Overall, I had a great birthing experience at Clinica Labrador and highly recommend it. The facility wasn’t state of the art by any means, but was more than adequate. It was clean and comfortable, and I felt like I was in good hands with the head nurse, who was obviously very experienced.
There were some less-than-desirable parts of the experience, of course. I had some complications after the birth and lost a lot of blood, but my doctor was wonderful throughout the process and very reassuring. He even made a house call to check on me the day after we left the hospital.
A couple of things to note about the hospital in general for anyone thinking about delivering there: Although the staff was supportive of breastfeeding in general, they encouraged formula as well. Several times when Sam was crying in our room, a nurse would barge in, saying that the baby was hungry and trying to give him formula despite the fact that he was nursing fine. Something else to keep in mind is that most of the nurses at Clinica Labrador only spoke Spanish. Between the two of us, Matt and I were able to understand most of what they were saying, but if you don’t speak any Spanish, it would be difficult. The last thing that could have made the experience better was support for breastfeeding. This might have depended on who was working that day, but no one helped me with breastfeeding when I was first starting. Luckily, though, I had spent a lot of time learning about it in advance and Sam got it right away so it went smoothly.
So that’s our experience giving birth in Costa Rica. If you’re planning on having a baby in Costa Rica yourself and have a question, post it below and we’ll do our best to answer it.
Looking for more information about starting a family in Costa Rica? Check out these posts:
Having a Baby in Costa Rica: Part 1 – Our first post about our experience having a baby in Costa Rica. Focuses on prenatal care and why we chose to have a private doctor and deliver at a private hospital.
Buying Baby Stuff in Costa Rica – Info on cost of baby gear in Costa Rica and where to find it.
La Leche League: Costa Rica has a La Leche League, which provides support for breastfeeding mothers. There are local groups all around the country. Find more info here.
The post Having a Baby in Costa Rica: Part 2 appeared first on Two Weeks in Costa Rica.