Matthew Houde's Blog, page 28
June 14, 2016
Santa Rosa National Park: Hiking and History in Guanacaste
Two Weeks in Costa Rica |
Drive north from the busy beach towns of Guanacaste and you will find a quiet countryside of fields and shrubby forest. Although this lazy landscape may not seem to offer much to travelers, it’s also where you will find Santa Rosa National Park. Not only does this park hold a massive amount of protected tropical dry forest, it also hosts the site of Costa Rica’s most famous historic battle. In this post, we’ll share some of the history behind Santa Rosa National Park and let you know how you can explore its hiking trails, on-site museum, and more remote areas.

About Santa Rosa National Park
Santa Rosa National Park is located 35 km (22 miles) north of Guanacaste’s capital city of Liberia. With a hefty landmass totaling 38,000 hectares (94,000 acres), Santa Rosa has the distinction of being the largest remaining swath of protected tropical dry forest in the Neotropics. The park is also noteworthy for being designated Costa Rica’s first official national park in 1972.
While much of the land at Santa Rosa is considered dry forest, meaning that most trees lose their leaves in the dry season, the park stretches from Highway 1 all the way to the Pacific Coast. Within this area are several other habitats, including oak forests, beaches, swamps, and mangroves.

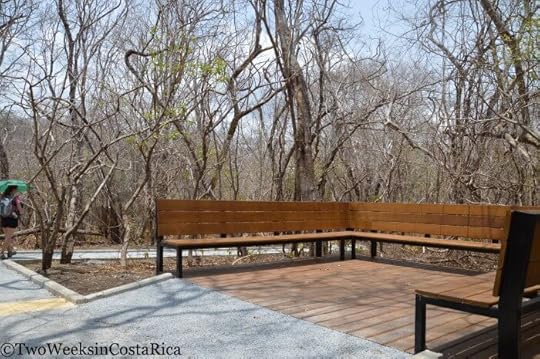
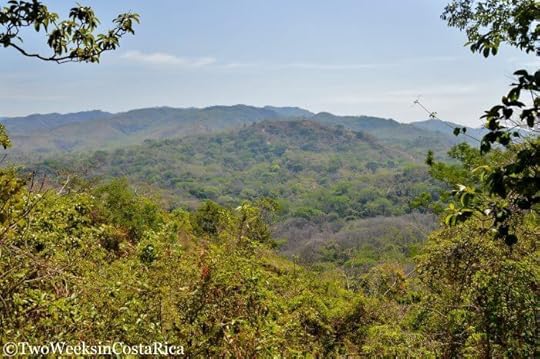
Viewpoint near the entrance of Santa Rosa National Park
Santa Rosa National Park is probably best known for the Battle of Santa Rosa, which took place at La Casona, an old ranch house that is part of the park. In addition to the historic aspect, the park also has several different trails if you are up for some hiking. Many are accessible only with a sturdy 4×4, though, so before you go, read below for more info.
Areas to Explore
Which areas of the park you can explore really depends on the type of vehicle you have and how much time you plan to spend. Below we’ll start with the easiest area to access and continue to the most difficult.
Note that Santa Rosa National Park has two different sectors. In this post, we’ll cover the most visited sector, Santa Rosa. The other is the Murcielago Sector farther to the north.
The Battle Site and Ranger Station
The most accessible area of Santa Rosa National Park is right around the Santa Rosa Sector Ranger Station. While this spot is 7 km (4.3 miles) from the highway, it is down a nicely paved road that any car can drive. The road is actually quite nice with trees all around, and you’ll likely see some wildlife on the way. We saw a coati (raccoon-like animal) and several species of birds, including the Magpie Jay and Capped Flycatcher. There is also a nice lookout on the right called Mirador Tierras Emergidas, which is worth a stop.
Once you arrive at the ranger station and pay the admission fee ($15), you will be able to access La Casona (the house where the battle of Santa Rosa took place), a monument and lookout right behind the house, and also a trail called Sendero Indio Desnudo. (More on each of these attractions below.)
La Casona: If you are a history buff, you will love La Casona (see cover photo, above). This building was the site of the famous 1856 battle of Santa Rosa where a Costa Rican army blindsided a resting militia and sent them retreating back to Nicaragua. The intruders were under the orders of William Walker, a power-hungry lawyer and doctor from the United States who had plans to take over five Central American countries, including Costa Rica. The building’s rooms have been turned into a museum, and while there aren’t many artifacts, there are detailed displays in English and Spanish that talk about the timeline of events and people involved. There is also an art gallery with beautiful nature photographs taken within the park.
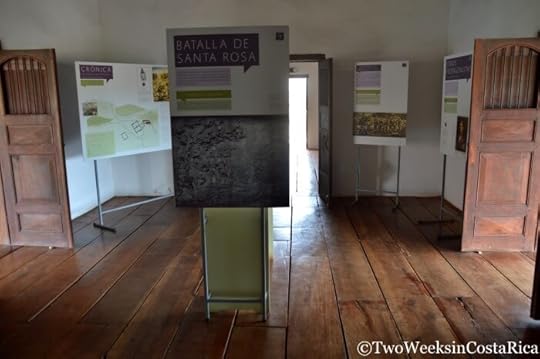
Inside the museum at La Casona
Monument: Behind La Casona are a series of steps with monuments in between stating the names of those who have fought in Costa Rica’s biggest battles (two other major ones happened at Santa Rosa, as the museum explains). The steep steps go up to a nice viewpoint where you can see a distant volcanic mountain range to the east.
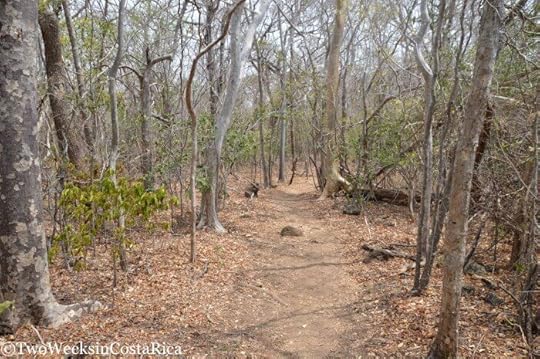
Sendero Indio Desnudo (Naked Indian Trail): This is a short trail (0.8 km/0.5 miles) that was just rebuilt in April 2016 to become handicap accessible. The flat concrete path goes through an area of dry forest, over a stream bed (dry when we visited in April), and ends at the paved road that you drove in on. There are signs indicating several tree species native to the dry forest, including the Indio Desnudo (Naked Indian). This tree has bark that frequently peels off, hence the name. The trail also has some resting benches along the way and restrooms near the entrance. Besides the different trees, we didn’t see much here other than a variegated squirrel, but we walked it during the hottest part of the day (nearing 100˚F). We talked to someone else who had seen an anteater earlier in the day when it was much cooler.
The handicap-accessible Naked Indian Trail
Tip: If don’t have a 4×4 and are not interested in the history of the battle, we would say that visiting this section alone probably isn’t worth the drive and $15 admission. Without a 4×4, Rincon de La Vieja National Park would be a better choice for hiking and wildlife.
Other Hiking Trails
To access more of the park, you need a good 4×4 vehicle or be willing to hike in because the remaining trails are down a very rough road with serious rocks and ruts. The road is 12 km (7.5 miles) long and eventually leads to the coast, but there are different trails spaced out along the route. By our account, it would take most of the day to drive the entire road in both directions (it’s that bad), so you would be better off staying at the campground near the beach if you plan to go all the way.
Click here to see a map of the park.
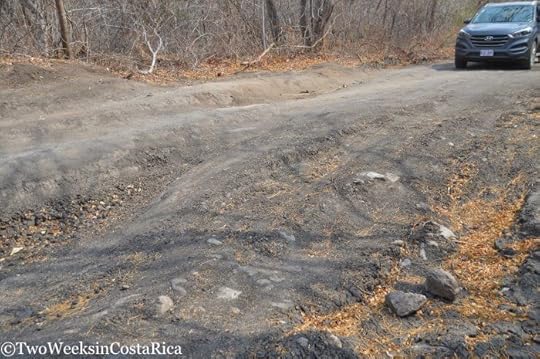
Section of the road from the ranger station to the beach. Our car in the distance really gives some perspective on the size of the ruts.
Trails Reachable in a Half-Day
We drove the rough road from the ranger station for about 1.5 hours each way and accessed both Los Patos Trail and the Mirador Valle Naranjo Trail. If you have a good part of the day before or after visiting the battle site area and are willing to drive the treacherous road, these two trails are your best option.
Sendero Los Patos: About 1.5 km (0.9 miles) down the access road, you will come to Sendero Los Patos (the Ducks Trail) on the left. This trail goes 1 km (0.6 miles) each way and is fairly flat, other than some uneven rocks to cross near a seasonal riverbed. There is a nice lookout at the end where you have a view of the valley below and ocean in the distance. We saw a cool type of cactus growing up in the trees here and there were lots of hummingbirds buzzing around.
Los Patos Trail looking really dry at the end of the dry season (April)
Mirador Valle Naranjo Trail: Continuing on the bumpy access road, you will come to another short trail at about the kilometer 4 mark. The Mirador Valle Naranjo (Orange Valley Lookout) Trail is 0.6 km (0.4 miles) in each direction and dead-ends at the viewpoint. Here, you’ll get a sweeping valley view with Playa Naranjo (Orange Beach) and the famous Witch’s Rock in the distance. Witch’s Rock is one of Costa Rica’s best surfing spots, and the big rock is a local icon. On this short trail, we saw a white-faced monkey and had two good bird sightings, a Squirrel Cuckoo and a Black-headed Trogon.

View of Witch’s Rock in the distance from the Mirador Valle Naranjo Trail
Rental Car Tip: We had a 4×4 Hyundai Tuscon from Adobe Rent a Car (click here to get a discount), which was handling the road okay, but it was very slow going and somewhat stressful. A Suzuki Jimny or Bego, which are both smaller and have a shorter wheel base, would probably get over the larger rocks a little easier. Note: We would not recommend taking this road at all during the rainy season.
Trails Reachable in a Full Day or More
For those who have the right vehicle and are up for some adventure, there are several more sights to see. We turned around at the Mirador Valle Naranjo Trail, but here is what we know about the other trails if you have a full day or more to spend at the park.
Sendero Palo Seco: This is actually a road that connects to the biological station near Playa Nancite. This beach an important nesting site for olive ridley sea turtles, so access here is restricted.
Sendero Carbonal: The ranger made it seem like no big deal to get here, so our original goal was to hike this trail that goes through some lower areas, including mangroves. However, the trail starts near the end of the 12 km road, close to the beach, and since it was such slow going, it would have taken us most of the day to get there and back. We weren’t going to do that with our four-month-old baby so we decided to save this for another visit. This trail goes 4 km (2.5 miles) in each direction, and we were told that it should be a good spot for wildlife viewing during the dry season.
Sendero Aceituno: Sendero Aceituno (Olive Trail) starts near the park’s Naranjo campground and is how surfers get to Playa Naranjo and Witch’s Rock. We were told that you have to cross a lagoon/river that has crocodiles to do this.
Park Information
Admission: Foreigners $15 Adult, $5 Children 6-12. Nationals ₡1,100 Adult, ₡500 Children 6-12.
Hours: Monday to Sunday, 8:00 a.m. – 3:30 p.m.
Camping Sites: $19/day foreigners, ₡3,300/day nationals. Price includes daily admission fee. No reservation needed.
Hostel Room: $30/day foreigners, ₡8,700/day nationals. Price includes daily admission fee. By reservation only. Contact the park by email: ecoturismo(at)acguanacaste.ac.cr.
Tips for Visiting
As we said before, if don’t have a 4×4, your options for what you can see are limited to the very short Naked Indian Trail and La Casona. If you’re not interested in the history of the battle, you might want to visit another park in the area instead like Rincon de La Vieja, which has volcanic features and waterfalls, or Diria National Park.
If you want to explore the trails that are farther away like Sendero Aceituno and Sendero Carbonal, camp overnight at the ranger station near Playa Naranjo so that you don’t have to make the long drive twice in one day. We would love to go back and do this to see the beach and Witch’s Rock and check out the more remote trails.
Avoid visiting the park at the end of the dry season when most of the trees have lost their leaves and the landscape is quite barren. It is much nicer earlier on in the dry season or in the rainy season.
Be sure to bring plenty of water. Temperatures were well into the 90s on our visit in April, and the trails were very sunny due to the lack of leaves. Other people we met on the trail complained about the heat and left early because it was too much.
Arrive as early as possible (park opens at 8 a.m.) to beat the heat and see the most wildlife. Remember to take into account that the ranger station is 7 km off the highway, and you can look for animals along the forested road before the park opens.

A white-nosed coati we saw early in the morning
Santa Rosa wasn’t our favorite national park in Costa Rica since we spent much more time driving the access road than we expected, and as a result, didn’t see much wildlife. Still, we really enjoyed the battle-site museum and the few short trails that we did manage to access. Now that we know the setup, we’ll be prepared next time and hope that you are too.
Have you visited Santa Rosa National Park? What did you see? Did you venture down that rough dirt road? Let us know in the comments below (Email subscribers click here to post your comment online).
Looking for more information for your trip to Guanacaste? Check out these posts:
Playa Conchal: The Allure of Shell Beach – If you’re looking for a relaxing getaway in a beautiful setting, check out our guide to Playa Conchal. Includes info on an all-inclusive resort in the area and other options for lodging.
Diria National Park: Hiking Near Guanacaste’s Gold Coast – Another great choice for hiking in the area. Read our tips for visiting this little-known park near Santa Cruz.
Best National Parks in Costa Rica – A list of our favorite national parks in Costa Rica for wildlife, waterfalls, lush rainforest, and cloud forest.
The post Santa Rosa National Park: Hiking and History in Guanacaste appeared first on Two Weeks in Costa Rica.


June 9, 2016
Packing List for Traveling with a Baby to Costa Rica
Two Weeks in Costa Rica |
Packing for your vacation can be stressful in itself but adding a baby to the picture takes it to a whole new level. Luckily, Costa Rica is a very baby-friendly country and with the help of a few essential items, you can rest easy and enjoy it with your family. We have been traveling around Costa Rica with our little one since he was three months old and have learned some important lessons about what to have on hand. We wrote a separate post that covers general issues about traveling with a baby to Costa Rica, but in this one, we’ll share our specific tips on what to pack.

Clothing
Costa Rica is in the tropics so much of the country is hot and humid. We live at the beach where temperatures are in the 80s every day, and our baby is in onesies almost all the time. When we go out for dinner, we might throw on a pair of shorts to dress him up, but anything more than that is too heavy. If you’re visiting the cloud forests of Monteverde or San Gerardo de Dota where it is damp and cooler, also pack a few long-sleeve shirts, pants, socks, and pajamas. And remember to keep a few extra sets of clothes in your diaper bag because your baby is likely to get sweaty and need a change.
Most hotels have laundry service that is very affordable. On our last road trip, we kept our dirty clothes in a reusable diaper bag and it worked out great. We also brought along a small container of laundry soap. In Costa Rica, people tend to use really fragrant detergents so bring your own if you prefer something unscented.
Flying
International travel with a baby can be an adventure. We recently visited the US and the trip to Boston took basically the entire day because there were no direct flights. It wasn’t as bad as we expected though and our first-time traveler, who was only three months old at the time, did a great job.
Baby Carrier: A few key things made the trip a lot easier. Jenn used a baby carrier to get around the airport, which was great when we had to do a lot of walking between terminals. They did make her take it off to go through security in Boston, but she wore him the rest of the time.
Toys: A friend gave us some Chewbeads before we left, and these turned out to be one of the best “toys” we had. Jenn wore them with Sam in the carrier, letting him have something to play with while we were waiting in line. On the plane, we had a lot of different toys to keep him entertained. A few favorites that aren’t too loud for other passengers are Sophie the Giraffe, who he adores, and some books. Indestructibles are awesome for travel because they’re super lightweight, and babies love them because they can chew them up and they make a crinkle noise. If your baby is on solids, moms and dads always recommend bringing lots of snacks too.

One of Sam’s favorite Indestructibles books
Portable Changing Station: For changing time, keep in mind that not all airlines have changing tables in the bathroom. If they don’t, you can close the toilet cover and use that with a changing pad on top. Either way, we all know how cramped plane lavatories are so be well prepared with a portable changing kit that has everything you need to get in and out of there fast. Large zip lock bags or a roll of odor-eliminating bags are good to have on hand as well.
Disinfecting Wipes and Hand Sanitizer: We like to wipe down all surfaces around our seats, especially tray tables, with disinfecting wipes to help with germs. Also keep some hand sanitizer with you. We love the Babyganics foam sanitizer because it’s not too heavy and alcohol free.
Diapering
Disposables: You can find disposable diapers in Costa Rica at grocery stores and big box stores like Maxi-Pali. They have local brands and some of the kinds sold in North America like Pampers and Huggies. Keep in mind that diapers here more expensive, especially the name brands. If you’re spending a while in Costa Rica, it might be worth it to stock up at one of the Wal-Marts around San Jose where prices are much better.
We recommend bringing at least a couple of days’ worth supply from home to get you started and then buying more when you get here.

Diapers available at a larger grocery store in Monteverde
Cloth Diaper Alternative: We cloth diaper, but when we travel, it is too hard so we usually use disposables. Recently, though, we discovered a cool product (sold at stores in the US or online) that is sort of a cloth-disposable hybrid. gDiapers makes a disposable insert that you can use in cloth covers. It is almost like a pad and we found it to be really absorbent and effective. They are biodegradable too so more ecofriendly than traditional disposables. You can use them in gDiapers, but they worked great in the Flip and Thirsties covers that we already had. Our covers stayed clean for the most part, but if something gets on them, you can just wash it out at your hotel and let it dry overnight.
Feeding
Formula: If your baby is on formula, you can find a few different kinds in Costa Rica, including Similac and Enfamil. Costa Rica does not, however, have as much variety as many places, so if you’re not sure if stores will carry the type you use, it is best to bring your own.
Baby Food: If your baby is on solids, jarred food and pouches are available. Most stores have only regular Gerber and Heinz, though, so if you use organic, bring it. Cereals are also readily available.
Beach/Pool
Many of Costa Rica’s beaches are backed by thick palms trees, but many are not, so you will want to be prepared for the sun. Since Costa Rica is near the equator, the sun is extremely strong and your baby will burn in minutes. We are always trying so hard to protect Sam from the sun and think we have a pretty good routine. Here is our list of must-haves:
Swim Shirts, Hats, and Sunglasses: Swim shirt and sunglasses if you can get your baby to keep them on. Sam has Babiators and they are really durable and so adorable. For sun hats, we have a couple that we love. This one is a good, all-around hat with UV protection and a lot of coverage. For the pool, we prefer one that’s waterproof like this.
Bathing Suits: You will also want swim trunks, a bathing suit, or we especially love swim diapers because they snap on and off easily. We haven’t had any major accidents in them yet, but have heard that they are much easier to get off than a wet swimsuit. There are lots to choose from. We have a couple from Alva Baby that are a good value and have really cute designs.

All geared up in sun protection for the pool
Sunscreen: Even with all the sun protective clothing, you’ll want to use sunscreen on areas that are still exposed. Here is a link to some products intended for babies. The American Academy of Pediatrics considers sunscreen safe for babies six months and up. They recommend a broad spectrum, water resistant sunscreen of SPF 15 or higher.
Beach Towels/Blanket and Umbrella: Microfiber towels work really well for the beach because they’re lightweight, dry quickly, and roll-up small. Beach umbrellas can be found in most popular tourist destinations in grocery stores or souvenir shops.
Hiking
We love hiking and haven’t slowed down much since having Sam. We bring him everywhere in the baby carrier and have done hikes as long as four hours with him. Whatever carrier you have is probably fine, but if you’re in the market for one, we love our Ergo Performance because it is lightweight and breathable.
Sun Protection: To keep baby protected from the sun, we have found that a hat coupled with us carrying an umbrella works the best out on the trails. For extra protection, get an umbrella with UV protection. And for especially hot days, we carry along wet face cloths to put on Sam’s head to cool him down. You can just use a zip-lock bag filled with ice, but what we’ve found works best is a dry bag. Dry bags can be used as wet bags and are insulated so keep things cooler. Just throw a couple of towels in with the ice and rotate when necessary.

Hiking to the waterfalls in Montezuma
Insect Repellant: We usually don’t need to use repellent on our baby (perhaps having it on ourselves helps), but it is a good idea to bring some in case the bugs are really bad. No one wants their baby to be bothered by annoying bites, plus Costa Rica does have some mosquito-borne illnesses like Dengue and Zika.
Current guidelines from the American Academy of Pediatrics say repellents with 10-30% DEET are safe and effective for babies two months and up. Products containing Picaridin or essential oils are also considered safe, but long-term studies have not yet been done. Here is a link to some good choices. If you’re looking for more information on choosing an insect repellent for your child, check out HealthyChildren.org.
Miscellaneous
Stroller: Most sidewalks in Costa Rica are uneven and difficult to navigate with a stroller. Although some parks and nature reserves have nice smooth walkways, others are rugged, with tree roots, rocks, mud, steps, and other hazards. If you are really attached to your stroller, it’s fine to bring it. You will find places where it is useful. But if you’re not sure you want to lug it around, definitely just bring a baby carrier. We find it so much easier to just throw our son in the carrier and go!
Car Seat: We have a lot of info in our Traveling with a Baby post about if you should bring your own car seat or not. If you do decide to bring it, don’t forget a bag for the plane or you can just use an extra large Space Bag like we did.
Medical Kit: You can find a lot of these things at pharmacies in Costa Rica, but the brands will be different and the people working might only speak Spanish. For peace of mind, bring along the essentials like a thermometer, Children’s Tylenol, a nasal aspirator, and antiseptic wipes.
Travel Chair: This is a great little chair for sticking your kid in at the hotel when you need to take a shower or get dressed. We use ours all the time. It is good for travel too because it folds up flat and can fit in luggage.
Night Light: Lights in hotel rooms are usually a little too bright to leave on all night so be sure to pack a night light if your family uses one at home.
Waterproof Camera: You will probably want to bring your regular camera with you to capture all of the great family memories, but we also recommend a waterproof camera. They’re great for the beach and pool and we have gotten a ton of use out of ours.

Fun in the pool with our waterproof camera!
Those are our tips for what to pack when traveling to Costa Rica with a baby. We try to be as minimalist as possible, but have found these to be the essentials for having a fun, stress-free, and safe vacation.
Have a tip or question about packing for a baby? Let us know below. (Subscribers click here to post your comment online.)
Some of the links in this post are connected to affiliate programs we have joined. If you make a purchase using one of the links, we get a small commission. This doesn’t cost you anything extra and helps us keep providing information on this website for free. Thanks for your support!
Looking for more info to plan your family vacation? Check out these posts:
Traveling with a Baby in Costa Rica – Getting priority at the airport, crib and tub availability at hotels, changing stations, and what the culture thinks about babies (they LOVE them!).
Packing for Costa Rica: The Essentials – Now that you have your baby figured out, check out this list for what to bring for yourself.
Safety Tips for Costa Rica – Precautions to take when renting a car, staying in a vacation rental, taking a taxi, etc.
The post Packing List for Traveling with a Baby to Costa Rica appeared first on Two Weeks in Costa Rica.
June 2, 2016
Montezuma: A Bohemian Beach Town
Two Weeks in Costa Rica |
Not long ago, Costa Rica was known for its bumpy dirt roads that led only the most determined explorers to pristine beaches and virgin jungle. While many destinations have been built up significantly since those days, Montezuma has maintained its off-the-beaten-path feel. We first visited this laid back beach town several years ago and recently made another trip. In this post, we’ll give you all the details you need to plan your visit, including recommendations for the best hotels, activities, and restaurants.
About Montezuma
Montezuma is located on the very southern coast of the Nicoya Peninsula. This area of the country is more remote, making Montezuma a little difficult to get to and, therefore, not overly crowded. The people who make the trek are typically a mixture of backpackers, young families, and couples looking for a romantic getaway. The draws of Montezuma are its many quiet beaches, thick forest, and wildlife like monkeys, butterflies, and birds. One of the things that makes it unique is its almost bohemian feel. Though small, Montezuma is a vibrant community, made up of like-minded expats and locals. Adding to this, Montezuma has an impressive selection of restaurants serving food from all around the world (see our picks below).
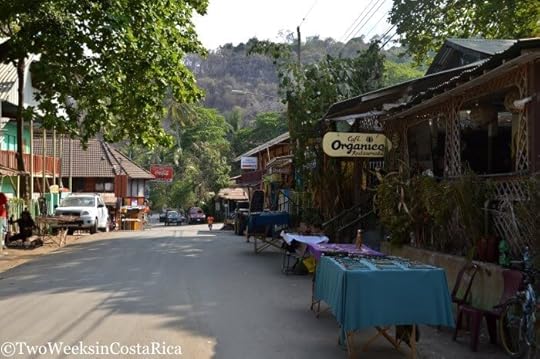
The main drag in Montezuma
Getting There
Visitors have several options for getting to Montezuma. If you’re on a budget, the public bus is the best choice. When we first visited as tourists, we took the direct bus from San Jose and really enjoyed it. Although it is a long trip (around 6 hours), it includes a scenic ride on a ferry. Those wanting to save time should drive themselves or take a shared shuttle. Small planes also fly from San Jose to the nearby Tambor airstrip.
Tips for Driving to Montezuma: If you’re renting a car, the roads are well paved until you reach the Southern Nicoya Peninsula. This area of the country is infamously known for its rough roads, though they are slowly improving. If you’re coming from Liberia International Airport or another destination in Guanacaste, you will encounter a mixture of paved and gravel roads on the drive south along the eastern coast of the peninsula. If you’re traveling from San Jose International Airport or the Central Pacific Coast, you can speed up the trip by taking a ferry from Puntarenas across the gulf and then continuing by car from Paquera. For more information about the ferry, read our post Taking the Puntarenas-Paquera Ferry.
The roads around Montezuma are best traveled with a 4×4 vehicle. Although this is an extra expense, getting stuck on a steep incline because of loose gravel or mud is no fun. To help with the cost, check out our rental car discount.
Activities
Montezuma’s jungle-backed coastline has a lot to offer for activities. While you could spend days staring out at the crashing waves or looking overhead for monkeys, there’s also plenty to do if you want to be active.
Beaches
Just north of town is Montezuma’s most popular beach, Playa Montezuma. Here, you will see people sunbathing on the sand, camping under the palms, or taking a swim in the choppy water. If you are up for a little adventure, continue walking north to explore more beaches and secluded coves. About 15-20 minutes away is a spot marked with dozens of makeshift rock sculptures called cairns and also a small waterfall. If you keep going (bring some water and snacks), you’ll follow a trail on and off the beach to Playa Grande, about 45 minutes away. Playa Grande is a long, beautiful beach and one of the best in the area for surfing. The walk out to Playa Grande is backed by really nice jungle, so keep an eye out for animals and birds.

Playa Montezuma
Cabo Blanco Nature Reserve
For more serious hiking, head to Reserva Natural Absoluta Cabo Blanco. This was Costa Rica’s first national reserve and its creation helped to shape the country’s conservation efforts. Besides being an important part of history, there is abundant wildlife to see, including monkeys and birds. At the end of the trail, you’ll also find a remote beach where you can take a dip to cool off after the long hike. See our post Cabo Blanco Nature Reserve for more info.
Montezuma Waterfalls
Probably the most popular activity in Montezuma are the waterfalls just south of town. The Montezuma Waterfalls are a set of three cascades that have something for everyone. While some just relax or picnic at the largest waterfall (almost 80 feet tall), more adventurous types jump and swim at the other two. The falls can be visited in two different ways. One includes a cool hanging bridge and the other goes up the riverbed. We did both on our latest visit and wrote about it in our post Montezuma Waterfalls: Best Ways to Access.

View from the top of the middle waterfall
Snorkeling at Tortuga Island
A popular tour from Montezuma is a visit to nearby Isla Tortuga (Tortuga Island). This small island is about one hour away by boat and has volcanic rock structures that create favorable snorkeling conditions. There’s also a white sand beach that most operators take you to for a BBQ lunch. The ride out to the island is a tour in itself as you take in the beautiful coastline. Sometimes dolphins, turtles, or other marine life are spotted from the boat too.
Isla de Cabuya
This tiny island sits right offshore in the small fishing village of Cabuya, just south of Montezuma. It’s so close to land that you can even walk to it at low tide! Isla de Cabuya is best known for having a cemetery, and a walk through the gravesites is a unique and spiritual experience. The entrance is marked by a whitewashed archway and throughout the island you will see rows of agave plants and seashells adorning the graves. Be sure to check the tide chart before heading out and don’t get stuck when the water level rises as the island is rumored to be haunted.

View of Cabuya Island from shore at low tide. You walk out from the area to the right.
Proyecto Montezuma
If you’re interested in taking Spanish classes, becoming TEFL (teaching English as a foreign language) certified, or even learning to surf, check out Proyecto Montezuma. We met with one of the founders of this great non-profit on our recent visit and learned so much about the organization’s efforts. Their main goal is to teach English to locals in the area, especially elementary school children so that they are able to get good jobs in the future. By taking one of their language or surfing classes on your visit to Montezuma, you’re helping to support their community efforts. Visit their website for more details.
Restaurant Recommendations
Clandestina
If six different in house craft brews doesn’t lure you up the steep hill to Clandestina, maybe the Latin-flare tapas menu will. This newer restaurant at the Mariposario Montezuma Gardens has an intimate feel that is great for dinner. Not only that, but the small plates are innovative and were some of the most flavorful in recent memory. A few of our favorites were the mango snapper ceviche, street tacos, and pork carnitas with plantain tostones. They also have a lot of vegetarian, gluten free, and dairy free options. Open for lunch and dinner, Tues. – Sat. You can also just stop in at the bar for a beer. Cash only.

Mango Snapper Ceviche at Clandestina
B. Bar Craft Burgers and Beer
This new riverside restaurant located at Hostel Cascada is the perfect place to grab a sandwich or burger after hiking to the waterfalls. You can also quench your thirst with their six types of La Selva beer, another local brewery down the road in Cabuya. Food offerings include beef, fish, veggie or other specialty burgers, as well as chicken or tenderloin sandwiches. These are all served up with fresh-cut regular or yucca fries or onion rings, and a selection of special sauces. There is also pizza and a kids’ menu. Open for lunch and dinner.
Puggo’s
The diverse menu at Puggo’s has something for everyone, from barbequed meats, to sushi, soups, and many Middle Eastern favorites like moussaka, falafel, and tandoori chicken. The BBQ ribs and sushi were very good, but our favorite was the hummus and crispy fried olives appetizer. The atmosphere at Puggo’s is also really nice, with an open air dining area right off the main street in town. Open for dinner. Cash only.

Sushi at Puggo’s
Cocolores
This was one of our favorite restaurants on our first visit to Montezuma and the fact that it is still around is a reflection of the innovative and delicious dishes that they serve. Exotic curries, soups, seafood, kabobs, and high-quality steaks are among the variety of cuisine you’ll find at Cocolores. The atmosphere is great for couples with candlelit tables at the ocean’s edge, but fine for families too. Open for dinner. Closed Mondays.
Chelo Pizzeria
We couldn’t dig up any online reviews of this restaurant right on the corner in town, but decided to give it a try anyway. We’re so glad we did. Formerly L’Angolo Allegro Pizzeria, this place’s Italian cuisine seemed really authentic. They have a large pizza and bruschetta menu as well as salads. We tried the bruschetta with locally smoked fish and would go back just for that. The pizza was also very good. Open for lunch and dinner. Closed Thursdays.

Pizza and bruschetta at Chelo
Ice Dream
Head to this coffee shop in the center of downtown for a quick pick-me-up or meal. Their expressos, lattes, cappuccinos, and iced coffees will give you a nice jolt. They also have casual food like baked goods, croissants, breakfast sandwiches, salads, and veggie rollups as well as omelets and gelato. With a good Wi-Fi signal and A/C, you could easily spend a couple of hours sipping some java or having a long lunch.
Hotel Recommendations
Budget Hotels
Montezuma Pacific Hotel
On a visit to Montezuma a few years ago, we arrived in town without a hotel reserved. We were lucky to find a room at Montezuma Pacific Hotel. This is a simple, no frills hotel but the rooms have everything you need, and the owner, Carlos, is very friendly. The hotel is located on a quiet side road but is only a minute walk to restaurants and shops. Double rooms, including A/C and hot water, around $50. Check Rates and Availability Here.
El Mariposario Montezuma Gardens
El Mariposario Montezuma Gardens has a lot to offer other than just the hotel. It houses the butterfly garden, which you can access for free as a hotel guest, and also Clandestina restaurant, which brews its own craft beer. Finding out that we could grab a delicious craft brew at any time of day was all we needed to know when picking our lodging for Montezuma. Rooms are simple but we found ours on the second floor to be quite comfortable. $50-70, includes a good breakfast. Check Rates and Availability Here.

Upstairs room at El Mariposario
Luz de Mono Hotel
Luz de Mono is a good value for the area. The hotel is located right by the beach and close to town, yet is nestled in the rainforest so nice and quiet. Wildlife like monkeys and iguanas often visit the grounds. The property has 12 rooms and casitas. All have fans only so consider another option if you would like A/C. $50-100. Check Rates and Availability Here.
Mid-Range Hotels
Amor del Mar
Amor del Mar is a nine room hotel just outside town and directly across from the river that leads to the Montezuma Waterfalls. The property faces the ocean and has several comfortable areas for lounging and taking in the view. Rooms are rustic but nice and most have private verandas. $90-150, includes A/C. Check Rates and Availability Here.
Hotel Amor del Mar
Casitas Sollevante and Casa Frangipani
These are separate properties located on the same road, up a hill outside town. They both offer amazing ocean views and are good options if you’re looking for some privacy. Casa Frangipani ($130-160 double occupancy) has four contemporary villas set in the jungle. Casitas Sollevante is a slightly cheaper option ($80-150), and has a mix of standard rooms, villas, and houses. Both are best accessed with a rental car. Check Rates and Availability for Casa Frangipani and Casitas Sollevante.
High-End Hotels
Ylang Ylang
Ylang Ylang is the most luxurious option in Montezuma. Located on an isolated part of the beach north of town, this resort offers private bungalows for a romantic couple’s getaway as well as family suites and tent cabins. As we toured the beautifully landscaped grounds, we saw wildlife like monkeys, birds, and agouti. To make it even more appealing, the property overlooks a secluded beach. There is also an onsite pool and a restaurant that focuses on organic, healthy cuisine. $160-420 double occupancy, includes breakfast and dinner. Check Rates and Availability Here.

View from a common area at Ylang Ylang
If you’re looking for a beautiful place to relax and unwind, the beaches and jungle of Montezuma may be the perfect fit. Although it may seem out of the way, it is actually a great place to start your trip in Costa Rica. From Montezuma, you can easily head north to more laid back beach destinations like Samara or Nosara, or grab the ferry to busier beach towns like Jaco or Manuel Antonio.
Have a question about visiting Montezuma? Ask us below. (Email subscribers, click here to ask your question online).
Some of the links in this post are affiliate links. If you book a hotel using one of the links, we receive a small commission at no extra cost to you. Read our Privacy Policy for more information.
Check out the links below for more practical info for planning your trip to Costa Rica:
Costa Rica and Mosquitoes: Tips to Prevent Zika, Dengue, and More – Current info on the Zika virus, links to find more specific data, and recommendations for the best repellents to use on your trip.
Simple Spanish for Visiting Costa Rica – Key words and phrases for those times when someone only speaks Spanish. Scenarios include greetings, ordering at restaurants, taking the bus or a cab, and more.
Best Hotels Near SJO – We’ve spent a lot of time staying at and touring different hotels near San Jose international airport. Read our recommendations for the best hotels here.
The post Montezuma: A Bohemian Beach Town appeared first on Two Weeks in Costa Rica.
May 24, 2016
Samara Trails: Exploring the Tropical Dry Forest
Two Weeks in Costa Rica |
The town of Samara in Costa Rica’s Guanacaste region is probably best known for being a chilled-out beach destination. But in the hills above the sand-sprinkled streets is an amazing nature experience waiting to be had. If you are up for some moderately difficult hiking, a visit to Samara Trails’ Werner-Sauter Biological Reserve is an activity you won’t want to miss. In this post, we’ll tell you why this protected swath of tropical dry forest is so important and let you know how to plan your visit.
About the Werner-Sauter Biological Reserve
The Werner-Sauter Biological Reserve is a 140 hectare (346 acre) private reserve that was once a family farm. As was typical for the region, they grew sugarcane and mangoes and also had cattle and horses. During Costa Rica’s environmental movement in the 1970s and 80s, large sections of the country’s rainforest and cloud forest were being protected. Nothing was being done for the tropical dry forest, however. Concerned about the future of this rich and important ecosystem, the family began to turn their working farm back into the natural forest that existed centuries earlier. Some 30 years later, the land is making great progress regenerating and is attracting a plethora of wildlife in the process.
Today, the family’s next generation has opened up the reserve to visitors. About five years ago, Alvaro Teran, a grandson of the original owners, cut some trails on the property and started Samara Trails. He began offering guided tours about the natural history of the area and the local flora and fauna. Now other guides have joined in to help him. Alvaro also started the Not Gone Yet Project. This is an effort to replace mango trees and other remnants of the old farm with endangered hardwoods native to Costa Rica (more on this at the end of the post).
The Trails
Our adventure at the Werner-Sauter Reserve began with our guide, Hanzel, enthusiastically jumping out of the van and gathering our small group in a circle. He was working quickly to get us started, trying to beat the heat, which would creep into the mid-90s F (mid-30s C) later in the day. Looking around, there wasn’t anything overly impressive about the surrounding forest. In fact, it looked rather dry and desolate. Leaves littered the ground, and because it was the very end of the dry season (April), many of the trees were naked from the lack of rain.
Within minutes, however, Hanzel was changing everyone’s perspective. Without walking more than a few steps, he pointed out a group of sac-winged bats perched under a thatched roof. These bats, he explained, fed mostly on insects. Minutes later, Hanzel was showing us a family of Pacific-screech Owls, including a baby, hiding in some bamboo.

Pacific Screech Owl
The tour continued into the woods, eventually up some steep paths to a series of lookouts. Along the way, Hanzel taught us about some of the special trees growing beside the trail. We saw a balsa, used in shipbuilding, and then a rosewood, which is ideal for furniture and instrument making. Hanzel explained that these and other trees are somewhat rare in the area because they had been heavily logged for their lumber over the years.
We also saw a lot of wildlife thanks to our guide’s sharp eyes. Howler monkeys, birds like the Turquioise-browed Motmot and Long-tailed Manakin, and even some sleeping tropical porcupines, were a few of the highlights.

Porcupine sleeping in a tree
The best part of the fairly difficult hike, in our opinion, was the two viewpoints. The first one appeared to show nothing more than a nice view of the forest below, but we learned something really important. In the distance just beyond the border of the reserve was a gigantic teak tree plantation of almost 1,600 hectares (4,000 acres). These trees, native to India, were set in neat rows with nothing growing in between them. Apparently the leaves of teak are filled with tannins that local fungi and bacteria can’t break down. This essentially creates a stifling blanket of leaves on the ground that prevents any other plant species from growing. Even from far away we could see right through the rows of trees to the ground beneath.
In stark contrast, Hanzel pointed out that the land within the reserve was thick with different layers of vegetation. Many of the taller trees had lost their leaves because of the dry season, but a whole different layer of plants was growing underneath. And it was that shrubby layer that was preventing erosion and providing food and habitat for all the animals we saw. Hanzel then asked us how many porcupines and monkeys we thought lived in the neighboring teak forest, leaving us to ponder the importance of the reserve as we continued up hill.
The teak plantation is the more brown mountain in the far left corner. The reserve stretches to the top of the first mountain and is much more lush.
A few minutes later, we reached the second and final viewpoint. This was the scenic viewpoint that we had been picturing. From 205 meters (672 feet) above sea level, we had a bird’s eye view of the sweeping Pacific Ocean. We could even see the beaches of Samara and Carrillo far below, separated by a wide point. With resting benches and a nice breeze off the ocean, the whole group really enjoyed spending some time at this lookout.

Outstanding view of Playa Samara and Playa Carrillo from above
Trail Conditions
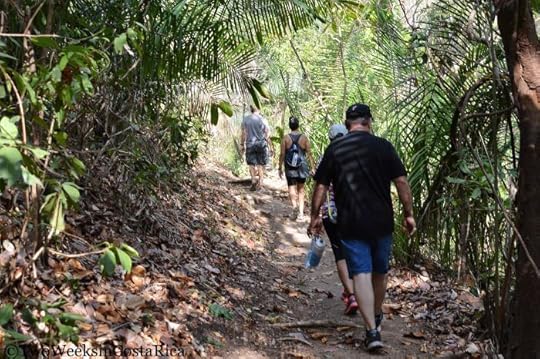
The 5.5 km (3.4 mile) hike getting to this point was fairly strenuous. The trails were in good condition during our visit, but there were some rocks, roots, and rustic steps to navigate. We would categorize the hike as moderately difficult, mostly because of the intense heat, but also because there are some steep stretches leading to the viewpoints. In our group, there was a couple in their early 60s, another in their 50s, and Jenn and me with our five-month old in the baby carrier. We all did fine overall, but one of the couples needed to take frequent breaks during the climb up because of the heat. We would recommend this hike only to those who are conditioned for moderate hiking as even an easy hike is fairly difficult in hot weather. Even though it was a tough hike, everyone agreed by the time we made it to the viewpoint that it was well worth the effort.
What to Bring
Sun protection: A hat and sunscreen. This is especially important during the dry season (December-April) when there isn’t much shade.
Insect repellant: Even though it was dry during our visit, we did encounter some mosquitoes on the trail. We like natural options like these, but Deet products and those containing Picaridin are also very effective.
Hiking boots, good gripping sneakers, or hiking sandals like Keens.
A large bottle of water (1 liter per person recommended) or Camelbak. Samara Trails provides a small bottle of water and drinks for afterwards, but you will need more during the hike.
The oldest couple was prepared with a pouch of ice and some facecloths to share, which turned out to be a great way to keep baby Sam and everyone else cool. For the rest of our trip, we used our dry bag as an ice bag, which worked out great because it kept things cooler and didn’t leak.
Camera and/or Binoculars
Tour Information
Tours are 2-3 hours and can be booked through Samara Trails. They offer a morning (7:00 a.m.) and afternoon (3:00 p.m.) tour, which includes a guide, hotel pickup, and drinks and snacks (we had cookies and fresh fruit).
Price: $40 Adults, $30 Children 12 and under. Minimum of 2 people.
Those wishing to further contribute to the Not Gone Yet reforestation project can do so by buying a Samara Trails T-shirt. The designs are pretty cool and doing so sponsors the planting of a native and endangered tree in your name. T-shirts are available at the Samara Adventure Company tour office in downtown Samara for $30. Alvaro will email you the details about your tree after you make the purchase. Here is a picture of the Ron Ron tree that we sponsored for Sam!

Ron Ron Tree we sponsored
* * *
If you are looking for a challenging hike and some nature exploration during your stay in Samara, we highly recommend the Werner-Sauter Biological Reserve through Samara Trails. We learned so much about the tropical dry forest and it really made us appreciate this particular area of Costa Rica even more.
Special thanks to Samara Trails for hosting us on the tour. As always, all opinions are our own.
Have you ever hiked through the tropical dry forest? Let us know what you saw in the comments below (Email subscribers click here to post your comment online).
Looking for more information to help plan your trip? Read these posts:
Packing for Costa Rica – We covered some helpful items you might want for this hike but this post gives you all the essentials for your visit to Costa Rica.
Costa Rica Wildlife Guides: Our Picks – Are you the type who wants to know specifically what type of monkey or bird you are seeing out on the trail? Check out these carry-along field guides that can slip right into your day pack.
A Taste of Costa Rica: 7 Traditional Foods to Try – Costa Rican cuisine can be as diverse as the forest. Check out these seven traditional dishes that you should try on your vacation here.
The post Samara Trails: Exploring the Tropical Dry Forest appeared first on Two Weeks in Costa Rica.
May 18, 2016
Traveling with a Baby in Costa Rica
Two Weeks in Costa Rica |
Since having our son, Sam, last December, we have learned a lot about traveling with a baby in Costa Rica. Although we had already lived here and traveled the country many times before, things changed a lot with him. We went from carrying the bare minimum in backpacks to having several pieces of luggage bulging with our new “bare” necessities. We wouldn’t have it any other way though and have loved sharing this amazing country with him. Sam has joined us on day hikes through the jungle and weekend excursions to the mountains. Most recently, we took a two-week road trip up the northern Pacific coast. In this post, we’ll tell you what to expect when traveling with a baby in Costa Rica based on our experiences.

General Info
Costa Rica is a wonderful place to travel with a baby. First off, it is very safe. There isn’t a lot of crime and you don’t have to worry about if the food and water is clean. If your child is on solid foods, feel free to let him or her taste the exotic fruits and even sample the local specialties. There are also many baby-friendly things to do. From visiting the national parks and reserves to hanging out at the beach, there are plenty of places to bring a baby. Costa Rica is also a fairly small country so it is easy to plan a trip that doesn’t require too much driving.
Another important thing to note is that the country is extremely family oriented. In particular, the culture loves babies and everything to do with them. You won’t get far on your trip before a friendly Tica (Costa Rican woman) comes up to you, oohing and ahhing about your gorgeous baby. She may even ask to hold him or her (more on this below). Once you have an understanding of how family oriented the country is, some of the idiosyncrasies about traveling with a baby here make a lot more sense.
Airport
One of the big benefits of traveling with a baby or child in Costa Rica is that you get priority at the airport. After you get off the plane in Costa Rica, you have to go through customs and immigration before you are allowed to enter the country. A lot of times, especially at San Jose’s busy international airport, this line is long and can take a while to get through. If you have kids, you skip the line altogether and get to go to a special priority line.
Last time we flew into San Jose, I was carrying Sam in the baby carrier. We knew about the special line for families but it was roped off at the time so we weren’t sure what to do. All of a sudden, a friendly Tica working saw us coming and stopped us from entering the regular line. She opened the family line, and with a smile, directed us to the immigration agent. We got right through immigration, with no waiting involved. The family line is definitely an awesome benefit of traveling with a baby in Costa Rica.
Hotels
Most hotels in Costa Rica are small to medium in size and often family run. While you can find resorts that will have everything you need for traveling with a baby, part of the fun of visiting Costa Rica is staying at some of the locally owned places. On our recent road trip, we stayed in six different small hotels. Our son was four-months old at the time so we needed a crib for him and also needed something for bath time.
We used Booking.com to make our reservations like we usually do. The good thing about this site is that you can see, first off, if a hotel allows children at all (some that we looked at didn’t) and if they have cribs available. You can also send messages to the hotel through the website to confirm crib availability, just to make sure one will actually be available during your stay. This may not sound like a big deal, but the fact is, a lot of hotels in Costa Rica don’t have great information online. Since a lot of them are smaller, they either don’t have a website or it is very simple. Booking.com is nice because most of the hotels in Costa Rica are on there and it’s easy to see all the information you need in one place without having to search on several different websites.
About half of the hotels we stayed at had portable cribs (Pack ‘n Plays). If you need a crib, obviously make sure to stay at a hotel that offers them. Many of the larger hotels (especially chains) have them and some smaller ones do too. If you end up staying somewhere without one, you could always bring or purchase a simple Pack ‘n Play when you get here. However, keep in mind that depending on where you’re visiting, it may not be convenient to find one and it will likely be expensive.

Portable crib in our hotel room
If your baby is too small to take in the shower, you’ll also need to be sure your hotel room has a tub. Tubs are not very common in Costa Rica; showers are the norm. Higher end hotels are the most likely to have a shower with a tub. If your hotel doesn’t have one, an easy solution is to buy an inexpensive plastic tub when you get here. These are readily available in baby stores and also larger big box stores like MaxiPali (a Wal-Mart company).
Restaurants
Most, but not all, restaurants have high chairs available. They are usually not the plastic ones that you’re used to, but handmade wooden ones with Tico flair.

High chairs at a restaurant in Samara
Earlier we mentioned about locals wanting to hold your baby. One of the places that this happens most often is in restaurants. Especially in smaller towns, servers and sometimes patrons will come over and ask (in Spanish) if they can hold your baby. They put their arms out and can be somewhat insistent, making it difficult to say no. Part of it is that they are being nice and want to give you the chance to eat (if you’re holding the baby) and part of it is simply that they love kids! At first, we were really freaked out about this but now actually kind of like it. Sam loves meeting new people and we think being held by random ladies telling him how adorable he is could be part of the reason. Usually he has made friends with everyone, including the kitchen staff, by the time we leave.

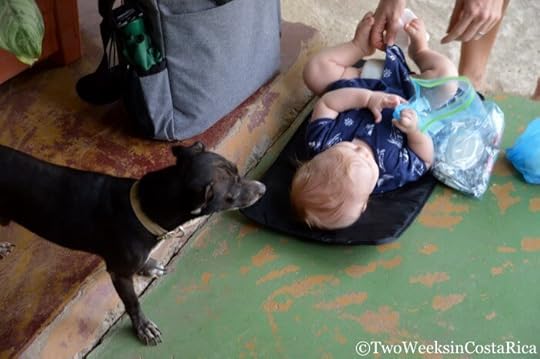
Free babysitting in Monteverde
Car Seats
Car seats or booster seats are mandatory in Costa Rica for children 12 and under (up to 57 inches/145 cm or 79 pounds/36 kg). The country has specific laws for the different age groups.
Infants up to one year (up to 28.5 pounds/13 kg or 29.5 inches/75 cm) are to be rear facing.
Babies and children ages 1-4 (20-40 pounds/9-18 kg or up to 43 inches/110 cm) can be front facing.
Children ages 4-6 (33-55 pounds/15-25 kg or up to 57 inches/145 cm) are to be in booster seats with a back rest.
And ages 6-12 (48.5-79 pounds/22-36 kg or up to 57 inches/145 cm) must be in a backless booster seat.
You can read the specific requirements here in La Nacion (translated from Spanish on this website).
Although Costa Rica has strict requirements, they are often not enforced. You will see kids unrestrained in the back or even front seat of a car. Families even sometimes ride with their kids on motorcycles when going across town. Still, as a visitor, make sure to be in compliance, as fines for not following the car seat laws are ₡198,000 or about $400.
Car seats are available through all reputable shuttle van and rental car companies in Costa Rica for free or a small fee. They typically have infant carriers, convertible seats, and booster seats that comply with Costa Rican requirements. Keep in mind, though, that the exact models on hand at any given rental location will vary widely. If you are not comfortable knowing in advance what kind of car seat will be available, we recommend bringing your own. Most airlines don’t charge for checking car seats as luggage and the peace of mind is worth the hassle of lugging your reliable seat with you.
If you are renting a car, check out our discount to save money and get free car seats for your kids.
Changing Stations
One thing that is difficult when traveling with a baby in Costa Rica is the lack of baby changing stations. You will very rarely find them in restaurants, even nice ones. We have seen them once or twice at rest area-type restaurants, but it is unusual. Be sure to bring a travel-size changing pad for diaper changes on the go. We’ve had to change diapers in all sorts of places, outside restaurants, on park benches, and in the back of our SUV. Some kind of covering to put under the changing pad is also a good idea in case you have to do it somewhere dirty like the floor of a bathroom.
Changing time on a restaurant floor
Breastfeeding in Public
While breastfeeding in public in some places is controversial, that is not the case in Costa Rica. In fact, it is the exact opposite here. The majority of moms in Costa Rica breastfeed and do so openly. You will see women breastfeeding while shopping at the grocery store, in restaurants, and on the bus. It is culturally accepted (and encouraged) to not cover up. A fellow expat from the United States who also had a baby in Costa Rica told us that a Tica once asked her why she was covering up. If you’re not used to breastfeeding in public, it can feel weird to do it at first. But if you’re only covering up for other people, you can let loose in Costa Rica. You will notice that instead of turning away, the locals will smile and praise you for it. After all, you’re taking care of that precious little baby—and they love babies!
Packing
We’ve discussed before how difficult it can be to find baby gear in Costa Rica. Basic items like diapers, rash cream, formula, bottles, and pacifiers are readily available if you forget something. Remember, though, that they might not be the brand you’re used to or will be expensive. Anything specialty like organic baby foods, baby sunscreen, etc. is much harder to find outside San Jose. Try to bring everything you will need from home to avoid wasting time on your vacation searching for things. In a pinch, the popular tourist towns usually have small shops that carry at least some baby products. You can also find the basics at most grocery stores.
In the coming weeks, we’ll be posting a packing list of what to bring when traveling to Costa Rica with a baby. (Click here to sign up for our mailing list to receive this and our other posts by email.) That will have tips on the best ways to carry a baby around for activities, what to bring for different excursions like the beach and hiking, etc. But for now, we can’t emphasize enough the importance of bringing two items: sunscreen and insect repellent. Since Costa Rica is at the equator, the sun is extremely strong and your baby will burn quickly. If your baby is old enough (the general guidance is 6 months and up), pack some baby sunblock. You will also want insect repellent if your little one is old enough (generally 2 months and up). Unfortunately, Costa Rica does have those mosquito-borne illnesses that are common in the tropics like Dengue and the Zika virus. Here is a link with some ideas for repellents to keep everyone safe and bite free.
Those are our tips for traveling with a baby in Costa Rica. While vacationing with your little ones isn’t always easy, you won’t regret the extra effort you put in when you see them enjoying all that this amazing country has to offer.
Have a question about traveling with a baby in Costa Rica? Ask us below. (Email subscribers click here to post your comments online.)
The post Traveling with a Baby in Costa Rica appeared first on Two Weeks in Costa Rica.
May 11, 2016
Montezuma Waterfalls: Best Ways to Access
Two Weeks in Costa Rica |
If you’re visiting Montezuma on Costa Rica’s Nicoya Peninsula, chances are you’ll be heading to the Montezuma Waterfalls at some point during your trip. This set of three waterfalls is one of the area’s biggest attractions and for good reason. Not only are the falls themselves beautiful but you can swim in the refreshing pools and even jump from some of them if you dare. In this post, we’ll tell you more about the Montezuma Waterfalls and the two best ways to access them.

About the Montezuma Waterfalls
The Montezuma Waterfalls are a set of three different cascades.
The Top Waterfall is the smallest at only about 15 feet (5 meters) tall, but dumps into a nice deep pool that is perfect for swimming and jumping. How high the jump is depends on where you stand on the rocks, but varies from about 5 feet (1.5 meters) to 15 feet (5 meters). There is also a rope swing on a tree here, so you can hurl yourself into the pool that way too. This is a great place to swim and hang out for an hour or so.

Jumping in using the rope swing at the Top Waterfall
The Middle Waterfall is hidden between the Top Waterfall and the Lower Waterfall. You actually have to swim across the pool of the Top Waterfall to see it. Once you do, you can look down at the roughly 40 foot (12 meter) drop. People do jump from the top of this waterfall—we saw someone do it—but there have been accidents where people have died so we don’t recommend it. It’s cool to see from above, though. Just watch your step when peeking over the edge as sometimes the rocks are slippery.

Looking down at the Middle Waterfall from the Top Waterfall
The Lower Waterfall is the biggest at about 80 feet (25 meters) and also the most visited. This waterfall has a nice pool to swim in while gazing up at the cascading water. During our visit, it hadn’t rained for months so there wasn’t much flow and the water in the pool was quite murky. Still, it was very pretty and there are smooth rocks to relax on and some trees for shade. It’s not safe to jump from the top of this waterfall because of the dangerous rocks, so if you’re looking for a thrill, plan to visit the upper falls.

Lower Waterfall during the dry season (April)
Note: While researching our visit to the waterfalls, we were a little confused about how to best see all three. To clear things up, we visited them twice by two different access points to see how they differed.
Accessing the Montezuma Waterfalls: The Two Options
There are two main options when hiking to the Montezuma Waterfalls, the Riverbed Trail and the Canopy Tour Trail.
The Riverbed Trail
Note: This is the easiest way to get to the Lower Waterfall, which is the biggest cascade and the one that most people visit. Getting to the other two from this direction is a hard hike up some very steep stairs.
The Riverbed Trail is probably the best one if you just want to visit the Lower Waterfall. This waterfall is popular because it is the biggest, has the shortest hike, is free (except parking), and is closer to town. You don’t need a car to get here if you’re staying near downtown Montezuma. Here’s how it works:
From downtown Montezuma, walk or drive about 0.3 miles (0.5 km) south to the small bridge that crosses the Rio Montezuma. Just after the bridge there is a trail and parking area on the right. Parking costs ₡1000 (about $2), otherwise there is no entrance fee. The trail is dirt at first but soon enters the rocky riverbed. During the dry season, there are plenty of different ways to walk along the boulders and rocks or next to them, but when it is rainier and the water levels are higher, the hike can be much more difficult. At a couple of tricky spots, there are ropes along the riverbank to help you pass. Some of the rocks are also very slippery so be sure to bring footwear with good tread that you don’t mind getting wet like Keens or Tevas. After hiking for about 20 minutes, you will reach the Lower Waterfall and pool.

Riverbed Trail to Lower Waterfall
To access the two upper waterfalls from the riverbed, look for a rustic set of stairs about 100 feet (30 meters) before the lower waterfall on your left. This is a steep climb with around 200 stairs and best described as moderate to difficult. After about 20 minutes or so, you’ll reach a small structure at the top. An employee from Sun Trails (the zip-line company that owns the property) may ask for a fee of ₡1000 ($2) per person to keep going (no one was there at the time of our visit in April). After the structure, there are about 80 more steps going down to the river (5-10 minutes). You’ll come out at the Top Waterfall and then can swim to the Middle Waterfall if you want.

Stairs to the upper waterfalls
Tip: While there is a very rustic and somewhat vertical trail to the right of the Lower Waterfall that also leads to the top, we recommend taking the stairs. The other trail is very extreme and somewhat dangerous.
Canopy Tour Trail
Note: This is the easiest way to access the two upper waterfalls. Getting to the Lower Waterfall from this direction takes more effort because you have to climb down and back up a very steep set of stairs.
The Canopy Tour Trail for accessing the Montezuma Waterfalls requires a car or at least a ride. This way brings you through the property of Sun Trails, over two of their hanging bridges, and then to the Top Waterfall. From there, you can climb on the rocks and then swim across the pool to see the Middle Waterfall. If you want to see the Lower Waterfall from this direction, you will have to make a steep climb (almost 300 steps each way) or access the Lower Waterfall on a separate occasion using the Riverbed Trail.
We did this trail carrying our four-month-old son, but only to the upper falls. We didn’t do the treacherous stairs. This way was better, in our opinion, because we didn’t have to climb on the slippery rocks of the Riverbed Trail with him in the baby carrier. The trek to the two upper falls would also be great for older kids who can do some moderate hiking on their own. Here’s how it works:
To get to the canopy tour company, drive south from downtown Montezuma about 0.4 miles (0.6 km), crossing the bridge, and take a right after Hotel Amor del Mar. Go up the steep hill (4×4 recommended), past the Butterfly Garden until you reach the Sun Trails Canopy/Zip-line on your right. Pay the entrance fee for the self-guided hike ($4/pp) and they will explain about the trail.
This way starts out with a couple of awesome hanging bridges where you can walk along the treetops and look down at the forest. From there, the trail meanders downhill, with some uphill and flat portions, for about 20 minutes before reaching the Top Waterfall. There are lots of rustic steps and tree roots along this trail but it is only a moderate hike. Along the way, we saw a lot of birds like the Turquoise-browed Motmot, Scarlet Tanager, and several Long-tailed Manakins. Sun Trails also has put out some signs that help you learn about the local flora and fauna.

Hanging Bridge on trail maintained by the zip-line company
After you have checked out the two upper falls, if you are up for it, you can climb the almost 300 stairs down to the lower waterfall. This is definitely a challenge, especially on the way back, so only do it if you are in pretty good shape.
Other Helpful Information
Sun Adventures is open from 8:30 a.m. to 4:30 p.m. if you want to access the waterfalls via the Canopy Tour Trail. They also offer a zip-line tour that includes time at the waterfalls for $45/pp.
You can access the falls by the Riverbed Trail at any time; there are no hours.
Don’t visit the waterfalls too late as it’s no fun trying to get back in the dark. Sunset is around 5:30 every day in Costa Rica.
Bring plenty of water and snacks for the trail. It can be really hot and you’ll definitely burn some calories on the hike.
Don’t forget the footwear. We recommend something like Keens or Teva hiking sandals that you can get wet.
Be careful of high waters and strong currents. River conditions can change quickly because of rain so if you notice a sudden change, it’s best to get out of the water immediately.
If you are visiting during the rainy season (May through November) and planning to take photos, think about if you want a LifeProof case for your phone or a dry bag to keep things safe and dry. A GoPro or regular waterproof camera (we love our Olympus Tough) is also fun to bring to waterfalls and you don’t have to worry about it getting wet.
Most importantly, don’t jump from the waterfalls unless you are 100% sure it is safe. Ask a local, follow someone’s lead, or play it safe and don’t jump if you aren’t sure. The bigger hospitals are hours away and getting an injured person out on the rustic trail is no easy feat.
No matter how you access the Montezuma Waterfalls, the experience getting there is very rewarding. The area is beautiful, surrounded by thick jungle and amazing wildlife, and there is nothing like swimming in a refreshing pool after a strenuous hike!
Have you visited the Montezuma Waterfalls? Leave us a comment below with your experience (Email subscribers click here to post your comment online.).
Looking for more info for your trip to the Nicoya Peninsula? Check out these posts:
Taking the Puntarenas-Paquera Ferry – Going to the Nicoya Peninsula from San Jose or the Central Pacific? Read this post to learn how you can cut off some driving time while you relax on a ferry across the gulf.
Cabo Blanco Nature Reserve – This was Costa Rica’s first nature reserve and when you visit you will realize why it’s so important. We saw some spectacular wildlife along the moderately difficult trails here and you can swim at the secluded beach too!
Best Waterfalls in Costa Rica – Looking for more great waterfalls to visit on your trip to Costa Rica? Here are seven others that you shouldn’t miss.
The post Montezuma Waterfalls: Best Ways to Access appeared first on Two Weeks in Costa Rica.
May 4, 2016
Taking the Puntarenas-Paquera Ferry
Two Weeks in Costa Rica |
With Costa Rica’s zigzagging roads and spread out destinations, getting from point A to point B can be either half the fun or the most frustrating part of your trip. But if you’re planning to visit areas on Costa Rica’s southern Nicoya Peninsula like Montezuma, Mal Pais, or Santa Teresa, one great option is to take the Puntarenas Ferry. This ferry accommodates passengers but you can also take your car. In this post, we’ll explain when using the ferry makes sense and give you all the details to make your ride as stress free as possible.

About the Puntarenas Ferry
The Puntarenas Ferry travels between the ports of Puntarenas on the Central Pacific Coast and Paquera on the Nicoya Peninsula. The ride across the bay is 11 nautical miles and takes about 70 minutes. The large ship holds 170 cars and up to 700 passengers but is rarely full. Because of the size, the ferry is very steady in the water and you can hardly feel any movement from waves or winds. The views along the way are beautiful too and make for a nice break from driving or riding the bus. Our first ride on the Puntarenas Ferry was back in 2007 when we took the public bus from San Jose to Montezuma. On a more recent trip, we had a rental car and chose to take the ferry to save time driving.

Tip: Riding the ferry can cut off hours of travel time if you are accessing the Southern Nicoya Peninsula from the Central Pacific Coast/San Jose or vice-versa. If you are coming from or going to Guanacaste or points up the coast, it probably makes more sense to drive the roads along the peninsula instead.
How it Works
Taking the Bus
If you are riding a direct bus between San Jose and Santa Teresa or Montezuma, your driver will pull up to the ferry landing in either Puntarenas or Paquera. You’ll then get a ticket from the driver for the ferry (included in the bus fare), get your bags from under the bus, and wait in a designated area while the bus parks on the boat. When it’s time to board, you’ll walk onto the ferry with your bags and then board the same bus again on the other side. If you are taking collective buses to Puntarenas or Paquera (buses that make local stops between destinations), read the instructions below for how to buy your ticket at the ferry dock.
Boarding the Ferry with a Car
If you’re planning to take your car across, the process is a little different and there are more steps. Below we’ll give instructions for both the Puntarenas Ferry terminal and the Paquera Ferry terminal.
From Puntarenas
In Puntarenas, much of the city is built on a long point that juts out into the ocean. To get to the ferry terminal, just follow the main road, Avenue Central, all the way to the end of the point and take a right. The terminal is located around the corner from a small water park and lighthouse. This area is a little confusing since the docks are hard to see and there are a lot of different buildings. People are also likely to come up to you and offer their help. They do this in exchange for a tip at the end. The process is easy enough to do on your own, though.
The first step is to get your car in line (You do this before you buy tickets). Look for a yellow gate and blue sign (pictured below) that says Entrada de Pasajeros/Passenger Entry. To the right of this gate/sign, there is a large paved area where the cars, vans, trucks, and buses line up. Don’t be scared, just drive in and get in line. Stay to the left if there is room. A ferry employee will guide you to the right spot and hand you a laminated ticket. You can turn off your car at this point.
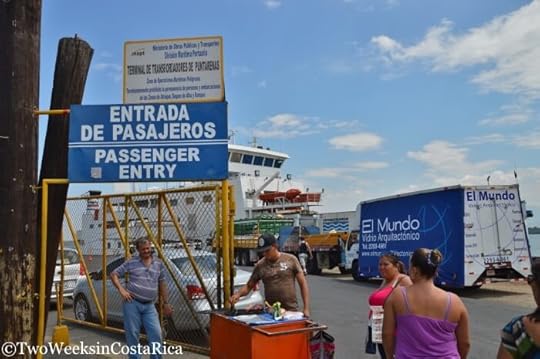
Look for this gate when parking your car
Note: If you are running late or it is very busy (weekends/holidays), sometimes the line can extend down the street. Try to arrive at least 45 minutes early to avoid having to rush.
Once you have parked, you will need to buy tickets for each person in your car and the car itself. To do this, go directly across the street to the small building that says Boleteria Ferry a Paquera (pictured below). Only one person has to go, but be sure to bring the laminated ticket that you received for the car.

Ticket Counter
At the Boleteria building, you will probably have to wait in a short line to get your tickets. The fares are displayed on the wall (see the end of this post for fares too). They only accept cash and do not take $50 or $100 bills. They will take the laminated ticket and give you a paper one for the car and one for each passenger. Once you have your tickets, you can return to your car. They prefer that only the driver remain in the car during boarding so other passengers usually get out and walk onto the ferry when the time comes. If you have young kids or older passengers though, they will probably allow it. As you drive on, ferry employees will guide you to a parking spot on the ship. Lock everything up and go find your group on the upper decks.
Parking area
From Paquera
The ferry terminal in Paquera is much smaller and less hectic than the one in Puntarenas. The process is almost the same too. To get to the ferry terminal, you take the road (Route 621) past the Pali grocery store and gas station in Paquera and follow it to the end. When you arrive, park in one of the lines with help from the ferry employee and go inside the building to buy your tickets. Only one person has to go; the other passengers can stay with the car/luggage. Inside the building, look for the blue ticket counter (pictured below).

Ticket counter in Paquera
At the counter, make sure to buy a ticket for your car and each passenger. The fares are displayed on the adjacent wall (see the end of this post too). They only accept cash and do not take $50 or $100 bills. Once you have your tickets, you can return to your car. If you have extra time, there is a cafeteria-style restaurant in the building on the Paquera side that sells food and drinks. There’s a restroom too.
As in Puntarenas, they prefer that only the driver remain in the car during boarding so other passengers usually get out and walk onto the ferry when the time comes. If you have young kids or older passengers though, they will probably allow it. When it is time to board, ferry employees will guide you onto the boat to a parking spot. Lock everything up and go find your group on the upper decks.
The Ferry Ride
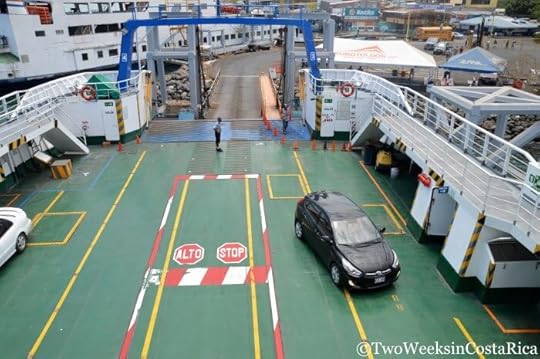
The ferry has an open parking deck on the bottom and two upper decks for passengers and crew. If you’re taking your car across, you’ll go up to the passenger decks after you park. The same is true for the bus. No one except crew is allowed on the vehicle deck during the trip so that your belongings are kept secure. Nonetheless, it is always a good idea to carry your valuables (cash, passports, etc.) on you.
The top deck has a canopy to help block the sun but is otherwise open to the elements. This is the best place in our opinion to catch great views of the gulf and small islands. There is a snack bar on this deck that sells basic things like chips, empanadas, water, beer, and sodas.

Upper deck
Tip: Be careful of the sun. Even with the shade of the canopy, we got a sunburn during the 70-minute ride. Also if you are wearing a hat, hold onto it. We saw a lady’s brand new sun hat get blown overboard by the wind.
If you’re not up for the open air, the middle deck is fully enclosed with air conditioning, a larger snack bar that has more types of food and drink, and TVs with kid’s shows playing. The seats are also more comfortable, with some couch-style seating. Each deck is also handicap accessible via a small elevator; just ask a ferry employee for help.

Enclosed second deck
Puntarenas Ferry Schedule
Leaves from Puntarenas at: 5:00 a.m., 9:00 a.m., 11:00 a.m., 2:00 p.m., 5:00 p.m., and 8:30 p.m.
Leaves from Paquera at: 5:30 a.m., 9:00 a.m., 11:00 a.m., 2:00 p.m., 5:00 p.m., and 8:00 p.m.
Ticket Prices
Adults: ₡810 (about $1.50)
Children Under 12: ₡485 (about $1)
Regular Sized Vehicle: ₡11,400 (about $21)
Motorcycle: ₡3,400 (about $6)
Bicycle: ₡2,200 (about $4)
Note: To double check the schedule or rates, visit the Naviera Tambor website.
If you’re looking to cut some driving time off your next trip to the Nicoya Peninsula, we highly recommend taking the ferry between Puntarenas and Paquera. The ride is beautiful and you won’t regret it.
Have you taken the Puntarenas Ferry? Leave us a comment about your experience below (Email subscribers click here to post your comment online).
Looking for more information to help plan your trip to the Nicoya Peninsula? Check out these posts:
Road Trip to Mal Pais: Why we loved our road trip to Mal Pais. Awesome beaches to check out, an overview of restaurants and activities, and how to get to this remote destination.
Driving in Costa Rica: Detailed guide about driving in Costa Rica. How to handle river crossings, night driving, GPS and apps for maps, keeping your car secure, and more.
Rental Car Discount: Find out how to save on a rental car for your trip, plus extras like a free second driver, free drop off at hotels, and discounted GPS.
The post Taking the Puntarenas-Paquera Ferry appeared first on Two Weeks in Costa Rica.
April 20, 2016
Spying on the Rainforest: Using Trail Cameras in Costa Rica
Two Weeks in Costa Rica |
Almost everywhere we go in Costa Rica, we have a camera strung around our neck, ready to capture the diverse wildlife at a moment’s notice. But on all the roads, trails, paths, and parks we visit, we know that there is a lot more hiding that we just can’t see. Inspired by this, we decided to find out what kinds of animals were lurking in the jungle around our own backyard. In this post, we’ll tell you how we used two Browning Trail Cameras to spy on the wildlife in Costa Rica and let you know what creatures we discovered.

About the Trail Cameras
Trail cameras, sometimes called camera traps, aren’t anything new in Costa Rica. Researchers have been using various forms of them for decades to learn about animals, like the coati (pictured above). Essentially, these cameras sit in one location, usually strapped to a tree, and use sensors to snap pictures or video of whatever moves in front of them. The great thing is that trail-camera technology has come a long way over the years. Sophisticated units are now much more affordable to everyday nature enthusiasts like us. We’ve wanted one of these cameras for a while, and thanks to Browning Trail Cameras who sent us two of their most popular models, we’ve been spying on wildlife for a few months now.
Here are the two models we’ve been playing with:
Browning SPEC OPS Series – model BTC-8FHD (pictured below on the left)
Browning Recon Force Series – model BTC-7FHD (pictured below on the right)

Both of these trail cams look almost identical and shoot 10 MP images, full HD video with sound, and have other fun features like rapid-fire shooting and a time-lapse function. The key difference between them is the flash. The Recon model uses a standard infrared flash that is visible to people or animals at night, while the SPEC OPS model has an invisible infrared flash. Since the invisible flash doesn’t illuminate the scene as much, nighttime shots sometimes aren’t as clear with the SPEC OPS model. Invisible flash is better for those who are concerned that someone might discover their cameras at night. Some people also think that the visible flash could scare off animals. As you’ll see below, though, the wildlife we captured didn’t seem too shy anyway.
Setup
When we received the trail cameras from Browning, we could hardly wait to set them up. Luckily, it was really easy, essentially putting in some batteries and a memory card, and setting the time, date, and shooting mode.
Tips: One drawback of trail cameras like these is the batteries they use. Each of ours required eight AAs. Since batteries are so expensive in Costa Rica (about $1 each), we had some rechargeable ones brought down and they have worked out great. Another thing to consider is the speed of the SD card you buy. If you plan on using the camera to shoot in rapid-fire mode or HD video, faster SD cards like these will perform better on capture and playback.
Placement
Part of the fun with these cameras was getting them out in the jungle and figuring out where to put them. The area behind our house is very remote and there is hardly ever anyone walking through. Still, we weren’t sure what animals would be around and what parts of the forest they would be traveling through. After trying out the cameras on a main trail without much luck, we decided to go deeper into the woods and cut a new trail with a machete. While doing this, we found some faint animal trails and prints—a good sign that we were in the right spot.
After we found some spots that seemed hopeful, we attached the cameras to trees. When you do this, you can use the trail cam’s test mode to see if your angles are right. The motion sensor displays a small red light to tell you (when you wave your hand) if you are in the field of view. This was a little tedious but important.
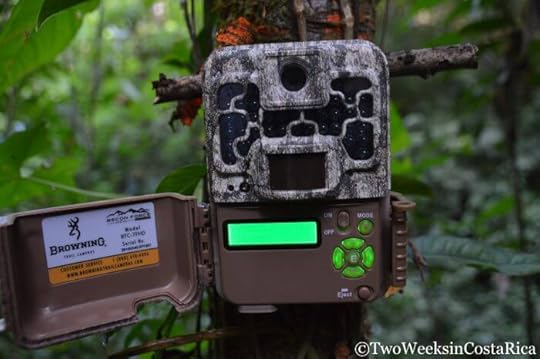
The Browning Recon model strapped to a tree. Notice the stick we put near the top to help get the right angle.
As we moved the cameras around to different trees over the weeks and months, we learned some lessons. The biggest was that the vegetation in the jungle moved around a lot more than we expected. On a couple of occasions, a vine or branch fell down and covered most of the camera’s field of view, blocking any pictures from being taken. After that we made sure to chop back anything even remotely nearby. We also learned to attach the cameras very low to the ground, as most of the animals we saw were fairly small and wouldn’t trigger the camera if it was up higher. Some of the areas we found to be the most successful were near a small stream bed, along a narrow animal trail, and at the edge of a larger clearing where several trails met.
What We Saw
Over the last few months, our Browning Trail Cameras have captured over 1,000 photos and videos. We feel that they have performed really well, even with our learning curve. In the beginning, we mostly used the single shot function, which triggered quickly but had a delay of about five seconds between pictures. That didn’t work out too well. We usually only got one shot of each animal, sometimes blurred or part way out of the frame, and they were gone before the next picture was taken. But once in a while we did get some good ones.
This image of a White-tailed Deer was taken in single shot mode. It was moving slowly while grazing so we got plenty of good shots to choose from.
When we switched to multi-shot mode, the camera took a lot more pictures at once and had a better chance of getting a good shot of faster moving animals. While we did get lots of images of the same animal over and over, the quality of them (in terms of being framed well) improved dramatically.

In single-shot mode, we got a picture of this Tayra on the far right of the screen and another one 5 seconds later on the far left. We didn’t get one nice and centered.
Using multi-shot mode, we got several good shots of this Tayra, even though it was running quickly.
One surprise was that we didn’t get as many nighttime captures as we expected since the jungle is usually really active at night. Mostly we saw possums, armadillos, and occasionally an anteater. We aren’t sure if this was due to the cameras not sensing things in the dark as well or if it’s just normal to have less nighttime activity in the particular spots we chose.

A Giant Anteater cruising by in the middle of the night.
A couple of other surprises that we didn’t expect were this vulture who came down to the stream for a drink.
This Turkey Vulture was quite the show off.
And this cool animal, which is called a Greater Grison. If you look carefully, you can actually see two (one is right under the camera and the other is on the right in the stream bed). These animals are sort of like Badgers and not a lot is known about them. They usually travel solo so this is probably a mating pair!

These two Greater Grison were exploring the stream bed in the middle of the day.
Recently we started to experiment with the HD video settings too. As you can see from video below of the Great Curassows, an endangered turkey-like bird, the quality is pretty awesome.
So far, these camera traps have been a great success and a lot of fun. Every time we go out and retrieve them from the jungle we are surprised to see what has been scurrying by. And while we have been very happy with the birds and animals we’ve seen, we are really hoping to get an image of a big cat at some point. Stay tuned on our Facebook Page to see if we spot one.
Have you tried setting up a trail camera? What did you see and were there any surprises? Let us know in the comments below (Email subscribers click here to post your comment online.).
Special thanks to Browning Trail Cameras for providing us with these two cameras. All opinions in this review are honest and unbiased. We really liked how the cameras performed!
The post Spying on the Rainforest: Using Trail Cameras in Costa Rica appeared first on Two Weeks in Costa Rica.
April 12, 2016
Safety Tips for Your Next Trip to Costa Rica
Two Weeks in Costa Rica |
Many people visiting Costa Rica are uneasy about safety. They have heard about violence in other areas of Central America and are unsure of what to expect. Rest assured that Costa Rica is generally a very safe and peaceful place to visit. As long as you exercise some precautions, you shouldn’t have any problems on your trip. Below we share some general tips and also specific guidance for different situations.

General Precautions
The majority of crimes against tourists in Costa Rica involve petty theft. Most often, they are opportunistic in nature and non-aggressive. While Costa Rica does have more serious crimes like armed robberies and home invasions, these occur much less frequently. During all of our years traveling in Costa Rica and during the almost three years that we have lived here, we have been the victim of a crime only once. On one of our first visits to the Manuel Antonio area, Matt was getting our bags from the luggage compartment of the public bus at the bus station in Quepos. As he was reaching under to retrieve our bag, a guy took his wallet from the outside pocket of his cargo shorts. Matt didn’t notice at first because of all the commotion of everyone trying to get their bags. Later, his wallet turned up on the ground nearby. The $20 that was inside was gone, but his license and all of his credit cards were still there. This was one of those typical petty theft crimes that occur here every day. It easily could have been prevented if he had his wallet in a more secure location. Luckily, we had the rest of our money safely stored away in a bag that Jenn was carrying.
Here are some ways to prevent crime from happening to you.
Carrying Valuables
Don’t carry a lot of money on you. This shouldn’t be much of a problem as ATMs are easy to find in most areas of Costa Rica and credit cards are widely accepted. If you are traveling to a destination where you’ll need to be carrying cash due to a lack of banks (e.g., Drake Bay, Tortuguero), keep it in a money belt, neck wallet, or a secure place in a bag with a zipper. Also be careful when taking money out of your wallet not to flash it around. If you’re carrying a lot of cash, you don’t want people to know that. When we traveled as tourists and took the bus to get around, we hid money in plastic bags under the soles of our sneakers!
When you don’t need your passport, keep it in a safe place like a hotel safe. Here’s another easy thing to do, which is recommended by the US Embassy. Photocopy the first page of your passport (with your name, photo, etc.) and the page with your stamp allowing entry into Costa Rica, and carry that with you instead.
Leave any cards, like credit cards, that you’re not planning to use at home so that if you have your wallet stolen, you don’t lose everything. And make sure to write down the account and support phone numbers for your cards and keep them separate from your wallet, in case something does happen.
Never hang a purse or bag on the back of your chair at a restaurant. We have seen a few security camera videos where people causing a little commotion on the other side of a restaurant distract everyone while another person comes from behind and snags the belongings.
It is also a good idea to leave flashy jewelry at home to avoid looking like you have a lot of money.
For electronics, people walk around all the time with their expensive SLR cameras hanging around their necks. This is fine for the most part. Costa Rica is a very touristy country and the locals are used to this. A few places where it’s a good idea to keep your camera in a bag is the city of San Jose, in remote areas, and at bus stations and other public areas where people congregate. One example we know of someone having their camera stolen in an unexpected place was on a beach path near Puerto Viejo de Talamanca. The person was walking by himself back from the beach on one of the small paths in the middle of the day. There weren’t any people around, and a guy came out of nowhere and grabbed his camera.
If you’re traveling with a laptop, tablet, phone, etc. keep it locked in the hotel safe when you’re not using it and you should be fine. As a precaution, we like to have tracking software like the Prey Project installed on our devices. This would help us track and hopefully get our stuff back if it was ever stolen. The software uses your device to take pictures of the thief, track them with GPS, and follow what websites they go to such as their email and Facebook account so you can find out who they are.
Renting a Car
Rental cars are targets in Costa Rica. The main car companies all use the same handful of models so thieves know which cars on the road are rentals. Don’t let that stop you from renting, though. Most of these crimes are easily preventable. The most important security measure is to never leave anything, even a pair of cheap sunglasses, inside the car. This goes for things in sight and out of sight. If you are traveling between destinations and need to make a stop, bring your bags with you if possible, leave one person to watch the car, or find a lot that is guarded. A lot of restaurants in Costa Rica have attendants who will watch your car in exchange for tips. You’ll also see them along the street in cities and at some attractions.
Also be aware of scams. One we’ve heard of involves giving you a flat tire by putting nails, etc. on the road or under your tire in a parking lot. After you get a flat and pull over, someone comes to the “rescue” to help while another person steals your belongings. This isn’t too common but is good to be aware of. If you do get a flat, try to make it to the nearest gas station or pull over at a local business if that’s not possible and call the rental car company for help.
If you have a cell phone, bring it so that you don’t have to rely on anyone else in case of an accident or problem with the car.
Taking the Bus
We traveled by bus almost exclusively when visiting the country as tourists. We loved taking the bus because it was a great chance to interact with the locals, and we seldom ran into problems. A couple of tips are to keep any valuables you have on you or in a small bag at your seat. Buses have an overhead compartment that is fine to use for most things, but you wouldn’t want to keep anything valuable up there as someone could easily grab the bag and then exit the bus. The same goes for the luggage compartment under the bus. The bus driver or someone helping usually helps take the bags from under the bus when it stops, but this isn’t always the case.
Avoid people trying to “help” you at the bus station. We’ve been harassed by these types of people before. Once we were traveling from San Jose and had to switch buses in Limon before heading on to Cahuita. As we were waiting for the bus continuing south, a friendly guy approached us, insisting on helping us get our tickets. Even though we told him that we didn’t need any help, he kept following us around. Later, he asked for a tip for his help and wouldn’t go away so eventually we gave him some money just to get rid of him. Try to avoid these situations by taking direct buses or looking busy at the bus station while you wait for a connection.
Taking a Taxi
Costa Rica has pirate taxis, which are cars manned by unlicensed taxi drivers. For safety reasons, it is best to avoid these and use only official taxis. Taxis that have been licensed by the Costa Rican government are uniformly red or orange (for airport taxis) and have either a yellow triangular medallion or airport taxi symbol on the door.

Airport Taxi
Staying at a Hotel or Vacation Rental
For the most part, you don’t have to worry about crime at hotels. If you’re staying in an area that has problems with theft, the hotel will most likely have a guard on duty 24 hours a day and may have one as a precaution, even in areas without much crime. Many hotels, especially in San Jose, also have security gates that close at night and require that you beep to be let in. Even with security measures, it is always good to be vigilant and keep your belongings locked in the hotel safe.
Vacation rentals present a unique problem. They usually don’t have the same level of security, and thieves often know which houses are vacation rentals. They also know that tourists don’t always take the necessary precautions. If you are concerned about crime in the area you’ll be visiting, pick a vacation rental that has security measures in place. A guard, security system, gate, deadbolt, safe, etc. all go a long way towards keeping a property secure. Even when you are home, don’t leave valuables in sight from windows and especially within arm’s reach of screened windows since they can be easily torn or cut. Whenever you leave or are sleeping, always be sure to lock the house’s windows and doors.
Going to the Beach
One of the most common crimes that occurs in Costa Rica is bags being stolen from the beach. We are always amazed at the number of tourists who leave their bag on the beach while they go swimming. Never do this, as thieves are often not far away, and will grab your bag then run off on a nearby beach trail. If you’re traveling with more than one person, take turns swimming and be sure that someone stays up on the sand with the bags. One way to avoid this problem altogether is not to bring anything valuable with you. If you only have a towel, sunscreen, and flip-flops, there is nothing of value for anyone to take.
Going Out at Night
If you’re planning to go to the bars and clubs at night, stay in a group. Take a cab home or drive yourself, don’t walk, especially at night. We have heard of assaults on women happening late at night as they walk back to their hotel from a bar.
What to Do if You Are the Victim of a Crime
If you’ve had something stolen or been the victim of another type of crime, it’s important to report the details to the police immediately. Sometimes quick action can get you your stuff back and catch the perpetrators. Costa Rica has several different branches of police, which can be confusing. If there is an emergency or a crime has just happened, you should call 911 as they will help dispatch the correct officers.
Most likely the Fuerza Publica (National Police) will arrive. This is the branch of police that is in charge of crime prevention and general public safety. Hopefully, they will arrive soon after your call, but sometimes it can take a while. If the incident was related to a traffic accident or violation, the Transit Police will likely arrive. Transit Police have jurisdiction only over Costa Rica’s roads and vehicles.
The Policia Turistica (Tourist Police) could also respond. They are on patrol at many popular tourist destinations, and are usually bilingual (English). Their job is to reduce crimes against tourists and provide outreach to travelers to help them stay safe.
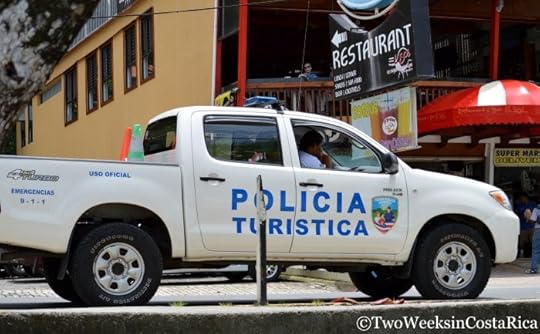
Tourist Police in Manuel Antonio
Whichever type of officer responds, a report of the crime must be made at an entirely different branch of the police called OIJ (Organismo de Investigación Judicial). OIJ investigates crimes and brings charges against suspects. Sometimes the closest OIJ office is a good distance away, but it is important to go there to report the crime or else nothing will ever happen. A recent pilot project in towns such as Manuel Antonio, Jaco, Tamarindo, Playas del Coco, and Puerto Viejo de Talamanca hopes to make this a bit easier by allowing the Tourist Police to file criminal reports in addition to OIJ.
Those are our tips for staying safe on your next trip to Costa Rica. They are intended to be preventative and not to scare you. Keep in mind that most Costa Ricans really are honest and kind, but just like anywhere in the world, the people are not all good. It is always prudent to be aware of the most common scenarios for crimes so that they don’t ruin your vacation or worse.
If you’re interested in more information about crime and safety in Costa Rica, check out these links:
US Department of State’s Costa Rica Crime and Safety Report for 2015
Safety Tips from US Embassy
Safety Tips from UK government
Looking for more information to help plan your trip? Here are some more useful posts:
Money Matters: Currency, Exchanging Money, and Tipping in Costa Rica – Covers using ATMs and credit cards, tipping in different situations, and the best ways to exchange money.
Best Time to Visit Costa Rica: Info on what it’s like to travel during the dry and rainy seasons, and times to avoid.
Best Hotels Near SJO Airport: Seven awesome hotels that will make your first or last night in Costa Rica memorable.
The post Safety Tips for Your Next Trip to Costa Rica appeared first on Two Weeks in Costa Rica.
April 7, 2016
Best National Parks in Costa Rica
Two Weeks in Costa Rica |

One of the things that makes Costa Rica unique is the amount of protected land it holds. Beginning in the 1960s, Costa Rica started putting parcels of land aside for conservation in order to protect it from deforestation through ranching, farming, and development. Today, the country boasts 27 national parks and many more reserves and refuges. These protected spaces are located throughout the country and offer many different types of experiences. Some protect nesting sea turtles or offer spectacular wildlife viewing, while others showcase volcanoes and waterfalls. Below we share our top picks for the best national parks in Costa Rica.
Be sure to refer to the map at the end of this post, which pinpoints the location of each national park.
Poas Volcano National Park

Poas Volcano on a clear day. Photo Credit: Philippe Guillaume
Known for: The world’s largest active crater volcano
Visit from: San Jose or anywhere in the Central Valley
Best for: Anyone. Park has easy trails and is handicap accessible.
Since Costa Rica is in the ring of fire, it has some pretty spectacular volcanoes. One of the most intriguing is Poas. This active crater volcano is considered to be the largest in the world. It is almost a mile (1.5 kilometers) wide and 900 feet (300 meters) deep. If you manage to time your visit on a clear day, you can see the bright blue crater lake right from the viewing platform. What’s great about this park is that it makes it easy for anyone to see a volcano. Just follow the paved path from the parking lot, and in about 10 minutes, you’re there. It is also a nice place to observe the local culture, as the park is a favorite among Ticos visiting from San Jose.
For more information, read our post Racing the Clouds at Poas Volcano.
Corcovado National Park
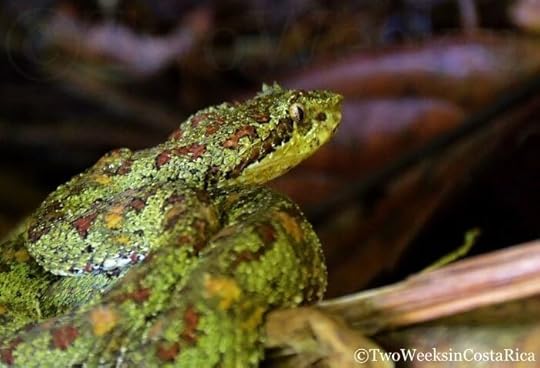
Eyelash Pitviper coiled on a tree branch in Corcovado National Park
Known for: Amazing biodiversity & wildlife viewing
Visit from: Drake Bay or Puerto Jimenez
Best for: Off-the-beaten-path hiking. Trails vary in difficulty from moderate to very difficult.
While Corcovado may not be easy to get to, it is well worth the effort. This remote park located on the Osa Peninsula offers a chance to see raw, untouched rainforest and some of the country’s most exotic wildlife. Scarlet Macaws, Baird’s Tapir, and all four types of monkeys that live in Costa Rica can be discovered, and if you’re lucky, big cats too. Corcovado has a large network of trails that span the peninsula, but most people visit one ranger station on day trips. From Drake Bay, you can take a boat to San Pedrillo or Sirena Ranger Stations. From Puerto Jimenez on the other side of the Osa, you can access La Leona or the new El Tigre entrance, just north of town.
For more information, read our posts:
Corcovado National Park
Spotting Costa Rica’s Most Spectacular Wildlife at Sirena Ranger Station
Corcovado’s El Tigre Entrance: Hiking and Activities from Puerto Jimenez
Tenorio Volcano National Park
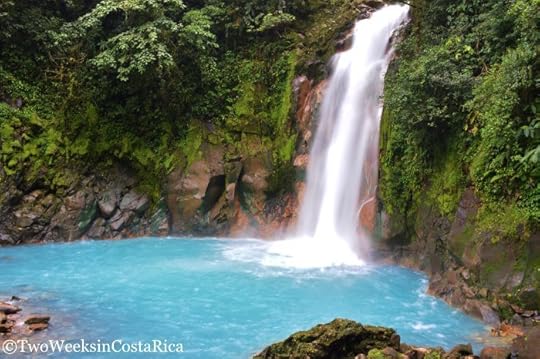
The gorgeous Rio Celeste Waterfall at Tenorio National Park
Known for: The bright blue Rio Celeste Waterfall
Visit from: Bijagua, Guatuso, La Fortuna/Arenal, or the Lake Arenal Area
Best for: Anyone up for a moderately difficult hike
Tenorio Volcano National Park has become more popular in recent years as an off-the-beaten-path destination in Costa Rica. It is located in the rural northwestern part of the country, where tourism is just beginning to grow. While the park has scenic trails that pass through primary rainforest and cloud forest, the Rio Celeste Waterfall is the focal point. Photos of this waterfall might have you wondering if the bright blue hue is real. It is, and to see it in person is unforgettable.
For more information, read our post the Enchanting Rio Celeste.
Manuel Antonio National Park
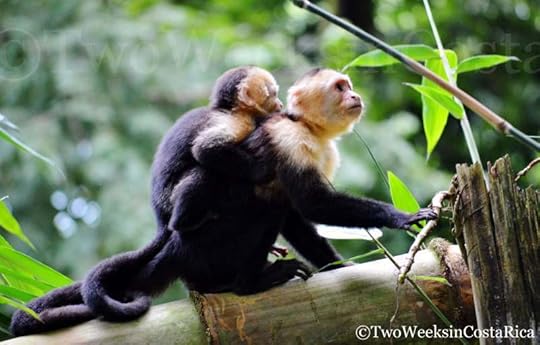
A couple of the many white-faced monkeys in Manuel Antonio National Park
Known for: Easy wildlife viewing, especially monkeys
Visit from: Manuel Antonio/Quepos or Uvita/Dominical/Ojochal
Best for: Casual hiking. Good for families as trails are easier.
This popular park on the Central Pacific Coast offers easy access to the rainforest. It is located right in the booming tourist town of Manuel Antonio and has many different options for trails. You can see wildlife like sloths, lizards, and birds, but it is best known for its abundant, and very social, monkeys. Manuel Antonio National Park also has a protected marine zone with three beautiful beaches, including a calm cove that is especially good for swimming.
For more information, including tips on how to avoid the crowds, read our post Manuel Antonio National Park.
Monteverde Cloud Forest Reserve
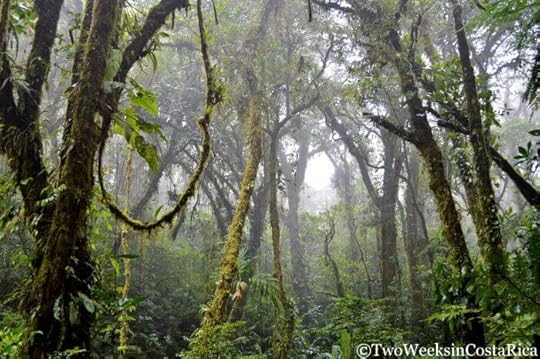
The misty cloud forest of Monteverde
Known for: Biologically rich cloud forest
Visit from: Monteverde or Santa Elena
Best for: Those looking for cooler temps. Trails vary in difficulty from easy to moderate.
Costa Rica has an extremely variable climate. You can be soaking up the sun at the beach one minute, and only a few hours later, be bundling up in the cool cloud forest. The Monteverde Cloud Forest Reserve is one of the best places in Costa Rica to experience the biologically diverse cloud forest. Not only is this park noteworthy for its vast flora and fauna, the experience of walking through this type of environment alone is memorable. Thick moss covers nearly all the greenery, vines taper from treetops, and misty clouds come and go with the shifting winds.
For more information, including a description of the park’s different trails, read our post Monteverde: A Forest in the Clouds.
Braulio Carrillo National Park
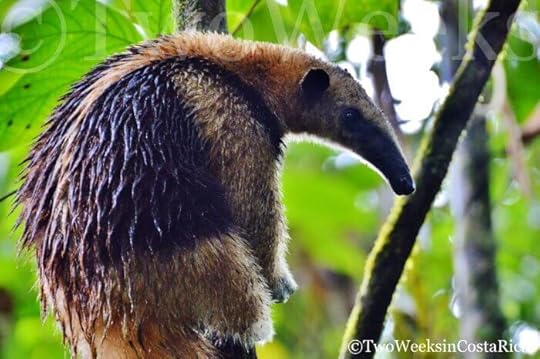
Anteater at Braulio Carrillo National Park
Known for: Vast swaths of lush rainforest
Visit from: San Jose or on the way to the Caribbean Coast
Best for: Off-the-beaten-path hiking. Trails vary in difficulty from easy to difficult.
If you have ever driven from the capital of San Jose to Costa Rica’s Caribbean Coast, you’ve passed right through this park and probably didn’t even know it. Braulio Carrillo is Costa Rica’s largest national park at more than 100,000 acres. Though much of this land is inaccessible and preserved to protect important aquifers, a ranger station and trails are located right off the highway. Even after visiting many of Costa Rica’s parks, Braulio Carrillo was one of our favorites. The rainforest feels very wild, and birds and wildlife are abundant. We were lucky to spot one of our favorite mammals on our visit, a giant anteater.
For more information, including details about trail conditions, read our post Braulio Carrillo National Park: Wild Jungle Near San Jose.
Carara National Park
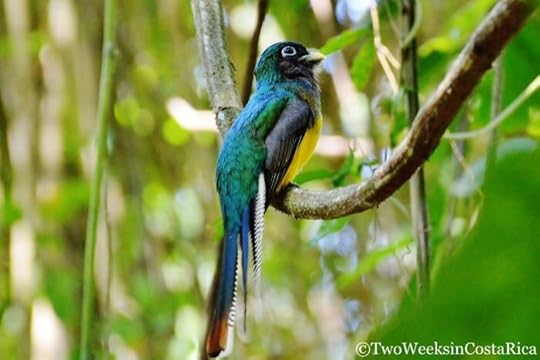
One of the beautiful birds found inside Carara National Park, the Violacious (Gartered) Trogon
Known for: Spectacular birding
Visit from: Jaco, Herradura, or Playa Hermosa
Best for: Anyone. Trails vary in difficulty from easy to moderate. One trail is handicap accessible.
Like many national parks in Costa Rica, Carara National Park offers hiking and wildlife viewing. But what makes this park special is its abundance of birds. Carara, on Costa Rica’s Central Pacific Coast, is in an ecological transition zone. Here, tropical dry forests to the north meet the wetter rainforests to the south. This unique hybrid environment draws birds from both habitats, and over 400 different birds have been spotted. Some noteworthy species include three types of Trogans, including the Gartered, Slaty-tailed, and Black-throated; the Orange-collared Manakin; Turquoise-browed Motmot; and Great Tinamou. The area also hosts a large population of Scarlet Macaw parrots.
For more information on the best trails to bird, read our post Birding in Carara National Park.
Tortuguero National Park
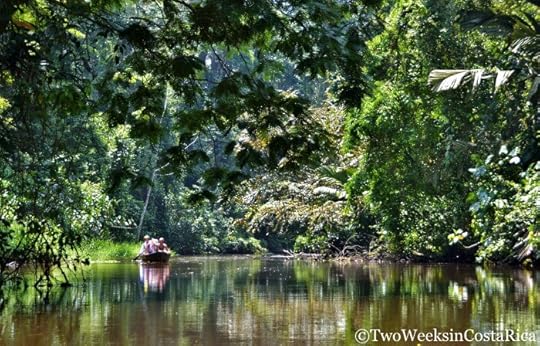
Exploring Tortuguero National Park by canoe
Known for: Wildlife viewing and sea turtle nesting
Visit from: Tortuguero
Best for: Families and seniors who can get in and out of a boat.
Tortuguero National Park is unique in that it is not only offers wildlife viewing by land, but also by water. The canals of the village are one of the best ways to see wildlife. By small boat or canoe, you meander along the edge of the dense mangrove and forest to sneak up on animals like spider monkeys, howler monkeys, white-faced monkeys, freshwater turtles, caiman, crocodiles, and green basilisk lizards, as well as many kinds of birds. The park also encompasses protected beach for nesting marine turtles. Tortuguero is one of the most important sea turtle nesting sites in the world, with four different kinds of turtles coming to the shores to lay eggs.
For more information, including the best times of year to see turtles, read our post Tortuguero National Park: A Wildlife Hot Spot.
Costa Rica has many more amazing national parks and reserves, but those will give you a good sampling of what the country has to offer.
Map of the Best National Parks in Costa Rica
What’s your favorite national park in Costa Rica? Let us know by commenting below. (Email subscribers, click here to post your comments online.)
Want more information to help you plan your trip? Check out these posts:
Packing for Costa Rica: The Essentials – Details on what to bring on your trip, including clothing and gear.
Itineraries Page – Includes sample itineraries to help you get started with your planning. Detailed one-week, two-week, and honeymoon itineraries.
Costa Rica Rental Car Discount – Save on a rental car with our discount through Adobe.
The post Best National Parks in Costa Rica appeared first on Two Weeks in Costa Rica.