
C.D. Loken's Blog, page 34
January 22, 2014
Chocolate Chip Oatmeal Cookies with a 'secret' ingredient!
When hubby and I were dating, like most couples, we went through the 'standard' questions faze. You know-like, are you a dog or cat lover? Or, do you have any hobbies?
But, my ultimate favorite question hubby asked me was: "Do you cook?" I had to think about that one for a bit. (Joking). Of course I answered yes! (Mama didn't raise no fool!)
Hubby stated that he also enjoyed cooking. His specialty? Oatmeal chocolate chip cookies. He even went so far as to claim that his cookies were the absolute best I would ever eat!!!
Funny- we've been married for almost three years, and I have yet to taste one of these 'so called' delicious morsels!
It's not like he hasn't had an opportunity to do so. He has-plenty of times. But, for some-strange reason, he's never brought the 'cookie' challenge up again. It makes me wonder if maybe, just maybe, he got a little worried after eating one of my Chocolate Chip Oatmeal Cookies-(with the secret ingredient, of course).
What hubby, (and all the other people who have ever eaten one of my cookies) doesn't know, is that I came upon the 'secret ingredient, quite by accident!
You see, it was years ago, when my daughter, Mel, was in fifth grade. She came home from school one night, and declared she needed two dozen cookies for the next day. No biggie! Whipping up a batch of cookies wasn't a major chore. Besides, it gave her and I a little 'mother/daughter bonding time. (Oh how I miss those days!)
After gathering all the supplies to start our cookie baking bonanza- I realized that I was missing one very important ingredient. A staple in every cookie recipe! Vanilla!
Since we were miles from the nearest grocery store, and it was getting late, I decided there was only one thing to do (No, not panic-although, I have to admit, I was a little nervous.) Mel was counting on me, and I couldn't let her down. So, I improvised, and used almond extract, instead.
I can still remember opening the bottle, catching a whiff, and thinking, 'This isn't going to work. You should really go to the store!' But, I didn't. I continued on and I'm so glad I did. It turns out, that almond extract was one of the best baking snafu's, I've ever had!
The cookies came out perfectly, and the nutty flavor of the extract, mixed with the chocolate and oatmeal, was a delicious combination!
Here is the recipe:
Preheat oven to 350
1 cup shortening
1 cup brown sugar
1 cup white sugar
2 eggs well beaten
1/2 tsp almond extract
1 tsp salt
1 tsp baking soda
2 cups flour
3 cups quick oatmeal
6 oz semi-sweet chocolate chips
6 oz dark chocolate chips
In a large bowl, combine- flour, salt, baking soda and oatmeal. Set aside. In a mixing bowl, cream shortening, eggs and sugars. Add almond extract. Slowly stir in dry mixture. Add chips.
Chill mixture for 15-20 minutes. Form cookie dough into small balls and place on a greased cookie sheet. Flatten slightly. Bake for 10-12 minutes. Let cool for 5 minutes, before placing on cooling rack. Makes about 42 cookies!

The last batch of these cookies came out, just as hubby was coming in the door today. He didn't even wait to take his coat off, before he'd gobbled up two of them. "They're good," he said (with a cheesy grin), "but not as good as mine." The challenge is on!
Until then- Happy Baking- and if you've had an 'accidental' baking snafu that turned out successful. Jot me a comment. I'd love to hear from you!


January 21, 2014
Homemade Kahlua
A few years ago, hubby received a homemade beer kit for his birthday. It was one of those gifts where the intention was good, (hubby likes his micro beers), but maybe not practical.
You see, when hubby wants to relax with a cold brew, that means he reaches in the refrigerator for one. Not brew it up himself. But, with a little coaxing, (okay, so I forced him! I had to, that dang kit was an eyesore sitting in our back porch!) hubby finally decided to brew up a batch.
I learned a lot that day. #1 Hubby can't follow a recipe. #2 Hubby doesn't have any patience. #3 Hubby can't follow a recipe. (I know I said that already, but, it bears repeating.) #4 Hubby should stick to 'buying' beer.
But, there was one 'good' thing that came out of that day! I was inspired! (No, not to make beer!)
I was thinking of that wonderful elixir with coffee and chocolate undertones. Kahlua!
Was it possible? Could I actually make this coffee liqueur, and save the $20-$30 it costs to buy the name brand stuff?
Well, according to a Google search, I could.
The only problem was- what recipe, out of the hundred or so that came up, should I use?
In the end- I didn't use any 'one' recipe. Instead, I experimented with several, made some tweaks, and finally, came up with the exact flavor I was looking for. (I later did a taste test with friends, using homemade versus the real thing. Guess which one they chose?)
You got it! Homemade Kahlua wins!
Here is the recipe:
12 cups of your favorite brewed coffee (After several experiments using different coffee's, I chose Eight o'clock Dark Italian Espresso. It has a rich, chocolaty flavor that really enhanced the other ingredients.)
2 lbs of light brown sugar
6 1/2 tablespoons of real vanilla extract
1 liter of vodka (You can use whatever kind you like, but I liked Svedka. (It's not the most expensive-around $15, but it's been distilled 5 times!!! It has to be good!) *** Some recipes call for Everclear. I did experiment and used this in one of my batches. My recommendation?- Save it for Apple Pie (I'll share that recipe in another post.)
Once coffee is brewed, pour it into a large pot. (I used my 8 quart stock pot). Add sugar. Bring mixture to low boil. Lower heat and let simmer for 20 minutes. Let cool completely!
Add vanilla and vodka and mix thoroughly.
Hubby had some really cool beer bottles that he saved, so I decided to recycle them. Once sterilized, I used a funnel and poured in the Kahlua. (Each bottle was 12 oz, and I still ahead enough for a 64 ounce mason jar!)
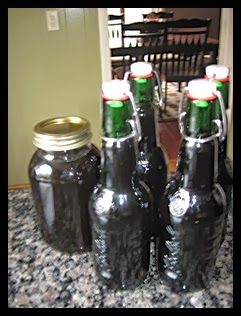
You can drink the Kahlua immediately, but I found if it sits in a cool, dry location, for about two weeks, it tastes a WHOLE lot smoother. This worked out perfectly, because I made this batch a few weeks before Christmas. Since our family was doing the 'homemade' gift theme, this yummy liqueur made the perfect addition to my gift basket. (To make it more festive, I tied some colorful raffia around the neck of each bottle and added a tag with some cocktail recipes.)
Of course- my favorite cocktail using Kahlua is the Colorado Bulldog!
2 oz Kahlua
2 oz milk or half and half
Splash of cola
Pour over ice.
Enjoy responsibly-but.... DO ENJOY!

January 20, 2014
Homemade Pork Egg Rolls
Last night I was already planning my menu for our Superbowl party, while the Seahawks and 49'ers were playing. I'll be posting some really yummy appetizer recipes that week, but I thought I'd share one with you all today.
Since these delicious egg rolls can be made ahead of time and frozen, I thought I'd get a head start and make a batch today.
Recipe:
1 package of egg roll wraps (1 lb)
1 lb ground pork
1 tsp fresh ground ginger
2 cups shredded cabbage (I'm all about making things simple- so I buy the bagged)
1/4 1b bean sprouts
1/2 cup shredded carrots
3 green onions, finely chopped
2 Tablespoons soy sauce
Stir fry the ground pork and ginger in a skillet over high heat, until meat is browned. (about 3 minutes). Add cabbage, bean sprouts, carrots, and green onions. (Cook about 2 min.) Stir in soy sauce and mix thoroughly. Let mixture cool.
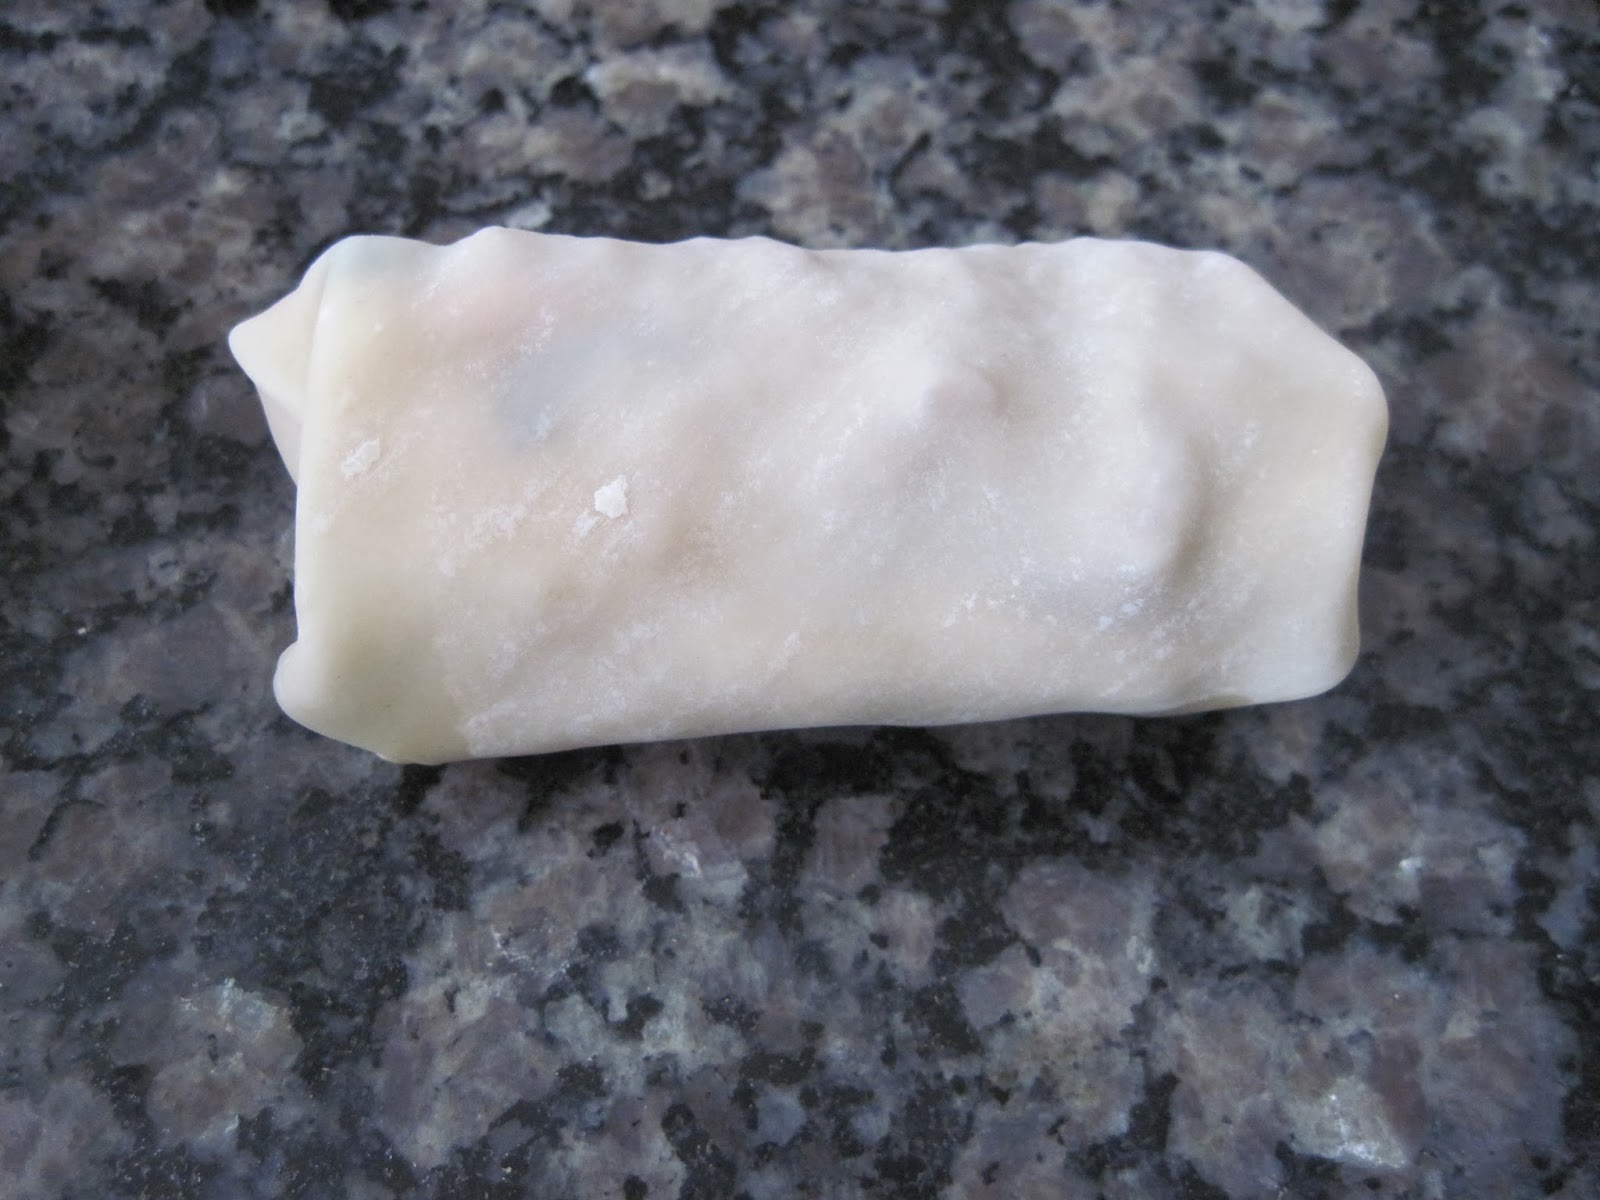
Place egg roll wrap on flat surface (diagonally). With a pastry brush, lightly dampen all sides with water. Scoop 2 tablespoons of mixture in center.
I think this one got a bit more than 2 tablespoons- oops!

Fold bottom half up over the mixture tightly. Fold in both sides, and roll once, sealing the top.
 Once you get the hang of rolling these delicious morsels up-you'll wonder why you ever bought them in the store! (I sure did!)
I place the egg rolls on a baking sheet covered in wax paper (so they don't stick).
 Now you have two choices. #1-You can freeze them. **Tip- I place the entire pan in the freeze for 15-20 minutes-just until they are set. Once set, I place them in freezer bags and they are ready for whenever you need a quick snack, lunch, or appetizer. But, if you're like me, you're stomach will be growling at this point, so I'm going with #2- Cook those delicious morsels. Here's how: Bake- Preheat oven to 400. Place egg rolls individually on a greased baking sheet. Use a pastry brush and lightly brush tops with olive oil. Bake until golden brown. (10-12 minutes). Or, you can deep fry. Make sure oil is 350 degrees. Cook for 2-3 minutes. Serve with hot spicy mustard sauce or sweet and sour! YUM!
Whatever you decide, I hope you enjoy!
Since these delicious egg rolls can be made ahead of time and frozen, I thought I'd get a head start and make a batch today.
Recipe:
1 package of egg roll wraps (1 lb)
1 lb ground pork
1 tsp fresh ground ginger
2 cups shredded cabbage (I'm all about making things simple- so I buy the bagged)
1/4 1b bean sprouts
1/2 cup shredded carrots
3 green onions, finely chopped
2 Tablespoons soy sauce
Stir fry the ground pork and ginger in a skillet over high heat, until meat is browned. (about 3 minutes). Add cabbage, bean sprouts, carrots, and green onions. (Cook about 2 min.) Stir in soy sauce and mix thoroughly. Let mixture cool.
Place egg roll wrap on flat surface (diagonally). With a pastry brush, lightly dampen all sides with water. Scoop 2 tablespoons of mixture in center.
I think this one got a bit more than 2 tablespoons- oops!

Fold bottom half up over the mixture tightly. Fold in both sides, and roll once, sealing the top.
 Once you get the hang of rolling these delicious morsels up-you'll wonder why you ever bought them in the store! (I sure did!)
I place the egg rolls on a baking sheet covered in wax paper (so they don't stick).
 Now you have two choices. #1-You can freeze them. **Tip- I place the entire pan in the freeze for 15-20 minutes-just until they are set. Once set, I place them in freezer bags and they are ready for whenever you need a quick snack, lunch, or appetizer. But, if you're like me, you're stomach will be growling at this point, so I'm going with #2- Cook those delicious morsels. Here's how: Bake- Preheat oven to 400. Place egg rolls individually on a greased baking sheet. Use a pastry brush and lightly brush tops with olive oil. Bake until golden brown. (10-12 minutes). Or, you can deep fry. Make sure oil is 350 degrees. Cook for 2-3 minutes. Serve with hot spicy mustard sauce or sweet and sour! YUM!
Whatever you decide, I hope you enjoy!
French Country Cabinets
***Guest post by my daughter Mel***
You will be able to find more of Mel's DIY and French Country decorating ideas, on her page- "Mel's French Country Chic"- soon!!!
Here is her tutorial on how she took basic store-bought cabinets and turned them into country chic! Enjoy!
*****
We bought a new townhouse 6 years ago, and though the appliances were never used and the floors had never been lived on, it was bare bones. New homes have their perks of course, fewer problems,but imagine white walls everywhere and little character. So over the years, my husband and I have made it our own. This year after seeing this amazing picture of a laundry closet on Pinterest, I realized that we had to do something with our own laundry closet!
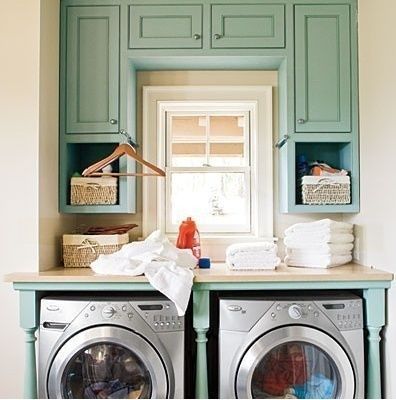
I loved the teal, which I already had in our living room and I absolutely loved the look of the cabinets and potential storage I could achieve. However, ours looks a bit different. We do not have the amazing washer dryer set seen here and the DIY table with the old legs wouldn't work. So I improvised and used this picture as my inspiration.
I began by buying some cabinets from Menards, plain- untreated cabinets. The cost was just under $150.00 for these three individual cedar cabinets.

Then I took the paint color that I used in my living room ( I am not a huge fan of a massive color pallet-one color for each room etc. I take 3-4 colors and use them throughout to keep a more simple consistent feel to the flow of the house) and painted each piece.

I wanted a more distressed look to them so I decided to "antique" the cabinets. I took chocolate brown paint in a plastic bowl and diluted it with water until it was super runny. I wanted the brown to only come through in the cracks so I made it extra runny so I could add more later in case I wanted it darker. Then with a paint brush I painted the brown-watered down paint over the teal. After waiting just a few minutes, I took a rag and wiped the paint off. Wiping it off makes it look more even. Don't leave the watered down paint-whatever shade you use- on too long because it can make it look a bit uneven and really dark. The rag helps to even out the tone.
 Last, after the pieces were all dry I assembled the cabinets and picked some cute knobs from Target and my husband hung them.
This is how it turned out! A great thanks to my Mom for the amazing laundry sign!

You will be able to find more of Mel's DIY and French Country decorating ideas, on her page- "Mel's French Country Chic"- soon!!!
Here is her tutorial on how she took basic store-bought cabinets and turned them into country chic! Enjoy!
*****
We bought a new townhouse 6 years ago, and though the appliances were never used and the floors had never been lived on, it was bare bones. New homes have their perks of course, fewer problems,but imagine white walls everywhere and little character. So over the years, my husband and I have made it our own. This year after seeing this amazing picture of a laundry closet on Pinterest, I realized that we had to do something with our own laundry closet!
I loved the teal, which I already had in our living room and I absolutely loved the look of the cabinets and potential storage I could achieve. However, ours looks a bit different. We do not have the amazing washer dryer set seen here and the DIY table with the old legs wouldn't work. So I improvised and used this picture as my inspiration.
I began by buying some cabinets from Menards, plain- untreated cabinets. The cost was just under $150.00 for these three individual cedar cabinets.

Then I took the paint color that I used in my living room ( I am not a huge fan of a massive color pallet-one color for each room etc. I take 3-4 colors and use them throughout to keep a more simple consistent feel to the flow of the house) and painted each piece.

I wanted a more distressed look to them so I decided to "antique" the cabinets. I took chocolate brown paint in a plastic bowl and diluted it with water until it was super runny. I wanted the brown to only come through in the cracks so I made it extra runny so I could add more later in case I wanted it darker. Then with a paint brush I painted the brown-watered down paint over the teal. After waiting just a few minutes, I took a rag and wiped the paint off. Wiping it off makes it look more even. Don't leave the watered down paint-whatever shade you use- on too long because it can make it look a bit uneven and really dark. The rag helps to even out the tone.
 Last, after the pieces were all dry I assembled the cabinets and picked some cute knobs from Target and my husband hung them.
 This is how it turned out! A great thanks to my Mom for the amazing laundry sign!

January 19, 2014
Sunday Night Dinner is all about Comfort Food!
I can't believe it's already Sunday!
Yesterday seemed to fly by so fast! Hubby and I spent it alone. It has been way to long since we've had a 'day' date. We hung out, had a few laughs over lunch, did some shopping, and ended the evening with a movie. It was great fun, and something we really need to make an effort to do more often this year.
This morning we woke up and starting preparing a birthday brunch for Mike's son. His golden birthday is tomorrow, and since he has to work, we thought we make him a special meal to get his day started. We had homemade blueberry waffles and bacon and sausage. *** I will have a post devoted entirely to breakfast goodies, later in the week. I promise!
But, just so you can get your taste buds ready, here's a pic of the deliciousness!

Making Sunday brunch has become one of those traditions I was talking about in my last post. Usually mom comes to join us, but, unfortunately, she couldn't make it this morning.
I was really disappointed! What with the cold and snowy weather, I've only seen mom twice since Christmas! She usually stops over at least once a week, so this has been a long stretch! I really miss her!
That's why I decided tonight is a good night for some good, old-fashion, comfort food. The kind of meal mom used to make for me when I was a kid.
My favorite dinner of all time, and the one I decided to make is: Scallop Potatoes (this recipe was passed down from her mother in law-which she passed down to me, and I, to my daughter Mel) ***The younger generations have made a few adjustments to it-but just making these potatoes, brings back so many good memories.
Meat loaf
Green Beans w/almonds
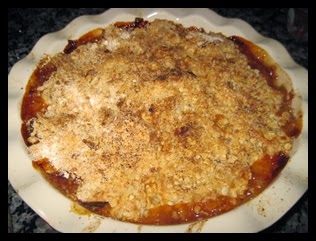
Apple Crisp
Recipes
Scallop Potatoes:
Preheat oven to 375.
5-6 medium red potatoes (You can use any kind, but I prefer red.) **I also leave the skin on, but you can peel them if you like.
1 can cream of chicken soup (I've seen recipes using cream of mushroom, cream of broccoli, and even cream of celery.)
1 cup half and half
1 small onion (diced)
3 tablespoons butter
1 tsp parsley
1/2 tsp salt (as I think soup is salty enough)
1/2 tsp pepper
1/2 tsp garlic powder
1/2 paprika
 I just had to show this pic! Hubby is helping! Of course it's only because he gets to use his absolute favorite kitchen gadget- wait for it...wait for it...yes- it's a VEGOMATIC!!! (BTW- this is the original model, not the new kind that is on the market now) Hubby found it brand new at rummage sale, and kicks himself to the this day that he didn't grab the other one they had for sale.
Okay- I had my laugh, back to the recipe.
You can slice your potatoes anyway you like- just make sure they are thinly sliced (about 1/8"-1/4" thick )
In a medium bowl-Mix soup, half and half, parsley, salt, pepper and garlic powder . Layer potatoes and onion in a 2 qt casserole dish. Pour soup mixture over top. Stir until potatoes are well coated. Dot potatoes with butter. Sprinkle paprika on top.
Bake covered in oven for 60 min. Remove cover and bake for another 30, or until potatoes are tender.
Here they are baked! Creamy, Buttery and oh so, yummy!

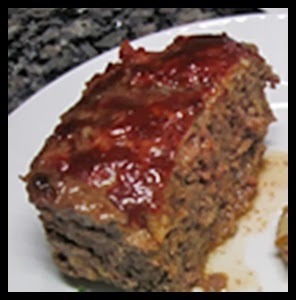
Meatloaf. (Same temp on oven-375)
2 lbs hamburger
1 onion (diced)
1 clove of garlic (minced)- you can substitute 1/8 tsp garlic powder
1/4 tsp salt
1/4 tsp pepper
1/4 parsley
1 tsp Worcestershire sauce
1/2 cup milk
2 eggs
2 slices of bread (cut into small chunks)-or (1/4 cup dry bread crumbs)
Combine all ingredients in bowl. (I just dig right in with my clean hands)- Place in greased loaf pan.
Topping:
1/3 cup ketchup
2 tablespoon. brown sugar
1 tablespoon. prepared mustard
Cover meatloaf with topping.

Bake in oven for one hour.
Hubby actually got up from the couch and cut this piece for himself. No dry meatloaf here! Look at the juice!
Apple Crisp (Also in a 375 oven.)
4 large apples (I used Gala, because they are usually around year round. But in the fall I use Jonathan or Wealthy) peeled, cored and cut into 1/2" chunks
3/4 cup flour
1/4 brown sugar
1/2 tsp salt
1/2 cup white sugar + 2 tablespoons
1 stick of butter-cold and cut into cubes
1 cup quick oats
2 tablespoons fresh lemon juice
1/2 tsp cinnamon
1/4 tsp nutmeg
In medium bowl, combine flour, brown sugar, 2 tablespoons white sugar and oatmeal. Cut in butter.

Use fingers if need be, until well mixed into large, moist clumps. Put aside.
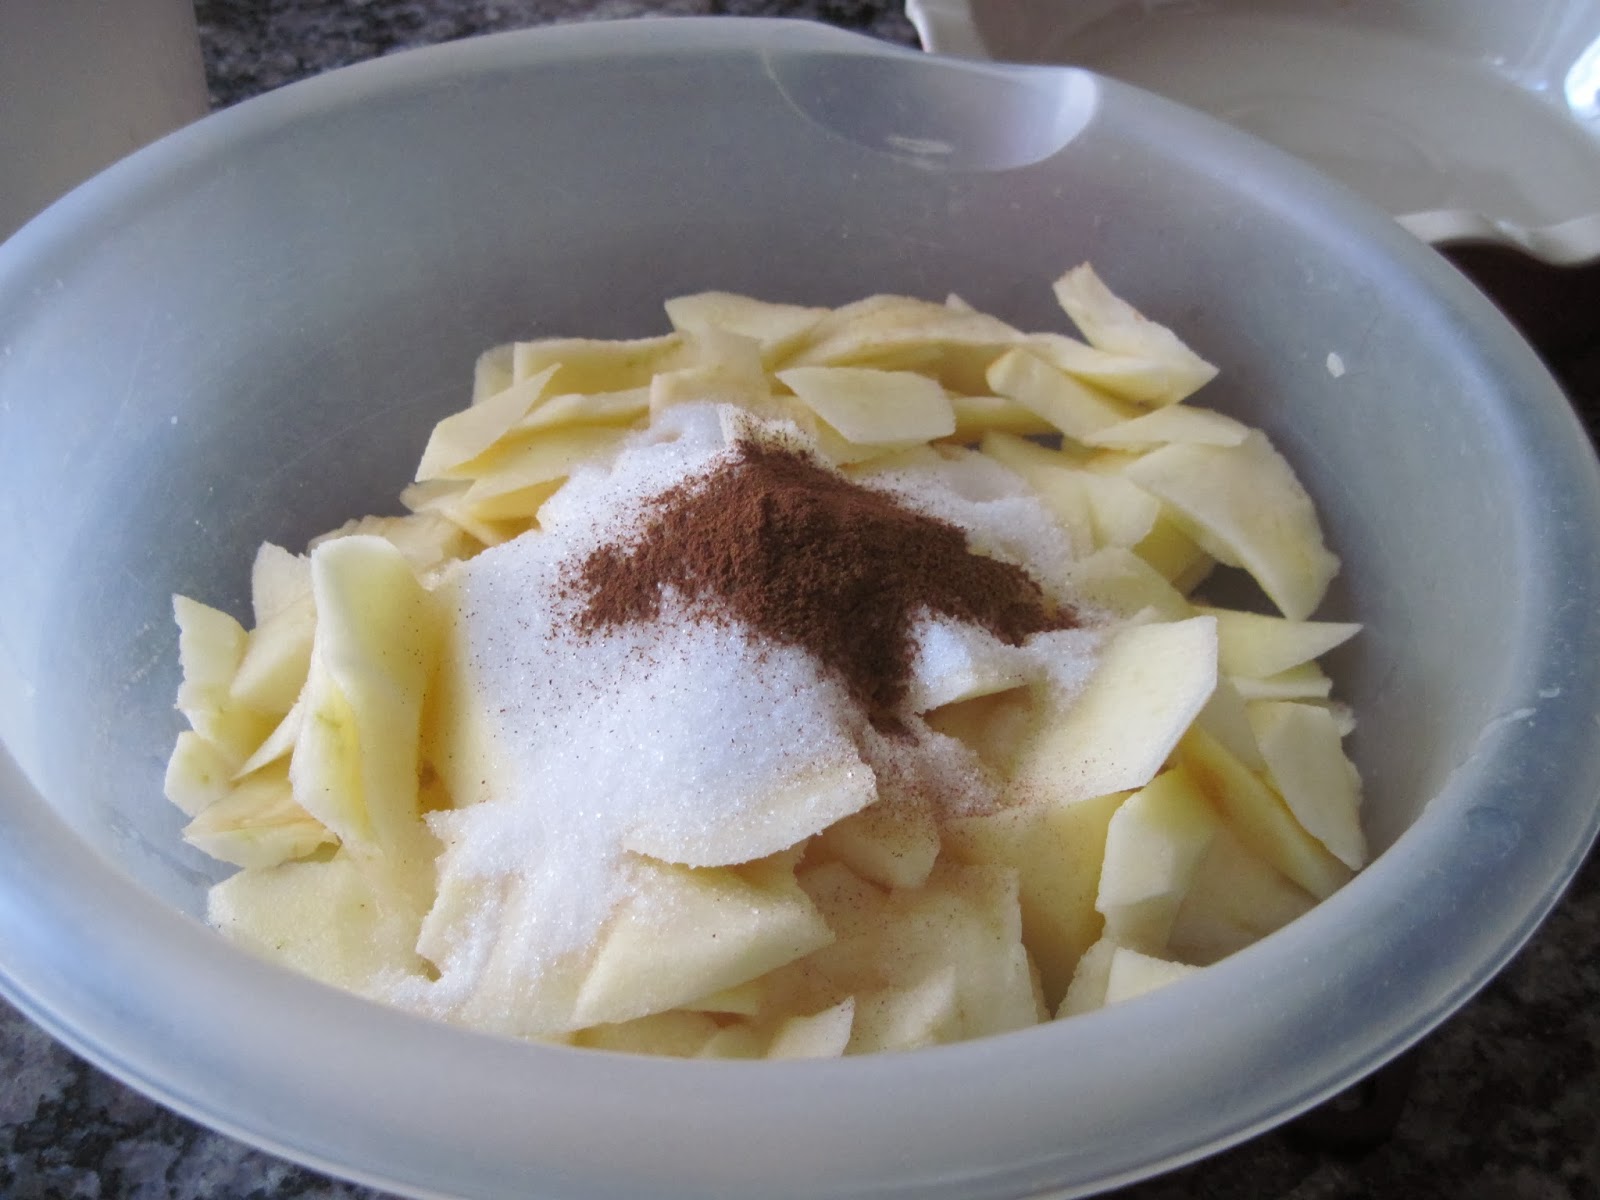
In another bowl, add lemon juice and cinnamon to apples. Stir in 1/2 cup sugar and toss until combined.

Pour apples mixture into bottom of a shallow- 2 qt casserole. Sprinkle with topping mix and end with a sprinkle of nutmeg.

Bake for 1 hour. Yummy! (I love the way the whole house is filled with the scent of cinnamon and nutmeg) Hubby must too-because he got off the couch to come and investigate! I told him he couldn't have any until after dinner! He pouted and went back to his couch!

No more hubby pouting! Dinner is served!
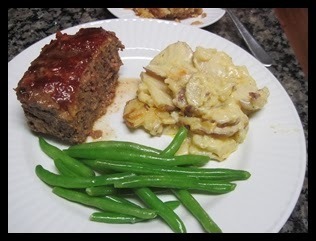

(That yummy looking drizzle on top of the Apple Crisp is Salted Carmel Sauce) I promise to share that recipe soon!)
But for now, I've got to put away the leftovers! It's a good thing I have some, because mom called shortly after dinner. Guess what? She must have smelled what I was making for dinner! She's decided it's not so cold after all, and she's paying me a visit tomorrow!
Hope you all had a good weekend! I'd love to hear what some of your favorite comfort foods are!
Yesterday seemed to fly by so fast! Hubby and I spent it alone. It has been way to long since we've had a 'day' date. We hung out, had a few laughs over lunch, did some shopping, and ended the evening with a movie. It was great fun, and something we really need to make an effort to do more often this year.
This morning we woke up and starting preparing a birthday brunch for Mike's son. His golden birthday is tomorrow, and since he has to work, we thought we make him a special meal to get his day started. We had homemade blueberry waffles and bacon and sausage. *** I will have a post devoted entirely to breakfast goodies, later in the week. I promise!
But, just so you can get your taste buds ready, here's a pic of the deliciousness!

Making Sunday brunch has become one of those traditions I was talking about in my last post. Usually mom comes to join us, but, unfortunately, she couldn't make it this morning.
I was really disappointed! What with the cold and snowy weather, I've only seen mom twice since Christmas! She usually stops over at least once a week, so this has been a long stretch! I really miss her!
That's why I decided tonight is a good night for some good, old-fashion, comfort food. The kind of meal mom used to make for me when I was a kid.
My favorite dinner of all time, and the one I decided to make is: Scallop Potatoes (this recipe was passed down from her mother in law-which she passed down to me, and I, to my daughter Mel) ***The younger generations have made a few adjustments to it-but just making these potatoes, brings back so many good memories.
Meat loaf
Green Beans w/almonds
Apple Crisp
Recipes
Scallop Potatoes:
Preheat oven to 375.
5-6 medium red potatoes (You can use any kind, but I prefer red.) **I also leave the skin on, but you can peel them if you like.
1 can cream of chicken soup (I've seen recipes using cream of mushroom, cream of broccoli, and even cream of celery.)
1 cup half and half
1 small onion (diced)
3 tablespoons butter
1 tsp parsley
1/2 tsp salt (as I think soup is salty enough)
1/2 tsp pepper
1/2 tsp garlic powder
1/2 paprika
 I just had to show this pic! Hubby is helping! Of course it's only because he gets to use his absolute favorite kitchen gadget- wait for it...wait for it...yes- it's a VEGOMATIC!!! (BTW- this is the original model, not the new kind that is on the market now) Hubby found it brand new at rummage sale, and kicks himself to the this day that he didn't grab the other one they had for sale.
Okay- I had my laugh, back to the recipe.
You can slice your potatoes anyway you like- just make sure they are thinly sliced (about 1/8"-1/4" thick )
In a medium bowl-Mix soup, half and half, parsley, salt, pepper and garlic powder . Layer potatoes and onion in a 2 qt casserole dish. Pour soup mixture over top. Stir until potatoes are well coated. Dot potatoes with butter. Sprinkle paprika on top.
Bake covered in oven for 60 min. Remove cover and bake for another 30, or until potatoes are tender.
Here they are baked! Creamy, Buttery and oh so, yummy!

Meatloaf. (Same temp on oven-375)
2 lbs hamburger
1 onion (diced)
1 clove of garlic (minced)- you can substitute 1/8 tsp garlic powder
1/4 tsp salt
1/4 tsp pepper
1/4 parsley
1 tsp Worcestershire sauce
1/2 cup milk
2 eggs
2 slices of bread (cut into small chunks)-or (1/4 cup dry bread crumbs)
Combine all ingredients in bowl. (I just dig right in with my clean hands)- Place in greased loaf pan.
Topping:
1/3 cup ketchup
2 tablespoon. brown sugar
1 tablespoon. prepared mustard
Cover meatloaf with topping.
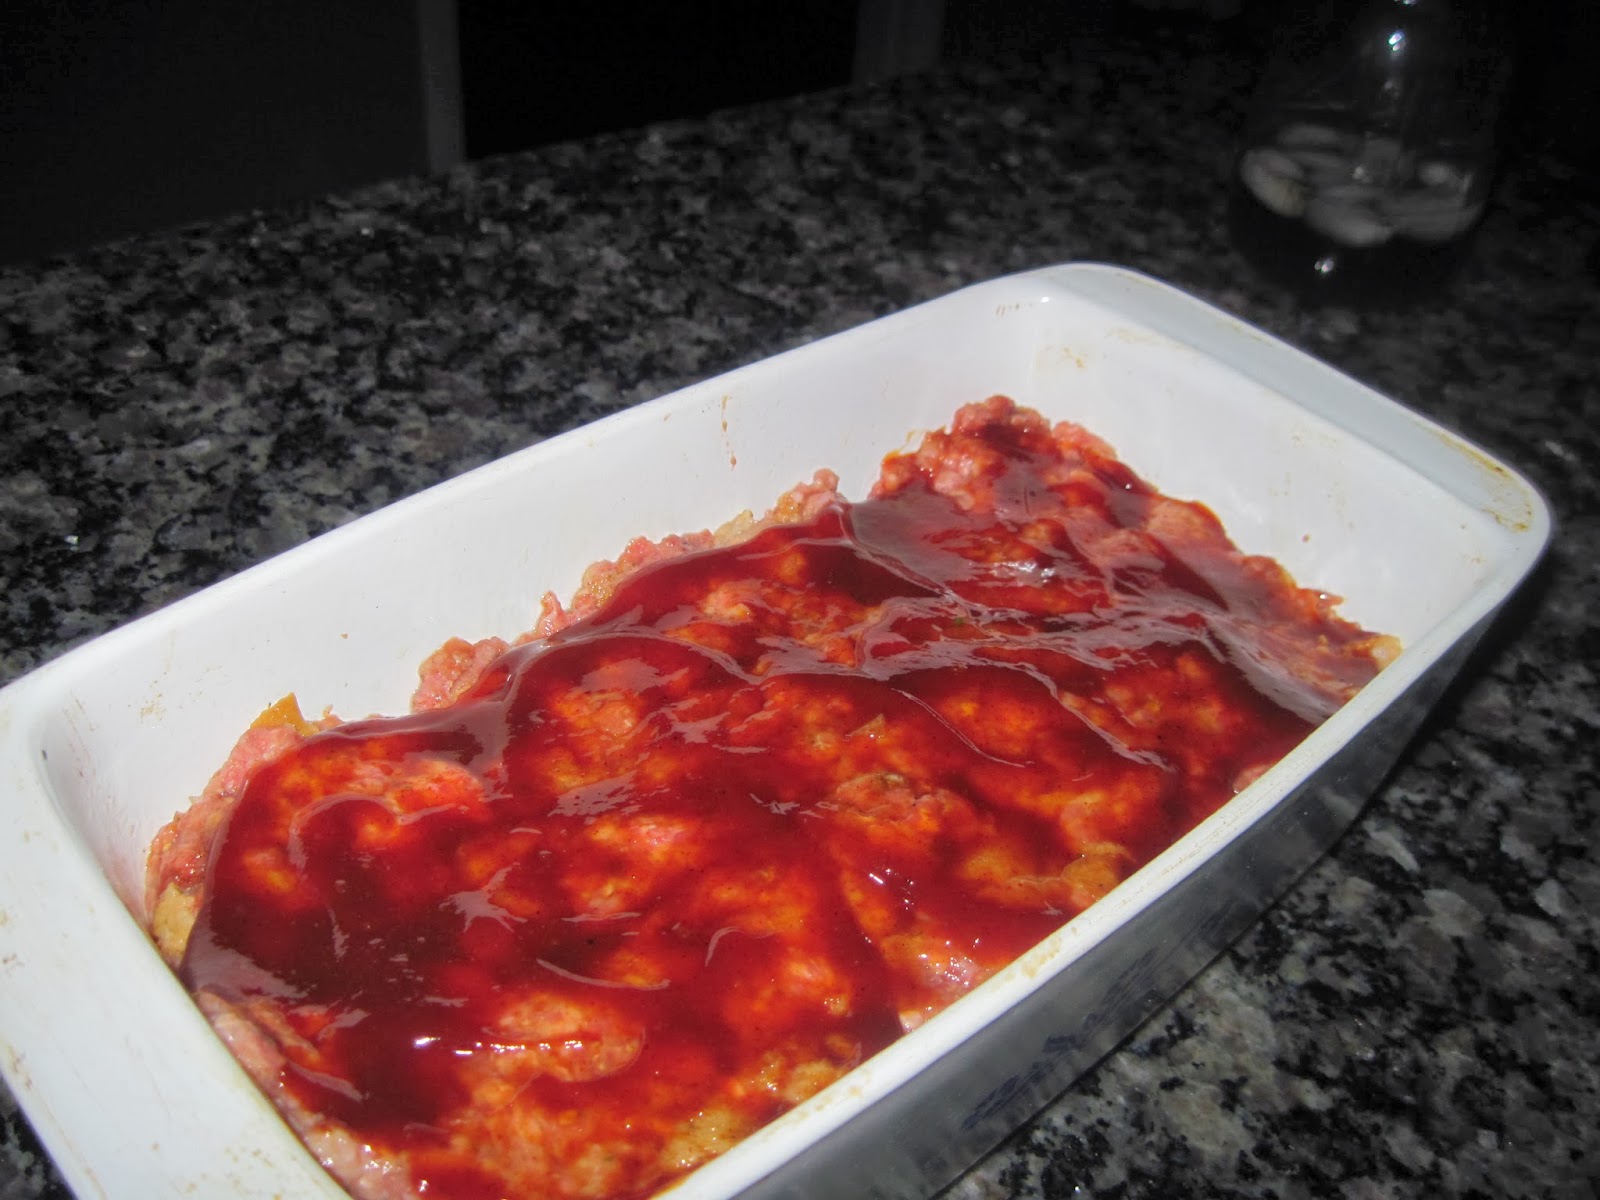
Bake in oven for one hour.
Hubby actually got up from the couch and cut this piece for himself. No dry meatloaf here! Look at the juice!

Apple Crisp (Also in a 375 oven.)
4 large apples (I used Gala, because they are usually around year round. But in the fall I use Jonathan or Wealthy) peeled, cored and cut into 1/2" chunks
3/4 cup flour
1/4 brown sugar
1/2 tsp salt
1/2 cup white sugar + 2 tablespoons
1 stick of butter-cold and cut into cubes
1 cup quick oats
2 tablespoons fresh lemon juice
1/2 tsp cinnamon
1/4 tsp nutmeg
In medium bowl, combine flour, brown sugar, 2 tablespoons white sugar and oatmeal. Cut in butter.
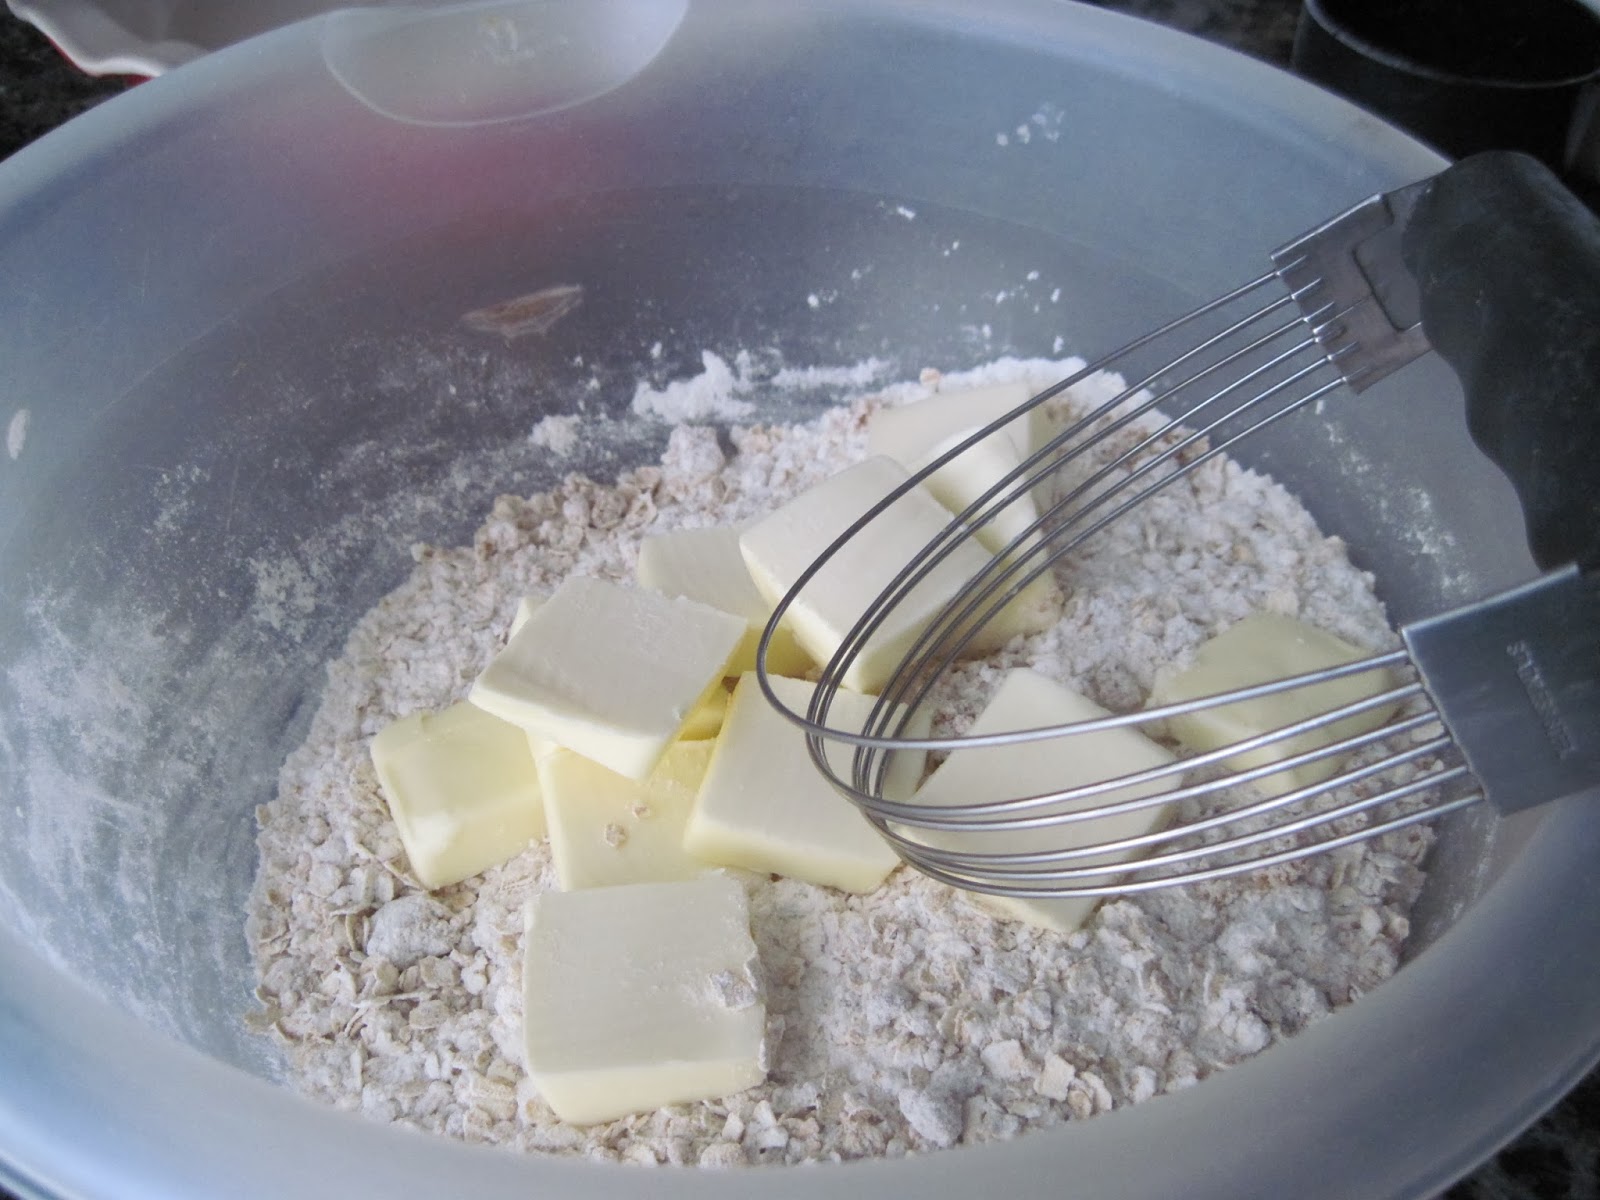
Use fingers if need be, until well mixed into large, moist clumps. Put aside.
In another bowl, add lemon juice and cinnamon to apples. Stir in 1/2 cup sugar and toss until combined.
Pour apples mixture into bottom of a shallow- 2 qt casserole. Sprinkle with topping mix and end with a sprinkle of nutmeg.

Bake for 1 hour. Yummy! (I love the way the whole house is filled with the scent of cinnamon and nutmeg) Hubby must too-because he got off the couch to come and investigate! I told him he couldn't have any until after dinner! He pouted and went back to his couch!
No more hubby pouting! Dinner is served!


(That yummy looking drizzle on top of the Apple Crisp is Salted Carmel Sauce) I promise to share that recipe soon!)
But for now, I've got to put away the leftovers! It's a good thing I have some, because mom called shortly after dinner. Guess what? She must have smelled what I was making for dinner! She's decided it's not so cold after all, and she's paying me a visit tomorrow!
Hope you all had a good weekend! I'd love to hear what some of your favorite comfort foods are!
January 17, 2014
Homemade Pineapple & Pepperoni Pizza
Hubby and I are all about traditions. That is why we made Thursday nights-Pizza night! I'll admit it has taken a lot of trial and error (especially finding a good crust) but I think we finally have it down!
Last night we made our version of Pineapple and Pepperoni Pizza.
Here is what we did!
First- The Crust:
1 pkg active dry yeast (2 tsp.)
1 cup warm water
1 tsp white sugar
2 1/2 cups flour
2 Tbls. olive oil
1 tsp salt
Place water, yeast and sugar, into a medium bowl and let dissolve until creamy-(10 min) Since I'm using my Kitchen Aid anyway, I just used that bowl.

Stir in flour, olive oil and salt. Mix until well blended.
 Grease another bowl with a Tbls of olive oil. Form dough into a ball and place in bowl. Cover with Saran wrap. ** Tip- I also cover with a thick towel to avoid drafts.) Place in a warm location. Let sit until double in size. (1 hour) ***If you don't have time to raise the dough, that's okay. The crust will just be a bit more denser.
While dough is rising- I cut up the toppings and preheat the oven to 425.
1 cup of pineapple-diced ( I use fresh)1 cup of spinach (fresh again-this time I cut into strips)1 cup of red onion (sliced thin)Thinly sliced pepperoni (I buy this in my local groceries deli section)
You can use any sauce that you like, but if you have the time and want homemade- I recommend Giada's Marina Sauce. It's amazing and you can make it ahead and refrigerate or freeze!

Lightly grease a pizza pan. Roll out dough-pinching the edges to hold in all the 'yummy' toppings! **Tip-I like my crust on the crispy side. So, I place the (crust only) in the oven for 8 min.
While the crust is baking, I shred up my cheeses. For this pizza I used:1 1/2 cups mozzarella1 cup provolone
Remove crust from oven and layer on the toppings! Bake for an additional 12-15 minutes.
Here is the Delicious result!

Happy Traditions!
Last night we made our version of Pineapple and Pepperoni Pizza.
Here is what we did!
First- The Crust:
1 pkg active dry yeast (2 tsp.)
1 cup warm water
1 tsp white sugar
2 1/2 cups flour
2 Tbls. olive oil
1 tsp salt
Place water, yeast and sugar, into a medium bowl and let dissolve until creamy-(10 min) Since I'm using my Kitchen Aid anyway, I just used that bowl.
Stir in flour, olive oil and salt. Mix until well blended.
 Grease another bowl with a Tbls of olive oil. Form dough into a ball and place in bowl. Cover with Saran wrap. ** Tip- I also cover with a thick towel to avoid drafts.) Place in a warm location. Let sit until double in size. (1 hour) ***If you don't have time to raise the dough, that's okay. The crust will just be a bit more denser.
 While dough is rising- I cut up the toppings and preheat the oven to 425.
1 cup of pineapple-diced ( I use fresh)1 cup of spinach (fresh again-this time I cut into strips)1 cup of red onion (sliced thin)Thinly sliced pepperoni (I buy this in my local groceries deli section)
You can use any sauce that you like, but if you have the time and want homemade- I recommend Giada's Marina Sauce. It's amazing and you can make it ahead and refrigerate or freeze!

Lightly grease a pizza pan. Roll out dough-pinching the edges to hold in all the 'yummy' toppings! **Tip-I like my crust on the crispy side. So, I place the (crust only) in the oven for 8 min.
While the crust is baking, I shred up my cheeses. For this pizza I used:1 1/2 cups mozzarella1 cup provolone
Remove crust from oven and layer on the toppings! Bake for an additional 12-15 minutes.
Here is the Delicious result!

Happy Traditions!
DIY Dog Bed!


Meet Bentley!
These photo's were taken the day we picked up our little rat terrier/pug, and brought him home. That was two years and one month ago-exactly one week before Christmas!
Even though hubby had his heart set on a Husky-he couldn't help but fall in love with this little guy! At 8 weeks old, Bentley barely fit in the palm of his hand!
I will admit- Mr. Bentley has been quite a handful. Just like any other puppy, he missed his mommy and we had plenty of sleepless nights. He also was a slow learner on the potty training. But that wasn't the worst part. The worst was his food allergies.
After much research, and even more trial and error, we finally found a kibble that didn't cause poor Bentley to break out in a full body rash!
Bentley is all grown up now, and the only issue he didn't outgrow, was his constant chewing up of his bed. After going through three of those soft, plush beds from the pet store, I finally decided enough was enough! It was time for a dog bed that was indestructible!
 Two weeks ago- I found this drawer down in the basement.
It wasn't very pretty prior to this pic-but it was in good shape. Hubby sanded it down to get rid of all the chipped paint, and gave it a good coat of oil-based.

After the paint dried, hubby added a handle! (He said it would make it easier for traveling to Mel's.) I think it was because hubby didn't want his dog's bed to be so plain.
The next step was to raise it up off the floor. Our first choice was some wooden dowels. After hubby screwed them in- we needed to check for sturdiness, so we called Bentley over. He made one attempt to get in,(he moved backwards so fast that the pic I took was blurry) and then cowered at my feet. "Hmm," hubby said. "Maybe it's too high." Indeed!
Never fear! Hubby-determined to get the project done perfectly, found some old drawer pulls with flat bottoms. We tried the sturdiness/like test again. This time Bentley jumped right in and even laid down!


Even so-Puppy doesn't look too impressed does he? What could it be? His new bed looks comfy enough, and he's got his favorite Gopher blanket. But...there's got to be something missing!
Wait....mummy knows!

Now that's better! A bed for a Prince!
I know- it's cheesy (I can see Mel's eyes rolling right now) But all it took was my stencils, some red paint,(I already had on hand)and ten minutes of my time. And look how much happier he is now that his bed is personalized!
Okay- It's time for Bentley's nap, and for me to go back to work. But, if you have a spoiled pet like I do-I'd love to hear why!
January 16, 2014
Is it Spring yet?
As hubby and I were sipping our first cup of coffee this morning, our local weatherman declared that we were under another winter warning advisory. "Chance of snow and freezing rain," he said. "With winds gusting up to 40 miles an hour."
"UGH!" That was my response to this dreaded forecast. Hubby, on the other hand, just shrugged. "It's winter. What do you expect?" Indeed! What should I expect?
Well, for sure I can expect that winter isn't ending anytime soon. Even though the calendar says Spring begins March 20th, that never is the reality here in the Midwest. Here, winter ends when Mother Nature says it does.
I can also expect more snow, more blustery winds, and the depressing realization, that the closest I'll be to getting into my garden for awhile, is the daydreams in my head.
But, that's the magic of the long, dreary, cold days of winter. You have plenty of time to daydream about Spring. And to plan. Which is exactly what I've been doing.
I started by looking through all the photographs I took last year. (You can see some of those I uploaded, here on my Gardening page).
Having these photo's is very helpful in the planning process. Especially when, like I said earlier, winter is so long. There is no way I could possibly remember what I've already planted and where it is located in the garden, without photo's and a plan.
After I've reviewed what I have, I can start putting pen to paper. This is when I decide what plants need to be rotated, or transplanted to a new garden entirely. I can also see 'bare spots', and decide what existing, or new plants I can use to fill those areas in.
Color is also a factor. Without those photographs I would have no way of knowing that one of my back gardens has way too much pink. ( I love pink- but not that much!)
Finally, I'm able to review what didn't work. Like the hydrangea I planted in one of my side gardens.
 See, it's that poor, very unhappy plant inside the circle. (Don't you think Fox Sports Network should hire me on for how amazing I draw circles?)
Anyway, I really don't know why I didn't notice this when I originally took the picture. (I guess I was too busy transplanting, pruning and getting everything ready for winter!)
If I remember correctly-I transplanted Mr. Hydrangea (yes, my plants are gender specific-I have many Ms. and Mrs too), because he wasn't producing any flowers in his old spot. I figured maybe he was getting too much sun, and needed a new home. So, I planted him here. At the time I guess I felt this spot was perfect. It receives good morning sun and partial shade in the afternoon.
As you can see- the variegated Hosta in the background, absolutely adores his spot! Which brings me to the problem. I transplanted four new Hosta's around that guy. Four Hosta's that hopefully will grow just as big! Where does that leave the Mr. Hydrangea? Well, if I were to hazard a guess-he probably won't be producing flowers this year either. Unless-I transplant him in the spring. Which, thanks to my photo's- is exactly what I'm going to do!
Now, with all that said- there is one downfall of planning your gardens this early in the season. You got it! I have this overwhelming desire to grow something. Not three months from now. Not in Spring-but RIGHT now! But never fear-that is what the internet is for. To inspire. And boy did I get inspired this morning.

Thank you to White on Rice Couple for the photograph! It not only inspired me-it made me giddy with excitement. If you read my last post, you know how much I owe the amazing lemon for my new-found love of water. But, in case I haven't told you-it's winter here. Which means, that feeling of joy every time I take a slurp of H2O, is marred by the fact that those lemon diamonds are very expensive this time of year.
Problem solved, or so I thought.
After a bit of research (check out Martha Stewart and Gardenista for more information) I learned that growing a lemon tree indoors, isn't exactly easy.
In fact-it might just be downright impossible! Is that going to stop me from trying? Heck no. In fact, I'm making a call to my local nursery right now!
If you have any gardening tricks or tips-I'd love to hear from you! Until then-Happy planning!
January 15, 2014
Mom's home remedies for curing the common cold
 The wintry view from my office window this morning, makes me very happy that I work from home.
The funny thing is-we are actually going through a heat wave-with the temps expected to hit 17 above today.
That wasn't the case last week, when our little neck of the woods experienced record sub-zero temperatures and a mixture of freezing rain and heavy, wet snow.
With three days of-50 degree wind chills, all of the schools in and around our community were closed, and there were even a few business' that shut down!
Like a lot of people, mom decided to keep her car snug as a bug in her garage, and stay inside, until the cold snap was over. Even though mom doesn't like the cold (she says it makes her arthritis act up), she does believe that the bitterly, bone-chilling weather has one positive side to it.
"The cold temperature's keep the bugs away," she stated the first day of the cold spell.
Mom is known for sharing her many 'old wives tales.' (Trust me- some of them are hilarious), but I had to agree with her on this one. It makes sense that if everyone is hunkering down in their homes, the germs aren't being spread. The downside is, the cold spell moved on, and so too, did those nasty little bugs. Once all the kiddies went back to school, those little germs took flight and BAM- the cold and flu season was in full swing.
I know this, because earlier this week, when the temps reached a high of 30 above, I ventured out to do some grocery shopping. This is going to sound silly (I think I'm getting more and more like mom), but once inside the store, I felt like I was in a horror movie, surrounded by a bunch of zombies. It seemed every isle I went down, someone was coughing, sneezing, or sniffling. Even the gal at the check out was blowing her nose, in between scanning my grocery items. (UGH!)
Hubby just laughed at me when I rushed in the door and frantically began washing my hands. This was one time I didn't mind. In my 47 yrs (shh-it's our secret) of life, I've learned a few things about protecting myself from those dratted germs that make you feel like you've been run over by a semi!
Now, I know you've probably heard these preventive steps a thousand times over, but it's always good, (especially this time of year) to have a refresher course. Besides, if you don't continue reading-you'll miss mom's 'unique' ways of curing a cold. (Oh boy) That is-just in case the world is aligned wrong, the moon is full, or for some other crazy reason-your body is taken over by a bug!
Okay- here we go.....My top 4 ways to prevent the cold/flu-based on my 'youthful experience' (come on- work with me here) and loads of research. (True)
1. Wash your hands. I don't just mean- squirt some soap on and rinse quickly. I mean scrub every nook and cranny (including your fingernails) with hot, soapy water!!! Once you've gotten all those ghastly germs unseeded, rinse, rinse, and rinse again. If you think I sound a bit obsessive compulsive, than you haven't seen me in a public restroom, doing the 'door handle shuffle'. (For those of you who don't know what that is- it's when you reach for the door with a paper towel in hand, and hold it open with one shoulder, while you slam dunk 'said' towel into the garbage.)
2. Increase your dosage of Vitamin C. I know- I know- there is so much controversy on whether or not Vitamin C really does help prevent a cold. Well, I am not a doctor, but I'm living proof it does. I've been taking this glorious vitamin, for as long as I can remember. Usually I take 1,000 mg daily. During the winter months, I increase that by 500 mg. During the cold and flu season, I increase it by another 500 mg. That's right. 2,000 mg a day. Now, I know I can get Vitamin C through eating healthy foods,(sometimes I do), but just in case I don't-I'm covered.
3. Allow your mind and body to rest! (And I don't just mean sleeping) Any expert will tell you that stress is one of the leading causes of illness and disease. When your brain and body are on overload, and your worn down, you don't have a fighting chance against germs. Relax! (Trust me- I know this isn't always easy advice to follow) but, I also know it is imperative for maintaining good health and strengthening your immunity. So, when I'm a bit overwhelmed with work, or life in general, I try to find ways to wind down. A bath, music, or just going for a walk. It doesn't matter. Just take some time for you-or you're bound to get the flu!
4. Drink water! LOTS of it! (For me-this was probably more difficult than the relaxing!) Why? Because I hated water! Coffee-YES please! Soda-absolutely! Wine, or the occasional beer-no problem. But water- that tasteless liquid that I believed had only one purpose(Bathing)-no way! Unfortunately-all those other beverages do not have the power that water does. The power to hydrate+ flush those nasty, pesky little bugs-right out of your system. So, I learned to love water (with a little help from lemons-of course). All I do is fill up a big jug with H20 and squeeze a little fresh lemon juice in it, and off I go!
Unfortunately, like I said earlier-sometimes, no matter what you do, those dreaded bugs infiltrate your body and start having a war. If that happens-mom has some home remedies that she swears by. (FYI- she did a lot of research on this as well- I know because I was one of her guinea pigs as a child.) Did they help? Well, I'll let you decide that one on your own.
Step One- Lather yourself from head to toe with VIX Vapor Rub. That's right. Spread a nice, thick layer of that menthol-smelling magical potion on every inch of your skin-(Don't forget between your toes and especially up your nose!)
Step Two- Put a warm stocking cap over your head. (Make sure it is comfortable-because you'll be wearing it for days.)
Step Three- Wrap a sock around your throat. (Not too tight-you don't want to choke yourself-and be prepared to retie it often, because you definitely don't want a draft to get on your throat.)
Step Four-Find a sturdy mug and fill it with three parts hot water and 1 part each of lemon juice, honey and a stiff jigger of brandy. (aw heck-make it two).
Step Five-Plop your bottom down on your comfy sofa (set your mug down to ensure none is spilled) and wrap your entire body mummy style-except for one hand that you'll need to hold your elixir. (Again-you don't want a draft to catch you.)
Step Six- Turn your TV on and begin sipping your magic elixir. (Mom recommends watching a good soap opera like Days of Our Lives, because their lives are far worse than a nasty cold and realizing that will make you feel a whole lot better.)
Step Seven- Once the elixir is gone and the soap is over- you will probably feel very tired. That's okay. Burrow down under the covers and doze as long as needed. (Warning- if you wake up in a sweat-DO NOT BATHE!-You certainly can change into a clean outfit (preferably something made of flannel) but bathing exposes you to drafts and breaks the seal of that glorious magic potion (VIX).
Step Eight- even if you are not hungry- you MUST eat. If you do not have your mum close by to make you homemade chicken soup-it's okay. Mom says Campbell's is just as good and far less work for your mum. If you don't have chicken soup-milk toast is a good second choice. It will settle your tummy and also make you tired-which leads to...
Step Nine-Return to cozy couch. Make sure you grab a box of tissue on the way. (Between the soup, elixir and the magic potion kicking in-you're going to need it.)Doze if you like, or watch more TV-but whatever you do-don't get out from under the covers unless you have to go to the restroom.
Step Ten- Repeat Steps One through Nine for as many days as it takes to kill those dreadful germs. And remember- DO NOT BATHE and keep out of drafts- or these steps will never work!
So- there you have it! Mom's family secret for the curing a cold. I bet all the doctor's in the world will now be able to breathe a sigh of a relief.
If you have a family secret or homemade remedy, I'd love to hear it. Until then-Stay healthy and just to be on the safe side- keep a container of VIX handy!
January 14, 2014
Hello!
Hello to all of you amazing fans of my mother's blog! I am so happy that she has asked me to guest blog and share with you all of the trendy DIY projects I have been doing. I take after my mother in many ways, but my love for DIY and cooking is purely because of her amazing creative influence growing up. My vision for this section of the blog is tell you all about the Chic Country lifestyle. "Country" doesn't have to exist only on the farm and it doesn't have to include chicken or apple decor. Happy reading!

Mom and me!


