Eric VanRaepenbusch's Blog, page 7
September 5, 2013
$5.00 Whoa!
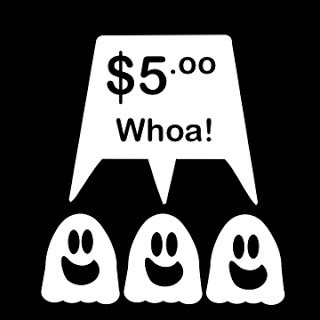
Amazon has all of the Three Ghost Friends paperback books on sale for $5!
I am the author and that is about what I buy them for! It is great deal!
I don't know how long this will last, but get them while you can. They would be a perfect Halloween gift for your little ones!
Don't forget that we are up over 60 FREE activities and printables too! Buy the books and have one activity for each day leading up until Halloween!
Thank you so much for your support!


Spooky Ghost Launch - BOOOOOOOOm!
Last May, my boys and I made a spouting blue whale in our backyard. It turned out really cool! Mixing baking soda and vinegar was the secret to our success. Since then, my boys have asked, on many occasions, to do the activity again.
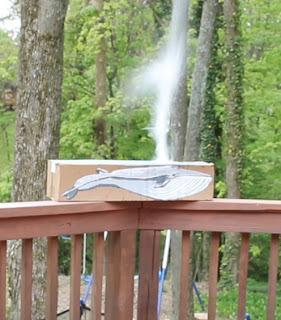
This time we challenged ourselves to come up with a ghost-themed baking soda and vinegar experiment. We came up with the idea of a ghost blasting out of a grave!
Materials needed:1. Cardboard2. Cardboard box3. Paint and paintbrushes4. Plastic water bottle5. White duct tape6. White streamers or toilet paper7. Black Sharpie Marker8. Baking soda9. Vinegar10. Plastic Wrap11. Cork that will fit tightly in the opening of your water bottle.
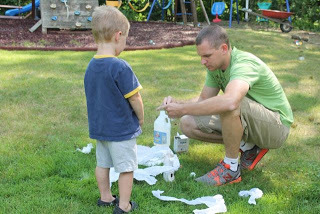
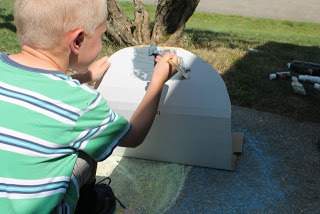 My son painted a headstone we made out of cardboard.
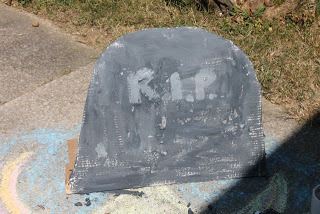 We added R.I.P.
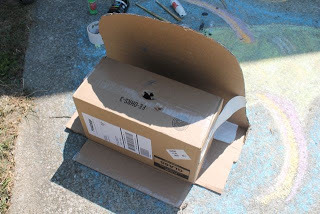 Next, we taped a cardboard box to the back of the headstone with a hole cut in the top of the box. This hole was big enough to stand up the drinking end of a water bottle, but not too big that the bottle would fall through the hole.
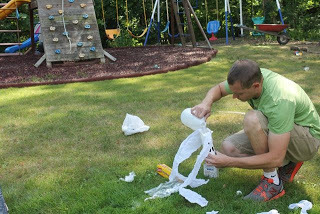
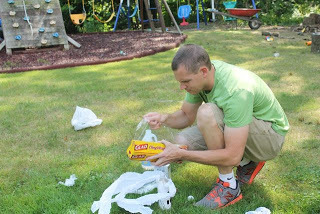
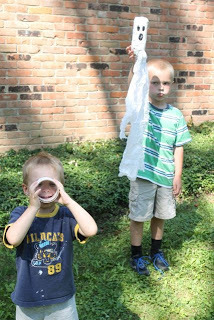 It was time to design our ghost. We wrapped a plastic water bottle with white duct tape. Then, we taped on some white streamers and added a ghost face with a black Sharpie marker.
 I poured vinegar into the bottle. I never measured, but it was probably about a 1/4 cup.
 I tore a piece of plastic wrap and laid it flat on the ground. Then, I poured a pile of baking soda on it. Once again, I didn't measure. It was probably 2-3 Tbsps.
 Then, I gathered the plastic wrap around the baking soda and then pushed it into the bottle. The purpose of the plastic wrap is to keep the baking soda from touching the vinegar until you shake it up. So, don't wrap it too tight, but don't make it too loose.
Once, the baking soda and vinegar were inside the bottle I asked my boys to stand back. Then, I placed the cork in the bottle, shook it and quickly placed the bottle in the hole in the back of the headstone. (You will place the bottle upside-down in the hole. The cork will be inside the box.)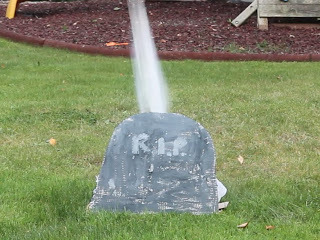 We waited until the pressure built up from the chemical reaction between the baking soda and vinegar. Then, BOOOOOOOm! Our ghost blasted out of the grave!
I can't stress enough the importance of being safe with this activity. Make sure children are far away from the headstone. Keep your bottle facing straight up when it is placed in the hole so that it launches straight up in the air. Consider using safety goggles and gloves.
Happy Ghost Launching and Happy Halloween! Enjoy!Here is a video of our launch:

This time we challenged ourselves to come up with a ghost-themed baking soda and vinegar experiment. We came up with the idea of a ghost blasting out of a grave!
Materials needed:1. Cardboard2. Cardboard box3. Paint and paintbrushes4. Plastic water bottle5. White duct tape6. White streamers or toilet paper7. Black Sharpie Marker8. Baking soda9. Vinegar10. Plastic Wrap11. Cork that will fit tightly in the opening of your water bottle.
 My son painted a headstone we made out of cardboard.
 We added R.I.P.
 Next, we taped a cardboard box to the back of the headstone with a hole cut in the top of the box. This hole was big enough to stand up the drinking end of a water bottle, but not too big that the bottle would fall through the hole.
 It was time to design our ghost. We wrapped a plastic water bottle with white duct tape. Then, we taped on some white streamers and added a ghost face with a black Sharpie marker.
 I poured vinegar into the bottle. I never measured, but it was probably about a 1/4 cup.
 I tore a piece of plastic wrap and laid it flat on the ground. Then, I poured a pile of baking soda on it. Once again, I didn't measure. It was probably 2-3 Tbsps.
 Then, I gathered the plastic wrap around the baking soda and then pushed it into the bottle. The purpose of the plastic wrap is to keep the baking soda from touching the vinegar until you shake it up. So, don't wrap it too tight, but don't make it too loose.
Once, the baking soda and vinegar were inside the bottle I asked my boys to stand back. Then, I placed the cork in the bottle, shook it and quickly placed the bottle in the hole in the back of the headstone. (You will place the bottle upside-down in the hole. The cork will be inside the box.)
We waited until the pressure built up from the chemical reaction between the baking soda and vinegar. Then, BOOOOOOOm! Our ghost blasted out of the grave!I can't stress enough the importance of being safe with this activity. Make sure children are far away from the headstone. Keep your bottle facing straight up when it is placed in the hole so that it launches straight up in the air. Consider using safety goggles and gloves.
Happy Ghost Launching and Happy Halloween! Enjoy!Here is a video of our launch:
August 21, 2013
Bread Clip Comic Strips: Create Your Own Halloween Stories
Last Halloween I saw a photograph on Pinterest for bread clip monsters. I thought they were awesome! I started collecting bread clips right away. This week I went through our junk drawer and I was surprised by how many bread clips I had collected over the year. I immediately wanted to develop a fun activity for my children to create their own bread clip monsters!
My daughter told her mom when she got home from work, one day this week, "Today, we did the most awesome activity with Dad!"
We called the activity Bread Clip Comic Strips! This blog post includes all the FREE printables to replicate the activity with your family. All you need is your own bread clips and materials to turn them into monsters.
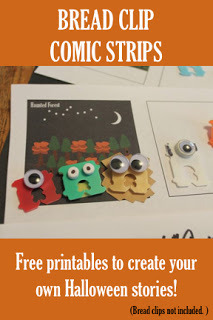 PLEASE PIN THIS PICTURE! And be sure to follow Three Ghost Friends on Pinterest!
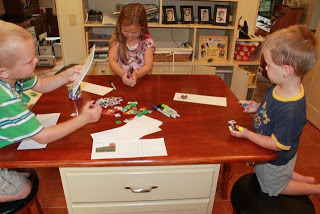 I laid out all the bread clips on the table along with googily eyes, Sharpie markers, tiny hole punches, glue dots, and construction paper. My children immediately went to work making their monsters! I also had them select a comic strip template (see below!).
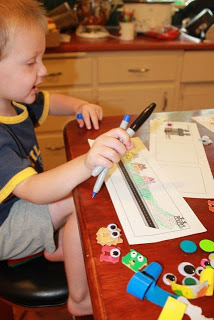
 My oldest two children selected the blank comic strip templates. My son told a story about a one-eyed ghost in a pumpkin patch graveyard under a moonlit sky. Zombies rose from the dead and gave the ghost a BIG scare.
 My daughter told a silly story about a monster sliding down a hill who met a friendly one-eyed zombie. In the last scene, they had a funny conversation. It reminded me of a conversation from the picture book
Cowboy and Octopus
by Jon Scieszka and Lane Smith.
My daughter told a silly story about a monster sliding down a hill who met a friendly one-eyed zombie. In the last scene, they had a funny conversation. It reminded me of a conversation from the picture book
Cowboy and Octopus
by Jon Scieszka and Lane Smith.
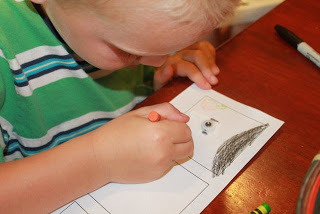
 My youngest son spent quite a bit of time making his bread clip monsters. Then, I showed him the three monsters and the Trick or Treat Street comic strip I made. He thought my story was funny and it inspired him to create his own story about his monsters trying to find toys inside a haunted house. They didn't find any toys, because there are "NO TOYS IN A HAUNTED HOUSE, Dad!"
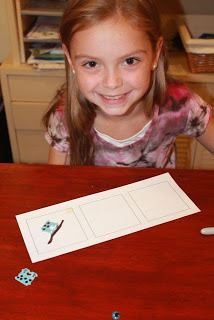
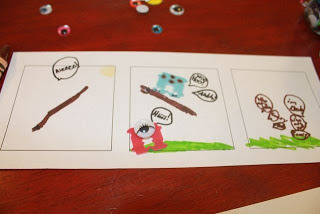 Notice how my daughter drew word bubbles and then moved her bread clip monsters through the comic strip.
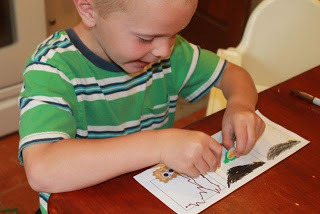 Here is my son telling his story.
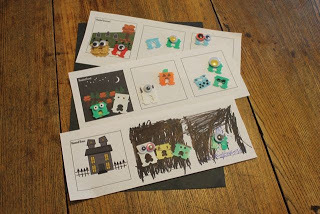 My youngest son's comic strip is on the bottom! It is pretty dark and scary inside the haunted house! (and there are NO TOYS!)
Now download and print your free printables and please tell all your friends about this fun activity! Also, be sure to check out my activities and printables page!Free Printables:
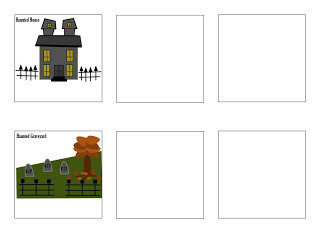 Haunted House/Haunted Graveyard Comic Strip Template
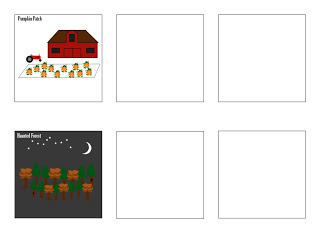 Pumpkin Patch/Haunted Forest Comic Strip Template
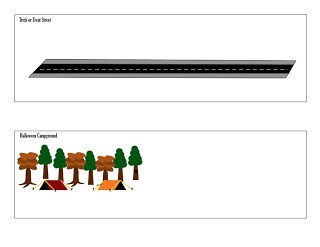 Trick or Treat Street/Halloween Campground Comic Strip Template
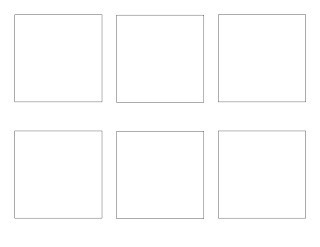 Blank 3 Square Comic Strip Template
 Blank 1 Rectangle Comic Strip Template
My daughter told her mom when she got home from work, one day this week, "Today, we did the most awesome activity with Dad!"
We called the activity Bread Clip Comic Strips! This blog post includes all the FREE printables to replicate the activity with your family. All you need is your own bread clips and materials to turn them into monsters.
 I laid out all the bread clips on the table along with googily eyes, Sharpie markers, tiny hole punches, glue dots, and construction paper. My children immediately went to work making their monsters! I also had them select a comic strip template (see below!).
 My oldest two children selected the blank comic strip templates. My son told a story about a one-eyed ghost in a pumpkin patch graveyard under a moonlit sky. Zombies rose from the dead and gave the ghost a BIG scare.
 My daughter told a silly story about a monster sliding down a hill who met a friendly one-eyed zombie. In the last scene, they had a funny conversation. It reminded me of a conversation from the picture book
Cowboy and Octopus
by Jon Scieszka and Lane Smith.
My daughter told a silly story about a monster sliding down a hill who met a friendly one-eyed zombie. In the last scene, they had a funny conversation. It reminded me of a conversation from the picture book
Cowboy and Octopus
by Jon Scieszka and Lane Smith.
 My youngest son spent quite a bit of time making his bread clip monsters. Then, I showed him the three monsters and the Trick or Treat Street comic strip I made. He thought my story was funny and it inspired him to create his own story about his monsters trying to find toys inside a haunted house. They didn't find any toys, because there are "NO TOYS IN A HAUNTED HOUSE, Dad!"
 Notice how my daughter drew word bubbles and then moved her bread clip monsters through the comic strip.
 Here is my son telling his story.
 My youngest son's comic strip is on the bottom! It is pretty dark and scary inside the haunted house! (and there are NO TOYS!)
Now download and print your free printables and please tell all your friends about this fun activity! Also, be sure to check out my activities and printables page!Free Printables:
Haunted House/Haunted Graveyard Comic Strip Template
Pumpkin Patch/Haunted Forest Comic Strip Template
Trick or Treat Street/Halloween Campground Comic Strip Template
Blank 3 Square Comic Strip Template
Blank 1 Rectangle Comic Strip TemplateAugust 17, 2013
Halloween Driveway Art: Crushed Chalk Painting
The bucket that holds our sidewalk chalk is a clear indication that we have had a great summer drawing on the driveway. It is full of small pieces of every color that are frustrating for my children to use. Today, we crushed all those small pieces with a hammer into chalk dust, added water, and painted a few Halloween decorations on the driveway.
 We initially tried crushing the chalk in larger containers with rocks.
 It worked but we were not very efficient.
 A hammer was much more effective.
 A hammer in a smaller container seemed to work the best.
 I crushed the chalk until it was as small as I could get it.
 We added water until it was consistency of craft paint.
 This picture shows a good consistency. We did have a batch of yellow that we added too much water and my kids didn't like the way it painted.
 I couldn't resist painting a ghost with my crushed white chalk.
 Please pin this picture!
I loved the results. I thought this would be great for Trick or Treat night to paint the driveway with Three Ghost Friends, jack o' lanterns, and monsters!
August 15, 2013
Oozy, Foamy, Overflowy Ghost
My kids discovered a recipe for Elephant Toothpaste on Steve Spangler Science website and wanted to do it right away. I thought it would be fun to turn this cool science experiment into a fun ghost activity that your kids will love this Halloween. We did this for the WOW factor, but if you are interested in the science behind the experiment make sure you check out his site.
 This activity would be fun to do after reading any of my Three Ghost Friends eBooks (also available in paperback!)Supply List:
1 Clear large plastic container that is ghost-shaped. (I used a mayonnaise container.)
1 cup of hydrogen peroxide solution (many of the science websites call for a 20-volume hydrogen peroxide liquid that is a 6% solution and is available at beauty supply stores. We just used the bottle we had at home that was purchased at the pharmacy.)
2 teaspoons of dry active yeast
4 Tablespoons of warm water
Liquid Dish Soap (We used Dawn)
Food coloring (if you want a colored ghost -- Hey I know a good eBook for that!)
Small cup for mixing yeast and water (we used a yogurt container.)
Black Sharpie Marker
Safety goggles
Funnel
Measuring spoons
Mixing container that is pourable
Tray to collect overflowing foam
Three Ghost Friends eBooks or paperbacks
Procedure:
 Here are some of the supplies we used! Hopefully, you have them in your house and you won't have to go buy these items at the store. But, if you don't, you will find that they are all relatively inexpensive.
 First, I drew a ghost face on the mayonnaise container.
 Then, we poured 1 cup of hydrogen peroxide into the container. If you want to add food coloring you would do that now. We chose not to because we wanted a white ghost.
 I had my oldest son squirt a bunch of Dawn dish soap into the container. You need around 2 Tablespoons.
 My youngest son mixed the 2 teaspoons of dry active yeast with the 4 Tablespoons of warm water.
 We used a fork to break up the bits of yeast, and help it dissolve into the warm water..
 Meanwhile, my son swirled around the Dawn dish soap and hydrogen peroxide. (Notice, he is not wearing safety goggles. We forgot and should have had them on because hydrogen peroxide can irritate skin and eyes.)
 Next, we moved outside and placed our ghost container in a tray to collect the overflowing foam.
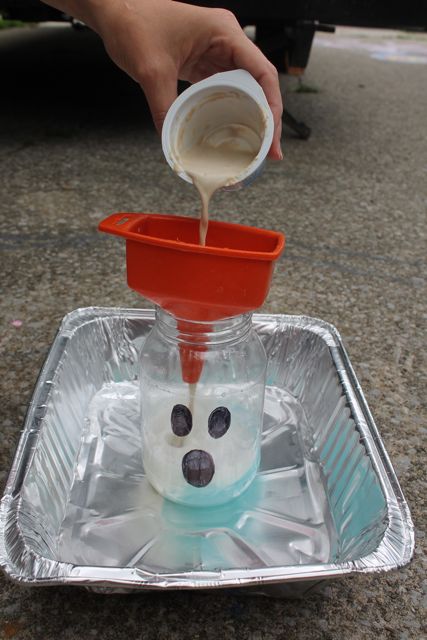 The funnel helped get the yeast and water mixture directly into the container without spilling.
 The foam started growing immediately!
 My kids yelled and screamed with excitement at this point!
 Very cool!
 The ghost looks like it is yelling, "OH NO!"
 Where did the ghost go?
 BOO! There it is!
 Please pin this picture to your Halloween activities board!
Follow Three Ghost Friends on Pinterest!
June 22, 2013
Homemade Binoculars
I have often made binoculars and spotting scopes from paper towel and toilet tissue tubes for my children. I don't think there has ever been a time when my children haven't gotten excited when I handed them a pair. This time, however, I think I blew their minds with a pair of homemade binoculars made out of pint size coffee cream containers and duck tape.
 Please pin this picture
 Start with two empty pint size coffee cream containers. I made homemade binoculars with Coffee-mate brand (clear) and International Delight (white) containers. They both work great!
 Remove the outer plastic labels. Make sure you wash the bottles and allow them to dry completely. I placed my bottles outside in the hot sunshine to dry faster.
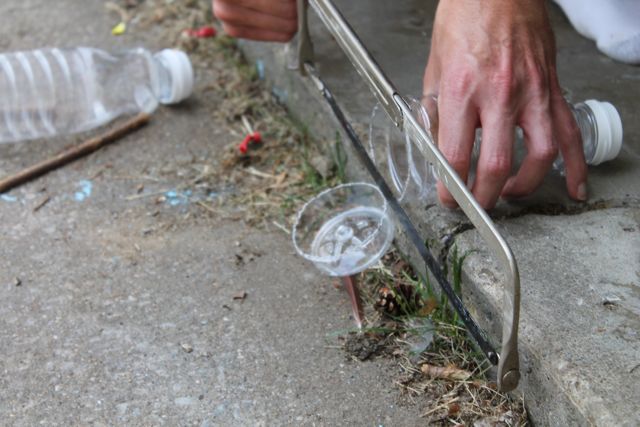 Next, cut off the end of the each bottle using a hacksaw, knife, or pair of scissors . The bottles already have grooves which made this very easy. I cut at the first groove from the bottom.
 The edges of the bottle were a little jagged from the hacksaw, so I trimmed with a pair of scissors to make sure it was smooth. I later covered these edges with tape too.
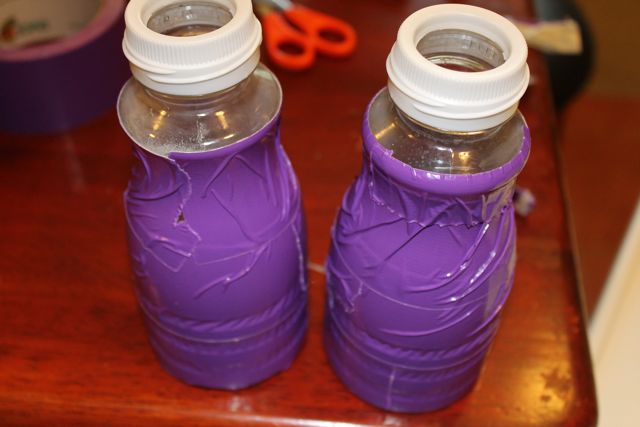 Wrap the bottles in duck tape.
 I rolled a few pieces of tape and placed on the side of the bottles to allow them to stick together.
 Then, I wrapped long pieces of tape around both bottles. I started in the middle of the binoculars to try to get the tape down in between the two bottles. The bottles were now secured together.
 I had my son try the binoculars on for size. The eye holes were a little wide, so I pulled them closer together by wrapping tape around the bottles near the top.
 Lastly, I folded a long piece of duck tape in thirds and attached it to the bottles for a strap.
 The first thing he did was check out the birds at the birdfeeder! Actually, my older kids loved the binoculars too. They remarked that they felt just like real binoculars!
 Pin this picture too!These binoculars are fun for every day play! But come Halloween time, you may just want to make an orange and black pair of binoculars and go on a ghost hunt! Please use the free printable below to print out the THREE GHOST FRIENDS. Included in the PDF download is a really big ghost, ghosts in primary and secondary colors, white ghosts and ghost shapes. Hang the ghosts around the house or outside, and use the binoculars to have a fun ghost hunt!!
 Click here to download the ghosts!
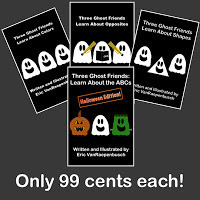
The characters from the printables are from my THREE GHOST FRIENDS series available as eBooks (iBookstore and Kindle Store) for only 99 cents or print versions from Amazon.com
 (some titles are on sale for as low as $4.80 (as of June 22, 2013)!
March 12, 2013
The Force is Strong in Renn!
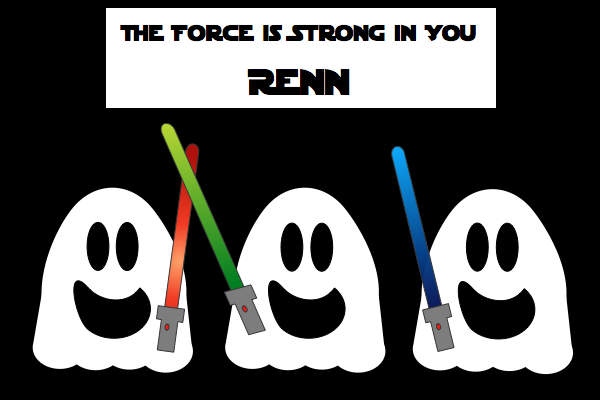
Our family is thinking of you!
Read more on how you can let Renn know you are thinking of him at Susanna Leonard Hill's blog!
February 5, 2013
Thank you to THE CASTLE LIBRARY Blog
Three Ghost Friends was mentioned and reviewed at The Castle Library today. I was so happy with the comments describing the series:
"These are not books to simply be read, but to be explored."
"Graphics are simple, yet cute and appealing for youngsters."
Further she described and acknowledged all the activities available here on the blog:
"The author keeps activities, like his books, simple and easy for other parents and teachers to enjoy doing."
Thank you so much to Jackie Castle for this fabulous blog post!
Castle just came out with a book of her own, not for preschoolers but for the YA crowd. It has received many excellent reviews on Amazon!
January 9, 2013
Katie Davis's Brain Burps About Books Interview
I was interviewed by author and illustrator, Katie Davis, for her podcast Brain Burps About Books . We discussed my experiences using Pinterest to market the Three Ghost Friends series.
I have been a huge fan of Katie's picture books -- my favorite being Who Hops? . I think the book has been read in our house hundreds of times with each of my kids becoming obsessed with it for a period of time!
It was an honor to be on her show. Thanks Katie!
 Click Here to listen the show on her website!
Click here to listen to her show on iTunes!
December 24, 2012
Merry Christmas from Three Ghost Friends

I hope everyone has a happy and healthy holiday with their family and friends.