
Luisa Weiss's Blog, page 4
February 10, 2021
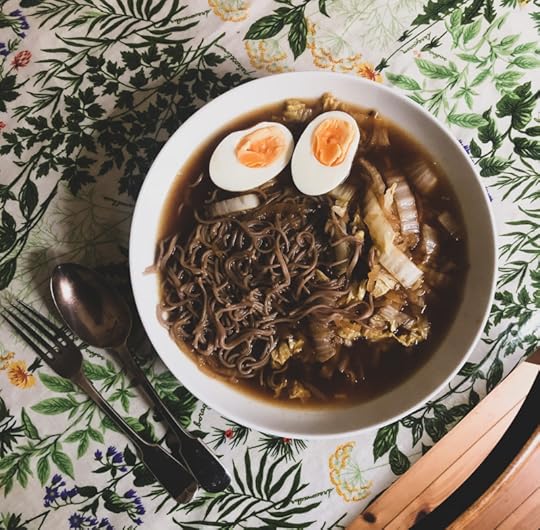
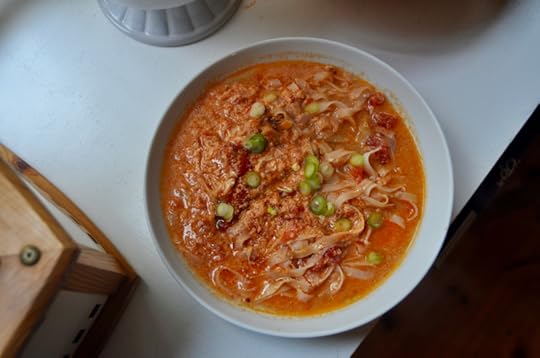
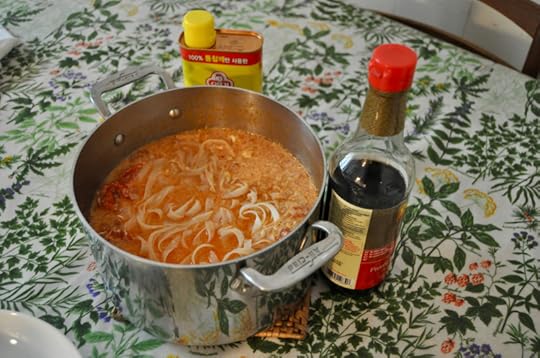
Meera Sodha's Caramelized Onion Ramen
It is 4:24 pm and by some small miracle, I currently find myself alone in our apartment. Max and Bruno left a little while ago to trudge through the snow to the pharmacy and drugstore. Hugo is in the courtyard playing in the snow. He can't stay away from it, he's bewitched by it. It's dystopian to think about how novel a truly cold winter is for our little Berliner, when the very cold winters of our childhoods in Berlin were practically a defining feature of the experience of growing up here. But wait, I'm getting away from things. I am home alone.
HOME ALONE.
First I blasted music, just to feel something. Then I drank a cup of scalding hot tea and burned my mouth. Now I'm sitting here by the radiator, trying to write. A child outside is screaming bloody murder at her father for making her play in the snow and although I usually barely register the noise of children who don't belong to me, this one is making me want to howl out the window. We're all losing our minds a little, yes?
Where was I. Home alone. You all. This soup.
Oooh, this soup. It comes from East by Meera Sodha. One of the best cookbooks I own. Every recipe I've tried has been delicious and complex, but also easy and fun and interesting. If you follow me elsewhere, you may be sick of hearing me wax on about it. I'm sort of sick of me going on about it! But it really is an amazing collection. It has taught me so much and broadened my pantry immeasurably. My cooking is better for owning the book, my diet more varied. The recipes are all vegetarian or vegan, Asian-inspired and simple to make.
Meera's recipes are a study in the masterful layering of flavors, and this soup is a perfect example. You start by caramelizing onions (I got impatient and moved on after 20 minutes and my soup was still staggeringly delicious), to which then add stock and cooking wine and soy sauce and miso. Taste the broth and kapow, it'll blow you away. Best of all, your work is now mostly done! All you have to do is cook your noodles, drop them into the deep brown soup along with some greens (I used Napa cabbage) and a jammy egg (she recommends a soy egg, which requires a little advance planning), and sit down to eat.
You'll feel like you're eating restaurant food, which is the highest praise I can give food right now, because I am so sick of my own cooking and my dinner staples and if I could, I would just order in dinner from a different restaurant every day, but I can't, so instead I depend on cookbooks to give me a glimmer of the outside world.
Which cookbooks are you leaning on to give you that sense that the world is still out there, awaiting us? I love a good cookbook chat, so have at it.
Note: This post includes an affiliate link and I may earn a commission if you purchase through it, at no cost to you. I use affiliate links only for products I love and companies I trust. Thank you.
Caramelized Onion Ramen
Serves 4
Print this recipe!
Vegetable oil
3 large onions, peeled and finely sliced
3 garlic cloves, peeled and finely sliced
�� tsp salt
1 bird's eye chile, finely sliced
6 cups/1�� liters vegetable stock
2 tablespoons Chinese rice wine
1�� tablespoons light soy sauce
1 tablespoon brown rice miso
Salt and black pepper
7 ounces/200 grams ramen noodles (I used gluten-free buckwheat noodles)
7 ounces/200g leafy greens like gai lan or choi sum, or Napa cabbage, cut into 6cm pieces
Chile crisp, to serve
4 7-minute eggs or soy eggs
1. In a large, heavy-bottomed saucepan, warm 5 tablespoons of oil over medium heat. Add the onions, garlic and salt to the pan, stir to coat in the oil, then cook for 8 to 10 minutes. Reduce the heat to low and continue to cook for 20 to 30 minutes, stirring every five minutes. The onions will gradually start to caramelize and color. Eventually they'll start breaking down into a soft, sweet, caramel-colored paste.
2. Add the chile, if using, and stock to the pan, bring to a boil, then turn the heat down to a simmer and add the rice wine, soy and miso, stirring well to combine. Taste, adjust the seasoning, then turn off the heat.
3. Cook the noodles according to the packet instructions, then drain, refresh under cold water and stir in a little oil to keep them from sticking together.
4. Cook the greens just before serving. Bring the broth up to a boil, drop in the greens and cook for a minute or two, until just tender.
5. Divide the noodles between four bowls and ladle the broth over the top, making sure to share out the greens evenly. Halve the eggs, if using, and place two halves on each serving. Drizzle over the chile oil, if using, and serve.


February 5, 2021
Elise Bauer's Blueberry Buckwheat Pancakes

Ever since Hugo was born, I've been trying to find my pancake recipe. You know, the kind of pancake you can make every week and never tire of, the one that turns out consistently every time, the one that pleases everyone at your table? I've cooked my way through countless recipes, from blogs and books and newspaper clippings, and found a few gems along the way, sure, but they were never quite right as an evergreen.
I also discovered a few things about myself. For example, I am not, nor will I ever be, the kind of person who will willingly separate and beat egg whites for pancakes on a Sunday morning! Turns out light-as-air pancakes aren't as important to me as being able to mix a batter quickly, while there are still cobwebs in my eyes, and my hangry children are banging their forks against the table. As long as the pancakes turn out tender and fluffy, that's plenty good for me.
Also, apparently buckwheat is a non-negotiable factor in my pancakes! I've tried whole wheat, cornmeal, oat flour and ground nuts in my batter. And you know what, they're all fine. But to me, nothing beats the hearty, old-fashioned flavor of a buckwheat pancake. (To be accurate, I actually use a blend of buckwheat and all-purpose flour - or gluten-free all-purpose - because the children like it best, but who knows, some day, when they're older, I'll try to slide a 100% buckwheat pancake past them. I'll let you know how it goes.)
Mix-ins? For me, nothing beats a blueberry. Frozen or fresh, it doesn't matter, though I love the marbled swirls that frozen berries give the batter.
Finally, while we're all bullied into thinking that buttermilk is best for pancakes, it turns out that in these pancakes, a mixture of three quarters yogurt and a quarter milk makes for the thickest, most tender pancakes.
Now. Pancakes, like all food, are personal! These are the conditions of my favorite pancake, but yours may look different. If that is the case, ignore this post and peace be with you! But if you are still on the hunt for your favorite weekly pancake, may I humbly suggest you try this one? I first found the recipe on Simply Recipes a long time ago, fiddled with the recipe until it produced the pancakes I liked best, and then committed it to the side of my fridge, where it still lives today.
We make these nearly every week. They're nicely balanced and tender, not too sweet, so they don't give you that slightly sweaty, sick feeling that other pancakes can, and delicious in a little pool of maple syrup. I fork them hot from the pan onto everyone's plates and keep cooking while the others dig in. The children love them, as do we.
Maybe you will too.
Blueberry Buckwheat Pancakes (optionally gluten-free)
Serves 4 (about 14 pancakes)
Print this recipe!
3 tablespoons (43 grams) unsalted butter
3/4 cup (100 grams) buckwheat flour
3/4 cup (100 grams) all-purpose flour or all-purpose gluten-free flour blend
2 tablespoons sugar
1/2 teaspoon salt
1 teaspoon baking soda
1 egg
1 1/2 cups (350 grams) whole-milk yogurt
1/2 cup (150 grams) whole milk
Generous handful frozen blueberries (fresh, if you have them)
Vegetable oil for coating the pan
Butter, for serving (optional)
Maple syrup for serving
1. Melt the butter and set aside to cool slightly.
2. In one bowl, whisk together the flours, sugar, salt and baking soda. In a separate bowl, whisk together the egg, yogurt, milk and melted butter.
3. Whisk the liquid mixture into the dry ingredients until just combined. Do not overbeat. Gently fold in the blueberries.
4. Place a nonstick skillet over a medium-high flame. Put a drizzle of oil on the pan and spread it around evenly with a paper towel. Ladle the batter into the hot skillet to create about 3 5-inch pancakes. Reduce the heat slightly. Cook for 2-3 minutes, until air bubbles appear on the surface on the pancake. Flip and cook the other side until done, another 1 to 2 minutes. Repeat with more oil, if needed, and the remaining batter.
5. Serve the pancakes as they come off the pan, or keep them warm in the oven until ready to serve, topped with butter (if desired) and maple syrup.
February 1, 2021
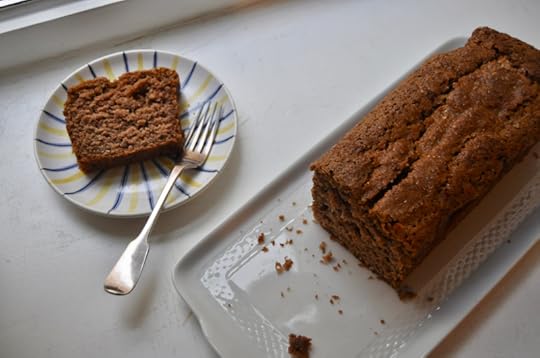
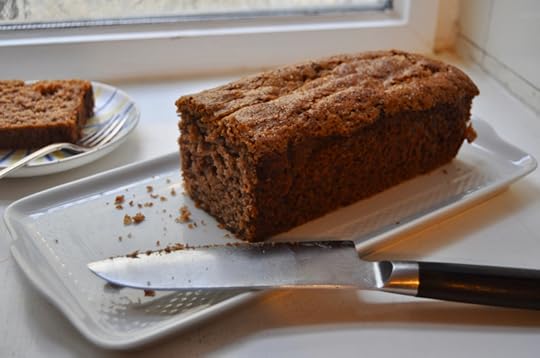
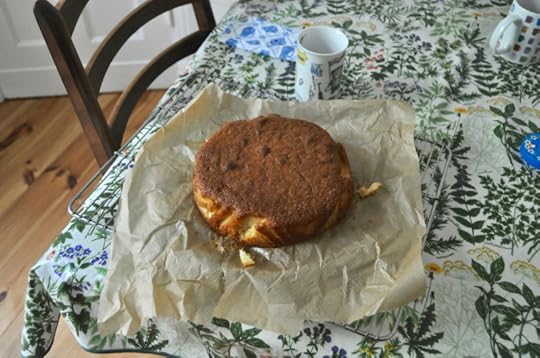
Erin Jeanne McDowell's Gluten-Free Apple Butter Loaf Cake
I know that there is nothing more tedious than reading about other people's special diets, but I'm going to be posting about gluten-free baking more frequently here and I would like to explain the shift. I'll try to keep things brief, but obviously, if you have questions about any of it, please feel free to ask away below.
I recently stopped eating gluten for good. It was a long time coming. Several years ago, after the fog of my second pregnancy lifted, I noticed lots of persistent and painful digestive symptoms. On my doctor's advice, I tried eliminating various foods out of my diet. The most noticeable difference happened when I stopped eating gluten, but, I mean, I love gluten. I LOVE IT. I love eating it and baking with it, bread and pies and pasta and toast and cakes and cookies and and and...I really just didn't want it to be true. Plus, some pesky and particularly worrying symptoms remained regardless of what I ate or didn't eat.
I ended up having a colonoscopy, during which a pretty large precancerous polyp was discovered and removed. It was a scary experience. The handsome gastroenterologist, who'd been a little scornful about why I was showing up for a colonoscopy at the age of 40, turned white as a sheet after the procedure and told me that my GP, who had insisted on the colonoscopy despite my young age, had saved my life. Uh, yay? Around the same time, I was diagnosed with stress-related gastritis. During the endoscopy for that, I was tested for celiac disease, which turned out to be negative, thankfully.
I took a course of antibiotics for the gastritis and tried to reduce my stress (ha ha haaaa) and things slowly calmed down. Still, even when all the scary stuff was out of the way, I still dealt regularly with pain and bloating and other unpleasant things. I tried the FODMAP diet for a while, which sort of helped. I tried replacing all regular bread with sourdough, which also sort of helped. But eventually, I cut gluten out entirely, and it has made a world of difference. In fact, it made me realize for just how long I'd been dealing with digestive pain, anxiety and distress. It long predates having children, that's for sure.
So that's that. I don't have celiac, but I do have gluten intolerance. I've stopped eating gluten, but luckily, I don't have to worry too much about cross-contamination. For example, when we have pasta for dinner, I make regular pasta for my family and gluten-free pasta for me, but when I have to test the pasta, I know that half a wheat noodle isn't going to hurt me. But I recently ate a piece of regular birthday cake at Bruno's birthday (how bad could it be to have just one piece?) and I was in so much pain and discomfort the next day that I really regretted it (damn, it was a good piece of cake, though).
Going gluten-free without celiac disease isn't a terrible hardship. Good-quality gluten-free pasta and bread isn't that hard to find anymore (and I'm lucky enough to live sort of close to the most amazing gluten-free sourdough bakery called Aera) and I have loved the challenge of discovering the huge variety of Asian noodles that are naturally gluten-free, as well as cooking more with rice and other gluten-free grains. But gluten-free baking really is a whole other ball of wax.
As I wrote on Instagram the other day, after a lifetime of home baking, it's been humbling, to say the least, to dip my toes into the waters of gluten-free baking. So much trial and error. So many failed experiments. What I have realized is that my only goal, really, is to learn to make gluten-free things that are delicious in their own right and that people will want to eat even if they aren't gluten-intolerant.
Which means that now I can finally get to the thing I really wanted to tell you about! This cake!
The recipe originally comes from the self-titled baking fairy godmother herself, Erin Jeanne McDowell, and isn't gluten-free to start with, but I fiddled with the ingredients a little bit (after an ill-fated experiment with a different applesauce cake that was so sandy as to be rather repulsive) and ended up with a cake so tender and lovely that we couldn't stop eating it. It was my tea break cake and Hugo's breakfast cake for nearly a week! It's the kind of cake that you want living on your counter permanently, with a velvety crumb, a wonderfully chewy-crunchy top and a whole lot of cozy flavor.
You'll need apple butter, which I make every fall after we go apple picking, using this brilliant recipe. This year I made the apple butter in the Instant Pot, which made things go so much quicker, so I very much recommend that little shortcut. You'll also need an all-purpose gluten-free flour blend. I use one from Sch��r, because it's what I can get at my local grocery store here. Two things I've learned from kind commenters and some reading is that adding a little bit of oat flour to a gluten-free cake or cookie can help provide a better, less gritty crumb and that it's essential to let gluten-free cake batter (and other baking mixtures, I assume) sit a bit to hydrate the flours properly. I reduced the amount of sugar from the original and I think it's the perfect amount of sweet.
Below you'll find the recipe as I made it (the original is here). I hope you like it as much as we did. Next time, I'll try folding in a handful of walnuts and the time after that, a handful of fresh cranberries. (If you stick to the original recipe, I still think you can leave out the brown sugar entirely.)
And if you have any tips or tricks or favorite gluten-free recipes or sites or books to recommend, have at it in the comments! I'd be so grateful.
Gluten-Free Apple Butter Loaf Cake
Makes one 9-inch loaf cake
Print the recipe!
1 cup/130 grams all-purpose gluten-free flour blend
�� cup/60 grams oat flour
1 teaspoon baking soda
1 teaspoon ground cinnamon
�� teaspoon ground allspice
�� teaspoon freshly grated nutmeg
�� teaspoon fine sea salt
�� cup/120 milliliters vegetable oil
�� cup/100 grams granulated sugar
2 large eggs, at room temperature
1 �� teaspoons vanilla extract
�� cup/180 milliliters apple butter
�� cup/60 milliliters plain yogurt
1 1/2 tablespoons turbinado sugar, or to taste
1. Heat the oven to 350 degrees F (180 Celsius) and line a 9-by-5-inch loaf pan with parchment paper. In a medium bowl, whisk together the all-purpose flour, oat flour, baking soda, cinnamon, allspice, nutmeg and salt to combine. Set aside.
2. In a large bowl, whisk the oil and sugar until well combined. Add the eggs one at a time and whisk well after each addition to incorporate. Whisk in the vanilla extract.
3. Add the flour mixture and stir just to combine. Add the apple butter and yogurt and mix well to incorporate. Pour the batter into the prepared loaf pan and smooth the top. Set aside to rest for 8-10 minutes.
4. Sprinkle the surface of the loaf generously with turbinado sugar. Bake until a toothpick inserted into the center comes out clean, 45 to 55 minutes. Let cool for 20 minutes in the pan, then, using the parchment paper as a sling, pull the cake out onto a rack to cool completely before slicing and serving. The cake, loosely wrapped with plastic wrap, will last at room temperature for five days.
January 29, 2021
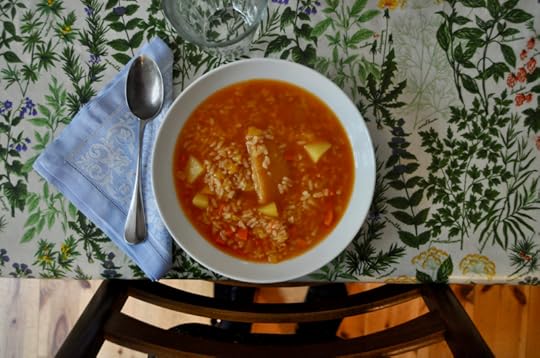
Lidia Bastianich's Rice and Potato Soup with Parmesan
I just have one question for you today. ARE YOU SAVING THE RINDS OF YOUR PARMESAN CHEESE?
Sorry if that's a little loud, but I just really need to make sure that all of you have gotten the Parmesan rind memo, okay?
I'll try and calm down now. Alright.
Now, have I told you about my freezer? (Okay, fine, two questions.) There are many, many things that I love about living in Europe. But I'll tell you one something: European freezers are not one of them. They are A LOT to get used to and by A LOT I mean not much at all. I have shoe boxes larger than my freezer. Not even kidding!
Anyway!
My freezer. It is the home of a few forlorn Chinese dumplings, some tortillas purchased in Boston in 2019 (sob), a couple of boxes of frozen veg, my KitchenAid ice cream attachment (wheee! It was one of my birthday presents in December and it is brilliant) and about 15 foil-wrapped Parmesan rinds. We go through a lot of Parmesan cheese in this house, as it must top almost every plate of spaghetti (not Hugo's, though, who loathes melted cheese in all forms yes I'm talking grilled cheese and gratins and lasagne and nachos and PIZZA why God whyyyyyyyyyy) and because it is the only cheese that the boys will eat thin slivers of, after dinner, like sophisticated little creatures destined for a life of pleasure and harmony.
Every time we get to the end of a wedge of cheese (and I mean the very end, we're talking just a few millimeters), I wrap them up in a piece of aluminum foil and throw them into the freezer. This way, the next time I make soup, I know I have a little umami flavor bomb just waiting to be pulled into active duty. Straight from the freezer, I unwrap the rind, plop it into the pot of broth and let it do its magic.
As it simmers away in that pot of soup, the rind miraculously continues giving up huge amounts of flavor, enough to scent the house and make your soup taste very, very good. Then there is the added bonus that the rind is entirely edible. As it cooks, it softens and mellows. Upon serving the soup, you can fish out the rind and, depending on the size, either share it with your fellow diners or eat it all yourself, a very well-earned cook's snack.
My mother and I love the rind and always share it. My husband and children do not (it's a textural thing, as it's a little rubbery, which is pleasing to some and not to all), so I get to eat it all myself.
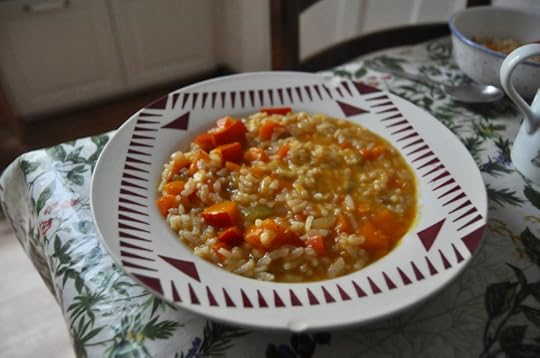
Now, on to this particular soup. It comes from the way back, dusty depths of this very blog, having first been published in November of 2005, when baby Wednesday Chef was just a few months old. A wee bairn! It comes from Lidia Bastianich, grande dame of New York Italian cooking, and it features the absolutely wonderful pairing of potatoes and rice, which will strike some of you as too much starch! and others as just enough. I am firmly in the there is no such thing as too much starch camp and so this soup is one of my very favorites.
It is nourishing and a balm, to make and to eat, and you can, as with Rachel's squash and rice soup, play with the amount of liquid you use to make a looser or stewier soup. If you err on the side of stewy, and there are leftovers, they will cool into risotto, which will please (no, let's be real, may please) the children in your home. The parsley, I feel, is essential because it brings a bit of brightness and the faintest touch of acidity to the soup, balancing out the flavors nicely. If your children are the kind to fall over in a dead faint at the sight of something green in their soup COUGH COUGH, leave it out of the pot and just sprinkle it on your own portion.
One of the oddities of a life in food blogging is the fact that you have the pleasure of eating so many delicious meals that rarely get made again, because there are so many other recipes to get to. This is hardly a hardship, though Max has been known to beg me to remember certain dishes while he's eating them. I'm happy to say that this recipe is one of those rare ones that comes around again and again, lamination-worthy, as I have been known to say. These beloved favorites now have their very own category over there in the sidebar on the right.
Eagle-eyed readers may notice that the categories in general have been cleaned up and clarified a bit, so that now you can quickly navigate your way to quick weeknight dinners, vegetarian main dishes or gluten-free recipes. I hope this helps you navigate all the good food available here. In fact, in the coming weeks, I'll be featuring other favorites that I first wrote about long ago, but that I feel deserve some fresh sunlight and a little love.
Note: This post includes an affiliate link and I may earn a commission if you purchase through it, at no cost to you. I use affiliate links only for products I love and companies I trust. Thank you.
Rice and Potato Soup with Parmesan
Serves 6
Print this recipe!
3 tablespoons olive oil
2 medium carrots, diced
2 celery stalks, diced
4 to 5 medium-sized potatoes, peeled and cut into 1/3-inch cubes
Salt and pepper to taste
1 tablespoon tomato paste
1 cup long-grain or arborio rice
8 cups hot vegetable or chicken stock, plus more if desired
2 2-inch-squares Parmesan rind
1 fresh or dried bay leaf
A handful chopped flat-leaf parsley
1. In a deep, heavy 4- to 5-quart pot, heat olive oil over medium heat. Add the carrots and celery, season with salt and pepper, and cook, stirring occasionally, until softened, 3-5 minutes. Add the potatoes and stir to combine. Add the tomato paste and stir well to coat the vegetables.
2. Add the rice, broth, cheese rinds and bay leaf. Bring to a boil, stirring well, then lower the heat and simmer, covered, for about 18-20 minutes. Check the seasoning. If you'd like a looser soup, add a little more broth. Remove from the heat, discard the bay leaf and stir in the parsley. Remove the rinds, cut into pieces and distribute among the serving plates. Ladle the soup on top and serve.
January 25, 2021
Odette Williams' Plain Vanilla Cake

Bruno's fourth birthday was this past weekend. For months, he's been planning on whom to invite, painstakingly listing the names of his little buddies from KiTa on his adorable little fingers. Of course, ultimately, no one could come, but our sunny boy bore that with his signature good humor, which we have been leaning on so much recently that I feel almost badly about it. So we focused on the cake instead. After all, Hugo has never been particularly interested in birthday parties, much preferring to spend time thinking about which cake to request. Bruno, by contrast, couldn't have cared less about the cake, and only after much prodding by his brother and me, grudgingly gave in and said his cake it should be a yellow cake with, very important, pink and purple frosting.
Hugo was much chagrined, having hoped that his preference for a chocolate cake would be shared by his brother. But I was excited, because a couple years ago, I made the discovery of the best vanilla cake ever and I'm always thrilled to have an excuse to make it and I've been meaning to tell you all about it for, well, years. It comes from Odette Williams's book Simple Cake and is, in my mind, the very best plain yellow cake I've ever had. It's got buttermilk for a bit of tang, and quite a bit of vanilla (which is why, in the book, Odette calls it Very Vanilla Cake), and the batter, which comes together quickly with a mixer, has a gorgeous silky texture. But mostly, it's just a delight to make, as easy as easy can be.
I've made it as frosted cupcakes, as a simple round cake dusted with confectioners' sugar, baked in a tube pan and served plain, and split and filled and frosted, and it has been a slam dunk every single time. It's my forever yellow cake. I mean, I love the recipe so much that I have it taped with washi tape to the side of my fridge, an honor bestowed on only two other recipes! (One is Elise's buckwheat pancake recipe, the only pancake recipe I ever make, shall I tell you about it sometime? And the other is Diana Henry's mustard-panko baked chicken.)
This time, I baked the cake batter in an 8-inch round pan that I had lined with parchment paper. I knew I was going to cloak the whole thing with swaths of whippy frosting ultimately, so I didn't really care what the sides looked like, and the parchment-as-sling really is just so easy. But obviously, if you want neater sides, you should cut the parchment to fit the bottom as well as make a collar and also possibly use a spring form rather than a regular cake pan.
Once the cake was fully cooled, I split it in half and spread about 3/4 of a jar of storebought lemon curd on one half. You could, of course, also make your own lemon curd! But I was grateful to have the shortcut. I placed the other half back on top of the cake. Then I made frosting out of whipped cream and ricotta, only because my husband didn't buy enough whipping cream and I had ricotta that had to be used up anyway. (It was 200 ml of heavy cream and a little less than 200g of ricotta whipped together with enough confectioners' sugar to make it sweet, but not too sweet.) I really don't like buttercream very much and making a meringue frosting was just not going to happen this time (though I think it'd be perfect here, honestly!), so the whipped cream frosting was where I ended up.
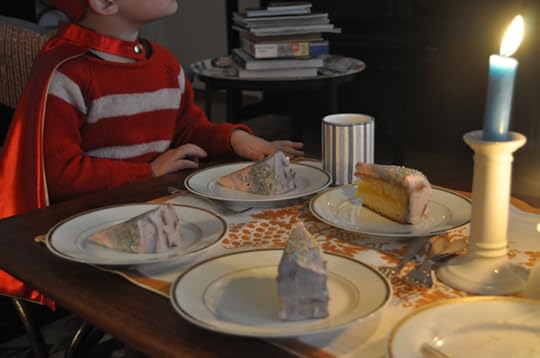
I divided the cream frosting in half and tinted each batch pink and purple, then did a bit of swirly cake spackling. I will never win any beauty awards for my cake decorations, and ultimately, generously speaking, the cake looked more a cloudy sunset than anything else, but it tasted wonderful���the combination of tender cake, sweet-sour filling and whipped cream frosting worked absolutely perfectly���and everyone loved it and Bruno, our darling boy who is the cuddliest, loveliest, funniest little bunny, was happy. What more could I ask for?
Note: This post includes affiliate links and I may earn a commission if you purchase through these links, at no cost to you. I use affiliate links only for products I truly love and companies I trust. Thank you.
Plain Vanilla Cake
Makes one 8-inch/20-cm round cake
Print the recipe!
1���2 cup (120ml) buttermilk
2 eggs, at room temperature
1 tablespoon vanilla extract (or the scraped seeds of 1 vanilla bean)
3���4 cup (150g) granulated sugar
1 1���2 cups (195g) all-purpose flour
1 teaspoon baking powder
1���4 teaspoon baking soda
1���4 teaspoon salt
8 tablespoons (115g) unsalted butter, at room temperature
3 tablespoons mild-flavored vegetable oil
1. Preheat the oven to 350��F/180��C. Grease an 8-inch/20-cm round pan with butter and line the bottom and sides with parchment paper. In a small bowl, whisk the eggs together. Set aside. If using the vanilla seeds, use your fingers to work the vanilla bean seeds into the sugar in a small bowl. Remove any bits of pod that may have come off with the seeds. Set aside.
2. Place the flour, baking powder, baking soda, and salt in a bowl and mix with a fork.
3. Using an electric mixer with beaters or a paddle attachment, beat the butter for 30 seconds on medium speed and then gradually add the sugar. Scrape down the sides of the bowl. Continue beating on medium speed for another 4 minutes or until light in color and fluffy. If using the vanilla extract, add to the bowl and beat until combined.
4. With the mixer still on medium speed, gradually add the eggs. On low speed, add the flour mixture and then the oil and milk; mix until just combined. Don���t overbeat. Scrape down the sides and bottom of the bowl.
5. Pour the batter into the prepared pan and smooth the top. Bake in the center of the oven for 40-50 minutes. When a skewer inserted into the center comes out clean, and the cake bounces back when lightly pressed, remove the cake from the oven and let it stand for 10 minutes. Run a knife around the cake to gently release. Invert the cake, peel off the pieces of parchment paper and cool on a wire rack.
January 21, 2021
Hetty McKinnon's Tomato and Egg Drop Noodle Soup
Good morning! The sun came out today. Joseph Robinette Biden, Jr. is president. Kamala Devi Harris is vice president. We stayed up late watching the various festivities and the virtual inaugural parade across America, which was far more moving than I expected. Our country, so broken in so many ways, still has so much energy and power, so much beauty and diversity. Don't underestimate what power that holds to the rest of the world. My Max, who grew up idolizing the United States, had his illusions broken over the past four years. His despair over the destruction of the country he had always believed in so much was almost painful to witness. To a child growing up in a divided Germany, Americans were saviors, protectors, benevolent and cool. America was always the land of possibility and enterprise and diversity and energy. Resplendent in its soft power, so often derided and misunderstood by the ill-intentioned or simply ignorant.
To be sure, that disillusionment was also necessary. To realize that the famed American experiment was meant for some but not for all, that its kindness and justice is extended to some but not to all, must be understood, grappled with by all of us. And fixed. Peeling back the layers to reveal the truth is both painful and necessary. It simply must be done.
But last night, as we watched Harris and Biden take their vows in the place so desecrated by violence and ugliness just weeks before, as we watched Amanda Gorman soar with her words, as we saw Majorettes and skateboarders, Native Americans and old ladies with walkers twirl and dance and kick, I could feel some of our trust being restored. It was good to be reminded all day long of just how colorful and beautiful our country can be. I kept breaking into tears and goosebumps.
Today, I feel hungover on nerves, jumpy and slightly frantic. It is so easy to sink into cynicism and dread, despite everything. After all, the road ahead looks hard and bumpy and there is so much to repair. I want to share this poem by Clint Smith that I came across this week that resonates so powerfully today:
When people say, ���we have made it through worse before���
��� Clint Smith
all I hear is the wind slapping against the gravestones
of those who did not make it, those who did not
survive to see the confetti fall from the sky, those who
did not live to watch the parade roll down the street.
I have grown accustomed to a lifetime of aphorisms
meant to assuage my fears, pithy sayings meant to
convey that everything ends up fine in the end. There is no
solace in rearranging language to make a different word
tell the same lie. Sometimes the moral arc of the universe
does not bend in a direction that will comfort us.
Sometimes it bends in ways we don���t expect & there are
people who fall off in the process. Please, dear reader,
do not say I am hopeless, I believe there is a better future
to fight for, I simply accept the possibility that I may not
live to see it. I have grown weary of telling myself lies
that I might one day begin to believe. We are not all left
standing after the war has ended. Some of us have
become ghosts by the time the dust has settled.
But I also want to revel in the moment. It's important to hold still and remember: This time a good man won over a malevolent one. A Jewish man and a Black man are Georgia's newest senators. We have our first female vice president who is both Black and Asian. Multiculturalism is being represented at the highest level and that matters.
It matters.
And yes, I have another soup. I didn't plan this, I swear. If it is only just occurring to me now, at the age of 43, that January is a month for soups, then so be it.
A standard in Chinese kitchens, the recipe for this sweet-salty delight comes from Hetty McKinnon. I've tried a few variations on this soup recently, and this one has pleased me the most. You use the holy trinity of onion, garlic and ginger to enrich a simple base made of tomatoes and broth, then pour in beaten eggs to make long silky ribbons (in the photos, my eggs look rather a little curdled, because I mistakenly whisked them in). Sugar flavors the broth as well as soy sauce, and although I reduced the amount of sugar from the original, I wouldn't skip it. A whorl of silky noodles completes the soup (I used pleasingly slippery rice noodles, though wheat ones are recommended). Then comes the best part, the dotting and drizzling on top of sauces and oils that form into little pools, and a pretty scattering of thinly sliced scallion.
The soup is a joy to eat, slurping with abandon, your mouth gently, sweetly afire. And somehow it feels quite fitting to pair this soup with this new day. It originated elsewhere, but is surely as at home in the United States as it is in Hong Kong.
Tomato and Egg Drop Noodle Soup
Print this recipe!
Serves 4
Note: The original recipe calls for 12 ounces of wheat noodles, which you cook in plenty of salted boiling water and divide among serving bowls, before topping with the finished soup. I used a slightly lesser amount of rice noodles, which I simply soaked in hot water and added to the pot just before serving.
1 small yellow or red onion
2 garlic cloves
1 1-inch piece ginger
1 scallion
8 ounces rice noodles
2 tablespoons vegetable oil
1 28-ounce can diced tomatoes
4 cups low-sodium vegetable broth or water
4 large eggs
Salt to taste
Pinch of freshly ground white pepper
2 tablespoons light or dark brown sugar or granulated sugar
Toasted sesame oil or chili oil
Soy sauce, for serving
If using rice noodles, place them in a large bowl and cover with hot water, then set aside. If using wheat noodles, cook them in plenty of salted boiling water.
While the noodles are soaking or cooking, prep the vegetables. Peel the onion, halve, and thinly slice into half-moons. Smash and peel the garlic cloves, then finely chop. Scrape skin from ginger with a knife or spoon. Thinly slice ginger; stack slices two at a time and cut into matchsticks. Line up matchsticks and cut crosswise into tiny squares. Finely chop the scallion; set aside for serving.
Heat the vegetable oil in a large pot over medium-high. Add onion and cook, stirring constantly, until soft and golden, about 5 minutes. Add garlic and ginger and cook, stirring, until fragrant, about 30 seconds. Add the diced tomatoes and broth or water to pot. Reduce heat to medium, cover pot with a lid, and cook broth until flavors have come together, 10���15 minutes.
Meanwhile, whisk the eggs together with a teaspoon of salt and a pinch of freshly ground white pepper in a large measuring glass or a small bowl with a lip.
Uncover broth and stir in the sugar, then add another pinch of salt salt. Taste and adjust seasoning as desired. The broth should be slightly sweet and a little tart.
Increase heat to medium-high and bring broth to a boil. Very slowly trickle beaten eggs into soup (no need to stir). Cook eggs until set, 30���60 seconds from when you start pouring. Remove soup from heat. The egg doesn���t need to be totally cooked through���it will continue to cook in the residual heat of the broth. Place the rice noodles in the pot, stir well and serve immediately. (If using wheat noodles, rinse them under running water to loosen, then divide them among the four plates before topping with the soup.) Top each plate with toasted sesame oil or chili oil and soy sauce to taste, and sprinkle with reserved scallions.
January 11, 2021
Rachel Roddy's Squash and Rice Soup
There are a few soups that I have made so many times, I can cook them with my eyes closed. Minestrone, for example, a jumble of fridge and freezer veg, flavored with a Parmesan rind, as comforting and soothing as cuddling under a cashmere blanket on a sofa. Or a smooth, silky pur��e of carrots and fennel, as pleasing to children, for whom I top it with crunchy croutons, as it is to adults, whose portions I dollop with cr��me fra��che and sprinkle with sumac. Then there's stick-to-your-ribs potato soup (check My Berlin Kitchen for the recipe) or lentil soup, studded with smoked ham, that I make when I have to produce a sturdy dinner, but I'm low on energy and grasping at straws.
I've been making these soups for twenty years now, and in the case of minestrone and potato or lentil soup, I've been eating them for forty years. As much as I am addicted to trying new recipes, reading new food writers' work and discovering new cultures through cookbooks, it is a tonic to know that, at the tips of my fingers, at the bottom of my subconscious, these one-pot meals await me and will really never let me down.
In recent years, I discovered a few soups that I fell in love with immediately, but none that I've made so frequently that it can be added to my little Rolodex of eyes-closed soups. Until this pumpkin and rice soup from Rachel Roddy strolled into my life, that is. Since first discovering it in the fall, I've made it so often that I no longer need the recipe, which I believe may be a record (for my frequently distracted and slightly enfeebled brain). It's as simple as they come, built on the classic soffritto, bulked out with cubed squash, thickened with silky grains of risotto rice, and given rich flavoring from Parmesan.
Whilst making it again and again, I adapted it to my needs, using Hokkaido squash rather than butternut, so that you can skip the peeling step and shorten the cooking time (plus, I find Hokkaido to be the sweetest, creamiest squash, the one that is easiest to love), and adding a Parmesan rind to amplify the savory flavor and give the cook a delectably chewy little treat. If not watched carefully at the end, the soup can quickly turn into a sort of soupy risotto, which is not a bad thing, per se. But if you're hoping for a slightly looser soup, be sure to add more water or stock at the end.
And here's the highest praise I've got: when I make this soup, my children run into the kitchen, telling me how good it smells. I smile because it smells like my mother's house, like Italy, like home. It tastes like it too.
In other news, dear readers, I've started a newsletter! It's called Letter from Berlin and it aims to fill the space between this blog and my Instagram account. If you'd like to subscribe, and I so hope you do, click here.
Squash and Rice Soup
Serves 4
Print the
recipe!
A small lump of butter
A glug of olive oil, plus more for serving
1 medium onion, diced
1 carrot, diced
1 stick celery, diced
Salt and black pepper
About 1/3 of a small Hokkaido squash (approx. 400g), cubed
1 liter/4 cups vegetable or chicken stock, or water
180g/1 cup arborio or vialone nano rice
1 piece of Parmesan rind
Grated Parmesan
Hot red pepper flakes (optional)
1. In a large pot, heat the butter, olive oil, onion, carrot, celery and a pinch of salt, frying gently until the vegetables start to become translucent.
2. Add the squash and stir for a minute, then add the rice and stir well. Add the stock and the Parmesan rind, bring to a boil, then reduce, cover and let simmer for about 17 minutes. The squash should be soft and the rice should be cooked. You may need to add more stock or water. Taste for seasoning.
3. Serve, topping with grated Parmesan, a drizzle of olive oil and/or hot red pepper flakes.
January 1, 2021
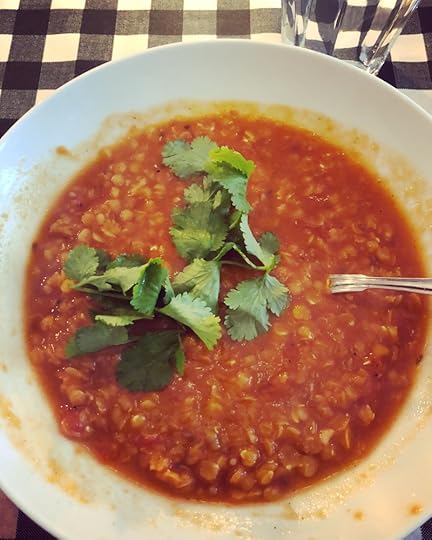
Nigel Slater's Spiced Red Lentil Soup
You may already be in the process of cooking your lentil soup for New Year's Day, but in case you haven't decided on one yet, may I be so bold as to suggest this one? It comes from Nigel Slater's wonderful book, The Christmas Chronicles, the only Christmas-themed book I've ever owned. Reading it in the quiet, stolen moments of December is swiftly becoming a tradition and it is as interesting (did you know that old-fashioned lametta is still made of silver plate in Tyrol?) as it is inspiring (daydreaming about a life in which you can spend each winter in Japan is not a terrible way to get through a pandemic). It makes more sense to read it in November, so you can prepare for all the wonderful things you'll do once Christmas rolls around, but this year I read it in the sleepy week between Christmas and New Year and it was also very nice to think about next year's Christmas, when things will hopefully look quite different.
Nigel says that the soup is styled, flavor-wise, after Indian rasam, which I've only ever seen as the thin, fiery broth that comes served with dosa or uttapam in South Indian restaurants. But this soup is thicker and more nourishing and stands alone very well on its own, no lacy thin fermented rice pancake alongside required. We made the quantity indicated in the book, but could have easily doubled it because it's the kind of soup that will have everyone wanting seconds (even our picky Bruno asked for more) and leftovers of it will be more than welcome. So use the recipe below if you want only a starter portion for four people and double it if it's your only dish. (The original has you make a spice paste, grinding whole spices and hauling out the food processor for ginger and garlic. I went the lazy route and streamlined things with no great detriment to the results. And I tripled the amount of tamarind concentrate, because I love its plummy, sour flavor.)
It feels so good to write here again. There were long stretches of time this past year where I basically came around to accepting the idea of this blog going dark once and for all. But it always felt weird and wrong. I miss writing here so much, having this space to play in. After feeling so trapped and stuck, both figuratively and literally, over the past 10 months, knowing that I can come here and feel free is very, very nice. I don't make New Year's resolutions anymore and haven't in years. But I very much believe in starting the year as you mean it to continue.
So see you again soon, I hope. And Happy New Year!
Spiced Red Lentil Soup
Serves 4
3 tablespoons olive oil
1 teaspoon cumin seeds
1 teaspoon yellow mustard seeds
2 cloves garlic
A thumb-sized piece of ginger, peeled
3/4 teaspoon salt
Freshly ground black pepper
1/4 teaspoon cayenne
1 14-ounce/400 gram can peeled tomatoes
175 grams red lentils
2-3 tablespoons tamarind concentrate
Fresh cilantro, stemmed and washed
1. Put the olive oil in a pot over medium heat. Add the cumin seeds and mustard seeds and cook, stirring, until they start to become fragrant.
2. Press the garlic through a garlic press and add to the pot, then grate in the fresh ginger. Cook, stirring, for another minute, then add the salt, pepper, cayenne, the tomatoes and 2 tablespoons of tamarind concentrate. Stir to combine, cook for just a minute, then add the lentils and stir. Fill the tomato can with water twice, and add to the pot. Bring to a boil, then reduce the flame, cover the pot and simmer until the lentils are soft, about 20 minutes.
3. Puree half the soup with a hand-held blender. Taste and add the remaining tamarind, if desired, and season with more salt and pepper to taste. Serve topped with cilantro leaves.
April 2, 2019
Diana Henry's Roasted Tomato, Fennel and Chickpea Salad
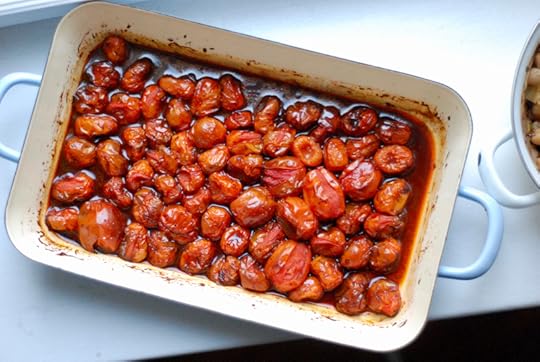
About once a week for the past I don't know how many years, I've sectioned a fennel bulb into eighths, washed a handful of cherry tomatoes, put them in a baking dish with a good glug of olive oil (more is better here) and some salt and then stuck it in a 200C/400F oven until the vegetables are tender as can be and the tomatoes have browned and slumped, about 30 minutes, though I confess I've never really timed it. I also let the dish cool in the hot oven, which helps the caramelization at the end and then I basically eat the entire thing, unless my husband is around in which case I share. I love this dish so much that I nearly lick the baking dish. It's easy, it can be made all year long, since even the yuckiest cherry tomatoes come alive with this treatment, and it tastes ambrosial. If I happen to be lucky enough to have some nice sourdough bread around, I pair the vegetables with that for an easy little meal and life feels good.
I love a ritualistic vegetable dish like this that keeps showing up in my life over and over, that never gets old, that I don't even have to think about when I cook it. Like roasted broccoli, stewed peas, sauteed zucchini - the all-stars of my cooking life. These are the things that flesh out our dinner table night after night and that I imagine my children will remember, either fondly or not, when they look back at the food of their childhood. However, as much as I love these dishes and the comfort they bring me in both flavor and preparation, they are not necessarily stuff for company. They are humble, regular dishes, not show-stopping or even really conversation-worthy. When you're having people over or if you need to bring a dish to a potluck, I think you kind of need to up your game a little. Not a ton, but enough to make a bit of an impression.
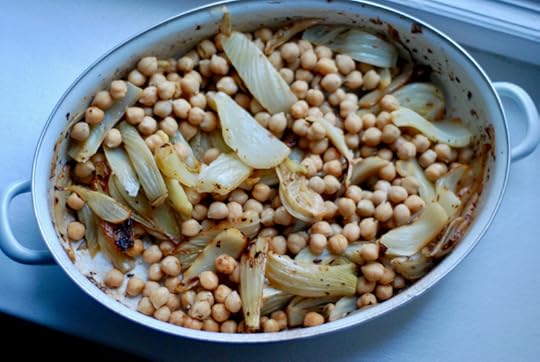
Of course, my culinary hero Diana Henry has a recipe for precisely this kind of elevated salad that used roasted fennel and tomatoes as the base, but pumps it up with all kinds of crazy flavorings, like harissa and preserved lemon and balsamic vinegar. It comes from her book How to Eat a Peach and is quite a stunner. The addition of chickpeas makes it a slightly more substantial kind of salad and fresh herbs make it beautiful - the kind of thing you can plonk on a buffet table and feel secretly smug about. And also consume rather obsessively. Which is the whole point. One more thing I love about it: the flavorings are so bold and fresh but actually this salad is essentially seasonless, so you can serve it in spring, when people are crazy for asparagus and rhubarb, and you can serve it in winter, when big roasts and stews prevail, and in both cases it just kind of works. Pretty neat.
As luck would have it, I discovered a similar kind of special version of roasted broccoli dish that you need to know about (as in, my father literally said WHAT IS THIS WITCHCRAFT THIS IS THE BEST BROCCOLI I HAVE EVER EATEN when he had it), but I'll have to save it for next time. My camera, beloved and trusty documentation device on this blog since 2007, died a few weeks ago. Like, right in the middle of taking these photos, which is why I don't have a photo of the final dish (here's one from Diana, though). I thought it just needed a little repair work, but the camera shop guy told me it wasn't worth it - the repair would cost far more to do than the camera is worth. I was unexpectedly gutted, I have to admit. I loved that camera. I salvaged the lens and put it on my husband's camera, which is only a few years newer than mine was, but requires a whole new education. So bear with me while I figure that out.
Diana Henry's Roasted Tomato, Fennel and Chickpea Salad
Adapted from How to Eat a Peach
Serves 6
For the tomatoes
10 large plum tomatoes (or an equivalent amount of cherry tomatoes, left whole)
3 tbsp olive oil
1 tbsp balsamic vinegar
1�� tbsp harissa
2 tsp sugar
Salt and freshly ground black pepper
For the fennel
2 large fennel bulbs
Juice of �� lemon
2 garlic cloves, crushed
�� tsp fennel seeds, coarsely crushed in a mortar or left whole
Generous pinch of chile flakes
2�� tbsp olive oil
400g can of chickpeas, drained and rinsed
For the dressing
2 small preserved lemons
2 tsp juice from the lemon jar
2 tbsp white wine vinegar
1�� tbsp runny honey
5 tbsp olive oil
4 tbsp chopped parsley
1. Preheat the oven to 190��C (375 F). Halve the tomatoes lengthwise and lay in a single layer in a roasting pan or ovenproof dish. Leave whole if using cherry tomatoes. Mix the olive oil, balsamic vinegar and harissa and pour this over the tomatoes, tossing to coat well, then turn the tomatoes cut sides up. Sprinkle with the sugar and season.
2. Quarter the fennel bulbs, cut off the stalks and remove any coarse outer leaves. Pull off any tender fronds (reserve these) and cut each piece of fennel into 2.5cm thick wedges, keeping them intact at the base Add the lemon juice, garlic, fennel seeds, chile and olive oil, then season and turn everything over with your hands. Spread out the fennel in a second roasting tin and cover tightly with foil.
3. Put both trays in the oven. Roast the fennel for 25-30 minutes, until tender (the undersides should be pale gold), then remove the foil and roast for another 5-10 minutes, or until soft, golden and slightly charred. Roast the tomatoes for 35-40 minutes, or until caramelized in patches and slightly shrunken. Stir the chickpeas into the fennel and taste for seasoning. Leave both to cool to room temperature.
4. Now make the dressing. Discard the flesh from the preserved lemons and dice the rind. Whisk the preserved lemon juice with the wine vinegar, honey and olive oil, season and add the lemon rind and parsley. Taste for seasoning and sweet-sour balance.
5. Arrange the fennel, chickpeas and tomatoes on a platter, adding the juices from the roasting tins; there might be quite a bit from the tomatoes. Scatter any fennel fronds you reserved over the top. Spoon on the dressing. (Leftover dressing can be used on other salads or to zhuzz up mayo for chicken or tuna salad.)
March 19, 2019
Catherine Newman's Ricotta and Spinach Frittatine
Here's a funny-well-not-really anecdote for you:
Our morning routine is very rushed. Hugo has to be up by 6:10 at the latest to have enough time to get dressed, eat breakfast, brush his teeth and get out the door (with shoes, jacket and scarf on, preferably) by 6:55 to catch the school bus. While the boys have their breakfast, their dad's showering and getting dressed (he has to leave at the same time Hugo does and has a nearly 2-hour commute each way), I'm chatting with them, packing Hugo's snack box and pounding down some kind of hot drink to keep from falling over.
Hugo's favorite weekday breakfast are toasted English muffins with peanut butter and jam. We don't always have English muffins around, and on those days, he's happy enough to settle for whatever bread we do have (it's usually some kind of dark German rye thing), as long as it's spread with PB & J. (Occasionally, he will decide it's butter instead of PB that he wants. That is fine!) Bruno's favorite breakfast is oatmeal with frozen blueberries. That child will plow through an adult portion first thing, then basically refuse to eat more than a bite of this and that at lunch and dinner. Small mercies.
Now, this morning, since there were no English muffins, I decided to make oatmeal for both boys. I do have to grudgingly admit that I sort of had an inkling (oh, ho ho ho) there was going to be some kind of pushback (ha ha haaa), so I pumped up the oatmeal with chopped apples and cinnamon and brown sugar (which I usually never add), added frozen blueberries for good measure, even drizzled the top with maple syrup. All their favorite things! What lucky boys! They were definitely going to gobble this up, weren't they? I ignored my misgivings, dished it up, place the bowls on the table and...then...
Both children contemplated their breakfast. Hugo made a face and asked me where his English muffin was. "There are none. This is your breakfast today!" I grinned in what I hoped was an encouraging way, but I suspect was slightly more maniacal. Who knows; I was still feeling pretty chipper in that moment. You know, pride cometh before a fall and all that. I mean, Hugo used to love oatmeal with blueberries, just like his baby brother! Two years ago, yeah, but still! What could go wrong?
He took a tentative bite, while Bruno dug in briefly. Then Hugo put down his spoon and refused to eat anymore. Bruno watched and followed suit. And then my head exploded. Parenthood! Ain't it a kick in the head?
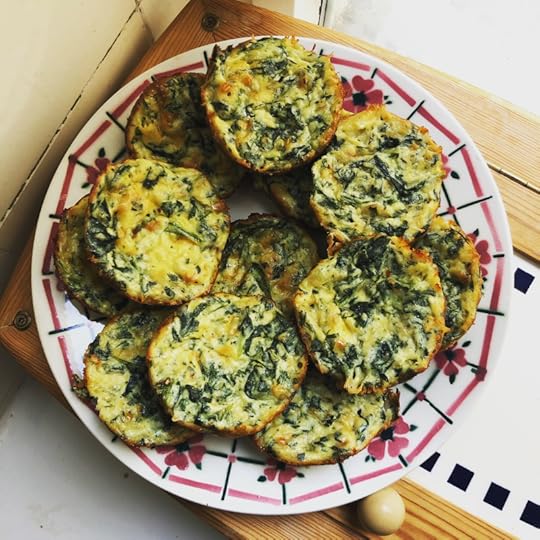
The reason I'm telling you this is because I feel like the recipe I actually want to share today is exactly the same kind of thing as that lovely oatmeal: on the face of it absolutely harmless and tasty, yet still a total minefield waiting to happen. Nevertheless, I promise you that you will want these little ricotta-spinach frittatine for your back pocket. Even if your crazy children won't eat them, YOU will. And you can bring them to any school buffet, bake sale, book club potluck, WHATEVER, and they'll be the first thing eaten and grown-ups will pester you for the recipe. Ask me how I know.
The recipe comes from my beloved Catherine Newman, who writes a column about low-carb recipes for Diatribe.org, which is a website for people with diabetes, which I do not have, but Catherine's recipes are always very good and also family-friendly so I follow her everywhere she goes and cook almost anything she tells me to. Especially these mini cheese-and-vegetable frittatine.
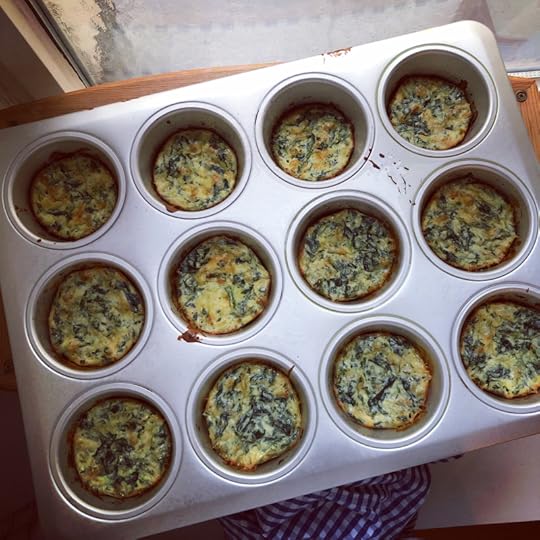
The frittatine are made with eggs, a lot of grated cheese, ricotta and some vegetables and herbs. I've used spinach and broccoli, both to rave reviews. I've used grated Cheddar and grated Gouda, both to rave reviews. What I'm trying to say is that they are very flexible things. They're easy to make, bake up cute in muffin tins and store well in the fridge. I love how portable they are and how much flavor is packed into each little round. I use less ricotta and cheese than Catherine does, but to no ill-effect. These are versatile and easy and I love them, yes, I do.
The first time I made them, they were for a school buffet, but I gave the first two to Hugo and Bruno to see if they liked them. I was pretty sure they would! Spoiler alert: They did not. Fair enough. Luckily, I thought they were scrumptious. And at the school buffet, they were gone in minutes. Vindication! A pathetic one, but still. My sense is that if your children like cheese and scrambled eggs, there's a good chance they'll like them. But they might not. In that case, try to be better than me and just appreciate the fact that you now have a batch of delicious cheesy vegetable egg bites for your breakfast all week.
Off to buy more English muffins, maybe two packages, now.
Catherine Newman's Ricotta and Spinach Frittatine
Makes 12 mini frittatine
Adapted from
Diatribe.org
3 tablespoons olive oil
1 small onion, chopped
1 garlic clove, minced
3 eggs
250 grams (8.8 ounces) whole-milk ricotta
1 heaping cup grated cheddar, gouda or mozzarella
1/3 cup freshly grated parmesan
3 cups chopped baby spinach (around 6 ounces) or equal amount of steamed, chopped broccoli or frozen spinach
1-2 tablespoons finely chopped fresh herbs (like parsley, chives, basil or a lesser amount of thyme or marjoram)
3/4 teaspoon kosher salt
Black pepper
1. Heat the oven to 350 and grease the 12 wells of a standard muffin tin.
2. Heat the oil in a small skillet over medium heat and saut�� the onion until soft and browning, about 10 minutes. Add the garlic, cook another minute, then add the spinach and cook until just wilted, about 1 minute.
3. In a medium bowl, whisk the eggs, then add the cheeses and stir. Add the vegetables, the herbs, and the salt and pepper, and stir well.
4. Divide the mixture in the muffin cups and bake 15-20 minutes until puffed, deeply golden, and set. Eat right away or refrigerate.


