
Luisa Weiss's Blog, page 11
February 11, 2015
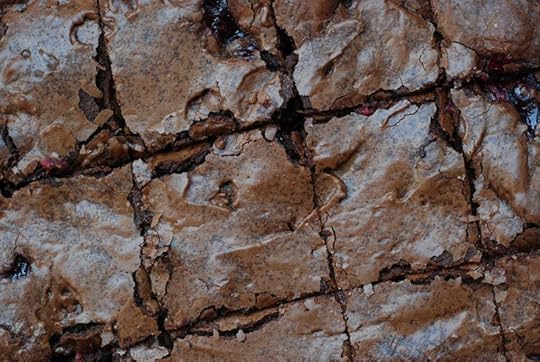
Gerhard Jenne's Bittersweet Brownies with Cranberries
Drowning as I am in cakes and cookies and sweet breads, I have absolutely no business - none! - making brownies on my day off. But I couldn't help it! I'm sorry! It's just that I was looking through a book that a British publisher sent to me last year (written by a German baker living in London) when something on page 141 called Boston Brownies caught my eye.
Now as you know, I have spent many a year in Boston, both as a child and a college student, and I have never, in all that time, heard of a Boston brownie. (Have you?) I had to read a little closer. My interest was piqued! Turns out that Gerhard Jenne, inspired by the fresh cranberries he discovered on a trip to Massachusetts, decided to pop a bunch of them in a brownie batter. The result - sort of like an American take on the Black Forest Cake of his youth - was so good he put the recipe in the book.
I was intrigued. I was also a little skeptical. I mean, fresh cranberries? With chocolate? (Also, er, Anglo-German brownies?) The recipe looked really easy, though, and it was Sunday and I happened to have frozen cranberries in the freezer, so I decided to go for it and I am here to tell you now that these brownies are amazing.
AMAZING.
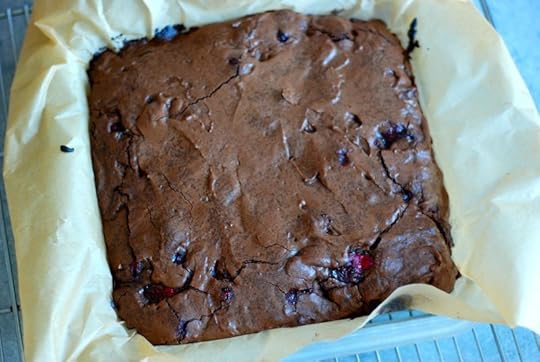
You all. The brownies themselves, made with a mix of bittersweet chocolate and cocoa, are incredibly fudgy and dark with a gorgeous crackling crust. So the recipe would be a keeper for that alone. But the addition of the cranberries is, in fact, totally inspired - the sour, fruity pop against all that rich, dark chocolate is really delicious. We took the brownies to tea at our friends' house, where we each ate two pieces (Hugo included!) and then the men each ate a third while I tried to distract Hugo from demanding more by throwing myself on the floor and pretending to be a car. (It worked!)
In conclusion:
A.The world does need another brownie recipe.
B. Fresh cranberries in brownies are brilliant.
C. Anglo-German bakers have got the brownie thing figured out.
Oh, and furthermore! Do not repeat my dunderheaded mistake of always leaving the pan of brownies wherever I bring them. Make sure to keep a few for yourself the next day or you will regret it. Speaking from experience. Ahem.
Gerhard Jenne's Bittersweet Brownies with Cranberries
Adapted from Deservedly Legendary Baking
Makes 16
Note: The original recipe calls for 200 grams of chocolate and only 1 tablespoon of cocoa, but I didn't have enough chocolate in the house that day, so I made do with what I had and upped the amount of cocoa. I loved the result, so that's what I've listed below.
3 eggs
1 1/3 cups (275 grams) sugar
6 1/4 ounces (175 grams) butter
6 1/4 ounces (175 grams) dark chocolate (54 – 60% cocoa solids), chopped into small pieces
1 1/3 cup flour plus 1 tablespoon (175 grams) all-purpose flour
3 tablespoons cocoa powder
1/4 teaspoon salt
6 1/4 ounces (175 grams) fresh cranberries
1. Heat the oven to 350 F (180 C). Line an 8 x 8-inch pan with parchment paper.
2. Break the eggs into a mixing bowl, then whisk in the sugar until frothy. Set aside.
3. Put the butter in a pan and melt over medium heat until it has completely melted and small bubbles are just beginning to rise to the surface. Turn off the heat, add the chocolate, and stir until melted.
4. Whisk the eggs and sugar again until pale and frothy, then whisk in the chocolate mixture until well combined. Sift in the flour and cocoa powder and stir gently with a spatula until there are no white streaks remaining. Add the salt. Fold in the cranberries. (If you're using frozen, this will cause the batter to seize up slightly, so work quickly.)
5. Scrape the mixture into the prepared pan and even the top. Bake for about 25 minutes, then take the pan from the oven and place on a cooling rack to cool completely. Cut into squares and serve.


February 9, 2015
Amelia Morris' Corn, Chile and Potato Soup
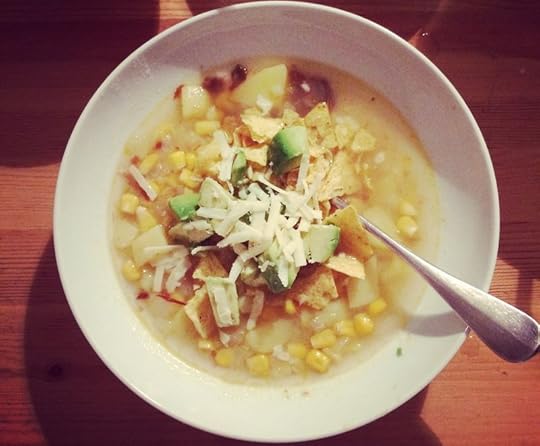
Without further ado, my favorite soup discovery of 2014! Potato soup spiked with chipotle chiles, some corn and lime juice, then topped - at serving time - with shredded cheese, crushed tortilla chips and lime-juice-slicked avocado cubes.
Yup. But you know what? It's even better than it sounds. It's a freaking symphony of flavors and textures - hot, sour, spicy, spiky, soft and crunchy - all in one delicious bowl.
I found the recipe in Amelia's just-published memoir, which I first received as a galley last year. It too is, in turns, soft and spiky, funny and bittersweet. With wit and honesty, Amelia takes a magnifying glass to her own coming-of-age story as a Pittsburgh transplant in Los Angeles, trying to find her way as a home cook and a wife and writer, but mostly just as a person.
And this soup is a perfect distillation of that coming-of-age narrative. The base is a very simple potato soup - olive oil, chopped onion, chicken broth, cubed potatoes. But then as the soup gets going, you start adding in some, well, let's call them complicators. Chipotle chiles in adobo (one if you want just a little heat; two if you're nuts). Lime juice, sharp and floral. Nubby bits of corn.
When the soup is done and you sit down to eat, you're a kid again, crushing chips with your hands, squeezing more lime, sprinkling in avocado and shredded cheese to soothe your fiery mouth (we do two chipotles, because we are nuts). The heat makes this a grown-up soup for sure, but it's definitely the most fun grown-up soup I've ever known.
Amelia Morris' Corn, Chile and Potato Soup
From Bon Appétempt
Serves 3 to 4
2 pounds potatoes
3 tablespoons olive oil
1 large onion, chopped
Salt and freshly ground black pepper
4 cups chicken broth
½ cup water
1 to 2 canned chipotle chiles in adobo
2 avocados
1 to 2 limes
1 (16-ounce) package frozen corn (not thawed) or 1 large can (between 340-450 grams) of corn
Tortilla chips
Grated cheddar cheese
1. Rinse, scrub, and peel the potatoes. Chop them into 1- to 2-inch pieces. Set aside.
2. Heat the oil in a large pot over medium heat. Add the onion and give it a few pinches of salt and a bit of pepper. Cook, stirring occasionally, until the onion is softened, 4 to 5 minutes.
3. Add the potatoes, chicken broth, water, and 1 teaspoon salt to the pot. Raise the heat to high to bring to a boil. Mince the chile using a fork to hold it steady as you chop. Add the minced chile to the pot. Once the soup is boiling, take it down to a simmer; simmer until the potatoes are very tender, 15 to 17 minutes.
4. Meanwhile, dice the avocados and place in a bowl. Sprinkle with salt and pepper and the juice of half a lime. Set aside.
5. Using a potato masher, mash the potatoes right in the soup—just until coarsely broken up. Add the frozen or canned corn and simmer for about 2 minutes more, until heated through. Turn off the heat. Add the juice of the other half of the lime.
6. Ladle into bowls and top with a nice heap of tortilla chips, avocado cubes, and shredded cheddar. Serve with wedges of the remaining lime.
February 6, 2015
Delicious Friday Links

Heh.
So! This week I delivered my first batch of recipes for the cookbook with head notes, a table of contents, and a handful of photos from my kitchen to the publisher. The rest are due in August, which seems like a lot of time on some days and absolutely no time at all on others. If you're following along on Instagram, you know that we are deep in a Russischer Zupfkuchen phase, a cake that I ignored my entire life until about a week ago and that now has me tightly in its grip. (It's a Quark cheesecake baked in a chocolate crust, dolloped with more pieces of chocolate dough. It has nothing to do with Russia, despite the name, and is totally addictive.) This weekend, Linzertorte and raisin buns are on the docket and next week, we're diving into a whole slew of recipes from southern Germany, including a leek tart, a savory potato cake-bread-hybrid thing, and an applesauce loaf that I am verrry excited about.
In other (thrilling) news, the electricians are done rewiring our apartment. On Monday, the painting begins. And, uh, on that very same Monday I have to choose the paint colors. Hold me?
Elsewhere,
The prettiest cream-of-wheat!
This list of cooking tips has some really smart stuff on it (via Tim).
Speaking of smart, do you roast vegetables on parchment? I think I need to change my game.
I've been craving hamburgers for weeks now and this put me over the edge.
Perfect February baking project: Homemade rye crispbread with poppy and sesame seeds.
Thanks to reader Leslie for alerting me to this smoky black bean stew. (!!!)
I loved this interview on blogging and life with Grace Bonney of Design*Sponge; so interesting and inspiring.
And, related, Grace and Julia's kitchen makeover - amazing what a few coats of paint and some shelves can do!
Ooh, I love a good Grub Street Diet and Christine Muhlke's totally delivers. (Actually, I'm in awe.) (And now off to order some Smoky Earl Grey.)
Have a wonderful weekend!
February 2, 2015
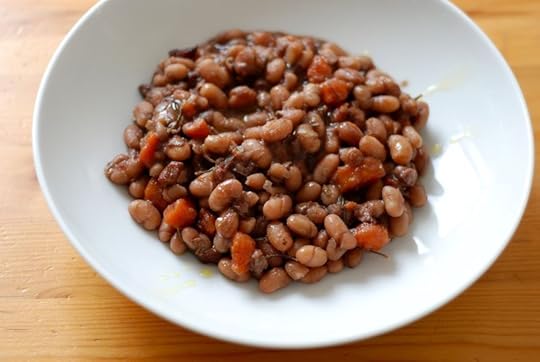
Melissa Clark's Braised Beans with Bacon and Wine
I have a very unquiet mind when it comes to dregs of wine in bottles and leftover ends of cured bacon in the fridge. (Okay, fine, when it comes to other things, too, but let's not dwell on that today, shall we?) Last week, a friend came over for dinner with a really nice bottle of Zweigelt that we almost finished, but not quite, and I bought a chunk of Speck for recipe-testing (I am deep into the savory chapter right now and it is just full of good stuff, let me tell you) that I almost finished, but not quite, and then there was this weirdo jar of dried beans on my pantry shelf that had been eyeing me reproachfully for months - all of this building to a feverish crescendo when I stumbled upon Sarah's post. Blog kismet, because there was a recipe that would use up all three - wine, bacon and beans - in one delicious big-potted meal. I practically felt like shouting "a-ha!" out loud.
It's funny, after all these years of obsessive recipe clipping from the newspaper, I still sometimes miss recipes when they're first published. Like this one, a Melissa Clark recipe for a refined bean stew with rosemary, bacon and wine that she put together with a little help from Daniel Boulud. She created it in response to a request for an affordable, vegetarian dinner party dish and I am here to say that not only would I happily serve this as a dinner party dish (oh wait, I did!), but it does very nicely indeed as a three-times-in-one-week-for-the-two-of-us-dish, too. More than very nicely. It makes you feel practically rich, to have a pot full of beans like this just waiting for you on the stove every day.
What makes the stew refined is the wine syrup that you make separately, while your beans and bacon and aromatics are braising away in a big pot. The syrup then gets mixed in at the end, darkening the beans both visually and taste-wise. Both Sarah and Melissa suggested serving this stew with polenta, which I did, but I confess that I didn't like it as much as I liked just plopping a big ladleful or two in a shallow bowl, drizzling the top with nice olive oil and then tucking in with a chunk of crusty, holey white bread. Which came in very handy, too, for cleaning the bowl carefully at the end. Because - I'll just go ahead and tell you - you won't want to miss even one gram of the gravy, which is a veritable symphony of flavors.
Of course, the bacon makes this stew decidedly un-vegetarian, though I think the meaty, salty, smoky bacon is crucial to the end result. Plus, I love coming across those chewy little cubes as I eat the meltingly tender beans. But Melissa swears that it's just as good without the bacon, so proceed as you wish.
Melissa Clark's Braised Beans with Bacon and Wine
Serves 8
Note: You can soak the dried beans overnight or skip this step. If you soak the beans, the cooking time will reduce by about half. But remember that the age of your dried beans will also affect the cooking time (the older they are, the longer they'll take). I used dried beans, unsoaked, and they were done after 2 hours of cooking.
½ pound smoky bacon, diced
1 large onion, peeled and diced
2 celery stalks, diced
2 medium carrots, peeled and diced
4 garlic cloves, chopped
2 large sprigs rosemary
1 pound dried beans (pinto or white beans)
2 teaspoons coarse salt, more to taste
2 cups dry red wine
Extra-virgin olive oil, for serving
1. In the bottom of a large enameled cast-iron pot, over medium-high heat, brown bacon until golden, about 5 minutes. Stir in onion, celery, carrots, garlic and rosemary. Cook, stirring occasionally, until vegetables are tender, 5 to 7 minutes.
2. If you soaked the beans, drain them and add to pot along with 1 tablespoon salt. Pour in enough water to just cover the beans (about 7 to 8 cups). Bring liquid to a boil; reduce heat and simmer gently until beans are just tender, 45 minutes to 1 hour for soaked beans, 1 1/2 to 2 hours for unsoaked beans.
3. Meanwhile, in a small pot over medium heat, simmer wine until it is reduced to 2/3 cup, 20 to 30 minutes.
4. Remove rosemary branches from bean pot and discard them. Pour wine into beans and cook for 10-15 minutes longer to meld flavors and thicken broth to taste. Drizzle with olive oil and serve, preferably with some crusty bread.
January 30, 2015
Things That Made Me Happy This Week
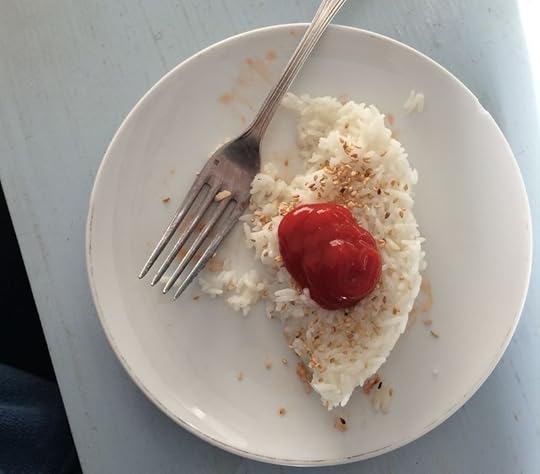
Sometimes blogs are accused of peddling an unrealistic, gauzy version of life that makes readers feel inadequate over time. I'd hate to think of that happening here, not when I indulge in culinary confections such as this - cold, day-old rice dug out of the rice cooker and topped with a squirt of Heinz ketchup and toasted sesame seeds for lunch yesterday - on a regular basis.
(There was a whole dill pickle, too. Beforehand.)
(Those sesame seeds were totally inspired, though, right?!)
(I also am still wearing my workout clothes from this morning. I have not yet worked out. It's 2:07 pm.)
(Keeping it real!)
Today I'm only linking to things that just plain old made me happy this week:
We have all been despairing a lot about humanity lately, but help is here! If you also need your faith restored or want a quasi-religious joyous experience, you need to check this out. You probably alllllll know about Humans of New York, but on the off-chance you do not, you're welcome - it is possibly the very best thing on the entire Internet.
Catherine's 10-year-old (!) post on homemade hot chocolate. This blog may be the second best thing on the Internet.
Quietly freaking out about the concept of roasted shallot, tomato and pickled jalapeño quesadillas for dinner.
This video on creativity, which has made the rounds many times over, but which I stumbled upon again recently at a very opportune moment.
This is how masterful food blogging is done! Sometimes all you need are a few sentences. (And roasted onions.)
This video on...fatherhood? made me laugh so hard I cried. Tears rolling down my cheeks, gasping, etc. It's old (sorry!), but hysterical.
See you next week!
January 29, 2015
How to Make Ciambellone
Listen to this: My editor at Bazaar took me out to lunch before the holidays and congratulated me for eating the bread out of the bread basket that was placed on the table while we waited for our meal. (The chewy, delicious bread, I might add, though I would have eaten it even if it hadn't been good, because I am a human and it was lunchtime and I was hungry.)
She.
Congratulated.
Me.
She ate the bread, too, mind. It's just that she's the only person she knows - besides me now, I guess - who still actually eats bread. And pasta. And springs for two courses on a business lunch. Sigh.
You all know I like a good New Year's resolution as much as the next person. I'm all about fresh starts and good intentions, I really am. Why, just the other day I ordered a ginger-apple-carrot juice with breakfast myself! But when congratulations are offered on eating a piece of bread, for the love of Pete, I feel like this whole cleanse/no-carb/juice/detox mania has officially reached crazy-making levels. (Exhibit A: Elevating Adaptogenic Latte. What?) And while I'm at it: can we once and for all get rid of the term "clean eating"? It makes my head hurt.
So, in light of all of this, I've decided to post a second recipe for cake in one week. I feel like it's my civic duty or something.
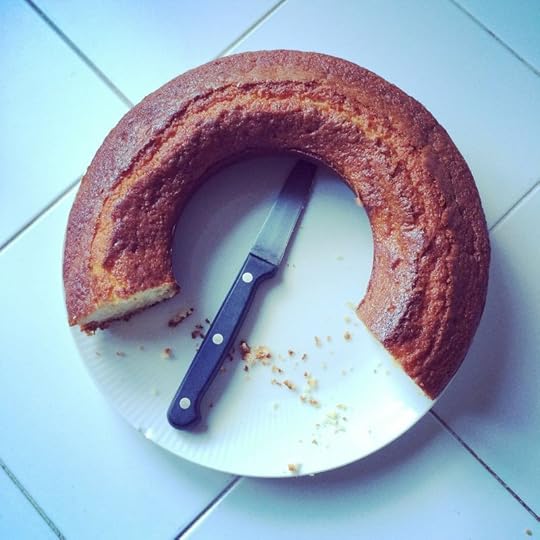
Without further ado: Ciambellone! (chahm-bell-ohn-eh) Also known as the only cake my mother knows how to make. (More or less.)
Ciambellone is a sunny, simple tube cake made with yogurt and lemon peel. It's tender and fragrant, has a good, sensible crumb, lasts for a few days on the kitchen counter, is not-too-sweet, easy to make, and very nice for breakfast (with a glass of green juice or without). It's also good at teatime and as a snack for little children. In other words, it's a perfect everyday cake.
(Other perfect everyday cakes: Catherine Newman's Donut Cake, Deborah Madison's Poppyseed Cake and Alice Medrich's Kamut Pound Cake, all of which I adore passionately and do not make nearly enough. I blame that thing I'm working on. On my to-make-soon list, though, is Molly's whole-wheat riff on an Edna Lewis cake, which looks right up my alley. Consider it my New Year's resolution!)
I suspect you will be relieved to know that ciambellone does not require confectioners' sugar on top or an icing of any kind or new-fangled additions to the batter. It is simplicity itself, wholesomeness incarnate. But most of all, it's just a happy-making little thing. Which makes it just right for gray, old January. Or any other month out of the year.
Three cheers for cake!
POSTSCRIPT: In the most thrilling news ever (to me, obvs), precisely 9 years, 5 months and 1 week after I started this blog, I can finally offer you a printable recipe! I apologize deeply for it having taken so long. Now, when you get to the bottom of the recipe, you'll see a little Print this recipe link. Click on that and you'll get the recipe in PDF form. Which means that when you print, all you'll get is the recipe itself. No post, no pictures and no pesky comments. Hooray! This feature is - for now - only available on recipes starting from today.
Ciambellone
Makes one 9-inch tube cake
Note: The original recipe calls for 1/2 packet of Pane degli Angeli, which is Italian vanilla-flavored baking powder. If you have access to that, use it - it's lovely - and leave out the vanilla extract and baking powder below. If you don't have access to Pane degli Angeli, follow the recipe below.
3/4 cup minus 1 tablespoon (150 grams) sugar
2 large eggs
3.5 ounces/7 tablespoons (100 grams) unsalted butter, melted
1/2 cup (125 grams) plain whole-milk yogurt
1 teaspoon vanilla extract
Grated peel of 1/2 organic lemon
1 2/3 cup (200 grams) all-purpose flour
2 teaspoons baking powder
1. Heat the oven to 350 F/180 C. Butter a tube pan.
2. Place the sugar, eggs, melted butter, yogurt, vanilla extract, and grated lemon peel in a bowl. Beat with an electric mixer until smooth. Then slowly beat in the flour. Finally, beat in the baking powder. Scrape the batter immediately into the prepared cake pan, even the top and bake for 30 minutes, until a rich golden-brown.
3. Let the cake cool on a rack for 15 minutes, then turn the pan upside-down and unmold the cake. Let cool completely before serving. Loosely covered with plastic wrap, the cake will keep at room temperature for 3 days.
January 26, 2015
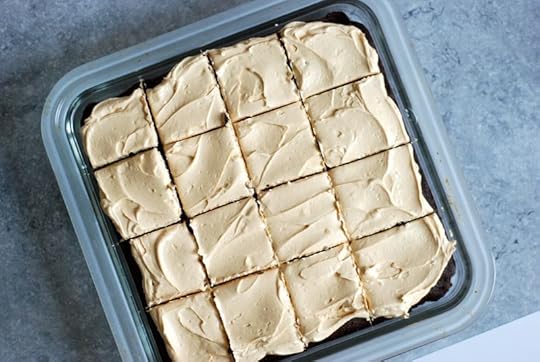
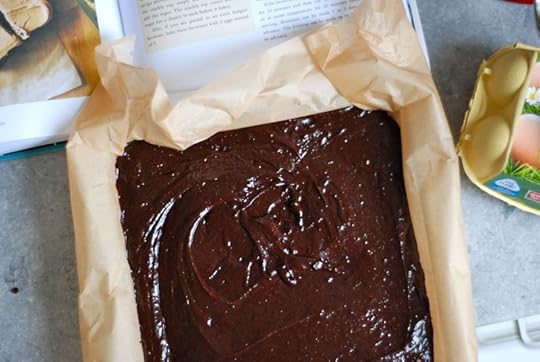
Ashley Rodriguez's Bittersweet Brownies with Salted Peanut Butter Frosting
According to the internet, the East Coast of the US is about to be swathed in an apocalyptic amount of snow. Meanwhile, over here, it's just miserably gray, as it always always always is this time of year. I can't remember the last time I saw the sun. Hugo, who is really into SAAHN! and MOOOON! and DAHK! and LIGHT! and COWDS! is very confused.
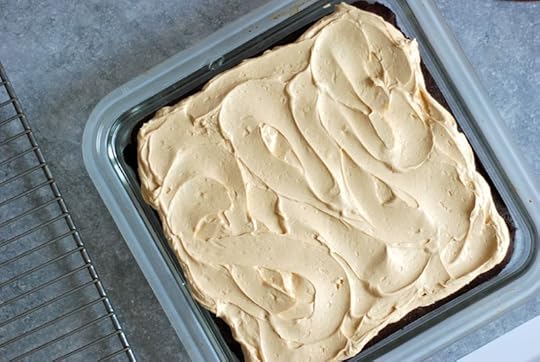
Luckily, I have just the thing for all you over there and all of you over here to make while the winds howl and the sun remains stubbornly behind that impenetrable bank of clouds: Brownies. Bittersweet ones. With SALTED PEANUT BUTTER FROSTING. (If you can, imagine me yelling those last four words, getting increasingly louder with each word.)
For the past five years, I've been loyal to one single brownie recipe: Alice Medrich's Cocoa Brownies. They're easy, they're fudgy, you don't need a single special ingredient and everyone who eats them falls instantly in love with them. Why, even my husband now knows how to make them. (This, my friends, is saying a lot. Ahem, Mister Instant Mashed Potatoes, ahem.) I was pretty happy with my one single brownie recipe! It felt pretty good to have found The One. After all, at least on the brownie front, I didn't have to do any more looking.
But. Then. Along came Ashley Rodriguez of Not Without Salt and her beautiful, vulnerable, touching first cookbook called Date Night In (more on that in a second). In one flip of a page, her recipe for bittersweet brownies with a salted peanut butter frosting very unceremoniously kicked those sweet little cocoa brownies right off the ledge. Pow!
Ashley used to have her own custom cake company, and before that she learned the tricks of the trade at Spago, working under pastry chef legend Sherry Yard, so when it comes to sweets, she's a voice of authority. In Ashley's brownie recipe, you build layers of rich flavor by first browning the butter and then using a combination of chocolate and cocoa. She also gives you tips on how to get the fudgiest brownie possible (just use 2 eggs instead of 3) and that lovely crackly top, but the salted peanut butter frosting is really the, uh, icing on the cake, the cherry on top, the gilding of the lily. It's the whole raison d'être of these brownies (though they are pretty fabulous on their own, too).
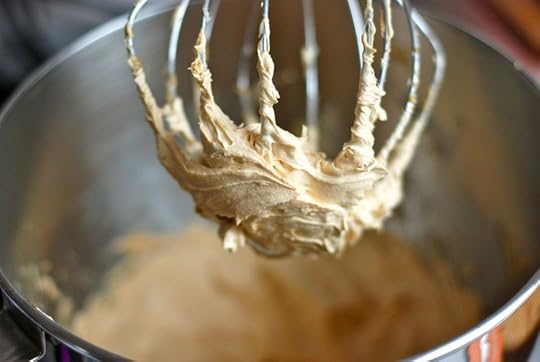
You whip peanut butter, butter and confectioners' sugar together, beating them together at high speed until the mixture gets lighter and lighter, and then spread great swoops of it onto the cooled brownies. Ashley has you sprinkle the pan with flaked salt at the end, but I happened to have some of this fancy French butter with salt crystals hanging around and used that in the frosting instead, eschewing the salt sprinkling at the end.
But whatever path you take, definitely include salt. It's an essential finishing touch that keeps all the flavors together, that cuts the richness, that makes you sit up and take notice. It's no coincidence that Ashley's blog is called Not Without Salt. These aren't just any old brownies, no sirree. These are paradigm-breakers.
As for Ashley's book, which is a collection of seasonal menus (from cocktails to dessert) that she's made for a weekly date night at home with her husband Gabe, it really is so lovely. Each menu is preceded by a little story she tells about her marriage and its natural ups and downs. With busy jobs, three children, and 10 years of marriage under their belts, several years ago Ashley and her husband found themselves drifting apart. Determined not to slide into a deeper hole, they started going on dates at home every week. Gabe would mix cocktails and Ashley would create a restaurant-worthy menu just for the two of them, no kids allowed. Through this very purposeful, conscious way of approaching their marriage and their need to connect again, they created a whole new level of commitment to each other. It is, to say the least, inspiring.
Also mouthwatering, because Ashley really knows food. A few of her menus are ambitious (for a tired working mother, at least), but that's sort of the point. It's her way of showing her husband her love and commitment and she expects no less from her readers. And there are plenty of menus that are more straightforward. I've already earmarked the recipes for their perfect burger, the French 75 cocktail, salted toffee popcorn, a pickled vegetable salad and salmon cakes with chiles and fresh herbs. (Plus, thrillingly, Ashley includes a recipe for pickled peppers in the style of Mama Lil's, which Molly sent me for Christmas once and which I haven't stopped thinking of since!)
Now all I have to do is get my husband to mix me a cocktail...
Ashley Rodriguez's Bittersweet Brownies with Salted Peanut Butter Frosting
Adapted from Date Night In
Makes 16 square brownies
Note: The original recipe calls for unsweetened chocolate, which isn't available in Germany. Instead I substituted an equal amount of 70% chocolate and then reduced the sugar from 300 grams to 175 grams. I was thrilled with the result, especially paired with the sweet-salty frosting. Depending on your taste, though, if you go this route, you may want to up the sugar amount to 200 grams.
Brownies:
3/4 cup (170 grams) unsalted butter, plus more for the pan
3 ounces (90 grams) bittersweet chocolate, chopped
3/4 cup plus 2 tablespoons (175 grams) granulated sugar
1 tablespoon vanilla extract
3 eggs
1/2 teaspoon salt
1/2 cup (40 grams) cocoa powder
1/2 cup (70 grams) all-purpose flour
Frosting:
6 tablespoons (85 grams) butter with salt flakes, at room temperature
3/4 cup (100 grams) smooth peanut butter
1/3 cup (40 grams) confectioners’ sugar
1. For the brownies: Preheat the oven to 325 F (160 C) degrees. Grease an 8-inch square pan. Line the pan with parchment paper so that a couple of inches hang over the edge. Then grease the parchment.
2. Place the butter in a medium saucepan and melt over medium-high heat. Allow the butter to cook until the milk solids bubble up and then settle into the pan and caramelize. Swirl the butter in the pan in order to see the color of the little bits on the bottom. As soon as the milk solids are golden and the butter smells nutty, about 3 to 5 minutes, remove the pan from the heat.
3. Pour the browned butter into a medium bowl and add the chopped chocolate. Let stand for 1 minute to melt, and then whisk together. Whisk in the sugar and vanilla while the butter mixture is still warm. Stir in the eggs, and salt until well blended. Sift in the cocoa powder and flour. Fold the ingredients together until just combined using a spatula.
4. Pour the batter into the prepared pan and bake for 25 to 30 minutes, or until a toothpick inserted into the middle pulls out clean. Let cool to room temperature.
5. For the frosting: With an electric mixer, whip together the butter, peanut butter, and confectioners’ sugar in a large bowl. Continue to mix until everything is well combined and the frosting has lightened in color. Frost the cooled brownies, cut into squares and serve. Brownies can be made 1 to 3 days in advance. The frosting can be made up to 1 week in advance.
January 19, 2015
Getting Back in the Saddle
Dear Readers,
I have fallen and I can't get up. I took a little break over the holidays, just a little one, I thought, and now I cannot for the life of me figure out how to get back in the blogging saddle. I keep sidling up to it, but I can't even get a foot in the stirrup! I just stand there, staring at the horse and its big, glossy-black side, and then leave again because I'm so intimidated. And tired. Gah. (In case you were wondering, the insomnia continues unabated. But I am seeking professional help, starting this week. Cross your fingers.)
So today I'm going to make a list, because list-making soothes me. And perhaps by making said list I can actually pass along some kind of interesting content to you? We'll see. Let's take it slow. Thank you.
1. The hilarious Amelia Morris of Bon Appétempt is about to publish her first book, a coming-of-age story with recipes. It is, as I said in my blurb, wry and touching (I still feel the same way!). It made me laugh out loud (no joke) and also kind of broke my heart. Plus, on page 230 of the book, Amelia shares a recipe for potato, corn and chile soup that we declared the best soup discovery of 2014. It's exciting (chiles! avocado and cheese topping!) and comforting (potato soup with corn thrown in, enough said) at the same time, plus you get to crumble tortilla chips on top of the soup, which is at the top of the list of reasons why being an adult can be, at times, a lot of fun. Thank you, Amelia!
Action shot of adult tortilla-crumbling:

2. We got the keys to our new apartment on Friday. Renovations start today (we are replacing the electrical system, having the walls painted, and installing a kitchen). The process of finding and buying this apartment has been so smooth and uncomplicated thus far that my level of terror regarding the renovations has reached DEFCON 3. Something has to go wrong at some point with this whole endeavor, doesn't it? What will it be? Black mold in the walls? Murderous, chain-smoking neighbors? A hidden World War II bomb lodged in the ceiling? (As you can imagine, my lack of sleep is totally helping me out on this one.) Here's a picture of the kitchen, in all its dingy glory. We are keeping the 105-year-old tiles, which I am thrilled about, and the 105-year-old floor, which I am less thrilled about, and will finally have a gas stove again, for which I give thanks every single day, forever and ever, amen.
We will not, for the record, be keeping that stove. Hallelujah, praise be.

3. From June 15-20 this year, Rachel Roddy of rachel eats and I will be hosting a food writing workshop called The Language of Food at the Anna Tasca Lanza Cooking School in Sicily. For five days, we will read, write, explore and cook together, with the flavors and fragrances of Sicily as inspiration. Fabrizia Lanza, the owner of the school, will take us on excursions throughout the region, from Agrigento to Polizzi Generosa, as well as introduce us to local winemakers and food artisans. It will be fun and delicious, but more than anything I hope it will be an inspiring and productive week for anyone who can join. (There are 10 to 15 spots available!) I cannot overstate how thrilled I am to be co-hosting it with Rachel, whose writing fills me up with contentment and joy every time I read it. For more information, click here.
Here is a picture Rachel took at dusk last June at the school during aperitivo hour. Aaaahhh...

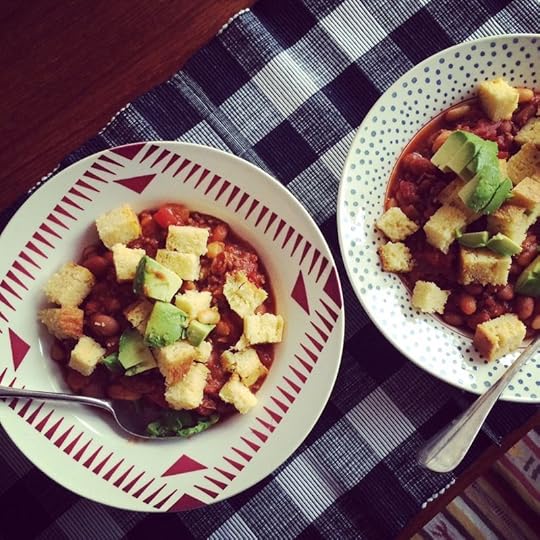
4. The one thing I have made three times in the past month has been this chili, but with beef instead of turkey and with twice as many beans and half as much meat. The first time I made it, it was actually to use up a batch of stale cornbread (Edna Lewis's sour milk cornbread), but we loved it so much that I can't stop making it. I have no idea if it is authentic, nor do I really care. It's very delicious, very easy and can be easily doubled to feed a crowd, with leftovers to boot. It even pleased every single member of my book club recently. You should know about it.
Behold the cubed stale cornbread:
And that's it! That wasn't so hard after all, I guess. Happy New Year, everyone, if it is still acceptable to say so on January 19th. I'll be back soon, after trying this milk-roasted chicken and making something from this beautiful book (I am still waffling between trying the salted chocolate chip cookies and the bittersweet brownies with peanut butter frosting - have a preference?).
December 25, 2014
Yotam Ottolenghi's Raspberry Meringue Roulade

I realize this is verrrry last-minute, but perhaps there are a few among you who have not yet decided on your Christmas dessert or who are still planning your New Year's Eve dinner or just plain want to have your socks knocked off by a dessert. Yes? Yes?
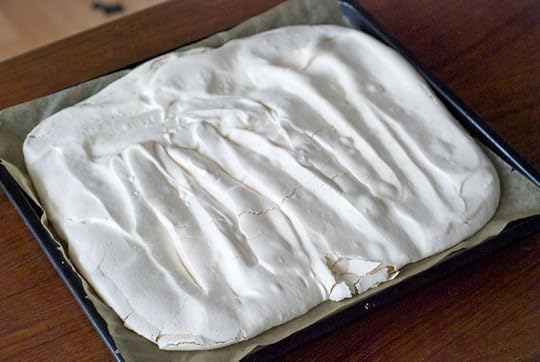
Getting right down to brass tacks, because none of us have any time at all right now (amirite?): Yotam Ottolenghi's meringue roulade from his latest book Plenty More. Imagine: a base of vanilla-flavored meringue - with cornstarch and vinegar mixed into so that it stays marshmallowy and rollable after baking instead of crisp and crackling - spread with whipped cream and fruit, then rolled up and topped with more whipped cream and fruit plus powdered sugar to make it look all festive and wintry and perfect.
BOOM.
To put it bluntly: It's so good that it literally rendered an entire table of people at our Christmas Eve dinner last night entirely speechless.
The original version has you flavor the whipped cream with rose water and top the roulade with chopped pistachios in addition to raspberries, but I don't like rose water, so I left it out and then left out the pistachios too and it was still divine. (The whipped cream is mixed with mascarpone for some extra flavor and ballast.) You could do any number of combinations - I keep thinking that pomegranate seeds would be fantastic in it.
The roulade is just the right thing after a heavy holiday meal - all sweetness and light with little pops of fruit here and there and the cooling smoothness of cold cream. (Though the next time I make it, I will reduce the sugar just a touch. The recipe below reflects that change.)
Have a wonderful, delicious and peaceful holiday season, darling readers. I am, as ever, so grateful to have you all in my life.
Yotam Ottolenghi's Raspberry Meringue Roulade
Adapted from Plenty More
Serves 8-10
4 egg whites
1 cup/200 grams granulated sugar
1 teaspoon vanilla extract
1 teaspoon white wine vinegar
1 teaspoon cornstarch
3.5 ounces/100 grams mascarpone
1 tablespoons confectioners' sugar, plus extra for dusting
1 3/4 cups/400 ml whipping cream
5 ounces/150 grams fresh raspberries
1. Preheat the oven to 160ºC/320ºF.
2. Line a baking sheet with parchment paper. In a large, clean bowl, whisk the egg whites with an electric mixer until they begin to firm up. Add the granulated sugar to the whisking whites in spoonfuls or tip into the bowl in a slow stream. Continue whisking until you achieve a firm, glossy meringue. Using a large metal spoon, gently fold in the vanilla extract, vinegar and cornstarch. Spread the mixture evenly onto the parchment paper, making a 13x9.5-inch/33x24-cm rectangle.
3. Bake in the oven for 30 minutes, until a crust forms and the meringue is cooked through (it will still feel soft to the touch). Remove from the oven and allow to cool in the pan.
4. Unmold the cooled meringue on a fresh piece of parchment paper. Carefully peel off the first piece of parchment.
5. Place the mascarpone in a large mixing bowl along with the confectioners' sugar. Whisk to combine, then add the whipping cream. Whisk just until the cream starts to hold its shape. Don't overmix - you want a relatively loose whipped cream. Spread most of the mascarpone cream on top of the meringue, reserving a few tablespoons. Leave a small border around the edge of the meringue. Scatter most of the raspberries all over the cream
6. Use the paper to assist you in rolling up the meringue along its long edge, until you get a perfect log shape. Carefully transfer the log on to a serving dish. Use the remaining cream to create a rough wavy strip along the top of the log. Chill for at least 30 minutes.
7. When ready to serve, dust the log with confectioners' sugar and dot with the remaining raspberries.
December 8, 2014
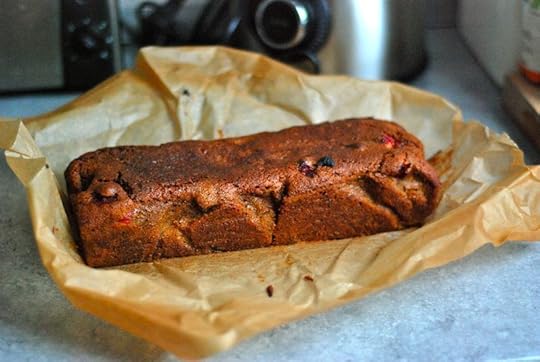
Alice Medrich's Buckwheat Squash Loaf with Cranberries

Good morning, everyone! Ooh, this week is starting off well. The sun is shining, I'm about to turn a pound of butter and an equal amount of raisins into Stollen for the book, and I have a cake discovery for you, a wondrous, light, delicious cake discovery. I am so, so excited for you!
Friday evening was the first time in ages that I'd some time to myself in the kitchen. Hugo was asleep, Max was out with a friend, and I was finally - finally!!! - all on my own with nothing to do. I roasted a squash, I boiled broccoli rabe, I cooked fish for dinner. It was quiet, it was heaven. And when the squash was roasted and beaten to a purée, I set to making this cake. This wonderful, tender darling of a cake that I plan to make again today and then again mid-week, since that seems to be about the pace that we are consuming it at. (It is marvelous for breakfast.)
I first spotted the recipe on Megan's blog in early November. She got the recipe from Alice Medrich's newest book, Flavor Flours, a baking book that happens to be gluten-free but is really more focused on the tastes and textures that different flours bring to the table. The original recipe is made with buckwheat and rice flour, regular sugar, pumpkin purée and raisins (or currants). But when Megan made it, she swapped in dark brown sugar for the regular sugar, added chocolate chips instead of raisins and topped the loaf with pumpkin seeds. And when I saw the recipe, I knew instantly I'd fold in frozen cranberries instead of raisins or chocolate, use butternut squash purée instead of pumpkin, and leave off the pumpkin seeds, but keep Megan's brilliant muscovado sugar swap.
Without further ado, I'd like to present to you the newly-christened Buckwheat Squash Loaf with Cranberries.
(NB: No matter what it's called, I LOVE IT SO MUCH I CAN'T WRITE THIS POST FAST ENOUGH.)
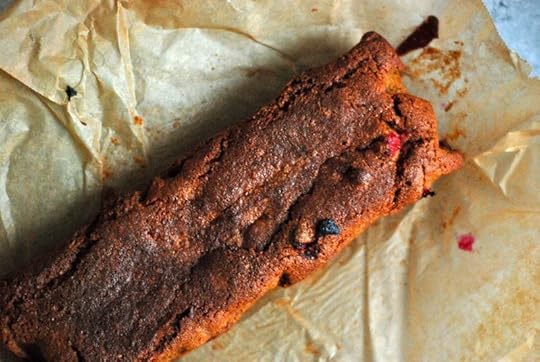
If you are a fan of buckwheat flour - and you know who you are - then I practically guarantee that you'll love this cake. Its strange and stony flavor is one of my very favorites. I used a medium-grind buckwheat flour that I had in the pantry, which resulted in a cake that crunched ever-so-subtly in my mouth. But the cake crumb is so velvety and fine that it practically quivers. It's quite something. I pulled the cake out of the oven right before bedtime and let it cool in the pan overnight. Early Saturday morning, the first fat slices I cut for myself were just on the right side of damp. The dark brown sugar brings moisture and depth to the cake and those sour, brilliantly pink pockets of cranberry against the velvety, spicy crumb were exactly right.
I know these kinds of superlatives can be so annoying, but I just scrolled through all my posts from 2014 and must tell you that it is my favorite cake of the year. I love this cake. I love it so much. I hope you do too!
Buckwheat Squash Loaf with Cranberries
Makes one 9-inch loaf
Adapted from Alice Medrich's Flavor Flours
8 tablespoons (1 stick/115g) unsalted butter, melted
1 cup (190g) muscovado (dark brown) sugar
2 large eggs
3/4 cup (120g) white rice flour
1/3 cup (40g) buckwheat flour
1/2 teaspoon baking soda
1 teaspoon baking powder
1 teaspoon ground cinnamon
1/2 teaspoon ground nutmeg
1/4 teaspoon kosher salt
3/4 cup (170g) squash puree
1/2 cup (55g) fresh cranberries
1. Position a rack in the lower third of the oven and preheat the oven to 350 F. Line a loaf pan with parchment paper.
2. Combine the butter, sugar, and eggs in the bowl of the stand mixer and beat on medium speed with the paddle attachment until lighter in color, about 2 minutes. Alternatively, use a handheld mixer and beat for 3-4 minutes.
3. Add the rice and buckwheat flours, baking soda, baking powder, cinnamon, nutmeg, salt, pumpkin puree and beat on low speed until smooth. Fold in the cranberries.
4. Bake the loaf for 45 -50 minutes, or until a toothpick inserted into the center comes out clean. Cool the loaf in the pan for 30 minutes before using the parchment as a sling to unmold the cake and let cool completely on a rack. The cake keeps for several days on the counter, wrapped loosely in parchment or plastic wrap.


