
Ali Edwards's Blog, page 90
June 13, 2021
Laugh Story Kit + July Stories By The Month
This month we are focusing on stories related to the theme of Laugh.
Laughing is simply the best. It's a balm for our weary hearts + a release from stress. It's one of the ways we connect with one another and there's really nothing better than a real, true belly laugh. This month we are telling stories about the things and people who fill our lives with laughter.
Initial story ideas for this theme include:
Who makes you laugh the hardest in your life?
What are your favorite things to watch that make you laugh super hard + forget about the other stuff?
Sense of humor is a very personal thing. Tell a story about your own sense of humor right now or through the years.
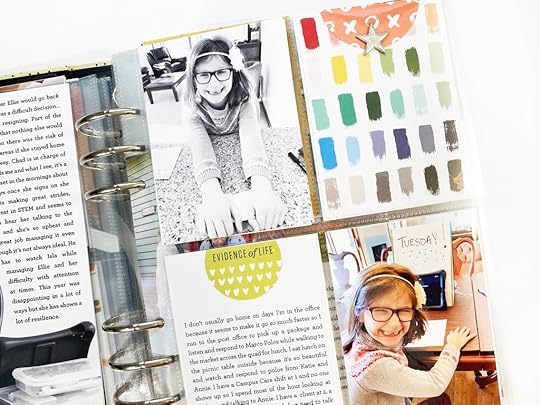
The
Story Kit™ includes:

Here's a video overview of the
Story Kit™ and Add-On options this month:
STORY STAMP™
The
Stamp Set:

Here's a video overview of the Story Stamp:
DIGITAL STORY KIT™ (Included with the STORY CLASS)
Your digital kit and the classroom and any Add-Ons purchased will be available to you on the 15th once your card has been charged for the month.
Here's a look at what's included in the Digital Story Kit™:

And a couple peeks at the layouts I created with the kits this month (full details, including process videos and how-to handout, are included with subscription):


This month Lisa Varshine is joining me in the classroom with a Project Life spread:

Again, thanks so much for subscribing and/or considering my
Story Subscription program! If you have any questions about this program please let me know below in the comments.
Stories By The Month™ kits include 4x6 chipboard, 3x4 and 4x6 cards, a 3x4 stamp, a sticker sheet, and an embellishment (wood veneer, cork, etc).
Here is a full look at the kit:

And a video overview:
This subscription is a great option for those who are looking to tell more calendar/everyday life sorts of stories.
Loved using those cork words already in my summer story notebook:

Add On options are available to all Story Kit™, Story Stamp™, and Stories By The Month™ subscribers
(this excludes Digital Story Kit/Story Class subscribers since you don't have any part of your subscription shipped already).

Current and new subscribers can select + purchase Add-On's via your new drop-down menu access under your user name in the top right corner of the site.
Depending on product availability subscribers may be able to purchase the Add-On's after the Add-On period has ended and regular shop shipping rates will apply because they will ship separately from the kit.


June 11, 2021
In Case You Missed It | June 11

Happy Friday, friends! Welcome to the latest In Case You Missed It. Just a reminder that this is a quick post that will happen every Friday afternoon with all the updates and links that have happened throughout the week. So, let's get to it:
CRAFT THE STORY YOUTUBE SERIES
In today's Craft The Story video (Episode 23) Ali is sharing a look at what she’s been up to in her office including organizing past kits, art journaling, and thinking about a summer story notebook. Watch the video here.STORY CHAT
Tomorrow, June 12th at 4pm PT/7pm ET, we will host our third Story Chat with Ali, Lisa, and creative team members Morgan and Krystal. We’ll be talking all about the new Story Kit theme, LAUGH. If you can’t join us live, don’t worry! A recording of the conversation will be available on our Instagram account, as well as on the blog, and in the Story Classroom. As a fun new addition to our monthly Story Chats, we will be putting together a Spotify playlist of songs that represent the month’s theme. Find our first one here. We look forward to incorporating your suggestions, starting this month.ON THE BLOG
All this week, we have been spotlighting completed Week In The Life™ albums. Head over and check out these amazing projects and helpful insights.CLASSES
Have you registered for Stamp Your Story Live happening June 19th? This $5 community stamp day will be live on the 19th and then recordings of all the content will be available to enjoy at your own pace after the 19th. Find all the class details and registration here.CREATIVE TEAM
Our creative team is sharing their projects using the Strong Story Kit™ over on the blog. You don’t want to miss the beautiful pages these ladies have put together. Read it here.As always, we’re so grateful to have you all as members of this community! Thanks for joining me today and have a great weekend!

Week In The Life™ 2021 | Special Guest Laura Wonsik

Happy Friday! We're wrapping up our week-long Week In The Life™ spotlight with some insight from creative team member, Laura Wonsik.
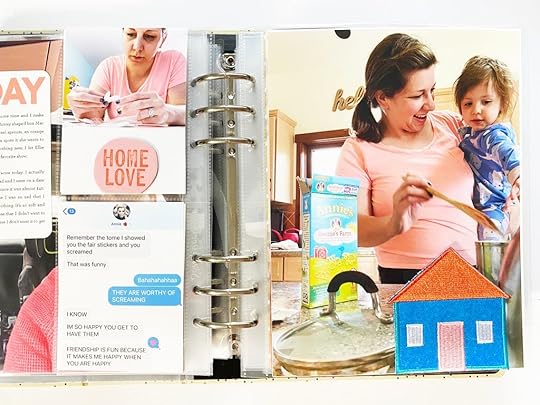
Hello! It's Laura Wonsik here sharing some images from my 2021 Week in the Life Album. This was my 5th time completing this project. Here are some things to know about my process and experience with Week in the Life this year.


 I wasn't really in the mood for this project this year so it's basic, I did it quickly and it doesn't have a lot of original or super creative design.
 I used a lot of products from my stash for this, I love using WITL as an opportunity to stash bust! Especially loved using the Morning and Evening story kits.
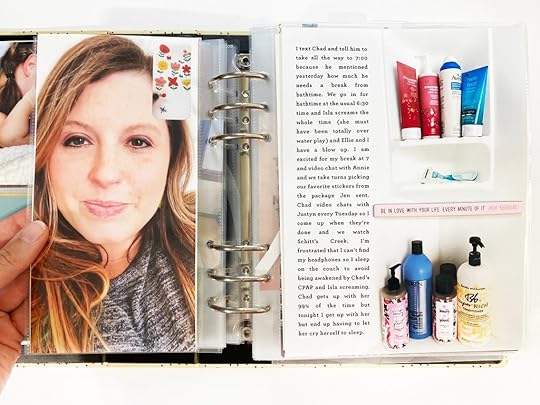 I incorporated photos from my husband as he is a stay-at-home dad right now and has lots of stories throughout the day I wanted to include.
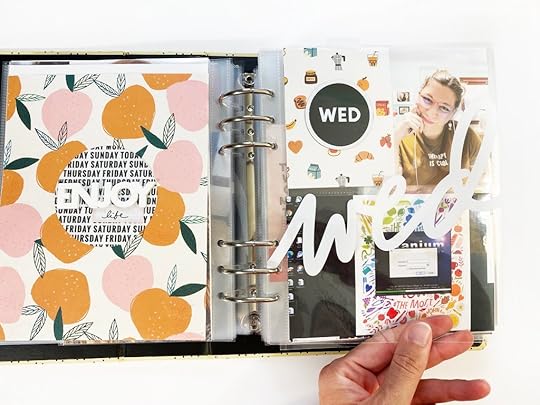
 I like to do my journaling in the present tense. I have done it that way for all of the years I have done Week in the Life and have absolutely no idea why.
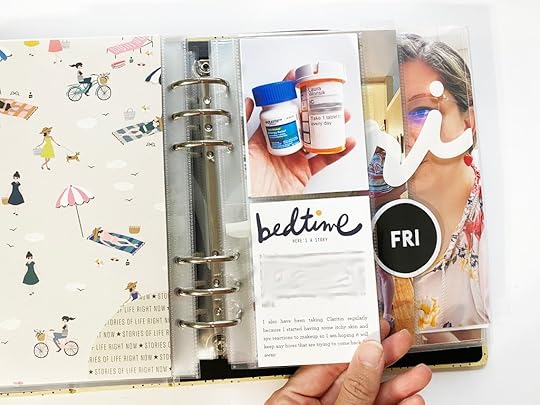
 This project is like a big puzzle. Sometimes if the pieces don't seem to "fit" I make it work by adding inserts or waterfall sleeves.
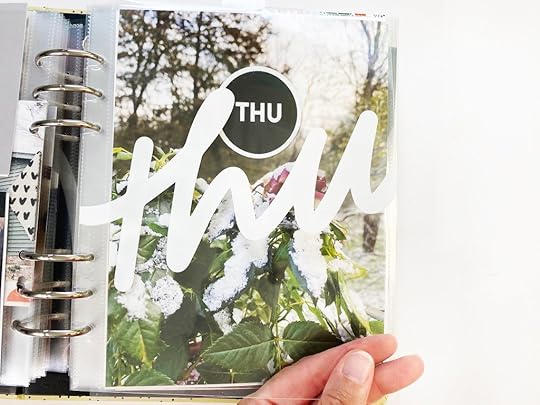
 So much of life is virtual these days so I captured those stories through screenshots.
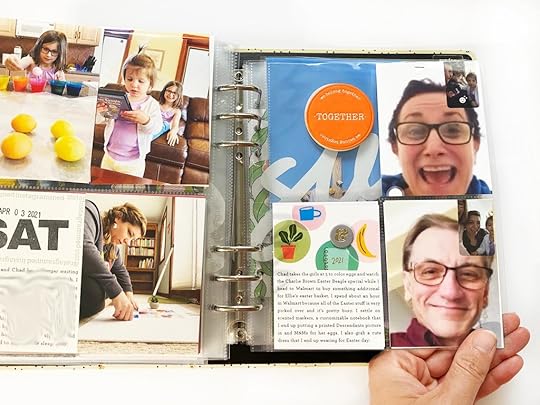 There are certain photos I like repeating year to year including what's in the shower and work selfies every day from the same angle.
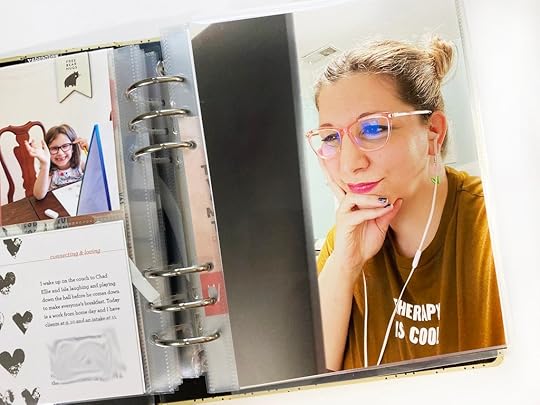
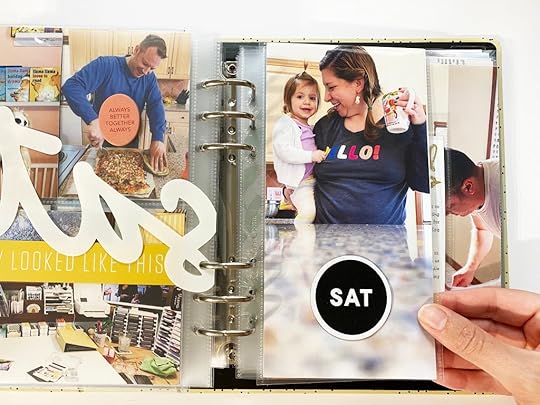
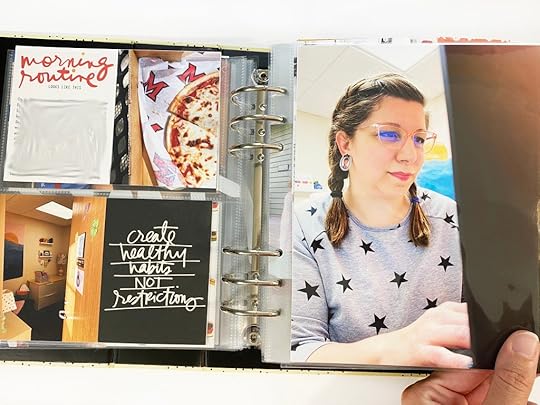 Textured elements go on the outside of the pocket page. The self-timer was my friend. I took lots of photos that didn't make the cut.
  Less is more. There is no right way to tell your story!
Make sure to check a full walkthrough video of Laura's album on her IGTV channel here. We love seeing the variety of ways you make this project work for you! Thank you for joining us this week.

Around The Office June 2021
In today's Craft The Story video (Episode 23) I’m sharing a look at what I’m up to in the office including organizing past kits, art journaling, and thinking about a summer story notebook.
SUPPLIES
Organizer Boxes From Scrapbook.com Stories By The Month™ Kits Story Kits™ Ikea Dragan Storage Boxes Large Baking Trays Art Of Noticing Notebook Baking Trays (similar)
More posts on organizing can be found here.
Watch my Morning Marks videos on Instagram here.

June 9, 2021
Week In The Life™ 2021 | Special Guest Jill Drangsholt

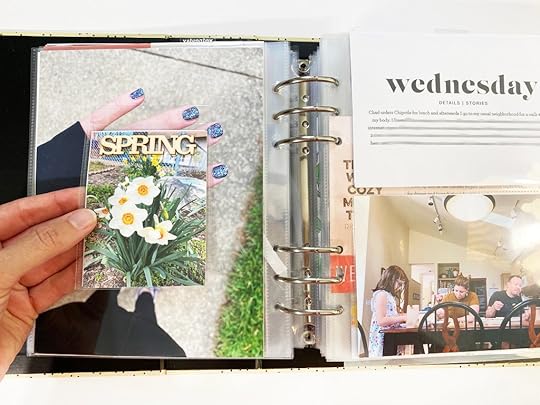
Hello friends! Jill here and I can’t believe it’s my 10th year doing Week in the Life! It has taken many forms over the years, from Shutterfly photo books to Ali's 6x8 albums to several years putting it right in my Project Life album. I used to stress myself out taking hundreds of photos and get very overwhelmed putting my projects together. But eventually, I settled into a system that could scale up or down depending on how motivated I was feeling that year. It is the key that has kept me going year after year. And that is to simply have a goal of documenting at least one morning, one afternoon, and one evening story each day. Some years that meant only 3 photos a day (gasp!!), but those years mean just as much to me as the more robust documenting years. It’s all part of the bigger story.


I just came out of several “lean” documenting years and again set myself a doable goal of at least 3 photos a day. But after a few days, I realized that I was settling into a routine of about 10 photos a day (yay!!). I had a feeling I’d be taking more photos this year, but not enough for a full album, so I decided to try it out using the 6x8 folio that released with this year's One Little Word products paired with two Freckled Fawn pocket page inserts. It ended up being a perfect fit!! The only downside was that it's not as easy to add inserts as in a traditional album, but as you'll see, with some creative glueing, staples, and washi tape, I found a way!


Rather than using the Week in the Life kit this year, I thought that my three story documenting style would work perfectly with using the Morning and Evening story kits paired with the May Stories by the Month kit for the afternoon stories. This project successfully crushed all three kits and gave me seven mini stories from each kit, which I love so much! For my Thursday evening stories, I even squeezed in three extra stories inspired by Ali's story classroom content.


This year was definitely product heavy for me compared to previous years, because I had so much fun playing with these kits. I let the journaling cards guide many of my stories for each of the days plus some of my smaller Ali stamps for prompts such as "today I" and "loving." I think this is my favorite year for this project so far and am already looking forward to trying to graduate back to a full album next year. We'll see!


I mentioned earlier that I did several years directly in my Project Life album, so I wanted to share one of those with you as well. My 2019 project has been sitting unfinished for 2 years, but during this year's prep day I just got it done! That year I really did only take 3 photos a day and had them all laid out in just two spreads. But I had never gone back to do the journaling, so I altered the digital journaling cards from Ali's kit to hold my morning, afternoon, and evening stories. The rainbow of journaling cards make me so happy and sort of make up for the fact that there are zero embellishments on this one. Because this year was pre-covid and pre divorce and I was finishing it two years later, I did all of my journaling using the "I want to remember" prompt. This helped to keep me focused on the good memories from that time. My 2019 project may be lacking in embellishments or creative photography or photos in general, but it's still a piece of my story that I'm so grateful to have documented just as it is.


My encouragement to all of you reading this is to make the project yours. It doesn't have to look like Ali's or any of her creative team. And it doesn't have to look like how you did it last year. Switch it up, experiment, make it work for YOU.


Here's Saturday and Sunday:


You can find me at @jill.drangsholt on Instagram where I will be posting a full walk through video of this album on IGTV this week.
2019 Week In The Life™album photos:


Documenting Summer 2021

How do you document summer stories?
I've been thinking a lot lately about what I might want to use as a home for some summer stories this year + decided to use an older Art Of Noticing notebook as my jumping off point. I wanted something that felt casual + playful where I could easily add in a full page photo or a full page of patterns or stamping or words depending on what mood I was in at the time. No rules. Just a home for stories.
Want to play along with me this summer? Grab a notebook and have some fun capturing the little + big stories that make up your summer adventures.
Here's what I've added so far:

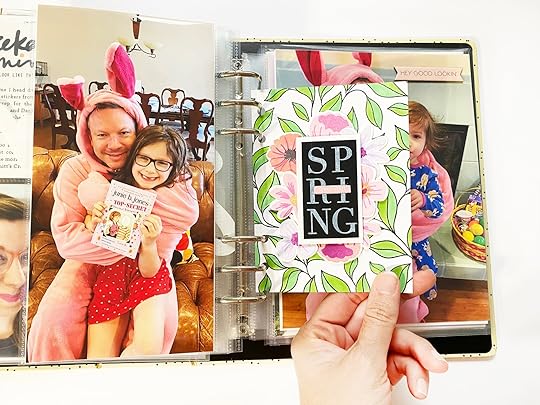
Cork words are from the July Stories By The Month kit coming out next week.

The lemon pattern paper is from American Crafts. It's so bright and fun and I'm not sure I would have used it if I wasn't starting this little album where I feel really free to just try out some things and add in patterns I just happen to love. I decided after I cut up the paper that I wanted it to cover both pages so that's why the pattern doesn't meet up in the middle. The pocket envelope + journal card was a recent add on option for kit subscribers. I added a bit of yellow ribbon to the top of the journal card to make it easy to pull it out of the pocket + I wrote a bit about my intentions for this notebook.


June 8, 2021
Week In The Life™ 2021 | Special Guest Jennie Rey
Hi! Jennie here! It’s done! My 2021 Week in the Life is in the books!

As you might have read in my previous post. I was never this prepared in the 12 years I participated in this project. I had my ‘design formula’ ready to go and my album all planned out. During the documenting week I had my daily sheets at hand and meticulously wrote everything down. It helps a lot but it still took me a couple of weeks and every spare minute I had to finish this album because this is a VERY BIG project! It takes time and that’s okay! Having my finished album in front of me makes me so incredibly over the moon happy and I just can’t put it on the shelf yet! I am so very happy you are willing to look at my album because here in the house everybody but me is pretty done with Week in the Life (but why tho..!) so thank you!!

On the last day of the documenting week I was able to get everybody in one place and get a self timer photo of all of us and isn’t it the best way to start my album?! I cropped it into a half circle in Photoshop and used one of the digitals from the Week in the Life Prep Day to make a transparency to put on top of the photo. (If you haven’t purchased the Prep Day yet, you really should! So much amazing content!) On the backside I used a digital patterned paper from Vicki Boutin and another Prep Day digital file for my reason why, the circle on top is a journaling card from the digital 2017 December Stories by the Month kit, that card really says it all!

I pretty much stuck to my plan and started with translating my scribbles from the week into seven portions of journaling per day (that seemed to fit best) and stamped the times on top of my journaling. It works best for me to do these little tasks in batches, so I typed out all of my journaling, stamped the times on top of it, assembled my half circle piece, attached it to the page using washi tape and so on!

Next step was to select and edit my photos. I started with a photo of our dinner for on the backside of the plastic half circle and then a big 6x8 photo to start each day with. I also selected two photos for each day and cropped those into a half (8,25 inch high) circle and attached those back to back.


Next I had to select photos to crop into quarter circles for in my 2x2’s page protector and I did struggle a bit with this portion! I had planned to randomly put photos, ‘stuff of life’ and die cut pieces in the pockets but that didn’t work out that well! Not every photo can be cut into a quarter circle in a random direction, so eventually I made two different layered templates in Photoshop to be able to plan my photo placement. Here are links to my templates: template one and template two. I also decided to fill one side with photos and the other side with my collected ‘stuff of life’. In one of the pockets I put the fabric circle with the day on it and on the backside a piece of patterned paper with a heart sticker from Ali’s mini kit.


Because those quarter circles looked pretty busy and to make sure they stayed in place I decided to make transparencies in the colors of the plastic half circles and cut those into 2x2 squares. I attached a photo on one side and a piece of ephemera (cropped into a quarter circle) on the other side. I think it does look less busy and I really like that there still is a see through effect!
To also make it a bit more easy for the eye I decided to use a photo of the sky behind the 2x2’s page protector. I took a photo of the sky each day and made a screenshot of the weather forecast: it is really funny to see how changeable the weather can be here in The Netherlands.

I selected two more photos to go back to back in the shape of a half circle for each day (I really love those larger photos) and for each member of the family I selected a 3x4 photo and a 4x6 photo and dedicated one page each day to that family member. They each were so kind to fill out the ‘this day looked like this’ card (and we had a lot of fun filling one out for our cat!) and I asked them to choose one word to describe themselves. They came up with a lot of crazy answers and I did warn them that it would end up in the book! I used one of the digitals from the Prep Day to make a 3x4 transparency and used the digitals from the main kit to make a few more of those die cut circles, and stamped their names, their age and the chosen word on top. On the backside I put a circle of the same Vicki Boutin paper with their embossed initial on it. I also filled out the ‘today’ card with a few fun facts about their lives right now.


Last step was to include one of the layered templates for each day. I did already decide on which one to use for the day when I was selecting the photos, some days there were specific topics that deserved their own page (a photo shoot, my son’s engagement, the self timer shots of all of us) and the other templates I used to document what I was watching that week, random screenshots from my phone, things I overheard during the week and the one with the cameras I used for the projects I was working on that week. I added the same colorful patterned paper as a background for all of them and added a digital file from the Prep Day on some of them.


And that’s it!! Another Week in the Life album to add to my growing collection and I couldn’t be happier! I am so grateful for this project (Ali, you are the best!) because this time next year, nothing will be the same!
Thank you so much for taking a look at my album! A sped up flip through can be found on my feed on Instagram: @thereypie or find a bit slower version on YouTube: https://youtu.be/PbuEwc-qioM

AE Creative Team | STRONG Story Kit™
This past month we have been documenting stories about strength and how it shows up in both tiny details and big decisions. And today we are delighted to share with you the projects that our Creative Team made using the STRONG Story Kit™.
And just as a reminder, this Saturday, June 12th, is the last day to subscribe and receive the STRONG-themed products.


As always, we are so grateful to our Creative Team for sharing their stories and creative inspiration with all of us!

June 7, 2021
Week In The Life™ 2021 | Special Guest Linda Jordan

Hi! I’m Linda and today I’m going to share with you a look at my completed Week in the Life 2021 album and a little about my process. This is my seventh year documenting a week in my life and every year I learn a little more about how to make this project work for me.
During the documenting week I focused on taking my photos and typing out my words using the Day One app so that when I was ready to put my album together my words were already all typed out. My first step in putting my album together was to select & edit my photos. I did all of this on my iPad using the Color Story app. After my photos were edited I worked on getting everything in my album.


I used a design formula to help my album come together so each day followed the same basic pattern. This made it easy to put the album together in an “assembly line” so, instead of working on one day at a time, I did one element at a time, e.g. the first photo of each day. This simplified the process because I was able to repeat the same steps seven times and allowed me to work on elements out of order so I could do what was inspiring me at the moment.
This year I decided to not use any divided page protectors and just adhere my pages back to back. My base pages ended up 6.625 inches by 8 inches and I included a few smaller inserts. I started each day with the day of the week transparency & a full page photo. Then I added the bulk of my journaling printed out with the “Monday Looks Like This” from the 4x6 cards in Ali’s mini kit & the 3x8 kraft daily sheets. I allowed this title card to dictate the color that I used for the rest of the embellishments for each day.


After my journaling, I added the rest of my content using a variety of layered templates sized to the full page & a smaller inserts with singular enlarged photos. In addition to my photos, I added a few craftier elements. My favorite page was created by watercoloring on watercolor paper with the color of the day and, after it dried, printing the daily overlays on top. On top of these pages I added a cut down divided page protector to include an interactive pocket. Inside the pocket I added the “5 pieces of the story” card to include a few more details backed with another photo.
I also created a half circle page that followed the same formula each day to document my daily outfit paired with the half circle transparencies. Underneath the transparency I stamped out the day of the week in a coordinating ink color. On the back of these pages I added a photo cut to the half circle shape. During the week I had fun looking for items to photograph that would be fun cut to this shape which included plates, pizza, the wheel of a bike, and my cat curled up in a circle.


I used two of the layered templates Ali offered this year to add more of my content to each day. The first included six iPhones that I used to document various screenshots. Secondly, I used the template that had space for 10 photos designed to look like polaroids which gave me the opportunity to add a lot more photos (I take so many photos with this project, so I am always looking for opportunities to add more into my album).
I didn’t necessarily include my photos during the day in chronological order, instead I chose photos based on the size and orientation that I would like them printed. Typically, I added my favorite photos as enlargements, and the smaller photos included those that told more of the story, but weren’t necessarily great photography.


I added the rest of my photos by creating two daily photo collages in PSE. I varied the sizes and layout of the photos each day depending on how many additional photos I wanted to include. On these pages I added in embellishments from the digital version of the Paislee Press mini kit. I had a lot of extra photos on Monday and Saturday so, for both of those days, I added an additional insert with an extra full page photo paired with an additional photo collage. Using a design formula definitely helps bring the album together, but sometimes you need to break your formula to make it work for your album.
Finally, I ended each day with a large stamped phrase paired with a photo. I had a lot of fun stamping out a few words for each day and creating a bit of a craftier album than I had done in the past for this project. I only added minimal embellishments to the album at the end, instead allowing the photos & words & craftier elements to be the focus.


A full flip through can be found on my IGTV @lindalovescreating. I hope you enjoyed this peek into my album & find some inspiration to go finish your album!

June 6, 2021
Week In The Life™ 2021 | Special Guest Tazhiana Gordon

Hello crafty friends! Tazhi here with a few tips and tricks to set you up for success as you work through the second phase of Week In The Life – the documenting phase.
Before the week even started, I made a game plan with the sizes of photos I wanted to take as well as the journaling lenses I planned on using and the bits of life I wanted to remember to document. This helped me be more intentional about the week and ensure I actually had something to work with once it came down to creating the actual album.

I found that what was the most successful for me was to break the project up into short and actionable tasks and to batch process the work. I know that some people have had success working on it one day at a time but I found that really daunting and so I broke it up into words, photos and the extra. I went with words first because I did my journaling every night in the Day One app and it was very easy to copy the text straight from my journals there and paste it into the templates I created in photoshop. That whole process took me less than a half hour and then it took me another 20 minutes to stamp the dates in the corresponding colors and then the words were in the album! It was a small task that I could cross off and that gave me the momentum to keep going.

Next, I tackled the photos aspect. I used Lightroom and Amy Gretchen’s tutorials to take my 700+ photos down to the 100 or so I decided to edit and print for the album. She has a ton of videos on using Lightroom to make a project like this more manageable and I worked on my photos in batches as well – first selecting the photos I wanted to use, then creating buckets of the various sizes I wanted to print in, then printing (I print at home using the Canon Pixma Pro 100 series) and finally trimming all of the photos down to size and arranging them into the order they would live in. I made the phone cards during this step as well as it required photos and it just made sense to get it done at this moment. This took me about a week of working on it a bit every night but once this step was done, it felt like a bulk of the work was finished and I was sailing on to the end. I find that crossing off steps like this gives me a lot of energy for the project, the closer to the finish line I get, the more I want to get there.

Finally, we made it to the fun stuff which is making it look good! Even that, I broke down into smaller steps. First, I worked on the plastic semi circles, opting to stamp a mantra on white cardstock I cut down using the free template Ali had on offer on her blog and then stamping the day of the week and attaching the semi circles to the plastic with a brad. This took me one day in front of a show on Hulu and went into the pocket, which I came back to a few days later and stitched down with my sewing machine. On a different day, I tackled how I wanted to fill in my 2x2 pockets so I spent one day creating seven alcohol ink panels and a different day die cutting them down to spell the different days. On a different occasion, I foiled some kraft circles and popped them into the 2x2 page protector. What I learned was that even if I had an idea for a page or embellishment, there was no need to make all seven of them on the same day – rather, I broke it down into actionable steps and chipped at it a bit each day until I had a final product that could go into the album.

By the time I got to this step, the album was 90% finished and all it needed was the icing on the cake. At this point, all of the words, photos and miscellaneous bits were in the album and that made it really easy to see where embellishments were necessary where it would add to the overall flow of the album or where it would detract from it. It only took me two hours for this last step as most of the choices were made already and all I needed to do was add a tiny phrase sticker here or a piece of chipboard.

At the end of my first successful Week In The Life album, I’ve learned that the recipe for success is to touch the album a million times but only for a small bit of the process each time. I made a list of all the things I wanted to get done and then worked on the whole album each time, crossing off one step at a time. This project is way too big to work on in one sitting and I am very happy with my two week turnover. Even if it had taken me longer, it would have been easily accessible by working off of my plan. I hope this gave you some tips and strategies to approach your own project and future memory keeping endeavors!
We're so excited to have Tazhiana sharing her album today! For a more detailed look at her album and process, check out the links below:
https://youtu.be/NccyCT7uHzs - WITL Flipthrough https://youtu.be/mE1EEZvMAR8 - WITL Prep Videohttps://preciselytazhi.com/2021-witl-flipthrough/ - Blog Post With Week’s Stories


