Elizabeth Minchilli's Blog, page 2
April 17, 2023
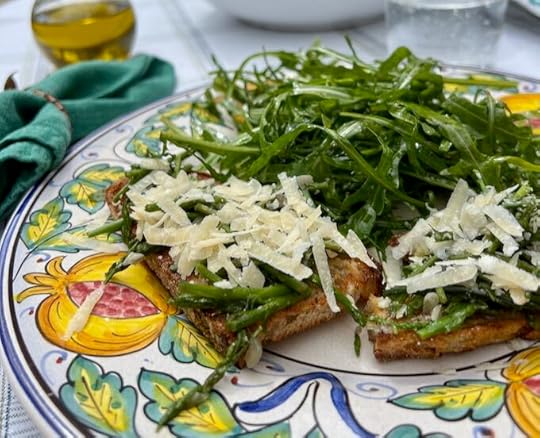
Asparagus + Avocado Bruschetta
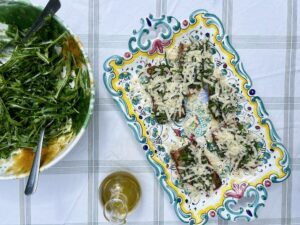

I’m totally obsessed with bruschetta these days. Specifically asparagus and avocado bruschetta. I think it has a lot to do with a fantastic new bakery opening in my neighborhood. I’ve never been a huge fan of bread in Rome. I know everyone loves the bread from Roscioli, which is basically pane di lariano. And I can appreciate that it is good, but big huge loaves, with rock hard crust and huge airy bubbles inside a slightly chewy crumb just doesn’t do it for me personally.
Instead Forno da Milvio is making bread that is denser, slighty sour doughy and with crust that is not so agressive it’s going to cut the roof of your mouth open. The down side of all this is that I’ve probably been eating more bread than ever.
But rather than just eat the bread, I’ve been making a meal out of it, especially at lunch time. Last week up in Umbria (where I made sure I brought one of the loaves from Rome up with me) I made what was basically avocado toast and called it lunch. But since I toasted it over the coals, rubbed it with garlic and olive oil, and finally topped it with sauteed wild asparagus and grated parmigiano reggiano I think it deserves the upgrade to asparagus and avocado bruschetta.
foto : @fornodamilvio
PrintIngredientsWhole grain sour dough bread1 ripe avocadolemon juiceSaltolive oil1 shallot, diced1 cup asparagus tips1 garlic cloveParmigiano reggianoInstructionsMash the avocado with a bit of lemon juice and salt until smooth.Pour olive oil into a small sautee pan, add the asparagus and turn flame to medium. Season with salt and cook until tender, adding a bit of water. It should take about 8 minutes. Make sure all the water is evaporated.Slice the bread into half inch slices. Toast over coals, or in the toaster.While still hot, rub bread with garlic and drizzle with olive oil.Top with a few spoonfuls of avocado, some asparagus and some parmigiano reggiano grated on the big hole of the grater. Season with salt and pepper and enjoy with a salad.

The post Asparagus + Avocado Bruschetta appeared first on Elizabeth Minchilli.


Carciofi Pari – Stewed Artichokes
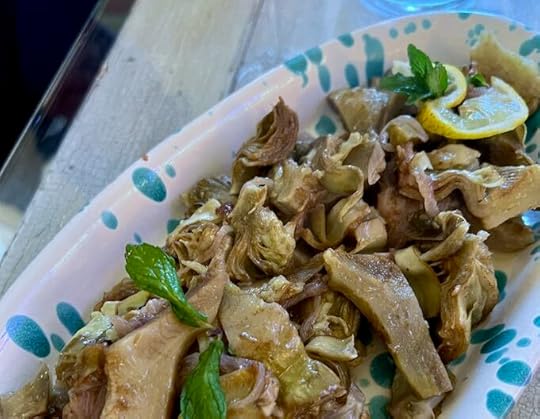
I seriously didn’t think there was an artichoke recipe in Italy that I didn’t know. But last week, while Sophie and I were in Lecce with our group, we participated in a cooking lesson where we learned this amazing recipe which was totally new to us.
The name of the recipe is ‘Carciofi pari’ or ‘Carciofi tutti pari’ which roughly translates as ‘Artichokes all the same.’ We learned that this is a method of cooking almost any mixture of vegetables where everything gets cooked in one pot at the same time. You just layer it all in and cover to cook. No sauteing of onions first. And no stirring. Also no salt and pepper, just grated cheese to season it all. (I love that the cheese is a seasoning!)
I loved the way the dish tasted so much like fresh artichokes. Very straightforward and rustic and delicious. The mint brought brightness and the grated cheese added a bit of richness.
You can apply this method to other seasonal vegetables and I’ve found some recipes that add potatoes along with the artichokes which sounds pretty fantastic to me.
Traditionally this dish is cooked in a terra cotta pot, which allows the vegetables to cook slowly and evenly without burning.

If you’d like to join us in Puglia next year you can find out about our Week in Puglia and Basilicata tour here, or send us an email.
The post Carciofi Pari – Stewed Artichokes appeared first on Elizabeth Minchilli.
February 22, 2023
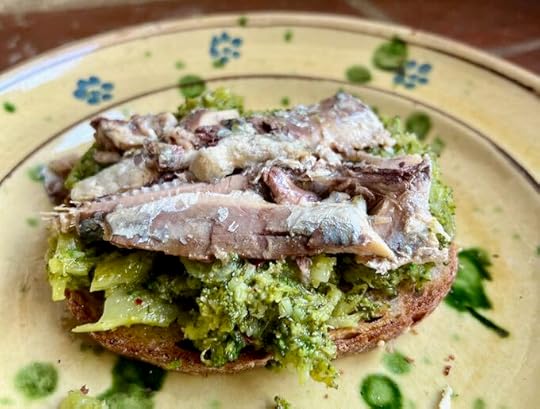
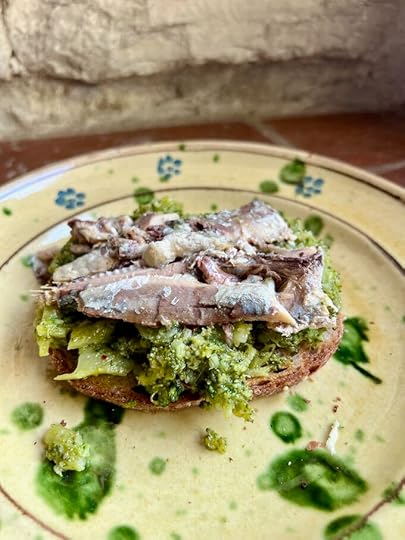
Bruschetta with Sardines and Broccoli

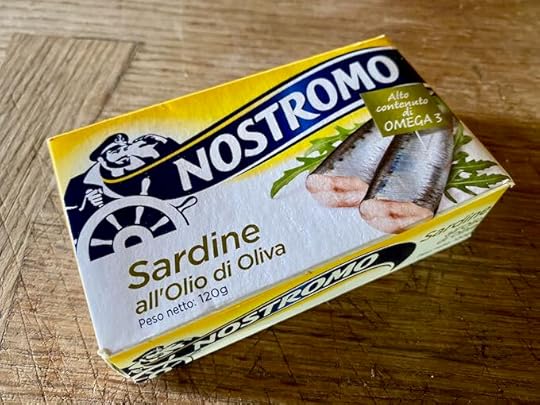
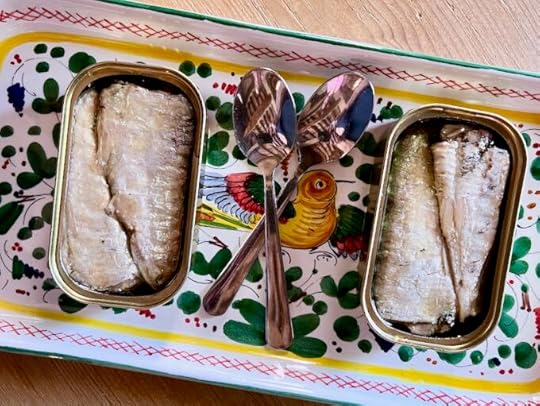
 My friend Annie recently wrote about the health benefits of eating certain types of canned fish. If your idea of canned fish is limited to water packed tuna, then you’re in for a delicious surprise. High quality, oil packed sardines, anchovies, clams and more are a incredibly scrumptious – and convenient and healthy – thing to keep in your pantry.
I am a huge fan of sardines and often add them to pasta or make salads. But I usually just eat them as is, on a plate with a side of leftover vegetables and some bread for lunch. But this past weekend I turned things up a notch, and made this Bruschetta with Sardines and Broccoli. The inspiration for the recipe was not so exciting: a container of over cooked broccoli from dinner the night before. As you can see, it went from sad to sexy pretty easily.
Below is a video I made and the recipe. If you don’t have sardines, you can always sub in anchovies. And any slightly sad leftover overcooked veg will do just fine
Have a happy lunch!
PrintBruschetta with Sardines and Broccoli
Yield 1
Ingredients1 slice whole grain bread1 clove garlic, peeledsaltred pepper flakesExtra virgin olive oil1 cup cooked broccoli, room temperature1 small can of sardinesLemon: zest and juice to seasonInstructionsToast the bread (I did this over an open fire but feel free to use a toaster)While the toast is still hot, rub it with a garlic clove, place it on a plate and drizzle with olive oil. Season with salt.Place the broccoli in a small bowl and mash with a fork. Season with olive oil (about a tablespoon,) salt and red pepper flakes. Taste and adjust seasoning.Spread the broccoli on the prepared bread, top with a few anchovies. In the video you’ll see I didn’t use lemon (because I didn’t have any!) but it would be great with a final squeeze of lemon and grating of zest.
For more recipes from my Italian kitchen see my books The Italian Table and Eating My Way Through Italy.
And if you’d like to learn more about healthy eating in Italy, you can join my friend Dr. Annie Fenn in Sicily next September. Click here to request a brochure.
The post Bruschetta with Sardines and Broccoli appeared first on Elizabeth Minchilli.
February 15, 2023
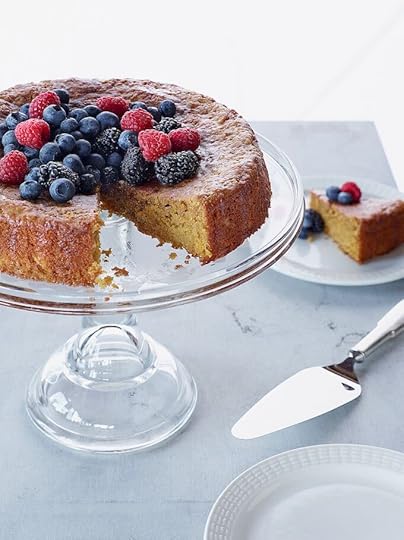
Glazed Citrus, Almond and Olive Oil Cake

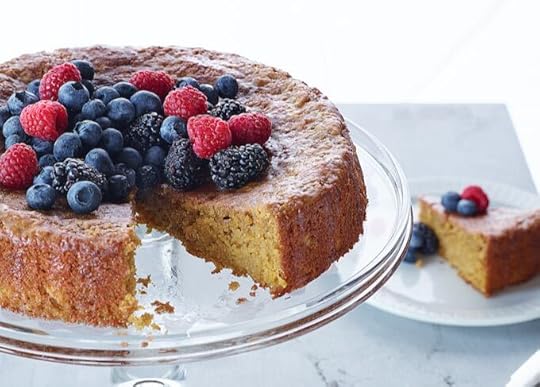
Today’s post , a recipe for Glazed Citrus, Almond and Olive Oil Cake, is from my friend Dr. Annie Fenn and is an excerpt from her new book The Brain Health Kitchen. Annie has made a career out of the fascinating intersection of food and health, and naturally derives inspiration from many of the ingredients we love and that are part of the Mediterranean Diet. Case in point: this delicious cake recipe features citrus, almonds and olive oil. If you’d like to dive deeper into the brain healthy benefits of recipes like this, we’ve partnered with Annie for a tour to Sicily this fall. Send us an email to find out all the details.
Post by Dr. Annie Fenn:
Author Annie Fenn
Yield 12
This cake makes a persuasive case for baking with almond flour, whether you are gluten-free or not. Olive oil adds peppery spice and amplifies flavors like orange and lemon better than butter does.
You can use almond flour or meal interchangeably here with good results, with the meal resulting in a more rustic, nubby texture. Toasted and ground whole almonds work, too (see the sidebar). To reduce the amount of sugar, omit the glaze.
Ingredients⅔ cup (150 ml) fruity olive oil, plus more for the pan and the glaze1 small seedless orange (6 ounces/170 g), such as navel or Cara Cara1 small lemon (5 ounces/140 g), such as a Meyer lemon1½ cups (170 g) almond flour or meal1 cup (115 g) oat or quinoa flour1 tablespoon baking powder½ teaspoon kosher salt4 eggs, at room temperature1 cup (170 g) coconut palm sugar¼ cup (25 g) confectioners’ sugar2 teaspoons warm waterFresh berries, for serving (optional)InstructionsPreheat the oven to 350°F (180°C). Brush a nonstick 9-inch (23 cm) springform pan with oil.Place the orange and lemon in a saucepan and cover with water. Bring to a boil, then reduce to a simmer. Cook until you can easily insert the tip of a knife into the peel easily, about 30 minutes. Drain and set aside until cool enough to handle.Combine the almond flour, oat flour, baking powder, and salt in a medium bowl; set aside.Cut the lemon and orange in half through the equator. Scoop out the pulp and seeds from the lemon and discard, then scoop out just the seeds from the orange, keeping the pulp. Place the lemon rind and the deseeded orange in the bowl of a food processor. Pulse until it resembles a thick marmalade. Scrape into a measuring cup; you should have about 1 cup (250 g).Combine the eggs and coconut sugar in the food processor and process until frothy, about 1 minute. With the machine running, pour the oil through the top of the feed tube and process for another 1 minute until smooth. Scrape the egg mixture into the flour mixture and combine by hand until no streaks of flour remain. Fold in the marmalade until evenly distributed.Pour the batter into the prepared springform pan and bake for 40 to 50 minutes, until the edges pull away from the sides and a tester inserted into the center comes out clean. Set aside to cool completely.To make the glaze, stir together the confectioners’ sugar and 2 teaspoons of the warm water until no lumps remain. Add up to 2 teaspoons oil until smooth and glossy.Run a flexible metal spatula or a knife between the edge of the pan and the cake, then release the sides. Pour the glaze over top and spread to the edges in an even layer with the back of a spoon or an offset spatula.When the glaze has set, cut the cake into wedges and serve with fresh berries (if using).To store, cover tightly and refrigerate for up to 5 days. Or wrap each wedge individually and store in the freezer for up to 3 months.
If you’d like to learn more about brain health and its connection to the traditional foods of Italy you can join Annie in Sicily September 10-16, 2023. Send us an email to find out the details. You can also read about the tour here.
And you can find more recipes like this one in Annie’s new book The Brain Health Kitchen.
The post Glazed Citrus, Almond and Olive Oil Cake appeared first on Elizabeth Minchilli.
February 13, 2023
Porta Portese Flea Market in Rome


This post is from Sophie:
Sunday in Rome is one of my favorite days of the week. People really take it slow, and enjoy time with family and friends. There are a few ways I like to spend my Sundays in Rome, but my absolute favorite is a visit to the weekly Porta Portese flea market.
However, it can be overwhelming (it’s huge!) so here are a few tips and tricks to make the most of your morning at Porta Portese:
Timing
The market is only open on Sundays, and only in the morning. It tends to get very crowded as the day goes on, so make sure to get there early in order to not be standing behind rivers of locals trying to make the best deal, but to still get a chance to get the best deals and see the other early risers shop their way through the market. I like to get there between 9/9:30am
BreakfastI always start with breakfast before wandering off into the stands, and my favorite place is Pasticceria Cecere on Via Benedetto Musolino. They have delicious pastries and coffee, but I always end up getting their savory pizzette rosse (puff pastry with tomato sauce). They are right around the corner from the antiques section of the market which is my favorite (after breakfast head to the corner of Via Angelo Bargoni and Via Ergisto Bezzi)
RoutePorta Portese market is like a maze, so if you want to get lost, you should! It’s the best way. Just follow the locals and spend a few hours looking through the different sections of the market (antiques, clothes, kitchenware. etc).
However, if you feel more comfortable following a route and map, here is what I usually do:
Start at the corner of Via Ergisto Bezzi and Via Angelo Bargoni.At the end of the road, turn right onto Largo Francesco Anzani and then left on Via Ippolito Nievo.At the end of Via Ippolito Nievo, turn right on Via Ettore Rolli until you get to the end of the road.Then turn back around (there are stalls on both sides of each road, so I like doing one side first, and the other on my way back)BargainingThis is completely up to you and there are no rules! This is the only place in Rome where it’s ok to bargain, but of course some people will be more open to it than others. Just be strong and confident, you can do it!
LunchWalking through Porta Portese can be exhausting, so you deserve a big Sunday lunch. Here are a few of my favorites which are not too far from the market
Mercato di Campagna Amica (Via di San Teodoro) This is a farmer’s market, not really a restaurant. But they have a lovely outdoor area in the back where different farmers cook a special of the day. You will always be able to find a plate of pasta, sandwiches, grilled meats and vegetables, and sometimes even seafood (about a 15/20 min walk from Porta Portese)Piatto Romano (Via Giovanni Bodoni) One of my favorite resaturants in the Testaccio neighbourhood (only a 10 min walk from Porta Portese). This is the place to sit down and have a big Roman lunch with all the traditional dishes: Carbonara, Amatriciana, Cacio e Pepe..etc. I also love their seasonal vegetable dishes, they change all the timeOsteria della Trippa (Via Goffredo Mameli) If you want to explore the Trastevere neighbourhood after a visit to Porta Portese, come to this small family owned trattoria on a quiet and shaded street. All their dishes are delicious, and they focus on Roman cuisine. After lunch here, go have a gelato at the nearby Otaleg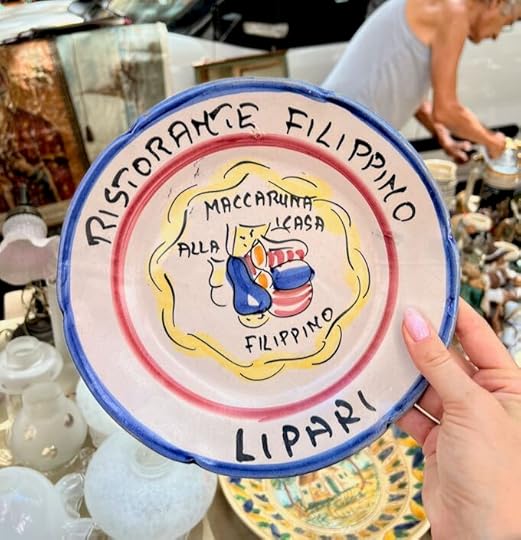


When: Every Sunday 7:00 – 14:00
Where: Piazza Porta Portese (but see Sophie’s personal plan of attack above)
What: There are over 1000 stands that stretch over 2 kilometers of streets.
Why: This market sells everything: from new clothing to old tires. In between there are stands specializing in kitchenware, vintage table top objects, old books and photographs, etc.
Who: Everyone. It’s a very popular – and crowded – market.
If you want to know more about life in Italy, buy Sophie’s book The Sweetness of Doing Nothing.
And if you’d like to join Sophie for a week in Italy you can. She leads tours in Puglia and you can find the full schedule here.
The post Porta Portese Flea Market in Rome appeared first on Elizabeth Minchilli.
January 18, 2023
New Tours for Spring 2024


It seems like a long way away, but I know a many people are starting to plan for 2024 already. With this in mind we’ve just added four tours to our schedule for Spring 2024:
March 11-16, 2024 – Puglia and Basilicata with SophieMay 12-18, 2024 – Puglia with SophieMay 26-June 1, 2024 – Parma with ElizabethJune 9-15, 2024 – Umbria with Elizabeth & SophieYou can visit this page for the current schedule (including a few spots left for 2023 to Puglia and Umbria) or send and email here to receive all four brochures.
The post New Tours for Spring 2024 appeared first on Elizabeth Minchilli.
January 5, 2023
Green Winter Soup
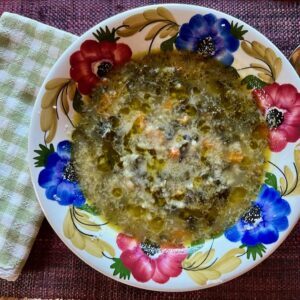
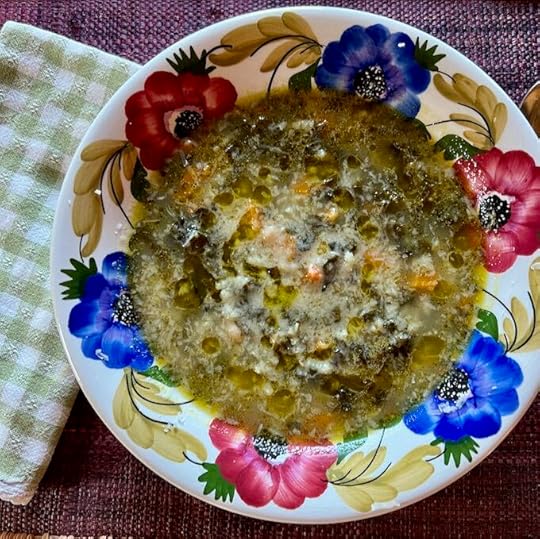
We are up in Umbria this week which almost never happens. In January, after the holidays, we are usually in Rome since it’s a great time of year to be there. Few tourists, sunny skies and crisp clear days. Instead, January in Umbria is for the most part damp, foggy and cold. But somehow we were both craving a nice cozy week and here we are. And I’m so glad to be here.
Yes, it’s been foggy, but the weather clears enough for me to get my daily walk in. Yes, it’s cold, but that’s just one more reason to keep the fire going all day long. Between the cold weather and the past two months of eating and drinking everything rich and wonderful, all I’ve been craving is lots of vegetables.
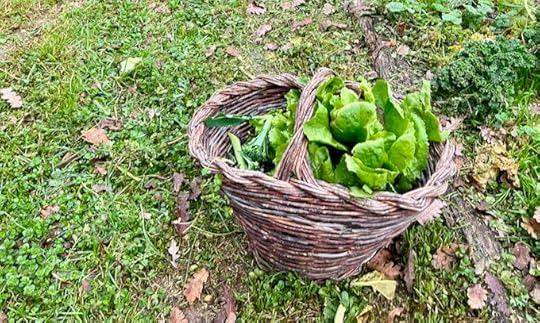
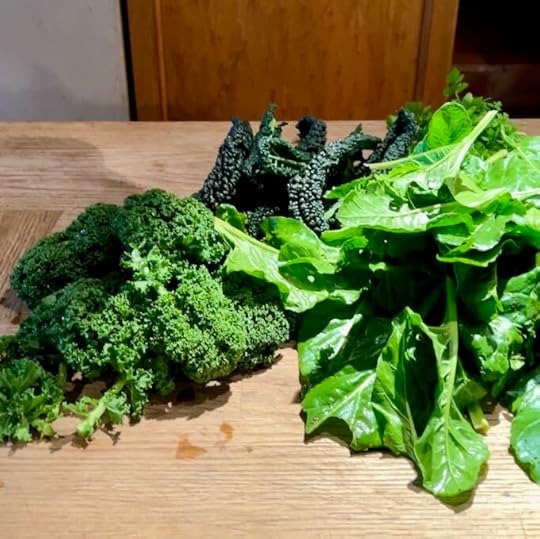
Luckily the recent warmish weather here in Umbria has meant our vegetable garden is still full of goodness: kale, swiss chard, cabbage and all sorts of other hardy veggies. The other day I decided a green soup was in order. I’ve made versions of this soup in the past, but this one was different enough to write down the recipe. We’ve been eating it every day this week and I’m sad that it’s finished.


Don’t worry if you don’t have the exact greens I mention in the recipe. Any will do! Spinach, cabbage, escarole.
Ingredients1/3 cup extra virgin olive oil1 onion, chopped1 carrot, chopped1 teaspoon salt1 pinch red pepper flakes4 cloves of garlic, minced1/4 cup chopped parsley4 fresh sage leaves, finely chopped2 tablespoons tomato paste10 cups chopped greens ,stems removed (I used a mixture of curly kale, cavolo nero and swiss chard)4 cups vegetable broth3 cups cooked rice or other grainParmigiano for servingInstructionsPour the olive oil in a pot big enough to hold all the soup. Heat gently and add the onions, carrots, salt, red pepper. Let cook gently until softened, about 10 minutes.Add the garlic and herbs and let cook another 2 minutes.Add the tomato paste and cook another few minutes, stirring to let it dissolve.Add the chopped kale first, stirring it to let it wilt a bit. You can add a bit of water if you’d like and cover it for 5 minutes.Then add the chard, stir and add the broth.Cover and cook for about 45 minutes to an hour. Taste and adjust for seasoning. Add the cooked rice, heat through.To serve ladle into bowls and top with a drizzle of your best olive oil, and lots of freshly grated parmigiano or pecorino.The post Green Winter Soup appeared first on Elizabeth Minchilli.
December 14, 2022
Roast Whole Fish
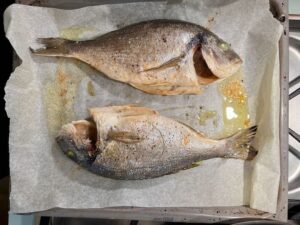

Roasting a whole fish is something I’ve been doing for most of my life. I take it so for granted that I am always shocked when people ask for a recipe. The recipe is basically: Buy a fish and stick it in the oven. Really. It’s that simple.
But I realize that many people have never bought/cooked a whole fish. They are more used to following recipes that call for fillets, and so when faced with a fish with a face, are a bit put off. You shouldn’t be. Fish cooked with the bones in, like any meat, is always going to be more flavorful.
We are very lucky to have a great fish store right across the street. They have fresh fish which they will gladly clean for me, ready for roasting. This means they not only take out the insides (the guts) but also take off the scales.
The most common fish I buy are Dentice, Orata or Spigola. These are all Mediterranean fish, and I always buy the ones that are not farmed (I find farmed fish to be a bit mealy). I also sometimes buy Triglie, which are my favorite, but usually quite small and so too fiddly to deal with, or a Rombo, which is often too big for just two people.
If you are buying a fresh whole fish, the important thing is to try to buy it the same day you are going to eat it. The longer it sits around, the more ‘fishy’ it will taste (and not in a good way.) When you get home, take the fish out of whatever wrapping it is in, and give it a rinse and pat dry. Then put it in a clean dish. The best thing to do is to put it in a colander over a dish, so any liquid can drain. What you want to insure is that the fish does not sit in its own liquid. This is what can make it taste off.
Since I buy fish the same day I am going to cook it, I just unwrap it, give it a rinse, and place it on a plate in the fridge.
Quantities: I usually figure on about 600 grams (about a pound) of fish per person. So if it’s just Domenico and me, I either get two small fish or one big one.
Cooking times: Usually 20 minutes for a small fish and about 25 for a bigger one.
Serving: I find it’s easiest if I do the boning in the kitchen. Especially for a dinner party, no one wants to be dealing with bones. It’s not that hard once you get the hang of it. Here is a video that is pretty good at explaining it. Just make sure you tell people to watch out for bones.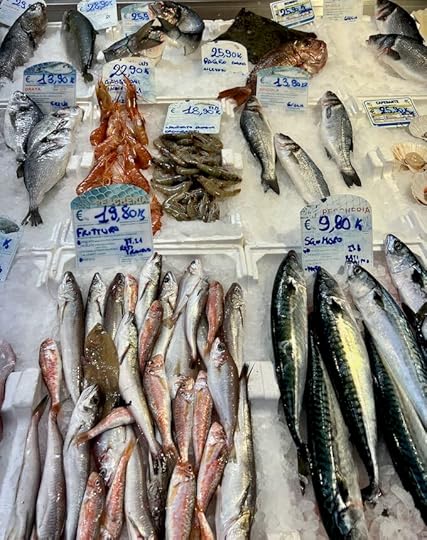
Yield 2
Ingredients1.2 kilos / 2 pounds of whole fish*SaltPepperExtra virgin olive oilOptional: a few slices of lemon and a few sprigs of parsley*Either two small fish or one big one
InstructionsPreheat oven to 180C/350F
Line an oven tray with parchment. This makes clean up easier.
Pat the fish dry and place on lined oven tray.
Drizzle with olive oil, using your hands to evenly coat fish. Then season inside and outside with salt and pepper. If you want, you can stuff the cavity of the fish with a few slices of lemon and some parsley.Place in preheated oven for 20 minutes for the small fish or 25 minutes for the large fish.When done, take out of oven and let it sit for a few minutes. Bone the fish, placing the fillets on a warm serving platter. I usually bone the fish directly on the oven tray, putting the bones to one side. This way I can use the parchment to wrap of the bones to through away.Drizzle with a bit of light olive oil if desired and serve.The post Roast Whole Fish appeared first on Elizabeth Minchilli.
Dirty Vodka Martini


Although it seems like I was born with a martini in my hand, it wasn’t always so. Domenico and I used to have a glass of wine before dinner, and maybe another with dinner. But over the last 12 years or so we’ve shifted over to cocktails. I tried to track down the exact moment when the shift occurred, but could only find this old post on the basic Italian cocktails from 2010.
While I looked through all of my past cocktail posts (and there are many!) I am kind of nostalgic for the days when I would whip up a different cocktail each evening. These days though, we are mostly about martinis.
Yet even with martinis my taste has evolved over the years. While I do love a gin martini, I find myself more drawn to vodka martinis these days. If going through my past cocktails writings is anything to judge by, I’m sure if you check in this time next year, my tastes will have evolved. But for now, today, this is my current go to Vodka Martini recipe.
A few things to note:
I like my vodka martini very dry. So dry that there is no vermouth in it at all.I like my martini dirty, so brine is essential. Not so much so it makes it overly salty, but just enough to make it briny.Stirred or shaken? I go back and forth. I was always a stirred girl, since I love the silky texture of a stirred martini. It’s also much less cloudy. Then, during lockdown, I decided I needed my drink watered down just a bit more than usual, and so began shaking. Today I go back and forth for no particular reason.Garnish: As I mentioned it has to be dirty, so there has to be brine. But it doesn’t have to be olive brine. I’m open to trying almost any well made pickled vegetable. Pickles obviously, but also onions or even cherry tomatoes or peppers. If I am using olives, they are usually the best I can get. I’m particularly fond of the huge green ones from Cerignola in Puglia. As those of you who follow me on TikTok know, I recently discovered blue cheese-stuffed olives. I am obsessed and want to get one of these little tools to make my own.Bitters: Here is where I make this martini my own. Since there is no aromatic vermouth, I add a few drops of celery bitters to our martinis. They are not easy to find, but worth the effort. I use Fee Brothers Celery Bitters.Vodka: Vodkas I like: Kettle One, Grey Goose, Zubrowka; WybrowaVodkas I don’t like: Tito’s, Absolut, SmirnoffGlass: Sometimes I use a standard martini glass. I like the ones from Bormioli since they aren’t too big or too expensive. But since they are a bit difficult to manage when filled to the brim, I’ve become partial to these sour glasses from Reidel. I use the bar range which are less expensive and more sturdy. I also love vintage glasses, but tend to break them right away which makes me sad.
 PrintDirty Vodka Martini
Yield 1
Ingredients2 oz vodka1 tablespoon olive brineice2-3 olivesCelery BittersInstructionsPour vodka and olive brine into a shaker. Add a few ice cubes. Close the shaker and shake a few times to chill and dilute your drink. (about 6 seconds should do it).Strain into a martini glass.Garnish with 2 or three olives on a toothpick.Add 3-4 drops of Celery BittersEnjoy with potato chips of choice.

Here are a couple of fun reels I made on instagram:
The post Dirty Vodka Martini appeared first on Elizabeth Minchilli.
November 15, 2022
Onion Parmigiana

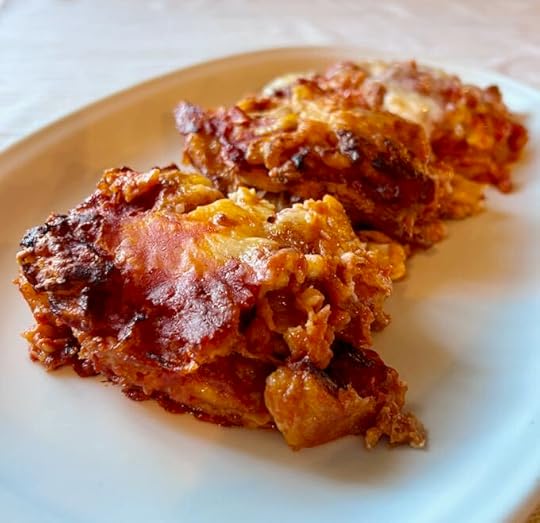
We all know and love eggplant parmigiana. And I’ve also delved into other parmigianesque treatments of vegetables like zucchini and fennel. But somehow I’ve failed to share my favorite parmigiana of them all: Onion Parmigiana.
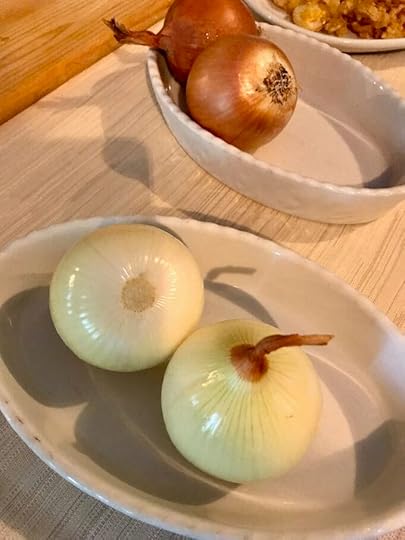
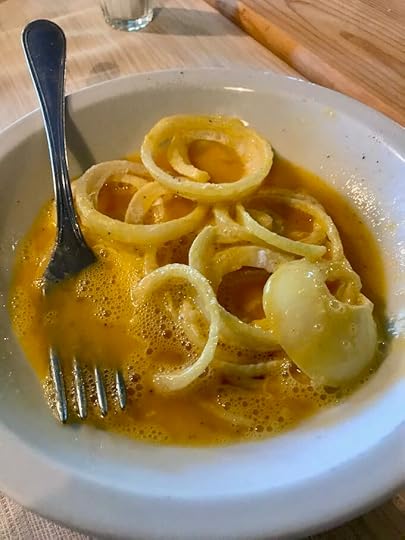
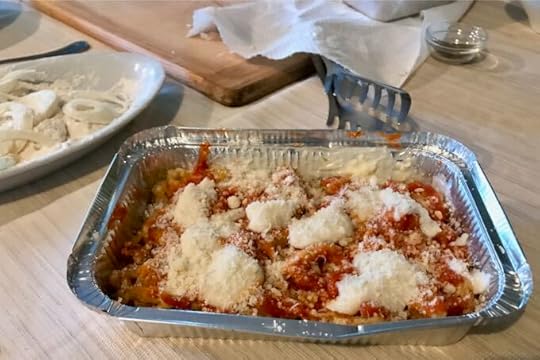
I first had this about 6 years ago at Il Cerreto , a small restaurant run by a family that also has a farm and agriturismo. Almost all of the products in the kitchen come from the farm, including the justifiably well known cipolla di cannara – a local variety of super sweet onion. As far as I can tell it was Doriana, the mother in the family and also the head chef, who developed what is basically a fried onion casserole.
Imagine if you took the best onion rings imaginable, and then layered them with a rich tomato sauce, bechemel and grated parmigiano. The photos never come out as good as it tastes (I mean it’s a casserole, so what do you expect?). Rest assured it’s absurdly delicious.
Yield 4
This recipe is obviously the best if you are making all the ingredients from scratch. But if you want to buy premade tomato sauce or even premade bechamel, that’s ok. My friend Evan even did a version with take out onion rings. I’m not sure I approve that message. 
*Tomato sauce: Put 8 cups of tomato puree into a pan along with 2 chicken wings, salt and pepper. Let cook for about 40 minutes, on low flame, until the sauce is thickened. Let cool before using.
Bechamel sauce:50 grams butter50 grams flour1/2 liter (2 cups) whole milk, heatednutmegmelt the butter in a pan and then add the flour. Stir and let it cook for about 3 minutes, but don’t let it brown. Slowly add the milk, stirring, until it is all mixed in. Continue stirring until it is thickened, and add salt, pepper and a bit of nutmeg to taste. Set aside.
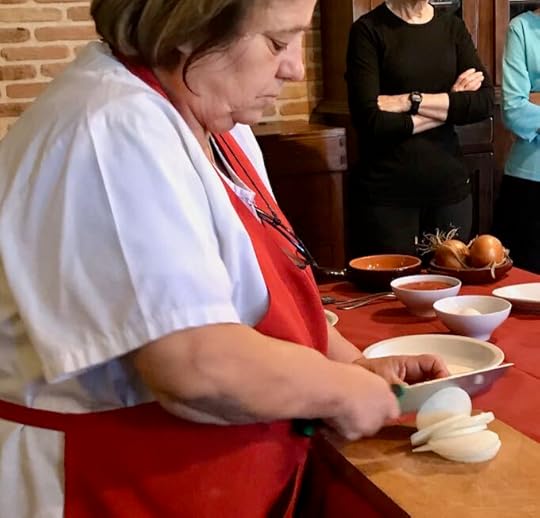
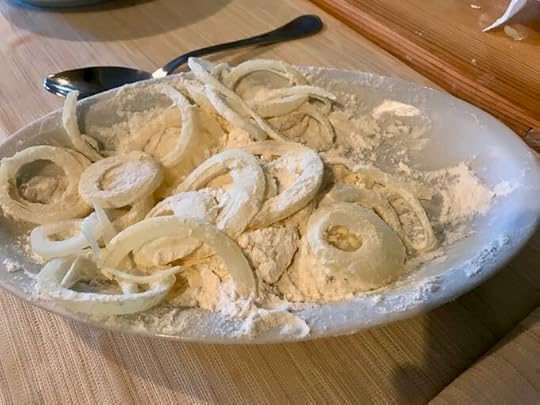
InstructionsBefore you being make the tomato sauce and the bechamel sauce (see below for recipes)Peel and slice the onions into very thin rings, about 1/8 inch. Put into a bowl, separating the rings. Add enough flour to coat the onion rings, tossing them so that they are all dusted.Break the eggs into a bowl and season with salt and pepper. Beat with a fork break up, but don’t over do it.Pour the sunflower oil into a high edged saute pan, enough to come up about 3 inches. Heat over medium high flame. When the oil is hot, take a handful of the onion rings, and place them in the eggs, tossing them with your hands to coat. Gently lift them out and carefully drop them into the hot oil. Don’t over crowd. Fry the onions until golden, and then remove to a parchment lined tray. Work in batches until you are done.Butter the baking pan, then begin to layer the parmigiana. Each layer should be very thin, dont over do it. You may have too many ingredients to fit into one pan, so you can probably make another smaller one.A thin layer of tomato sauceA layer of fried onionA thin layer of tomato sauceA layer of bechamel, which will be more of dollops than a real layerA few tablespoons of freshly grated parmigiano reggianoAnother layer of onionsAnother thin layer of sauceAnother layer of bechamelA final layer of parmigianoAt this point you can set it aside, or even freeze it to thaw out or heat up for later.Place in a preheats 350F/180C oven for about 20 minutes, until hot and bubbling. A few more fun photos from Il Cerretto
Sophie hanging out with the family.
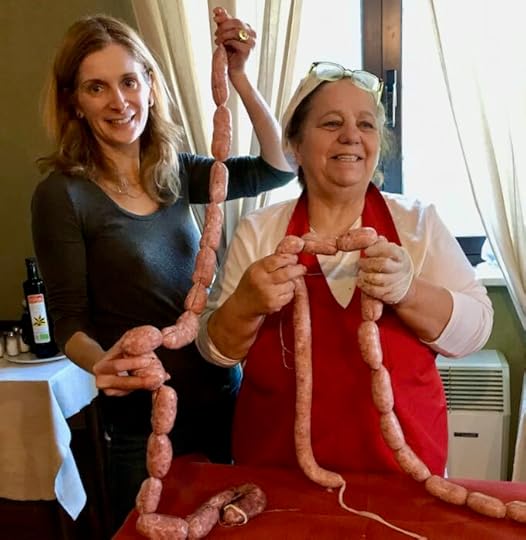
Melissa Clark and Doriana playing with their food.
The post Onion Parmigiana appeared first on Elizabeth Minchilli.