
Rinku Bhattacharya's Blog, page 37
June 9, 2019
Chicken wings with Hoisin, Sriracha, and Sesame Seeds

This is an update of my original post, dated February 1. 2012.
This includes an Air Fryer variation – Mealthy CrispLid. You can order your own using my affiliate link here. It suports the site.
It is that time of the year, when I resurrect my chicken wing recipes. This one is always high on my list, something about that Hoisin and Sriracha magic that calls my name. They taste just as good done in the air-fryer and is less fussy.
Now, just because I really do not completely follow Superbowl does not mean, that I cannot cook up a recipe for wings in time for the big game. I can cook it and if you try it, you will agree like me that it is pretty good.
And let me tell you it is easy and not terribly unhealthy. So there! Now you have a super easy Asian Inspired recipe for Hoisin and Scallion Chicken Wings that you can surprise your friends with. Weekends especially Sundays are about something special, today I made it work with these insanely easy and flavorful chicken wings. I had actually assembled them earlier, so all I did was turn on the oven and bake them.

I have to confess, this recipe is getting out there really as a challenge to myself. For all my professions of seasonal eating, I never get posts up in time for the events. I have lofty ambitions for Valentine’s Day ( who knows, I just might make it this year!). For that matter, also Thankgiving and almost any other event that you can thing about. This weekend I had tried these chicken wings and we all loved them.

The air fried version is a little drier and a little crisper. Do not skip the marinating, it adds a lot of flavor.

The magic ingredient here is hoisin sauce, yes, sticky sweet hoisin the peeking duck kind. Actually I seem to have a bottle of the stuff that I am not quite doing enough with, so you will see some of it show up in various dishes here and there over the next few weeks. I will warn you that this recipe has almost all of the ingredients in the title and they really are super simple.
If you like this recipe and want more ideas, do join my Indian Instant Pot Facebook group and Legume Love Group. Of course Instant Indian is ready for order, joining its siblings The Bengali Five Spice Chronicles and Spices and Seasons.
PrintChicken Wings with Hoisin, Sriracha and Sesame Seeds
Prep Time: 5 minutes
Cook Time: 25 minutes
Total Time: 30 minutes

A simple sticky and spicy recipe for Asian Inspired Hoisin and Scallion Chicken Wings with a nice dose of ginger.
Ingredients
6 tablespoons hoisin sauce2 tablespoon sriracha sauce (or any other chili garlic sauce
1 tablespoon freshly grated ginger
1 tablespoon sesame oil
2 pounds of chicken wings
1/2 cup chopped scallions
Sesame Seeds to garnish
Instructions
In a mixing bowl mix together the hoisin sauce, sriracha sauce, grated ginger and the sesame oil.Toss the chicken wings in the mixture and marinate for 2 to 3 hours or overnight. I usually place this in a ziplock bag and set aside.
Pre-Heat the oven to 375 degrees and place the wings in a casserole and bake for 20 minutes, until soft and sticky.
Remove from the oven place in a serving dish and toss with the scallions and sprinkle with sesame seeds and serve.
Notes
Air Fryer/CrispLid Directions
Continue with the recipe until ready to cook. Place the long trivet in the instant pot. Place the trivet in the inner pot. Place the air fryer basket on the trivet and place about 8 to 10 wings on the trivet. This will depend on the size of your wings.
Place the CrispLid over the pot. Cook at 425 degrees for 9 minutes. Turn and cook for another 7 to 8 minutes. Remove from the basket. Garnish with chopped scallions and sesame seeds and serve.
3.1http://www.spicechronicles.com/asian-inspired-hoisin-sriracha-scallion-chicken-wings/The post Chicken wings with Hoisin, Sriracha, and Sesame Seeds appeared first on Spice Chronicles.


June 8, 2019
Soy Maple Garlic Crispy Tofu – Air Fryer
 After years of trying to get Crispy Tofu right, I finally nail it using the air fryer. Less oil, less mess and hands off. That pretty much sums up this Soy Maple Garlic Crispy Tofu. Did I say hands off?
This simple creation is my thrill of the day. It is turning out to be one of those outrageously crazy weekends. June plans on keeping me busy, all with school activities wind down. Just the kind of month for simple sure fire dishes like this. This is much approved by my vegetarian daughter. And yes, I loved what my new toy the CrispLid has done for the tofu. If you are in the market for a new CrispLid, do consider using my affiliate link.

Everything comes together in well under 30 minutes. This recipe is vegan, to keep this gluten-free you can use tamari. I tend to use tamari by default, it seems to work just fine for all my recipes. I have not added any cornstarch for my sauce. To have a thicker, clingy sauce a little cornstarch will not hurt. You can use any assortment of vegetables for this.
All said and done, the crispy air fried tofu is very much the star of the dish. I also made another extra block, so I can use it for something else later in the week. So that is a meal planning hack for you. Now, the air frying for each one pound block does take about 17 minutes and is done in two batches. However, once you have the hang of things it just needs a little planning and is done hands off.
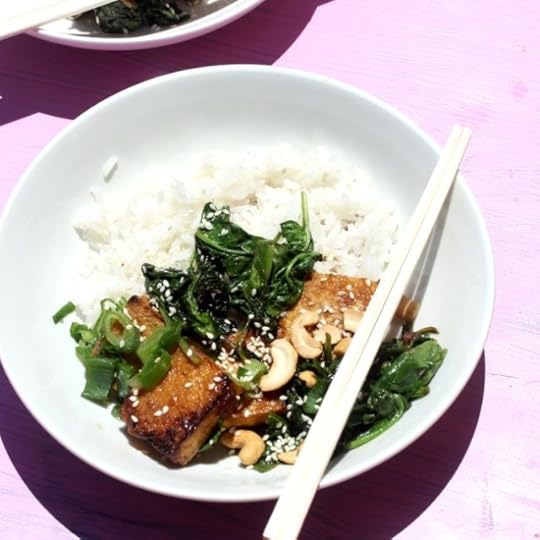
I have used baby spinach but broccoli will work well too. Actually so will asparagus. But, then again you get the gist. I do not add anything to the tofu, I feel that it absorbs the flavors much better this way. This sweet and savory sauce is just perfect for a comforting wind down meal.
Note: If you do not have an air fryer, you can pan fry the tofu or bake it.
If you like this recipe and want more ideas, do join my Indian Instant Pot Facebook group and Legume Love Group. Of course Instant Indian is ready for order, joining its siblings The Bengali Five Spice Chronicles and Spices and Seasons.
PrintSoy Maple Garlic Crispy Tofu – Air Fryer

Ingredients
1 block of extra firm tofu2 tablespoons extra virgin olive oil
3 cloves garlic, thinly sliced
1 tablespoon minced ginger
1 teaspoon red pepper flakes (optional)
1/2 cup tamari
1/4 cup maple syrup
1 teaspoon sesame oil
1 and 1/2 cups baby spinach
1/4 cup cashew nuts
1 teaspoon sesame seeds
Instructions
Cut the tofu into 2 inch by 1/3 inch squares. Place the trivet in the electric pressure cooker insert. Place the air fryer basket on the trivet and place the tofu on he air fryer basket. Place the CrispLid on the pot and cook at 425 degrees for 8 minutes. Turn and cook for another 7 minutes. I did one block in 2 batches.To make this in the oven, place the tofu on a baking sheet and drizzle with oil. Bake at 450 degrees for about 15 minutes on each side.
In a large skillet heat the oil for about 2 minutes. Add in the ginger and garlic and sauté until golden.
Add in the red pepper flakes if using, add in the tamari, maple syrup and sesame oil. Add in the crisp tofu.
Stir in the spinach leaves and cook until wilted. Add in the cashew nuts. Serve with rice and sprinkle the sesame seeds over the tofu before serving.
3.1http://www.spicechronicles.com/soy-maple-garlic-crispy-tofu/
The post Soy Maple Garlic Crispy Tofu – Air Fryer appeared first on Spice Chronicles.
June 2, 2019
Butter Chickpeas/Tikka Masala/Vegan
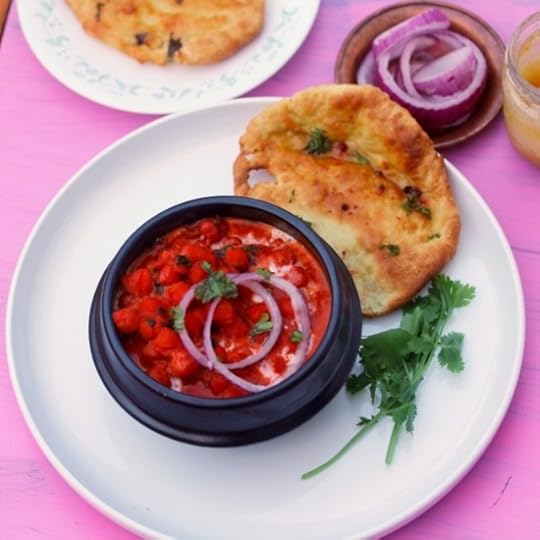 I did not start out with any intensions of creating the newest favorite dish for my household. These butter or maybe unbutter chickpeas just found there way into my life. I had soaked chickpeas waiting for me in my kitchen this Friday. And inspiration struck creating our new favorite dish. Or as my son says the new favorite dish until we find the next one. I played around and even came up with an air fryer kulcha recipe which were just perfect with these chickpeas. My daughter associates the taste of dried fenugreek leaves with any creamy sauce as comfort food.
A true Indian-American she cannot resist associating the core ingredients of Tikka Masala with comfort food. I added some coconut milk to make a very easy and comforting dish. This is part of this weeks store of items that are waiting in the refridgerator. It promises to be a busy week, and I am glad that I have a stocked refridgerator. Along with the instant pot, these chickpeas can be made in your mealthy multi-pot and the kuchla done with CrispLid. Yes, ordering off these affiliate links supports the blog.

One small step like soaking the chickpeas can make such a big difference. Nothing beats a true 24 hour soak for chickpeas. Don’t get me wrong, I am not always organized enough to do it. But when I am the results are golden. As for the kulcha, I will tell you all about this as soon as I can.
Speaking of organized, here are some meal ideas for this week. When I can do I do keep my promises.
So for Monday – Enjoy these butter chickpeas,
Tuesday – Make yourself a gorgeous batch of my cauliflower mac and cheese
Wednesday – How about my Singapore Curry Noodles
Thursday – Enjoy a good Bengali Fish Curry
Friday – Well, you can surprise yourself or try this Seven Ingredient Chicken Curry and raise your hands to the air and say, I am a weeknigh warrior and I survive another amazong week.
Well, here is wishing everyone an amazing week ahead.
If you like this recipe and want more ideas, do join my Indian Instant Pot Facebook group and Legume Love Group. Of course Instant Indian is ready for order, joining its siblings The Bengali Five Spice Chronicles and Spices and Seasons.
PrintButter Chickpeas/Tikka Masala/Vegan
Prep Time: 8 hours, 5 minutes
Cook Time: 30 minutes
Total Time: 8 hours, 35 minutes

A gorgeous and flavorful vegan rendition of butter chickpeas or tikka masala.
Ingredients
1 medium sized onion coarsely chopped1 knob sized piece of ginger. (about 1 inch)
4 cloves garlic
1/2 cup tomato sauce
1/2 cup coconut milk plus more for drizzling
1 and 1/2 teaspoons salt or to taste
1 tablespoons tandoori masala
2 tablespoons coconut oil
1 teaspoon whole cumin seeds
3/4 chickpeas soaked overnight or for several hours
2 tablespoons almond or cashew butter
1 tablespoon dried fenugreek leaves
Chopped cilantro and sliced onions for garnishing
Instructions
In an blender puree the onion, ginger, garlic , tomato sauce and the coconut milk with the salt.Stir in the tandoori masala.
Turn on the saute mode and add the coconut oil and wait until the oil is hot for about 3 to 4 minutes.
Add in the prepared spice paste and the chickpeas with 1 and 1/2 cups water.
Set to cook on 20 minutes of pressure and allow a natural release. If in a rush, cook for 30 mintues and do a quick release.
Remove the lid, stir in the cashew butter and dried fenugreek leaves.
Place in serving bowls, drizzle with extra coconut milk and add the chopped cilantro and sliced onions and enjoy with rice or your favorite flatbread.
Notes
Most of the time for this recipe is for soaking the chickpeas.
3.1http://www.spicechronicles.com/butter-chickpeas-tikka-masala-vegan/
The post Butter Chickpeas/Tikka Masala/Vegan appeared first on Spice Chronicles.
June 1, 2019
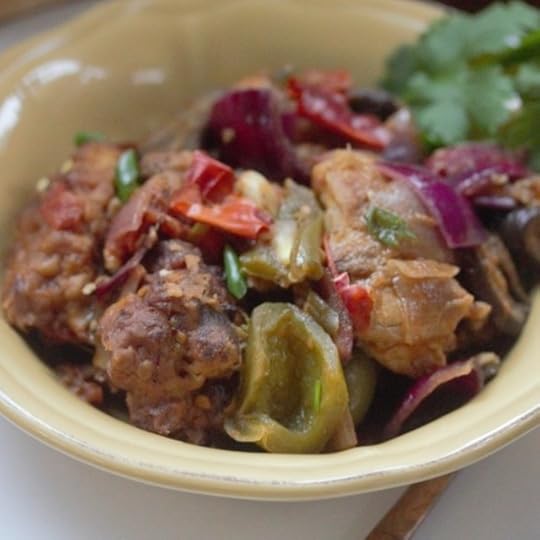
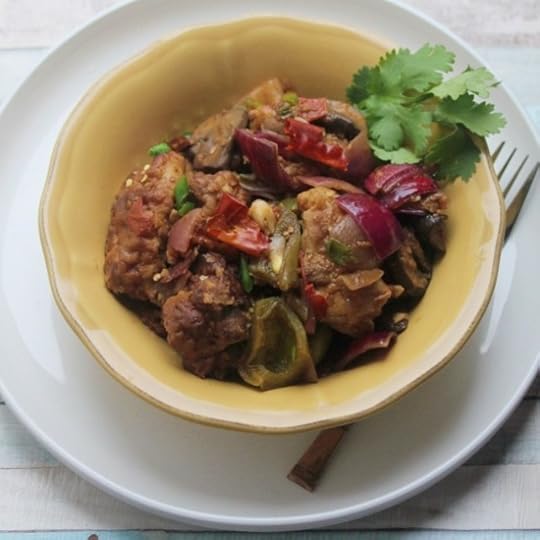
Indo-Chinese Chili Chicken (Air Fryer)
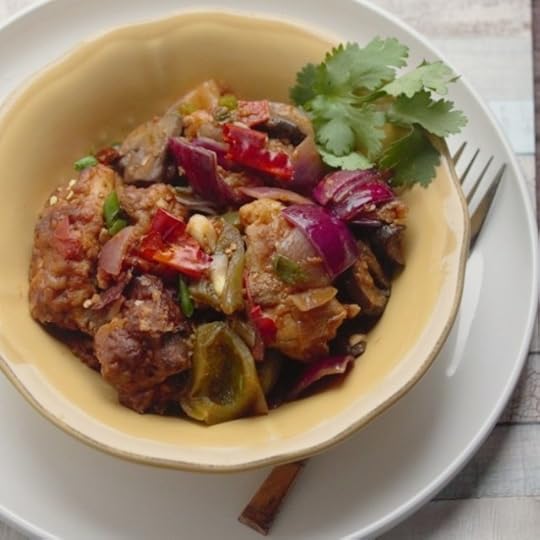 It feels like April, rainy, cool, and somewhat green. I am ready for spicy, comforting, soul food. The Indo-Chinese kind of food. Right on top of that list is naturally Kolkata Style Chili Chicken. Here is my traditional recipe. I am sharing with you my air-fryer version made using the Mealthy CrispLid in this post.
I am thrilled with the results working with the CrispLid. I cannot believe that I can ditch the deep frying and still get such good results. The chicken in this recipe crisps up with just enough clingy batter to allow it to absorb the spicy sauce. The essence of this recipe is deep soy sauce laden sauce and lots of green chilies. If you do not want it so spicy, you can add more thinly sliced green bell peppers. It will get you close but not completely there. This dish can be made fairly dry and enjoyed as an appetizer or somewhat more saucy and enjoyed with either rice or noodles. I am working on a recipe for burnt garlic fried rice as we speak.
After all, it is just the perfect weather for Indo- Chinese food. I am feeling nostalgic after wrapping up Aadi’s last middle school awards night. Yes, my baby is growing up. BTW, as with all things new and food related he is quite excited about my new experiments with the CrispLid. We have identified a few new recipes to try over the weekend.
Of course, like all weekends before school closes out, this promises to be quite a busy one. I have signed myself up for a seminar in the Botanical Gardens this weekend. I hope the weather holds out. Much as I like the rain, it will be a waste to head out and not enjoy some flowers.
Well, fast forward… While today is a picture perfect day, it is somewhat hot for walking trips. I also did not get as much sleep has I would have liked so I am back home early to get some rest. Alright, the real reason is that I have the house to myself and I am able to cook up quite the storm. I have tested a whole bunch of recipes and have gotten up close and personal.
If you want to pick up a CrispLid ahead of everyone else, you can use this affiliate link. Yes, it certainly will support this site and keep me continuing with recipes like this one.
If you like this recipe and want more ideas, do join my Indian Instant Pot Facebook group and Legume Love Group. Of course Instant Indian is ready for order, joining its siblings The Bengali Five Spice Chronicles and Spices and Seasons.
PrintIndo-Chinese Chili Chicken (Air Fryer)
Prep Time: 10 minutes
Cook Time: 25 minutes
Total Time: 35 minutes
Yield: Serves 4 to 6

An air fried lighter version of the classic deep fried recipe.
Ingredients
For the Chicken1 tablespoon minced ginger
1 and half pounds chicken, cut into 1 inch pieces
2 teaspoons salt
1 egg
3/4 cup cornstarch
1/2 cup flour (note you can use all cornstarch if you want to keep this gluten free
Enough water to make a thick batter
Cooking spray for cooking
For the sauce
2 tablespoons oil
1 tablespoon minced ginger
1 teaspoon minced garlic
1/2 cup soy sauce
3 tablespoons vinegar
3 tablespoons ketchup
1 teaspoon sugar
1 tablespoon hot sauce such as Sriracha
8 to 10 green chilies such as Serrano, finely chopped
3 onions, quartered and layers separated
1 green bell pepper, finely chopped
Instructions
Toss the chicken with the ginger and 1 teaspoon salt.Mix the remaining salt, egg, cornstarch, flour with enough water to form a thick batter.
Layer the air fryer basket with foil. Dip the chicken pieces in the batter and place onto the basket. Spray well with cooking spray. Set the CrispLid or air fryer to 425 degrees, cook for 10 minutes.
Turn the chicken spray with cooking spray and cook on the second side for 10 minutes.
In the meantime, place the oil for the sauce in a large wide pan and heat well.
Add in the ginger and garlic and cook for 2 minutes
Add in the soy sauce, vinegar, ketchup, sugar, sriracha and the green chiclies with 1/2 cup water and bring to a simmer.
Add in the chiclen and cook until the sauce thickens and coats the chicken. Add in the onions and bell pepper and cook for 4 minutes until the vegetables soften a little.
Garnish with additional green chilies and serve hot.
Notes
If you want to reduce the heat in this recipe, you can replace some of the Serrano chilies with a milder green pepper.
3.1http://www.spicechronicles.com/indo-chinese-chili-chicken-air-fryer/
[contact-form]
The post Indo-Chinese Chili Chicken (Air Fryer) appeared first on Spice Chronicles.
May 29, 2019
Cauliflower Mac and TV Dinners
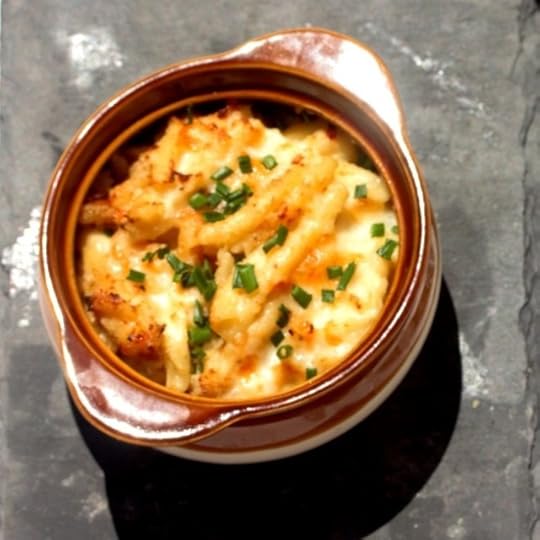 Another ritual in this house, for the children and us are TV dinners. There are special dishes reserved just for TV dinners. One of them is this Cauliflower Mac and Cheese.
Over the years, I have tweaked and transformed the recipe to get this to its current simple form. The cauliflower in this can be the riced variety that you find anywhere. I use a fresh head and put it through a food processor when I have time and well when I don’t I rely on Costco or Trader Joes. With just a little texture, this mac and cheese is quite delectable.
I love cauliflower, but, it really is a vegetable for me. I will not be joining the cauliflower rice bandwagon anytime soon. Cauliflower mac is a different story. The good thing about the cauliflower rice bandwagon is that I have realized that cauliflower is an amazingly versatile vegetable. It works wonders with all kinds of cheese, so this cauliflower mac and cheese had enough vegetables in it to make it a balanced meal.

As for TV dinner, it really is Netflix dinner. We do not really watch mainstream TV in this house, but, we all love movies. Anyhow, TV dinner is all of us watching a movie together and eating dinner while doing that. Hence TV dinner. It is a simple tradition reserved for certain weekend evenings when we want to enjoy a quite evening at home. Often, this is something that the children do together. So what are TV dinner dishes in our house? They are portable one dish or bowl meals, which we can enjoy without too much fuss. This particular cauliflower mac is made in the instant pot or mealthy multipot.
For this to be complete the way my daughter likes it, the top needs to be browned just a little. I have been sticking it in the oven for a few minutes to do that. Now that I am a proud owner of the Mealthy CrispLid, I use that. If you want to skip the browning, that works too. It tastes pretty good as is. I use a mixture of two cheese – extra sharp cheddar and jack cheese. Also, I do add in some cream cheese as I find that it adds an amazing touch of creaminess to the dish. Feel free to add butter if you do not have cream cheese handy.

Often when I am travelling or not around for dinner, I leave this in individual serving bowls. They just need to be browned and they are ready for the children. I have not tried freezing them, but I have a hunch they will do very well.
Now speaking of the Mealthy CrispLid – it does fit on any electric pressure cooker, in fact I have been using it consistently on my Instant Pot. It will not be available for order for a few weeks, however you can follow this link for an exclusive early pre-order option.
If you like this recipe and want more ideas, do join my Indian Instant Pot Facebook group and Legume Love Group. Of course Instant Indian is ready for order, joining its siblings The Bengali Five Spice Chronicles and Spices and Seasons.
PrintCauliflower Mac and TV Dinners
Prep Time: 5 minutes
Cook Time: 25 minutes
Total Time: 30 minutes

A healthier take on mac and cheese and every bit as delicious.
Ingredients
2 tablespoons olive oil4 cloves of garlic, minced
1 small onion, finely chopped
8 ounces shells, elbows, or any small shape pasta
1 cup water
1 and 1/2 teaspoons salt
2 cups riced cauliflower
3/4 cup milk or half and half
2 tablespoons cream cheese
1/2 cup extra sharp cheddar (my favorite is Cabot)
1/4 cup shredded jack or pepper jack cheese
Chopped chives to garnish
Instructions
Turn your instant pot or electric pressure cooker onto sauté mode. Add the olive oil and heat for 2 minutes. Add in the garlic and the onion and cook for about a minute until fragrant.Add in the pasta, water, salt, cauliflower and cover and cook on pressure for 3 minutes. Do a quick release. Remove the cover.
Turn back onto sauté mode and mix the pasta well.
Stir in the milk and cream cheese and mix well.
Stir in the cheddar and the pepper jack cheese and mix well.
Turn off the sauté mode. If you have the CrispLid, place over the pot, set on 400 degrees for 10 minutes until the top is golden. You can do this in individual containers.
Alternately, place in an oven safe container, turn the oven to 400 degrees cook until the top is golden (about 15 minutes)
Garnish with chives and serve.
Notes
To make your own riced cauliflower, take a head of cauliflower and pulse it a few times in the food processor.
3.1http://www.spicechronicles.com/cauliflower-mac-and-tv-dinners/
The post Cauliflower Mac and TV Dinners appeared first on Spice Chronicles.
May 25, 2019
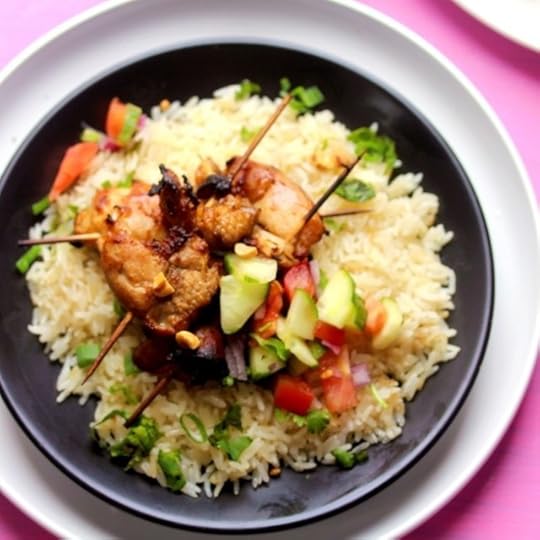
Chicken or Tofu Satay Dinner
 This weekend started on a mixed bag sort of note. Something that I was hoping for did not pan out. At least the disappointment was quick. And then, my crisp lid arrived in time for me to try making the weekend less of drag. In fact, tonight we inaugarated the Mealthy Crisp lid by making a Chicken and Tofu Satay Dinner. Just a quick note, this post is in partnership with Mealthy, but it is not a sponsored post.
So, what is the Crisp Lid? Simply put it is an add on to an electric pressure cooker that converts it into an air fryer. If is for someone like me who does not have a lot of counter space, especially for another appliance but would like to try out the concept of air frying. This has kept me from actually buying an air fryer. Well, that and the fact that I am actually not convinced that an air fryier adds that much more to the mix.
Well, today my first try was quite a hit. I made a chicken and tofu satay meal. I served this over ginger jasmine coconut rice. Oh that rice!
The tofu version, rice, fixings and all is completely vegan. The chicken is naturally not. In my motley household this meal offers something for everyone. So, I love the fact that I can now add some more oomph to my already amazing forrays with my instant pot/mealthy multi pot. Yes, I have them both and I will tell you all about the multi-pot one of these days. Today is about this amazing chicken that I cooked with the Crisp Lid. The entire meal with some organization came together in 45 minutes. This does not include the condiments, but it does include marinating time and all. So, I am a happy camper. So stay tuned through these posts, I am really excited with everything that I will be cooking up over the next few days.

A satay is an Indonesian grilled chicken dish that is just as popular in Thai restaurants. What makes it addictive is the creamy rich peanut sauce. Of course I realize not everyone has this cool toy yet. In fact, hang in along with me and you will be rewarded with an early pre-order link. But, I digress, so this recipe while designed for the air fryer works just as well in your oven or over the grill. So, dig in and enjoy.
If you like this recipe and want more ideas, do join my Indian Instant Pot Facebook group and Legume Love Group. Of course Instant Indian my Indian Instant Pot cookbook is ready for order, joining its siblings The Bengali Five Spice Chronicles and Spices and Seasons.
Do not forget to get social with me, Facebook, Twitter, Instagram, Pinterest and even Youtube.
PrintChicken or Tofu Satay Dinner - Air Fryer or Grill
Prep Time: 6 hours, 15 minutes
Cook Time: 25 minutes
Total Time: 6 hours, 40 minutes

A flavorful take on satay, this recipe can be done in the oven or air fried.
Ingredients
For the chicken or Tofu1 and 1/2 pounds of boneless skinless chicken thighs or 1 pound of extra firm tofu
2 tablespoons tamari sauce
1 tablespoon chopped ginger
3 to 4 cloves garlic
4 tablespoons lime juice
1 teaspoon red cayenne pepper
1 tablespoon brown sugar
2 tablespoons oil or cooking spray
For the Peanut Sauce
1 tablespoons sriracha or other spicy sauce
1/3 cup coconut milk
1 tablespoon brown sugar
1/2 cup creamy unsalted peanut butter
1 tablespoon soy sauce or to taste
For the Cucumber Tomato Salad
1 small cucumber
1 small tomato
1/2 medium sized onion
2 tablespoons rice vinegar
Instructions
Cut the chicken or tofu into 2 inch pieces.Place the tamari, chopped ginger, garlic, lime juice, red cayenne pepper and brown sugar in a blender and process until smooth. Toss over the chicken or tofu and set aside for at least 6 hours.
Mix the ingredients for the peanut sauce and set aside.
Chop the cucumber, tomato and onion into a fine dice. Mix together with the rice vinegar and set aside.
Tread the chicken or tofu into small skewers. To air fry using the crisp lid, place on the air fryer basket, spray with cooking spray. Set to 425 and cook for 7 to 8 minutes on each side. Alternately place in a 350 degree oven for 15 minutes and turn once. Broil for one minute and then finish.
Serve over rice or as an appetizer with the peanut sauce and salad.3.1http://www.spicechronicles.com/chicken-or-tofu-satay-dinner/
The post Chicken or Tofu Satay Dinner appeared first on Spice Chronicles.
May 24, 2019
Instant Pot Taco Pasta Skillet
 This Taco Pasta skillet, is everyting you want from a taco, with the comfort of pasta and convienience of making it in an electric pressure cooker. What more can you ask for from a good weeknight dinner. Actually make that any kind of dinner. Pasta features on our weekly rotation at least once a week and making it in the instant pot or your mealthy multipot makes it quite the game changer.
This dish is made with pantry staples – black beans, corn, ground turkey, chopped tomatoes and garlic. You can certainly top this with chopped diced avocados if you wish. All that works but, cilantro and fresh lime juice as I have done here. The flavors of this dish works wonderfully with any taco toppings of your choice. The spice lovers in my house have been rooting for chopped jalapenos along with other things. Me, I am happy with chopped tomatoes, well I am always happy with tomatoes. My son will tell you this is all about more cheese. The daughter will flash a rare smile when there is a dollop of sour cream. In fact, as I write this I realize this is a perfect dish for a party. Simple dish, lots of fixins what more can you ask for?

This week I have been thrilled about the flowers in my garden. Not so thrilled about the fact that my car has been in the auto shop because of a tire blowout. I have realized local potholes are not a fun local thing. I am quite ready for the long weekend. The unofficial start of summer. I am diving into it will lots of to do items. Trying to whittle down the list just a little so that there is room for some fun over the weekend. I will be cooking and hopefully sharing the fruits of my labor over the weekend, so do join me on social. Here is wishing you and yours a fun filled weekend.

If you like this recipe and want more ideas, do join my Indian Instant Pot Facebook group and Legume Love Group. Of course Instant Indian is ready for order, joining its siblings The Bengali Five Spice Chronicles and Spices and Seasons.
PrintInstant Pot Taco Pasta Skillet
Prep Time: 5 minutes
Cook Time: 20 minutes
Total Time: 25 minutes

A taco skillet pasta that brings all the flavors of your favorite taco onto the table.
Ingredients
3 tablespoons extra virgin olive oil1 tablespoon minced garlic
1 small onion, diced
1/2 pound ground turkey (note this can be eliminated if you want to keep this vegetarian)
1 cup diced tomatoes
1 tablespoon taco seasoning (I use McCormick)
1 teaspoon salt
Several grinds fresh black pepper
6 ounces of your favorite pasta
1/2 cup fresh or frozen corn kernels
1/2 cup cooked black beans
2 tablespoons fresh lime juice
2 tablespoons chopped cilantro
Freshly grated cheese to garnish
Instructions
Turn the instant pot onto saute mode. Add in the oil and heat for 3 to 4 minutes. Add in the garlic, onion and saute well for 2 to 3 minutes.Add in the turkey and mix well for 2 minutes. Stir in the diced tomatoes, taco seasonings, salt and fresh black pepper and the pasta. Add in 1 cup of water. Set the instant pot of electric pressure cooker on 2 minutes of pressure. Do a natural release. The pasta will be somewhat watery and a little al dente. It will absorb water and soften over the next few minutes.
Turn onto to saute mode. Add in the corn and black beans and heat through.
Turn off the heat. Sprinkle with lime juice and cilantro and cheese if desired and serve immediately!3.1http://www.spicechronicles.com/instant-pot-taco-pasta-skillet/
The post Instant Pot Taco Pasta Skillet appeared first on Spice Chronicles.
May 13, 2019
Eggless Mango Cardamom Mini Bundt Cakes
 I am so excited about these delectable Mango Cardamom Mini Bundt Cakes. Actually, almost as excited as I am about the Mealthy Hand Blend. I used it to make the dreamy mango sauce that I drizzled over the bundt cakes. These cakes are eggless, moist, and complete with a slightly dense texture. They are brimming with the rich fragrance of cardamom.
This post is in partnership with Mealthy, but, not sponsored by them. In other words I am telling you about the hand blend because I like it a lot! In an Indian kitchen, there is always loads of chopping – everything begins with onions, ginger, and garlic. Having the hand blend around makes life so much easier. The overall Mealthy philosophy is to offer tools for everyday living. This hand blender is one of the many products in their universe. And they are determined to keep up the good work.

The hand blend not unlike any other one out there has an immersion blender, nice large whisk, chopper attachment and cup, and a nice large sized smoothie jar that I use for my morning lassi. It makes a great start to any morning. Light, peaceful, wholesome, and refreshing. The construction is neat and everything is just a little larger offering you value for money.
A neat feature of the hand-blend is their turbo mode. It is speedy and allows you to blitz anything with panache. And I will be giving one of these away to one lucky person.

These mango bundt cakes were a treat, made actually for my visiting mother-in-law. While I am not sure whether she liked them the kids enjoyed them. In this journey, motherhood or otherwise I roll with the punches. In fact, I sometimes wonder if you can do it any other way. A couple of notes, if you are going to serve these bundt cakes later, wait to drizzle with the mango sauce just before serving.

Head over to Instagram, Facebook or Twitter by tomorrow to see the details on the giveaway. Here is wishing everyone an amazing rest of the week.
PrintEggless Mango Cardamom Mini Bundt Cakes

Ingredients
For the Cakes1 and 1/4 cup all purpose flour
1 and 1/2 teaspoons freshly ground cardamom powder
1 teaspoon baking powder
1 teaspoon baking soda
1 and 1/4 cup condensed milk (1 standard size can)
6 tablespoons unsalted butter melted
1 cup freshly pureed mangoes (you can use frozen mango chunks or 2 fresh mangoes, peeled and cubed)
For the Mango Sauce
1 fresh mango, cubed or 1/2 cup frozen mango cubed
1/2 cup heavy cream
1/4 cup sugar
Instructions
Preheat the oven to 350 degrees.Grease the mini-bundt pan well, taking care to reach all the little grooves.
Sift together the all purpose flour, cardamom powder, baking powder, baking soda.
In a separate mixing bowl mix together the condensed milk, melted butter and pureed mangoes.
Mix the mango mixture with the flour mixture. Do not over beat.
Pour the mixture into the bundt pan and bake until golden and well set. This takes about 35 to 40 minutes.
In the meantime add the mango chunks, sugar, and the cream in a small pan and heat for 3 to 4 minutes, until the mangoes soften and the sugar is dissolved. With a hand blender or a regular blender blend until smooth.
Allow the cakes to cool in the oven for 10 minutes. Remove from the oven and carefully remove from the pan. Cool, drizzle with the mango sauce and serve with additional fruit if desired.3.1http://www.spicechronicles.com/mango-cardamom-mini-bundt-cakes/
The post Eggless Mango Cardamom Mini Bundt Cakes appeared first on Spice Chronicles.
May 11, 2019
Mini Rum and Raisin Bread Pudding Bites
 I am a fan of bread puddings, but not the overly sweet cluttered kind. My grandmother used to make steamed Bread puddings with raisins and maybe some chopped nuts. In her memoru I offer you these mini Rum and Raisin Bread Pudding bites. Put that egg bites container to good use by making these small almost bite sized bread pudding bites.
This is a great addition to a brunch table when you are looking for just a lttle added touch of sweetness. I make these using brioche that is at least a day old. Soaking the raisins in rum for a few hours or overnight adds a nice hit of flavor. They are perfect as a pick-me-up with a nice cup of coffee and tea. I finish with a drizzle of maple syrup and some chopped toasted almonds.

So, we are on the eve of another mother’s day. I can wax poetic about how much This year I am missing mom a lot, almost beyond being able to wax poetic about all her contributions and influences. All said and done, I enjoy doing that spontaneously, rather than reserving this for any one day.
It however of course never hurts to have a day where things are just a little extra special. I woke up somewhat reflective this morning. A typical day of running around and I am just left contemplative.

I am glad for the ability to send transatlantic gifts. Sometimes a bit of a splurge but well worth it.
These bread pudding bites are simple and fool-proof. Perfectly comforting and filled with plump flavorful rum soaked raisins. If you do not want to use rum, soak them in orange juice. You can throw in some fresh fruit into the mix if you so choose. With the instant pot, you are guaranteed a soft and creamy result. So why mess with perfection?
If you like this recipe and want more ideas, do join my Indian Instant Pot Facebook group and Legume Love Group. Of course Instant Indian is ready for order, joining its siblings The Bengali Five Spice Chronicles and Spices and Seasons.
PrintMini Rum and Raisin Bread Pudding Bites
Prep Time: 6 hours, 5 minutes
Cook Time: 25 minutes
Total Time: 6 hours, 30 minutes

A simple rum and raisin infused take on bread pudding. Steamed to perfection in bite sized portions, finished with a maple syrup drizzle.
Ingredients
1/3 cup rum½ cup raisins or currants
1 cup half and half
2 eggs
1/2 cup sugar
1 teaspoon vanilla extract
1 and ½ cups cubed day old brioche or challah bread
Egg bite Mold
Optional Garnishes
Pure maple syrup
Sliced toasted almonds
Instructions
Place the raisins in the rum with 1/3 cup water and soak for 6 hours or longer.n a mixing bowl place the half and half, eggs, vanilla extract, and sugar and beat with an electric mixer until thick and creamy.
Add in the raisins and the soaking liquid. Toss with the bread cubes to coat well.
Grease the egg bite mold and pour enough of the mixture to fill (but not overfill) the containers.
Cover with foil.
Notes
Notes: Most of the prep time is for soaking the raisins
3.1http://www.spicechronicles.com/mini-rum-raisin-bread-pudding-bites/The post Mini Rum and Raisin Bread Pudding Bites appeared first on Spice Chronicles.
May 7, 2019
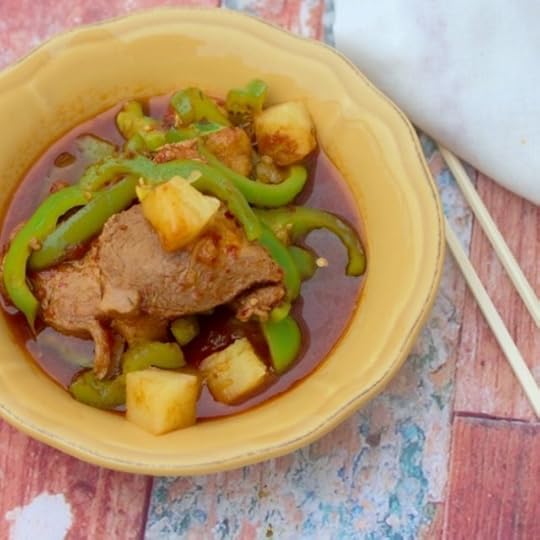
Sweet and Sour Pork Chops – Book Review/Giveaway
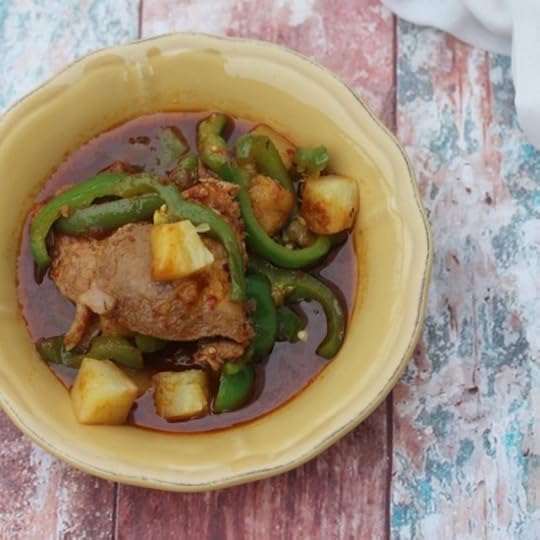 I connected with Shelby Kinnaird a couple of years ago, when Spices and Seasons just hit the shelves. She was kind enough to post a review of my cookbook. Fast forward to April, and I found out that she had an electric pressure cooker/instant pot cookbook in the market, yes, just like Instant Indian. This recipe for Sweet and Sour Pork Chops is very closely adapted from her book. I will tell you all about her book in this post, and will have a great giveaway at the end.
The Diabetes Cookbook for electric pressure pressure cookers is a collection of delicious low glycemic recipes. These recipes are great for anyone but especially well suited for managing your diabetes.
Some things that I love about the book, other than the recipes is,
The section on meal planning
A good introduction to the diabetes kitchen
The section on desserts (come on, face it, desserts that are healthy?! I am sure you are with me on that one.
For someone like me, who is way too fond of her carbs, a book like this works wonderfully to impact just a little mindful balance. The ingredients in the recipes are simple, wholesome, and practical.
Overall, there are so many other recipes that I have bookmarked to try – the Savory Bread Pudding with Mushrooms and Kale and the Fire Cracker Meatballs to name a few. I did make just a few tweaks to the recipe, mostly, adding some garlic, ginger and crushed red pepper flakes. Being the lazy person that I am, I also simplified quite a few of the steps.
I also skipped the cornstarch, this sauce is so delish, I keep sneaking spoonfuls of it all the time. Try it and you will too!
I made this on a rainy Sunday. It brightened the day and the table. And before I get onto the recipe, let me tell you about the giveaway. You get a chance to win two cookbooks – Instant Indian and The Diabetes Cookbook.
The details are on my facebook page and there are four ways to win! Random winner is picked on mother’s day!
If you like this recipe and want more ideas, do join my Indian Instant Pot Facebook group and Legume Love Group. Of course Instant Indian is ready for order, joining its siblings The Bengali Five Spice Chronicles and Spices and Seasons.
PrintSweet and Sour Pork Chops – Book Review/Giveaway
Prep Time: 5 minutes
Cook Time: 20 minutes
Total Time: 25 minutes

A flavorful take on sweet and sour pork chops.
Ingredients
For the Sauce3 tablespoons Spiced Tomato Ketchup (I used Sriracha Ketchup) the book offers a recipe on page 129
1 tablespoon Worchester Sauce
1 teaspoon yellow mustard
1/2 teaspoon freshly squeezed lemon juice
Few drops of hot pepper sauce (optional), note I skipped this but added crushed red pepper later
For the pork chops
4 3/4 inch thick, rib pork chops
Kosher salt
Freshly ground black pepper
2 tablespoons avocado oil, divided
1 teaspoon minced garlic
1 teaspoon minced ginger
1 teaspoon crushed red pepper flakes
1 8-oz can pineapple chunks in juice
1 medium green bell pepper cut into thin strips
Instructions
To make the sauce, in a small bowl, mix together the ketchup, Worchestershire sauce, mustard and lemon juice.Turn the instant pot or EPC to sauce setting. All it to get really hot.
In the mean time, sprinkle the pork chops with salt and pepper. Add 2 tablespoons of avocado oil to the instant pot. Allow it to heat for a minute.
Add the pork chops and sear for 2 to 3 minutes on each side. This can be done in two batches Remove the pork chops and transfer to a plate. Turn off the saute mode.
Drain the pineapple juice from the can and mix into the prepared sauce. Reserve the chunks
Deglaze the pot with 2 tablespoons of water.
Add the pork chops and the prepared sauce with the ginger, garlic and crushed red pepper flakes.
Cover and cook on high for 1 minute, allow a natural release.
Remove the cover and stir well.
Turn the saute mode back on. Add the green bell pepper and pineapple chunks and cook for 3 minutes until the pineapple softtens.
Serve hot!
3.1http://www.spicechronicles.com/sweet-sour-pork-chops-book-review-giveaway/
The post Sweet and Sour Pork Chops – Book Review/Giveaway appeared first on Spice Chronicles.


