
David Petersen's Blog, page 55
May 19, 2015
Mouse Guard color Video #6
For this week's blogpost I colored a inked Mouse Guard character portrait (one that I drew and inked when I visited Italy last Fall) in my normal fashion in Photoshop. I recorded the process and speed up the result x8. Here is the video:
direct link to watch the video on Vimeo:
https://vimeo.com/112128087
Here is a better look at the original inks and the finished piece:

To see more coloring videos visit my Vimeo Video Page:https://vimeo.com/mouseguard/videos
2015 Appearances:Denver Comic Con May 22-25Heroes Con June 19-21San Diego Comic Con July 8-12Boston Comic Con July 31- Aug. 2Long Beach Comic Con: Sept. 12-13Baltimore Comic Con Sept. 25-27New York Comic Con Oct. 8-11Art-Bubble Comics Festival: Copenhagen: Nov. 14-15
direct link to watch the video on Vimeo:
https://vimeo.com/112128087
Here is a better look at the original inks and the finished piece:


To see more coloring videos visit my Vimeo Video Page:https://vimeo.com/mouseguard/videos
2015 Appearances:Denver Comic Con May 22-25Heroes Con June 19-21San Diego Comic Con July 8-12Boston Comic Con July 31- Aug. 2Long Beach Comic Con: Sept. 12-13Baltimore Comic Con Sept. 25-27New York Comic Con Oct. 8-11Art-Bubble Comics Festival: Copenhagen: Nov. 14-15


May 12, 2015
Weasel Rinding a Woodpecker
 Back in March this photo of a baby weasel 'riding' on a woodpecker in the UK went viral. People shared it, made memes of it, photoshoped people/things in place of either creature...it was a big deal online for a few days. And many many fans sent it my way to make sure I'd seen it.
 And every time it would come across my digital desk, I'd think "If I had the time, I'd do a drawing of this to have some fun and let everyone know I've seen it". Instead of doing a drawing, I opted to tweet this. But it lead to some fans, who missed my joke, thinking they needed to show me the photo to prove that a drawing like that would be believable.
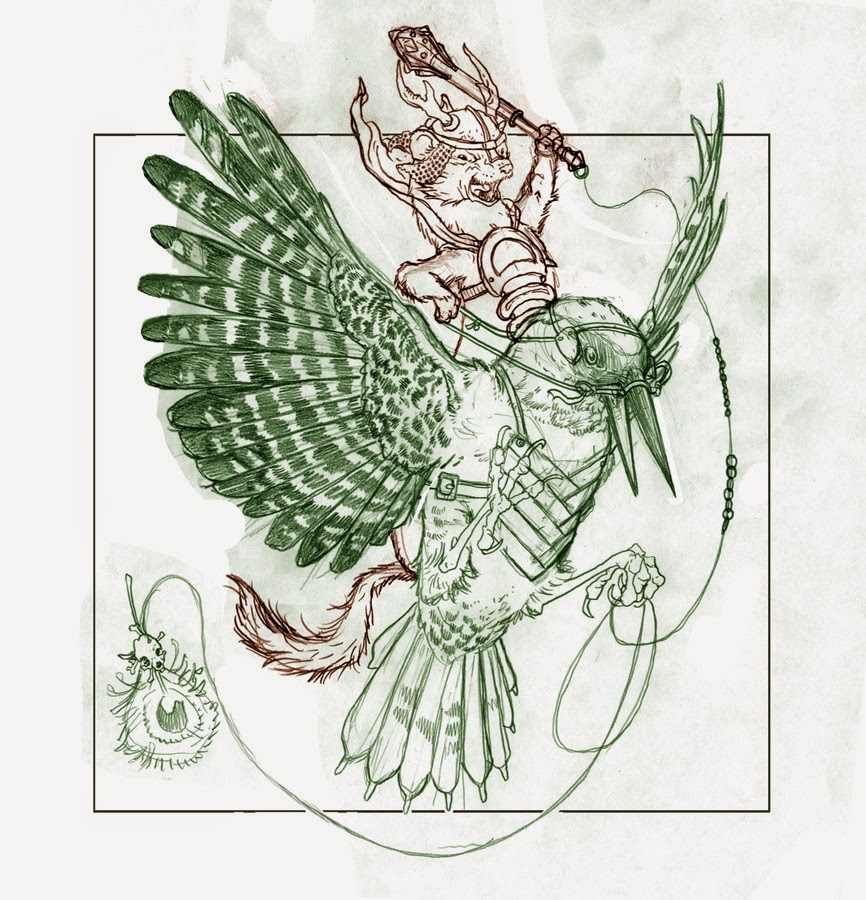 So I pushed aside the work I was supposed to be doing to quickly pay homage to the photo, and have some fun with non-mouse characters who could appear in Mouse Guard (or perhaps a Legends type tale). I drew the woodpecker and the weasel on separate sheets of paper, but worked on the weasel while laying that sheet over the woodpecker sheet on the lighbox to help get the scale and pose right for the woodpecker's position. I scanned the pencils in to Photoshop to merge the drawings (though I tinted them to help me see each figure better) and resize it within a border so I could re-use the art later for publishing if I wanted to.
I printed out that photoshop work-up and taped it to the back of a sheet of Strathmore 300 series Bristol. On my lightox I could see the printout through the surface of the bristol to use as a guide while inking. For pens I used Copic Multiliners (the 0.7 & 0.3 nibs mainly)
In both the penciling and inking steps I looked at reference for the European Green Woodpecker's feather pattern and markings (as well as anatomy & proportion). I opted to not include any back ground inking texture or marks to let the two figures really tell the story.
 Lastly I scanned the inks and colored the piece in Photoshop. Most of the rendering and effects were done using the Dodge and Burn tools over base color flats. This piece will be appearing in my 2015 Mouse Guard Sketchbook due out in July.
2015 Appearances:Motor City May 15-17Denver Comic Con May 22-25Heroes Con June 19-21San Diego Comic Con July 8-12Long Beach Comic Con: Sept. 12-13Baltimore Comic Con Sept. 25-27New York Comic Con Oct. 8-11Art-Bubble Comics Festival: Copenhagen: Nov. 14-15
May 5, 2015
Saxon, Kenzie, & Rand vs Snake print process
 For this year's convention appearances (and for my online store) I created a few new prints. Today I'll be walking through the process of this larger one to the left. It's 11x14.
 Because I knew the piece wold be one of the larger prints I offered, I decided for it to be a full scene father than just posing characters or a portrait. To the left is the finished artwork, but below is the process steps I took to get there.
 My first idea for this piece was to have mice battling a snake, after all, it is what worked and grabbed people's attention in the first ever issue of Mouse Guard. While researching snake species, I found a photo of a Northern Water Snake going through a trickle of water cascading off some rocks. It was rather subtle, not battle to the death imagery. But, I liked the idea of drawing mice approaching/discovering an unaware (but alert) snake on the way to some mouse city.
This pencil sketch was drawn at 4" x 5" to get the basics of my concept to paper. As I drew in the mice here, I decided they should be Saxon, Kenzie, and Rand.
 I scanned that small sketch and in photoshop, enlarged it to the exact size I needed the final art to be and then printed it out. It would all fit on one sheet of paper, so I printed the top and the bottom and then taped them together. On this printout, I drew over the printed sketch to define the snake and the city as well as to tighten up other details.
Sometimes when I do this, I then re-scan the drawn on printout and make other adjustments, but this time, I didn't think I needed to, so I taped the printout to the back of a sheet of Strathmore 300 series bristol to start inking.
 On my lightbox I can see the printout and new pencil lines through the surface of the bristol. This allows me to use the printout as a guide when I ink. For pens, I used Copic Multiliners (the 0.7 & 0.3 nibs mainly).
The piece is larger than most Mouse Guard pieces: 11" x 14" and so it took a while to ink in all the value on the rocks and the castle details.
 Once the inks were finished, I started the coloring process by flatting the piece in Photoshop. Flatting is the part of coloring where you establish the areas of color. No rendering, lighting effects, or textures are being used or considered, this is just to make the fur a different color than the cloaks, which is different from their skin, which is different from...etc.
Then the final stage of coloring was to add in all those things you avoid while flatting: texture, light source, shadow, color holds and effects, etc.
Once the inks were finished, I started the coloring process by flatting the piece in Photoshop. Flatting is the part of coloring where you establish the areas of color. No rendering, lighting effects, or textures are being used or considered, this is just to make the fur a different color than the cloaks, which is different from their skin, which is different from...etc.
Then the final stage of coloring was to add in all those things you avoid while flatting: texture, light source, shadow, color holds and effects, etc.To the right you can see the finished image. I thought the image lacked depth when just colored, so I added color holds and some effects to give 3 levels of depth: the foreground mice, the midground snake, and the background castle.
This print will be available at my convention appearances and in my online store soon.
2015 Appearances:Motor City May 15-17Denver Comic Con May 22-25Heroes Con June 19-21San Diego Comic Con July 8-12Long Beach Comic Con: Sept. 12-13Baltimore Comic Con Sept. 25-27New York Comic Con Oct. 8-11Art-Bubble Comics Festival: Copenhagen: Nov. 14-15
April 28, 2015
5x7" Saxon Print process
 This year at conventions (and through my online store) I'll be offering a few new matted prints. For one of these, I did a new image of Saxon with a lantern. The print is 5" x 7" in a 8x10 mat. To the left you can see the finished art, but for today's blogpost, I'll go through the steps involved in creating the piece.
 The original art is bigger than 5x7. I drew it larger to give myself a bit more breathing room while penciling and inking it, but knowing it was going to be printed smaller led me in decision making for the image.
 I started with the idea of a single character, in a non-action pose. I'd contemplated having it be a portrait, but decided that it would be more interesting to show full body and perhaps some suggestion of a setting. So, in pencil, I sketched out Saxon holding a sword and lantern. With the lantern, I thought could play up some interesting lighting effects. For the setting I sketched in some suggestion of leaves and a stick-strewn floor, but figured what it lacked in detail would be made more interesting with the glow coming from the lantern.
 Because the lighting effects were going to be so important with this piece, I did a little photoshop underpainting on my pencil rough to work out if my idea would look the way I vaguely was imaging it. This step helped me think about how I wanted to handle the shadows...if I wanted to have them be painted in color details or values established by the inks. I opted for the colors to do the heavy lifting in this case other than a bit in the details on the floor where I less densely concentrated the black in the part that would be the most illuminated.
 I printed out my Photoshop composite (I turned down the underpainting a bit so the pencil lines stood out more clearly) and taped it to the back of a sheet of Strathmore 300 series bristol. On my lightbox, I was able to see through the bristol to the printout so I could follow my pencil lines as I inked on the surface of the bristol. I used Copic Multiliners to ink with and tended to use the 0.7 and 0.3 nibs for most everything here. I do wish that in the same way I left open white areas in the lantern's range on the ground, I'd left some less dense highlights on the chainmail piece. Oh well.
 After the inks were finished I scanned them into photoshop and started prepping my file for coloring. The most tedious part of this process is called "flatting" where flat (non-rendered) colors are laid in establishing what areas are which colors. It's basically an exercise in "stay in the lines" coloring.
 Once the flats are established, it's easy to select parts to render and add effects to. For most of that I use the Dodge and Burn tools in Photoshop. They are used to lighten and darken whatever the base color you are going over. I use a stock Photoshop brush that has some texture while I do this to get the final look of the piece.
And here again is the finished piece. The prints will be available in my online store shortly, or at my convention appearances all this year.
2015 Appearances:C2E2 April 24-26FCBD: Jetpack Comics NH: May 2ndMotor City May 15-17Denver Comic Con May 22-25Heroes Con June 19-21San Diego Comic Con July 8-12Long Beach Comic Con: Sept. 12-13Baltimore Comic Con Sept. 25-27New York Comic Con Oct. 8-11Art-Bubble Comics Festival: Copenhagen: Nov. 14-15
April 21, 2015
Art Book Info
 In July a new Mouse Guard art book will be released that celebrates and explores my work over the 10 years Mouse Guard has been in-print and goes into almost a decade of drawings prior to that showing the development of Mouse Guard before it ever was Mouse Guard.
 Here is the full solicitation:THE ART OF MOUSE GUARD: 2005-2015 HCRetail Price: $59.99
Author: David Petersen
Artists: David Petersen, Mike Mignola, Stan Sakai, Geof Darrow, Various
Cover Artist: David Petersen
 What’s To Love: Since its debut in 2005, David Petersen’s Mouse Guard has been a New York Times bestseller, won Eisner and Harvey awards, and has become an influential staple of the comics industry, earning thousands of fans. In honor of the 10-year anniversary of the series’ debut issue, The Art of Mouse Guard: 2005-2015 is a celebration of the beautiful world, memorable characters, and intensive artistic process of David Petersen’s beloved series.
What It Is: Celebrate the first 10 years of a comics classic from the very first sketch. For the first time since the series debut, David Petersen’s process for creating the world of Mouse Guard and bringing it to life in stunning illustration is documented in exquisite detail. With never-before-seen sketches; 100 pages of full-color, oversized artwork; and commentary from colleagues, collaborators, and Petersen himself, readers and fans get an unprecedented look behind-the-pages at how their favorite characters and adventures were born.
 Last spring, my then editor, Rebecca "Tay" Taylor came out to our home in Michigan to go through all my archives of sketchbooks, file drawers of notes, hard drives of files...it was three days of intense digging, recollecting, note taking, and scanning (of which I only really did the recollecting.)
This is a massive book! 368 pages 12" x 12" with tons of stuff the general public has never seen, as well as things seen for the first time at full-size or without text/logos.
 The unofficial theme of the book is "evolution". I found it hard to look at some of the drawings I was doing as a professional even long after Mouse Guard started. But it was seeing the book as a whole and watching as my art changed from chapter to chapter, as the process changed, and how Mouse Guard will continue to change. Art books are a peek behind the curtain into an artists studio, to see all the flaws and cracks and work that leads to the published book, and I think we accomplished that with this book.
If you are interested in The Art of Mouse Guard 2005-2015, please pre-order it from your local comic shop. We rely on fans to tell their retailers they want the book, it's the way shops know to order it and how many to order.
Below you can see more samples of the types of content you will find inside the pages:


If you are interested in The Art of Mouse Guard 2005-2015, please pre-order it from your local comic shop. We rely on fans to tell their retailers they want the book, it's the way shops know to order it and how many to order.
2015 Appearances:C2E2 April 24-26FCBD: Jetpack Comics NH: May 2ndMotor City May 15-17Denver Comic Con May 22-25Heroes Con June 19-21San Diego Comic Con July 8-12Long Beach Comic Con: Sept. 12-13Baltimore Comic Con Sept. 25-27New York Comic Con Oct. 8-11Art-Bubble Comics Festival: Copenhagen: Nov. 14-15
April 14, 2015
Stained Glass "Veyga" piece
 This last week I've been recovering from back to back travel to Seattle and Belgium and then returning with a head cold. To help ramp back into full-time work, I created this piece for myself. It wasn't just for fun, but will be included in this year's Mouse Guard sketchbook (coming in July). I've posted about stained glass in my work before and the importance it has to showing the culture, artisan craftsmanship, and myth-telling of the characters in a story. For today's blogpost I'll walk through the creation of this piece.
 Originally I set out to do some kind of pattern art piece for the back cover of my sketchbook and I didn't have stained glass on the mind at all. But, while using google image search for pattern inspiration, I saw a piece of painted glass. Instead of using that image though, I went online to the place of my previous employment Materials Unlimited and looked at their stained glass offerings to find this window. I liked the round center portrait and the shield motif.
 For the portrait though, I needed a mouse design. What mouse would be honored with the labor and effort of craftsmice creating a stained glass window of them? My answer: A Matriarch. I re-used one of the Matriarchs already depicted in stained glass in the Matriarch's Chamber "Veyga". From working at Materials Unlimited and also having done some stained glass work myself, I was familiar with the shapes of pieces glass can be cut into by hand and, therefore, where lead lines would go. This experience made simplifying a mouse portrait into a glass design all the easier and more satisfying.
  In Photoshop I re-worked the existing glass photo elements and my new portrait into a square design and digitally layed out all the lead lines. Unfortunately, I was too lazy/unambitious to alter the designs of the shields to incorporate existing Mouse Guard heraldry, but as this piece was being done to shake off my travel/sickness rust, I pushed past it with the goal of getting the art finished. I printed out the design and taped it to the back of a sheet of Strathmore 300 series Bristol. This is a scan of the printout with the blue painter's tape used to secure it to my bristol included.
 With the printout on the back of the bristol, I was able to ink the piece on my lightbox where I can see through the bristol to use the printout as my "pencils". Because most of the lines are so thick, I used a 1.0 Copic Multiliner pen for most of the lead-work...but unfortunately that pen was of a disposable variety, and mostly dead when I started. So I took it apart, and rolled the dice refilling the ink cartridge by hand and a bottle of Bombay Black ink. Luckily, it worked! and then I finished out the finer details with a smaller nib pen. To help me isolate the details that are meant to be painted on the glass (opposed to lead lines separating different pieces) I avoided getting those detail lines from touching the lead line inks.
The last step was to scan my finished inks and color the piece. This included isolating all the 'painted & fired' detail inkwork for color holds, and flatting out the base colors. I pulled a lot of the palate from the original window, but I simplified the field glass to be less colorful. To render the color and add texture, I used the Dodge and Burn tools with a stock 'drybush' brush. The key to making this look authentic was to add the illusion of both grime and shadow where the glass meets the lead line. The other trick was that I selected pieces of glass in the same area of color and then lightened, darkened, and adjusted the color balance so they looked like separate pieces of glass instead of a Photoshop fill-tool layout.
With the printout on the back of the bristol, I was able to ink the piece on my lightbox where I can see through the bristol to use the printout as my "pencils". Because most of the lines are so thick, I used a 1.0 Copic Multiliner pen for most of the lead-work...but unfortunately that pen was of a disposable variety, and mostly dead when I started. So I took it apart, and rolled the dice refilling the ink cartridge by hand and a bottle of Bombay Black ink. Luckily, it worked! and then I finished out the finer details with a smaller nib pen. To help me isolate the details that are meant to be painted on the glass (opposed to lead lines separating different pieces) I avoided getting those detail lines from touching the lead line inks.
The last step was to scan my finished inks and color the piece. This included isolating all the 'painted & fired' detail inkwork for color holds, and flatting out the base colors. I pulled a lot of the palate from the original window, but I simplified the field glass to be less colorful. To render the color and add texture, I used the Dodge and Burn tools with a stock 'drybush' brush. The key to making this look authentic was to add the illusion of both grime and shadow where the glass meets the lead line. The other trick was that I selected pieces of glass in the same area of color and then lightened, darkened, and adjusted the color balance so they looked like separate pieces of glass instead of a Photoshop fill-tool layout.
2015 Appearances:C2E2 April 24-26FCBD: Jetpack Comics NH: May 2ndMotor City May 15-17Denver Comic Con May 22-25Heroes Con June 19-21San Diego Comic Con July 8-12Long Beach Comic Con: Sept. 12-13Baltimore Comic Con Sept. 25-27New York Comic Con Oct. 8-11Art-Bubble Comics Festival: Copenhagen: Nov. 14-15
April 7, 2015
Fan Art
It's really heartwarming and flattering that something I made is enjoyed enough that people do fan art of it. And this week I wanted to share a batch of artwork made by fans to celebrate Mouse Guard:
 Jen Chan
 Andrea Tosto
 Wedding Cake topper for Alex Steinke by Sugar High Inc.
 Elizabeth
 Erin English
 Henrik Dannevang
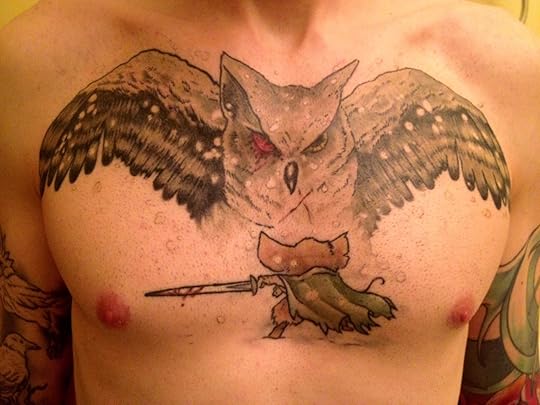 A tattoo on Mauro Reis
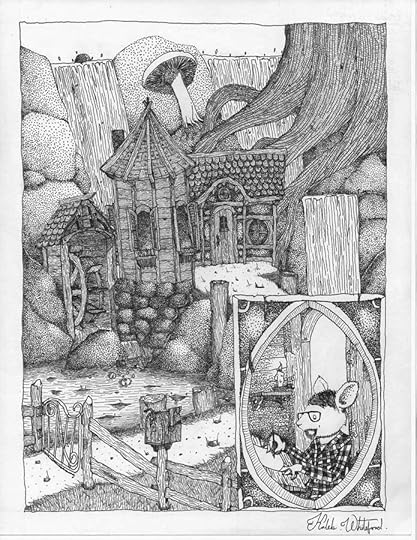 Kaleb Whiteford
 Lowe
Lowe
 John Marsh
 Steve Zieser
 Stef
Stef
 xFireflySkyx
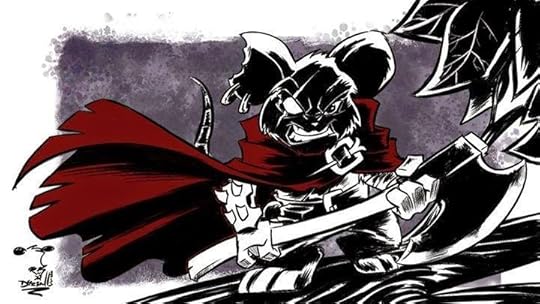
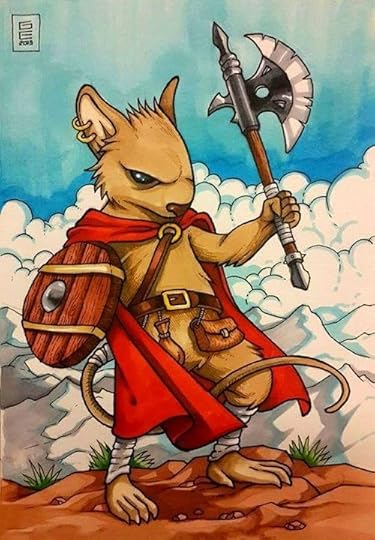
The remaining pieces are from fans in Turkey who had a drawing "Mouse Guard Battle" theme (you can see the full group of works here: https://www.facebook.com/media/set/?set=oa.366682060178448&type=1&pnref=story)
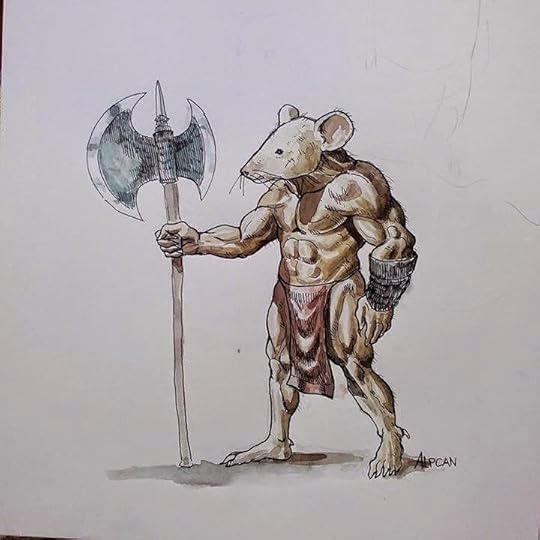 Alp Can Dürgen
 Çağdaş Ülgen
 Diren Ayhan
 Emel Alp Sarı
 Emrah Tumer
 Erinç Kargan
 Mehmet Korkut Öztekin
 Gökhan Erbaş
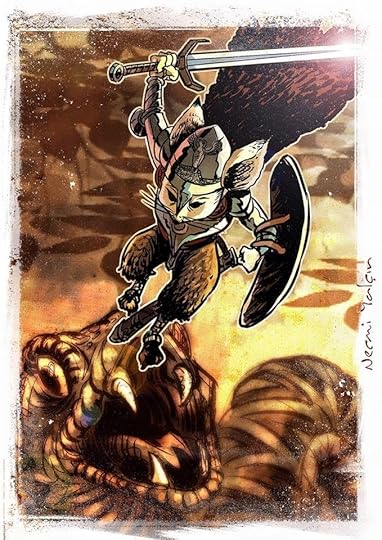 Necmi Yalçın
 Ömer Tunç
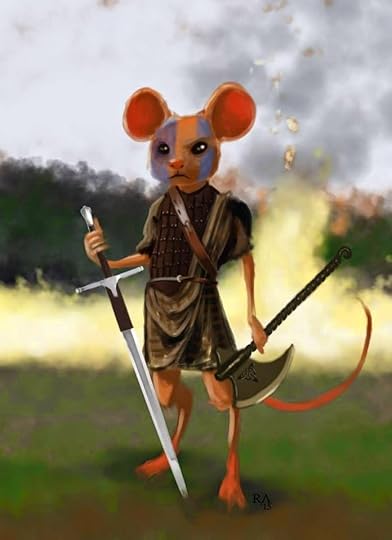 Ramazan Abbasoğlu
 Sarp Selcuk
 Semih Ünal
 Süleyman Ozan Sari
 Tamer Poyraz Demiralp
 Tolga Uçağı
 Yunus Emre Özbay
If you have Mouse Guard fanart you want to share, send it to ericebon(at)hotmail(dot)com and I'll get it into the next batch.
2015 Appearances:C2E2 April 24-26FCBD: Jetpack Comics NH: May 2ndMotor City May 15-17Denver Comic Con May 22-25Heroes Con June 19-21San Diego Comic Con July 8-12Long Beach Comic Con: Sept. 12-13Baltimore Comic Con Sept. 25-27New York Comic Con Oct. 8-11Art-Bubble Comics Festival: Copenhagen: Nov. 14-15
 Jen Chan
 Andrea Tosto
 Wedding Cake topper for Alex Steinke by Sugar High Inc.
 Elizabeth
 Erin English
 Henrik Dannevang
  A tattoo on Mauro Reis
  Kaleb Whiteford
 Lowe
Lowe John Marsh
 Steve Zieser
 Stef
Stef xFireflySkyx
The remaining pieces are from fans in Turkey who had a drawing "Mouse Guard Battle" theme (you can see the full group of works here: https://www.facebook.com/media/set/?set=oa.366682060178448&type=1&pnref=story)
 Alp Can Dürgen
 Çağdaş Ülgen
 Diren Ayhan
 Emel Alp Sarı
 Emrah Tumer
 Erinç Kargan
 Mehmet Korkut Öztekin
 Gökhan Erbaş
 Necmi Yalçın
 Ömer Tunç
 Ramazan Abbasoğlu
 Sarp Selcuk
  Semih Ünal
 Süleyman Ozan Sari
 Tamer Poyraz Demiralp
 Tolga Uçağı
 Yunus Emre Özbay
If you have Mouse Guard fanart you want to share, send it to ericebon(at)hotmail(dot)com and I'll get it into the next batch.
2015 Appearances:C2E2 April 24-26FCBD: Jetpack Comics NH: May 2ndMotor City May 15-17Denver Comic Con May 22-25Heroes Con June 19-21San Diego Comic Con July 8-12Long Beach Comic Con: Sept. 12-13Baltimore Comic Con Sept. 25-27New York Comic Con Oct. 8-11Art-Bubble Comics Festival: Copenhagen: Nov. 14-15
March 31, 2015
Mouse Guard LEGO display: ECCC
 Last weekend at the Emerald City Comic Con, the Seattle based ArchLUG LEGO builder club put together an amazing display of scenes and architecture from the pages of Mouse Guard. The display was populated by minifig LEGO with Mouse Guard heads created by Guy Himber of Crazy Bricks. To the left you can see the group (minus a few who couldn't attend) and I at the display, and below are the photos I grabbed with buildings and scenes from Fall, Winter, Black Axe, and Legends of the Guard.
 Mouse Guard Sculpture
 Lockhaven
 Midnight's Army at the gates of Lockhaven
 Guardmice on the walls of Lockhaven
 Celanawe, Kenzie, & Saxon watching Midnight's Army
 Lockhaven
 Lieam and the snake
 Barstone
 Barkstone
 Barkstone
 Inside the June Alley Inn
 Streets of Barkstone
 Carpenter squaring off lumber
 Streets of Barkstone
 A Mouse Thief?
 Outside Barkstone's Gates
 Crab attack on Calogero
 Crab!
Crab! Sadie & Conrad against a Crab
 Crab attack on Calogero
 Bunny Caravan
 Bunny Caravan
 Lieam & Celanawe against the Owl
  Celanawe falls victim of the owl
 Matriarch's Chamber
 Matriarch's Chamber
 Mice in the reeds
 Leaf Boat
 Leaf Boat
 Celanawe & Em on duckback
 Lower Port Sumac
 The Mariner's Bell
 Lower Port Sumac
 Upper Port Sumac: The Drupe
 Shorestone Exterior
 Shorestone Interior
 Shorestone main entrance
 Shorestone
 Haven Guildroom
 Shorestone
Big thanks to builders Alice Finch, Paul Hetherington, Dave & Kelli Smith, Thomas Garrison, Daniel Fortine, Bob Weiss, RJ Coughlin, Steve Walker, Scott Fowler, Dan Sabath, Sean Edmison, Anu Pehrson, David Frank, Thorin Finch, Shawn Snyder, Jim Edelen, Michael Kuroda, Dave Ingraham, & Guy Himber
2015 Appearances:Emerald City Comic Con Mar. 27-29Trolls and Legends Festival Mons, Belgium April 3-5C2E2 April 24-26FCBD: Jetpack Comics NH: May 2ndMotor City May 15-17Denver Comic Con May 22-25Heroes Con June 19-21San Diego Comic Con July 8-12Long Beach Comic Con: Sept. 12-13Baltimore Comic Con Sept. 25-27New York Comic Con Oct. 8-11Art-Bubble Comics Festival: Copenhagen: Nov. 14-15
March 24, 2015
2015 Bookplate process
 For the last 3 years I've released a limited print designed to be a bookplate for your books (Mouse Guard or otherwise). In years past I've used some type of process other than inked linework & digital color to create the image for the bookplate. I've done block printing, faux stained glass, faux embroidery, and for this year, I made a real* mosaic. To the left you can see the final bookplate design, but below I'll run through the process for making the piece.
 I started with a sketch I refined in photoshop (adding color cues & an elaborate background design) that I printed out and glued to a piece of chipboard (the stuff the backs of sketchpads are made of). Then I started the slow-and I do mean slow-process of cutting up little 'tiles' of chipboard and gluing them down to the mounted printout with super-glue. To fit into some of the stranger places, I'd refine the tile shapes using a hobby knife.
 Because I didn't pre-paint the chipboard tiles (there was too much chance for loss or over production of any given color), when I'd get a section of color finished, I'd paint those glued down tiles with acrylic paint. Going one color at a time made it easy to not get lost in the process of re-figuring out which tiles needed to be which color. I'd make small color variances within each area so the piece looked like it was made up of imperfect tile bits rather than looking painted or photoshoped to be one flat color.
 The process took much longer than I thought and over the course of two days I gave myself a bad arm cramp and a knot in my back and neck from leaning over the detailed tile bits for so long. It was a major relief on the last day when I was filling in the small areas of the background, though I had more accidental gluings, chipboard de-laminating, and lost custom cut pieces in the last few hours than I did on the whole project.
 Once the tiles were all glued down, I sprayed several clear coats of sealer over the entire piece. When that dried, I crossed my fingers as I mixed up custom grout, and rubbed it into the gaps between the tiles, obscuring the mosaic in the the process with thick muddy grout. Then I started wiping away the grout from the surface, hoping this roughness wouldn't chip tiles, peel paint, or just plain not come off. Ultimately, only two tiles had any damage from the grout process and to the left you can see the final mosaic.
Unfortunately, it didn't read well as a small image, so I made a lot of adjustments in photoshop for the final bookplate file. Here again is the final image. These will all be signed and numbered as a limited edition. The first convention I'll have this bookplate in-hand for is Emerald City Comic Con this month. After that I'll start offering them through my online store.
Once the tiles were all glued down, I sprayed several clear coats of sealer over the entire piece. When that dried, I crossed my fingers as I mixed up custom grout, and rubbed it into the gaps between the tiles, obscuring the mosaic in the the process with thick muddy grout. Then I started wiping away the grout from the surface, hoping this roughness wouldn't chip tiles, peel paint, or just plain not come off. Ultimately, only two tiles had any damage from the grout process and to the left you can see the final mosaic.
Unfortunately, it didn't read well as a small image, so I made a lot of adjustments in photoshop for the final bookplate file. Here again is the final image. These will all be signed and numbered as a limited edition. The first convention I'll have this bookplate in-hand for is Emerald City Comic Con this month. After that I'll start offering them through my online store.2015 Appearances:Emerald City Comic Con Mar. 27-29Trolls and Legends Festival Mons, Belgium April 3-5C2E2 April 24-26FCBD: Jetpack Comics NH: May 2ndMotor City May 15-17Denver Comic Con May 22-25Heroes Con June 19-21San Diego Comic Con July 8-12Long Beach Comic Con: Sept. 12-13Baltimore Comic Con Sept. 25-27New York Comic Con Oct. 8-11Art-Bubble Comics Festival: Copenhagen: Nov. 14-15
March 17, 2015
Legends of the Guard Vol 3 #4 Cover Process
 This week I'm sharing the cover to the final issue of Legends of the Guard Vol. 3 (I still have 1 cover to do for the Hardcover collection, but that's for a later blogpost). The final cover is shown to the left, but below is the process for the piece from concept to pencils through to colors.
  My original note to myself when I started this volume of Legends was: "#4: Insects crowning a mouse". The visual I had in mind then was much spookier and moodier, with misty dark blues in a foggy forest with a floor of scattered bones. But when it came time to draw this cover, I felt more whimsical and wanted the piece to feel more like a fairy tale. The mouse would be wearing a long cloak held up by some flying insect (I quickly thought moths were the right choice). On copy paper, I sketched out the elements, doing some Google-fu to research types of moths and their markings as well as fireflies and even a caterpillar of one of the moth species.
 I scanned those pencil drawings into Photoshop and started composing the cover's layout (keeping in mind where the fold between front and back cover is as well as where the logo is placed). For the background, I had a checkerboard pattern in mind already (I was thinking of is because of Edmund Dulac, one of my favorite illustrators, used it in his fairy tale illustrations often). I went in search of stock photos of stone arches that I could decorate with a checkered pattern and found an islamic facade that fit the bill. I modified the proportions, re-built the pattern and used it in several places the original photo didn't have it (including as the tile floor)
 After that digital composite was built up with all the characters placed an background set, I printed it out at full size (8.25" x 16.25") and taped it to the back of a sheet of Strathmore 300 series bristol. On my lightbox, I was able to see the printout and use it as a pencil guide to ink on the bristol surface. Because I knew I wanted to push the background wall back with color to separate its business from the characters, I left a little space between the subjects and any of the background inks (other than where they meet the floor).
 I scanned the inked artwork and started the process of establishing color areas called "flatting". The palate for the background was partly established by the original stock photo, but also by a few of Dulac's pieces I had in mind while working on this piece. The other colors were just put in as place holders as I filled in the spaces on the characters differentiating them from one another.
 The final colors were achieved (after altering my flats to the palate that worked to keep the characters visible but looking like they belonged in the scene) by using the Dodge & Burn tools in Photoshiop and a textured brush. I added some effects to the fireflies to make them glow and some subtle rendering on all my color holds on the background and tilework.
Legends of the Guard Vol.3 #4 will have the full "legend" of this image on the inside front cover. And will feature stories by: Aaron Conley & Fabian Rangel Jr, Becky Cloonan, & Ryan Lang.
2015 Appearances:Emerald City Comic Con Mar. 27-29Trolls and Legends Festival Mons, Belgium April 3-5C2E2 April 24-26FCBD: Jetpack Comics NH: May 2ndMotor City May 15-17Denver Comic Con May 22-25Heroes Con June 19-21San Diego Comic Con July 8-12Long Beach Comic Con: Sept. 12-13Baltimore Comic Con Sept. 25-27New York Comic Con Oct. 8-11Art-Bubble Comics Festival: Copenhagen: Nov. 14-15
David Petersen's Blog

- David Petersen's profile
- 339 followers
David Petersen isn't a Goodreads Author
(yet),
but they
do have a blog,
so here are some recent posts imported from
their feed.

