
David Petersen's Blog, page 54
July 28, 2015
Mouse Guard BOSTON COMIC CON 2015 Auction piece
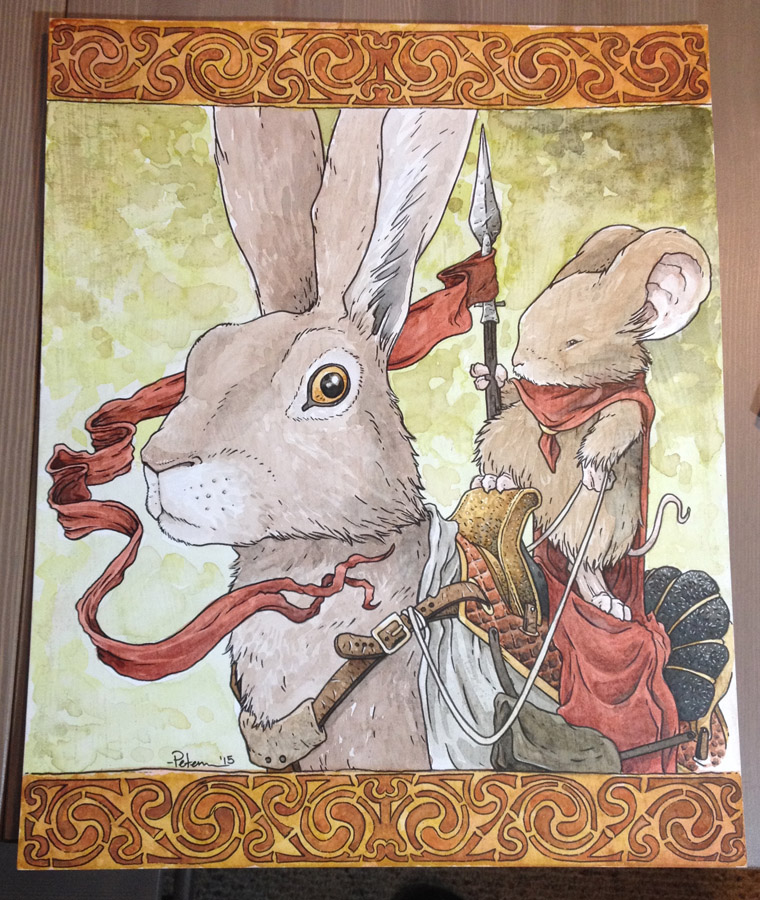 This weekend I'll be a guest at the Baltimore Comic Con. I'll be donating this new 16" x 20" Mouse Guard watercolor to their art auction. After Bob Shaw, art dealer and co-organizer of the Boston Con, saw my HEROES auction piece, he asked if I could fit something special in for their auction too. This piece follows a similar process to the HEROES piece, though on a more reasonable scale, and today's blogpost is all about sharing that process.
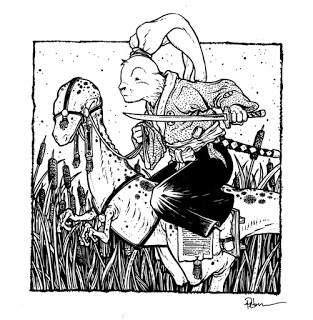
 The first step was coming up with a composition. I had some 16" x 20" matboard already cut and in the studio, so that pre-determined the size of this new piece. Looking through the Mouse Guard books, I flipped past the end chapters of Winter 1152 and decided to do a painting of a hare riding mouse. The sketch was done on copy paper, scanned in and enlarged to fit a 16" x 20" format. I used a border pattern I found online and then applied a grid to the file to help me with the next step.
 Because this piece needs to be printed at the same 16" x20" size of my matboard, I had to print the file out over the course of several sheets of 8.5" x 11" paper. Then using the grid to help realign the pieces, I trimmed and taped together the sheets into a patchwork of the full image at actual size. I learned this method of printing large format images on standard size paper printers when I worked at the antique store Materials Unlimited and needed to make affordable new signs for sales or products that could be read at a distance.
 When I normally work on an image that I digitally manipulated, I then move over to the lightbox to start work on bristol with the printout taped to the back...but since this painting is on matboard, I needed to do a different kind of transfer. On the backside, I rubbed graphite all over the areas where lines appeared on the front of the printout. I used a light table to help me see that I was getting coverage over the lines without wasting graphite or time and coating the entire backside.
 I then taped the paper printout to the front of the matboard and traced over my lines with a ballpoint pen. Wherever I applied pressure, the graphite on the back would transfer over to the surface of the matboard. Pictured here is the 16" x 20" matboard with the entire image transferred over in graphite. It was late when I got this step done, and I hadn't thought about color choices at all yet, so instead of pushing forward and starting to paint, I went to bed and decided to tackle painting in the morning.
 The next day, I decided that instead of the winter landscape from where fans saw the mice riding hares in Mouse Guard, I'd go for something warmer and more summer-ish. I started with a wash of yellow greens for the background. Then I discovered that this matboard, not thae same brand as the one I did my HEROES auction piece, would show the lamination glue streaks if the surface got too wet. I almost stopped and considered re-doing the transfer to a new sheet of board, but that would also mean a trip to the art supply store for new board. So I thought I'd push through and if got worse I'd stop.
Some more of those marks did show up, but in a way I found to be more like added texture rather than a flaw or distraction. So below you will see the many phone photos I took as I worked on this piece slowly building up the watercolor and then adding link work to punch up the illustration in the end.
 Base color wash to the border.
 Darker color to the pattern (detail)
 Border color done
 First wash to the hare's fur
 More work on the Hare's Fur& a wash to the Mouse's fur.
 Cloak & Flag washes. Adding details to the Hare
 More shading on the fabric & Starting on the Hare's riding tack.
 Detail shot of the saddle & blanket
 Finished watercolor
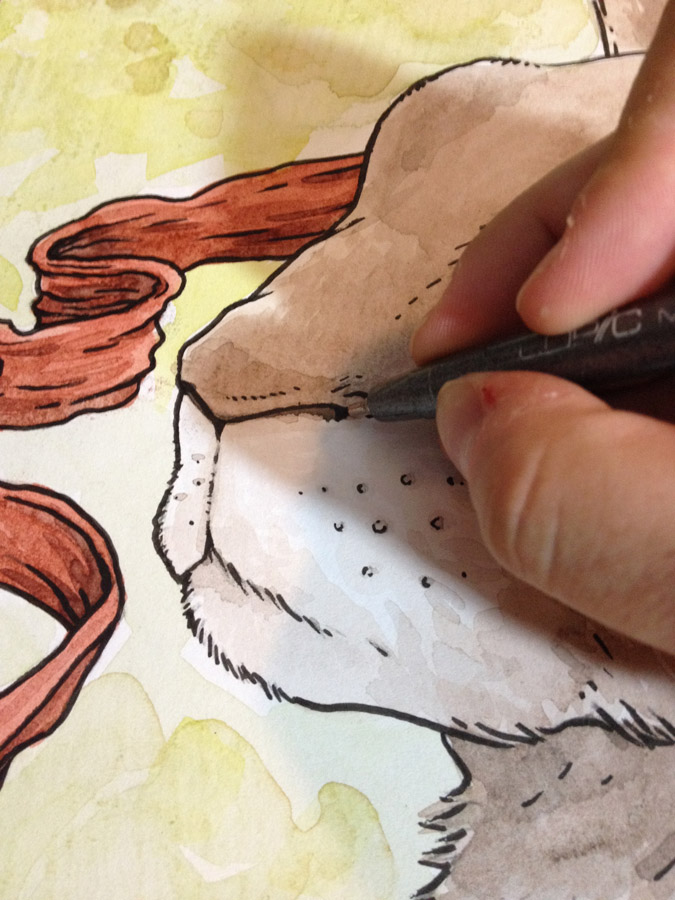 Inking details
 The finished piece.This will be available to bid on at the Boston Comic Con on Saturday.
 2015 Appearances:Boston Comic Con July 31- Aug. 2Long Beach Comic Con: Sept. 12-13Baltimore Comic Con Sept. 25-27New York Comic Con Oct. 8-11Art-Bubble Comics Festival: Copenhagen: Nov. 14-15


July 21, 2015
Mouse Guard color Video #8
For this week's blogpost (the last of these for a while...) I colored a inked Mouse Guard character portrait in my normal fashion in Photoshop. I recorded the process and speed up the result x8. Here is the video:
direct link to watch the video on Vimeo:
https://vimeo.com/112294688
Here is a better look at the original inks and the finished piece:

To see more coloring videos visit my Vimeo Video Page:https://vimeo.com/mouseguard/videos
2015 Appearances:Boston Comic Con July 31- Aug. 2Long Beach Comic Con: Sept. 12-13Baltimore Comic Con Sept. 25-27New York Comic Con Oct. 8-11Art-Bubble Comics Festival: Copenhagen: Nov. 14-15
direct link to watch the video on Vimeo:
https://vimeo.com/112294688
Here is a better look at the original inks and the finished piece:


To see more coloring videos visit my Vimeo Video Page:https://vimeo.com/mouseguard/videos
2015 Appearances:Boston Comic Con July 31- Aug. 2Long Beach Comic Con: Sept. 12-13Baltimore Comic Con Sept. 25-27New York Comic Con Oct. 8-11Art-Bubble Comics Festival: Copenhagen: Nov. 14-15
July 14, 2015
2015 Mouse Guard Sketchbook
 Last weekend at the San Diego Comic Con I released the 2015 Mouse Guard sketchbook. Like years past, this is a 24 page collection of commissions and other misc pieces that I have colored specifically for this printing. Each book is signed and numbered (500 in the edition), and can now be purchased through my online store: http://mouseguard.bigcartel.com
Here are a few sample pages of pieces you may have seen me post as commissions now colored for the sketchbook:


2015 Appearances:Denver Comic Con May 22-25Heroes Con June 19-21San Diego Comic Con July 8-12Boston Comic Con July 31- Aug. 2Long Beach Comic Con: Sept. 12-13Baltimore Comic Con Sept. 25-27New York Comic Con Oct. 8-11Art-Bubble Comics Festival: Copenhagen: Nov. 14-15
July 7, 2015
Art Book Cover Process
 This Month a Art of Mouse Guard 2005-2015 book will be released. It is a 368 page 12" x 12" book full of images and descriptions of how Mouse Guard came to be, the process to create my books, and the evolution of that process changing in the 10 years I've been drawing Mouse Guard books. It's a book I'm really proud of. You can read a previous blogpost about it's contents here, but today I'm going to be going over the process of creating the artwork for the cover.
 I wanted the artwork to not be a reused piece from the past, but I didn't quite manage to fulfill that desire of mine. While thinking of an image that would work to summarize the contents of the book (art book, process, Mouse Guard, etc.) I kept coming back to the Saxon, Kenzie, Rand portion of my Weasel War teaser print from SDCC a few years back. I redrew them making modifications to each character (taking away Kenzie's uncharacteristic sword for example).
 To fill the background, the editors and I wanted something design-ey. Something we could use a printing process like debossing or spot varnish on to really make the cover look classy and special. I dug through photo reference I'd taken and ran across this photo of a floor grate at Notre Dame and thought it would be perfect as it was A) already square, and B) the right density of pattern for a printing effect.
 I photoshopped the pencils of the mouse characters as well as the Notre Dame grate together and printed that composite out on standard printer paper. The printout was then taped to the back of a sheet of Strathmore 300 series bristol. On my lightbox I could see through the surface of the bristol to the printout below and used it as a guide while I inked the piece on the surface of the bristol. This process doesn't require erasing when the piece is inked because no pencil ever touches the bristol surface.
 After scanning my inks back into Photoshop, I came up with this monochromatic mockup for Archaia to look at. The idea was that the pattern was to be printed white and debossed while the linework was going to perhaps be branded or heat pressed on. However for both technical and artistic reasons this idea was scrapped. Another go-around had the cover being white with the mouse linework printed in black and the pattern not printed at all but only used as a template for a spot varnish (which would make it only visible when light hit it just-so).
 The cover version we ended up going with was closer to my original tan one, but now with the mice having a muted and barely rendered color scheme. The pattern will be printed slightly darker than the cover color, but will also be coated with a spot varnish to make the pattern sheen in the correct light.

The Art of Mouse Guard 2005-2015 will be available at Your Local Comic Shops, Amazon, Barnes & Noble, and conventions either I or Archaia/BOOM! attend this year.
2015 Appearances:San Diego Comic Con July 8-12Boston Comic Con July 31- Aug. 2Long Beach Comic Con: Sept. 12-13Baltimore Comic Con Sept. 25-27New York Comic Con Oct. 8-11Art-Bubble Comics Festival: Copenhagen: Nov. 14-15
June 30, 2015
Mouse Guard color Video #7
For this week's blogpost (and 1 more to follow) I colored a inked Mouse Guard character portrait in my normal fashion in Photoshop. I recorded the process and speed up the result x8. Here is the video:
direct link to watch the video on Vimeo:
https://vimeo.com/112129703
Here is a better look at the original inks and the finished piece:

To see more coloring videos visit my Vimeo Video Page:https://vimeo.com/mouseguard/videos
2015 Appearances:San Diego Comic Con July 8-12Boston Comic Con July 31- Aug. 2Long Beach Comic Con: Sept. 12-13Baltimore Comic Con Sept. 25-27New York Comic Con Oct. 8-11Art-Bubble Comics Festival: Copenhagen: Nov. 14-15
direct link to watch the video on Vimeo:
https://vimeo.com/112129703
Here is a better look at the original inks and the finished piece:


To see more coloring videos visit my Vimeo Video Page:https://vimeo.com/mouseguard/videos
2015 Appearances:San Diego Comic Con July 8-12Boston Comic Con July 31- Aug. 2Long Beach Comic Con: Sept. 12-13Baltimore Comic Con Sept. 25-27New York Comic Con Oct. 8-11Art-Bubble Comics Festival: Copenhagen: Nov. 14-15
June 23, 2015
Mouse Guard HEROES 2015 Auction Piece
 This HUGE 32" x 40" Mouse Guard Watercolor was auctioned off last weekend at the Heroes Con auction. The money raised from that auction go to help fund next year's HEROES. And since they are one of the best cons out there, privately owned by folks who really care about comic creators & fans, and they always put on a great show, I was happy to do an original piece for them. Today's Blogpost will walk through the steps used to create this piece.
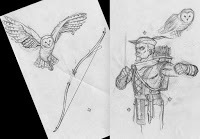
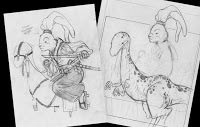
 Usually I don't do pieces this large. The exceptions being live art donations at a show like HEROES. There I'd be up on their stage, provided with materials and an enormous sheet of mat board to create something live while fans watched so they could prepare to place their bids later that night. Well, this year, I opted to do the piece at home in my normal controlled environment where I could do something more detailed and exciting. I did a few pencil sketches (the mouse and weasel are separate drawings added together in Photoshop), with some stock border pattern dropped on the top and bottom to frame the piece.
 The grid overlayed on the photoshop work up above was so I could accurately line up and tape all of it back together when I printed this 32" x 40" image out on several sheets of 8.5" x 11" paper! Yikes. I didn't have a projector available to me on short notice, so I opted to do this patchwork technique I used to use when needing to affordably make large signs in-house at my old job back at the antique store: "15% OFF ALL ANTIQUE RESTORED LIGHT FIXTURES IN JANUARY". Here I was starting to regret not doing some image simple enough to not just be drawn out on the board directly.
 To then get the image from that huge patchwork of printouts, I had to coat the back with graphite. I used a super soft (7B) Graphite stick and on the lightbox was able to make sure I was covering the backside of the image only where the lines were. This way I didn't break my hand rubbing graphite onto place that would never need it. Here, I was really starting to regret not doing something simpler that could just be drawn directly onto the board itself.
 After the graphite was applied, I flipped the patchwork over, taped it to the mat board, and started tracing over my lines with a ball point pen. The pressure of the ballpoint transfers the graphite from the back of the printout to the mat board's surface wherever I've drawn over with the pen. It was very late (or early AM) when I finished this step. It too was arduous, but I was having a more positive feeling about the final piece at this point. After some sleep, I'd start tackling the painting of it.Using a cheap tray of watercolors, I started applying washes and then building them up, letting natural splotches happen at times, while carefully controlling where the paint went at other times. Below is the progress of the washes:
 Yellow/ochre buildup on the knotwork border
 The large sky area wash that I left blotchy while purposely keeping the area near their faces the lightest.
Filling in the areas between the knotwork darker
 Knotwork done
 Weasel fur
 Mouse fur & Cloak
 Splotchy happy accident helmet
 When I'd finished the painting, I didn't think the piece was done. This is a classic thing for me. I work the watercolor thinking that I'll make the image strong enough to not need line, but ultimately get disappointed in the lack of focus of the final piece...and add line. And for it to look more like a traditional Mouse Guard piece (to get the most of a bid out of it), I knew the line would be important. So, I let the paint really dry, and left the inking for the next day.
 The last step was to add in the linework. I first considered using pencil to "ink" the lines, but found that it didn't pop enough to accomplish what I needed, especially near the darker valued areas of the painting. So I switched over to ink pens, large permanent (but archival) markers. I used a few of my stippling tricks, but for the most part left everything an even lineweight to let the watercolor rendering still do most of the talking. To the left, is the final image and below details of the Mouse & Weasel.

2015 Appearances:San Diego Comic Con July 8-12Boston Comic Con July 31- Aug. 2Long Beach Comic Con: Sept. 12-13Baltimore Comic Con Sept. 25-27New York Comic Con Oct. 8-11Art-Bubble Comics Festival: Copenhagen: Nov. 14-15
June 16, 2015
Puppet Forge & Petersen Collaboration!
 Puppet builder/performer and friend Gordon Smuder and I have collaborated on a new project (or perhaps series of projects depending on how it goes...) Gordon adapted my 2014 Monsters & Dames Monster into a Puppet, we decided that we should officially collaborate and have me draw some monster designs for him to build some limited high end puppets of. The character you see to the left is the first of our collaborations. only 10 of them will be made, and they will debut at HEROES CON this weekend! The deluxe hand puppets, with live hands and full bodies sell for $400 at The Puppet Forge booth and come with a limited print that I drew. Today's post outlines my art process and several more photos of a finished puppet below.
 I started by sketching out a few very different types of monsters and slapped some quick color onto them hoping that one of them would catch Gordon's eye. He liked them all, but worried the squid head was too ambitious to start with, the blue troll was too easy/predictable, and the dragon-elk was right on the cusp of being too tricky...so he went with the green pig. I don't know if we will revisit any of the remaining 3 at a later date, or if Gordon would prefer to start with new inspiration sketches next time.
 Because Gordon would need more than just the head, I needed to draw out the whole creature for him to start building from. This wouldn't be the final art for the print, but still a sketch that would show the body and proportions and details of the limbs. I offered a palate change here, to avoid comparisons with certain Star Wars pig guards, and Gordon leaned toward the more natural tan colors.
 For the final piece, I wanted the character to be acting a bit more, but without a busy background setting. I changed the proportions a bit again and put more detail in the expression and hair. This was all done in pencil, but I left the specifics of the fish bone pile vague for me to figure out as I inked it.
 Next up were the inks. I did my usual trick of taping the original sketch to the back of a sheet of bristol board and inking on the bristol over a lightbox so I can see the pencils as a guide. The detail of the hair was lost a bit compared to my pencils, but the fish bone pile was fleshed out more thoroughly. You win some, you lose some.
 And lastly I colored the piece in photoshop for the final print.
Now for more photos of Gordon's amazing work at translating my drawing into a fleece & foam puppet:


As I said at the top of the post, swing by The Puppet Forge Booth this weekend at HEROES CON to purchase one of these puppets.
2015 Appearances:Heroes Con June 19-21San Diego Comic Con July 8-12Boston Comic Con July 31- Aug. 2Long Beach Comic Con: Sept. 12-13Baltimore Comic Con Sept. 25-27New York Comic Con Oct. 8-11Art-Bubble Comics Festival: Copenhagen: Nov. 14-15
June 9, 2015
St. Paul's School Visit
 In May I was invited as a guest to St. Paul's School in Massachusetts. SPS is a 9-12 grade private boarding school with a fantastic arts program (because of their facilities, professors, and a focus on it being an important part of curriculum). The school also displayed several of my pages in the common area of their art building. Special thanks to Brian Schroyer who organized much of my visit, but also included a Mouse Guard assignment for his students, and was my guide for my time there. This week's blogpost is very photo intense, but I wanted to try and capture my visit to SPS and share it with you.
School GroundsI'll start with photos I took of the school grounds & facilities. SPS has a mix of architectural styles and ages, but the bulk of it is older, leaving you to feel like you've stepped into a Muggle Hogwarts in Massachusetts.
 The "New" Chapel (completed in the very start of the last century)
 Chapel Interior
 Chapel Interior
 Chapel Interior
 Chapel Interior
 Hargate: The Art Building
  Hargate: Common Area
 Hargate: Photography Studio
 Hargate: Painting Studio
 Hargate: Drawing Studio
 Hargate: Computer/Graphics Studio
 Library: Balcony
 Library: Study Room
 Scudder House (my lodgings for the visit)
 Scudder House: Common Room
 Scudder House: Common Room
 Hall to the Dinning Rooms
 A room in the Dining Hall used for special occasions
 A Room in the Dining Hall used for special occasions
 A Room in the Dining Hall used for special occasions
 At SPS in the Building where the Dining Hall is, every graduate's name is carved into the wall under a coat of arms for their graduating year. In the room pictured above where some of the oldest graduates are listed is a "Harry Potter".
My visit and interactions with the students.While visiting SPS, I was shown around campus, did demonstrations and interacted with students, discussed curriculum with the teachers, and gave a formal presentation in the auditorium.
 Some of My Mouse Guard pages were on display in the common area of Hargate
 Signing books for Brian Schroyer's daughter,
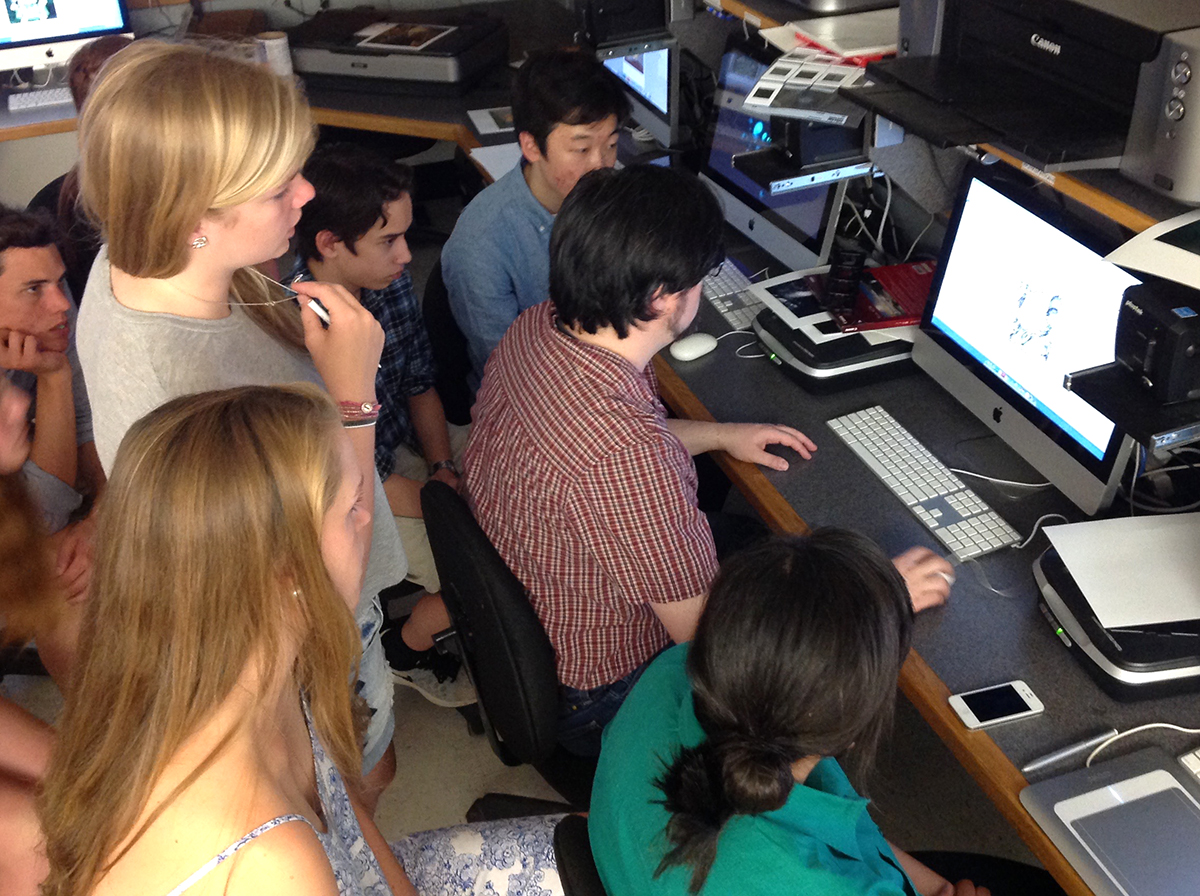 Giving a Coloring Demo to the Students
 Coloring Demo
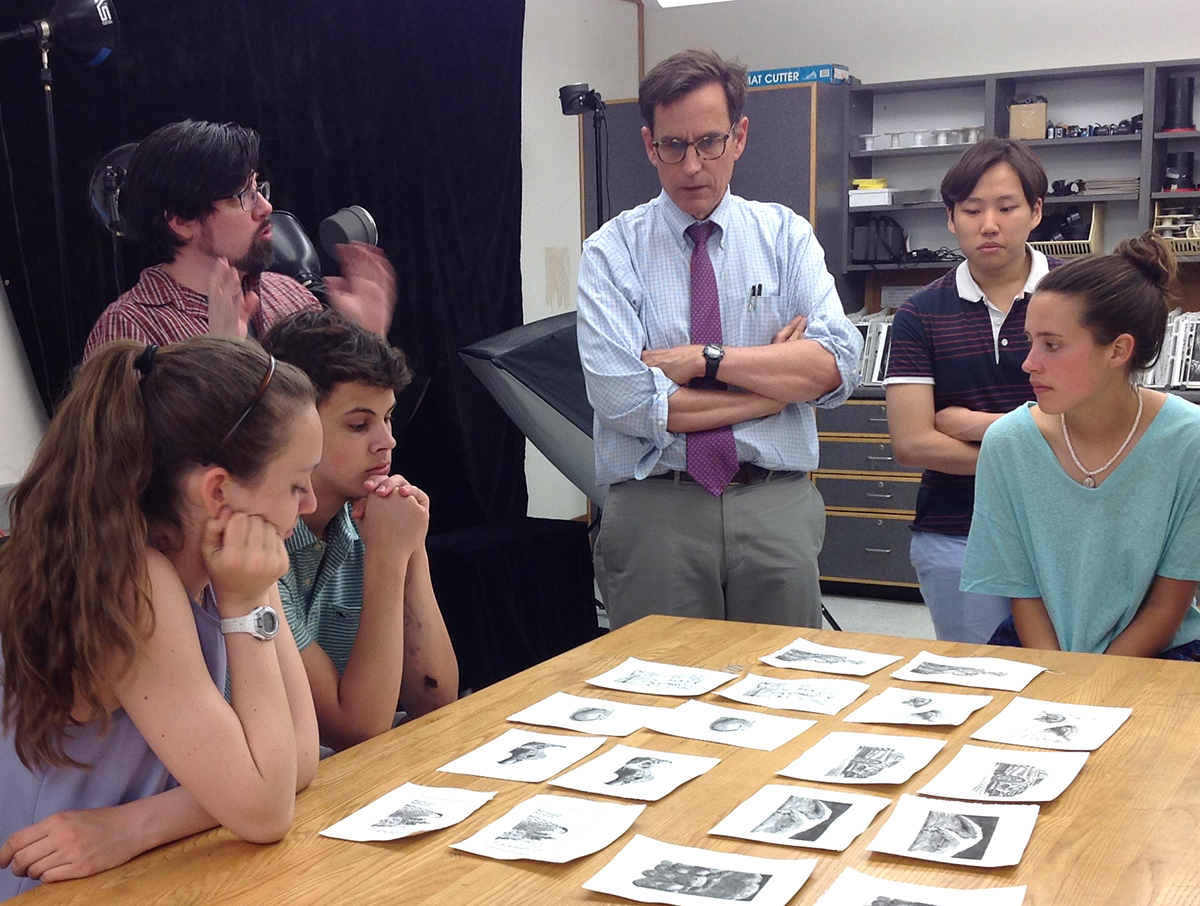 Looking over proofs with the Printmaking class
 Inking Demo on a lightbox
 Inking Demo
 Inking Demo
 Inking Demo sample
 Presentation for Students & Faculty(I focused on the "Drawing Like Yourself" message)
 Reading with Brian Schroyer's Son & Daughter
Student Work. The level of work these students were doing (9-12) was on par with college level assignments & portfolios. I took photos of work that was either on display or still out and available between classes.
 Oil Painting
 Abstracted planes assignment
 Abstracted Planes assignment
  Oil Painting
 Oil Painting
 Stil Life Paintings
 Stark Contrast Portraits in Ink
 Rendered Pencil Eyes assignment
 Painted Composition
 Painted Portrait
 Close up of Portrait to show brush strokes & canvas texture
Mouse Guard AssignmentBrian Schroyer assigned his drawing students to do an assignment in advance of my visit. For the first part, they were to refernce one of my drawings (either from my books or culled from this blog) and emulate my techniques and composition to recreate a Mouse Guard image. The second was for them to then draw a new piece using something from the first drawing in a new composition and allowing themselves to draw like themselves.
 Student copies of my drawings. These two were so good, I didn't realize they weren't print outs of my work until I was up close to them.
The Students' own compositions:


---------------------------------------
 The experience I had at SPS was a wonderful one. In my early college days I'd considered becoming a professor of printmaking, but with my desire to focus on my own work and avoid conflict with any school's administration, I never pursued it. I love to inform and share ideas and verbalize what I've come to learn, and I try to do as much of that as possible at conventions, but doing it for students of art was another level of fulfillment of my college era goal. I hope to do more of it and hopefully get to return to St. Paul's School sooner than later.
2015 Appearances:Heroes Con June 19-21San Diego Comic Con July 8-12Boston Comic Con July 31- Aug. 2Long Beach Comic Con: Sept. 12-13Baltimore Comic Con Sept. 25-27New York Comic Con Oct. 8-11Art-Bubble Comics Festival: Copenhagen: Nov. 14-15
June 2, 2015
Recent Commissions
Here are a few commissions I've done recently. Unfortunately, I had to take a break from doing them due to my workload and deadlines. I hope to be able to offer up commissions again sooner than later. UPDATE: Now with Pencil Sketches for many of these commissions:

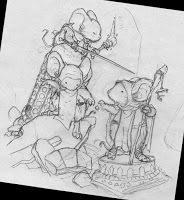
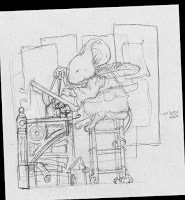 Mouse Architect.
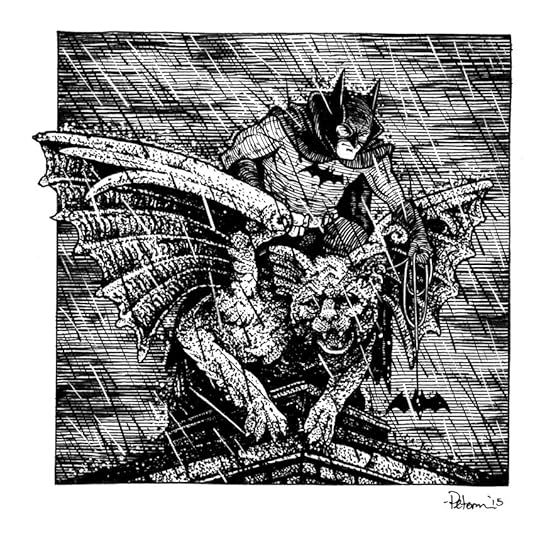 Batman on a Gargoyle.

 Saxon, Kenzie, & Sadie in Darkheather.
 Mouse Archivist.

 Cattail Harvester Mouse riding a Frog.

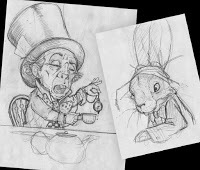 Mad Tea Party.
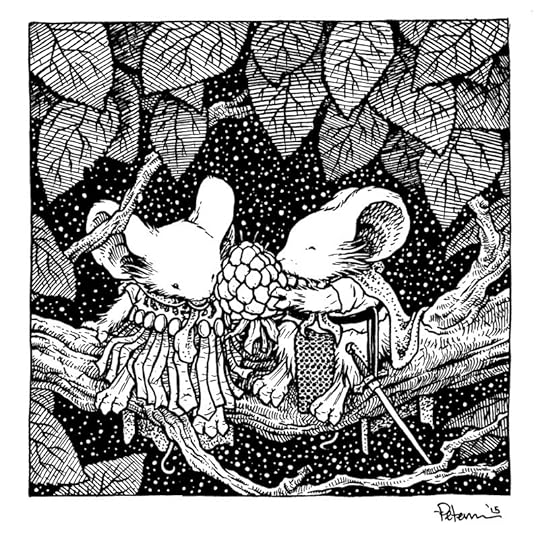 Gwendolyn & Saxon sharing a raspberry.
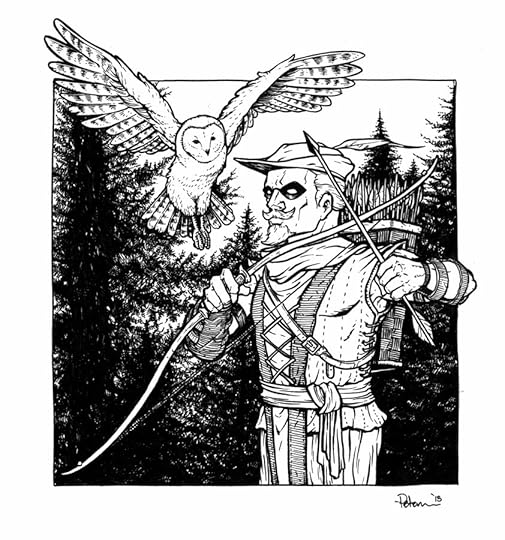
 Green Arrow.
 Usagi Yojimbo riding a Tokage.
 Spring Celebration.
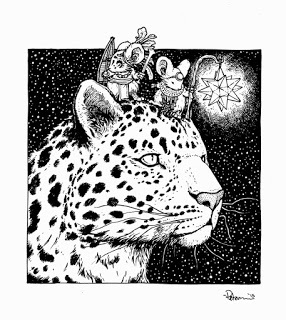
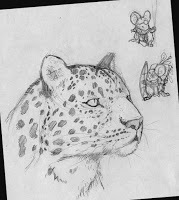 Mice with a Spotted Leopard.
2015 Appearances:Heroes Con June 19-21San Diego Comic Con July 8-12Boston Comic Con July 31- Aug. 2Long Beach Comic Con: Sept. 12-13Baltimore Comic Con Sept. 25-27New York Comic Con Oct. 8-11Art-Bubble Comics Festival: Copenhagen: Nov. 14-15

 Mouse Architect.
 Batman on a Gargoyle.
 Saxon, Kenzie, & Sadie in Darkheather.
 Mouse Archivist.
 Cattail Harvester Mouse riding a Frog.
 Mad Tea Party.
 Gwendolyn & Saxon sharing a raspberry.

 Green Arrow.
 Usagi Yojimbo riding a Tokage.
 Spring Celebration.
 Mice with a Spotted Leopard.
2015 Appearances:Heroes Con June 19-21San Diego Comic Con July 8-12Boston Comic Con July 31- Aug. 2Long Beach Comic Con: Sept. 12-13Baltimore Comic Con Sept. 25-27New York Comic Con Oct. 8-11Art-Bubble Comics Festival: Copenhagen: Nov. 14-15
May 26, 2015
Legends of the Guard Hardcover art process
 The third Legends of the Guard Volume will be collected in hardcover later this year. Like all Legends of the Guard cover, the images are Legends themselves. To the left you can see the cover as it will appear on the book, but for today's blogpost I'll go over the process to get there.
 I started with the idea of the Legend, which was a story seed I'd jotted down (with about 5 others) for contributors who needed some ideas to get them started. A story about a mouse who rode a snake as a mount had never been claimed, so I used it for myself. The snake and mouse were drawn on copy paper for me to scan to resize and place in a cover template file to make sure everything fit with logos, spine location, etc.
 After I composited the subjects and digitally painted in some color to help establish the horizon line, I printed out the layout (on several sheets of printer paper and then aligned them and taped them together.) On the printout I started penciling in all the clover and grasses that would make up most of the landscape of this cover.
 Here you can see my pencils on the printout. This is something that looks very detailed and chaotic, but since it's organic repetition of shapes, it's not as complex as it appears. I just keep doodling the same shapes over and over overlapping some, filling in gaps with back, and drawing a blade of grass or a clover flower popping up very so often to break the monotony of shape. The only downside with this was that I so tightly penciled the clover that there was less to do in the inking step and it made me feel like I'd lost some of the life and detail in my pencils.
 After adding in the clover on the printout, I decided I needed more background...the sky was missing something. So I went with a mouse city. For inspiration I looked to James Gurney's painting for Dinotopia: Journey to Chandara of the Windmill Village. I drew my mousey dwellings on copy paper aligning them to the printout on my lightbox to make sure I was drawing the buildings only in the open spaces.
 With the various printouts and sketches taped to the back of Strathmore 300 series bristol at different times, I was able to ink the cover on my lighbox. I used Copic Multiliners to ink with. I prefer the 0.7 nib for most of my lines, but I drop down to the 0.3 or 0.2 for really fine details or lines like the mouse's eye.
Below are some process shots I took with my phone and shared on Facebook, Instagram, and Twitter as I inked.


 After I finished the inks I scanned them in and started to color the piece with flat color in Photoshop. I added a color hold to all the village inkwork to help it recede into the background. I'd already established most of the color palate for this cover back when I did my digital mock-up/composite, so this was just a matter of coloring inside the lines.
 To render the color and get the shadows, highlights and texture, I use the dodge and burn tools with a textured brush. In areas like the clover (or when I do shingles or a forest floor of sticks) I select groupings of the shapes and then make them darker, lighter, or shift the color compared to a few around it...and I keep doing that until the clover all look a little different and not like they were painted on a computer.
Here again is the final cover art sans-logo and border. The book is due out this Fall and you can read about the legend of this mouse and snake inside its pages.

2015 Appearances:Denver Comic Con May 22-25Heroes Con June 19-21San Diego Comic Con July 8-12Boston Comic Con July 31- Aug. 2Long Beach Comic Con: Sept. 12-13Baltimore Comic Con Sept. 25-27New York Comic Con Oct. 8-11Art-Bubble Comics Festival: Copenhagen: Nov. 14-15
David Petersen's Blog

- David Petersen's profile
- 339 followers
David Petersen isn't a Goodreads Author
(yet),
but they
do have a blog,
so here are some recent posts imported from
their feed.

