
Andrew Huang's Blog, page 38
May 3, 2014
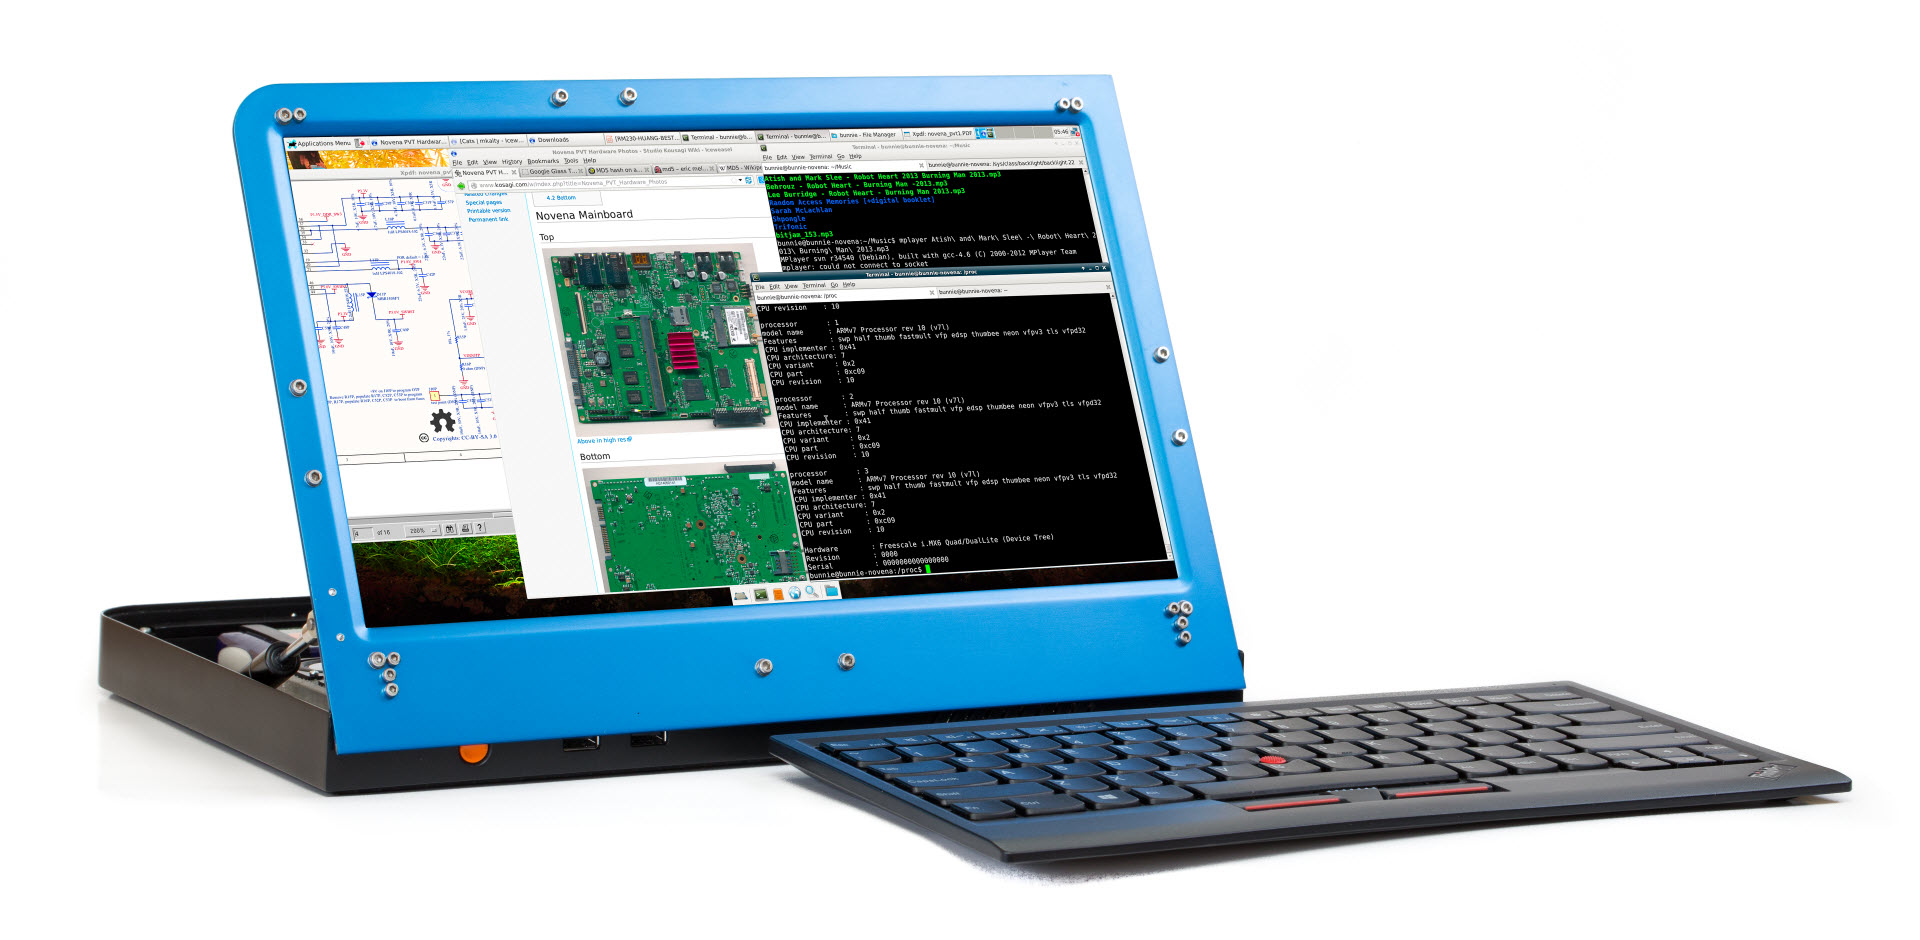
Novena’s Hackable Bezel
When designing Novena, I had to balance budget against hackability. Plastic parts are cheap to produce, but the tools to mold them are very expensive and difficult to modify. Injection mold tooling cost for a conventional clamshell (two-body) laptop runs upwards of $250,000. In contrast, Novena’s single body design has a much lower tooling cost, making it feasible to amortize tooling costs over a smaller volume.
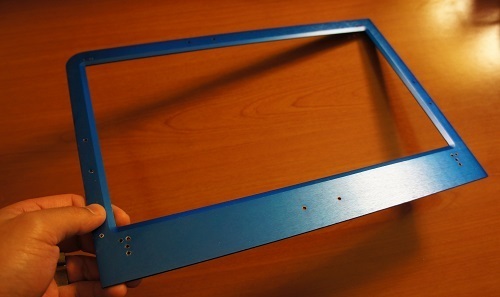
The decision to use flat sheet aluminum for the LCD bezel was also driven in part to reduce tooling costs. Production processing for aluminum can be done using CNC, virtually eliminating up-front tooling costs. Furthermore, aluminum has great hack value, as it can be cut, drilled, tapped, and bent with entry-level tools. This workability means end users can easily add connectors, buttons, sensors, and indicators to the LCD bezel. Users can even design in a custom LCD panel, since there’s almost no setup cost for machining aluminum.
One of my first mods to the bezel is a set of 3D-printed retainers, custom designed to work with my preferred keyboard. The retainers screw into a set of tapped M2.5 mounting holes around the periphery of the LCD.
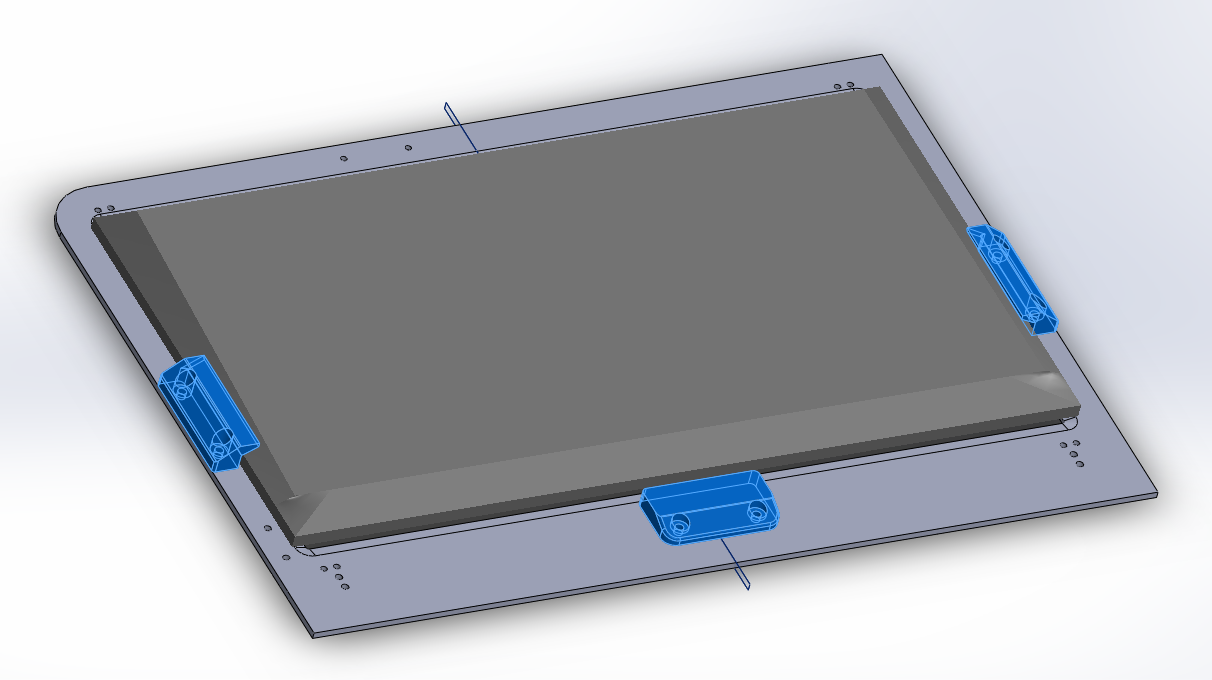
The idea is that the retainers hold my keyboard against the LCD bezel when transporting the laptop, protecting the LCD from impact damage while making it a little more convenient for travel.

Such an easily customizable bezel means a limitless combination of keyboards and LCDs can be supported without requiring expensive modifications to injection molding tools.
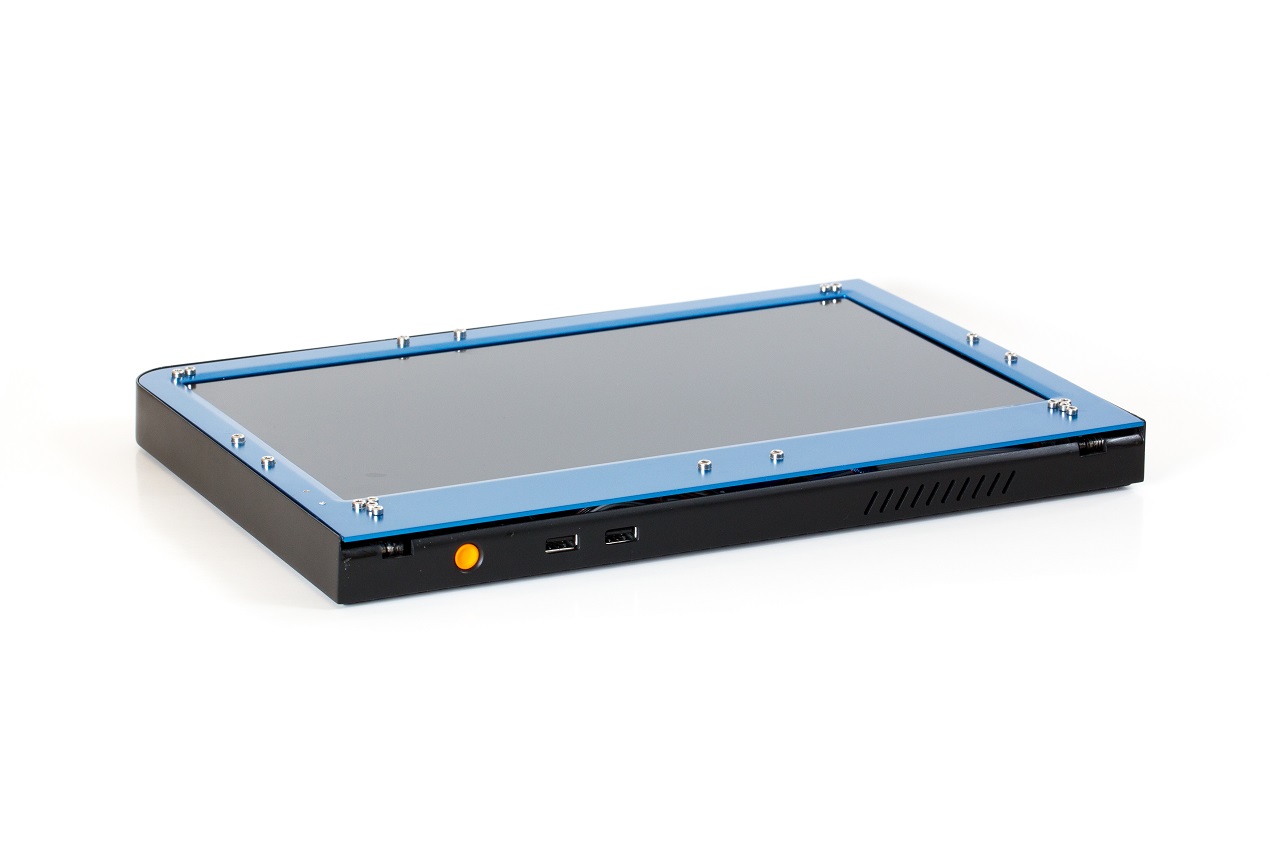
The flat design also means it’s easy to laser-cut a bezel using other materials. Here’s an example made out of clear acrylic. The acrylic version looks quite pretty, although as a material acrylic is much softer and less durable than aluminum.
![]()
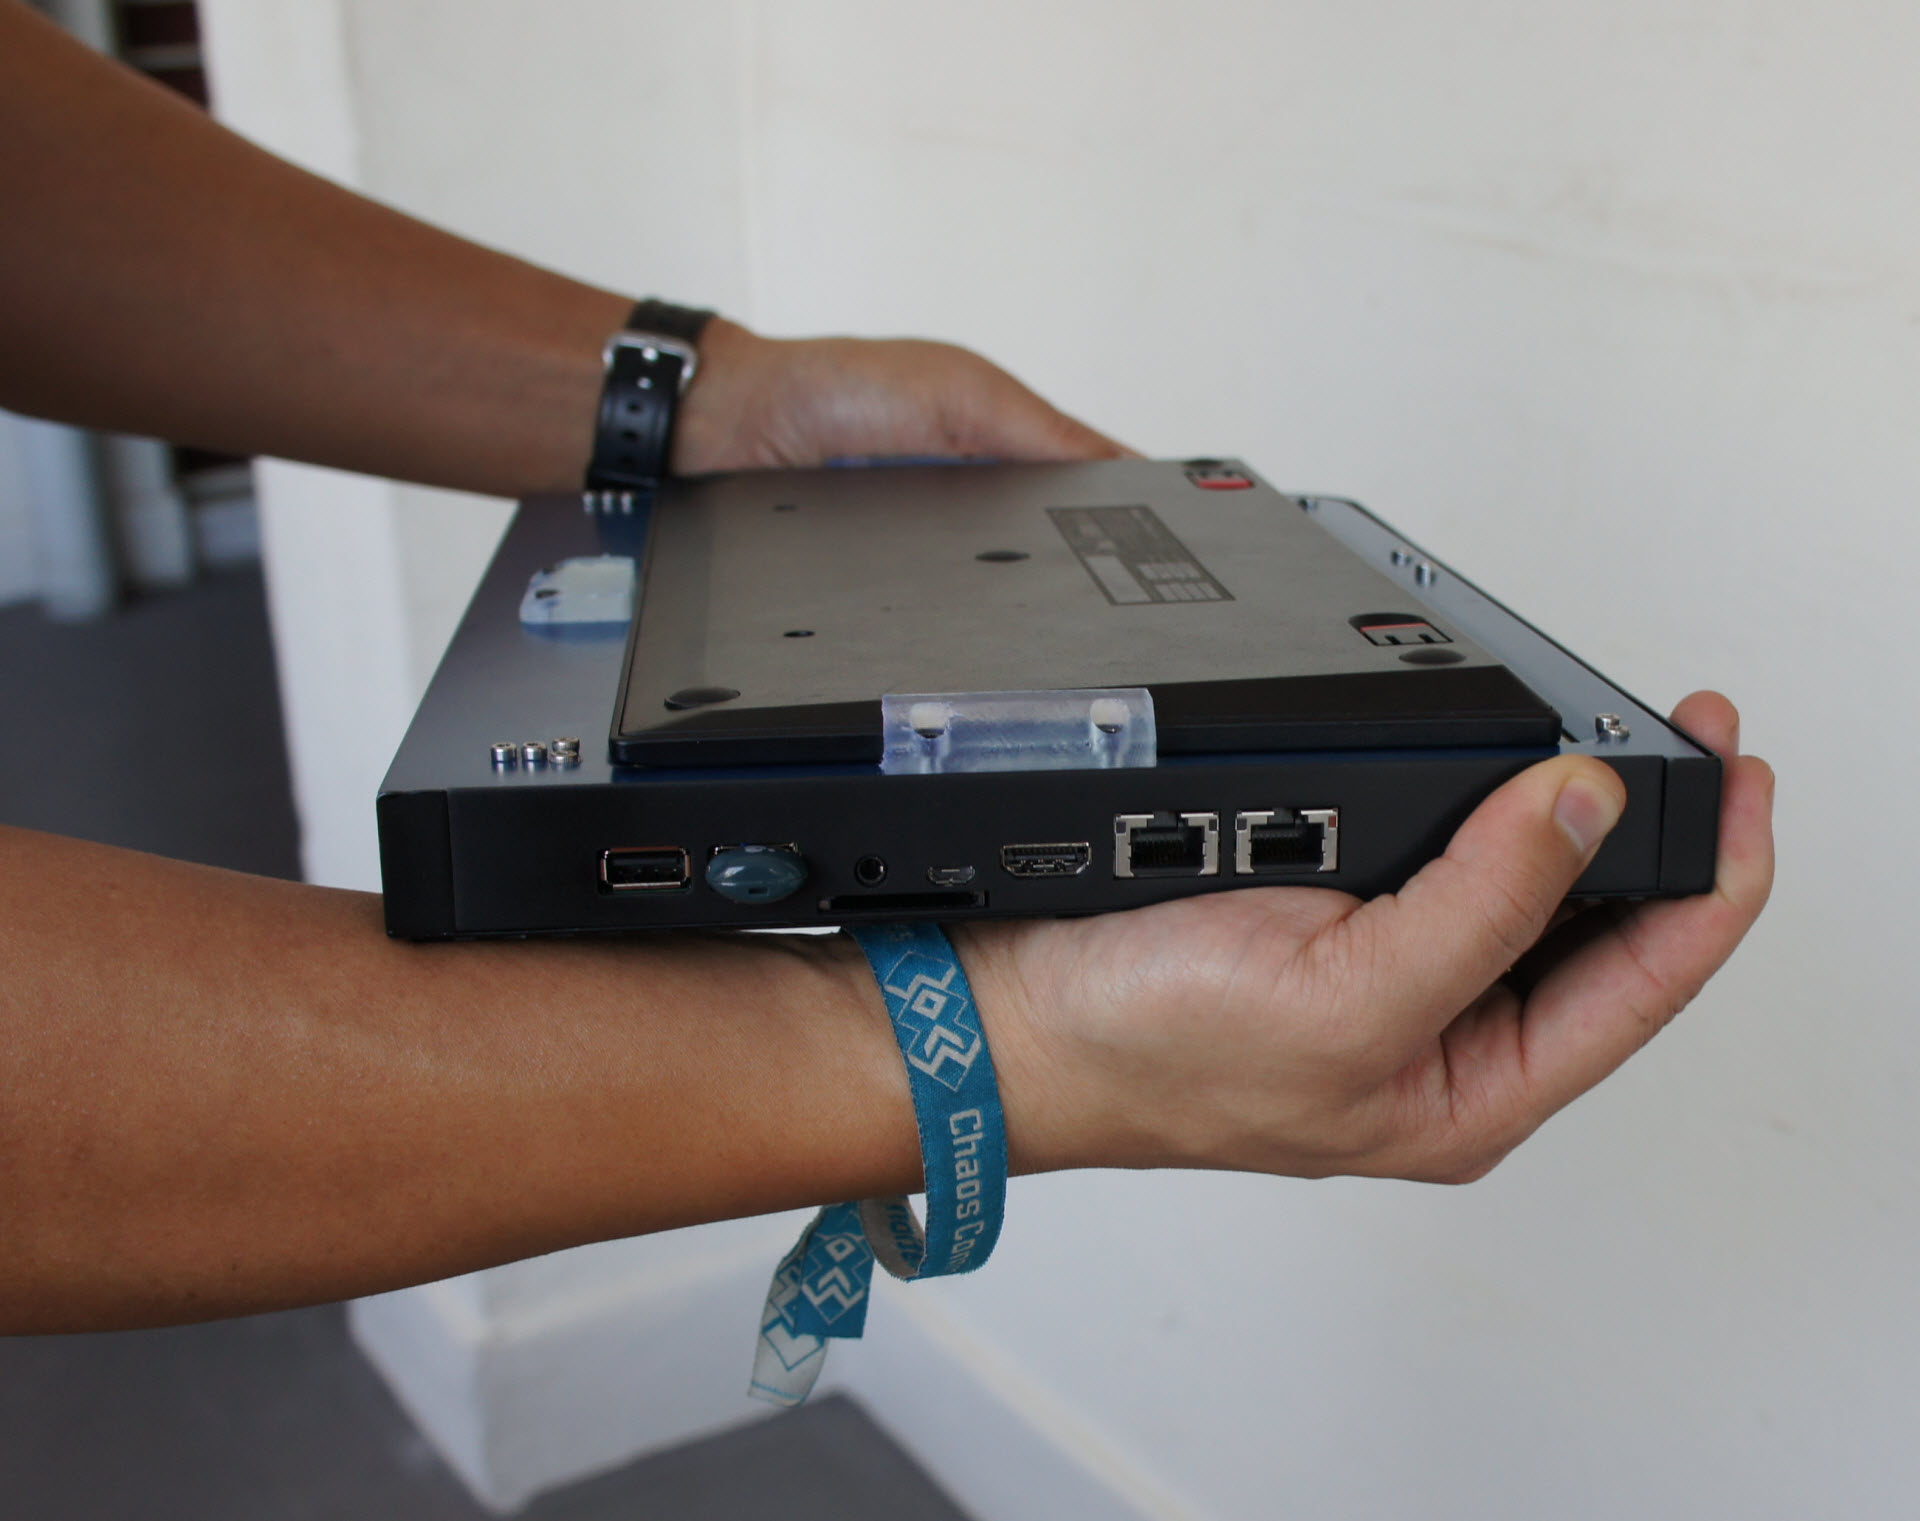
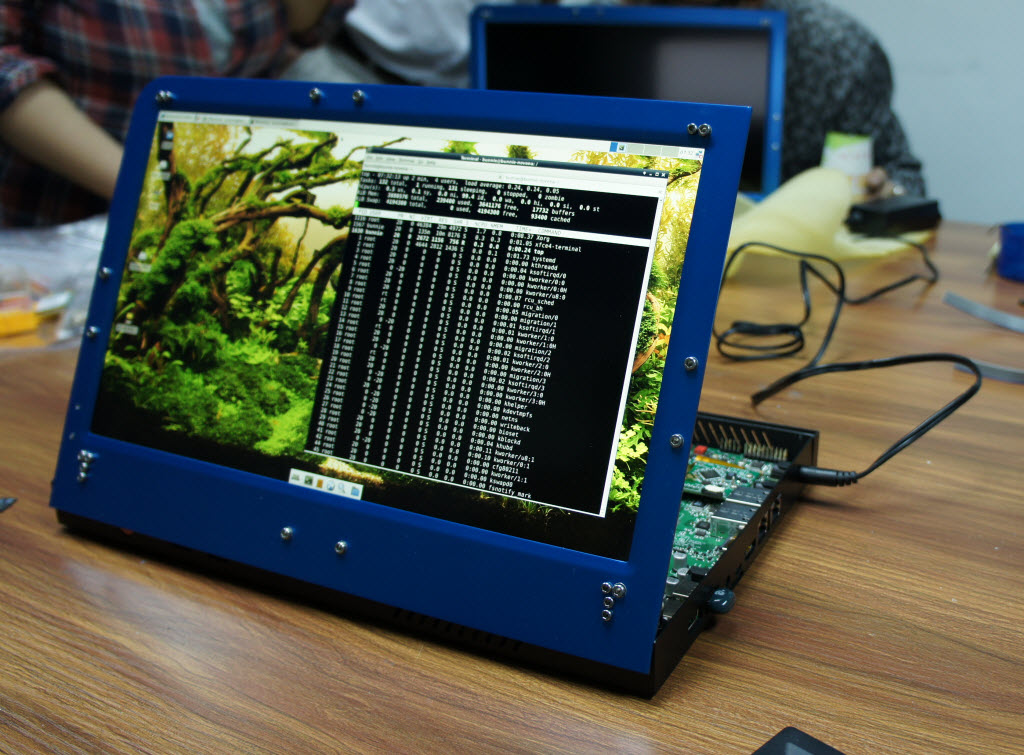
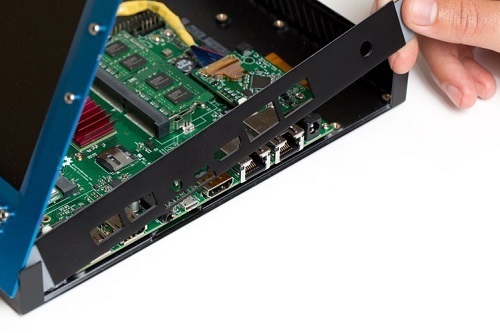
I also added a notch on the bottom part of the bezel to accommodate breakout boards plugged into the FPGA expansion connector.
![]()
The low up-front cost to modify and customize the bezel enables experimentation and serendipitous hacks. I’m looking forward to seeing what other Novena users do with their bezels!


April 29, 2014
Circuit Stickers Manufacturing Retrospective: From Campaign to First Shipment
Last December, Jie Qi and I launched a crowdfunding campaign to bring circuit stickers under the brand name of “chibitronics” to the world.
Our original timeline stated we would have orders shipped to Crowd Supply for fulfillment by May 2014. We’re really pleased that we were able to meet our goal, right on time, with the first shipment of over a thousand starter kits leaving the factory last week. 62 cartons of goods have cleared export in Hong Kong airport, and a second round of boxes are due to leave our factory around May 5, meaning we’ve got a really good chance of delivering product to backers by Mid-May.
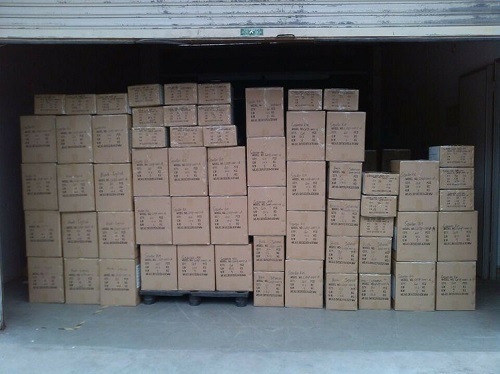
Above: 62 cartons containing over a thousand chibitronics starter kits waiting for pickup.
Why On-Time Delivery Is So Important
A personal challenge of mine was to take our delivery commitment to backers very seriously. I’ve seen too many under-performing crowdfunding campaigns; I’m deeply concerned that crowdfunding for hardware is becoming synonymous with scams and spams. Kickstarter and Indiegogo have been plagued by non-delivery and scams, and their blithe caveat emptor attitude around campaigns is a reflection of an entrenched conflict of interest between consumers and crowdfunding websites: “hey, thanks for the nickel, but what happened to your dollar is your problem”.
I’m honestly worried that crowdfunding will get such a bad reputation that it won’t be a viable platform for well-intentioned entrepreneurs and innovators in a few years.
I made the contentious choice to go with Crowd Supply in part because they show more savvy around vetting hardware products, and their service offering to campaigns — such as fulfillment, tier-one customer support, post-campaign pre-order support, and rolling delivery dates based on demand vs. capacity — is a boon for hardware upstarts. Getting fulfillment, customer support and an ongoing e-commerce site as part of the package essentially saves me one headcount, and when your company consists of just two or three people that’s a big deal.
Crowd Supply doesn’t have the same media footprint or brand power that Kickstarter has, which means it is harder to do a big raise with them, but at the end of the day I feel it’s very important to establish an example of sustainable crowdfunding practices that is better for both the entrepreneur and the consumer. It’s not just about a money grab today: it’s about building a brand and reputation that can be trusted for years to come.
Bottom line is, if I can’t prove to current and future backers that I can deliver on-time, I stand to lose a valuable platform for launching my future products.
On-Time Delivery Was not Easy
We did not deliver chibitronics on time because we had it easy. When drawing up the original campaign timeline, I had a min/max bounds on delivery time spanning from just after Chinese New Year (February) to around April. I added one month beyond the max just to be safe. We ended up using every last bit of padding in the schedule.
I made a lot of mistakes along the way, and through a combination of hard work, luck, planning, and strong factory relationships, we were able to battle through many hardships. Here’s a few examples of lessons learned.
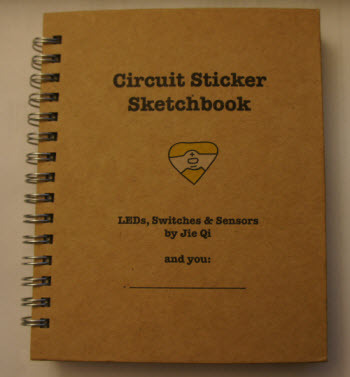
A simple request for one is not necessarily a simple request for another. Included with every starter kit is a fantastic book (free to download) written by Jie Qi which serves as a step-by-step, self-instruction guide to designing with circuit stickers. The book is unusual because you’re meant to paste electronic circuits into it. We had to customize several aspects of the printing, from the paper thickness (to get the right light diffusion) to the binding (for a better circuit crafting experience) to the little pocket in the back (to hold swatches of Z-tape and Linqstat material). Most of these requests were relatively easy to accommodate, but one in particular threw the printer for a loop. We needed the metal spiral binding of the book to be non-conductive, so if someone accidentally laid copper tape on the binding it wouldn’t cause a short circuit.
Below is an example of how a circuit looks in the book — in this case, the DIY pressure sensor tutorial (click on image for a larger version).

Checking for conductivity of a wire seems like a simple enough request for someone who designs circuits for a living, but for a book printer, it’s extremely weird. No part of traditional book printing or binding requires such knowledge. Because of this, the original response from the printer is “we can’t guarantee anything about the conductivity of the binding wire”, and sure enough, the first sample was non-conductive, but the second was conductive and they could not explain why. This is where face to face meetings are invaluable. Instead of yelling at them over email, we arranged a meeting with the vendor during one of my monthly trips to Shenzhen. We had a productive discussion about their concerns, and at the conclusion of the meeting we ordered them a $5 multimeter in exchange for a guarantee of a non-conductive book spine. In the end, the vendor was simply unwilling to guarantee something for which he had no quality control procedure — an extremely reasonable position — and we just had to educate the vendor on how to use a multimeter.
To wit, this unusual non-conductivity requirement did extend our lead time by several days and added a few cents to the cost of the book, but overall, I’m willing to accept that compromise.
Never skip a checkplot. I alluded to this poignant lesson with the following tweet:
Skip a gerber checkplot … scrap 200+ PCBs due to config error on just one pad's soldermask. Lose four weeks and $,$$$ #fml #hardwareishard
— bunnie (@bunniestudios) January 15, 2014
The pad shapes for chibitronics are complex polyline geometries, which aren’t handled so gracefully by Altium. One problem I’ve discovered the hard way is the soldermask layer occasionally disappears for pads with complex geometry. One version of the file will have a soldermask opening, and in the next save checkpoint, it’s gone. This sort of bug is rare, but it does happen. Normally I do a gerber re-import check with a third-party tool, but since this was a re-order of an existing design that worked before, and I was in a rush, I skipped the check. Result? thousands of dollars of PCBs scrapped, four weeks gone from the schedule. Ouch.
Good thing I padded my delivery dates, and good thing I keep a bottle of fine scotch on hand to help bitter reminders of what happens when I get complacent go down a little bit easier.
If something can fit in a right and a wrong way, the wrong way will happen. I’m paranoid about this problem — I’ve been burned by it many times before. The effects sticker sheet is a prime example of this problem waiting to happen. It is an array of four otherwise identical stickers, except for the LED flashing pattern they output. The LED flashing pattern is controlled by software, and trying to manage four separate firmware files and get them all loaded into the right spot in a tester is a nightmare waiting to happen. So, I designed the stickers to all use exactly the same firmware; their behaviors set by the value of a single external resistor.
So the logic goes: if all the stickers have the same firmware, it’s impossible to have a “wrong way” to program the stickers. Right?
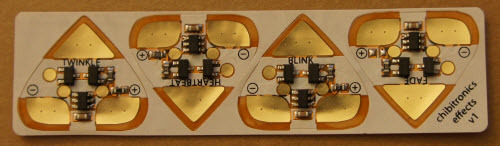
Unfortunately, I also designed the master PCB panels so they were perfectly symmetric. You can load the panels into the assembly robot rotated by pi radians and the assembly program runs flawlessly — except that the resistors which set the firmware behavior are populated in reverse order from the silkscreen labels. Despite having fiducial holes and text on the PCBs in both Chinese and English that are uniquely orienting, this problem actually happened. The first samples of the effects stickers were “blinking” where it said “heartbeat”, “fading” where it said “twinkle”, and vice-versa.
Fortunately, the factory very consistently loaded the boards in backwards, which is the best case for a problem like this. I rushed a firmware patch (which is in itself a risky thing to do) that reversed the interpretation of the resistor values, and had a new set of samples fedexed to me in Singapore for sanity checking. We also built a secondary test jig to add a manual double-check for correct flashing behavior on the line in China. Although, in making that additional test, we were confronted with another common problem –
Some things just don’t translate well into Chinese. When coming up with instructions to describe the difference between “fading” (a slow blinking pattern) and “twinkling” (a flickering pattern), it turns out that the Chinese translation for “blink” and “twinkle” are similar. Twinkle translates to 闪烁 (“flickering, twinkling”) or 闪耀 (to glint, to glitter, to sparkle), whereas blink translates to 闪闪 (“flickering, sparkling, glittering”) or 闪亮 (“brilliant, shiny, to glisten, to twinkle”). I always dread making up subjective descriptions for test operators in Chinese, which is part of the reason we try to automate as many tests as possible. As one of my Chinese friends once quipped, Mandarin is a wonderful language for poetry and arts, but difficult for precise technical communications.
Above is an example of the effects stickers in action. How does one come up with a bulletproof, cross-cultural explanation of the difference between fading (on the left) and twinkling (on the right), using only simple terms anyone can understand, e.g. avoiding technical terms such as random, frequency, hertz, periodic, etc.
After viewing the video, our factory recommended to use “渐变” (gradual change) for fade and “闪烁” (flickering, twinkling) for twinkle. I’m not yet convinced this is a bulletproof description, but it’s superior to any translation I could come up with.
Funny enough, it was also a challenge for Jie and I to agree upon what a “twinkle” effect should look like. We had several long conversations on the topic, followed up by demo videos to clarify the desired effect. The implementation was basically tweaking code until it “looked about right” — Jie described our first iteration of the effect as “closer to a lightning storm than twinkling”. Given the difficulty we had describing the effect to each other, it’s no surprise I’m running into challenges accurately describing the effect in Chinese.
Eliminate single points of failure. When we built test jigs, we built two copies of each, even though throughput requirements demanded just one. Why? Just in case one failed. And guess what, one of them failed, for reasons as of yet unknown. Thank goodness we built two copies, or I’d be in China right now trying to diagnose why our sole test jig isn’t working.
Sometimes last minute changes are worth it. About six weeks ago, Jie suggested that we should include a stencil with the sensor/microcontroller kits. She reasoned that it can be difficult to lay out the copper tape patterns for complex stickers, such as the microcontroller (featuring seven pads), without a drawing of the contact patterns. I originally resisted the idea — we were just weeks away from finalizing the order, and I didn’t want to delay shipment on account of something we didn’t originally promise. As Jie is discovering, I can be very temperamental, especially when it comes to things that can cause schedule slips (sorry Jie, thanks for bearing with me!). However, her arguments were sound and so I instructed our factory to search for a stencil vendor. Two weeks passed and we couldn’t find anyone willing to take the job, but our factory’s sourcing department wasn’t going to give up so easily. Eventually, they found one vendor who had enough material in stock to tool up a die cutter and turn a couple thousand stencils within two weeks — just barely in time to meet the schedule.

When I got samples of the sensor/micro kit with the stencils, I gave them a whirl, and Jie was absolutely right about the utility of the stencils. The user experience is vastly improved when you have a template to work from, particularly for the microcontroller sticker with seven closely spaced pads. And so, even though it wasn’t promised as part of the original campaign, all backers who ordered the sensor/micro kit are getting a free stencil to help with laying out their designs.
Chinese New Year has a big impact the supply chain. Even though Chinese New Year (CNY) is a 2-week holiday, our initial schedule essentially wrote off the month of February. Reality matched this expectation, but I thought it’d be helpful to share an anecdote on exactly how CNY ended up impacting this project. We had a draft manuscript of our book in January, but I couldn’t get a complete sample until March. It’s not because the printer was off work for a month straight — their holiday, like everyone else’s, was about two weeks long. However, the paper vendor started its holiday about 10 days before the printer, and the binding vendor ended its holiday about 10 days after the printer. So even though each vendor took two weeks off, the net supply chain for printing a custom book was out for holiday for around 24 days — effectively the entire month of February. The staggered observance of CNY is necessary because of the sheer magnitude of human migration that accompanies the holiday.
Shipping is expensive, and difficult. When I ran the initial numbers on shipping, one thing I realized is we weren’t selling circuit stickers — at least by volume and weight, our principle product is printed paper (the book). So, to optimize logistics cost, I was pushing to ship starter kits (which contain a book) and additional stand-alone book orders by ocean, rather than air.
We actually had starter kits and books ready to go almost four weeks ago, but we just couldn’t get a reasonable quotation for the cost of shipping them by ocean. We spent almost three weeks haggling and quoting with ocean freight companies, and in the end, their price was basically the same as going by air, but would take three weeks longer and incurred more risk. It turns out that freight cost is a minor component of going by ocean, and you get killed by a multitude of surcharges, from paying the longshoreman to paying all the intermediate warehouses and brokers that handle your goods at the dock. All these fixed costs add up, such that even though we were shipping over 60 cartons of goods, air shipping was still a cost-effective option. To wit, a Maersk 40′ sea container will fit over 1250 cartons each containing 40 starter kits, so we’re still an order of magnitude away from being able to efficiently utilize ocean freight.
We’re not out of the Woods Yet. However excited I am about this milestone, I have to remind myself not to count my chickens before they hatch. Problems ranging from a routine screw-up by UPS to a tragic aviation accident to a logistics problem at Crowd Supply’s fulfillment depot to a customs problem could stymie an on-time delivery.
But, at the very least, at this point we can say we’ve done everything reasonably within our power to deliver on-time.
We are looking forward to hearing our backer’s feedback on chibitronics. If you are curious and want to join in on the fun, the Crowd Supply site is taking orders, and Jie and I will be at Maker Faire Bay Area 2014, in the Expo hall, teaching free workshops on how to learn and play with circuit stickers. We’re looking forward to meeting you!
April 24, 2014
Name that Ware, April 2014
The Ware for April 2014 is shown below.
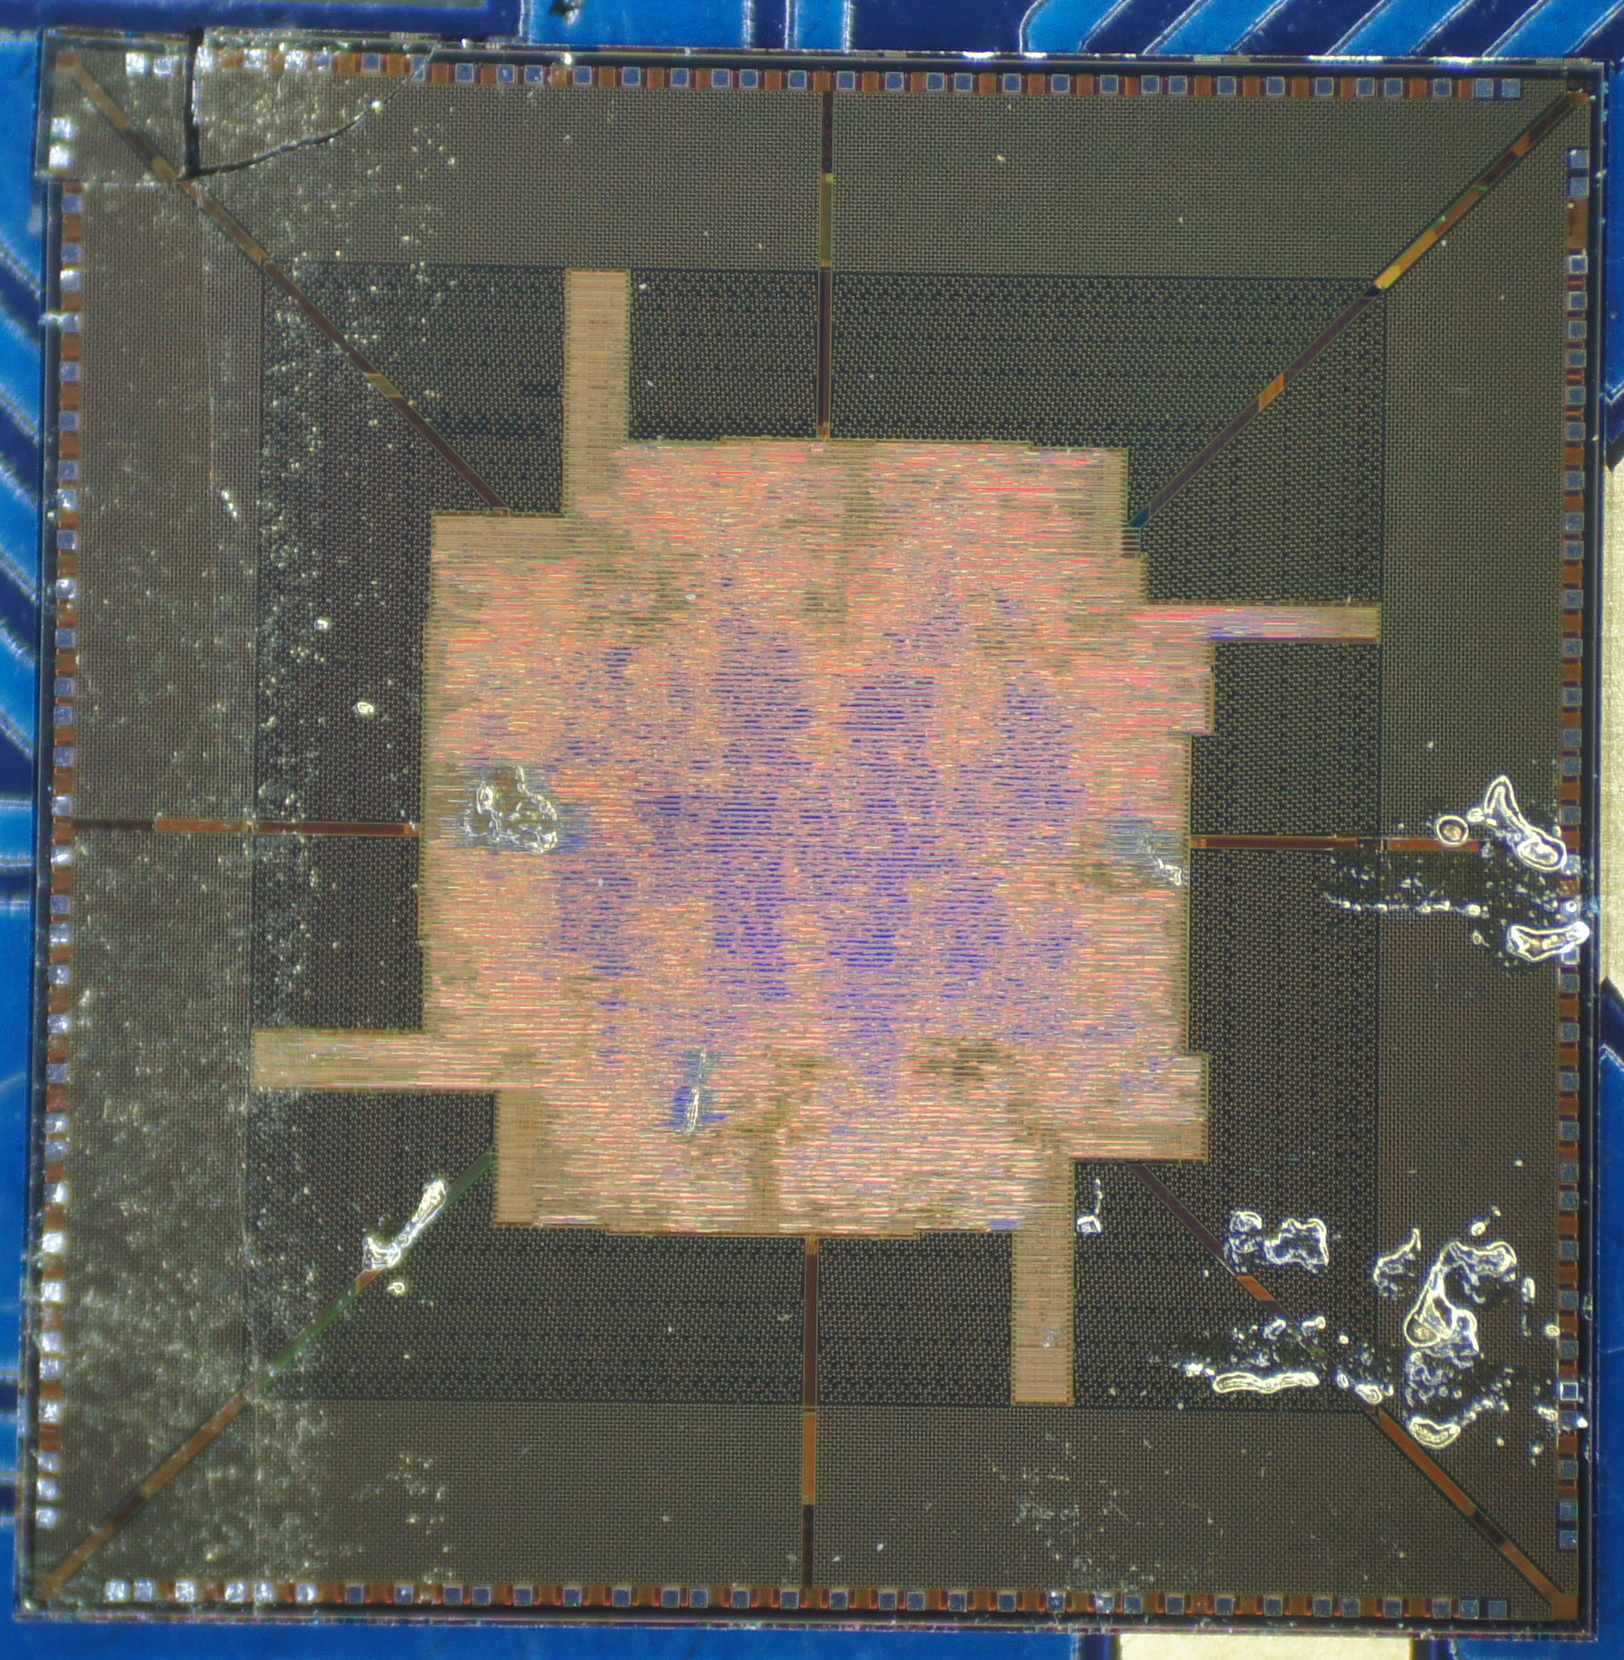
Apologies for the cracked/munged die, that’s how I received it. The die shot isn’t too high resolution, but I have a feeling its gross features are distinct enough that this ware will be guessed quickly.
Winner, Name that Ware March 2014
While there is no solid consensus on the precise function of this ware, there is a very solid body of evidence that March’s ware is part of a missile guidance system, likely from the AIM series of missiles made by Raytheon Missile Systems. Presumably Raytheon re-uses their missile avionics chassis across multiple product lines, hence it’s difficult to say exactly which design it’s from. The US has exported AIM-9 missiles to…a lot of places, including for example, Iraq, Iran, Pakistan, and nearby Asian countries including Singapore, Taiwan, Japan, Malaysia, and Thailand. So these scrap parts could have come from anywhere, not necessarily the US military. Next time I see one of these on the market, though, I think I will pick it up; it’ll make a great conversation piece for the coffee table.
As for a winner, I think I’ll go with Chip; congrats, email me for your prize. I found the insight into the CAGE code to be a nice tip, I’ll have to use that in the future. I actually come across military-looking hardware surprisingly regularly in the scrap markets, and they do make for a lively name that ware.
April 23, 2014
Design Novena’s Logo and Win a Desktop!
Novena needs a logo. And we need you to help! Today we’re announcing a competition to design a logo for Novena, and the winner will get a desktop version of Novena and a T-shirt emblazoned with their logo.
The competition starts today. Submissions should be sent to novena@crowdsupply.com by the end of May 11th. On May 12th, all submissions will be posted in an update, and on May 15th we’ll pick a winner.
We’re also adding a $25 tier for backers who would like to receive a T-shirt with our new logo on it. The base color of the T-shirt will be royal blue, like the blue anodization of Novena’s bezel, and the base fit will be the American Apparel Jersey T-shirt (S,M,L,XL,2XL,3XL) or the Bella Girly Jersey V-Neck T-shirt (S,M,L,XL,2XL — ladies, Bella sizes run small, so round up for a comfortable fit). We aim to ship the T-shirts within 2 months of campaign conclusion.
For the logo, here are the guidelines for design:
Single-color design strongly preferred. However, a multi-color master design can work if a single-color variant also looks good.
No halftones or grayscale: logo must be screen printable, laser etchable, and chemically etchable.
Only submissions in vector format will be considered, but do include a PNG preview.
Target size is approximately 30mm-50mm x 10-15mm tall (printable on the lower left bezel or as an etched metal plaque screwed in place).
Target color is Pantone 420U (gray), but other color suggestions and schemes are welcome.
Ideally looks good backlit, so we can also make stickers that go on the exposed LCD backlight for a nice effect.
The design could say “Novena” or “novena”, but we’re open minded to other names or an icon with no text. Novena was an arbitrary code name we picked based on our naming scheme of Singapore MRT stations.
Design should not infringe on any other trademarks.
By submitting an entry, the submitter agrees to having their submission publicly posted for review and, if the submitter’s entry is selected as the winner, to automatically give Kosagi globally unlimited, royalty-free and exclusive use of the logo design, with a dekstop version of Novena as the sole compensation for the single winning submission. Submitters retain the rights to non-winning submissions.
If you’ve already backed Novena at the desktop tier or above and you are the chosen winner, we will refund you the campaign value ($1,195) of the desktop pledge level.
Thanks in advance to everyone who will participate in the Novena logo design competition!
April 22, 2014
Stretch Goals for Novena Campaign
First, a heartfelt “thank you” to all those who have backed our crowdfunding campaign to bring Novena-powered open computing devices to the world. xobs and I are very flattered to have reached almost 70% of our goal already.
One excellent outcome of the campaign is a lot of people have reached out to us to extend the Novena platform and make it even better, and so we’re offering a diverse range of stretch goals to provide an even better open laptop for all walks of users.
Stretch #1: Partnering with Jon Nettleton for Open 2D/3D Graphics Drivers on Novena: +$50k ($300k total)
We designed Novena to be the most open platform we could practically build. The hardware blueprints and software source code are available for download. The entire OS is buildable from human-readable source, and requires no binary blobs to boot and run well.
However, there are elements of the i.MX6 SoC that lie dormant, due to a lack of open source drivers. In particular, the 2D/3D graphics accelerator in the i.MX6 has closed-source drivers. While we don’t force you to use these closed-source drivers, a major impediment to us being “libre” is the lack of open source drivers for these components.
We’re excited to announce a partnership with Jon Nettleton, an expert on Linux graphics drivers, to enable this crucial piece of the libre puzzle. Here is a short statement from Jon Nettleton himself on the prospect:
Novena Backers and OSS enthusiasts,
I am very pleased to announce myself, Jon Nettleton (a.k.a. jnettlet, linux4kix), as a stretch-goal partner for the Novena Project. I will be taking on the task of assuring that the shipping Novena platforms will not require a binary userspace driver for 2D/3D graphics acceleration. Utilizing my experience working on Linux graphics drivers along with my strong community involvement, I will be making sure that contributing developers have everything they need to keep the Etnaviv driver project moving forward.
To accomplish this we are requesting an additional $10,000 of funding. This additional capital will be used to not just fund my development effort, but to also provide incentives for other contributing developers. It will also benefit me the time to coordinate with other hardware vendors interested in supporting an open source graphics driver implementation for the Vivante chipset, and getting them involved. There is no “US“ and “THEM” in this effort. “WE” will bring to fruition a modern graphics accelerated desktop platform for the Novena Project.
Therefore, if we can raise $50k over our original target of $250k, we will donate the $10k that Jon needs for the effort for providing open 2D/3D graphics drivers for the Novena platform. The remainder of that raised will be used to help cover the costs of building the hardware you ordered.
Significantly, since this is an open source effort, everyone in the i.MX6 community can benefit from the outcome of this funding. Because of this, we’ve added a “Buy Jon a Six Pack ($30)” pledge tier (capped at 417 pledges) so that existing i.MX6 users who want to contribute toward this goal without buying our hardware can participate. For every dollar contributed to this pledge tier, we will give Jon Nettleton at least 80 cents, regardless of our ability to reach the first stretch goal. The other ~20 cents go toward compulsory campaign operation costs and financial operator transaction fees.
Stretch #2: General-Purpose Breakout Board: +$100k ($350k total)
We include a FPGA and a nice high-speed connector, but many users just want to toggle a GPIO or take a simple analog reading without having to design and build a PCBA from scratch. If we can raise an additional $50k over the previous stretch goal, we will include a General Purpose Breakout Board (GPBB) with every piece of hardware we ship.
The GPBB buffers 16 FPGA outputs and 8 FPGA inputs to be compatible with either 3.3V or 5V, gang-selectable via software. It also provides six 10-bit analog inputs (up to 200ksps sample rate) and two 10bit analog outputs (~100ksps max rate), all broken out to an easy-to-use 40-pin male 0.1″ dual-row header.
The GPBB is handy for all kinds of control and sensing situations. Because the GPBB is backed by a powerful FPGA, each of the buffered FPGA output lines can be programmed for a wide range of applications. For example, an FPGA output could be configured as a precision PWM channel with hard-real time feedback control for demanding robotics motor driver applications. Or it can be used to interface with bespoke serial protocols, such as those found in modern LED strip lighting.
For user who don’t want to muck with FPGA code and prefer to grapple a GPIO from the command line, we have user-space drivers for the board prepared in Linux, through a combination of the Linux GPIO API, and the Linux I2C API. As a result it’s a snap to script up simple applications using your favorite high level language.
Significantly, the GPBB isn’t vaporware — we developed this board originally for use as a breakout for production testing circuit stickers from our Chibitronics product line. At this very moment, the GPBB design is being used to drive mass production of circuit stickers.
But don’t just take it from me — Xzibit can say it much more eloquently:
Stretch #3: ROMulator Breakout Board: +$150k ($400k total)
We designed Novena to be a versatile hacking tool. Case in point, last December we reported results at 30C3 revealing a secret knock that can allow arbitrary code execution on select SD card controllers. We discovered this in part with the assistance of Novena.
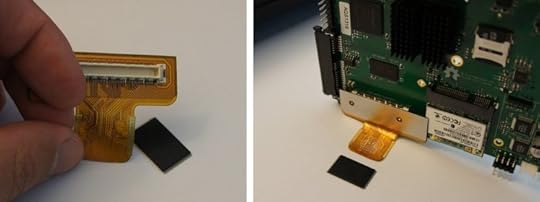
We used Novena as a ROMulator — a FLASH ROM emulator. For this application, we developed a flexible PCB that’s so thin, it can be soldered in between a TSOP FLASH ROM and the underlying PCB. In this mode, we can use the FPGA built into Novena to snoop the traffic going to and from the FLASH ROM.
Alternately, the FPGA can be used to emulate a ROM device using its local 256 MiB of DDR3 memory. Since the DDR3 controller implementation is multi-ported, during ROM emulation one can inspect and modify the ROM contents on the fly without disrupting target operation. This has a number of powerful applications, from ToC/ToU attacks to speeding up firmware development on devices that load from NAND.
If we can raise an additional $50k over the previous tier, we’ll include a ROMulator Breakout Board (in addition to the General Purpose Breakout Board) with every piece of hardware shipped.
Stretch #4: MyriadRF Software Defined Radio: +$250k ($500k total) or >200 backers for the desktop/laptop/heirloom version

Software! Defined! Radio! We’re very excited to offer the possibility of teaming up with MyriadRF, to provide a custom-made SDR solution for Novena. Their open hardware SDR solution operates in all the major radio bands, including LTE, CDMA, TD-CDMA, W-CDMA, WiMAX, 2G and many more.
The retail price of the MyriadRF is $299, and MyriadRF has graciously pulled strings with their fabrication partner and enabled a low minimum order quantity of 200 units to build this custom version for Novena. If we can clear a total raise of $500k or at least 200 total backers for the desktop/laptop/heirloom version, we’ll include with every desktop/laptop/heirloom version a MyriadRF SDR board. Since the MyriadRF is such a high ticket-item, only desktop and higher tiers are eligible to receive this reward.
Significantly, the MyriadRF extends beyond the front of the Novena case, so part of the money from this tier is going toward buying the extra tooling to provision a removable panel on the front edge of the case, so that when the SDR module is installed it can comfortably hang out of the case, giving easy access to the U.FL RF connectors.
If you find these stretch goals exciting and/or useful, please visit our campaign page and join the community helping to bring open hardware to the world, and please help us spread the word!
April 15, 2014
Myriad RF for Novena
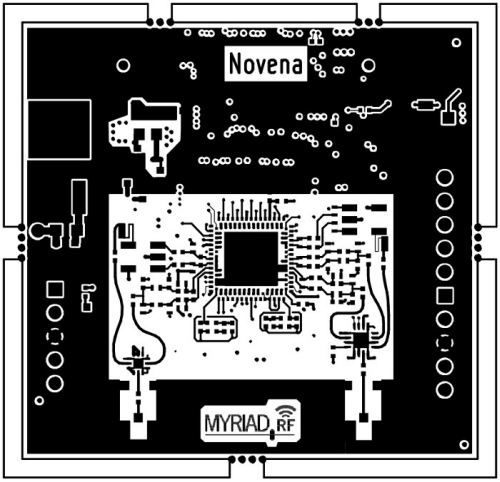
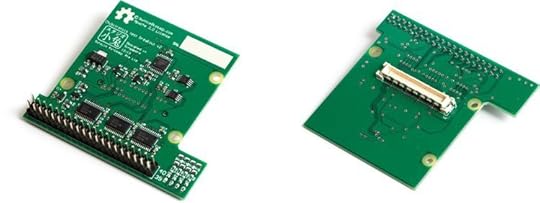
This is so cool. Myriad-RF has created a port of their wideband software defined radio to Novena (read more at their blog). Currently, it’s just CAD files, but if there’s enough interest in SDR on Novena, they may do a production run.
The board above is based on the Myriad-RF 1. It is a fully configurable RF board that covers all commonly used communication frequencies, including LTE, CDMA, TD-CDMA, W-CDMA, WiMAX, 2G and many more. Their Novena variant plugs right into our existing high speed expansion slot — through pure coincidence both projects chose the same physical connector format, so they had to move a few traces and add a few components to make their reference design fully inter-operable with our Novena design. Their design (and the docs for the transceiver IC) is also fully open source, and in fact they’ve one-upped us because they use an open tool (KiCad) to design their boards.
I can’t tell you how excited I am to see this. One of our major goals in doing a crowdfunding campaign around Novena is to raise community awareness of the platform and to grow the i.MX6 ecosystem. We can’t do everything we want to do with the platform by ourselves, and we need the help of other talented developers, like those at Myriad-RF, to unlock the full potential of Novena.
April 2, 2014
Crowdfunding the Novena Open Laptop
We’re launching a crowdfunding campaign around our Novena open hardware computing platform. Originally, this started as a hobby project to build a computer just for me and xobs – something that we would use every day, easy to extend and to mod, our very own Swiss Army knife. I’ve posted here a couple of times about our experience building it, and it got a lot of interest. So by popular demand, we’ve prepared a crowdfunding offering and you can finally be a backer.
Background
Novena is a 1.2GHz, Freescale quad-core ARM architecture computer closely coupled with a Xilinx FPGA. It’s designed for users who want to modify and extend their hardware: all the documentation for the PCBs are open and free to download, and it comes with a variety of features that facilitate rapid prototyping.
We are offering four variations, and at the conclusion of the Crowd Supply campaign on May 18, all the prices listed below will go up by 10%:
“Just the board” ($500): For crafty people who want to build their case and define their own style, we’ll deliver to you the main PCBA, stuffed with 4GiB of RAM, 4GiB microSD card, and an Ath9k-based PCIe wifi card. Boots to a Debian desktop over HDMI.
“All-in-One Desktop” ($1195): Plug in your favorite keyboard and mouse, and you’re ready to go; perfect for labs and workbenches. You get the circuit board above, inside a hacker-friendly case with a Full HD (1920×1080) IPS LCD.
“Laptop” ($1995): For hackers on the go, we’ll send you the same case and board as above, but with battery controller board, 240 GiB SSD, and a user-installed battery. As everyone has their own keyboard preference, no keyboard is included.
“Heirloom Laptop” ($5000): A show stopper of beauty; a sure conversation piece. This will be the same board, battery, and SSD as above, but in a gorgeous, hand-crafted wood and aluminum case made by Kurt Mottweiler in Portland, Oregon. As it’s a clamshell design, it’s also the only offering that comes with a predetermined keyboard.
All configurations will come with Debian (GNU/Linux) pre-installed, but of course you can build and install whatever distro you prefer!
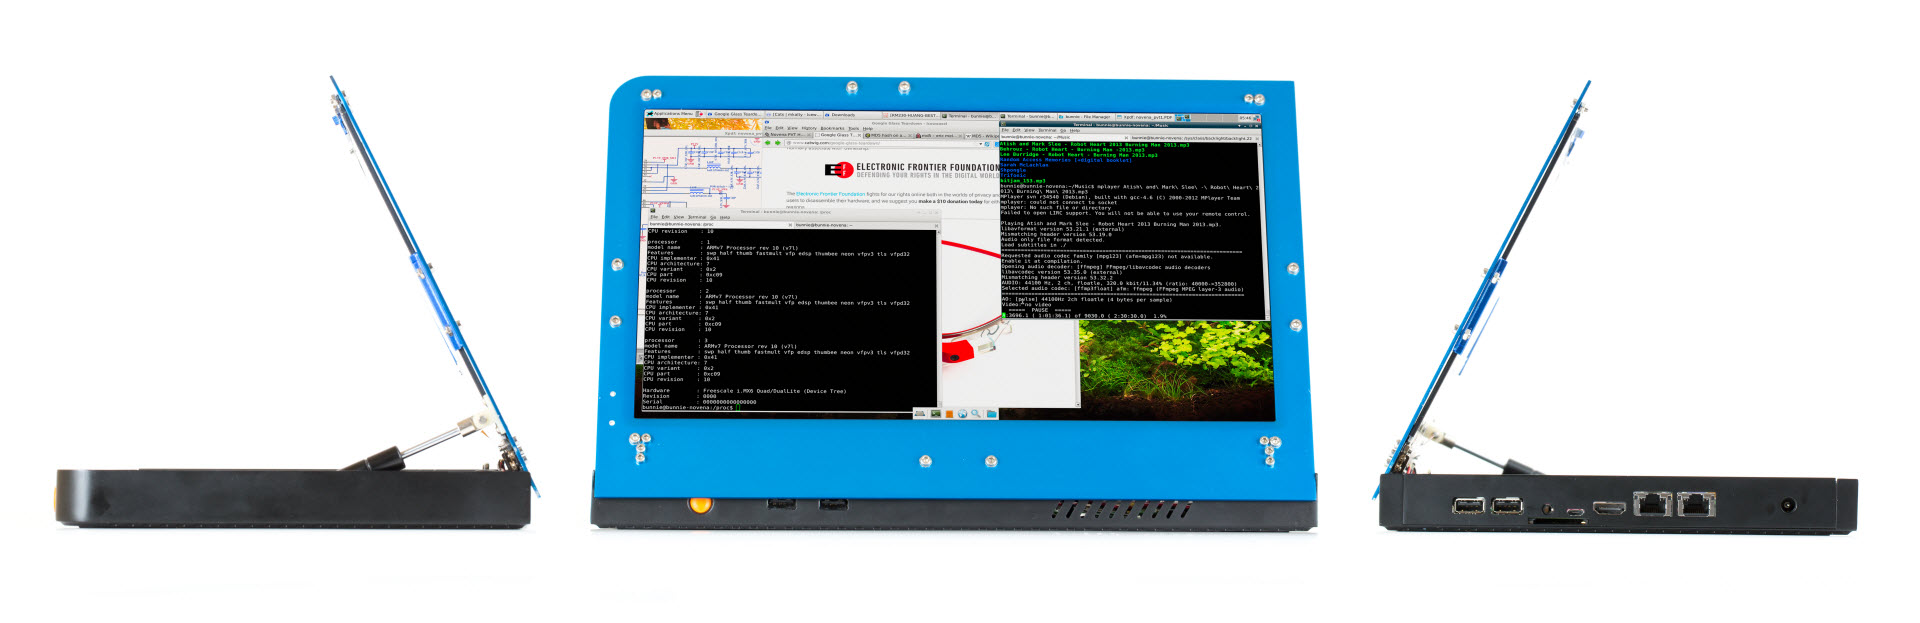
Novena Gen-2 Case Design
Followers of this blog may have seen a post featuring a prototype case design we put together last December. These were hand-built cases made from aluminum and leather and meant to validate the laptop use case. The design was rough and crafted by my clumsy hands – dubbed “gloriously fuggly [sic]” – yet the public response was overwhelmingly positive. It gave us confidence to proceed with a 2nd generation case design that we are now unveiling today.

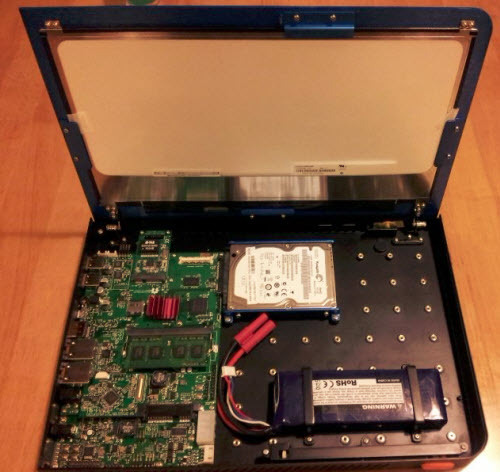
The first thing you’ll notice about the design is that the screen opens “the wrong way”. This feature allows the computer to be usable as a wall-hanging unit when the screen is closed. It also solves a major problem I had with the original clamshell prototype – it was a real pain to access the hardware for hacking, as it’s blocked by the keyboard mounting plate.
Now, with the slide of a latch, the screen automatically pops open thanks to an internal gas spring. This isn’t just an open laptop — it’s a self-opening laptop! The internals are intentionally naked in this mode for easy access; it also makes it clear that this is not a computer for casual home use. Another side benefit of this design is there’s no fan noise – when the screen is up, the motherboard is exposed to open air and a passive heatsink is all you need to keep the CPU cool.
Another feature of this design is the LCD bezel is made out of a single, simple aluminum sheet. This allows users with access to a minimal machine shop to modify or craft their own bezels – no custom tooling required. Hopefully this makes adding knobs and connectors, or changing the LCD relatively easy. In order to encourage people to experiment, we will ship desktop and laptop devices with not one, but two LCD bezels, so you don’t have to worry about having an unusable machine if you mess up one of the bezels!
The panel covering the “port farm” on the right hand side of the case is designed to be replaceable. A single screw holds it in place, so if you design your own motherboard or if you want to upgrade in the future, you’re not locked into today’s port layout. We take advantage of this feature between the desktop and the laptop versions, as the DC power jack is in a different location for the two configurations.
Finally, the inside of the case features a “Peek Array”. It’s an array of M2.5 mounting holes (yes, they are metric) populating the extra unused space inside the case, on the right hand side in the photo above. It’s named after Nadya Peek, a graduate student at MIT’s Center for Bits and Atoms. Nadya is a consummate maker, and is a driving force behind the CBA’s Fab Lab initiative. When I designed this array of mounting bosses, I imagined someone like Nadya making their own circuit boards or whatever they want, and mounting it inside the case using the Peek Array.
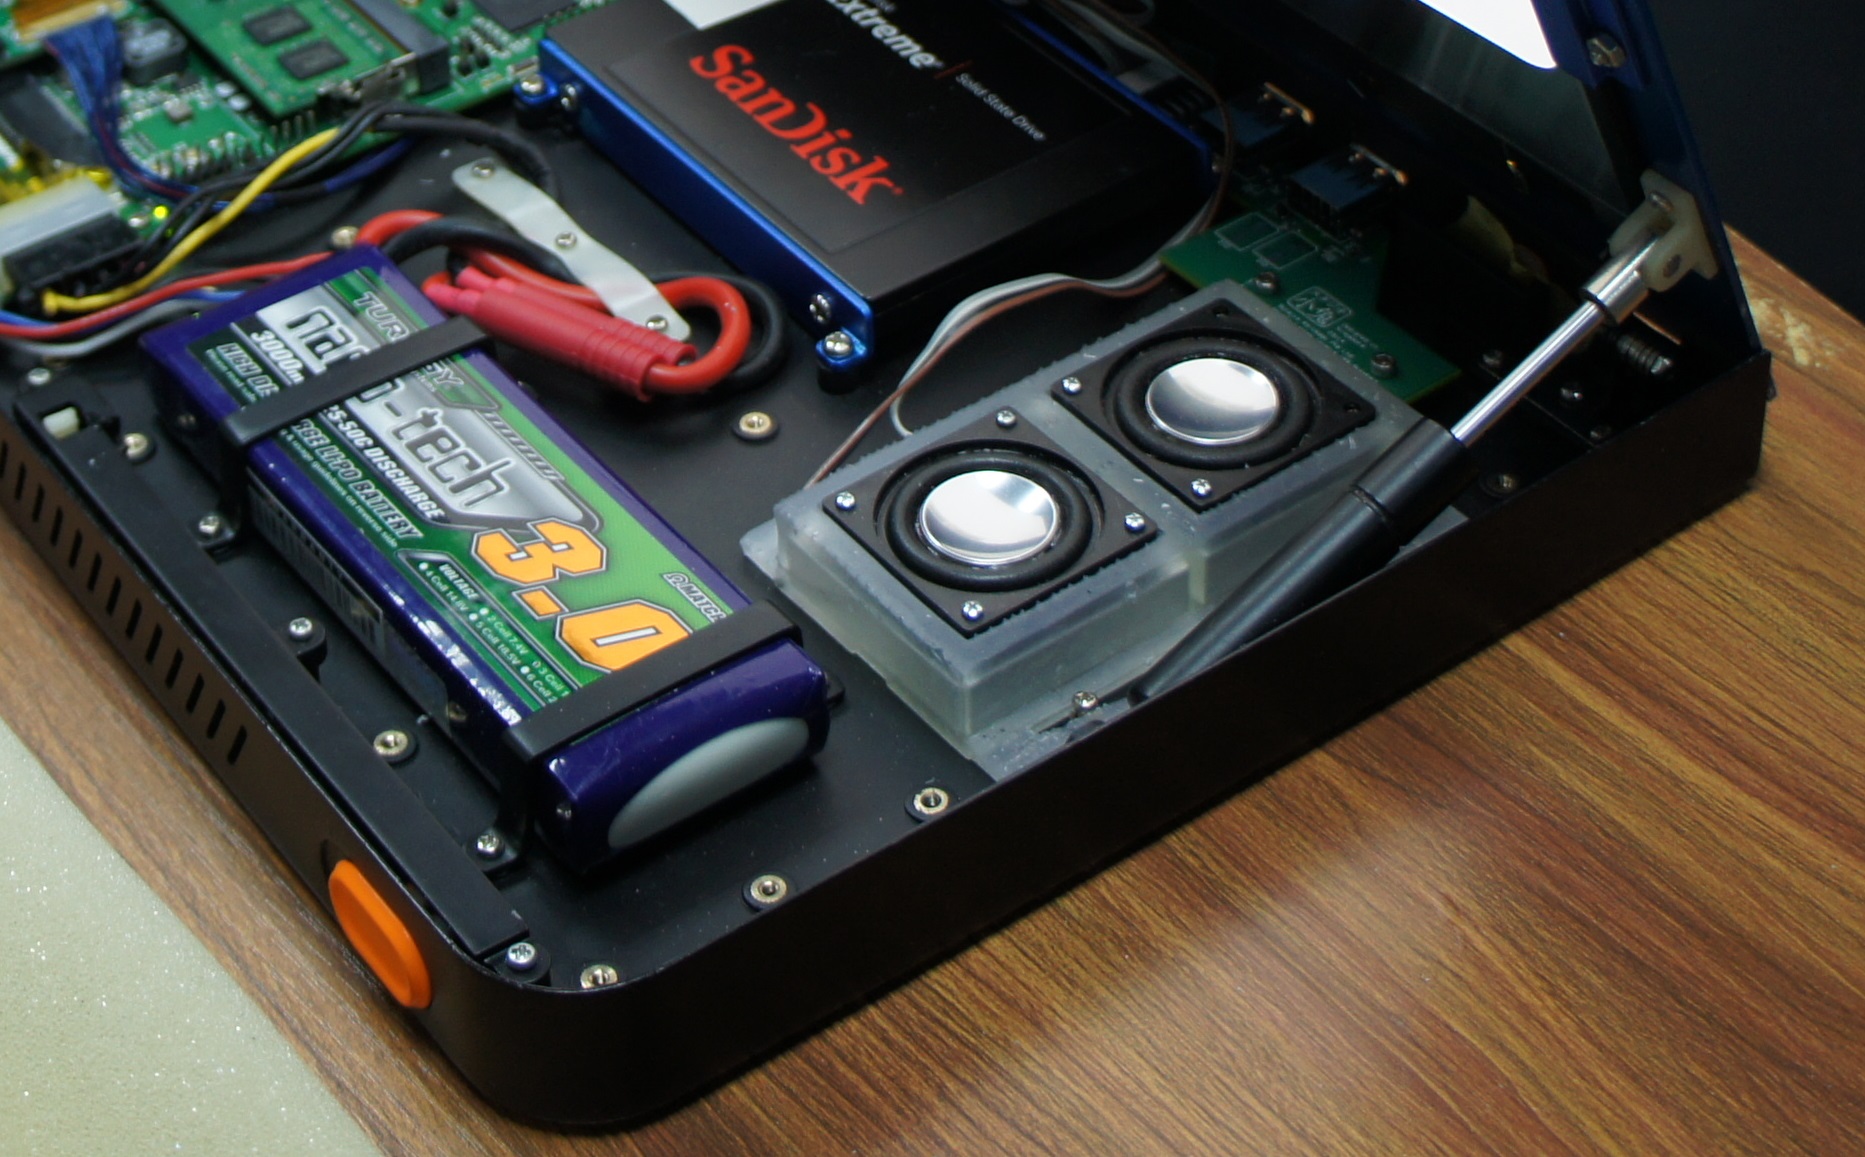
The first thing I used the Peek Array for is the speaker box. I desire loud but good quality sound out of my laptop, so I 3D printed a speakerbox that uses 36mm mini-monitor drivers, and mounted it inside using the Peek Array. I would be totally stoked if a user with real audio design experience was to come up with and share a proper tuned-port design that I could install in my laptop. However, other users with weight, space or power concerns can just as easily design and install a more modest speaker.
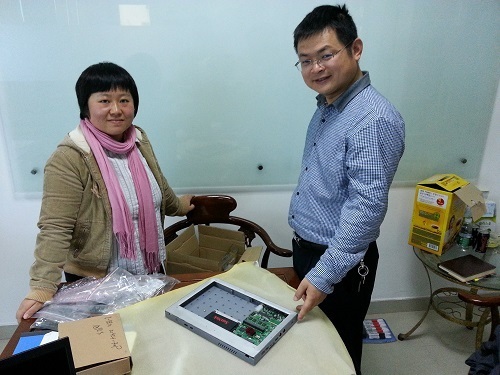
I started the Gen-2 case design in early February, after xobs and I finally decided it was time to launch a crowdfunding campaign. With a bit of elbow grease and the help of a hard working team of engineers and project managers at my contract manufacturing partner, AQS (that’s Celia and Chemmy pictured above, doing an initial PCBA fitting two weeks ago), I was able to bring a working prototype to San Jose and use it to give my keynote at EELive today.
The Heirloom Design (Limited Quantities)
One of the great things about open hardware is it’s easier to set up design collaborations – you can sling designs and prototypes around without need for NDAs or cumbersome legal agreements. As part of this crowdfunding campaign, I wanted to offer a really outstanding, no-holds barred laptop case – something you would be proud to have for years, and perhaps even pass on to your children as an heirloom. So, we enlisted the help of Kurt Mottweiler to build an “heirloom laptop”. Kurt is a designer-craftsman situated in Portland, Oregon and drawing on his background in luthiery, builds bespoke cameras of outstanding quality from materials such as wood and aluminum. We’re proud to have this offering as part of our campaign.
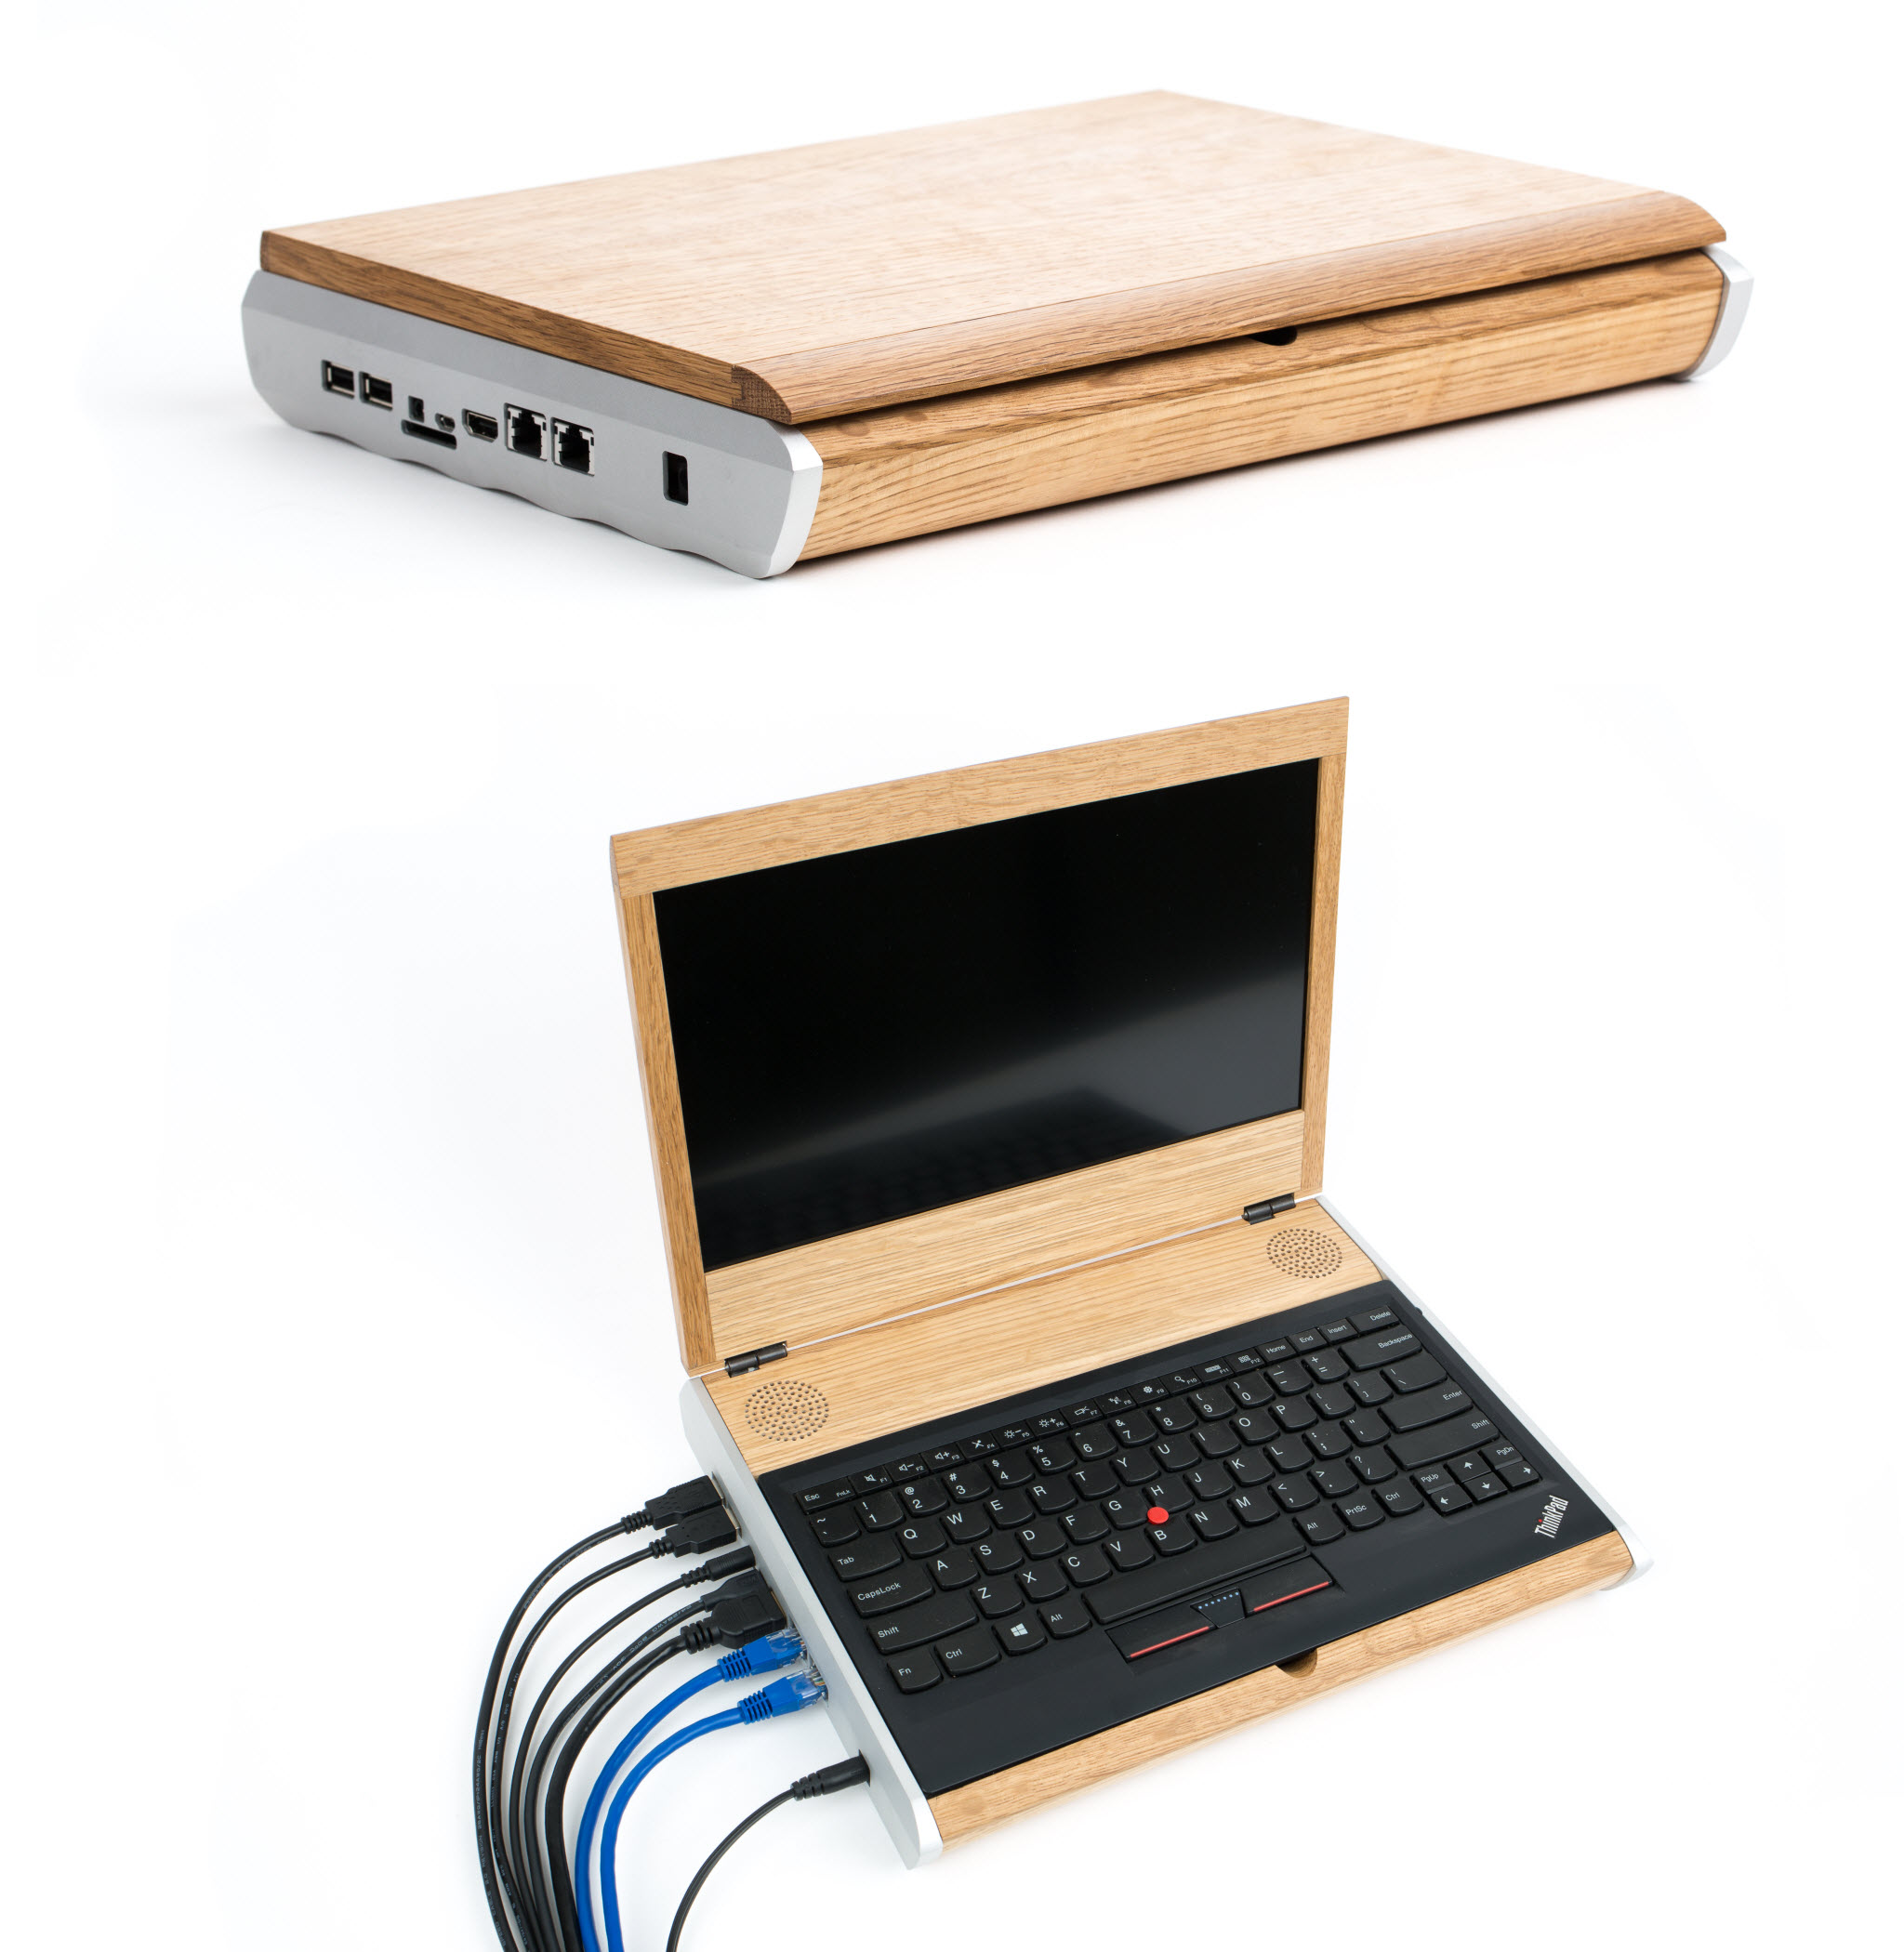
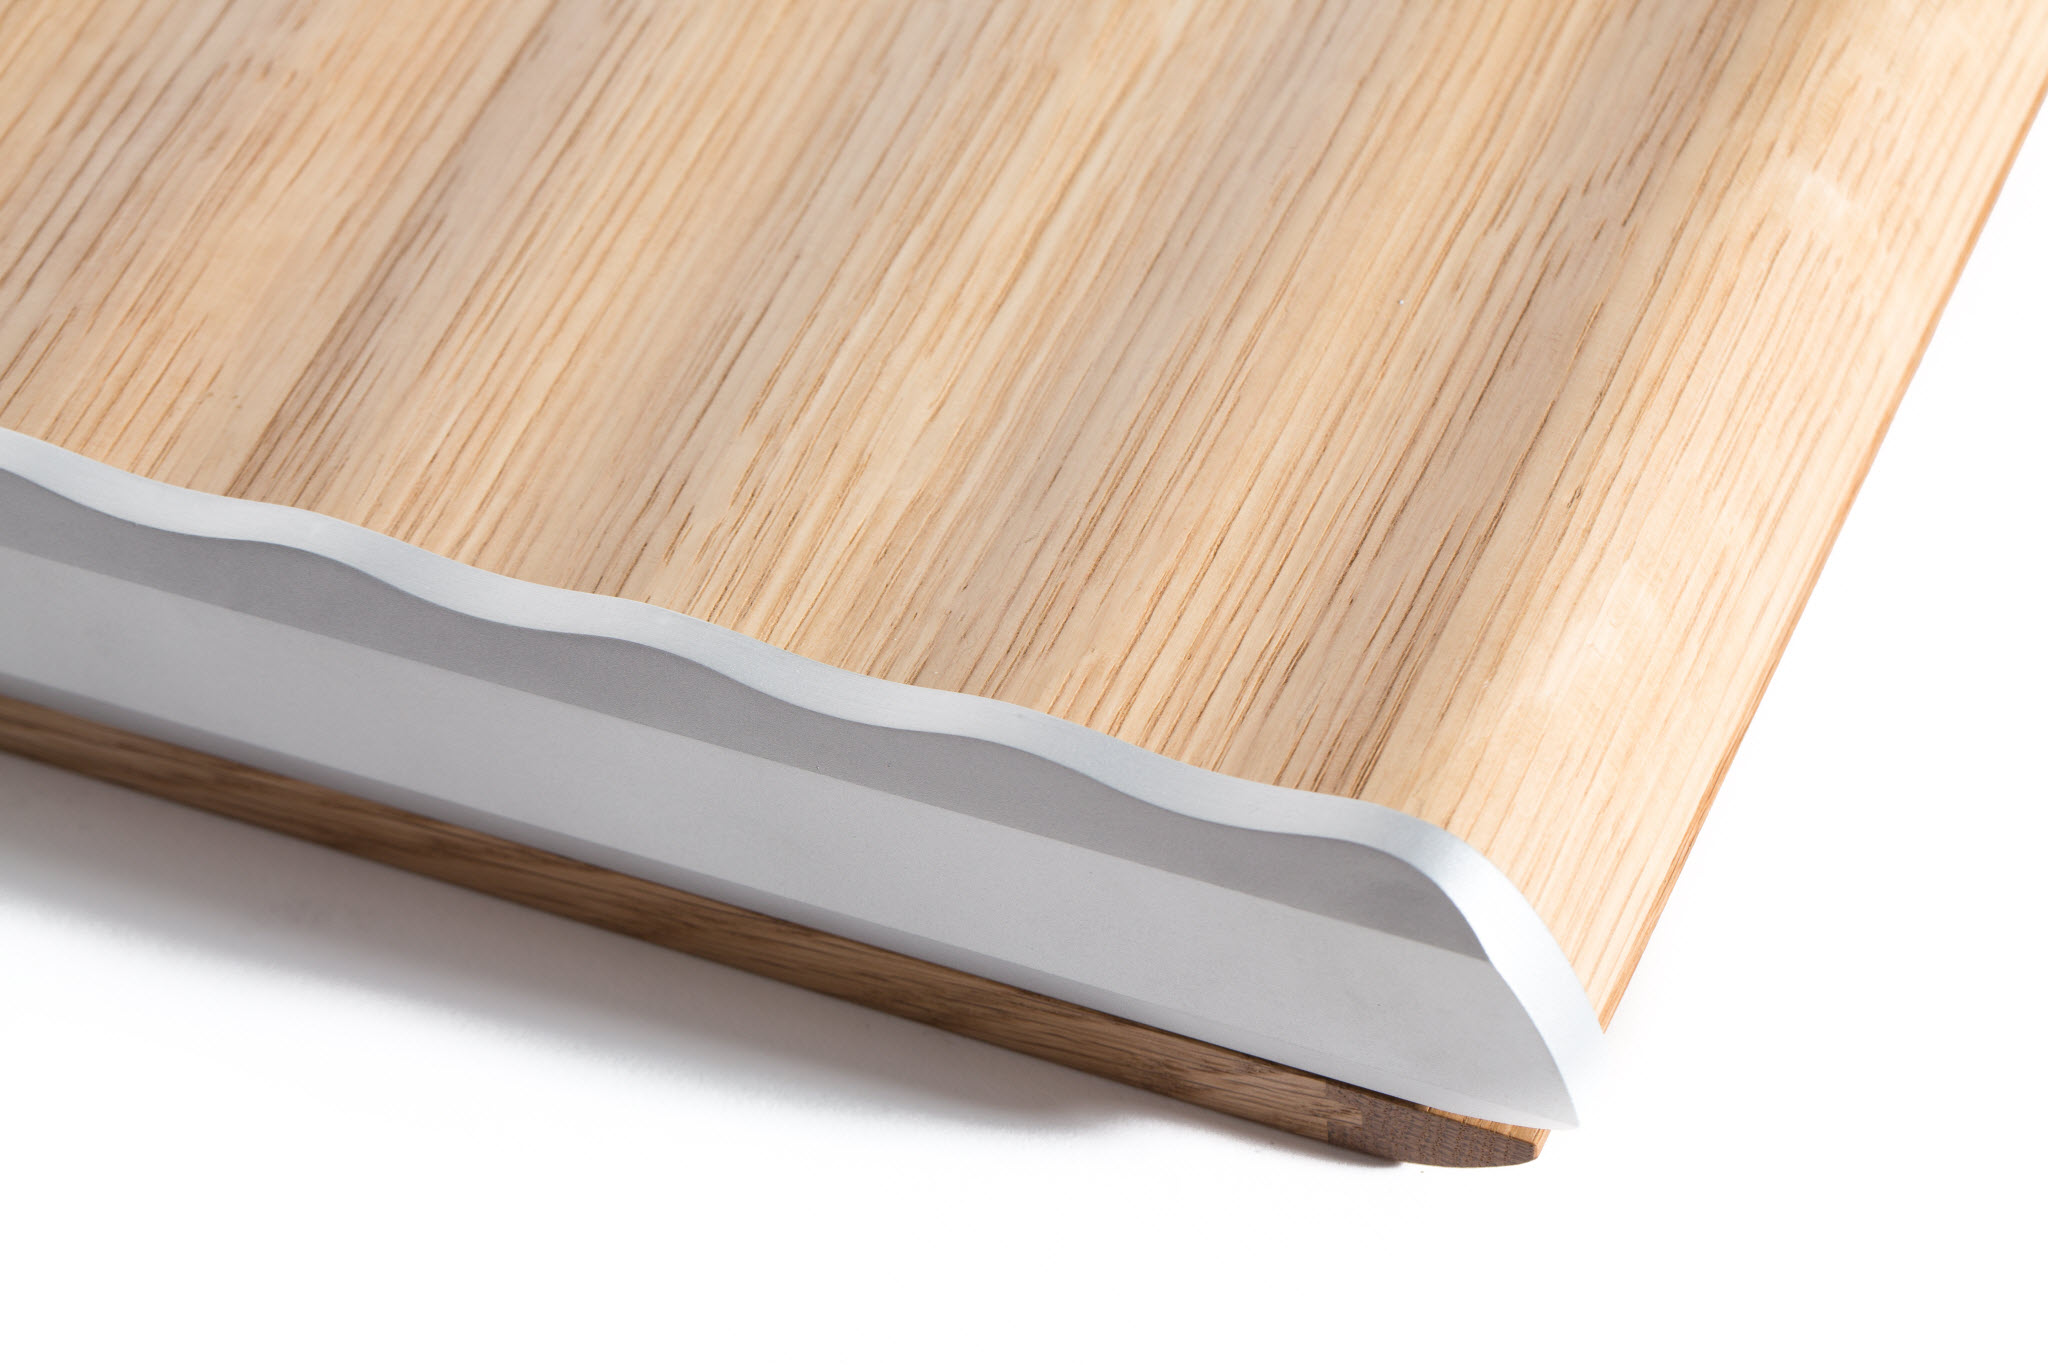
For the prototype case, Kurt is featuring rift-sawn white oak and bead-blasted-and-anodized 6061 aluminum. He developed a composite consisting of outer layers of paper backed wood veneer over a high-density cork core with intervening layers of 5.5 ounce fiberglass cloth, all bonded with a high modulus epoxy resin. This composite is then gracefully formed into semi-monocoque curves, giving a final wavy shape that is both light, stiff, and considers the need for air cooling.
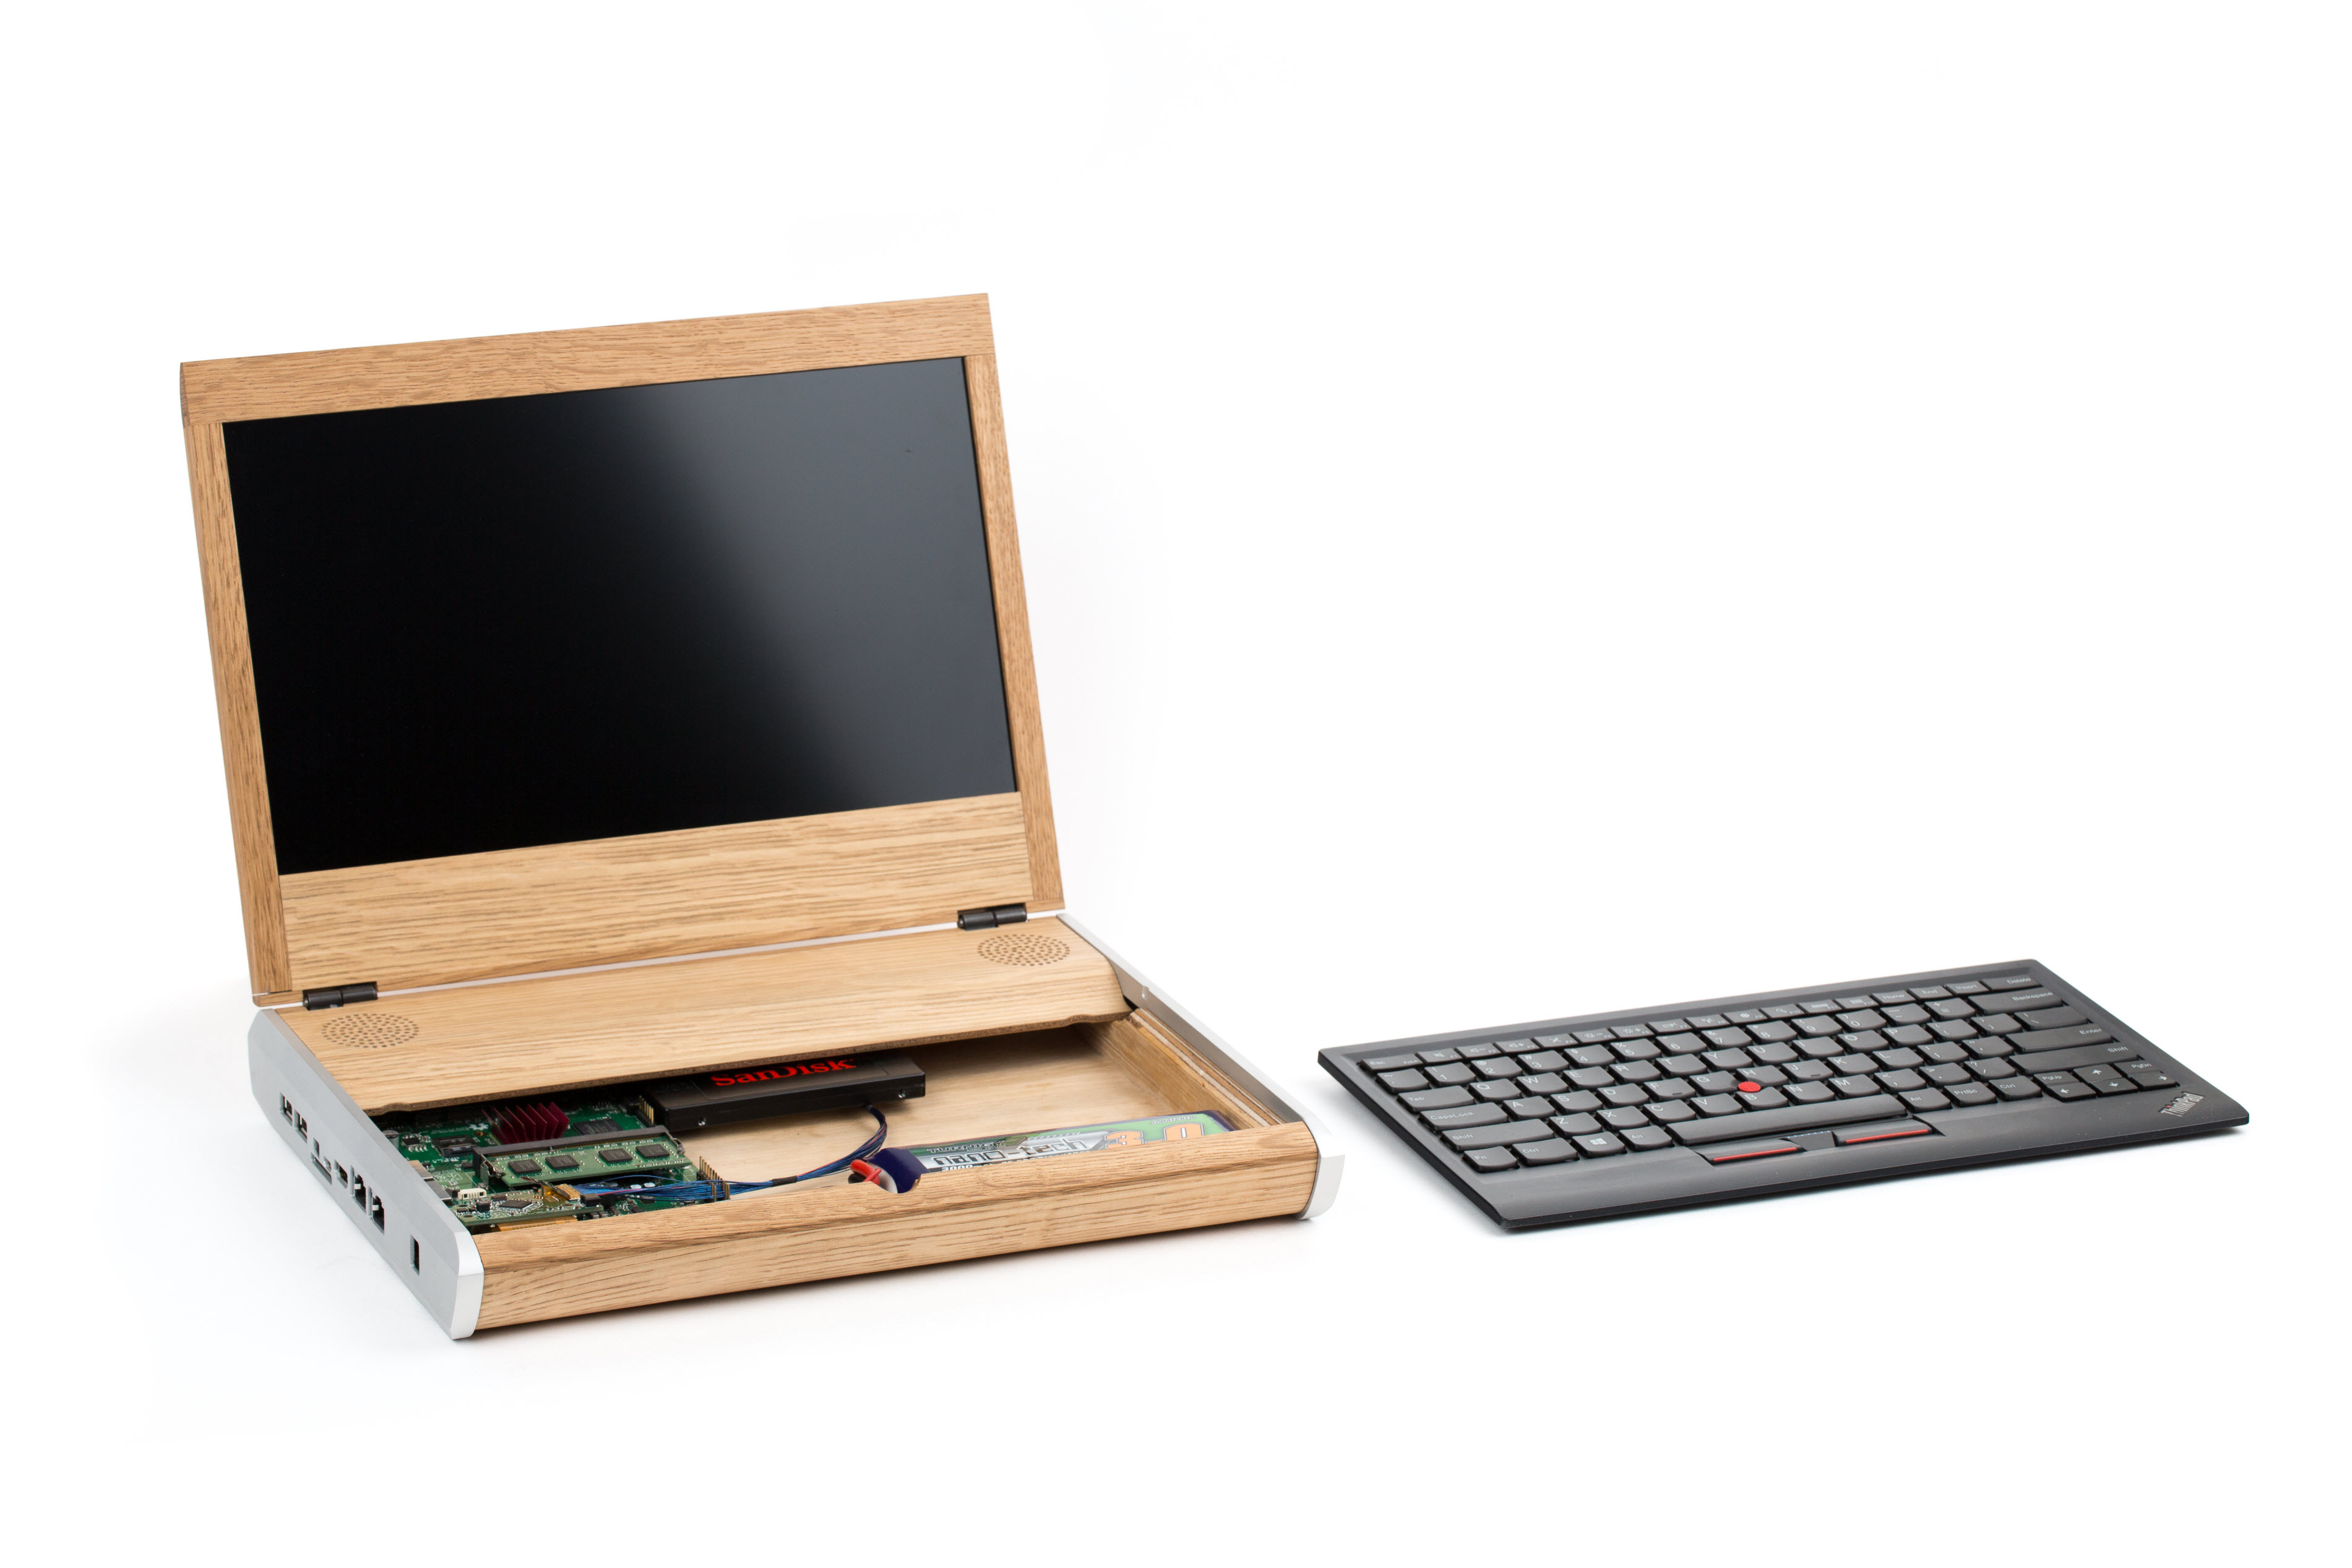
The overall architecture of Kurt’s case mimics the industry-standard clamshell notebook design, but with a twist. The keyboard used within the case is wireless, and can be easily removed to reveal the hardware within. This laptop is an outstanding blend of tasteful design, craftsmanship, and open hardware. And, to wit, since these are truly hand-crafted units, no two units will be exactly alike – each unit will have its own grain and a character that reflects Kurt’s judgment for that particular piece of wood.
How You can Help
For the crowdfunding campaign to succeed, xobs and I need a couple hundred open source enthusiasts to back the desktop or standard laptop offering.
And that underlies the biggest challenge for this campaign – how do we offer something so custom and so complex at a price that is comparable to a consumer version, in low volumes? Our minimum funding goal of $250,000 is a tiny fraction of what’s typically required to recover the million-plus dollar investment behind the development and manufacture of a conventional laptop.
We meet this challenge with a combination of unique design, know-how, and strong relationships with our supply chain. The design is optimized to reduce the amount of expensive tooling required, while still preserving our primary goal of being easy to hack and modify. We’ve spent the last year and a half poring over three revisions of the PCBA, so we have high confidence that this complex design will be functional and producible. We’re not looking to recover that R&D cost in the campaign – that’s a sunk cost, as anyone is free to download the source and benefit from our thoroughly vetted design today. We also optimized certain tricky components, such as the LCD and the internal display port adapter, for reliable sourcing at low volumes. Finally, I spent the last couple of months traveling the world, lining up a supply chain that we feel confident can deliver this design, even in low volume, at a price comparable to other premium laptop products.
To be clear, this is not a machine for the faint of heart. It’s an open source project, which means part of the joy – and frustration – of the device is that it is continuously improving. This will be perhaps the only laptop that ships with a screwdriver; you’ll be required to install the battery yourself, screw on the LCD bezel of your choice, and you’ll get the speakers as a kit, so you don’t have to use our speaker box design – if you have access to a 3D printer, you can make and fine tune your own speaker box.
If you’re as excited about having a hackable, open laptop as we are, please back our crowdfunding campaign at Crowd Supply, and follow for real-time updates.
March 26, 2014
Name that Ware, March 2014
The Ware for March 2014 is shown below.
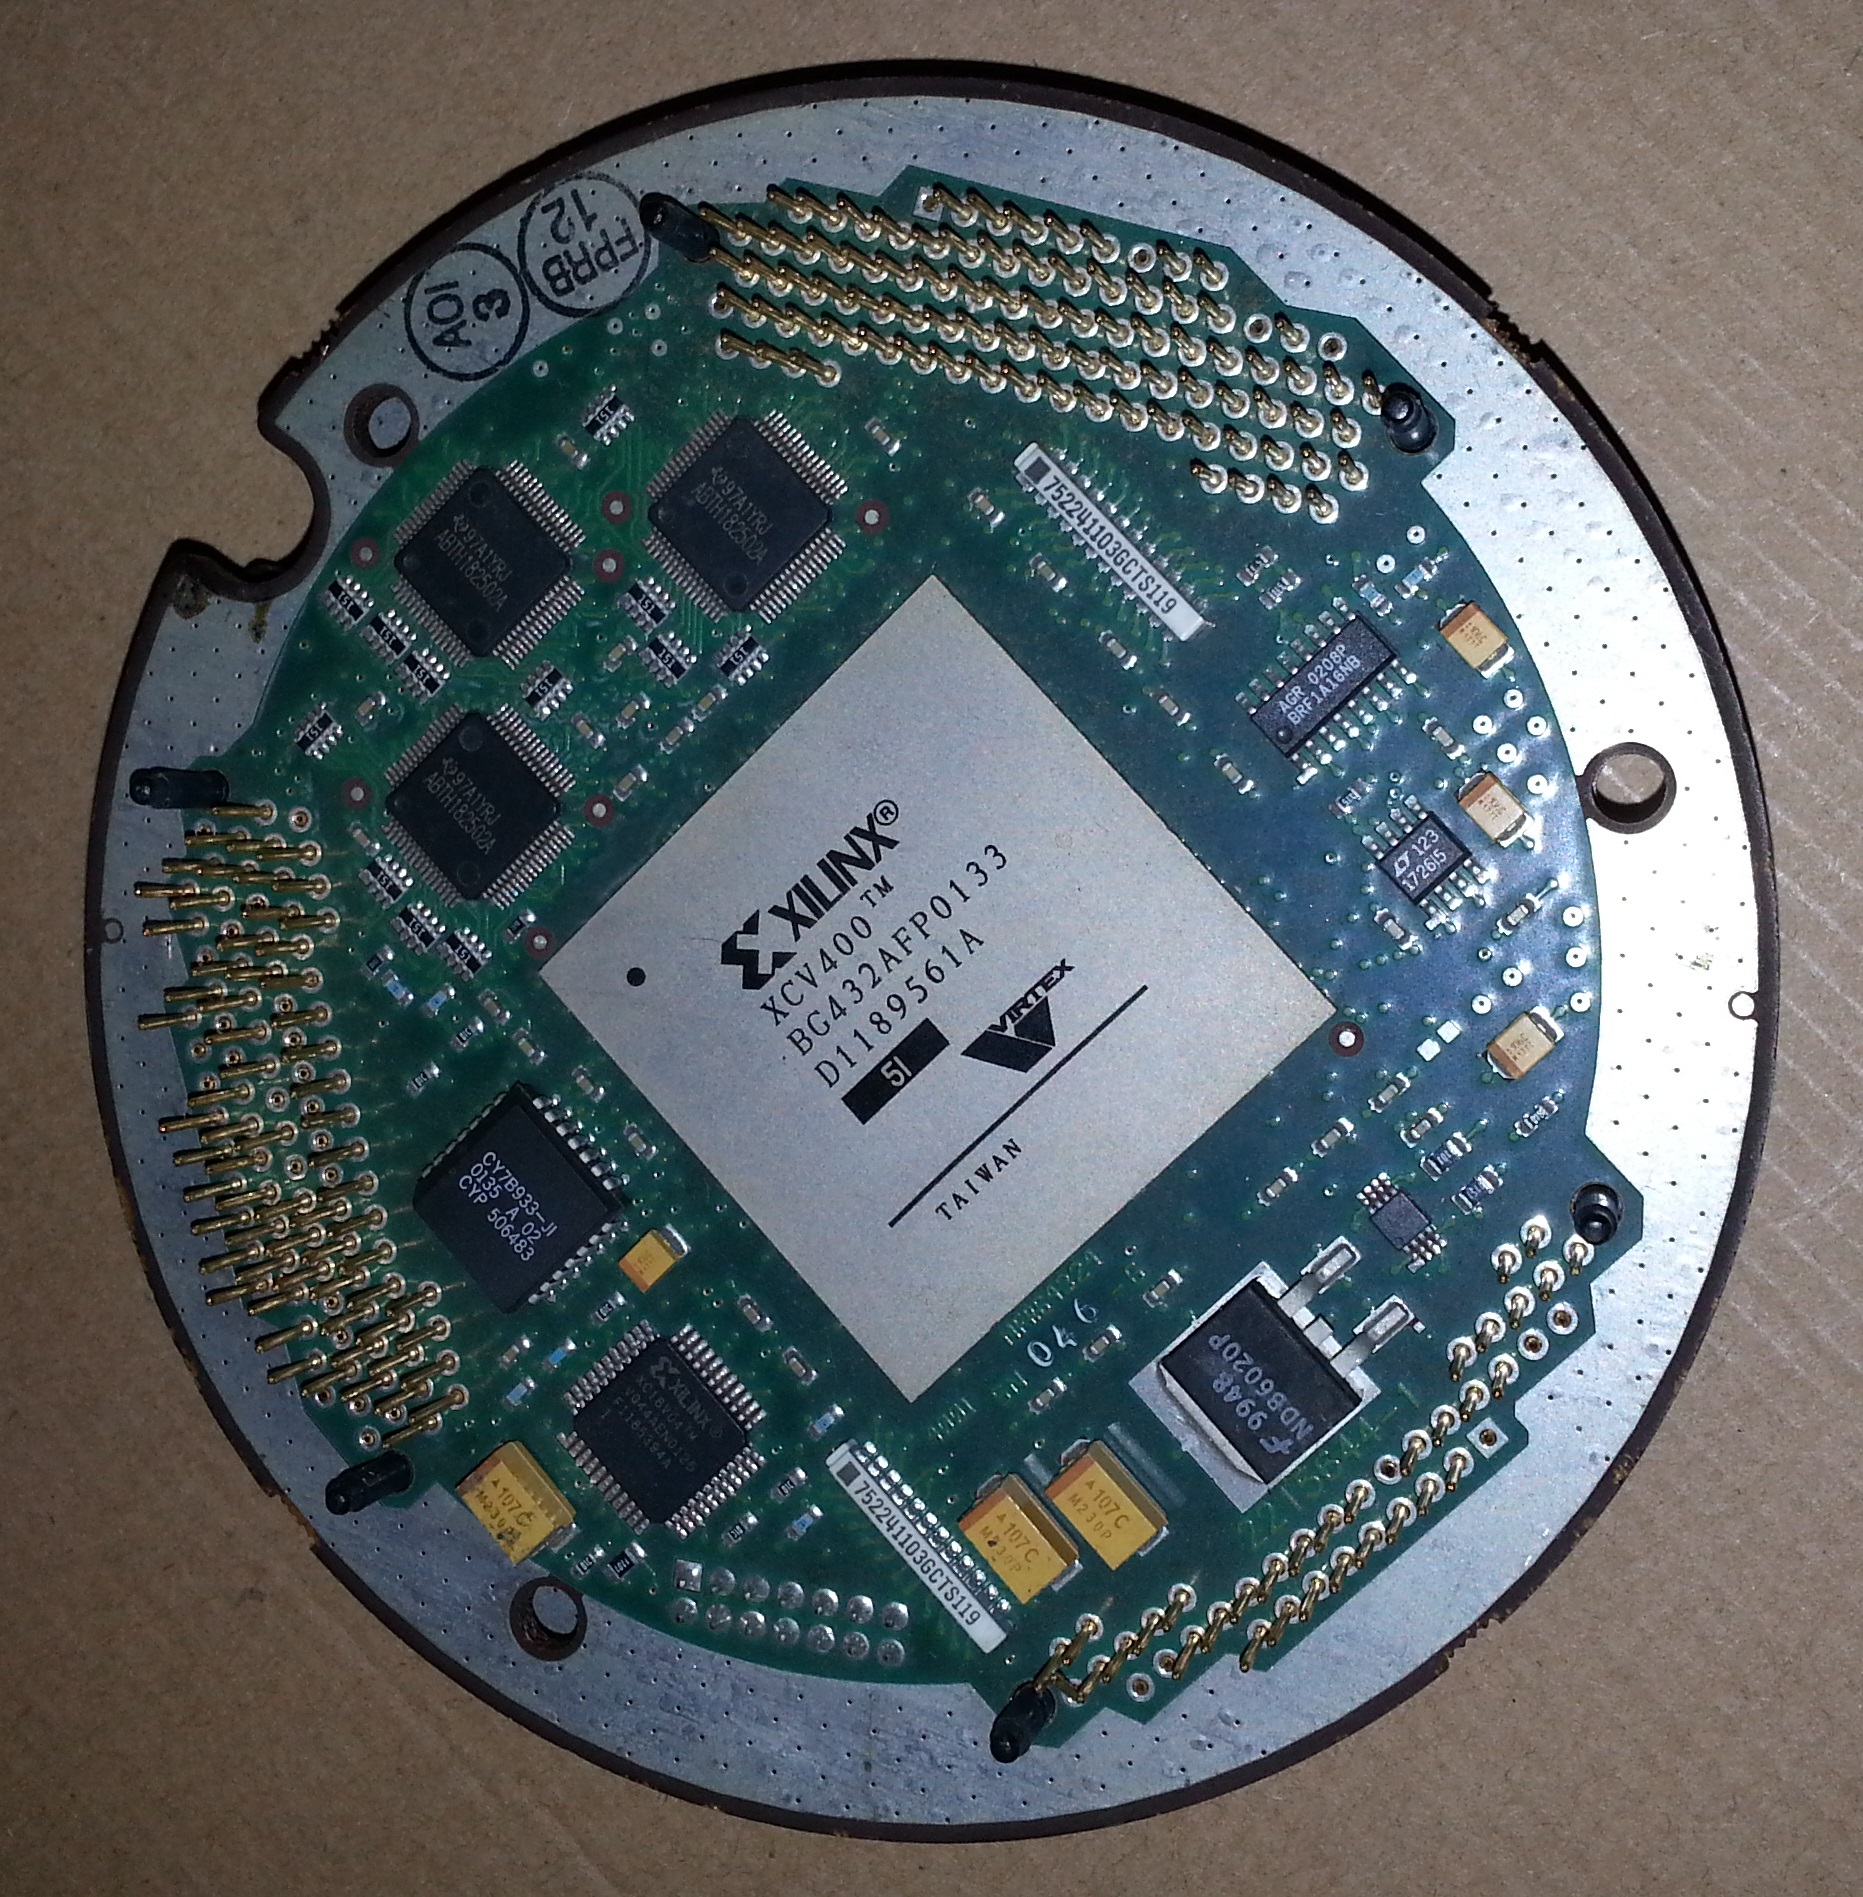
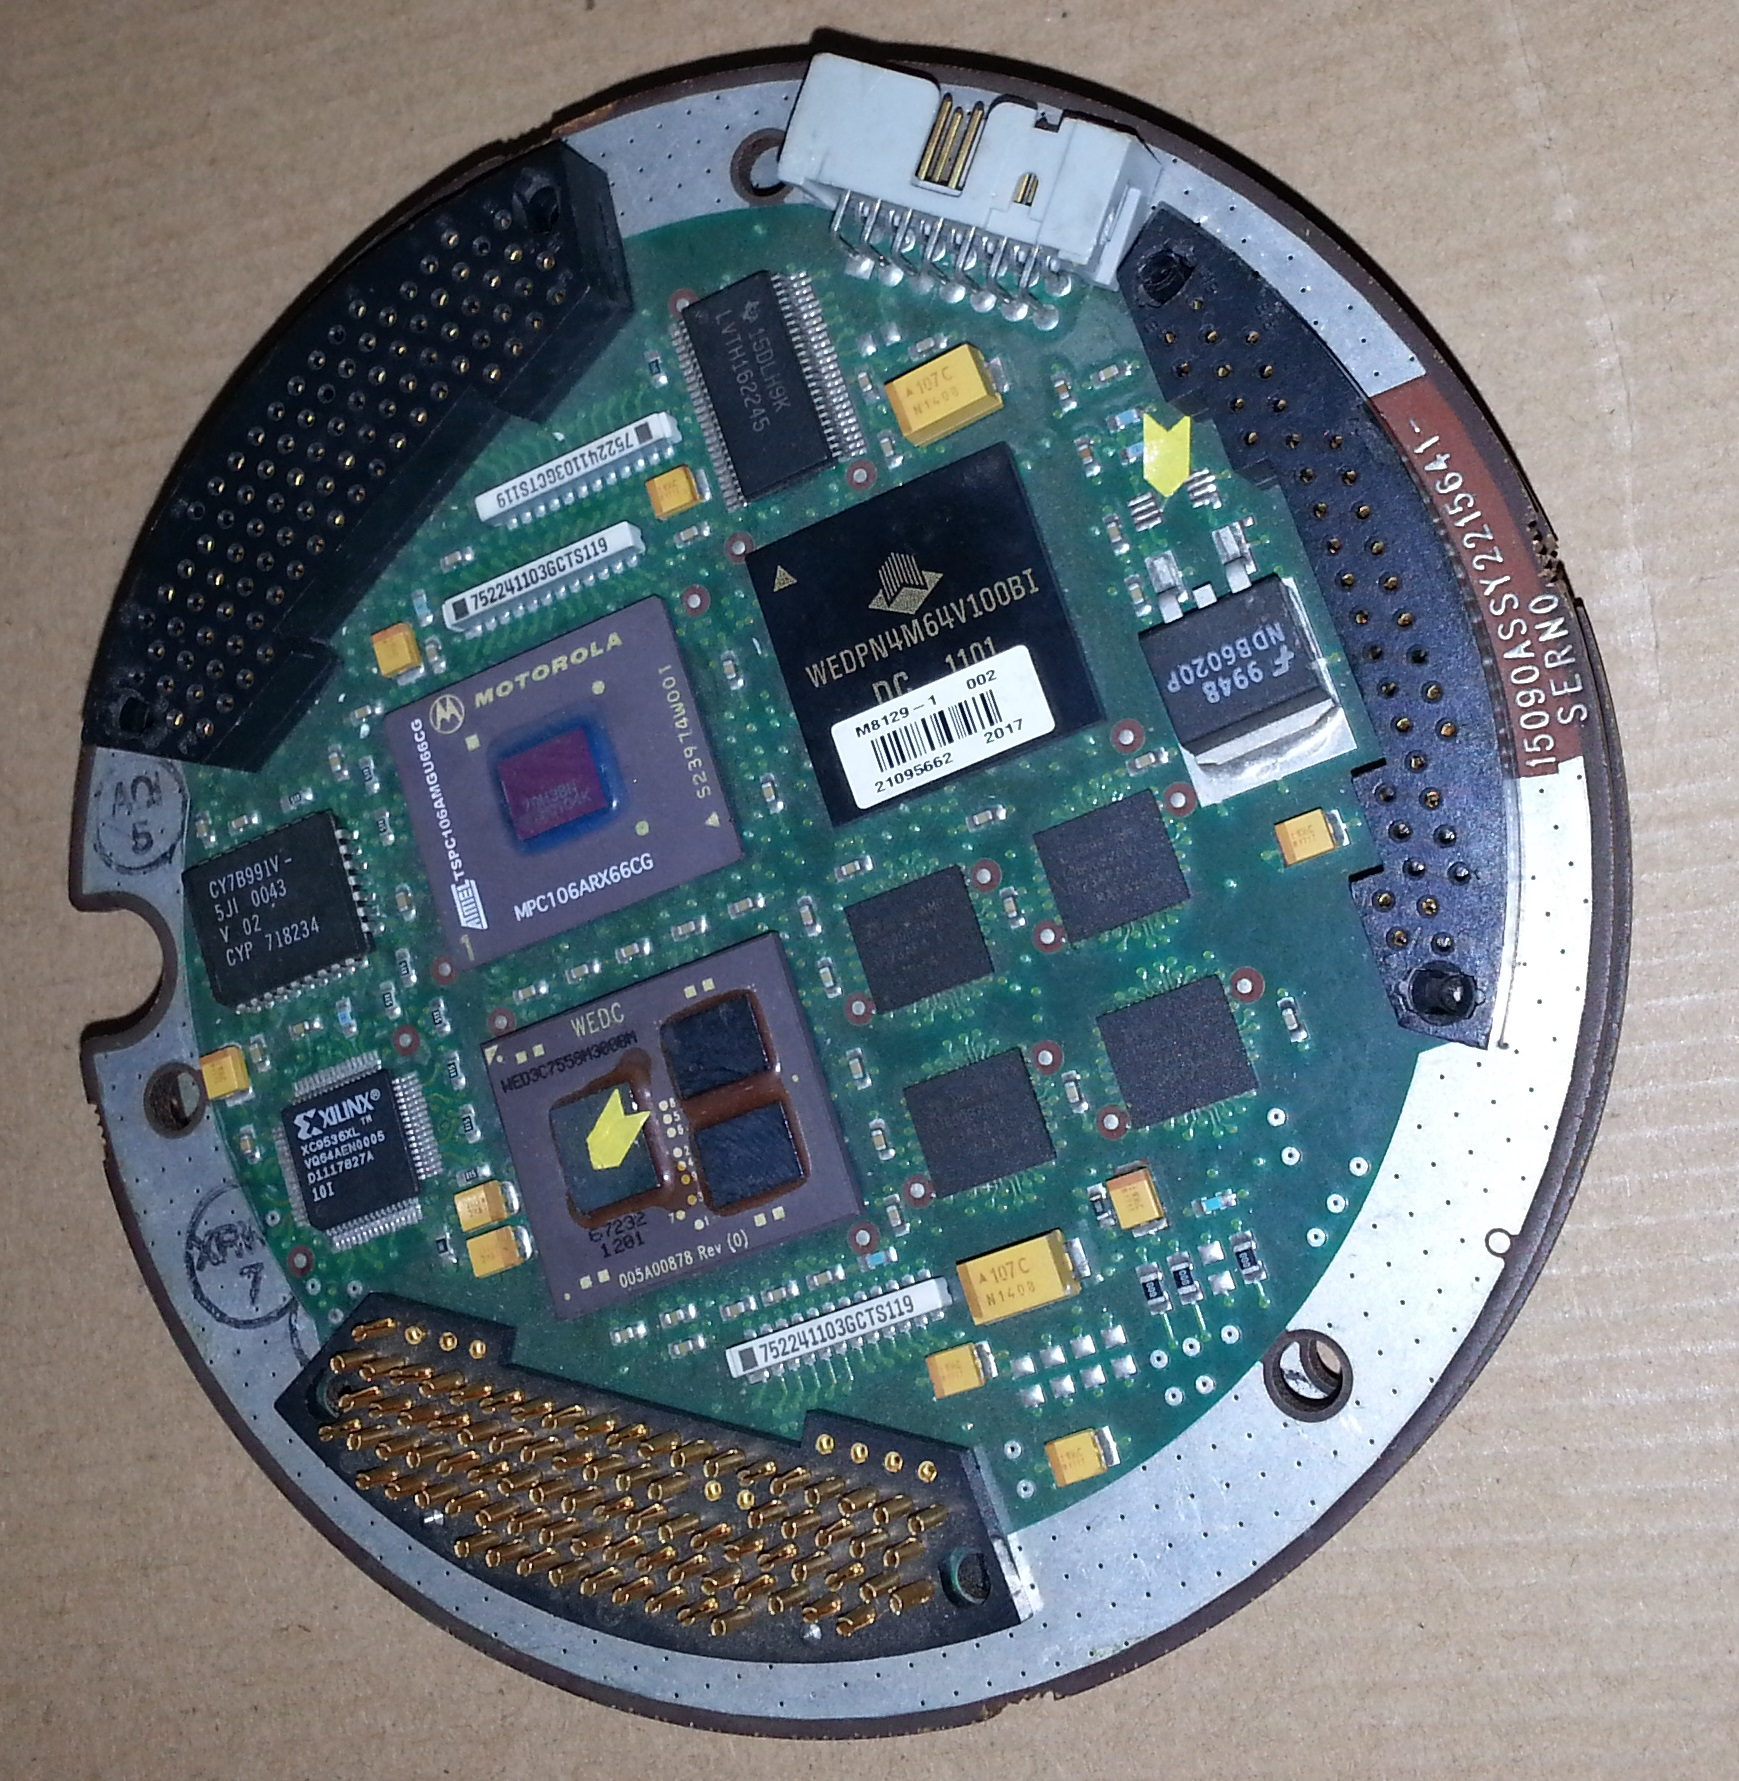
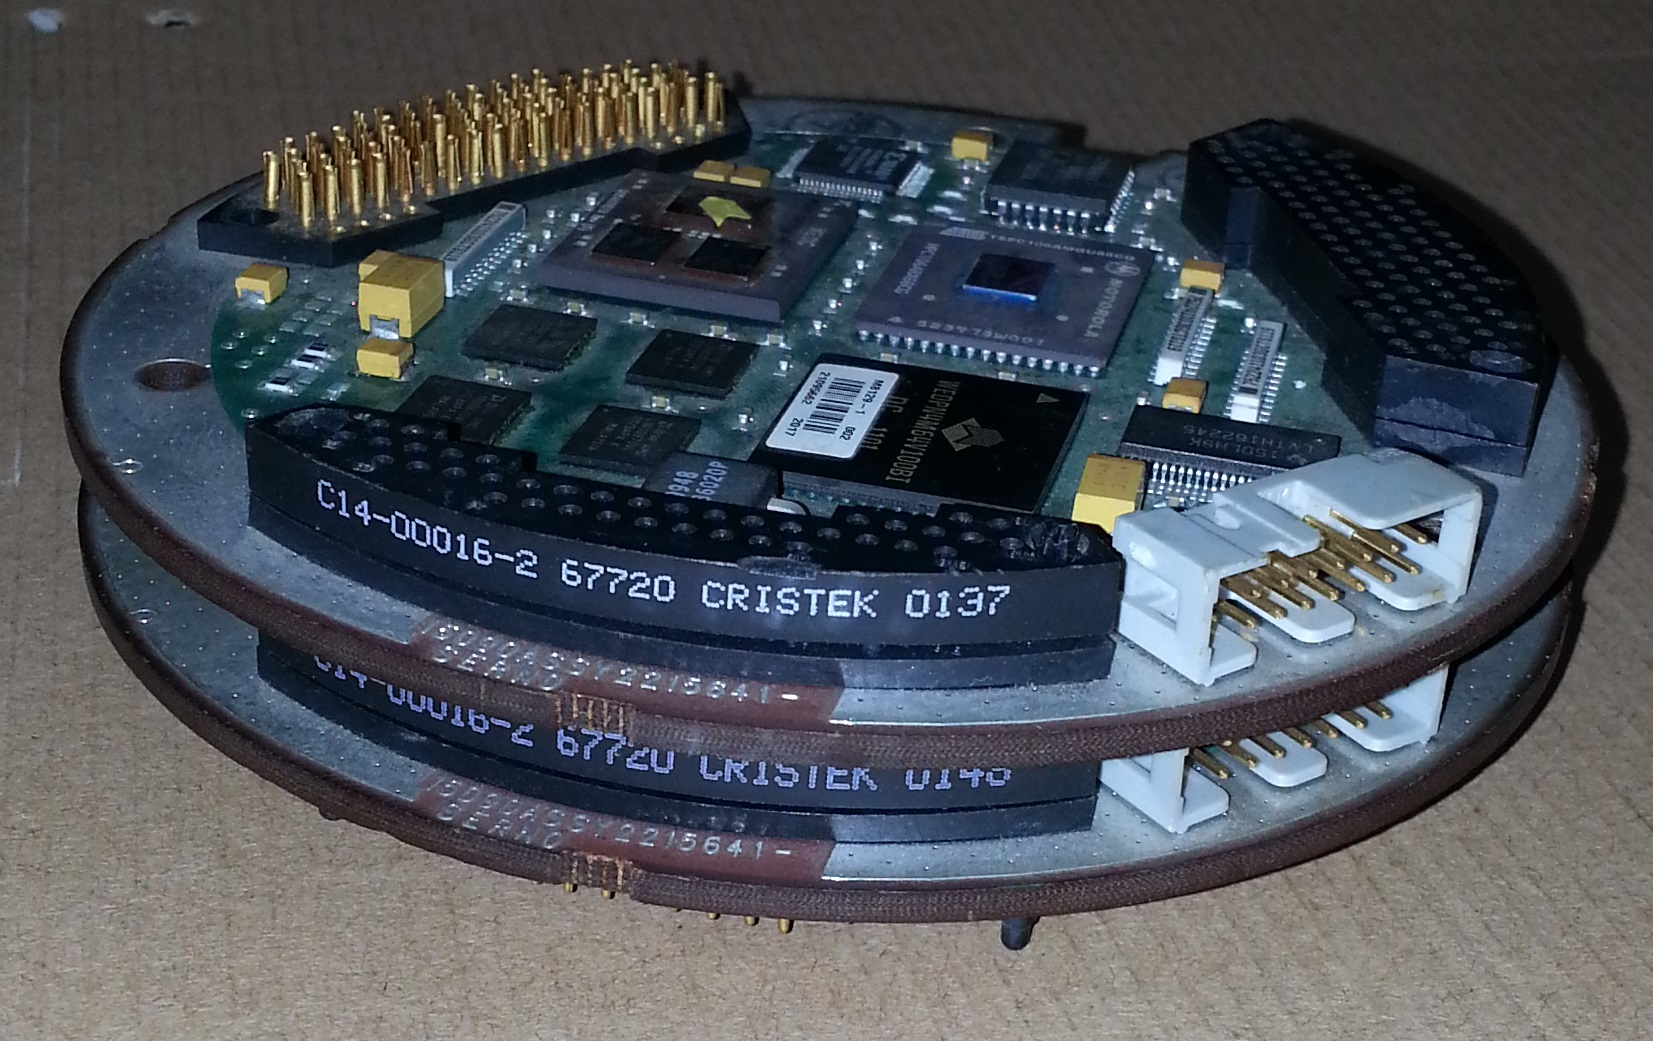
I came across this at a gray market used parts dealer in Shenzhen. Round, high density circuit boards with big FPGAs and ceramic packages tend to catch my eye, as they reek of military or aerospace applications.
I have no idea what this ware is from, or what it’s for, so it should be interesting judging the responses — if there is no definitive identification, I’ll go with the most detailed/thoughtful response.
Winner, Name that Ware February 2014
The Ware for February 2014 is an SPAC module from the racks of a 3C Series 16 computer, made by Honeywell (formerly 3C). According to the Ware’s submitter, the computer from which it came was either a DDP-116 or DDP-224 computer, but the exact identity is unknown as it was acquired in the 70′s and handed down for a generation.
As for a winner, it’s tough to choose — so many thoughtful answers. I’ll go the easy route and declare jd the winner for having the first correct answer. Congrats, and email me for your prize!
Andrew Huang's Blog

- Andrew Huang's profile
- 32 followers

