
Beth Cato's Blog, page 34
September 2, 2020
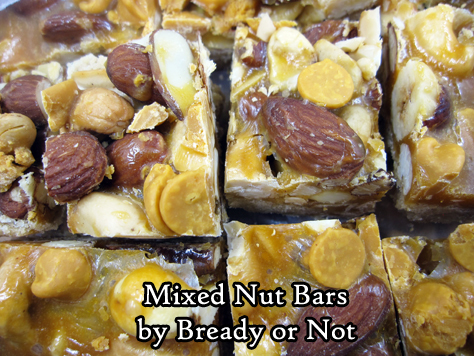
Bready or Not Original: Mixed Nut Bars
This has been a nutty year. Time to make it nutty in a delicious way with these Mixed Nut Bars.
The amount of nuts here is the equivalent of the can size found in many American stores, but I buy my nuts in bulk. (I’m cheap like that.)
Use whatever combination of nuts you like. I would recommend having at least two kinds mixed in, to make it fun. Really, throw in what you like.
If you’ve followed Bready or Not for a while, you know I love caramel chips. They are awesome in this recipe! They make these bars sweet without it being overkill.
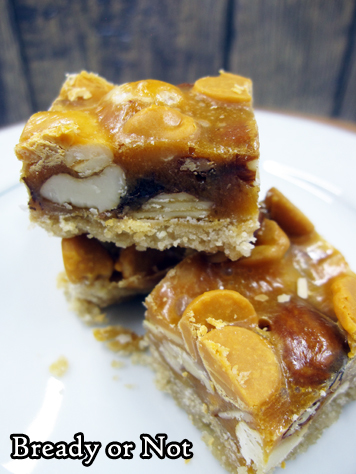
Make this to share with numerous folks. You essentially end up with a 13×9 pan of little candy bars. I imagine that they will keep well for days or even a week, but I can’t testify as to how long. When my husband took these to his work (in those halcyon days when that was allowed), they were gone in hours.
Bready or Not Original: Mixed Nut Bars
These mixed nut bars are like little candy bars, crunchy and just sweet enough. Caramel chips aren't made of actual caramel, but act like chocolate chips in baked goods.
Course Appetizer, Breakfast, SnackKeyword almond, caramel chips, hazelnuts, macadamia nuts, pecans
Author Beth Cato
Equipment13x9 pan
IngredientsDough1 1/2 cups all-purpose flour3/4 cup brown sugar packed1/4 teaspoon salt1/2 cup unsalted butter 1 stickNutty layer11 1/2 ounces mixed nuts1 cup caramel chips plus extra 1/2 cup for top, optional2 Tablespoons unsalted butter1/2 cup light corn syrup1/2 teaspoon vanilla extract
InstructionsPreheat oven at 350-degrees. Line a 13x9 pan with aluminum foil and apply nonstick spray.In a small bowl, stir together flour, sugar, and salt. Cut in the cube of butter until it resembles coarse crumbs. Dump into prepared pan and compress into an even layer; a strip of waxed paper and a heavy glass make this easier.Bake base layer for 10 to 12 minutes, until it looks set. Sprinkle nuts over the baked dough.In the microwave, melt 1 cup caramel chips with the 2 Tablespoons butter by cooking for 20 second increments and stirring well between each pass, until smooth. Stir in corn syrup and vanilla extract. Pour over the nuts to cover as much as possible.Bake for 12 minutes. If adding extra caramel chips, do so now, covering any thinner areas atop crust. Bake another 5 minutes.Cool completely at room temperature. Use foil sling to lift contents onto a large cutting board. Slice into bars.Store at room temperature in sealed containers.OM NOM NOM!


August 26, 2020
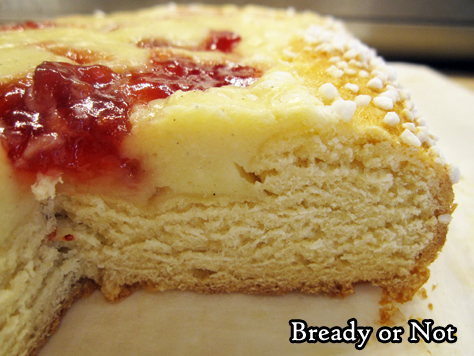
Bready or Not: Jam and Cream Brioche Tart
This Jam and Cream Brioche Tart is probably among the most extraordinary things I’ve ever baked, and that is saying something.
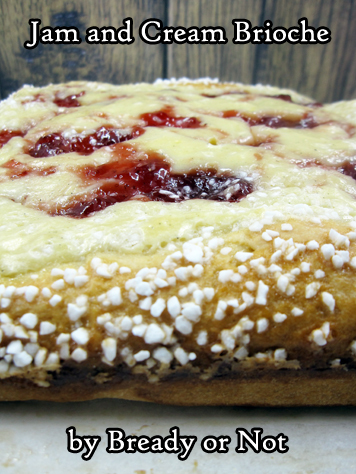
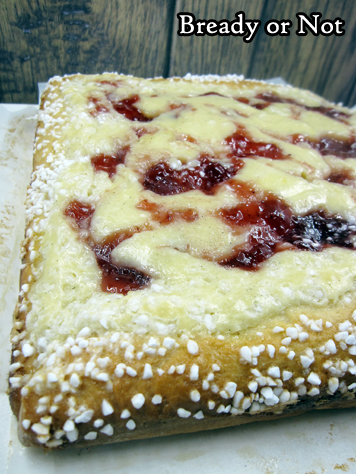
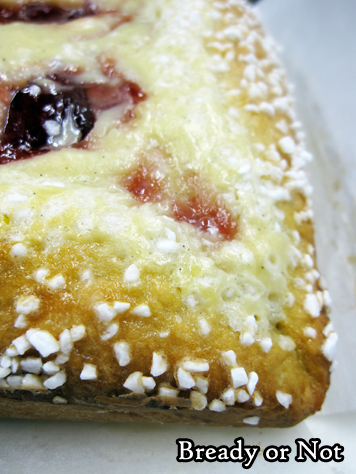
First of all, the end result is gorgeous. Golden, thick crust freckled by pearl sugar. Marbled cream cheese and contrasting jam, with flecks of vanilla bean throughout.
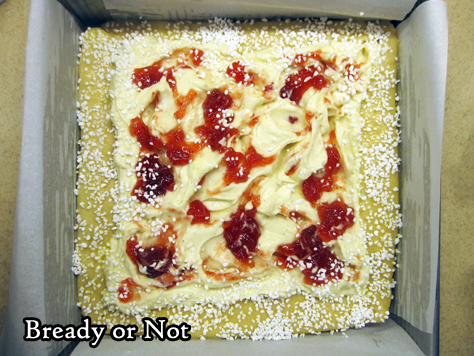
The tart is as delicious as it looks, too. The enriched dough is sweet and soft, providing a luscious base for the different kind of sweet-and-soft offered by the filling.
This is a showstopper of a dessert or breakfast.

The only unusual ingredient involved is the Swedish pearl sugar. I bought it on Amazon. I consider it a worthwhile investment, as there are a number of other pastry recipes I want to try that also use it. Plus, heck, you could even throw them on waffles or fruit or whatever.
Another not-quite-so-obscure ingredients I suggest you use is vanilla bean paste. This is VERY useful if you’re making fancy desserts because you get the flecks of vanilla beans without the high cost of using actual vanilla beans.
In a cream cheese filling or frosting, those flecks really stand out, and they add a lot to the WOW factor. Which this tart already has, many times over.
Recipe modified from Bake from Scratch, Sep/Oct 2019.
Bready or Not: Jam and Cream Brioche Tart
Don't be intimidated by the lengthy instructions! The actual process is fairly straightforward, and the result is gorgeous. Use vanilla bean paste for the filling, if possible, as the flecks of bean add a lot to the prettiness of the finished tart. Modified from Bake from Scratch, Sep/Oct 2019.
Course Breakfast, Dessert, SnackCuisine FrenchKeyword cream cheese, french, yeast bread
Author Beth Cato
Equipment9x9-inch panparchment paper
IngredientsFor Brioche1/3 cup plus 1 tablespoon whole milk or half & half2 3/4 cups all-purpose flour3 Tablespoons white sugar2 1/4 teaspoons instant yeast1 1/2 teaspoons kosher salt3 large eggs room temperature and divided1 teaspoon vanilla extract6 tablespoons unsalted butter softenedFor Cream Cheese Filling2 tablespoons unsalted butter softened1/3 cup white sugar1 teaspoon vanilla bean paste or substitute vanilla extract1/4 teaspoon kosher salt8 ounces cream cheese softened1 large egg room temperature3 Tablespoons all-purpose flourTo Finish2 Tablespoons fruit preserves use good quality stuff with nice chunks1 Tablespoon water1 1/2 Tablespoons Swedish pearl sugar
InstructionsUsing the microwave and a safe dish, heat the milk to between 120 and 130 degrees. Set aside.In the bowl of a stand mixer with a paddle attachment, beat the flour, white sugar, yeast, and salt at very low speed until combined, about 30 seconds.Slowly add the warm milk to incorporate. Add 2 of the eggs along with the vanilla, and beat for about 1 minute. Switch to the dough hook attachment. Beat at low speed until smooth and elastic, about 8 minutes.Add butter, about 1 tablespoon at a time, letting each piece incorporate before adding the next, about 8 minutes total. (If it refuses to incorporate, switch back to the paddle for this stage.) Beat until a smooth and elastic dough forms, about 6 minutes.Lightly flour a stretch of counter or tabletop and dump the dough there. Knead it for a minute or so and form it into a smooth round.Apply cooking spray inside a large bowl. Place the dough inside and give it a spray, too, to prevent sticking. Cover with a towel or plastic wrap in a warm spot to rise until doubled, 30 to 45 minutes.Cut parchment paper to line pan going up all four sides. Apply nonstick spray to pan, then lay both strips inside the pan and spray the top-most sides.On a lightly floured surface, roll the dough into an 11-inch square. Score a 9-inch square in center of dough (using the pan as a reference, if needed). Fold outside 2 inches over score mark, creating a crust around edges.Place dough in the prepared pan, making sure it is even and fills corners of pan. Cover and let rise until puffed, 20 to 30 minutes.Meanwhile, prepare the cream cheese filling. Beat together the butter, sugar, vanilla bean paste (or extract), and salt until well combined. Gradually add cream cheese, beating until smooth. Add egg to incorporate, followed by the flour.Preheat oven to 325-degrees. Using your fingertips to dimple the center of dough back down, leaving outside crust as is. Pour the cream cheese mix into the center of dough. Make small indentations in the cream cheese then add dollops of the preserves. Use a knife to swirl the fruit in a bit more.In a small bowl, whisk together the 1 tablespoon water and remaining egg. Brush the crust with the egg wash, then finish by sprinkling the pearl sugar all over the edge.Bake until the crust is golden brown with the filling set around outside edges, about 35 to 40 minutes. (If desired, check the temp: an instant-read thermometer inserted in center of filling should register 175°F.)Let cool in pan for 10 minutes then use the parchment sling to lift up the tart onto a serving plate or rack. Eat fresh, or let cool.Tart keeps for days well-wrapped in fridge. Eat slices cold, or make pieces even more delicious with a short zap in the microwave.OM NOM NOM!
August 24, 2020
Listen to “Toilet Gnomes at War” at The Overcast
Are you taking proper care of your household gnomes? You’ll find out the hard way if you don’t!
My story “Toilet Gnomes at War” is an old favorite for many of my readers, and it has now been podcast for the first time! If you want to start your week with a story that is fun and whimsical with a lot of genuine heart, this is the story for you.
Listen to it at The Overcast!
#SFWAPro
August 19, 2020
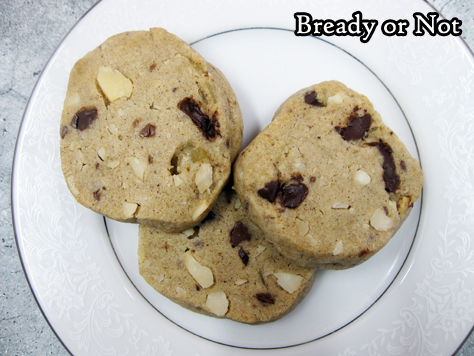
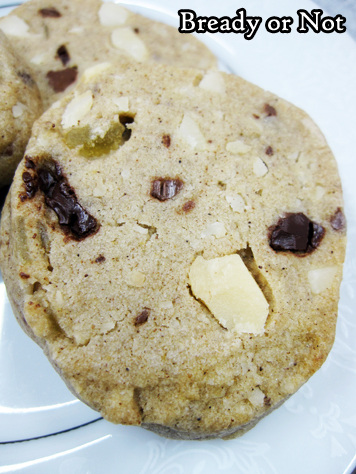
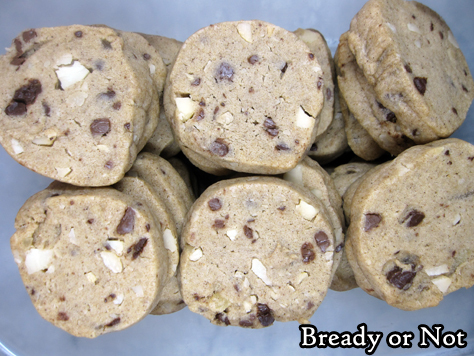
Bready or Not Original: Spiced Maple Macadamia Nut Cookies
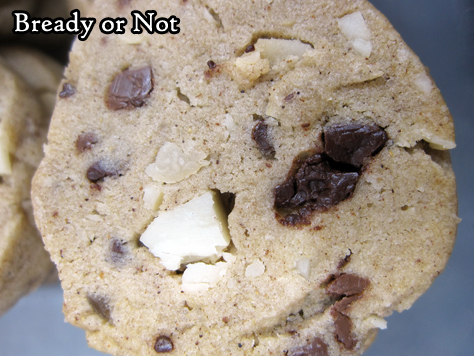
These Spiced Maple Macadamia Nut Cookies mix maple sweetness and warm spices and chocolate with the wonderful crunch of macadamias. They are perfect for fall–and throughout the year.
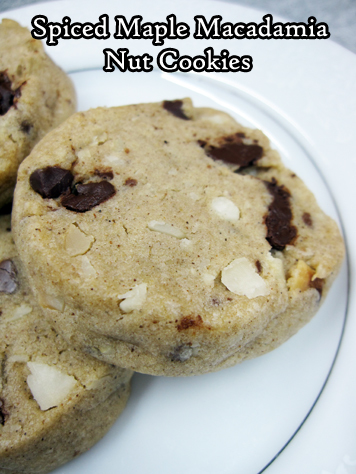
A food processor will be a big help in this recipe. The nuts and chocolate need to be in fine slivers. If the chunks are too big, the sliced cookies won’t be cohesive.
These are fridge cookies. Form the dough into tube shapes, wrap up well, then stash them in the fridge or freezer. Then thaw, slice, and bake when you need cookies.
If you do the full batch at once, you’ll likely get a lot of cookies, depending on your tube size and how you slice them. I got about 70 cookies.
These are perfect cookies to warm up your belly on a cool autumn or winter night (or in Arizona, to make-believe in such a temperature shift).
Bready or Not Original: Spiced Maple Macadamia Nut Cookies
These sliced cookies are a delightful blend of sweet maple and warm spices with added nuance from chocolate and crunchy macadamias. Mix up the dough and stash in the fridge or freezer for future baking! Makes about 70 cookies.
Course Dessert, SnackCuisine AmericanKeyword chocolate, cookies, macadamia nuts, maple
Author Beth Cato
Equipmentfood processor
Ingredients1 1/2 cups unsalted butter 3 sticks, room temperature1/2 cup white sugar3/4 cup real maple syrup4 cups all-purpose flour3 teaspoons ground ginger3 teaspoons ground cinnamon1 teaspoon allspice1/2 teaspoon ground cloves1 teaspoon salt1 1/2 teaspoons baking soda1 cup macadamia nuts3/4 cup chocolate chips semisweet or dark or mixture1/3 cup candied ginger finely chopped
InstructionsIn a food processor or by knife, finely chop macadamia nuts, followed by the chocolate chips. Set aside. (If these are not in fine pieces, the dough will fall apart when sliced.)In a large bowl, cream together butter and sugar until light and fluffy. Beat in maple syrup.In a separate bowl, stir together the flour, spices, salt, and baking soda. Gradually work this into the creamed mixture. Fold in the nuts, chocolate, and candied ginger until incorporated.Divide dough in half and shape into foot-long logs. Encase in plastic wrap. Chill at least two hours, or freeze for later baking.Preheat oven at 350-degrees. Unwrap log and cut dough into 1/4-inch thick medallions, reshaping with fingers as needed. Place spaced out on parchment-covered cookie sheet.Bake for 10 to 12 minutes, until set with a firm, golden base. Cool on pan for 5 minutes then move to rack to completely cool.Cookies keep for at least 3 days in sealed containers at room temperature.OM NOM NOM!
August 12, 2020
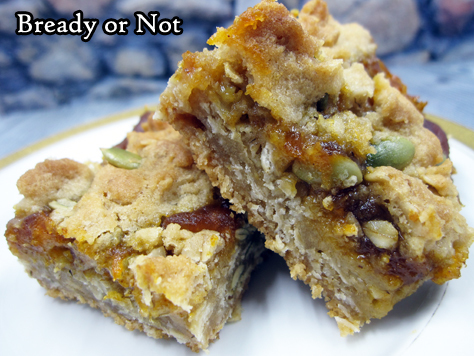
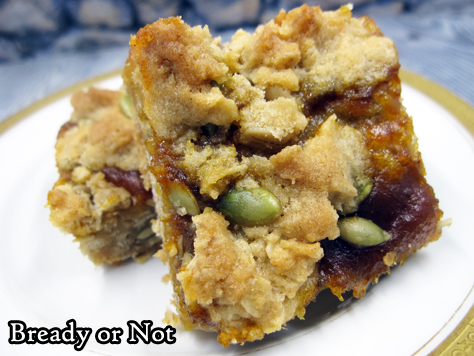
Bready or Not Original: Chewy Filled Bars
I present to you my Chewy Filled Bars: a versatile recipe that can use any number of fruit preserves, fruit butters, or other sweet filling, combined with different nuts or seeds, all to unique, delicious result.
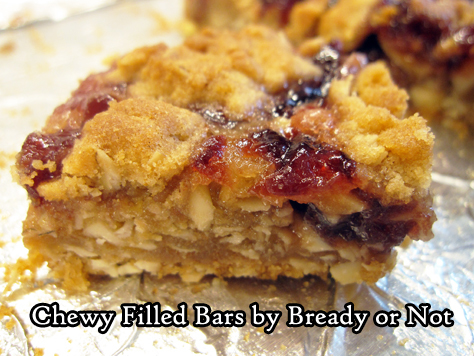
These pictures display the recipe using Sprouts Cherry Preserves (with slivered almonds and almond extract) and Sprouts Maple Pumpkin Butter (with pepitas and almond extract).

However, I also made the same recipe using Trader Joe’s cinnamon bun filling (with chopped pecans and vanilla extract) and Apple Cider Spread (with chopped walnuts and vanilla extract). Every single version was awesome.

The jarred filling I used varied from 12 to 14 ounces. All worked well, though the Cinnamon Bun Filling required a 40 minute bake to set. I liked mixing in different nuts or seeds to pair with the filling, but you could also omit that ingredient completely, if desired.
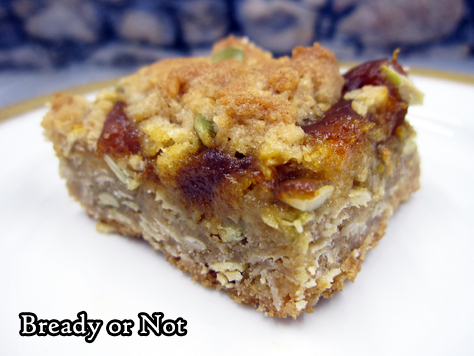
No matter the mix-ins, the result is a pleasantly thick, chewy bar that is just sweet enough.
Bready or Not Original: Chewy Filled Bars
This versatile base recipe can accommodate many different fillings, all of them delicious. Pick a jar of fruit preserves, fruit butter, or other sweet filling. Pick a complementary nut or seed. Pick an extract. Mix up. Enjoy!
Course Appetizer, SnackKeyword almond, bars, oats, preserves, pumpkin, walnuts
Author Beth Cato
Equipment13x9 pan
Ingredients1 cup unsalted butter room temperature2 cups brown sugar packed2 teaspoons baking powder1 large egg1 teaspoon almond extract or substitute vanilla extract2 cups all-purpose flour2 cups old-fashioned rolled oats1/2 cup slivered almonds or sliced almonds or substitute other nuts or seeds12 to 14 ounce fruit preserves or fruit butter or other sweet filling; possibilities include cherry preserves, pumpkin butter, cinnamon bun filling, etc
InstructionsPreheat oven at 350-degrees. Line a 13x9 pan with aluminum foil and apply nonstick spray or butter.In a large bowl, beat butter until creamy. Add brown sugar and baking powder. Follow up with egg and almond extract. Gradually mix in flour, oats, and sliced almonds.Set aside 1 cup of dough. Press the rest into the bottom of the prepared pan. A piece of waxed paper and heavy glass will help to compress it into a form, even layer. Spread preserves over top. Crumble the reserved dough over the fruit.Bake for 30 to 35 minutes, until top is lightly brown and no longer wobbly in the middle. Completely cool at room temperature, speeding process in the fridge, if desired. Use foil to lift contents onto cutting board to slice up.Store in sealed containers with waxed paper or parchment between the layers. Keeps at room temperature for days, and can also be frozen for weeks.OM NOM NOM!
August 7, 2020
Recent Poetry Publications
I’ve had a bunch of poems released in the last month. If you have a spare few minutes and need to escape this dreadful world, perhaps give these a read!
– “I Make Myself a Dragon,” The Book of Dragons
– “Great-Great Grandmother’s Recipe,” Polu Texni
– “The Luck Eaters” (co-written with Rhonda Parrish) and “When the Company Pays,” Star*Line 43.3
– “The Way is Long and Fraught with Perils,” Polu Texni

August 5, 2020
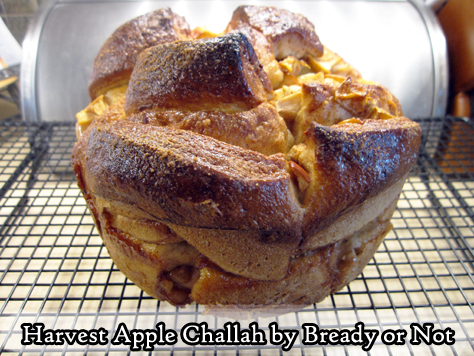
Bready or Not: Harvest Apple Challah
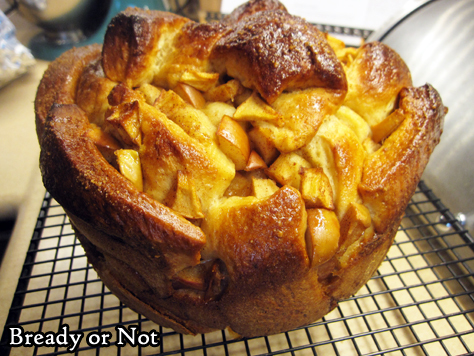
Welcome autumn with this big beautiful Harvest Apple Challah, packed with fruit and spice.
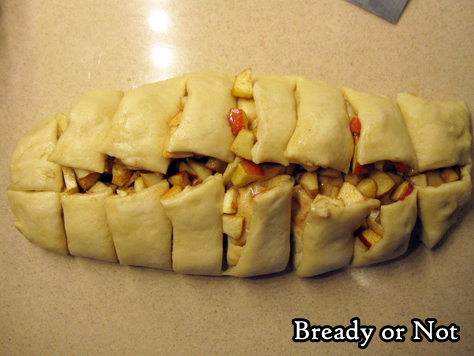
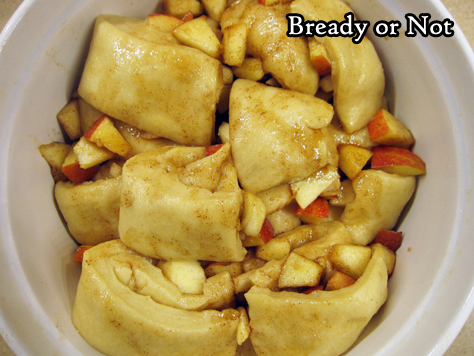
This recipe might look intimidating, but let me assure you, it’s not. The cutting stage is supposed to be messy.
Take comfort that this is not a loaf that is supposed to look tidy. The end goal is rustic–and delicious.
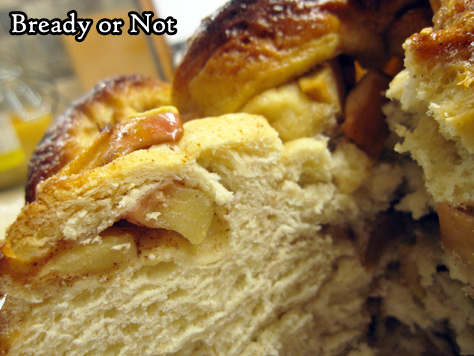
Challah is an enriched dough. Eggs and honey add extra richness plus soft texture.
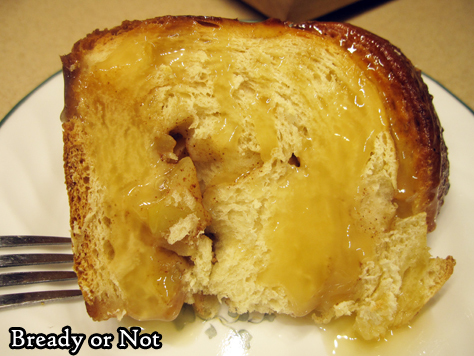
The final result is best served warm with an additional dollop or drizzle of honey. Use the good stuff here! I found that using the toaster oven for 5 to 7 minutes was about perfect for thick slices of bread.

I also found that this bread was great to freeze in slices. Pull out frozen pieces to thaw overnight, and breakfast is quick, convenient, and delicious the next morning!
Modified from a recipe at King Arthur Flour.
Bready or Not: Harvest Apple Challah
This big round of rustic-looking sweet bread is laden with apple chunks and beautiful to behold--and eat! This kind of bread is traditionally served at Rosh Hashanah along with some honey, but it's so good, it's worth baking all year long. Modified from a King Arthur Flour recipe.
Course Bread, Breakfast, SnackKeyword apple, yeast bread
Author Beth Cato
Equipmentdeep 9-inch round cake pan or casserole dishbench knifekitchen thermometer
IngredientsDough1/2 cup lukewarm water6 Tablespoons vegetable oil1/4 cup honey2 large eggs room temperature4 cups all-purpose flour1 1/2 teaspoons salt1 Tablespoon instant yeast or active yeastFilling2 medium apples1/2 teaspoon cinnamon1/4 cup white sugarTopping1 large eggcoarse sugar optionalhoney for serving optional
InstructionsMake the doughMix together the dough ingredients by hand or using a mixer with dough hook, until well-incorporated and not stiff. Place dough in a greased bowl to let rise about 2 hours, or until puffy; if poked with a finger, the dent in the dough should remain and not bounce back.Prepare a deep round cake pan or casserole dish (at least 4 inches) by greasing thoroughly.Also lightly grease a large stretch of counter top or table. Gently deflate dough and transfer to the surface, and flatten dough to an 8x10-inch rectangle.Prepare the fillingCore the apples but leave on the peels. Chop apples into chunks about 1/2 to 3/4-inch in size. Should equal about 3 cups total. Toss pieces in cinnamon and sugar.Assemble the breadSpread half the apples in the center of the dough. Fold one short edge over the apples to cover them, and press down the edge to seal them inside.Place the remaining apples on top of the existing apple-dough mound. Cover these apples with the other flap of dough, patting again to seal. It's okay if it is bulging and messy!Use a bench knife or paring knife to cut the dough down the middle, long-ways. Then cut again along the long side, edge to edge, to create a series of broad, messy stacks of dough with apples overflowing onto the surface.Start transferring pieces of dough and scattered apples into the prepared pan, forming a bottom layer, then keep stacking more dough and fruit on top until everything is in the pan.Cover loosely with plastic wrap, and let rise for another hour, until it is puffed again.Preheat oven at 325-degrees, with a rack in the lower third of the oven.Uncover the dough. Brush the top with an egg beaten with a tablespoon of water. If desired, sprinkle coarse sugar all over the top.Bake for 55 to 65 minutes, until the top is deep brown. As the dough is so thick, if a kitchen thermometer is available, use it to test the middle; bread should be at least 190-degrees.Set pan of bread on a rack to cool for 10 minutes. Carefully remove bread from pan.Serve challah warm, ideally with extra honey drizzled on top. Store covered at room temperature up to 4 days. Bread can also be sliced and frozen.OM NOM NOM!
July 29, 2020
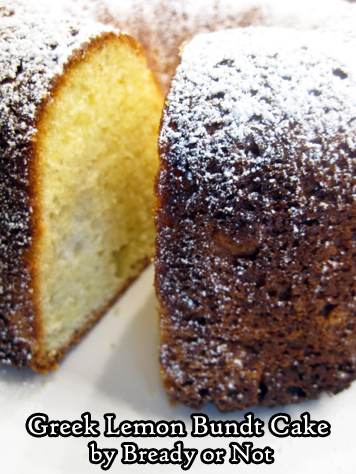
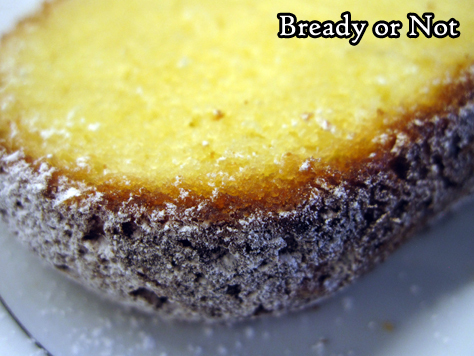
Bready or Not Original: Greek Yogurt Lemon Bundt Cake
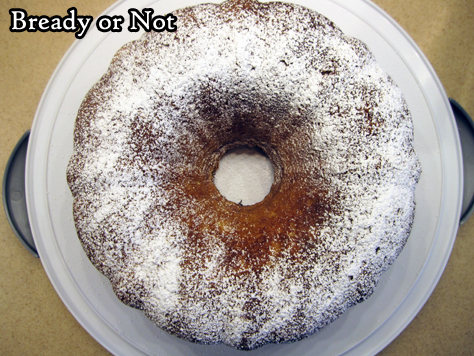
This Greek Yogurt Lemon Bundt Cake bakes up fluffy and light, with a fresh tang of lemon.
I’m not going to lie: this cake is going to dirty a lot of dishes, including two large bowls. The extra work makes for delicious results, though.
The texture of this cake is what makes it special. The Greek yogurt adds moisture, while the six eggs–with whites separated and beat to stiff peaks–adds a lot of loft.

My batter bowl ended up being full to the top and tricky to mix. I was worried that my bundt pan would overflow during baking and kept an eye on it, but it ended up being fine. Even so–be wary of your own pan.
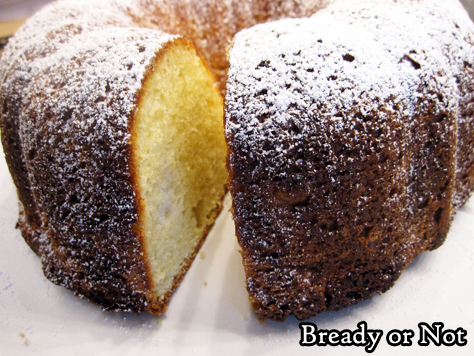
The baked cake is fancy and simple all at once. This needs no glaze. A sprinkling of confectioners’ sugar makes the cake prettier without adding any heavy sweetness.
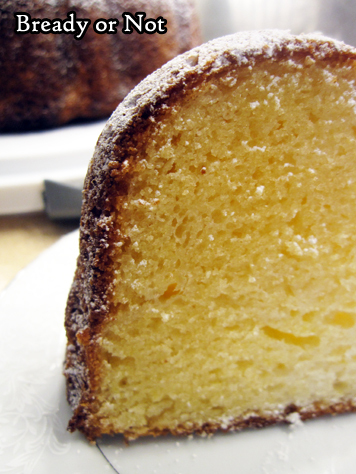
This cake is great for travel, either sliced or whole, because there’s nothing about it that can melt or ooze. I imagine it freezes well in slices, too, but I didn’t try that with this particular cake.
Bready or Not Original: Greek Yogurt Lemon Bundt Cake
This big cake bakes up with a light, fluffy crumb thanks to stiff egg whites folded in with the rest of the batter. Sure, making this dirties a lot of dishes, but the end result is delicious! This is a great cake for travel, either whole or in slices, as it can neither melt or ooze.
Course Breakfast, Dessert, SnackKeyword bundt cake, lemon
Author Beth Cato
Equipment10-cup minimum bundt pan or tube pan
Ingredients3 cups cake flour or substitute 3 cups all-purpose flour with 6 Tablespoons removed1 teaspoon baking soda1/4 teaspoon salt6 large eggs room temperature, separated2 cups white sugar1 cup unsalted butter (2 sticks) room temperature2 medium lemons finely grated and juiced1 cup Greek yogurt plain or vanillaconfectioners' sugar optional, to dust over finished cake
InstructionsPreheat oven at 350-degrees. Grease and flour the bundt or tube pan.In a bowl, stir together the flour, baking soda, and salt. Set aside.In a large bowl, beat egg whites until soft peaks form. Slowly add in 1/2 cup of the white sugar and continue beating until stiff, glossy peaks form. Their mass will increase immensely.In another large bowl, beat together the butter, remaining 1 1/2 cups white sugar, egg yolks, 1 Tablespoon lemon zest, and 3 Tablespoons lemon juice. If using electric mixer, beat on medium until everything is creamy and pale yellow, which takes about 3 to 5 minutes.Add the dry mixture to the yolk bowl, alternating with the addition of the Greek yogurt, until both are incorporated. Gently fold in the egg whites; this will create an enormous amount of airy batter.Pour and scoop into prepared pan. Bake for 50 to 60 minutes; if the pan is full to the top, keep an eye on it in case it overflows. Cook until the middle passes the toothpick test. Let cool for 10 minutes, then invert cake onto a wire rack to completely cool.Store beneath a cake dome or otherwise covered, at room temperature. Before serving, dust with confectioners' sugar, if desired.OM NOM NOM!
July 22, 2020
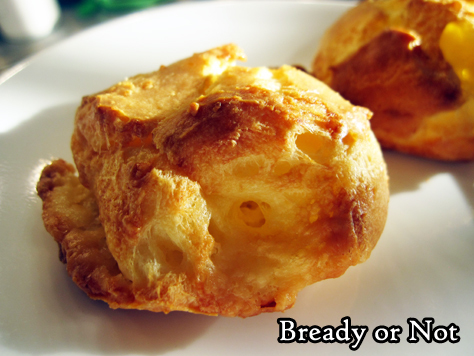
Bready or Not: Gougeres (French Cheese Puffs)
Eat your cheese in delicious, airy form in Gougeres, aka French cheese puffs!
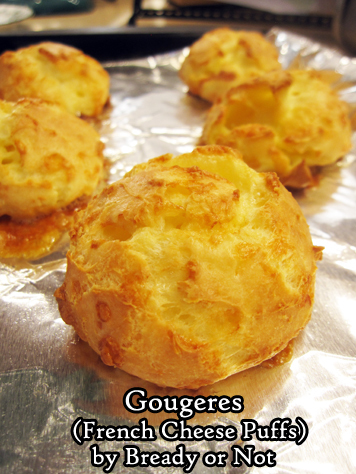
This is a savory version of pate a choux, the dough used for cream puffs and eclairs. In this case, though, you fold in a generous amount of grated cheese.
What kind of cheese? Go for ones that grate and melt. Traditional choices would include Gruyere or Comte, or be a rebel like me and use English cheddar. (Scandalous, I know.)
I modified this recipe from Dorie Greenspan’s version in her lovely tome Around My French Table. I felt like I learned something new every time I baked up a serving of these puffs, and I wanted to include all that info to prevent people from repeating my mistakes.
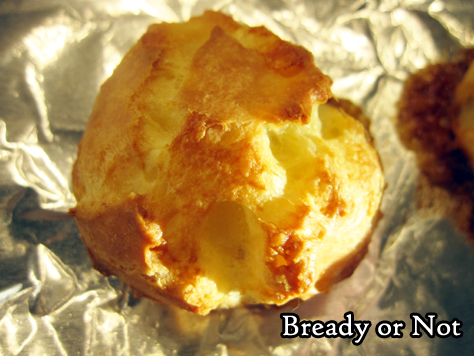
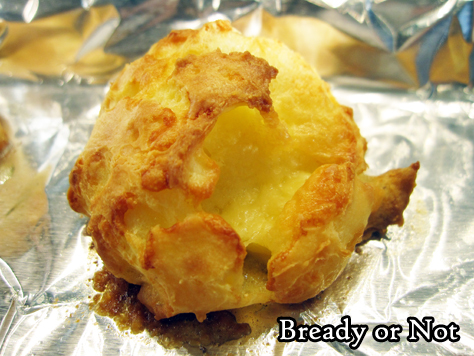
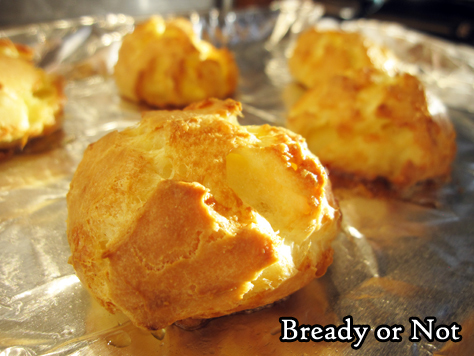
Such as, see the aluminum foil in these pictures? Don’t use that. Do parchment instead. I didn’t take pictures of how I mangled these gougeres, which were hopelessly stuck to the foil despite a spray of Pam.
The recipe results in about 30 puffs. These things keep well, unbaked and frozen, but only for about a month. After that, the puff declines and an eggy taste is more pronounced.
Bready or Not: Gougeres (French Cheese Puffs)
This recipe, modified from Dorie Greenspan's version in Around My French Table, combines grated cheese and pate a choux dough. The puffs bake up light, airy, and delightfully cheesy! Do the full recipe at once (it makes 30, using a tablespoon scoop) or freeze unbaked choux for later.
Course Appetizer, Bread, Side DishCuisine FrenchKeyword cheese, quick bread
Servings 30 puffs
Author Beth Cato
Equipmentbaking sheetsparchment papertablespoon scoopmixer
Ingredients1/2 cup whole milk or half & half1/2 cup water8 Tablespoons unsalted butter (1 stick) cut into 4 pieces1/2 teaspoon salt1 cup all-purpose four5 large eggs room temperature1 1/2 cups coarsely-grated cheese (6 ounces) such as Gruyere, Comte, Emmenthal, or cheddar
InstructionsIf baking now, position racks in oven to be at the top and bottom. Preheat oven at 425-degrees. Line two large baking sheets with baking mats or parchment paper; do not use aluminum foil.If preparing the gougeres now, with plans to freeze and bake later, line a pan with waxed paper and clear some space in the freezer so the puffs can set.Place milk, water, butter, and salt in a medium saucepan. Bring to a fast boil. Add flour all at once, then lower heat. Promptly start stirring batter with a wooden spoon or sturdy whisk. The dough will come together, but keep stirring with vigor for another couple minutes until the dough is very smooth and looks dryer.Drop the dough into the big bowl of a stand-mixer or a bowl where a hand mixer can be used. (Or, if mixing by hand, be ready for an arm work-out.) Let the dough set for a couple minutes, then add the eggs one by one. Beat, beat, beat that batter, fully incorporating each egg before adding the next. If it separates, that's okay--keep beating it! It needs to reach a stage where it is thick and shiny. Beat in the grated cheese.The batter must be immediately doled out onto pans to either bake or freeze. Use a tablespoon or tablespoon-sized scoop to measure out the batter; if baking, space out about two inches apart.Slide baking sheets into oven. Immediately lower temperature to 375-degrees. Bake for 12 minutes, then rotate pans from front to back, top to bottom. Continue baking another 12 to 15 minutes, until gougeres are golden and firm. Note that they will not puff until the end of the bake. Serve promptly.If freezing some or all of the gougeres, freeze on waxed paper, then place in a freezer bag or lidded container. Bake straight from the freezer--do not thaw them! Place on parchment or a greased surface to cook, with gougeres in a central location in the oven. Eat frozen gougeres within a month, as they will otherwise taste increasingly eggy and have less rise.OM NOM NOM!
July 15, 2020
Bready or Not Original: Hazelnut Hand Cake [cake mix]
Doctor up a basic yellow cake mix box into an amazing Hazelnut Hand Cake!
![Bready or Not Original: Hazelnut Hand Cake [cake mix]](https://i.gr-assets.com/images/S/compressed.photo.goodreads.com/hostedimages/1594888335i/29822353.jpg)
It’s called hand cake because it’s convenient to eat without a knife and fork. Heck, napkins are optional, if you don’t mind a dropped crumb or two.
![Bready or Not Original: Hazelnut Hand Cake [cake mix]](https://i.gr-assets.com/images/S/compressed.photo.goodreads.com/hostedimages/1594888335i/29822354.jpg)
This cake has a mild chocolate flavor–milder than that of a typical chocolate cake, from a mix or not. Nutella (or use a store-brand equivalent, as I did) is whipped into the batter, with some extra chocolate chips adding a gentle layer of flavor.
![Bready or Not Original: Hazelnut Hand Cake [cake mix]](https://i.gr-assets.com/images/S/compressed.photo.goodreads.com/hostedimages/1594888335i/29822355.jpg)
This thing is all about convenience. The cake comes together fast. Bakes fast. Give it some initial time to cool at room temp, then stash it in the fridge, and you can eat it even faster.
![Bready or Not Original: Hazelnut Hand Cake [cake mix]](https://i.gr-assets.com/images/S/compressed.photo.goodreads.com/hostedimages/1594888335i/29822356.jpg)
The end result is a cake with a soft, high, very moist crumb. The scattered nuts and toffee add extra flavor and crunch.
![Bready or Not Original: Hazelnut Hand Cake [cake mix]](https://i.gr-assets.com/images/S/compressed.photo.goodreads.com/hostedimages/1594888335i/29822357.jpg)
My husband’s co-workers inhaled this cake. One guy said it was the best Cato treat ever. Considering the goodies that come their way, that is high praise indeed.
Bready or Not Original: Hazelnut Hand Cake [cake mix]
No one will know this recipe uses cake mix! The resulting cake is easy to eat from your hand, no knife and fork required, and it embodies a gentler chocolate flavor than your typical chocolate cake.
Course Dessert, SnackCuisine AmericanKeyword cake mix, chocolate, hazelnuts
Author Beth Cato
Equipment13x9 pan
Ingredients1 box yellow cake mix3 large eggs2/3 cup water2/3 cup Nutella or similar hazelnut spread1/4 cup canola oil or vegetable oil1/2 cup semisweet chocolate chips1/2 cup chopped hazelnuts toasted or not1/2 cup Heath toffee bitsconfectioners' sugar to dust top, optional
InstructionsPreheat oven at 350-degrees. Line a 13x9-inch pan with foil and apply nonstick spray.In a large bowl, beat together the cake mix, eggs, water, hazelnut spread, and oil for several minutes, until thoroughly combined and no lumps remain. Fold in the chocolate chips, hazelnuts, and toffee bits. Pour batter into prepared pan.Bake for 25 to 30 minutes, until center is no longer jiggly and passes the toothpick test.Cool completely to room temperature; place in fridge to speed process along. Use foil to lift contents onto cutting board. If desired, sprinkle confectioners' sugar over top. Slice into pieces.Store in sealed container(s) at room temperature.OM NOM NOM!


