
Beth Cato's Blog, page 31
February 10, 2021
Bready or Not Original: Classic Brownies
Each year around Valentine’s Day, I like to share a chocolatey recipe. For this year, we’re going for Classic Brownies.
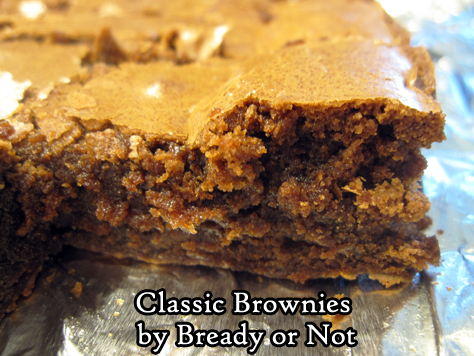
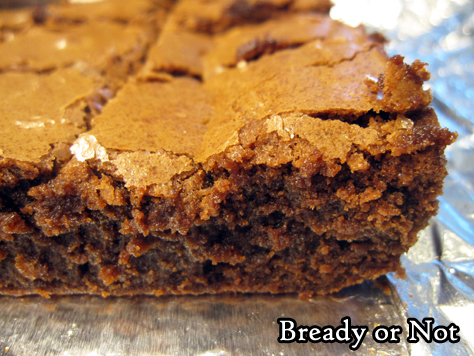
This straightforward recipe makes a 13×9 pan of luscious, moist brownies. They have a rich middle and a crackly top.
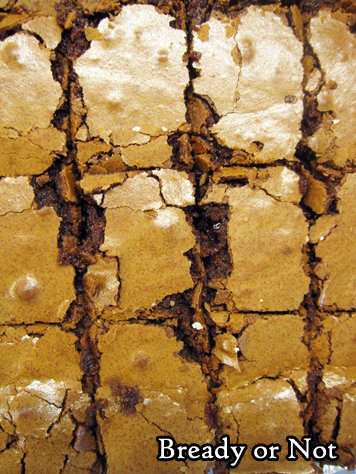
Yes, they might crumble a little, but they are by no means dry. Not unless they are overbaked.
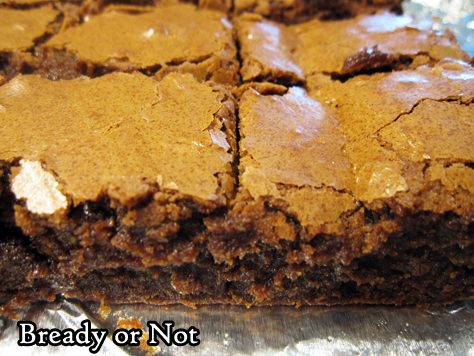
These brownies are great on their own but would be out-of-this-world paired with some ice cream or fruit, or both of those at once.
Store these at room temperature for a few days at most, or freeze them for several months.
PrintBready or Not Original: Classic BrowniesYou can’t go wrong with these classic brownies! This recipe makes a big casserole dish of chocolaty goodness. Make this recipe to share, or freeze some brownies for later!Course Dessert, SnackCuisine AmericanKeyword brownies, chocolate, coffeeAuthor Beth CatoEquipment13×9 panIngredients8 ounces semisweet chocolate chips1 cup unsalted butter 2 sticks2 cups all-purpose flour1/4 cup unsweetened Dutch-process cocoa powder sifted2 1/2 cups white sugar1 Tablespoon espresso powder or instant coffee granules2 teaspoons ground cinnamon6 eggs room temperature2 teaspoons vanilla extractInstructionsPreheat oven at 325-degrees. Line a 13×9 pan with foil and apply nonstick spray or butter.In a medium microwave-safe bowl, microwave the chocolate and butter in very short bursts, stirring well between each pass, until it is melted and smooth. Set aside to cool.In a small bowl, combine the flour and cocoa.In a large bowl, combine the sugar, espresso powder, and cinnamon. Pour in the chocolate mixture. Beat until just combined. Add eggs, one at a time, followed by the vanilla. Gradually stir in the flour-cocoa mix. Spread the batter in the prepared pan.Bake for 35 to 42 minutes, until the edges start to pull away from the sides of the pan and the very middle passes the toothpick test. Set on rack to completely cool.Use the foil to lift the brownies onto a cutting board. Cut into bars. Store in a sealed container at room temperature. Brownies can also be layered in wax paper and frozen for later enjoyment.OM NOM NOM!


February 3, 2021
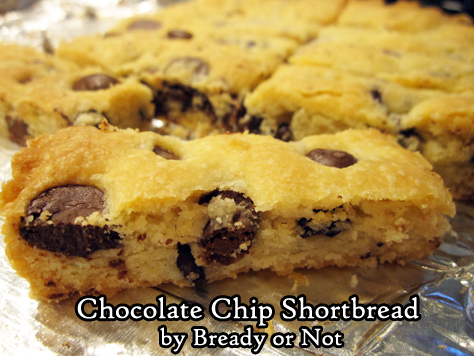
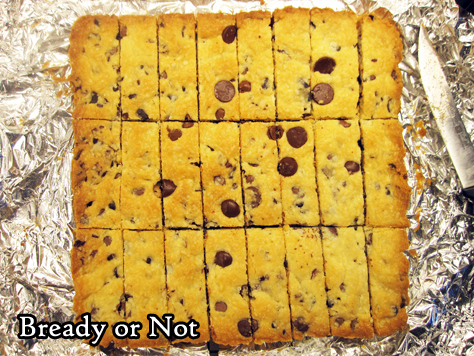
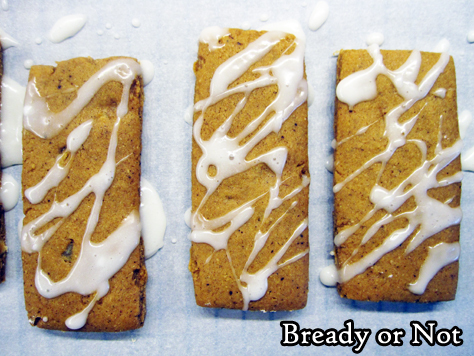
Bready or Not Original: Chocolate Chip Shortbread with Cocoa Nibs
A classic shortbread gets deeper coffee flavors in this new take featuring cocoa nibs.
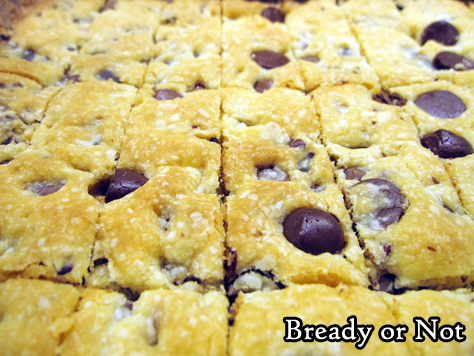
Cocoa nibs are strong stuff. You don’t need a lot to add some oomph. Here, two tablespoons is enough to do the trick.
Use whatever chocolate chips you have around for this recipe. Going dark will be a closer match for the nibs. Therefore, I prefer semisweet or milk chocolate, or a combination thereof.
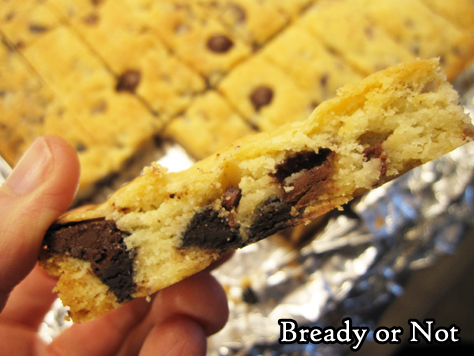
The resulting shortbread is firm enough to hold up when it is cut into finger-sized pieces, but it is wonderfully soft and chewy to eat.

Eat this for a snack or dessert, or do the proper UK thing and serve it with some hot tea!
PrintBready or Not Original: Chocolate Chip Shortbread with Cocoa NibsThis recipe creates a small pan of delicious chocolate chip shortbread with a boost from cocoa nibs.Course Dessert, SnackCuisine British, ScottishKeyword chocolate, cocoa nibs, cookiesAuthor Beth CatoEquipment9×9 panIngredients1 cup unsalted butter 2 sticks, room temperature1 teaspoon vanilla extract1/4 teaspoon salt3/4 cup confectioners’ sugar2 cups all-purpose flour3/4 cup chocolate chips2 Tablespoons cocoa nibsInstructionsPreheat oven at 350-degrees. Line a 9×9 pan with foil and apply nonstick spray.In a big bowl, beat butter, vanilla, and salt until it is smooth and creamy. Slowly beat in the confectioners’ sugar followed by the flour. Fold in the chocolate chips and cocoa nibs.Dump dough into the prepared pan. Lightly flour hands and pat dough flat and smooth. Score through the dough with a floured knife to make rectangular wedges, then prick surface all over with a floured fork.Bake for 30 to 33 minutes, until shortbread is set and the edges are browned. Let set in pan for 20 minutes, then use the foil to lift contents onto a rack to completely cool. Move them to a cutting board and slice into pieces along original score marks.Store in a sealed container at room temperature.OM NOM NOM!
January 27, 2021
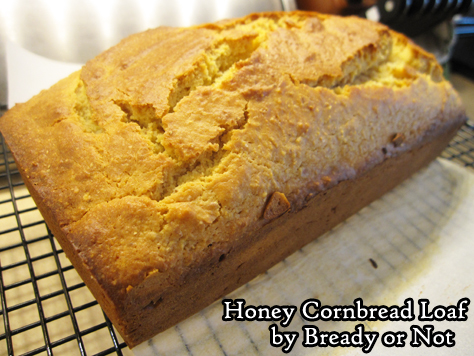
Bready or Not Original: Honey Cornbread Loaf
Cornbread is good ol’ basic American comfort food, perfect to warm up bellies at this time of year.
Sometimes, though, you don’t want a huge batch of cornbread. Just enough for a meal or two, maybe. That’s where this recipe comes in.
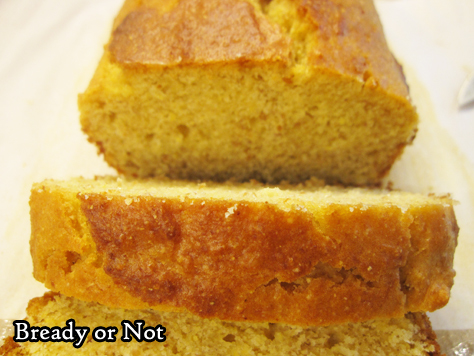
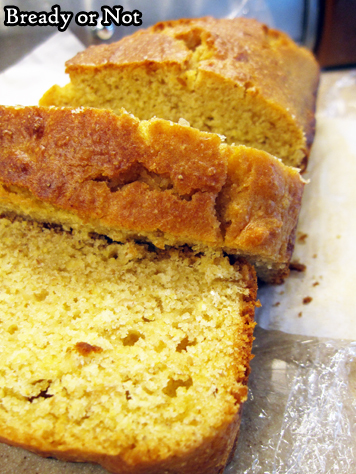
It makes a 9×5 loaf pan of delicious cornbread. Leftovers keep well wrapped up at room temperature, and the bread can also be frozen to eat later.
This cornbread is soft with a strong cornbread flavor highlighted with a touch of sweetness. Heat it up, add some butter, and you’re set.
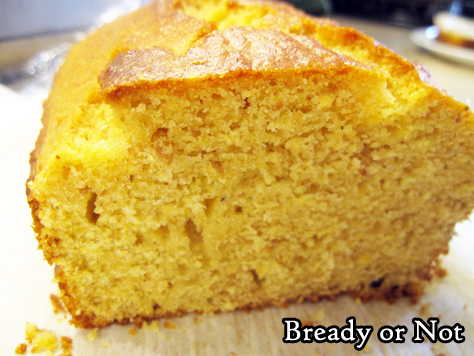
Eat it by itself for a warming snack. Make it to go along with chili or soup or a roast. However you eat it, it’ll be yummy.
PrintBready or Not Original: Honey Cornbread LoafThis small loaf is perfect for one person or a small family. It keeps well at room temperature for days, and can be frozen for later enjoyment, too.Course Side DishCuisine AmericanKeyword quick breadAuthor Beth CatoEquipment9x5x3 loaf panIngredients1 1/2 cups cornmeal1/4 cup all-purpose flour1/4 cup golden flax meal1 1/2 teaspoons baking powder1/2 teaspoon salt1/2 cup vegetable oil1/2 cup sour cream or substitute plain yogurt or crème fraiche1/4 cup honey2 large eggs room temperatureInstructionsPreheat oven at 350-degrees. Line a 9×5-3 loaf pan with a parchment paper sling along the long side, with enough paper sticking up on each side to grip it.In a medium bowl, stir together cornmeal, flour, flaxseed meal, baking powder, and salt.In a big bowl, beat together oil, sour cream, honey, and eggs. Add in the dry ingredients until just mixed. Pour batter into the pan.Bake for 30 to 35 minutes, until the middle passes the toothpick test. Let cool at least 10 minutes before using paper sling to set cornbread on cutting board.Cornbread keeps well for days well-wrapped at room temperature. It can also be frozen for later enjoyment.OM NOM NOM!January 20, 2021
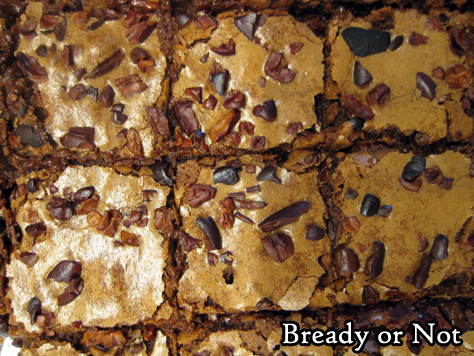
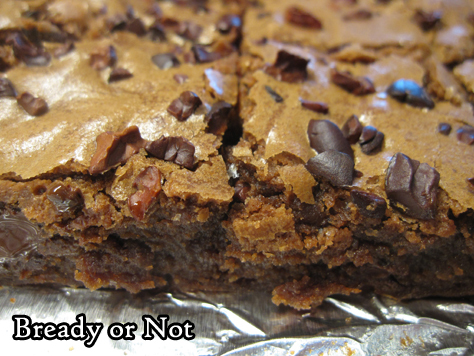
Bready or Not Original: Cocoa Nib Brownies
Cocoa nibs add chocolate flavor and a crunch to baked goods, and they are fantastic atop these Cocoa Nib Brownies!
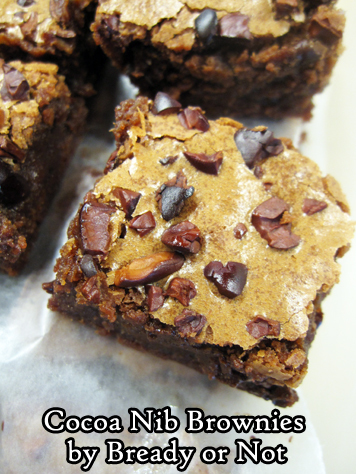
Cocoa nibs are strongly flavored like dark chocolate. You don’t need a lot of them to add a boost to these brownies.
The original version of this recipe involved melting the chocolate and butter on the stovetop. Ain’t nobody got time for that. I ended up reworking the entire recipe.
I’m all about using the microwave whenever I can. Fast to heat up, convenient to stick the bowl in the dishwasher afterward!
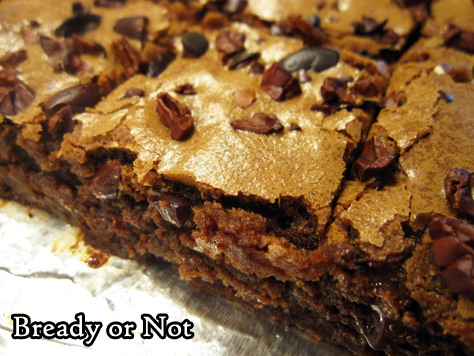
Of course, you can go back to the stove top method if you want. Either way, you get a delicious, chewy brownie packed with chocolate flavor plus a crunch.
PrintBready or Not Original: Cocoa Nib BrowniesThis recipe results in a luscious brownie with an extra crunch and flavor boost courtesy of cocoa nibs.Course Dessert, SnackCuisine AmericanKeyword brownies, chocolate, cocoa nibsAuthor Beth CatoEquipment9×13 dishbig microwave-safe bowluneven spatulaIngredients1 cup unsalted butter 2 sticks10 ounces bittersweet chocolate chips1 3/4 cups white sugar4 large eggs room temperature1 1/2 teaspoons vanilla extract1 1/4 cups all-purpose flour1/4 teaspoon kosher salt1/4 cup cocoa nibs plus 1 TbInstructionsPreheat oven at 350-degrees. Line a 9×13 pan with foil and apply nonstick spray or butter.In a big microwave-safe bowl, in short bursts melt together the butter and 1 1/4 cups of the bittersweet chocolate chips, stirring well between each pass, until everything is melted together and smooth.Whisk sugar into the chocolate. It’s okay if it still looks somewhat grainy. Beat in the eggs and vanilla, following up with the flour and salt. Once no streaks of white remain, fold in the last 3/4 cups of chocolate chips.Pour batter into the pan and use an uneven spatula to spread it to corners. Sprinkle the cocoa nibs evenly all over the stop.Bake for 25 to 28 minutes, until a toothpick stuck in the center comes out clean. Set out to cool completely. Use the foil to lift the contents onto a cutting board, and slice into pieces. Store in a sealed container at room temperature for up to 3 days.OM NOM NOM!January 13, 2021
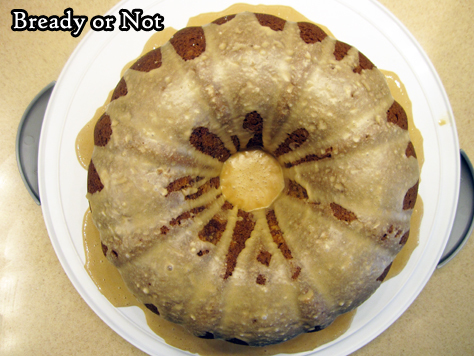
Bready or Not Original: Browned Butter Coffee Bundt Cake
This Browed Butter Coffee Bundt Cake is moist, delicious, and packed with a flavors that will get your day off to a good start.
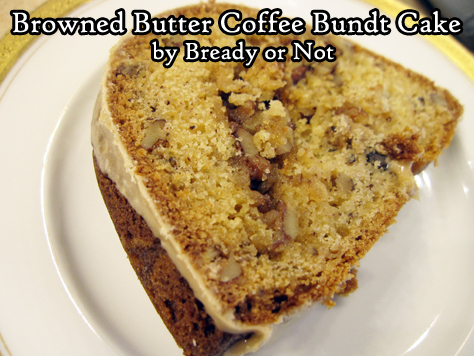
And by a good start, of course, that includes CAFFEINE. Espresso powder is included in the icing!
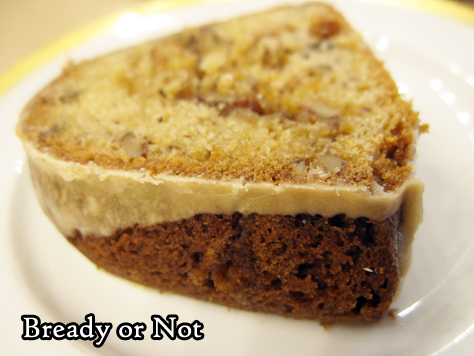
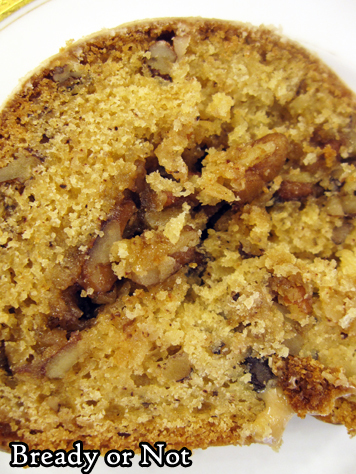
What I love about this cake is that it has all the luscious flavors of a coffee cake without the crumbly mess of the topping. In this cake, that crunchy, extra-sugary layer is in the center!

This is a great cake for a breakfast or brunch, and it’s a fantastic one to cut into individual slices, wrap up, and freeze for later.
If 2021 is anything like 2020, it’s a very good idea to have a stash of quick-thaw cake in the freezer.
Modified from Fall Baking Magazine 2013.
PrintBready or Not Original: Browned Butter Coffee Bundt CakeThis cake has all the delicious flavors and textures of a coffee cake, but without the crumbling, messy topping!Course Breakfast, Dessert, SnackCuisine AmericanKeyword bundt cake, cake, coffee, pecansAuthor Beth CatoEquipmentlarge bundt cake panIngredientsBundt cake3/4 cup unsalted butter 1 1/2 sticksnonstick spray with flour2 cups pecan pieces finely chopped, divided2 cups brown sugar packed, divided2 teaspoons all-purpose flour3 cups all-purpose flour1 1/2 teaspoons baking powder1 1/2 teaspoons baking soda3/4 teaspoon salt3 large eggs room temperature1 teaspoon vanilla extract1 1/2 cups vanilla yogurt or plain yogurt, crème fraiche, or sour creamCoffee icing4 teaspoons milk or half & half, or more as needed1/2 teaspoon espresso powder2 cups confectioners’ sugar or more as neededInstructionsFirst of all, brown the butter. (Note that this can be done a day ahead of time with the butter stashed in the fridge; set at room temperature to soften again or briefly and carefully, zap in microwave before mixing into recipe.) In a medium saucepan, melt the butter on medium-low heat for 5 to 6 minutes, until it becomes brown and embodied by a nutty fragrance. Remove from heat and cool for a while, then transfer to a small bowl. Cover and chill in the fridge for 2 hours, at minimum, to make firm.Preheat oven at 325-degrees. Apply nonstick spray with flour to coat inside of a large bundt pan. Soften the browned butter a bit.Prepare the filling. In a small bowl, mix together 3/4 cups of chopped pecans, 1/2 cup brown sugar, and 2 teaspoons of flour. Add 3 Tablespoons of the browned butter and work it in with a fork until it makes a crumbly mix.In another bowl, mix together the 3 cups flour, baking powder, baking soda, and salt. Set aside.In a big mixing bowl, beat together the remaining browned butter with the rest of the brown sugar. Add the eggs, one at a time, followed by the vanilla. Take turns mixing in the dry ingredients and the yogurt until just combined. Fold in the remaining 1 1/4 cups pecans.Pour about half the batter into the prepared pan and even it out. Sprinkle filling over it all the way around. Pour in the rest of the batter and spread it even again.Bake for 50 to 60 minutes, until it passes the toothpick test in the middle. Let cool for about 20 minutes, then invert it onto a rack to completely cool.Make the coffee icing. Stir together the milk, espresso powder, and confectioners’ sugar, adding more milk or sugar as needed to make an icing of a good consistency. Drizzle over cake.Store at room temperature. Can be sliced and frozen for later enjoyment.OM NOM NOM!January 6, 2021
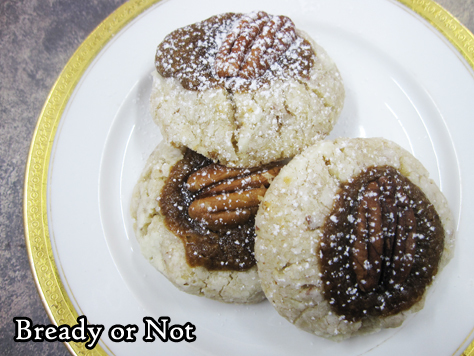
Bready or Not: Double Pecan Thumbprint Cookies
These Double Pecan Thumbprint Cookies take some extra work, but that is evident in their final appearance and flavor.
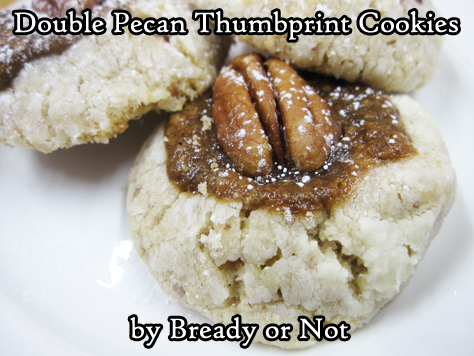
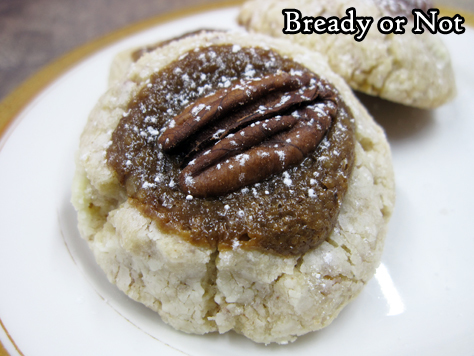
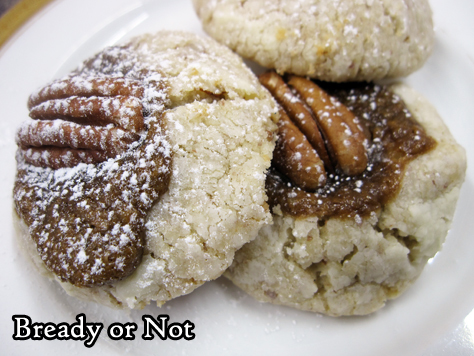
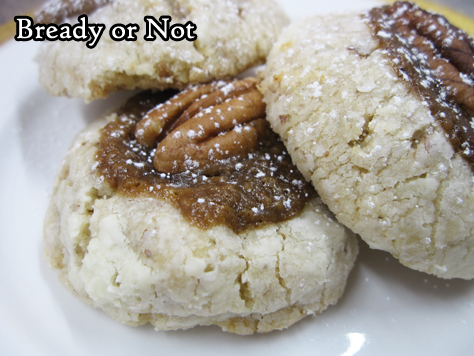
Seriously, these cookies are amazing. The shortbread-like base is filled with frangipane and crowned with a pecan. You get layers of flavor and texture in a single bite.
“What is frangipane?” you may ask. It’s an almond custard found in various fine European baked goods. You’ll find it in past Bready or Not recipes like last week’s Galettes Des Rois.
I wouldn’t rate this recipe as difficult, just outright laborious.
Plan to make these cookies over a day or a few days, and then try to space out the eating of the cookies like that, too. They are sooo dangerously good.
Modified from the original found in Bon Appetit December 2018/January 2019.
Bready or Not: Double Pecan Thumbprint Cookies
There’s no denying these cookies take extra work, but they look like it and taste like it! A shortbread-like base is topped with luscious from-scratch frangipane with a whole pecan crown. These cookies are delicious decadence.
Course Dessert, SnackCuisine AmericanKeyword cookies, pecans
Author Beth Cato
Equipmentfood processorstand mixer
IngredientsFrangipane2 cups pecan halves1/3 cup white sugar1 large egg white2 Tablespoons unsalted butter room temperature1 teaspoon espresso powder1/2 teaspoon kosher salt1/4 teaspoon almond extractDough and Assembly1 1/4 cups all-purpose flour1 teaspoon kosher salt1/2 teaspoon baking powder3/4 cup unsalted butter (1 1/2 sticks) room temperature1/4 cup white sugar3/4 cup confectioners' sugar divided; plus more for serving, if desired1 large egg yolk1 teaspoon vanilla extract or vanilla paste
InstructionsMake the Frangipane(This stage can be done as much as 3 days ahead of time. Cover the finished frangipane and store it in the fridge. There will be leftovers, but it’s great toasted on bread or mixed into other cookie dough recipes.)Preheat oven at 350-degrees. Line a small rimmed baking sheet with foil. Spread out the pecans on it to mostly be in a single layer. Lightly toast them for a total of 6 to 8 minutes, with a pause in the middle to stir them. Let the pecans cool. Set aside 1 1/4 cups to go into the cookie dough.Pulse the 3/4 cup of pecans and white sugar in a food processor until nuts are very finely ground, which will take less than a minute (don’t let them become paste!). Divide the egg, adding the egg white to the processor; place the yolk in a small bowl, add a sprinkle of sugar to help preserve it, then stash it in the fridge to go into the dough later.Into the food processor, add the butter, espresso powder, salt, and almond extract. Pulse until everything is smooth and combined. Scrape the frangipane into a small bowl and chill for anywhere from 30 minutes (minimum) to 3 days.Cookie DoughIn the clean food processor, pulse the flour, salt, baking powder, and 1 cup of the reserved pecans until nuts are very finely ground, about 1 minute. (Note that there is still 1/4 cup of pecans reserved for topping the cookies.)In the bowl of a stand mixer, beat the butter, white sugar, and 1/4 cup confectioners’ sugar until light and fluffy, about 4 minutes. Add in egg yolk and vanilla. Gradually mix in the dry ingredients until just incorporated, about 1 minute.Cover bowl with plastic wrap and chill dough until it is firm enough to be scooped and hold its shape, 30 to 45 minutes.Make the CookiesSet oven racks in upper and lower thirds, and preheat at 350-degrees. Line two large baking sheets with parchment paper.Place 1/2 cup confectioners’ sugar in a bowl. Scoop out dough by the tablespoon and roll into balls, then roll in confectioners’ sugar, knocking off any excess. Set balls on baking sheets, spaced a few inches apart.Bake cookies for 6 to 8 minutes, until puffed but edges are still soft. Remove sheets from oven. Make an indentation in the center of each cookie with the handle end of a wooden spoon or a similar heatproof object. Spoon a heaping 1/2-teaspoon of frangipane into each well and top with a pecan half from the reserved 1/4 cup.Return cookies to oven and continue to bake until edges are set and very lightly browned, 6 to 8 minutes more. Let cool on baking sheets.If desired, serve with a dusting of extra confectioners’ sugar on top. Cookies keep well in a sealed, room temperature container for up to 5 days.OM NOM NOM!
December 30, 2020
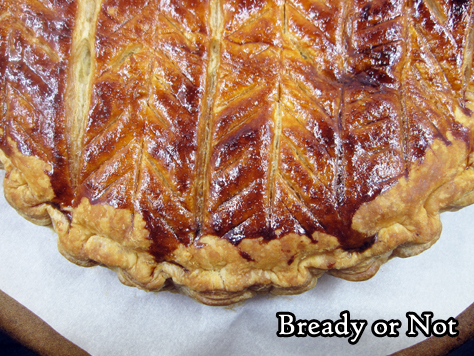
Bready or Not: Galette Des Rois
Eat like royalty without a lot of fuss with this shortcut recipe for Galette Des Rois!

Galette des Rois (King Cake) celebrates Epiphany and is available throughout January in France.
I am so not in France. Nor did I get to go there in June, as planned. Sigh. So, I have to make-do.
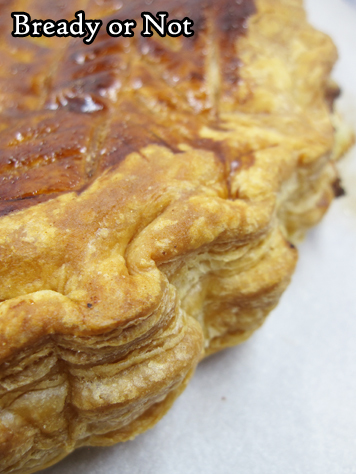
However, making-do can still be delicious. Frozen puff pastry is great stuff. You make a frangipane from scratch, but it’s pretty straightforward.
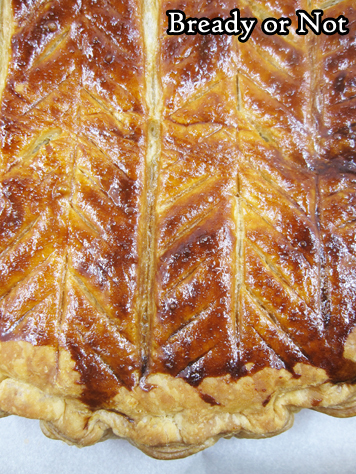
Honestly, the trickiest part for me was figuring out what pattern to etch into the top of the galette–and then hope that I didn’t dig the knife in too deeply.
If you do a Google search for Galette des Rois, you’ll see all sorts of different patterns you can do. I’m happy with my choice. And that I didn’t cut too deeply.

Because I am OCD and can’t bear to waste food, I include a bonus recipe on a great way to bake-up the scraps of puff pastry, too.
The galette and scraps are tastiest the day they are baked, but they are still good for the next few days, too.
Adapted from Dorie Greenspan.
Bready or Not: Galette Des Rois
Galette des Rois (King Cake) celebrates Epiphany and is available throughout January in France. Make your own using this shortcut take using puff pastry, modified from a Dorie Greenspan recipe. Traditionally, an almond or other small charm is hidden within the cake as an edible surprise (warn the eaters!).
Course Breakfast, Dessert, SnackCuisine FrenchKeyword almond, cake, puff pastry
Author Beth Cato
Equipmentbaking sheetparchment paperpastry brush
IngredientsFrangipane filling6 Tablespoons unsalted butter room temperature3/4 cup confectioners’ sugar3/4 cup almond flour sifted1/4 teaspoon salt2 large eggs room temperature1 Tablespoon rum optional but awesome1 teaspoon vanilla extract or vanilla bean pasteCake1 puff pastry dough box 14-17 ounce package, cold1 whole almond for the traditional charm
InstructionsPrepare the frangipaneThis can be made up to a day ahead, but needs at least an hour to chill before assembling the galette.Beat together the butter and sugar until they are creamy and light. Add the almond flour and salt. Add one whole egg. Divide the other egg, adding only the white–reserve the yolk for later. Mix in the rum, if using, and the vanilla extract.Transfer to a small bowl. Cover with plastic wrap, pressing it against the top of the mix, then place in fridge to chill.Mix the reserved yolk with 1 teaspoon of cold water, and cover it and set it in the fridge as well.Assembling the galetteSet out a complete sheet of puff pastry. Cut a 9-1/2 diameter circle out of the middle; if a 9-inch tart pan insert is available, use that as a handy guide. Set aside scraps from edges. Place the cut round on a parchment-lined baking sheet.Repeat the process with the second sheet of puff pastry. Place all of the cut-off bits aside in the fridge for now.Return to the pastry round on the baking sheet. Spread the frangipane evenly over the dough, but leave a 1-inch border bare. Place the almond somewhere on the filling. Moisten the border with some cold water. Set the second round of pastry on top and press it down around the edges to seal them together.Use the back of a butter knife to scallop the edges by creating an indentation about a quarter-inch deep, spaced out about a half-inch apart. Refrigerate for about 30 minutes.Preheat the oven at 425-degrees.Pull out the chilled galette. Brush a thin layer of yolk over the top, but be very careful that it doesn’t drip down over the edge, or the galette won’t rise. Use a paring knife to etch a design on the very top of the galette while taking care not to cut too deeply. Add 6 small slits spaced out to act as steam vents.Drop the oven temperature to 400-degrees. Bake the galette for 30 to 40 minutes, until it is puffed and golden brown. Keep an eye on it. If filling starts to ooze out, scrape it away so that it doesn’t drip off the pan. If the galette is browning too fast, cover it with aluminum foil.Transfer it to a rack to cool for at least 15 minutes. Expect it to deflate some, as that is the way of puff pastry. Best eaten when fresh, served warm or at room temperature, but can be chilled and eaten over the coming days.Bonus: As soon as the galette is out of the oven, put the puff pastry scraps on the parchment. Brush the remaining yolk atop. Then add a topping like pearl sugar, turbinado sugar, or maple sugar. Bake scraps for 15 to 20 minutes, until pieces are puffed and golden. Like the galette, they are best eaten the same day, but are still quite edible after that.OM NOM NOM!
December 23, 2020
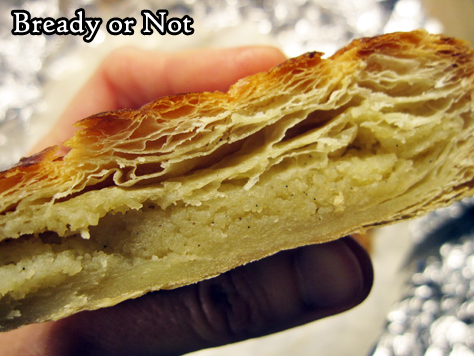
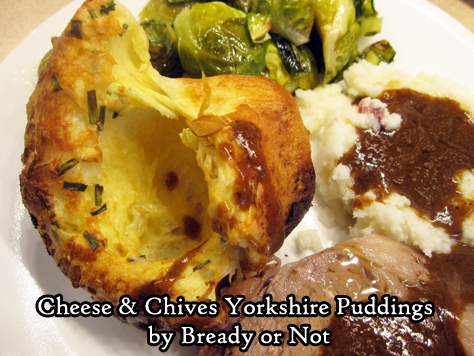
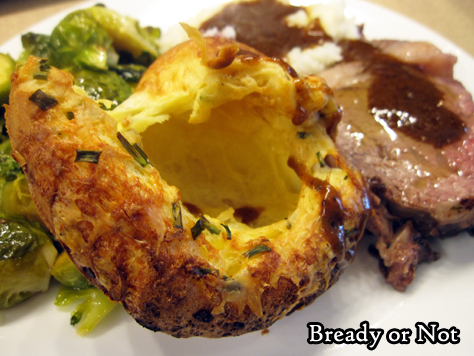
Bready or Not: Cheese and Chives Yorkshire Puddings (Small Batch)
Yorkshire puddings are what many Americans also know of as popovers–light, airy, crisp sponges perfect to eat with a roast and gravy!
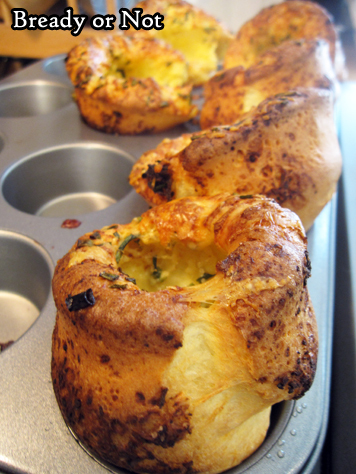
This recipe is for a small batch of puds. Since they are so airy (if they rise right), the six puddings of this recipe are perfect for two or three people.

Cheese makes everything better, of course. I used Dubliner Irish Cheddar, as it is available at my nearest Costcos for a good price.
Use a good quality cheddar here to really take these puddings to the next level.
Modified from Bake from Scratch Magazine.
Bready or Not: Cheese and Chives Yorkshire Puddings (Small Batch)
These cheesy Yorkshire puds are perfect to serve with a holiday roast and gravy! Unlike many recipes, this makes a small batch of six puddings, enough for 2 or 3 people. These are light, airy, and oh-so-cheesy. Use the best cheddar you can find–you'll be able to taste the difference.
Course Side DishCuisine BritishKeyword cheese, quick bread
Servings 2
Author Beth Cato
Equipmentmetal muffin panblender
Ingredients3/4 cup milk or half & half2 large eggs room temperature3 Tablespoons unsalted butter melted, divided3/4 cup all-purpose flour1/2 teaspoon kosher salt1/4 cup quality cheddar cheese (25 grams), freshly grated1 1/2 Tablespoons fresh chives chopped, plus more for garnish
InstructionsPreheat oven at 425-degrees.In the container of a blender, place milk, eggs, 1 tablespoon melted butter, flour, and salt; process just until smooth. Let rest for 10 minutes.In a small bowl, toss together grated cheese and chives.Place a 12-cup muffin pan in oven for 5 minutes to preheat.Remove muffin pan from oven, and quickly spoon the remaining 2 tablespoons melted butter into the 6 muffin cups that are being used. Return pan to oven for 2 minutes.Remove pan from oven. Working fast, spoon or pour batter into buttered muffin cups, dividing as evenly as possible. Top each with a spoonful of cheese mixture.Bake until puffed and golden brown, 15 to 18 minutes. Garnish with more chives, if desired. Serve immediately. Yorkshires are best fresh as they deflate after baking.OM NOM NOM!
December 16, 2020
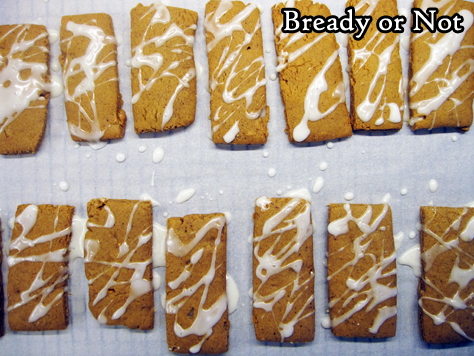
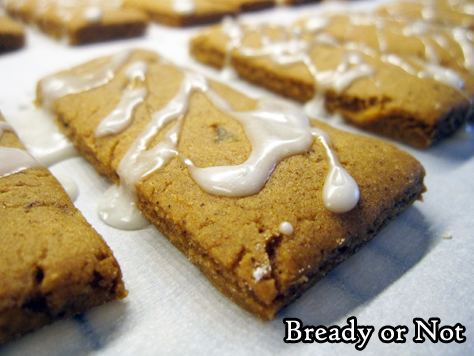
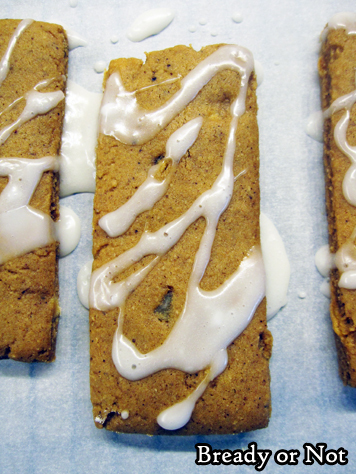
Bready or Not: Lebkuchen
It’s my understanding that there are likely thousands of Lebkuchen recipes in the world, and here is mine.
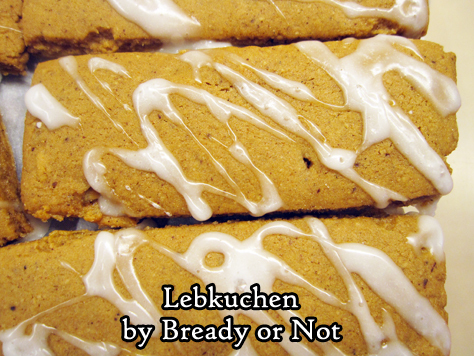
This traditional German Christmas cookie is like a gingerbread cookie, but is a lot more complex due to the spices used and the citrus mixed in.
Even the glaze adds to that wonderfully fresh citrus flavor, as it has a bit of lemon juice mixed in.
The only somewhat odd ingredient is chopped-up candied orange. I actually cut up a whole-slice version that Trader Joe’s sells at the holidays, but otherwise candied orange should be found near fruitcake ingredients at many grocery stores.
Note that this cookie dough needs to chill for a full day. That gives the flour time to develop and for the spices to really do their thing.
And trust me, you want their thing done. These are awesome cookies, sure to delight and surprise anyone who digs in.
Modified from a recipe printed in Cooking Light Magazine, December 2008.
Bready or Not: Lebkuchen
This take on the classic German holiday cookie is packed with complex spices and citrusy notes. Note that the dough needs to chill for a full day prior to baking. The final result is firm and chewy when fresh, and after about two days, they firm up more but remain delicious.
Course Dessert, SnackCuisine GermanKeyword cookies, gingerbread, holiday, lemon
Author Beth Cato
IngredientsCookies3/4 cup brown sugar packed1/2 cup honey1/4 cup unsalted butter half stick1/4 cup dark molasses2 teaspoons espresso powder1 large egg3/4 cup ground almonds sifted1/2 cup candied orange slices chopped, or candied orange peel3 1/2 cups all-purpose flour 15.75 ounces1 teaspoon ground cinnamon1/2 teaspoon baking soda1/2 teaspoon ground cardamom1/2 teaspoon ground cloves1/4 teaspoon ginger1/8 teaspoon saltGlaze3/4 cup confectioners’ sugar2 teaspoons lemon juice1 1/2 teaspoons water
InstructionsIn a medium saucepan on medium heat, constantly stir together the brown sugar, honey, butter, and molasses until the sugar is dissolved. Make sure it doesn’t come to a boil. Transfer the mixture to large bowl and let it cool to room temperature.Add the espresso powder and egg to the cool sugar mixture. Follow that up with the ground almonds and candied orange bits.In a separate bowl, stir together the rest of the dry ingredients. Gradually combine the two bowls until just mixed. Lift it up and knead it for a minute or so to make sure no flour remains at the bottom.Wrap dough in plastic wrap and stash in the fridge for at least a day.Preheat oven at 325-degrees. Cover two large baking sheets with parchment paper.Divide dough into 4 portions. Keep the other portions chilled while rolling 1 out into a 8×6-inch rectangle. Cut (a pizza slicer or bench knife are great) into 3×1-inch bars. Transfer to baking sheet, setting them an inch apart.Bake for about 20 minutes, or until firm. If cooking both sheets at once, switch their positions about halfway through.As soon as the cookies are out, mix up the glaze. Drizzle glaze back and forth over the warm cookies. Let glaze set for an hour before packing up cookies in sealed containers.OM NOM NOM!
December 15, 2020
Giftmas 2020: Help the Edmonton Food Bank!

I’m taking part in Giftmas again this year, an annual effort coordinated by Rhonda Parrish for the benefit of the Edmonton Food Bank. I don’t need to state the reasons why helping food banks is more important this year than ever before. We need to help each other. We can’t connect in person, but we can connect with a few bucks that will help fill bellies and add warmth to the world through kindness. If you’re American like me, your dollars will deliver extra bang with each buck, too. $1 = 3 meals.
Rhonda asked Giftmas participants to post on the subject of connections. For me, this year has featured an evolving connection with my son.
He turned fifteen in March. We didn’t get to do his annual birthday trip to IKEA, where he loves following the handout map and the big arrows on the floor, as he has since he was a preschooler. He’s autistic. He loves maps and numbers, and IKEA is all about those things.
Last year, he started high school. It was not a transition without hiccups. He needs routine and quiet. He struggles to understood the chaos of other people. The lead-in to his birthday was the start of virtual high school. It was… tumultuous, to say the least. The kid who needs routine, losing all semblance of it. Me, I’m diagnosed OCD and not much better at handling this stuff than he is, but I have to be the cool-headed parent because if I crack, he will really crack.
I’m also the at-home parent as I do this writer thing. I was the one who had to talk him through the fear, the unknowns. I had to talk myself through, too.
As April chugged along, as masks became the thing, his school days began to find more of a groove. He did, too. He actually found it easier to focus on his work in the online school format. I enjoyed having him around, too, preparing lunch for him and checking in during breaks to see how things were going. It became a situation that bonded us more, as we talked at lunch about the new COVID-19 case numbers for the day and what they meant for our family.
We’ve continued to work through, day by day, as his sophomore year began in the fall. He started out online, then got to return to school for two days a week for three weeks before an outbreak shut his school down in early November. Soon after that, rising case numbers for Arizona forced his entire district to return to online learning to finish out 2020. He’s handled these transitions oddly well. I’m proud of him. This year has been hard, but he has grown in this time. So have I.
That said, I selfishly would like fewer growth-through-adversity moments in 2021, for our sakes and for everyone else, too.
Thank you.
Follow the entire blog tour through RhondaParrish.com and her social media.


