
Beth Cato's Blog, page 32
December 9, 2020
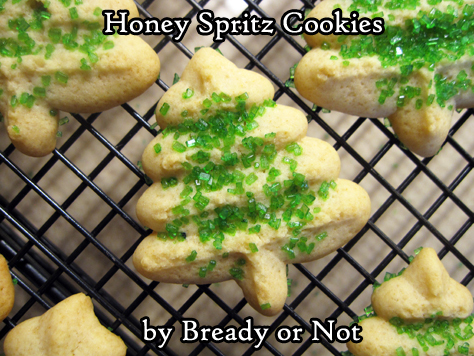
Bready or Not Original: Honey Spritz Cookies
These Honey Spritz Cookies are perfectly sweet, and with some added sanding sugar, will make cookie plates bright this holiday season!
I have a love and hate relationship with my cookie press. Sometimes I try to use it for recipes and it is a disaster. Not so with this recipe!
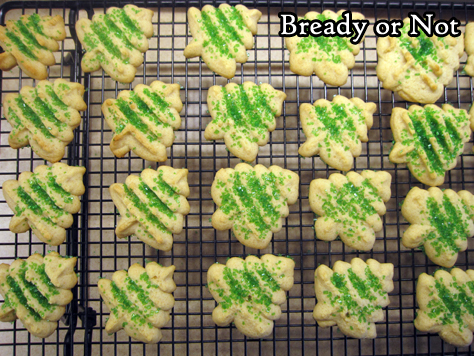
This dough was soft and dreamy to work with. I can only hope that you have a similar experience.
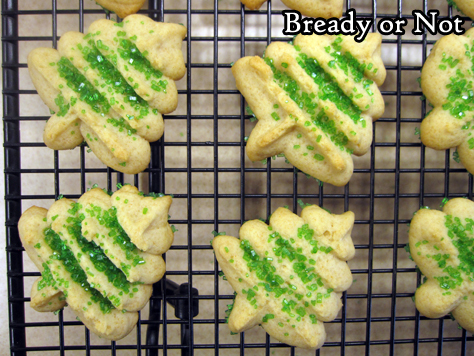
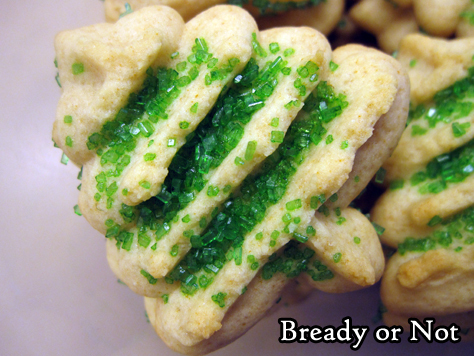
As I used a tree-shaped disc to make my cookies, I added some green sanding sugar. The fun thing about this recipe is that you can make it any time of year and customize it to the season.
Really, the most difficult thing about this recipe was rearranging my fridge to fit in the cookie sheets for their chill time.
Bready or Not Original: Honey Spritz Cookies
Use a cookie press to create delicious cookies! These treats are perfectly sweet.
Course Dessert, SnackKeyword cookie press, cookies, holiday
Servings 40 cookies
Author Beth Cato
Equipmentcookie press2 large cookie sheets
Ingredients2 cups all-purpose flour1/2 teaspoon baking powder1/4 teaspoon salt1/2 cup unsalted butter 1 stick1/3 cup white sugar1 large egg room temperature1/4 cup honey1 teaspoon vanilla extractsanding sugar or coarse sugar or other edible decorations
InstructionsPlace two cookie sheets in fridge to completely chill.Arrange oven racks at top and bottom of oven, then set to preheat at 350-degrees.In a medium bowl, stir together flour, baking powder, and salt. Set aside.In a large mixing bowl, beat the butter and sugar until light and fluffy. Add the egg, honey, and vanilla. Gradually add in the dry mixture until just combined. Dough will be super-soft.Cookie presses vary in how they work–fill the device with dough, however required, and add decorative disk or nozzle. Press out cookie dough directly onto the cold cookie sheets, spacing 1-inch apart.If desired, add colorful sanding sugar or other decorations. Bake for 7 minutes. Switch placement of cookie sheets within oven. Bake for another 7 minutes, until set. Let cool on pans for about 5 minutes then transfer to racks to completely cool.Store in sealed containers at room temperature.OM NOM NOM!


December 2, 2020
Bready or Not: Noel Cookies
We made it to December! Let’s celebrate with these Noel Cookies.
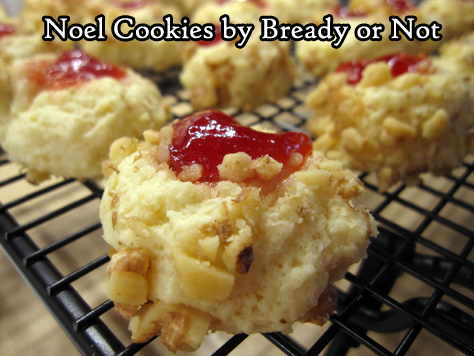
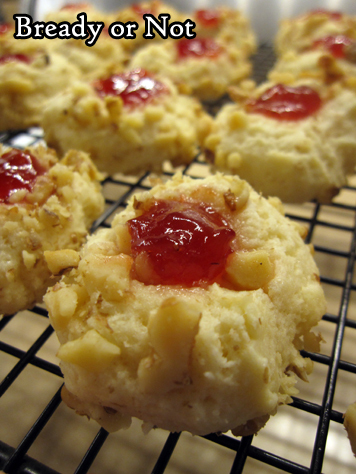
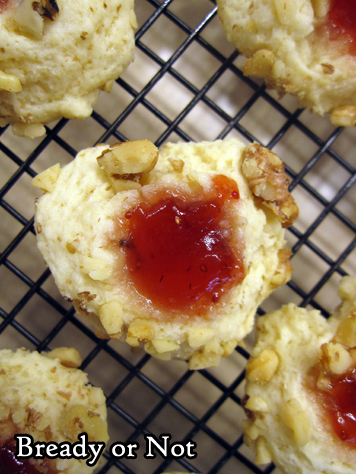
These cookies are a fun mixture of textures and flavors. Chopped nuts crust a soft cookie, everything complemented by a zing of jam.

I used good ol’ Smuckers strawberry preserves for this recipe and avoided large chunks of fruit. Really, use whatever jam you like!
I was a bit concerned about how these cookies would travel to my husband’s work. I didn’t want jam to get everywhere and make a sticky mess. I found, though, that the dabs of jam stayed put and that waxed paper between the stacked cookies kept everything from going sticky.
These cookies will keep for at least 3 days in sealed containers. They might last longer, but you’ll need to test your restraint to find out!

Recipe modified from Taste of Home Best Holiday Recipes 2008.
Bready or Not: Noel Cookies
These jam-filled cookies look bright and cheery for holiday cookie plates! Recipe makes about 40 cookies.
Course Dessert, SnackCuisine AmericanKeyword cookies, walnuts
Servings 40 cookies
Author Beth Cato
Equipmentteaspoon scoopparchment paper
Ingredients1/4 cup unsalted butter half stick1/4 cup shortening3/4 cup white sugar1 egg1 teaspoon vanilla extract2 2/3 cup all-purpose flour1/2 teaspoon salt1/4 teaspoon baking powder1/4 teaspoon baking soda1/2 cup sour cream3/4 cup finely-chopped nuts1/3 cup seedless fruit jam or preserves, avoid big chunks
InstructionsPreheat oven at 350-degrees. Line cookie sheet with parchment paper.In a big bowl, cream together the butter, shortening, and sugar until light and fluffy. Beat in the egg and vanilla.In another bowl, stir together the flour, salt, baking powder, baking soda. Gradually mix the dry ingredients into the butter mixture while also intermittently adding in the sour cream.Use a teaspoon scoop to measure the dough. Roll into balls, then roll each ball in the chopped walnuts. Place cookies about 2 inches apart on cookie sheet. Use the end of a wooden spoon or another kitchen tool to create a deep indentation in the middle of each cookie. Add a dollop of jam to fill each well.Bake for 10 to 12 minutes, until set. Let cool on cookies sheet for a few minutes, then move to rack. Store in a sealed container with waxed paper between the layers. Keeps for at least 3 days.OM NOM NOM!
November 25, 2020
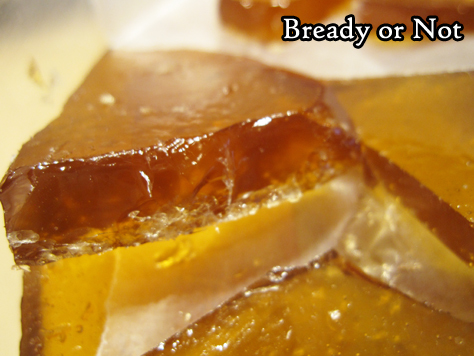
Bready or Not Original: Hard Maple Candy
This Hard Maple Candy garnered the name “Canadian meth” at my husband’s work. By that nickname, I take it that they 1) liked it, and 2) kept eating it.

On a more personal note, this candy could also work as a shiv, because this stuff is like GLASS. Trust me when I say that if you decide to break this into pieces with your hands, you will get little cuts all over. Ow.
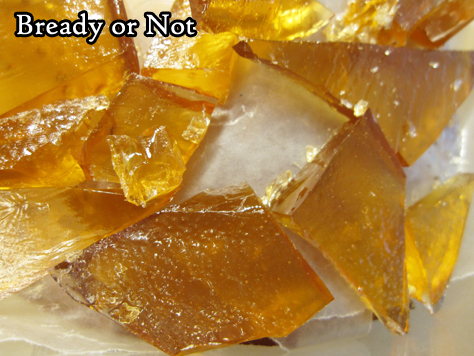
So maybe tap the candy gently with the butt of a butter knife or use a little mallet, whatever you have that will break the candy apart without harming your pan, counter, or you.
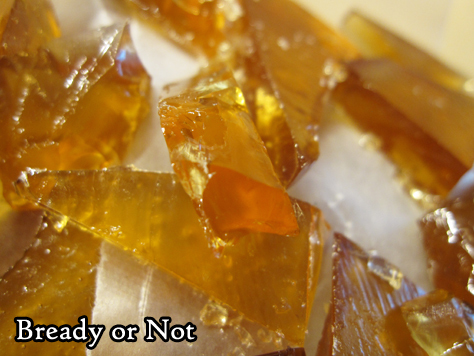
Once you survive that stage, though, wow will you have a lot of candy to enjoy. Definitely make this to share with a crowd, or you just might go into diabetic shock.
It’d be a delicious way to go, but seriously, I don’t recommend going at all. We’ve made it this far in 2020. Hold on a while longer.
Bready or Not Original: Hard Maple Candy
This super-easy recipe makes a LOT of hard maple candy that is best sucked on, not chewed. Perfect for holiday gifts!
Course DessertCuisine American, CanadianKeyword candy, maple, no bake
Author Beth Cato
Equipment15x10x1-inch pan (jelly roll pan)candy thermometer
Ingredientsnonstick spray3 1/2 cup white sugar1 cup light corn syrup1 cup water3 Tablespoons maple flavor
InstructionsHeavily apply nonstick spray to the jelly roll pan.In a large saucepan, stir together the sugar, corn syrup, and water. Start heating up. Set up candy thermometer and stir frequently as the heat rises to 300-degrees, which is hard-crack stage.Remove pan from heat. Stir in maple flavoring. Immediately pour candy into the prepared pan. Cool completely, which won’t take long.Carefully break into pieces. Note that this stuff is like candy glass, and if breaking with hands, it can and will cut the skin.Pack into individual bags or tins for gift-giving, or stack it in a large sealed container with waxed paper between layers. Can keep for weeks.OM NOM NOM!
November 24, 2020
Out Today: Escape Pod: The Science Fiction Anthology

Today’s the release date for Escape Pod: The Science Fiction Anthology, a book that celebrates Escape Pod’s 15th anniversary with a range of diverse science fiction stories. I’m somehow mixed in there with a who’s-who of authors. Here’s the official description; buy the book wherever books are sold, in print and in ebook!
The fifteenth anniversary of the Hugo-nominated science fiction podcast Escape Pod, featuring new and exclusive stories from today’s bestselling writers.
Finalist for the 2020 Hugo Award for Best Semiprozine.Celebrate the fifteenth anniversary of cutting-edge science fiction from the hit podcast, Escape Pod. Escape Pod has been bringing the finest short fiction to millions of ears all over the world, at the forefront of a new fiction revolution.
This anthology gathers together fifteen stories, including new and exclusive work from writers such as from Cory Doctorow, Ken Liu, Mary Robinette Kowal, T. Kingfisher and more. From editors Mur Laffterty and S.B. Divya comes the science fiction collection of the year, bringing together bestselling authors in celebration of the publishing phenomenon that is, Escape Pod.
Available at Amazon [affiliate link] | Bookshop.org [support indies] | Barnes & Noble
#SFWAPro
November 18, 2020
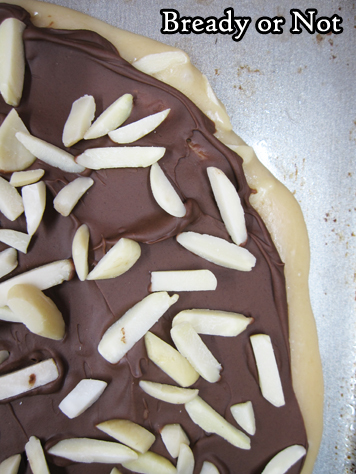
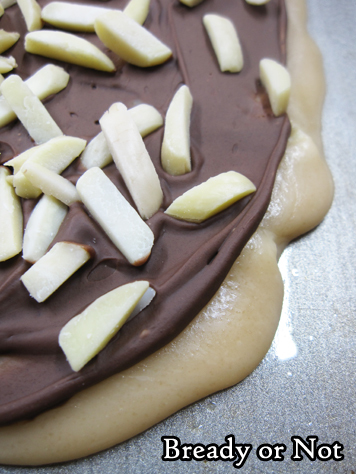
Bready or Not Original: English Toffee
English Toffee is a classic, timeless candy for a reason: IT IS DELICIOUS. With this recipe, you’ll have a whole bunch of candy made in as fast as 15 minutes!
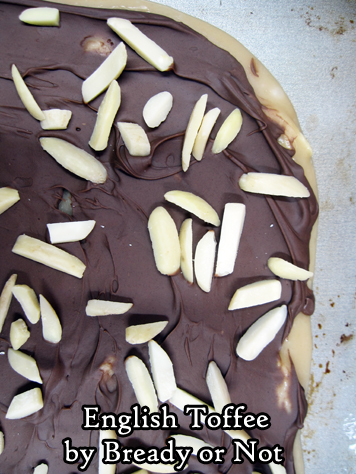
Make this to feed a crowd or to assemble for gifts. The recipe makes a lot, and trust me, you don’t want to be home alone with this temptation.
There is nothing healthy about this candy. It is pure indulgence. It’s also a cheap indulgence–you’d pay a lot of money at the store to get this much candy of quality!
And homemade is always better, right?

Bready or Not Original: English Toffee
This classic candy is deliciously perfect for holiday gatherings and gift-giving! With a cooperative stove, the candy is made in as fast as 15 minutes, and just needs more time to set.
Course DessertCuisine BritishKeyword almond, candy, chocolate, no bake
Author Beth Cato
Equipment10x15x1-inch jelly roll pancandy thermometeruneven spatula
Ingredientsnonstick spray1 cup unsalted butter 2 sticks1 1/4 cup white sugar2 Tablespoons water1/8 teaspoon salt3/4 cups almonds slivered or sliced, divided1 1/2 cups milk chocolate chips use medium-sized chips, not gigantic gourmet onesMaldon sea salt or other fancy salt for top, optional
InstructionsApply a generous amount of nonstick spray to a 10x15x1-inch jelly roll pan. Measure out the almonds and the chocolate and set them aside in separate dishes.In a large saucepan on medium heat, melt the butter. Add the sugar, water, and salt, and continue to stir it as the sugar cooks and dissolves. Bring everything to a boil, then reduce temperature to simmer. Continue to stir frequently for the next 5 to 6 minutes as the mix darkens to the color of a brown paper bag; on a candy thermometer, it should be 300-degrees.Remove pan from heat. Stir in 1/4 cup of the almonds (meaning there is still 1/2 cup reserved for later). Pour the toffee onto the prepared pan. Use a greased uneven spatula or tilt the pan to carefully spread the candy into an even layer.Immediately sprinkle the chocolate chips all over the top. Let them sit for a minute or two to soften, then use an uneven spatula to spread the chocolate across the toffee. Promptly sprinkle the remaining almonds over the top. Add Maldon or other fancy flaky salt, if desired.Cool to room temperature, then chill for a while to completely set. Use hands to break toffee into pieces. Some nuts and chocolate will fall off, but it’s all good.Store between layers of waxed paper in sealed containers. Keeps for at least 2 weeks.*OM NOM NOM!*
November 11, 2020
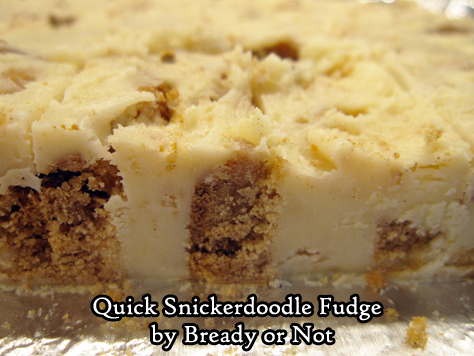
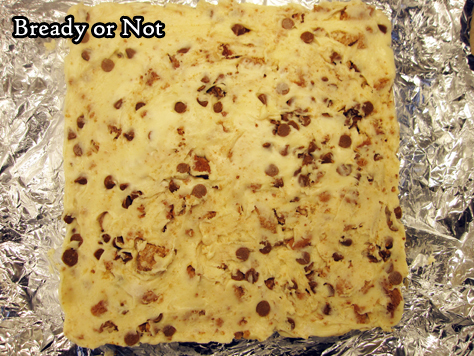
Bready or Not Original: Snickerdoodle Quick Fudge
Last year I shared my recipe for Cookies and Milk Quick Fudge. This new version builds on that with a holiday twist: I used Voortman Bakery’s holiday special Snickerdoodles plus caramel chips!
Old-fashioned stovetop fudge is great. It’s also fussy, prone to crystallize or not set. Quick fudges are no-fuss and just as delicious.
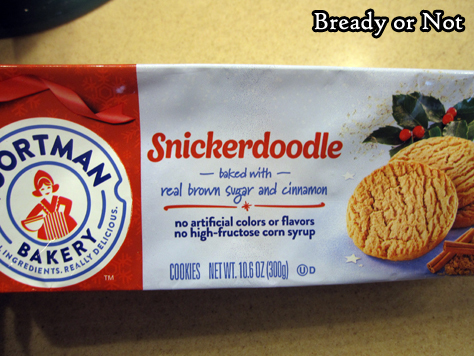
Any time of year, make this using crisp cookies like many from Keebler. For this holiday take, I used Voortman’s Snickerdoodles, but you could also use gingersnaps or other classic favorites and switch out the kind of sweet chips.
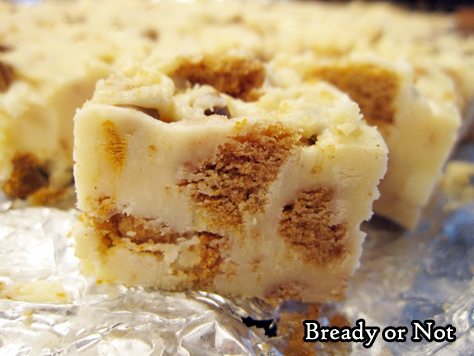
Prep the cookies by chopping up a cup and a half. Freeze those bits; it won’t take long. From there, it takes just a few minutes to mix up the fudge.
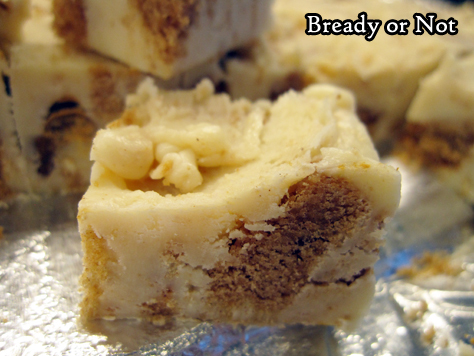
The hardest part is waiting for the fudge to set for the next few hours. This recipe makes a lot of fudge, but it’s easy to portion out. Slice it small, and keep it sealed and stored in the fridge!
Bready or Not Original: Snickerdoodle Quick Fudge
This quick fudge is fast to prepare and ready to eat after a few hours of chilling. Use any variety of crisp, firm store-bought cookies; Keebler cookies are great year-round, or use holiday cookies as in this version. Chop up the cookies and spread them on a wax paper-covered dish to freeze, which won’t take long at all. This recipe makes a lot of fudge, and it can keep for weeks if sealed in the fridge.
Course DessertCuisine AmericanKeyword fudge, holiday, quick fudge, snickerdoodle
Author Beth Cato
Ingredients1 1/2 cups store-bought holiday Snickerdoodle cookies chopped and frozen3 cups white chocolate chips14 ounces sweetened condensed milk1/3 cup caramel chips
InstructionsLine an 8×8 or 9×9 pan with foil and apply nonstick spray. Set aside.In a large microwave-safe bowl, heat the white chocolate and sweetened condensed milk in 30 second increments, stirring well after each bout, until it is melted and smoothed. Watch it closely!Quickly stir in the frozen cookies, and pour into the prepared pan. Sprinkle caramel chips on top and tap them into place.Refrigerate at least 2 hours. Use foil to lift fudge onto a cutting board to slice into small squares. Store in a sealed container in the fridge. Keeps for weeks.*OM NOM NOM!*
November 4, 2020
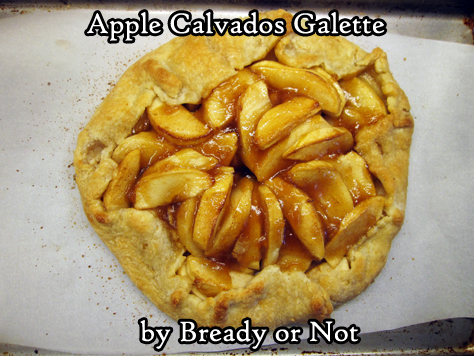
Bready or Not Original: Apple Calvados Galette
This Apple Calvados Galette is a perfect dessert for one or two people. Plus, it’s rustic and pretty to behold!
Calvados is an apple brandy made in Normandy. The price point of it can vary quite a bit. Feel free to use another kind of apple brandy in the recipe.
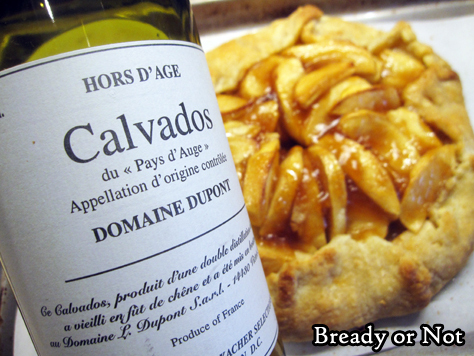
The delicious, original aspect of this treat is that you use the calvados to make a quick stovetop jelly that you then coat the apples with at the end of the bake time.
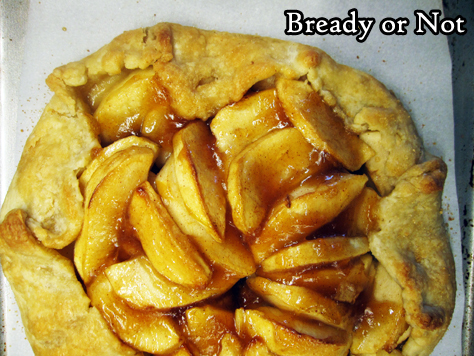
The alcohol flavor doesn’t linger. What you get is a concentrated sweet flavor of apples, right atop the fresh apples.
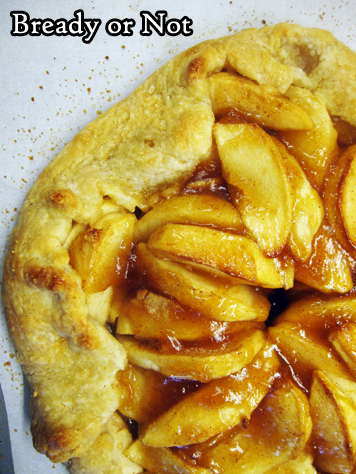
The baked galette keeps for days wrapped up in foil in the fridge. A quarter slice is the perfect amount for breakfast or dessert, and it’s not anywhere near as bready and dense as a full piece of pie.
Bready or Not Original: Apple Calvados Galette
This Apple Calvados Galette evokes the yummy goodness of apple pie, but in a more rustic, simple form. This is the perfect dessert for one or two people! If French calvados isn’t available, use another apple brandy.
Course Breakfast, Dessert, SnackCuisine FrenchKeyword alcohol, apple, pie
Author Beth Cato
Equipmentbaking sheetparchment paperbasting brush
IngredientsGalette1 single-layer pie dough store-bought or homemade4 medium apples such as Gala, Fuji, and Ambrosia1 Tablespoon lemon juice1/3 cup calvados or other apple brandy1 Tablespoon cornstarch3 Tablespoons brown sugar packed1/2 teaspoon ground cinnamonGlaze1 Tablespoon pure maple syrup1 Tablespoon maple sugar or turbinado sugar
InstructionsPreheat oven at 400-degrees. Line a baking sheet with parchment paper.On a lightly floured surface, roll out the pie crust to about a 10-inch diameter circle. Transfer it to the baking sheet and set in fridge while the other ingredients are prepared.Peel, core, and thinly slice the apples, placing them in a large bowl. Pour in the lemon juice, calvados, cornstarch, brown sugar, and cinnamon. Toss the apples to coat them completely.Pull out the chilled crust. Begin to arrange apple slices in the middle, fanning them out and stacking them, but leaving a 2-inch border of dough around the outside. DO NOT DISCARD THE LIQUID IN THE BOWL! Once the apples are arranged, fold the dough over to partially cover the apples.Start baking the galette for 15 minutes. While that is cooking, pour the leftover liquid into a small pot on medium-high. Stay close to the stove and stir liquid often. As soon as it gels, which is right at right about boiling temperature, remove it from heat. Set aside.Reduce oven temperature to 350-degrees. Bake galette for another 20 minutes.Pull out the galette. Drizzle the gel over the exposed apples in the middle of the galette then use basting brush to coat every nook and cranny. Measure out maple syrup. Use same brush (no need to wash it) to coat the top crust, then sprinkle maple sugar or coarse sugar over it to add a crystalline crunch.Bake for another 10 to 15 minutes, until apples in middle are fork-tender.Let cool slightly before cutting–a pizza cutter is ideal. Leftovers can be kept wrapped up in foil in the fridge for days.*OM NOM NOM!*
October 28, 2020
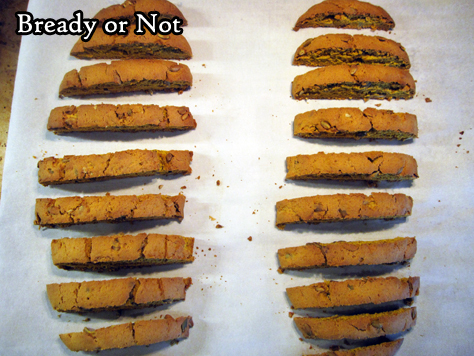
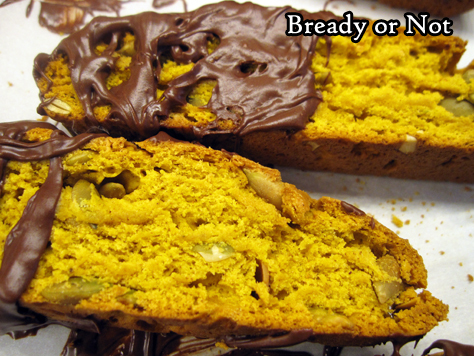
Bready or Not Original: Pumpkin Pie Biscotti
The 2020 pumpkin theme ends with a perfect fall treat: Pumpkin Pie Biscotti.

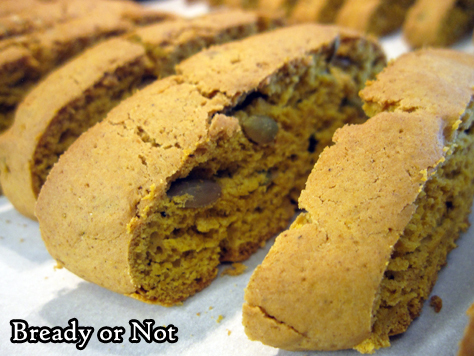
These things are dangerously good, and yes, they really do taste like pumpkin pie–in crisp, crunchy form.
I always keep pumpkin kernels around. I always use them in my Healthy Breakfast Cookies and in other things I make for myself, including salads. Use unsalted ones, if you can, or reduce the salt in the recipe.
Like all biscotti, these are great not simply because they are delicious, but because they should keep quite well if kept in a sealed container.
Enjoy these twice-baked treats with your hot drink of preference and feel appropriately autumnal.
Bready or Not Original: Pumpkin Pie Biscotti
These perfectly-autumn biscotti embody mild flavors of pumpkin and spice. Dip them in a refreshing hot drink for the perfect breakfast or midday snack!
Course Breakfast, SnackCuisine AmericanKeyword biscotti, chocolate, cookies, pumpkin
Author Beth Cato
Ingredients4 Tablespoons unsalted butter half stick, softened2/3 cup white sugar1 1/4 teaspoons pumpkin pie spice3/4 teaspoon ground cinnamon1 1/2 teaspoons baking powder1/2 teaspoon salt1 large egg room temperature1/2 cup pure pumpkin puree2 cups all-purpose flour1/2 cup unsalted pumpkin kernels also called pepitas3/4 cup semisweet chocolate
InstructionsPreheat oven at 350-degrees. Line a large baking sheet with parchment paper.In a large mixing bowl, blend the butter, sugar, pumpkin pie spice, cinnamon, baking powder, and salt, until smooth and creamy. Mix in the egg and pumpkin puree. Gradually mix in the flour followed by the pumpkin kernels.Divide dough in half. Place each piece spaced out on parchment. Dough will be very sticky, so shape with plastic spatula or greased or floured hands into 1-inch high flat rectangular logs.Bake biscotti for 25 minutes. Remove from oven and let set for 5 minutes. Use a long bread knife and slice down--don't saw--into long, even cookies. Space out cookies upright, if possible, or lay on sides.Bake for another 25 minutes; if cookies are laying on sides, flip them to other side halfway through. Set out on stove or counter to cool and dry for several hours.Melt chocolate in microwave or using a double-boiler on the stove. Drizzle chocolate over the ends of the biscotti and set again on parchment to set.Store biscotti in sealed containers at room temperature for days or weeks.OM NOM NOM!
October 21, 2020
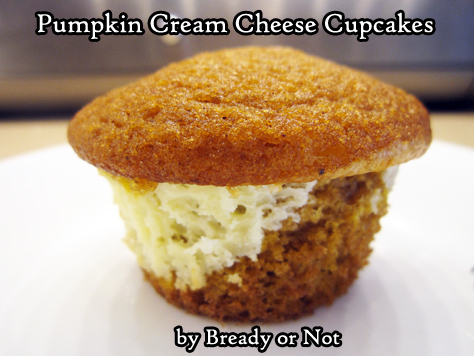
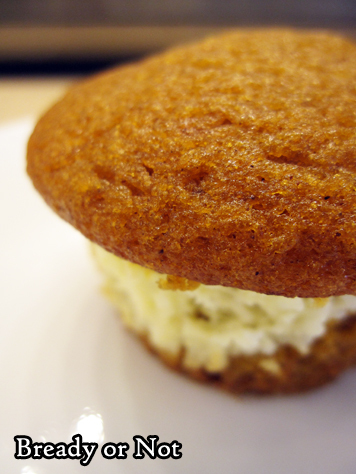
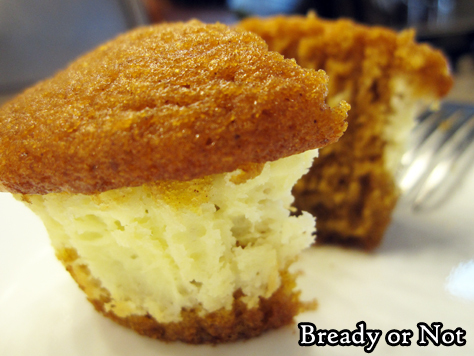
Bready or Not Original: Pumpkin Cream Cheese Cupcakes
Pumpkin pairs with cream cheese in this delicious Pumpkin Cream Cheese Cupcakes.
No need for extra sugar or frosting on top. These are delicious all on their own!
It seems that my pumpkin theme most years needs at least one cream cheese and pumpkin pairing. This one fulfills that requirement this year, and in a delicious way.
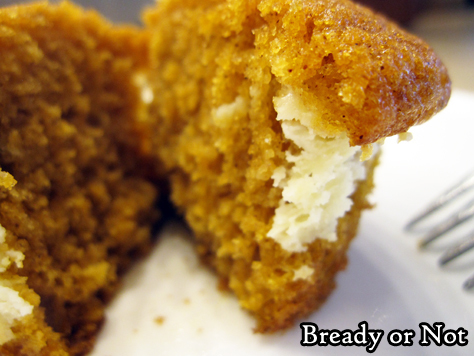
These cupcakes are light and airy with a bright flavor of pumpkin and spice, with the cream cheese adding wonderful sweetness.
This recipe makes two dozen. It’s certainly faster to bake up if you have two pans, but that is by no means required. One pan will do the job.
One warning about these things: they are so light and airy, it is easy to eat several at once. But because they are pumpkin, that makes them healthy, right? Just, uh, ignore that sugar and oil…
Bready or Not Original: Pumpkin Cream Cheese Cupcakes
These light, airy pumpkin cupcakes includes luscious pockets of cream cheese in the middle! Recipe makes 2 dozen.
Course Breakfast, Dessert, SnackCuisine AmericanKeyword cream cheese, cupcake, pumpkin
Servings 24 cupcakes
Author Beth Cato
Equipment1 or 2 cupcake/muffin panspaper cupcake liners
IngredientsPumpkin batter15 ounces pumpkin puree2 cups white sugar1 cup canola oil4 eggs room temperature2 cups all-purpose flour2 teaspoons baking powder2 teaspoons ground cinnamon1 teaspoon baking soda1/2 teaspoon saltnonstick sprayCream cheese filling8 ounces cream cheese1/3 cup white sugar1 egg room temperature
InstructionsPreheat oven at 350-degrees.In a big bowl, beat together pumpkin puree, sugar, and oil. Beat in eggs one at a time.In a small bowl, sift together the flour, baking powder, cinnamon, baking soda, and salt. Gradually blend into the pumpkin mix.In a small microwave-safe bowl, carefully warm the cream cheese a touch, just to make it soft enough to mash. Stir in the white sugar and egg until it is cohesive; it's okay if there are still some small chunks of cream cheese.Place paper liners in the muffin pan (or two pans, if available). Apply nonstick spray in each liner. Add pumpkin to fill each liner about 1/3; a teaspoon scoop is useful for this. Add some dollops of cream cheese into each. Add layers of pumpkin batter to cover.Bake for 20 to 25 minutes, until a middle cupcake passes the toothpick test. Cool in pan for about 10 minutes, then gingerly use two forks to pry out each cupcake to set on a rack to cool more. Place in sealed container in fridge to store.OM NOM NOM!
October 15, 2020
Judith Starkston’s Of Kings and Griffins is out today!
The Phoenix area is home to a lot of awesome authors, and Judith Starkston is among them. Her Tesha historical fantasy series is unique because it’s inspired by the Hittite Empire. Yes, we’re talking ancient history, an era usually ignored these days except for a few brief mentions in school history class.
The 3rd book in the series, Of Kings and Griffins, is out as of today. I read it as an early draft and I’m excited to see how it is in final, polished form! This is a book that works well as a stand-alone. You can grab it in ebook or paperback at Amazon.

I do highly recommend the whole series, though. Start with Priestess of Ishana (in ebook and paperback) and continue from there. If you love historical fiction as I do, you’ll appreciate some fantasy-tinted insights into a time and setting we know little about. If you want to know more about the actual history that inspires her books, her blog is a great resource.
[Book links above utilize the Amazon Affiliate program.]


