Bill Loguidice's Blog, page 96
November 30, 2016
Review: FKANT Gemini SE-6 Bluetooth Earbuds
Bluetooth wireless headphones are the idiomatic dime a dozen these days. Thanks to the latest Bluetooth technology found in our smartphones, tablets, and related devices, most of them even sound pretty good. So what is one key attribute that distinguishes one Bluetooth headset from another? Form factor.
The FKANT Gemini Bluetooth Earbuds are completely wireless, to the point where they don’t even have a connecting wire between the two earpieces. This is the next big design trend in wireless earbuds, and the Geminis do a good job of minimizing the bulk in their design versus some other brands of this type I’ve tried.

The box.
This design acumen extends to how these fit. Using the default size of rubber ear-caps (two other sizes are included), each earpiece fit snugly in each of my relatively small ear canals and didn’t fall out. Although these aren’t noise isolating, the snug fit actual went a long way to achieving that effect, which was particularly handy at the gym where I’ve been torture testing these. Even under the most intense gym activities, I’ve rarely had to adjust these earpieces once I placed them in my ears at the beginning of my workouts. It goes without saying that they were quite comfortable as well; it’s certainly liberating not having the usual wire behind my head found on typical Bluetooth sport headsets.
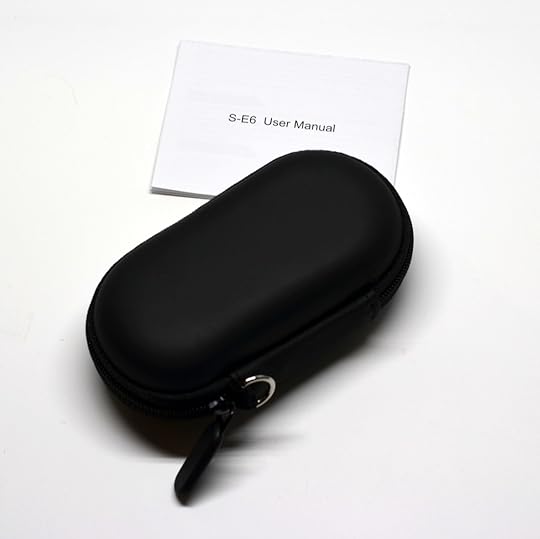
What’s inside the box.
Setup is as straightforward as any other Bluetooth headset. Charge them and then pair with your device of choice. You then stick each earpiece in your ear (R and L are helpfully marked on the exterior) and power on each side. A helpful voice indicates when each side is successfully paired and in sync.
In terms of sync, on my Apple iPhone 6 Plus, I would occasionally lose sync between the two earpieces and sound would only come out of one earpiece. This usually rectified itself a few seconds later and again, only rarely happened.
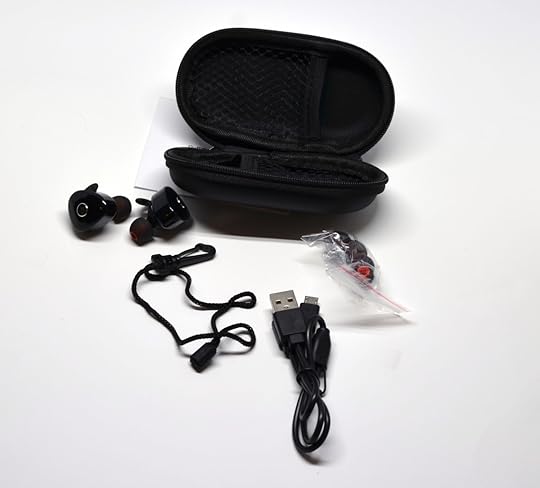
The contents of the storage case.
As for the sound, it’s a bit hollow and thin sounding, but does better with music than it does with talk-heavy podcasts (which is generally what I listen to with these). It’s also a bit bass heavy for my tastes, although others may not think it’s quite enough based on some of the bass heavy headphones I’ve listened to. Of course, you may not want to take my advice on bass, as, particularly in my advanced 44-year-old state, I’m just not a fan in the way those darn kids today seem to be (picture me shaking my fist at the screen for effect). Phone calls sounded just fine, with no complaints on the other end of the call either.
For the price, these are really a great deal. They’re roughly half the cost of similar headsets, with the only real budgetary consideration I can find being in how it charges. A lot of these types of headsets have charger storage cases that the earbuds snap into. Instead, these come with a Y micro-USB cable.
Although the three hours plus of music time these earbuds provide after a full charge is competitive, the fact that you can’t charge them further from a charger storage case means that you will be charging these more frequently than some of the more expensive models. With that said, this design certainly makes carrying these around in their case a more compact affair, which is certainly one plus.
Pluses:
Truly wireless
Comfortable fit
Snug in-ear with good natural noise isolation
Good price and overall value
Compact design that carries over to the storage case
Minuses:
Somewhat thin sound that works better for music than talk-heavy audio like podcasts
No charger storage case
Thanks to FKANT for the review unit.
The post Review: FKANT Gemini SE-6 Bluetooth Earbuds appeared first on Armchair Arcade.
November 27, 2016
News: Server Upgrade Complete!
I’m happy to report that Armchair Arcade’s move from a shared server to a dedicated server on our hosting provider is now complete. This should help address previous performance issues caused by a recent uptick in site traffic.
While I tried to be careful with timing, there were three or four recent comments that were lost during the transfer period. As such, if yours was one of those comments and you didn’t receive my response, please ask again now that everything else has been transferred. Of course, if any other issues crop up, kindly let me know and I’ll look into addressing them. Thank you and enjoy what should now be a faster, better Armchair Arcade experience.
The post News: Server Upgrade Complete! appeared first on Armchair Arcade.
November 21, 2016
Review: CNC Pro Toolhead for the ZMorph 2.0 SX (and overall review wrap-up)
After my prior first look, unboxing, initial setup, extended review of basic 3D printing, and review of the laser toolhead option for the remarkably versatile ZMorph 2.0 SX Full Set, I’m now ready to tackle a review of the CNC PRO milling toolhead add-on. This toolhead allows for engraving, cutting, and milling in 2D and 3D planes and can be used with various types of wood, PCBs, machining wax, plexiglass, leather, and paper, as well as other select materials. This will also be my final review in the series on the ZMorph 2.0 SX, so I’ll wrap up with some concluding statements about the overall machine itself.

Contents of the CNC Pro toolhead box. It has a carbide bit single flute (2mm).
I also have the CNC Milling Fun Pack, which includes four additional milling bits and a set of project materials:
2 x Carbide bit single flute 1 and 3mm (Pin 3.175mm or 1/8 inch, Bit length: 38mm)
1 x Spherical bit double flute (Pin 3.175mm or 1/8 inch, Bit length: 40mm)
1 x Engraving bit V-Type PCB (Pin 3.175mm or 1/8 inch, Bit length: 30mm)
1 x Cube wooden block (104 x 105 x 45 mm)
2 x Rectangular wooden blocks (100 x 200 x 20 mm)
2 x Plexiglass (100 x 200 x 4 mm)
2 x PCB laminates (100 x 200 x 1.6 mm)
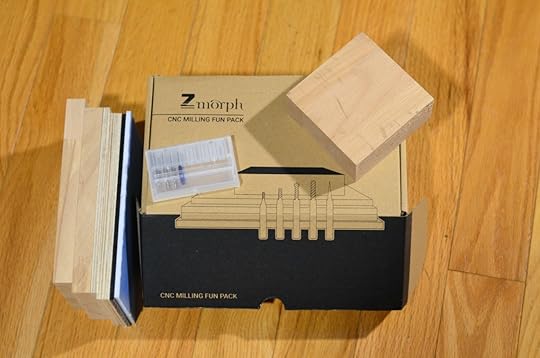
Contents of the CNC Milling Fun Pack.
Getting Started
To start, I went through these critical Knowledge Base pages:
CNC Milling Safety Guidelines
How to Prepare ZMorph 2.0 SX for CNC Milling
Material Attachment in 2d CNC Milling
Using the 3D Milling Toolhead – Example Workflow
After getting my bearings and successfully installing the toolhead (Pro tip: the drill bit is very sharp, so take extra care when handling!), I was ready to go.

Successful setup.
The Machine in Action
My testing involved using one of the rectangular wooden blocks and carving “Armchair Arcade” into it. For that, I went to Voxelizer and carefully followed the calibration steps here. Although I had a few false starts, I eventually was able to figure out the right settings. This process went quite a bit smoother than my previous laser engraving tests.

My dxf view settings in Voxelizer.

My gcode display in Voxelizer, with the print in progress. Don’t forget to set “Spindle On” before you send the print job!
A video posted by Bill Loguidice (@bill_loguidice) on Nov 20, 2016 at 9:51am PST

A quick vacuum and it’s looking good! I used Blu-Tak and some blue painter’s tape instead of double-sided tape to secure the wood to the platform. That worked well.
For my second test, I decided to mill a miniature stool, following the instructions and using the file here. While the cuts were true, I didn’t quite get the depth right:
A video posted by Bill Loguidice (@bill_loguidice) on Nov 20, 2016 at 1:29pm PST
It really is an extraordinarily neat process. Subtractive manufacturing is quite different from additive manufacturing like 3D printing. It’s pretty amazing that this one machine handles both of those functions and so much more.
Conclusions
I wish I had more time with this unit (I didn’t even get a chance to try the more advanced 3D milling feature, or the thick paste extruder), but with the review period over, it’s time to send it back. Using just a handle of its many features, I’ve been both overwhelmed and delighted by the possibilities this machine offers. Whether it’s 3D printing, laser engraving, CNC milling, or any of its other features, the future of in-home making and manufacturing is well represented by this one machine. If you’re at all interested in semi-pro work, it would be hard to go wrong with the ZMorph 2.0 SX. The full set really is an amazing value, especially in comparison to similarly priced machines that sport far fewer functions.
Here’s a video (and here’s the making of blog post) of what you can accomplish if you have both the skill and the time to work with multiple facets of this amazing machine:
Pluses:
Works great
So many possibilities!
This one machine really can do just about anything (for a price)
Minuses:
As expected, a high learning curve, but if you’re DIY-minded, it’s a challenge worth accepting
The post Review: CNC Pro Toolhead for the ZMorph 2.0 SX (and overall review wrap-up) appeared first on Armchair Arcade.
November 13, 2016
Atari Flashback Portable (2016): The Official Game List
The AtGames Atari Flashback Portable, which is just now starting to hit major retailers everywhere and should have full availability by the end of the month (November 2016), features 60 built-in games, including legends like Frogger, as well as all-time Atari 2600 classics like Adventure, Centipede™, Pong, Missile Command®, and Yars’ Revenge®. The fun never has to end with a built-in rechargeable battery and an SD card slot for adding even more games. Games can be played on the portable’s built-in high resolution 3.2” display or on a TV via optional cable. I’ll have a full review right here on Armchair Arcade soon.
The official game list for the Atari Flashback Portable:
Adventure
Adventure II
Air Raiders™
Aquaventure
Asteroids®
Astroblast™
Atari Climber
Black Jack
Bowling
Breakout®
Centipede™
Circus Atari™
Crystal Castles®
Dark Cavern™
Demons to Diamonds™
Desert Falcon
Dodge’Em
Double Dunk™
Fatal Run
Frog Pond
Frogger (new port specific to the Atari Flashback Portable hardware)
Frogs and Flies™
Fun with Numbers
Golf
Gravitar®
Hangman
Haunted House™
Human Cannonball™
Millipede™
Miniature Golf
Miss It!
Missile Command®
Night Driver™
Pong (Video Olympics)
Radar Lock
Realsports® Basketball
Return to Haunted House
Saboteur™
Save Mary
Secret Quest
Shield Shifter
Slot Machine
Solaris
Space Attack™
Star Strike™
Starship
Stellar Track™
Strip Off
Submarine Commander
Super Breakout
Swordquest: Earthworld
Swordquest: Fireworld
Swordquest: Waterworld
Tempest®
Video Checkers
Video Chess
Video Pinball
Wizard
Yars’ Return
Yars’ Revenge

Atari Flashback Portable
The Atari Flashback Portable carries a SRP of $59.99 USD. Note that game compatibility through the SD card is limited, as are the types of SD cards the portable supports. It supports SD cards up to 8GB in size, like this one, and the folder where you store the .bin files must be named Game. If you find that your .bin files aren’t appearing, change the case of the file name to first letter capital, second letter lowercase, e.g., change SPCINVAD.BIN to Spcinvad.BIN.
The post Atari Flashback Portable (2016): The Official Game List appeared first on Armchair Arcade.
October 31, 2016
Review: Laser Toolhead for the ZMorph 2.0 SX
Although I stated that my next review segment would be on the Dual Pro 3D printing head of the ZMorph 2.0 SX, I’ve had to take a detour due to a technical issue that can only be resolved through a replacement part. Instead of waiting for said part, I decided to move onto the laser toolhead, which technical support said should not be dependent upon the faulty component. On a related note, interestingly, although the supplied Dark Blue PLA filament worked for several tests, it eventually became too slippery to use. I confirmed this by trying to use it on another 3D printer I have. It’s a very strange defect.

This is a preview of the Dual Pro’s 3D printing capabilities. It’s a pity I can’t finish that portion of the review for now.
Anyway, after my prior first look, unboxing, initial setup, and extended review of basic 3D printing of the remarkably versatile ZMorph 2.0 SX Full Set, I’m now ready to tackle a review of the laser toolhead option, which allows not only for engraving various materials like wood, leather, and plexiglass, but also for cutting various materials like PVA foil, paper, and cardboard.
Getting Started
To start, I followed these instructions in the Knowledge Base. Note that I had trouble removing the toolheads unless, based on the suggestion from tech support, that I also loosen the screw above the screw with the butterfly nut that needs to be removed. Once that was loosened, the toolheads came right out.
Per the instructions, I installed the laser toolhead, although I wasn’t quite sure where to put the breakout box (for now, I have it on the top of the unit). I also installed the included plywood table in place of the glass printing bed for extra safety (no chance of laser reflections for one). That was easy thanks to the magnet-based system.

The laser toolhead and plywood table installed.
With installation out of the way, I proceeded to place the material I wanted to engrave, which for the first test, was a piece of cardboard. Instead of using double-sided tape, I decided to use some Blu-Tack to secure the cardboard to the plywood table. I decided to try the built-in Burn Calibration Pattern test after doing the ominous sounding “arm laser.”
(By the way, don’t forget to review the safety and materials guidelines!)
As is par for the course at this point, I forgot a few things and the Knowledge Base didn’t necessarily make it clear. First off, I forgot to attach the front and rear fans to the laser toolhead, although I’m not sure they’re necessarily needed (or even used). Second, the piece of cardboard I used was both too small for that test and too thin, which scorched some of the plywood table. I addressed both issues.
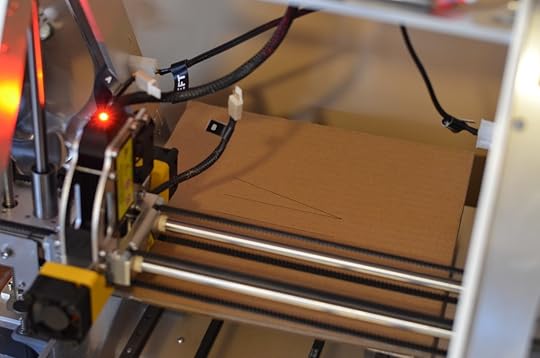
Calibration appeared successful.
One thing I’ll note is that this laser engraving/cutting process creates really smelly fumes, so definitely have some fans and good ventilation.
Initial Test Runs
For the first real test print, I flipped my cardboard over and ran the laser_placing.gcode file that’s built into the printer. That created a pattern similar to what’s on the plywood table.

Result of running the laser placing gcode.
The next print was ZMorph_engraving.gcode, which was the one other file built into the printer. I just let it engrave over the laser placing pattern.
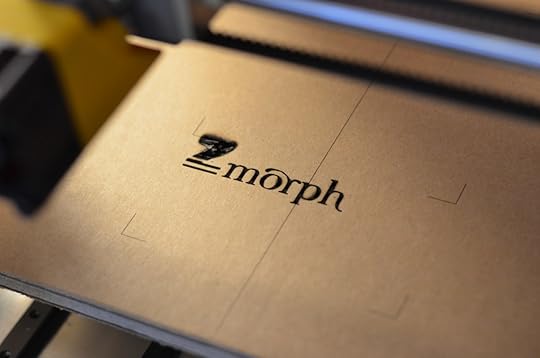
Result of running the ZMorph engraving gcode.
Now it’s time to move onto using the Voxelizer software.
Voxelizer Runs
There are two laser workflow options in Voxelizer that I’m aware of, and that’s image etching and laser cutting. First, I wanted to try image etching. The tutorial here was my guide, although I used my own image and material.

The image and settings for the block of wood I used. We recently replaced our fence, and this was some leftover material.

Additional settings as I print directly from Voxelizer over USB.
The software was rather confusing. It took several tries to get the Z axis set correctly, and even then for this run I set it way too high.
A video posted by Bill Loguidice (@bill_loguidice) on Oct 29, 2016 at 9:40am PDT
It still worked, but not quite as well if I set it perfectly. This could definitely use more of a step-by-step tutorial. Nevertheless, this is something that with some additional experimentation, I think I could more or less perfect. As a result, I decided to abort laser etching the wood for now and experiment more with the cardboard.
I loaded up the same image and worked out how to set the work Z stop more or less correctly. The other settings, like work speed, I set with my best estimate based on the material.

The image view settings.

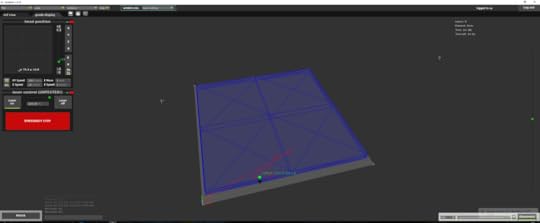
The dxf view settings.

The gcode display of the in-progress print.
A video posted by Bill Loguidice (@bill_loguidice) on Oct 29, 2016 at 6:35pm PDT
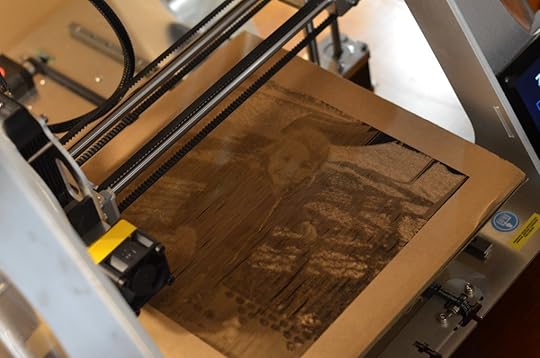
The end result.
As you can see from the photo of the end result, it came out decent for my first real laser etching. I think with more tweaks (particularly to things like depth) and more interesting material, the results would be even better.
Now it was time to try some simple laser cutting.
Unfortunately, although the tests that follow were successful, I still wasn’t quite sure how to control the laser’s depth, which I eventually figured out was related to the work speed of the laser, which you’ll see in the later screenshots (I thought travel speed might also be a factor, but slowing that down resulted in a lighter burn line). So, instead of cutting, the first few passes were more top layer etching (marking), while the later passes were more in line with what it was supposed to do, although still nothing like cutting.

Trying some text editing and placement.
You can read more about text engraving here.

The end result.
Next, I tried some files from the laser cut stickers article, although I stuck with the cardboard as the target.
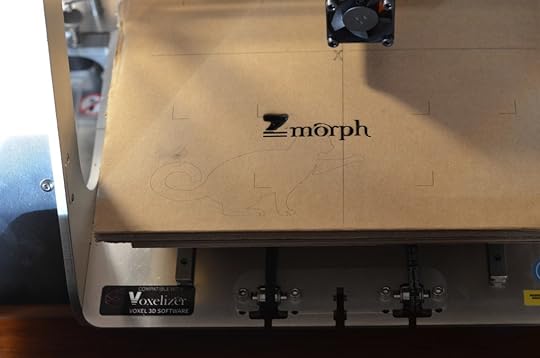
In progress cat.
The end result. Too light.

Another one.

The end result. Better (and note the interim test to the right).
Conclusion
As before with the 3D printing, this was not exactly smooth sailing. It’s a simultaneously frustrating and exciting process, with a fairly dramatic learning curve the more you want to take advantage of all of the features and troubleshoot and eliminate all of the issues that crop up. Once that time consuming stress is out of the way, though, it is pretty awesome. I definitely would want more time to work on truly understanding the settings, though, as this is not necessarily a straightforward learning process. I’d also want to develop some type of ventilation system, because laser etching and engraving really does generate a lot of fumes from the process, something akin to a strong wood burning fireplace.
I’m going to end with the usual Pluses and Minuses, but again, this is just one of a series of reviews on this printer, so I only consider those a reflection of this single function of many. Next up is the CNC routing functionality!
Pluses:
The basics are relatively straightforward
Good design for the toolhead maximizes safety
Minuses:
Fumes! (understandable, but wow, they’re intense)
Mediocre documentation results in a high learning curve with lots of trial and error
Did I mention the fumes? It’s the smell of smoke and burning, kind of like when you’re standing outside and someone has a wood burning fireplace going.
The post Review: Laser Toolhead for the ZMorph 2.0 SX appeared first on Armchair Arcade.
October 30, 2016
First Impressions: Sony PlayStation VR (PSVR) for PlayStation 4 (PS4)
Sony’s PlayStation VR (PSVR) for PlayStation 4 (PS4) has a convoluted setup, as well as a mediocre headset and controls. It’s also one of the most extraordinary gaming experiences around, genuinely transporting its players to amazing virtual worlds.
PlayStation VR is here, along with some backup during use. #psvr #playstation #vr
A photo posted by Bill Loguidice (@bill_loguidice) on Oct 20, 2016 at 2:06pm PDT
Even though I already had two working PlayStation Move motion controllers from the PlayStation 3 and a PlayStation 4 Camera (although the original squared off model), I decided it was still a better deal just to get the Launch Bundle of PSVR, which also includes the PlayStation VR Worlds disc.
A photo posted by Bill Loguidice (@bill_loguidice) on Oct 20, 2016 at 2:31pm PDT
Armed with the complete set and some ginger candy for my unfortunate motion sickness sensitivity (can’t read in a car, etc.), I was ready to go. Unfortunately, it really is a lot to set up.
Basically you need to intercept your PS4’s HDMI output with a breakout box that also has a separate power supply for the headset. Once you have the headset plugged into the breakout box, you also need to plug in the included wired headphones (or any headphones). Only then are you set before onscreen calibration.
PlayStation VR Demo Disc
Anyway, as stated, the Launch Bundle comes with PlayStation VR Worlds, as well as a Demo disc, which is supplied with all versions of the headset (if you have PlayStation Network, you can also upgrade to Playroom VR for free; a few other titles can also be upgraded to VR for a nominal fee). The Demo disc hearkens back to the days of the original PlayStation’s demo disc and provides a surprisingly robust sampling of most of the VR title offerings now available, including PlayStation VR Worlds:
Allumette (Penrose)
Battlezone (Rebellion)
DriveClub VR (SIE WWS)
Eve: Valkyrie (CCP Games)
Gnog (KO_OP)
Harmonix Music VR (Harmonix Music Systems)
Headmaster (Frame Interactive)
Here They Lie (SIE WWS)
Job Simulator (Owlchemy Labs)
PlayStation VR Worlds (SIE WWS)
Resident Evil 7 biohazard — Kitchen Teaser (Capcom CO., LTD.)
Rez Infinite (Enhance Games)
Rigs Mechanized Combat League (SIE WWS)
Thumper (Drool)
Tumble VR (SIE WWS)
Until Dawn: Rush of Blood (SIE WWS)
Wayward Sky (Uber Entertainment)
Within (Within)
So far, I was able to sample Battlezone, DriveClub VR, and Until Dawn: Rush of Blood. In fact, the very first experience I had was with Battlezone, and it blew me away, immediately converting me to the wonders of VR.
In Battlezone, as you would expect for a game loosely based off the arcade classic, you’re placed inside of a tank. The neat thing is is that you have a 360 degree view. Look behind you, you see the back of your cockpit and seat. Look up, you see the ceiling or sky. Look down, you see the bottom of your cockpit. It’s absolutely immersive.
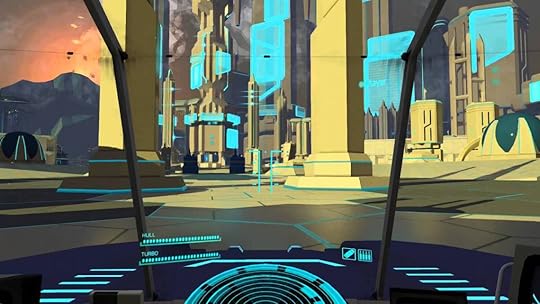
A scene from Battlezone.
I wasn’t terribly impressed with DriveClub VR. It also made me feel nauseous after only one race. No amount of ginger candy would be able to stop that. While a lot of people are criticizing the visuals, I’d say they’re serviceable enough, but in this type of game you’re virtually tossed about too much, which is rather hard on the old brain when your body is mostly stationary.
Until Dawn: Rush of Blood is a rail shooter with terrible visuals. It’s also absolutely terrifying, causing me to yell with terror a few times. That’s the power of VR. In fact, it’s so scary that my middle daughter and wife bailed even before it really got going. This is best played with two of the PlayStation Move controllers, which act as your two mini shotguns and help further enhance immersion.
PlayStation VR Worlds
This is actually a great title to show off VR. Even the lobby is incredibly immersive, both surrounding you and allowing you to interact with some of the environmental effects. The collection of games and experiences are as follows:
The London Heist
Ocean Descent
Scavengers Odyssey
VR Luge
Danger Ball
I first tried Ocean Descent, which places you in a shark cage and lowers you deep into the ocean in more or less real time. It’s a mostly passive experience, but quite engaging for what it is. I especially liked walking around the shark cage by walking in a small area in my room.
I then tried Danger Ball, which reminds me a lot of the games I used to play on Kinect. In this case, you have to head butt a ball back to the other side to defeat your opponent. While it’s little more than an evolved Pong, it’s still – and here’s that wording again – incredibly immersive. It’s also nice to have an athletic experience as well.

A scene from The London Heist.
Finally, I tried The London Heist, which I think is fair to say makes perhaps the greatest case for VR. You’re placed in a very adult London underworld as a gangster in the thick of a convoluted heist plot. The best part here is that while most of the other VR games scream out for some type of hand or body tracking, this game actually translates holding the two Move controllers into in-game hands. While not perfect, it does work, and soon enough your brain is fooled to the point where it really does feel like your arms in the game, picking items up, loading and point your gun, lighting and smoking a stogie (be sure to use the headset’s microphone!), etc. The 3D depth effect is also really amazing when you’re doing the laser targeting mini-game within the game. The only downside here is that the main story experience is really short, clocking in around maybe 30 minutes or less. Nevertheless, it’s something I’ll be going back to again and again, and would immediately buy a full blown game that’s just like it. This takes the boring out of first person shooters by letting you duck and cover by actually ducking and covering, so this too is a pretty physical experience. I will admit though that I didn’t know if I was supposed to sit or stand for the game, so I mostly stood, which was kind of awkward when sitting in the virtual car.
Conclusion
Both thumbs up. Way up.
The downsides are that there are too many wires and a clumsy breakout box, and the initial setup is convoluted. It’s also a bit hard to fit the headset perfectly, and it’s something my wife and kids have particularly struggled with most of the time.
Once you’re passed that, though, and actually using it (with a good fit), the immersion is extraordinary. You literally feel like you’re in another world, with everything wrapping around you in all ways.
While it’s undeniably immersive (I found myself spontaneously giggling at times in various games at how delightful and transformative the experience was), the actual controls when you’re in the virtual world sometimes leave something to be desired. This just screams out for full body and hand/arm tracking, which it doesn’t have (and no solution has to this point). It can track the controller for the most part, and does a good job of tracking your head, but that’s about it beyond a precious few games supporting Move controllers for rudimentary hand tracking. There’s kind of a disconnect there, i.e., you want to reach out and touch stuff, but you usually can’t, and, even when you can, not necessarily in the most optimal manner. When someone in the future solves the problem of full body tracking (and preferably ties it to some haptic feedback), then we’ll nearly have the equivalent of the vaunted holodeck.
I’ve played a handful of games so far, including the ones mentioned above (and Playroom VR, which is also quite immersive, but I haven’t found much to do with it yet), and I’m anxious to try more. Unfortunately, I can play for roughly 30 – 60 minutes a day before it gets to be too much. It’s telling how amazing the experience is that I’m willing to put up with that level of discomfort (I also hope that my tolerance will build up and my natural motion sickness will lessen over time).
I can see the difficulty of set up scaring some people off, but I think if they get to try it, they’ll be blown away like I was. It really is the type of thing you have to try rather than be told about. I guess that’s why it’s called an “experience.”
The post First Impressions: Sony PlayStation VR (PSVR) for PlayStation 4 (PS4) appeared first on Armchair Arcade.
October 28, 2016
Thoughts on the new MacBook Pro and Surface Studio and relative innovation
I think the word “innovation” is often misused. Certainly there’s been no true innovation in smartphones for years, just incremental improvements. Of course, there’s nothing wrong with that as incremental improvement is still improvement. Until someone truly innovates and makes the other companies look genuinely behind-the-times, there’s really no specific need to push for the next great breakthrough to happen before it would otherwise happen on its own. However, I do think there’s been relative innovation, or at least envelope pushing, over the past several years when it comes to computers from Microsoft, and not from Apple. I believe that the recent announcements of Microsoft’s Surface Studio all-in-one desktop and Apple’s new MacBook Pro‘s highlight this divide.
I’m a loyal Surface Pro user, presently using a Pro 3 as my daily mobile computing platform, although I certainly appreciate the versatility of the more traditional form factor Surface Book (which itself was just incrementally updated). At this point, it feels like Apple is just being stubborn not supporting basic touchscreen and pen functionality on their laptops. The Touch Bar would be a cool addition to a regular touchscreen, but is in no way a substitute or even partial analog for one. To my mind, the Surface Studio (Surface Dial included) is the type of product that could have and should have come from Apple. Frankly, Microsoft’s computer initiatives are making Apple look silly at this point.

Apple MacBook Pro with Touch Bar
To me, the only reason to stick with Apple anymore is if you genuinely dislike Windows 10, and there are certainly people who do, whether it’s for Windows 7, or a competing OS like Linux or macOS. Personally, I think Windows 10 is great and genuinely dislike macOS, but it would certainly have been an option I would have considered had Apple continued to provide the type of slick portable computing product I couldn’t get until the appearance of Ultrabooks on the Windows side circa 2011. It seems like since then, Apple has been content to stay the course. This course of action, or lack of action, was fine until PC vendors, and particularly, Microsoft, started to take proper advantage of touch and pen support.
Frankly, what Apple just announced is probably good enough for their core audience, who, I doubt will be going anywhere until Apple literally stops making new laptops. And even then, who knows? It seems strange to me, and something akin to the Nintendo effect, for Apple to not try and appeal to those outside their core audience, particularly since the company does so well with that on the smartphone and tablet sides of the business. As it is, instead of injecting new energy into the MacBook line, the Touch Bar only highlights how stale Apple’s computer vision has become.
The post Thoughts on the new MacBook Pro and Surface Studio and relative innovation appeared first on Armchair Arcade.
October 26, 2016
A Personal History of Word Processing (Part 1)
After reading Matthew G. Kirschenbaum‘s excellent Track Changes: A Literary History of Word Processing, fittingly on my Surface Pro 3‘s Kindle app, I was inspired to share my personal history on the subject. In the book, Kirschenbaum details the history of word processing from the standpoint of the famous writers – consisting mostly of fiction authors and poets – who pioneered the use of the technology in their work.
While the book mostly focuses on word processing from its primitive origins in the 1960s to its modernization and homogenization into the 1990s, my own history is naturally restricted to my lifetime, which began back on October 11, 1972. As such, like many of the writers featured in the book, my earliest attempts at writing were restricted to pencil or pen and paper, with a little bit of mechanical typewriter thrown in for good measure. Interestingly, even after I had access to solid word processing technology, my writing still almost always began with pen and paper before being transcribed to a digital format. It was only in the latter part of the 1990s, when I was well and truly steeped in the working world, that my writing process became digital from start to finish (“breaking” my handwriting in the process, which I previously detailed here).
Growing up and going to school as I did primarily in the 1970s and 1980s, I bore witness to sometimes awkward transitions. As you would expect, almost all writing assignments were handwritten, often requiring tedious and complete rewrites – even with use of a pencil – when more than a few mistakes on a page were made, and particularly when significant additions were needed. Erasable pens were around, but with ink that would just as easily adhere to your hand as it would to the eraser. With regular pens, Wite-Out was a possibility, but too much was discouraged for obvious mess-related reasons.
While I don’t recall writing much school work on our manual typewriter, we did get a second-hand electric typewriter at some point that did see a little more use in that regard. My lack of typing proficiency and the fact that errors were just as easy to make and not all that easy to correct in large quantities made its use no more practical than hand writing my assignments. That electric typewriter was my first exposure to something better than Wite-Out, though, and that was a two-level ribbon (it might have even been three, because I vaguely remember red being on there too) that allowed you to overwrite the black letters with a white ribbon, and then switch back to the black part of the ribbon and begin again.
My first computer was a Commodore VIC-20, which I got early on in fifth grade, when I turned 10. It was the basic unit with just the computer itself and nothing else. I programmed a little on it (losing my typed programs when the computer was powered off!) and played a few cartridge games, but I soon sold it to a classmate to get a Commodore 64. This too was limited for a time until I got a Commodore 1541 disk drive (thanks to a paper route) and Commodore MPS-803 dot matrix printer (a Christmas gift). I finally had my own feature complete computer.
I primarily used the Quick Brown Fox cartridge-based word processor (there was also a cassette with boilerplate), which was, to say the least, quite frustrating (at least we got it for cheap at a computer show). I did experiment with other word processors through the illicit passing of copied disks at the schoolyard, but nothing was particularly user friendly. In fact, the very first computer-driven assignment I can recall turning in was something I desktop published in the paint program Doodle (by Mark Rubin) for a 7th grade creative writing class (circa 1983 or 84, when I was 11 or 12). You can see a posting of the newspaper-mimicking result (sans the final body text) about halfway down this page on the old version of our Website. [Although I believe I was the first to produce such computer-generated output in my school, I clearly failed to predict the demise of the newspaper, although I did try to adjust for inflation (also, badly, because I don’t think you can buy a newspaper even now for that cheap).]
My productivity was still limited by poor, unstable software, as well as my inability to type, although I thought my two-fingered typing was hot stuff at the time, so learning wasn’t necessarily all that important to me (ironically something I think my oldest of three daughters, who is turning 12 soon, also believes at the moment). Learn I did, though, thanks to a keyboarding class using electric typewriters, which I believe happened in 8th grade, which would place it circa 1984 or 85. In addition to my skepticism that I was already a good typer, there were two other standout moments for me from that class. The first was when the teacher wrote the @ symbol on the chalkboard and asked us if we knew what it was. I had actually known what that strange symbol was from an incidental exposure earlier in my life, and, when I correctly identified it as the “at” symbol, the teacher was incredulous that I didn’t cheat by looking later in the lesson book. The other was towards the end of the semester, with the teacher wheeling in an Apple II computer for evaluation and being frustrated by an inability to access a screen to just type on. I consulted with my friend Brian who had an Apple IIe at the time and found out how to break out to a BASIC prompt, which did allow her to type, but was not what she wanted. Clearly, she wanted it to go straight into a blank screen so she could type freely. Naturally, that wasn’t possible on most early computers, unless they were something like the Commodore Plus/4, which had a primitive word processor built into its ROM. I don’t recall her making use of the Apple II again (due to obvious lack of training and software, I can’t blame her).
With my skillset growing, I still was limited by the technology at my disposal. One of the bigger offenders was my Commodore MPS-803 printer, which was a budget dot matrix printer. Unlike some of the more expensive dot matrix printers, the little dots it printed to make up letters was pretty low resolution, using only 9 pins to form its letters, plus it didn’t really allow for lower descenders like a “g” to go below the line (among other issues). One trick I picked up from a magazine (likely Family Computing, but I’m not sure) was if you printed on carbon paper the carbon copy would sort of blend the dots together, creating the illusion of higher quality output. I used that trick quite a bit, but it still didn’t make up for the relative lack of quality and the expectation of many teachers that if you didn’t hand write something, that the output quality should match that of a typewriter (there was some computer snobbery, of course, but the output that most of us were able to generate really was subpar).
A big change for me came when, circa 1987 (I was now in high school), after my original Commodore 64 was struck by lightning (it still worked, but the graphics were a bit corrupted), we replaced it with a Commodore 64c, which came bundled with GEOS disks. This was a Macintosh-like (but color) operating system with built-in word processor and paint program (all on a 64K computer with single 5.25 inch floppy disk drive!). The best part was that not only was the word processor GUI-based, but it was also WYSIWIG, so what you saw on the screen, be it fancy fonts or graphics, was exactly what you got on the printed page. The software accomplished this feat by bypassing the printer’s native output and printing everything – including text – as graphics. Combined with the carbon paper trick, you got something approximating the output of a laser printer, although obviously with less saturation and detail. Nevertheless, this was finally something I could semi-regularly use to turn in school papers.
While this was all a big improvement, the next changes came via two new computers, one forward thinking, and one that was something of a throwback. I’ll talk about those and more in Part 2.
The post A Personal History of Word Processing (Part 1) appeared first on Armchair Arcade.
October 22, 2016
Review: iROLA 7inch Android Kids Tablet
The iROLA Kids Tablet is a value-packed 7″ tablet bundle. Presently Armchair Arcade.
October 20, 2016
News: Introducing Nintendo Switch, nee Nintendo NX
Since first announcing a “dedicated games platform with a brand new concept,” code-named, NX, back on March 17, 2015, Nintendo has released precious little info about their newest system. Still presumably on track for a worldwide March 2017 release, it was high time for Nintendo to release some actual info beyond the next Zelda game seeing concurrent release on both that and the stillborn Wii U.

The heart and soul of Nintendo Switch.
While I’ve speculated endlessly since the announcement and made my opinions known about how the system might work, etc., which you can refer to here, it’s all been just that, speculation. Although there’s not much detail, Nintendo has at least finally let us know basic functionality, and yes, the name, Nintendo Switch, which plays into the hybrid system’s dual (and beyond) nature many of us have been quite sure was going to come into play (in short, a single platform to replace both the Wii U and 3DS).
And here’s the video (ignore the painful attempt at being “hip”):
From Nintendo’s own description:
Introducing Nintendo Switch! In addition to providing single and multiplayer thrills at home, the Nintendo Switch system also enables gamers to play the same title wherever, whenever and with whomever they choose. The mobility of a handheld is now added to the power of a home gaming system to enable unprecedented new video game play styles.

Nintendo Switch docked for TV play. Freedom to play anywhere and in the way you like seems to be the driving force behind the new system.
As expected, what we’ll get is a true portable with removable controls for multiplayer action that can be docked for normal console play on a big screen. Good stuff, and definitely a nice differentiator from the competition (although man, those removable portable controllers do look a bit tiny). I think it’s safe to say that we’ll have a legitimate – and healthy – three way console race again. I think Nintendo will once again become exciting to gamers beyond their core fan base.
The post News: Introducing Nintendo Switch, nee Nintendo NX appeared first on Armchair Arcade.


